-
Posts
217 -
Joined
-
Last visited
Content Type
Profiles
Forums
Gallery
Events
Everything posted by DavidG
-
Coca by DavidG - FINISHED - Amati - 1:60
DavidG replied to DavidG's topic in - Kit subjects built Up to and including 1500 AD
Hi Steven, thank you for the nice words. -
Coca by DavidG - FINISHED - Amati - 1:60
DavidG replied to DavidG's topic in - Kit subjects built Up to and including 1500 AD
...and the ultimate question at last, what to build next.? I have a couple of options.. An unstarted Vanguard kit, from the first production batch. While it's the ultimate project, and finally I have the space to build it, still not sure to take a 5+ years commitment. Probably I could build the Coca over the same time needed to frame the gunports on the 74. Other option is to finish my half built Occre Diana, which is so heavily modified, I can not call it Diana any more. I have the hull almost ready, however have some details which now I don't like and needs change. Then to mast and rig the ship, a year long project to say. Or start another quick build.. there are some nice little kits out there.. -
Coca by DavidG - FINISHED - Amati - 1:60
DavidG replied to DavidG's topic in - Kit subjects built Up to and including 1500 AD
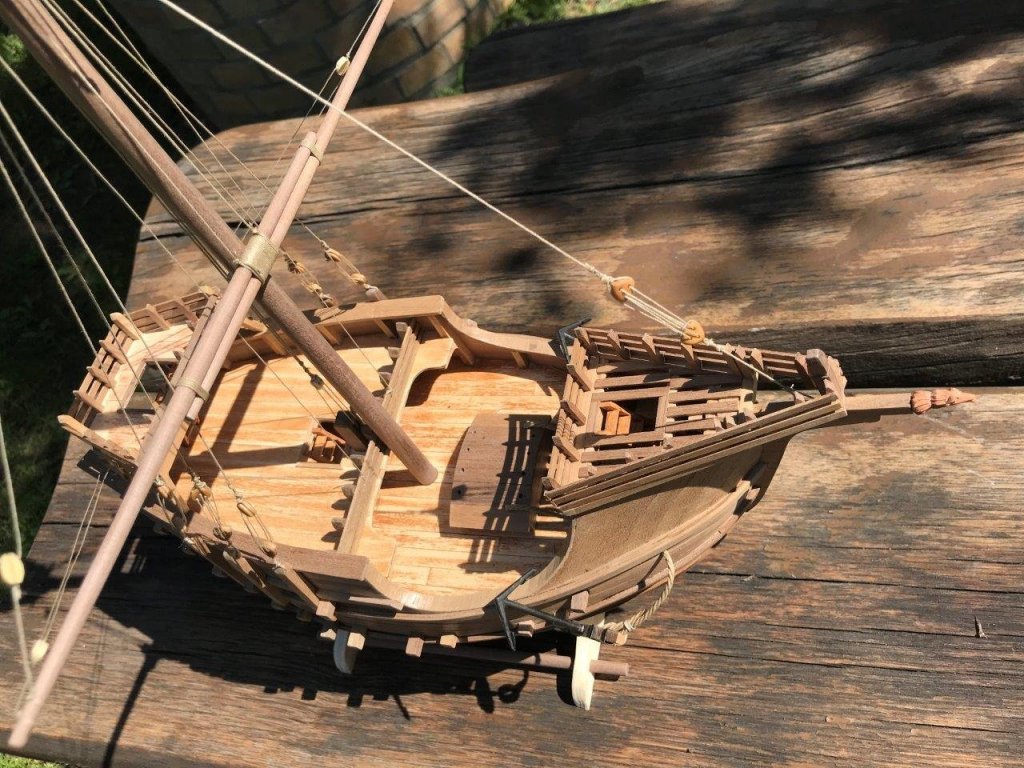
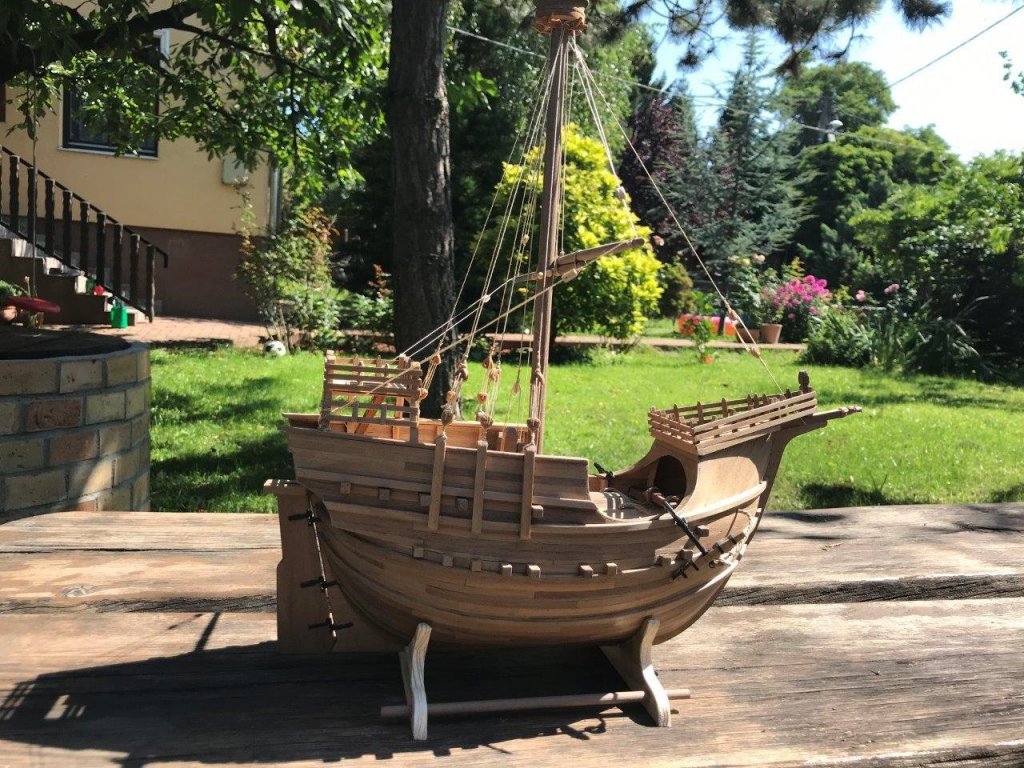
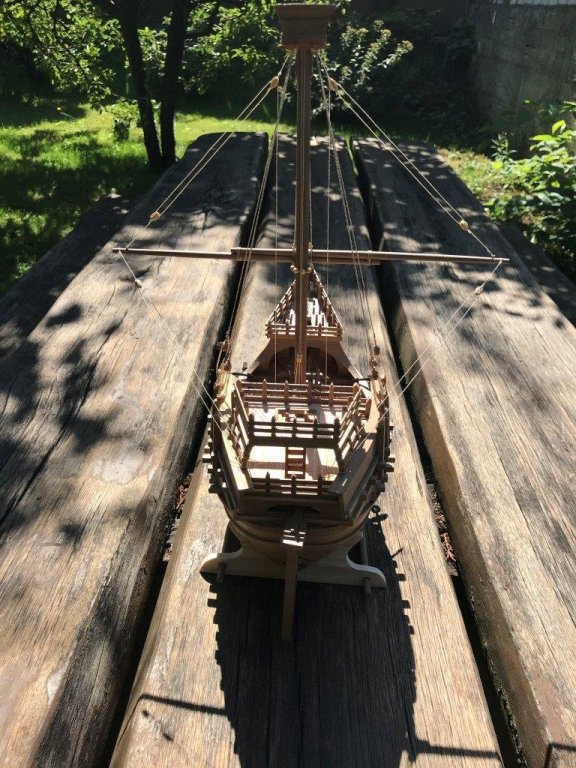
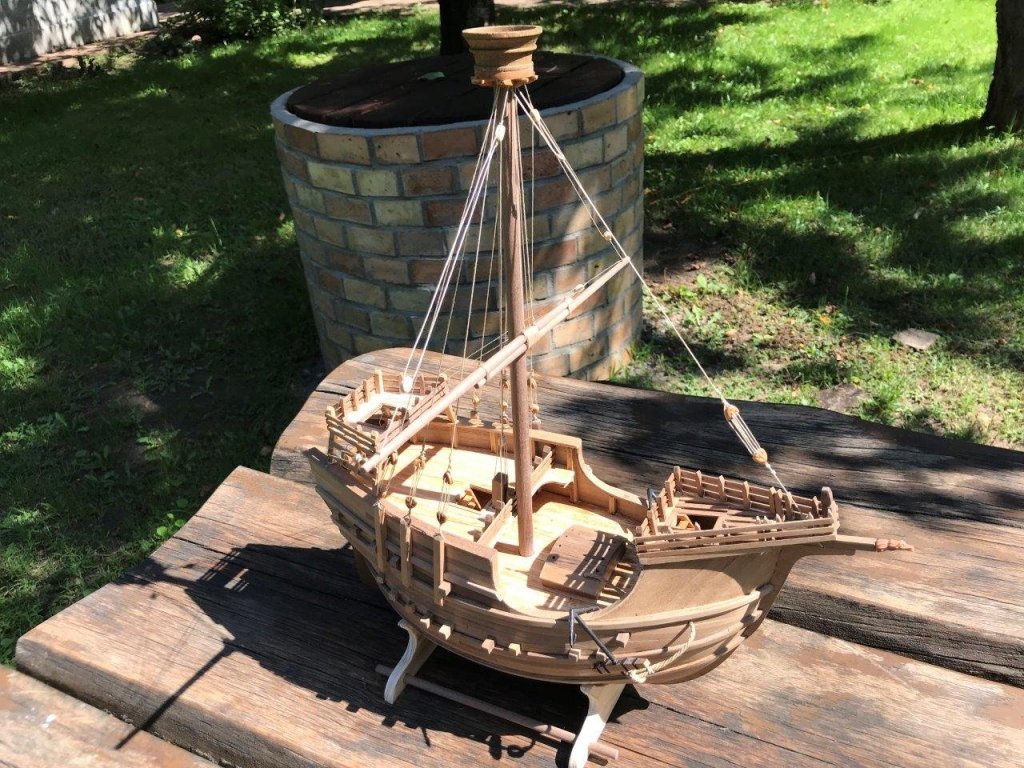
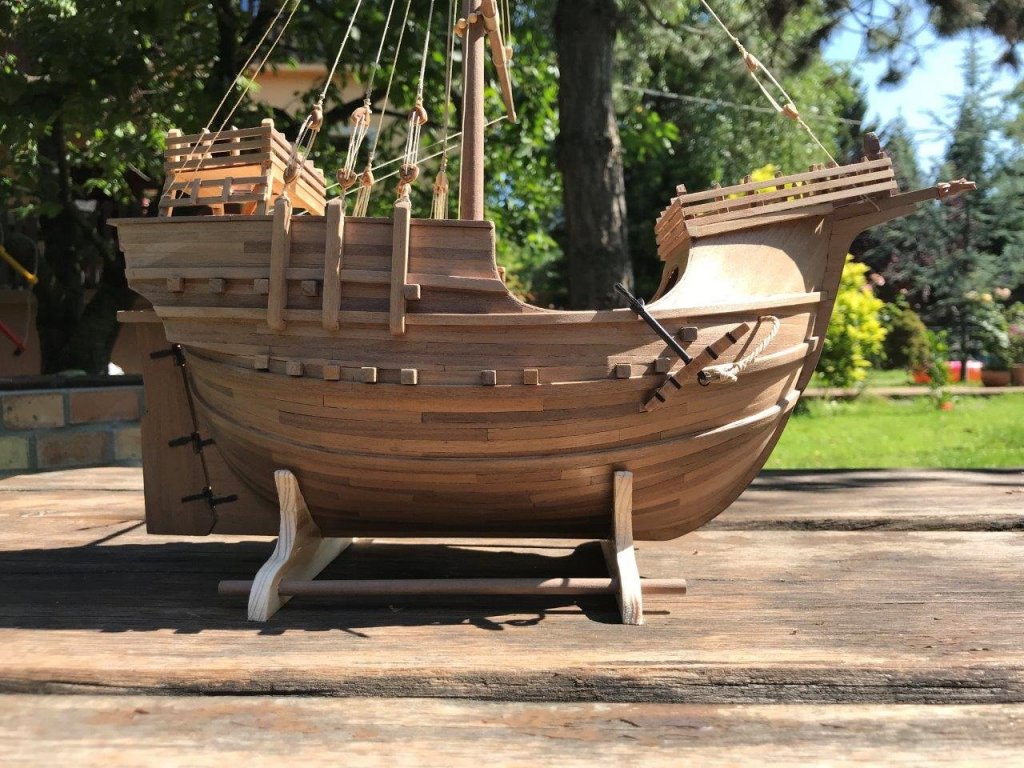
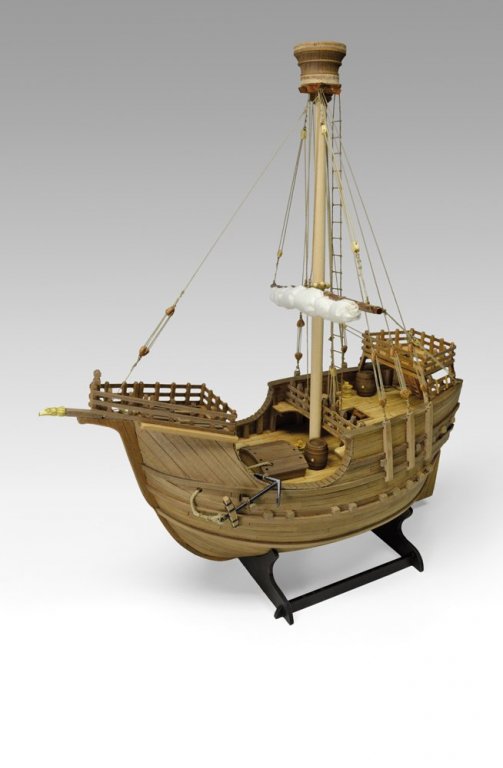
I had some spare evenings recently and finished the model. So, a quick summary of my overall thoughts. A nice little ship, not too difficult to build. Not having a lot of time, I wanted to build something which shows reasonable progress in even a couple of hours work, and this kit definitely met this demand. The model itself is quite simple, not too much of anything, but sufficiently maintains interest. For most of the time it is an excercise in planking. Plank the bulwark, plank two hull, plank the deck - most of the build is done. The only watch out is the hull shape - while the whole construction is really suitable to beginners, the severe bends are challenging at times. The kit supplies ramin dowels for the mast and spars, they are fine, but I changed them to walnut to maintain a uniform colour. Apart of it, I built everything out of the box. Here goes some pictures of the finished model: -
Diana by Snow - FINISHED - OcCre
DavidG replied to Snow's topic in - Kit build logs for subjects built from 1751 - 1800
congrats, great job ! I have the same model half built for 10 years.. maybe time to catch up with it. good luck for the Vanguard -
Girona by augustus
DavidG replied to augustus's topic in - Build logs for subjects built 1501 - 1750
Hi, I'm almost sure, the half built ship is a Corel kit of the Wappen von Hamburg. -
Coca by DavidG - FINISHED - Amati - 1:60
DavidG replied to DavidG's topic in - Kit subjects built Up to and including 1500 AD
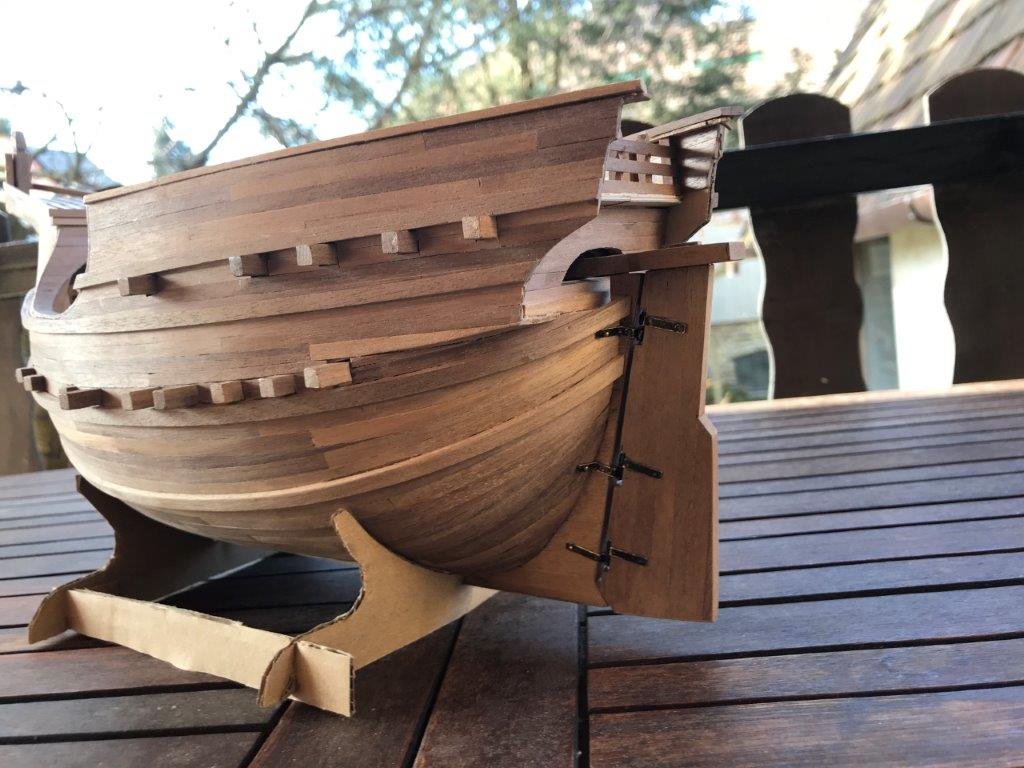
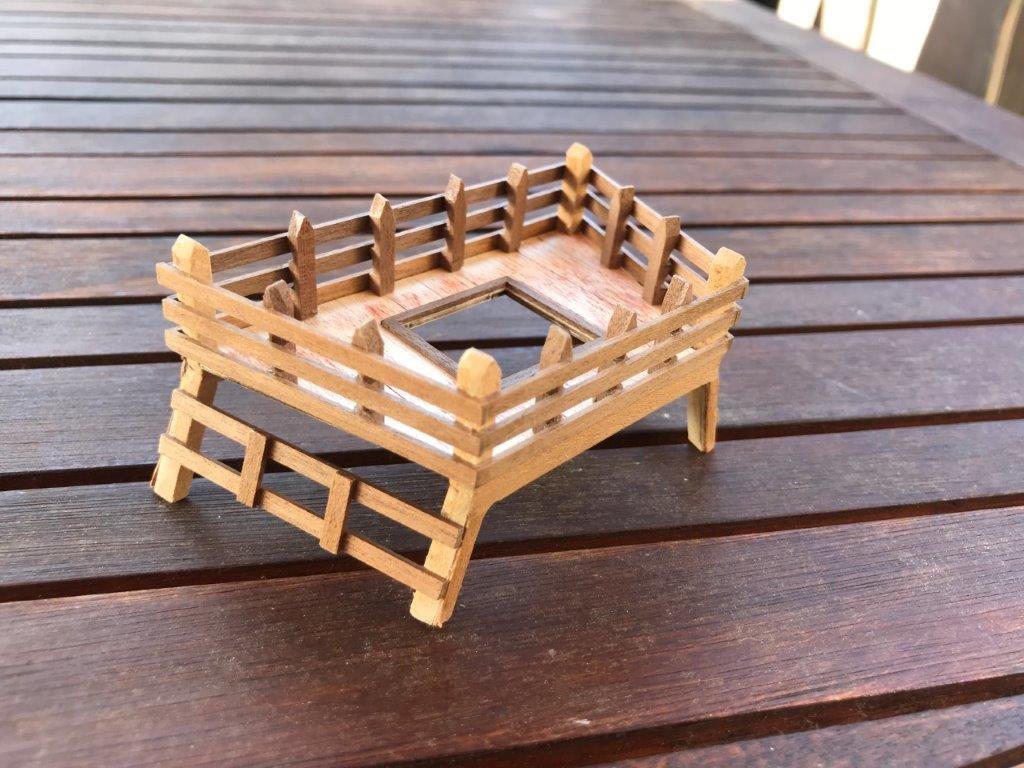
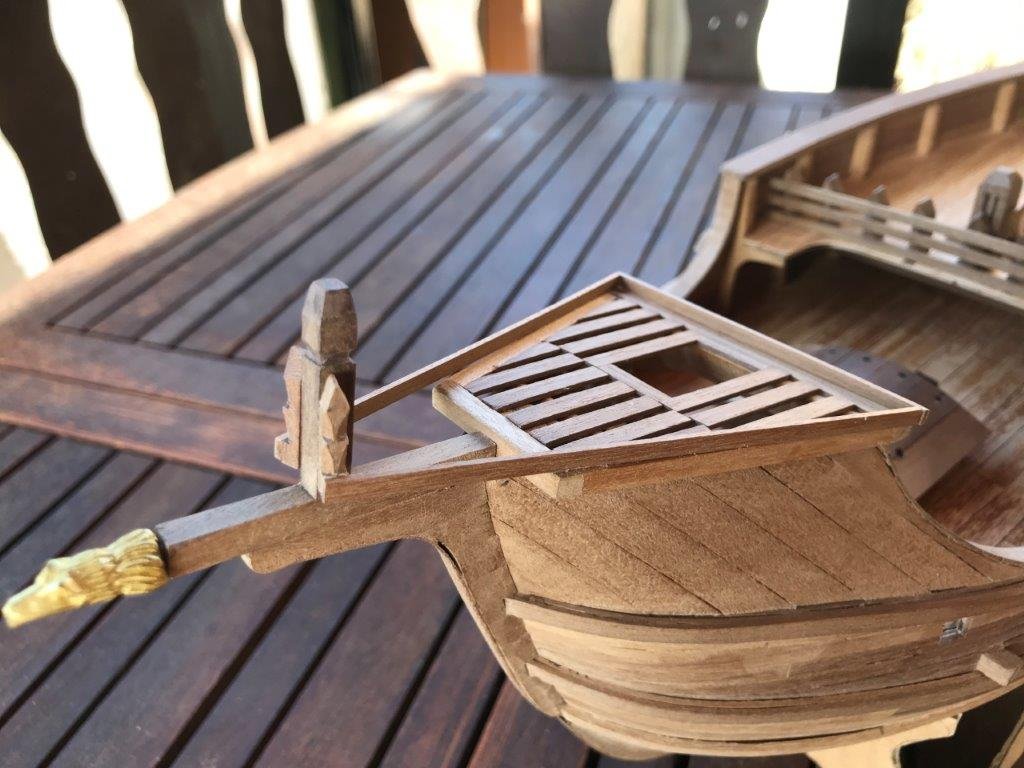
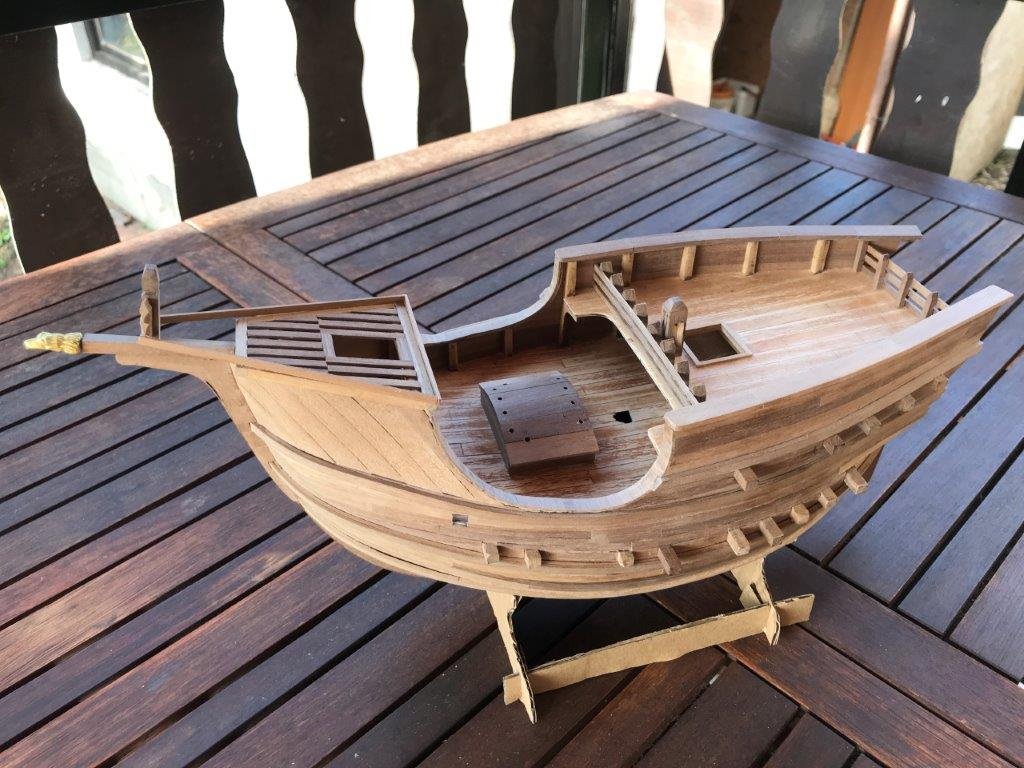
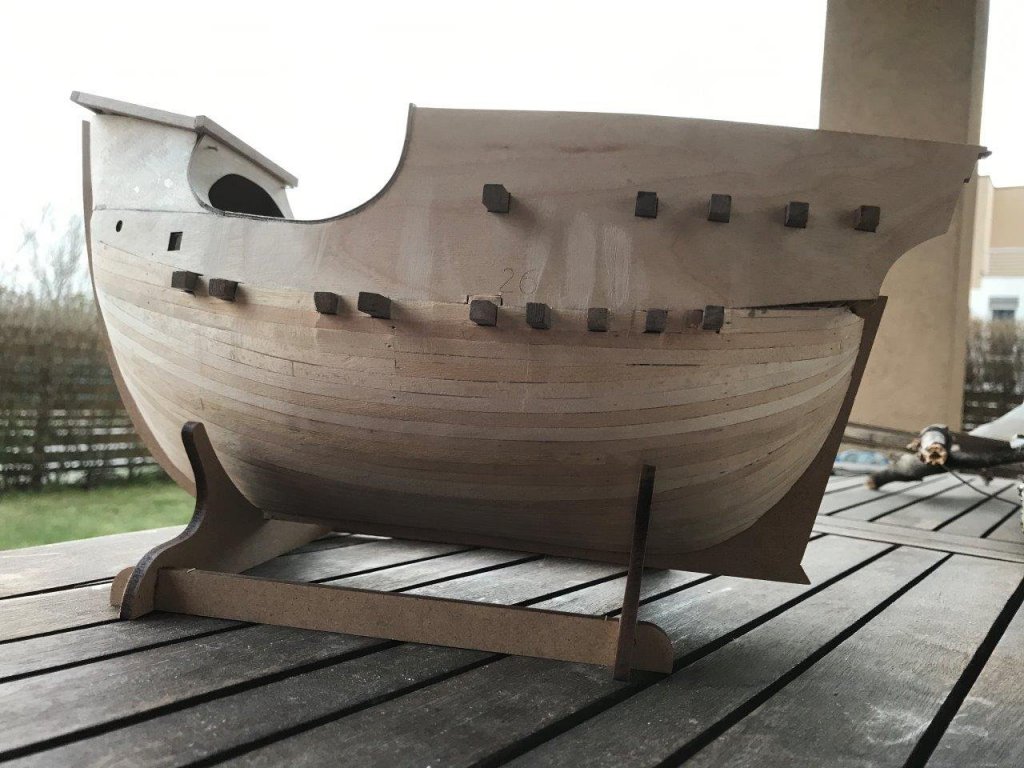
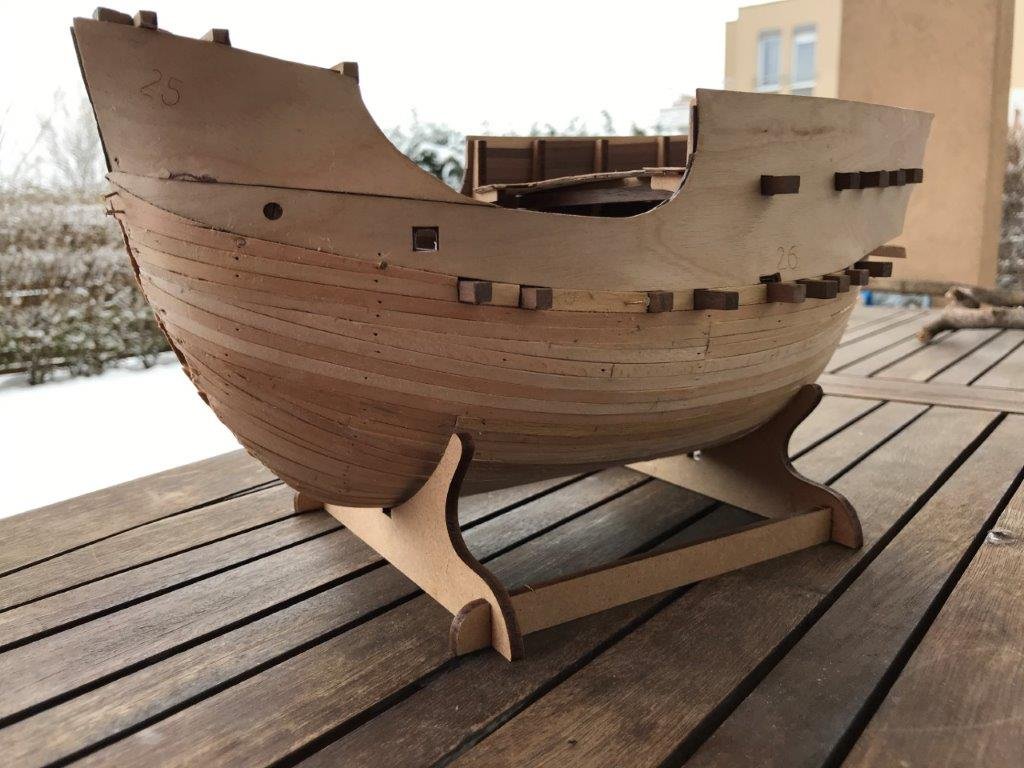
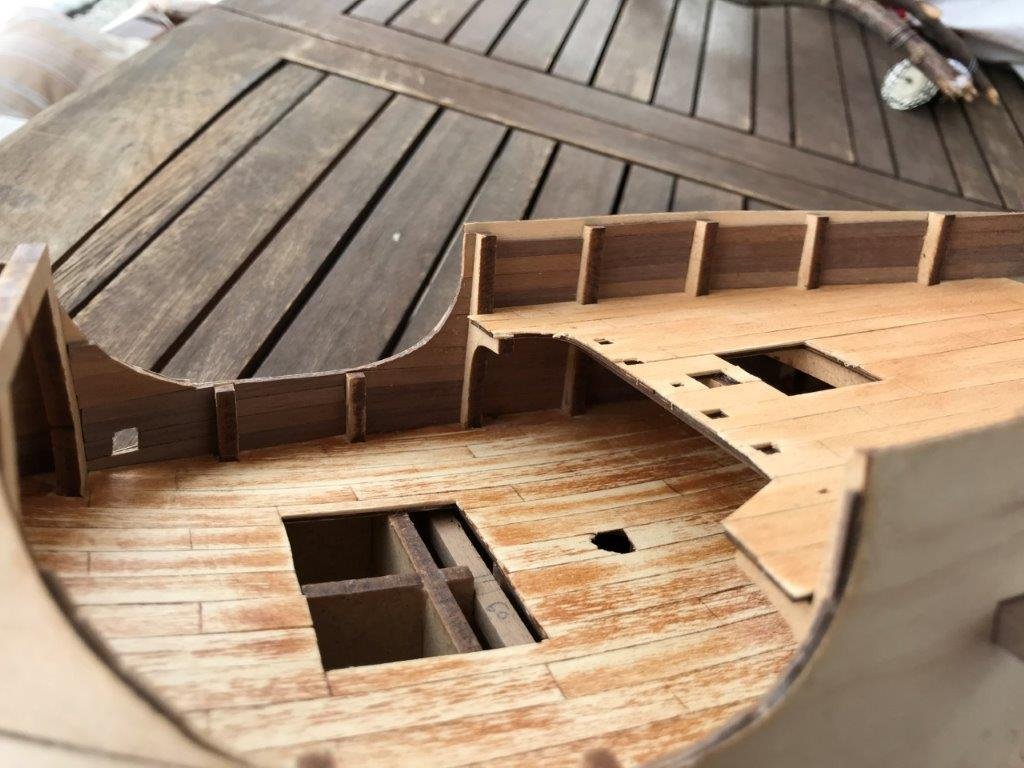
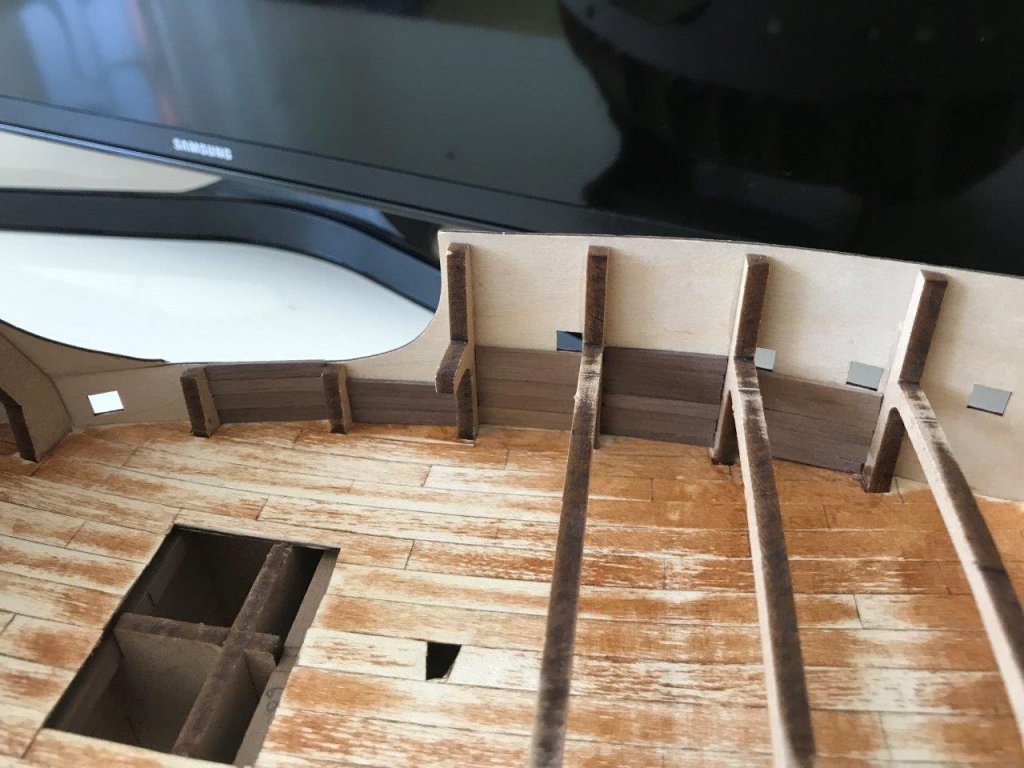
had some time last week to work on the model. first, attached the rudder. then built the deck superstructure. there is some detail carved to the posts, but they become almost invisible after the rails are attached. currently assembling the forward rail structure. I lay down the bottom rail first, glue it to the deck to provide some gluing area for the posts. finally an overall picture of the hull as it's current state actually there is not much work left on the hull. But will have to spend some time with smoothing out the details, fill the cracks and sand the edges smooth before applying the finish. I also have to make a new stand instead of the temporary cardboard one, as I lost the original in a recent house move. -
Coca by DavidG - FINISHED - Amati - 1:60
DavidG replied to DavidG's topic in - Kit subjects built Up to and including 1500 AD
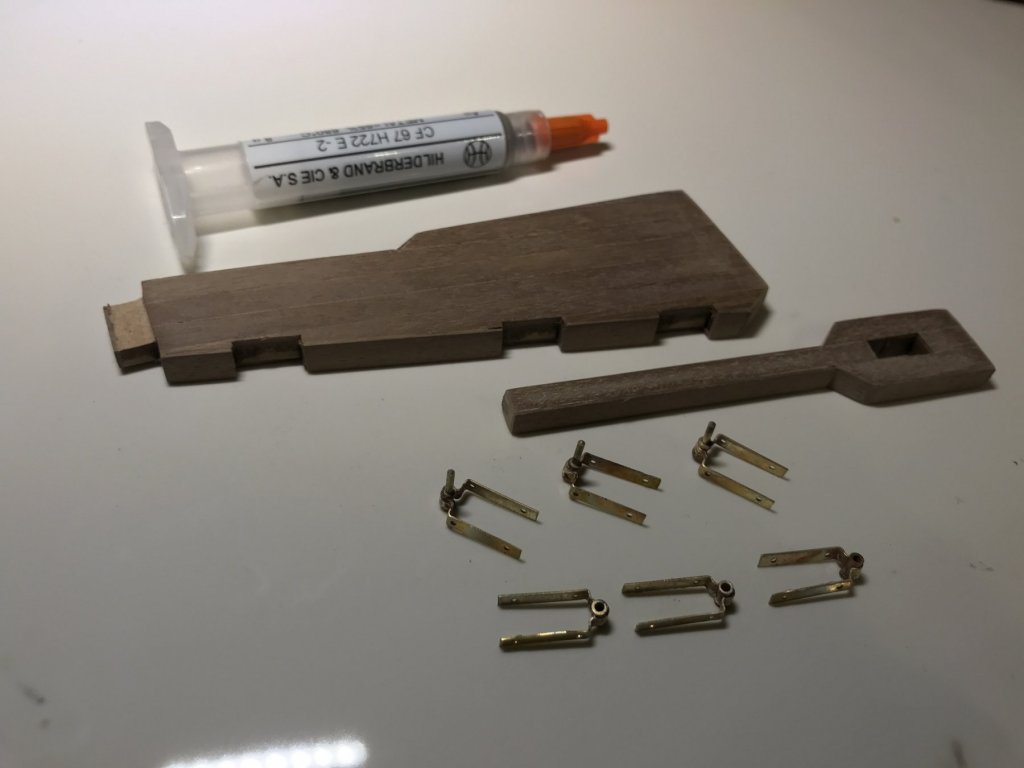
the parts for the rudder are made. the giant rudder is a planked mdf precut piece. The pintles and gudgeons are soldered. I still have to varnish the hull first, at least around the sternpost, than I can fit it to the ship. In the background, the silver soldering paste I used. It sticks to the surface and makes the task easily managable. -
Coca by DavidG - FINISHED - Amati - 1:60
DavidG replied to DavidG's topic in - Kit subjects built Up to and including 1500 AD
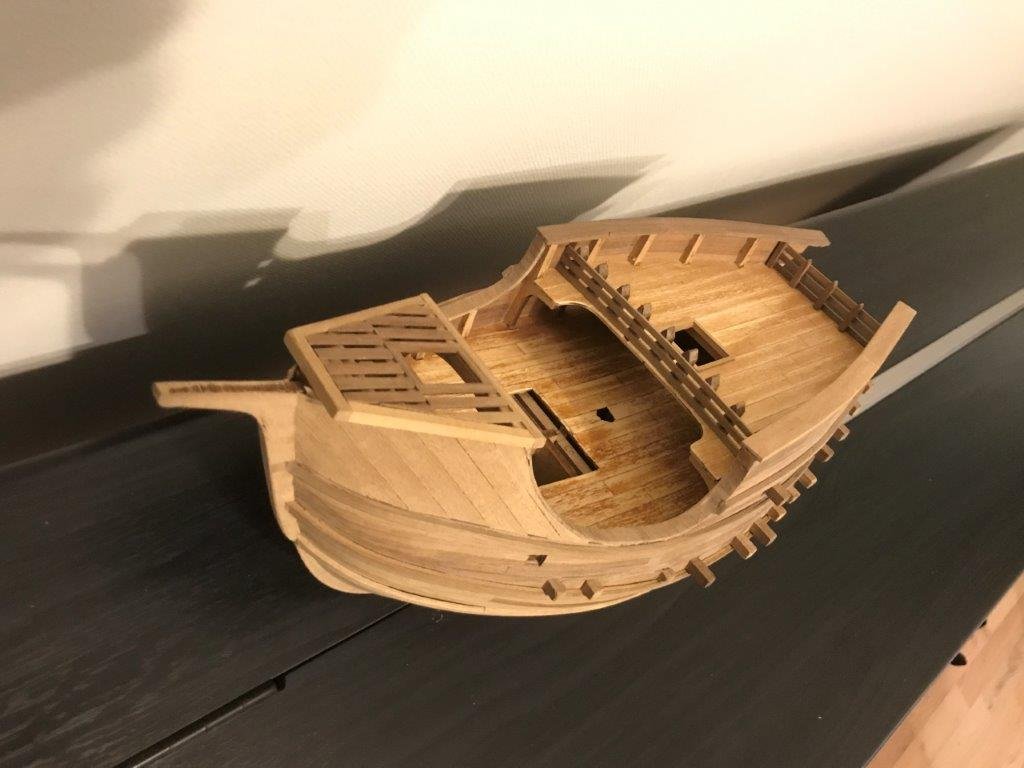
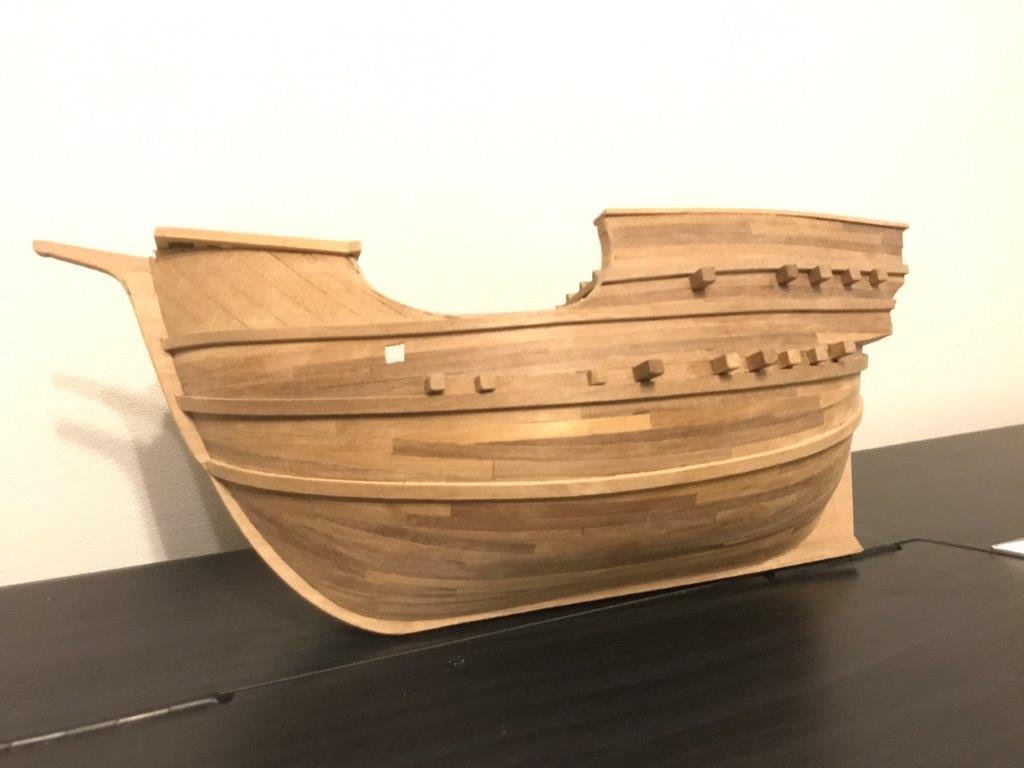
a long overdue update to log.. works slowed down a bit last year behind buying and extensively renovating a house, but the model is not abandoned. I finished the planking last summer, and I was able to do some small-scale work, like carving stanchions and other bits. Now I have a dedicated space to work, still not a full workshop but a craft desk in my working room, so works can catch up and I think I can finish the model before summer. a couple of (not so good) pictures of the current status, with the planking is done (if I ever choose to plank a ball, I feel prepared..) the rudder assembly next, shold be done for the end of the week. -
This is a great build. i found a similar article about colours here http://www.009.cd2.com/members/how_to/colour.htm
- 366 replies
-
- bellerophon
- victory models
-
(and 2 more)
Tagged with:
-
Hi Jasseji, it has a gundeck, however not full length, the bow area is closed and the deck does not extend there. The model is also designed with dummy guns on the gundeck - this is very simple to convert, just leave the dummy strip and add guns like I did. For the foremost gunport, which is between bulkhead 2 and 3, I added a small platform to hold the gun. Hope it helps.
-
Coca by DavidG - FINISHED - Amati - 1:60
DavidG replied to DavidG's topic in - Kit subjects built Up to and including 1500 AD
not a major update, just a status on planking. slow, but continuous progress in the last month. the most challenging part is over, the end is visible. probably needs another month to finish. -
Coca by DavidG - FINISHED - Amati - 1:60
DavidG replied to DavidG's topic in - Kit subjects built Up to and including 1500 AD
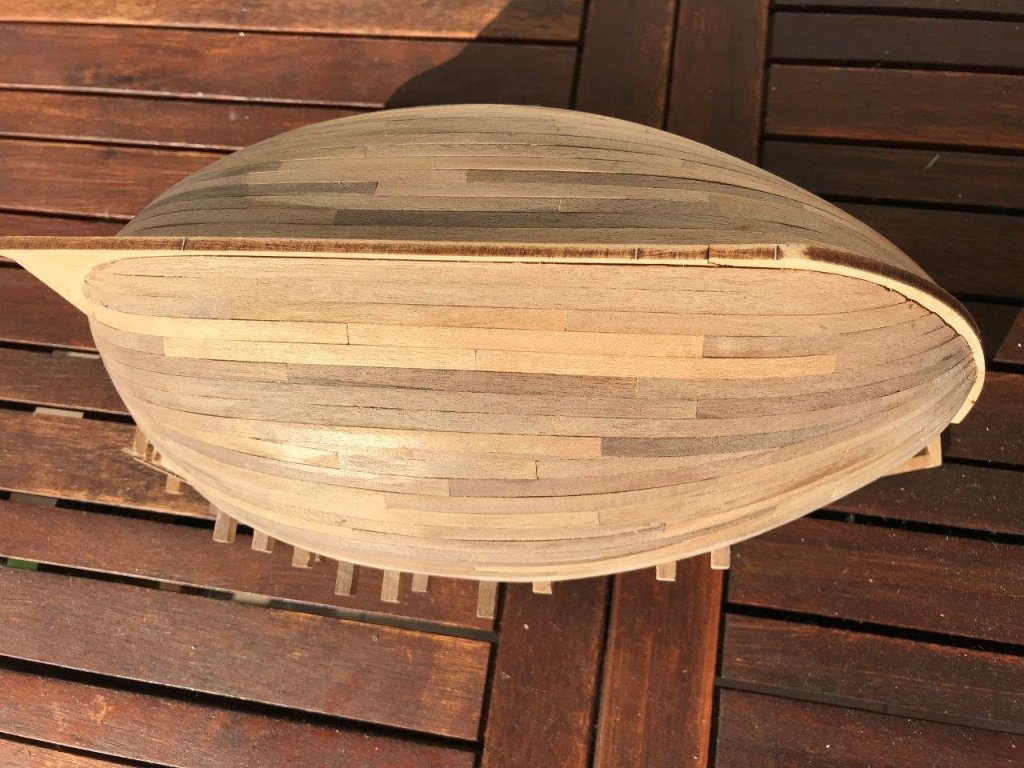
here is the progress I made in April on the second planking. The second belt is almost done on one side, and started on the other one. despite the small size of the hull, planking goes very slow (as usual). This is my first try on scale planking, but the severe bends on both ends would make it too difficult to shape the plank precisely anyway. Each plank segment needs to be pre-bent. This slows down the process considerably, I can do 1-2 planks per day. The 1x5 mm planks provided have a lot of room for later sanding, but they are a bit too massive for this size of the hull. My planks are clamped to a former overnight, than use PVA with spots of CA to hold the plank in place. The above picture shows my process, I place the tapered, bent planks to either sides of the row, than fill in the middle with full width segments. The second planking of this middle belt seems to be the most demanding part of the build, I hope to finish on this weekend, and than move on to the upper parts. -
Hi Snow, the kit calls to use the dark 2nd planking strips around the gunports, but I choose the insert some rows of the kit supplied light one. Not for authenticity, I just liked the look. I framed the gunports with standard 1x3 mm walnut strips (leftover from other kit) and stained them red. The result is some kind of dark reddish brown. I may try to take a pic in natural light if you are interested further.
-
thank you Sargon. Actually I worked a bit on her this year. Made a pair of replacement bow rail pieces (the kit one doesn't fit), but not glued yet. Also fitted the channels, deadeyes and chain plates. By the current plans, I'm not going to rig the model due to lack of space, but this might change as I plan to move. The Diana needs actually the bow area built and with some short mast poles could be declared as built. On the other hand there are some areas of the model I'm still not satisfied. I'm thinking of replacing the quarter galleries, making a new capstan, and tidying up the stern decoration which is a failed attempt of carving. This is no change vs my history with the ship, I was constantly building/ deconstructing / rebuilding, resulting the improved areas contrasting the kit parts, and defining new targets for update. In turn, this endless loop and the lack of time made me to stop working on the model for years. Anyway, I can set a build log, if there is interest.
-
Coca by DavidG - FINISHED - Amati - 1:60
DavidG replied to DavidG's topic in - Kit subjects built Up to and including 1500 AD
.. which do not fit at all. I don't know why. Either a build or design flaw, I need a workaround. Nothing too complicated though, on one side I salvaged some part of the kit piece and used a planking strip to extend it. On the other side, I edge bent some 2 and 1 mm strips from my reserves (2x2mm + 1x1mm, to be precise), glued them side by side, forming the rail. This is glued into place finally. The picture also shows the weathering of the upper deck, much lighter and more subtle than the lower one, while it doesn't really come through on the image. The second planking is the next task on hand. I will follow a similar, 3 belts approach like I did for the first one. Already made some progress, yet to take a picture. best, David -
Coca by DavidG - FINISHED - Amati - 1:60
DavidG replied to DavidG's topic in - Kit subjects built Up to and including 1500 AD
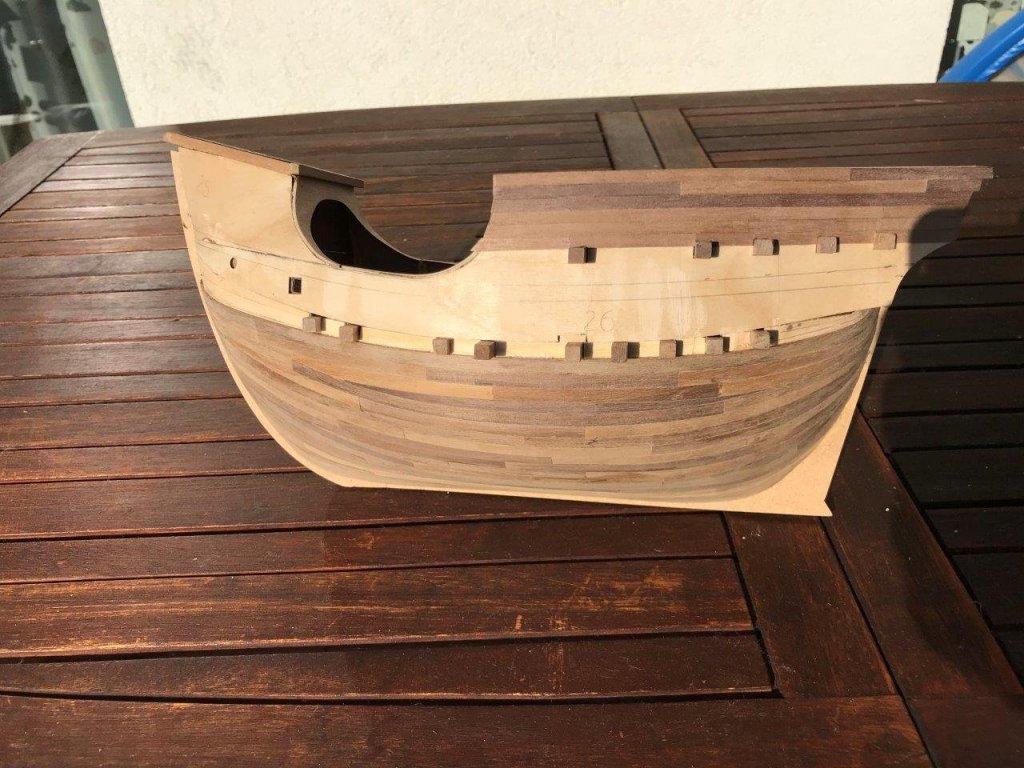
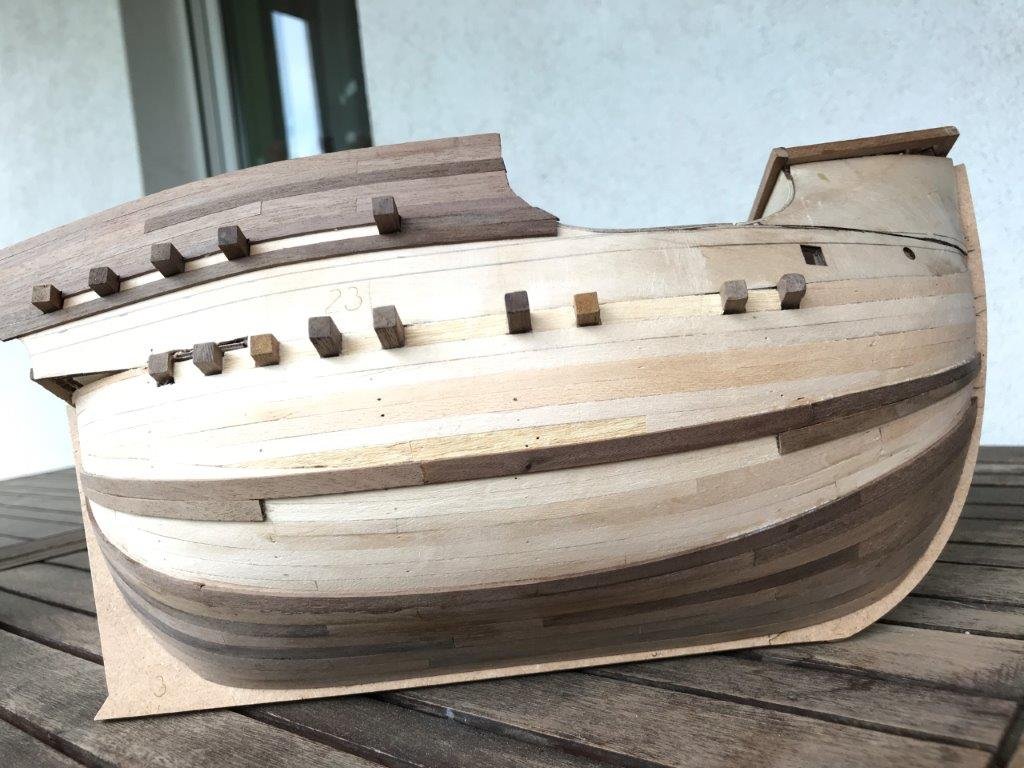
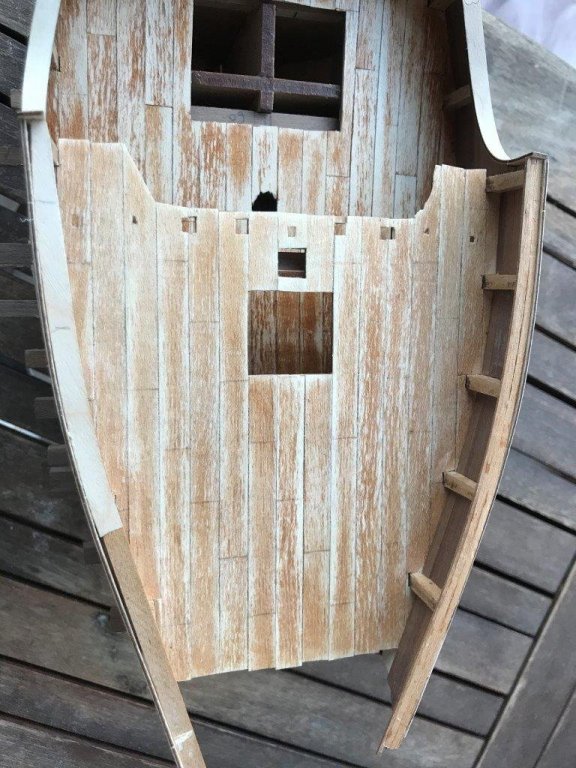
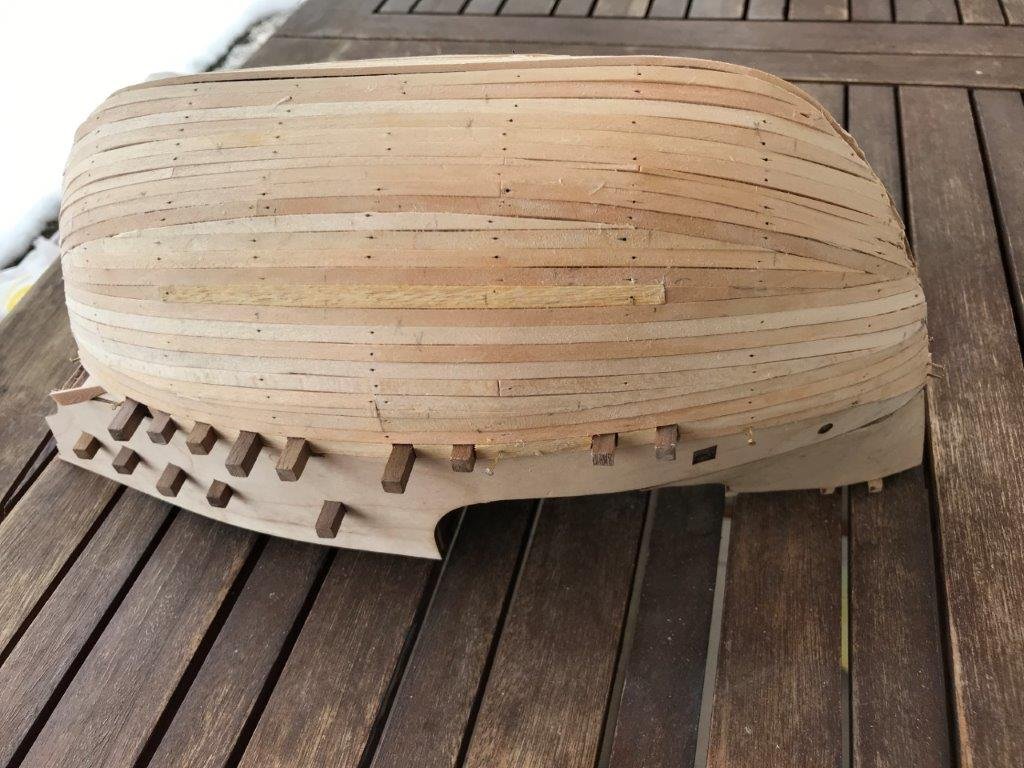
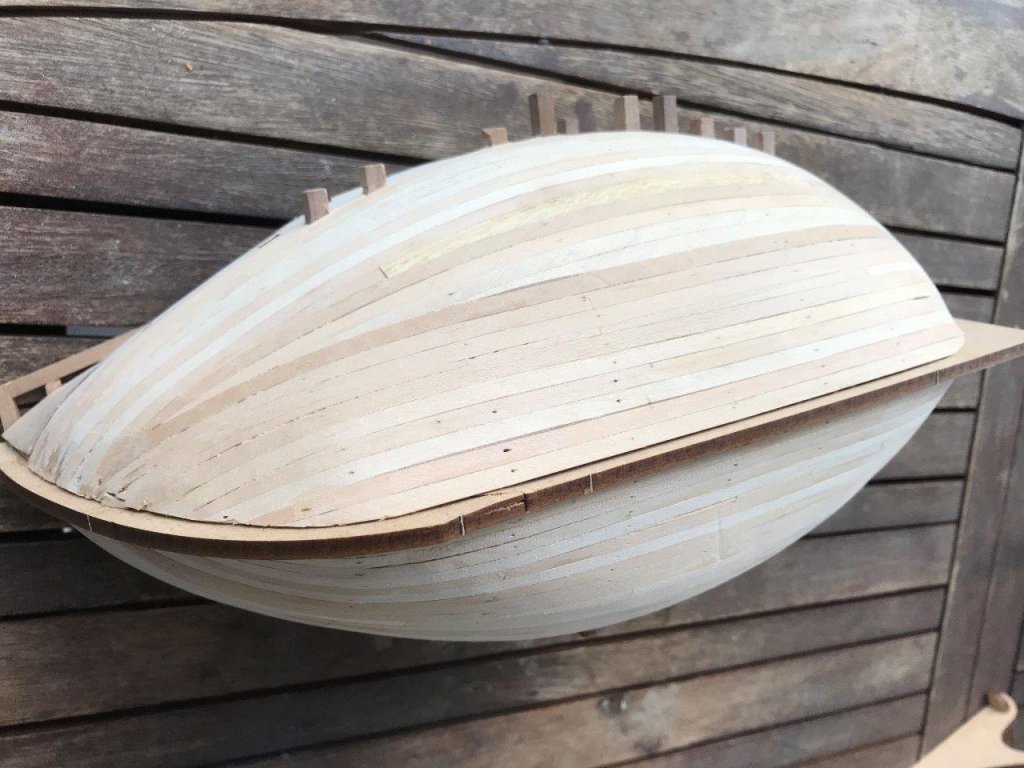
time for an update - I post some before/ after pictures of sanding the first planking. The picture of the finished raw planking is horrible, in real life it was much more acceptable, I even decided not to post it last time: I left the hull on my terrace table, and I did some sanding whenever I was out. For several days, progressively finer sandpaper. The hull took shape nicely, I had to stop myself at the end, remembering this is only a first planking and doesn't need the finest polish. The hull after sanding shows a striking difference: The last photo shows the arched lining of the forecastle, which continues as railing over the bulwark. The last task before the second planking is to fit the rear rails, as precut plywood pieces. -
Coca by DavidG - FINISHED - Amati - 1:60
DavidG replied to DavidG's topic in - Kit subjects built Up to and including 1500 AD
great pictures Jan, thank you. Vivian, you're welcomed, I read your story in another post and happy to see you back. Geoffrey, good luck for your build. I'm not a pro modeler by any means, but please ask if I can be any help of you. This is a well made kit, the hull shape requires some time to get over, but once you got the rhythm of it, it goes smoothly. -
Coca by DavidG - FINISHED - Amati - 1:60
DavidG replied to DavidG's topic in - Kit subjects built Up to and including 1500 AD
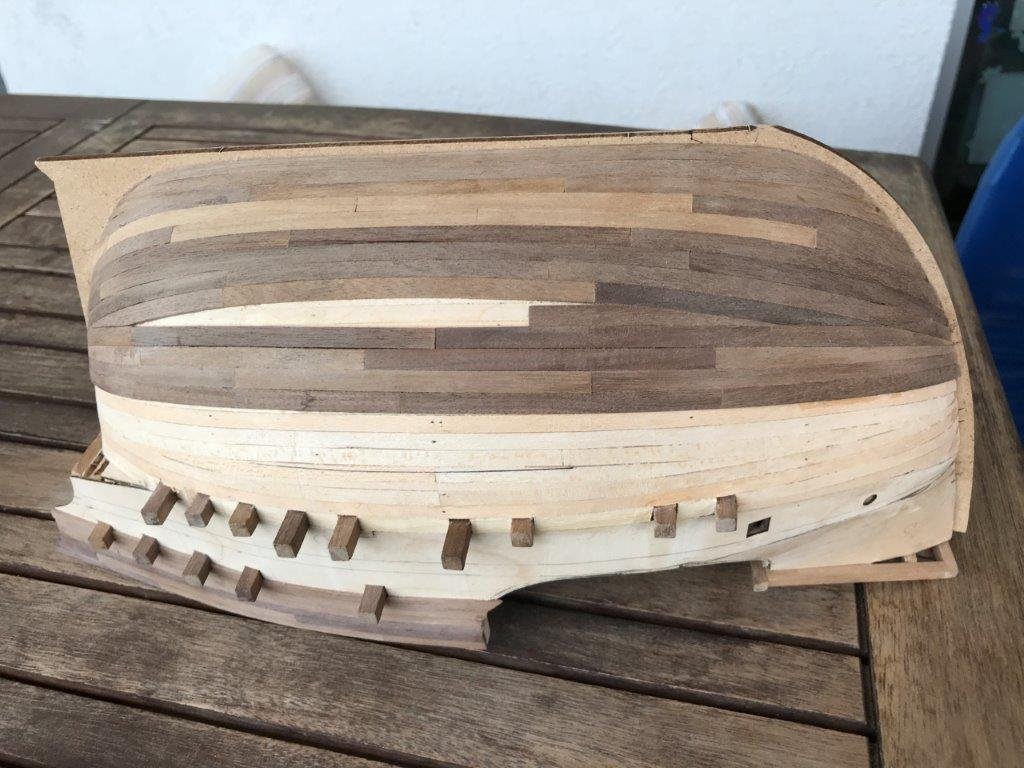
while the instructions call for finishing the upper part (build the railings and second plank the bulwarks) I decided to do the hull planking first. I divided the hull into 3 belts, the middle one was the trickiest due to the pronounced round shape. The kit supplies 2x4 mm basswood strips for the job, good quality and well cut. The soft wood easily bends after soaking for ~10 minutes. The only watch out is the planking around the false deck beams. They are perpendicular to the bulkheads, and do not follow the deck line. The 4 mm strip is not the best choice to plank around 5 mm beams, fortunately I had some 5mm spares. The small triangular gaps are fine at this stage, but I have to do a better job during the second planking. But for now I will sand the hull, and make the railings. -
Coca by DavidG - FINISHED - Amati - 1:60
DavidG replied to DavidG's topic in - Kit subjects built Up to and including 1500 AD
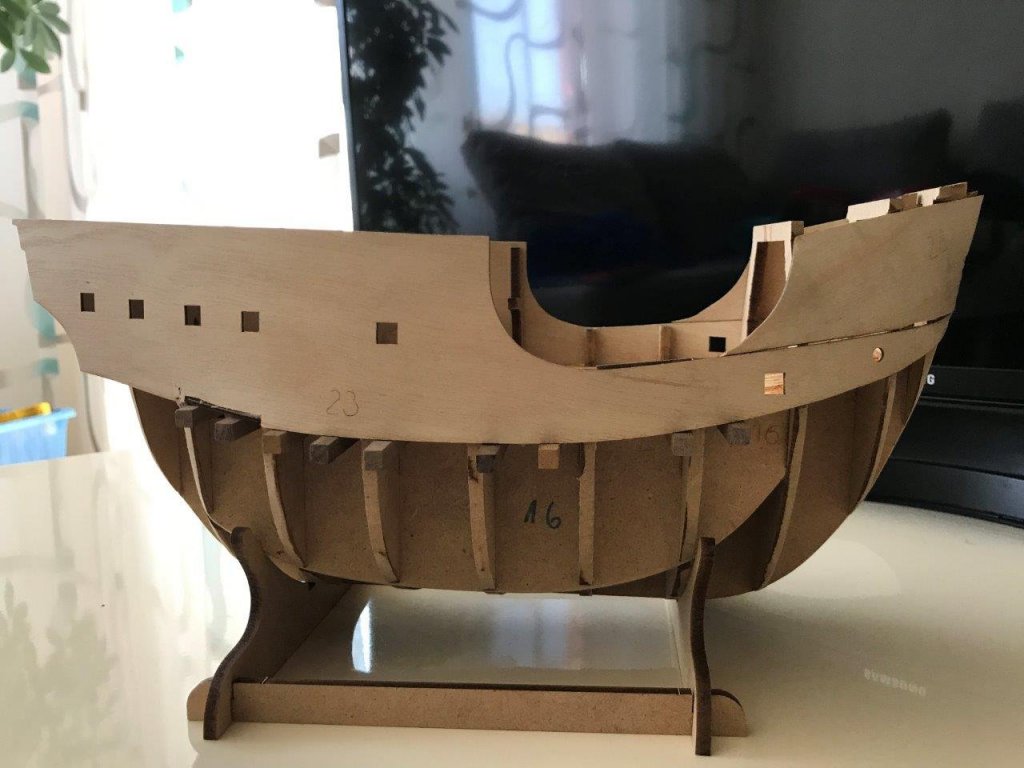
then planked the bulwarks. as the bulkhead extensions stay as they are, each segment must be planked individually. this takes some time. in the bow area I used a paper template to get the angles right. -
Coca by DavidG - FINISHED - Amati - 1:60
DavidG replied to DavidG's topic in - Kit subjects built Up to and including 1500 AD
thank you for the warm welcome and likes. after planking the bulwarks, I fitted the upper deck. the plywood templates needed some minor adjustment. this the raw planking of the deck. I will try to be more subtle with the weathering, but still keep some consistency in the look. I have to experiment on this. -
Coca by DavidG - FINISHED - Amati - 1:60
DavidG replied to DavidG's topic in - Kit subjects built Up to and including 1500 AD
the inner bulwarks to be planked next with 1mm strips. Now, that's a fiddly job between the bulkheads. There are 14 segments to do. Some MDF parts stay visible (like the two short bulwark posts ) - at this stage probably they can be cut off without the risk of distortion, I just chose to leave them as they are. In the last days I made some progress on bulwark planking, but this is close to the actual stage. Next task will be fitting the rear deck. So far, this is three weeks of evening work, 1 -1,5 hours, ~4 times a week. -
Coca by DavidG - FINISHED - Amati - 1:60
DavidG replied to DavidG's topic in - Kit subjects built Up to and including 1500 AD
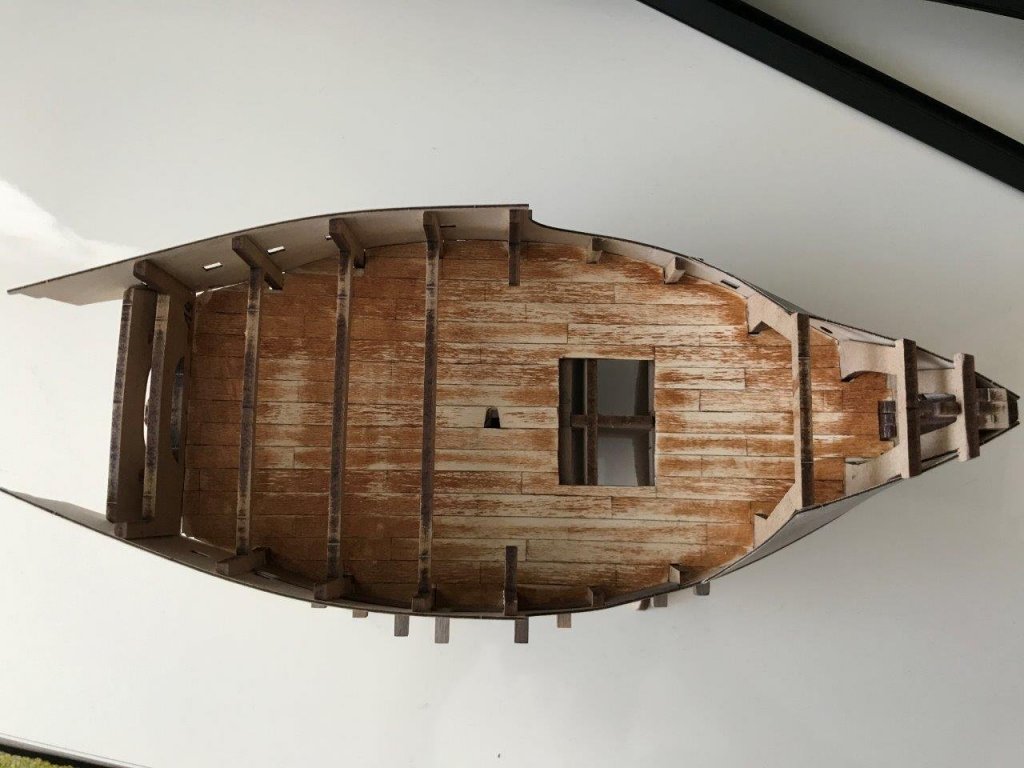
then on to the deck planking. 0,5x8 mm, unusually wide strips used, very similar the Occre second planking material. The upper beams on the frames make some areas difficult to reach. I liked the aged look of the deck in the instruction pictures, and applied a coat of stain to the deck, to be sanded back later. While I like the result in general, I overdid it. Should have diluted the stain, as it was pretty thick. I gave the deck a thorough sanding on the visible areas, and left the covered part as they are - will not be visible and sanding below the beams is an awkward job anyway. -
Coca by DavidG - FINISHED - Amati - 1:60
DavidG replied to DavidG's topic in - Kit subjects built Up to and including 1500 AD
two bulwark panels fit each side. the unusual proportions of the ship,short, but high and wide, become visible. the rectangular openings are for further deck beams. -
Coca by DavidG - FINISHED - Amati - 1:60
DavidG replied to DavidG's topic in - Kit subjects built Up to and including 1500 AD
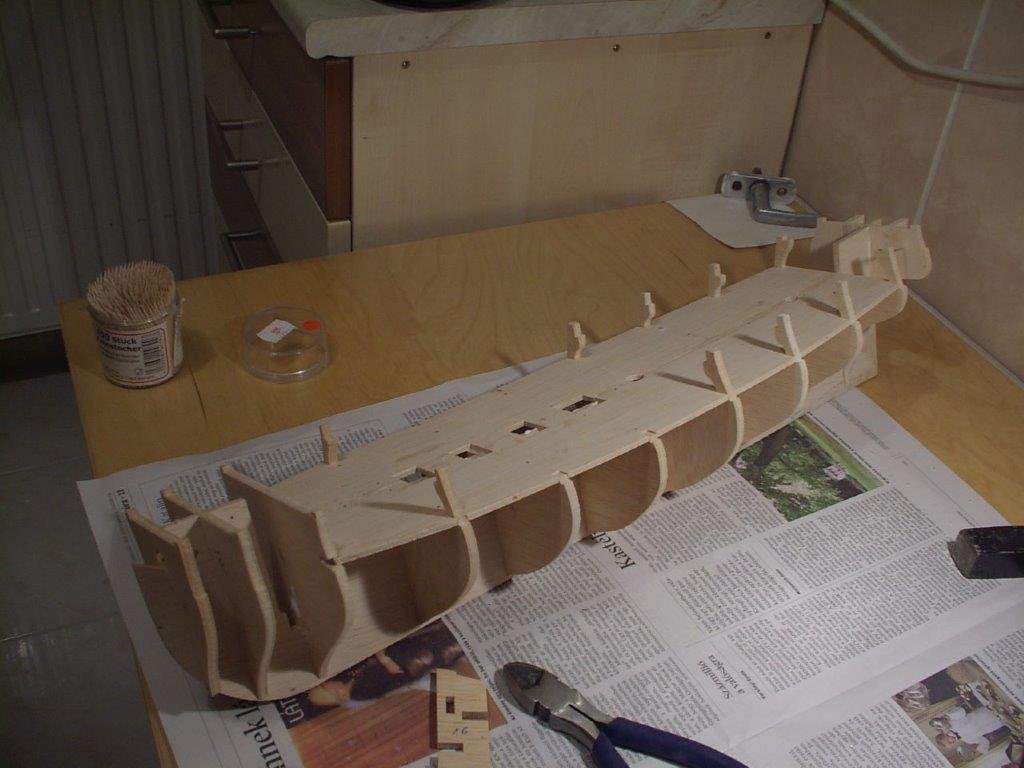
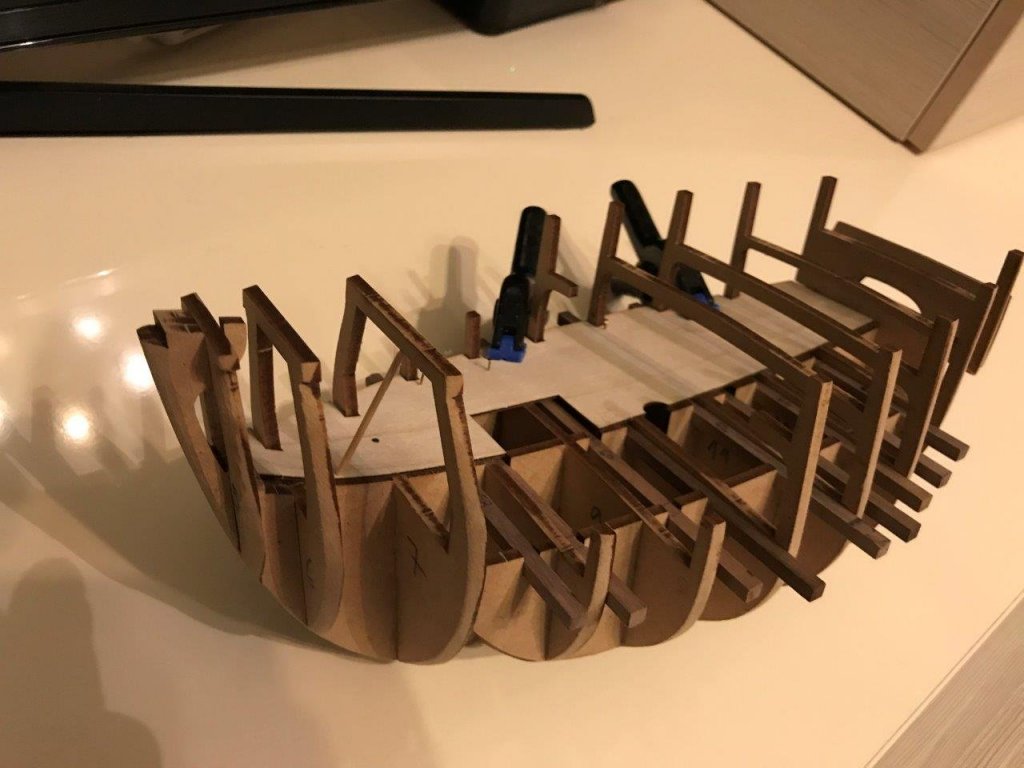
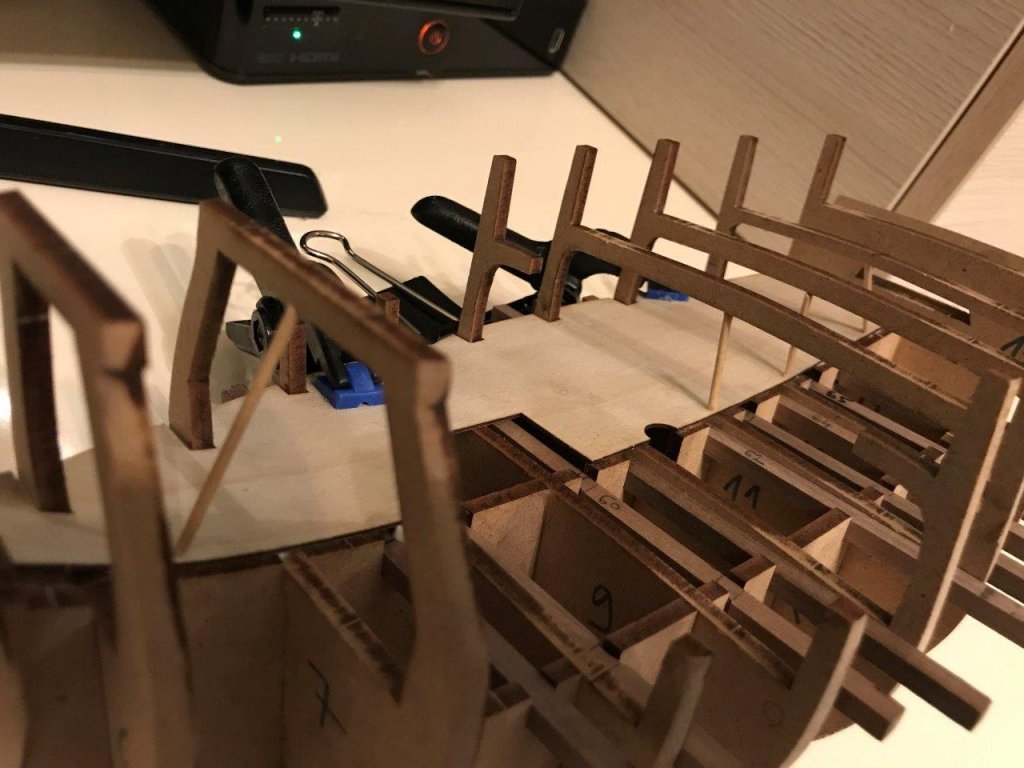
as it is not unusual these days, MDF parts used for the frame. The fit of the part is prefect, the result is pretty rigid. And heavy, compared to the size. two formers lock the frames on both sides of the keel, they also set the alignment for the false deck beams. These beams will stick out from the ship's sides. I used toothpicks to hold the plywood deck in place, they worked pretty well. -
I decided to get back to ship modeling. In a 10+ years period I always had something to build on my desk (namely a Billings Mayflower, Corel Prins Willem and the Occre Diana), while the birth of my older son in 2009 brought the end of the woodworking. Kids, time, space, work, other priorities.. probably you know. But the time has came, and I looked for something really simple. No guns. No painting. Not too big, to be able to finish in reasonable time. Visible progress even in an hour. Not aiming for the perfect model. Just to work with the wood, and have some relaxing time. The Amati Coca, a relatively new offering, advertised as a beginner kit just fits the bill. The kit is based on the famous Mataro ship, and will look like as the Amati picture shows:
About us
Modelshipworld - Advancing Ship Modeling through Research
SSL Secured
Your security is important for us so this Website is SSL-Secured
NRG Mailing Address
Nautical Research Guild
237 South Lincoln Street
Westmont IL, 60559-1917
Model Ship World ® and the MSW logo are Registered Trademarks, and belong to the Nautical Research Guild (United States Patent and Trademark Office: No. 6,929,264 & No. 6,929,274, registered Dec. 20, 2022)
Helpful Links
About the NRG
If you enjoy building ship models that are historically accurate as well as beautiful, then The Nautical Research Guild (NRG) is just right for you.
The Guild is a non-profit educational organization whose mission is to “Advance Ship Modeling Through Research”. We provide support to our members in their efforts to raise the quality of their model ships.
The Nautical Research Guild has published our world-renowned quarterly magazine, The Nautical Research Journal, since 1955. The pages of the Journal are full of articles by accomplished ship modelers who show you how they create those exquisite details on their models, and by maritime historians who show you the correct details to build. The Journal is available in both print and digital editions. Go to the NRG web site (www.thenrg.org) to download a complimentary digital copy of the Journal. The NRG also publishes plan sets, books and compilations of back issues of the Journal and the former Ships in Scale and Model Ship Builder magazines.


