
DavidG
-
Posts
217 -
Joined
-
Last visited
Content Type
Profiles
Forums
Gallery
Events
Everything posted by DavidG
-
 congrats to your fleet. Very nice progress through the line of builds on different difficulty levels. Looking to the list of your future builds, you may want to have a look on Dusek's take on Le Cerf. That one seems to be a more modern design of the same subject.
- 79 replies
-
- 1
-

-
- sergal
- sciabecco francese
- (and 1 more)
-
nice work, that's certainly a difficult bend. you may consider styrene strip for such difficult parts, especially if the model is painted as yours. another option is the "flexible beech" sold by Cornwall in several dimensions. That's a chemically treated wooden strip, and you can tie knots on them even dry, but after soaking can be formed to any shape, which is well retained when dried again.
-
Occre Frigate Diana - Rigging questions
DavidG replied to ObviousNewbie's topic in Masting, rigging and sails
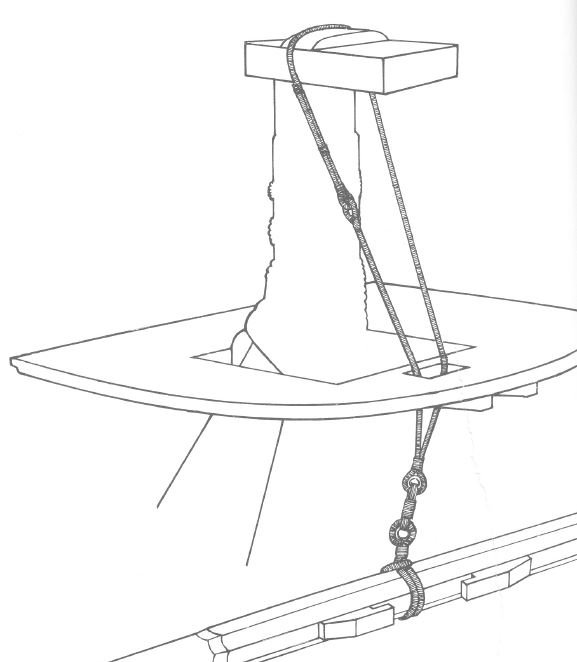
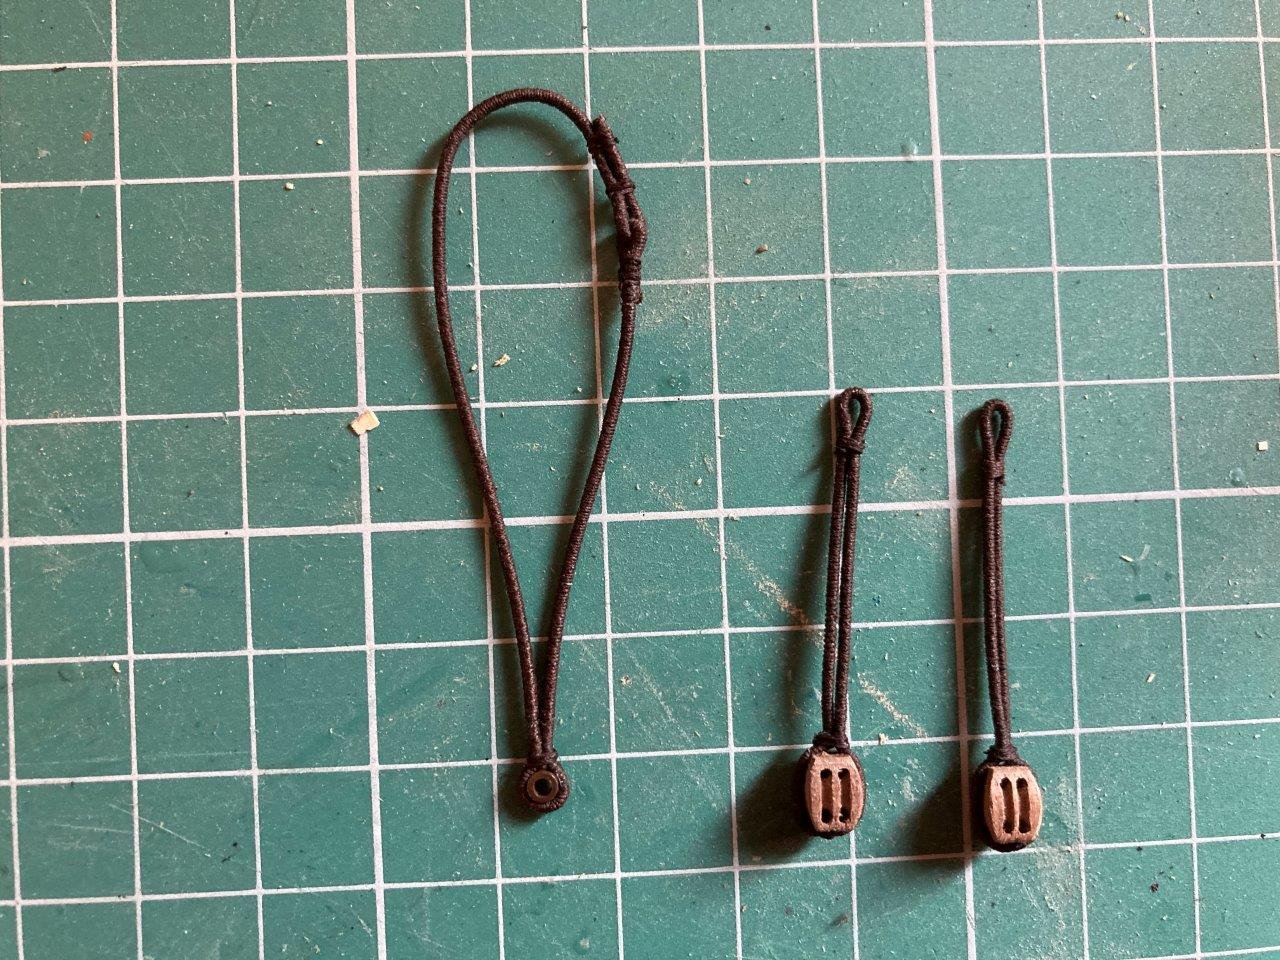
part 198 is the sling, which holds the yard as a security measure. the loop is the bottom part of the sling (actually holding a thimble), which is clearly visible in the the front view. My build log have a picture of the sling in post 38. Be sure, you install them before the topmasts are glued into place. the blocks on the mast cap must be for the lifts, they are lines to lower/raise the yards. What makes me wonder, these blocks should be under the mast cap, and forward of the position shown. The lifts must clear the shrouds in front of them, and I see the proposed alignment would cross the shrouds between the ratlines.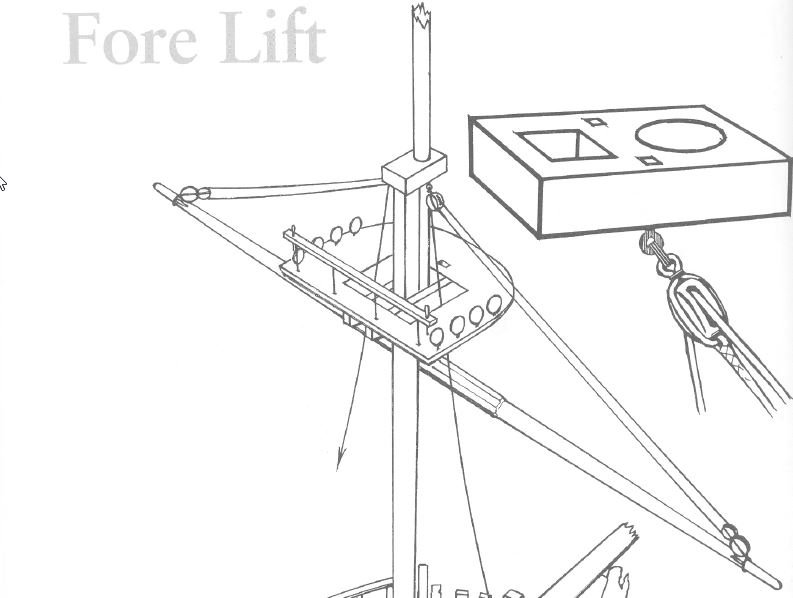
-
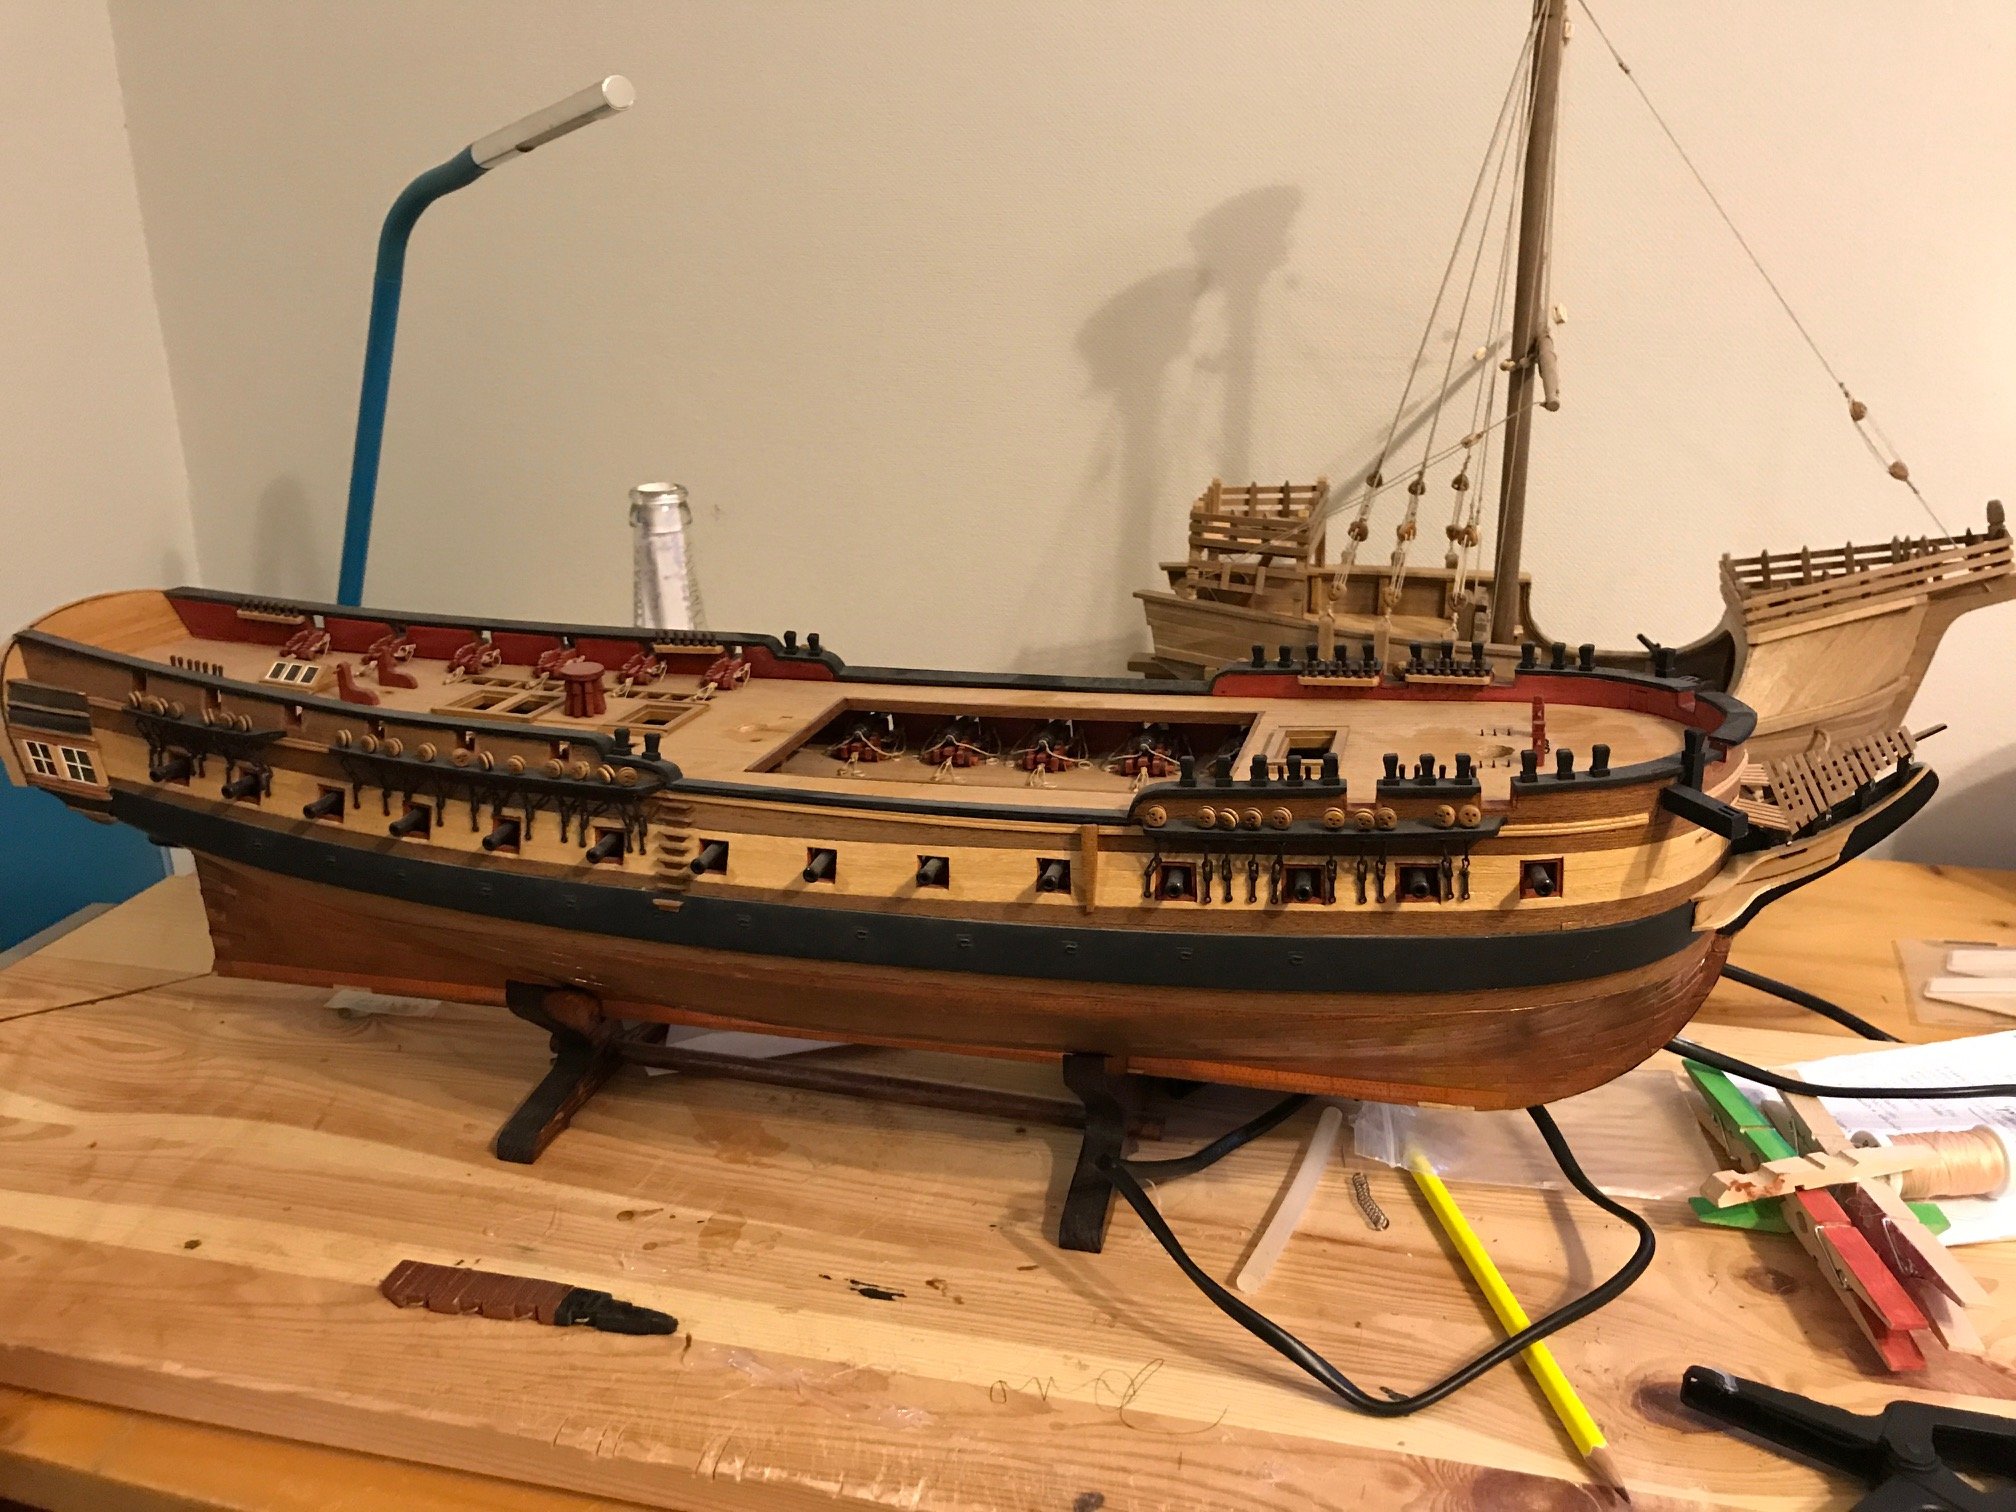
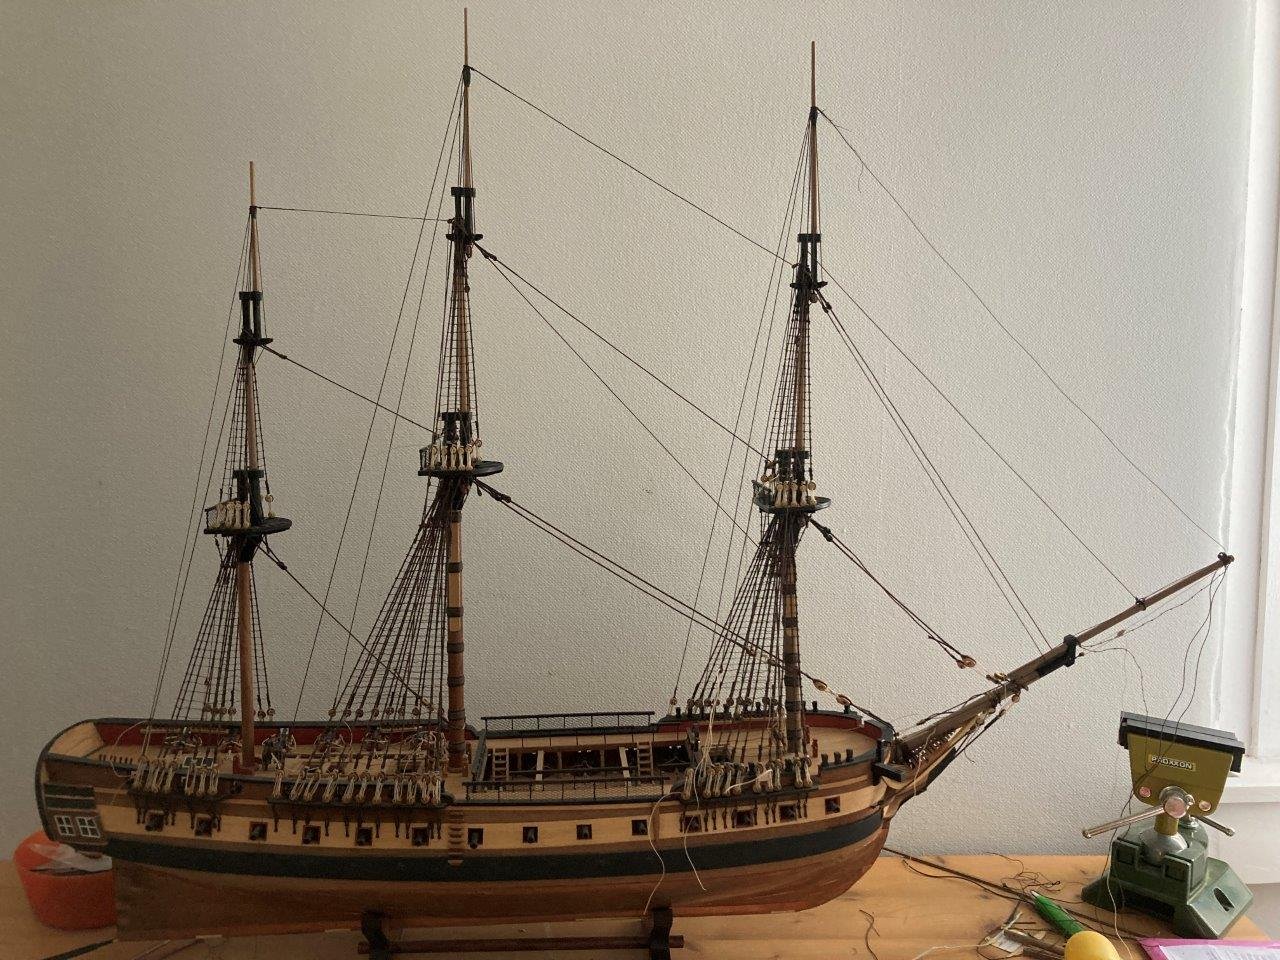
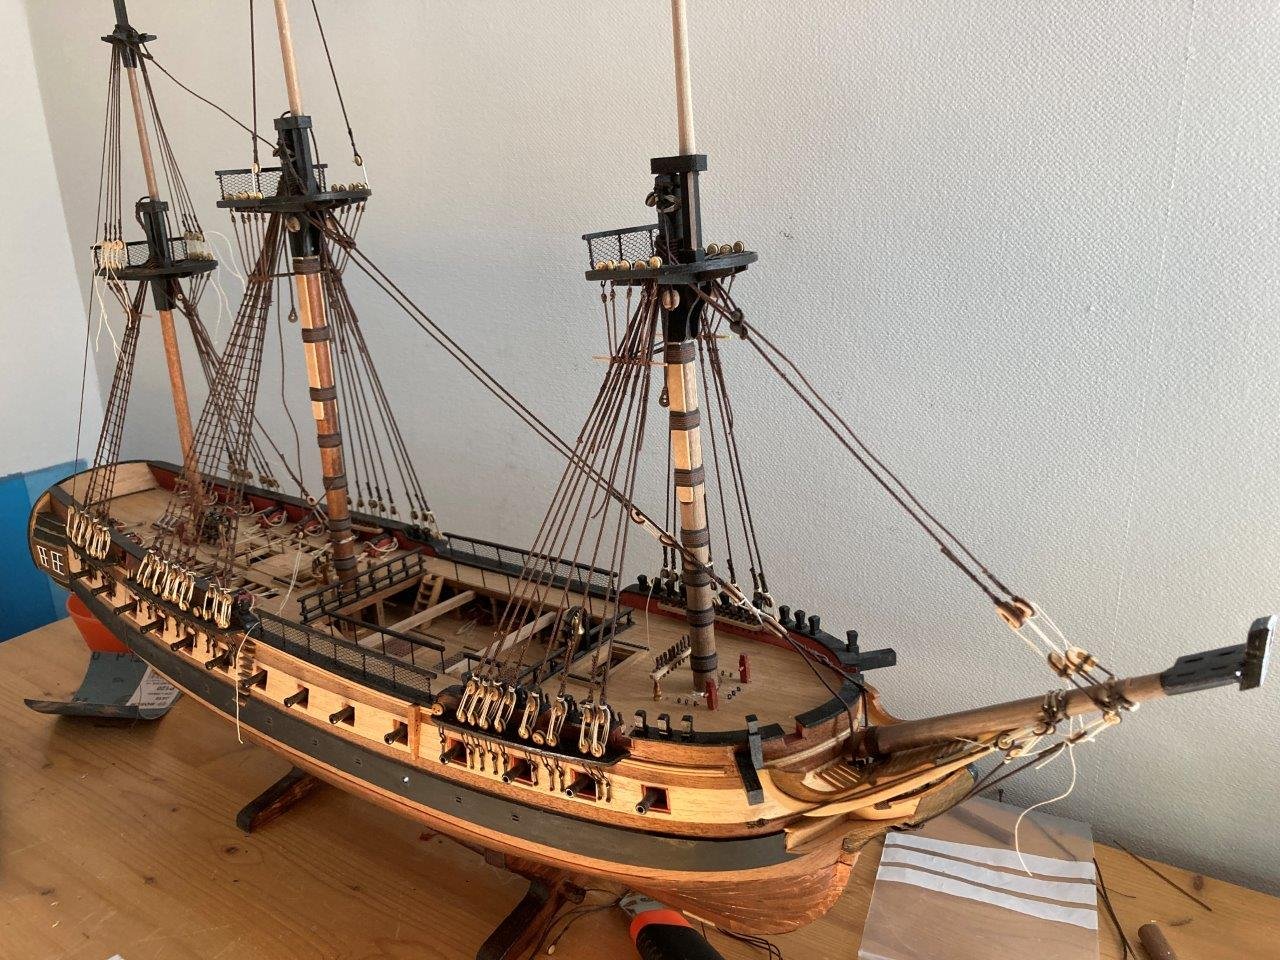
A year ago I had a plan to finish the model in 2020, which goal certainly wasn't met. Now it's time to make another public commitment, to finish it this year, 14 years after I started At least, I was able to install the topgallants and finish all standing rigging, also made the yards for the mizzen mast. The lines are not tied off, I'm sure they need adjustment later, especially when rigging the braces. Below is a picture of the current state, with standing rigging done:
-
very nice planking, Andrey. If you set up your build log, all members can follow your progress and you can get advice on building.
-
Hi Andrei, welcome to MSW and thanks for looking into my log. I'm happy to discuss your Diana build. The best way is to set up a build log of your own, simply by clicking the "Start new topic" button in the build log section. selecting the "choose files" option below your post, will allow you to upload pictures, which you can insert to your post with the "+" sign:

-
Hi Peter, the thicker, lime strips are used for first planking. After you are done with that, and gave it a thorough sanding, you plank the hull a second time with the thin strips. Looking to the pictures of your boat, the dark one is used on the lower hull and the lighter on the upper parts. This is very typical for Occre kits, many of their kits use this color scheme (like the Trinidad, Diana, Montanes, etc).
-
you can just click the quote button below the post.
-
there are several ways to do this, software like Adobe Illustrator can certainly do that. Much depends on the quality of your image, and probably you will have to adjust it manually after the conversion. I think Adobe provides a trial period, which might be just fine for your needs. But if you make a search to "jpg to vector" you find several videos on youtube and other solutions, like vectormagic.com and similar.
-
I came across this video on youtube recently, showing the finished model. I think not posted here before:
-
you made great progress on the second planking. looks very nice. regarding bending the thick wood, I can think of a couple of options. - soak it for several hours, than take a fairly large pot from the kitchen, clamp it slowly and wait until dries. than remove it, soak it again, and clamp it to a smaller one with a bit more severe bend. I had some success this way in the past, working progressively towards the required bend, but it takes a lot of time. all previous advice about using heat/ steam will help the process. - if you are going to paint your wales black, you might use the leftover strips from first planking. they bend easily, and the rough grain can be sanded and filled before painting. this is the path I chose. - you can also source some replacement walnut strips from Cornwall if everything fails and if you are for the natural look. they are not expensive and the one they sell bends way more easily than the Occre wood.
-
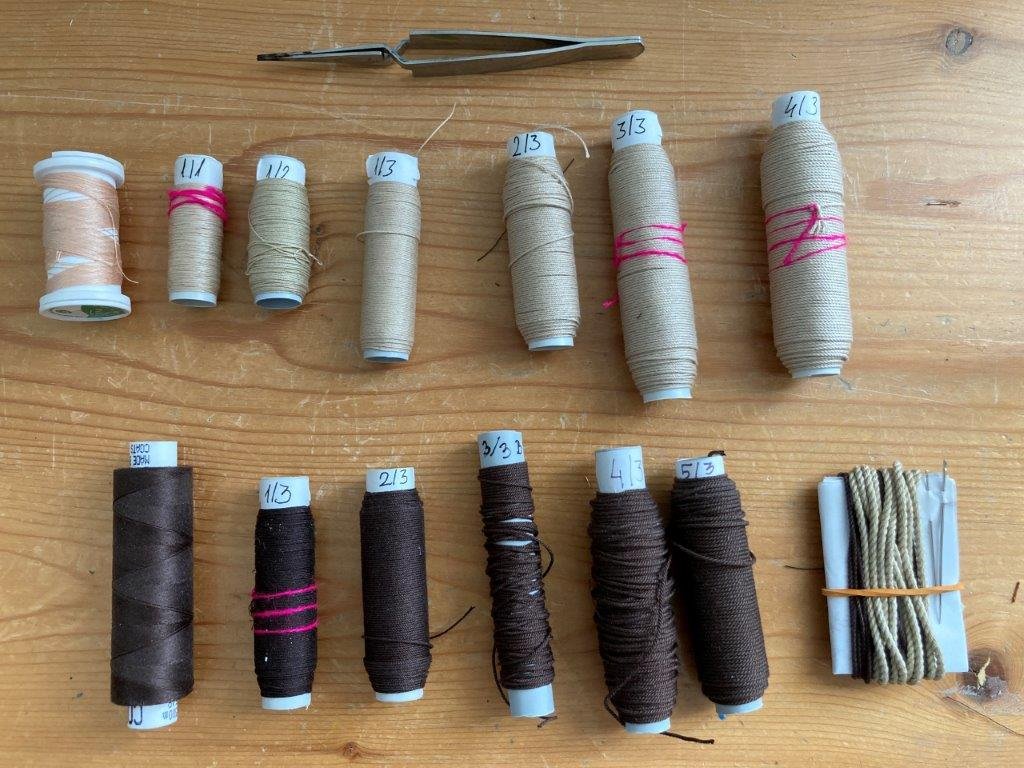
I made some progress in the recent months, actually finished all the ratlines. They add a lot to the look of the ship. Actually it wasn't too bad. On average I tied 7-8 lines per day, but sometimes I really got into it and finished a whole section in a day. Here are some pictures of the current progress. the topmast stays are already on, but not finally tensioned. I started to work on the topgallant masts, which is the next task on hand. Finally a picture of the rigging thread collection I use, purchased from a local source.
-
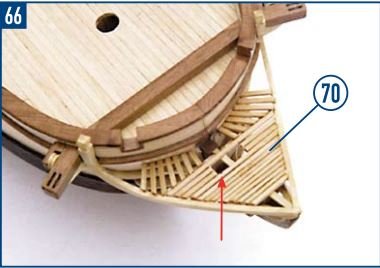
congrats for the nice planking! regarding the bulwark templates, I used them, but if I was to do it again I would plank the bulwarks. For the gundeck it's not an issue, nothing will be seen. But on the forecastle deck there is an opening for the catheads: which is a rather dubious feature. A flat piece of timber laid across the deck, connecting the the two sides.. can't imagine it is correct. The point is, the bulwark templates already have a hole for this board, which I decided not to install, and found it difficult to fill the gap nicely in the bulwarks. But the decision certainly is yours, I recall the templates are fine and fit as they intended. For the color scheme, I decided to go with natural wood look and the bulwarks (and guns) stained red. You can check my build log if you like this look. Must admit, I know nothing about Spanish ships, and I followed British reference material. I don't think varnishing of the hull before second planking is a good idea. Wood glue sticks to wood and anything in between results a weaker joint, But don't be afraid of the second planking, your job done is great. keep on the good work, David
-
I will watch this with interest, as I want to build a clipper ship one time. There are not many good kits on the market, this one seems to be of the better ones. Neither many finished examples of the Flying Fish available on the internet. You certainly know what you are doing, good luck for the build.
-
I gave a try to char removal with a dremel brush with mixed results. It worked fine to remove the loose top layer (which makes most of the mess) but the rest remained for hand filing. But at least made the dirty work a bit faster.
- 322 replies
-
- 4
-
-
- enterprise
- caf
- (and 1 more)
-
very nice work so far. your precision and finishing are really great! regarding eyes at the end of the block strops, you could try to cut the thread end diagonally. that way the thread end will diminish in thickness under the seizing, simulating the splice.
- 164 replies
-
- 2
-
-
- first build
- model shipways
- (and 2 more)
-
welcome to the Occre Diana club with a finished model you are not a newbie any more. Building the same ship for ages I will have an eye on your log. In your speed you probably will take me over soon.. Anyway, good luck for your build, this will build into a nice model.
-
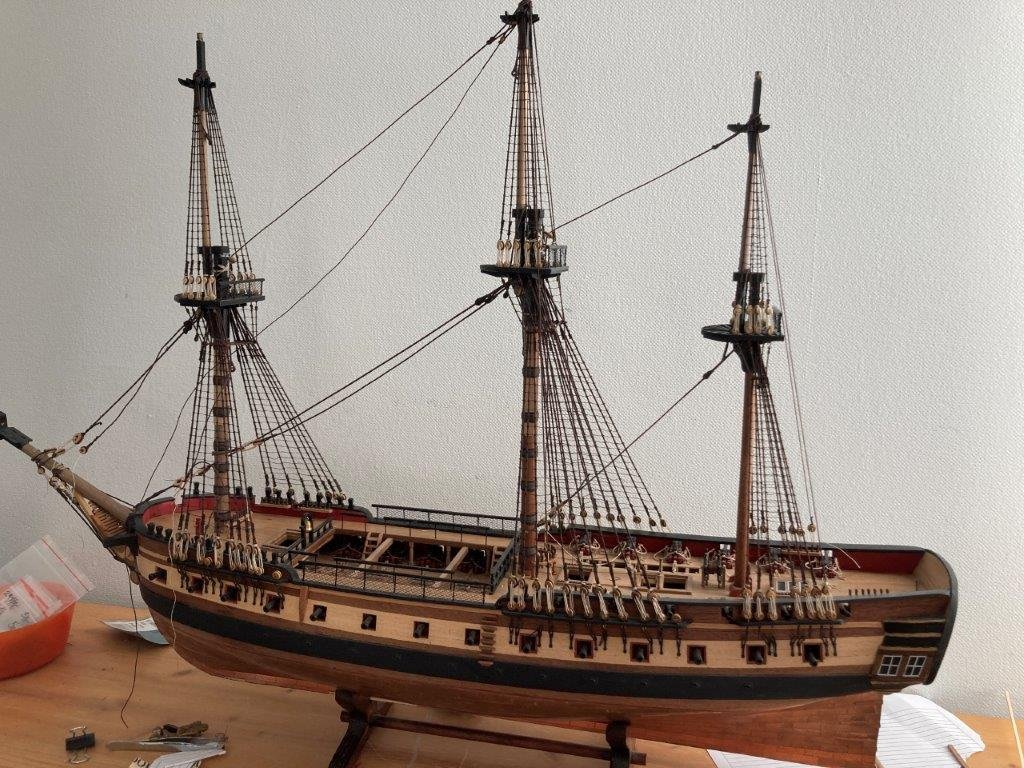
In the meantime, I started to tie ratlines. It is made by clove hitches, using size 50 Corona cotton thread Currently I'm setting up the topmast shrouds, the next milestone will be the completion of the topmast stays. Here is an overall view of the model in it's current state:

-
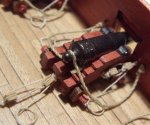
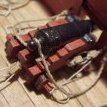
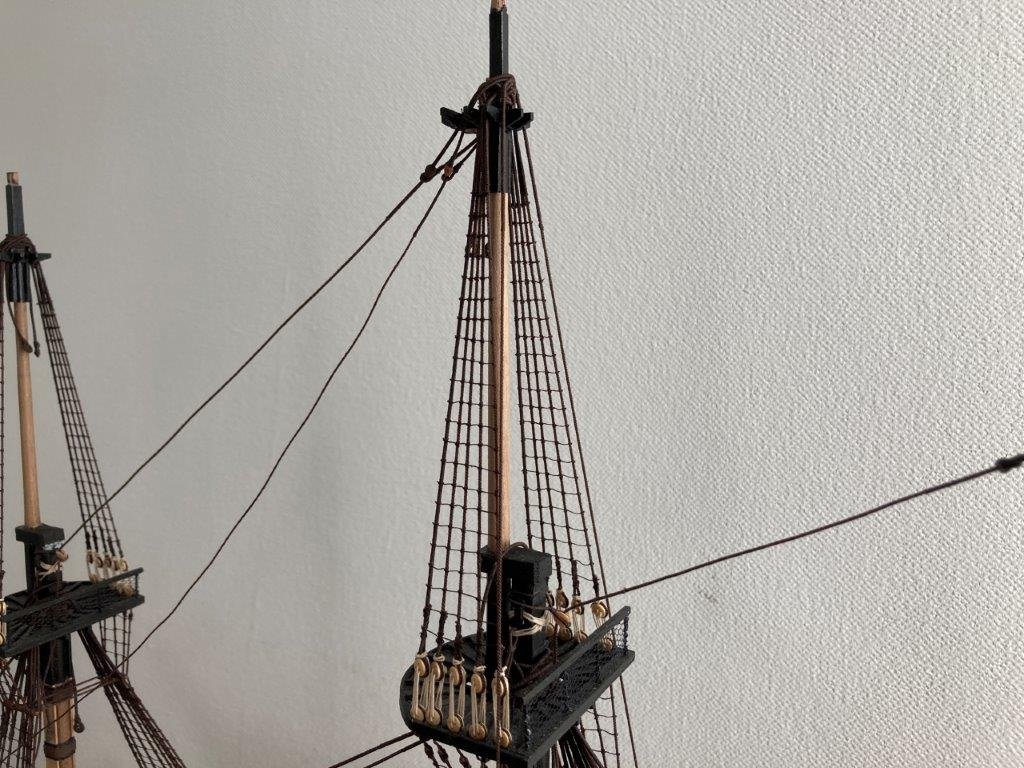
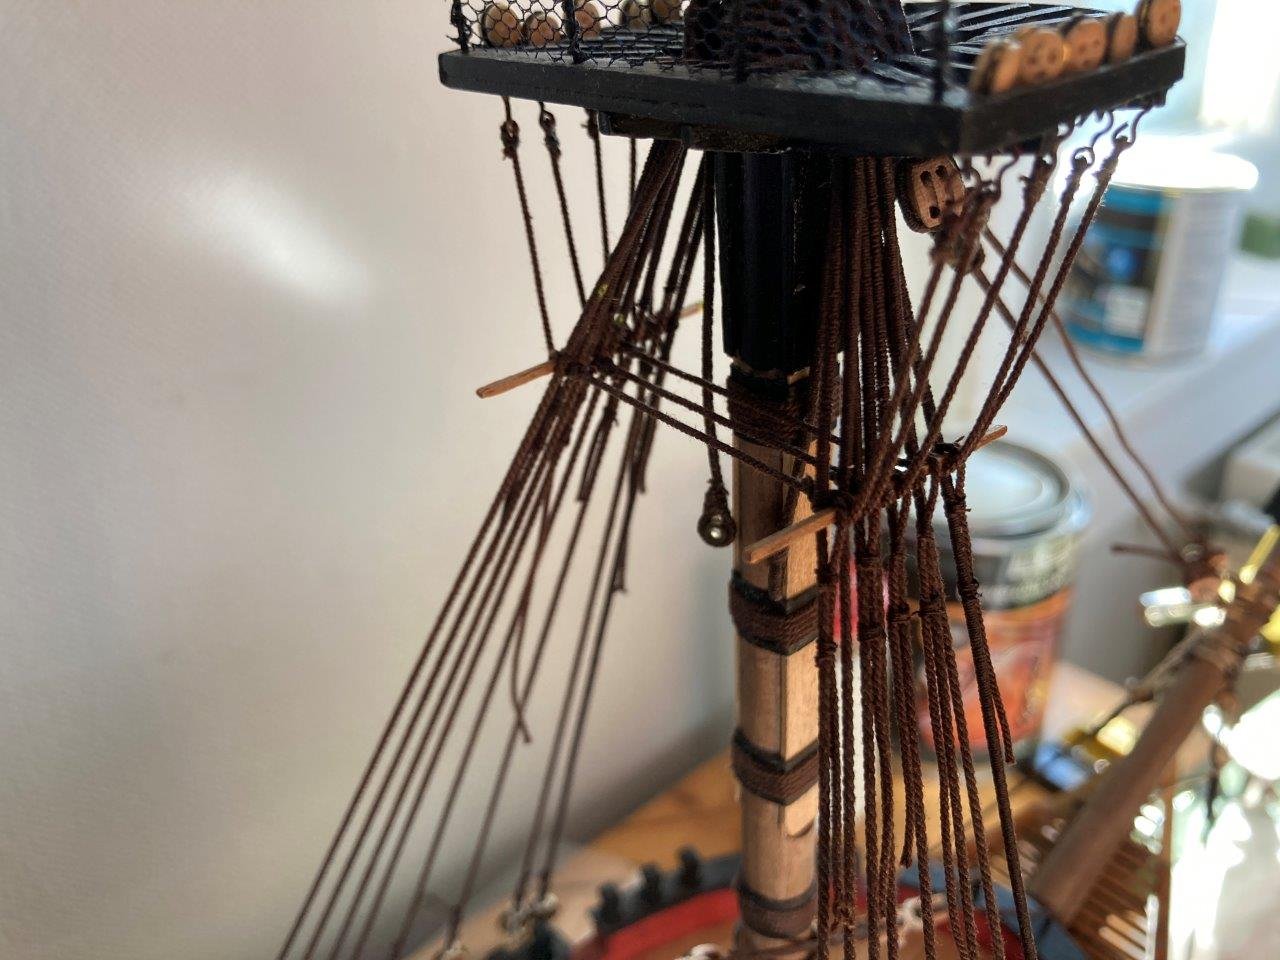
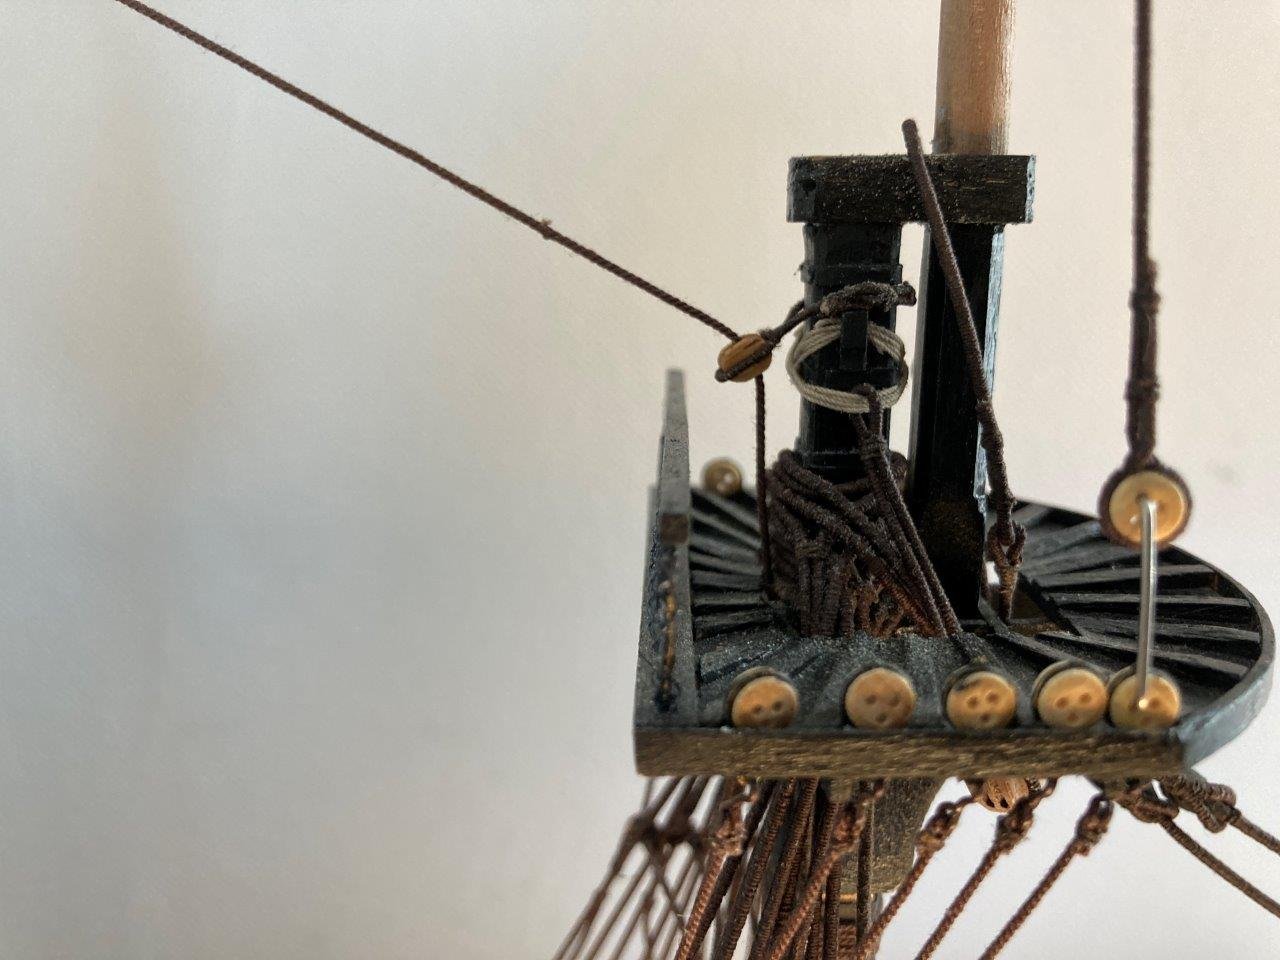
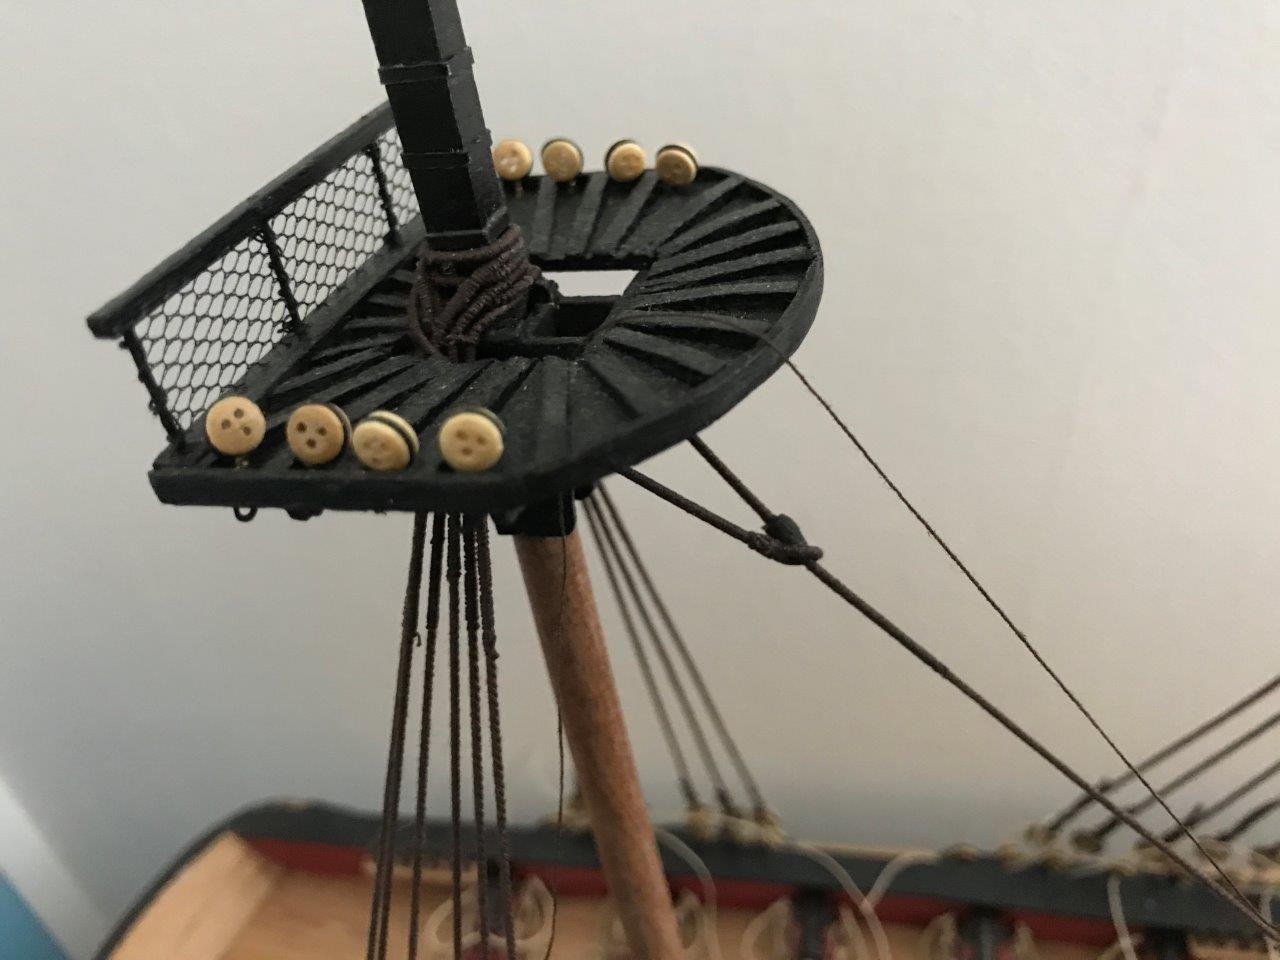
Before moving to the topmasts, some tasks were due around the mast tops. First is to install the catharpins and futtock shrouds on the main and fore masts. I used 1x1 mm wooden strips for the futtock poles, in retrospect they are a bit on the thick side, next time I may try to use thread instead. The futtock shrouds take a turn around the pole and secured by two seizings below. The hooks on their upper end are made from modified eyebolts (these are the small Amati copper ones), then darkened by heating them and dipped in oil. Then made the slings and the strops for the jeer blocks. The latter should have double strops, but I wasn't able to fi them to the blocks. Finally rigged them to the mast top.

-
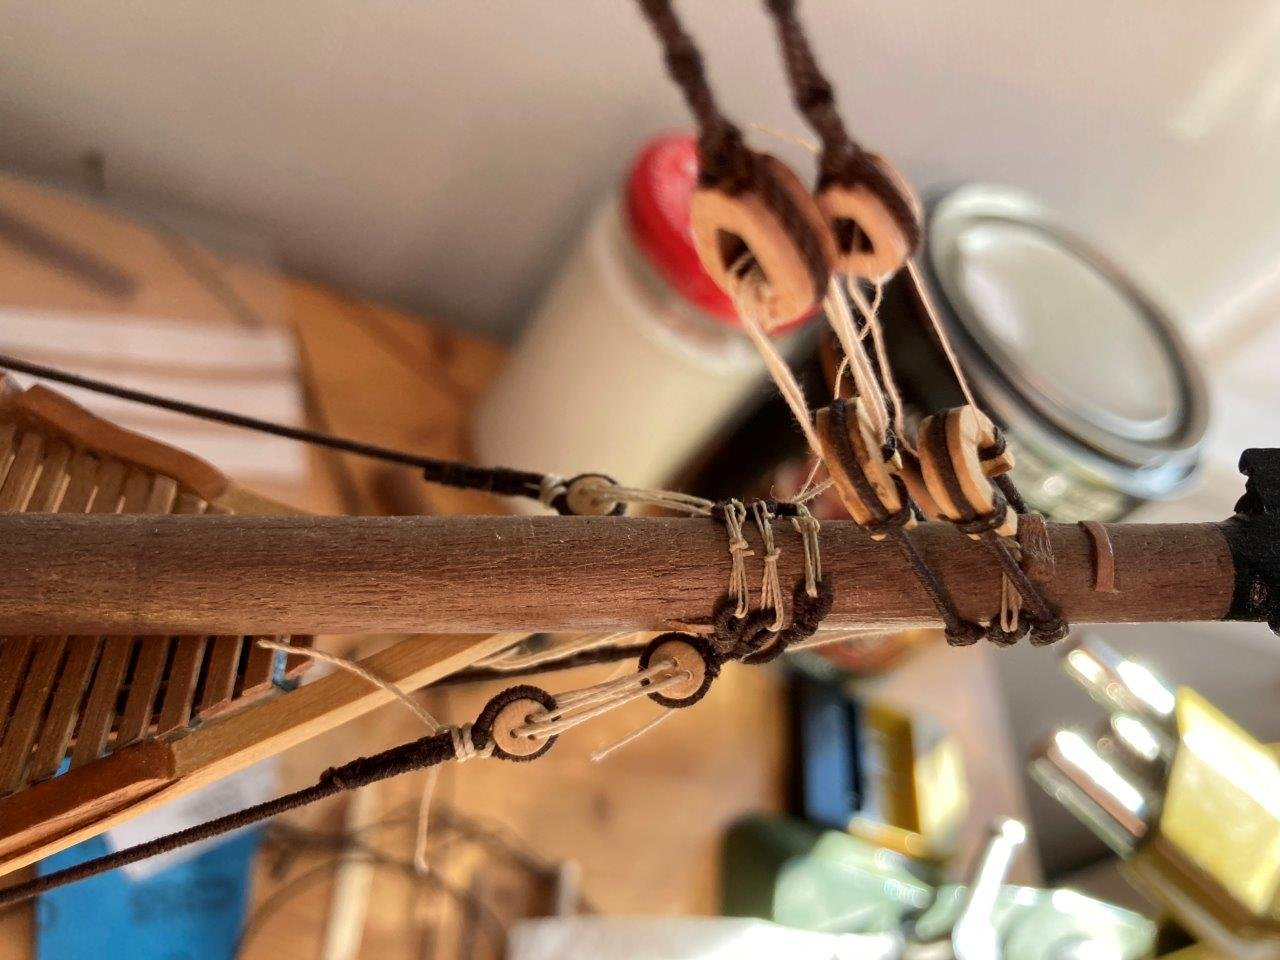
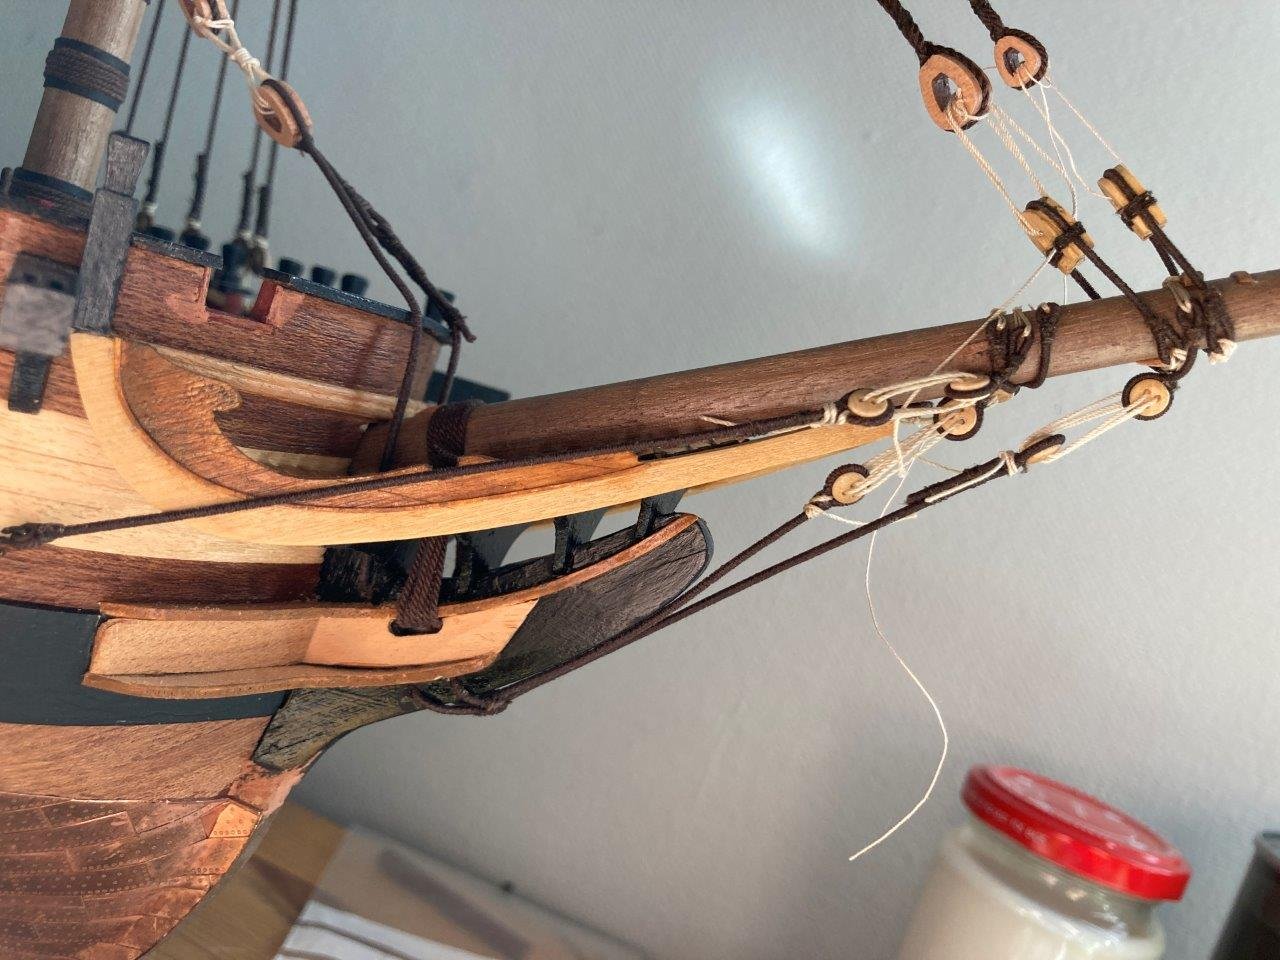
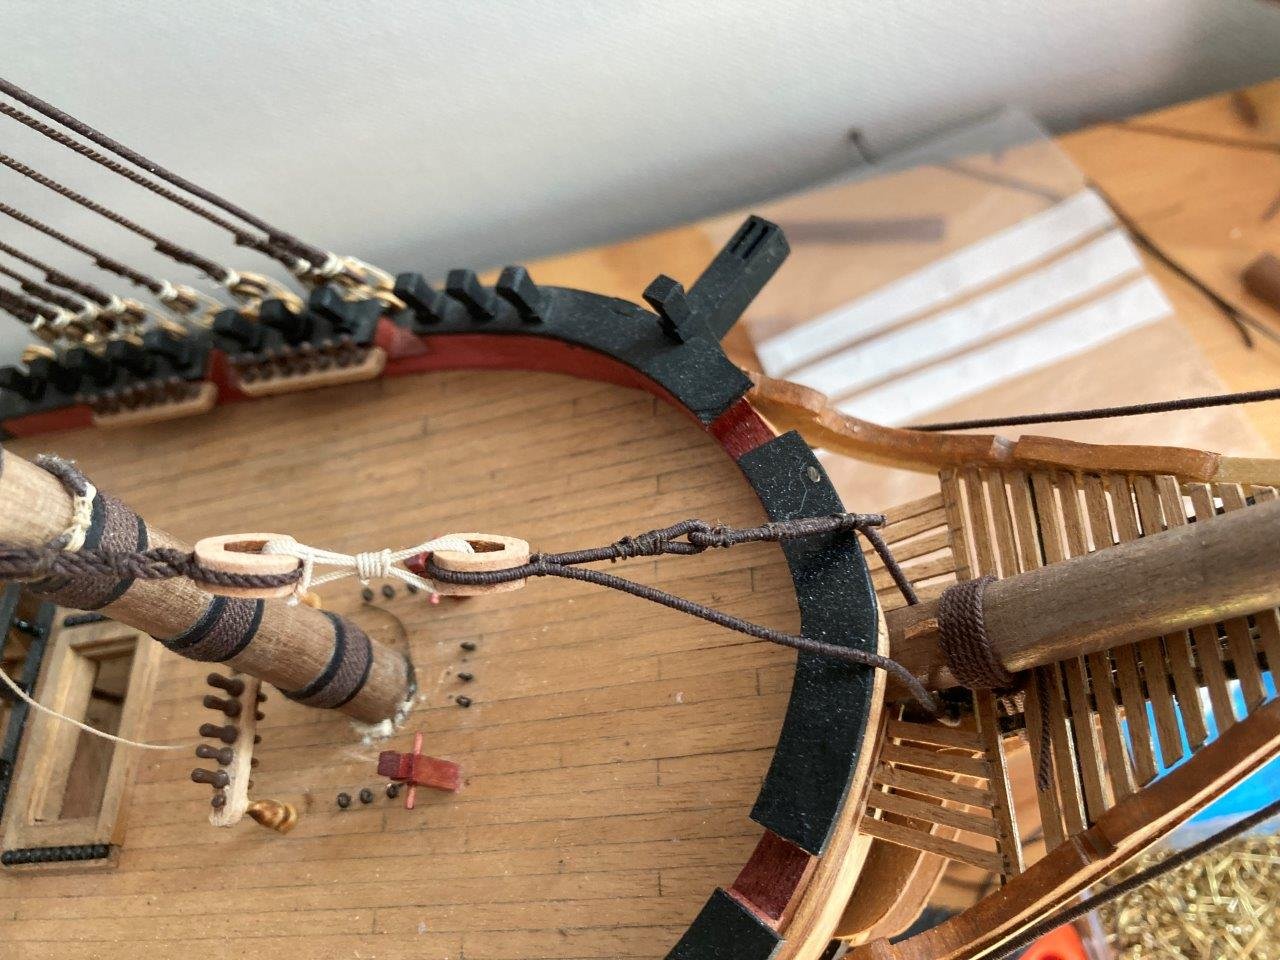
Having the lower stays done, I started to work on the bowsprit. Despite of there are reliable sources how to do it, I struggled a lot in this area. Given the dimensions of the head and the length of the bowsprit, the lines simply doesn't fit. The first issue is the bowsprit itself, I had to make it longer than the plan to fit the required fittings (and still had to remove the woolding behind the bees) and keep the lines away from bow rails. Then came the question of the figurehead. The kit supplied a nice one, with the small issue it doesn't really fit. The rigging plan bypasses this by leaving the bobstays slack to make space for the figure. My attempts to modify the figurehead or the whole arrangement of the bow were less than successful, moreover I accidentally dropped the poor figure casting broking her arms, to arrive to the conclusion I will have no figurehead on the model. Things got much easier to manage then. First, made the required collars for the bobstays, bowsprit shrouds and fore stays. Also cut two open hearts (the closed ones are from Vanguard Models).. Then set up the lines. The bowsprit shrouds and the bobstays along with all collars are served, it is also visible, how little space left for the figurehead. The bowsprit shrouds have a thimble holding a hook on the other end, attached to an eyebolt. I plan to add another pair of them, as shown in Petersson's book.
-
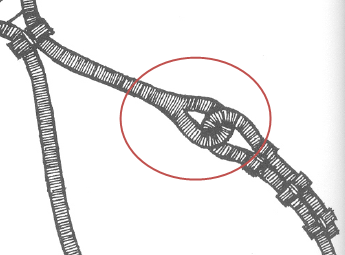
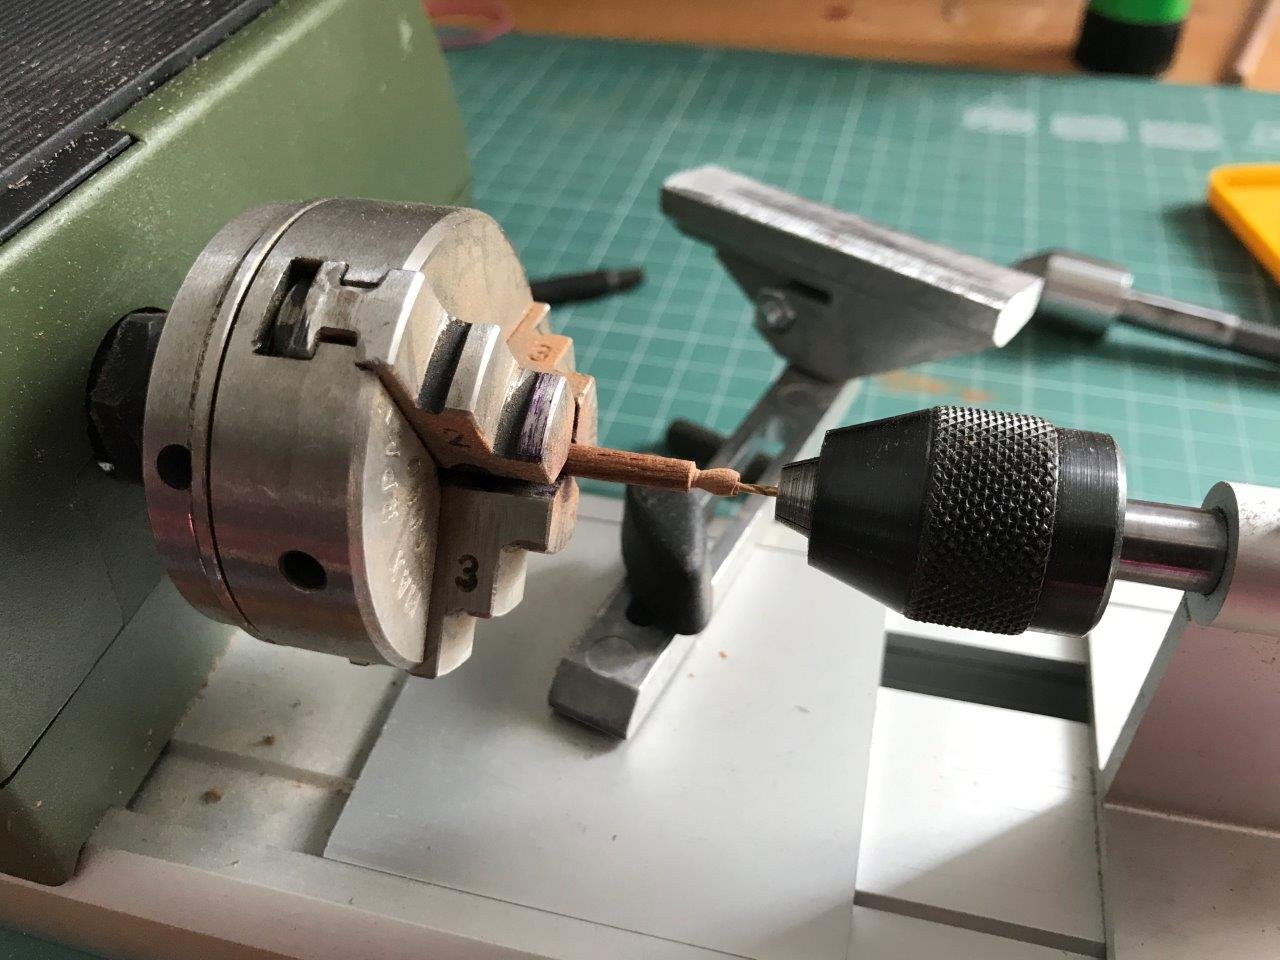
I had some progress in the last 3 months. I'm not a fast builder, but try to get some work done each day, even it sometimes to try a knot or two. After finished the rather straightforward (but lengthy) exercise of setting the lower shrouds, I started work on the lower stays. I concluded, the kit rigging plan is not any help at all- while I know nothing about the Spanish practice, some of the features shown are rather dubious (tying off topmast shrouds on the middle of masts, rigging fore stays with blocks, ect). For rigging lower stays I had more confidence, so started with these. The mouse was made on the lathe from dowel, the drill bit makes a good job the prevent the rather small part from braking. I gave a short thought to wave or serve the mouse but dropped the idea and simply painted it. This is the first one, installed on the mizzen mast. main mast: I chose to rig the main stay collar through a hole drilled to the head. Still don't know, what is proper way of tying off the lashing between the hearts. The example above is the most pleasing for my eye, and probably will use this form (v1), but I saw the lashing finished similar to a deadeye, tied off around the shroud above the heart (v2) and also tied off on itself, but only around the upper lashing lines, ie not holding the upper and lower lines together (v3). Any thoughts on this is appreciated, as I still haven't decided and most of the lanyards only temporarily rigged.

-
don't know how much of help, but pictures of the Woody Joe manuals are published as thumbnails on the right of their product page: https://www.zootoyz.jp/contents/en-us/p1075_Woody_JOE_Ship_in_Bottle_Kit_SANTA_MARIA_Wooden_Sailing_Ship_Model.html
-
I recently disovered hismodel.com master korabel also sells some fittings.
