HOLIDAY DONATION DRIVE - SUPPORT MSW - DO YOUR PART TO KEEP THIS GREAT FORUM GOING! (Only 13 donations so far - C'mon guys!)
×


Vivian Galad
-
Posts
596 -
Joined
-
Last visited
Content Type
Profiles
Forums
Gallery
Events
Everything posted by Vivian Galad
-
 Hey, Mark. Nice to see another junk. Have a question, though: from where came that figurehead? I ask cause I didn´t see any figureheads on junks till now.
 -
Dan, Loved your pictures and your junk. Great you enlarged the hatches, since AL gives us a junk with no compartments, lol. As you aged your deck, I did with mine. Can´t stand that clean look. I intend on doing some rustic crates. Thanks a lot for posting the pics and for your care in showing your work. =*
- 188 replies
-
- 1
-

-
- latin caravel
- artesania latina
- (and 1 more)
-
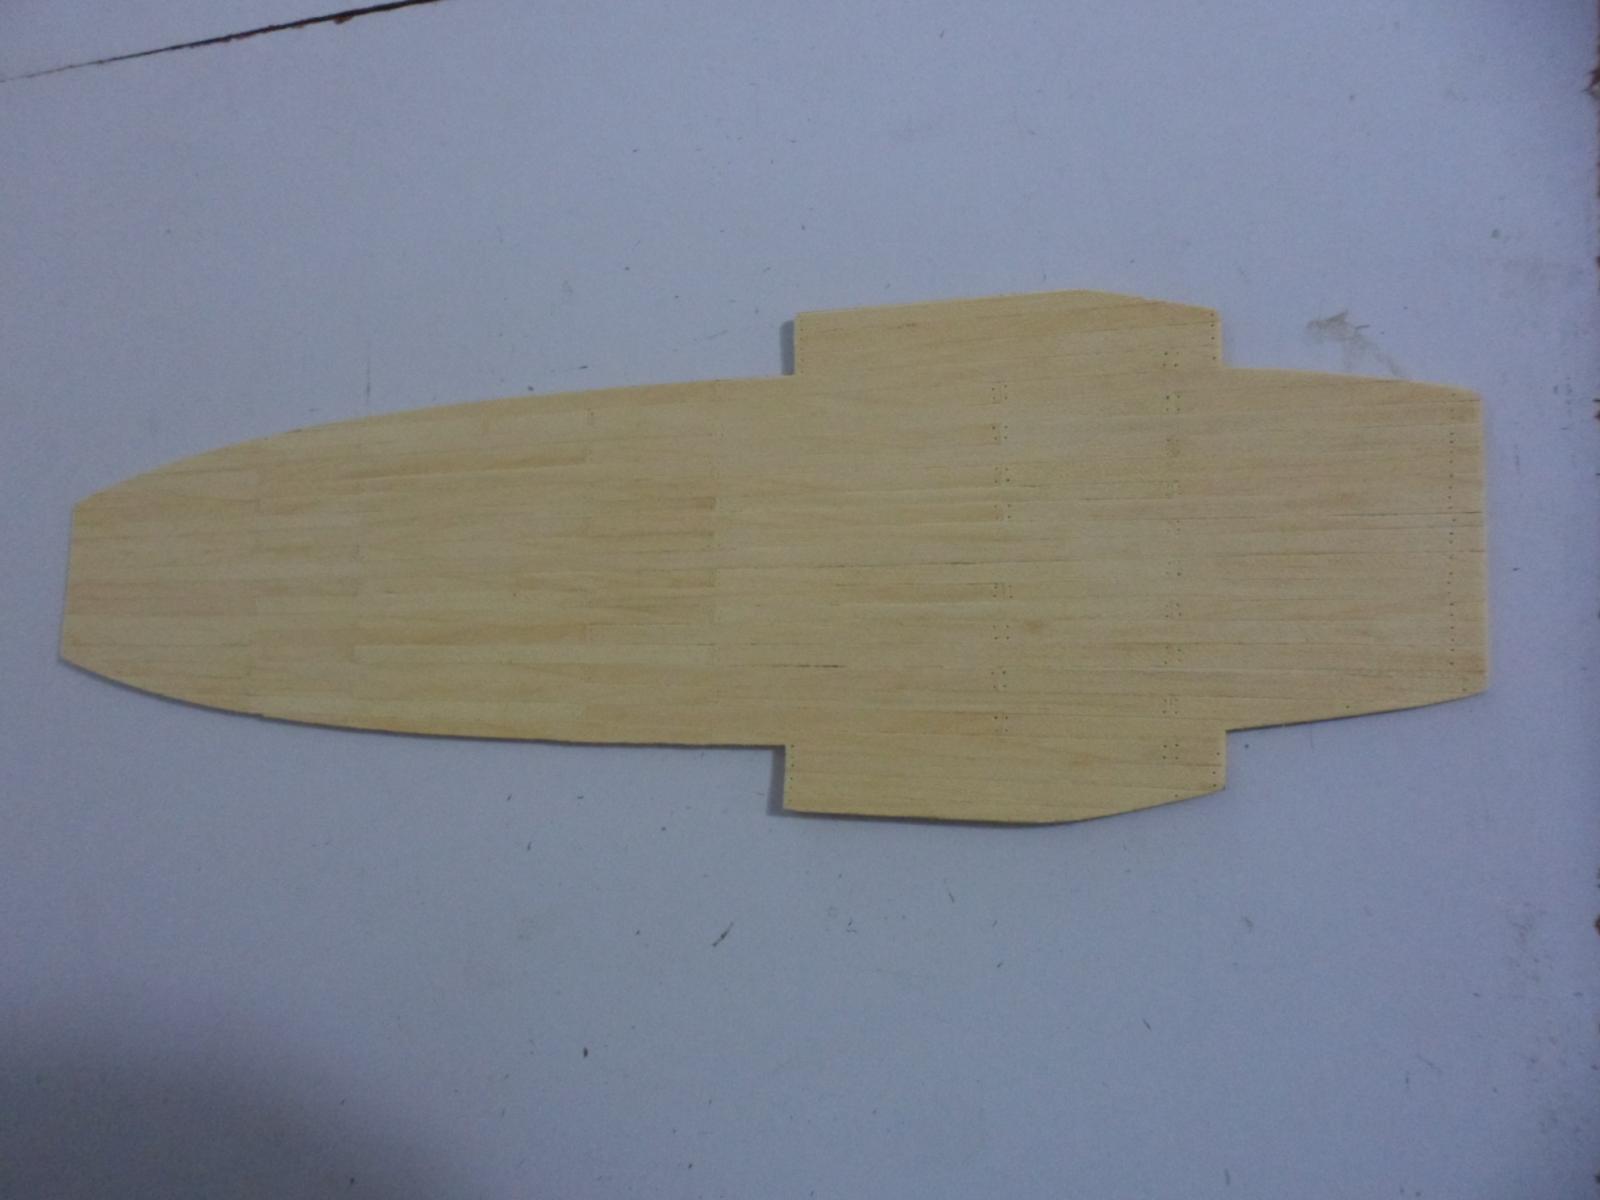
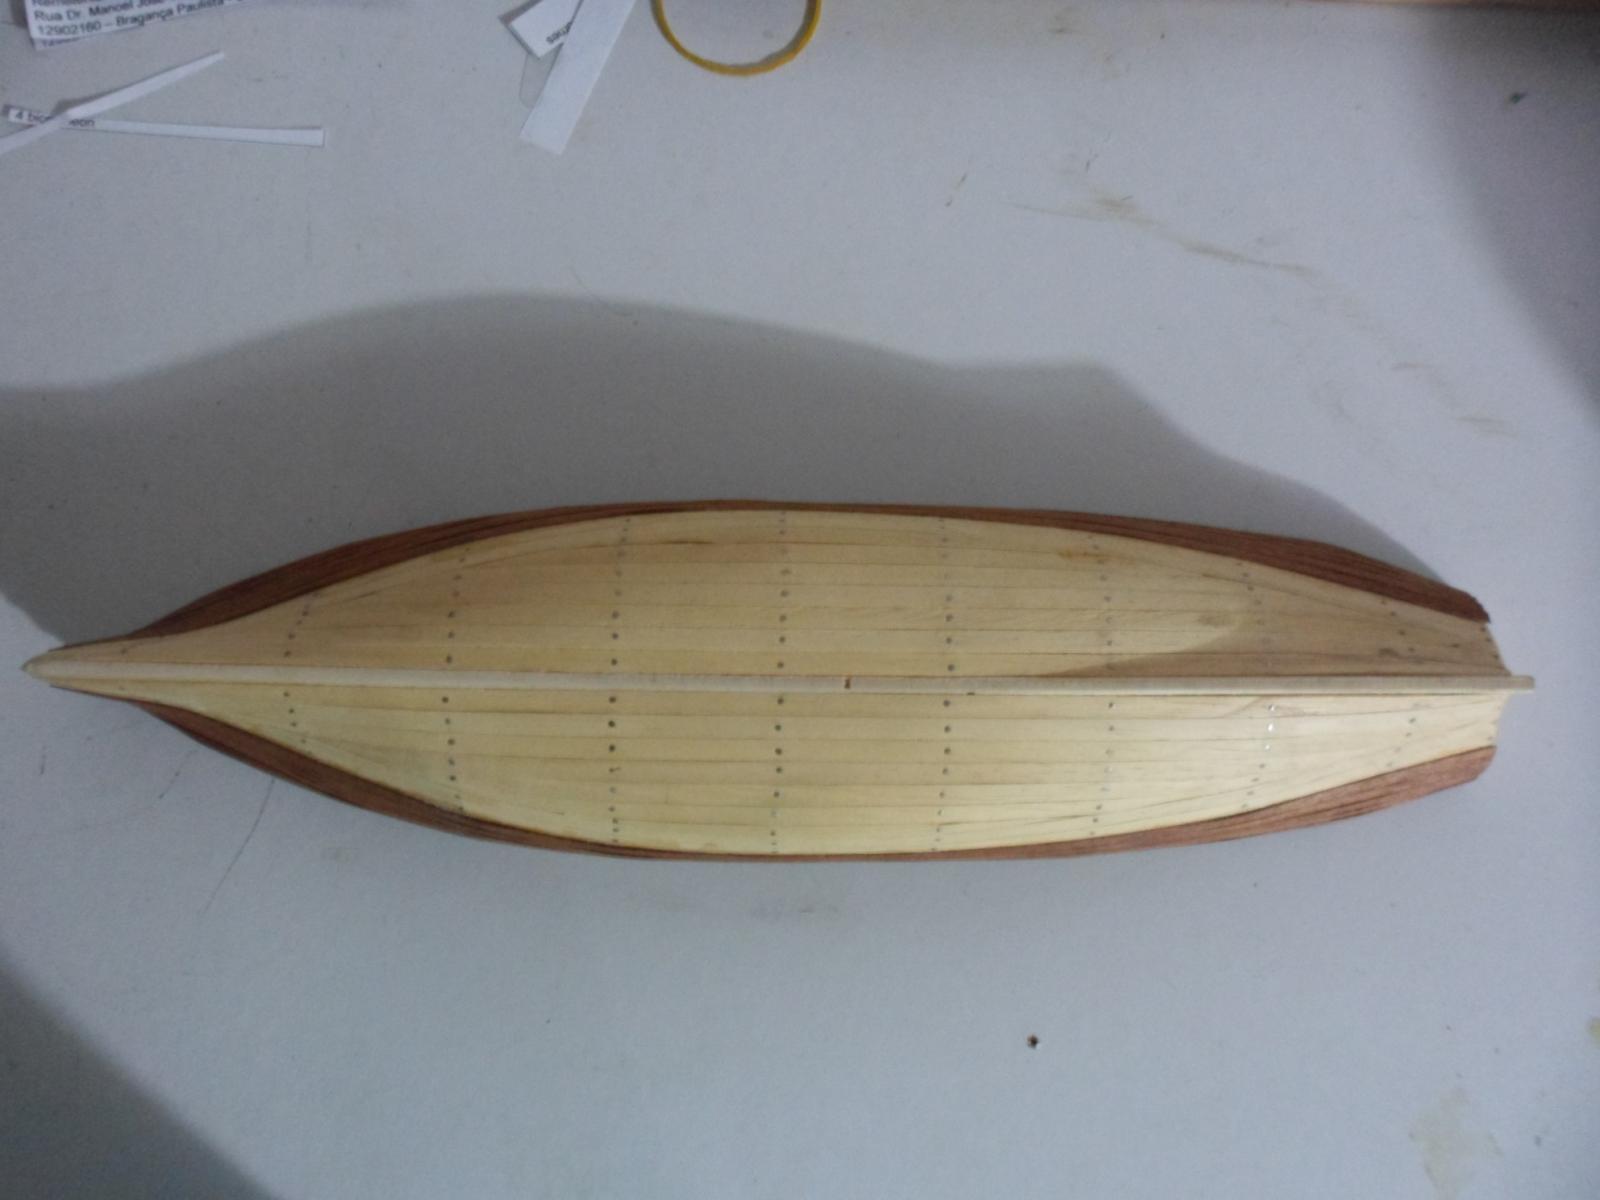
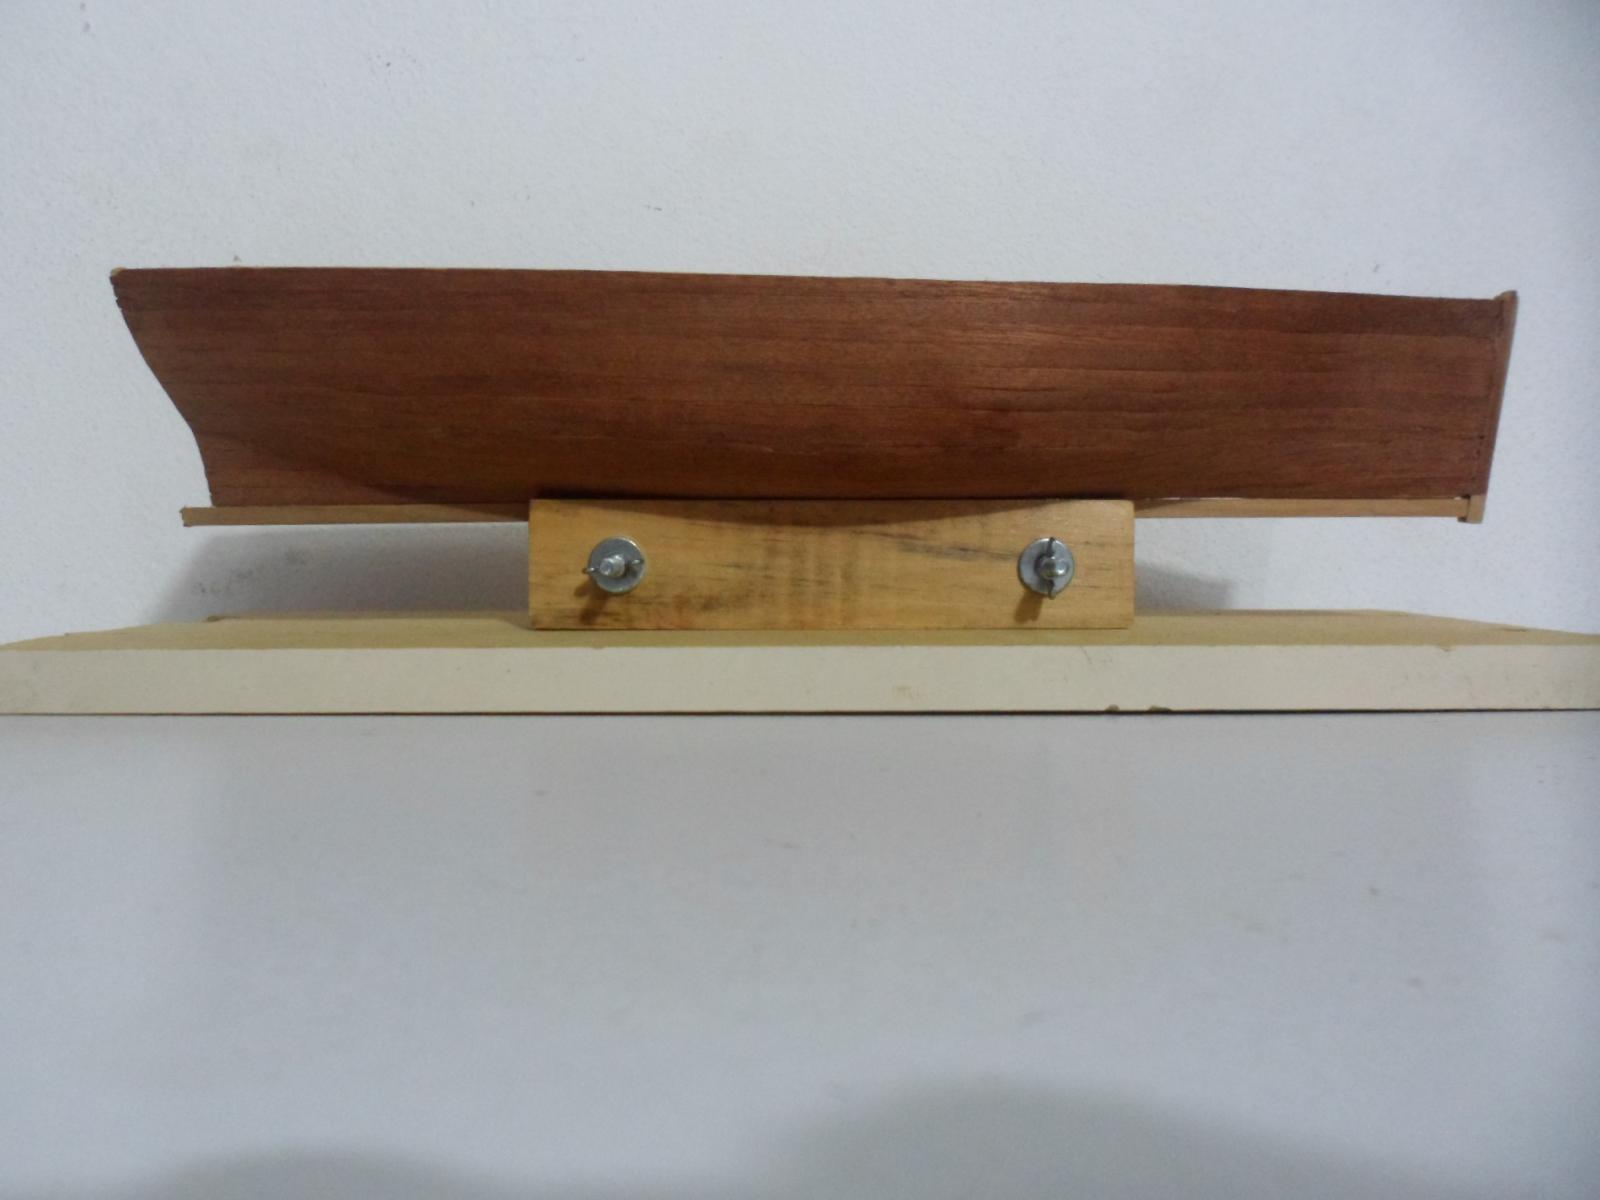
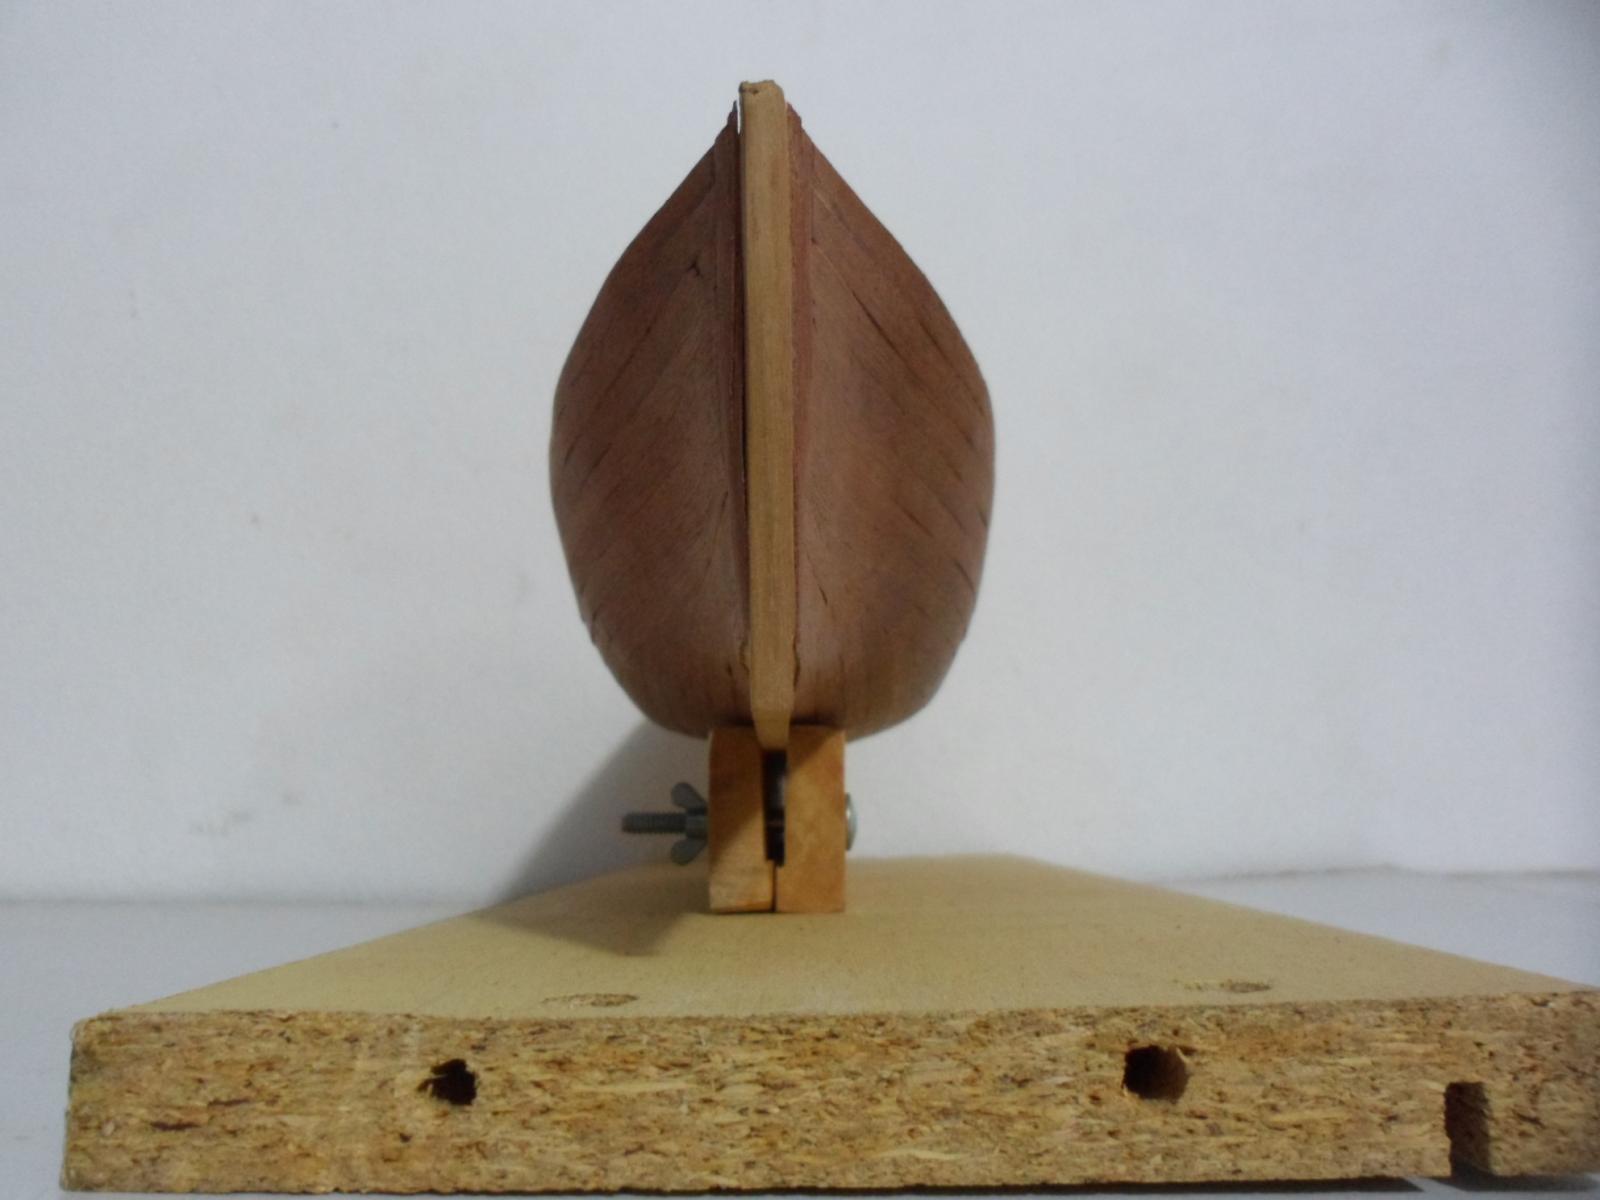
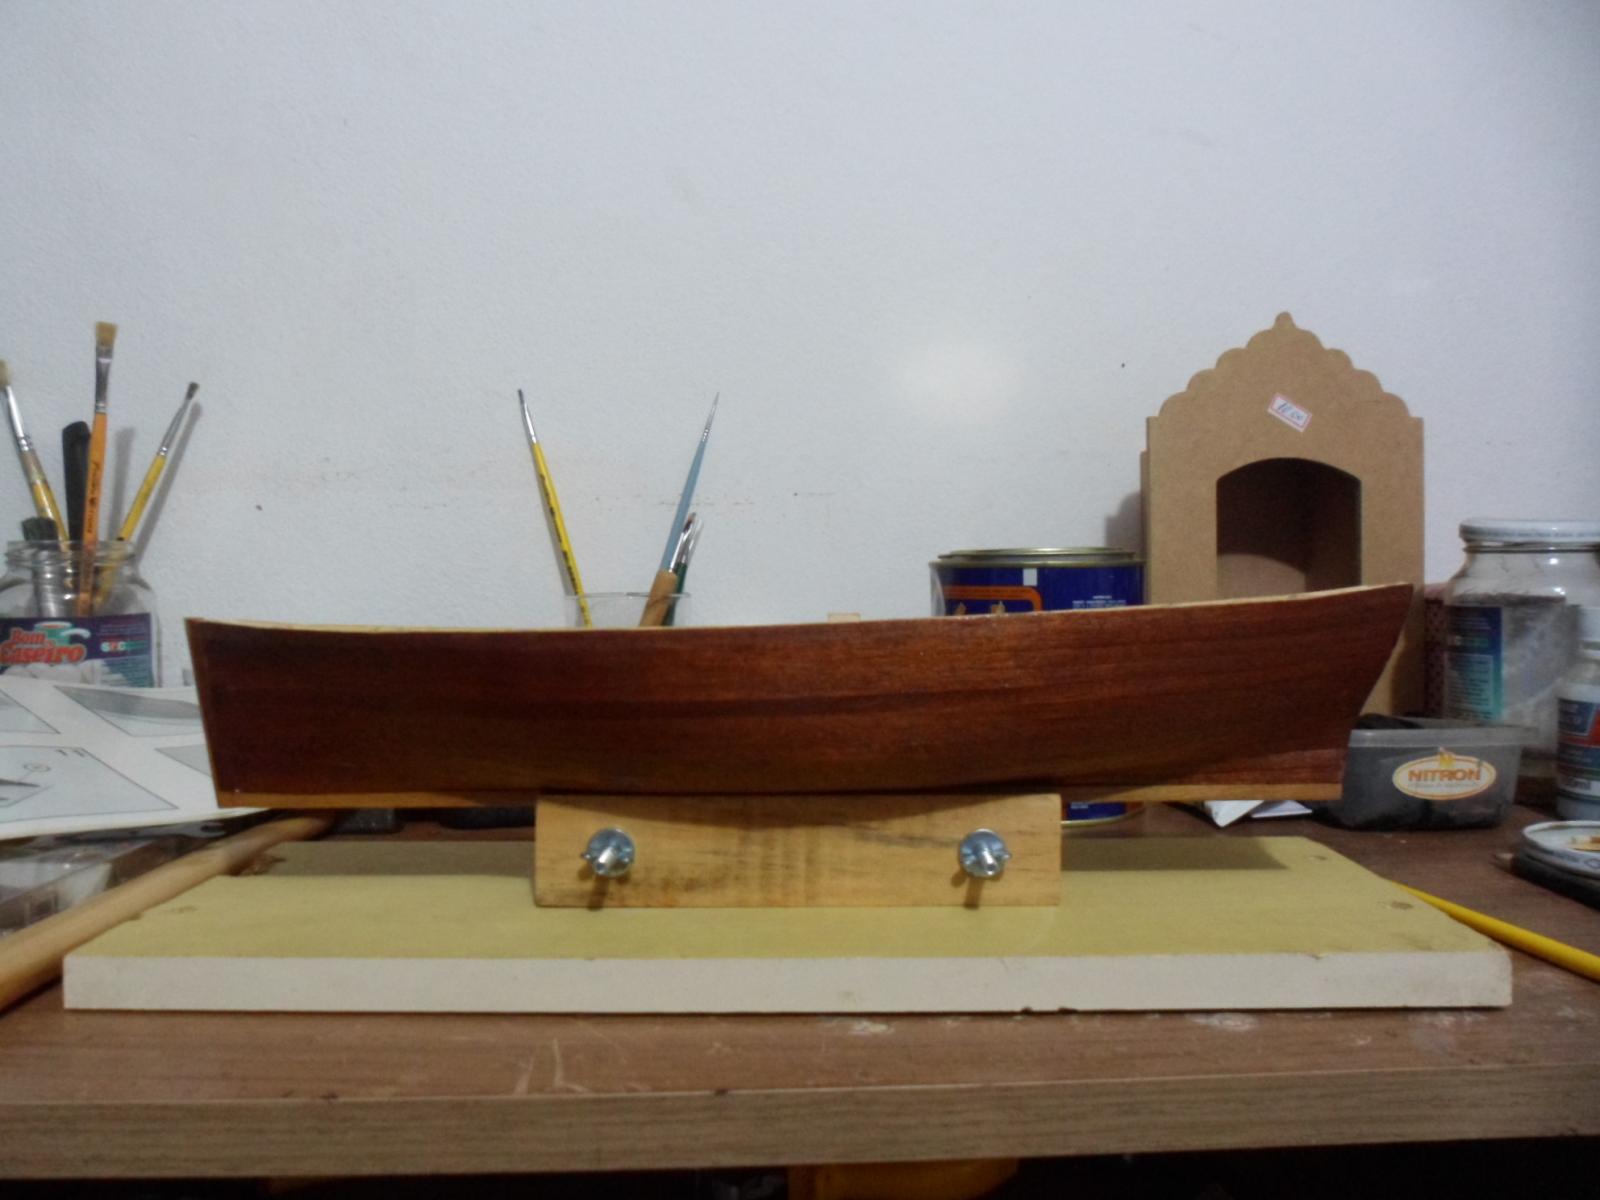
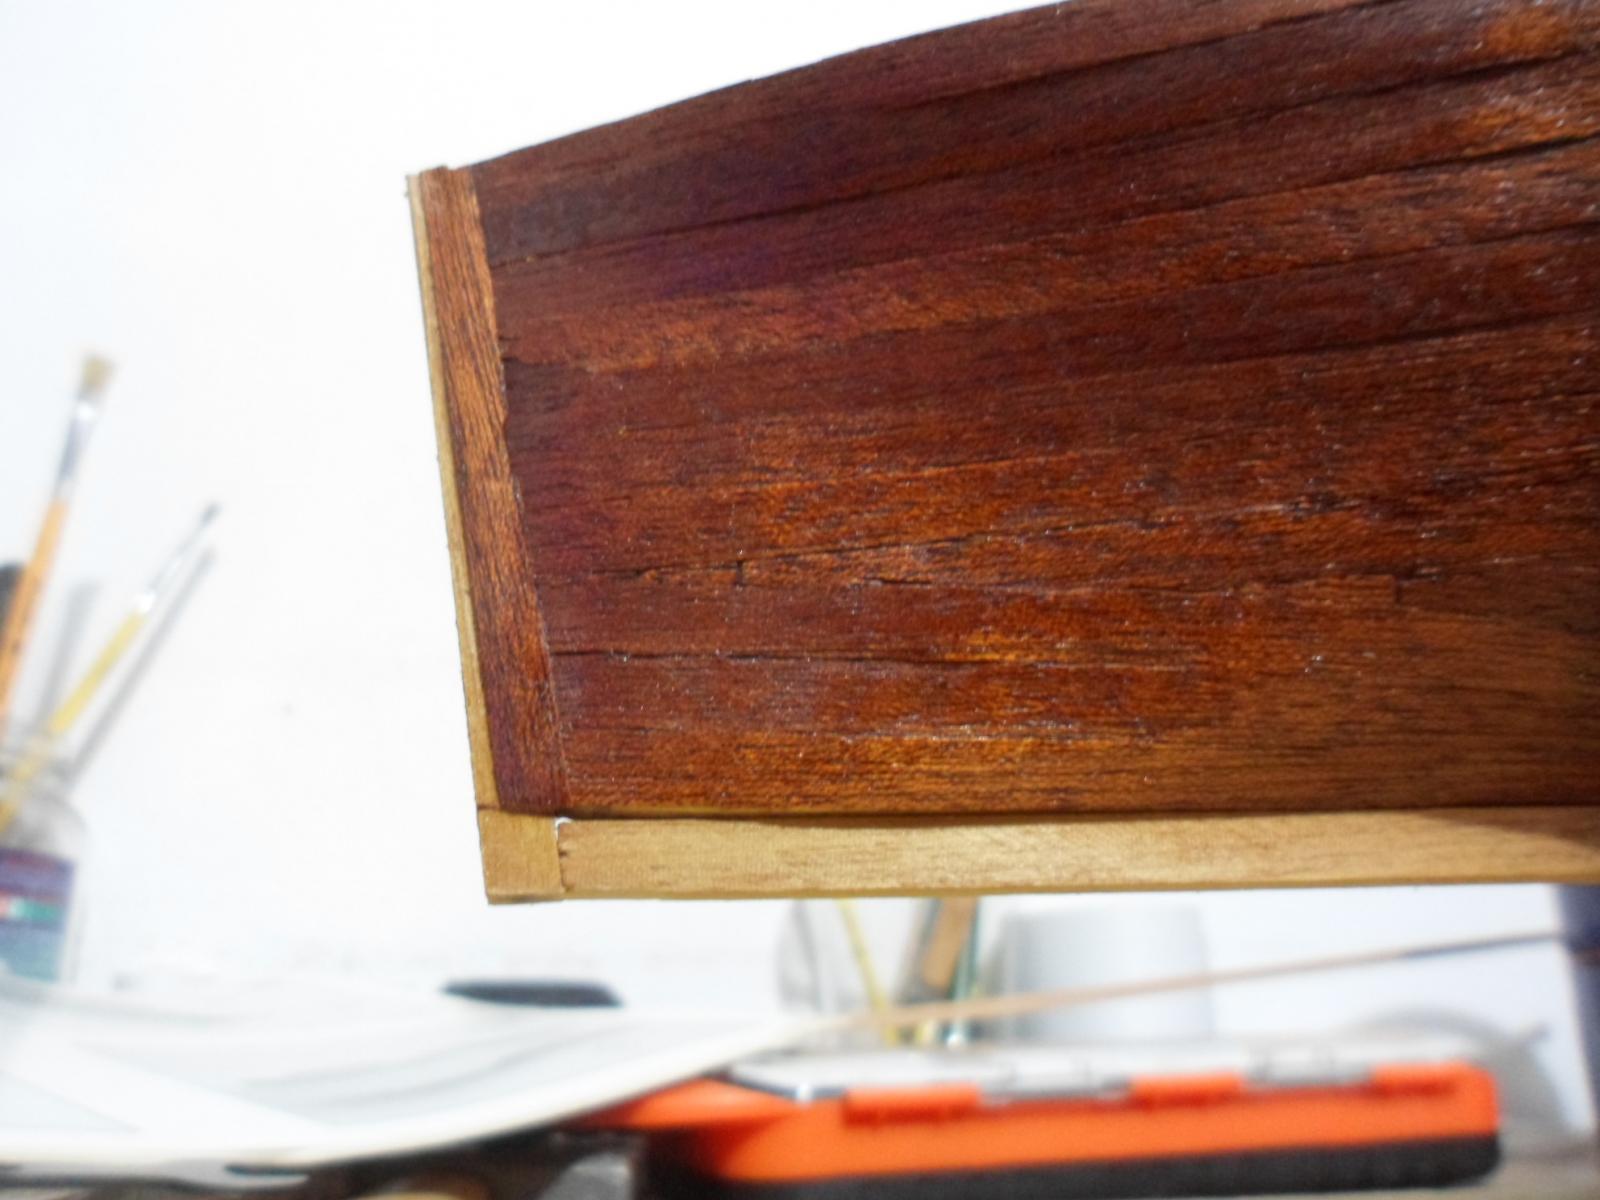
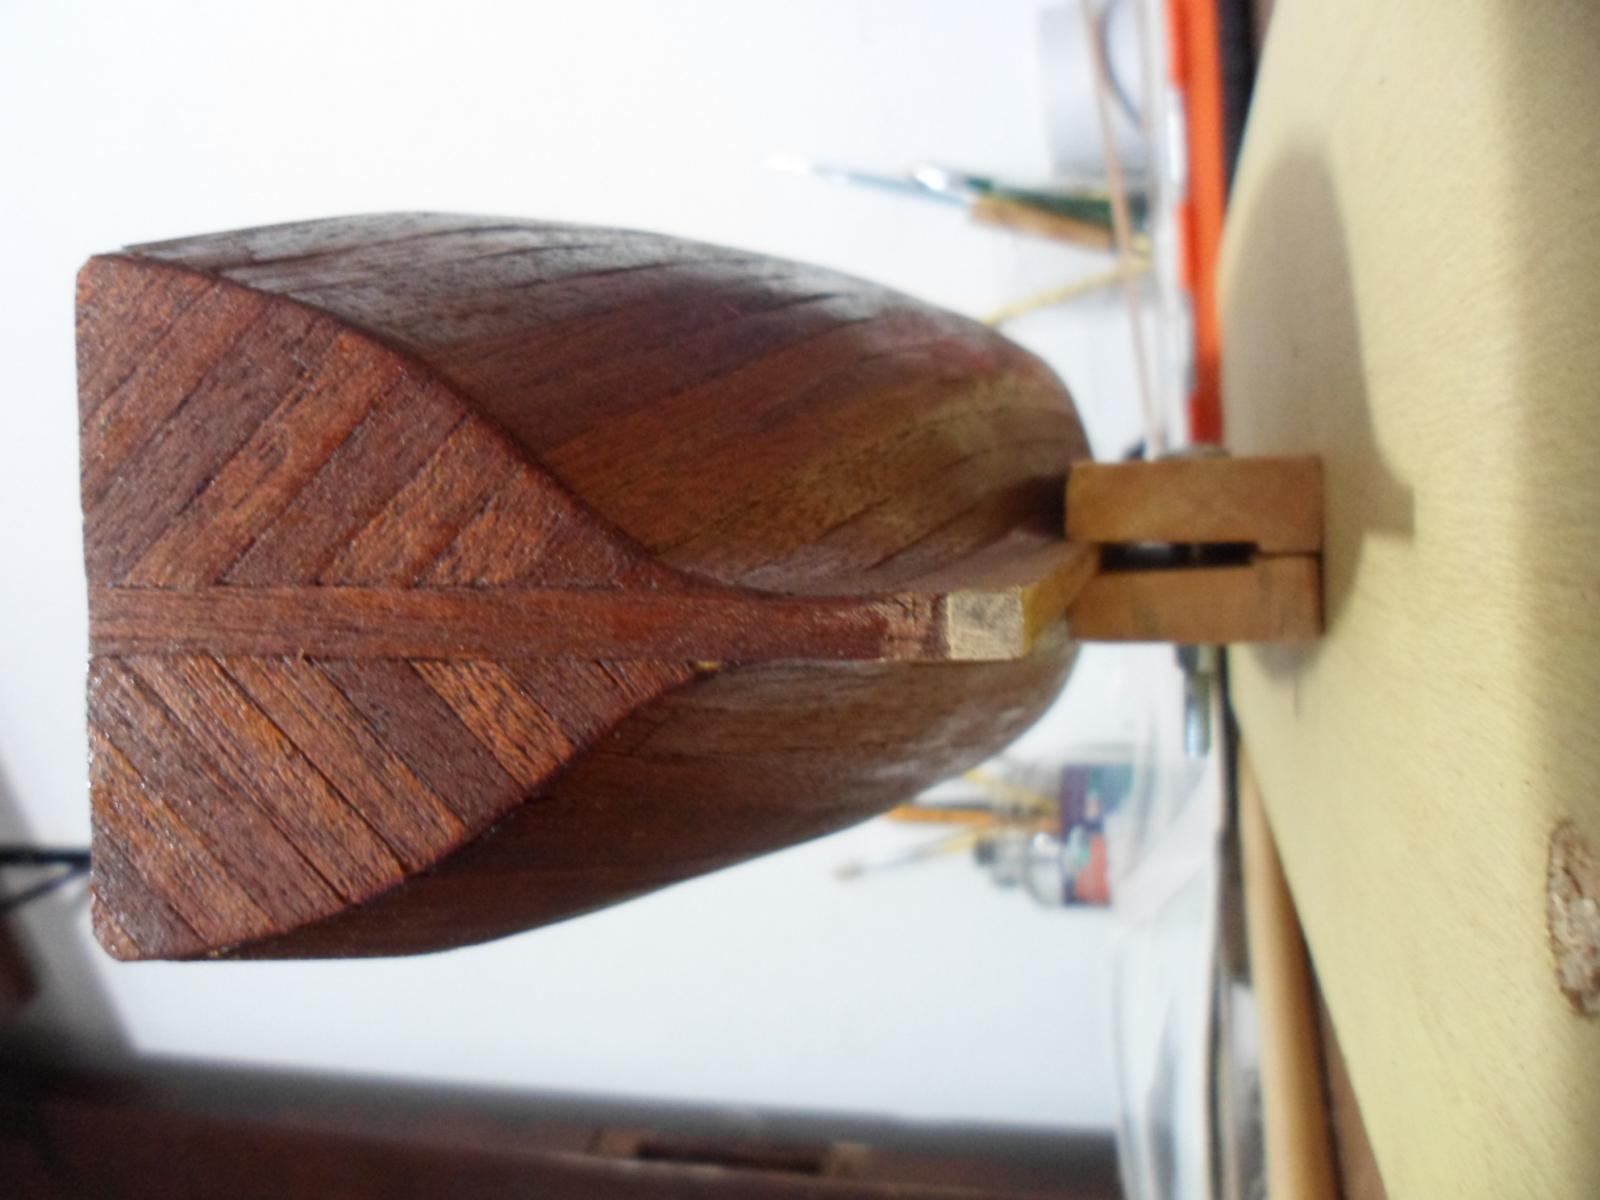
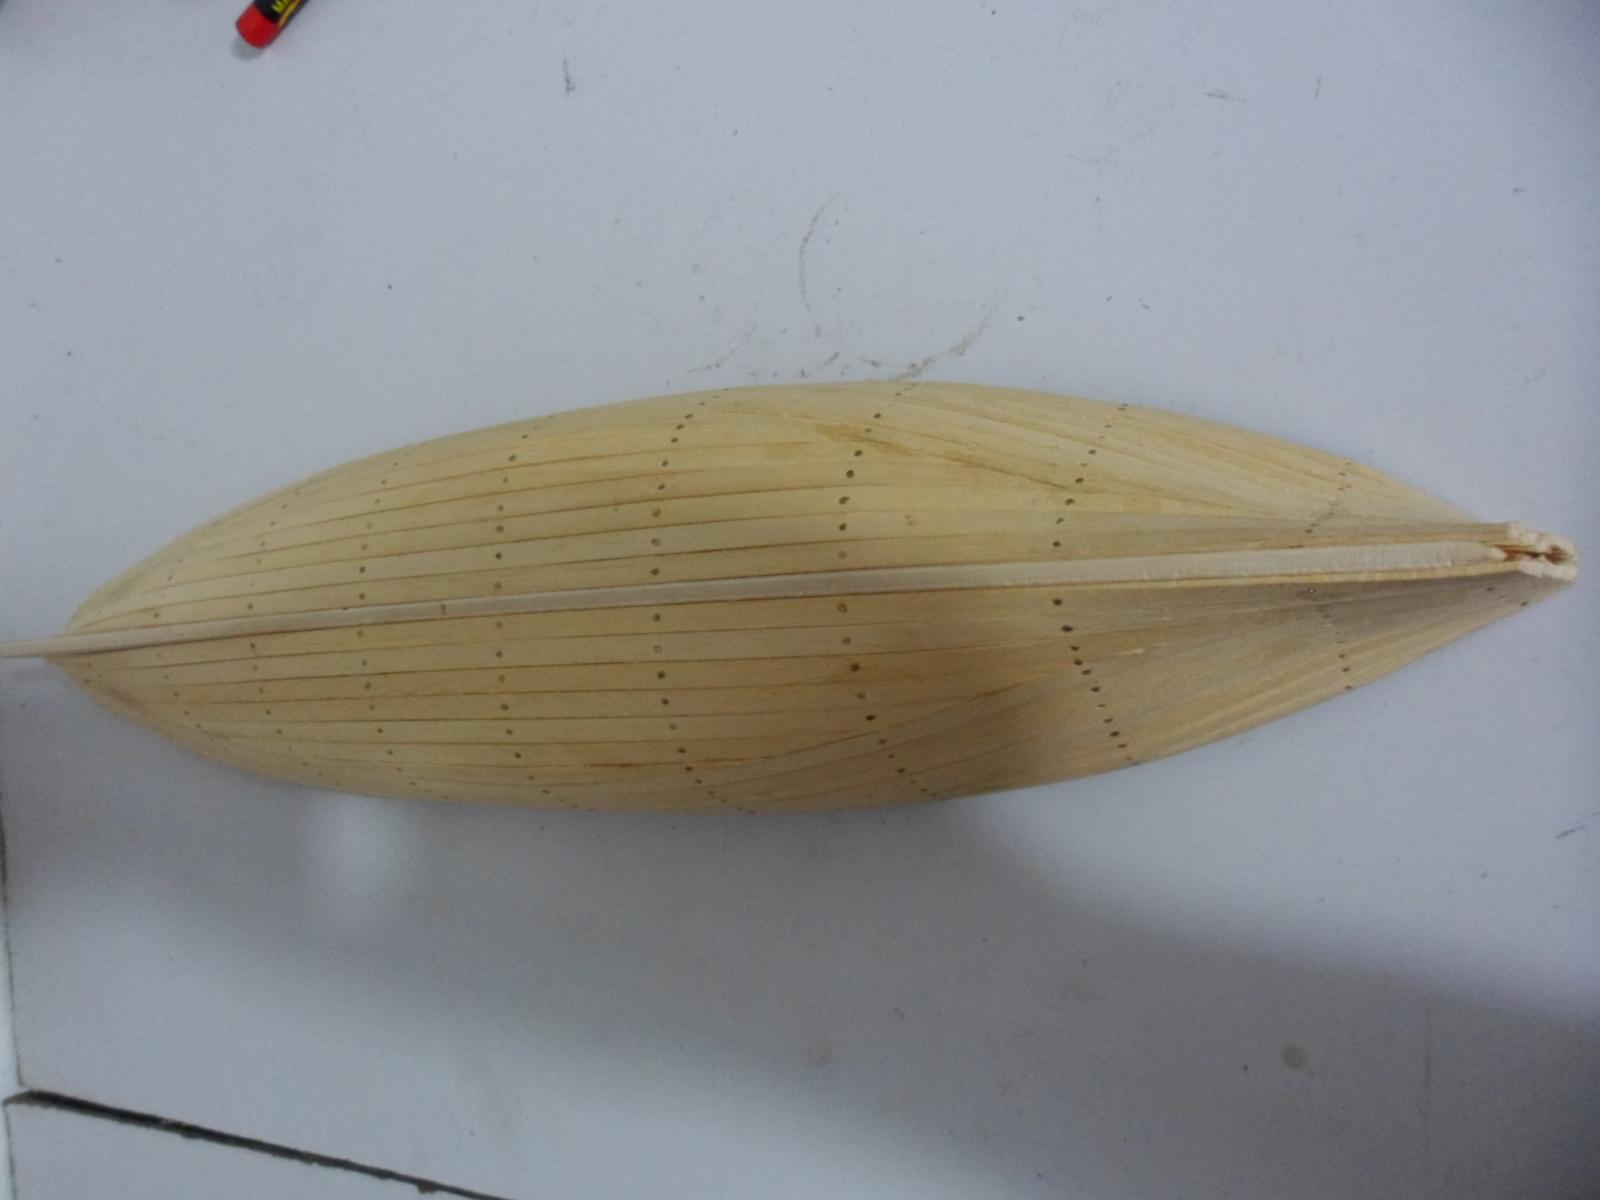
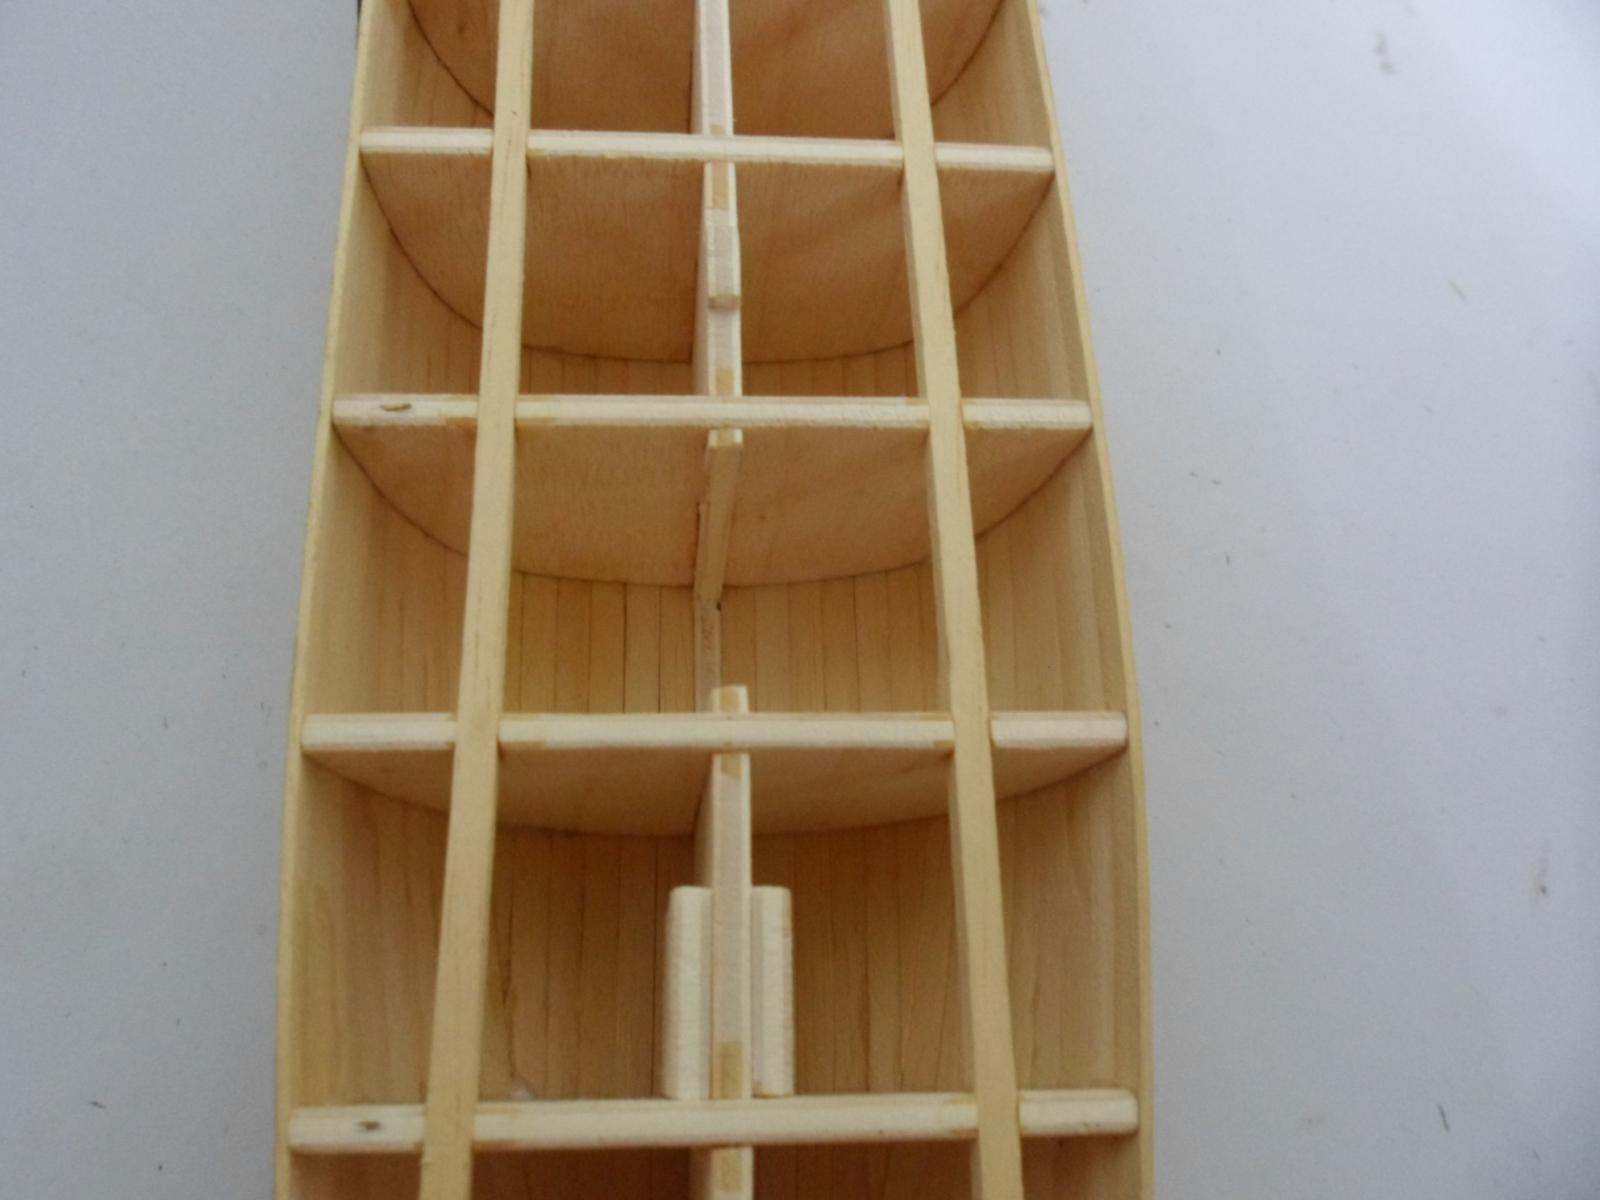
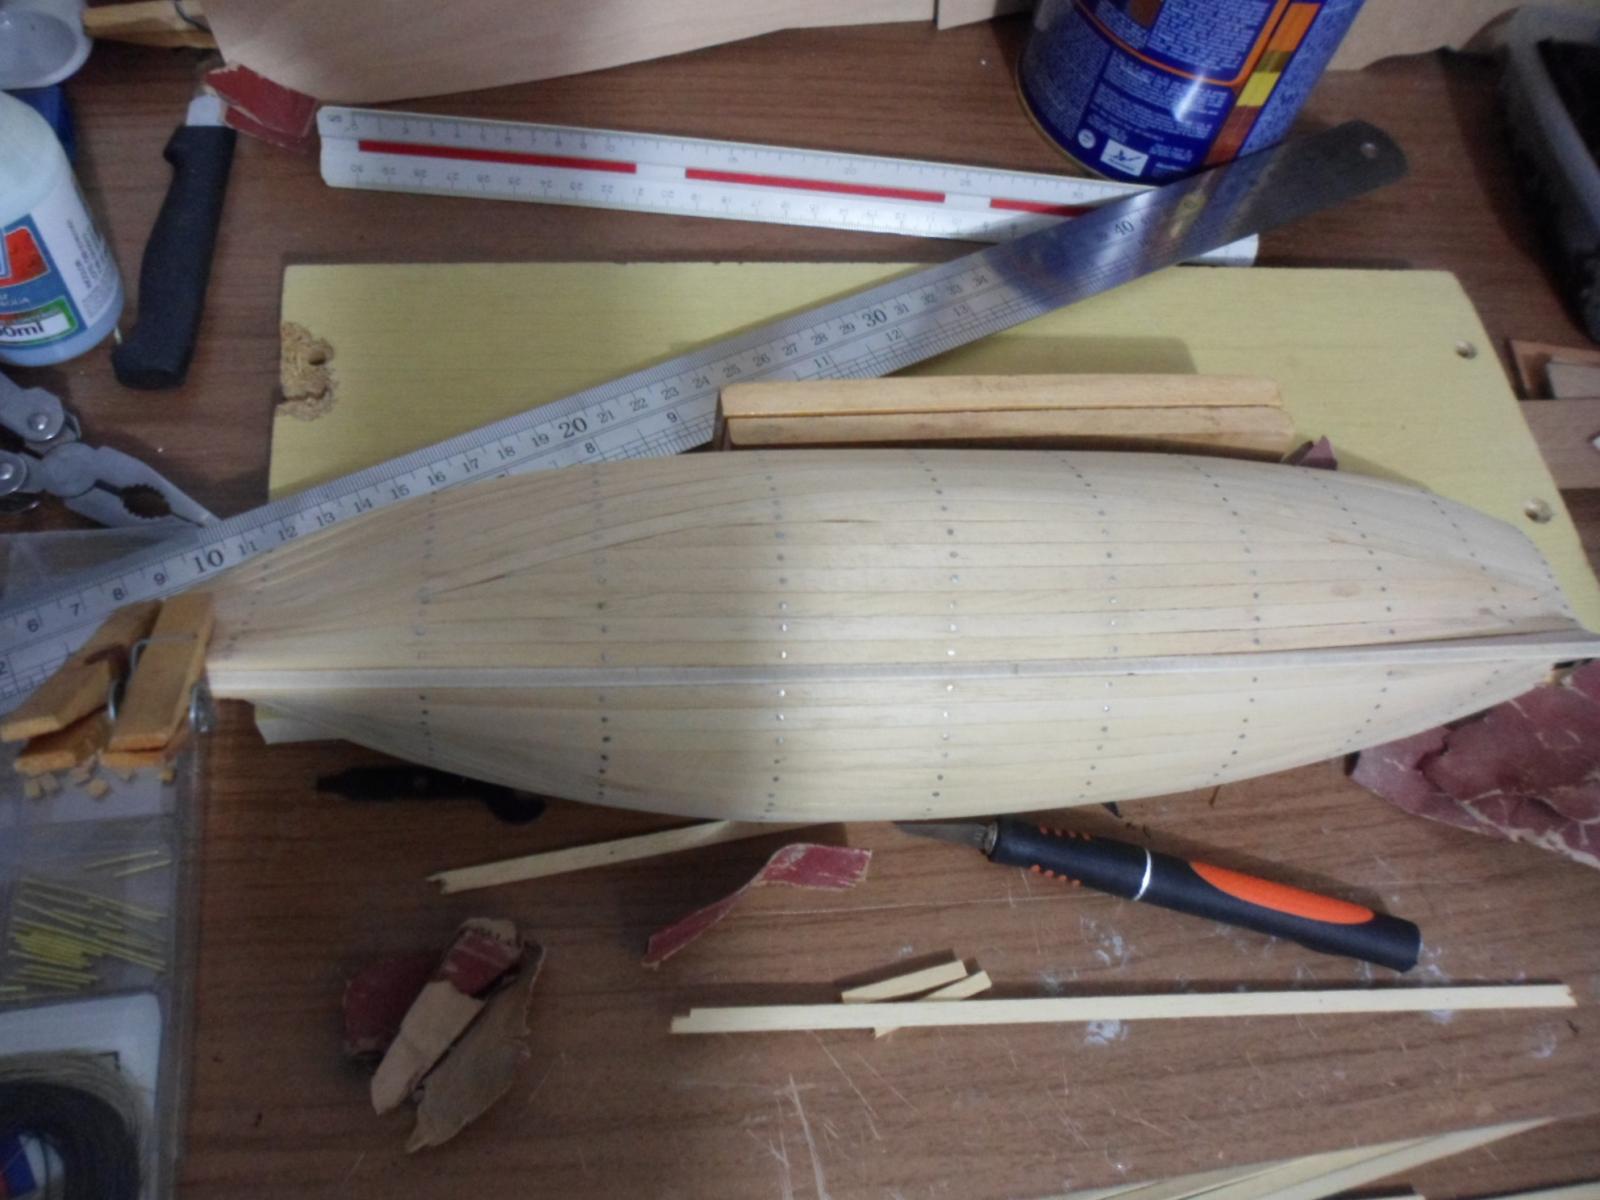
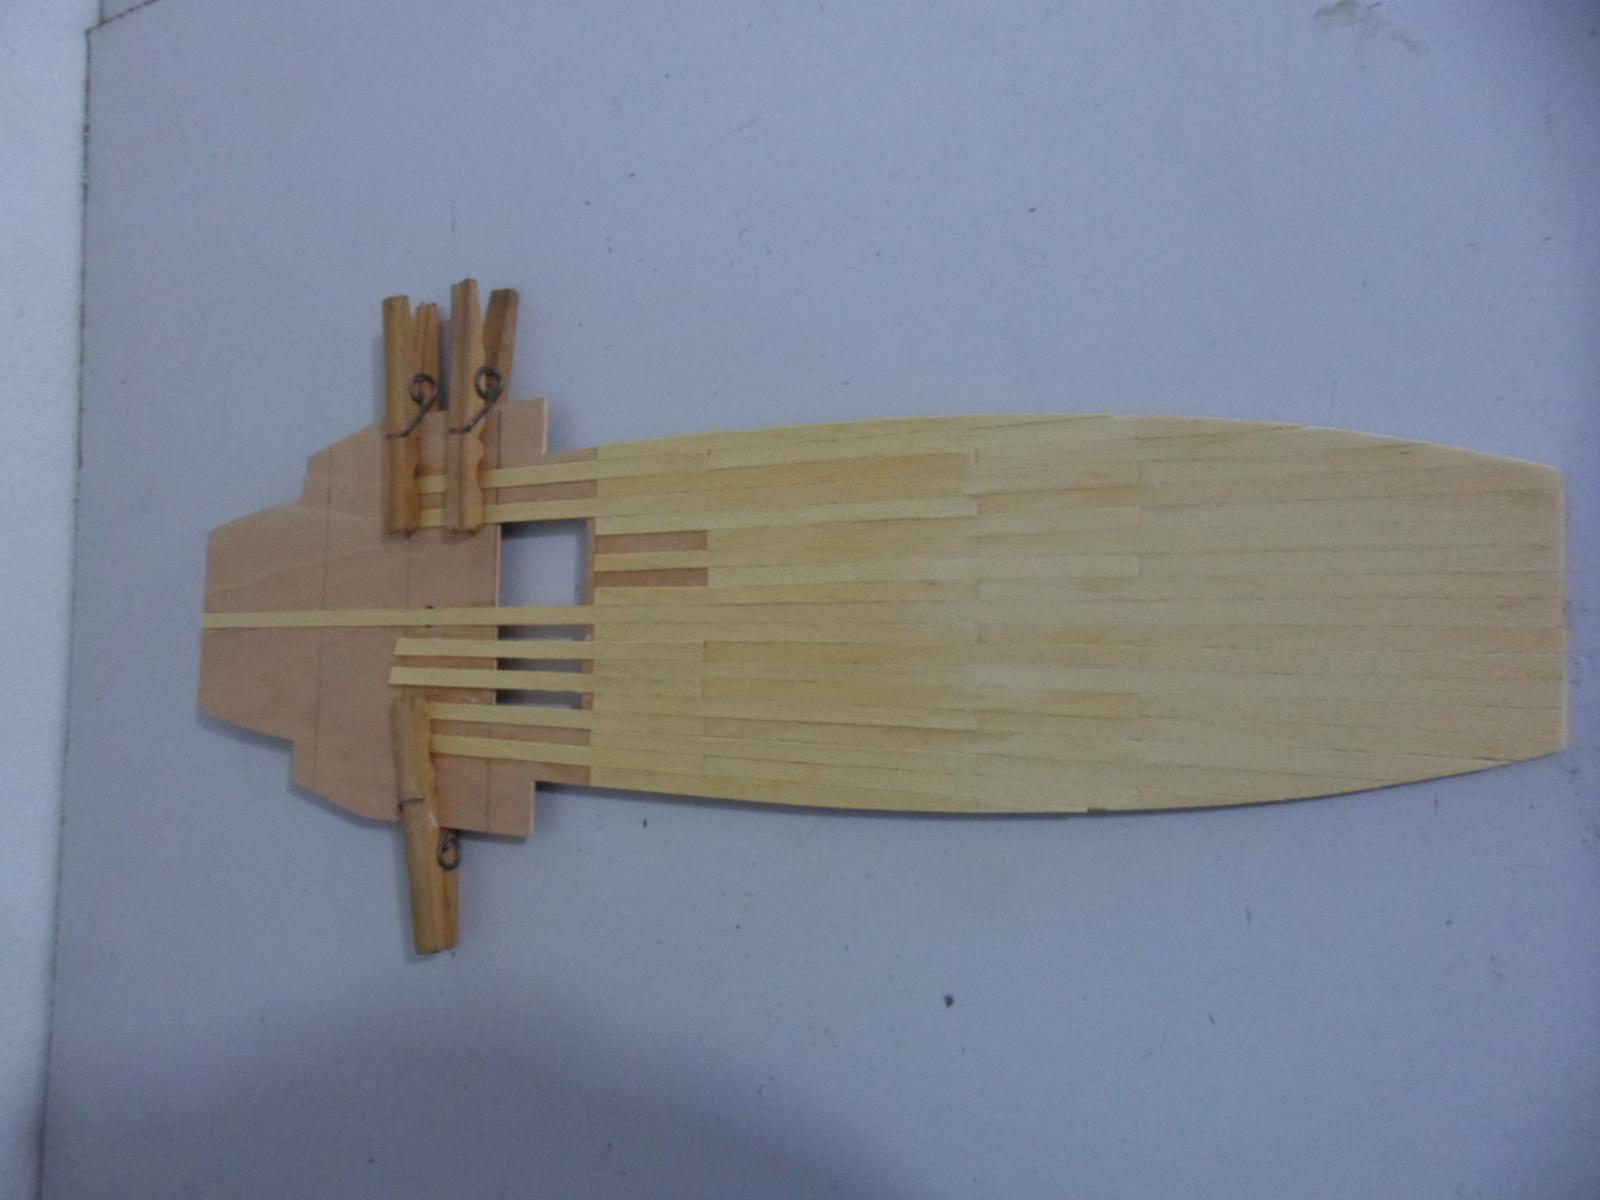
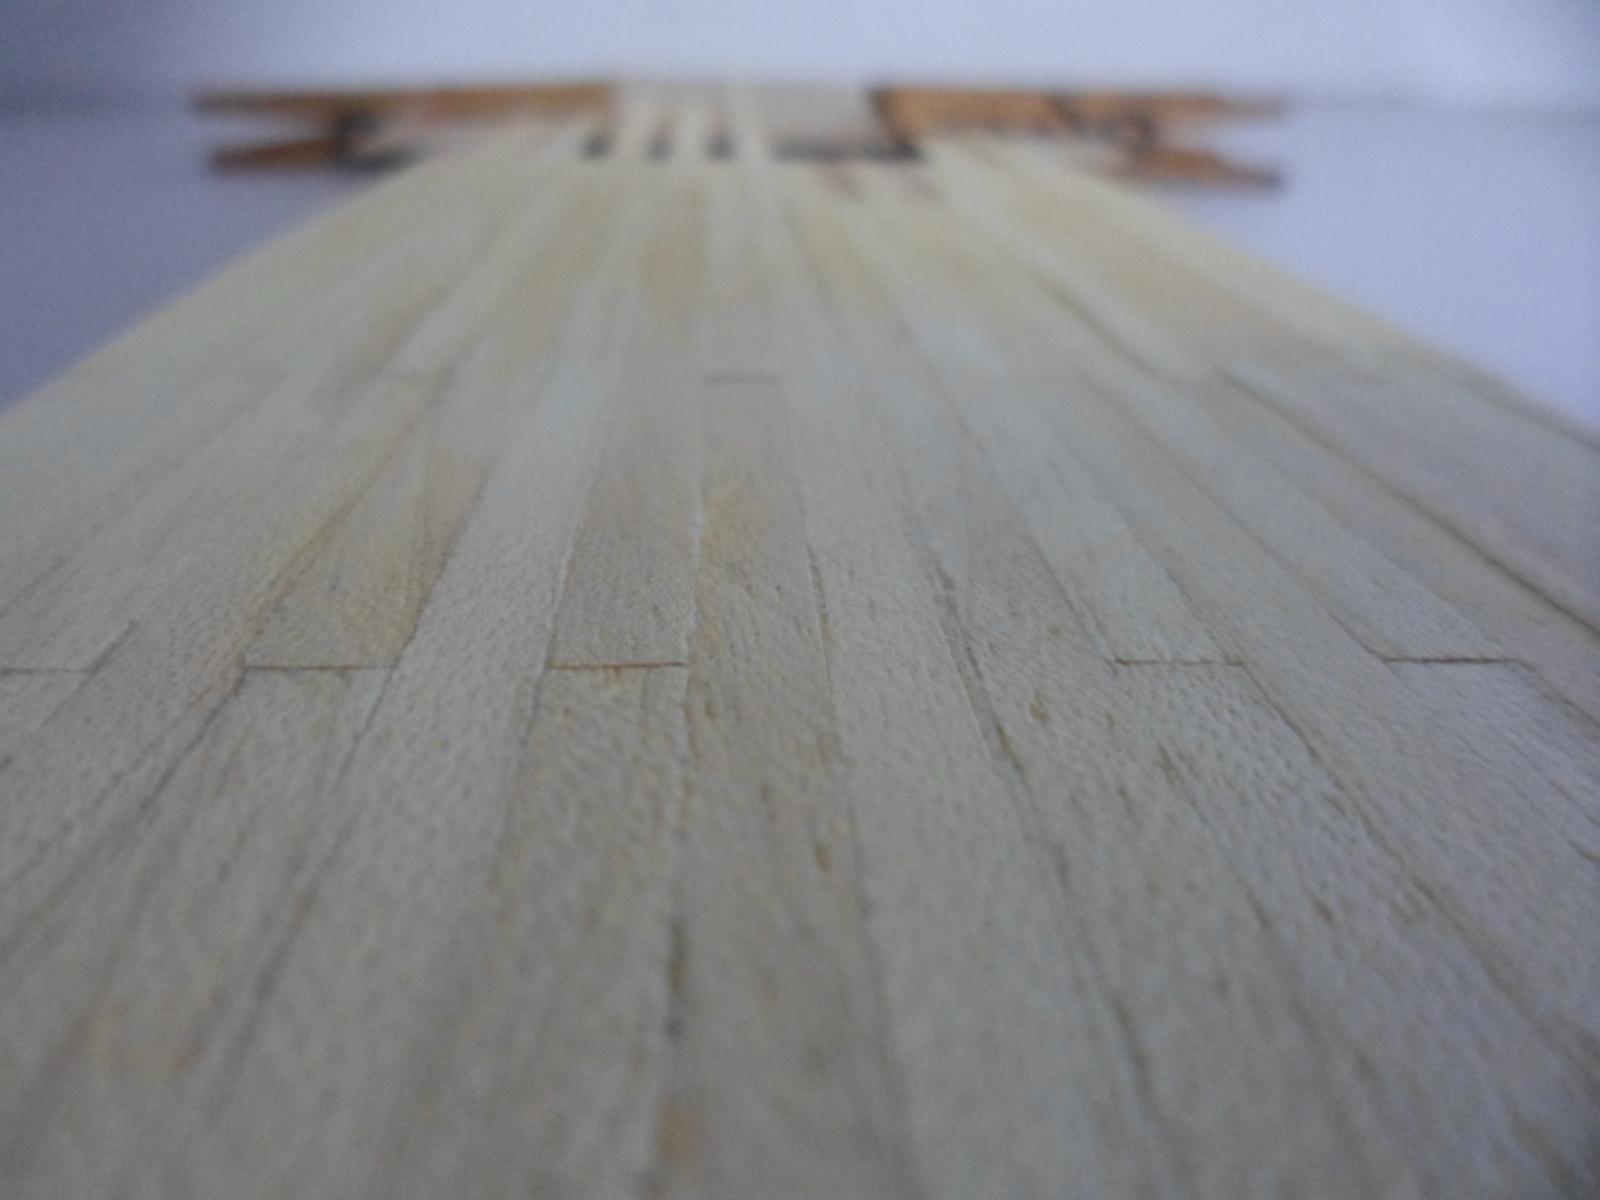
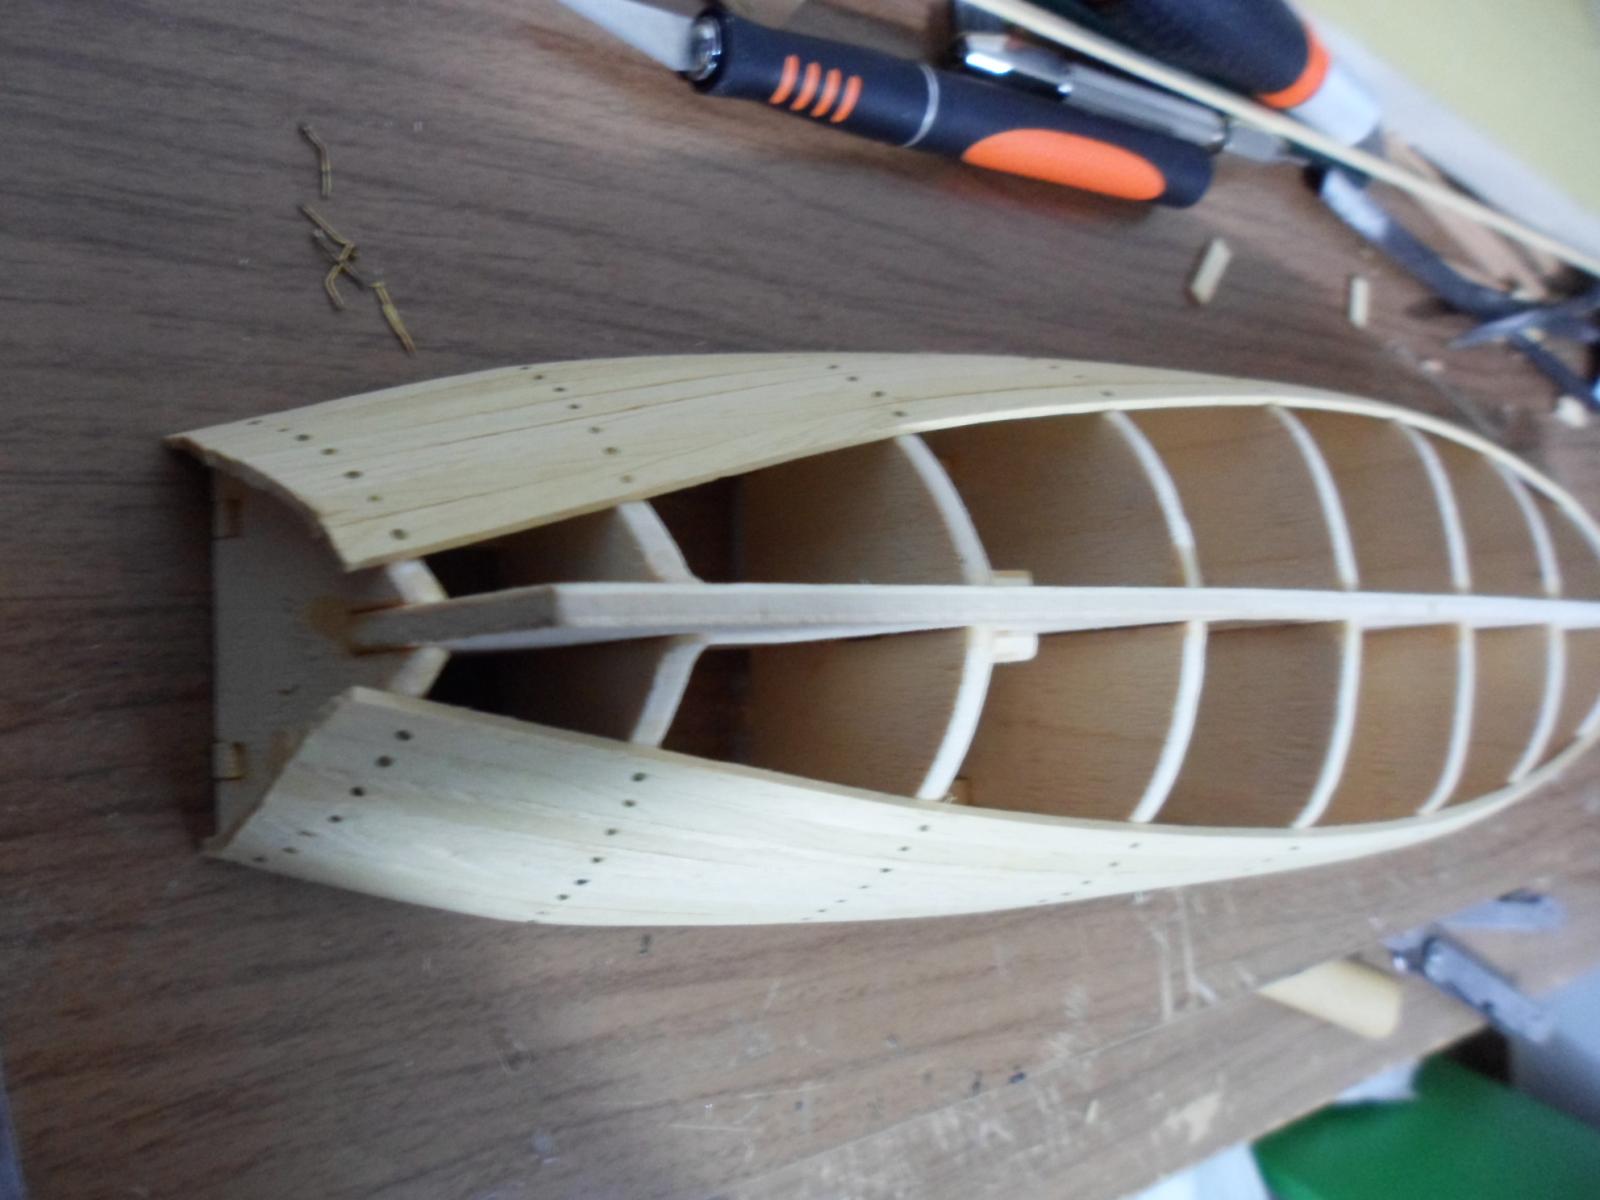
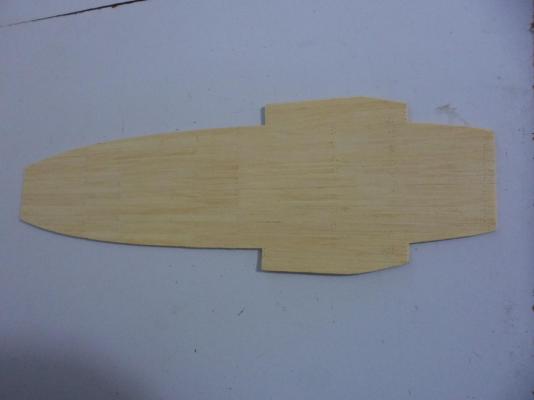
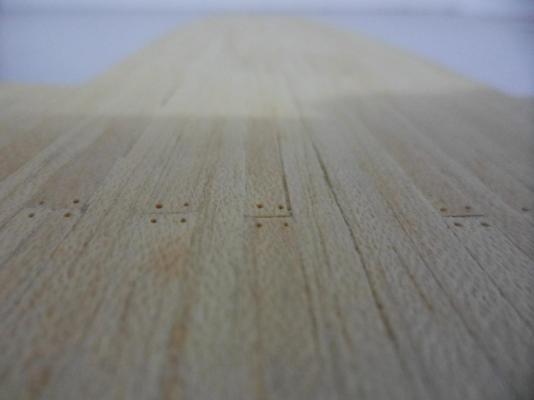
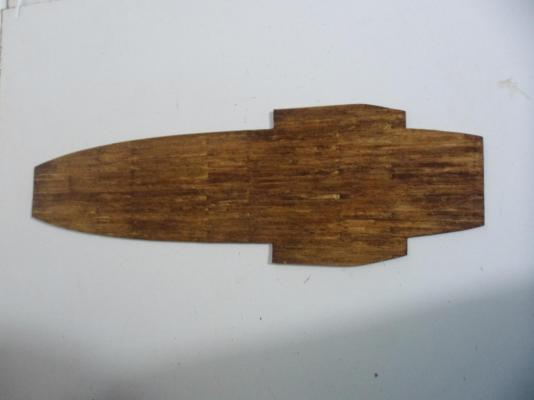
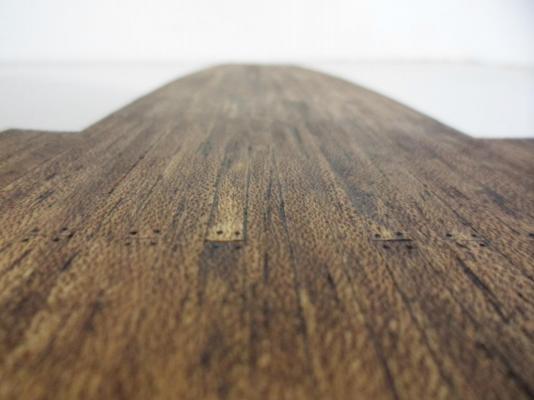
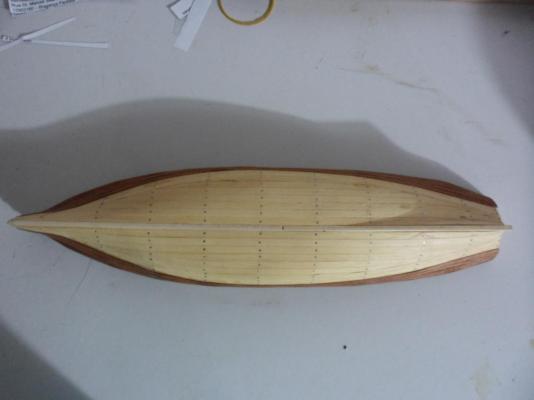
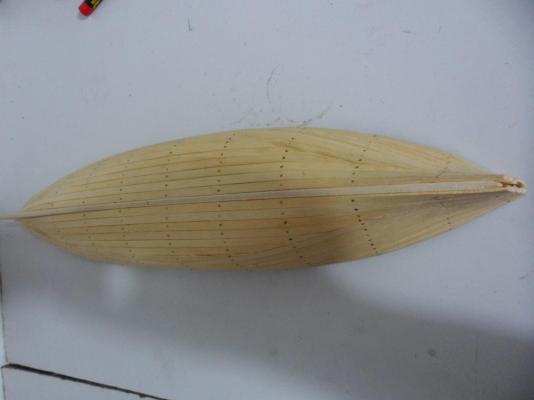
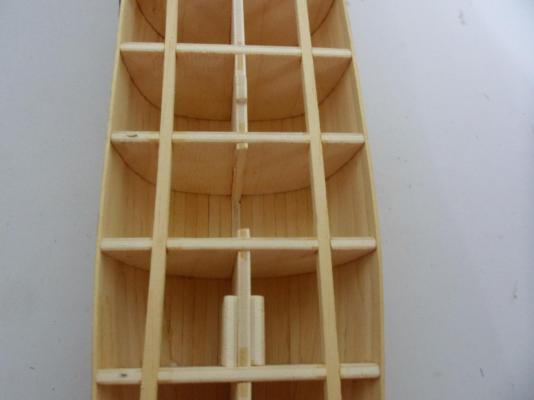
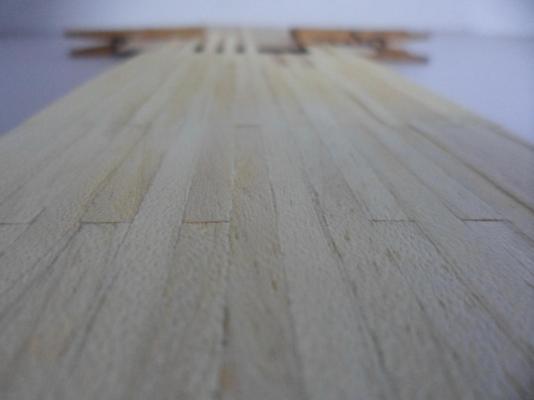
Some updates! Finished planking my deck. Took hours and hours searching for immages or some hint on if a junk would have treenails or not. After hundreds of pictures and a lot of reading, could not find anything on the subject - but, the planks have to be nailed to the bulkheads, so, I made them holes. On a different aproach, decided to stain the deck to look a little worn. After seeing some models depicting more close to reality junks, it took a good look!! =D Then, I got full on hull. Days waiting for the drying, then, when finished, I put one hand of an opaque varnish. Since the shine bothers me a little, waiting for it to weakens a bit before laying hands on my junk again. Now I´m planning how to fix the deck, since there must be a hole in it to the bulkead compartment. I´ll change some other things on deck, too, since the AL junk seems too "clean" on deck. Well, that´s all, folks!


-
Ty, ty, ty everyone, for the suport, compliments and likes!! Daniel, I´m trying to be a little more patient with this build than with the caravel. But I do see some small imprecisions to keep in mind for the next build. ^^ Curtis, take a chair, some beverages... Thanks for passing by and I´m waiting for your log on yours Red Dragon. =D
-
Bindy - ^^ Dan, nice pics. Yours is a big one representation, very similar to the Ning Po junk that crossed the Pacific in the early 20th cent. at least on details - the bird depicted is one of the immortals, too? Would love to see more pictures from your ship and regarding the dragon depiction from the AL kit, no way! There must be the eyes in there! Since I still don´t know where to place my junk in history (pirate one or part of an official fleet) and so, collors are on the open, yet. One thing I know - she´s to be there and seem a sailing ship - that´s a characteristic I want for all my ships. ^^
- 188 replies
-
- 1
-
-
- latin caravel
- artesania latina
- (and 1 more)
-
Wolf, When I saw it, I knew I had to build it. Thanks for the compliment ^^ Sam, That´s some good tips I´ll gladly try. I can´t keep away from my ships for too long. Almost everyday I go for some building. Addictive hobby. Ty! Capt´ Sure! As soon as I got to Zheng He´s flagship, I´ll reserve some space on the first line for you! =D
-
Ulises, thanks for coming. Second layer planking goes slowly and well!! ^^ I know, Popeye and will keep your tip for next ones (it´s good to have those tiny nails around). I kept them as I found the planking would be more secured to the bulkheads that way. On a second thought, the wood provided by the AL is not that good. Ty! Mark, thanks. Patiance is good to keep us safe, and the hobby can teach us something on that. Thank you Grant!
-
I really love your photos, Max. Wish I could get that quality on mine. Truth is that your build is a good model for the pictures!! =D
-
Ty, Bug! ^^ Don´t know if I´ll be a master builder, but I´ll love each build I do, Ulises. The Red Dragon will pass for a lot more than the caravel and I think each build from now on, till I scratchbuild my own models, will be modified more and more. There´s a lot to learn in there, though, and I just love to learn. =D
-
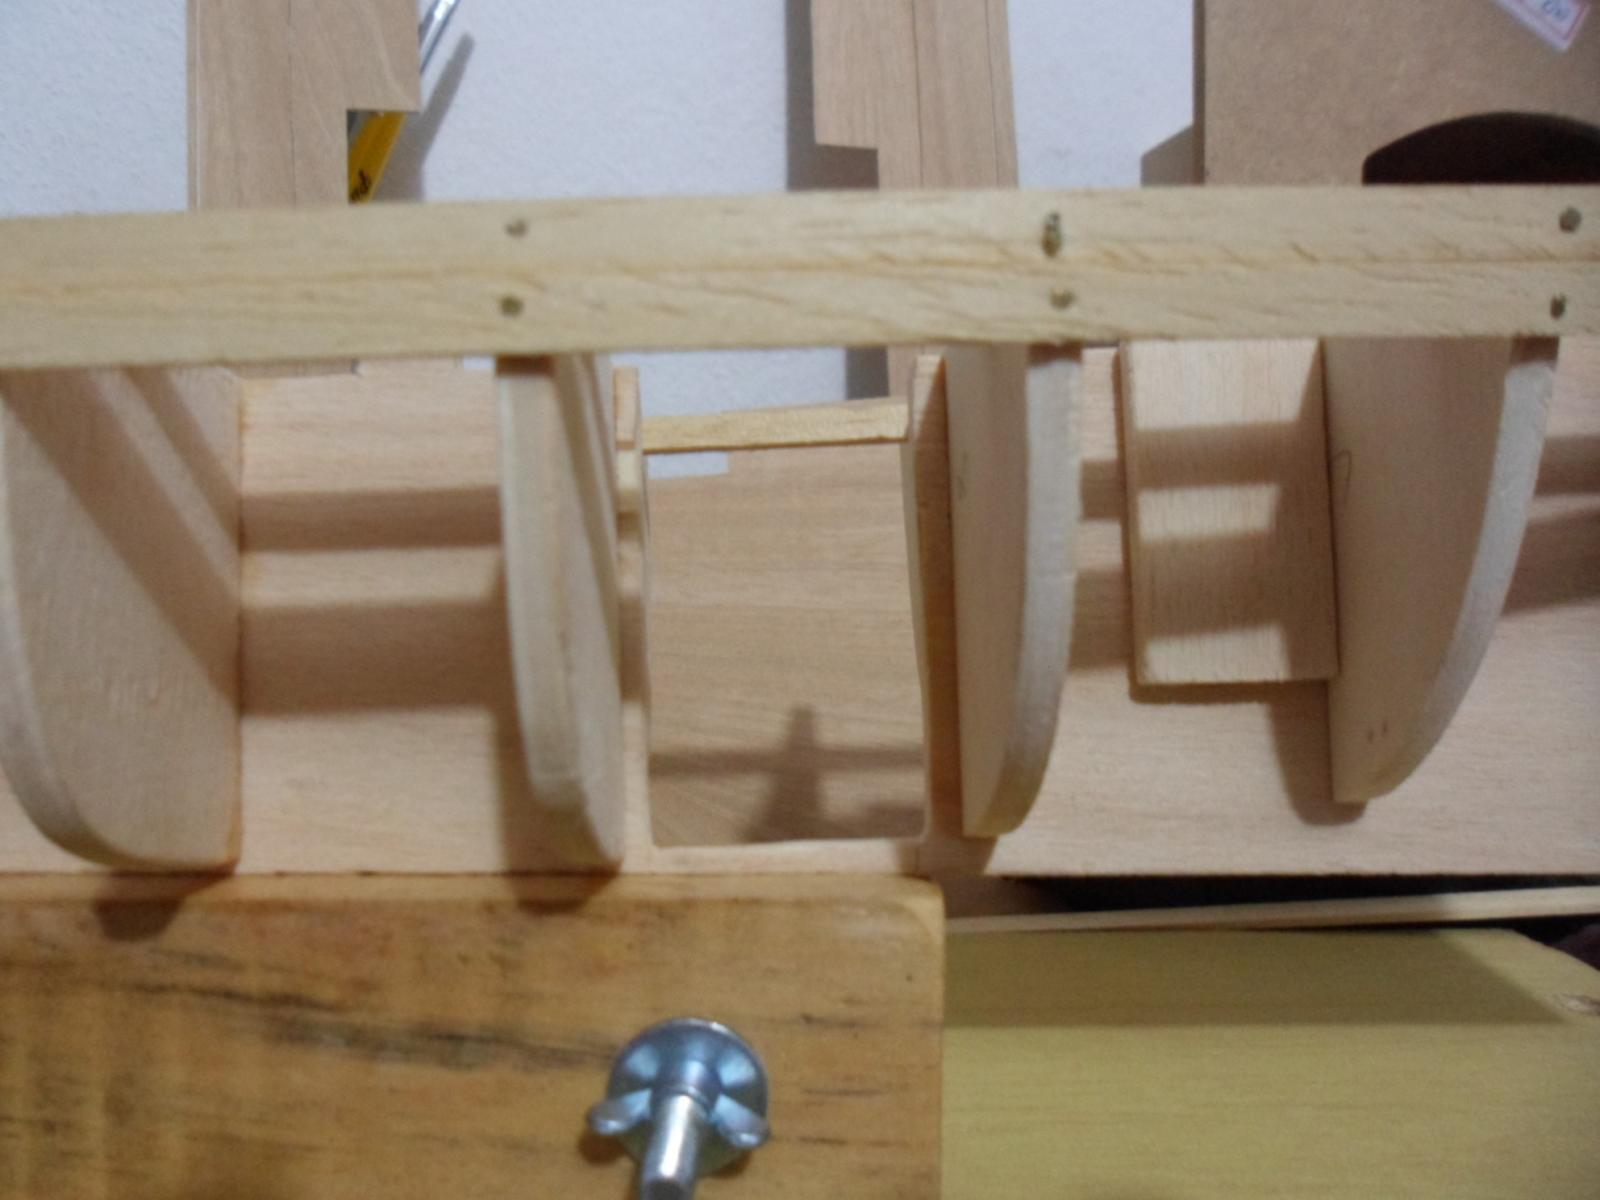
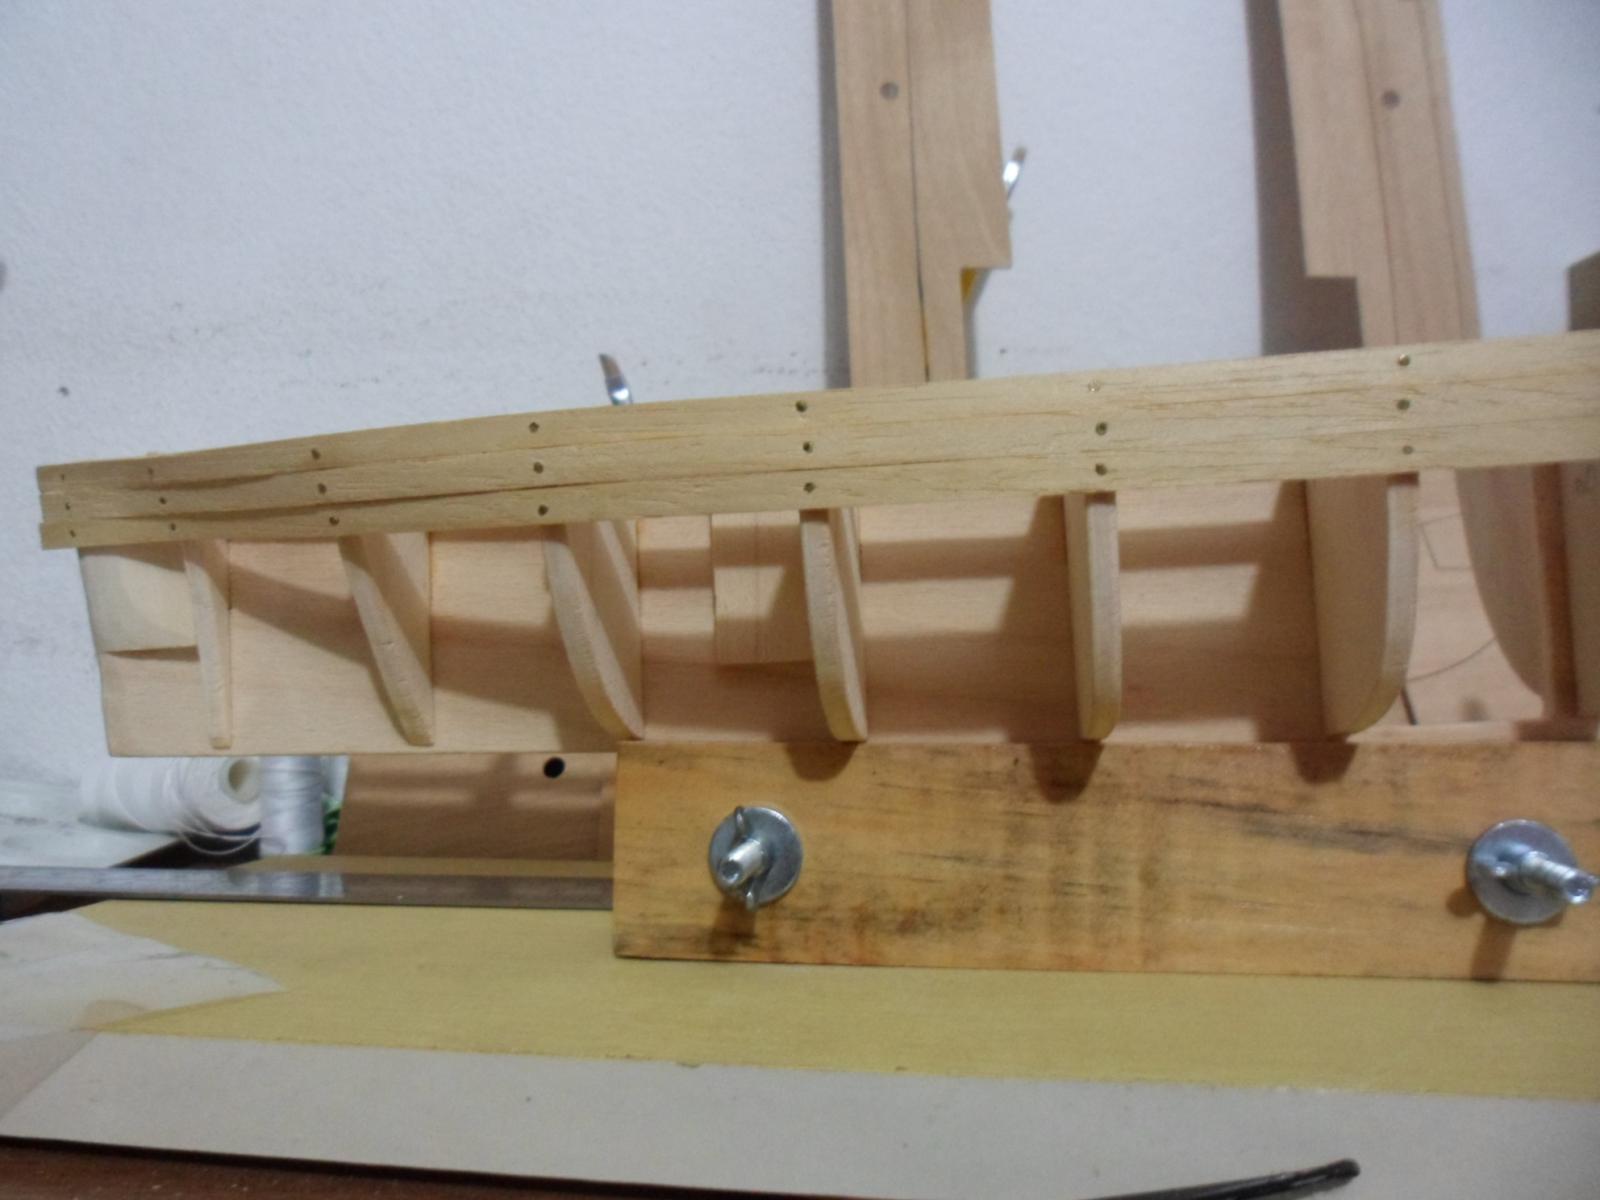
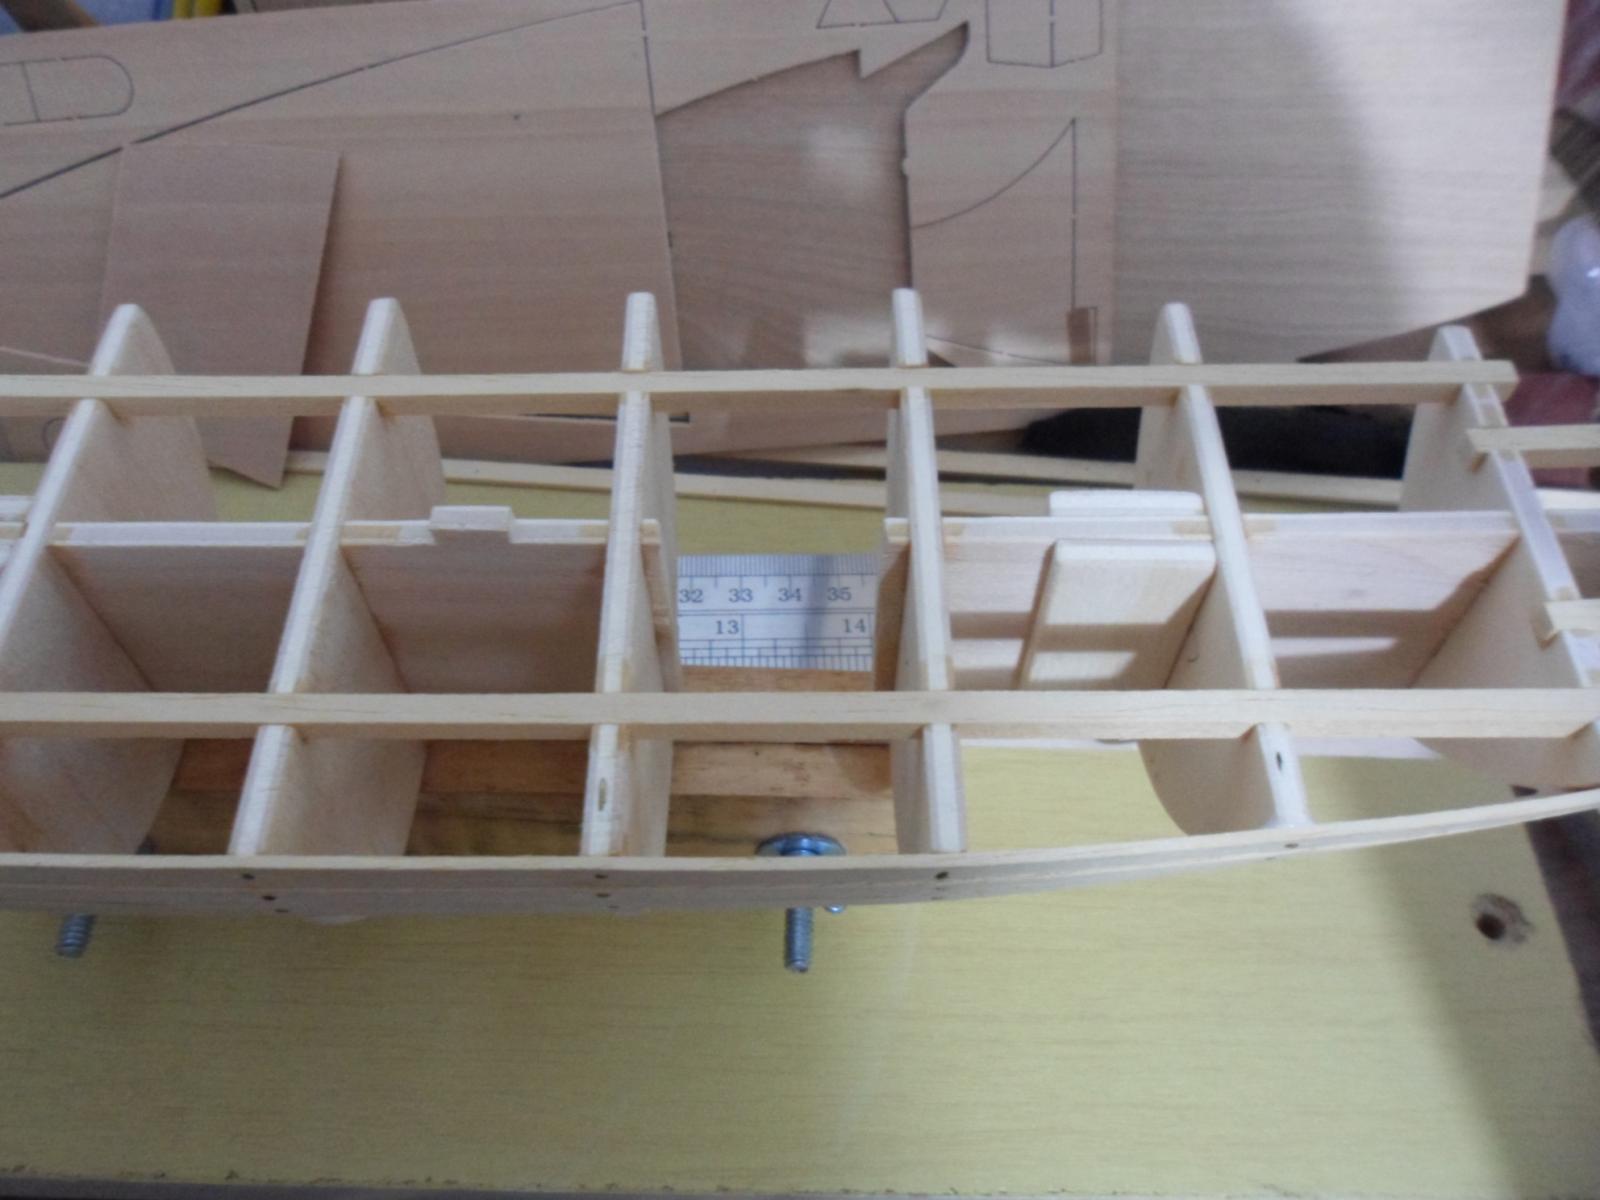
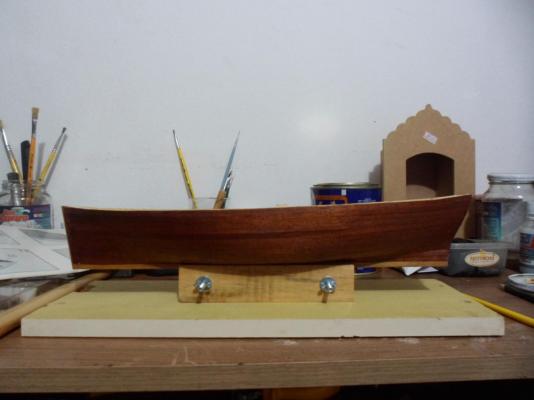
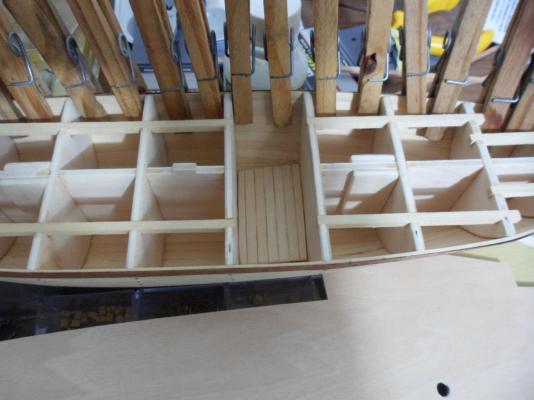
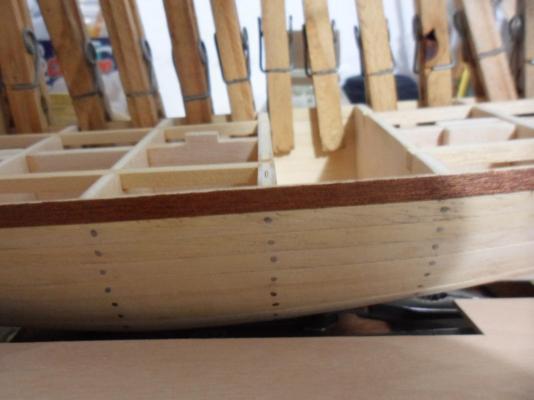
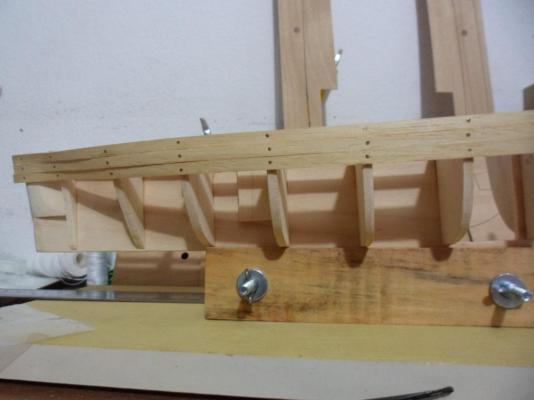
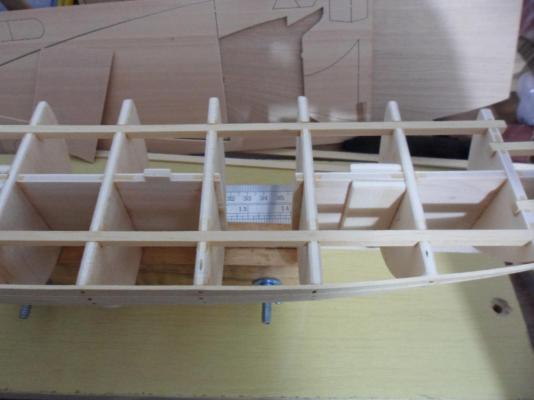
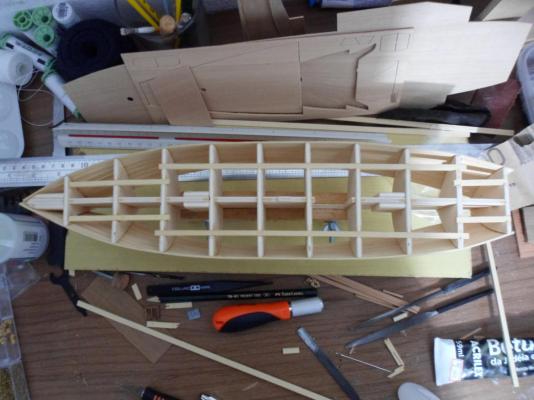
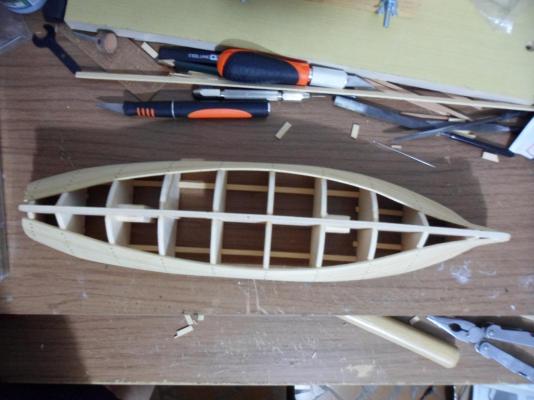
So, have been on my Red Dragon and here are the results: First planking of the hull finished. Used the nails from the kit and decided to keep them. internal view After that, sanded, sanded, sanded and got a smooth sensation on sliding my hands across the hull. Decided to put a movable deck on the bottom of the compartment I´ll show. Everything shall be painted dark red down there. Began hull´s second layer planking. Did not like the wood shine, but after a little sanding, it goes away. Hope the varnishing don´t bring it back. As planking the hull is a slow process, began to work on my false deck, opening a hole before planking. After that, lined the bulkheads on the false deck and began to plank. The hole is there for the compartment view. And that´s it for now. Practicing patience while the glue dries!! =D


-
That´s extrapolate the top. I laught in amazement. Really.
- 1,215 replies
-
- 1
-
-
- sloop
- kingfisher
- (and 1 more)
-
Hey, Captain, glad to be useful! ^^ And yes, Zheng He flagship is in my list for future scratchbuild. Already amassing information on it. Ty for the visit. =*
-
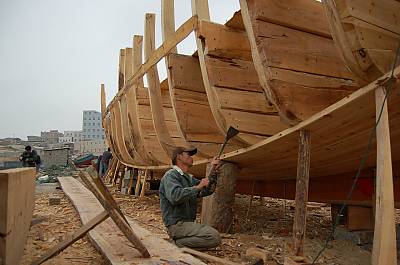
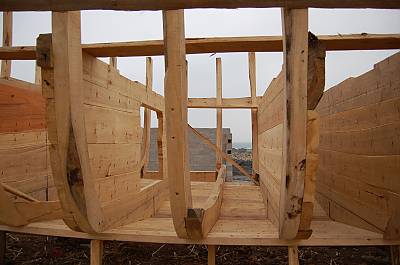
Well, before my pictures, some info: The enormous dimensions of the Chinese ships of the Medieval period are described in Chinese sources, and are confirmed by Western travelers to the East, such as Marco Polo, Ibn Battuta and Niccolò da Conti. According to Ibn Battuta, who visited China in 1347: …We stopped in the port of Calicut, in which there were at the time thirteen Chinese vessels, and disembarked. On the China Sea traveling is done in Chinese ships only, so we shall describe their arrangements. The Chinese vessels are of three kinds; large ships called chunks (junks), middle sized ones called zaws (dhows) and the small ones kakams. The large ships have anything from twelve down to three sails, which are made of bamboo rods plaited into mats. They are never lowered, but turned according to the direction of the wind; at anchor they are left floating in the wind.A ship carries a complement of a thousand men, six hundred of whom are sailors and four hundred men-at-arms, including archers, men with shields and crossbows, who throw naphtha. Three smaller ones, the "half", the "third" and the "quarter", accompany each large vessel. These vessels are built in the towns of Zaytun (a.k.a Zaitun; today's Quanzhou; 刺桐) and Sin-Kalan. The vessel has four decks and contains rooms, cabins, and saloons for merchants; a cabin has chambers and a lavatory, and can be locked by its occupants. This is the manner after which they are made; two (parallel) walls of very thick wooden (planking) are raised and across the space between them are placed very thick planks (the bulkheads) secured longitudinally and transversely by means of large nails, each three ells in length. When these walls have thus been built the lower deck is fitted in and the ship is launched before the upper works are finished. —Ibn Battuta[citation needed] It comes from Wikipedia, but some works I´ve read come to sustain what is said (mainly Phd thesis). That put, here comes my progress: For these, some explanation. Here is my first modification - After the videos and thesis I´ve seen/read, I thought I could show the inside of a bulhead compartment. For that I opened a hole on the false keel - chinese junks have no keel, at least, not a western conception one. That means it´s build solely on the planking, itself, with no guiding midsection stand. After planking I´ll take the remaining false keel bits. The info above is to justify why I should open the upper hull/sterncastle. I still have to think if my junk will be a pirate one or one from Zheng He´s Armada. A bit more of research to know.


-
Daniel, I saw other videos showing why - the first boats were bamboo rafts and since the bamboo have this bulkhead design, it was an easy association. Who knows? Anyways, the junk is the most successful ship design on world history and makes a fantastic subject to study and build. Meredith, yeah! This is an addictive hobby. I have to be carefull not to forget my daily routine and go for the ship. Many thanks for passing by. =* Ulisses, welcome! Raymond, that´s the truth. It´s an ending art and we live in the exactly moment it´s dying. A pity. Hope videos and lots of research goes on to preserve a little the techniques and art of these ships. I´m on the 1st planking. Pics soon to come. ^^
-
That´s huge! Loved the scale of the build. Best luck and I´ll be following. ^^
-
Gaetan, just some thoughts: As I haven´t that experience with using much of the tools of the craft, a kit makes my path easier. If I had to begin from a plan, scratch, I would have to sort out the wood I would use, where to get them and so on. I know only one supplier for wood here in Brazil, since our common wood shops are a little sparse on catalog. Getting to the tools again, would have to learn how to design the pieces, chose the right tools to cut the wood and be able to get those tools - since the wood from the kits come sorted, the bulkheads pre-cut (on pob) and the instructions to show us what to do next, in my view the kit is easier than the scratch, and while modifying kits I´m learning steps I´ll use on scratch. Sure I could begin on scratch, but would take lots of time to learn some basics, to buy some tools and to achieve some skills. But then, I did nothing on scratch yet
- 728 replies
-
- 1
-
-
- le fleuron
- 64 gun
- (and 1 more)
-
Jerome, I´ll search for it. It´s a good joinery, for sure - now I´ve got a new preoccupation - what type of joinery would be appliable on a 16th cent. chinese ship. I´ts interesting how the jesus ship remembers a longship, lol. Thought so, SoS. Had to share. Bindy, till now I thought the bulkead ship was just for modelling, or modern ships. To find it as an ancient technique puts some light on my work. Now I´ll think on removable planking on my deck to show one of these compartments - Another thing is the caulking, that I´ll consider to be the same collor of the wood, no need to blacken one side of the boards. I read about it´s composition in a thesis on the 10 chinese junks that traversed the pacific to the USA on late 19th cent. but had no idea about how it would look like.
-
Sam, I´ll give some thought on it. Meanwhile, found this video in youtube: Great information on it.
-
Gaetan, David may be right. The freedom to work the kit seems far away from building from scratch, but to get there, too, I think is good to know some things from kit building. But POF is really the work to do, the next step. Yours is beautiful and I love the small scales. 1:24 is a dream to me.
-
Nice work on the stand and good trick with the velcro!! Planking looks fine. Keep she busy ^^
-
State of the Art!
-
Loved your work so far. She´s a trully great ship. The scale makes the difference too and you´ve inspired me to do this one. I´ll be following your progress.
-
Sam, I´ll keep that in mind - no sharp tools when drinking - no finger dance! As for my joints, I´ll make a new window frame all lapped jointed. That first one was more of an experience. Next I´ll do with more care. Treenails at this scale can be tricky.