KenW
-
Posts
1,232 -
Joined
-
Last visited
Content Type
Profiles
Forums
Gallery
Events
Everything posted by KenW
-
 I 'marked' the edges of the deck planks with pencil to simulate the caulking between planks. Marking one edge of each plank is definitely better - looks the same and helps keep your fingers cleaner. Have fun with your first build.
- 455 replies
-
- 1
-

-
- fair american
- model shipways
- (and 1 more)
-
WOW. Thanks Alistair, Russ and Bob. I will try to use less glue, of course; but not using the damp paper towel/cloth sounds like great advise. And, I will wait to do my sanding and scraping. Also I will only use the pencil on one side. Thanks for your help and great, constructive advise. Cheers.
-
Actually, that's the way I do it. It's just I keep hearing that you can 'edge bend' planks but I could never get it to work. Thanks.
-
What is your technique for bending the plank for your cap rail? That is what I call a "sideways" bend, and I have not been able to accomplish it. Thanks.
-
Thanks Alistair and Russ for your advise. I am using holly planks so I don't think the wood is the problem. I am using a 4D pencil on both edges; but I think my problem is with my application of the glue. I get small areas or spots of glue forced up between the planks. I try to wipe it off using a damp paper towel but the glue, along with some pencil residue, gets on my fingers and the damp towel. I am thinking I have to use even less glue and not use a damp paper towel or cloth to clean up the decks. Perhaps I can scrape off any residue with the point of a knife before sanding or scraping. Thanks again for your help.
-
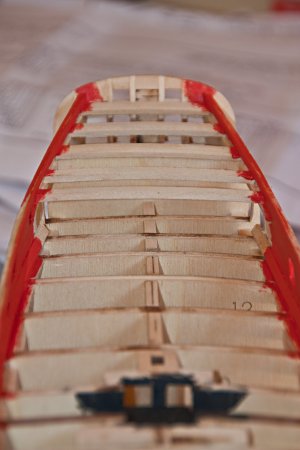
I began planking the deck. I finished the thicker planks; I decided not to extend these planks beyond the aft hatch. So the photo shows only the thick planks. I am not happy with how dirty the planks turn out. No matter how hard I try to keep my hands clean, I always seem to get the pencil lead on my hands and on the wood. It doesn’t seem that sanding or scraping is able to restore the nice white color of the original planks.

-
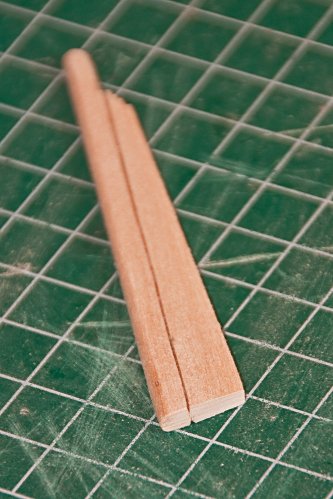
After a great vacation trip with my wife, I am back in “the shipyard” completing final preparations for planking the deck. I added wide scrap wood between the bulkheads so the ends of the deck planks will have something to glue onto. I also decided to add an inboard plank because I also like the way it looks. I notice that there is no ‘treenailing’ on the inboard plank on Bob (rafine)’s model. I will have to look at some more sites to see if I want to do that or not. The big problem I had was bending the inboard plank. I have never been able to bend a plank “sideways”. Instead, I used the widest planks I could find in the scrap wood from my previous build and cut out the curved inboard plank. (If you look close you can see I needed three pieces of wood for the plank.) I didn’t want to use the wide plank the kit supplied since it will be required for the rail. Does anyone have a method of bending planks “sideways”?

- 455 replies
-
- 1
-
-
- fair american
- model shipways
- (and 1 more)
-
Landlubber Mike's technique for furled sails
KenW replied to Landlubber Mike's topic in Masting, rigging and sails
Can you tell me the name of the fabric that Frank (riverboat) was kind enough to send you and you were able to find at your local store? Perhaps they have it in Brooklyn as well. (Also, what type of store was it?) -
I figured sail making rates might be kind of high. My daughter-in-law is talking rates that are high even with my "family discount". Since I only plan on having reefed sails, I think I will do my own; I shouldn't require too much sewing. Thanks.
-
I'm enjoying watching your rigging procedures. Just a couple of questions: 1. What is a crow hitch? (vs. a cow hitch or a half hitch) 2. Is your sail maker open for business? (How much would she charge per sail?) Thanks.
-
Thanks. I saw that as well. They have chains, sail material, parrels, and lots of other stuff. I've never used them, but most of the things I am interested in are pretty low price, so I may give them a try. Cheers.
-
Thanks Chris. I found the Amati Cornwall site and the etched letters. I think they are too big, however. I have some dry transfers that I am going to experiment with. Cheers.
-
What is the material you use for the sail? "Canvas"? Or some form of silk? Thanks.
-
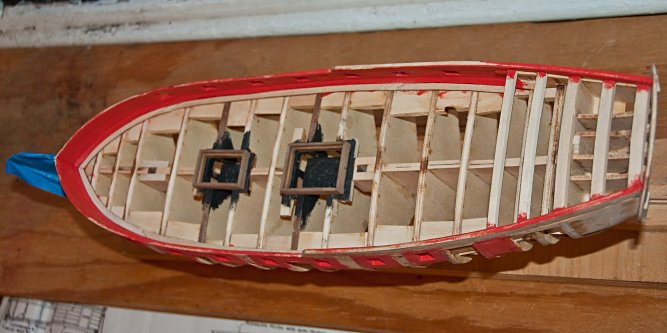
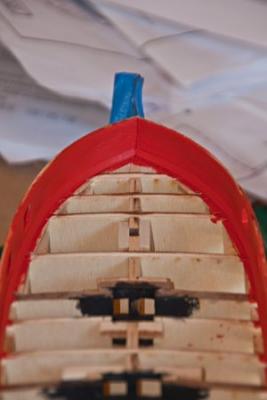
Here is a photo that shows the inner planking to better effect.

- 455 replies
-
- 1
-
-
- fair american
- model shipways
- (and 1 more)
-
Oldboy: I like the looks of your furling; it looks good. What did you use for sailing material? Do you have the bunt lines, chew lines and leech lines on your model's yards? I assume that the photos are not of the actual yard for the model. Thanks.
-
I would like to have read the discussions you had with Pete Jaquith; I'm sure I would have learned a lot. I did use a waterway; but the plans show both a waterway and a coverboard. I think I may leave out the coverboard. I just haven't decided about the margin plank inboard of the waterway. I have to think about it.
-
The inner bulwark planking is done and painted. I had trouble since the planks didn’t “want” to stay tight together. Therefore, three 1/8 inch wide planks were too ‘wide’ for the gun port openings, which are 3/8 inches high. So I used sand paper to make the planks slightly thinner. I don’t think it can be seen; and I used wood filler to fill in any places where light could be seen between planks. The next step is planking the deck. But I am still undecided about putting a plank inboard of the waterway. The instruction manual says that one should not be used since “no nibs (were) used on Fair American” since the ship is “too early for nibs”. I know that Bob used an inboard plank on his model, so I have to decide whether to follow Bob or the manual. Also, should I add a ‘covering board’? I welcome comments.
- 455 replies
-
- 1
-
-
- fair american
- model shipways
- (and 1 more)
-
The strip I used for the fancy rail was a 1/8 by 1/4 strip. I chose that based on a guess looking at Bob (rafine)'s blog. His upper (outer) planking had two 1/8 inch outer planks there. Since I added an extra 1/8 inch to the bulwarks to allow for larger gun ports, the top of the bulwark is the same height as that of bulkhead 16. The height of bulkhead 16 is the same as the two kit supplied pieces that form the side of the stern complex. So no filler strip was needed. In fact, the two fancy rail strips run straight from bulkhead 9 to the stern. (I don't remember if the 1/8 by 1/4 strip came in the FA kit or was left over from my last build.) I hope this helps. I look at Bob's blog daily to answer questions and help plan my next move.
-
Thanks for the comments everyone. Ed: My terminology was incorrect. I added the fancy rail (there is no fair cap). Cheers.
-
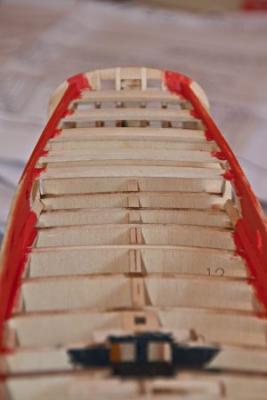
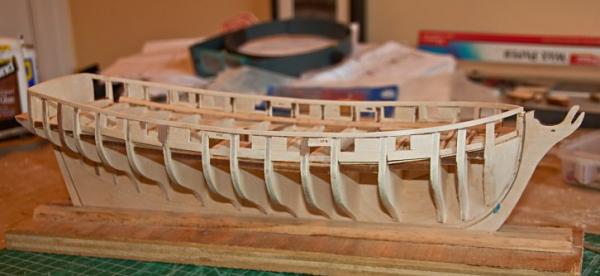
The basic frame of the Fair American is complete. I added the fair caps and supports for the quarter deck, as well as doing a final check of the gun ports to insure their measurements are correct. So I am ready to start planking the inner bulwarks using soaked basswood and wood glue.
- 455 replies
-
- 2
-
-
- fair american
- model shipways
- (and 1 more)
-
Ed: I have Bob Hunt's practicum, but I chose not to do his "kit bashing". I am using Bob (rafine)'s blog as my main guide. His model is well constructed and his build sequence seems logical and has been good so far. Thanks for your comments.
- 455 replies
-
- 1
-
-
- fair american
- model shipways
- (and 1 more)
-
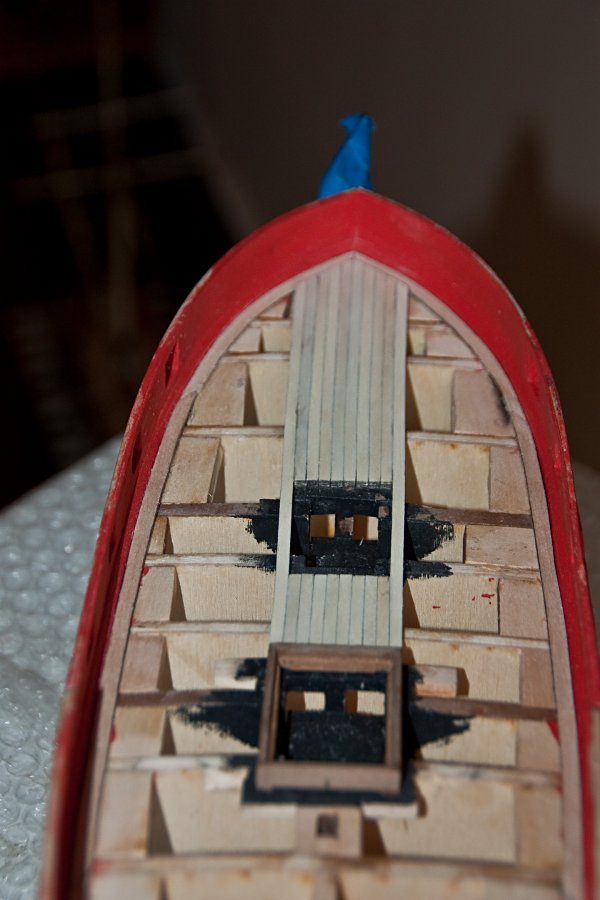
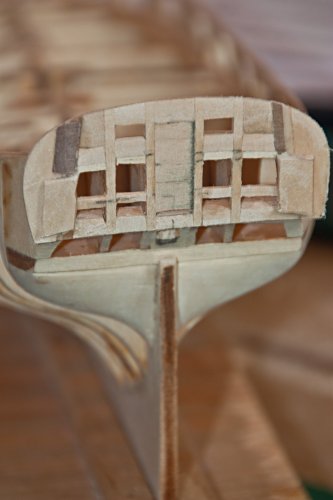
The stern framing is done and the windows roughly positioned. I have pieces of planks that the top and bottom of the windows that they can be glued to. These pieces will need some fine tuning once they are ready for installation. In order to insure that the hole for the rudder is made in the correct place, I made the rudder. The framing is a bit rough, but it all gets covered up by the final planking. I decided not to use the two windows on the stern wings and ‘outside’ the cabin. (This decision was helped by the fact that the kit only came with six windows.) I was wondering about the center window and why it is a ‘phony’ window. Perhaps there were supports there; or the rudder gets in the way. I welcome any recommendations.


- 455 replies
-
- 1
-
-
- fair american
- model shipways
- (and 1 more)
-
I am in the process of framing out the stern windows. I agree with you that I will eliminate the two windows that are actually outside the cabin. (Also, the kit only came with 6 windows.) But I was wondering why the center window is a "dummy". Was there a support there or something? Why not have 5 "real" window.? Thanks. Cheers.
-
Ed - Thanks for the comment. I found those clamps on www.historicships.com/Tools/Clamping & Holding. I was using that site for tools before I discovered Micro Mark. I don't know the brand name, but you can find them on that site. Cheers.
-
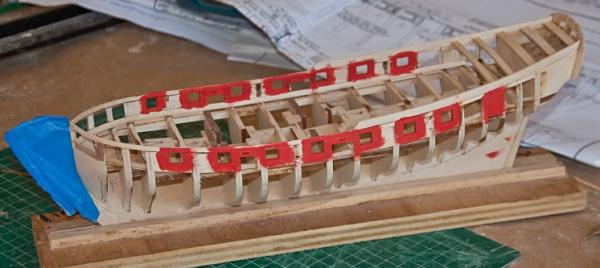
After studying the plans and the guns that I have already constructed, I decided that the gun ports should be 3/8 square rather than 1/4 inch square. That requires that the height of the bulwarks must increase by 1/8 inch. This seems to be a common alteration (see Bob rafine’s log). Also, the plans have the two aft guns practically right up against the housing front. I can’t see how those guns could ever be fired without knocking down the ladder to the quarter deck or even the housing itself. Plus, the captain would have to climb over the guns to exit his cabin. So I moved the guns about 1/16 inch closer together and will move the housing front aft towards bulkhead #13. I expect this will provide about an inch between the aft guns and the housing front. In framing out the gun ports I also added several shims to assure that all measurements were in line and there were no gaps between planks. This makes for a patchwork look - especially since I used walnut wood for the shims. I didn’t create a solid bulwark wall as Bob (rafine) did and I hope I won’t regret it later. But all in all I am pleased with the result. I attach another photo showing the addition of the extra bulwark planks port and starboard. And yes, there is a boat under all those clamps.

- 455 replies
-
- 3
-
-
- fair american
- model shipways
- (and 1 more)