KenW
-
Posts
1,232 -
Joined
-
Last visited
Content Type
Profiles
Forums
Gallery
Events
Everything posted by KenW
-
 I enjoy watching your build. And I was wondering - When is the boat show? I still want to see photos of the real boats (or replicas). Cheers.
 -
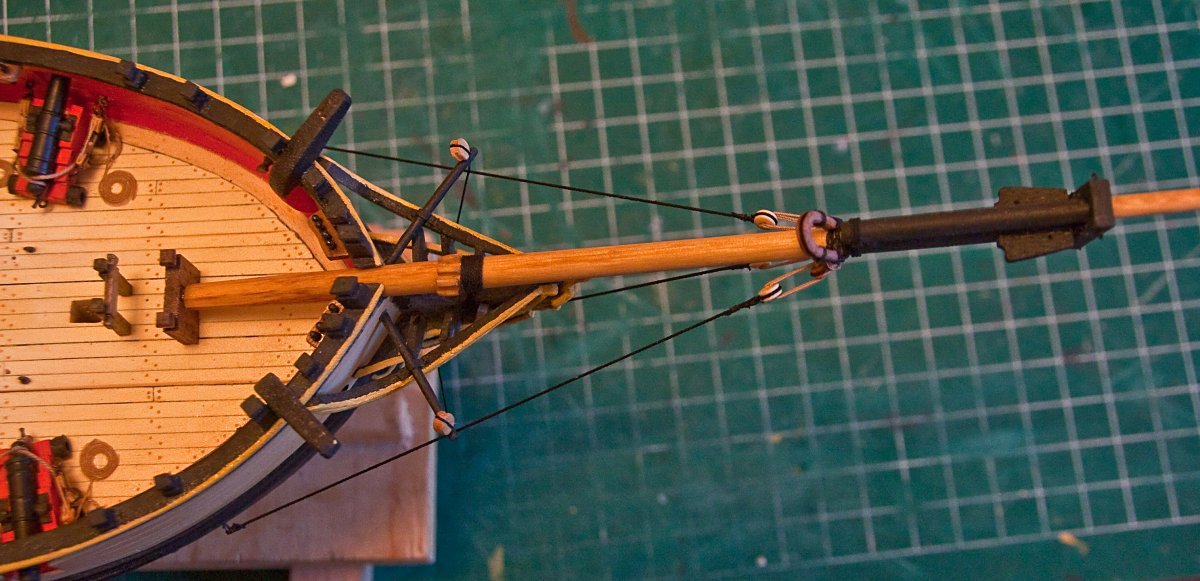
Thanks Bob and Russ. I used the same philosophy in rigging the bob stays and bowsprit shrouds as I used when rigging the cannon: I rigged as much as possible before the bowsprit was mounted on the hull. That way I could get the dead eyes equally spaced. After gluing the bow sprint to the hull, I attached the lines to their eye bolts. The seizing was not tightened until the shroud or stay line was pulled tight. The result was the dead eye spacing and the line tightness looking right.
- 455 replies
-
- 2
-

-
- fair american
- model shipways
- (and 1 more)
-
I have to admit, the World Cup is proving to be a major distraction. However, I did manage to install and rig the bowsprit and jib boom. The boomkins (sometimes called the bumkins) were also added and rigged. Everything seems to have turned out as planned with no problems. Once the games are played less frequently, I will work on the fore mast.


- 455 replies
-
- 10
-
-
- fair american
- model shipways
- (and 1 more)
-
WOW! A lot of people seem to think my idea of Model Expo using Bob's model for their Essex kit and paying him for it is a good idea. Now we all have to is petition the ME folks.
- 1,477 replies
-
- 2
-
-
- essex
- model shipways
- (and 1 more)
-
Great workmanship. I think Model Shipways/Model Expo should redo their kit to reflect your fantastic job. What your are creating is a beautiful rendering of a Napoleonic era frigate. And they should pay you for your trouble (or enjoyment).
- 1,477 replies
-
- 3
-
-
- essex
- model shipways
- (and 1 more)
-
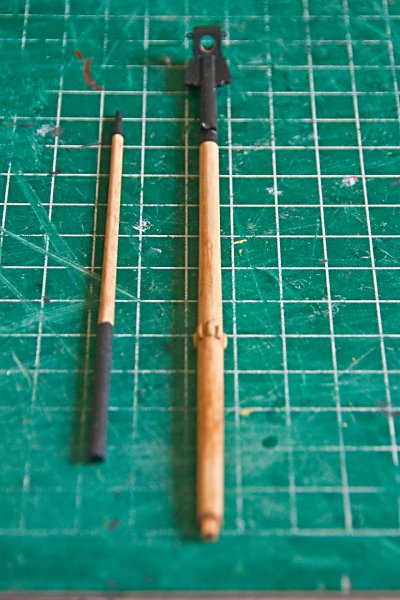
Just a status report – I’ve made the bowsprit and jib boom. They are not installed or rigged yet. I made both out of dowels and followed the plans.

- 455 replies
-
- 3
-
-
- fair american
- model shipways
- (and 1 more)
-
Victorpapa - My cannons were painted black because I didn't know any better. Now I have been using Birchwood Casey Brass Black for things like the belaying pins, cleats, eye bolts etc. Haven't yet used it on a canon barrel, of course, but people on this site seem to like it.
- 455 replies
-
- 1
-
-
- fair american
- model shipways
- (and 1 more)
-
Thanks for your comments Ed. I'm almost finished with the bowsprit and jib boom - entry and photos soon. My strategy is to follow Bob (rafine)'s FA blog. He made the masts from fore to aft and then rigged from aft to forward. On my previous model, I made all masts from dowels. I use the scraping method described in Bob Hunt's practicum for the Armed Virginia Sloop. I have been able to get the dowel 'cone-shaped' as per the plans and still retain a good roundness. Looking forward to seeing more photos of your work.
- 455 replies
-
- 1
-
-
- fair american
- model shipways
- (and 1 more)
-
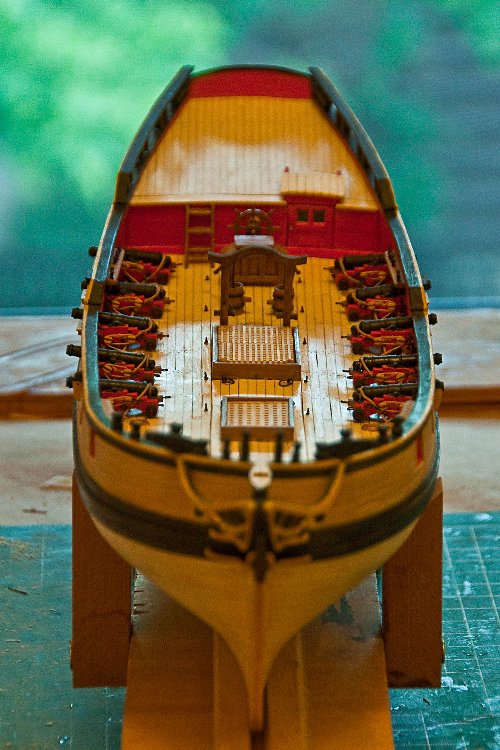
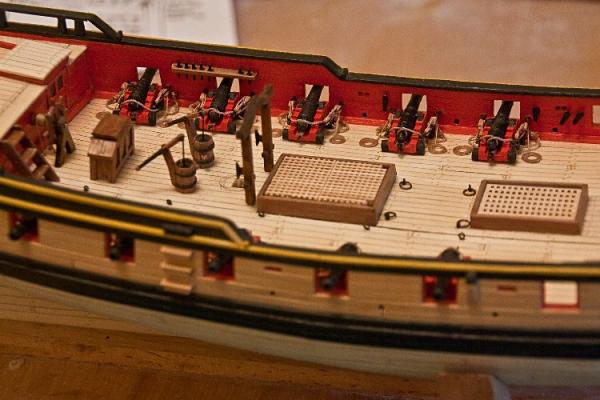
The last 4 guns have been rigged and installed. That completes the work on the hull, except for some items used for rigging, such as the channels and sheet horse. Also, I didn’t add the bow sprit bitts since that determines the final angle of the bow sprit. So I’m going to have a little private launch party and begin on the bow sprit and the rest of the rigging.

- 455 replies
-
- 10
-
-
- fair american
- model shipways
- (and 1 more)
-
I have another question. The netting on the bow sprint rigging - did you tie it as the plans show, or did you use some netting or window screens? Thanks.
-
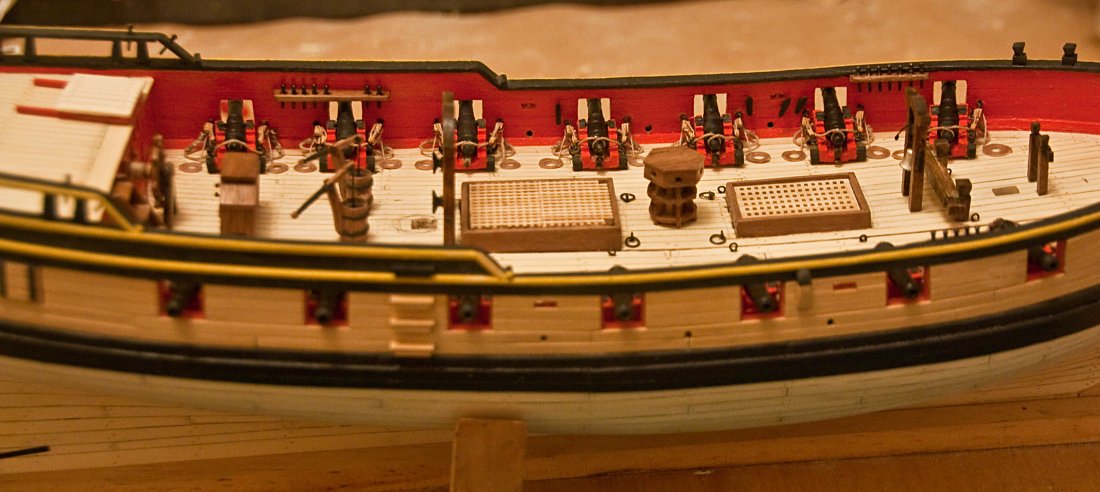
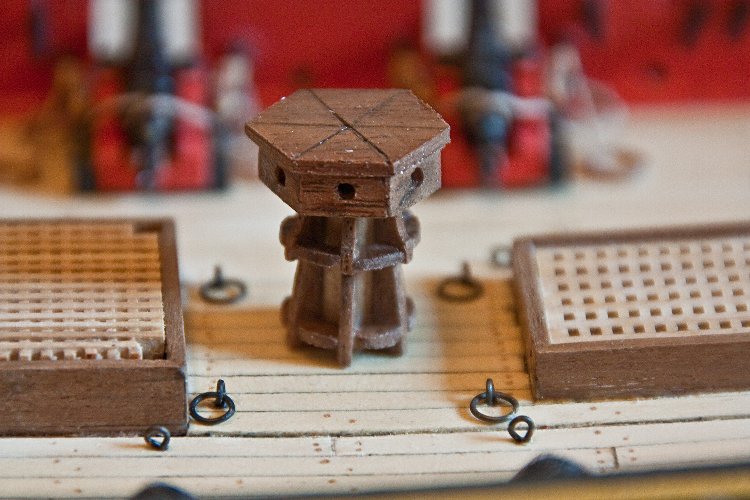
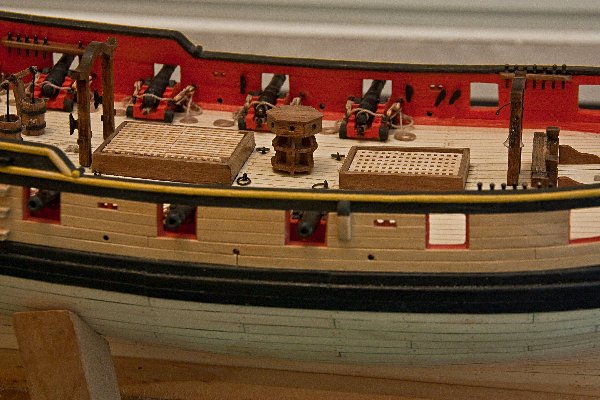
I have re-built my capstan to make it a bit smaller and improve the workmanship. I’ve kept the hex shaped design, however. The result is a definite improvement. I decided that the scale doesn’t matter as much as the look and feel of the piece. The rest of the deck furniture is also completed, but not glued. (I’m afraid the furniture might get in my way during the rigging phase.) Also, I still have to mount the final 4 guns. Once that is done, I’ m thinking of having a ‘launch’ party.
- 455 replies
-
- 8
-
-
- fair american
- model shipways
- (and 1 more)
-
I don't pre-shape either. And, I don't soak the manila strips. But I found it is better to paint the strips, and let the paint dry, before gluing them. You can just press them down once you apply the glue. Pretty easy to work with.
-
Your work is looking good. Cheers.
-
I agree that your guns look great. Are your barrels from the kit? Did you paint them or blacken them? I use cut strips of a manila folder for my trunnions. Great job.
-
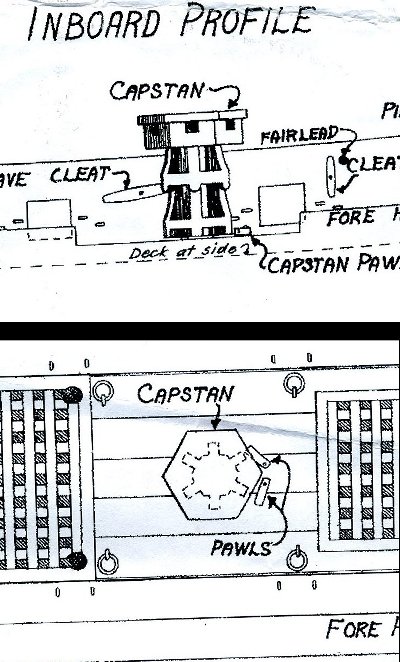
Thanks Russ. I don't intend to paint it. I think my workmanship can be improved and I can reduce the height down to the 3/4 inches on the plans. I feel that part of the problem is the model itself. It is a model of a model and the kit's scale is an issue. The housing front and captain's cabin door are only 3 feet high according to the scale. If an average man is 5 feet 6 inches. My capstan is 3 feet 9 inches which shouldn't be too high. I am thinking that what I need to do is reduce the height and redo the wood work and see what it looks like when all the guns and deck furniture are mounted. Thanks again.
- 455 replies
-
- 1
-
-
- fair american
- model shipways
- (and 1 more)
-
Hey Alistair - Sorry you don't like the capstan. It was a hard piece to construct because it is so small. The height is @7/8 inches, which is taller than the plan's capstan at 3/4 inches. The diameter is the same as the plan's (5/8 inches). I like the hexagon shape; but I may want to try to reduce the height. I'll have to take some time to think about it. Cheers.
-
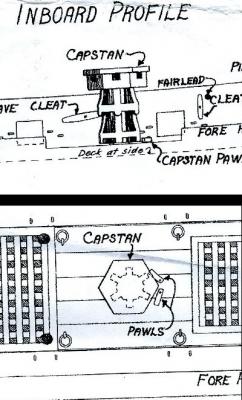
I looked at several sites that featured capstans and their designs. But, finally I realized that the answer was right in front of me – on the plans. So I did my best to create a capstan that matched the one on the model’s plans. I think it came out alright and I like the look better than the capstan that came with the kit. (Still need to add the pawls, of course.)

- 455 replies
-
- 5
-
-
- fair american
- model shipways
- (and 1 more)
-
I agree that your workmanship on the Cutter Mermaid indicates that you can build any model you set your eyes on. As to what woods to use: I like to avoid painting as much as possible to let the workmanship show through (even though my workmanship is not as good as yours). So on my current build I chose boxwood, which is yellowish, and holly, which is white, to create a hull that has the same look as the recommended painted model. If you want to go that way, look at the color of the original ship and choose woods that are (about) the same colors. (On my next model I have to look into ebony to replace the black wales.) If you like this idea, the Hobby Mill web site, "http://www.hobbymillusa.com/milled-wood-strips.php", has a great selection of different wood types. Just a thought.
-
Looking good Bob. Outstanding workmanship as usual. Ken
-
I think your model is a really good piece of work. One question, is the model painted on one side (starboard) or does it just look that way in the photos? Personally, I like the natural look better. Great job.
- 803 replies
-
- 2
-
-
- colonial cutter
- modellers shipyard
- (and 1 more)
-
Thanks Russ and Bob. And Bob: I got the idea of breaking gun installation into manageable batches from you.
- 455 replies
-
- 1
-
-
- fair american
- model shipways
- (and 1 more)
-
Thanks Gary. I have a photo of rafine's capstan and I will check out the other sources.
-
You are building a really great looking boat. Excellent workmanship and I like the color scheme. Really well done. Cheers.
- 803 replies
-
- 2
-
-
- colonial cutter
- modellers shipyard
- (and 1 more)
-
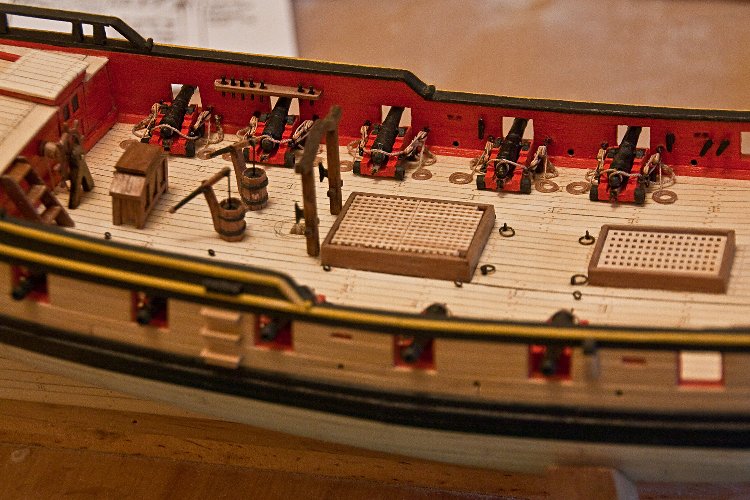
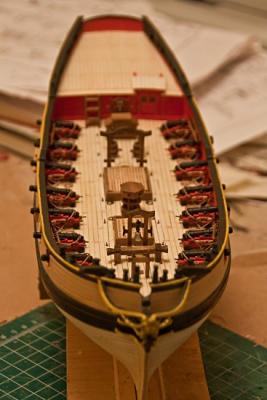
I now have a total of 10 guns mounted. I also added the bilge pumps and the aft gallows, although it isn’t glued. I acquired a new spool of 28 gauge wire that is annealed and it is much stronger than the wire I was using that I got from a craft store. It’s much easier to work with. My method for rigging the guns is to do everything before the carriage, with barrel attached, is installed on the deck. The holes on the bulwark are drilled and the eyebolt for the outhaul tackle is in; and the barrel attached to the carriage before installation. I do agree that the whole process of setting up the carriage/gun is lengthy, but I try to break it up by doing 4 guns and then working on some deck furniture. So I have 10 down and 4 to go. Next up is the capstan – and I’m not pleased with the kit supplied one. I’m going to have to create my own somehow.

- 455 replies
-
- 10
-
-
- fair american
- model shipways
- (and 1 more)
-
My two cents: First the work is outstanding as we are accustomed to here. As far as the gun rigging, (and we need some input here from someone who really knows) is that during action the in haul tackle is used to haul the gun in and secure it while it is being loaded. Recoil may not bring the gun all the way into loading position. Once it is loaded, the out haul pulls the gun into position ready for aiming and firing. I also agree that the in haul tackle would be stowed when not in use since it stretches across the deck and is a hazard.
- 1,477 replies
-
- 3
-
-
- essex
- model shipways
- (and 1 more)