DONATION DRIVE - SUPPORT MSW - DO YOUR PART TO KEEP THIS GREAT FORUM GOING!
×


Jack Panzeca
-
Posts
233 -
Joined
-
Last visited
Content Type
Profiles
Forums
Gallery
Events
Everything posted by Jack Panzeca
-
 Hey Grant, The new work looks great! The floor and futtock riders took the weekend, I am going to set aside a lot longer than that (maybe a month). Anyway, she looks terrific.
- 456 replies
-
- 1
-

-
- finished
- bomb ketch
- (and 2 more)
-
Hi Ken, Grant, Ben, David, mobbsie and Greg, Thanks for the kind words and encouragement. Anything worth doing is worth doing correctly and since I am a late bloomer in this area it does take some practice. I attempted model ship building 15 years ago or so and without the MSW community I stalled pretty quickly. Now whenever help is needed it is right here. Special thanks to Grant and mobbsie who started this group build and kindly allowed me to tag along. I learn something new from them every day. Thanks again to all the "Likes".
- 60 replies
-
- 2
-
-
- granado
- bomb ketch
- (and 1 more)
-
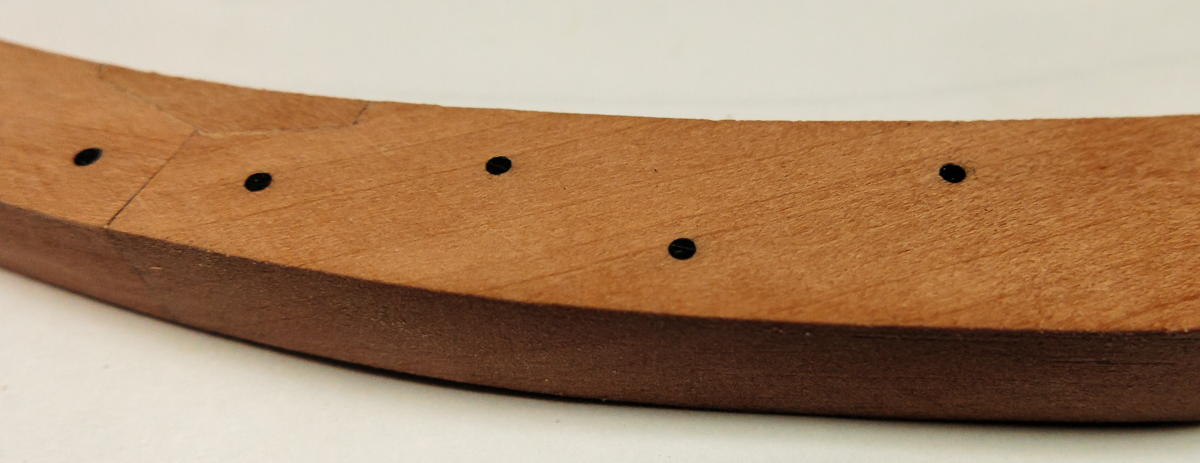
The first picture is the junk pile. Treenail (bolt) tests and joinery practice. Some were not bad some are awful. The next pictures are of frame 4A & 4B. The practice is paying off. I did all 40 ebony bolts even though, the best I can tell, when the model is finished only the 2 at the small chocks (8 total) will be visible. Good practice. A lot of sanding yet to go. This sure is fun. The emotional reward of finally getting it right is huge. Thanks to all the "likes" always appreciated. Special thanks to the rest of the group, their assistance is enormously helpful. The rest of the double frames are next.


- 60 replies
-
- 14
-
-
- granado
- bomb ketch
- (and 1 more)
-
Hi Mobbsie, I am paddling as fast as I can! If I catch up can I still copy your homework?
- 255 replies
-
- 4
-
-
- granado
- bomb ketch
- (and 2 more)
-
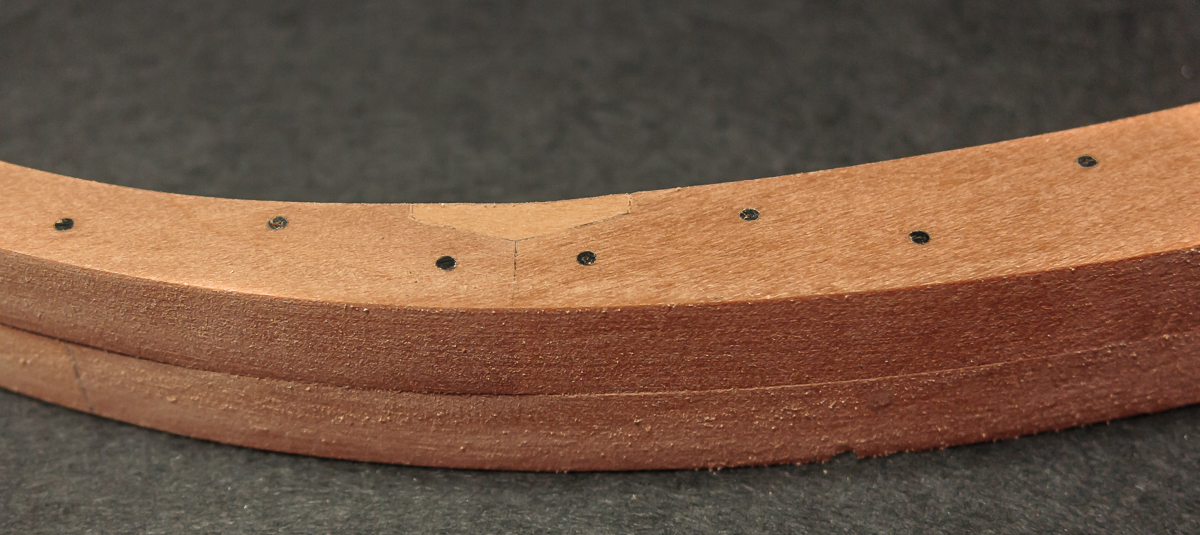
Hi Grant, Greg David and mobbsie, Thanks for the encouragement. Thanks to the "Likes" as well, it always means a lot. The chocks are close but little things keep them from being perfect. Just as an example the chock on the lower left of the picture has an uneven glue line and the one on the upper right is slightly off center. (I enhanced the contrast so that the flaws would stand out in the picture.) Don't get me wrong some are just fine, but the two end frames have to be absolutely perfect since I will have to look at them everyday for the rest of my life. I am going to start with the double frames in the center and by the time I get to the 2 outside frames the chocks and the treenails should be perfect. Thanks again to all who look in. Also, thanks to mobbsie for the tip on filing the scarph joints and the keel notches using a vice. It has really helped. Actually I borrowed the idea from Grant after he borrowed it from mobbsie. Time to make more sawdust.
- 60 replies
-
- 8
-
-
- granado
- bomb ketch
- (and 1 more)
-
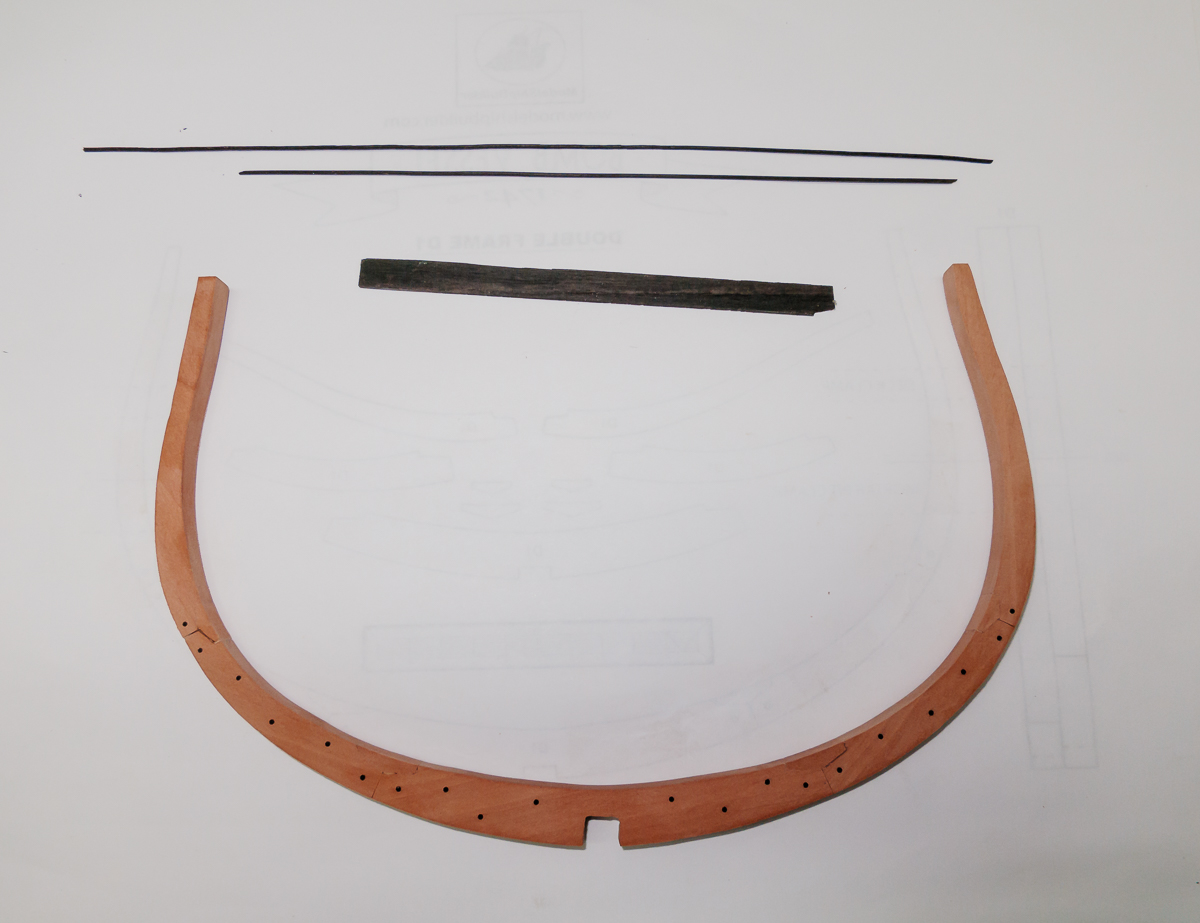
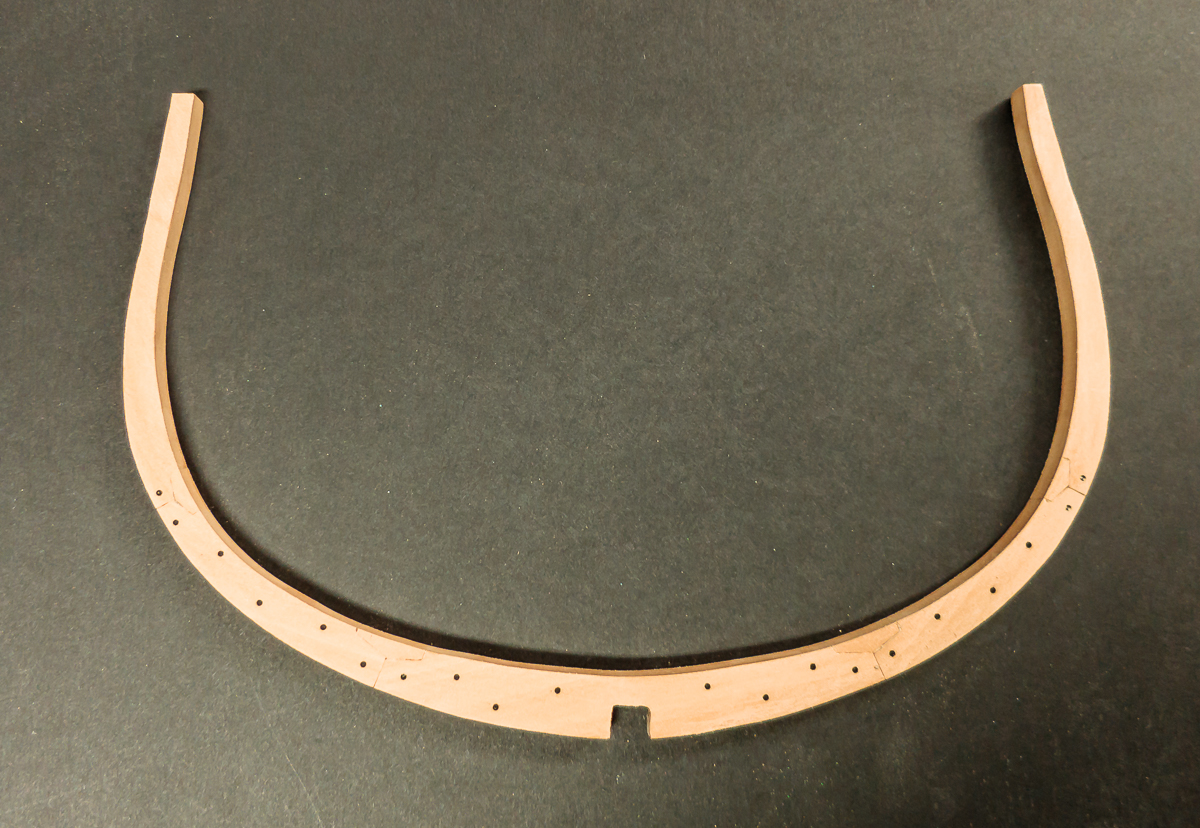
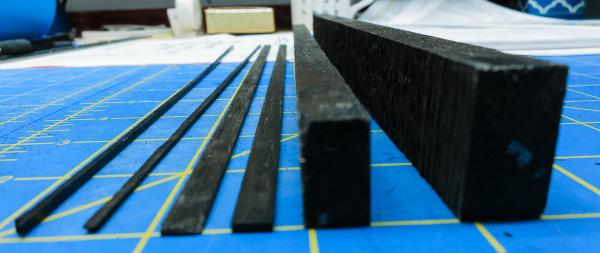
Well, my first keeper frame turned out to be another practice version. I have not mastered the fit of the chocks. Starting on the most visible frame is probably a tactical error. Just so you know that I am not napping, the latest try has produced some advancement. I originally planed to use copper wire darkened with Liver of Sulphur for the double frame bolts (Grant's method). I did not have much luck with it, staining the wood as well as the copper. Grant graciously tried to coach me through it but I did not do so well. I started to wonder how hard it would be to make the bolts from ebony. I had a block of ebony in the shipyard so I started to play. I cut the planks to 1/32 square dowels and with the help of the Byrne's thickness sander and finally the Byrne's draw plate they turned into .032 inch round dowels. Not too hard, it was fun. The first picture shows the frame and the ebony. I really like the way they look and i only have 200 or so to make. I think that I will start on the interior doubles and see how I do with those.


- 60 replies
-
- 12
-
-
- granado
- bomb ketch
- (and 1 more)
-
Hi Grant, It looks great. The "repairs" disappear. I have read the posts twice to try to push them into long term memory. No doubt I wiil revisit later. It does make perfect sense to wait to cut out the ports. Keep up the beautiful work and especially the pictures. I need the guidance.
- 456 replies
-
- 1
-
-
- finished
- bomb ketch
- (and 2 more)
-
Hi Mike, Grant, Ken, David and mobbsie, Thanks for the comments and encouragement. Thanks to the "Likes" as well. Grant and mobbsie: Where can I find mobbsie's keel notch technique? I have looked everywhere I can think of (Grant's log, mobbsie's log and the PM chain) and I still can't find it. I know that it is probably staring me in the face but as usual I am overlooking it. I could use a more precise method than "cut close with the scroll saw and file to fit". Mike: your frames are lovely!
-
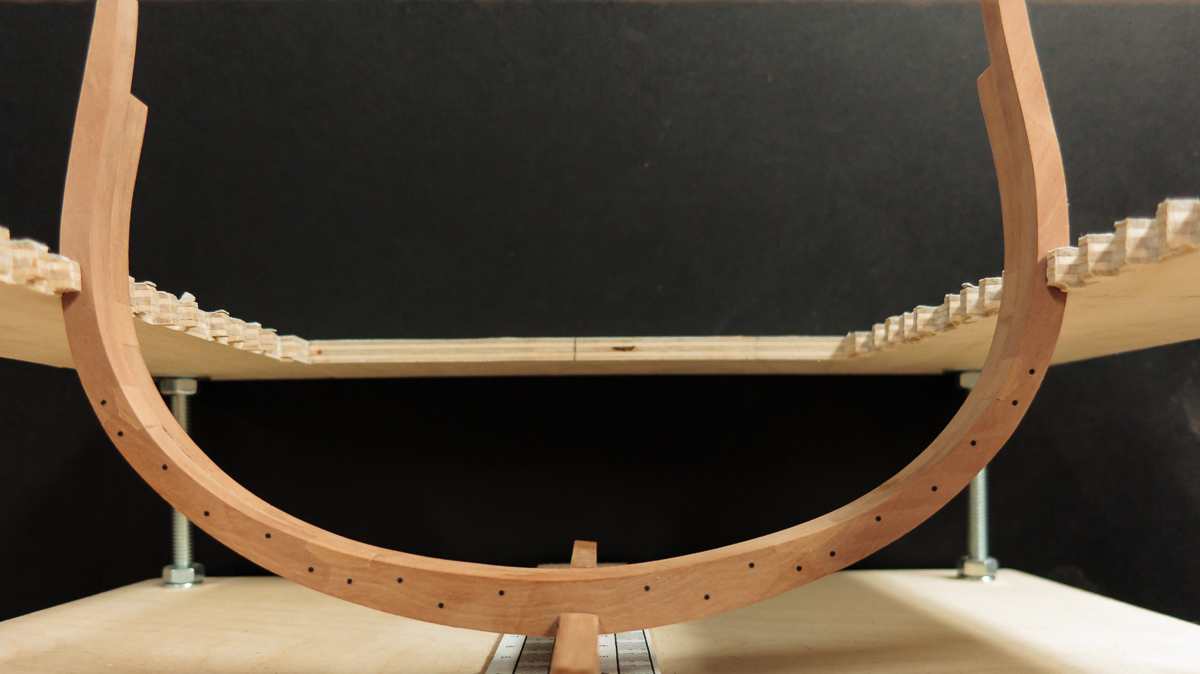
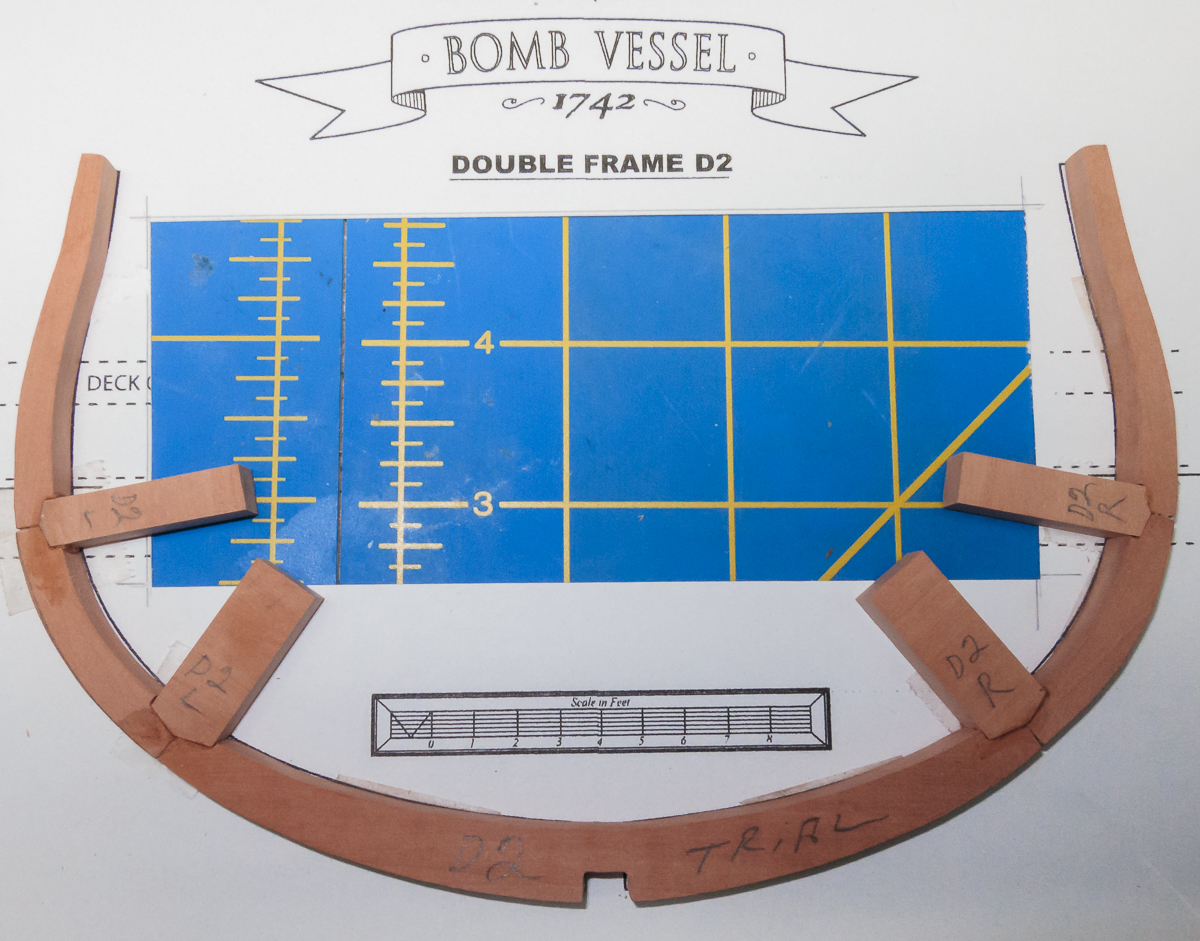
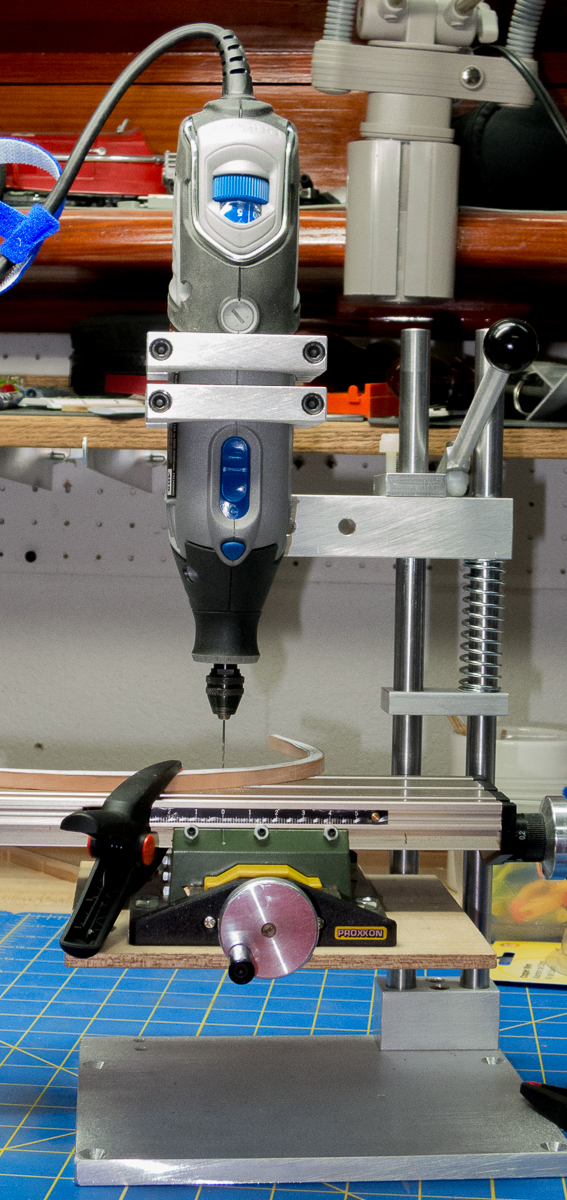
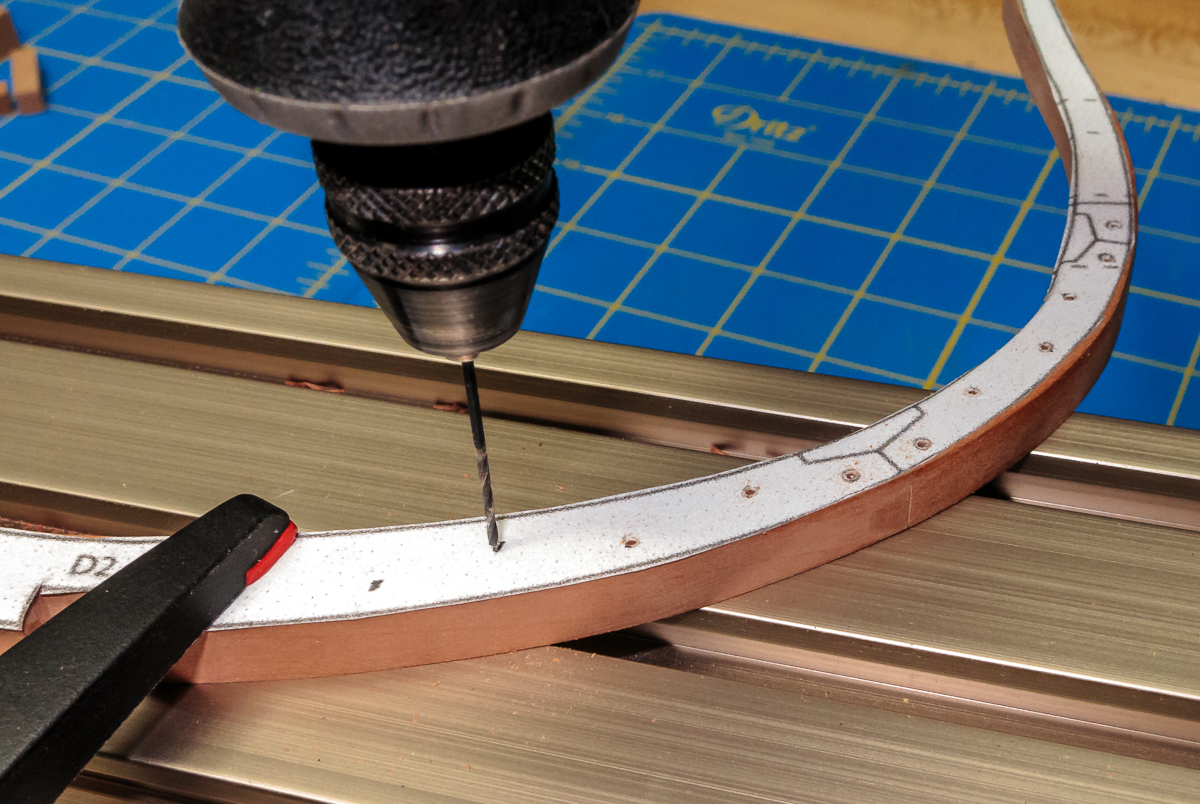
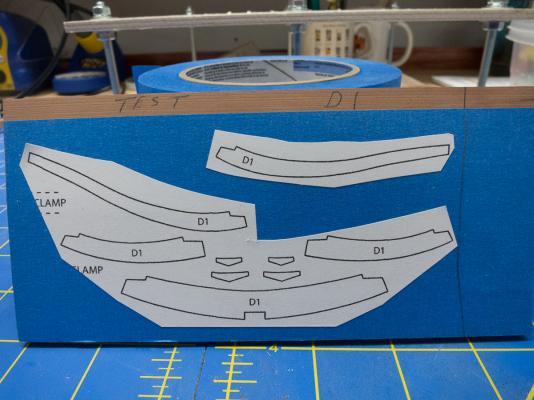
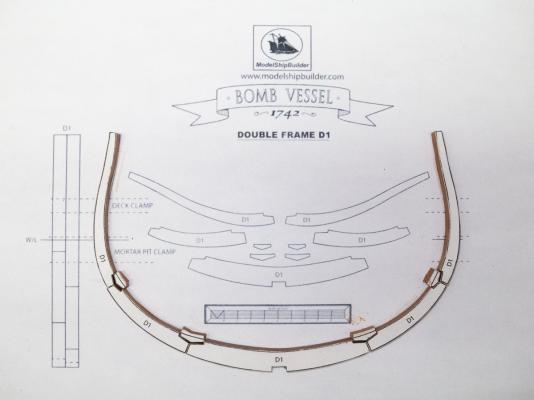
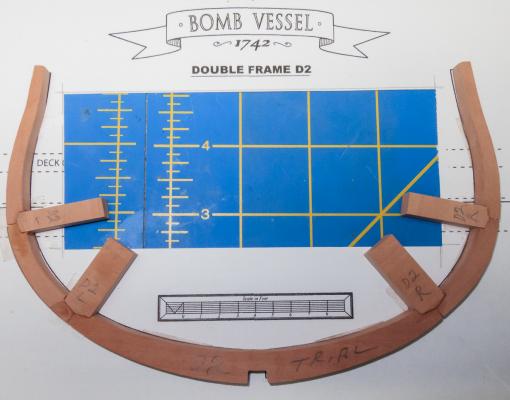
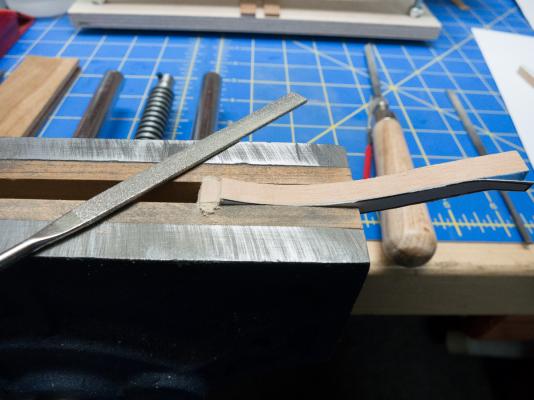
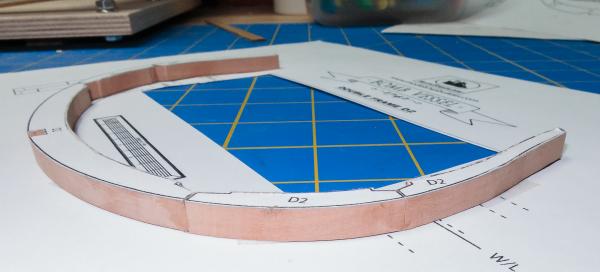
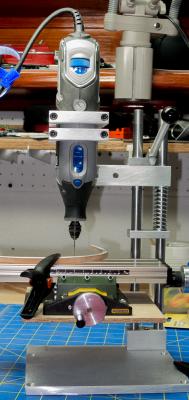
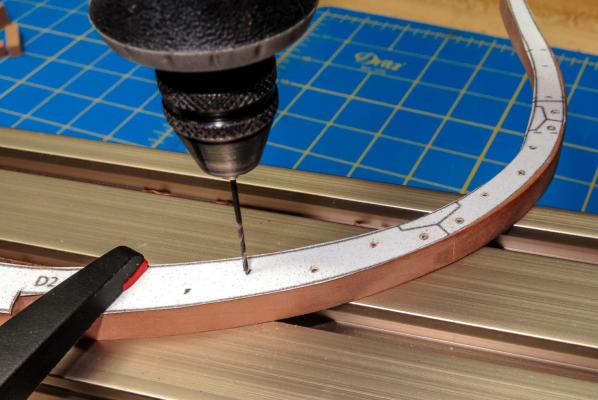
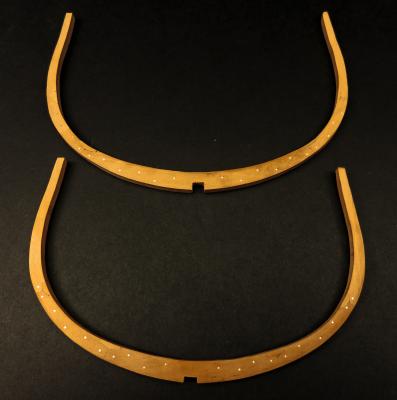
Time for a small update. I have been working on a couple of sets of double frames as my initial frame tests. Both sets were D1 and D2 which are 2 of the outside frames. The frame drawings were printed on letter size self adhesive labels and cut the futtocks out and stuck to the swiss pear. First I followed Grant's example and used 3M painter's masking tape which makes everything easier to remove from the wood. In this hemisphere it is blue rather than yellow. I have to mention how much nicer swiss pear is to work with than oak. Oseberg is almost completely oak and really hard to work in small scale. Swiss pear is much softer but still holds an edge. Sweet! They were cut out loosely with a scroll saw and fine-tuned on a spindle sander and a disk sander. These where my first frames and they were a long way from satisfactory. The joints were not precise and the chocks were still a mystery. I used only the 2 bolts shown on the drawings. They were made from .81mm copper wire. The second set was a lot better, I guess that is the point of practice. I used mobbsie's flat vice method to file the scarph joints which helped a great deal. I also replaced my decades old, not intended for prime time, Delta disk sander with another dream machine Byrne's model and that worked wonders for making the ends square. (It is balanced so precisely that when I shut it off it continues to rotate for 30 seconds.) Grant helped me with the layout of the additional bolts shown in AOTS. I laid them out on a drawing copy and than transferred them to a sticky label and added them to the glued up frames. I drilled them using a Vanda-Lay drill press with a Proxxon x-y table. Here they are sort of finished but not glued together or faired. They are much better but still not perfect. Third time is a charm (I hope). See you soon.
- 60 replies
-
- 9
-
-
- granado
- bomb ketch
- (and 1 more)
-
Hey Dee Dee, I agree with Eamon's earlier post, "that dang thing looks real". My mother taught me 2 things about hobbies: The first is to never keep track of the cost. If you do it ruins the fun. The second is never get in a hurry, if you do it quickly turns into work. For me ½ the fun is in figuring out how to do it. Your pace only needs to please you. She looks great. I like seeing the wood grain as well, fine job.
-
Hi mobbsie, Your progress looks wonderful. The more I watch you guys move ahead the more I realize what a great choice this set of plans is for a first scratch build. Keep on rolling buddy! Great Job.
- 255 replies
-
- 1
-
-
- granado
- bomb ketch
- (and 2 more)
-
Hi Grant, Looks Great! The progress is really amazing and the quality is just what we would expect. Thanks for sharing with us.
-
Hey Grant, mobbsie and Lou, Thanks for looking in and the kind wishes. Mobbsie and Lou: I posted a little more detail of the shipyard here: http://modelshipworld.com/index.php/topic/3869-so-where-do-you-do-yours-then-model-making-that-is/?p=278203 Hello Jeff, David John and Vivian, Thanks for dropping by. I am happy to be back at full speed (more or less). The wood is my favorite part of this hobby which is why I choose projects without paint or rigging. The Bluenose II has minimal rigging and I still hated it. I finished the hull 10 years before I got around to rigging it. Thanks as well to the "Likes" it means a lot.
-
Hey mobbsie, Terrific progress. You are flying. My plan is to use poly as well. Great work my friend.
- 255 replies
-
- 1
-
-
- granado
- bomb ketch
- (and 2 more)
-
Hi Grant, Your frames look great. So does that other object in the background. Just beautiful.
- 456 replies
-
- 1
-
-
- finished
- bomb ketch
- (and 2 more)
-
Hi Mike Y, Your frames look great. They will soon begin to look like a ship. I have just started to work on my first practice frames. The images of the replica ship are wonderful. HUGE! I worked as a consultant in Russia 10 or 12 years ago so I understand what you mean about the rules not applying. Keep up the good work.
- 969 replies
-
- 1
-
-
- hahn
- oliver cromwell
- (and 1 more)
-
Hi Nils, Brian, Grant, JesseLee, Jim L, David B, Mark, Chris, RevKB, Thomas, mobbsie, Mike, Matti, Vivian, Steve KibblesnBits and Joe. I wanted to officially thank everyone for the very kind words regarding the Oseberg. I am sorry to be so late responding but I had a fairly major health issue that took me a couple of months to recover from. (Some of you already know that) I only just started back in the shipyard after 2 months. I am fully recovered now and am having a lot of fun getting started on the Bomb Vessel cross section. The "Darkside" beckons. Thanks again and thanks to all the "Likes" as well.
-
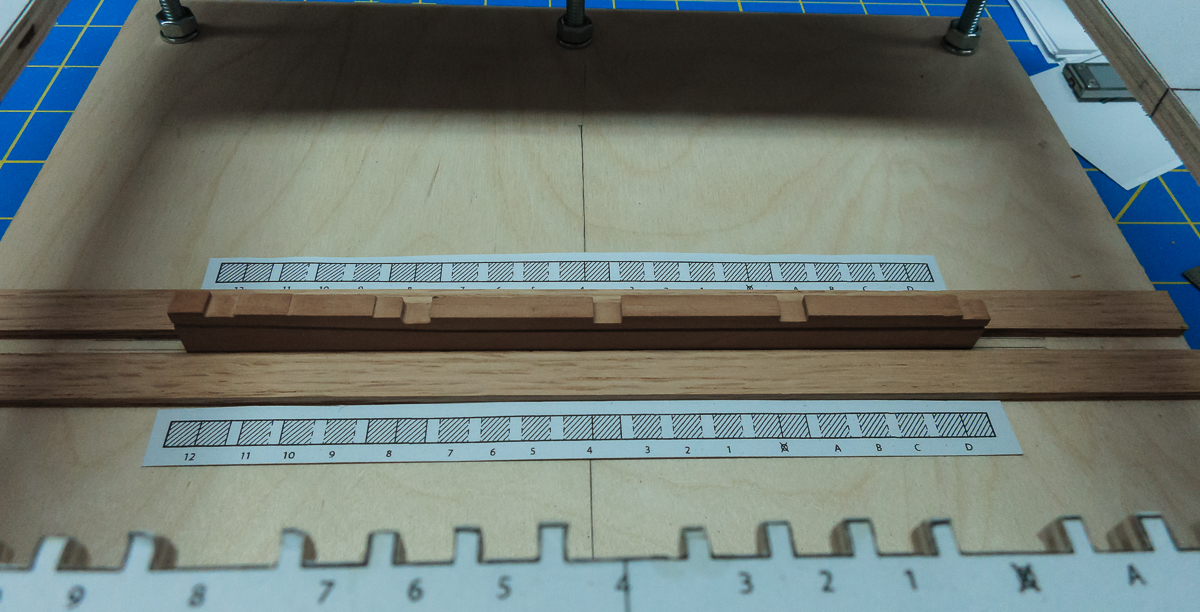
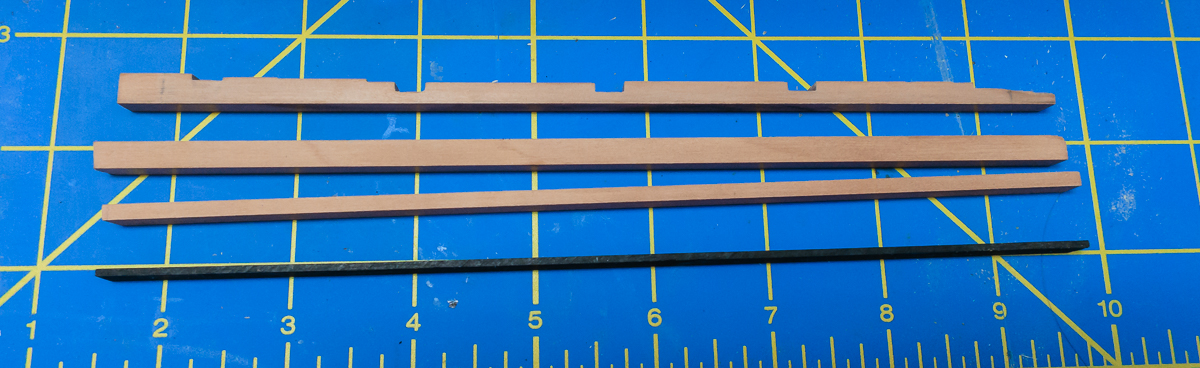
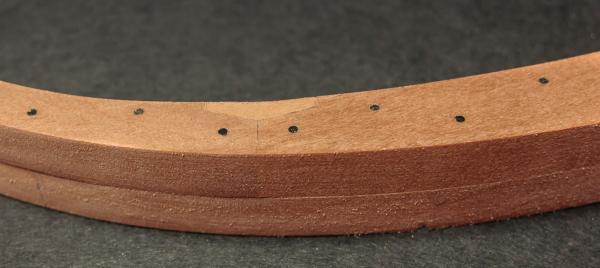
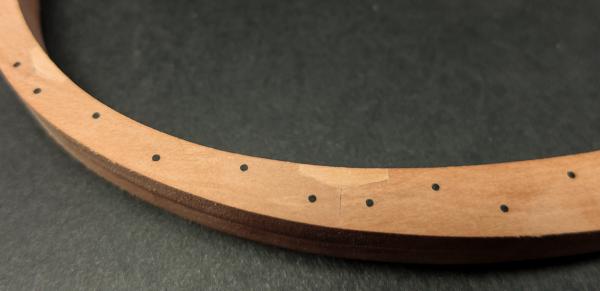
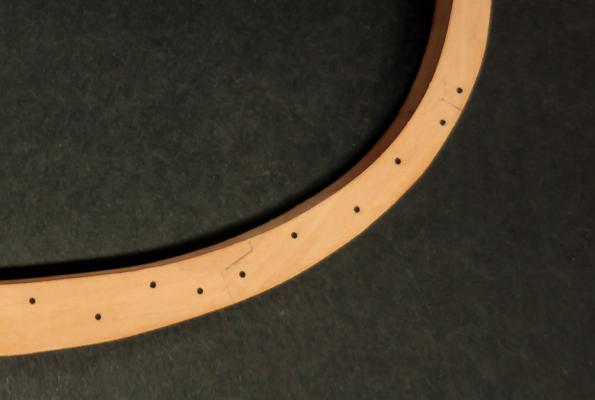
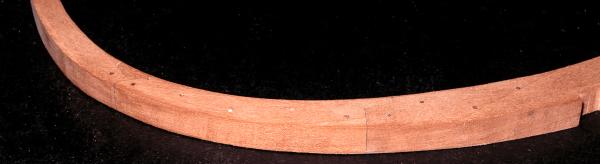
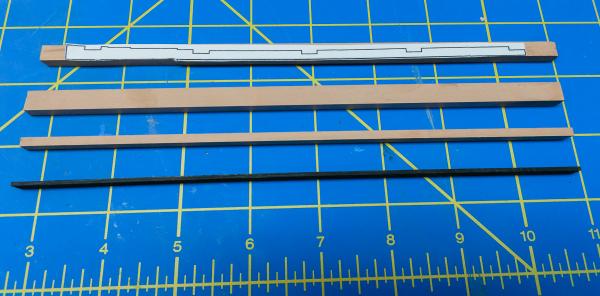
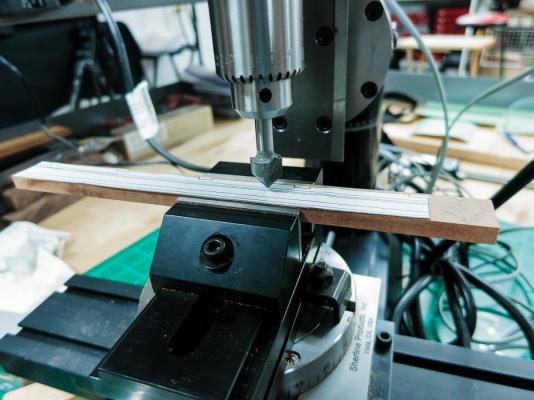
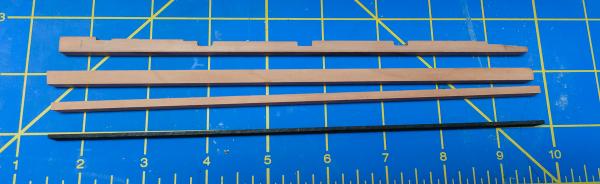
I have been working on the keel. The lower false keel is ebony and the upper false keel, keel and hog are swiss pear. The ebony piece was cut from a roughly 1" x 1" x 1' piece I found in a local Woodcraft store. Ebony sure makes a mess. I used an extractor on the saw and I am still cleaning up fine black dust a week later. It should be a real mess turning the mortar. I used the Grant method of cutting the hog. ¼" end mill to cut the notches and level the tops. I used a ¼' x 1" piece of pear to give me something to grip with the vice and than cut it to size when it was finished. I started out to use this keel as a test but it turned out so well that decided to keep it. I have been really worried about cutting the rabbet and once again went for the Grant method. It is essentially a 90 degree V groove placed in a mill. The rabbet runs straight about ⅔ of the way and turns up slightly. I can't imagine cutting this by hand. Great job on your end mobbsie. After the rabbet the ends were cut to the proper length and a pass or 2 through the thickness sander and here we are. Test frames coming up. Starting late on this group build has the advantage of me being able to have the benefit of all that previous experience. It sure does help. Thanks Grant, mobbsie and Lou.


- 60 replies
-
- 9
-
-
- granado
- bomb ketch
- (and 1 more)
-
Hi Ken, Grant, mobbsie, Dave and Dave, Thanks for the welcome. It really feels great to be back working on wood again. I am working slowly but getting more comfortable every day. I have been working on the keel and hog and will have an update soon. Thanks again and thanks to the "likes", always appreciated.
- 60 replies
-
- 1
-
-
- granado
- bomb ketch
- (and 1 more)
-
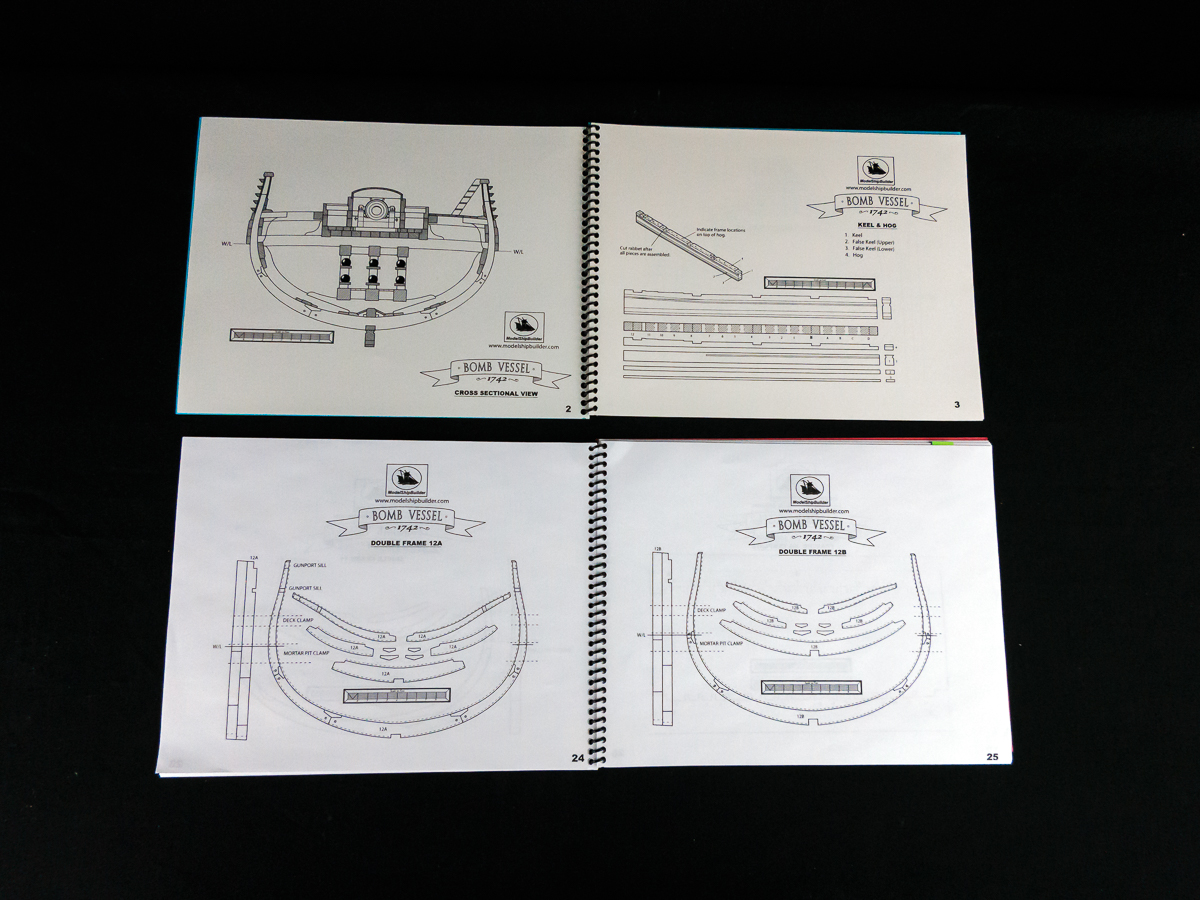
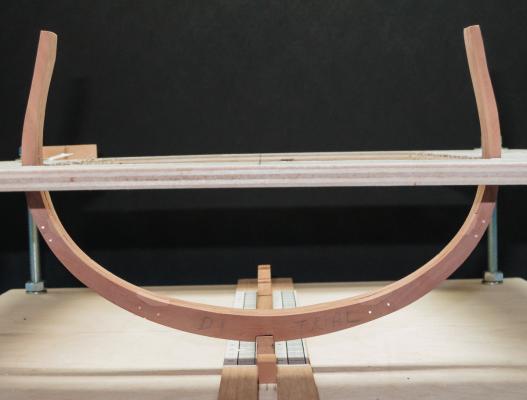
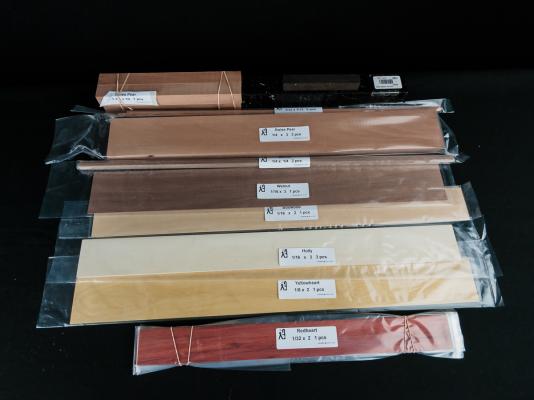
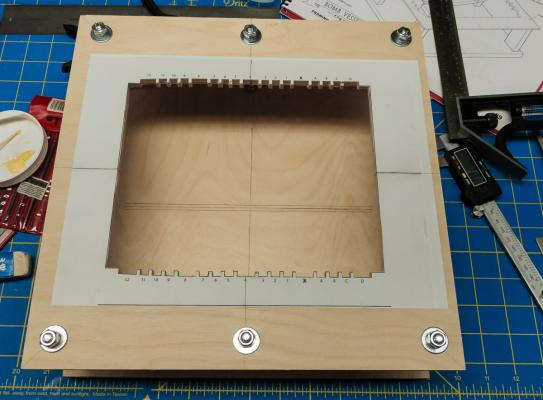
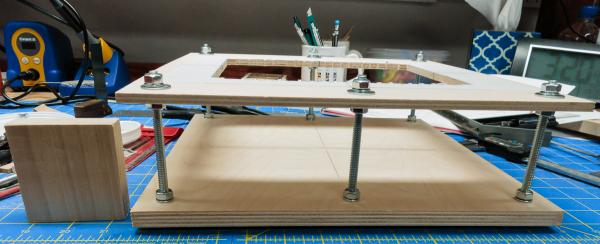
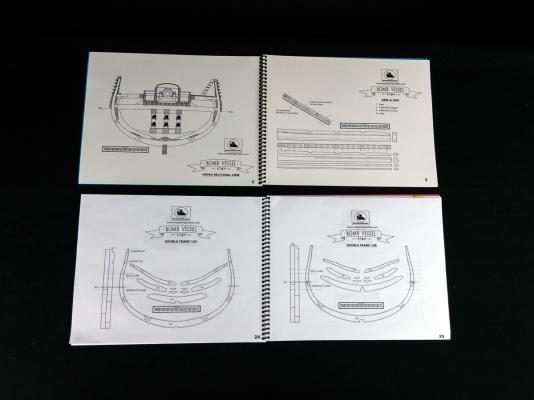
Here comes the fun. I have been laying low for a couple of months due to some health problems. Yesterday was my first day back in the shipyard and today was the first with actual sawdust production. It is nice to be back. This build will be part of the group build of the Bomb Vessel Granado, 1742, Cross Sectional Model drawn by Jeff Staudt. The plans at 1:48 scale fit on 8.5x11 or A4 which is very convenient. I bound a couple of sets of drawings so that can spread them out wherever needed. I also scanned them so that I can print whatever I need on adhesive paper to stick to the wood for cutting. I had been looking for a project to cross over to the dark side and when gjdale and mobbsie announced their group build I invited myself in and they graciously allowed me a space. Asat has joined in as well at 1:38 scale. The benefit of the group build is the multiple member PM system and the readily available logs. I scratched most of the Oseberg and by the time that I finished I wished that I had done it all. The wood was purchased from Jeff Hayes from Grant's brilliant take off and material list. Jeff had stopped supplying ebony by the time I placed my order but I found some locally (Dallas/Fort Worth). If it is too difficult to work I can always use Swiss Pear and color it black. This is a part of the wood supplied by Jeff, it is beautiful, we will miss him. The layout for the building jig is part of the plans and and I built mine as Grant and mobbsie built theirs. I am happy to be building again. I will finish up the jig and start the keel.
- 60 replies
-
- 8
-
-
- granado
- bomb ketch
- (and 1 more)
-
Hello my friends. Sorry to be so late to respond. I have been in the hospital for 2 weeks and only today have I been able to sit up. I am getting better every day and will responded in more detail in a few days. In the mean time thank you for all the kind words and "likes".
-
Hi Grant, Sorry about your saw. They always seem to crap out at the most inopportune time. Good luck with the repair. Nice progress. Your explanations are great and much appreciated. I probably should just stay a month behind you. Great work.
- 456 replies
-
- 1
-
-
- finished
- bomb ketch
- (and 2 more)
-
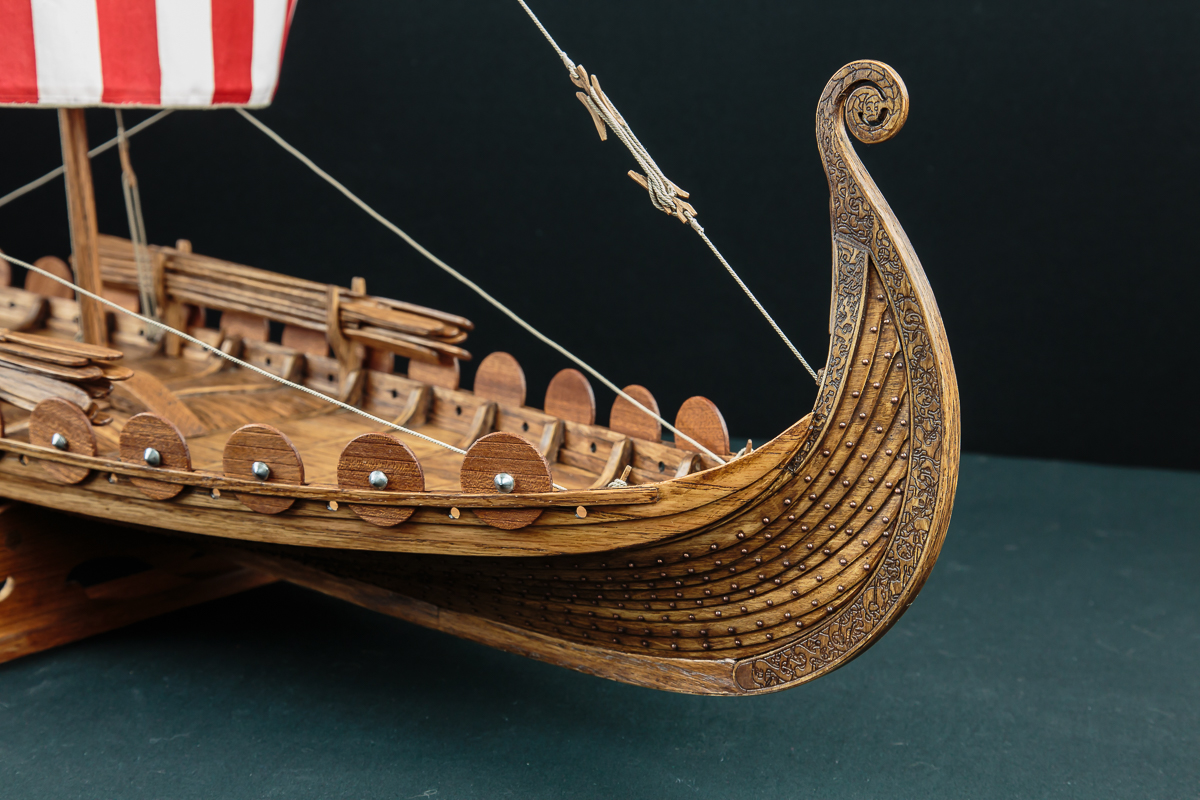
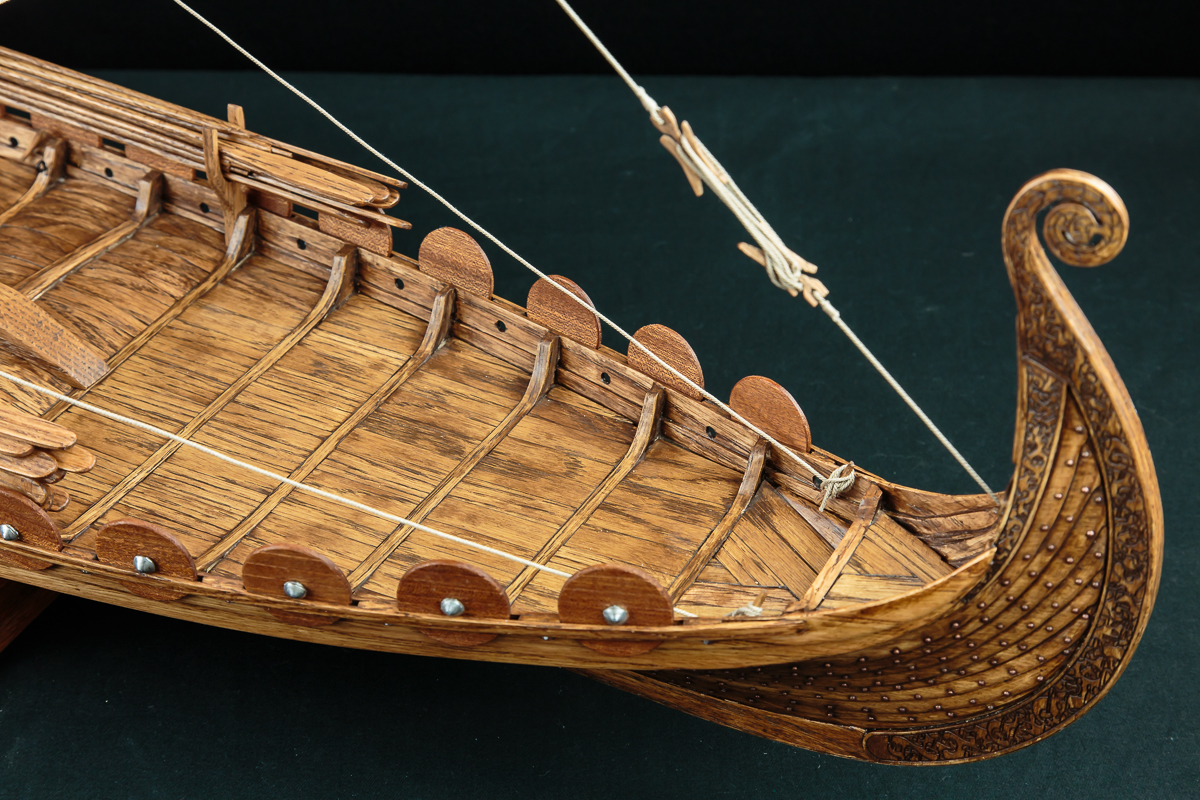
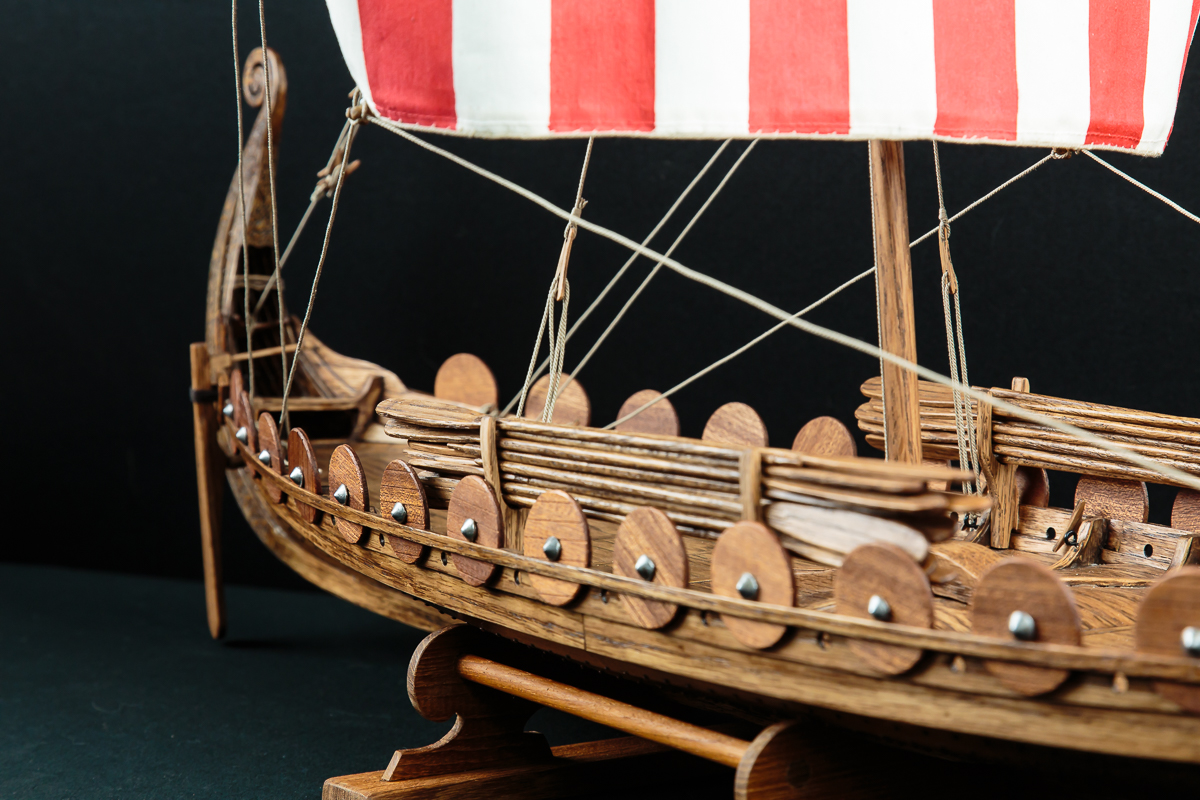
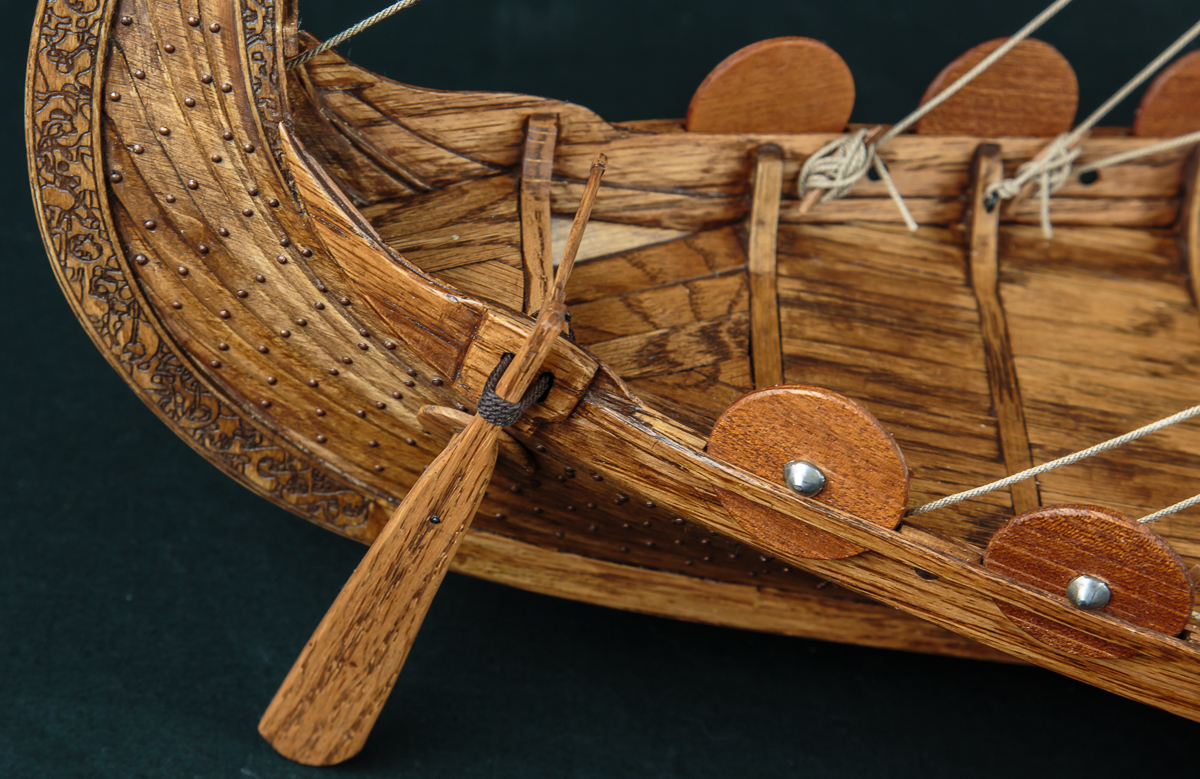
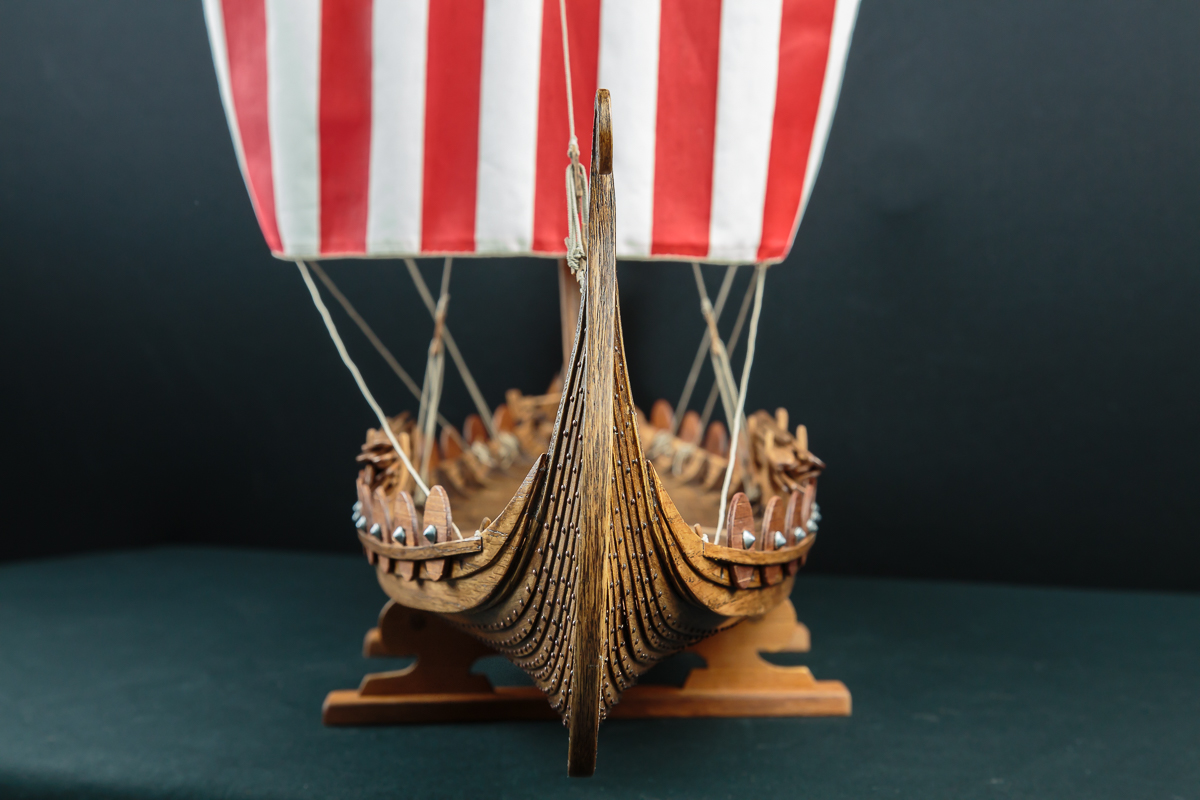
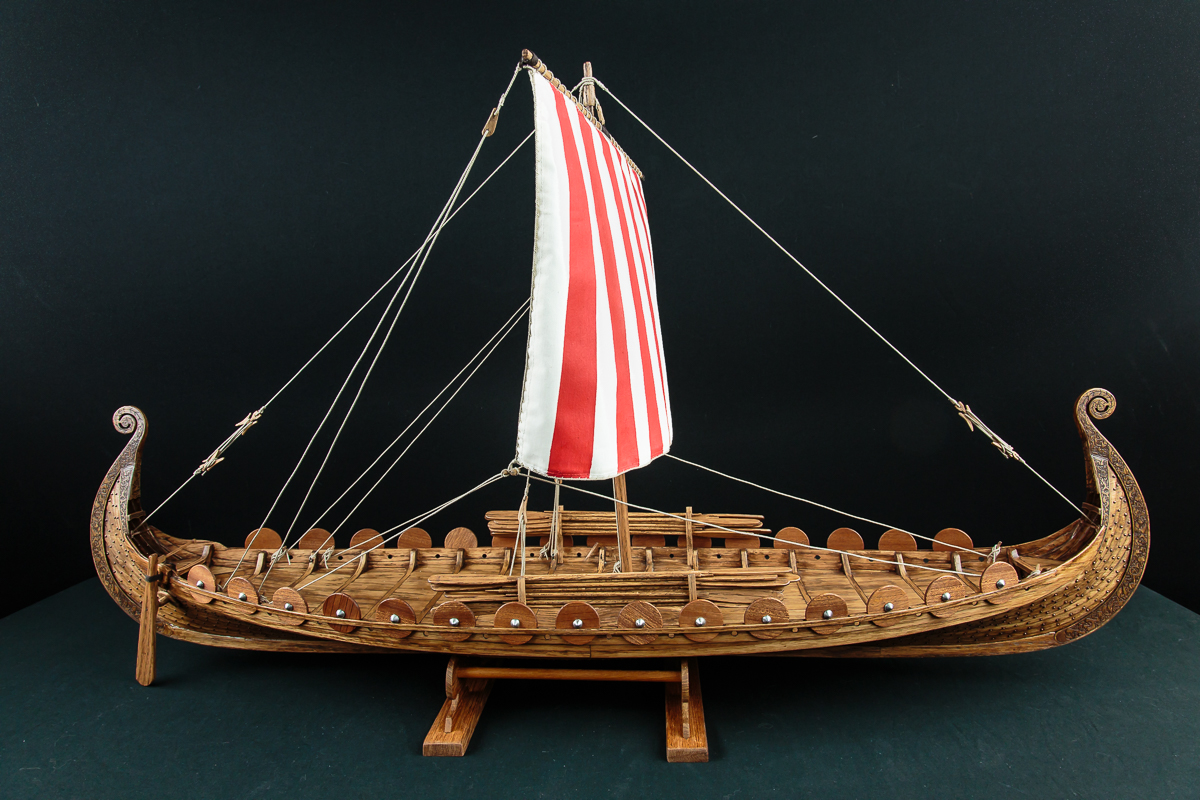
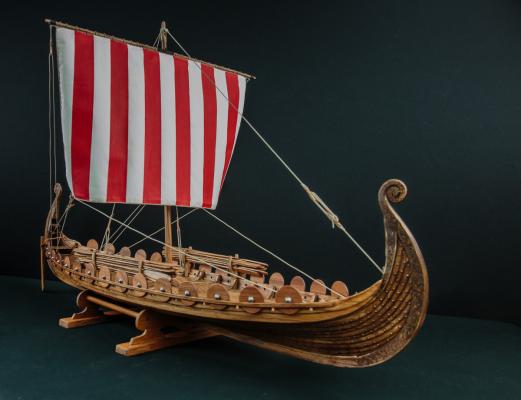
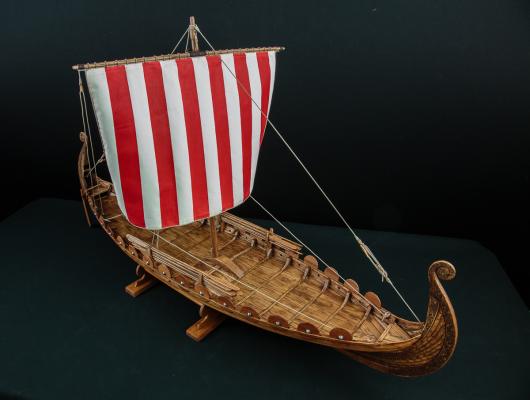
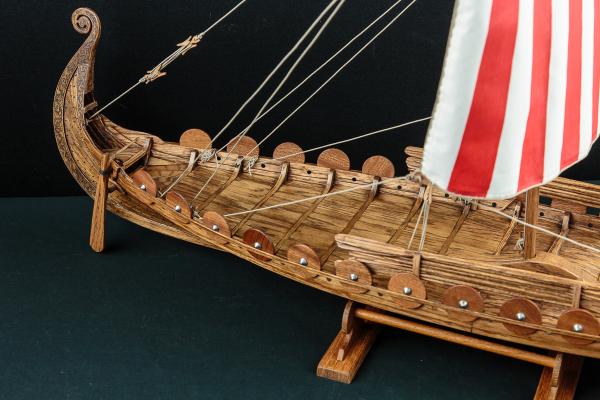
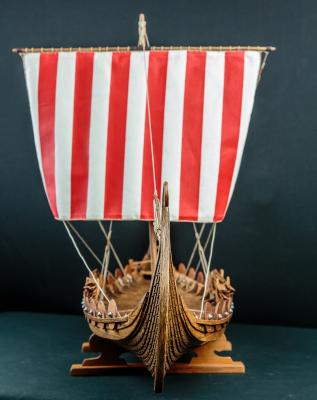
Well, she is complete in plenty of time for the Admiral's birthday. The Admiral is happy and as we all know when the Admiral is happy everyone is happy. The build was 9 months of fun and learning. Completion is very rewarding. I would like to thank everyone who helped with the build especially Von_Kossa. His log is what inspired me to build the Oseberg in the first place and his research kept me on the right track. Also, thanks to Vivian Galad (we are watching your Oseberg) and all those who followed the build, your encouragement was necessary and wonderful. I probably would not be involved in this hobby at all without the MSW community. There was not much information out there the first time I tried years ago. Now, whatever you need just ask. Thanks for the help. Time to move forward. I will now attempt to catch up with Grant and Mobbsie with our first shot at the dark side "Bomb Vessel Granado 1742".


- 275 replies
-
- 27
-