HOLIDAY DONATION DRIVE - SUPPORT MSW - DO YOUR PART TO KEEP THIS GREAT FORUM GOING! (Only 24 donations so far out of 49,000 members - C'mon guys!)
×


Maury S
-
Posts
1,490 -
Joined
-
Last visited
Content Type
Profiles
Forums
Gallery
Events
Everything posted by Maury S
-

Echo by tlevine - FINISHED - Cross-Section
Maury S replied to tlevine's topic in - Build logs for subjects built 1751 - 1800
Nicely done! Maury -
Boom tackles for late 19th c. fisherman
Maury S replied to juhu's topic in Masting, rigging and sails
The boom tackle is for preventing the boom from moving across the ship during an "accidental" jibe. When in use, one end is attached to the boom and the other end runs forward and attaches to a ring or some other rigid spot. Accidental jibes are quite dangerous to crew members if the boom sweeps across the deck unexpectedly. Maury -
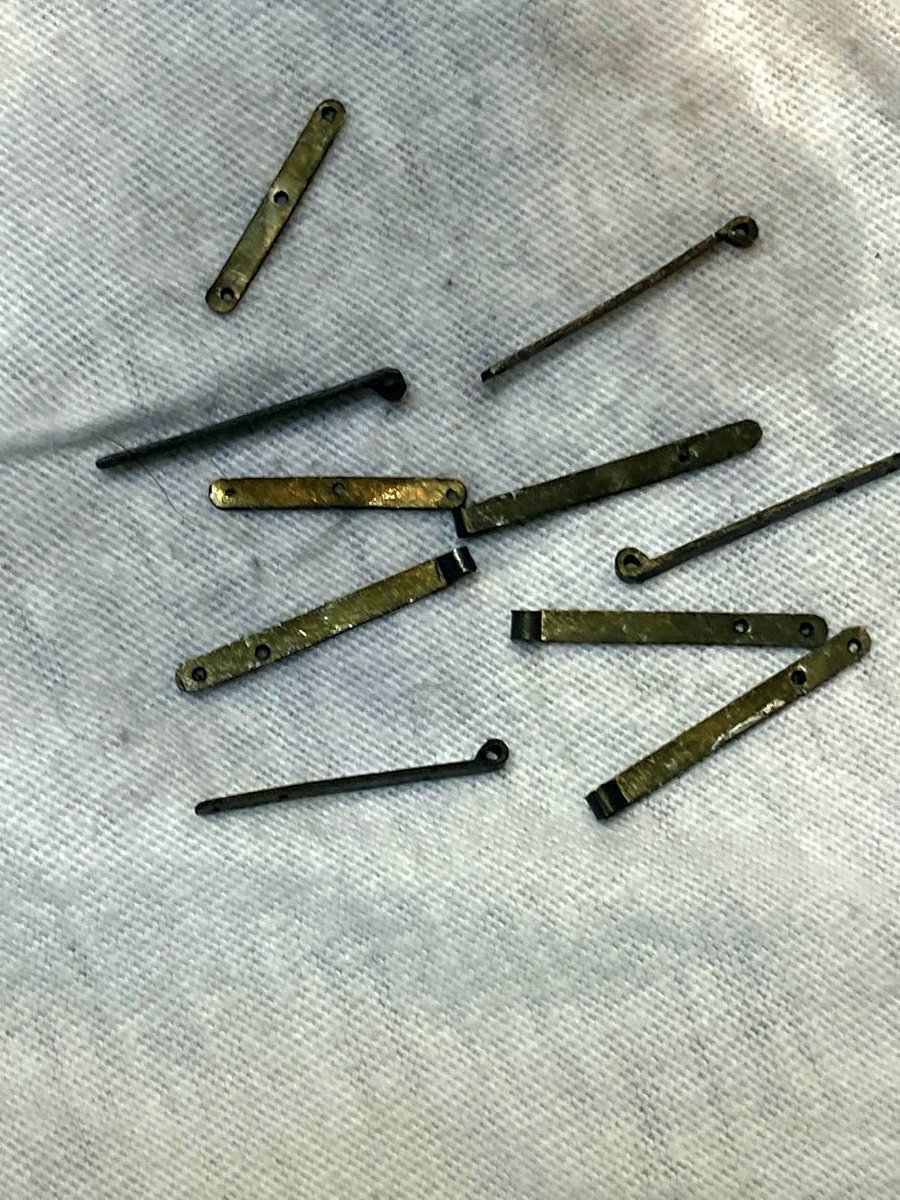
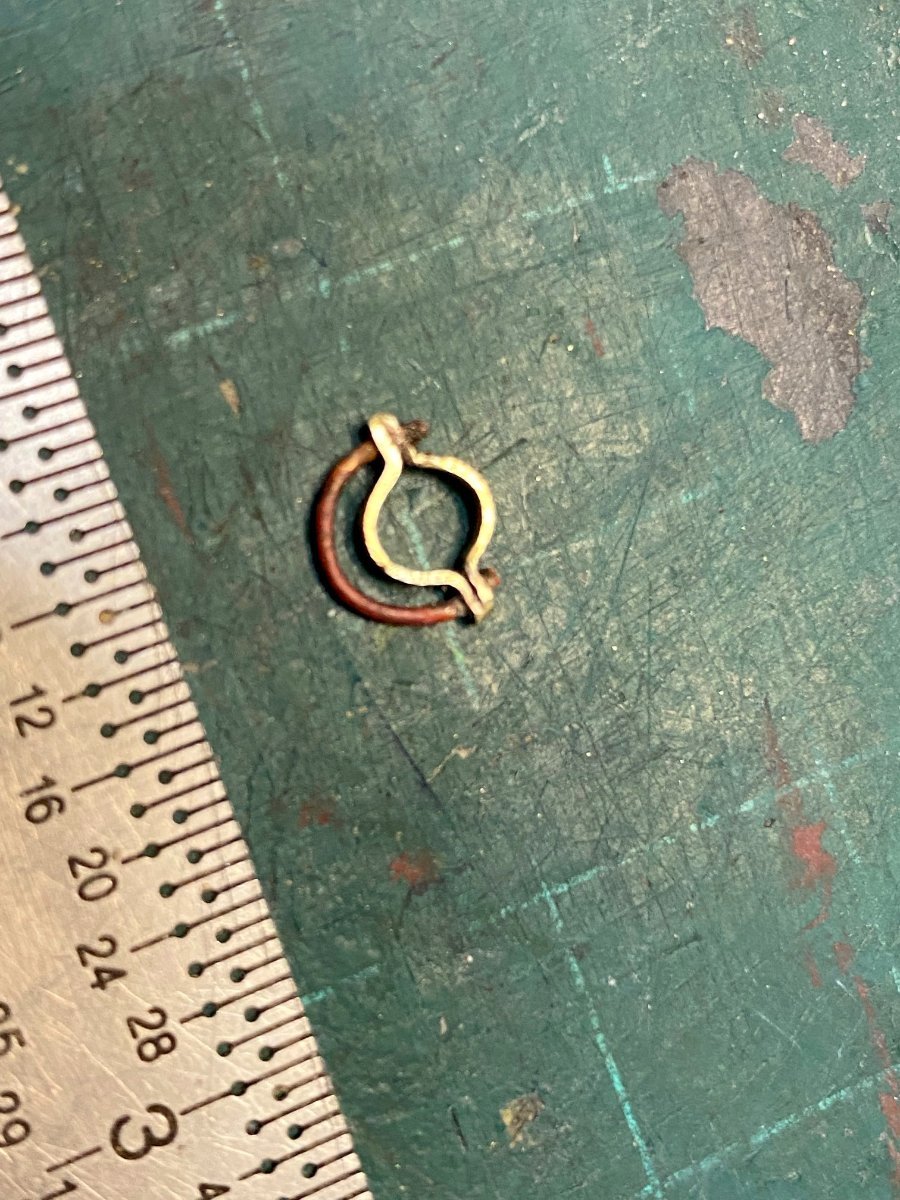
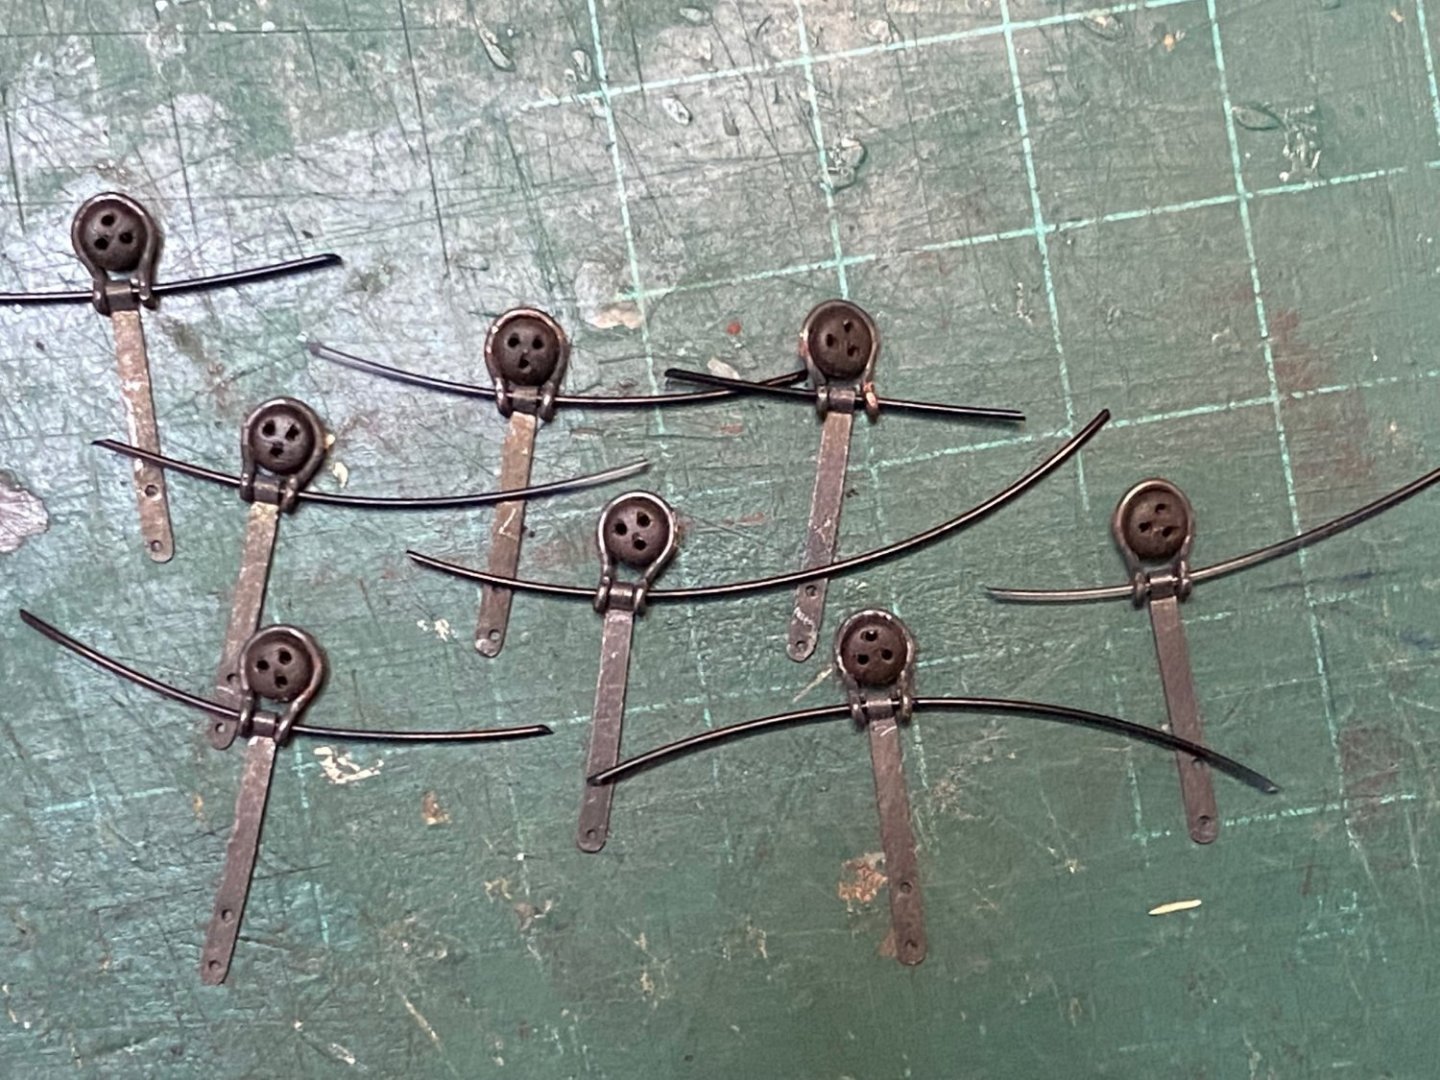
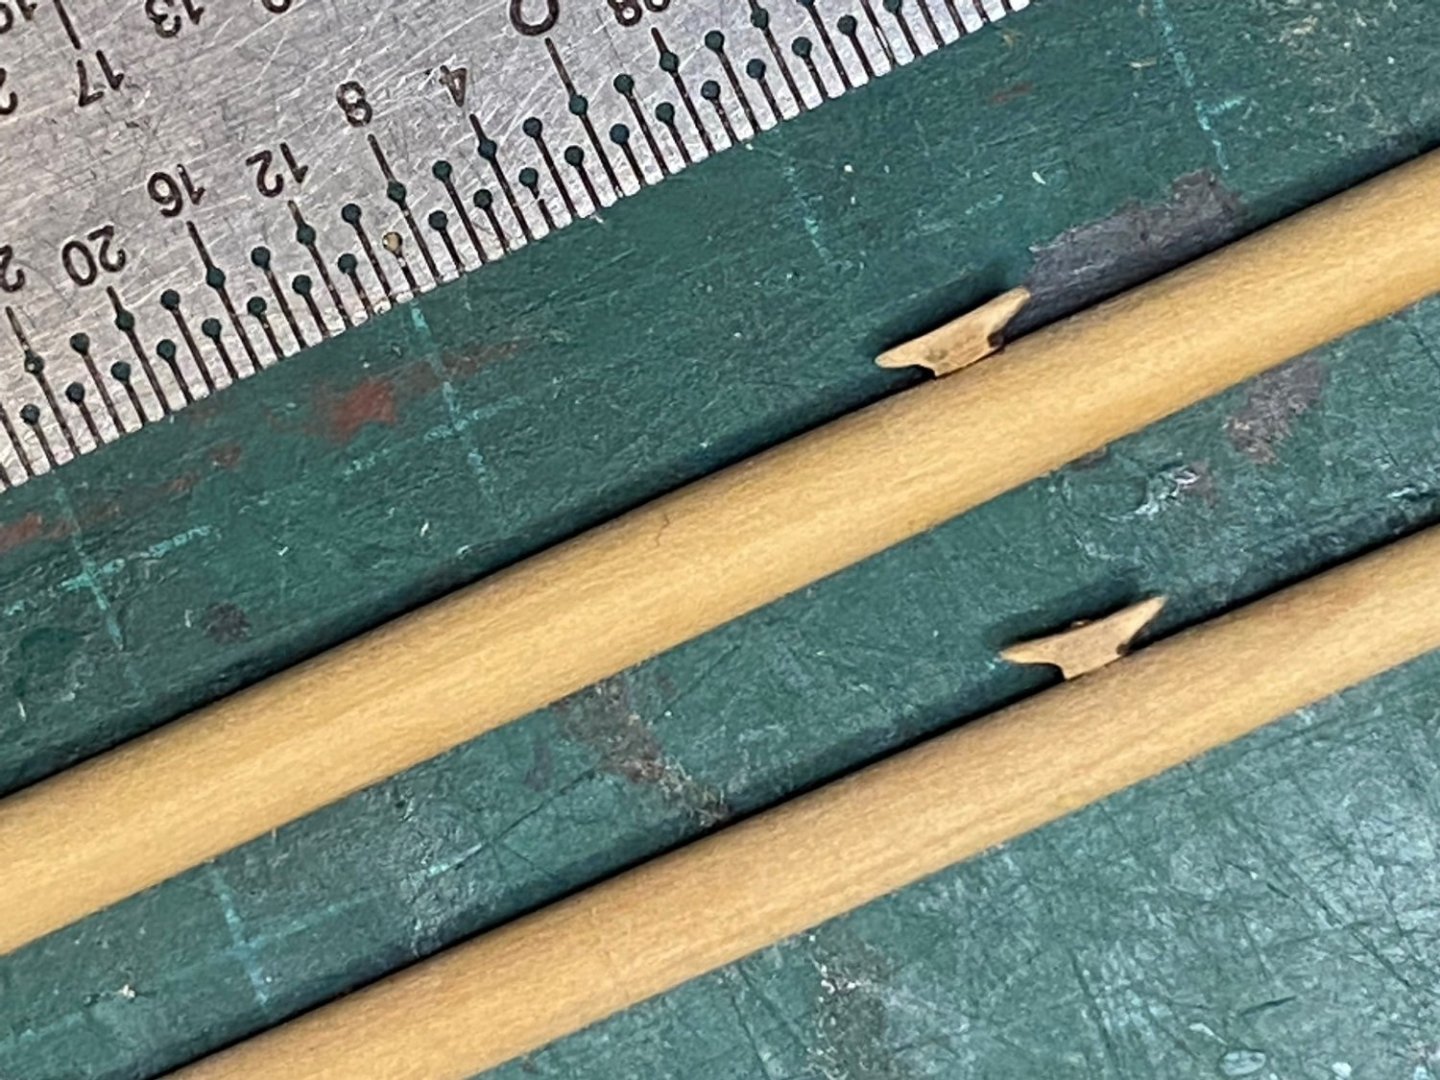
The chainplates are attached to the deadeyes with a pin made from black monofilament line. I touch both ends of the line with a soldering iron set to 240 degrees...just hot enough to partially melt the end and create a rivet to hold it in place. I'll touch up the copper with LOS and put a coat of WOP on them. Maury Maury

-
Lighting upgrade to Proxxon band saw
Maury S replied to Kevin Kenny's topic in Modeling tools and Workshop Equipment
I put these in my garage / workshop and the amount of light is significant. https://www.amazon.com/s?k=led+garage+lights&ref=nb_sb_noss Maury -
Thanks, Michael. Continued work on iron bands, etc. Not up to Ed Tosti standards, but moving in that direction. The gammon irons (on the left) look awful at this magnification...I'll clean them up and re-blacken. Next will be the deadeye straps. Maury

-
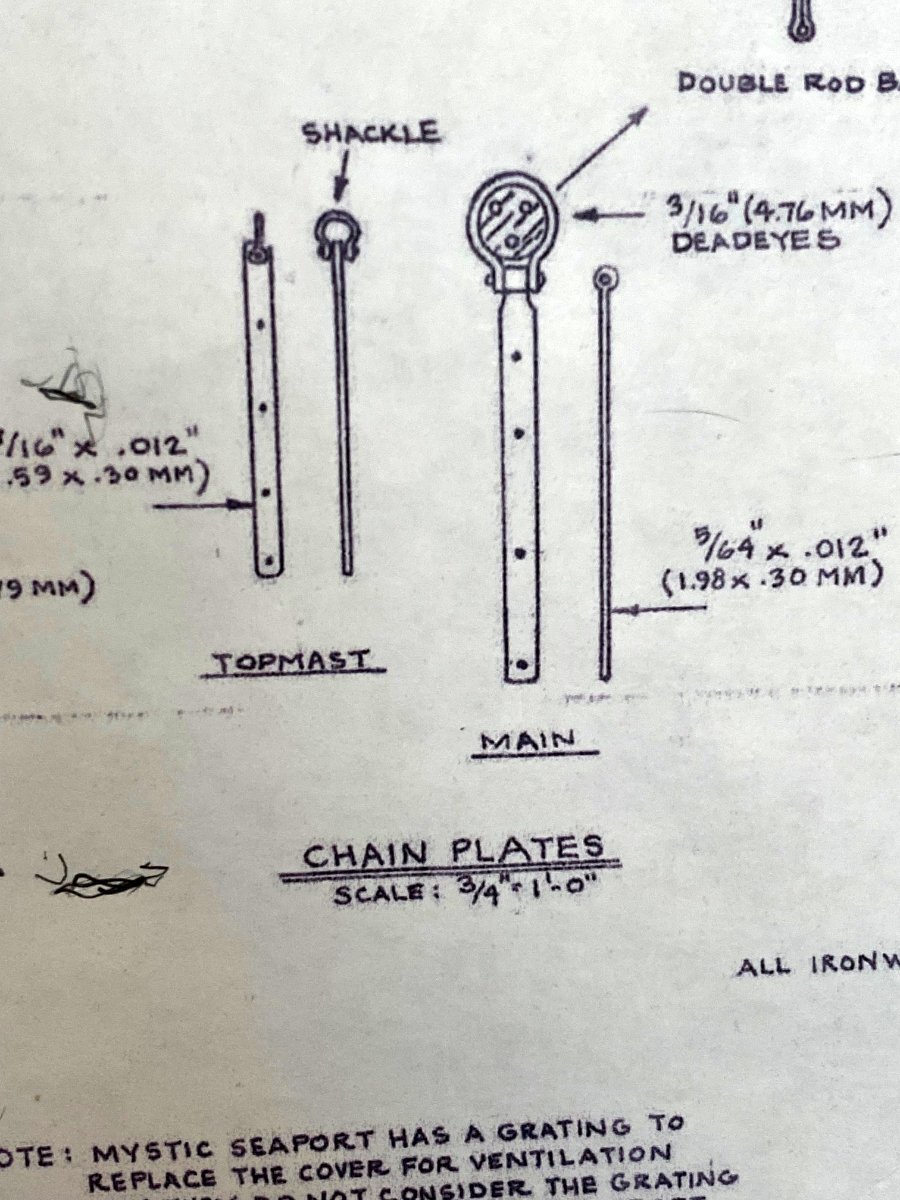
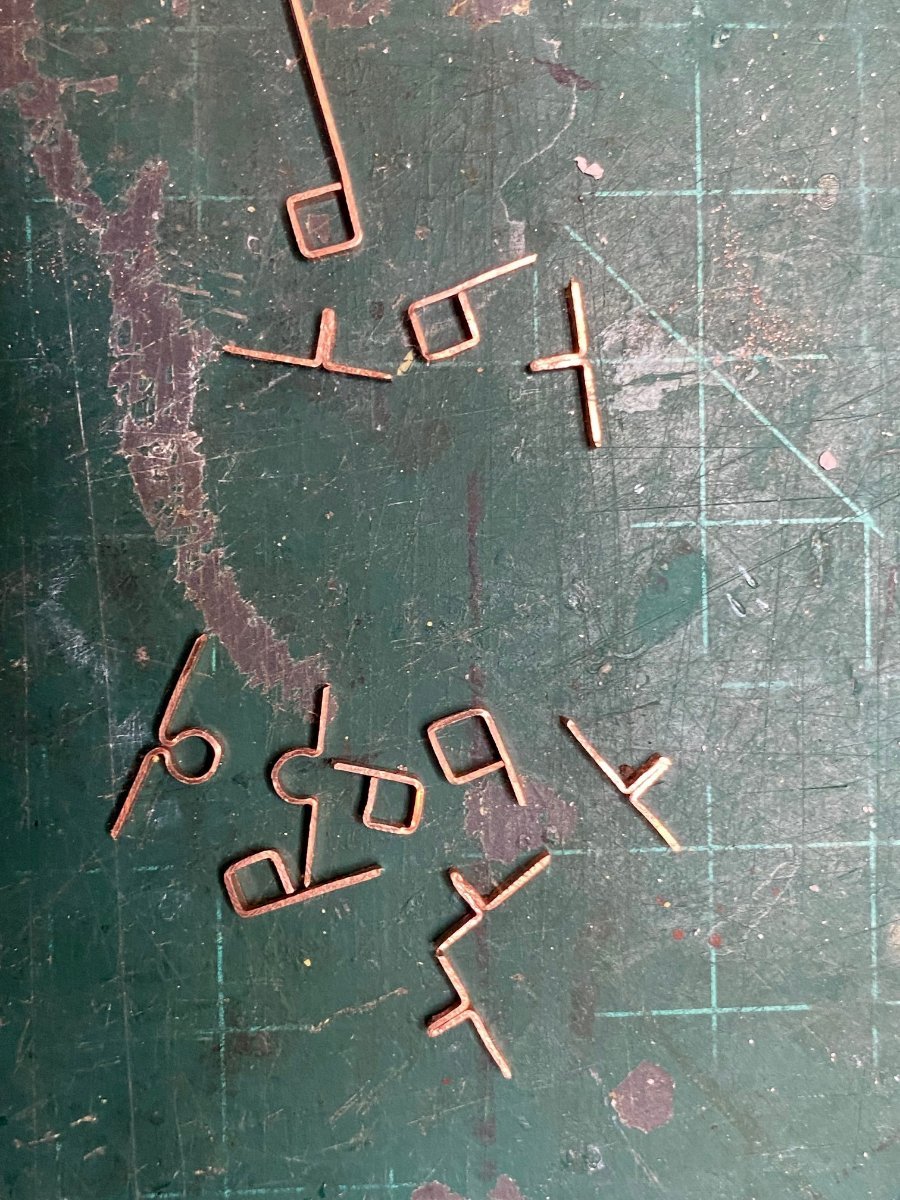
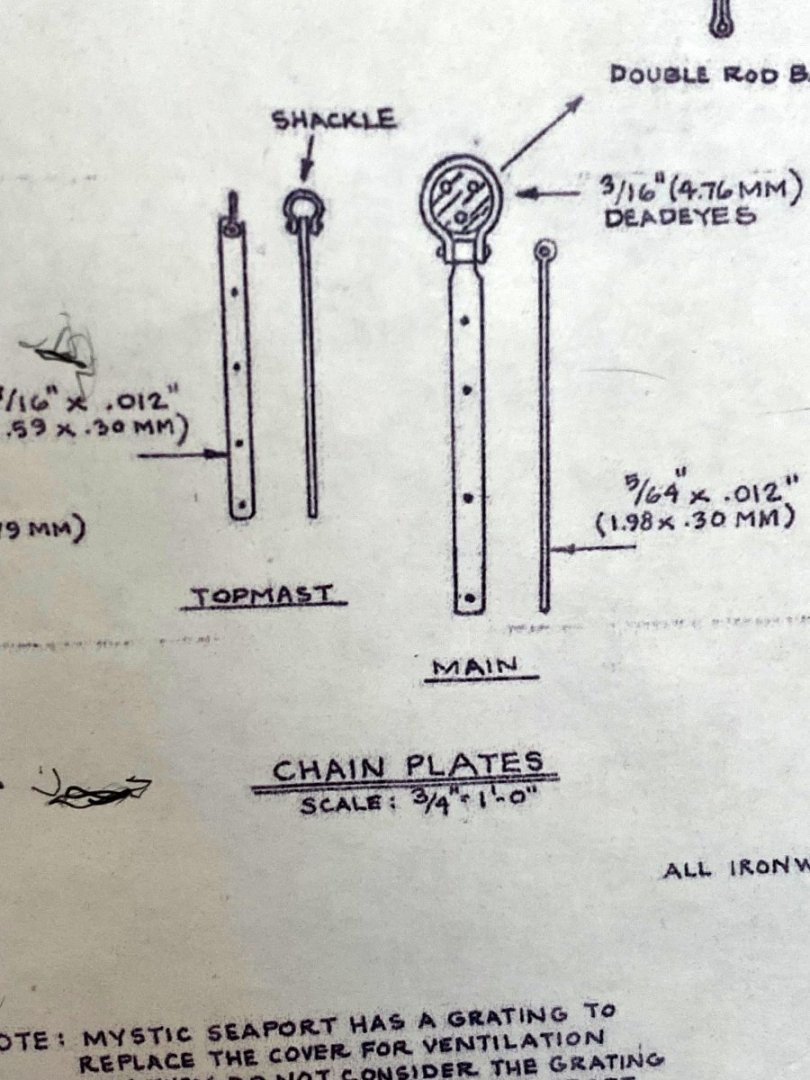
Metalwork continued---Chain Plates: They are laid out clearly on the plan sheet. (Ignore the notes on scale). Translated to copper, filed, drilled and blackened with LOS: The pair holding the topmast backstay are set with shackles, not deadeyes. Maury

-
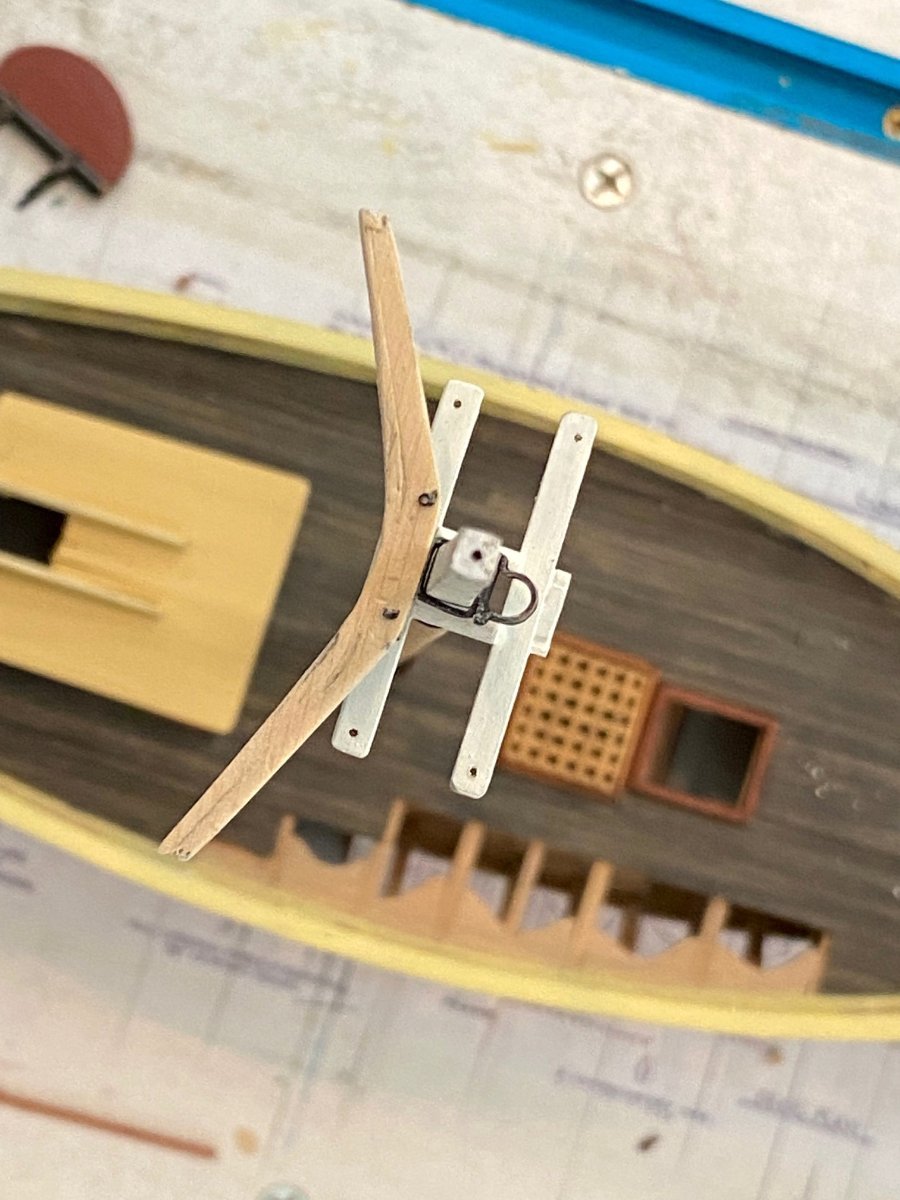
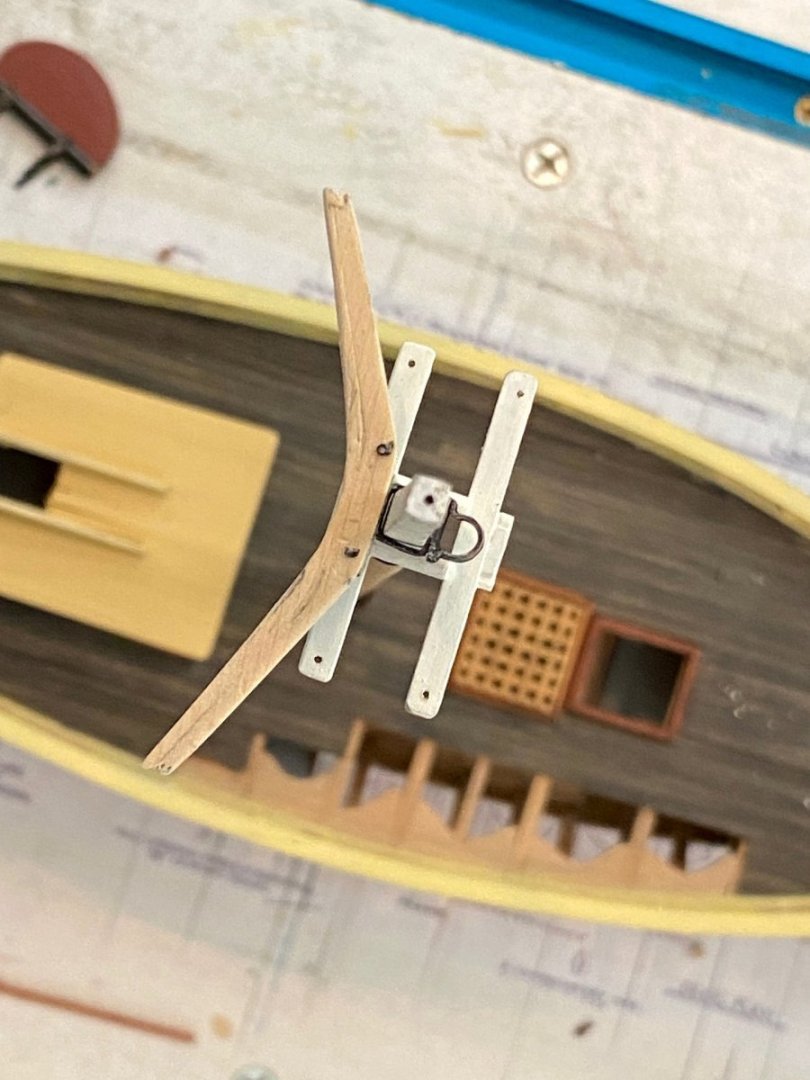
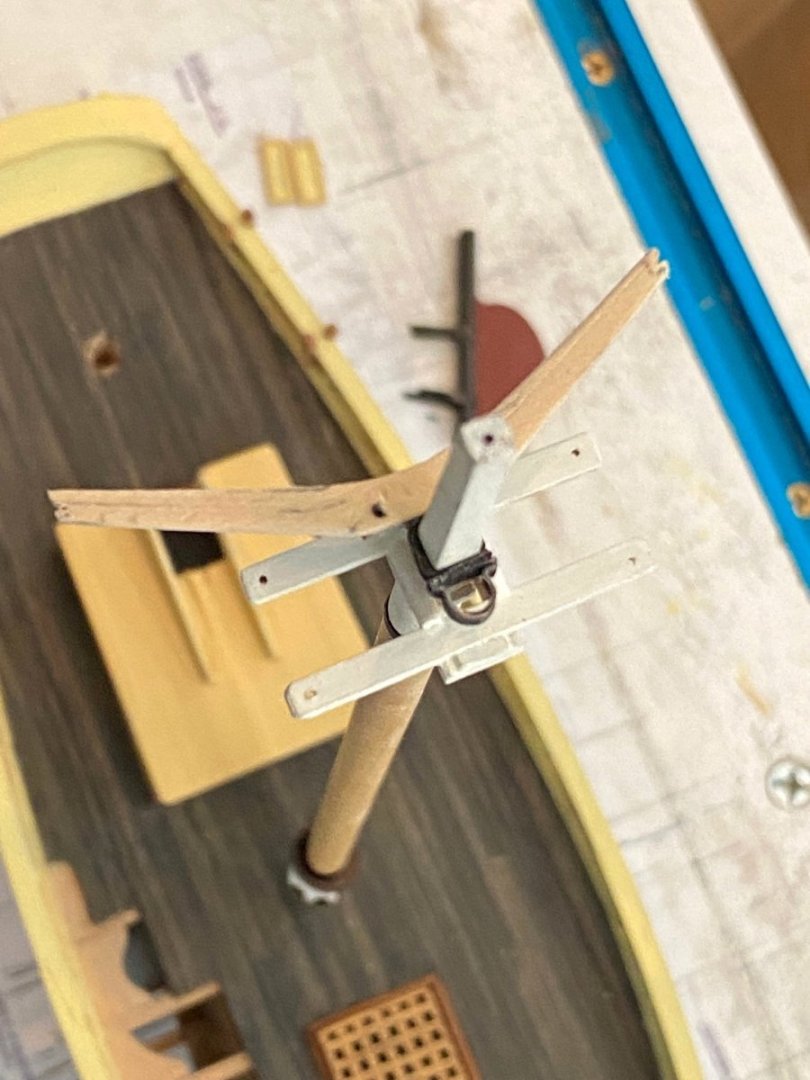
SPREADER: I had to re-design the spreader. The original was directly above the trestle trees and would have interfered with the top mast shrouds. The spreader is now swept back so the shrouds will be clear. Maury
-
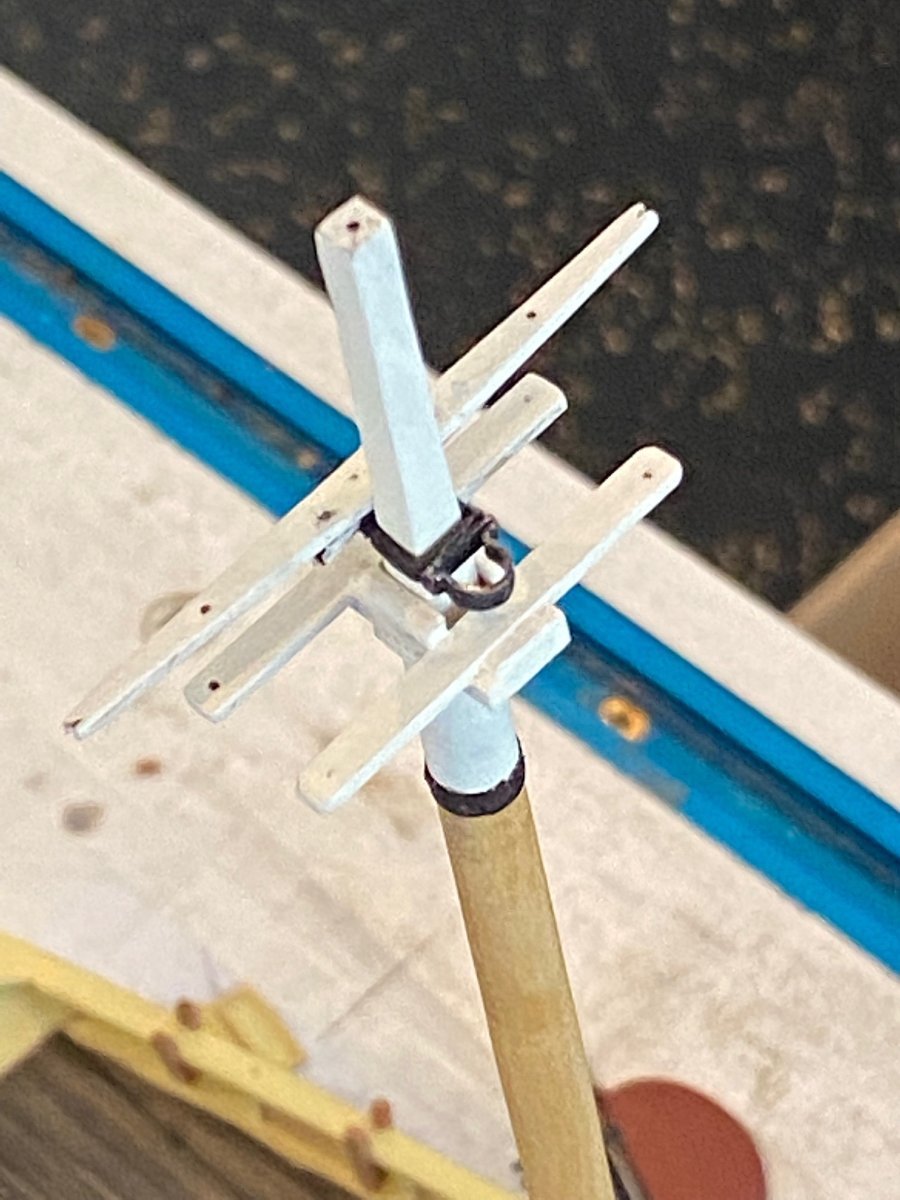
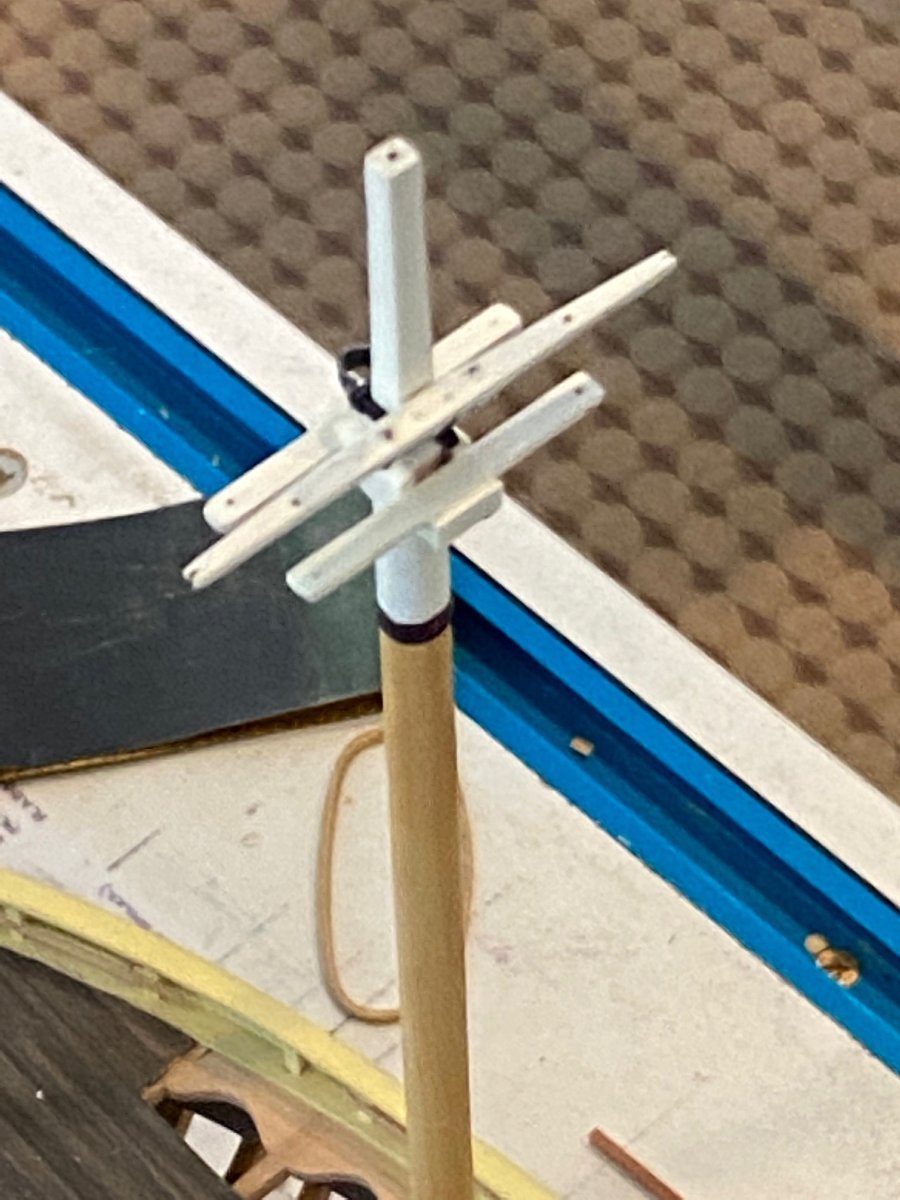
Main mast top: looking aft Looking fwd: Slow progress. Maury


-
Festool shop vacuums - a quieter option
Maury S replied to druxey's topic in Modeling tools and Workshop Equipment
I've got a cyclone hooked up to a ShopVac and handle the noise issue with a good set of headphones. Maury -
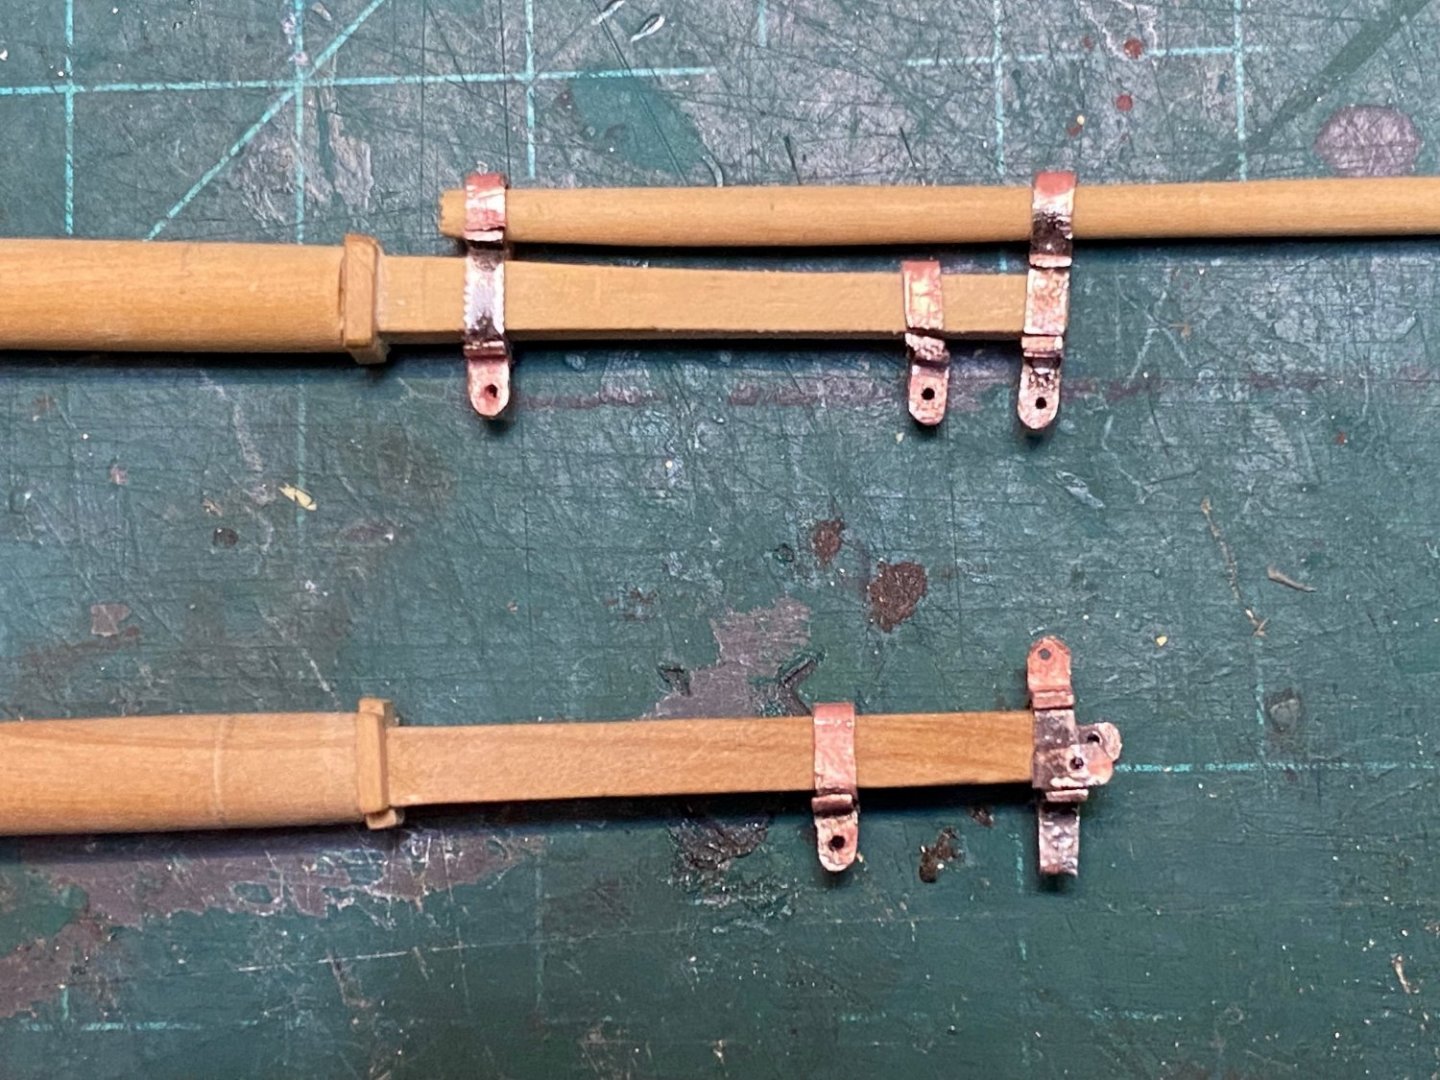
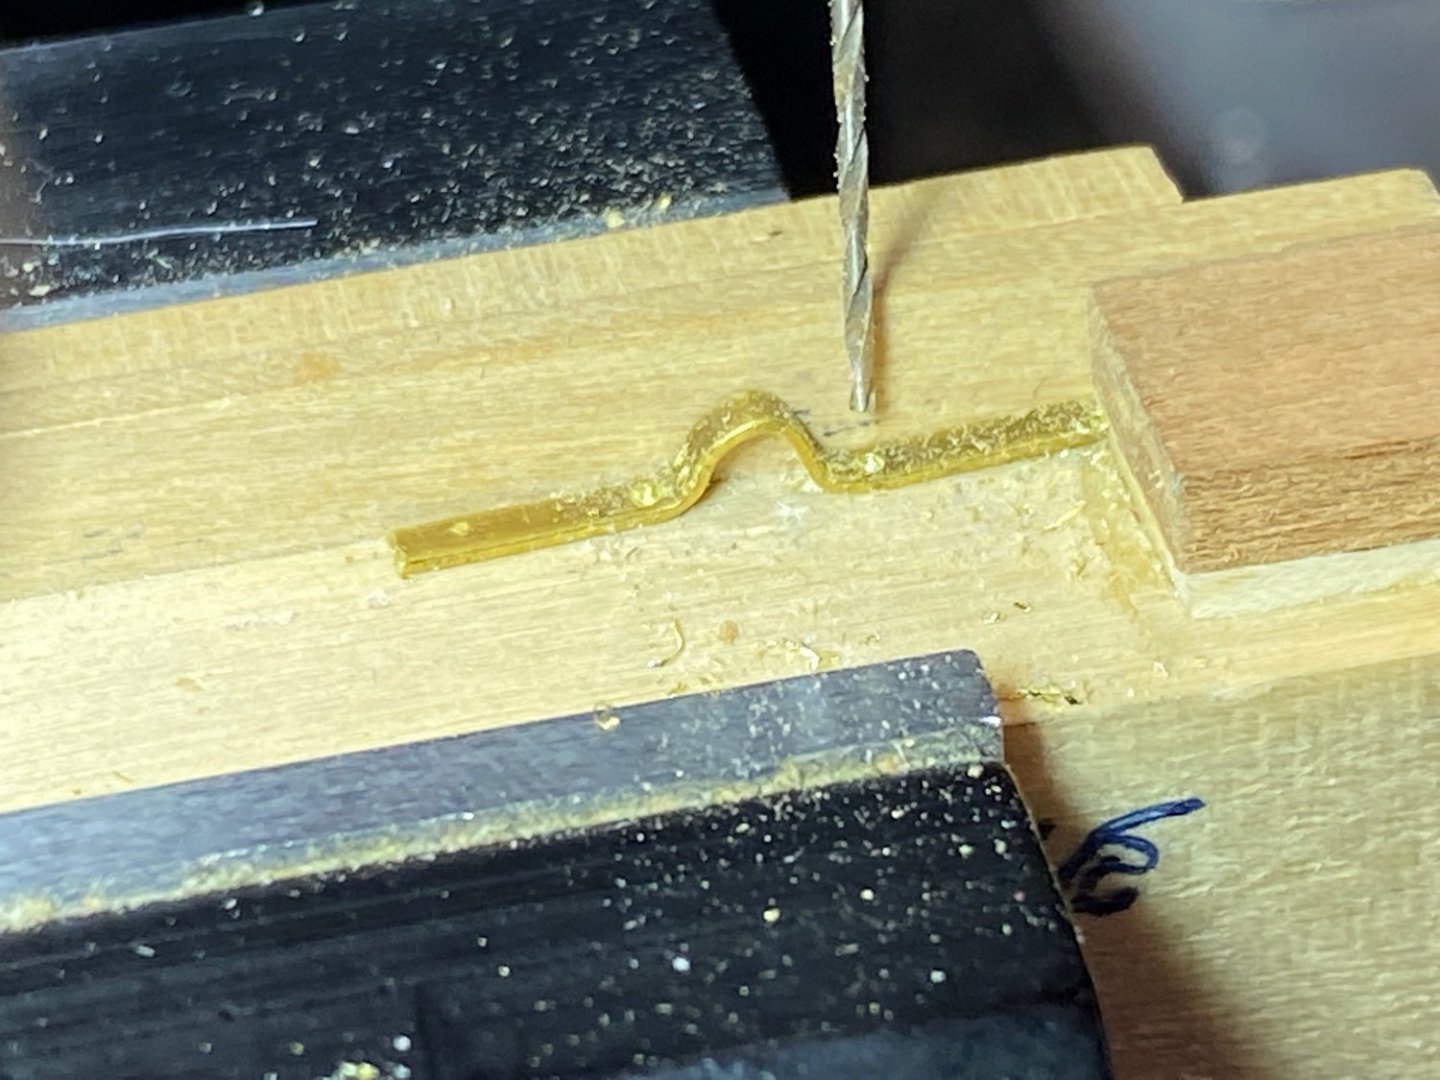
Mast Bands: Now that I was sure I could fabricate the mast bands, I formed the various parts for each of the 5 bands: Using the flux-containing solder provided enough "stickiness" to hold the pieces together while soldering. After a bit of cleanup, they were test-fitted. More minor cleanup (filing) and blackening (using LOS) to do. The lower piece at the top of the mast has a tab on the fore and aft end and vertical tabs on each side all held in place for one pass of the torch. Maury

-
Surprised this has not been posted before! She's intact on the sea bed. https://endurance22.org/endurance-is-found
- 1 reply
-
- 4
-

-

-
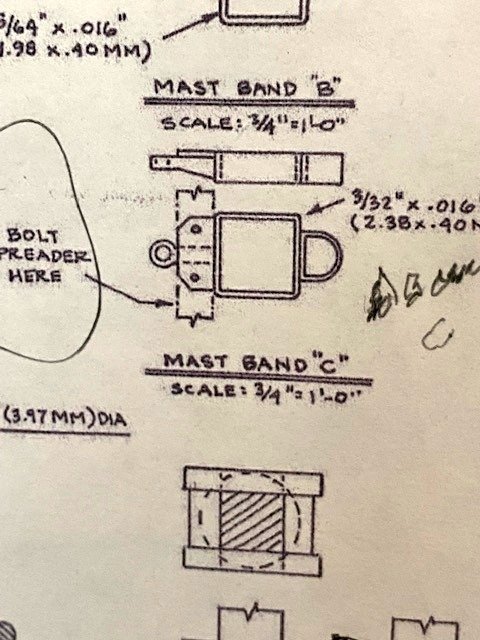
More work on the spars: Clappers inserted, etc. Mast band C holds the foot of the top mast and the spreader. It's shown on plan and after metal work. Ignore the size notations on the plan...it's for a 1:32 model: I tried making it in brass and couldn't get it soldered. Switched to copper and it came together just fine. Needs trimming and cleaning up. Maury
-
I'm going to stick to the belt and avoid the suspenders. A flat surface for the cleat to seat is probably all I need. All the cleats will have rigging lines attached and I doubt there will be much twisting force. Maury
-
Thanks, Rob. It's getting better. More work on the spars. The masts each have five cleats evenly spaced around the mast from zero degrees, 45, 90, 135 and 180. Since the sensitive drilling attachment was already on, I used the rotary table set up on the mill to drill the holes for the reinforcing wire. The center of the cleats (5mm) are at the level of the cap rail so this process assured they all are in the same plane. Now to lay out the top and spreader on the main mast. Maury

-
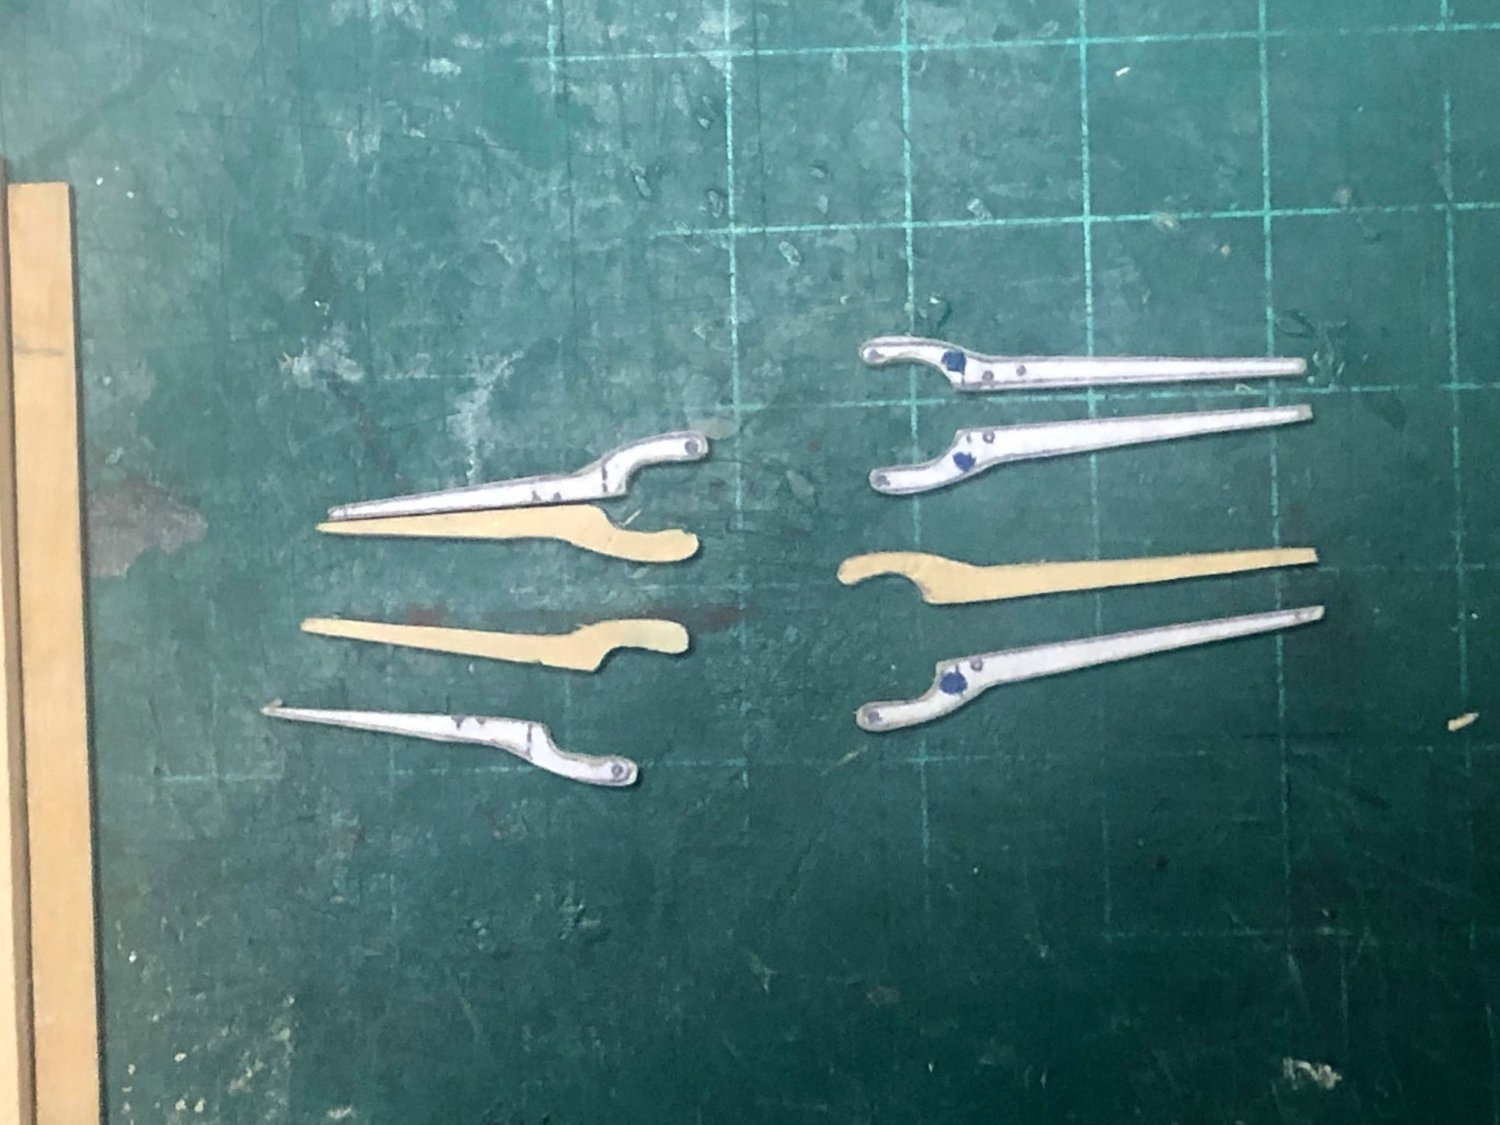
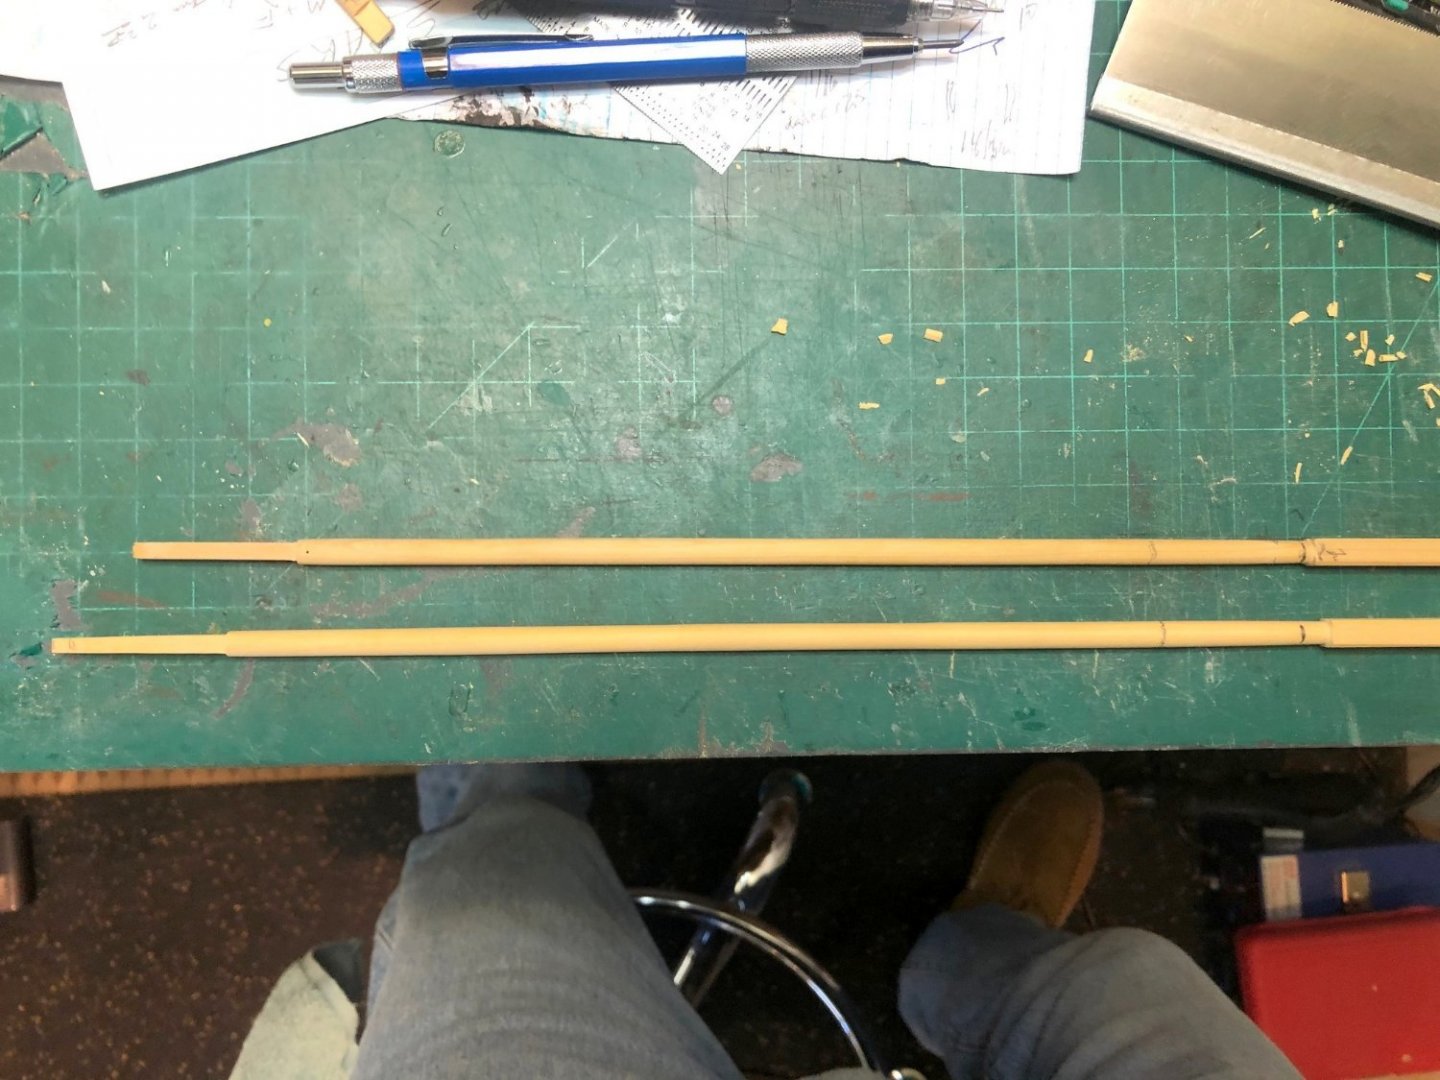
Work on the booms and gaffs. I file the booms flat where the cleats go. There is a hole .02" thru the center and hardened copper wire to reinforce. Metal work for the booms includes a bridle for the sheets. They are formed from brass strip and drilled out using the sensitive drilling attachment on the mill. After soldering... Soldered, pickled, and blackened. Bottom of main boom on top, top of fore boom on the bottom. All the booms and gaffs will be painted white. Maury


-
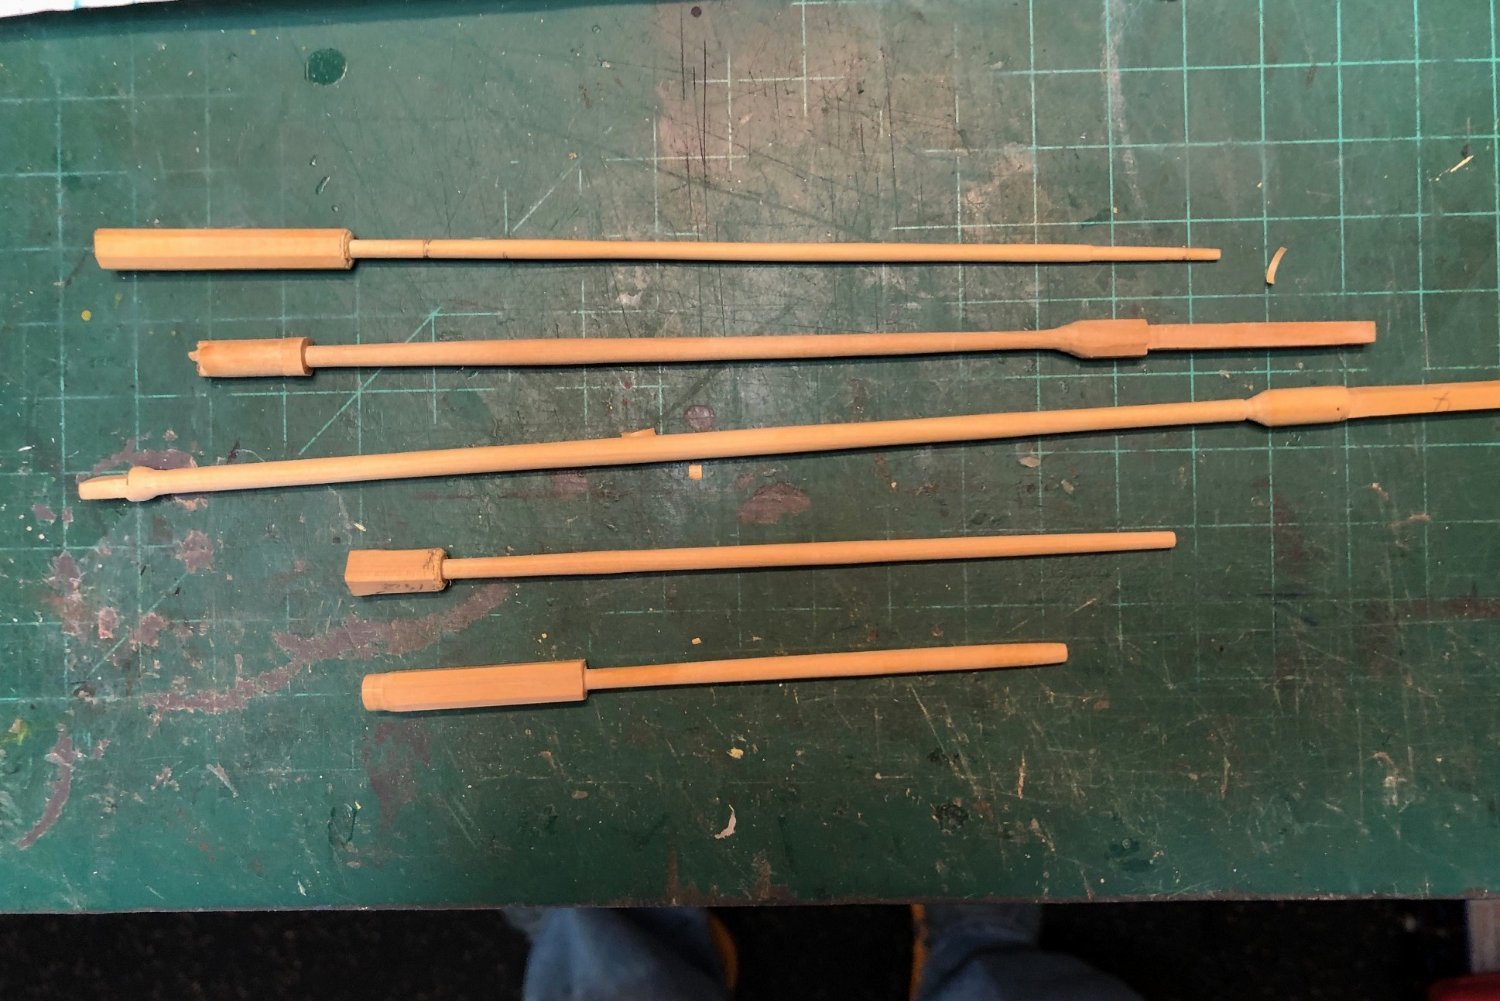
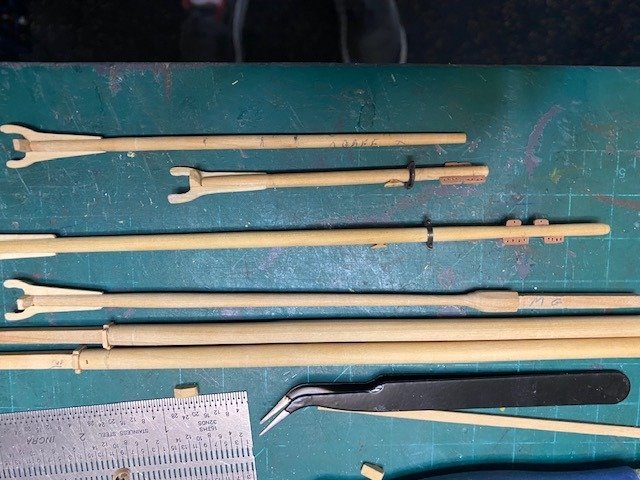
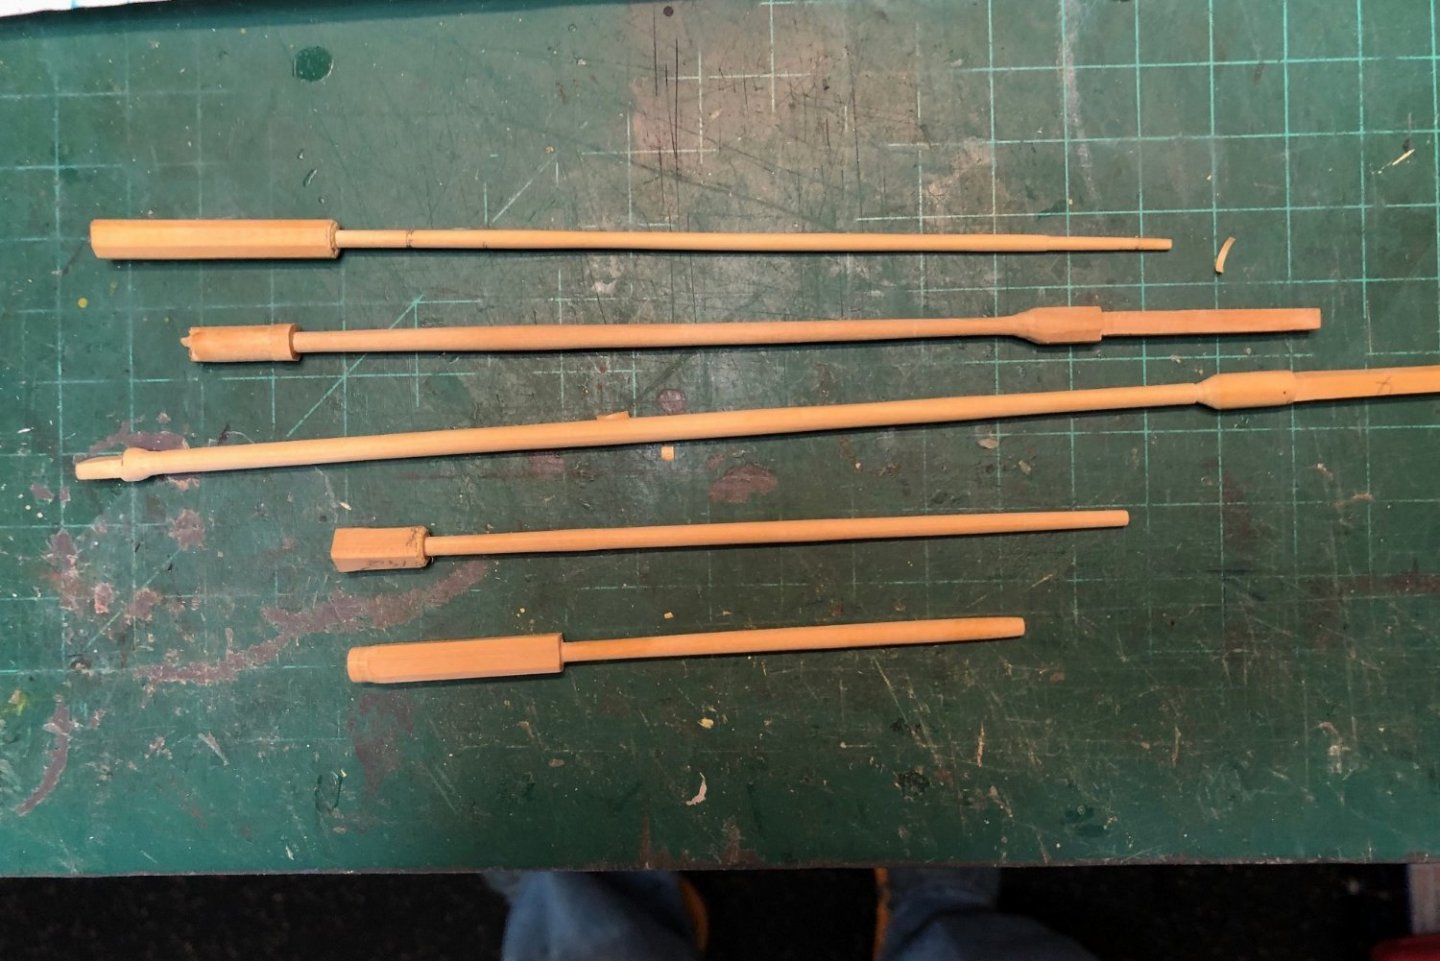
Top Mast, booms and gaffs were next. They too were done on the lathe...getting better each time. I left a square end in place for now since they give me a means of keeping the jaws aligned. Once they were turned, I set each spar (supported by the square end) on the table and sanded flat the last 1.25" for the jaws so they fit snug. Per the only plan of her as a schooner as well as several photos, the fore gaff ( 2nd to bottom) is about the same length as the fore boom and has not yet been cut to length. The jaws were rough cut on the scroll saw and hand-sanded in pairs. They need cleaning up. Maury

-
Druxey, Thanks for the tip. M
-
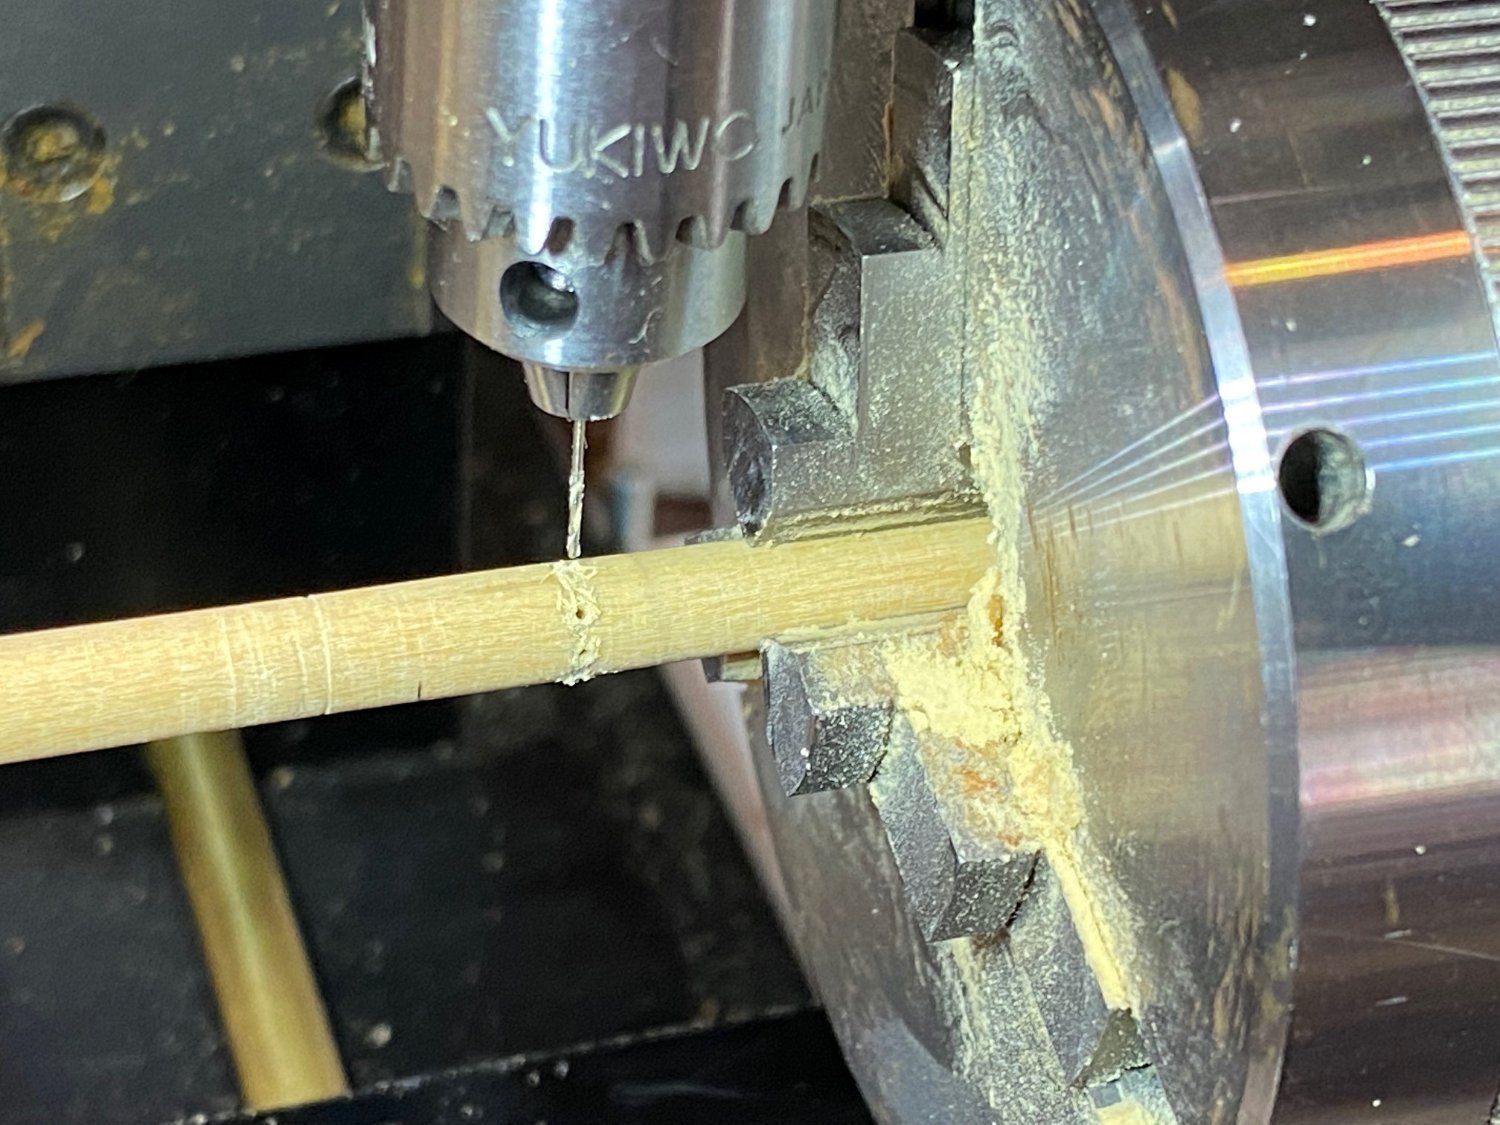
Very little progress. I made mast hoops. Saturday, I made the Main and Fore masts. Since the masts are round (except for the tops), I tried making them on the lathe (more learning experiences since all previous spars were hand made with 7--10-7 layouts). The tops were scored with the table saw and chiseled to the correct taper. There is only one hole for an eyebolt, so that was drilled while the sticks were still square before mounting in the lathe. Center was marked at the top end. I started from the top with about 2" from the vise jaws, turned with a taper (from 0.21" to 0.25"), hand sanded, then moved the stick and repeated several times until I approached the heel, where it tapers from 0.25" to 0.17". I have to remove some material at the heel to fit into the mast steps. Top mast, booms and gaffs are next. Maury
-
Echo by tlevine - FINISHED - Cross-Section
Maury S replied to tlevine's topic in - Build logs for subjects built 1751 - 1800
Toni, making the grating first is VERY smart. Nice piece of work! Maury -
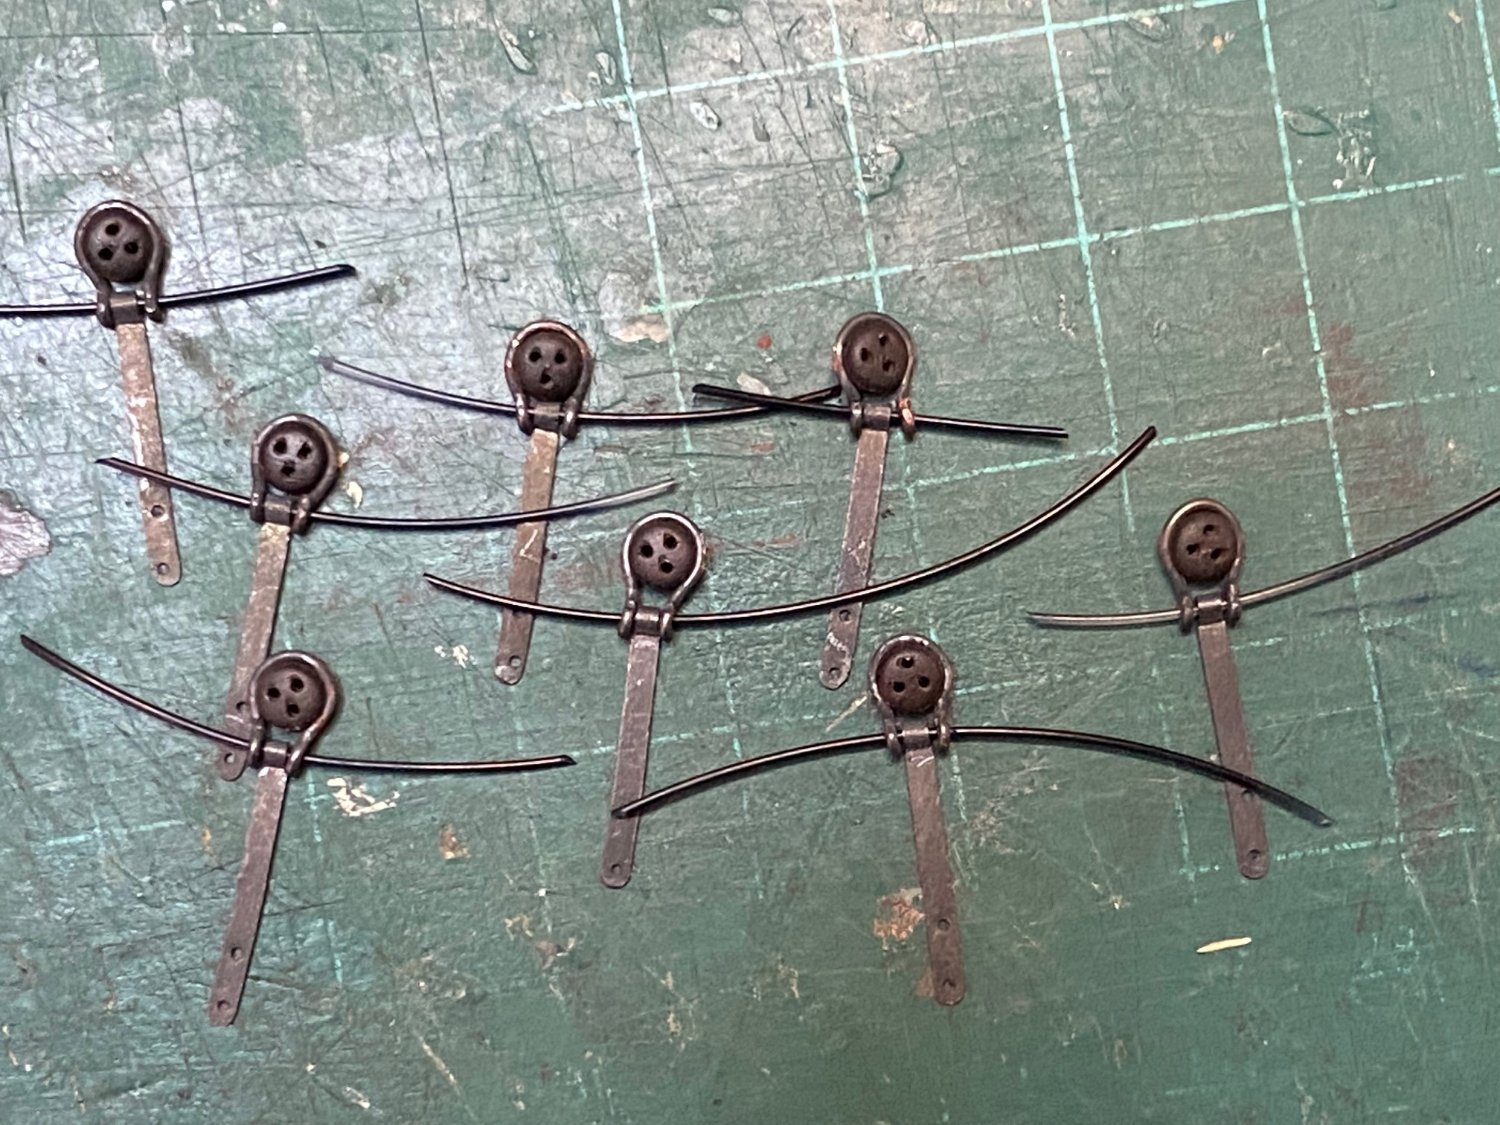
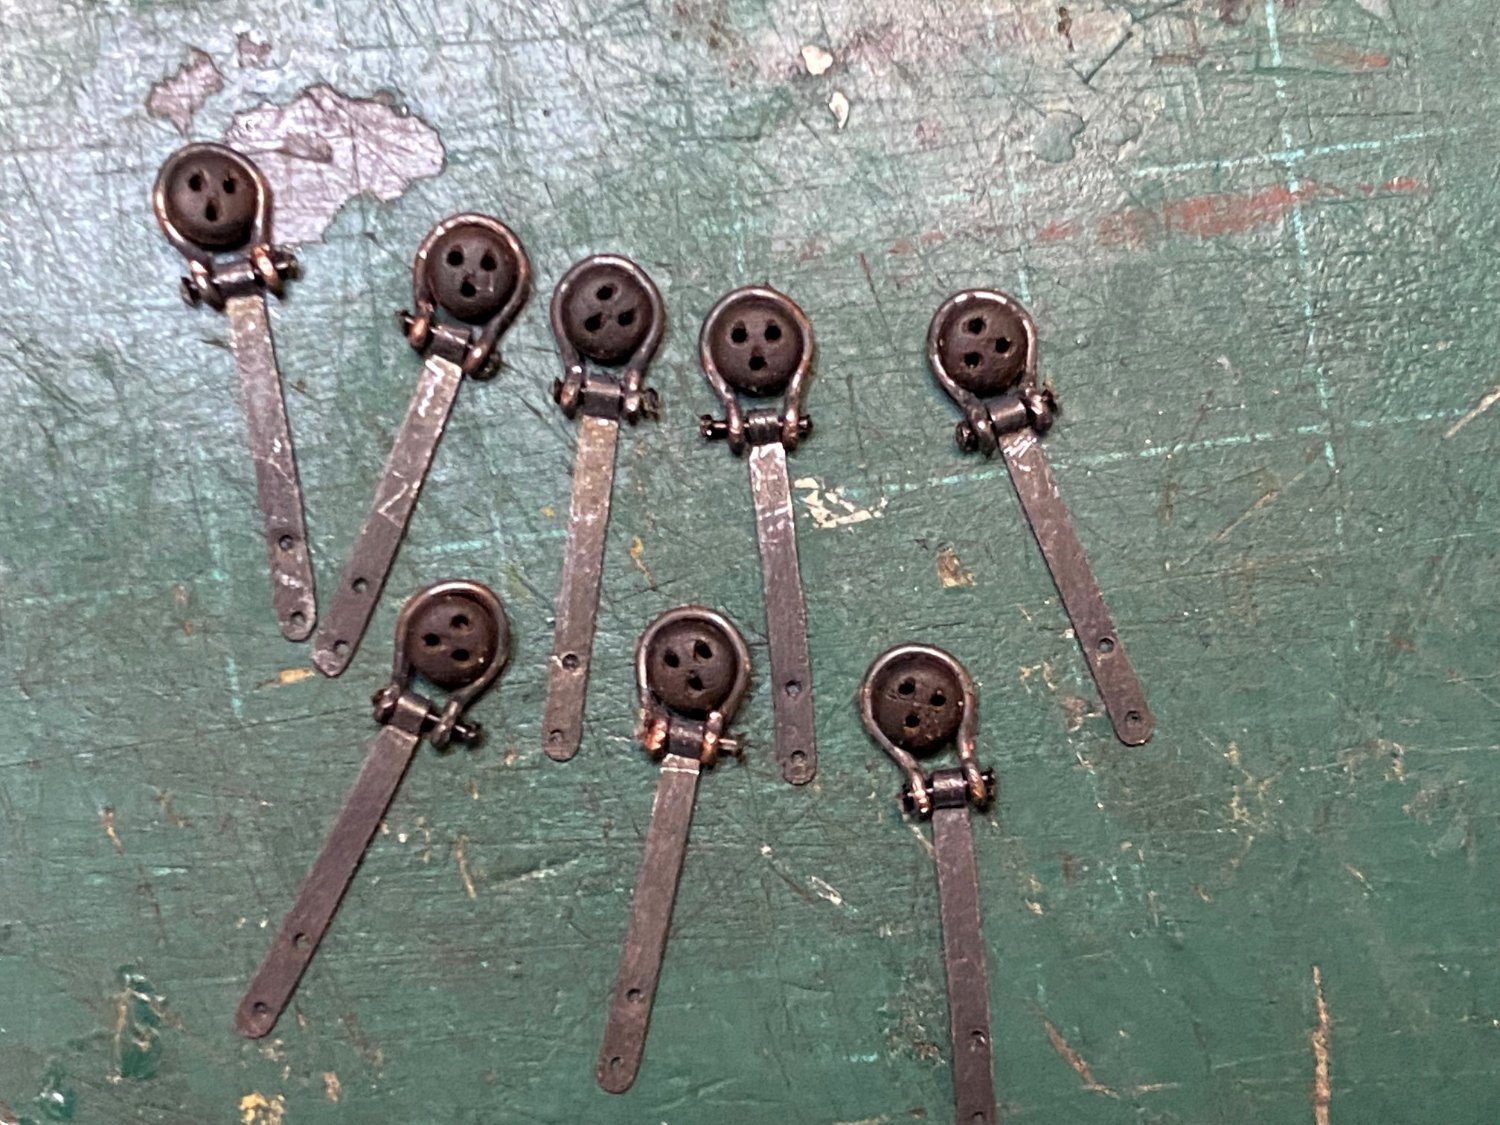
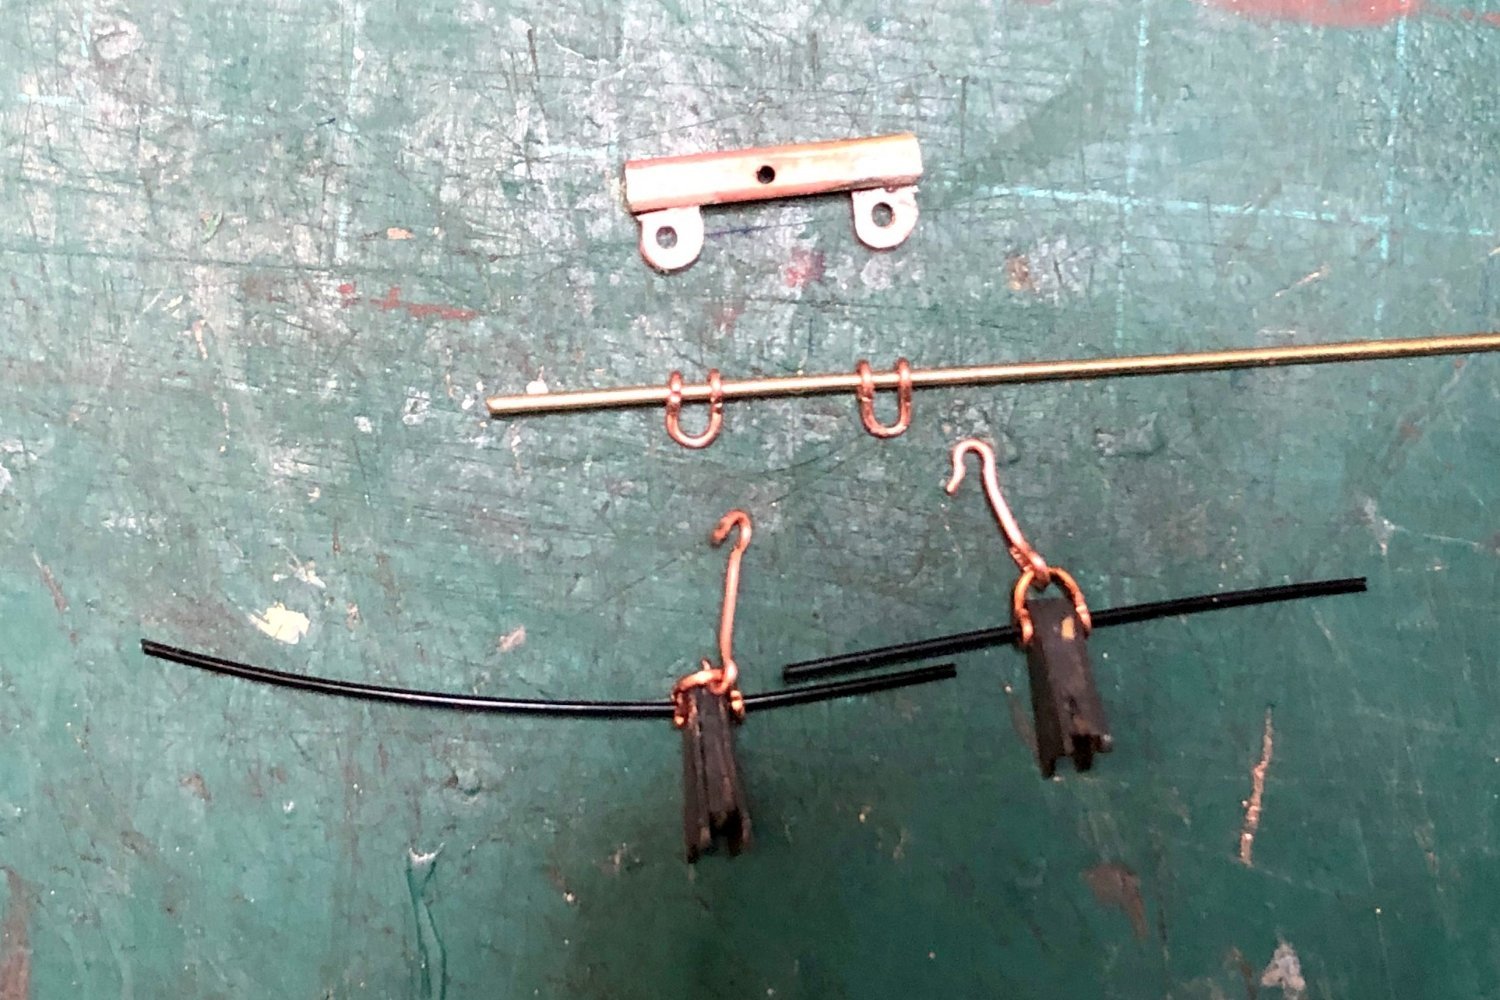
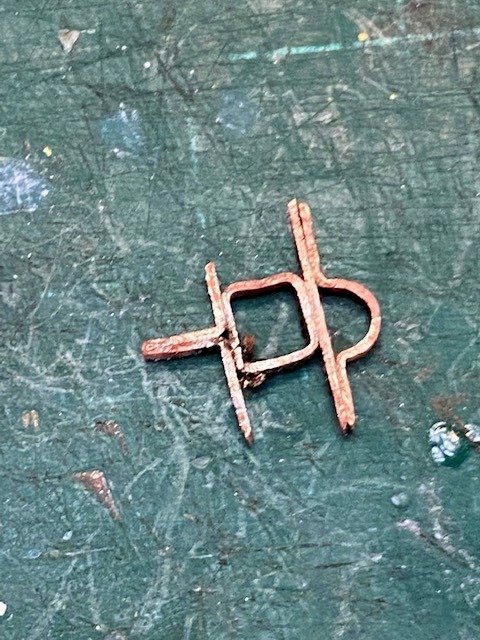
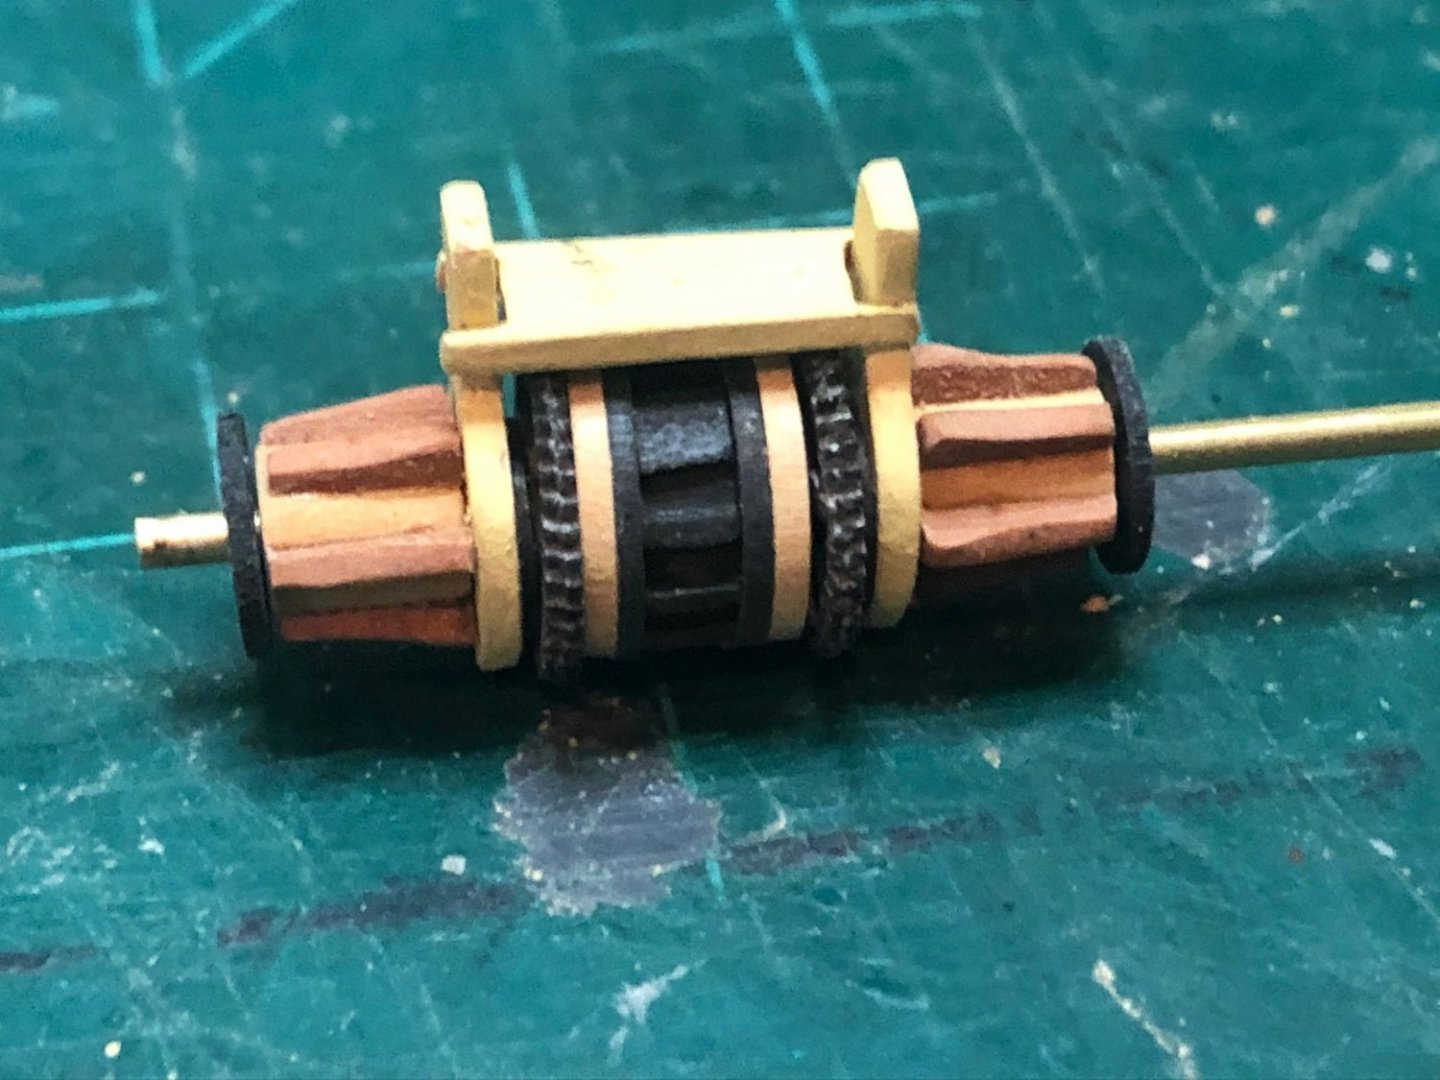
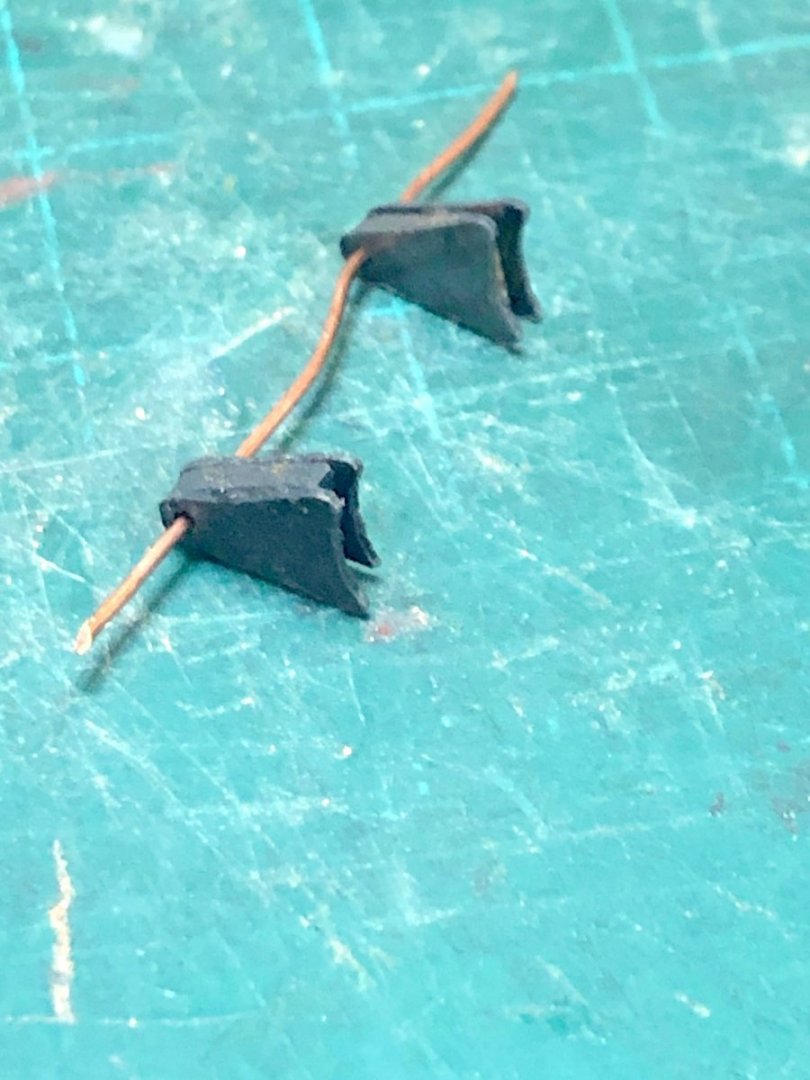
SLOW PROGRESS: Rocker arm, rods and purchase arms plus several shackles. The (copper) tabs on the square (brass) tubing were a bear to hold and solder (Maybe they weren't touching the tubing on the first three tries). Shackles are copper wire bent to shape. The pins for the shackles are 30 lb. test monofilament (black line) line. Touching the ends with soldering iron flattens them enough to stay tight while providing substantial holding ability. Maury

-
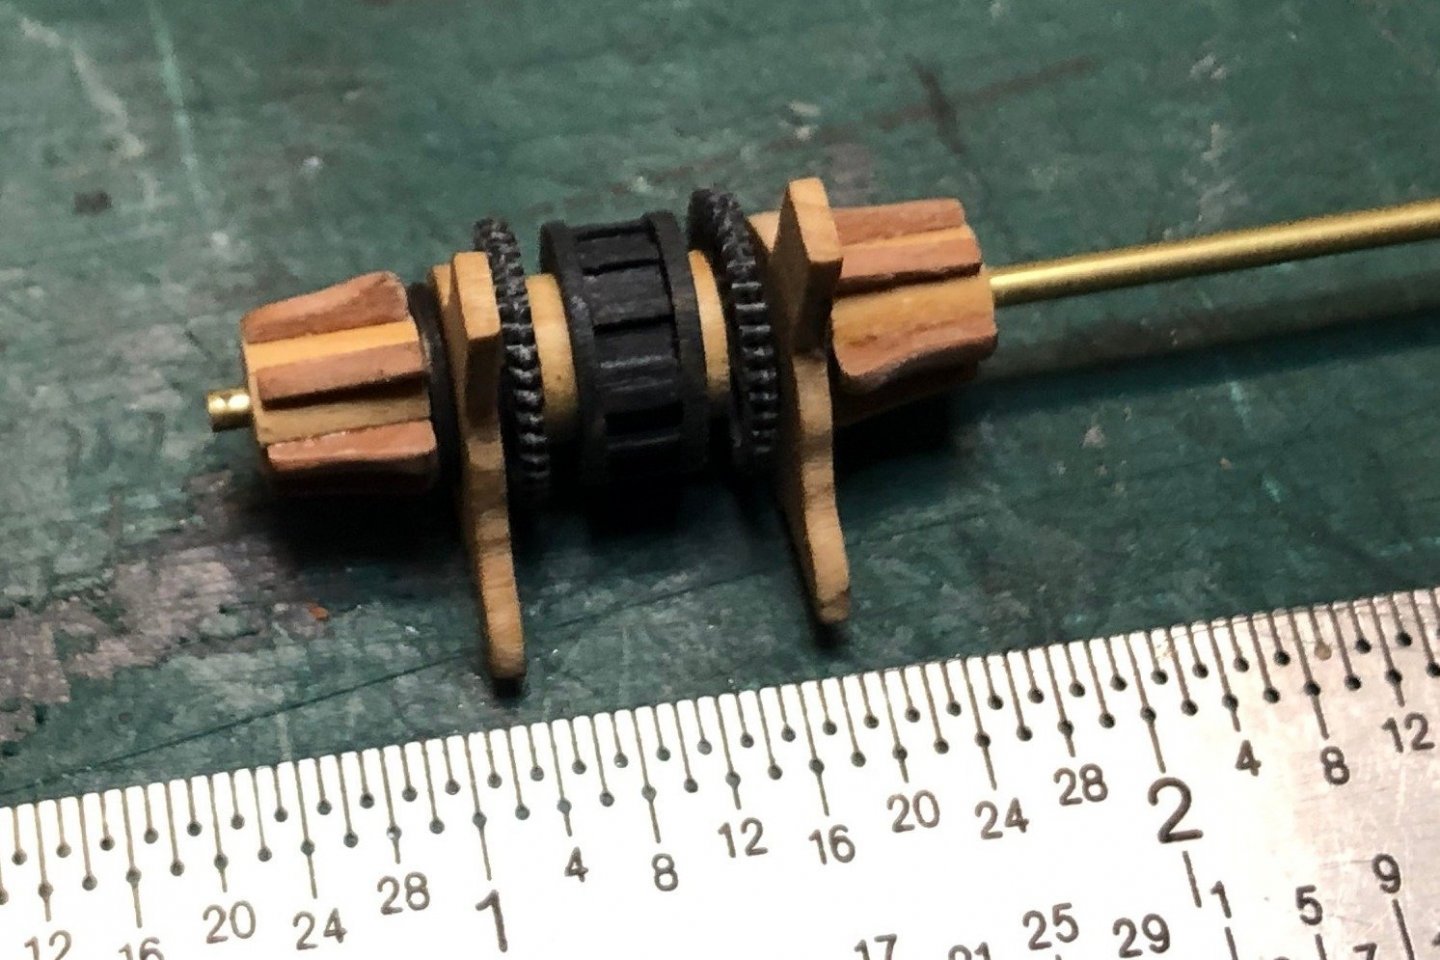
Some minor tweaks to the windlass and a couple of purchase arms made. Some cleanup on the arms to be done. Maury
-
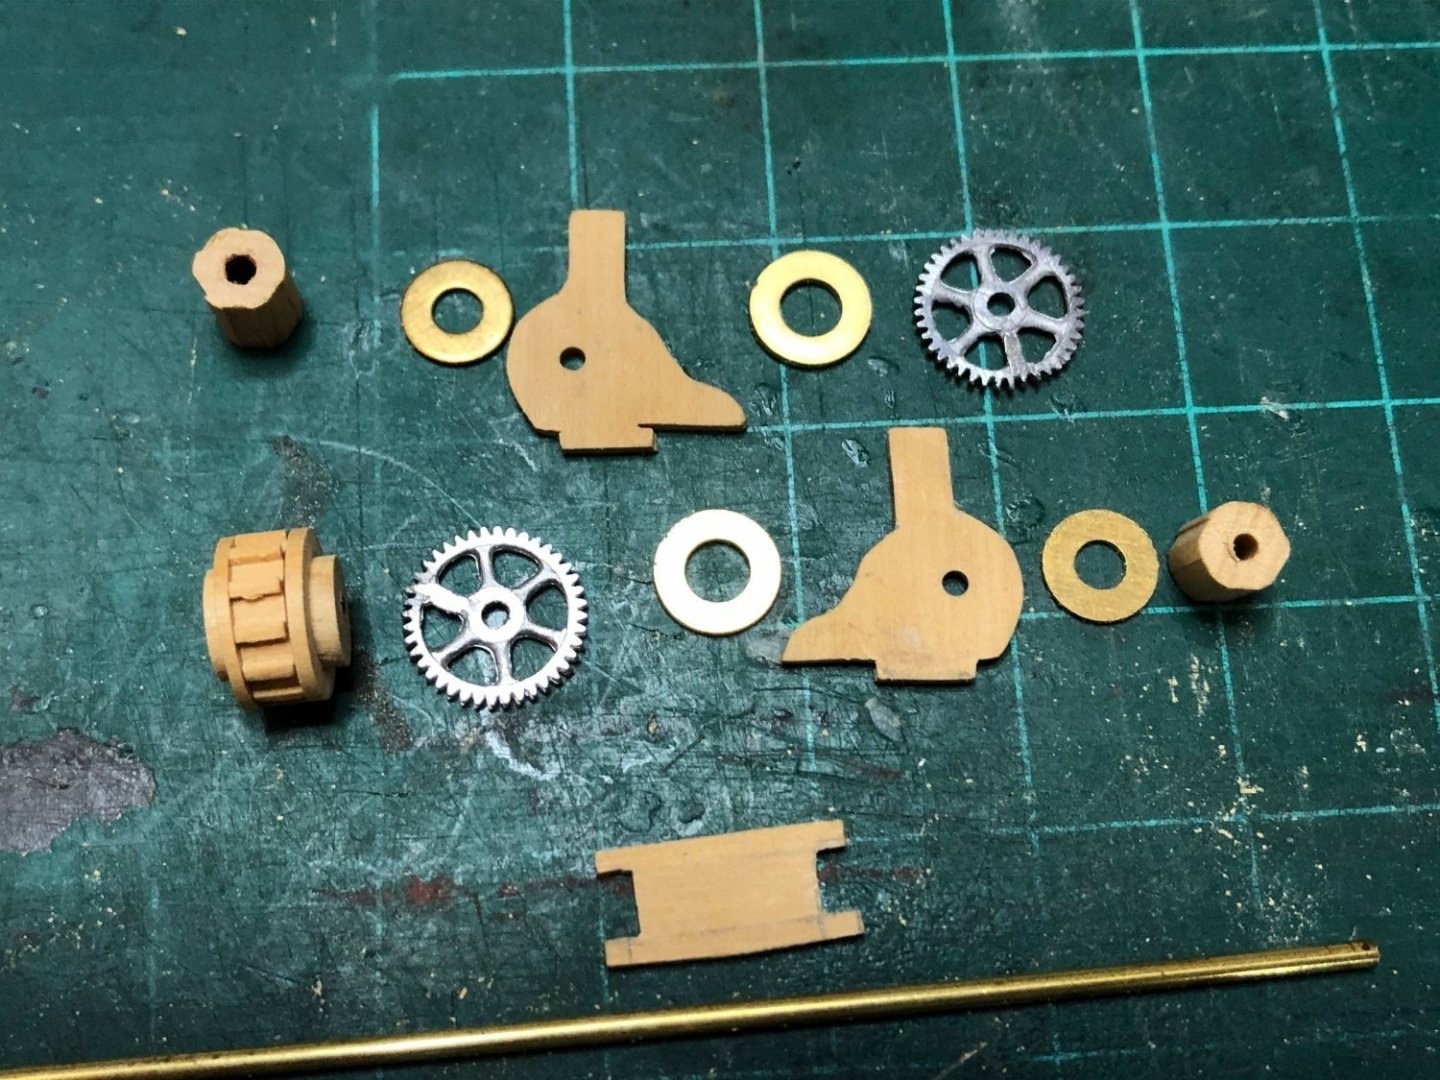
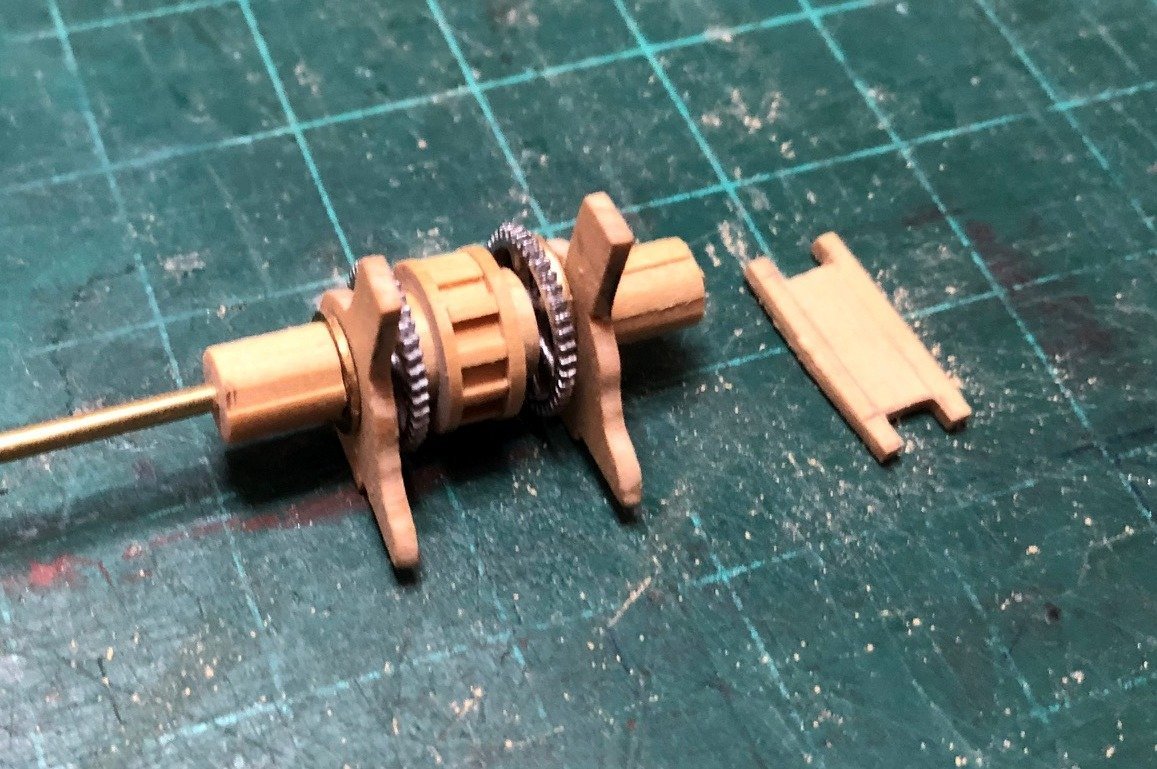
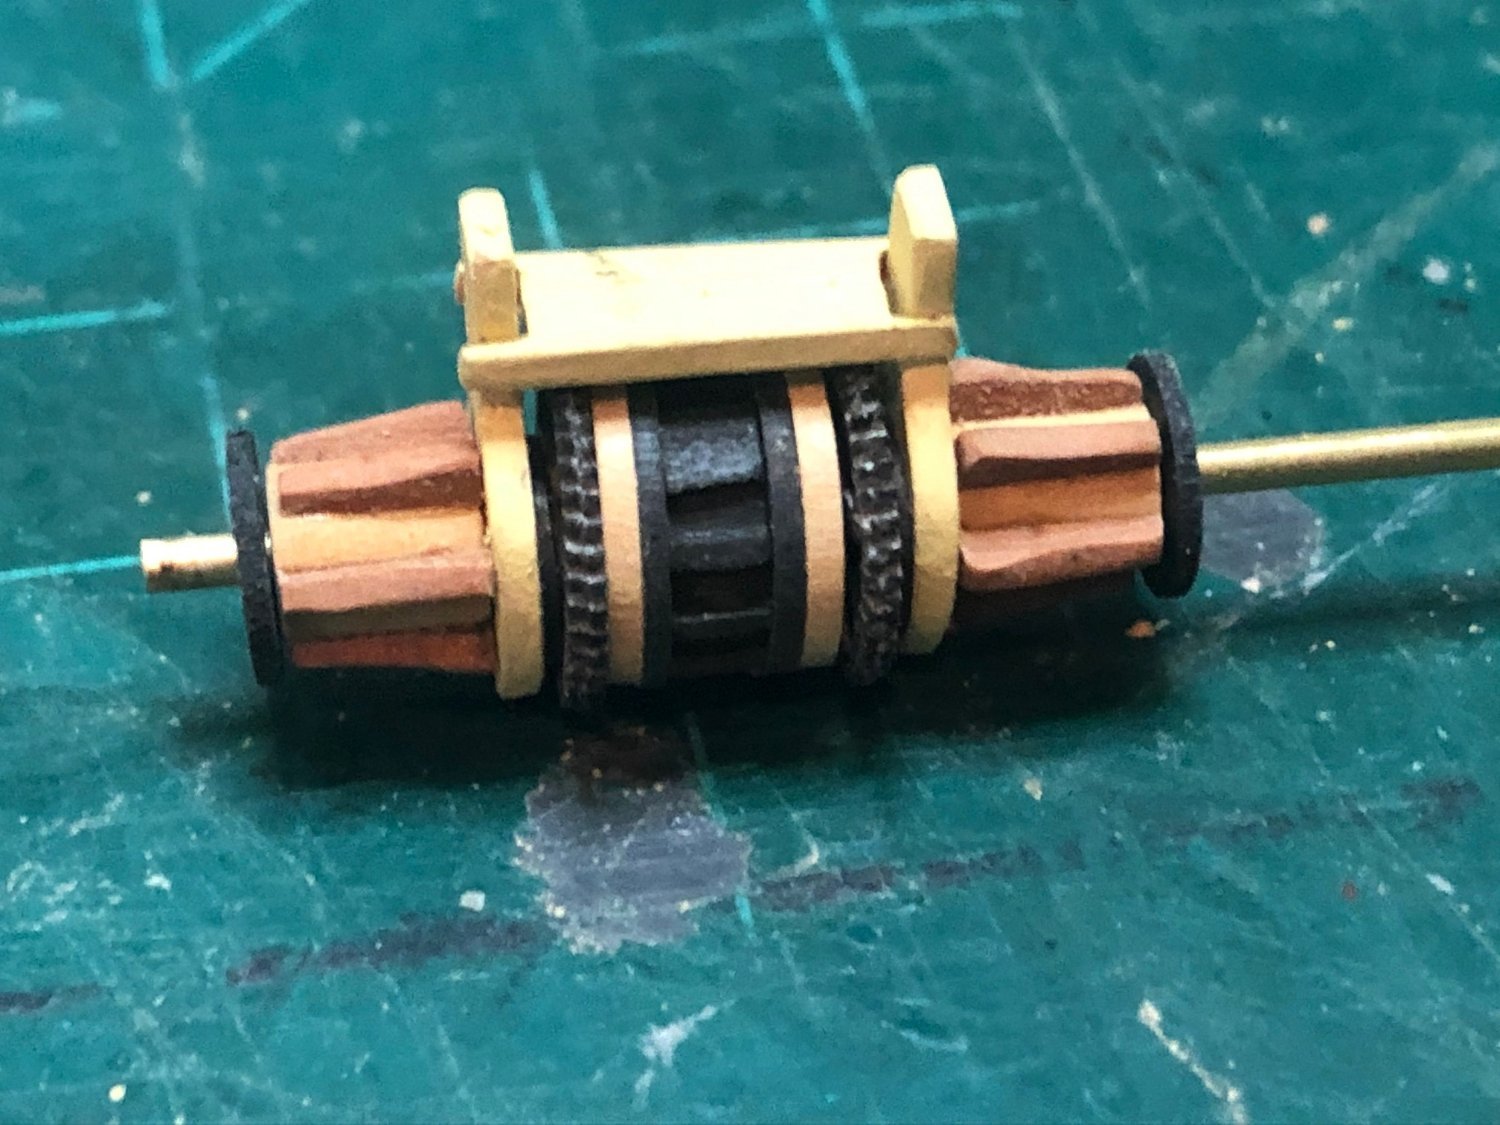
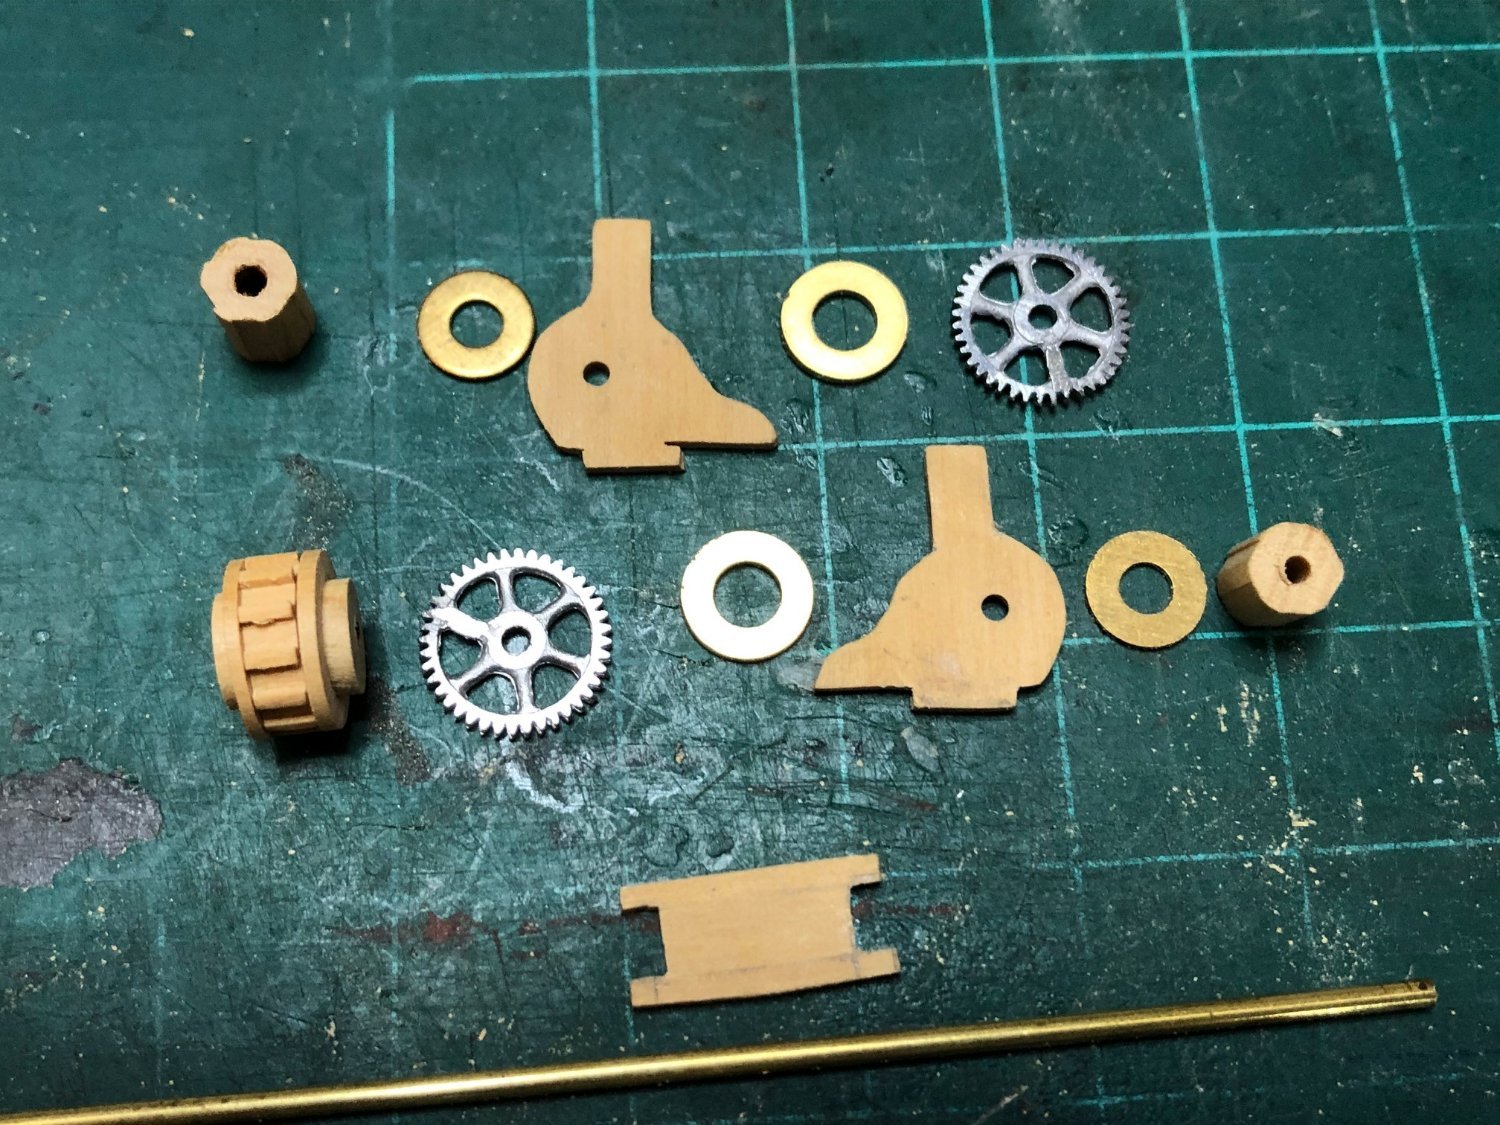
Whelps made, gears blackened and pawl wheel painted (Iron Black). Maury
-
Thanks for the comments, all. More on the windlass. I re-turned the barrels with a hole for a 1/16" axle. All the parts of the drum section are shown. The gears are Alexander Scale Models (Railroad) contributed by Randy Biddle. The heads (end parts of the windlass) were turned down to 21/32", removed from the lathe and mounted on the mill (rotary table set vertical) and 1/16" scores or flat spots were cut across the length every 60 degrees of rotation to support the set of 6 whelps (to be made and installed). Assembles pretty nicely on a piece of 1/16" tubing. The cross bitt on the right needs trimming. It mounts above the drum, stabilizes the bitts (and hides a good deal of the view of the windlass. Maury