HOLIDAY DONATION DRIVE - SUPPORT MSW - DO YOUR PART TO KEEP THIS GREAT FORUM GOING! (89 donations so far out of 49,000 members - C'mon guys!)
×


Maury S
-
Posts
1,490 -
Joined
-
Last visited
Content Type
Profiles
Forums
Gallery
Events
Everything posted by Maury S
-
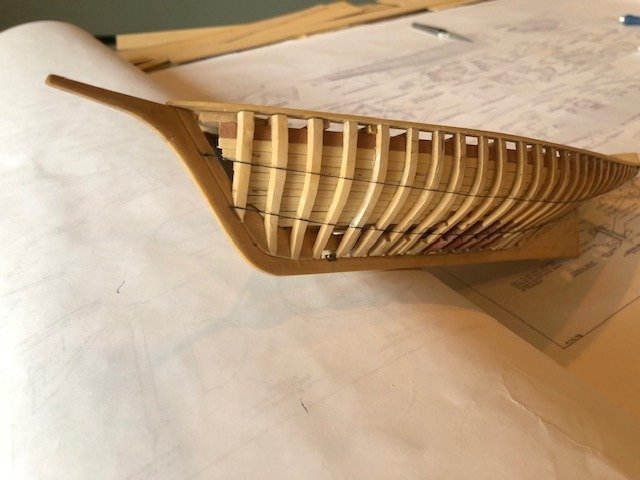
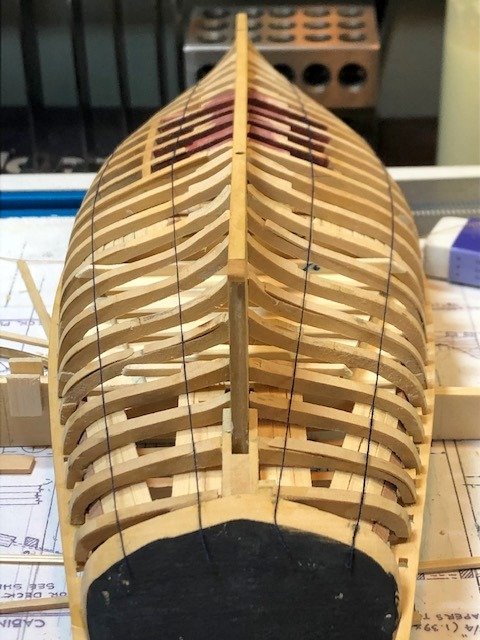
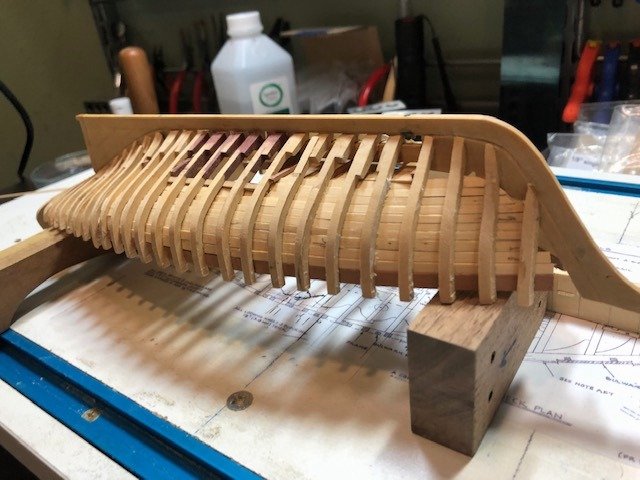
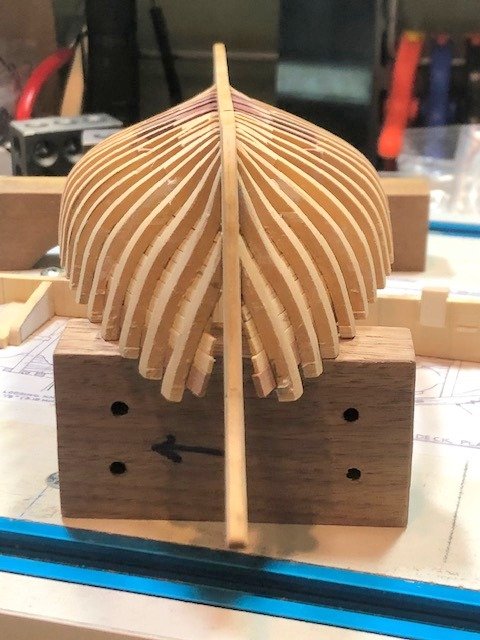
 Now that the covering boards are done, she gets taken off the building board to start work on the planking. First step is to define the three belts on each side. The Lankford plans have a planking layout so it made the process easier. I marked the bands at the stem, the transom and at the dead-flat frame (#13). I then laid a black thread connecting the three points and fiddled with them at each frame until they looked fair from all directions. Diluted glue on the thread at the frames makes "rolling" the thread into place easier. Hat Tip David Antscherl. I'll have to look at it a few more times to make sure the lines are fair. Maury
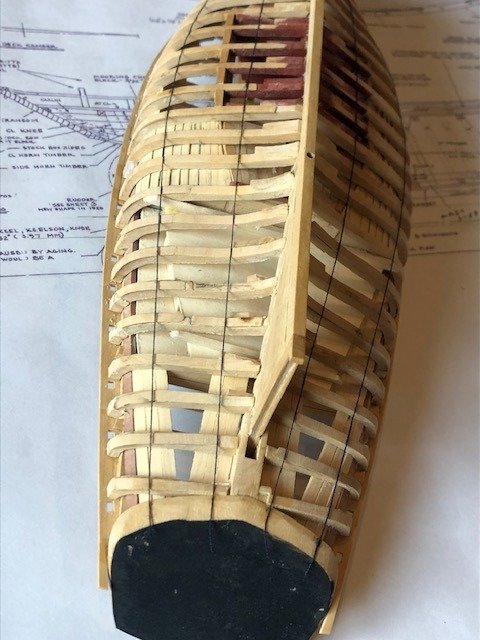
-
The port side covering board is being glued in place. The outside edge of the stanchion hole has to line up with the outer edge of the frames. I set a temporary stringer along the frames and inserted temp. stanchions in the holes that butted up against the stringer to make sure the alignment was OK. Maury
-
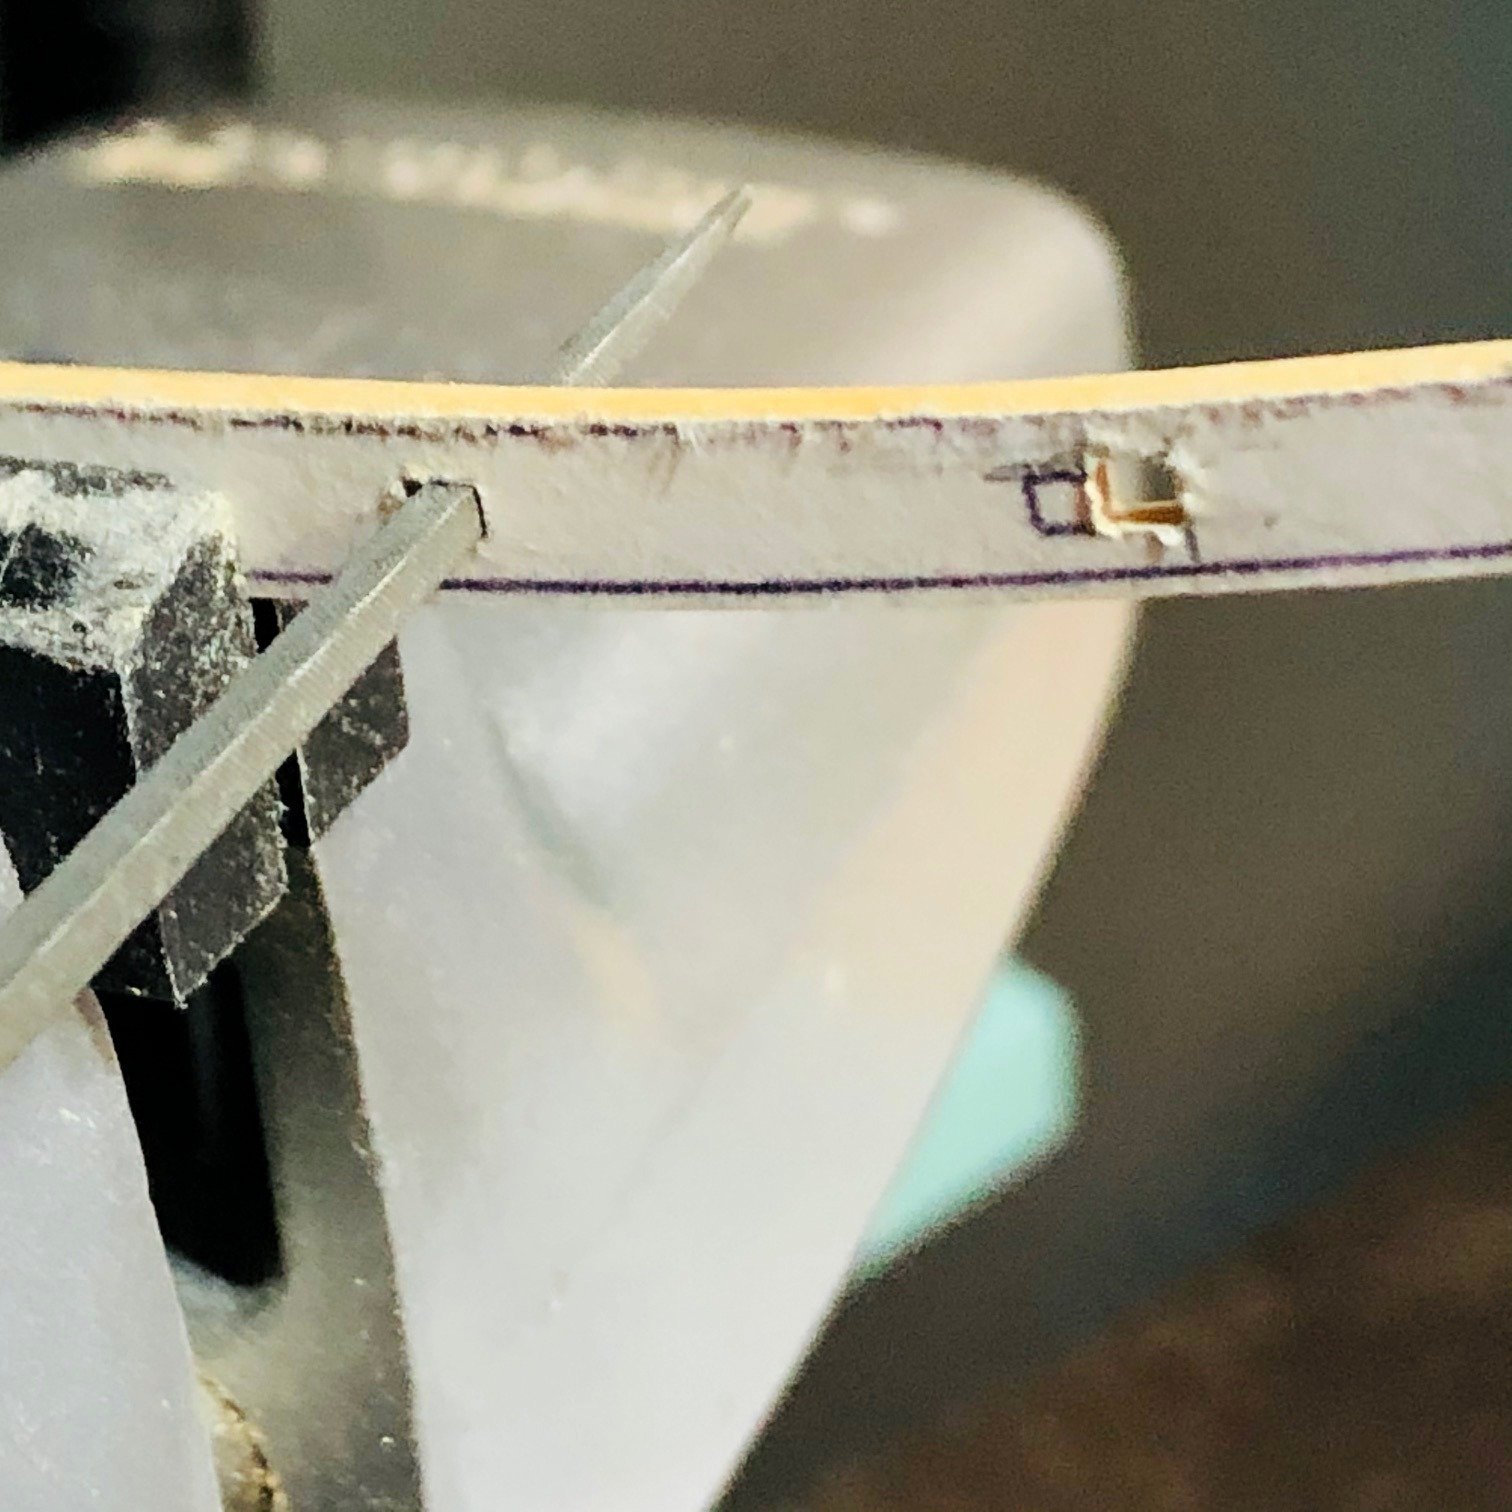
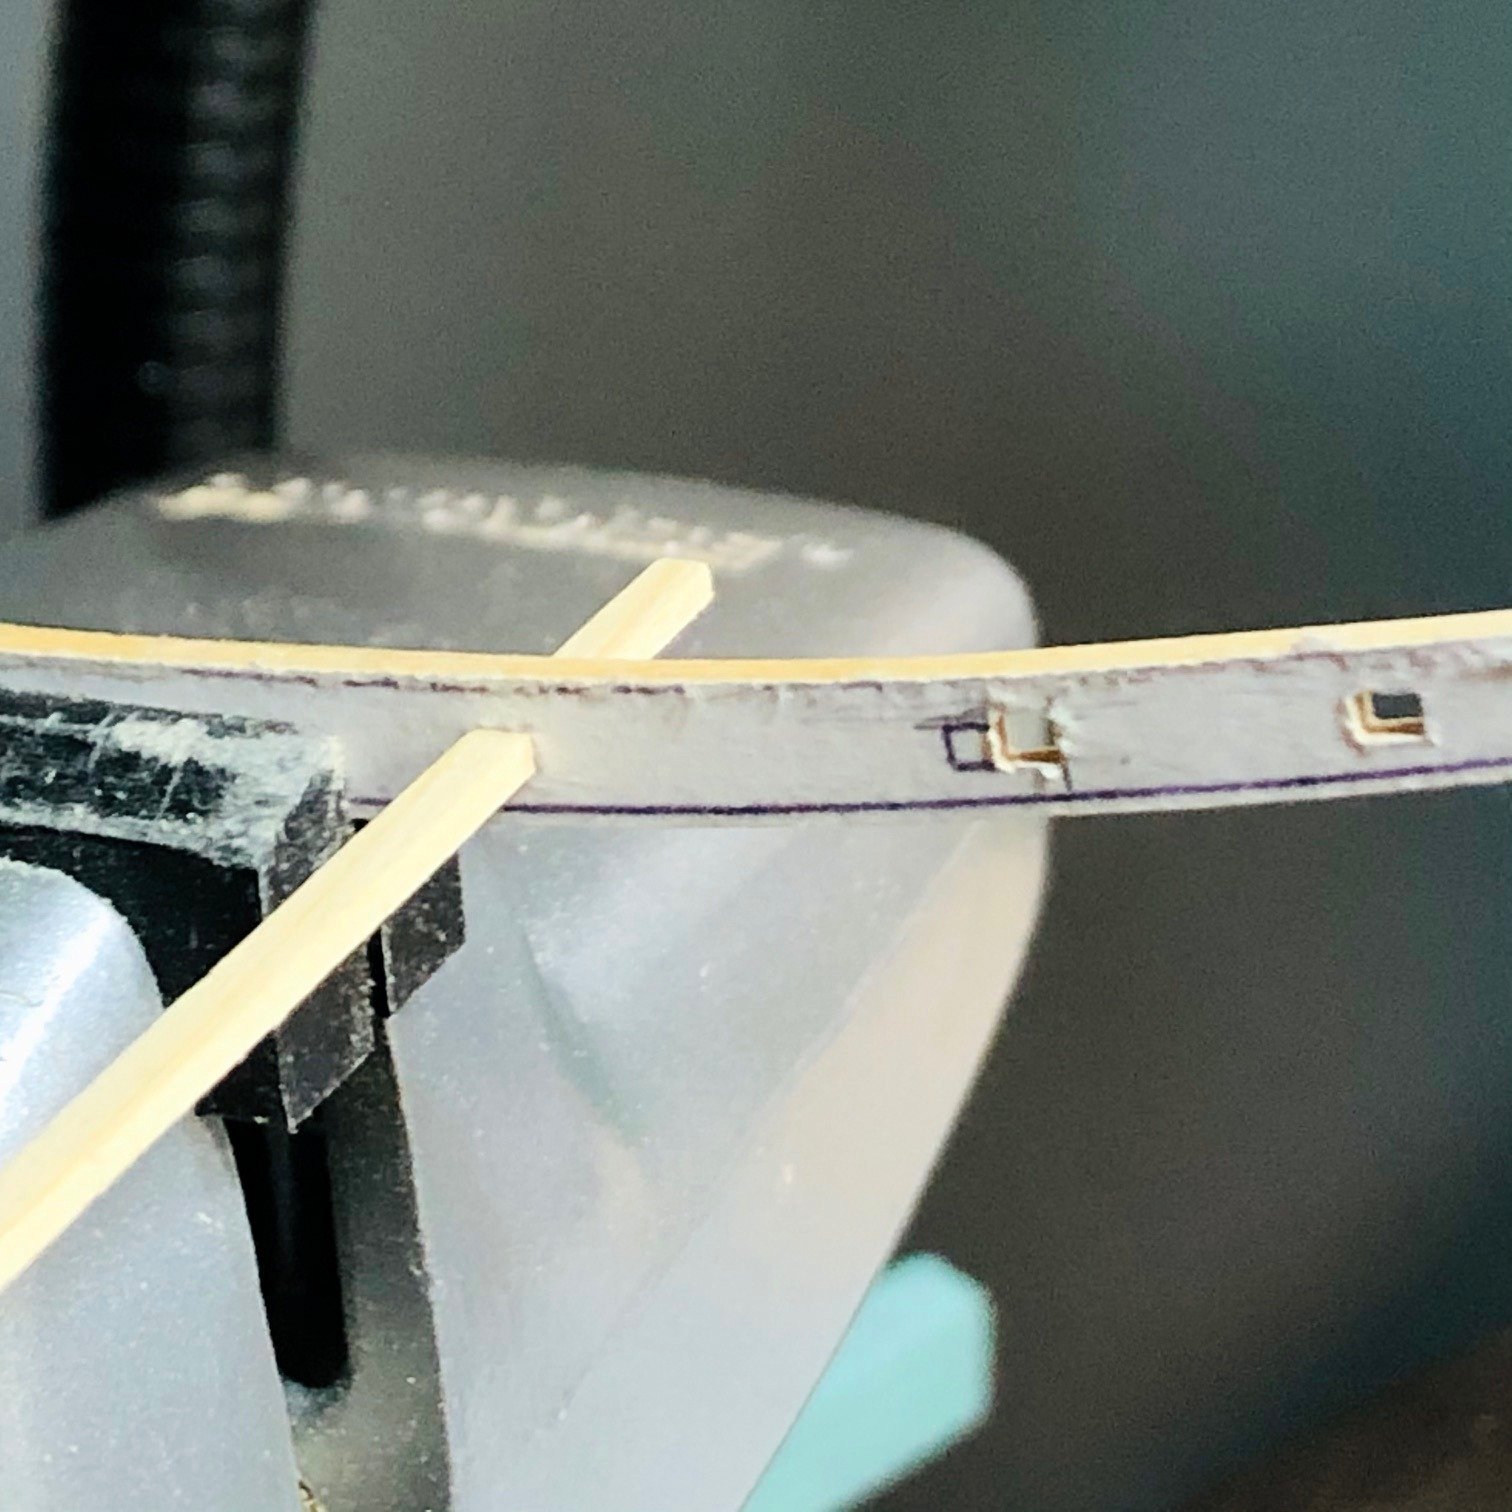
Slow progress. I used the Sensitive Drill Attachment on the mill to drill the corners of each hole. Then I used a #11 knife to connect the holes and then a swills file to square them up. The holes are rectangular and I made a dummy stanchion to the proper size and file until it fits snug. As you can see above, I had to relocate some of the holes because of frame tops. Very slow delicate work but coming along. Maury


-
Re: Drilling the holes with the mill... That's the plan. I'll use the Sensitive Drilling Attachment and drill a small hole at the corner of each stanchion hole then bore out the centers. We'll see how that goes later today. I guess I could use the jewelers drill press as well. Maury
-
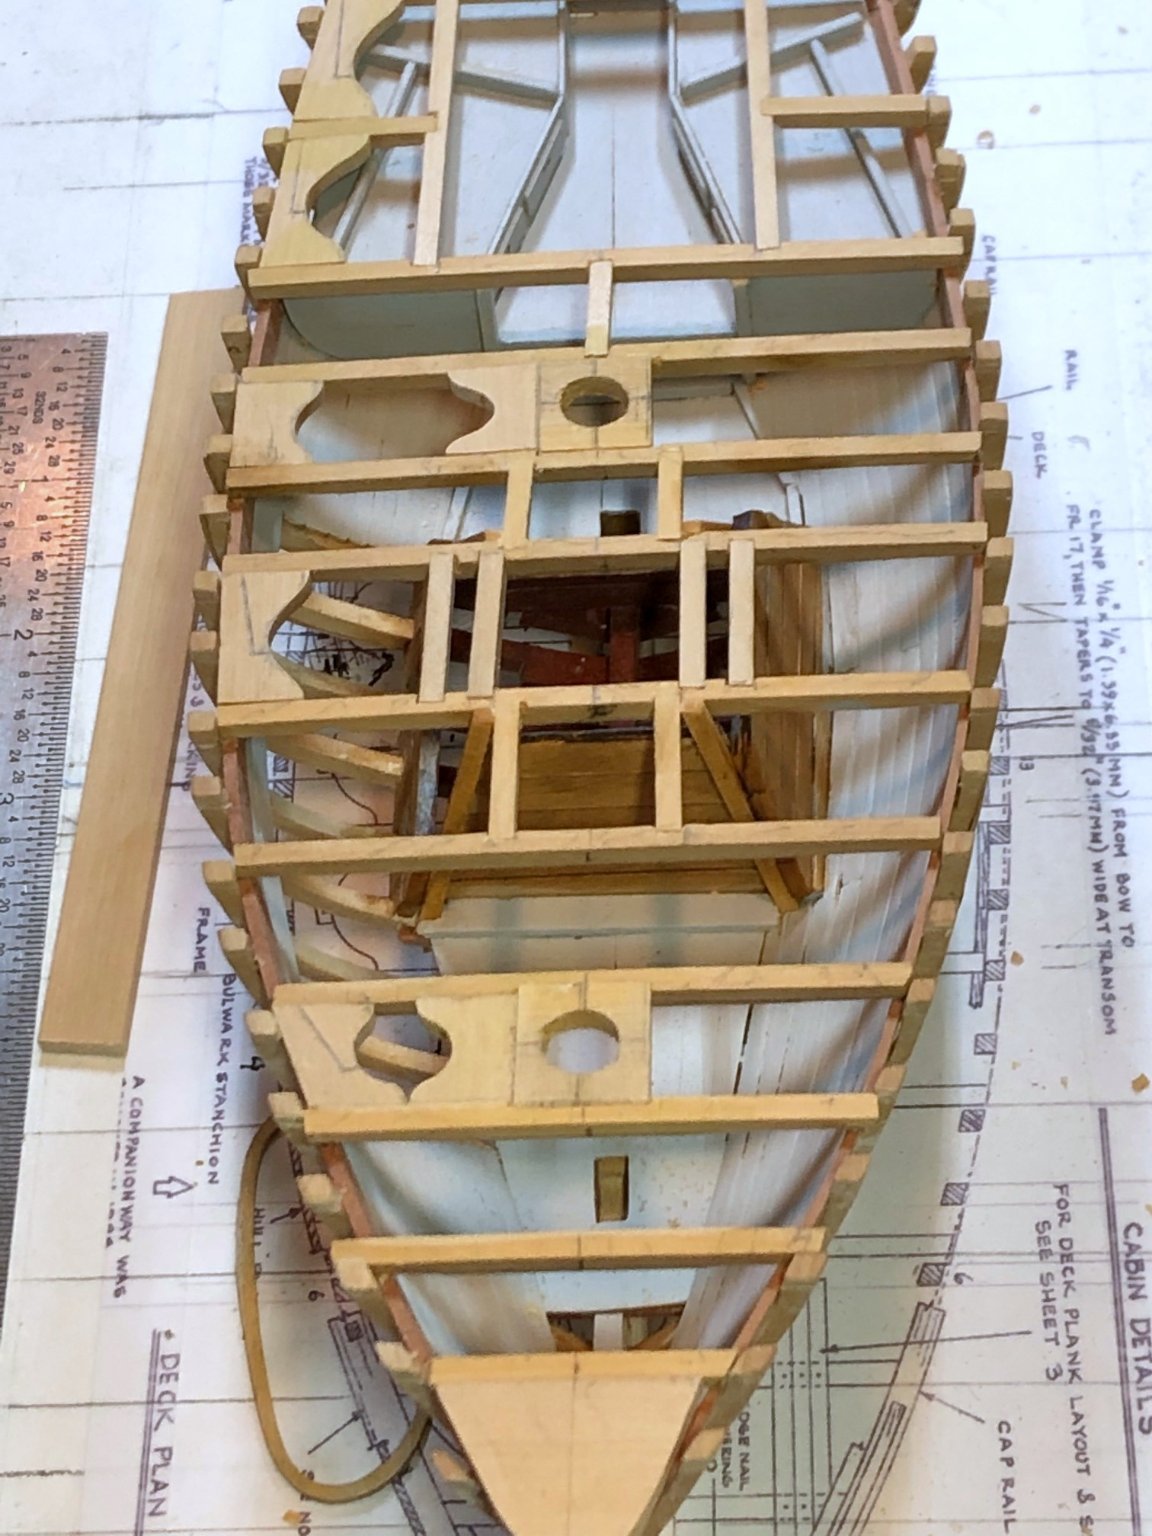
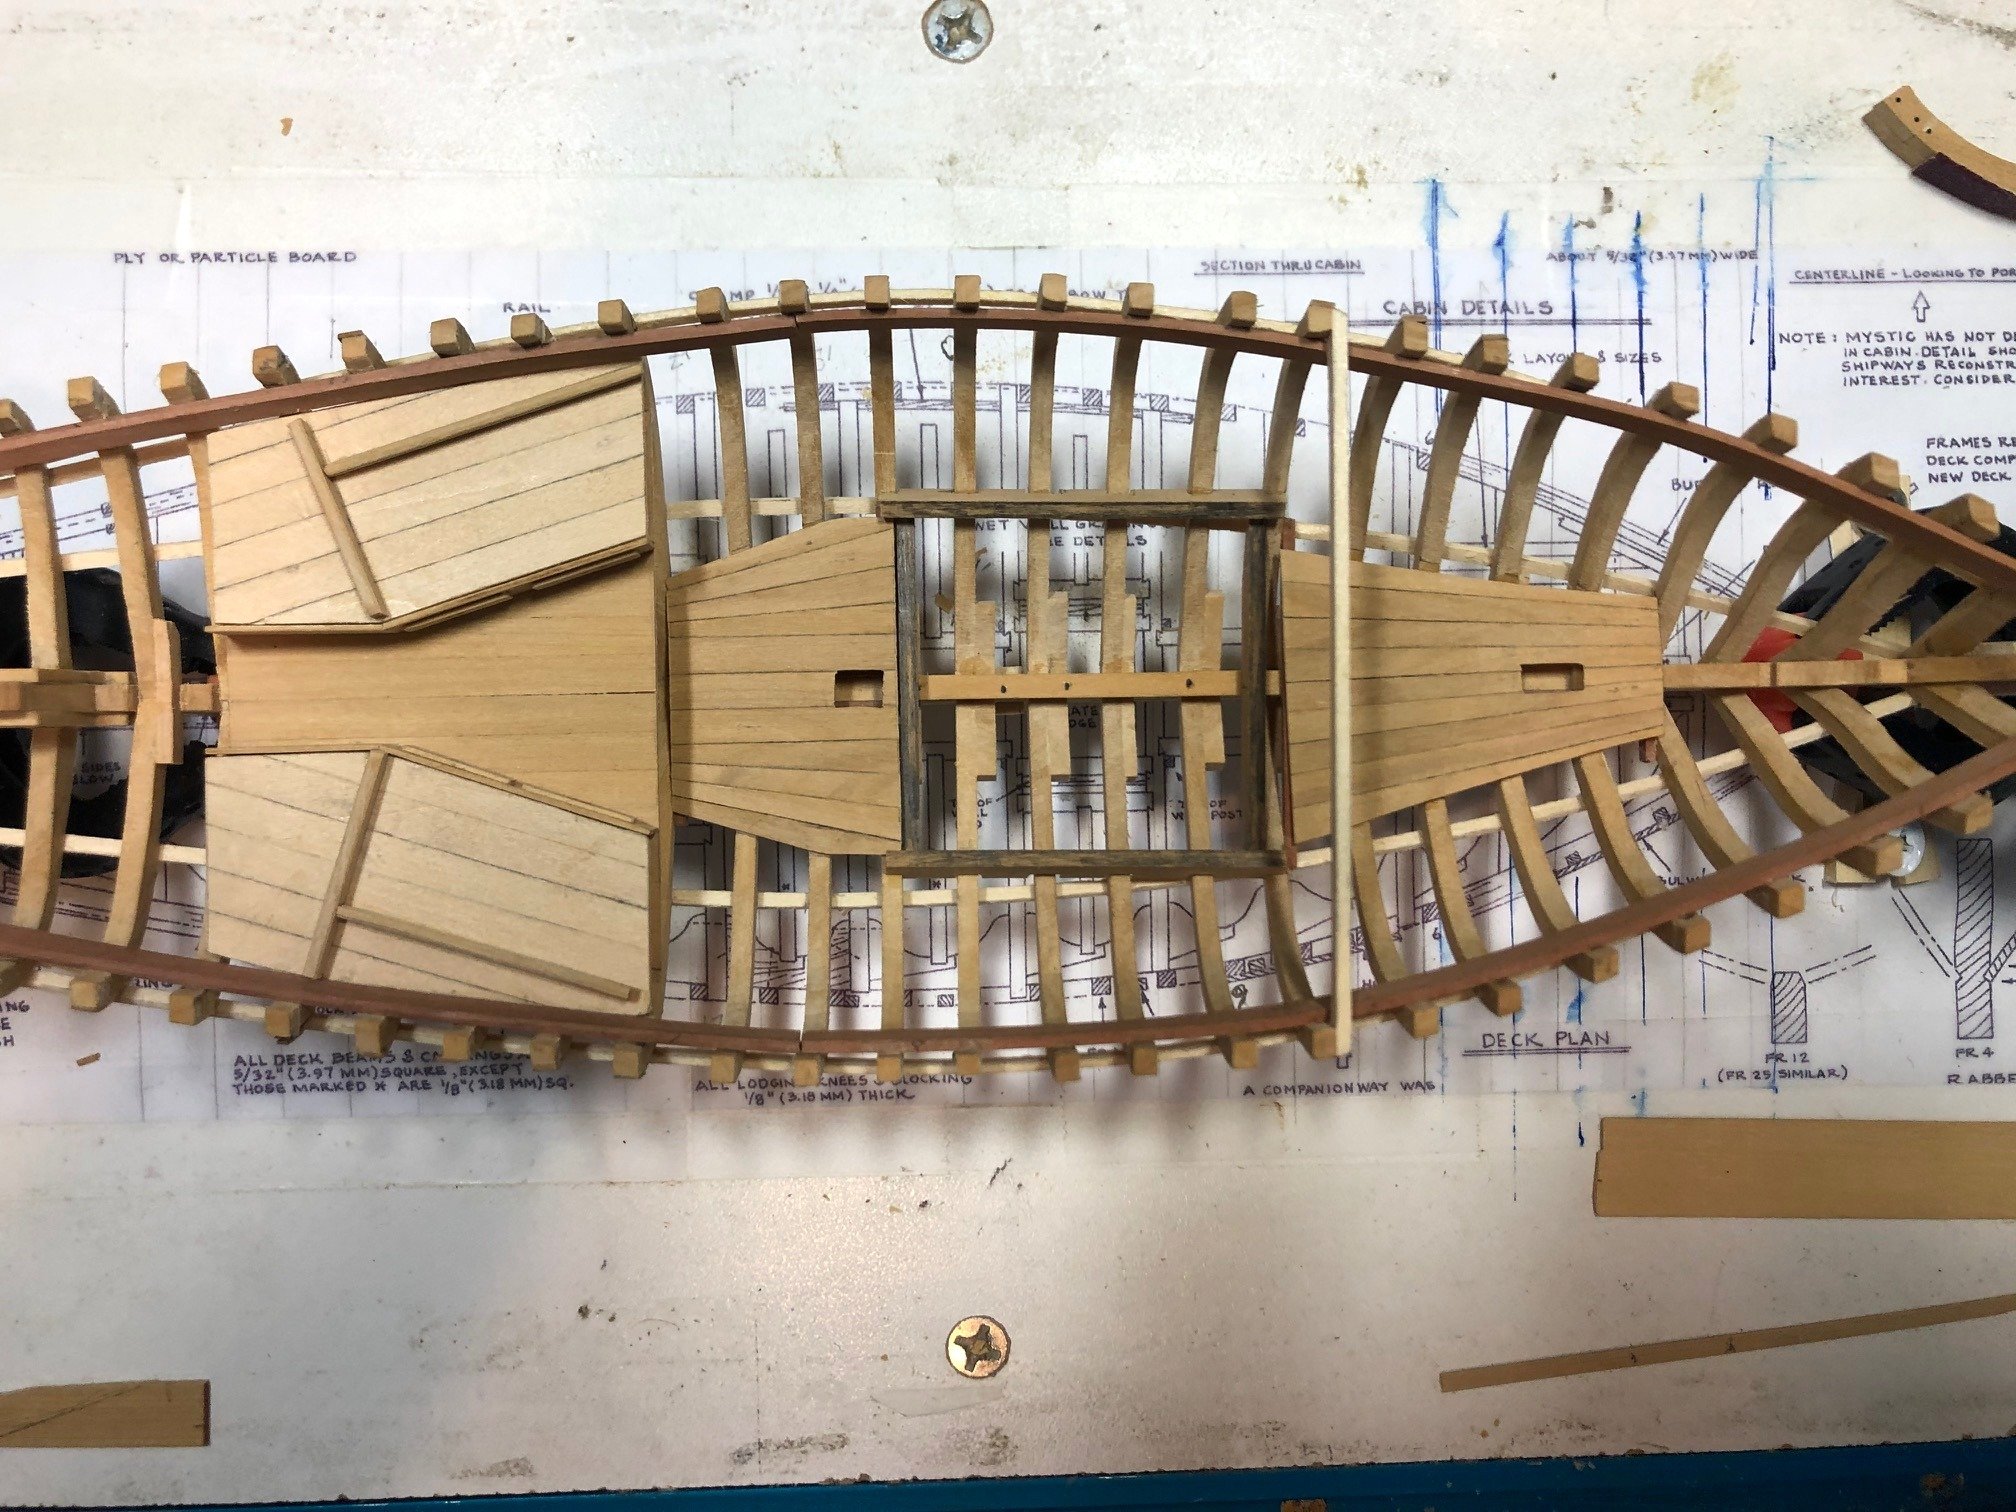
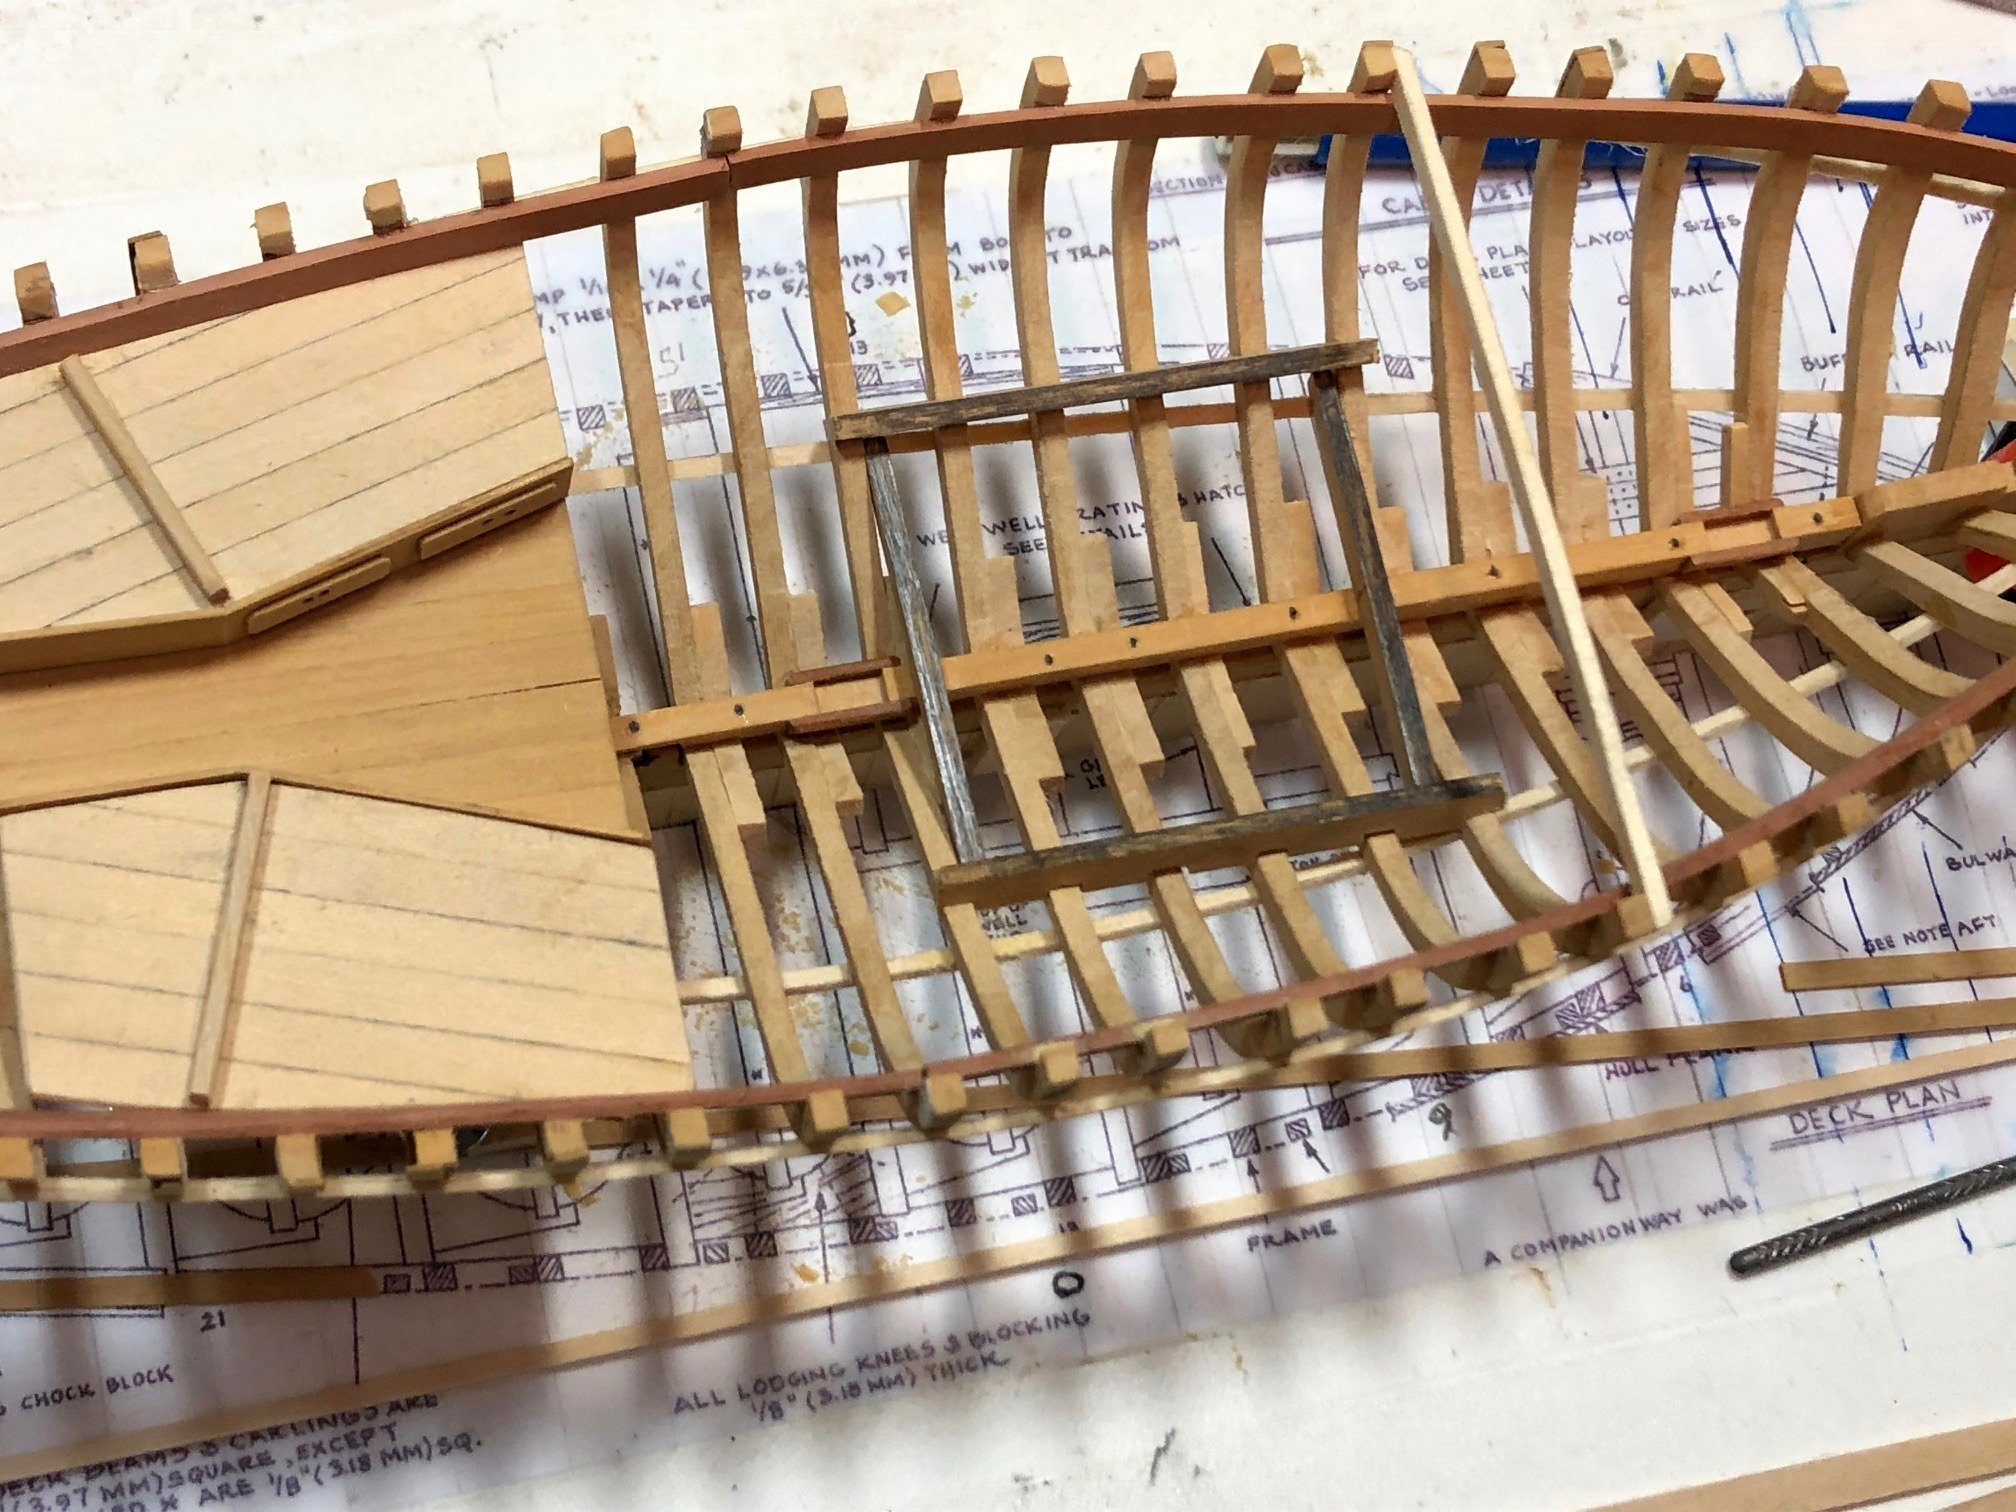
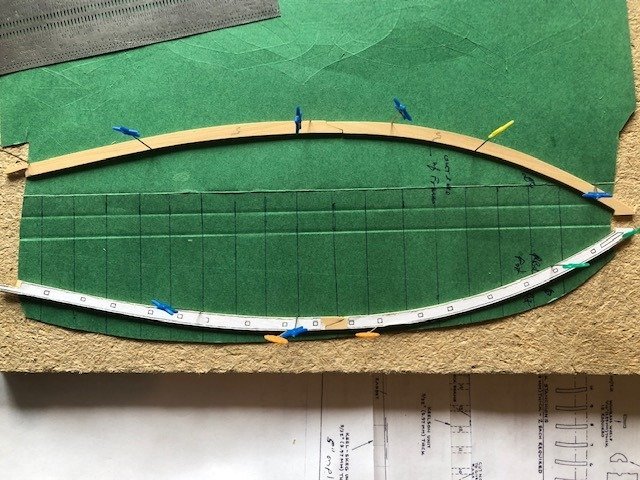
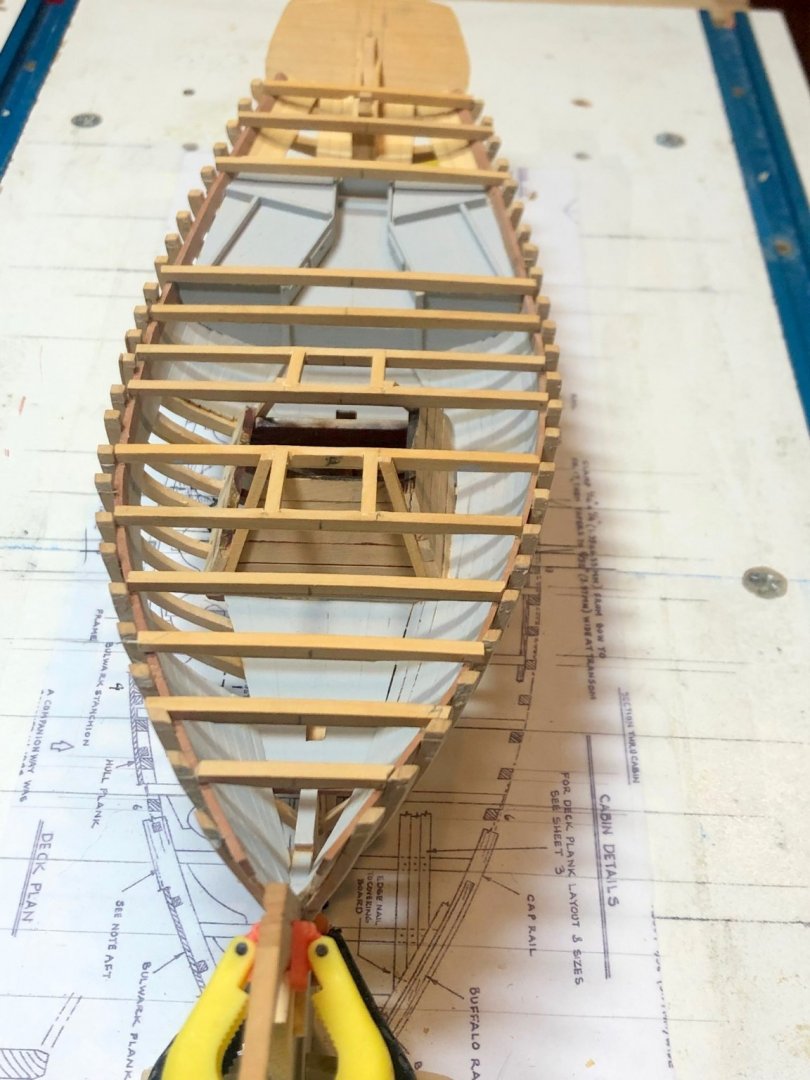
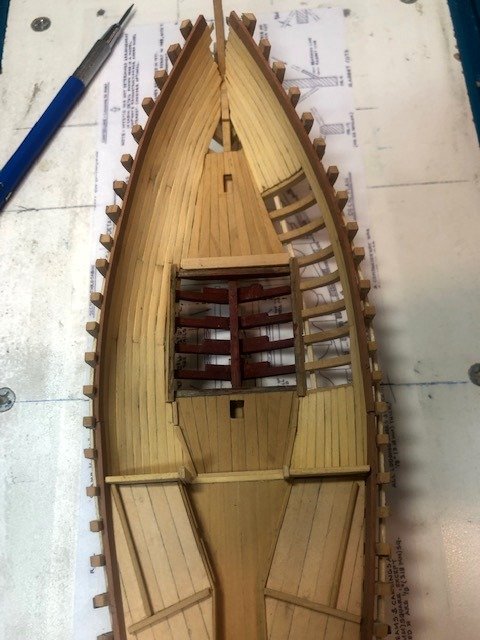
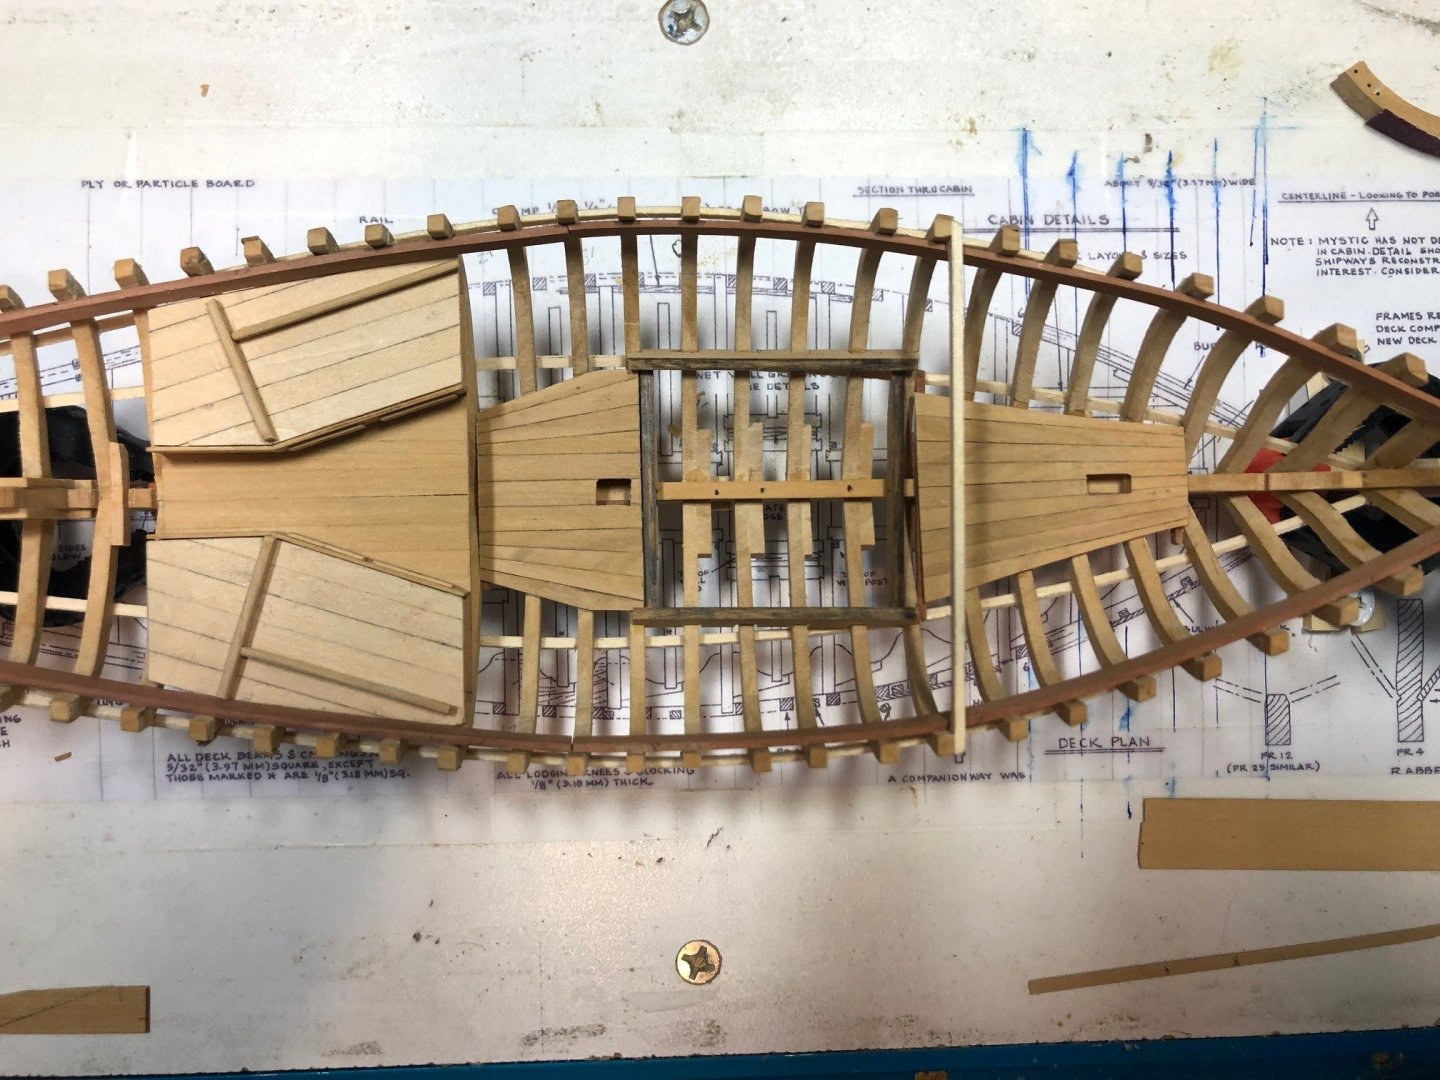
The deck beams and carlings are in on the starboard side. Covering boards are cut. They are each in two pieces. To make sure they fit the boat as built, I held a piece of card stock on the deck and marked the edge of each frame top. I used that pattern to make sure the scarph joint was properly fit and the covering boards matched the frames. They lay well on the deck Not glued yet. The marked holes for the bulwark stanchions will have to be individually cut or drilled out. Some adjustment had to be made as some of the holes per plan plan are situated on top of a frame. They must fit between frames. Stanchions will be .083"wide x .0625" thick. (4" x 3"). Maury
-
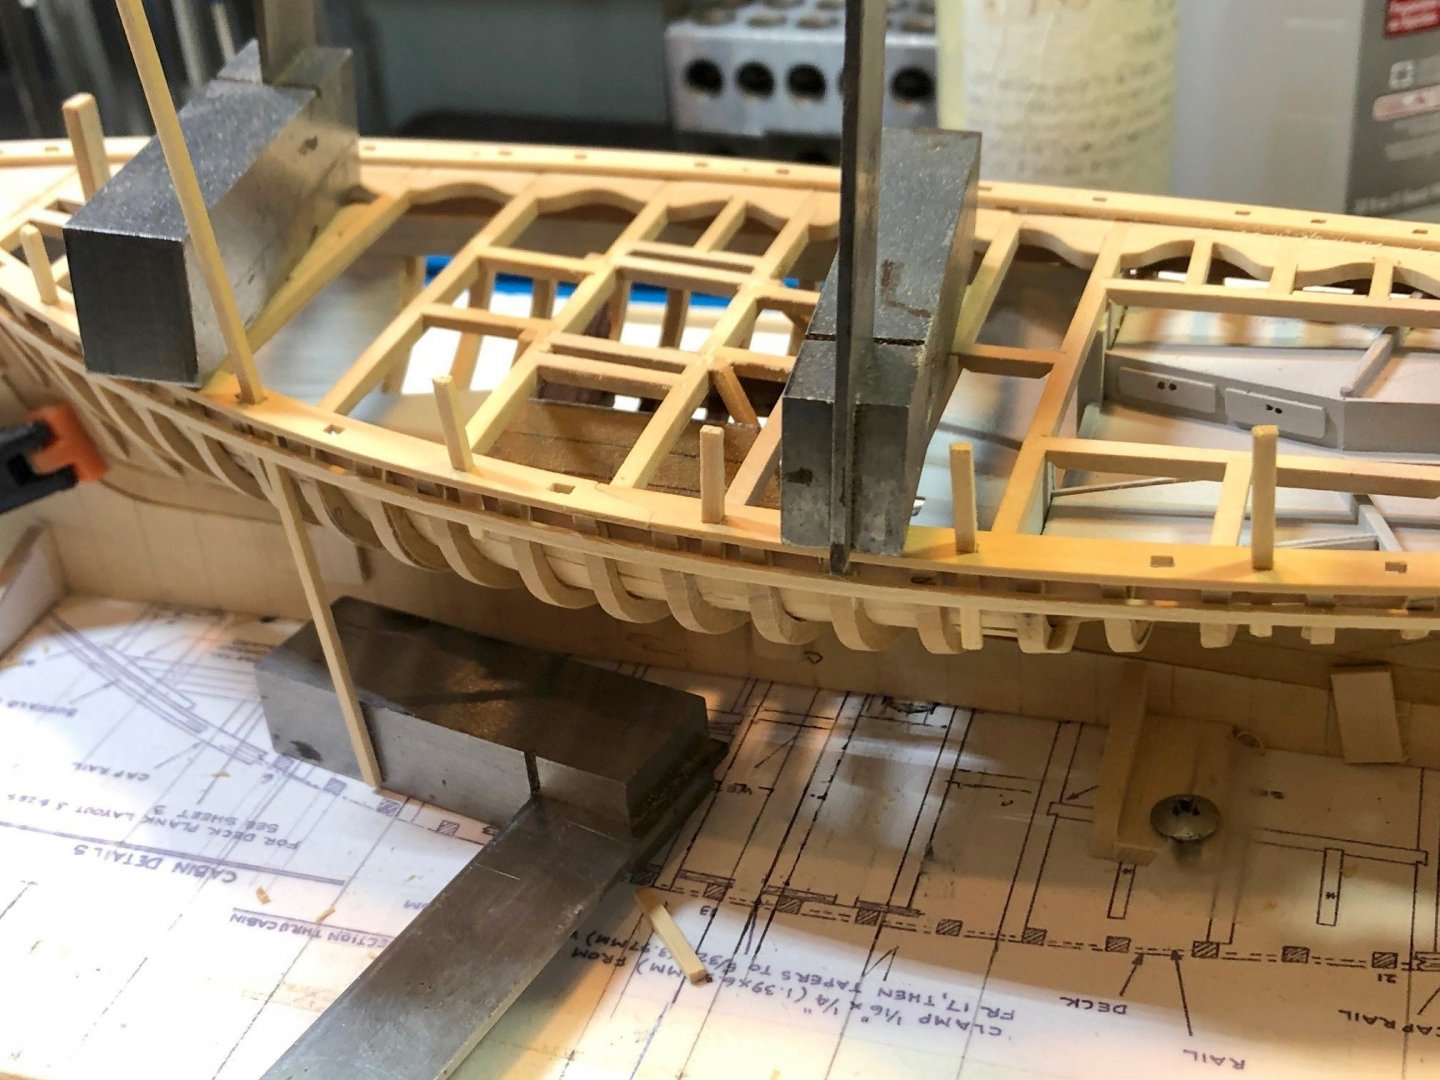
Back to the shipyard after some traveling...the carlings are in, the mast partners are drilled (a bit over-sized) centered and glued and I've started on the knees on the port side. The knees are one-piece. The mated pairs are just scored with a sharp pencil. They may not be visible, but maybe... No issues to describe along the way. Maury

-
The main deck beams are all installed. Next are the carlings and the minor beams. Maury

-
With the well constructed, I've moved on to installing the main deck beams. Same procedure with shaping the ends of the beam to account for keeping the face plumb and the beam resting fully on the clamp. Maury

-
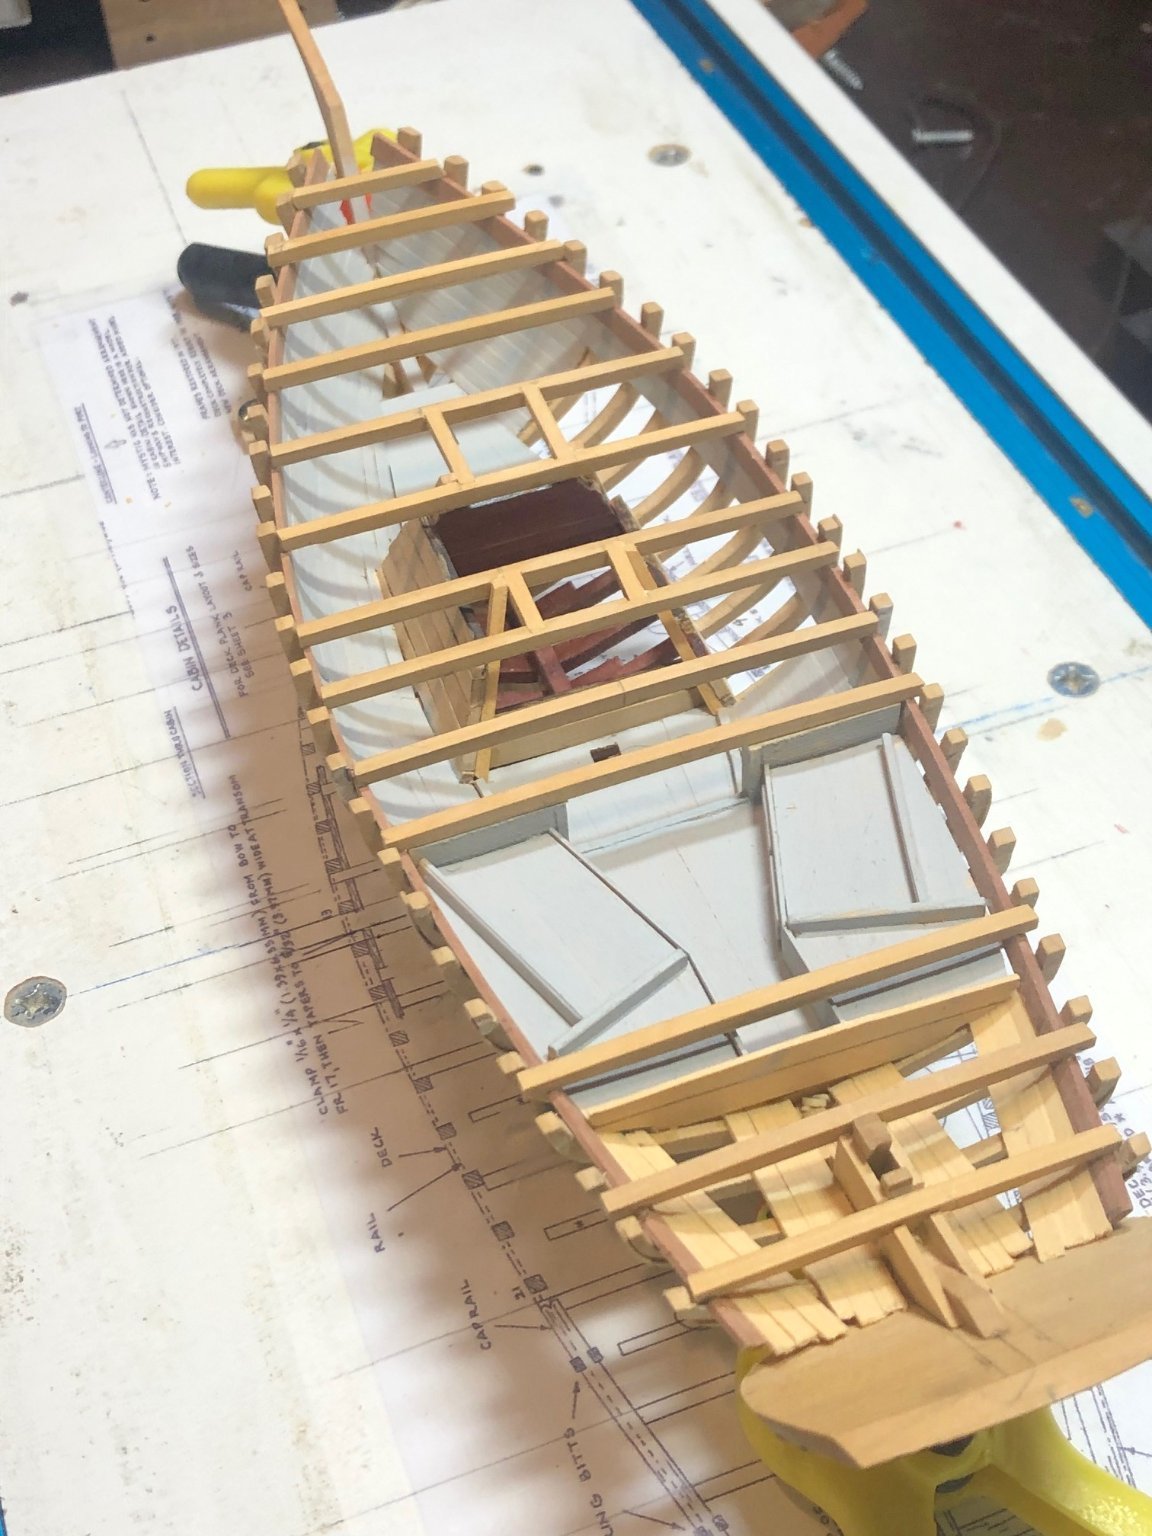
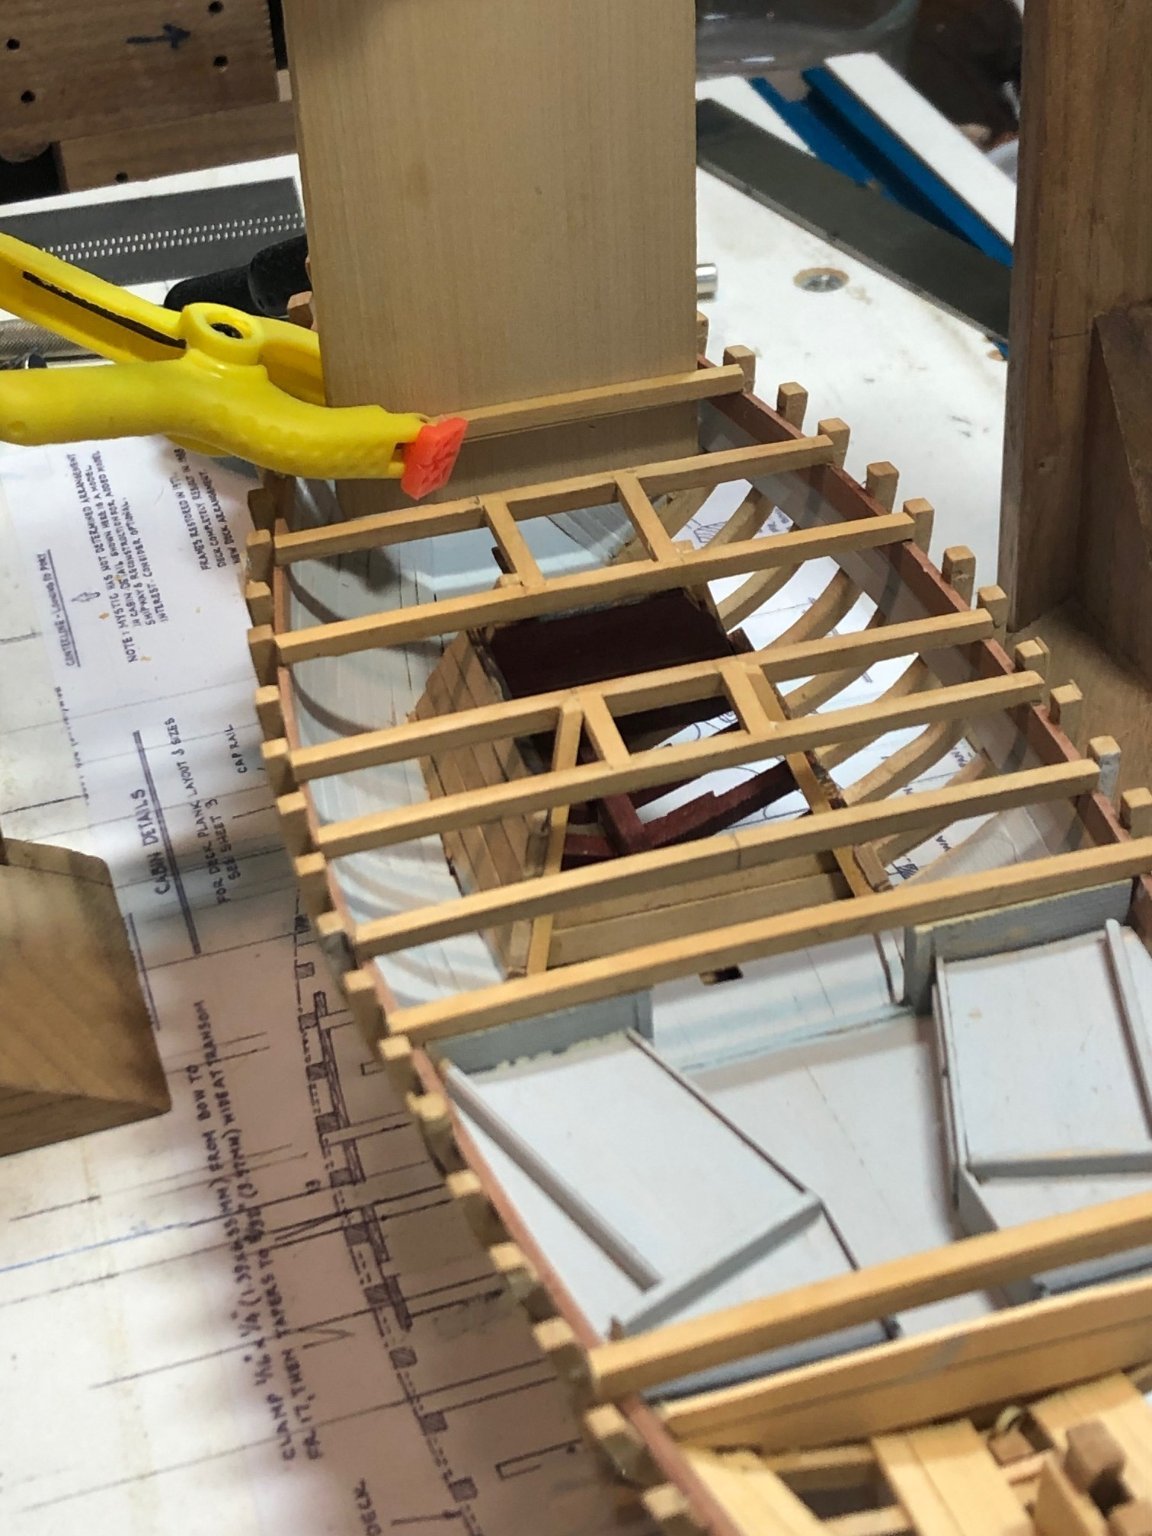
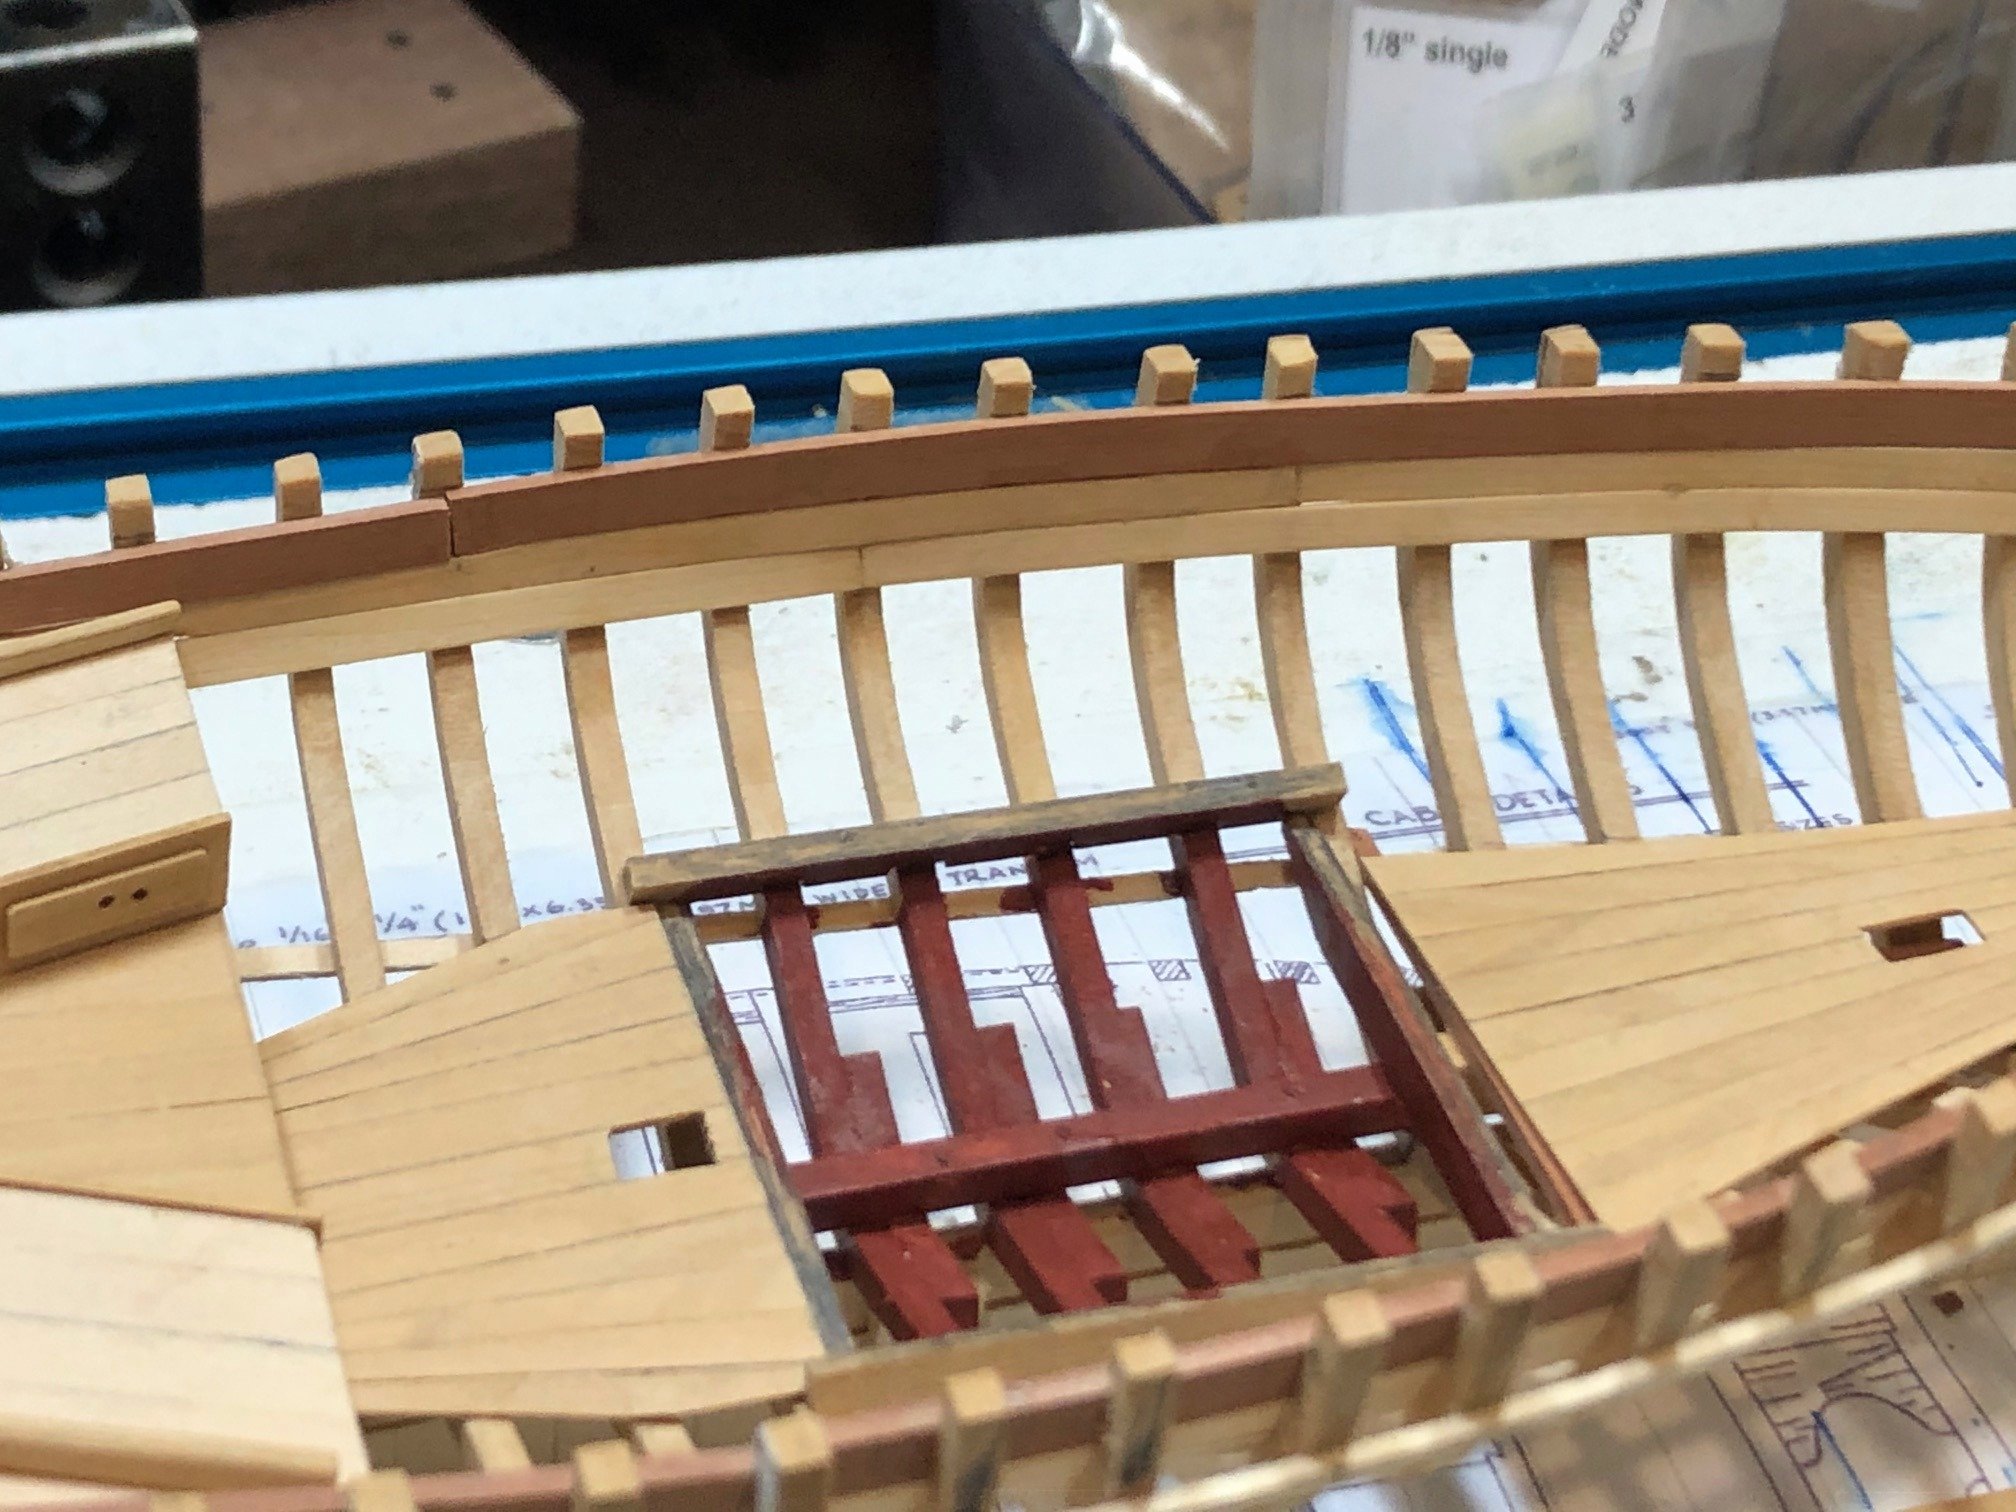
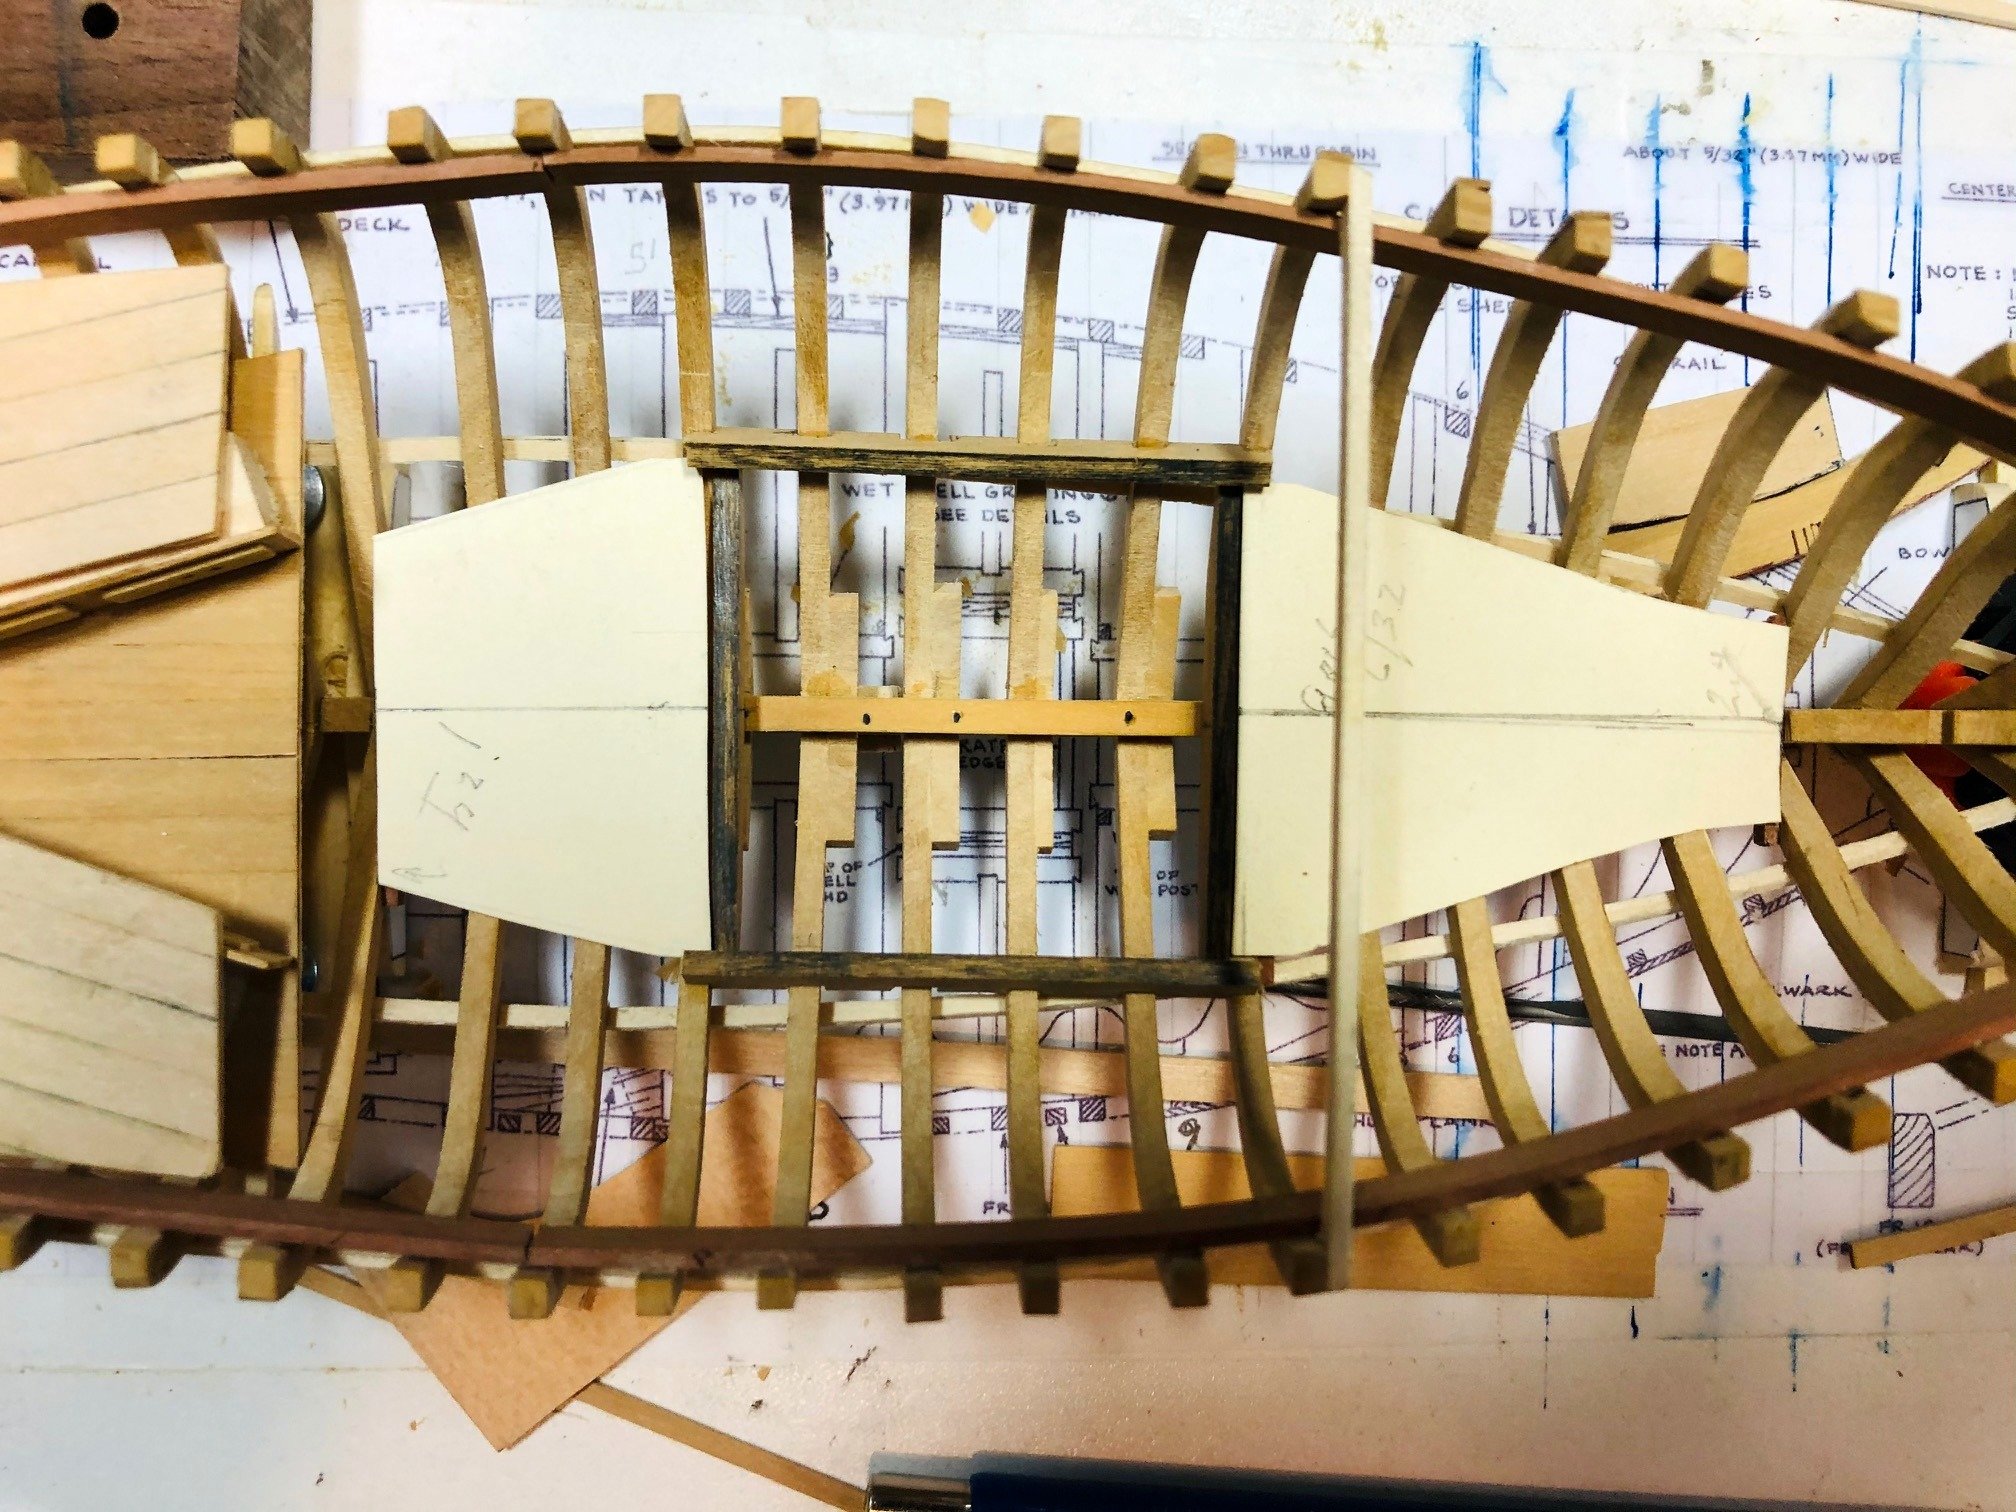
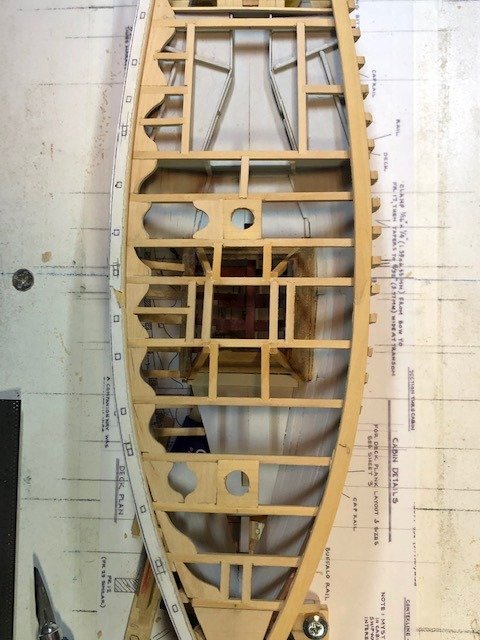
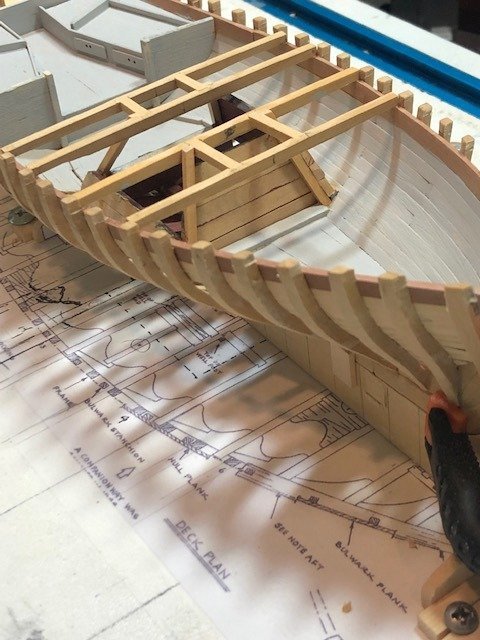
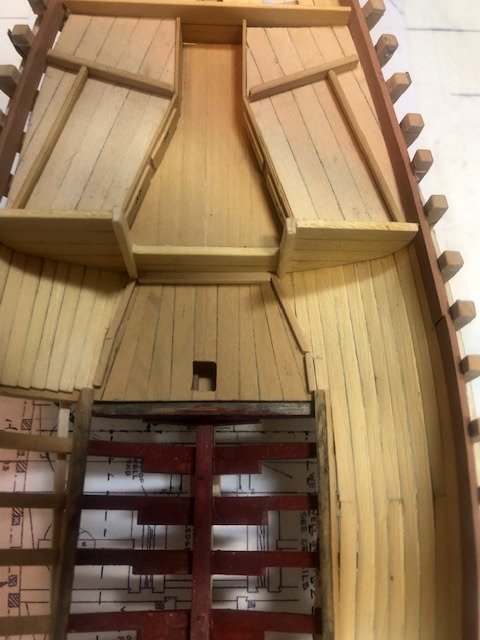
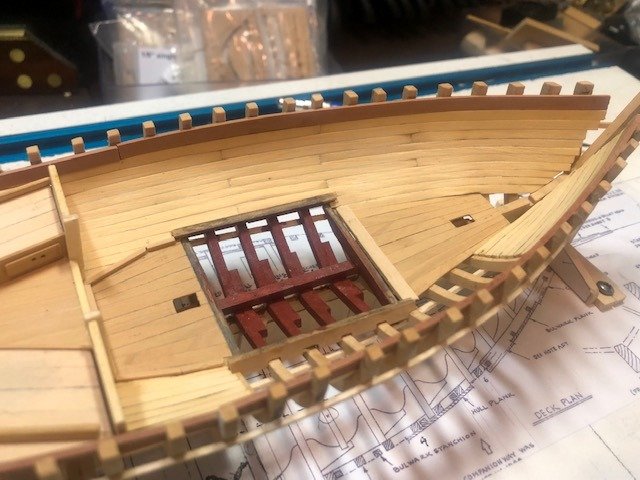
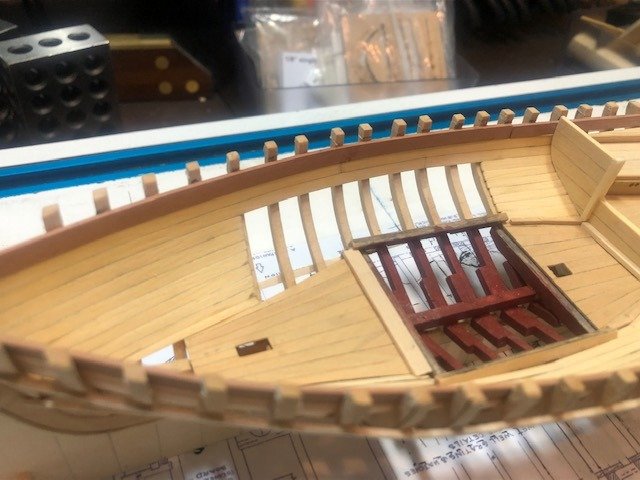
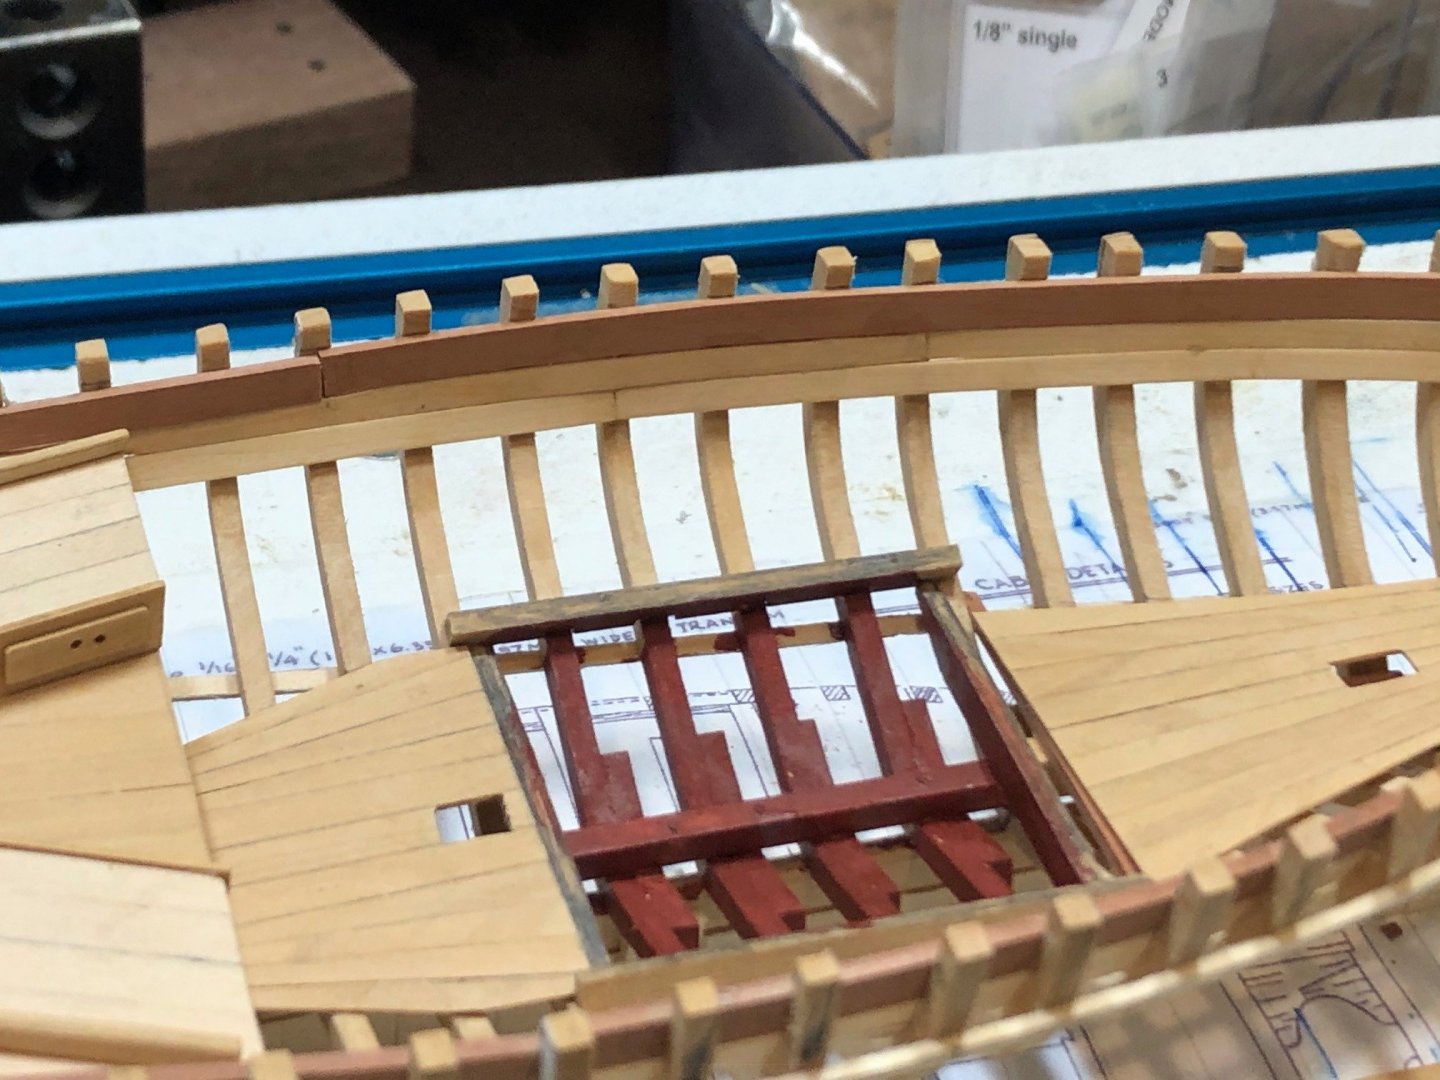
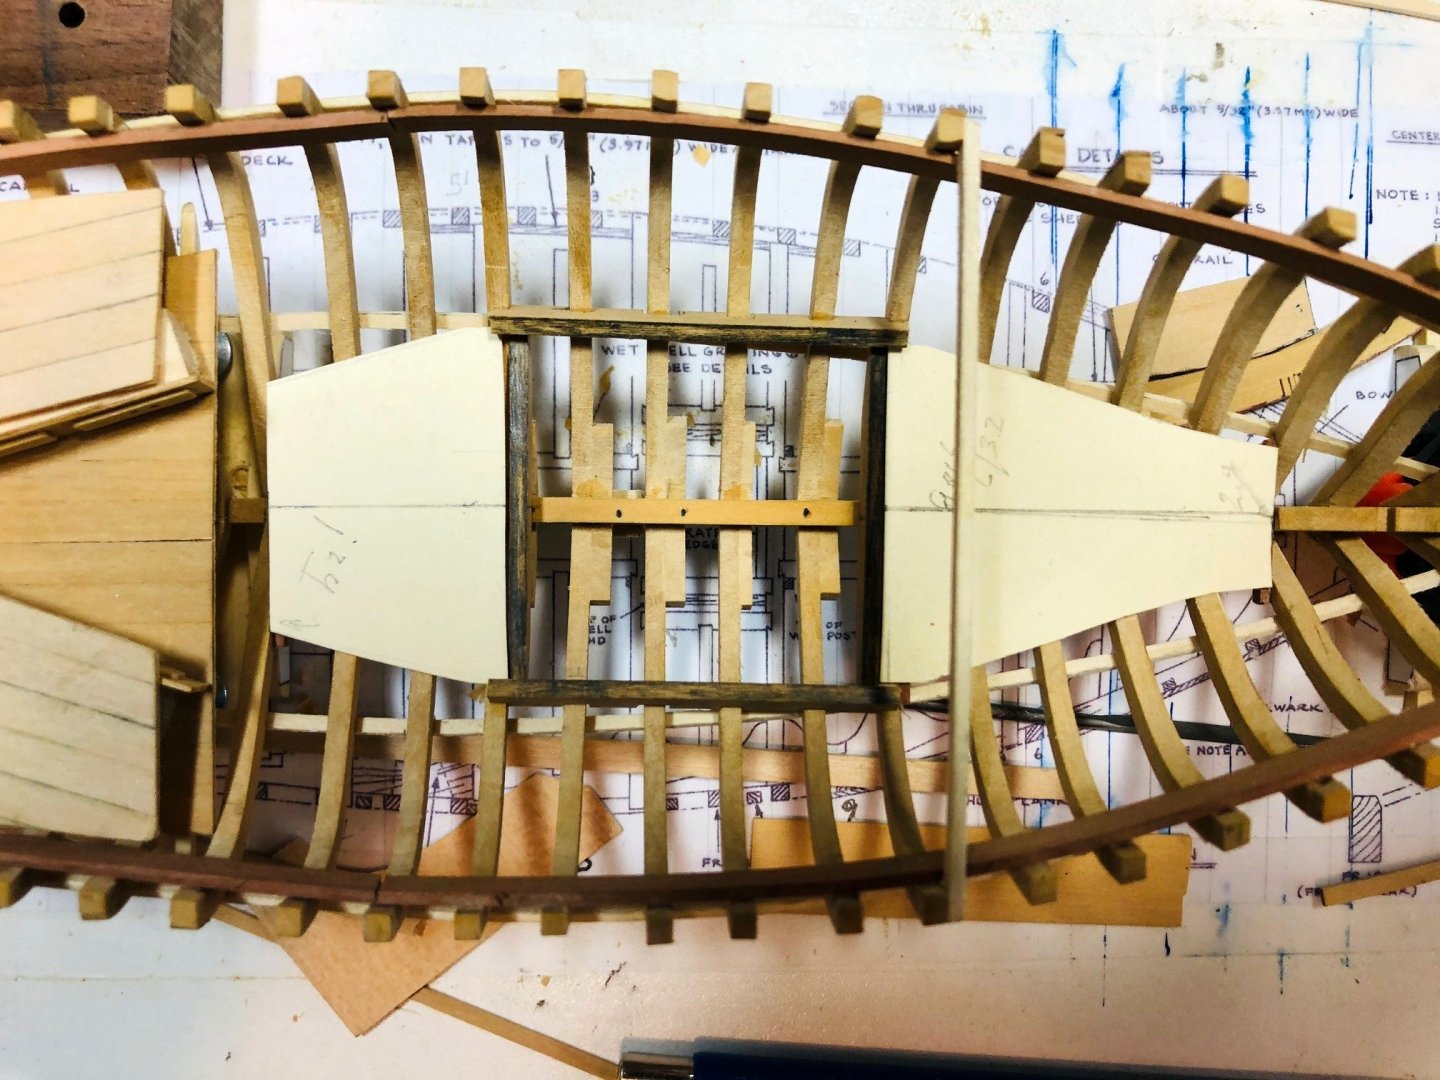
The wet well is complete. The planks of the well are painted Copper-Red on the inside and will be oiled on the outside. They are supported by 4"x4" posts that run from the frames at the bottoms to the intersection of deck beams and carlings at the top. That's why some of the beams needed to be installed before the well was completed. Most of the planks on the aft end and starboard side are omitted for visual impact. Maury

-
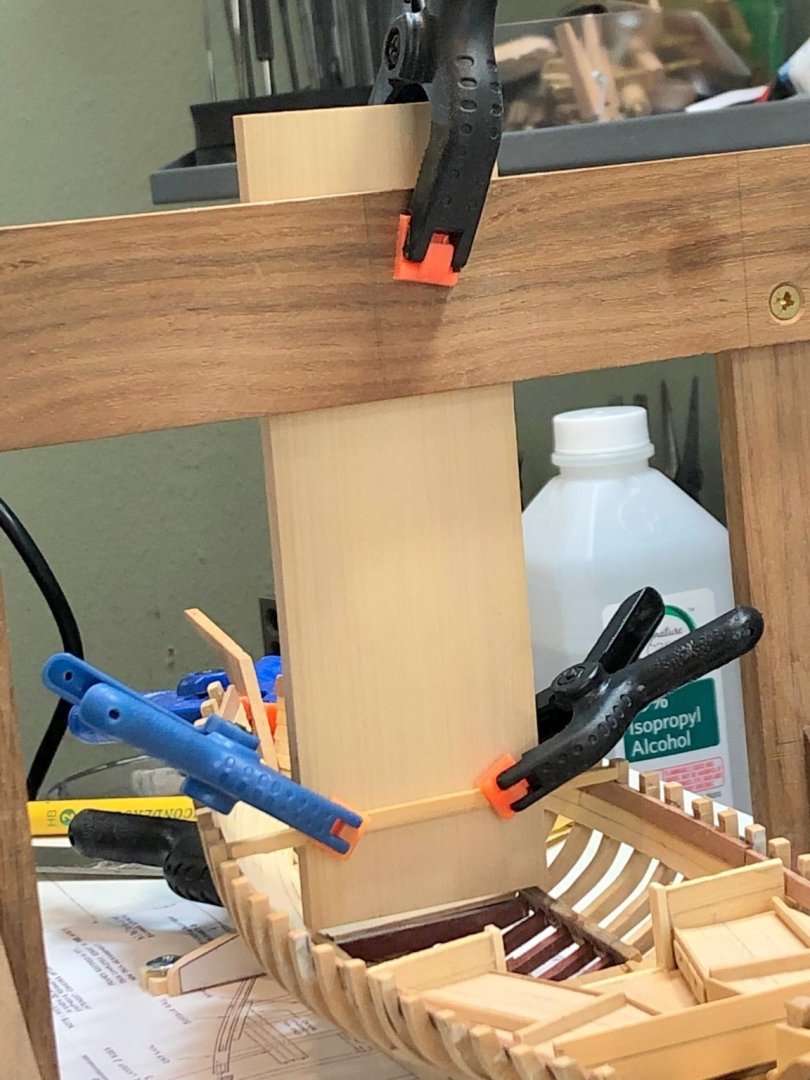
In order to finish the interior (wet well), some deck beams need to be installed as they support the corner frames of the well. The first of these beams is being installed. Sorry for the cluttered background. The location of the beam is determined by the plan on the building board. The gantry is set to align with the forward edge of the beam. A heavy (flat, even, smooth) board is clamped at the cross brace on the top of the gantry. The beam was pre-cut and sanded to the correct upper shape and roughly to the bottom shape. After fitting the beam (side to side), the lower edges are trimmed to the proper depth (5" / .104" @ scale) and beveled so the beam faces remain plumb. Clamping the beam to the board as shown in the photo keeps the beam in position while the glue to the clamp dries. Maury
-
NAIAD 1797 by Bitao - 1:60
Maury S replied to Bitao's topic in - Build logs for subjects built 1751 - 1800
The precision of your work is amazing. Maury -
I don't recall any shims on the cutter, or the Hoy, or the.... M
-
Shipman, So long as MSW exists, obscurity will not be an issue. Maury
- 433 replies
-
- 4
-

-
- open boat
- small boat
- (and 1 more)
-
The outside of the frames have been roughly faired. This involved a couple of shims at a few frames. I think Greg Herbert's [DVM27] comment about not beveling frames before installation is right-on. The additional sanding (fairing) is less work and cleaner than shimming. Next is to extend the wet well bed logs down to the outer edge of the frames. Then start on the deck beams at the top of the wet well. Planking will be put off 'til the deck work and covering boards are in place as they define the shear. Maury
-
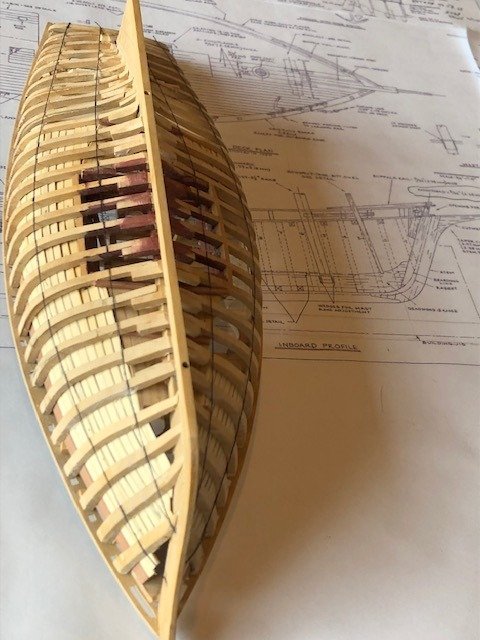
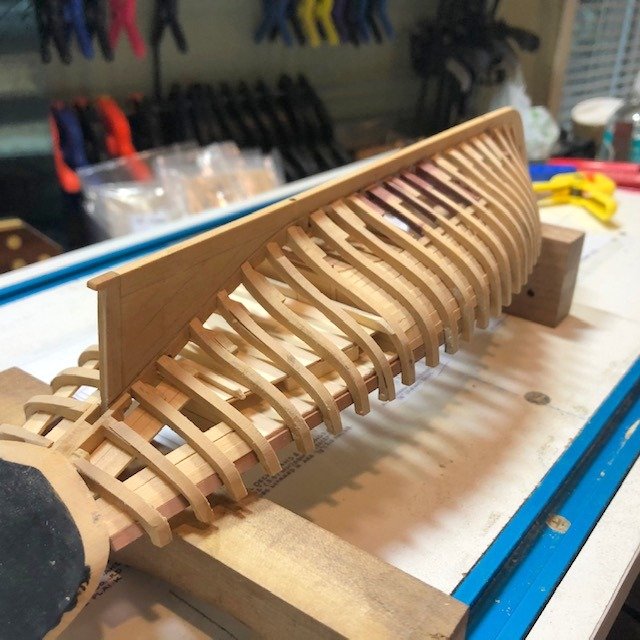
The ceilings and bulkheads are done. Starboard side partially exposed. The wet well can not be constructed until the deck beams above are installed. I removed the half breadth plans (showing the framing layout) and replaced them with deck plans. The beam layout was re-drawn and differs from Ben Lankford's plans because of the schooner rig. I think the stringers on the outside of the frames can now be removed and the frames faired in prep for the planking. I've spent some time reviewing the reconstruction notes from Mystic. Very helpful with many of the details. Maury
-
I don't think it's appropriate to FLUSH those tissues. Those chemicals end up in the ocean or your water supply. Soak them in water and allow them to dry outdoors. They can then be thrown in the trash. Maury
-
Druxey, Are you planning on doing a book, similar to the one for the hospital barge? Maury
- 433 replies
-
- 4
-
-
- open boat
- small boat
- (and 1 more)
-
I am not a great fan of AYC (i.e. it doesn't hold an edge when carved, gets fuzzy, etc) but there are some applications where it can be used effectively. It is soft and can be edge-bent easily (see Chuck's instructions on bending). The ceilings and most other interior parts will be painted grey so I chose to use it here. Maury
-
The ceilings are being installed. I had to decide which side would be un-planked for display, so it's the starboard side. Ceilings will be partial on that side as will outer planking. The butt pattern is similar to the outer planking (two frames between and two strakes between. In an effort to conserve my Costello Box supply, the ceilings are AYC. The restoration in Mystic used Southern Cedar, so close enough. The bed logs, frames and keel within the well are painted Copper Bottom red. Maury
-
Soles installed. Next up, the ceilings. 1.5" x 5". Maury
-
The sole sleepers are in and card patterns for the soles are cut. The planks will be tapered and edge-glued. The wet-well bed logs are glued in place. The inside of the well will be "Copper-bottom Red", the outside oiled...per the plan. The edges of the logs have a #2 pencil lead coating simulating tar. Several planks will be left off for presentation. Maury
-
I keep having to remind myself this is 1:48. Simply beautiful. Maury
- 433 replies
-
- 8
-
-
- open boat
- small boat
- (and 1 more)
-
OOPS, I need to install the mid and forecastle soles before the ceilings. Maury
-
The cabin sole is fitted and the bunks made up. At the aft end of the bunks will be a bulkhead. At the fore end of the bunks, there will be a bulkhead and door into the center section. The lower bed logs for the wet well cut and fit. Now that those are located, I can start on the ceilings. Maury