HOLIDAY DONATION DRIVE - SUPPORT MSW - DO YOUR PART TO KEEP THIS GREAT FORUM GOING! (Only 44 donations so far out of 49,000 members - C'mon guys!)
×


Maury S
-
Posts
1,490 -
Joined
-
Last visited
Content Type
Profiles
Forums
Gallery
Events
Everything posted by Maury S
-
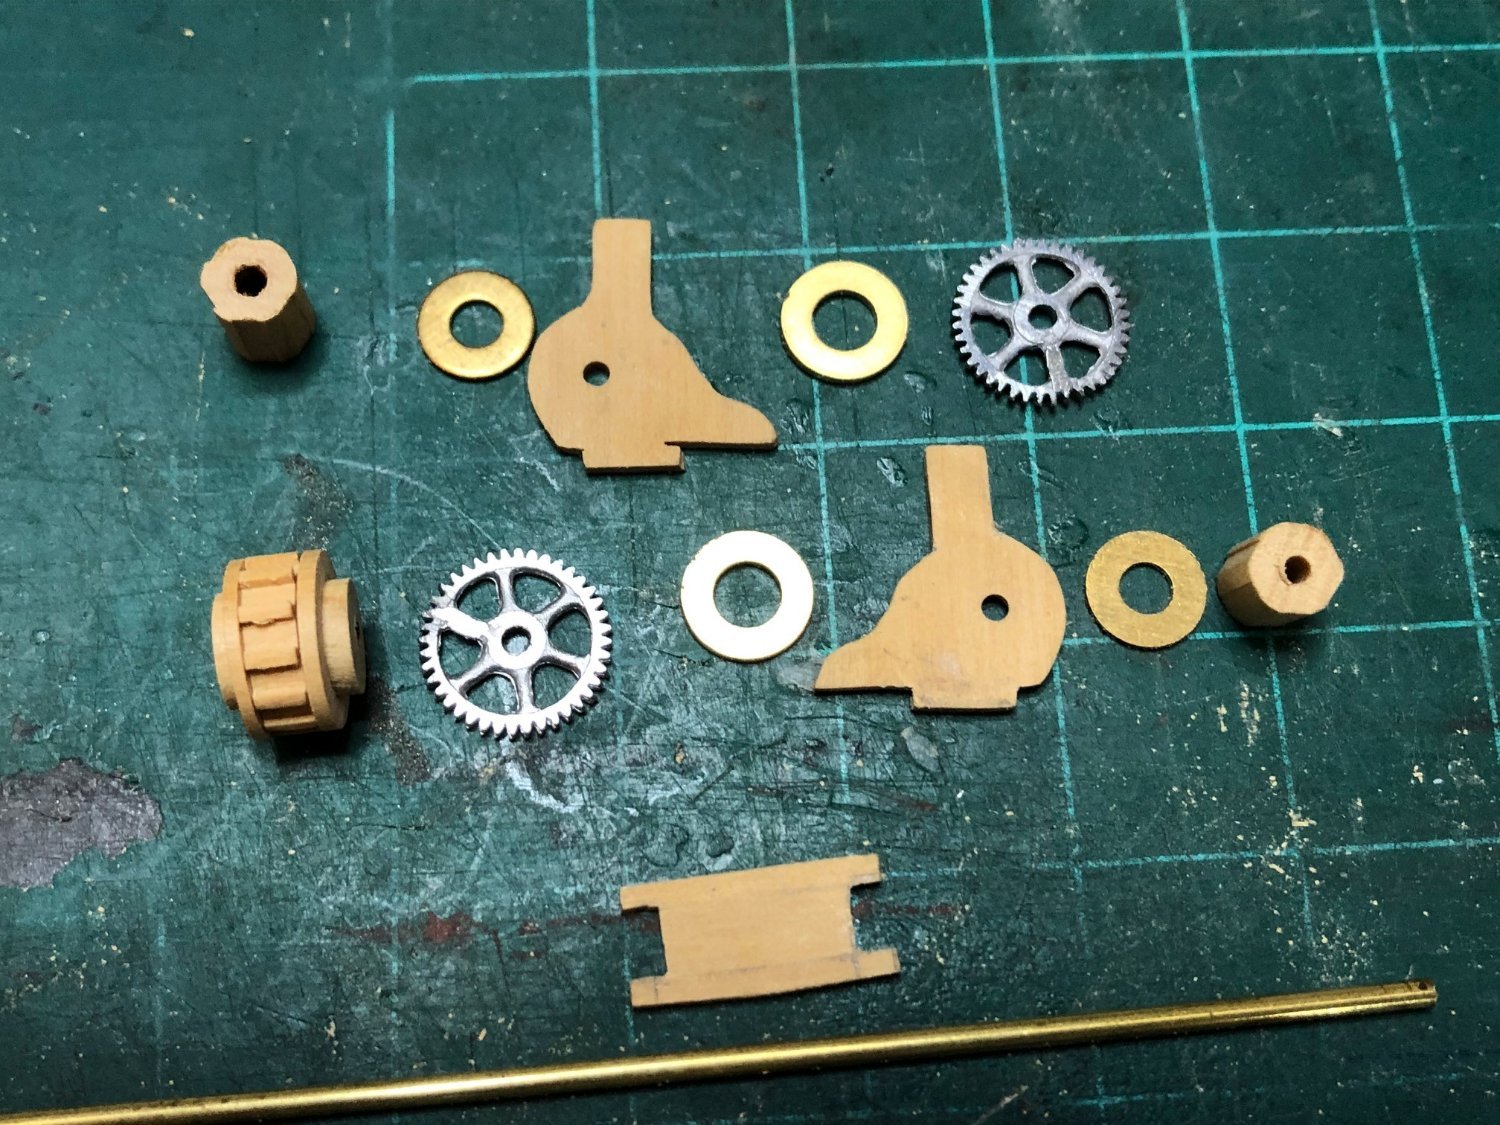
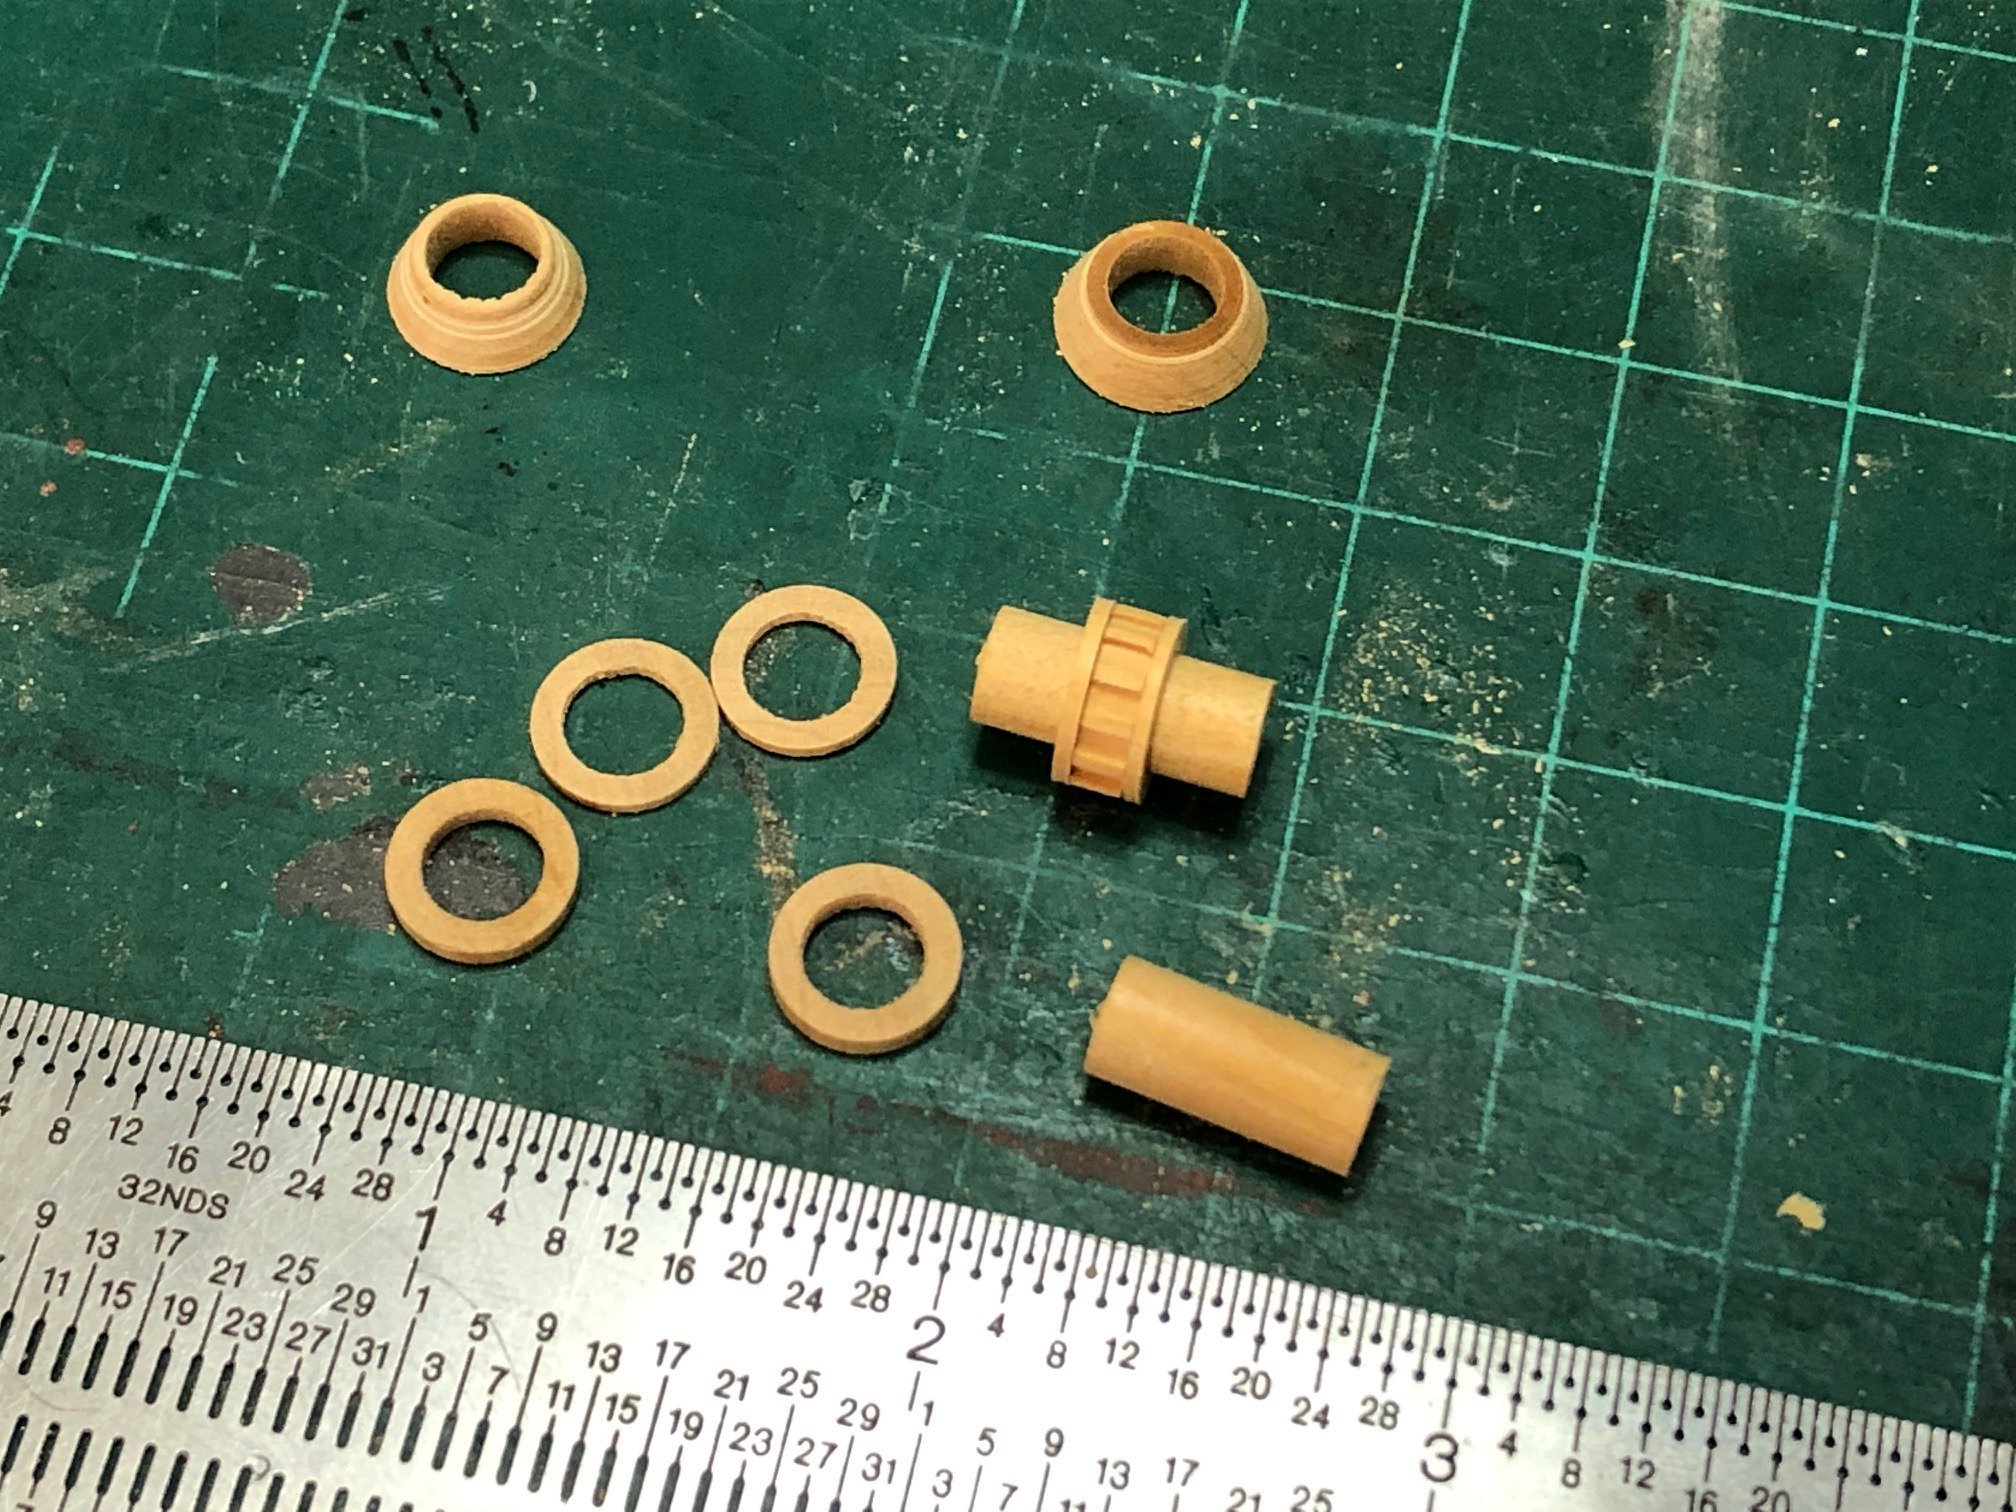
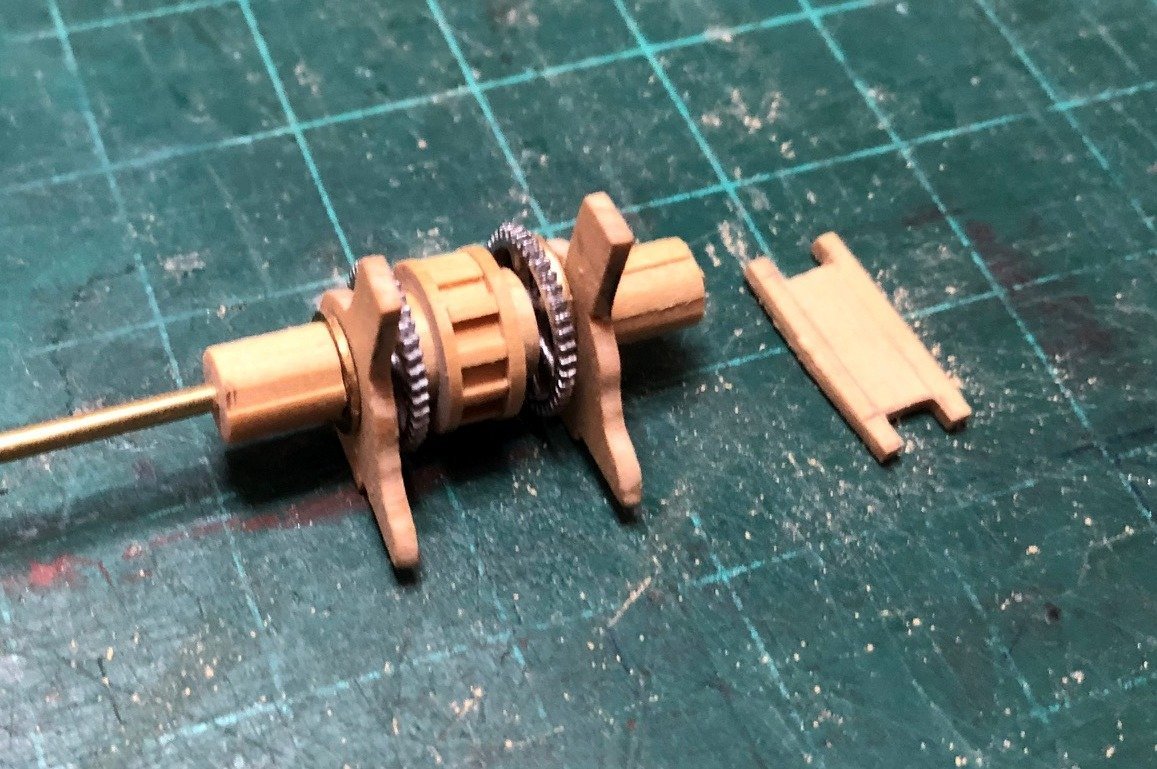
 Thanks for the comments, all. More on the windlass. I re-turned the barrels with a hole for a 1/16" axle. All the parts of the drum section are shown. The gears are Alexander Scale Models (Railroad) contributed by Randy Biddle. The heads (end parts of the windlass) were turned down to 21/32", removed from the lathe and mounted on the mill (rotary table set vertical) and 1/16" scores or flat spots were cut across the length every 60 degrees of rotation to support the set of 6 whelps (to be made and installed). Assembles pretty nicely on a piece of 1/16" tubing. The cross bitt on the right needs trimming. It mounts above the drum, stabilizes the bitts (and hides a good deal of the view of the windlass. Maury
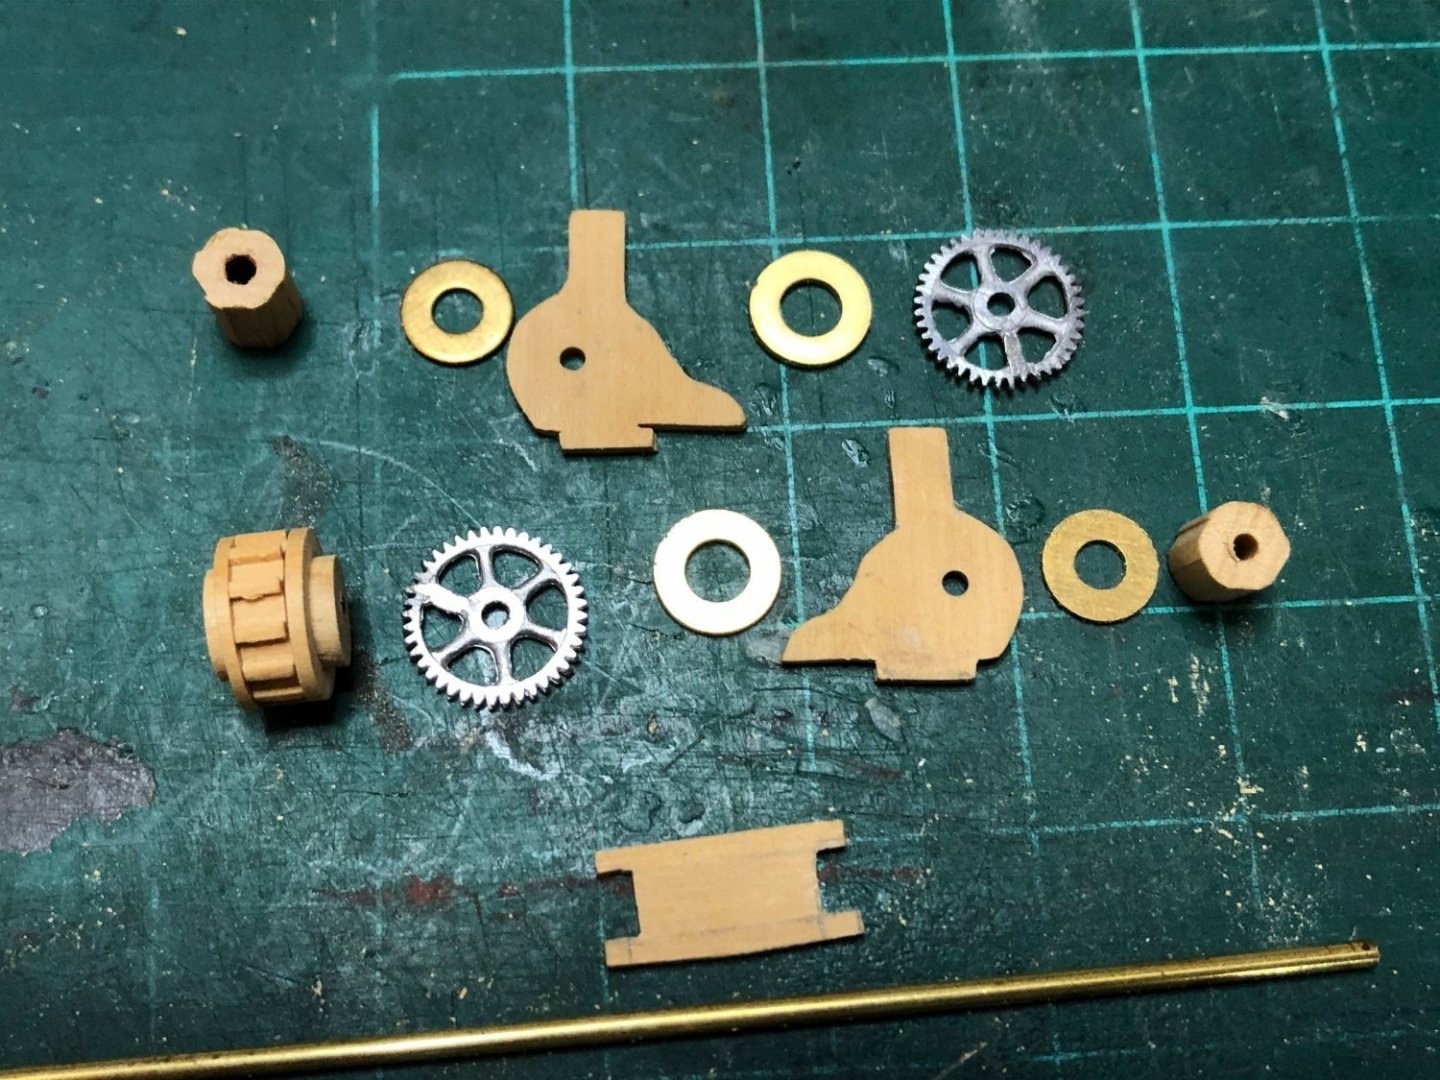
-
Great tip Ed. Maury
-
Swan-Class Sloop by Stuglo - FINISHED - 1:48
Maury S replied to stuglo's topic in - Build logs for subjects built 1751 - 1800
I've found a few drops of Red and Green food dye into a bottle of Tite-Bond or LMI glue makes a nice dark brown glue. Always wash off excess. (LMI = Luthiers Musical Instrument glue. It has a dye in it to show up under black light and you can see where it needs washing.) Maury -
Some time on the lathe and mill. I'm a novice with these tools, but getting better. Starting with the simplest pieces, I center drilled a 1/2" block (1/8" then 1/4") for the two mast coats at the deck level)(that would have been canvas. Turned the block down to about 3/8" and tapered them. (upper two pieces) The remaining pieces are parts of the windlass. The pawl wheel (or gear) was turned to the outside diameter and the block, still in the 4-jaw chuck was moved to the rotating table (set upright) on the mill. I used a 1/8" end mill, rotating 30 degrees every cut to make the cogs. After that was parted off, I sliced several spacers of various thicknesses that will separate the pawl wheel from the gears (not shown) and the bitts. The cylindrical pieces will form the drums. Whelps not made yet. Maury

-
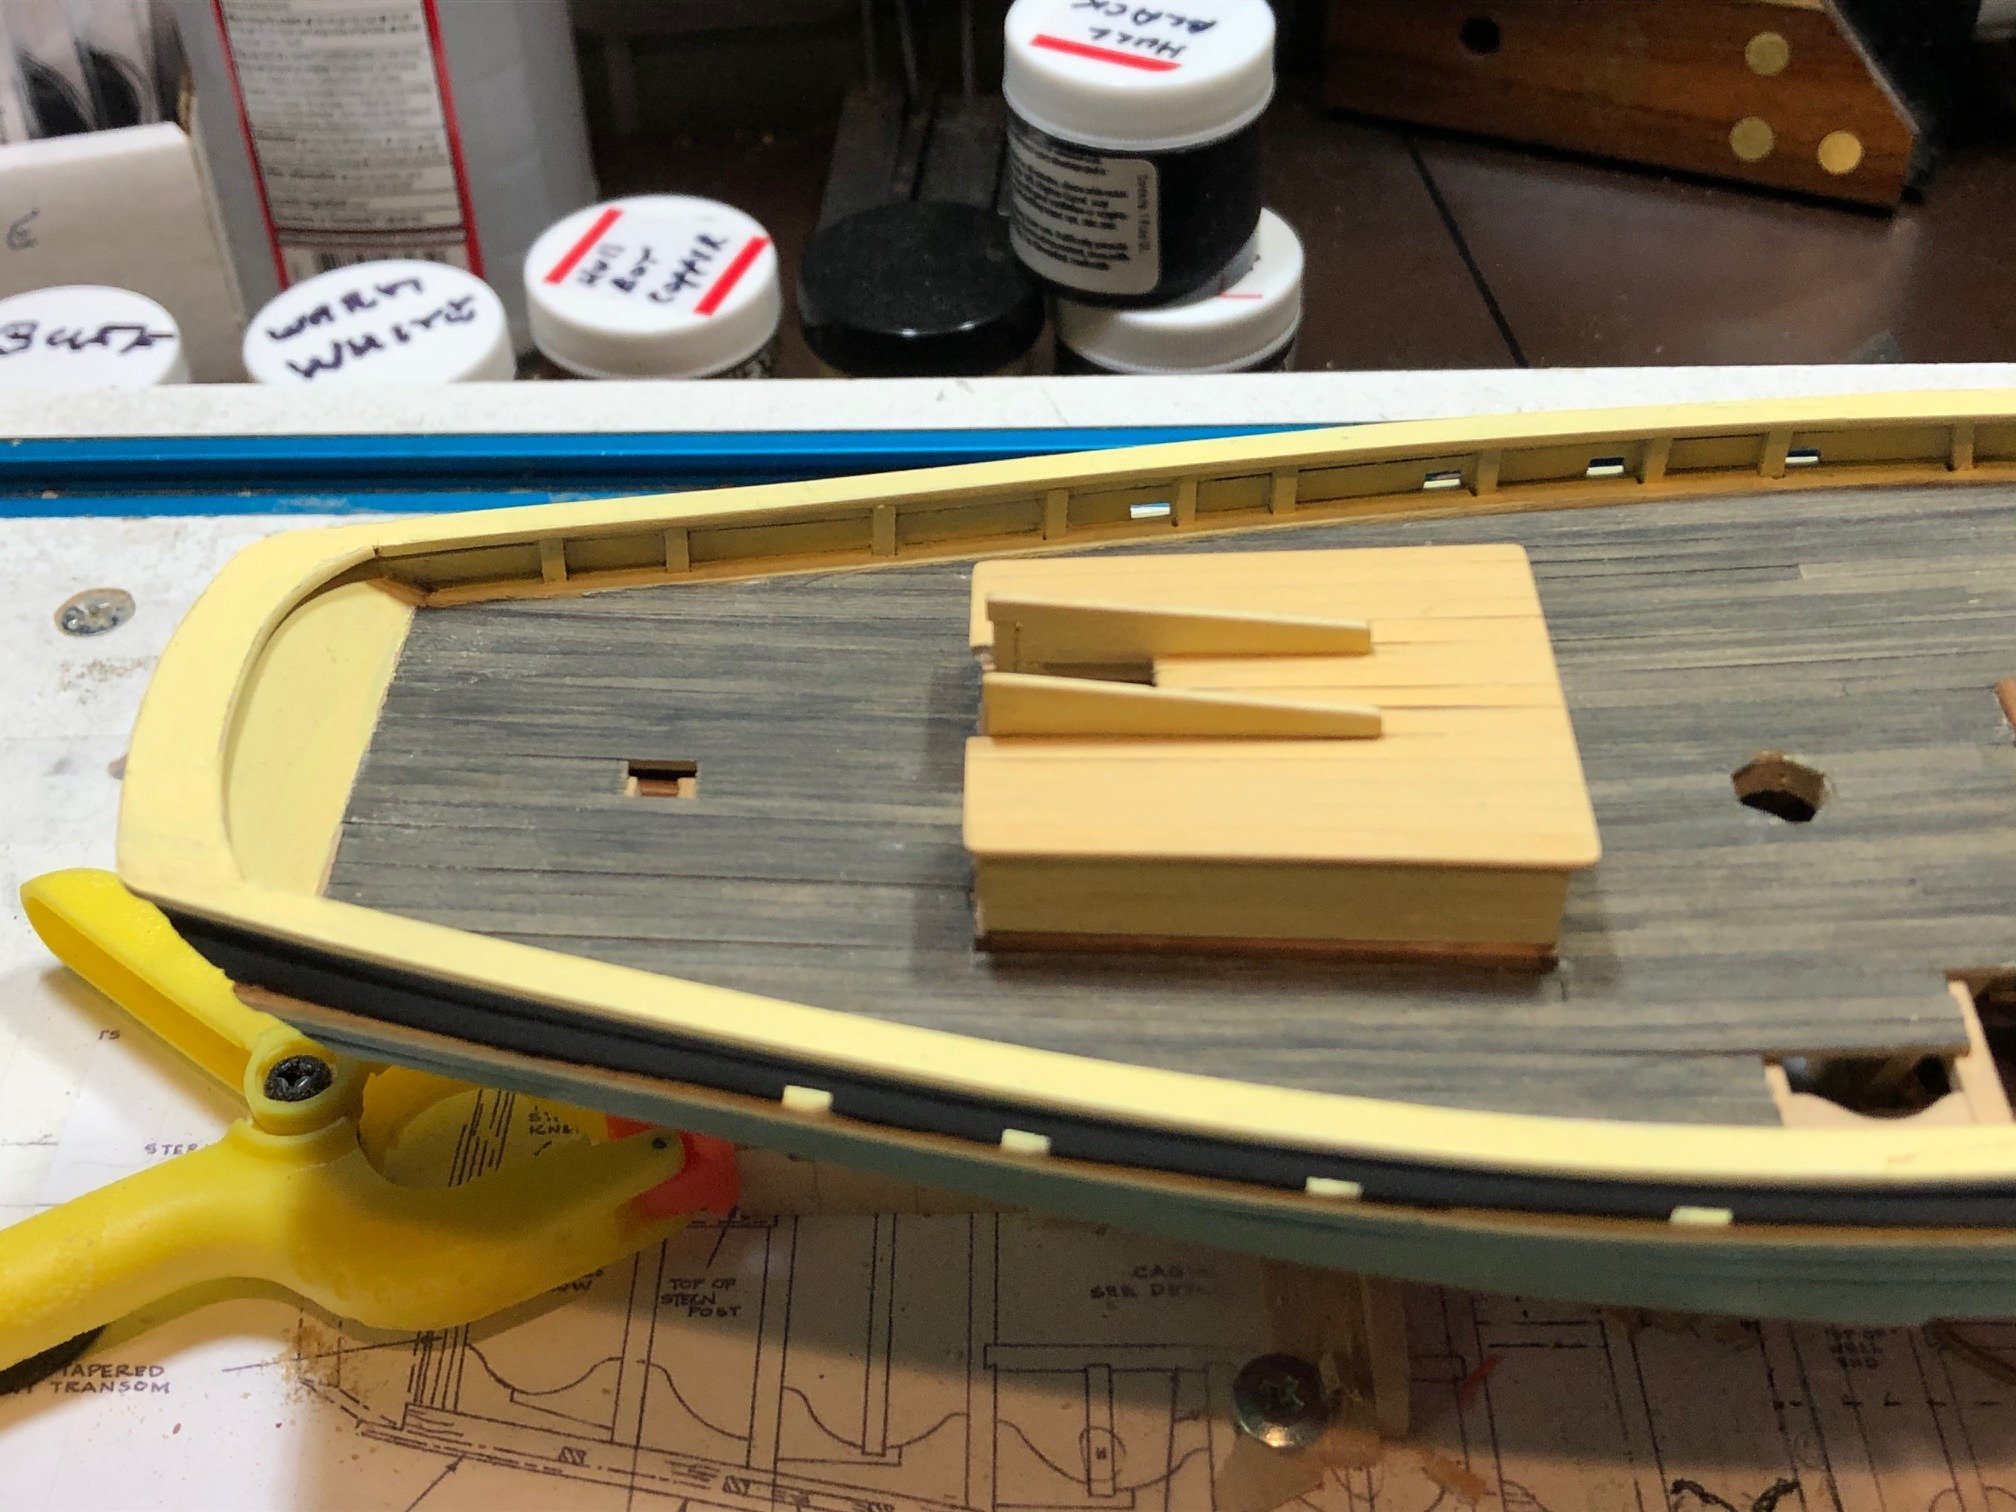
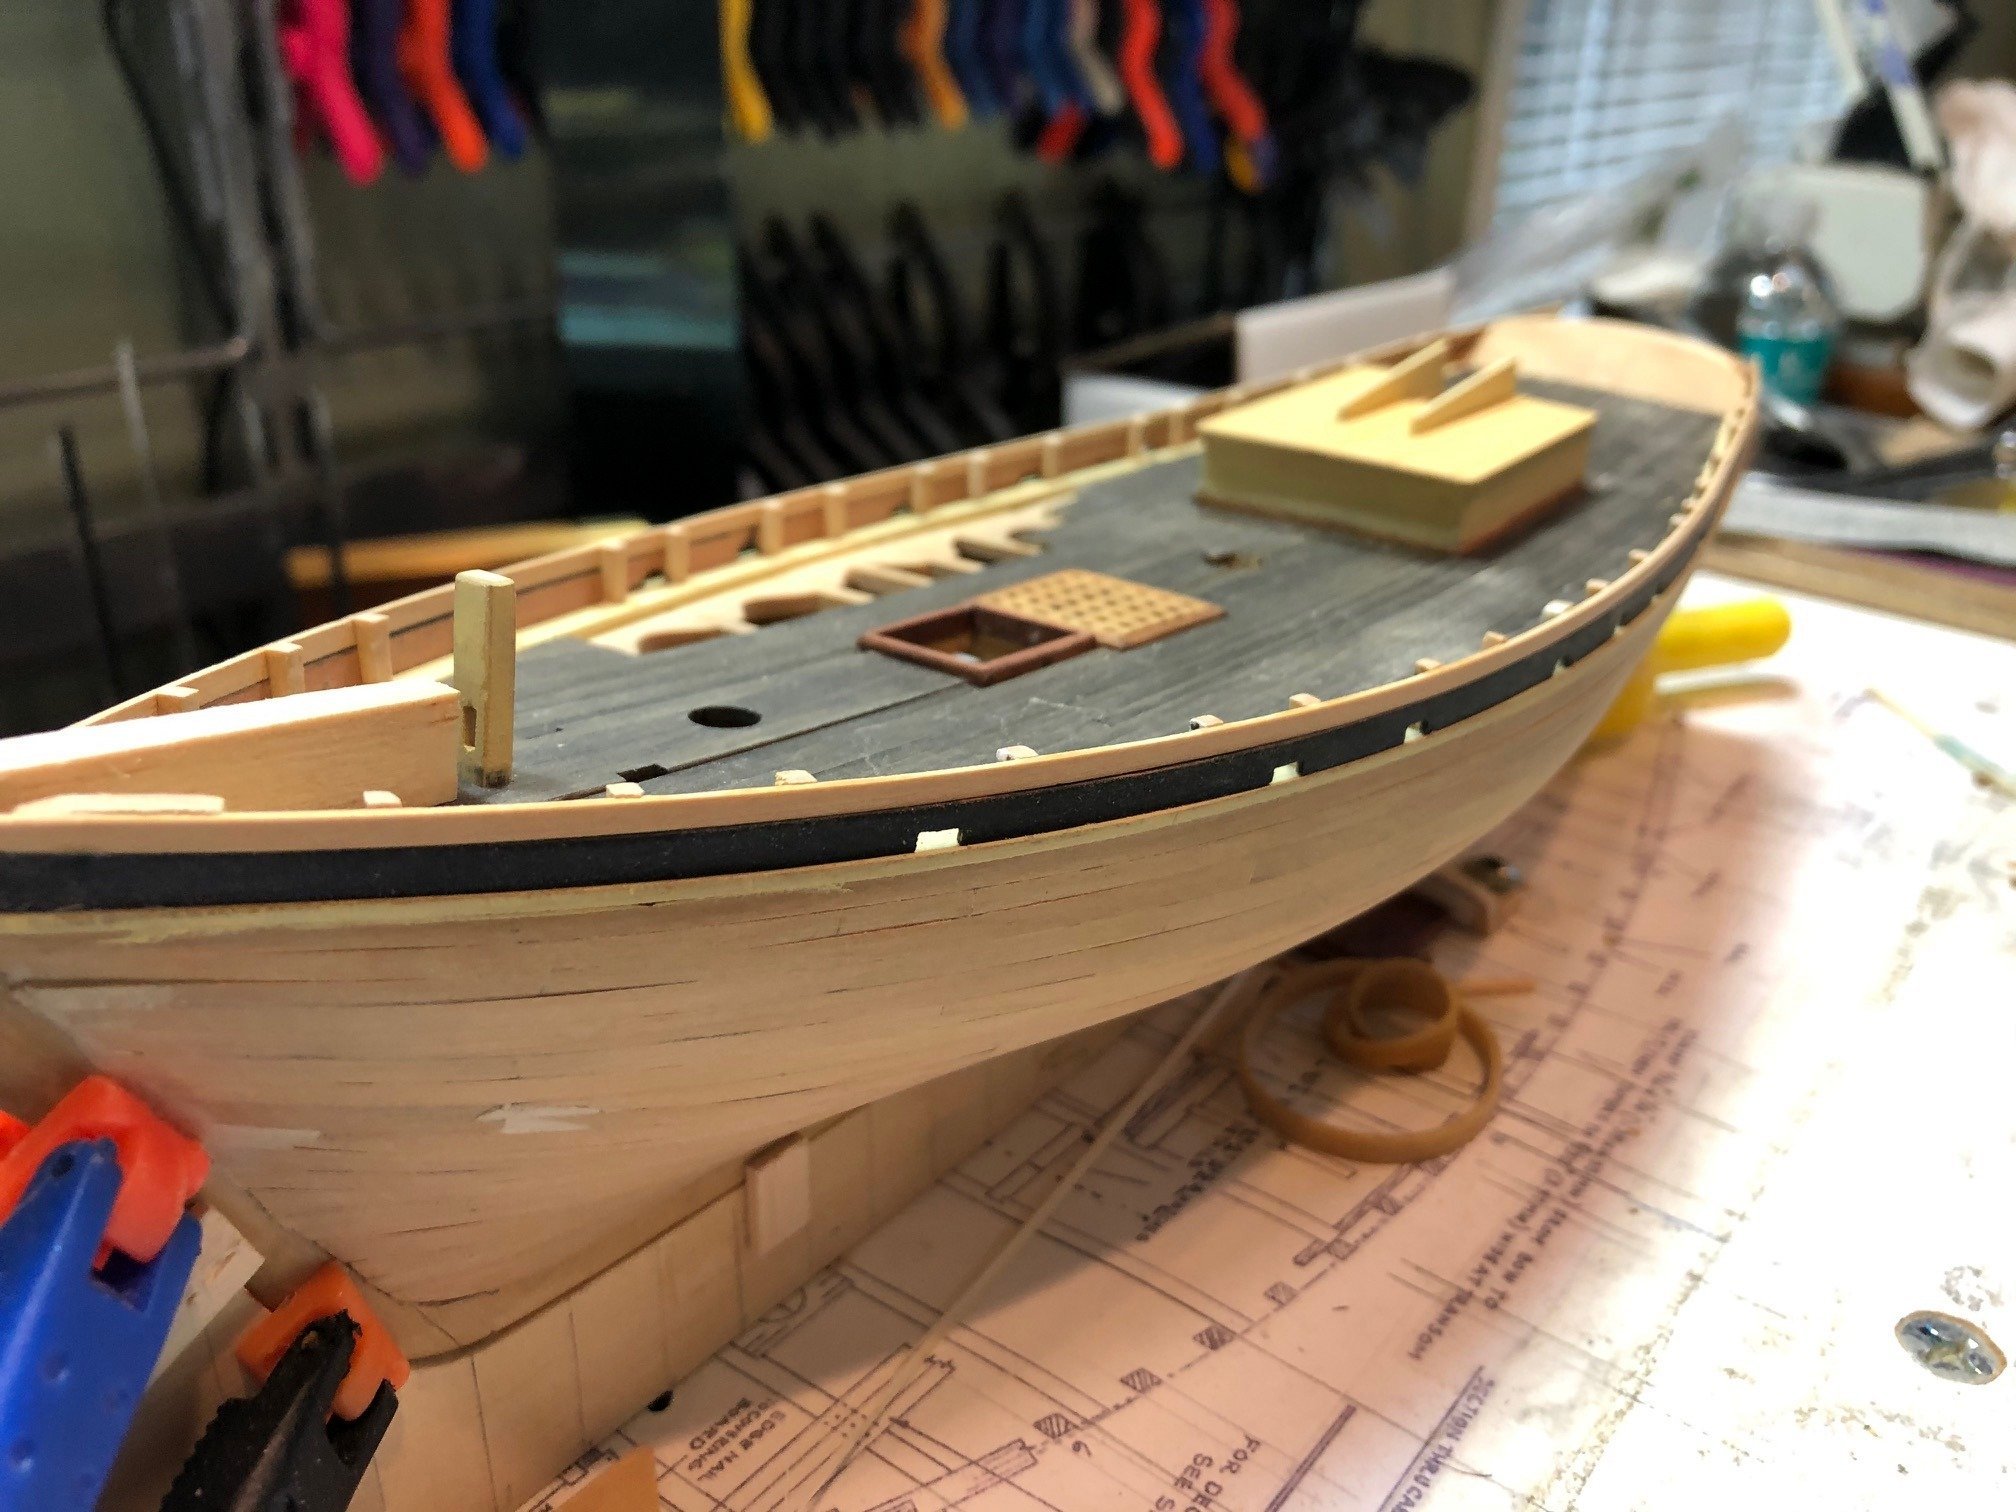
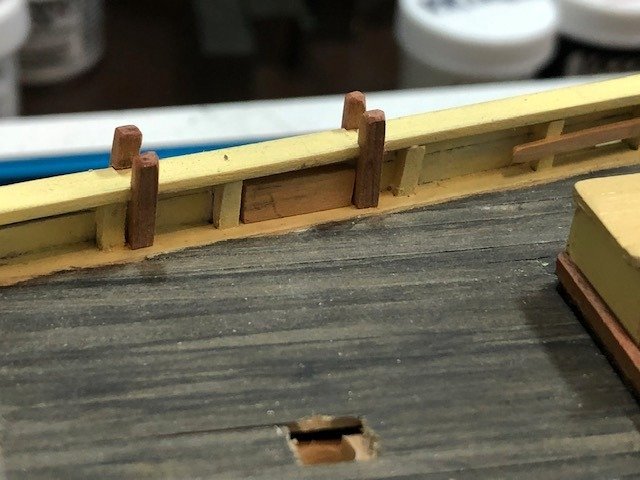
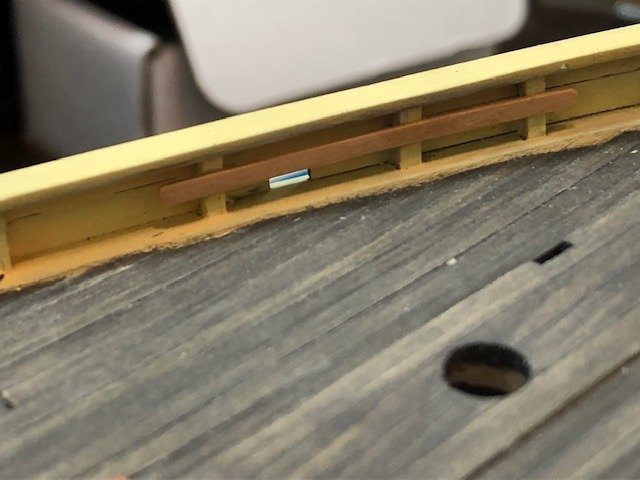
The mooring bitts, mooring chock blocks and lashing rails are in. Yet to be painted. Maury
-
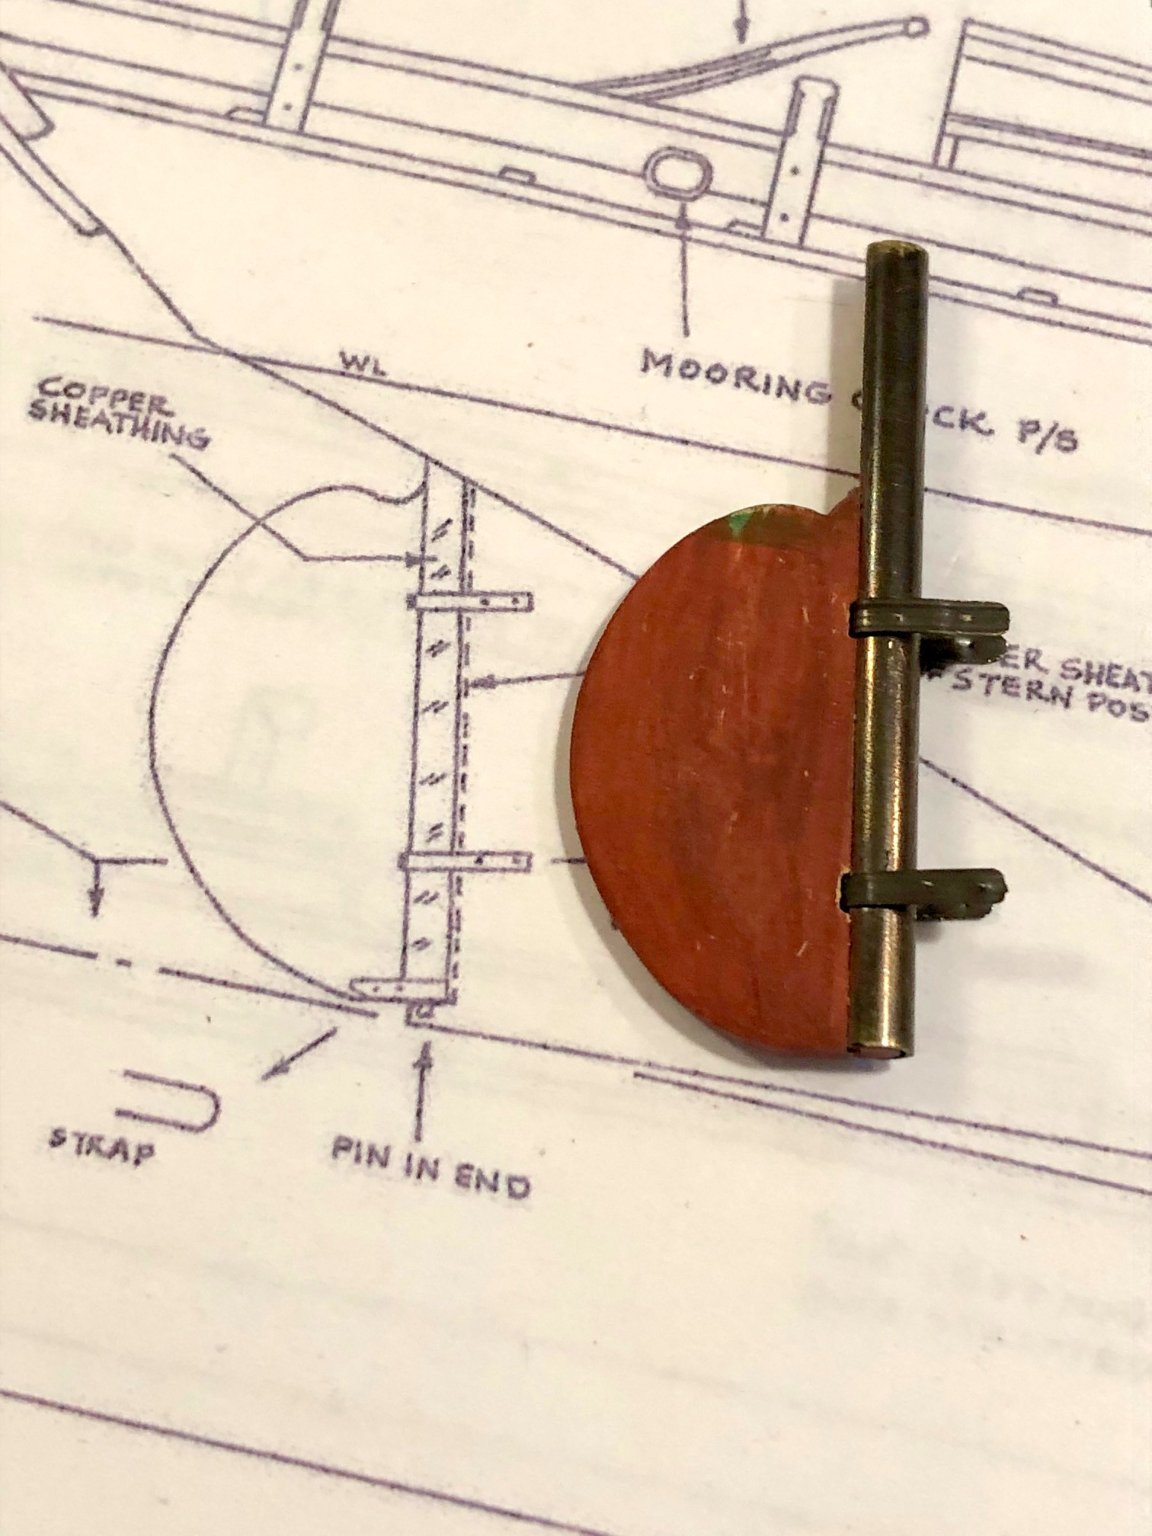
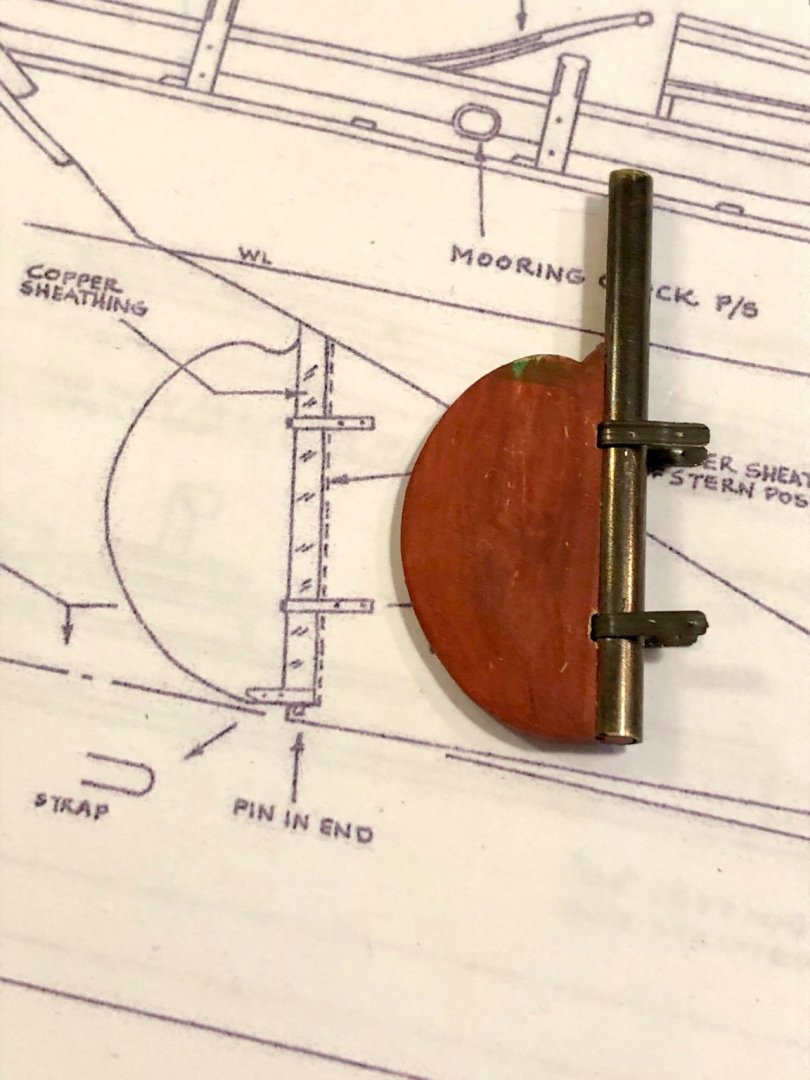
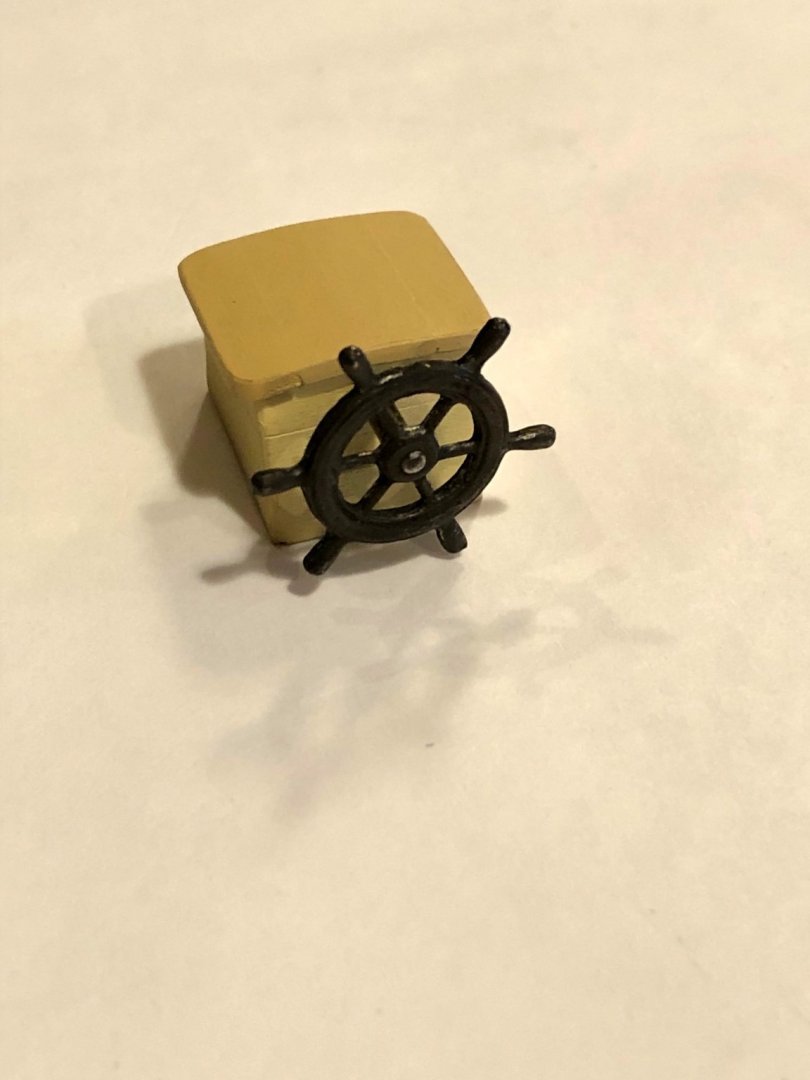
Rudder: The rudder is held on with two straps rather the the typical pinon arrangement. Wheel box: I don't remember where I got the wheel, but after filing and blackening it looks pretty close to the photos I have. Maury
-
Greg, So the strap is an open hook...not closed like a chain link? Maury
-
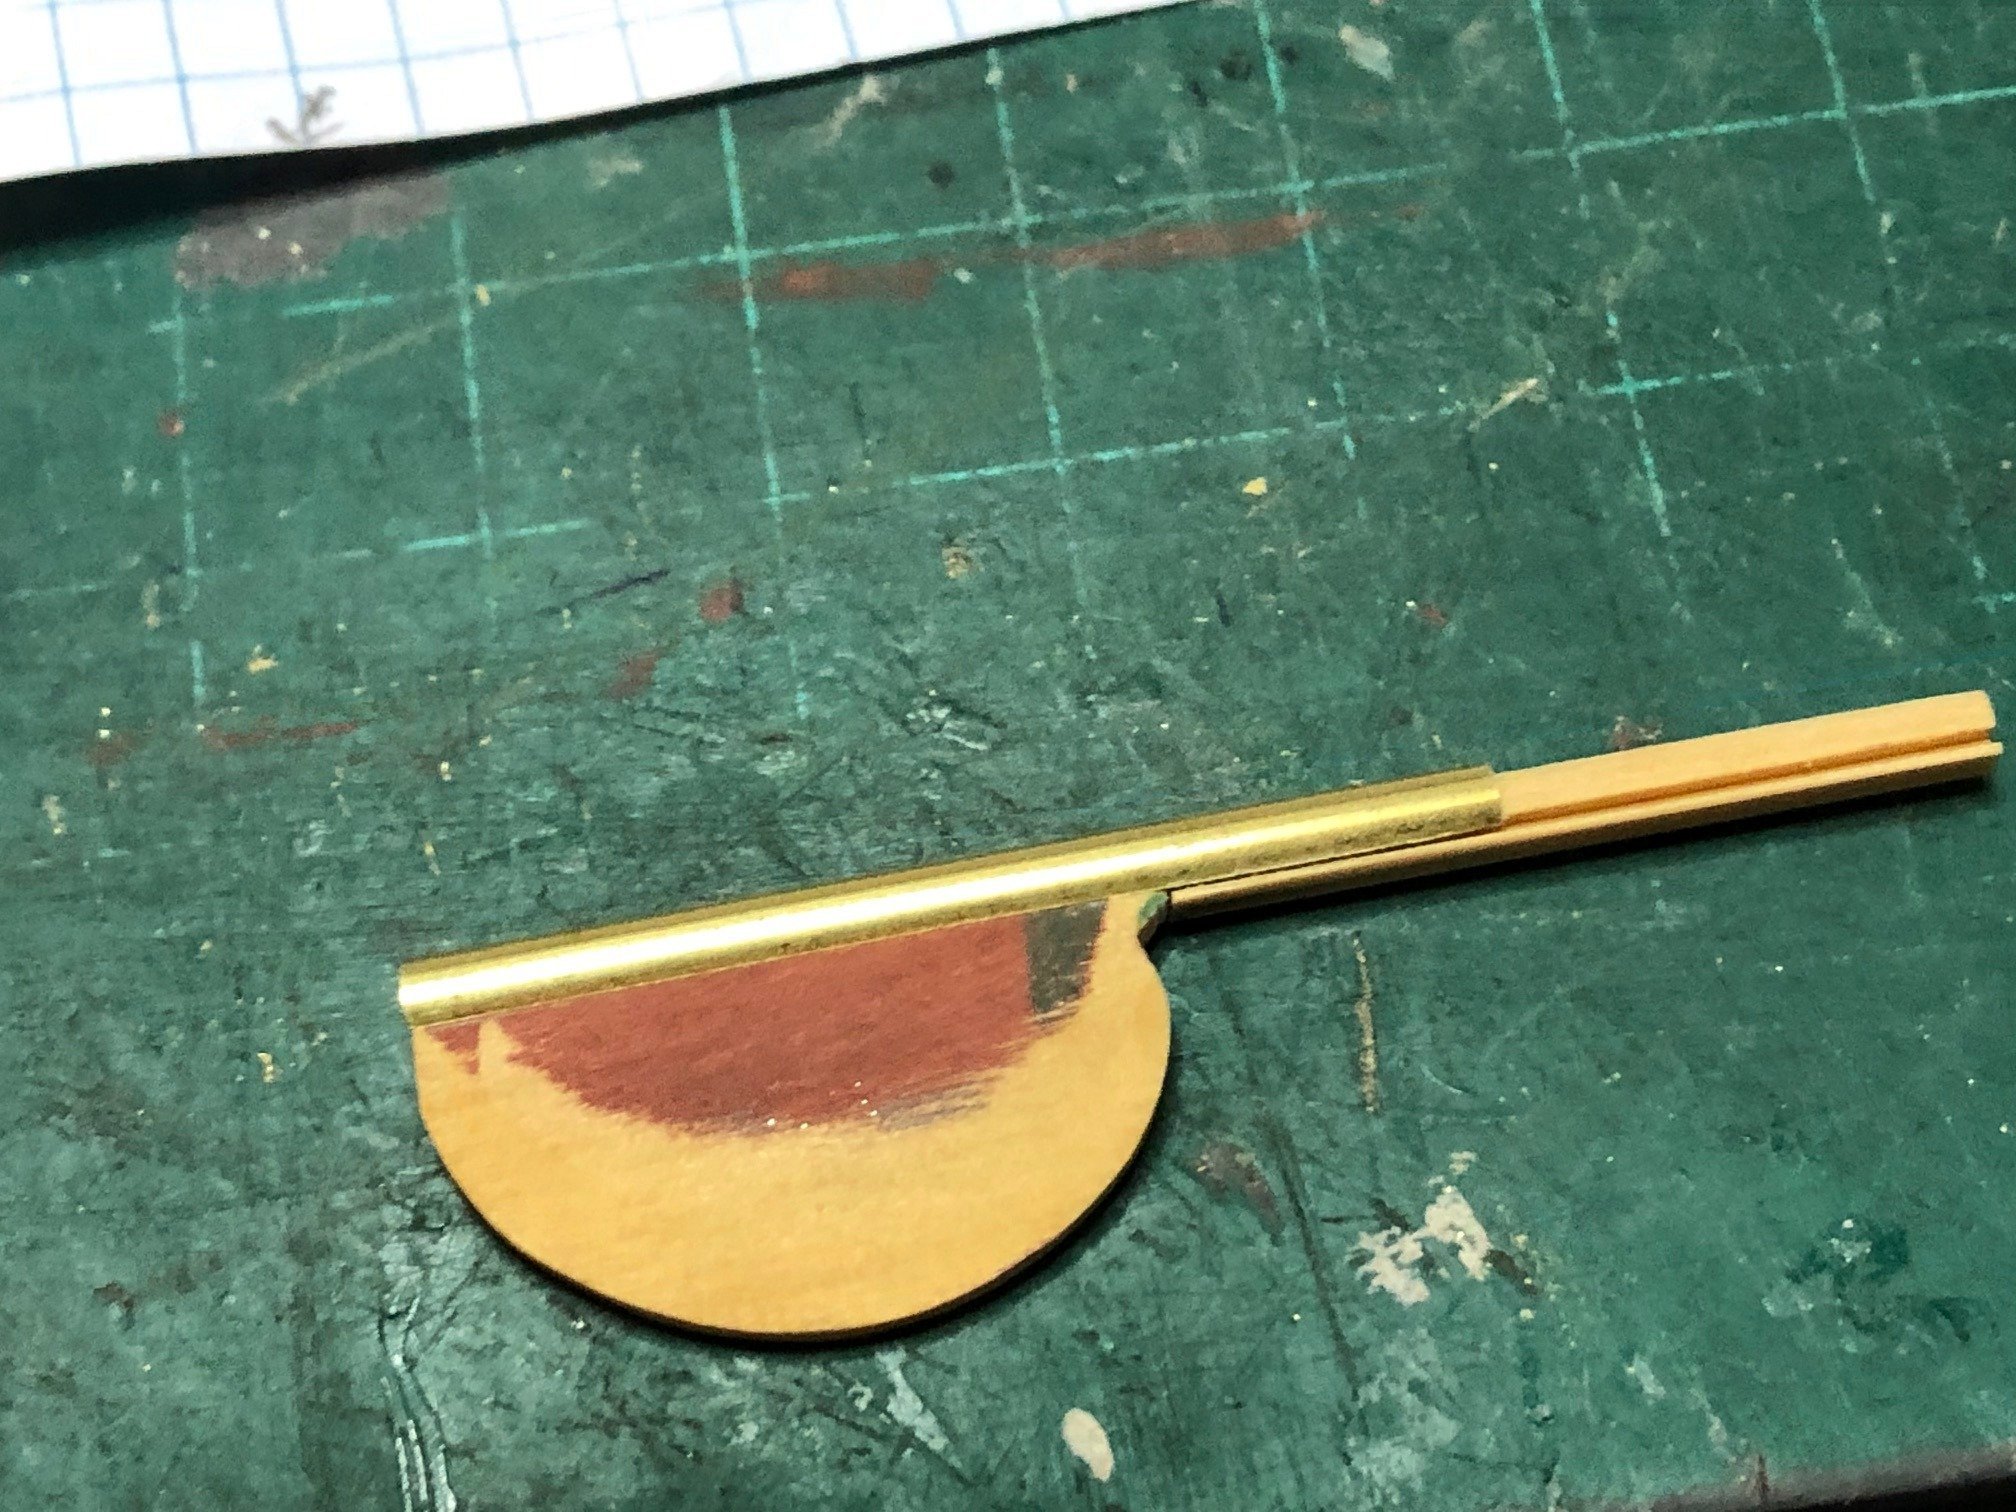
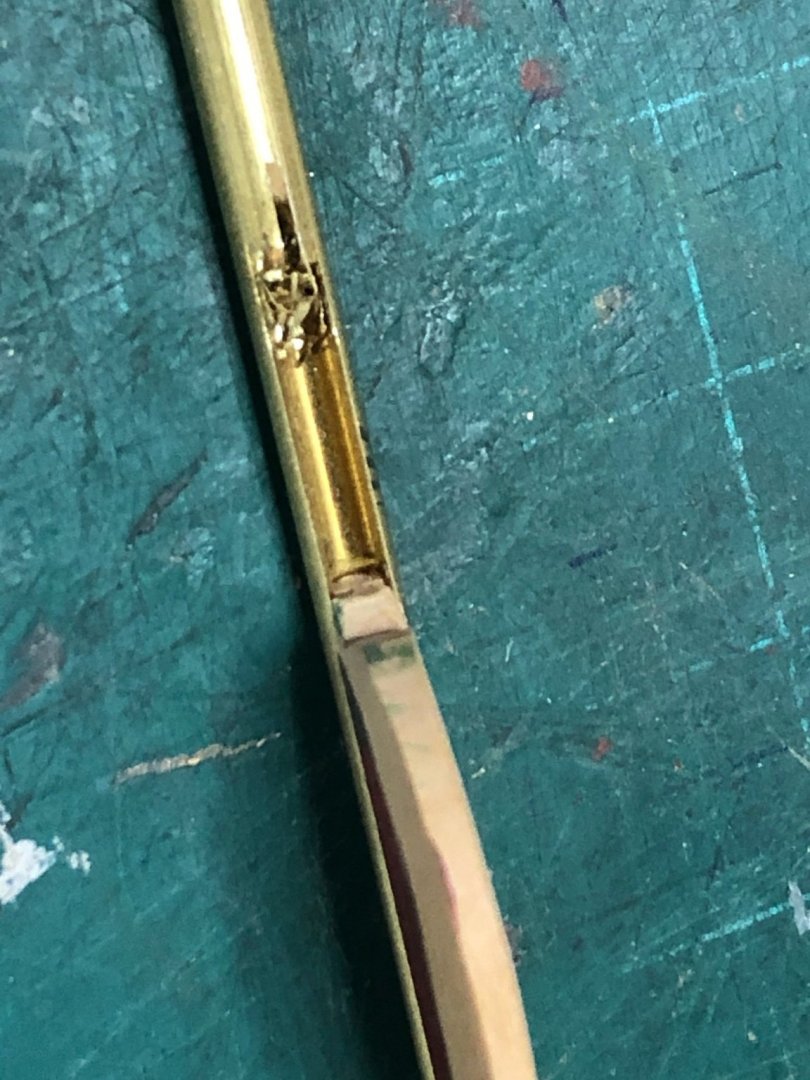
Will, I scored both sides of the rudder on the Byrnes table saw after the tubing was sliced. The fit came out perfectly on the first try. (Careful measuring) Maury
-
More work on the hull and related items. The rudder and wheel box are under construction. The rudder post is metal lined per the plan. I sliced a piece of brass tubing and scored the rudder to accommodate the post. The wheel box will be a solid block with planking on four sides and a roof. I drilled the planked box to accept the axle of the ship's wheel. (No photo included). Doors to the main cabin next. Maury

-
The cap rails are in place: Maury

-
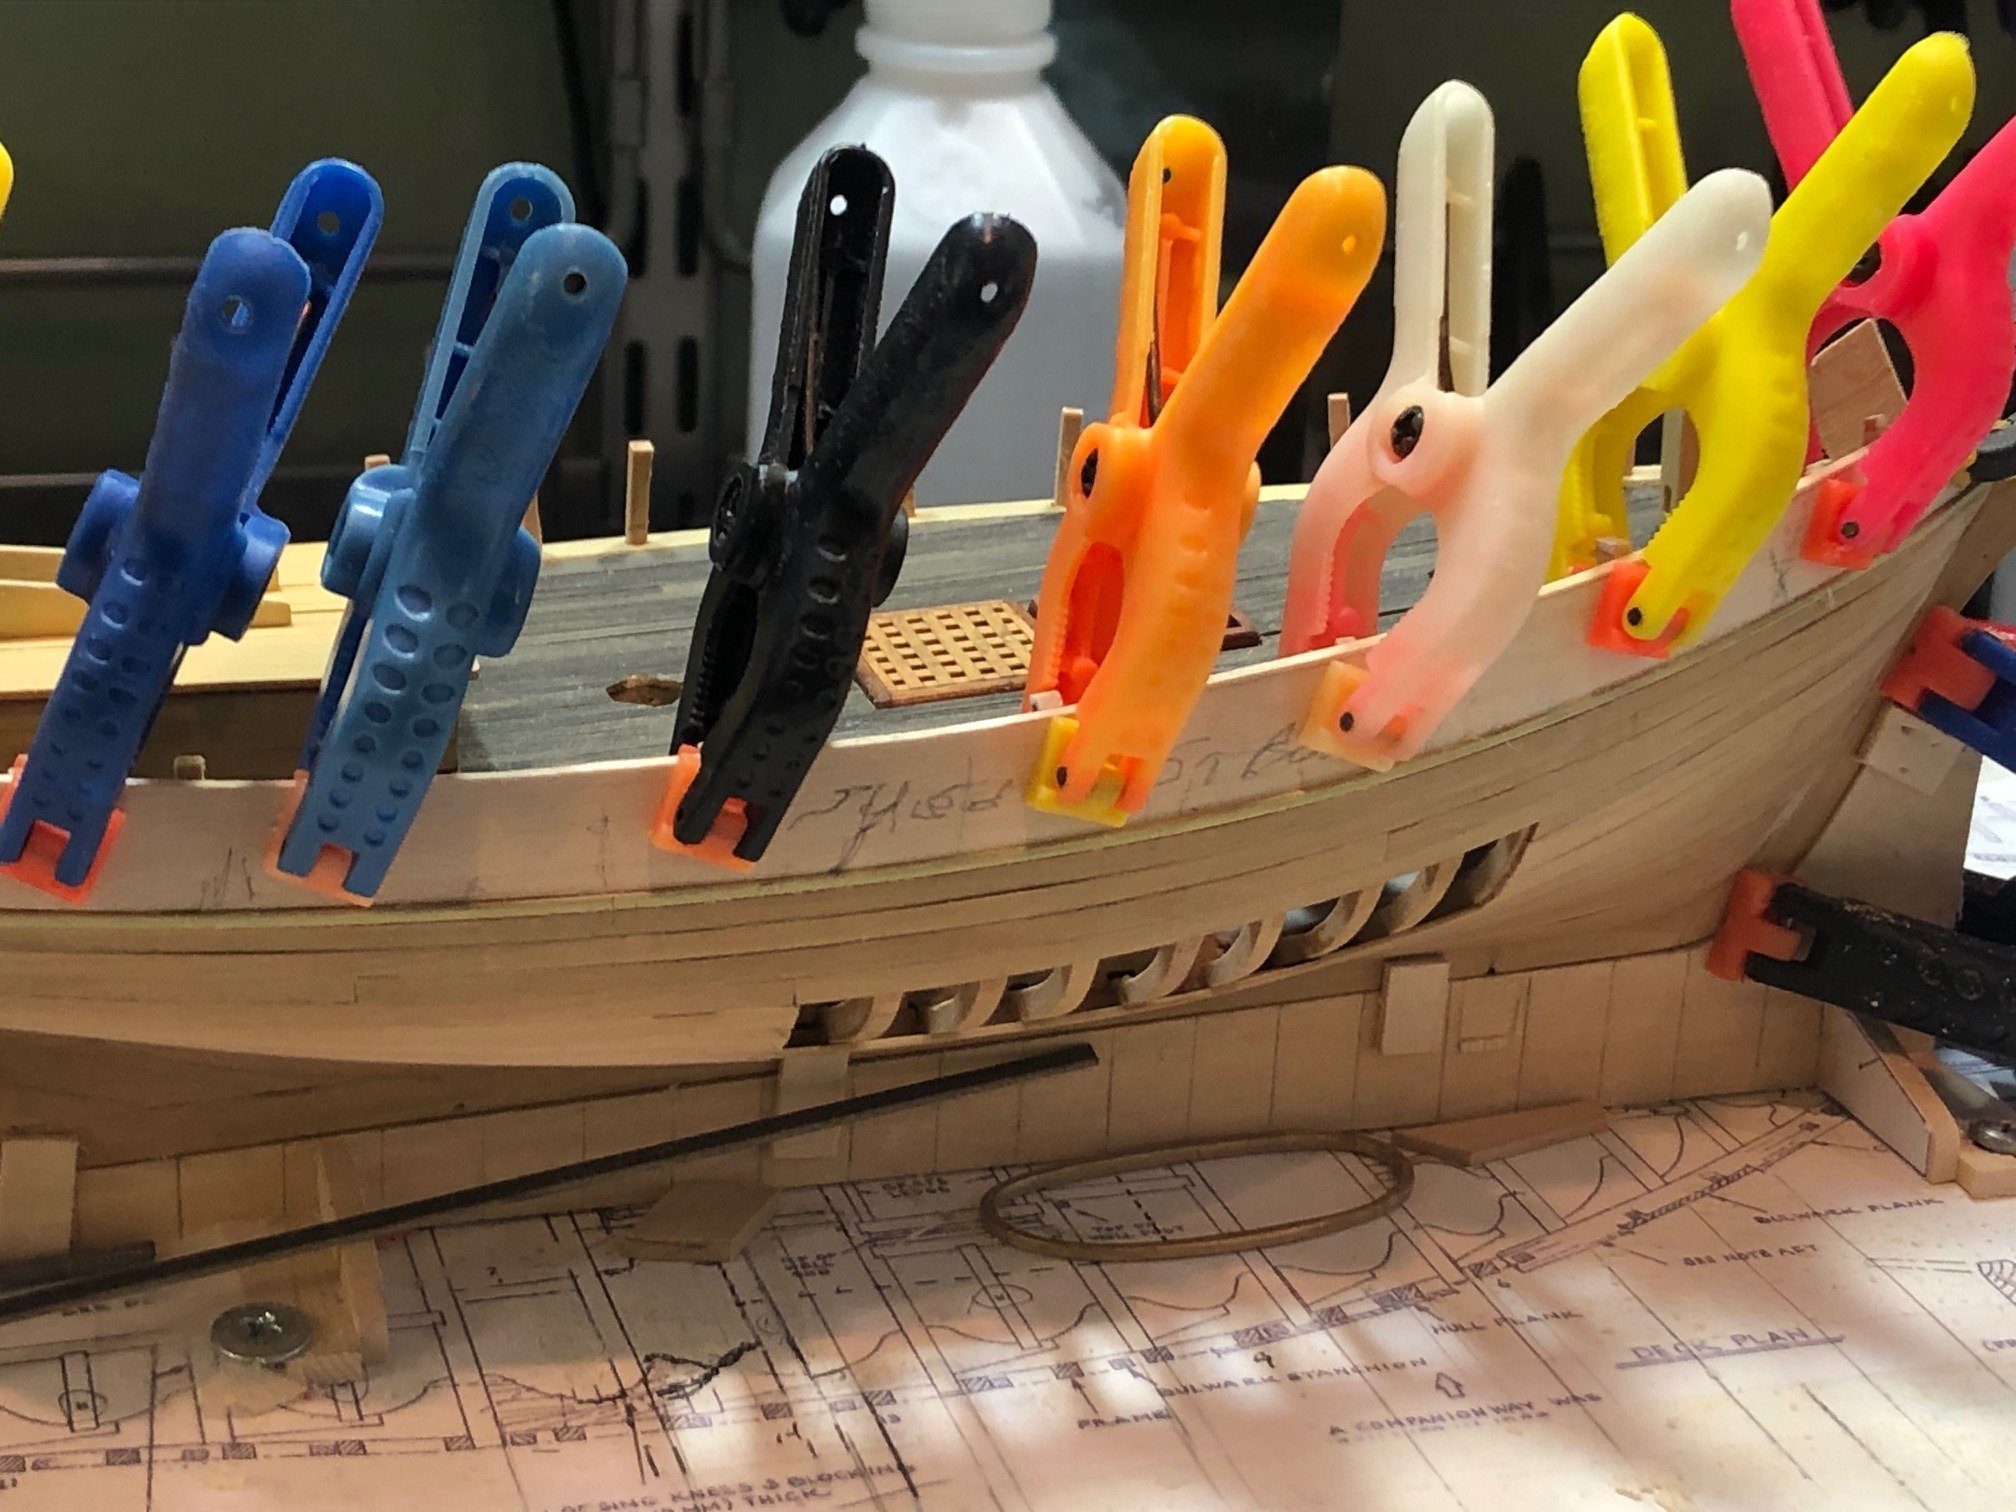
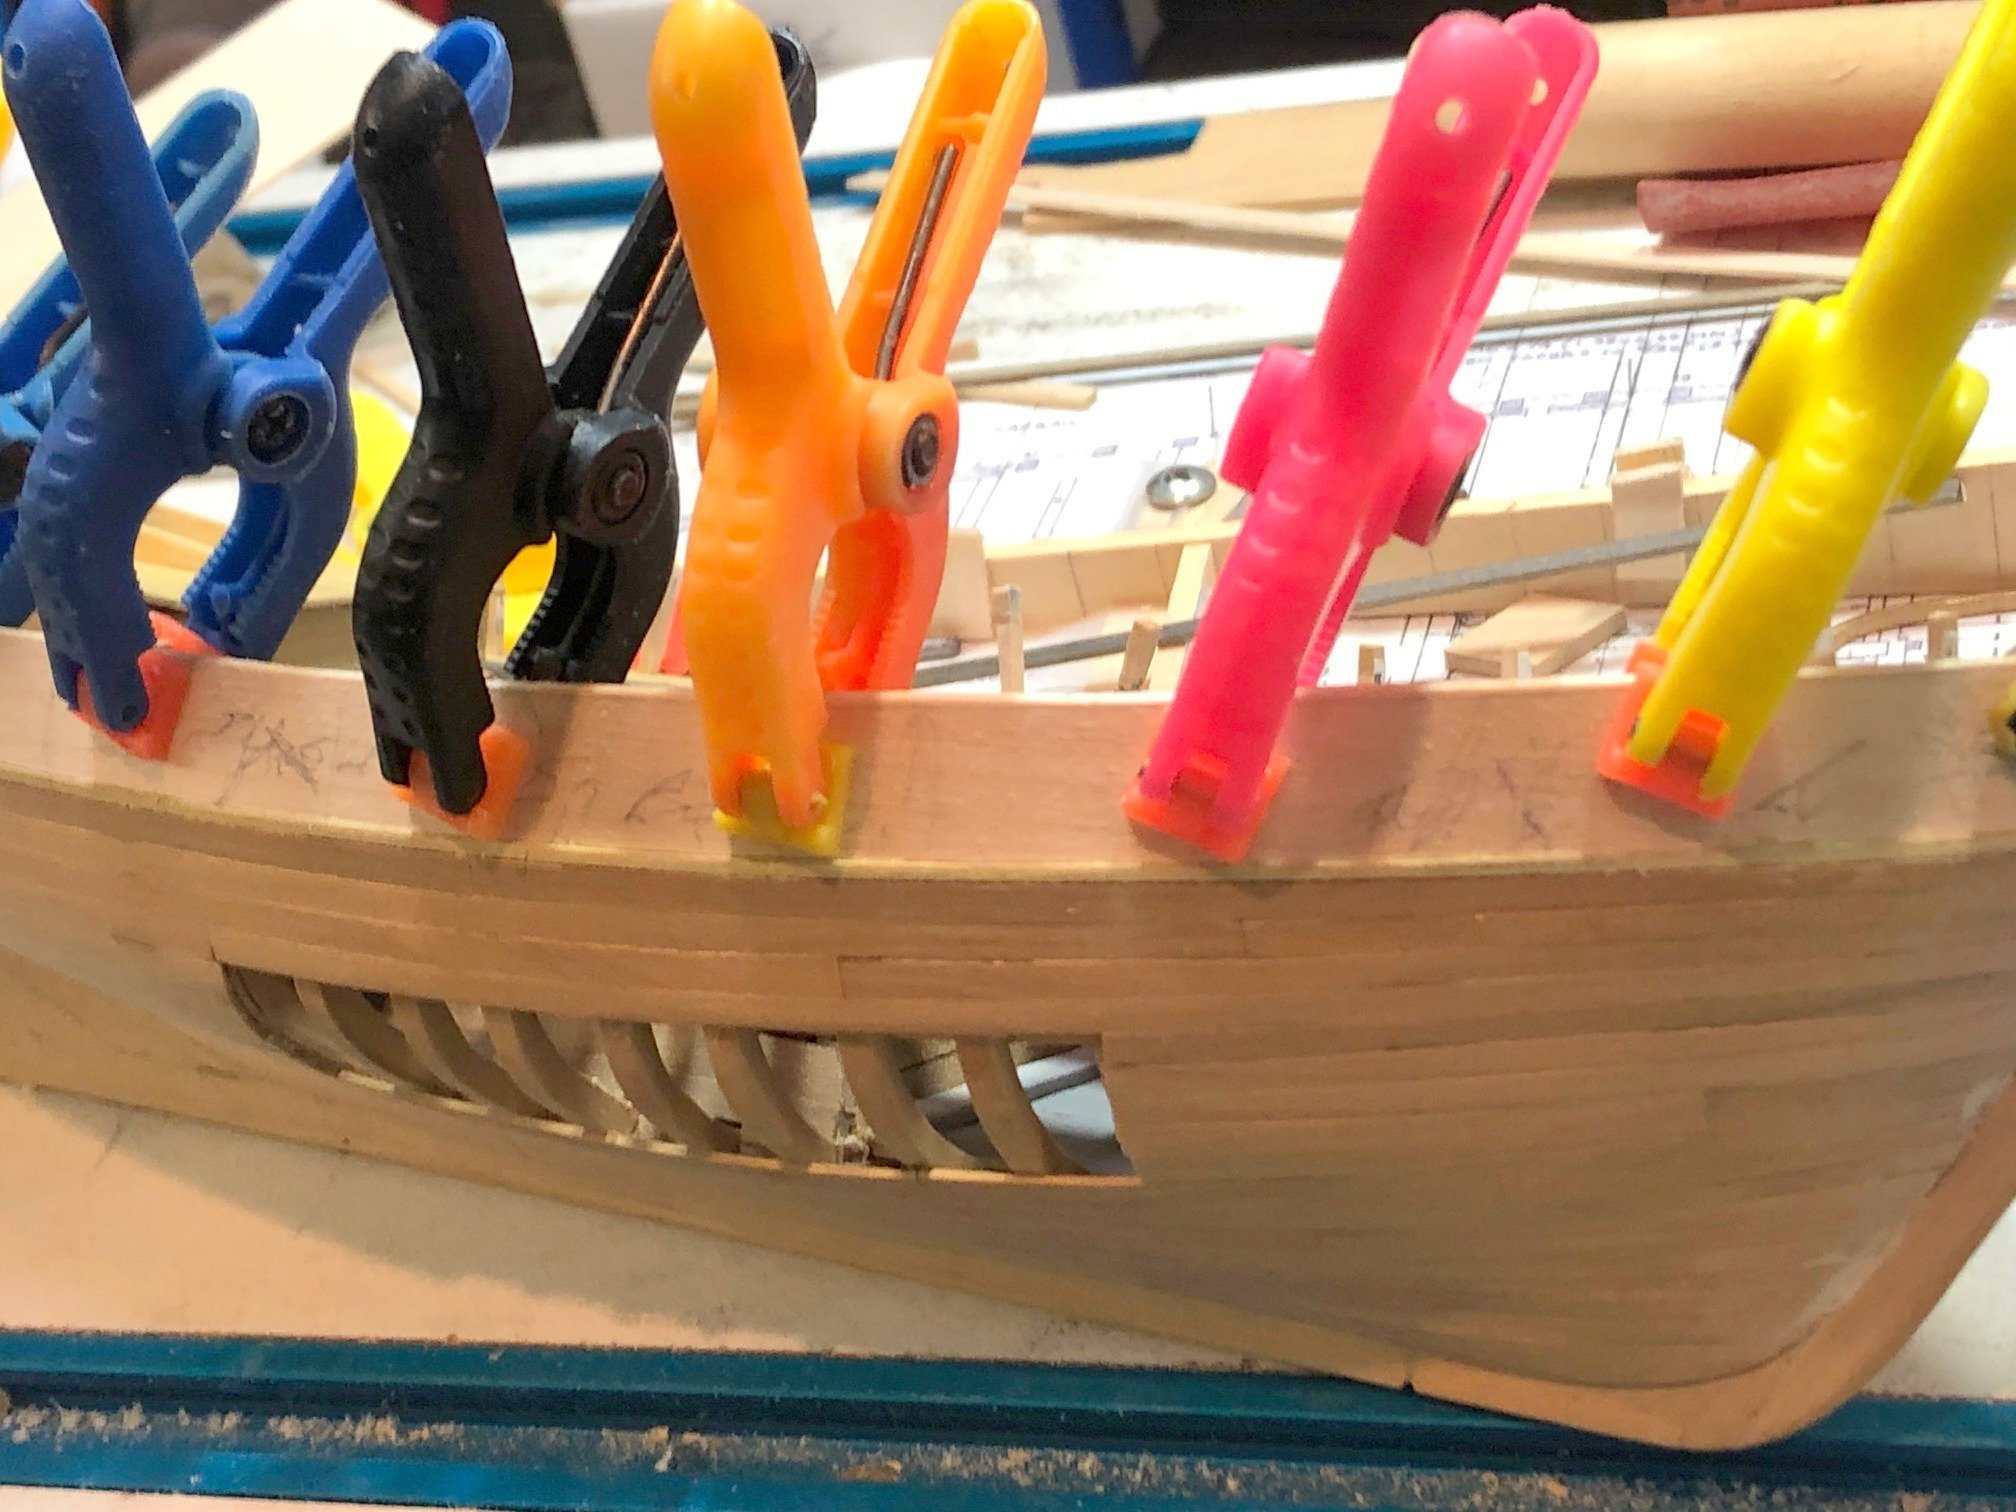
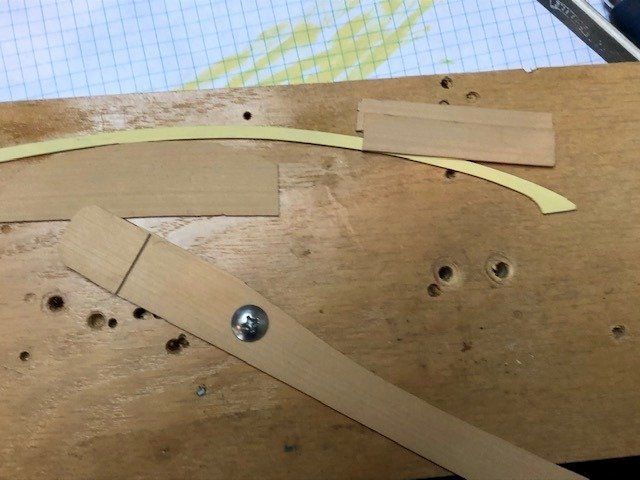
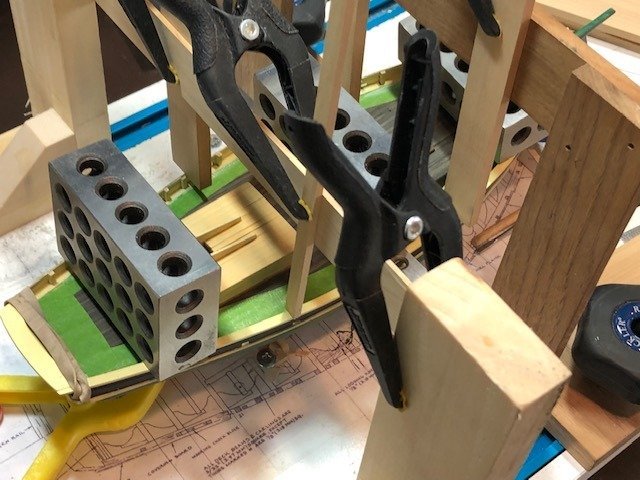
Cap rail The cap rail was created by marking a piece of card stock held on top of the stanchions/bulwarks for the outside edge. That piece was divided in two and marked on a piece of .05" pear. Once faired, a compass was used to set the inside edge. Scarf joints were cut in each side and glued up. A small variation in the face of the joint impacts the overall run of the rail, so some minor heat edge bending was necessary. The jig is just a scrap base with a lever and a couple of hold-downs so the piece doesn't twist. A few minutes with a heat gun does the trick. Once painted (3 coats so far) they were put in place and held there with every available method. Before this, the connection with the side and transom rail were cut to shape. The transom piece was glued in place first and the long rail pieces were mated. Once again, the use of the gantry on the building board allows for downward pressure on the rail. Maury
-
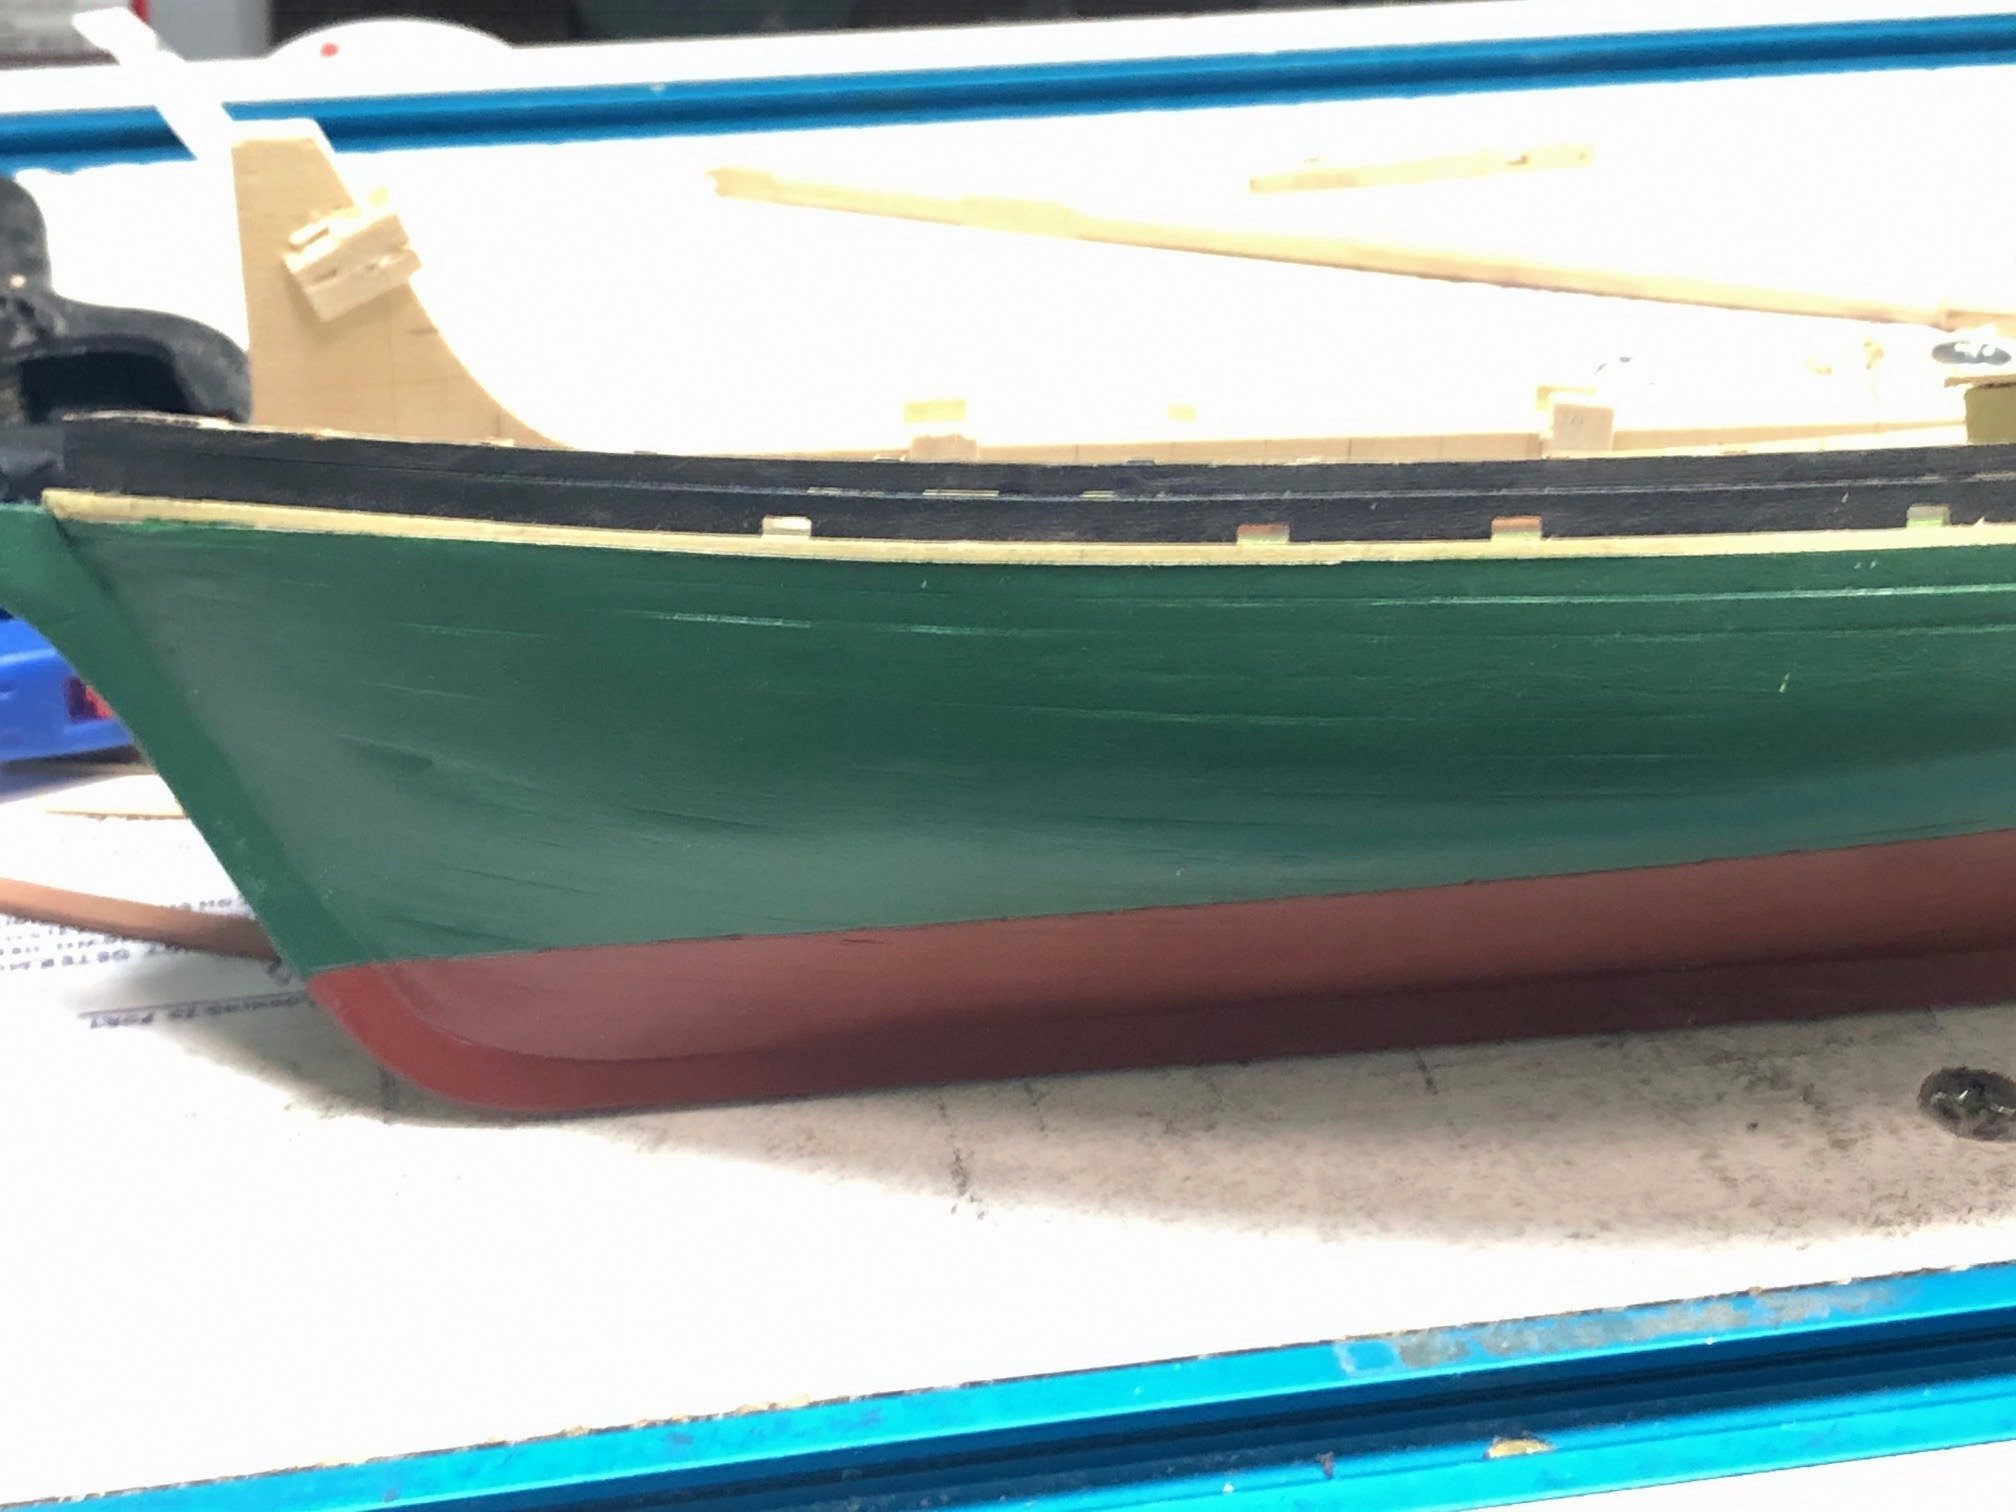
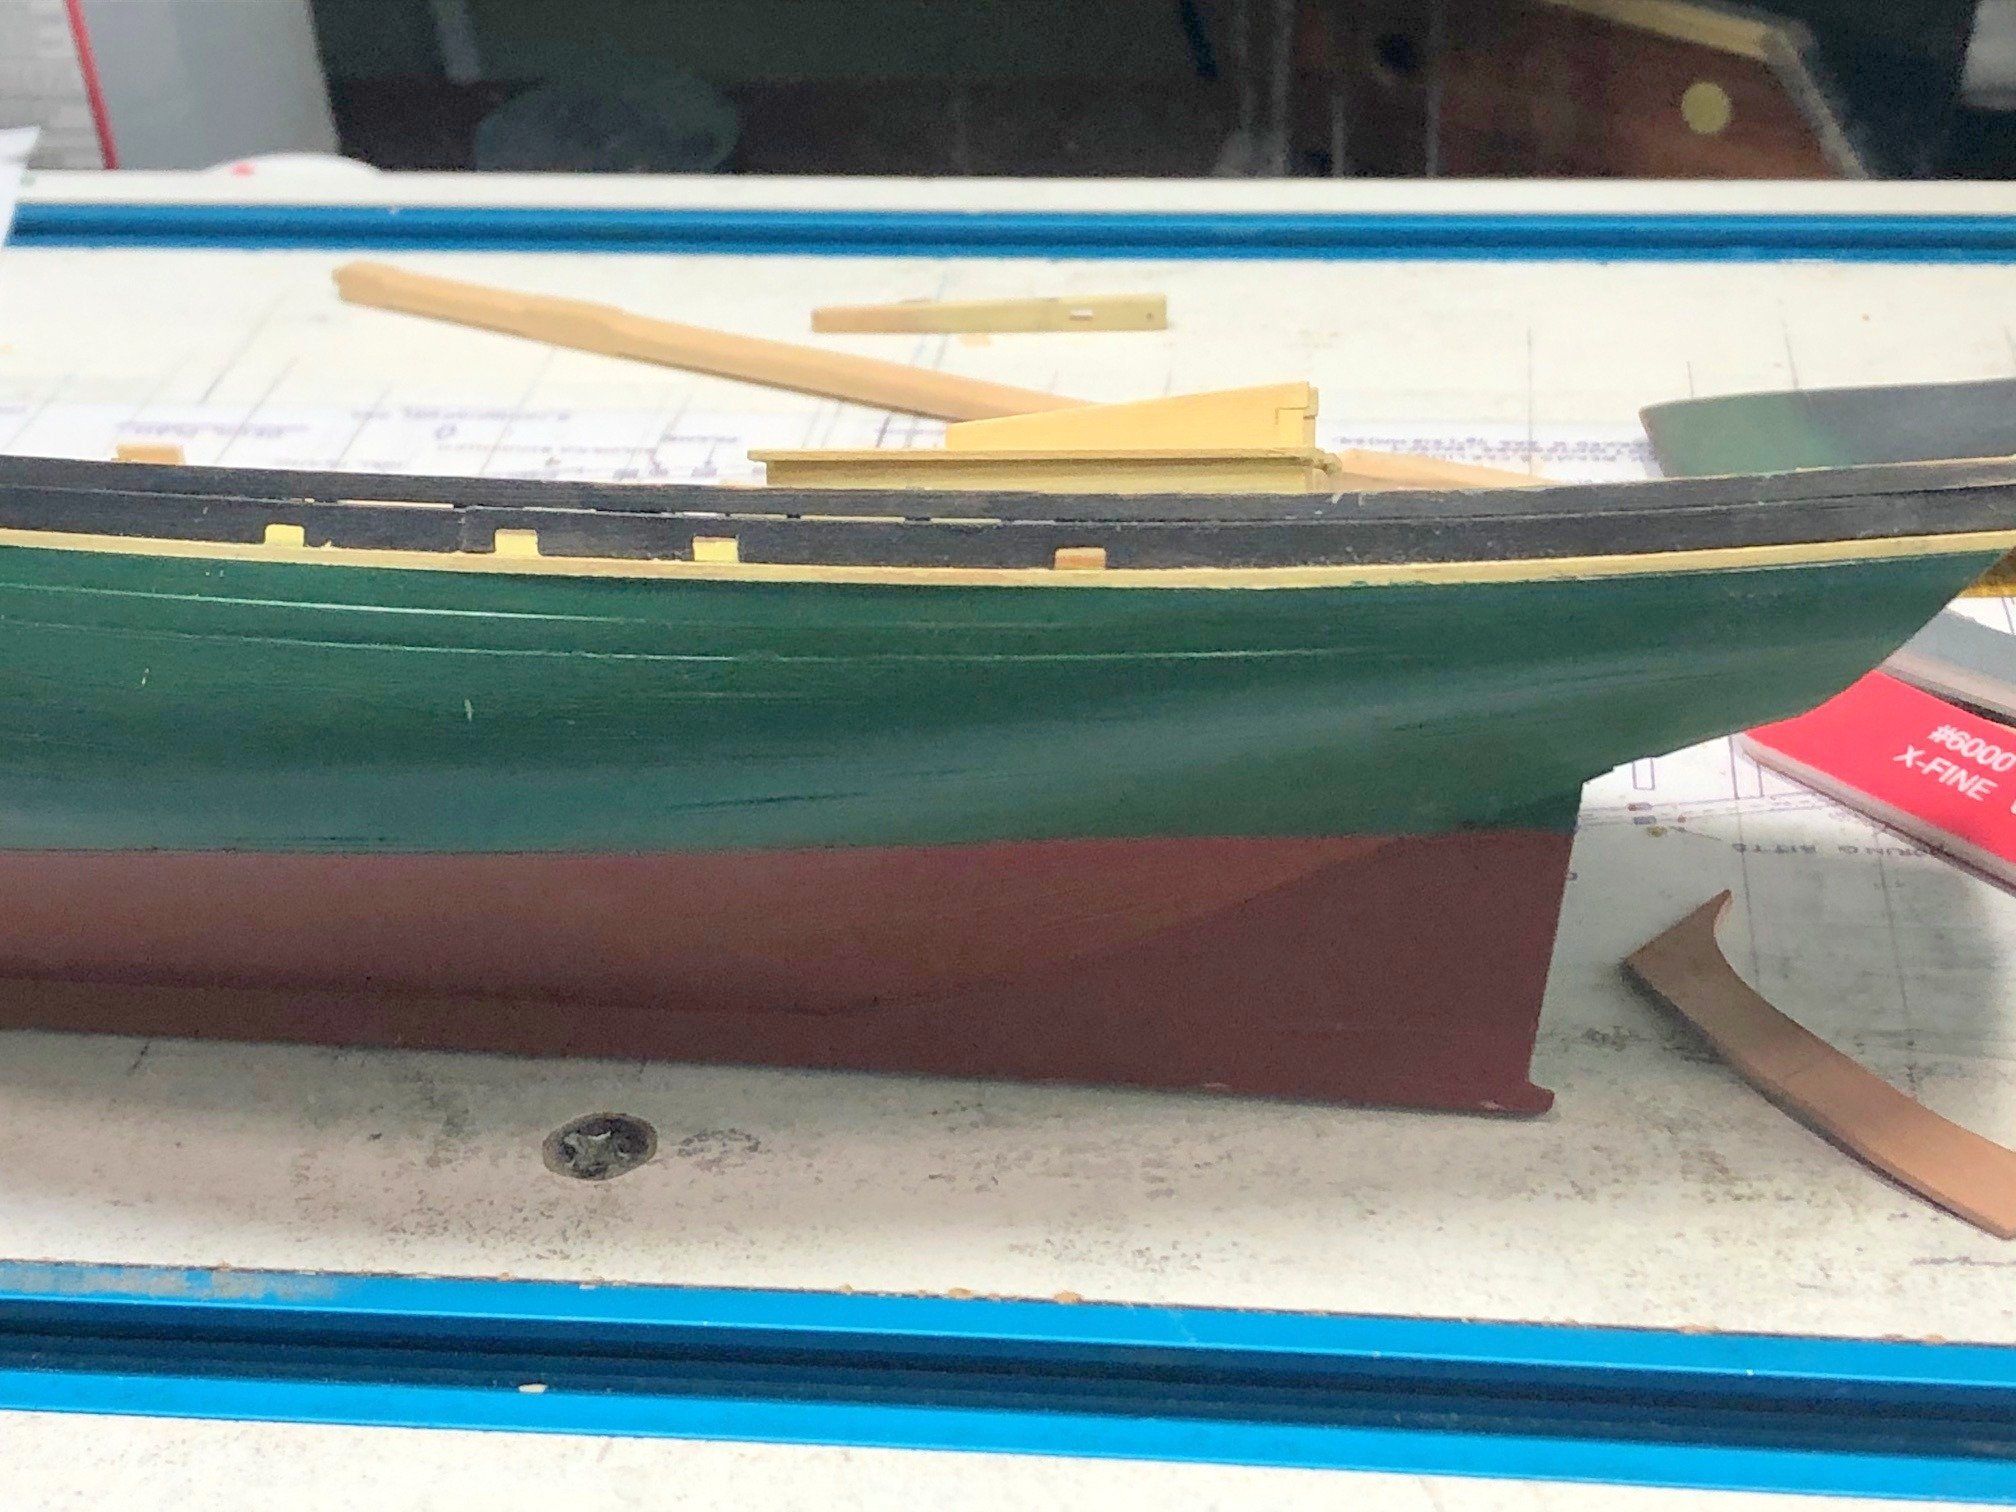
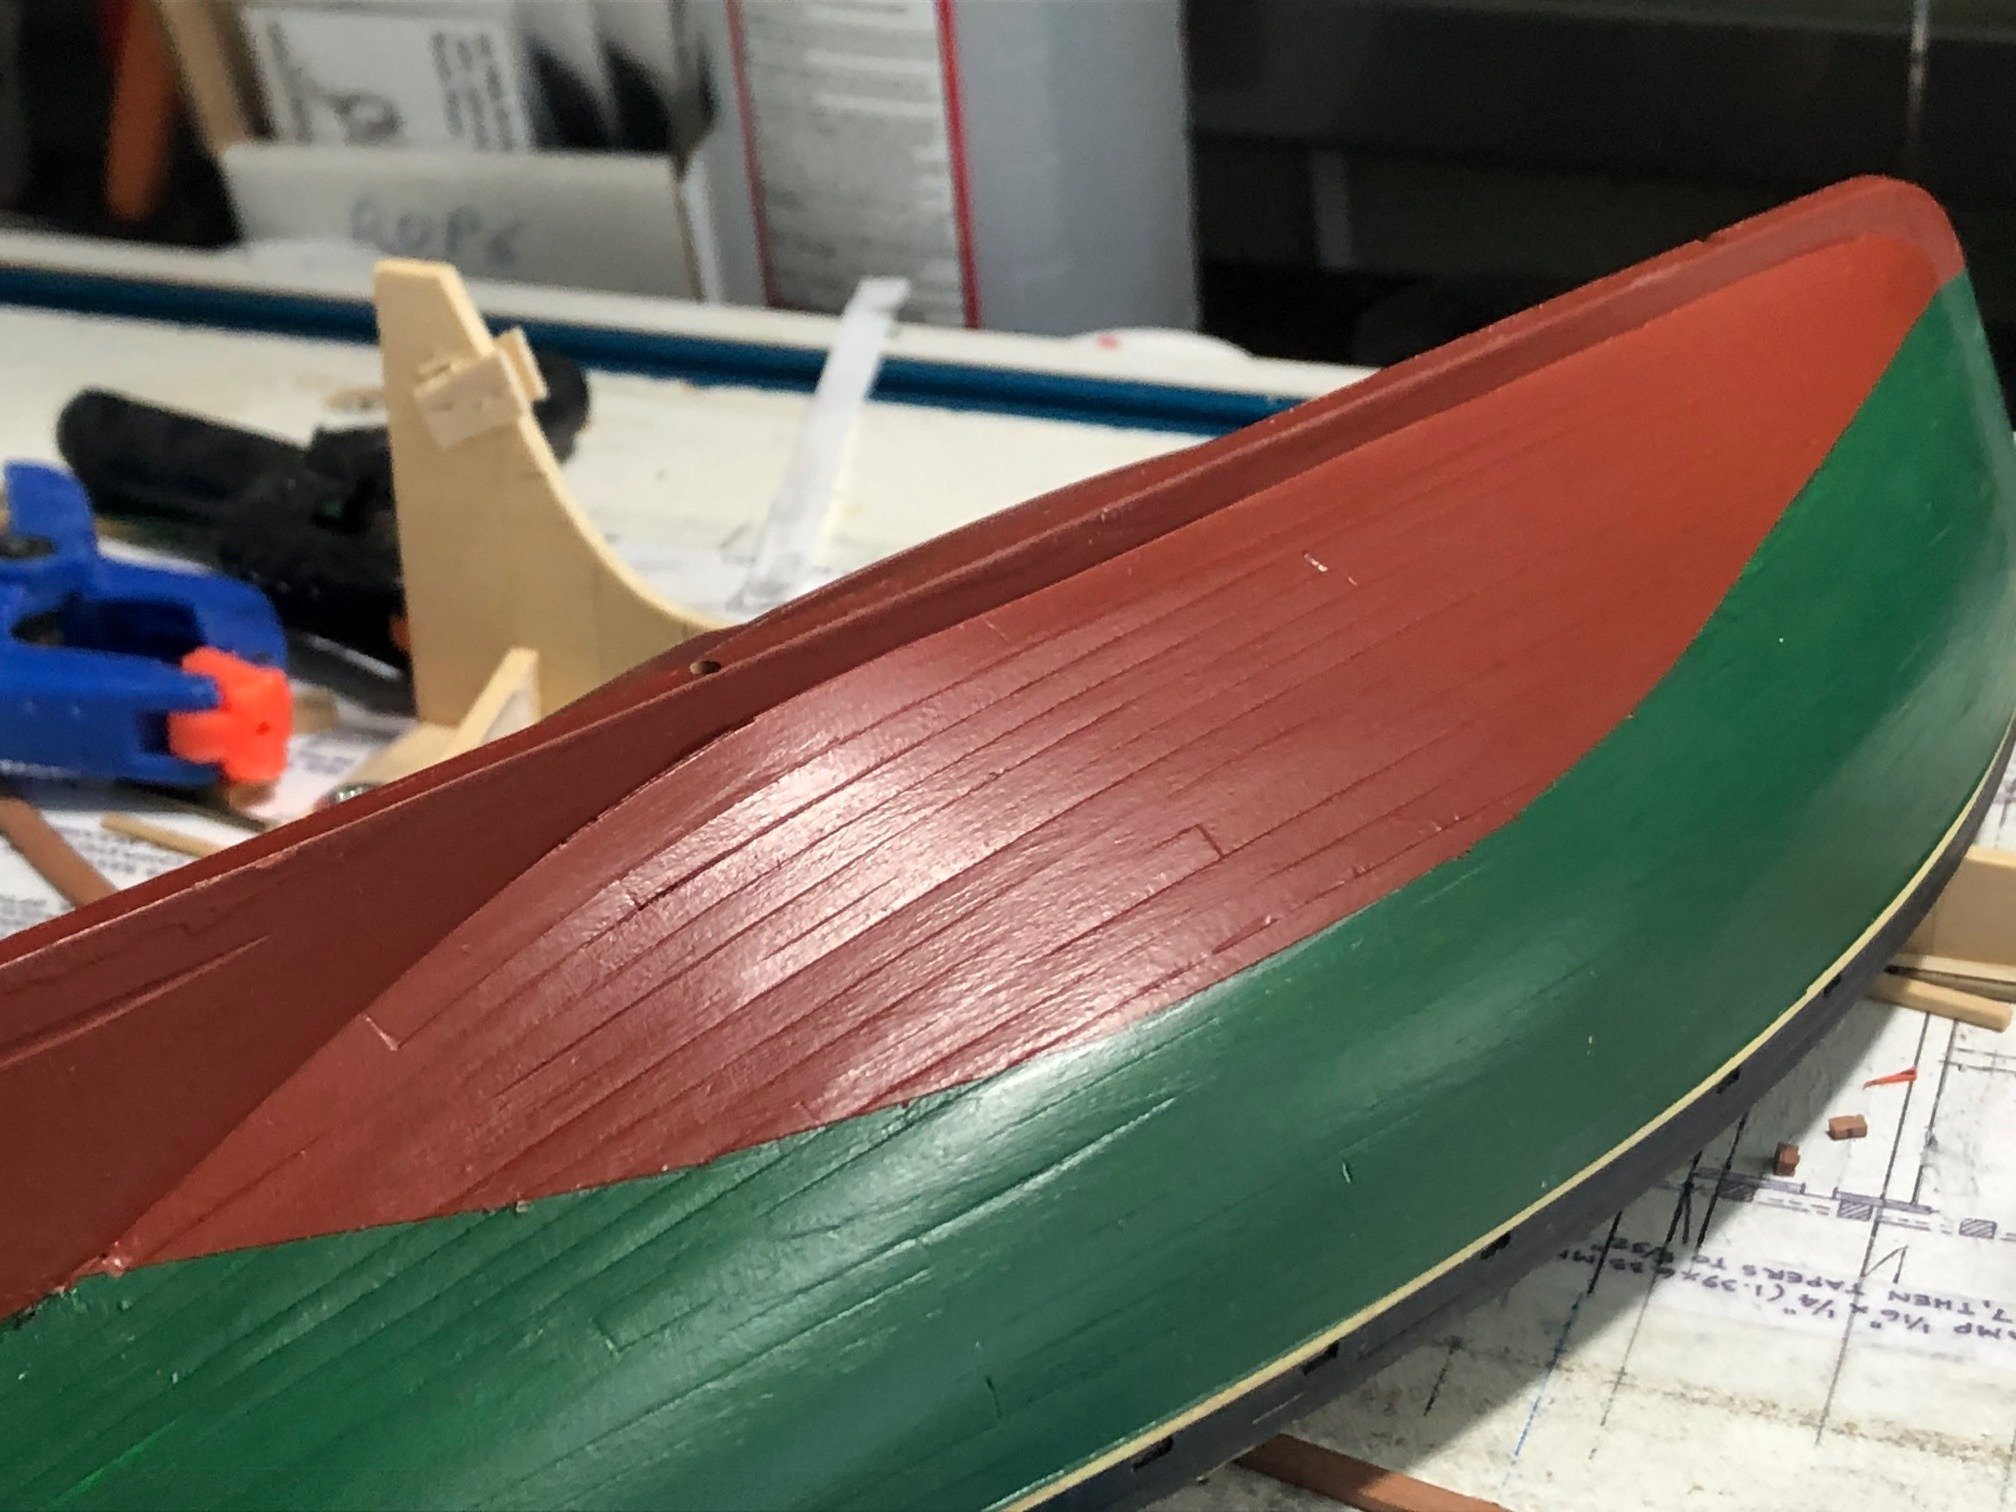
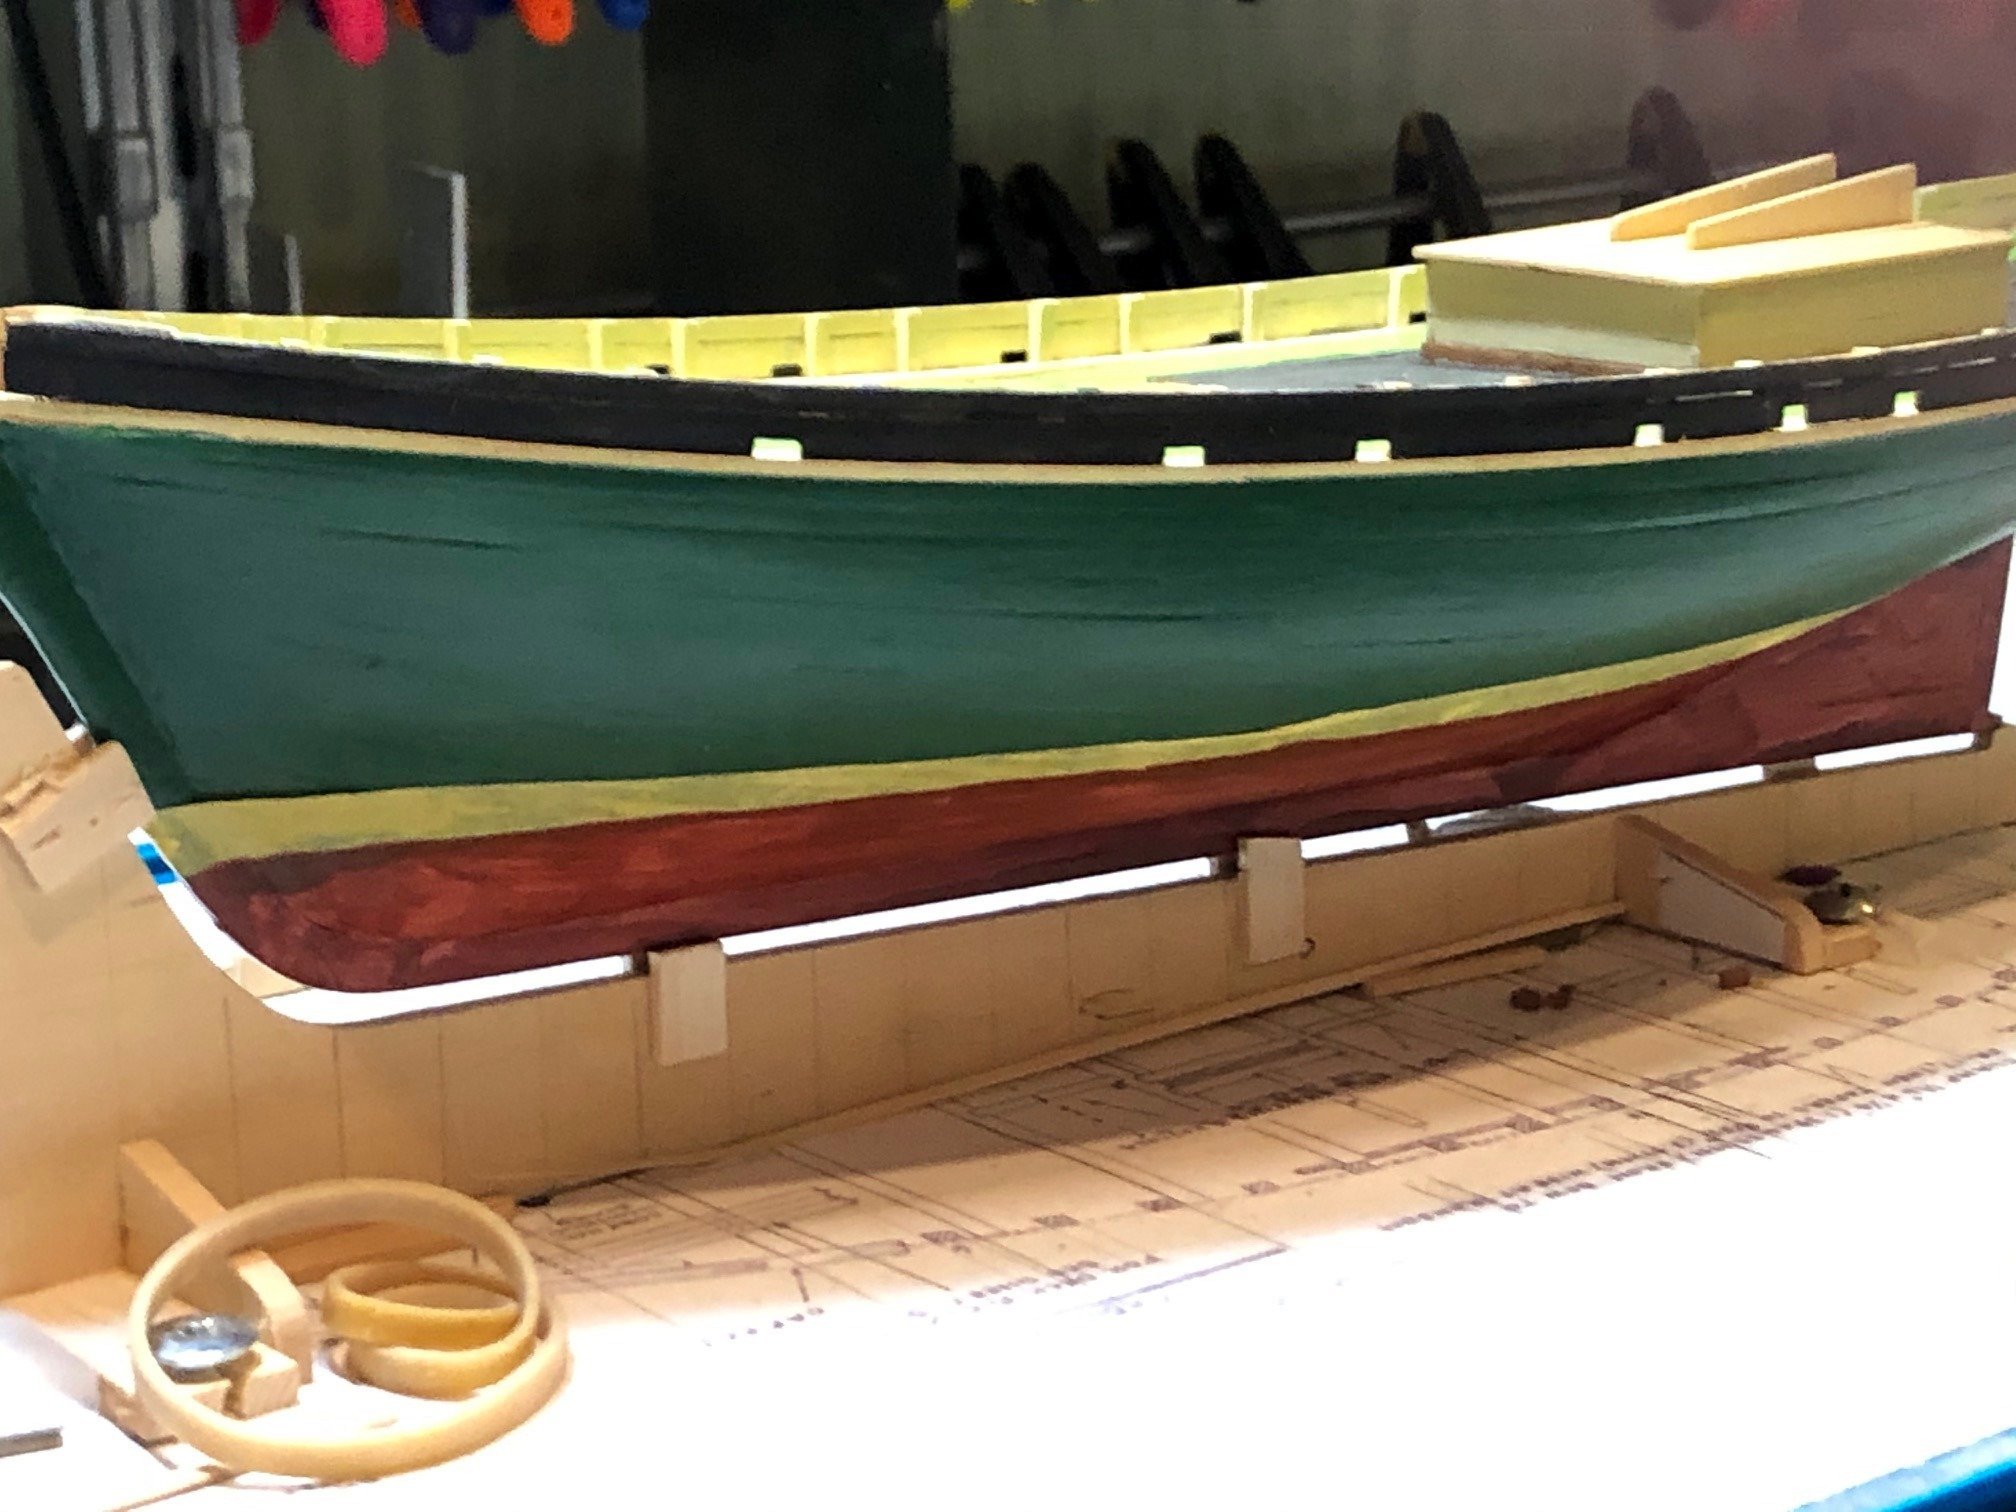
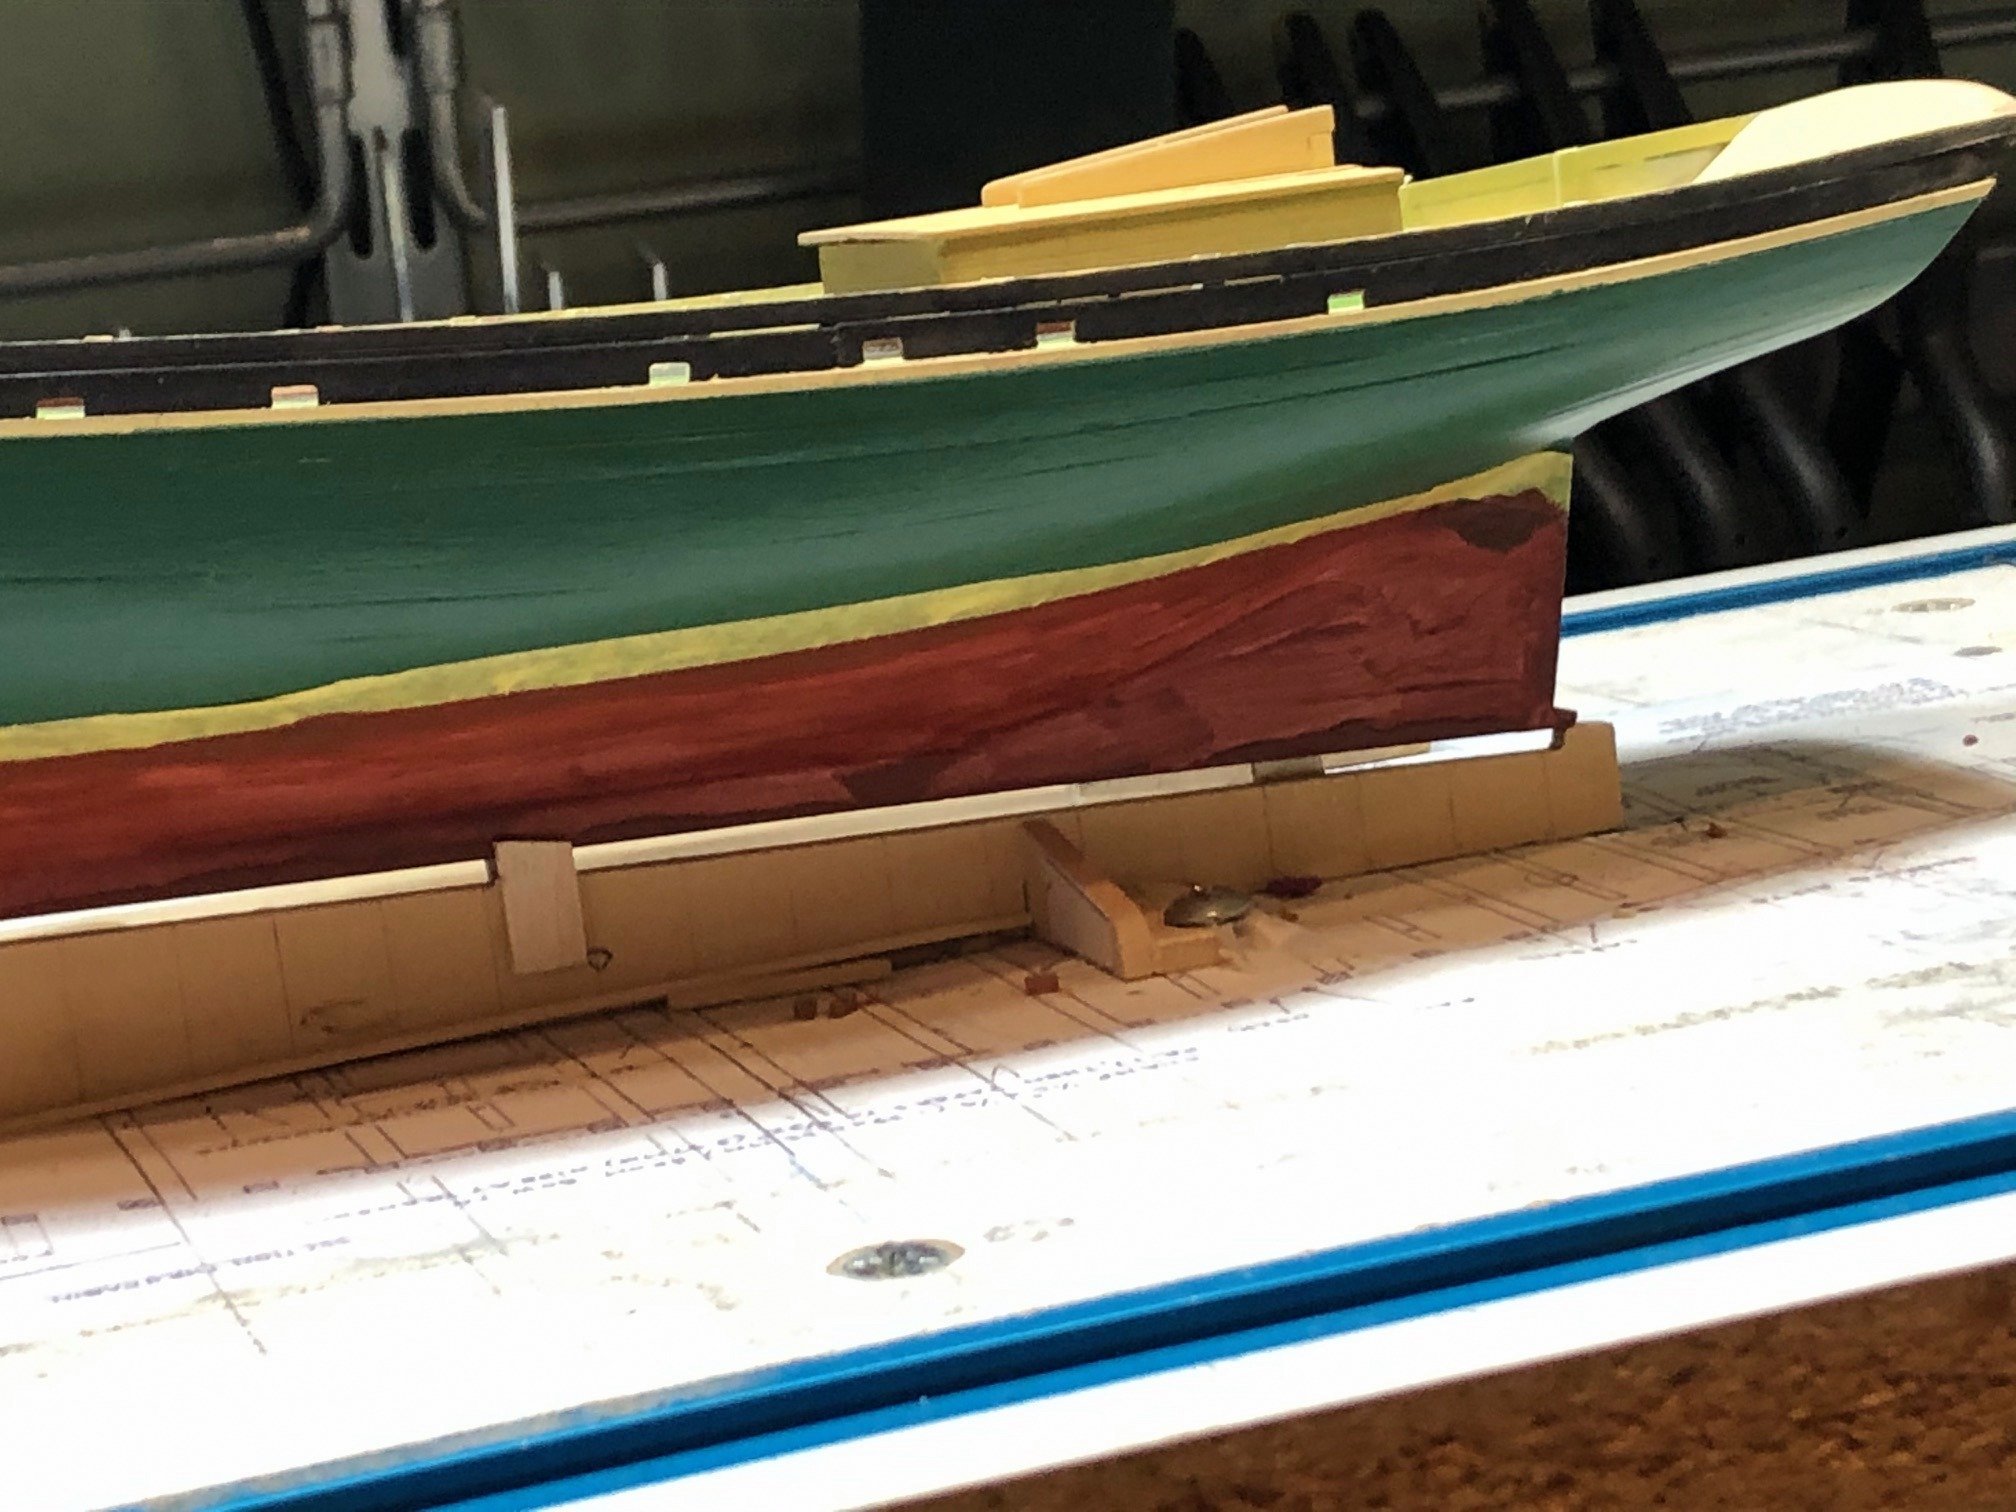
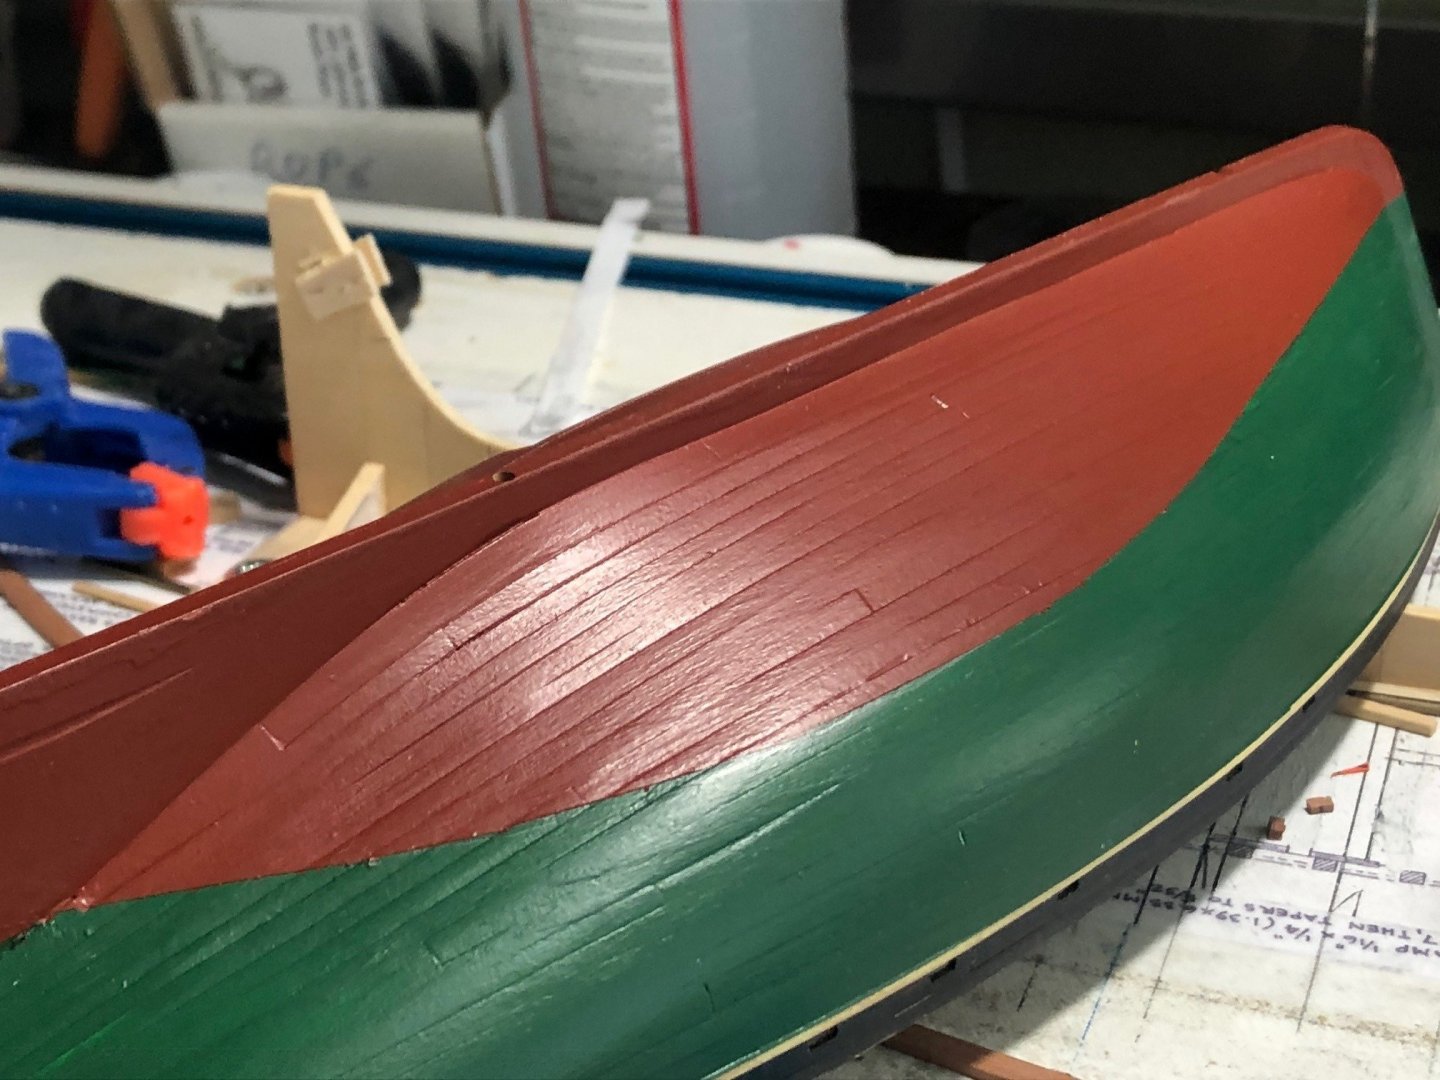
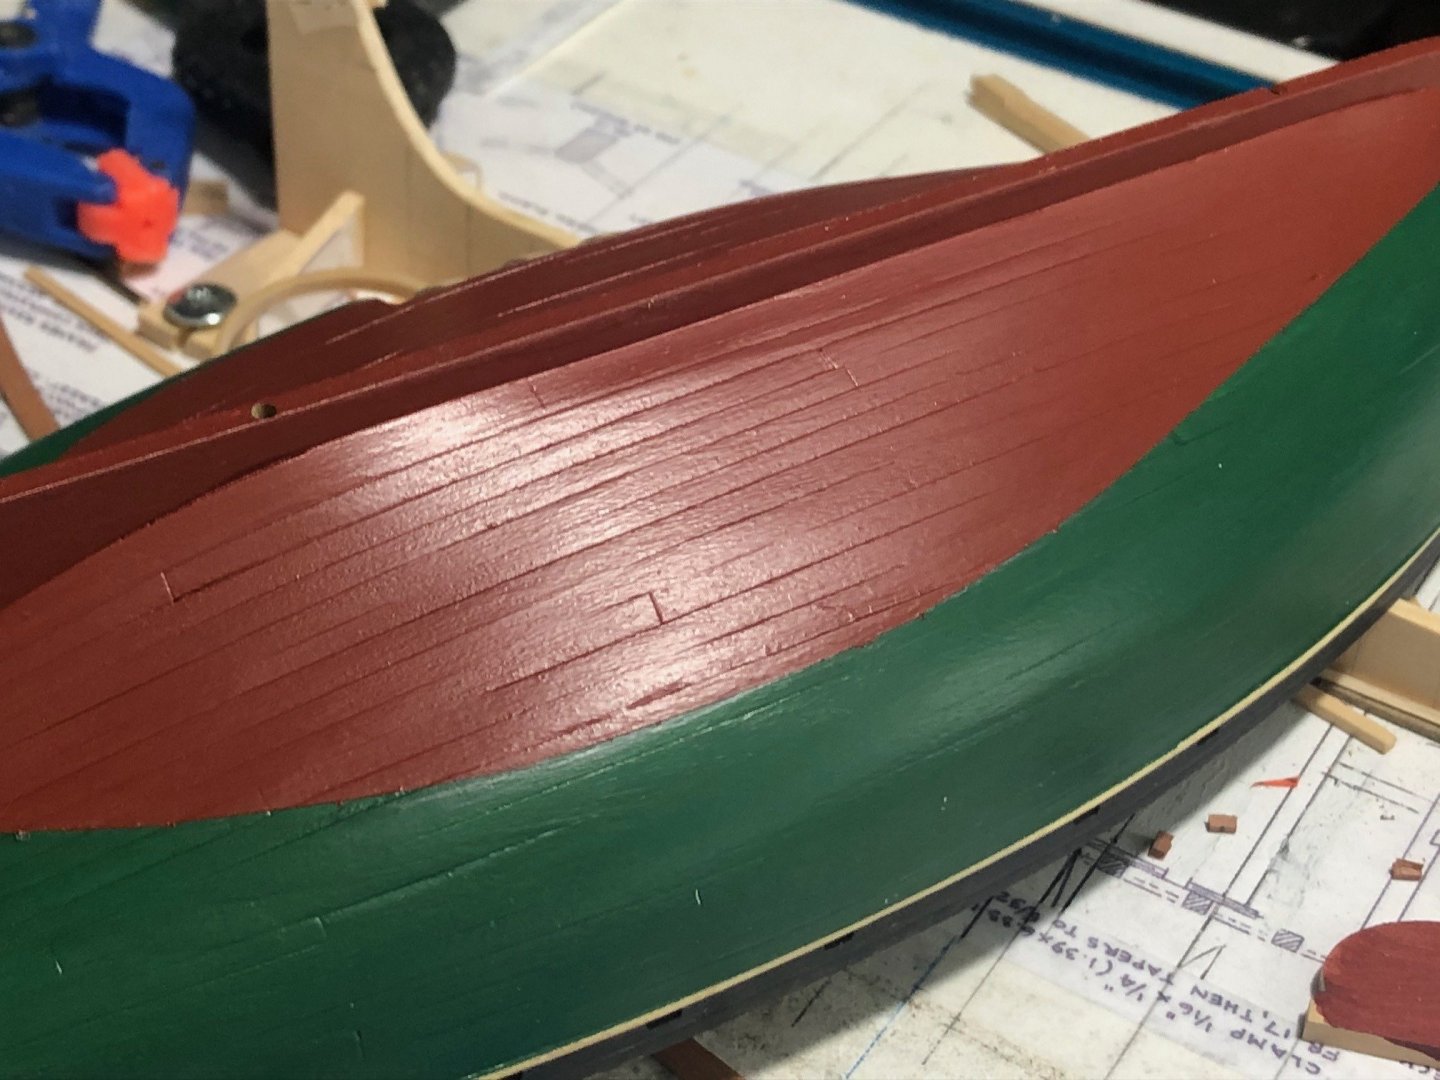
Hull painting complete. Five coats of Copper Hull Bottom (red) and six coats of Dark Green. Not a brush mark in sight. The green is a bit darker than it appears in the photo. Next is the cap rail. Maury

-
Thanks for the tip on the red paint. I was planning on 5 - 6 coats after my experience with the green. I wait about 24 hours before light sanding and the next coat. While acrylics do dry faster, I'm not sure that a couple of hours is enough for a proper cure before sanding. Maury
-
Byrnes saw extension….
Maury S replied to geneinmurphy's topic in Modeling tools and Workshop Equipment
Just build a small bench to set behind the saw. I'm constantly tipping my saw on edge to change blades. I don't need more stuff attached to the unit. Maury -
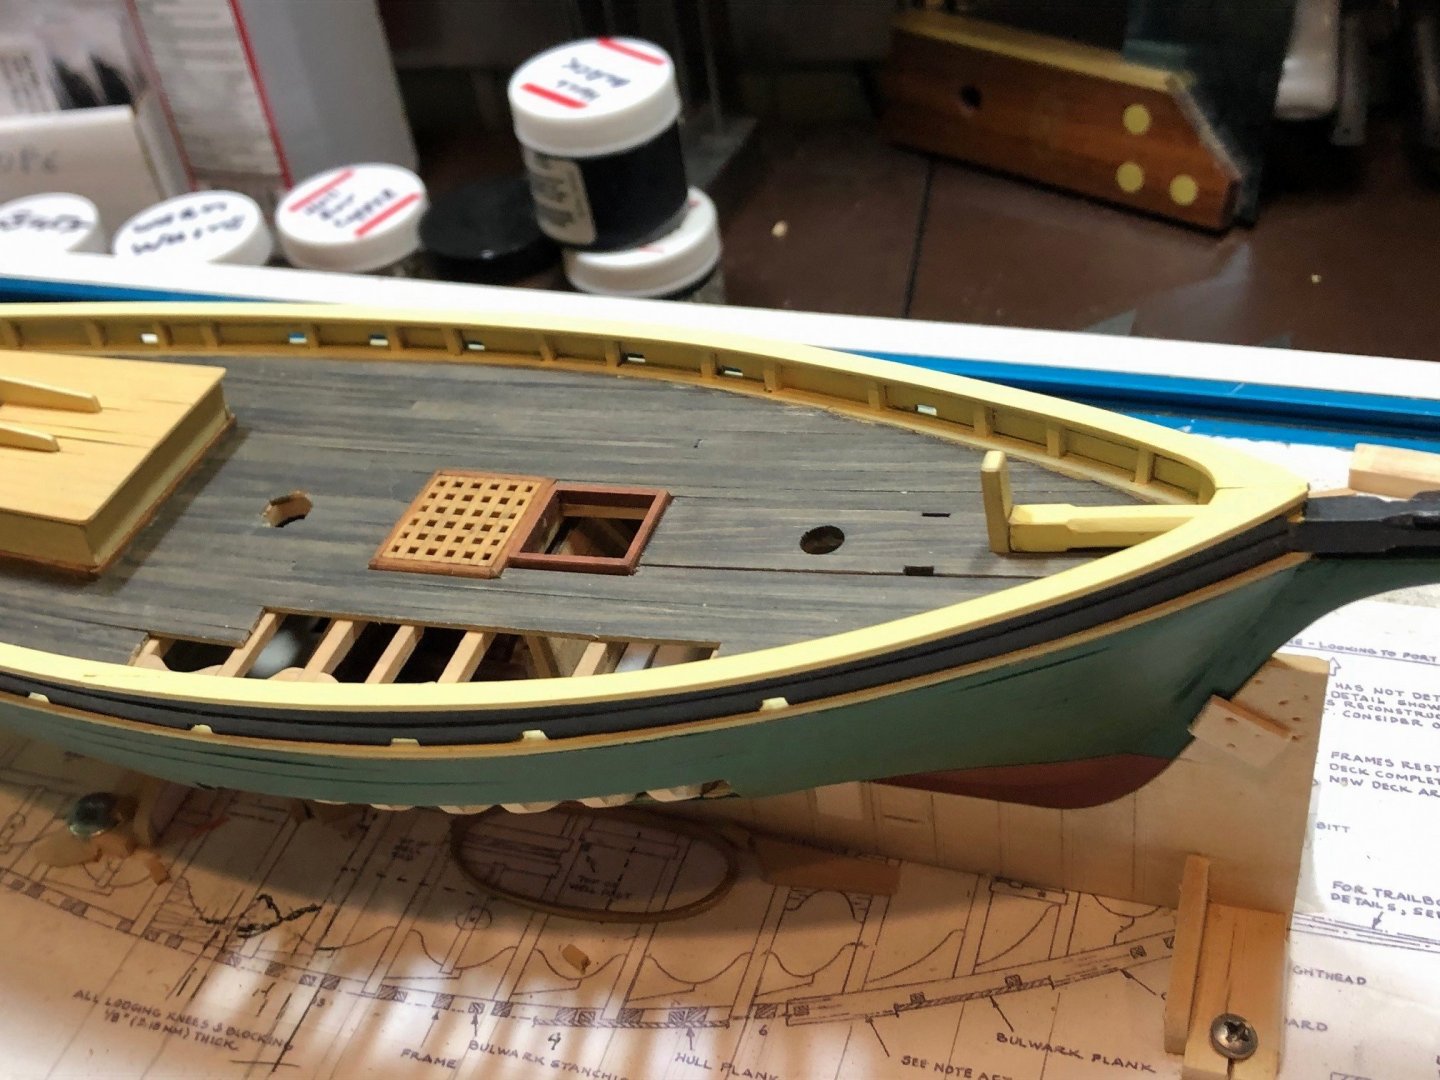
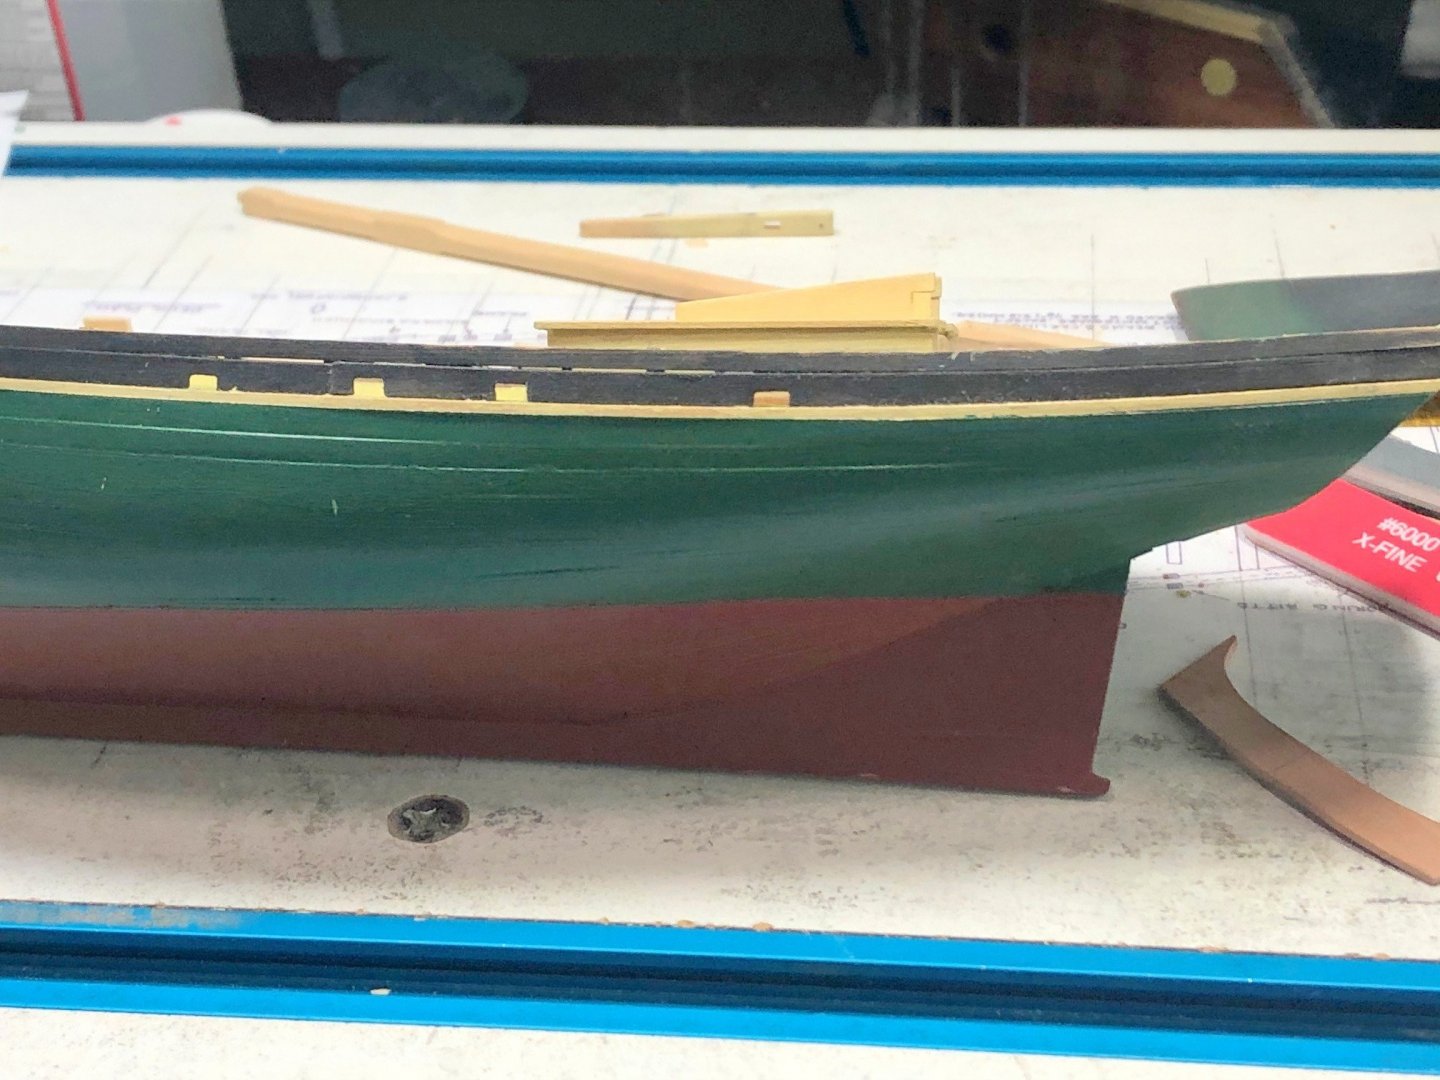
A lot of waiting for paint to dry... The planking between the LWL and the covering board has received 6 coats of diluted dark green (Model shipways Dark Green). The first coat of "Bottom Copper Red" (also Model shipways) has been applied. The broad yellow line is the (Tamia) tape marking the limit of the red paint. Probably 4 or 5 more coats of diluted red. Maury


-
Jim, Thanks for the comments. The pictures in the books you referenced clearly show light colored rails (matching the inner bulwarks). I've laid the dark green as well as the cream along the top and clearly the cream "looks" much better. I have a lot of leeway here so I appreciate the input. Maury
-
Decision time: Color of the cap rail. We know from several documents that ECB in the period she was converted to a schooner was painted green below the covering board and above the LWL. The bulwarks were black. I have maybe 100 B&W photos of her as a schooner (admittedly all taken in the 1930s). In each photo where the cap rail can be clearly seen, it is either 1] very light or 2] dark, but clearly not black. Chapelle's "American Fishing Schooners..." has a section on paint, but offers no help. Painting it cream to match the inner sides of the bulwarks doesn't make sense to me...it would not wear well on a work boat. Adding another color to the palette is not my choice so I'm leaning to the same green as the lower planking. If anyone has solid information on color schemes of late 19th century New England fishing boats, I'd appreciate a comment. Maury
-
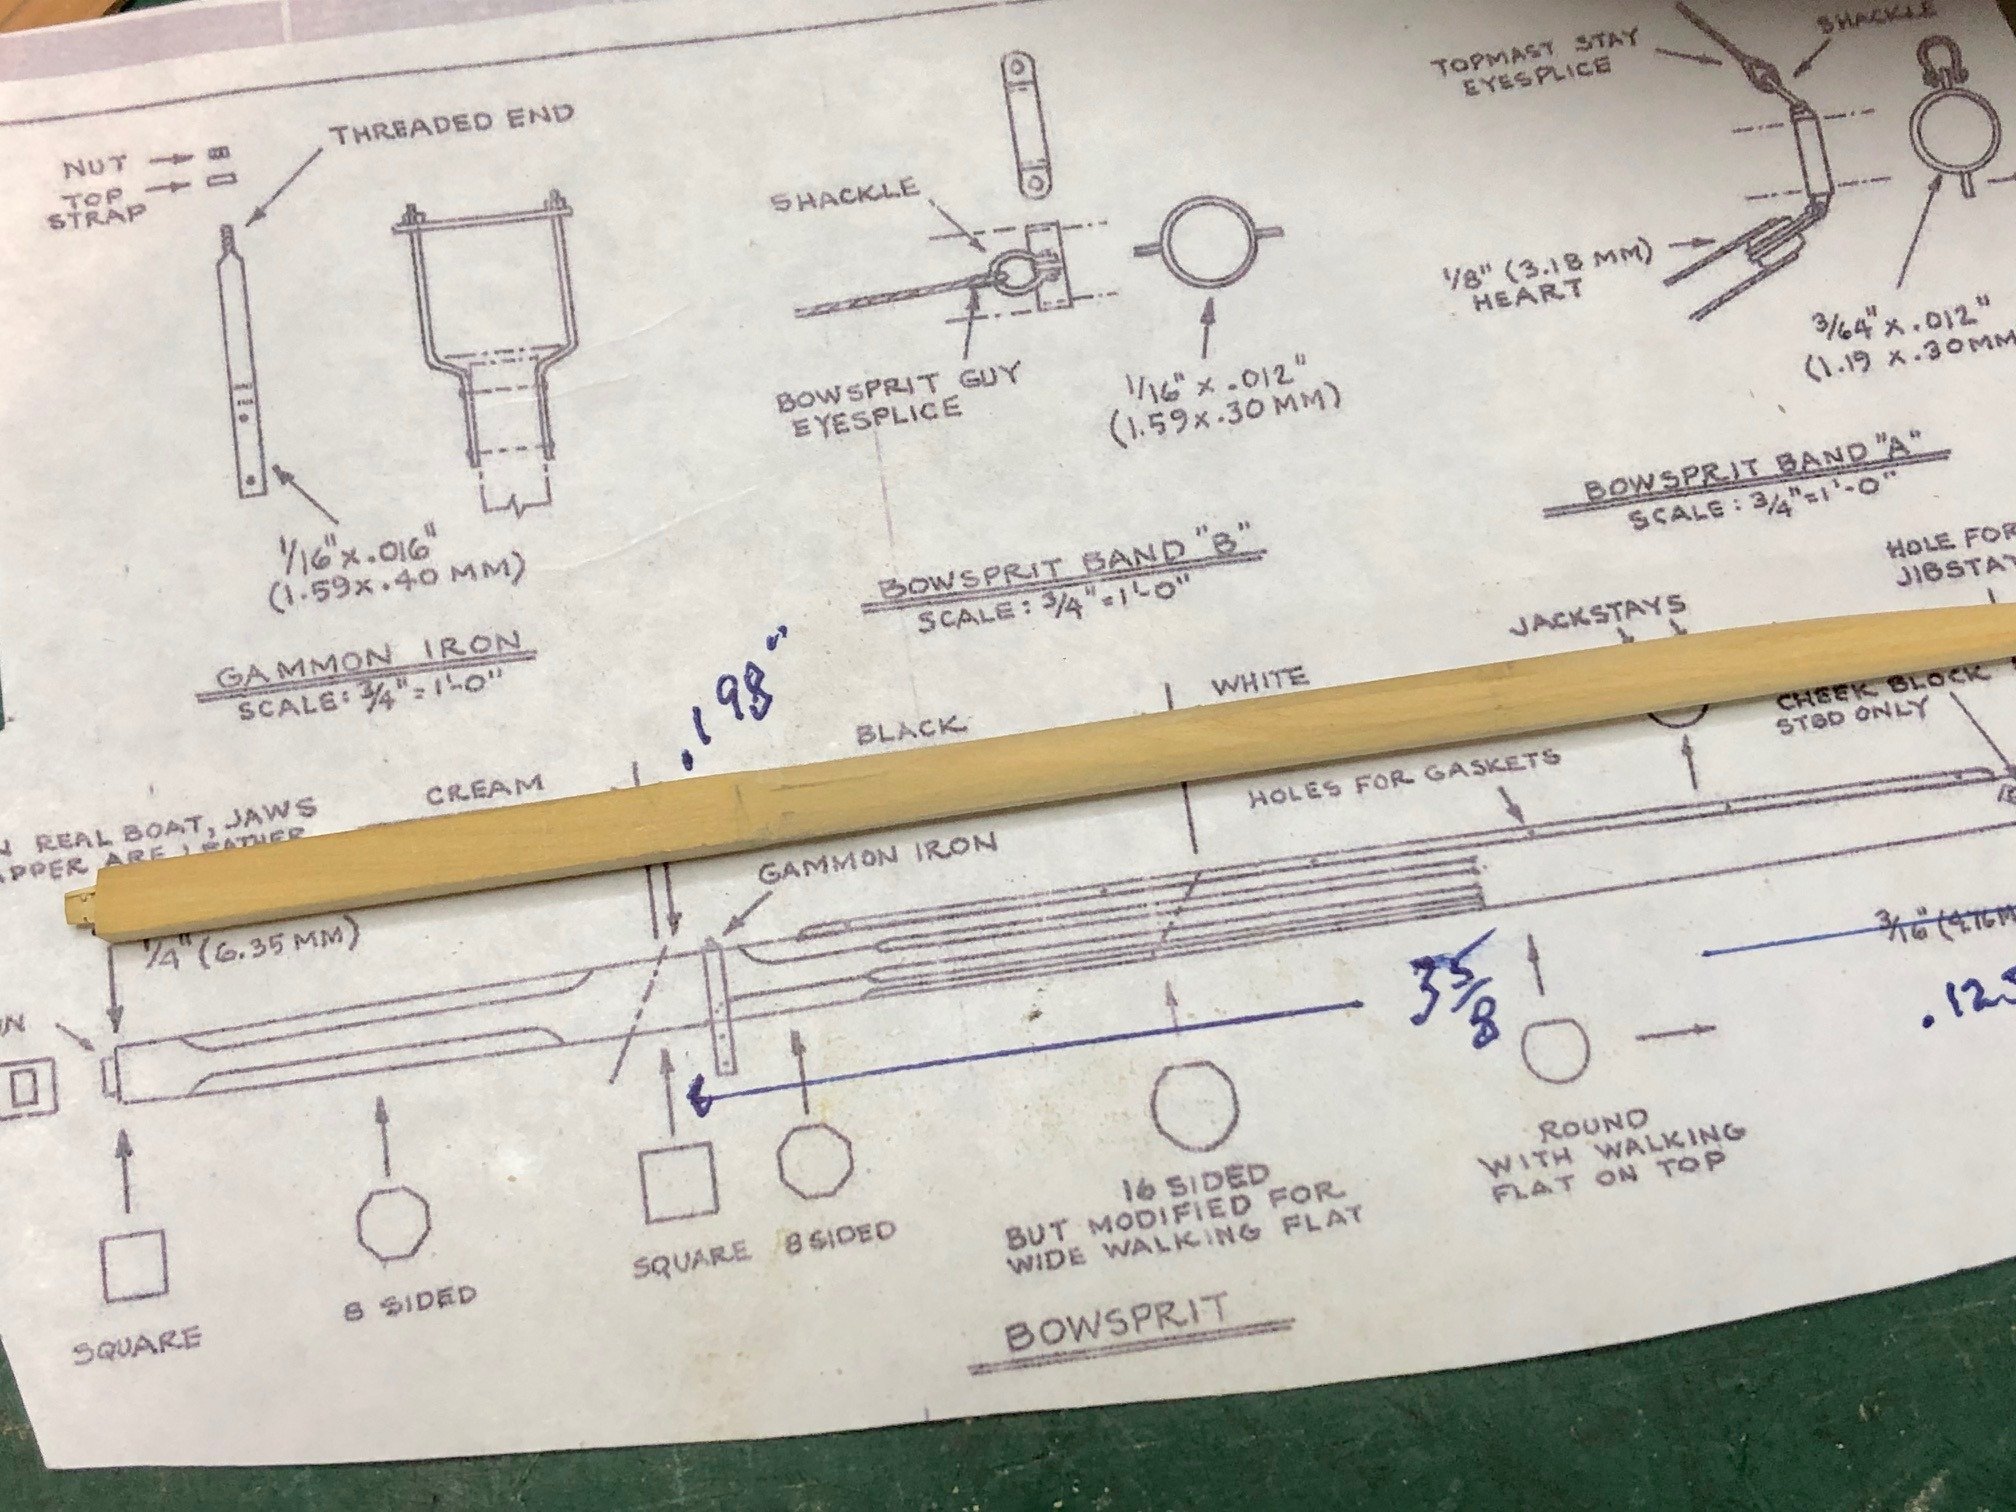
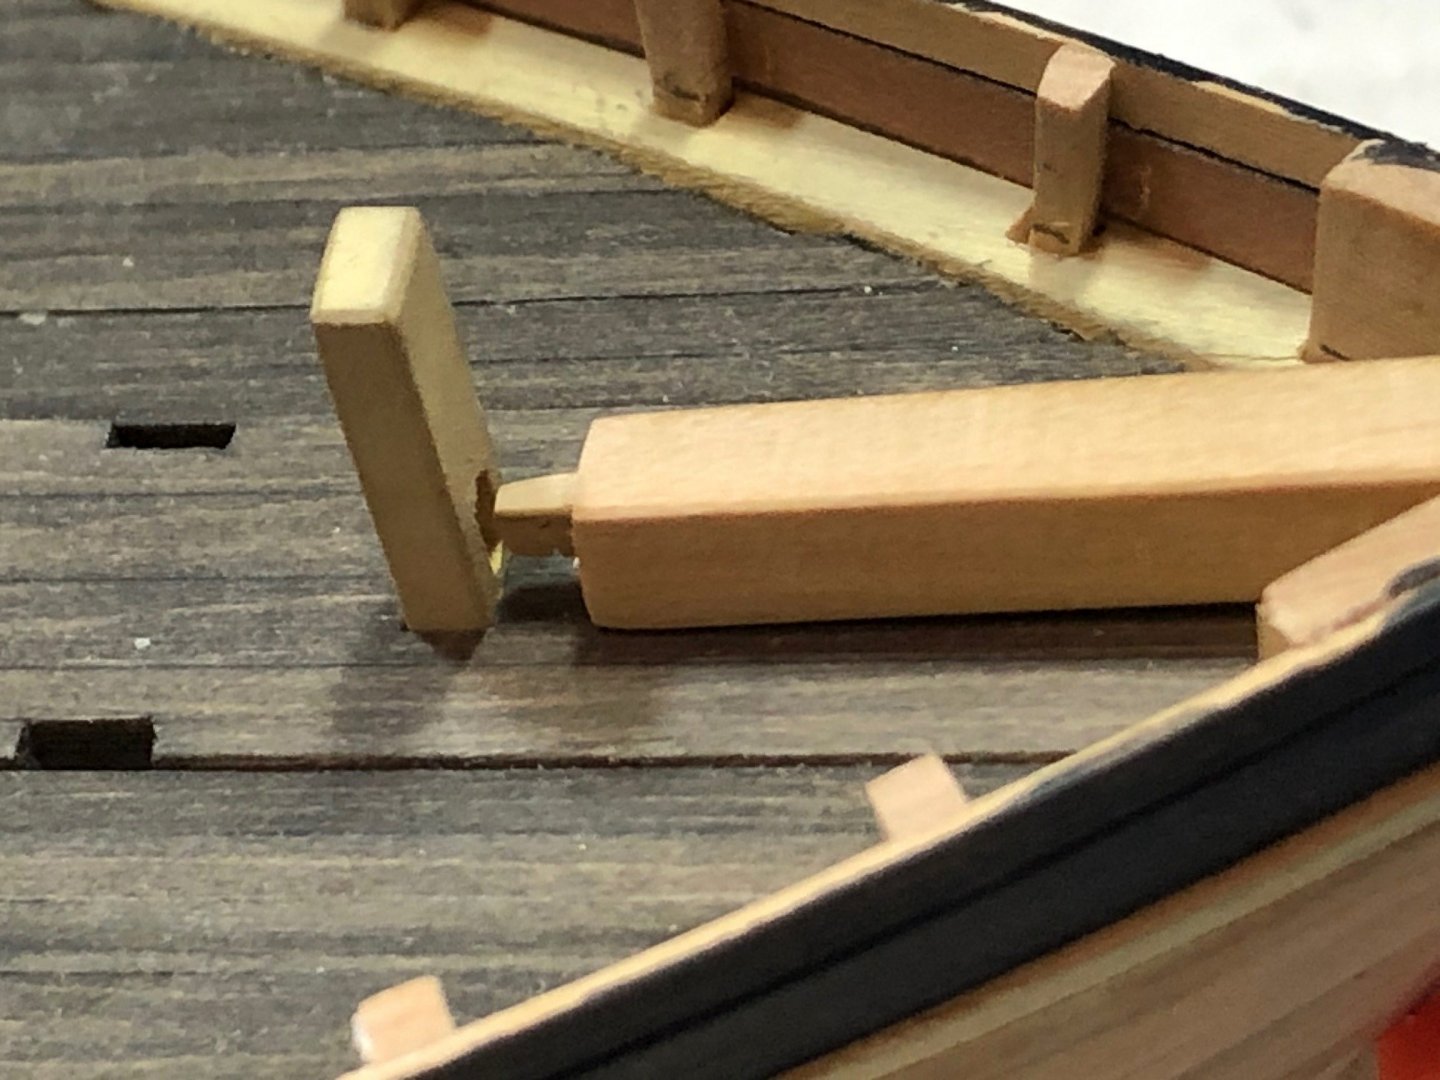
A slight diversion...the bowsprit. There is a tenon at the heel to fit into a mortise in the bit. The plan shows the bottom of the stick is flat and straight. All the taper comes from the top and sides. In addition, it goes from square at the heel, to eight-sided, back to square as it passes through the bulwarks, back to eight-sided, then sixteen-sided and finally to round. In addition, the top of the stick has a "walking flat". Using 7-10-7 layout, the square pole is being shaped in a jig using a 5/8" chisel. After cutting and sanding it's almost done. The eight-sided section near the heel needs to be cut and I've left the ends square so I can line up holes that need to be drilled. Photo is too low quality to see the details. Maury


-
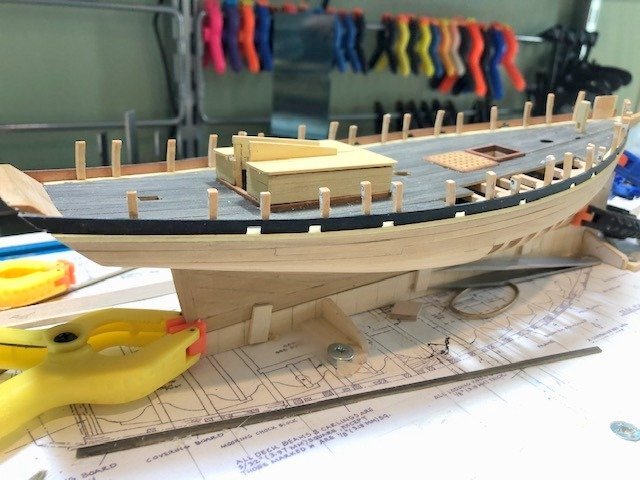
The bulwark is built up and the stanchions are trimmed. The bulwarks are painted with three coats of thinned "Hull Black" from Model Expo. The insides will be painted cream. Maury

-
NAIAD 1797 by Bitao - 1:60
Maury S replied to Bitao's topic in - Build logs for subjects built 1751 - 1800
Such a clean build! Thanks for sharing the journey. Maury -
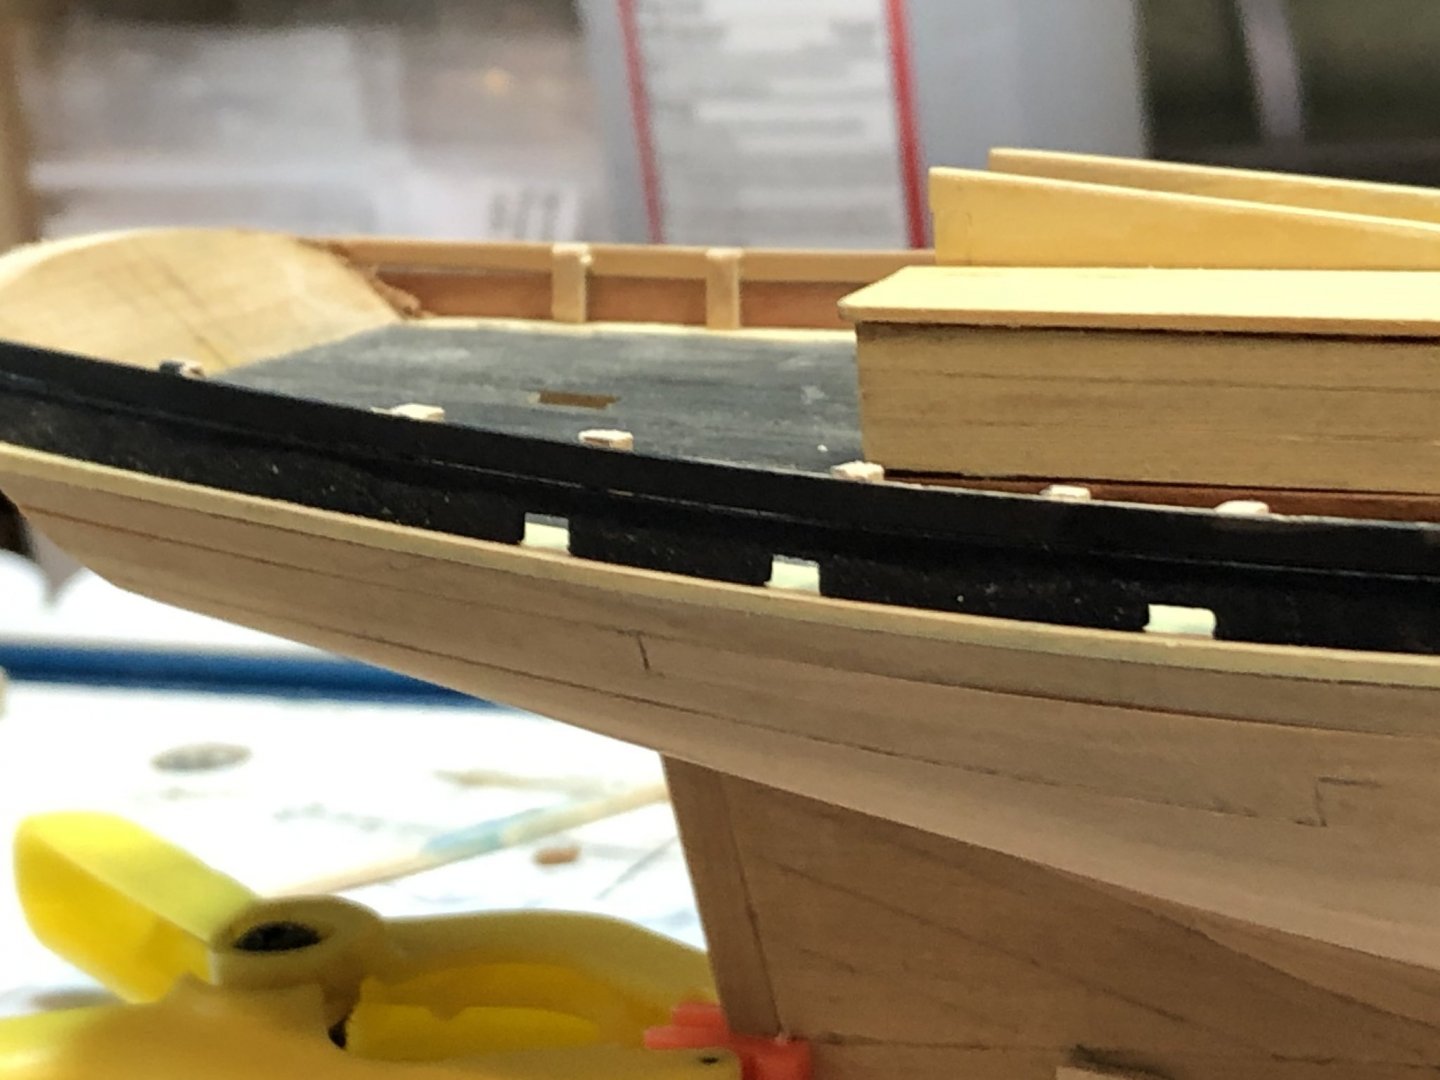
The scupper strakes are in. Thinner bulwark strakes above are next. The outside of the bulwarks are black. The planking below the covering board is green. Painting the scupper strake before installation assured a clean cream line for the edge of the covering board. Maury
-
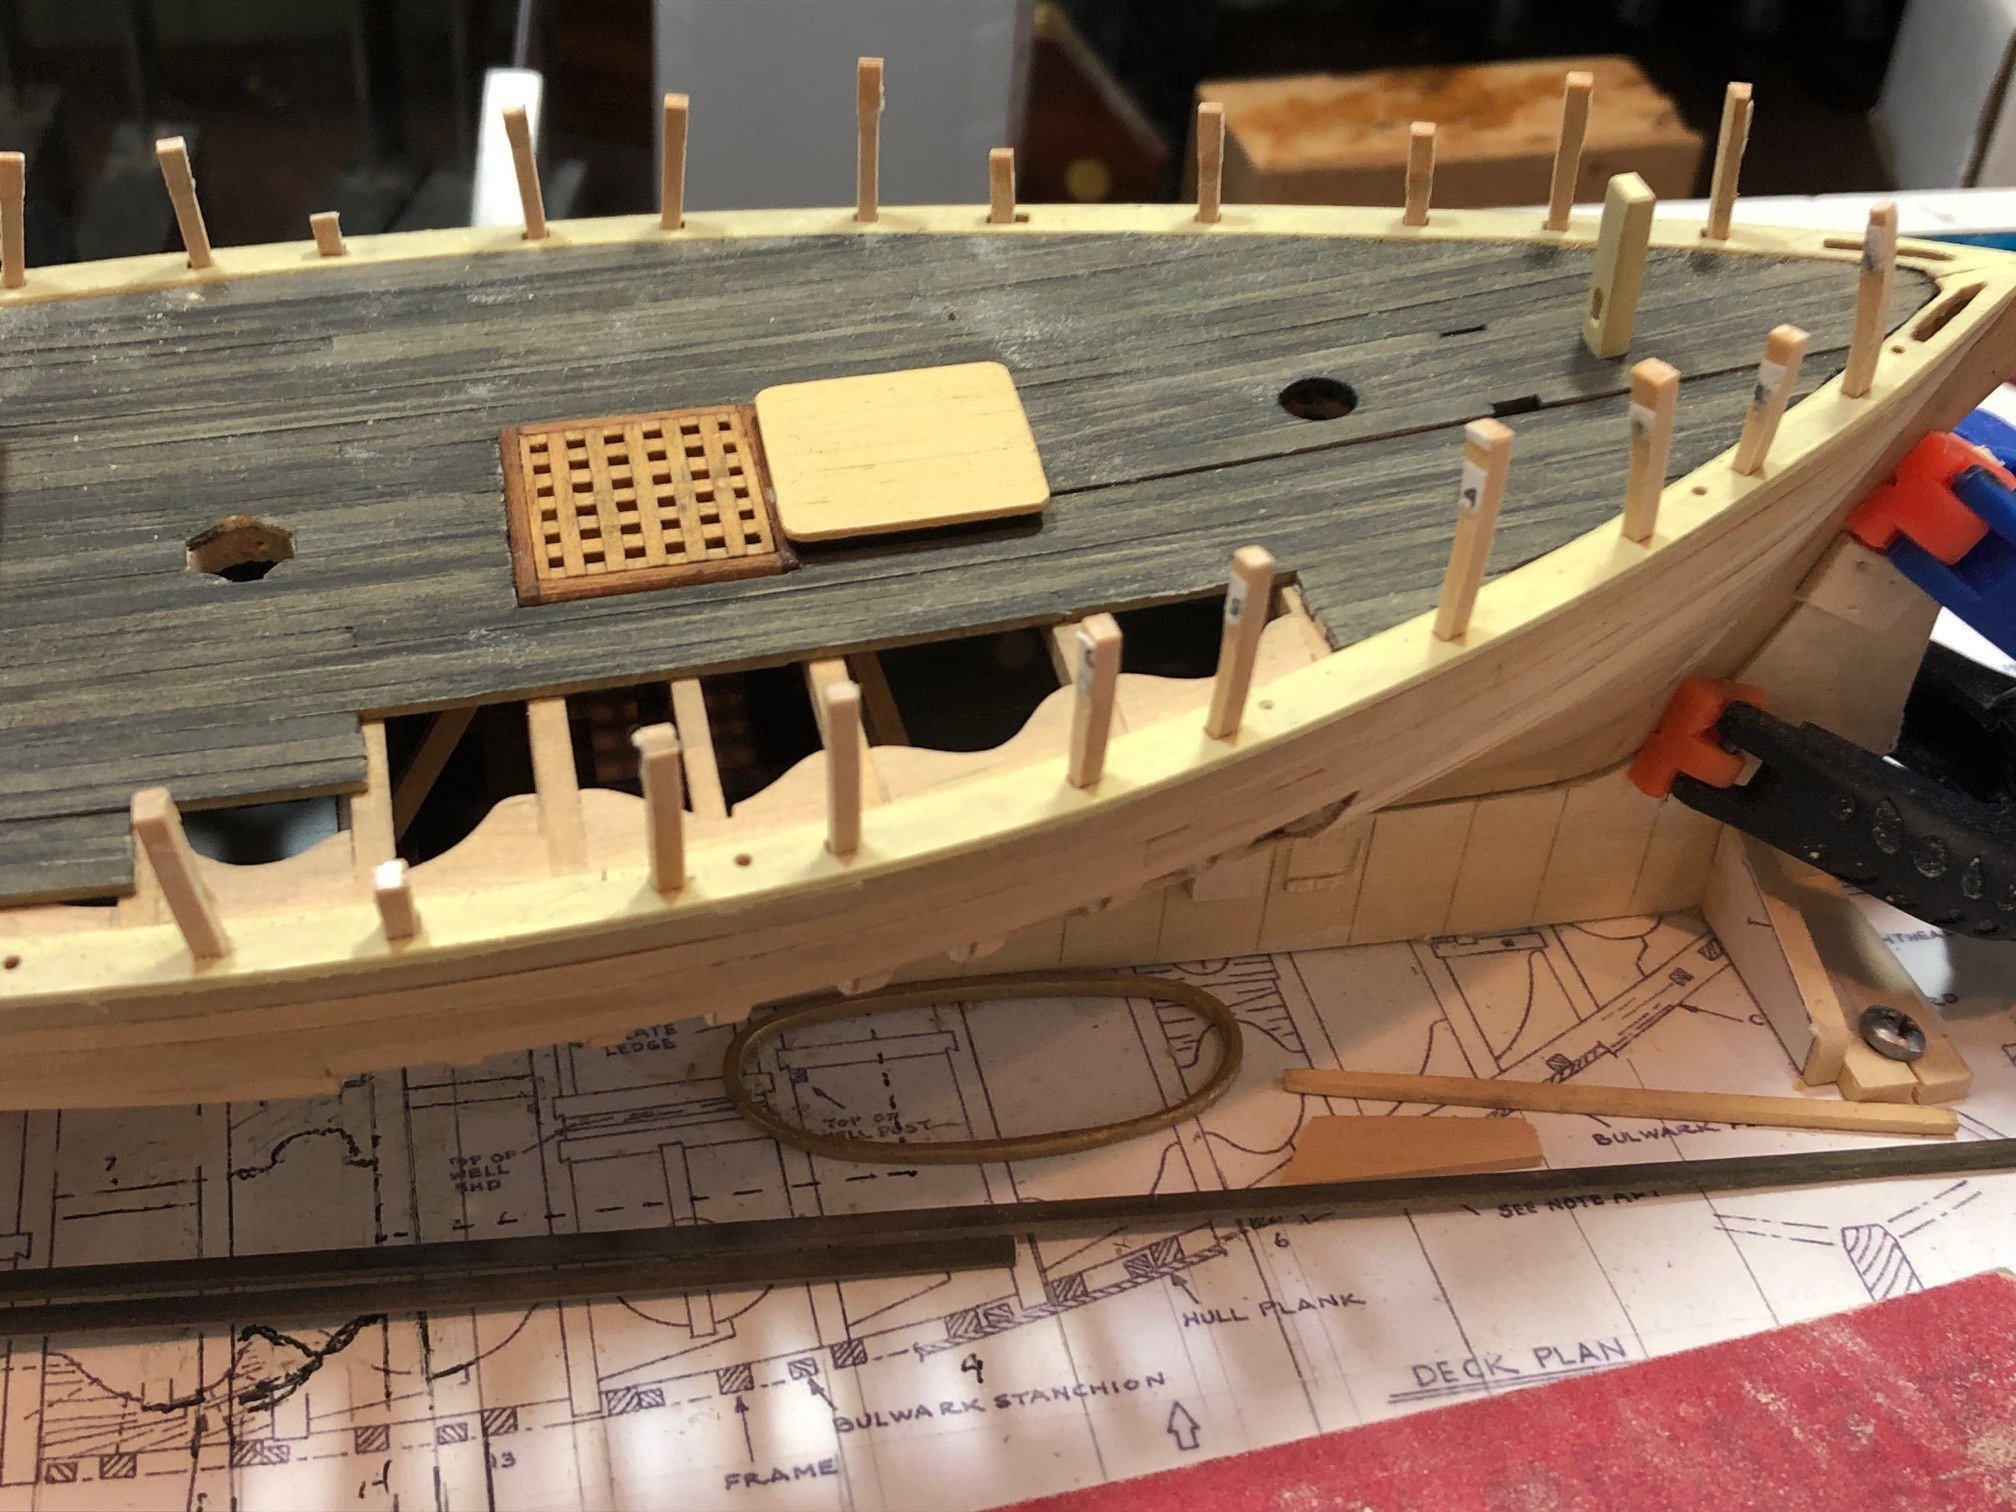
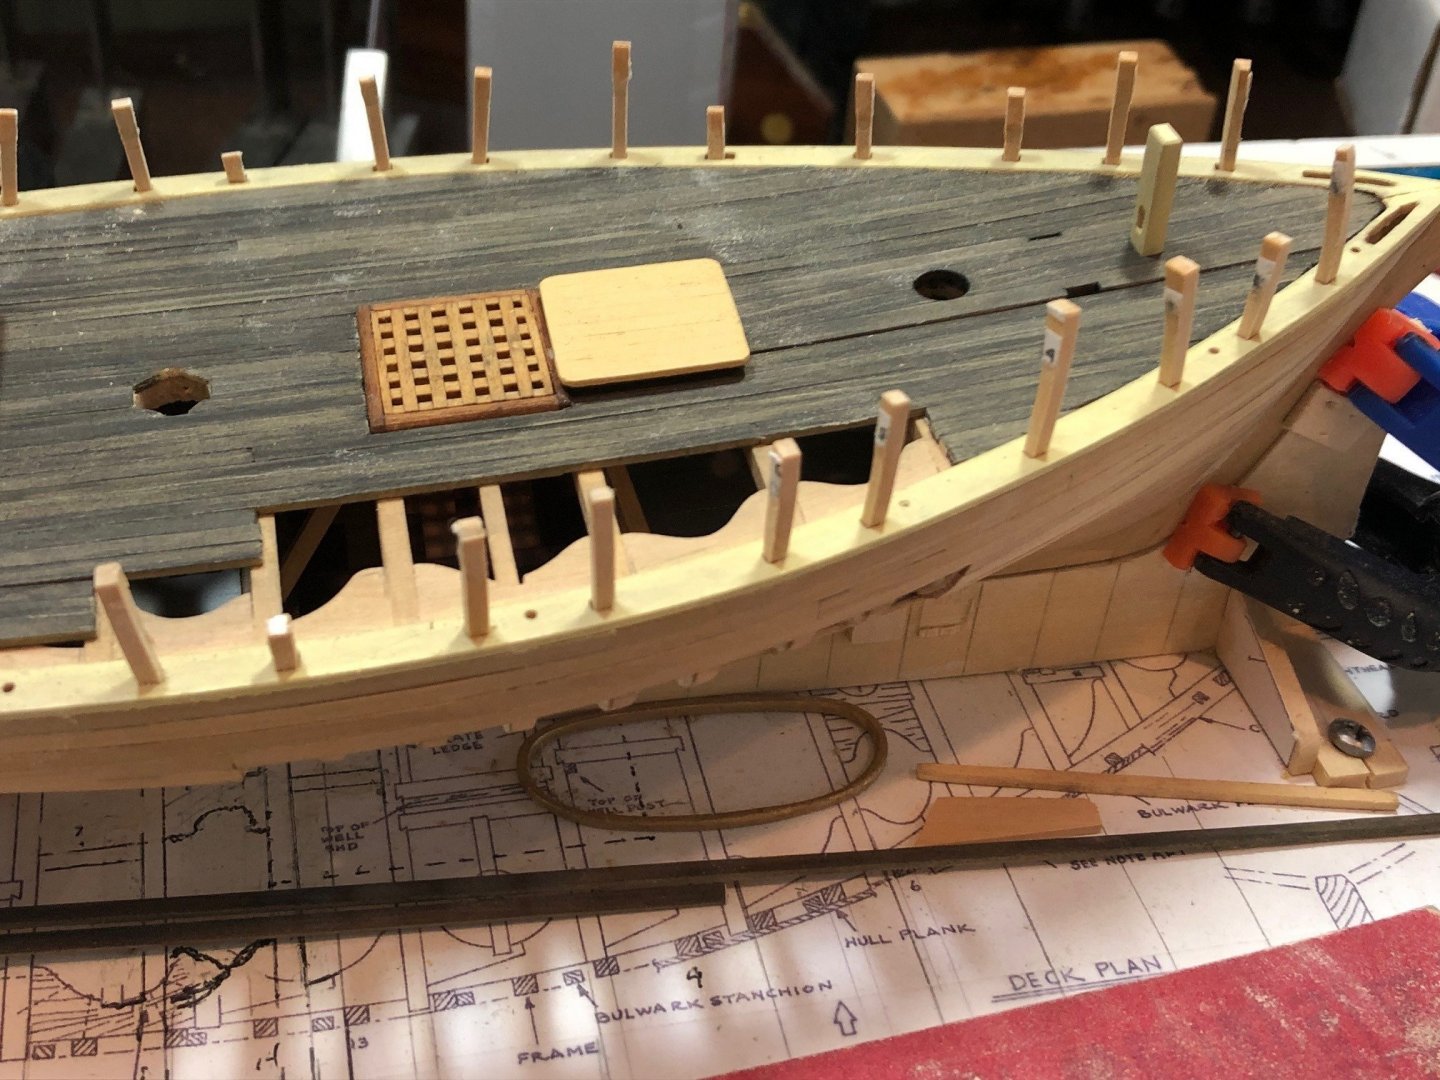
Gluing the stanchions in place needed a strake of planking to ensure they lined up. Two birds with one stone...I use 1/32" basswood rather than card stock for patterns. I spiled the plank so it will be the pattern for the scupper strake. Every other stanchion will be glued, holding each against the plank with clamps, then I'll go back and glue in the rest. Hopefully I've not glued the plank to any stanchion. Maury


-
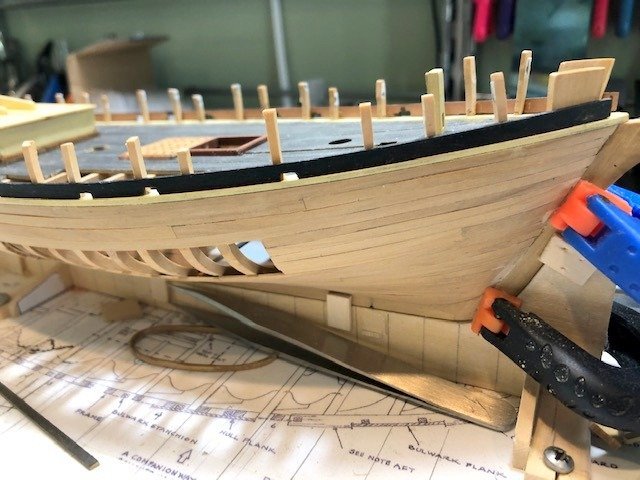
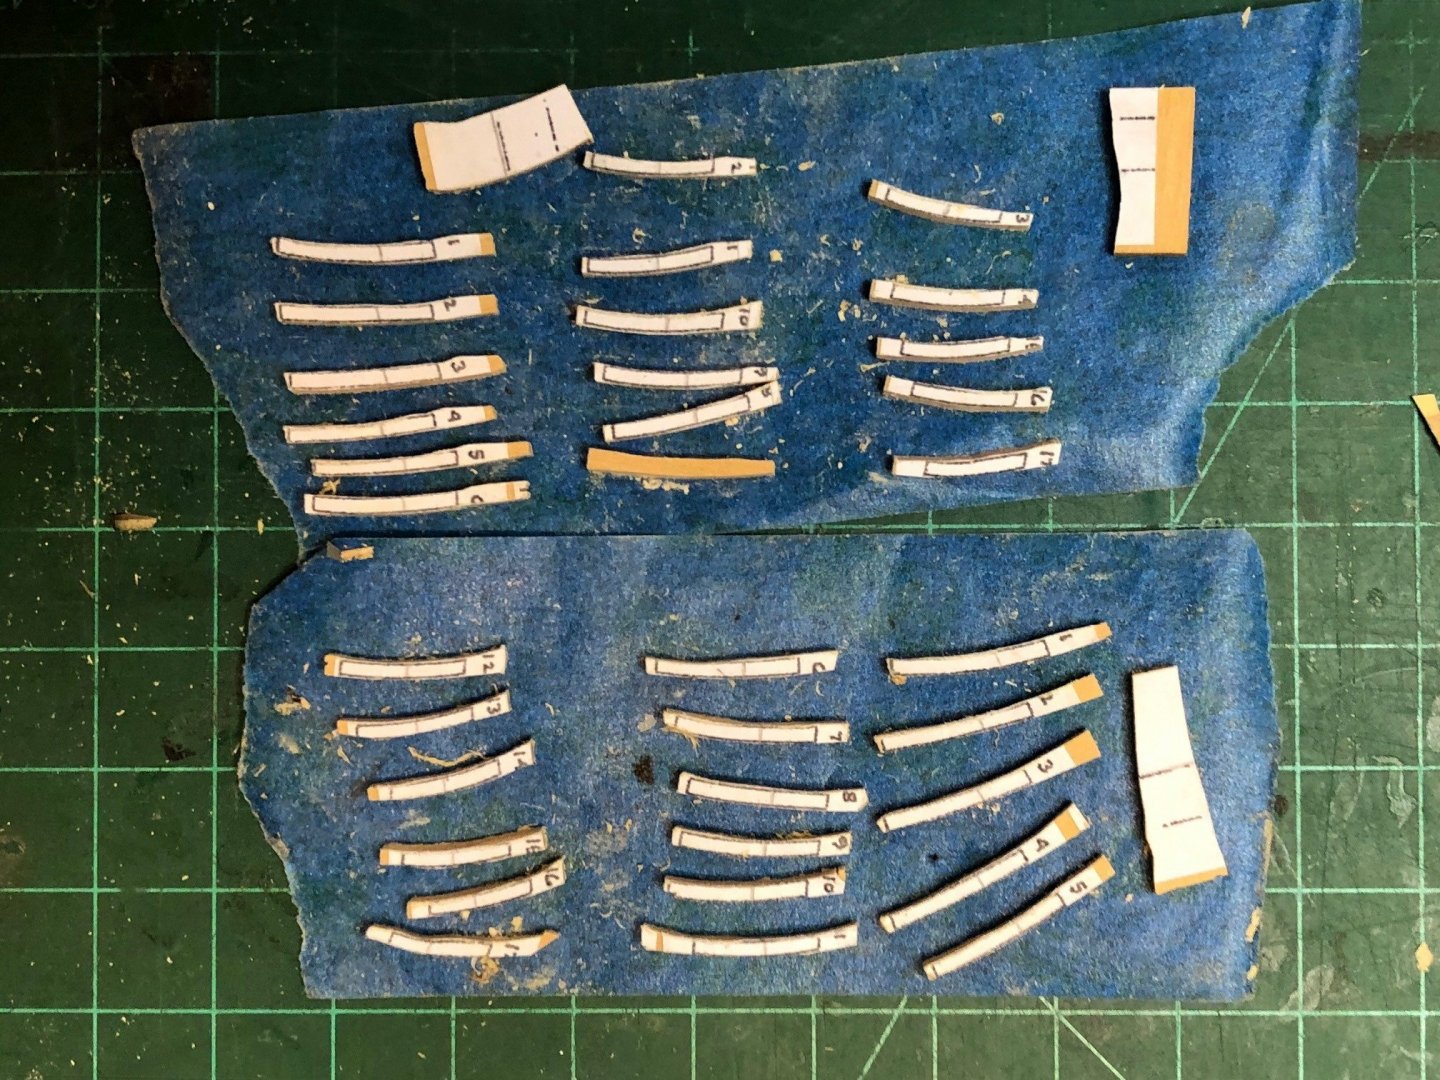
There are 17 bulwark stanchions on each side. The pieces are small and each is slightly different in shape. When they are cut on the scroll saw, I put them on a piece of painter's tape to keep them in order. I also leave a tab at the top with the piece number. Once cut, they are sanded to rough shape. Additional hand sanding is necessary as each piece is inserted into the holes in the covering board. Once fitted, I will use a batten to align them before gluing. Some were over-sanded a bit and will be replaced. The tops will be cut off once the bulwarks are put in place. Fiddey little things. Maury
-
I've been using Model Expo's "copper bottom red". Any improvement suggestions are welcome. Maury
-
Druxey, Painted, yes. Copper-bottom-red below the waterline, green planking up to the bulwarks, which are black outboard and cream inboard. I certainly don't have the weathering skills of the RR or military modelers. Maury