Jond
-
Posts
758 -
Joined
-
Last visited
Content Type
Profiles
Forums
Gallery
Events
Everything posted by Jond
-
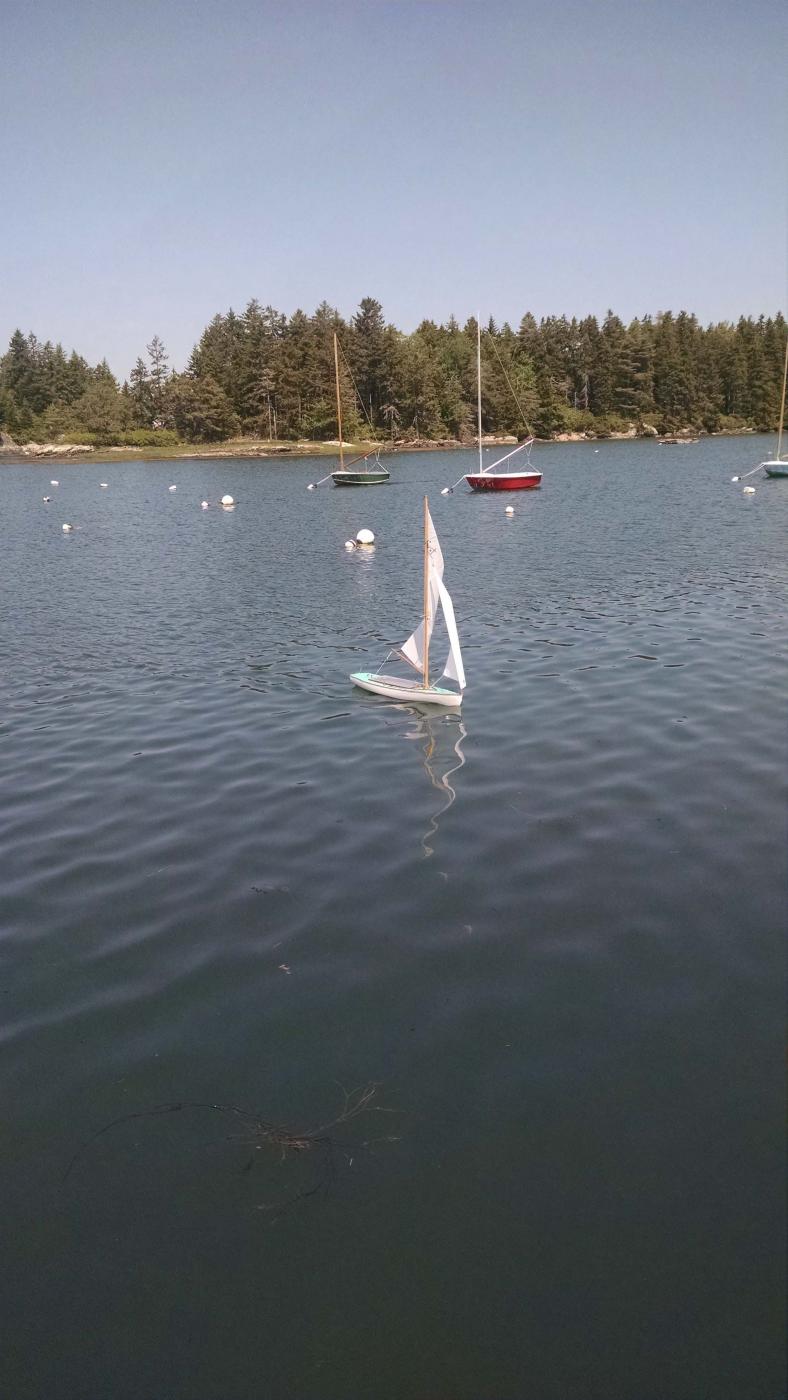
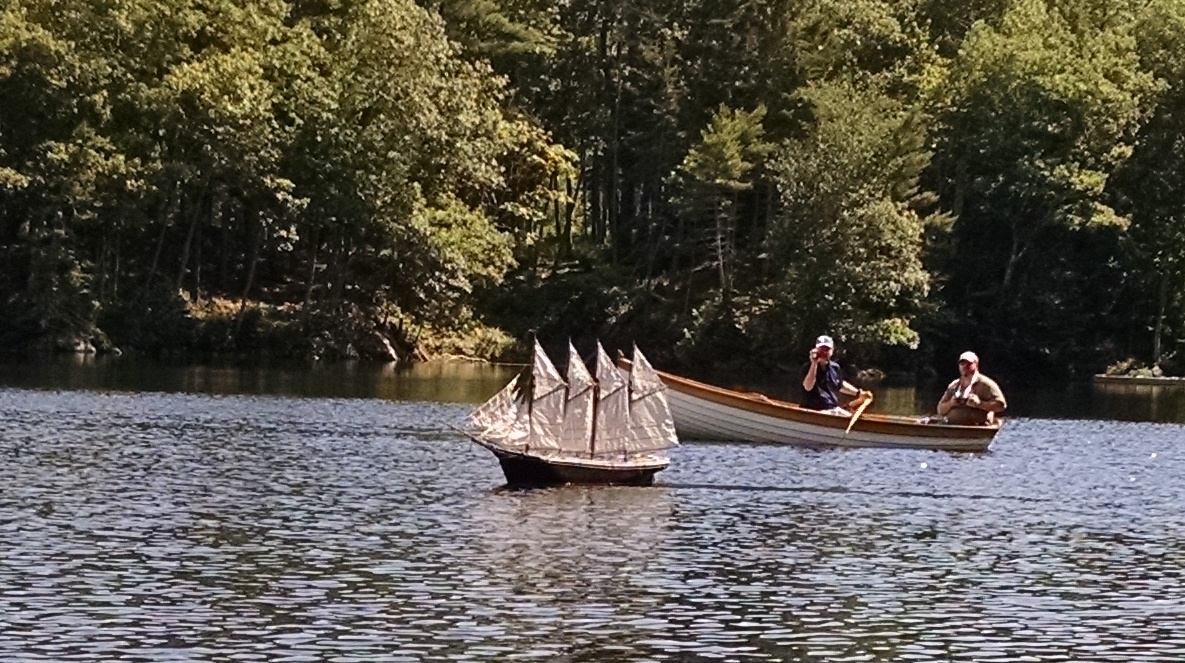
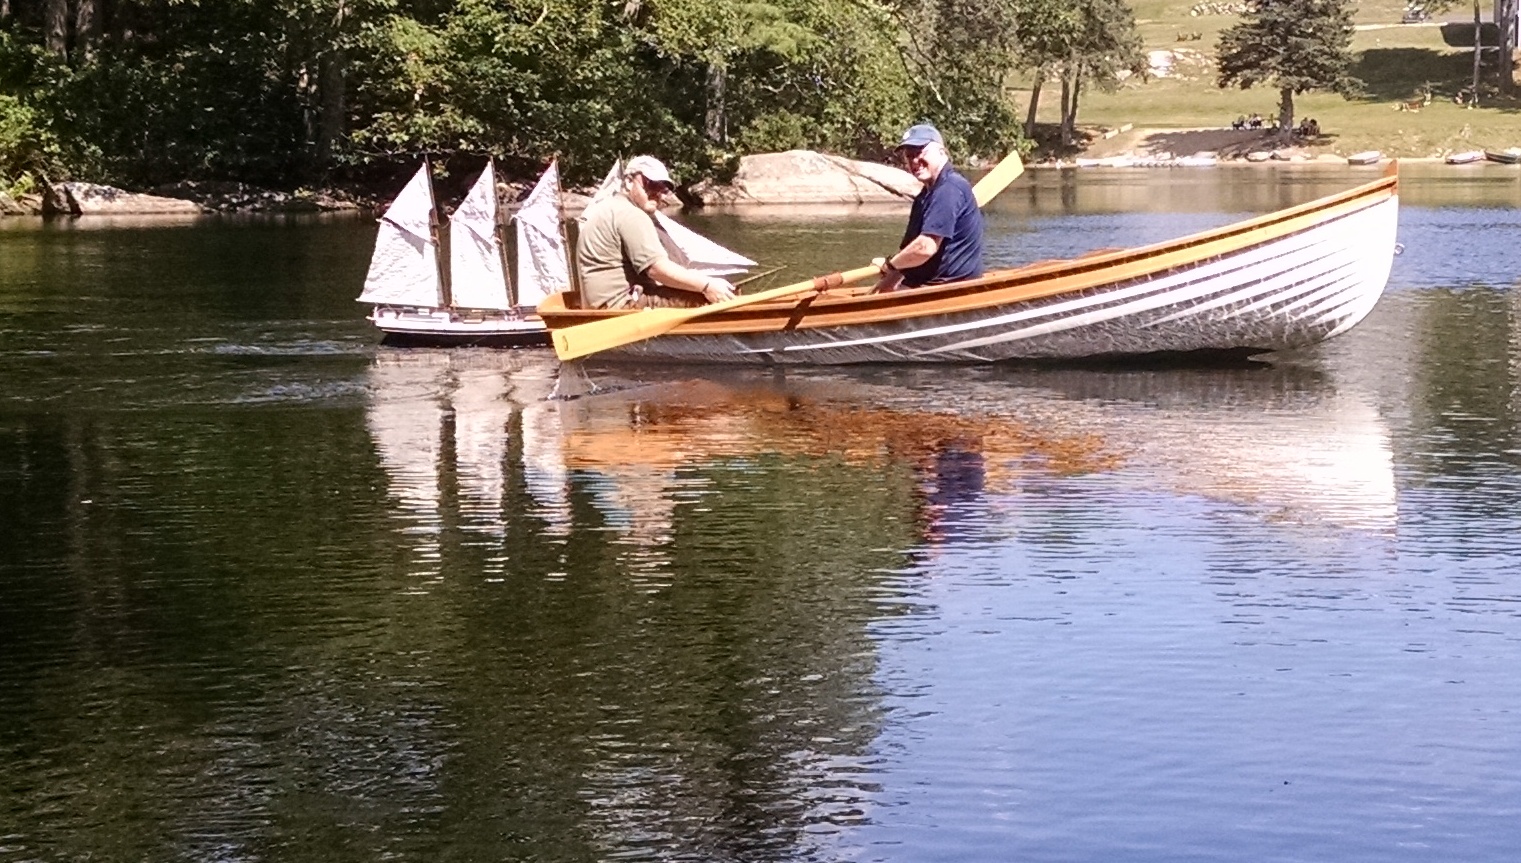
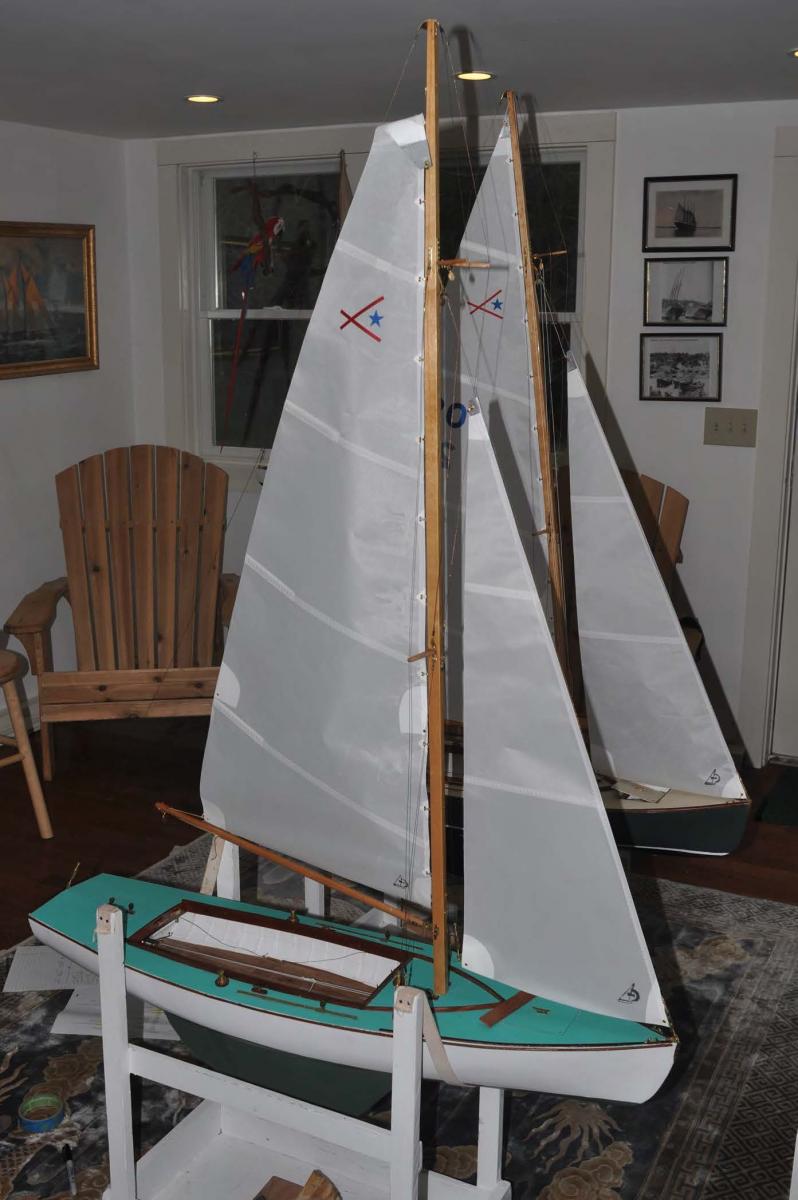
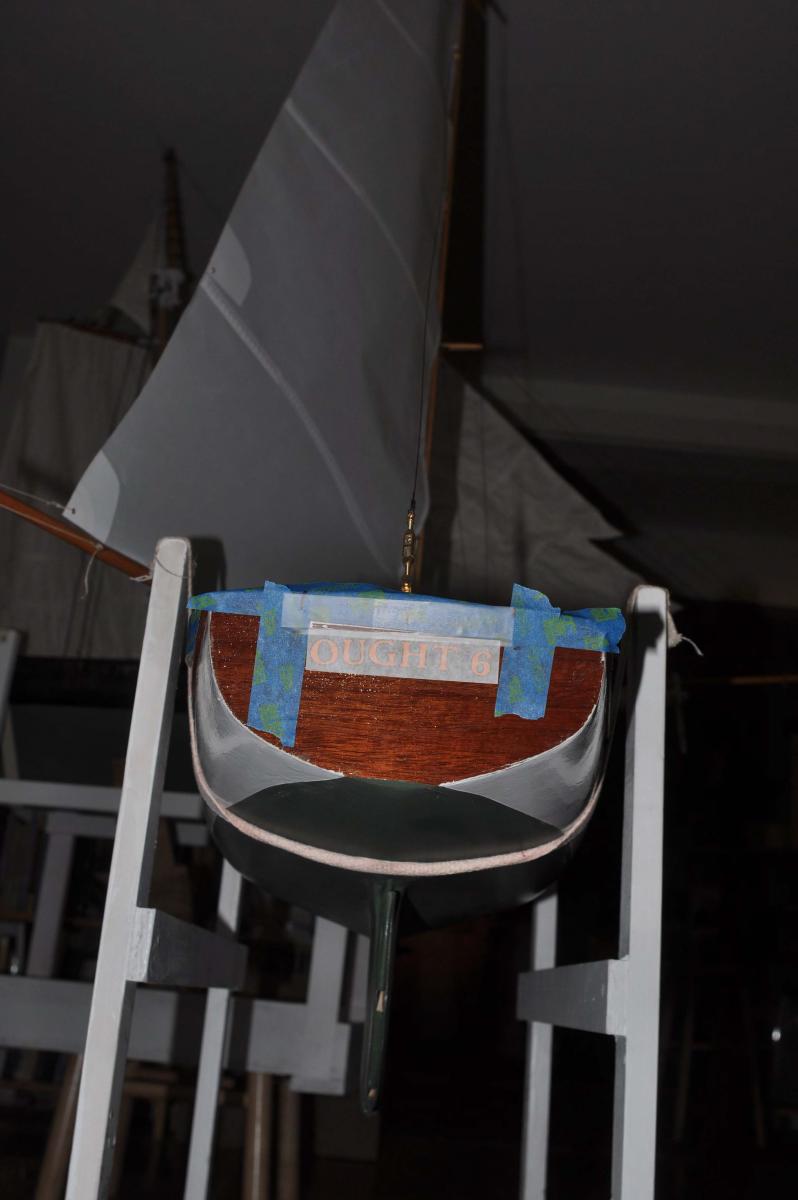
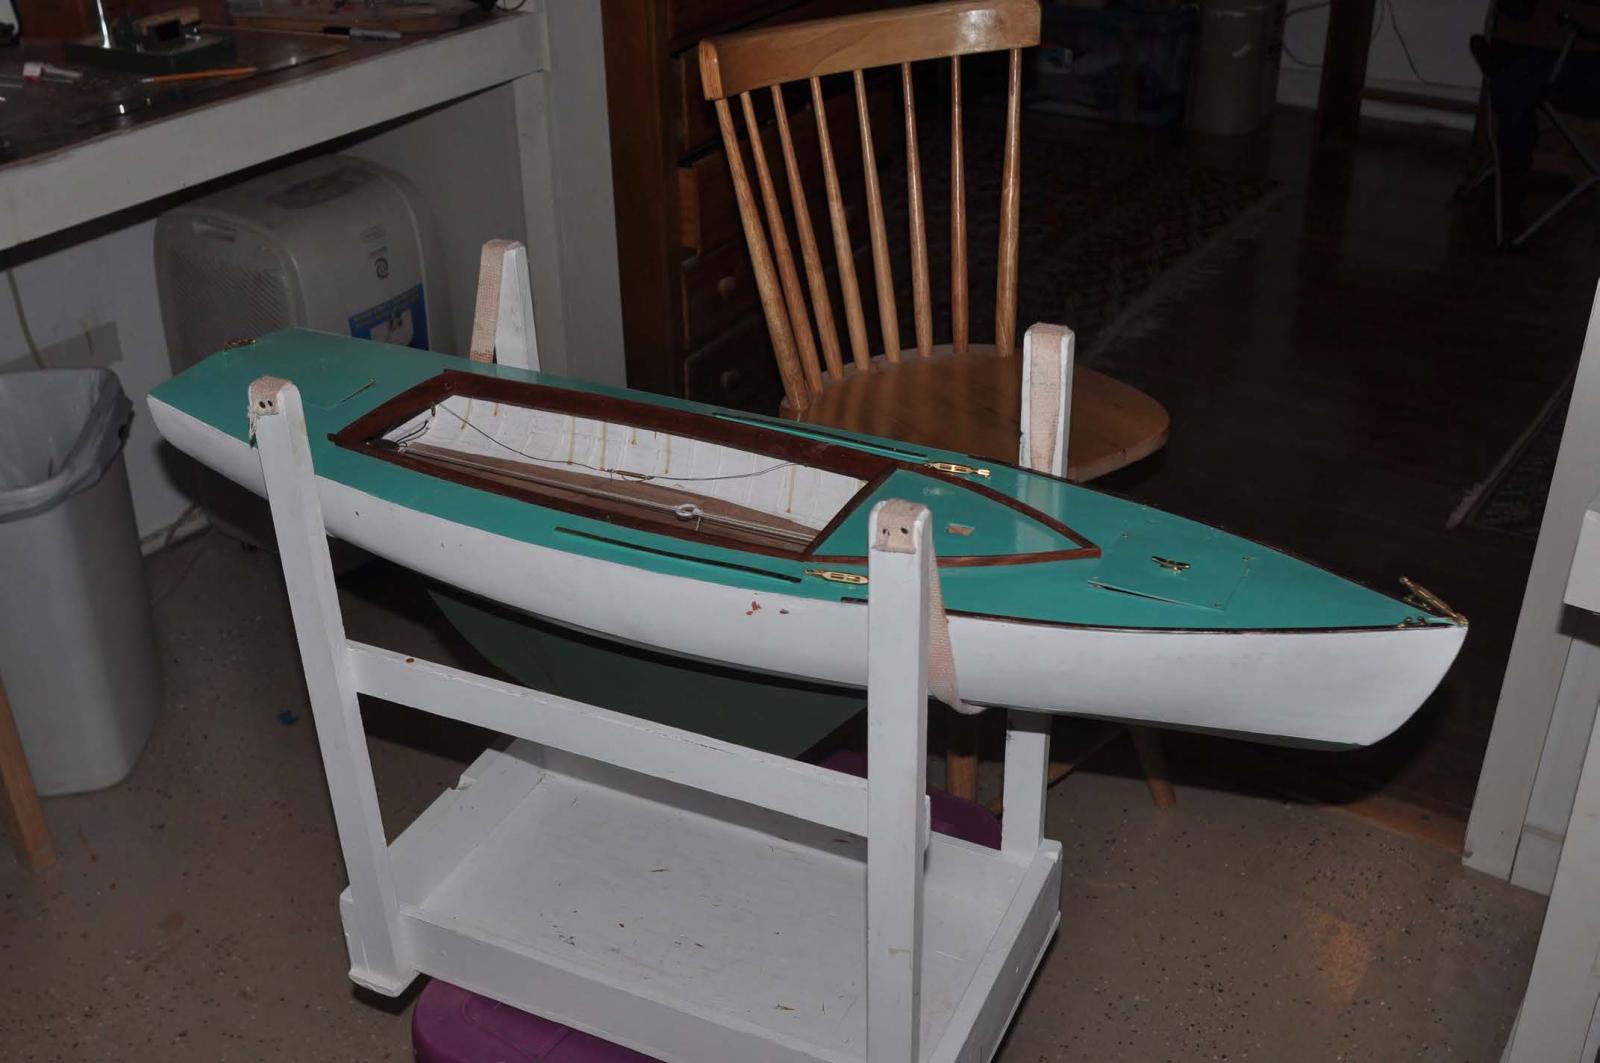
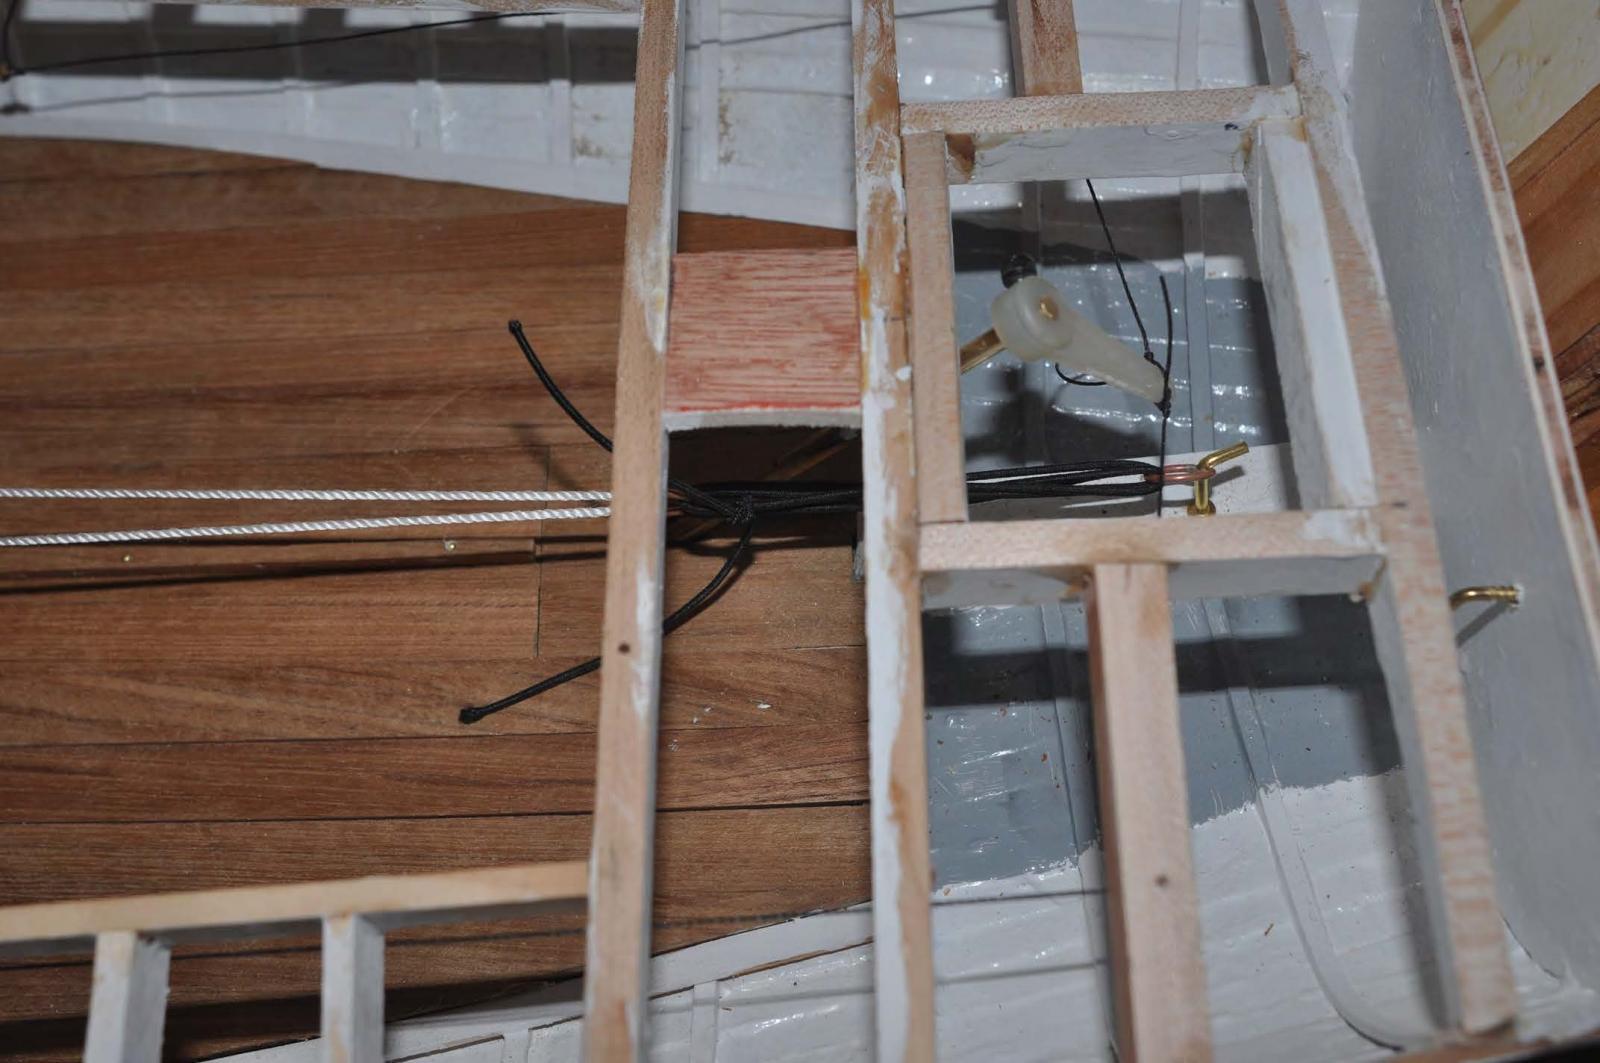
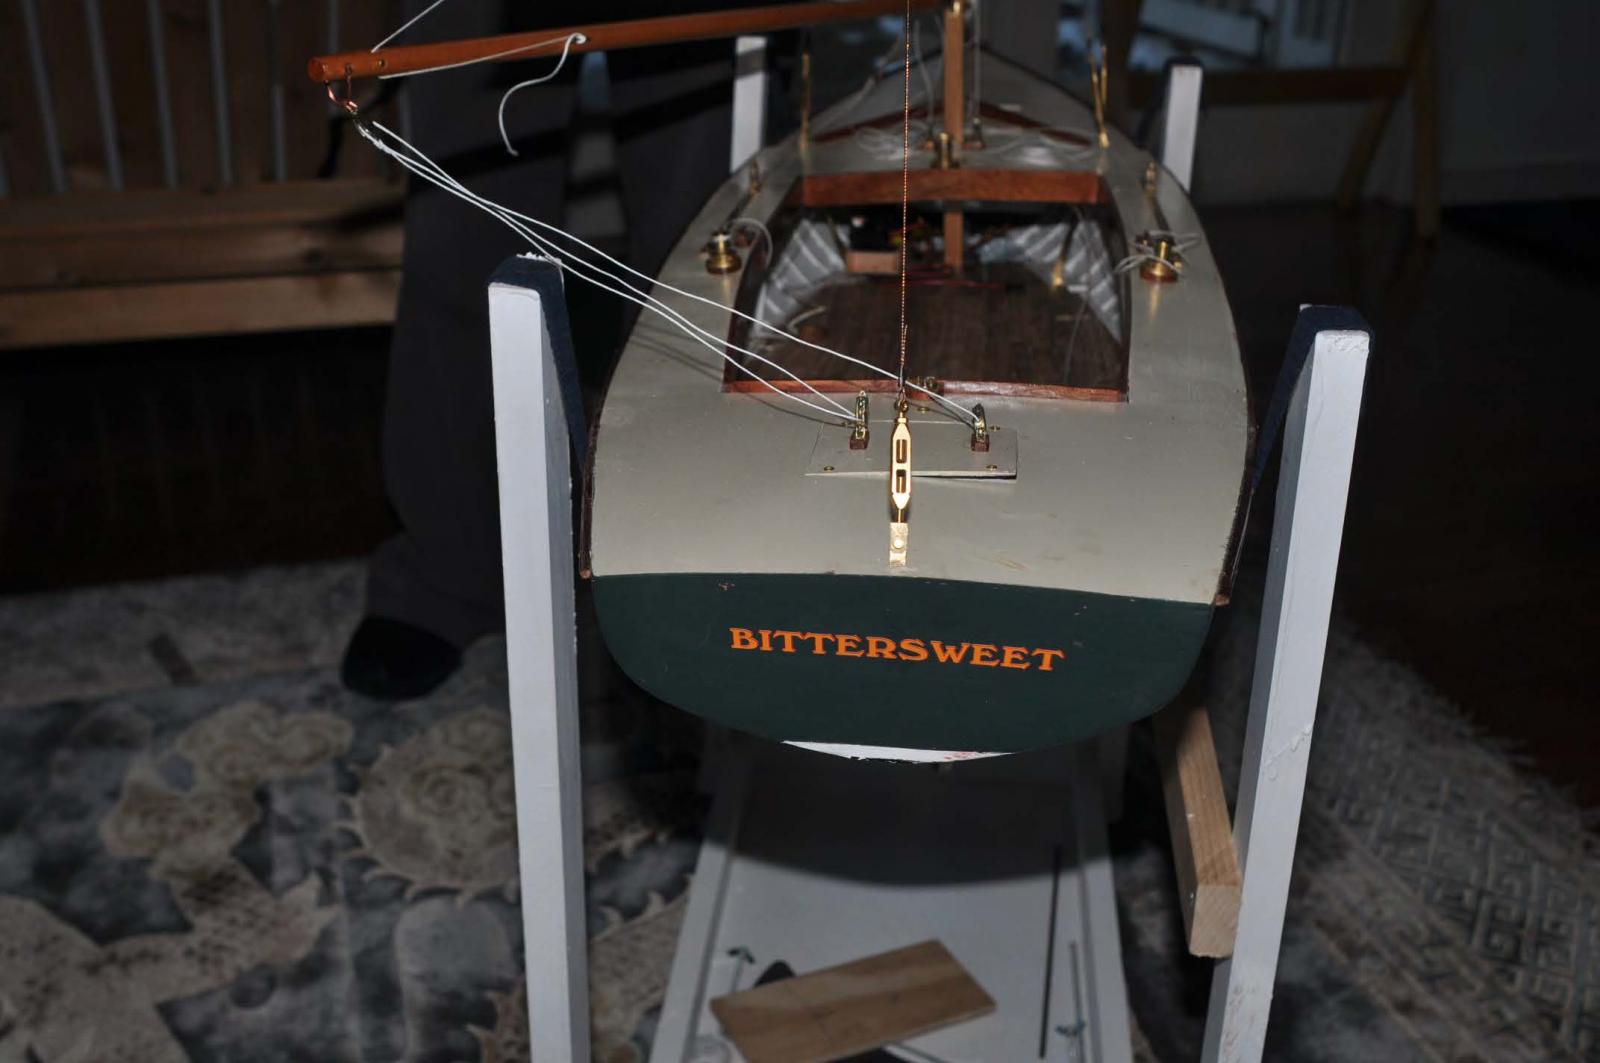
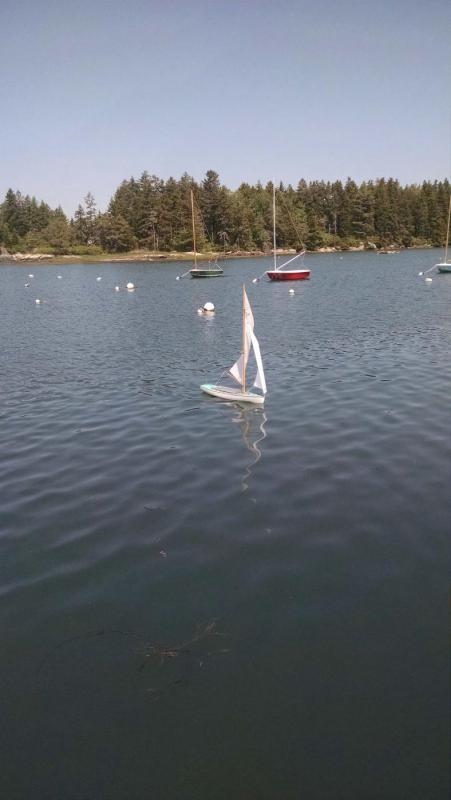
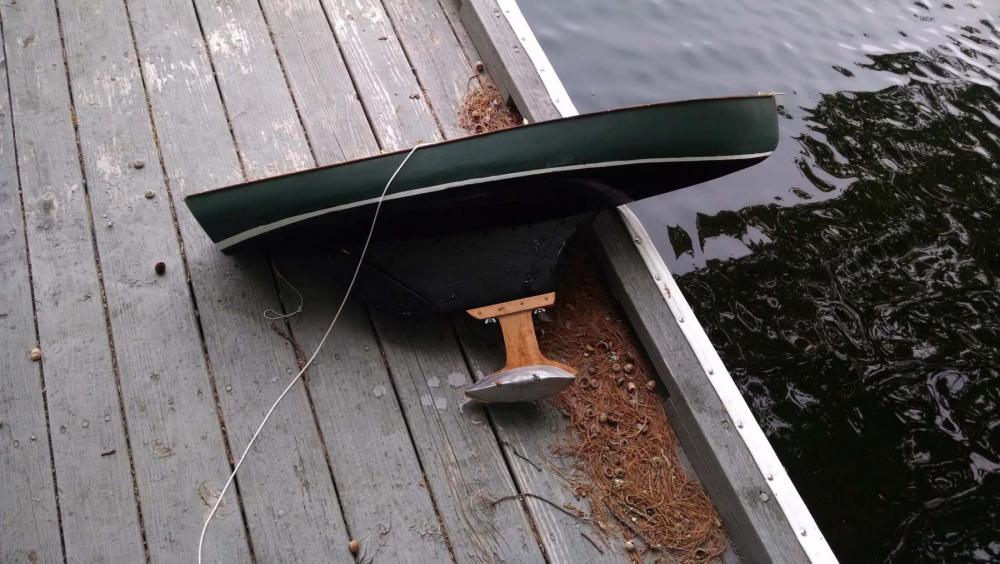
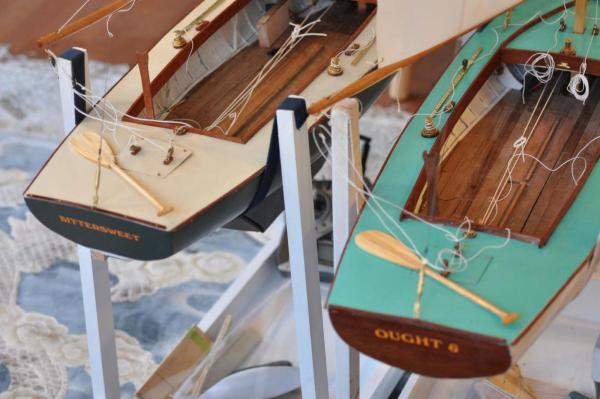
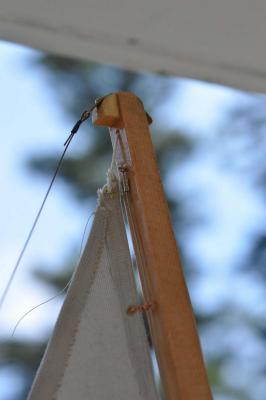
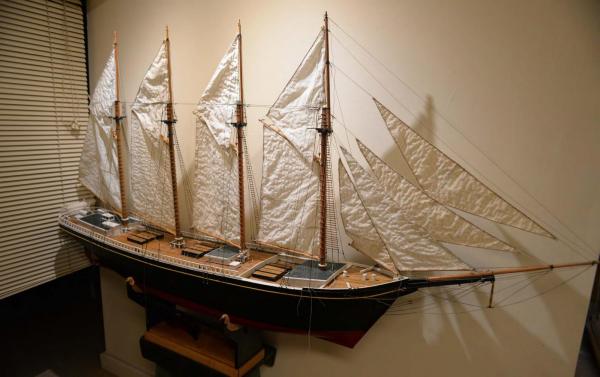
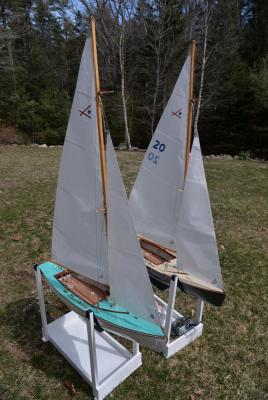
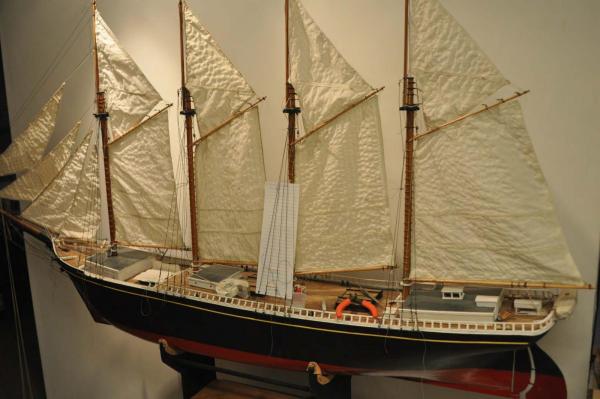
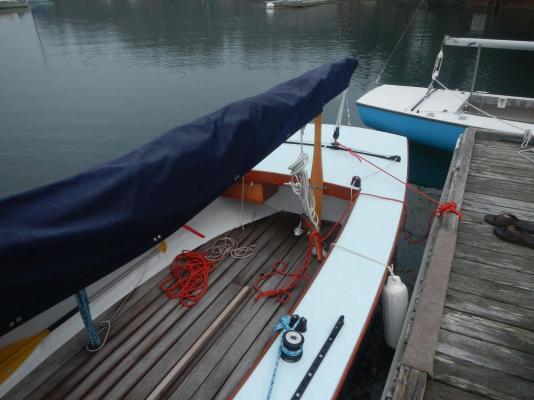
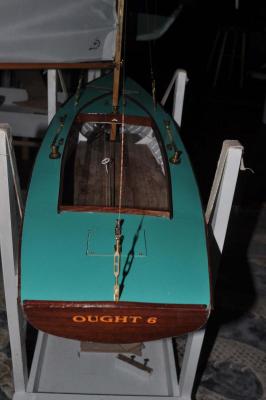
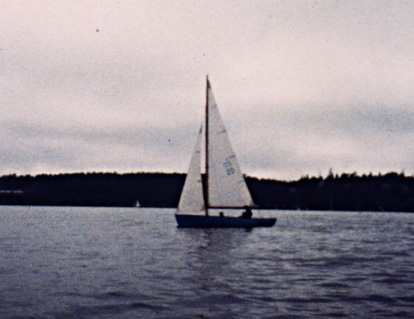
 tada!!!!! we are not home yet but both models have been sailed. I took Bittersweet to the yacht club dock as that is where in the future we hope to race. there was not enough breeze and the performance was not great but she did sail. here i took Ought 6 over to the Southport yacht club and there was a a good breeze. she sailed great after i got the hang of it and then the rudder line broke at the knot on the servo. Here one can see three of the four issues that I need to fix. I need to upgrade the line or connection fo the rudder lines. the black sting in the photo. I found the cute little stand up blocks on the after deck hatch cover catch the main sheet. I will need two hatch covers, one plain to sail and one as is for show. the nice looking hooks to connect the sheets to the boom hook should be more secure, perhaps a fishing lure clip like on the forestay. I also need to improve the connections to the sail clues and mainsail tack. the cute shackel I made up did not hold. I had a lot of problem with lee helm with little wind on the first day but no problem once we got a breeze. I look forward to working through the details cheers
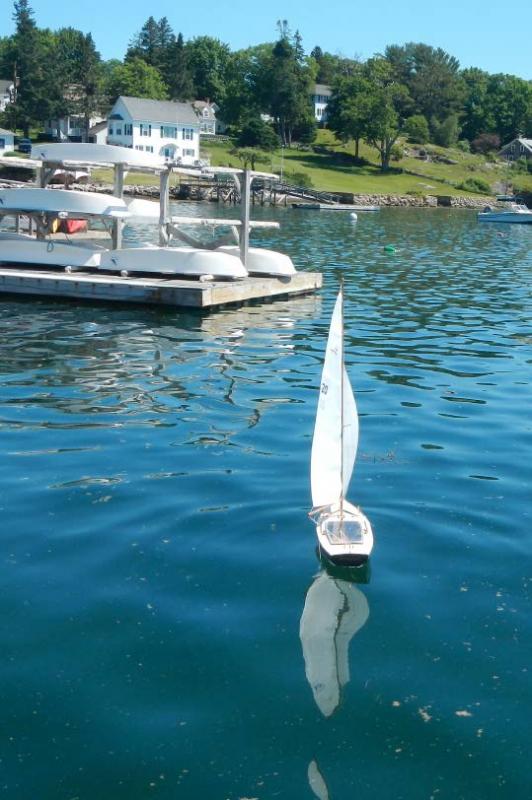
-
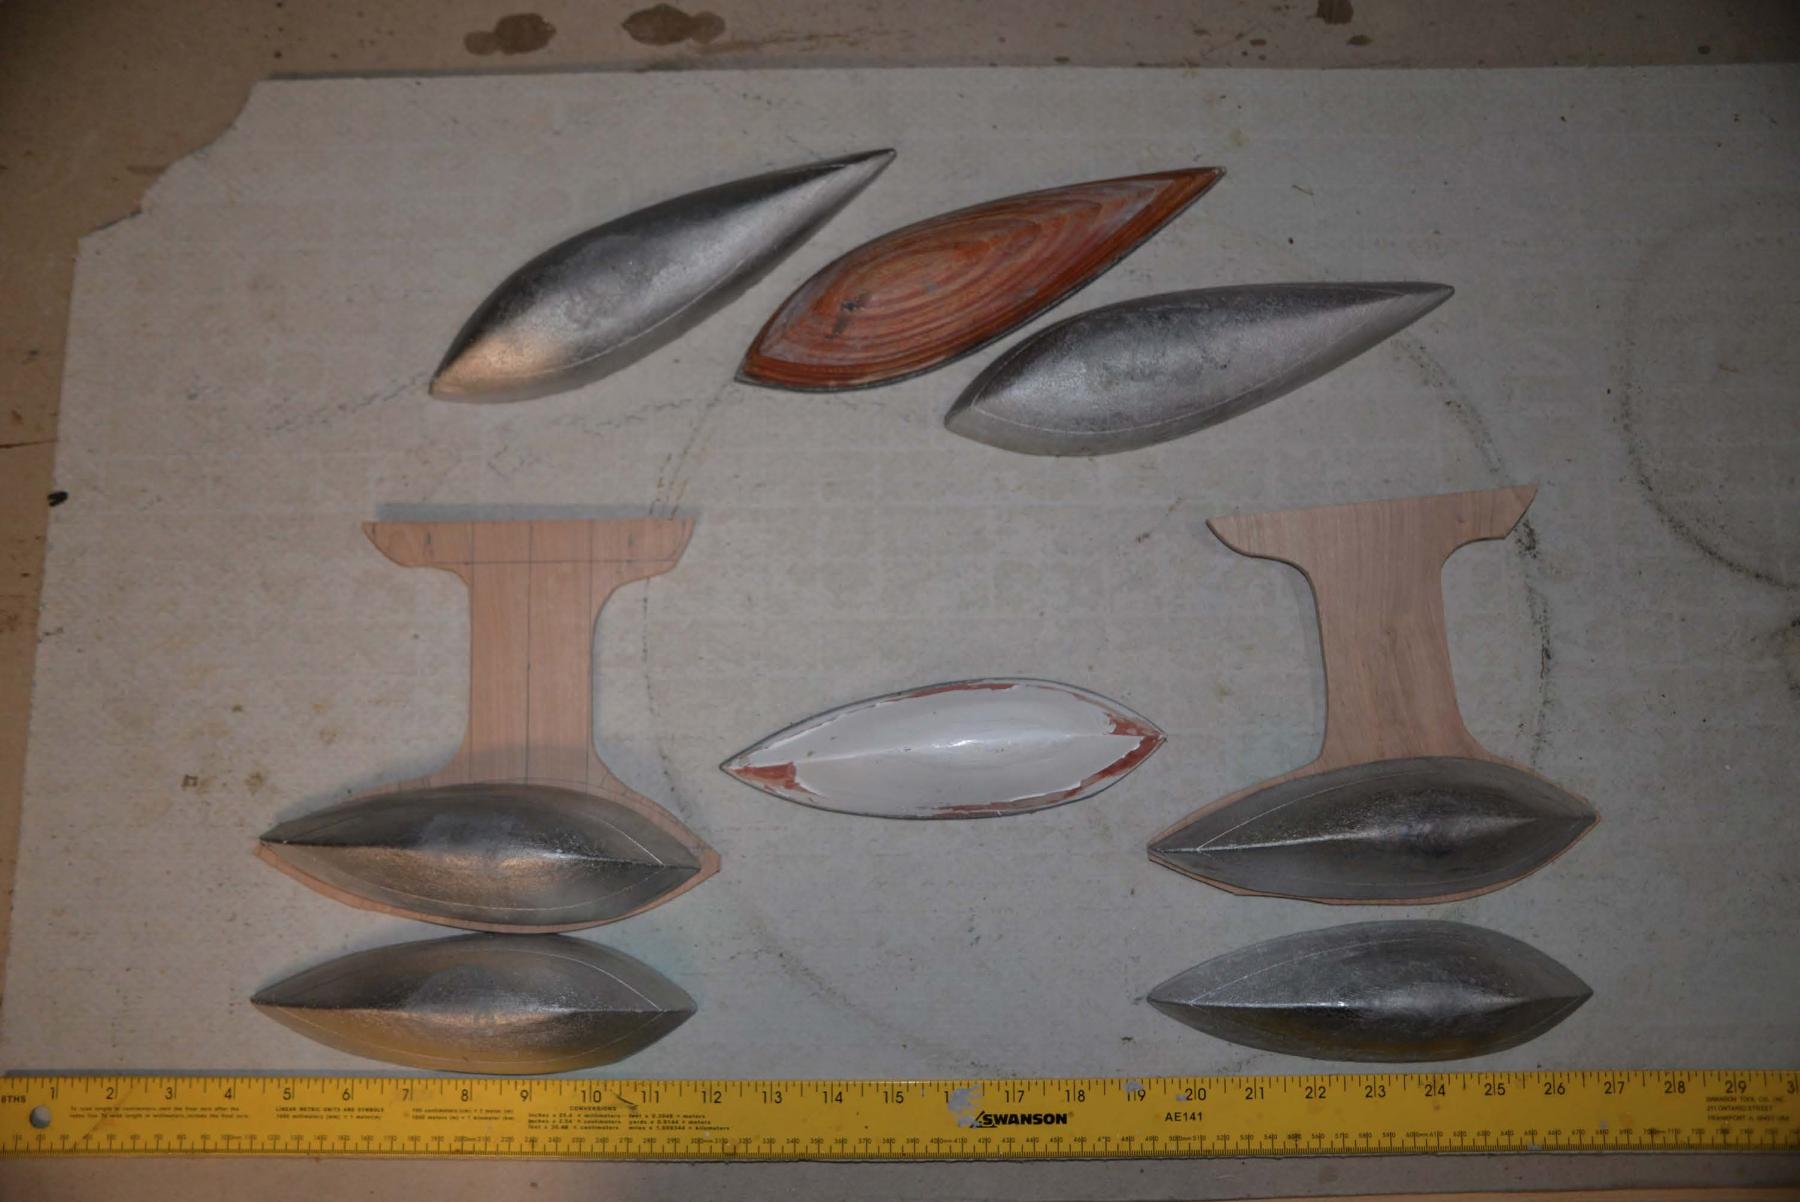
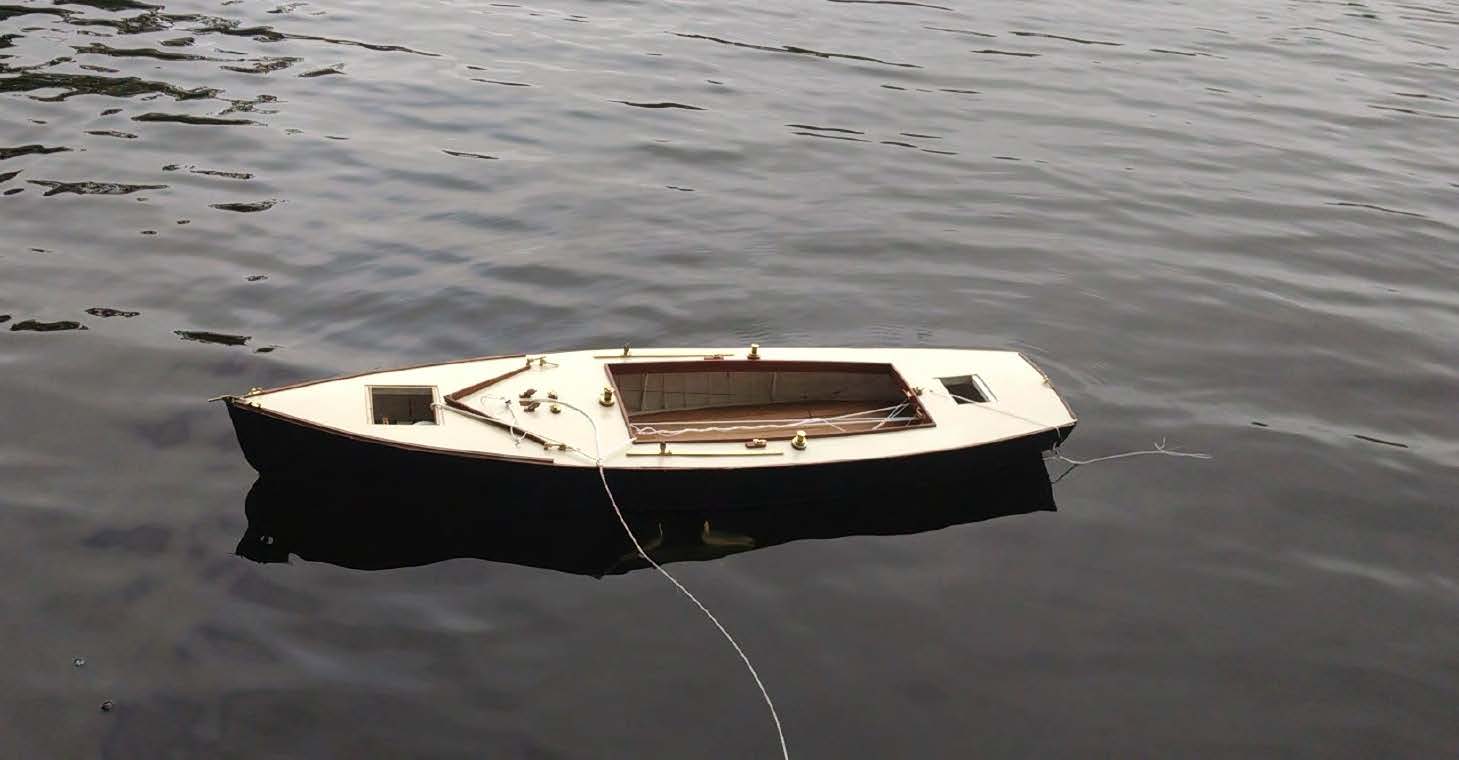
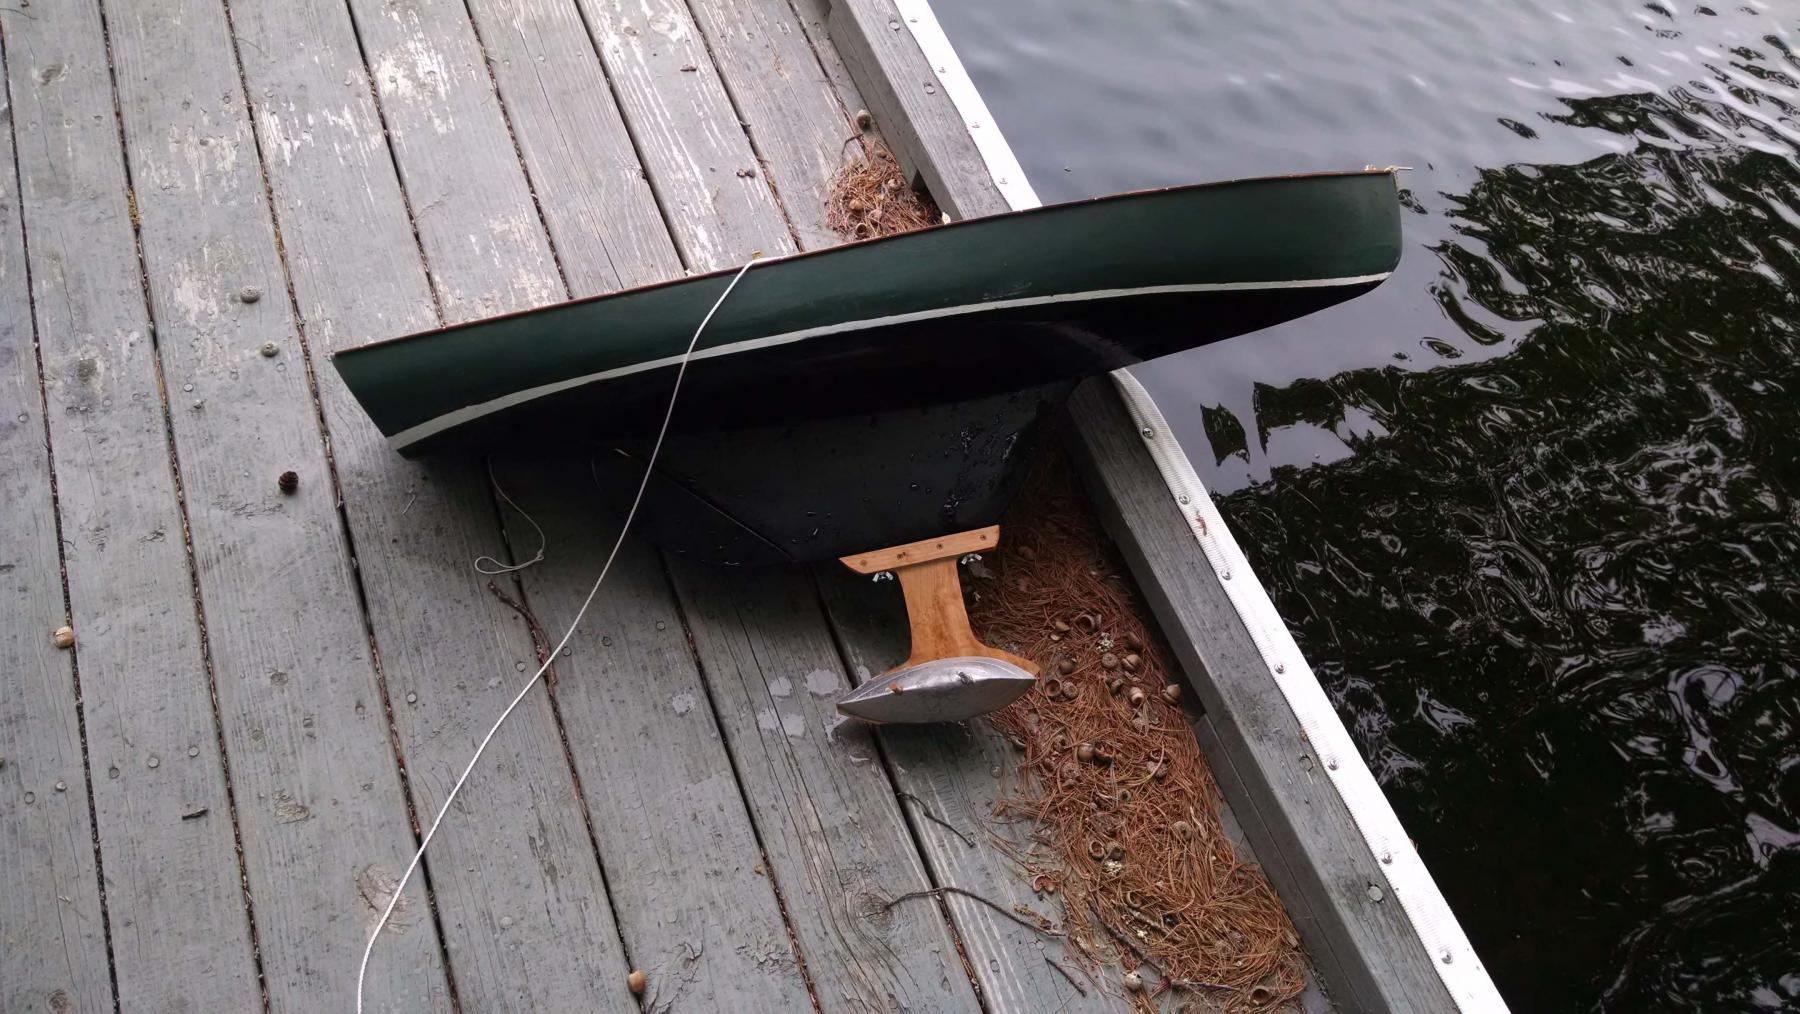
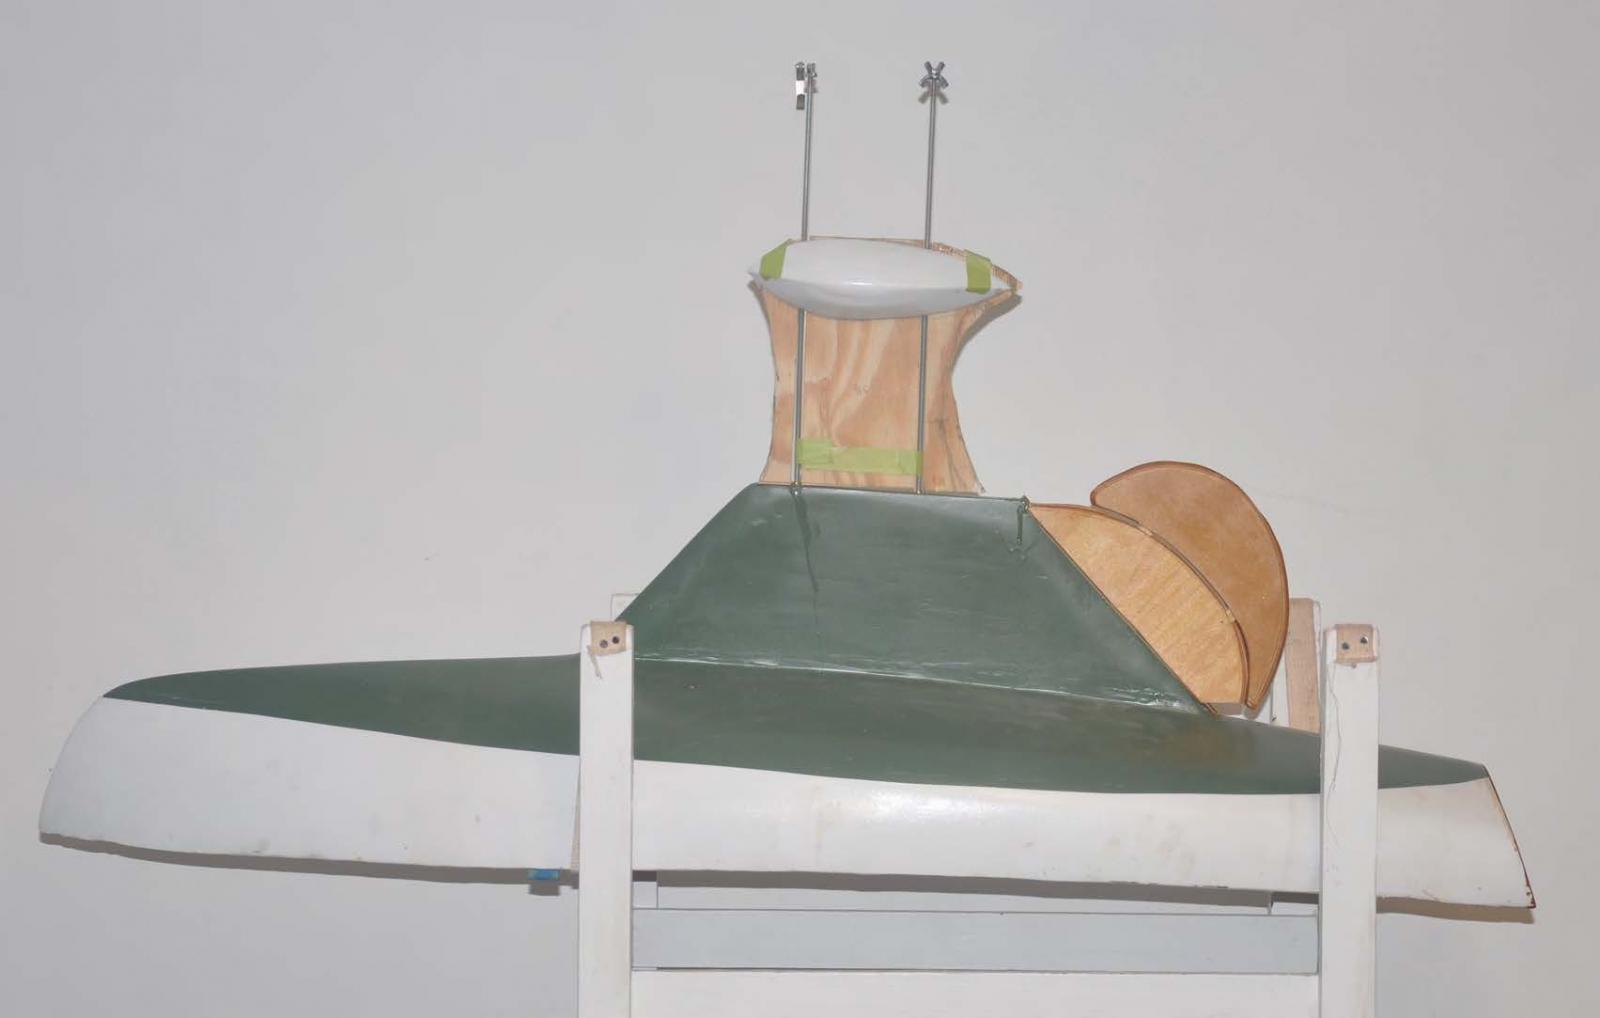
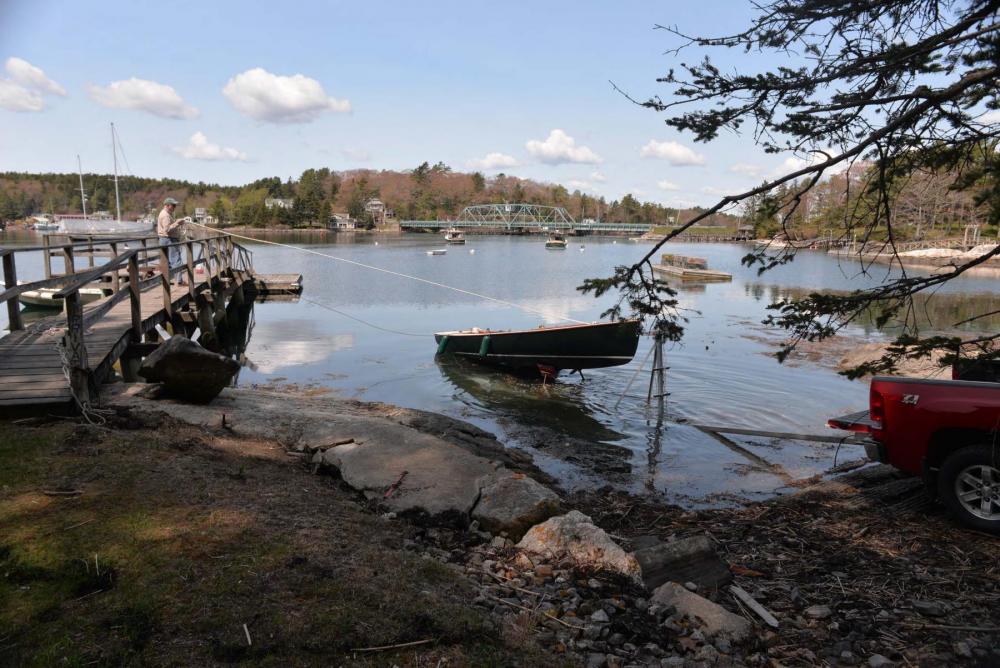
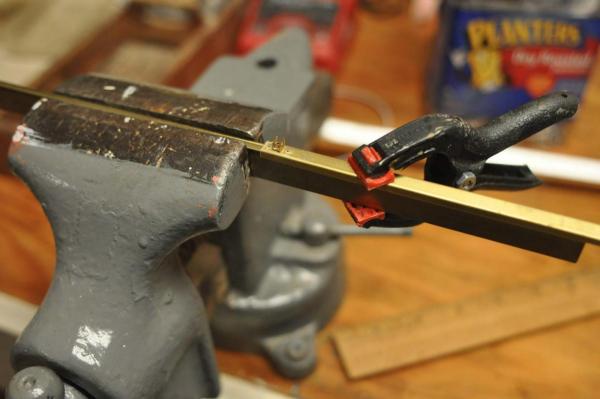
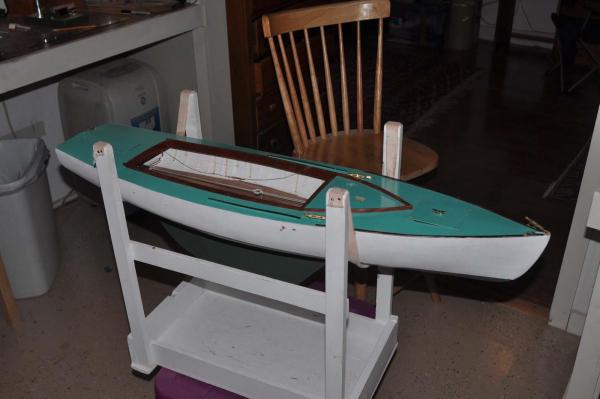
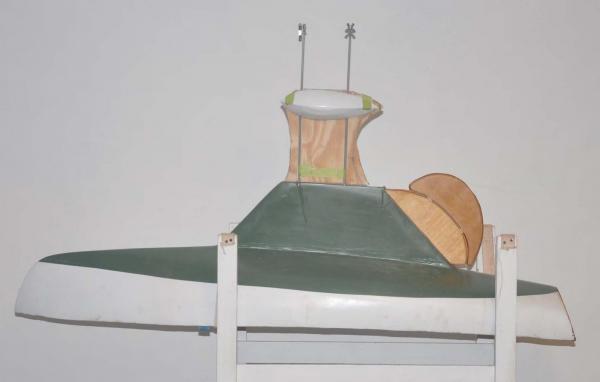
It is now time to get these boats sailing. I spent the last few days tuning up my other two pond yachts, 50 inch Marbleheads. It is important to have something to compare. I then moved to update and tune up the rigging I have done to make these two BHOD's ready to sail. The main sail loop now has its end block attached via shock cord to the transom. This finally clears the tiller lines. all sail sheets are now connected by hook to allow simple take down I redid the jib tack connection, so it can also be removed for travel. I need to have two boats plus all the RC stuff in one car so I need them to be able to set up quickly. The show lines [ sheets] all come off for sailing I reworked the jib sheet so it is off a second return loop and the sheets goes out 1/2 of the mainsail. This is a limitation of using a single drum winch as opposed to older designed arms. I have a programmable radio [ a must for scratch build] and trimmed the travel for the 3.5 turn drum winch to 80% to stay in the boat some day after it works. I will write it up and do a diagram. In the mean time, today was a big day. I was able to go up to Rockport and get my lead ballasts made from molds I made earlier. Here you see six new half keels bulbs. The two larger ones are supposed to be 5 pounds each and they are for one to the two larger schooners I never finished. The design is for the marble head. The four halves are for the BHOD and were designed on Cad to be 2.75 #. Richard told me he would add a little to compensate for shrinkage, so when I drill holes I should be fine. He showed me the 1/16 layer he added to the forms . oops. .... the haves weighed as is ..3 at just over 4# and one at 3.25#. so off to the immediate fix up and float test. I drilled 1/4" connection holes into two of the 4+ pounders. That brought them down to 3.25. if I use a dowel to connect instead of brass I really don't add weight back. So let's see what happens in the water and if 6.5 is still too heavy here we are through the woods to the dock and in for a bath. I moved her around and found the water is above the boot top, and that is not good either for speed performance or the look. You can see the the hull is wet well up the side. also note there are two holes in the lead. Since one of the remaining half bulbs is already 3.25 with no holes, I plan to do the following: Cut a thrid connection hole through the center of this pair. That hole should do away with 3/4 # and get us both back to what I had planned for and give me a method to deal with the two other half bulbs that are not currently balanced. This is a little bit of a trial and error approach. After the next go around I still may not be as high as would want to get the boot top up and visible. It is important however to keep this strong moment arm to keep the model more upright while sailing and that may be a comprise. I still have the possibility add on to the rudder. If I get a lee helm, with this new keel I will use that to try to trim since I can not do anything above deck. Just to keep up with her big sister. Real Bittersweet is now at her mooring. Here she is going in ...splashing in local talk here the mast is stepped and rigging ready for a sail cheers


-
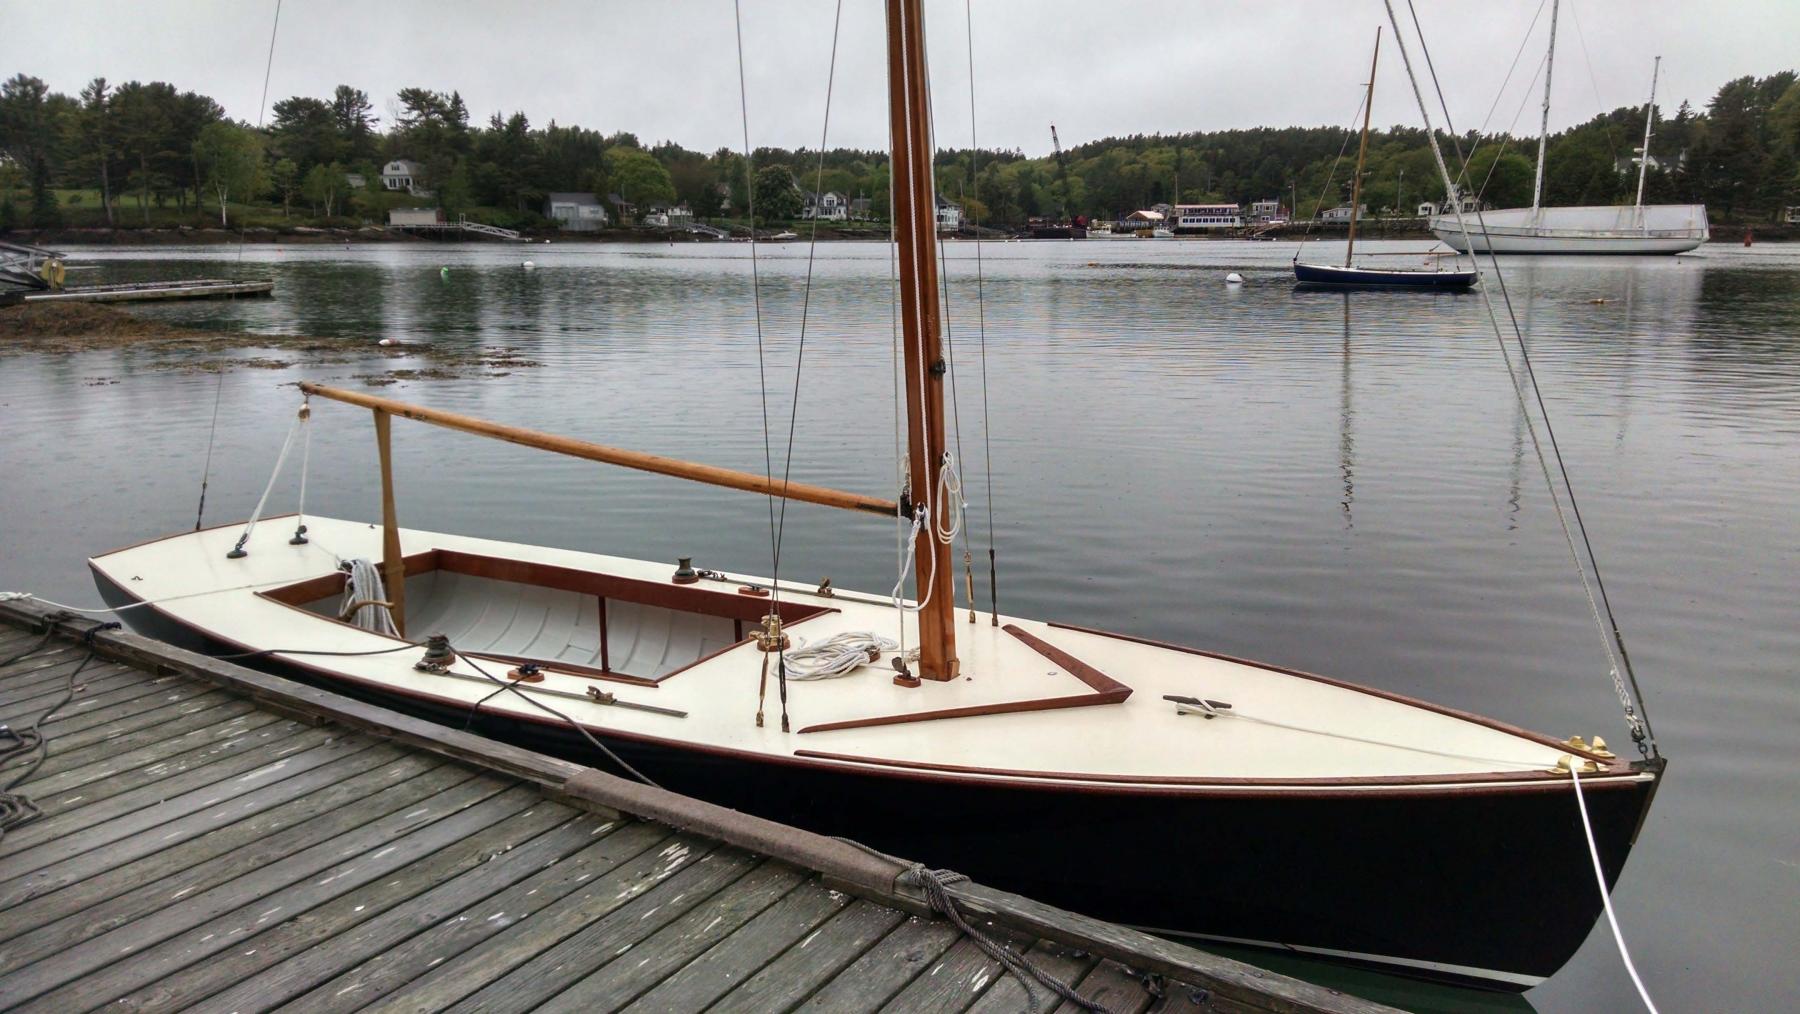
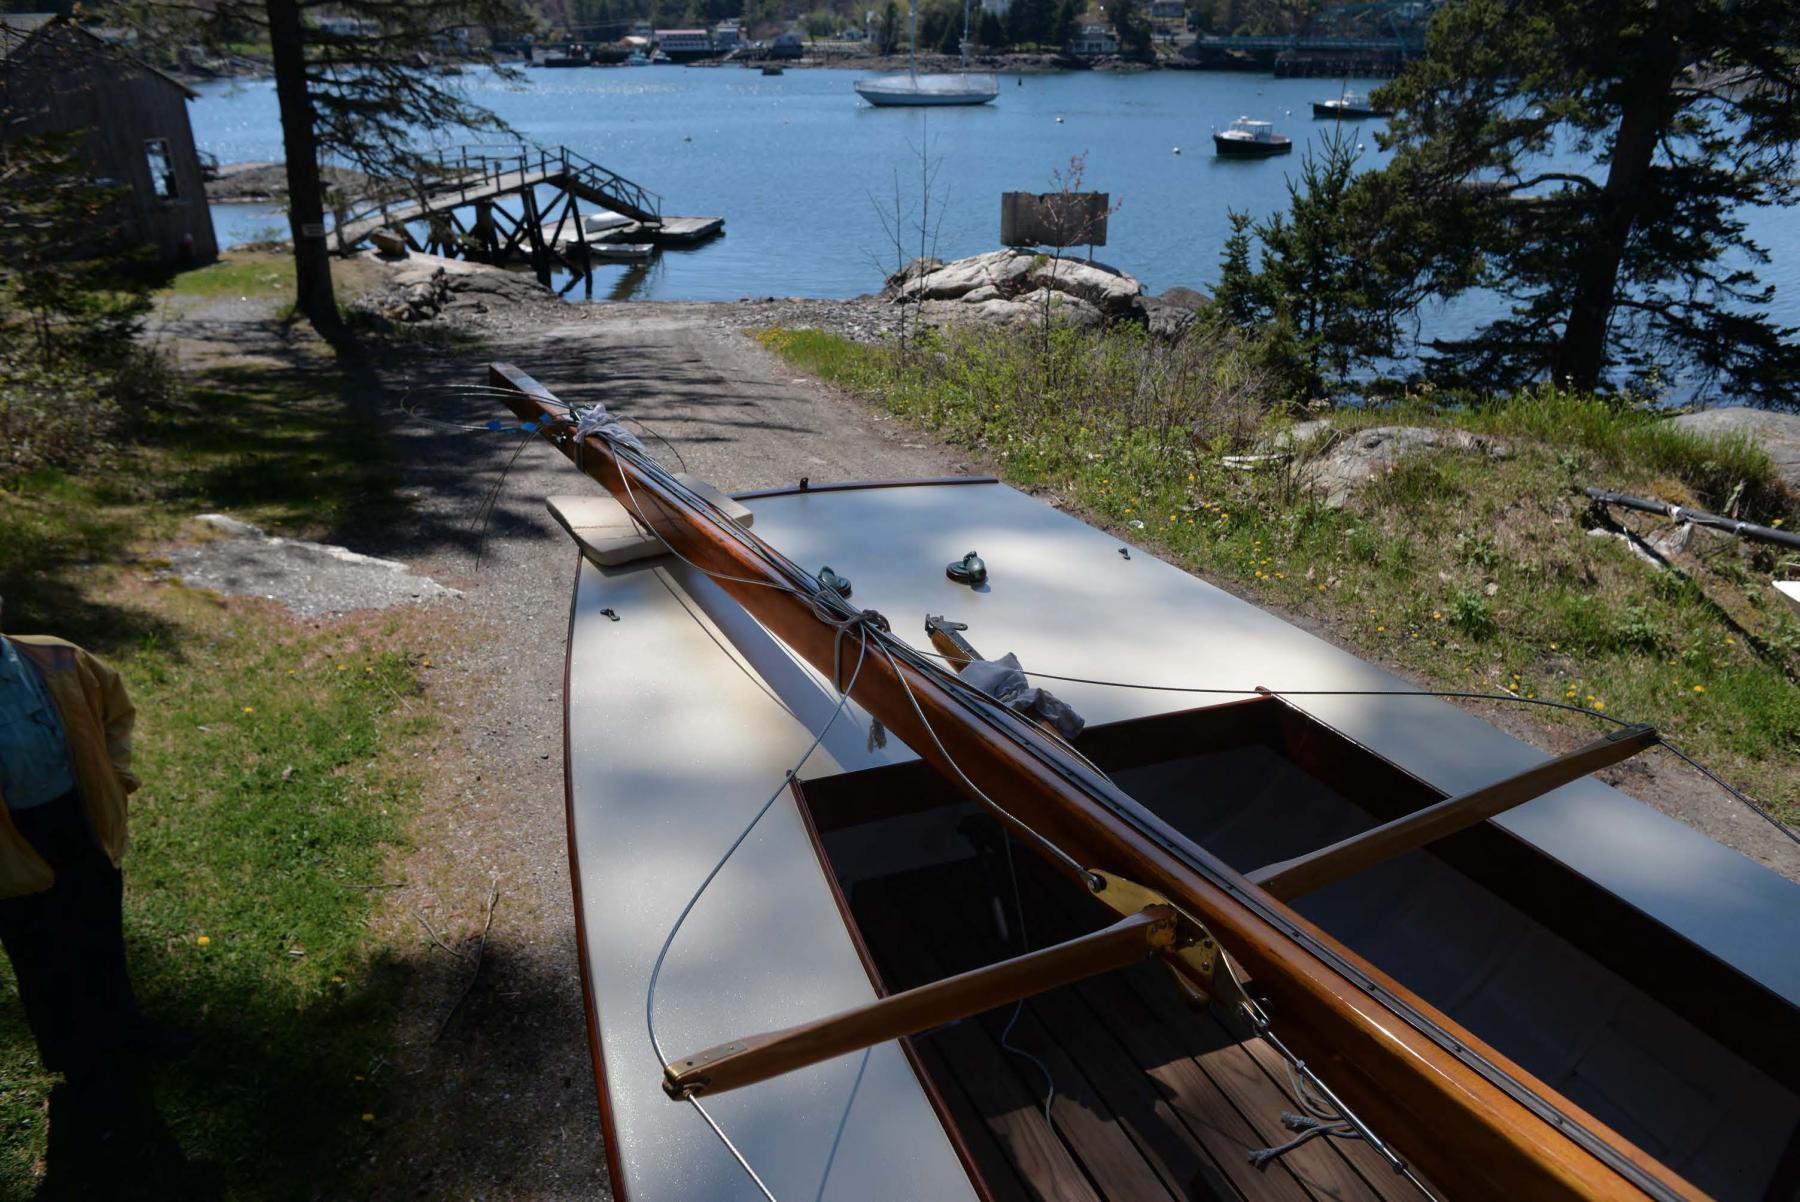
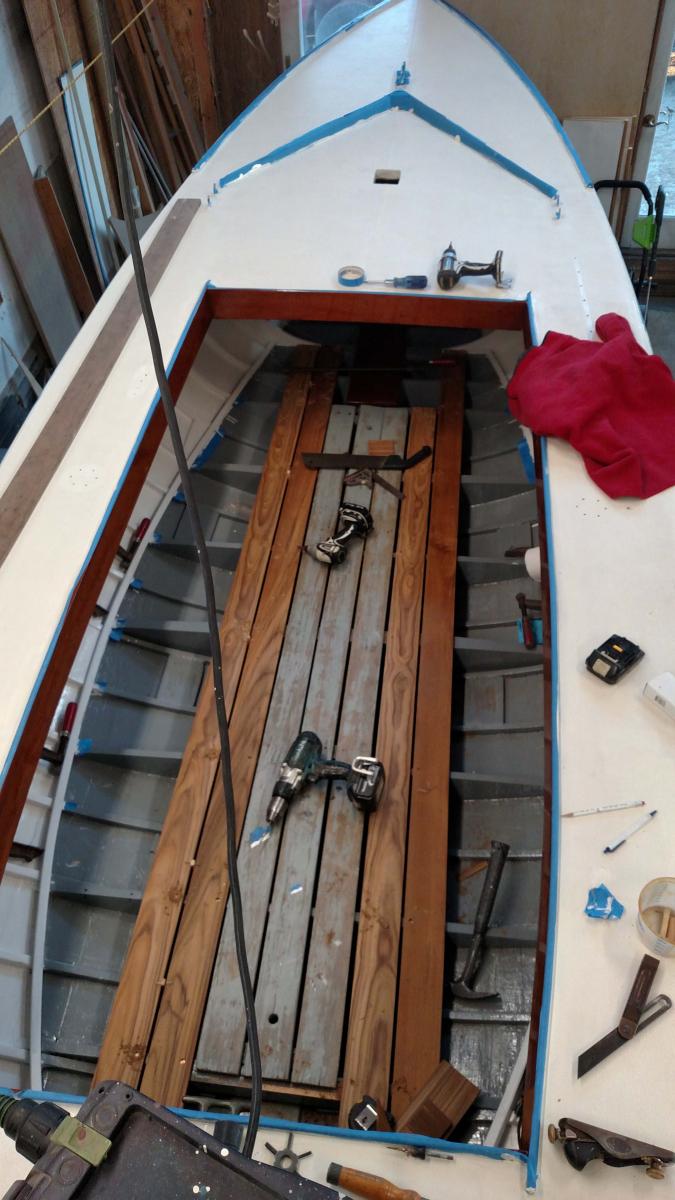
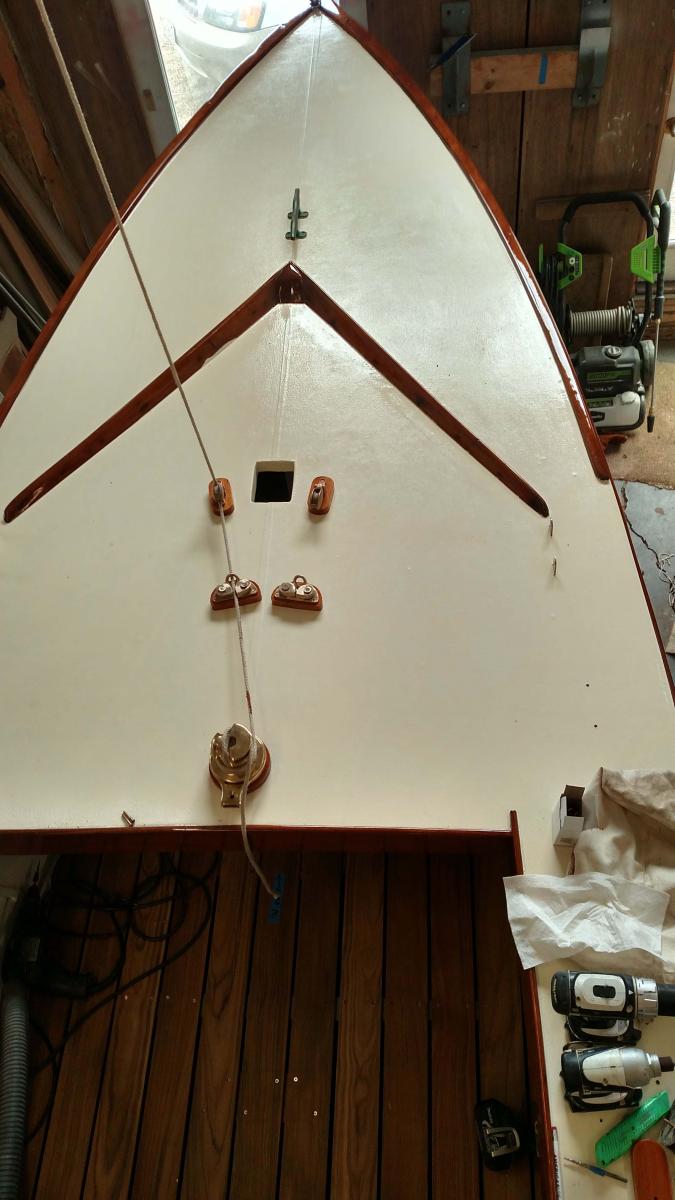
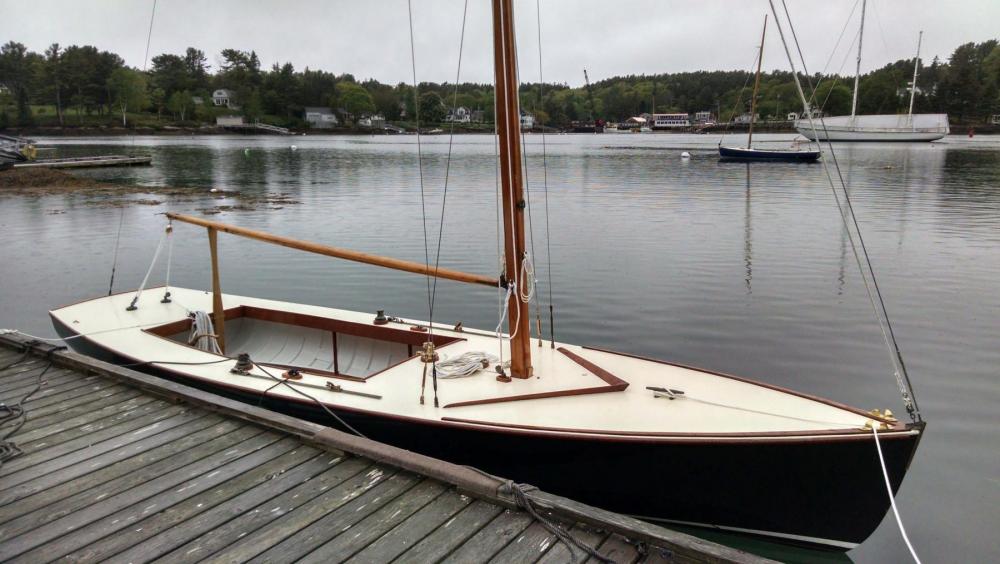
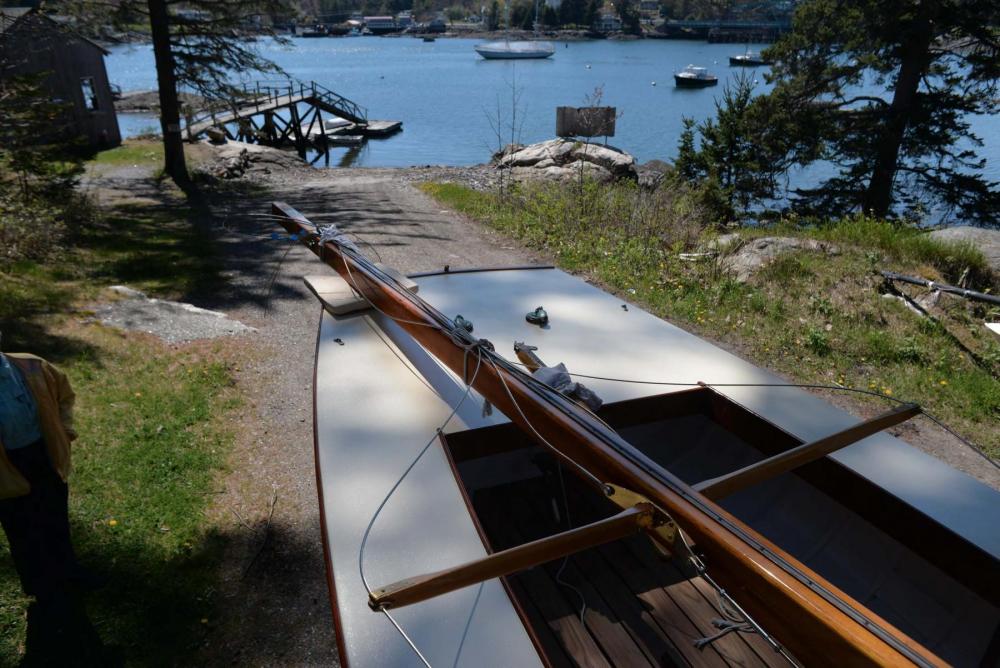
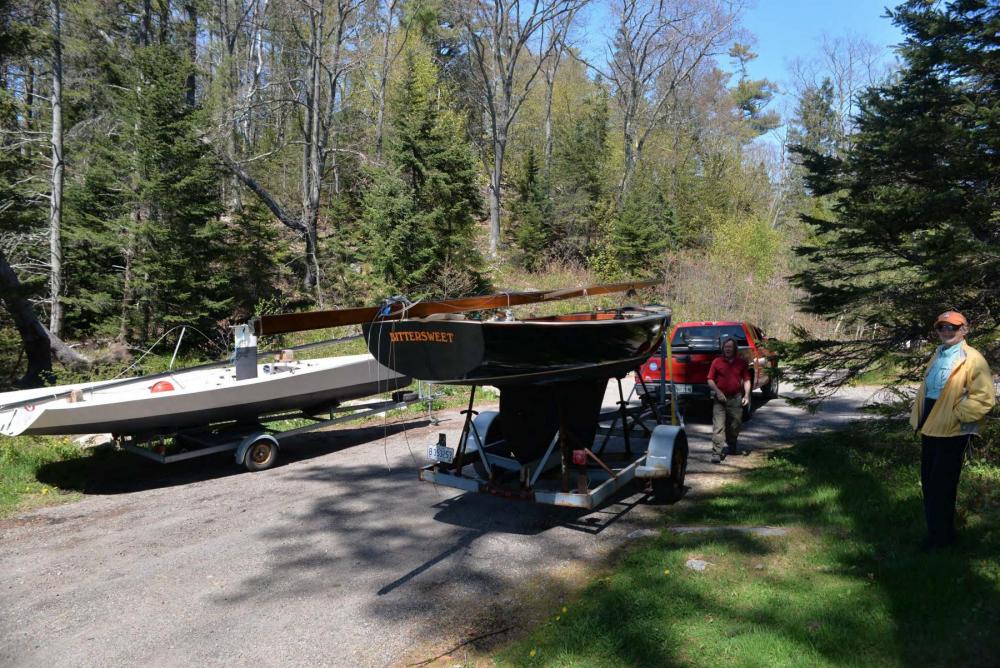
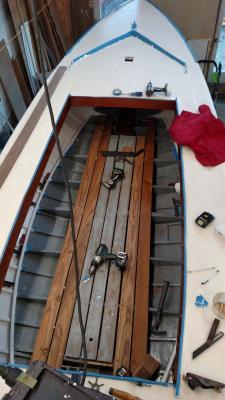
I need to update some progress. As spring arrives, I am waiting to hear the casting of the keel ballasts is done so I can get to water testing before the audience arrives. we have a big show on June 23 and I need to get them both sailing before that dock party. The casting was supposed to be last week and then by today; let's hope for next week. In the mean time the real Bittersweet came out of the barn and got ready to launch. Here she is getting her first breath of great spring air after winter inside. I still think her lines are just great. Not bad looking for a 75 year old girl! Then the next day she went to a boat yard with a crane for a quick set of her mast to measure the rigging and then go to stay at David's cottage to wait for launching. It is almost launch day....said up here..we are going to splash her when we get the right tide. her mast enjoyed the ride but it's time to take her off. We are splicing all the lines at home on the kitchen table. the new shrouds should come in a day or two. here is a view of the completed fore deck. Isn't that teak sole sweat! Here is a great view aft as you can enjoy David's dock, his 50 foot ketch that he sailed around the world with his family a few years ago and his work redoing the inside of the hull. Now we have measurement we need to complete the boom crutch too. ....and surprise the rear admiral came and approved all the work so far...that is big I will post the real launch and obviously the models' launches , but I need the keels! I include these because this story is both the building of the two models and also the restoration of the real boat in the same winter. cheers


-
Robin you are right is was truly a joy. My son came with his family from the deserts of Arizona and we were able to share. This is now my screen background note we are towing her back up wind cheers


-
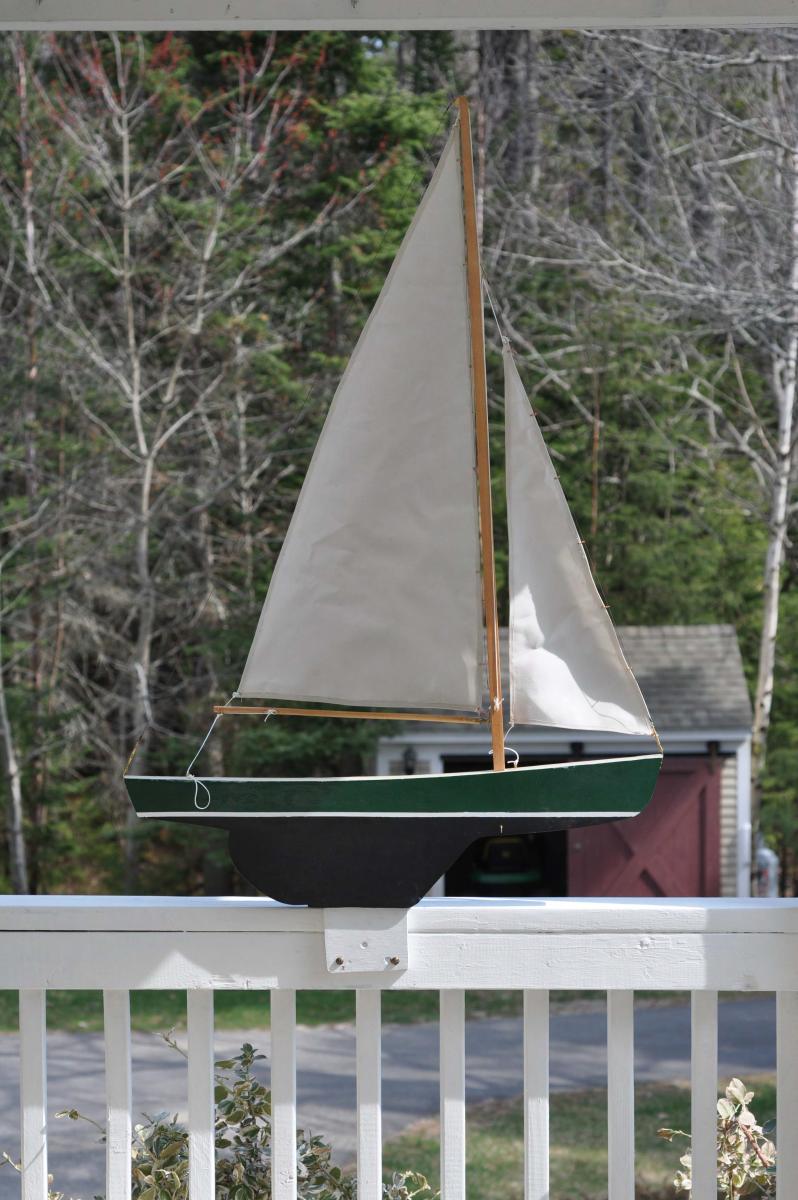
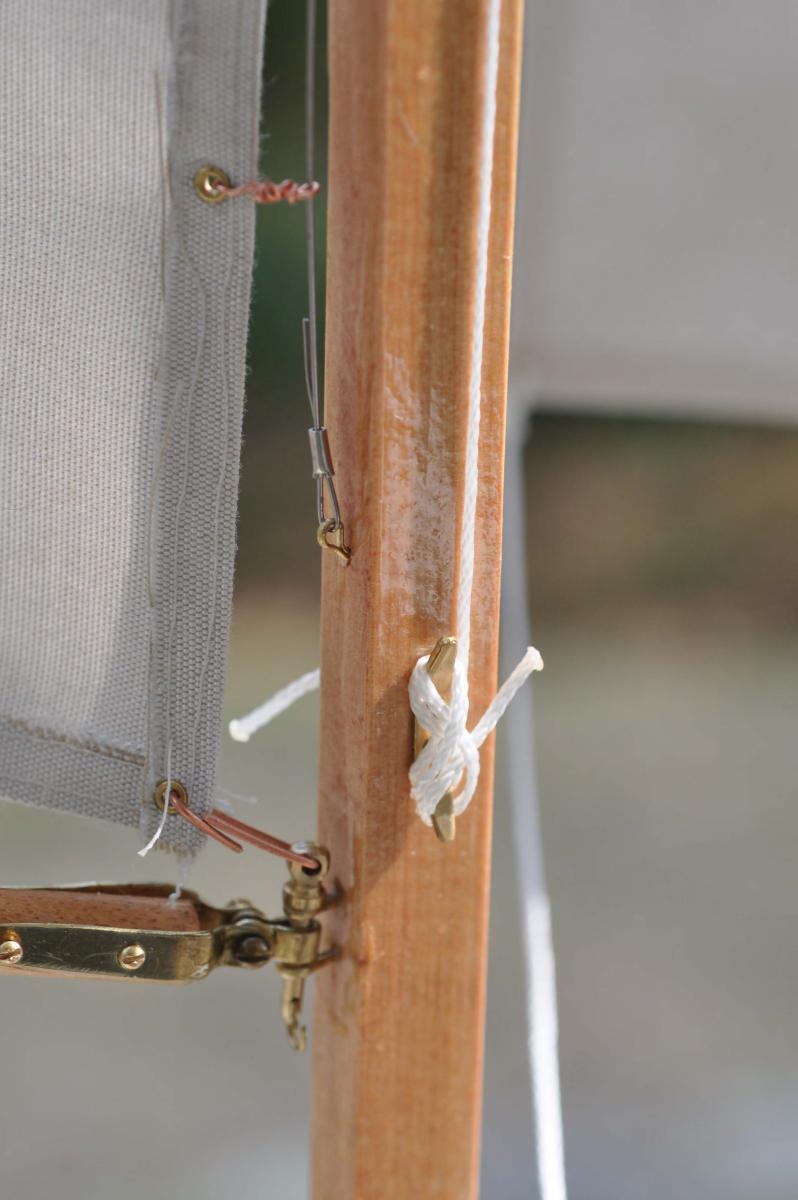
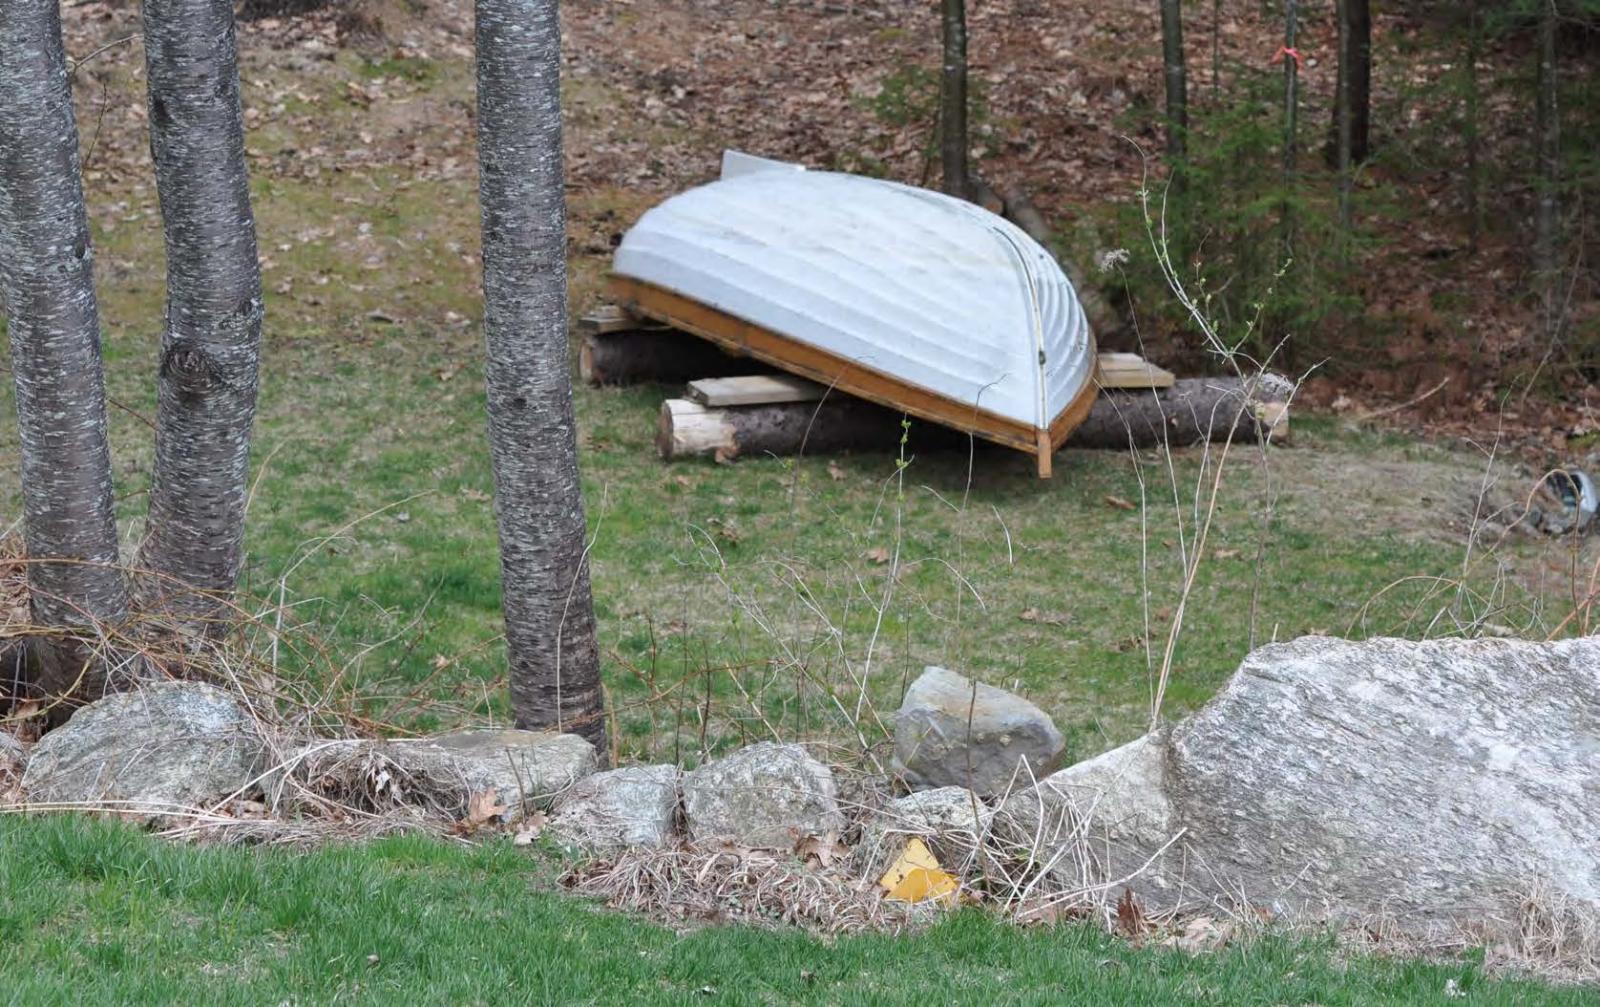
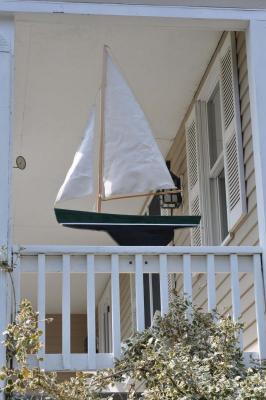
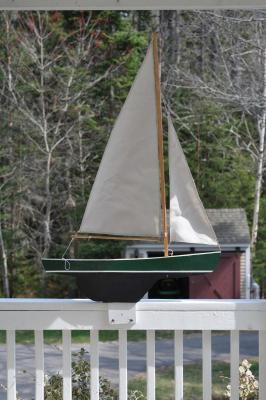
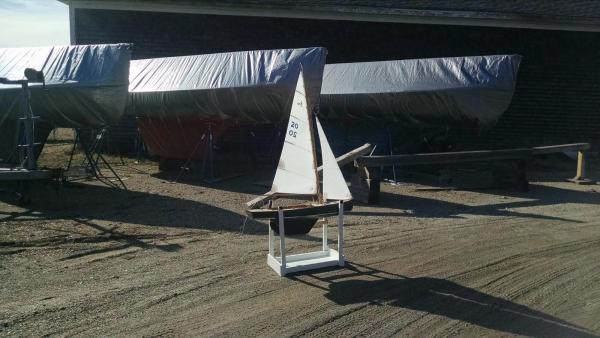
Spring is coming. i took burlap off the rhodies today and more important ..... i took the tarp off the chase boat. Now paint and varnish and get ready to go During this slow period I did make the auxiliary power for the boats here you can see we are now equipped with our paddles. Last week we had the annual show up at Owl's head museum Killing more time i decided to upgrade our previously generic house sign with a scaled BHOD profile in the correct Bittersweet color scheme. here we are with a light breeze off the cove. The numbers are on order and will go on the keel. ..up on the porch one thing led to another and I had to scrape and paint the railing. this is very early for us to get outside. We are normally inside until early May I had some fun making the mast to scale this time. I may add the upper jumper stays later Here I put together a goose neck from parts. I chose to make the sail hanks from twisted copper. the sails are sunbrella and are usually good for two seasons. They are removed for winter. Today I went upstate to visit the foundry and drop off the keel bulb patterns. we are getting closer to launch day but much to do first. cheers

-
Mark thanks. I planned it for several years as I got ready to retire. then off i went building through winter and sailing her last summer. I was tipped off early in the process that she would not sail well. She was beautiful to watch but could not head up enough to tack...that means come back to the dock I retired her and now I am learning more about finishing working rigging for these vintage schooners and focusing on my other build ....BHOD racing sloop for sailing this summer. cheers
-
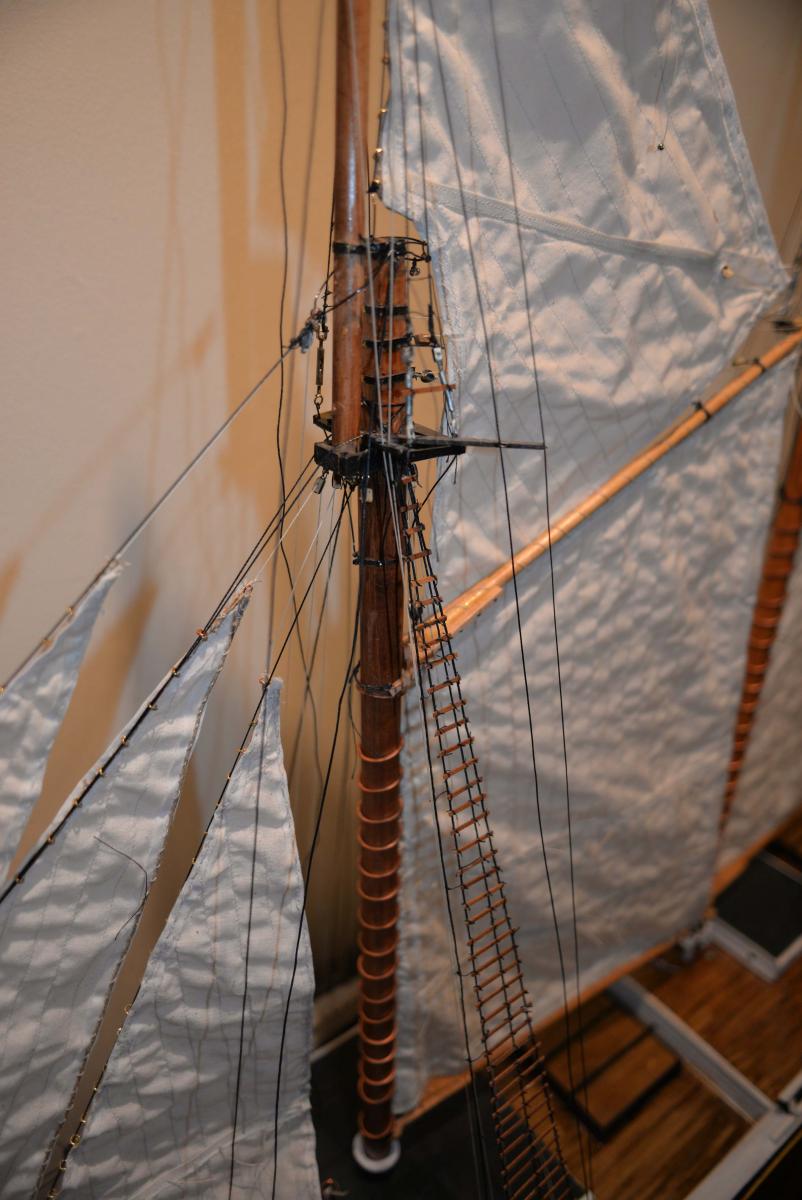
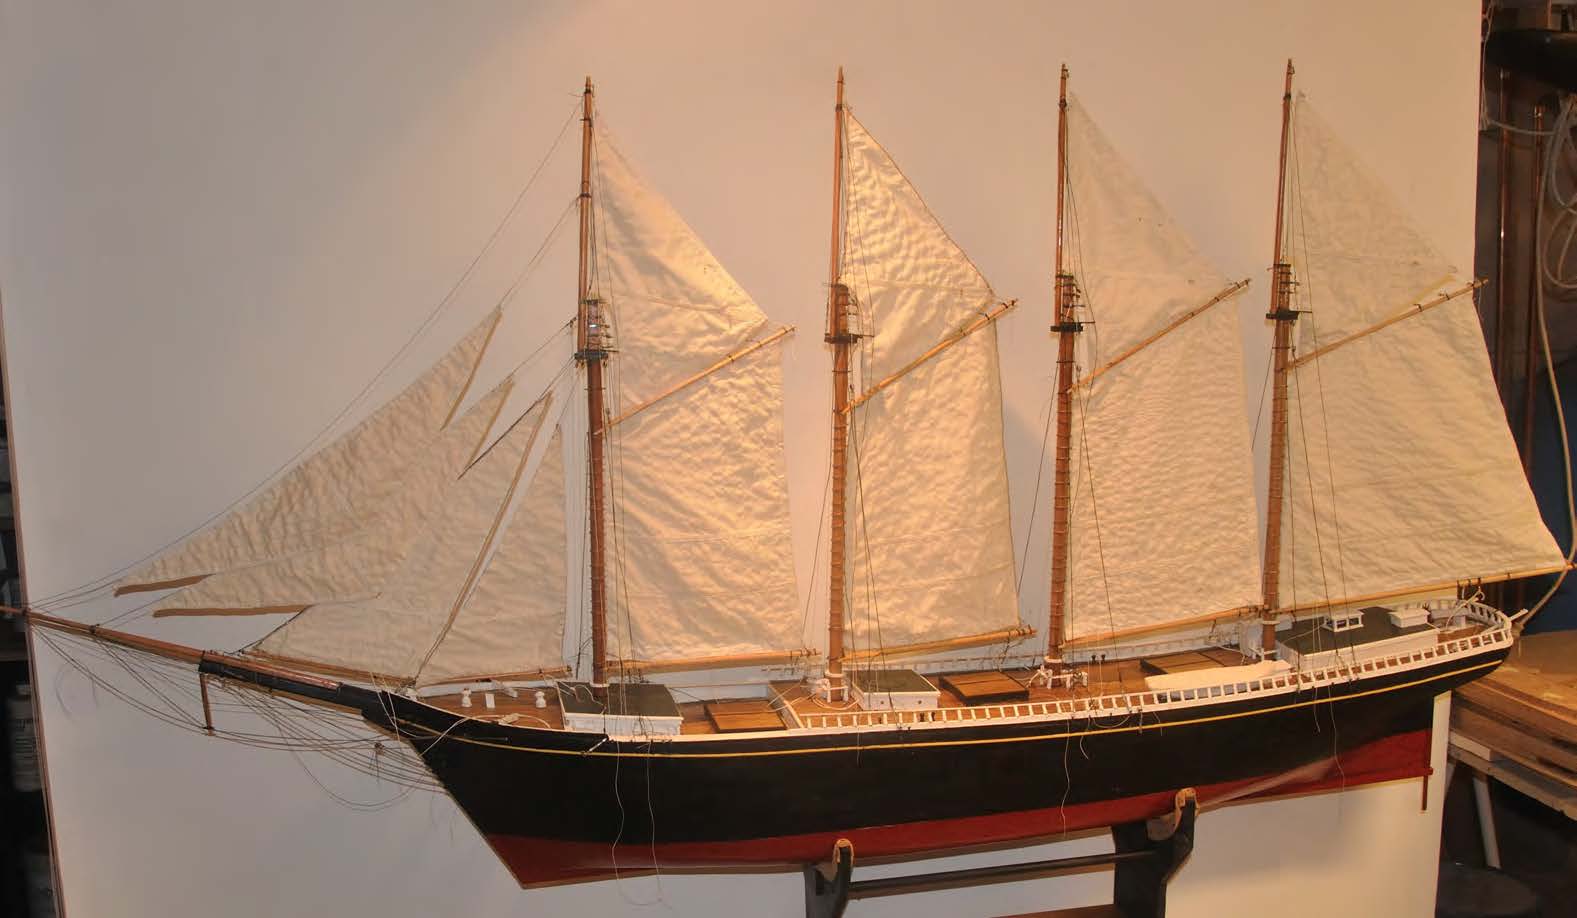
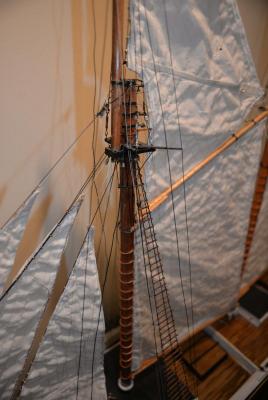
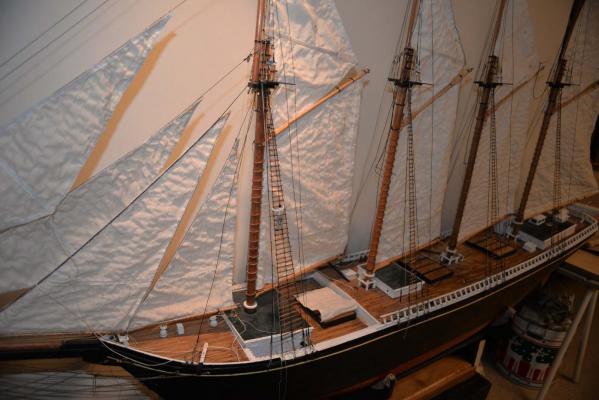
Here is an update as I am using available time before summer to work away on the rigging of the Schooner. As I stated in the last post, I started on the port side as I was learning how to complete turnbuckles shrouds and ratlines. That side will be the back side. Here we are with all the lower ratlines in place on the port side. the foremast gets double width. Note in the picture bright light on the foresail and jibs and a bit dark aft. This is how the peak came out with the ratlines including more shrouds at the top. I know most experts know that , but I had to learn by doing it twice. Now the crew can get up here, I need to complete the running rigging and upper ratlines. The upper area are not slats but lines. I struggled with lighting as this area of the shop does not have natural light. I had been using Halogen lights. After study and walking around Lowes, I came home with small replacement day light LED bulbs and wow what a difference. Here I have turned the boat around to the final display side and added the new LED lighting. I strongly recommend this upgrade for those doing rigging work away from large windows. Here we are cleaned up a bit with work beginning on completing the detailed running rigging that was left off for RC sailing. Adding the shrouds and ratlines makes a lot of difference. next up is three new top stay sails to mount off the top mast stays yet to be installed.

-
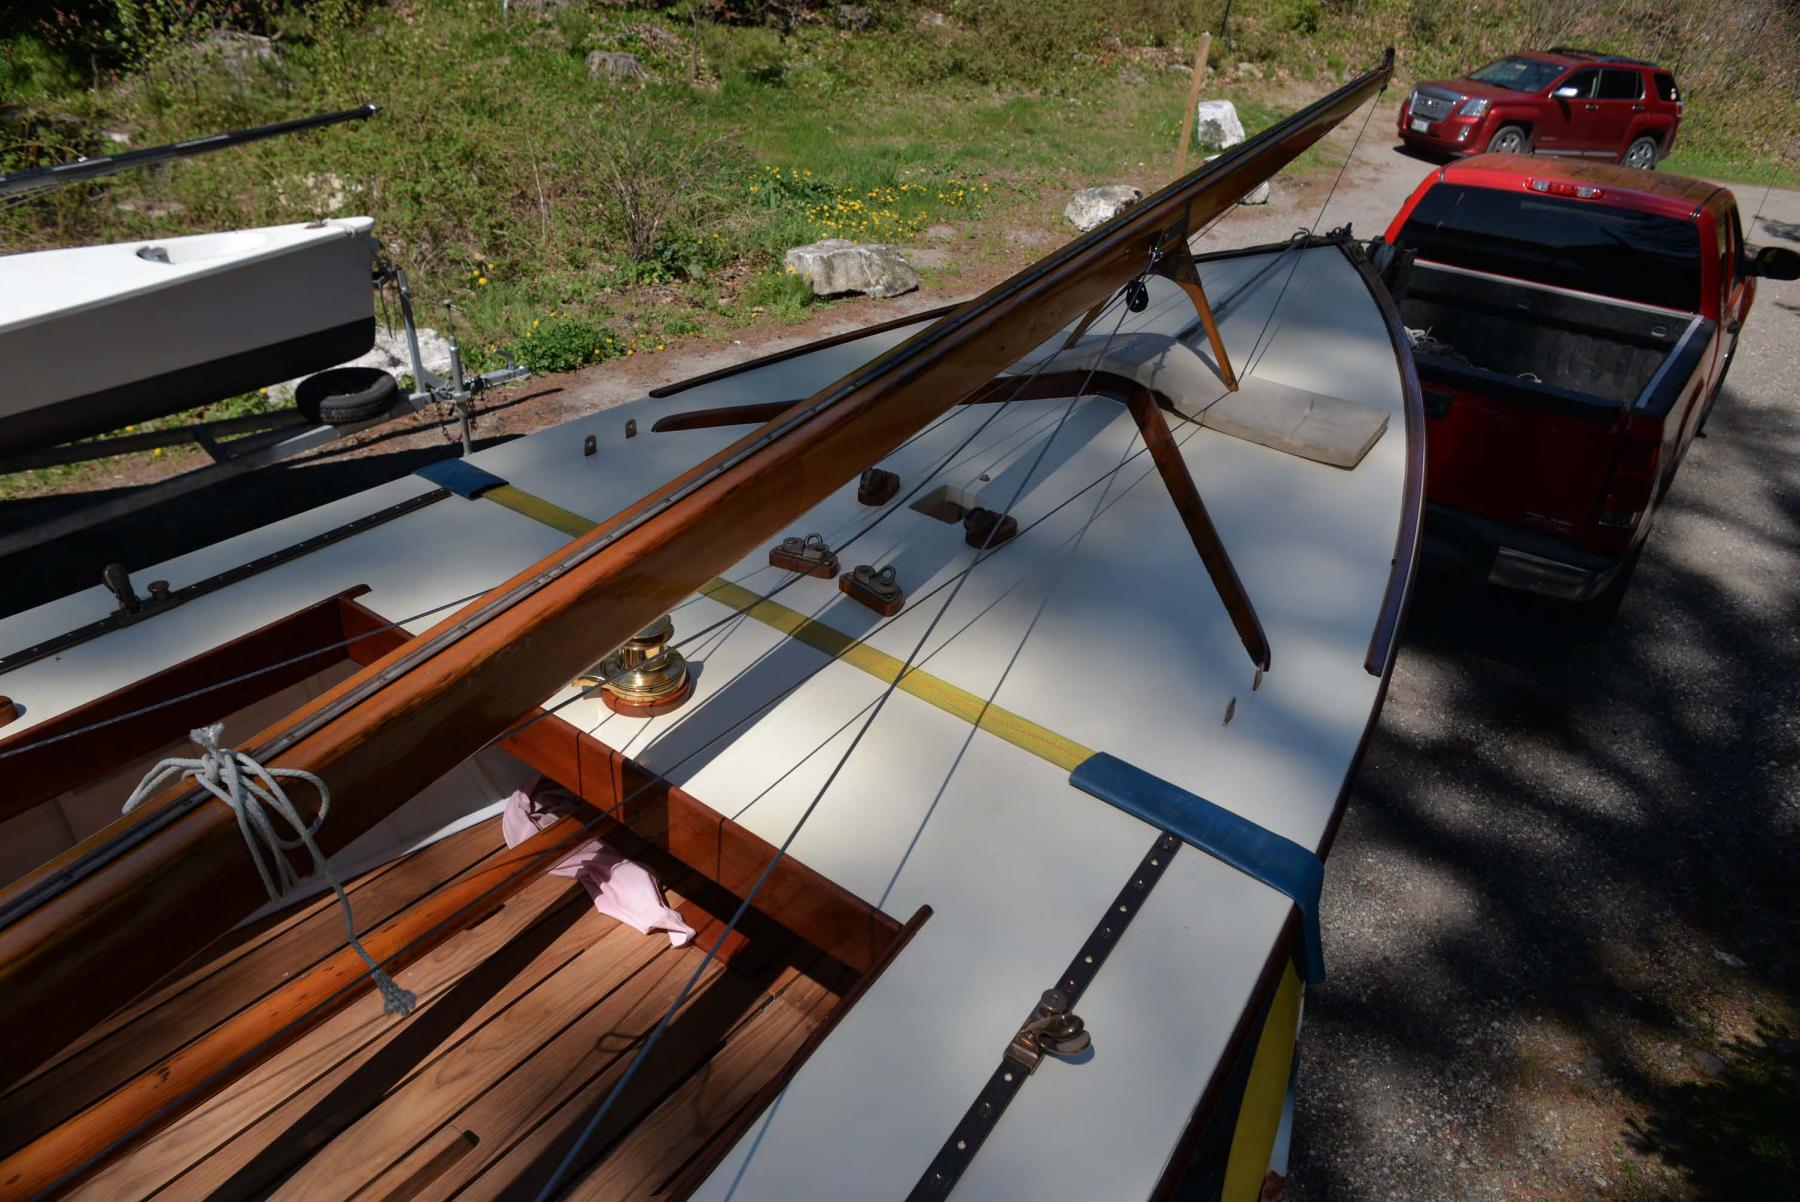
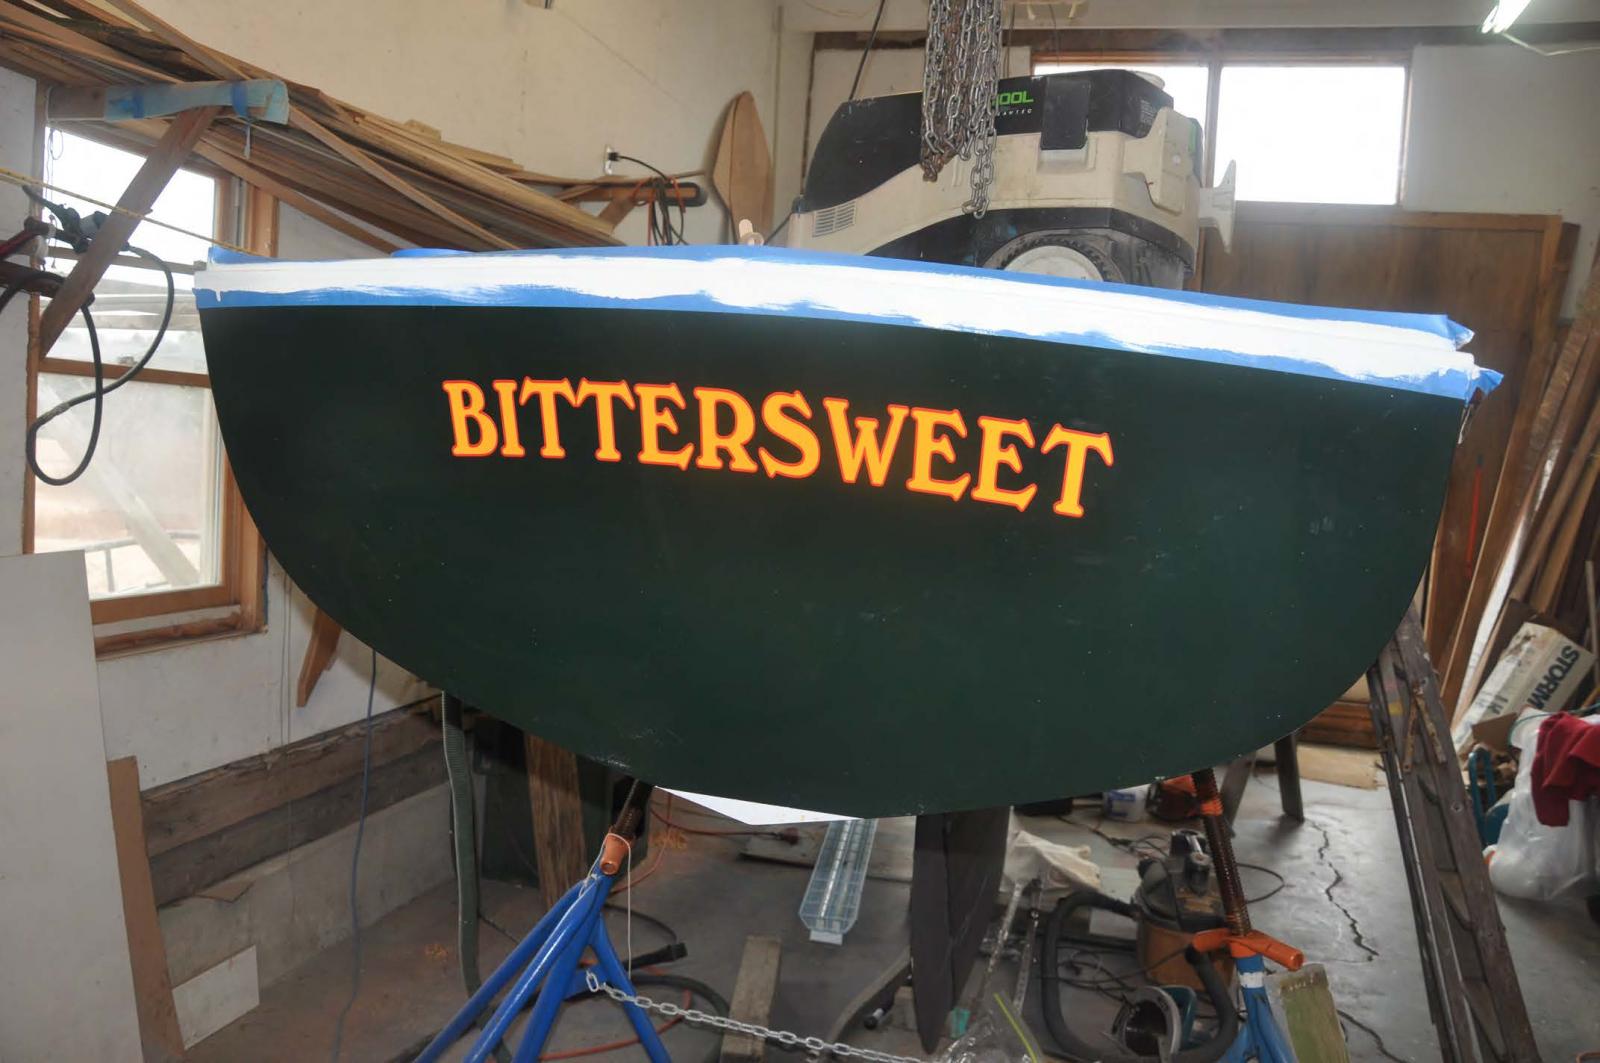
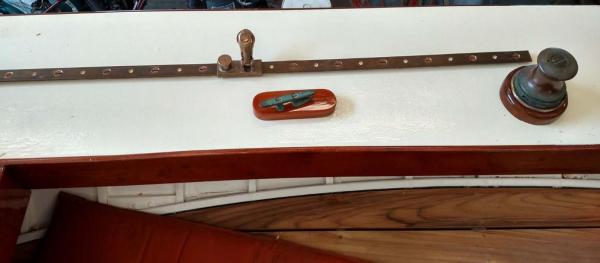
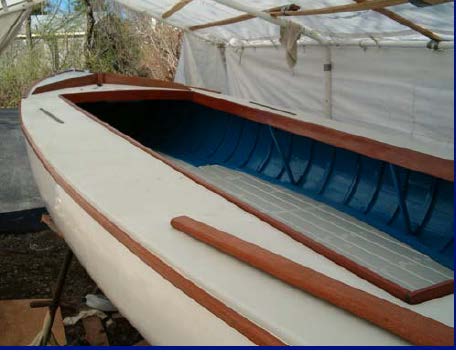
I need to update a few things that are happening as we are waiting for spring. We are still waiting for the foundry to reopen next month. Here area few photos of the restoration continuing on the real Bittersweet. It is fun to compare. I took Bittersweet junior up to David's shop. She enjoyed seeing many of her big sisters resting for winter. all those floors are in, the keel glassed and the bilge hard coated[ the gray]. The inside planks and under deck are painted and we are ready for the new teak sole. here is the hard part done getting the layout for all that new teak. I love it. He is also working to restore the deck painted finish. David had given me scrap teak wood to copy for the model. Look as those fittings...I made the bases. I note David turned the blocks to align, so pulling the halyard to the new winch is a straight line. oops I did not do that on the model. Here is the real jib track in Bronze. I think we came out OK on the model. I am so glad we made this change on the boat. It was stainless. After much talk we agreed not to reinstall the old Bittersweet mahogany sign board. My rear admiral chose the red outline and font for the gold letters and we have real Bittersweet. What I liked was I was able to order small sized letters at the same time so the model name is exactly like the real thing. OK back in the shop. I got the sails and rigging on and mostly done on Ought 6. There are a few more clevises and things to make to complete the work. Today I took them out side to get a little sun. It was still cool but they were happy in the breeze. This Photo is for the sign board as i will take Bittersweet to the Owls Head Transportation Museum annual show on Saturday in Rockland. cheers


-
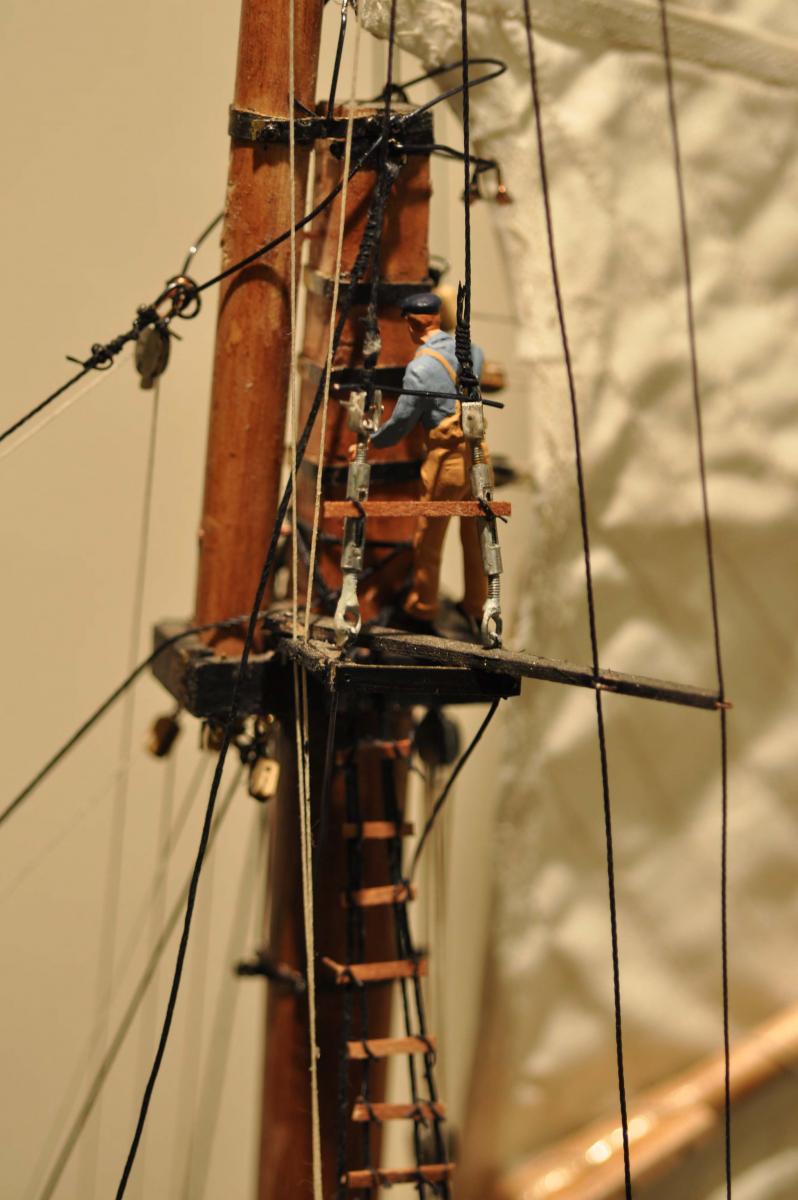
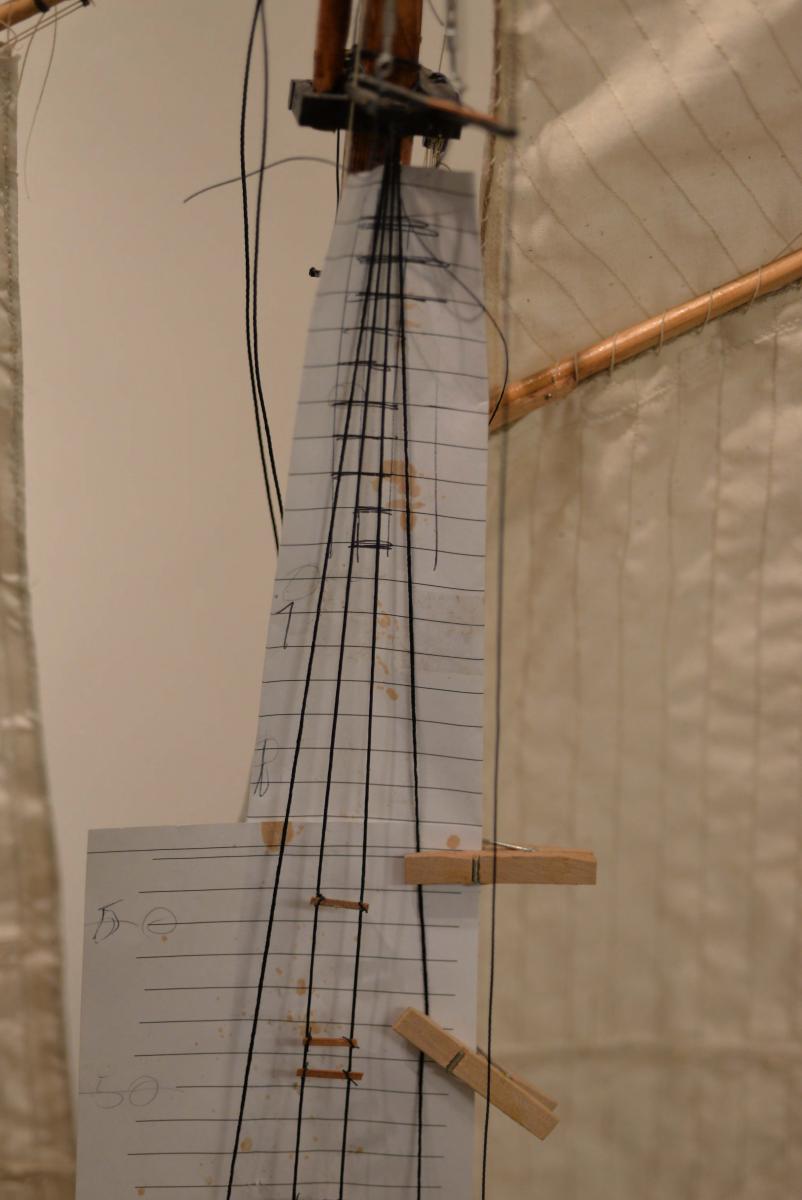
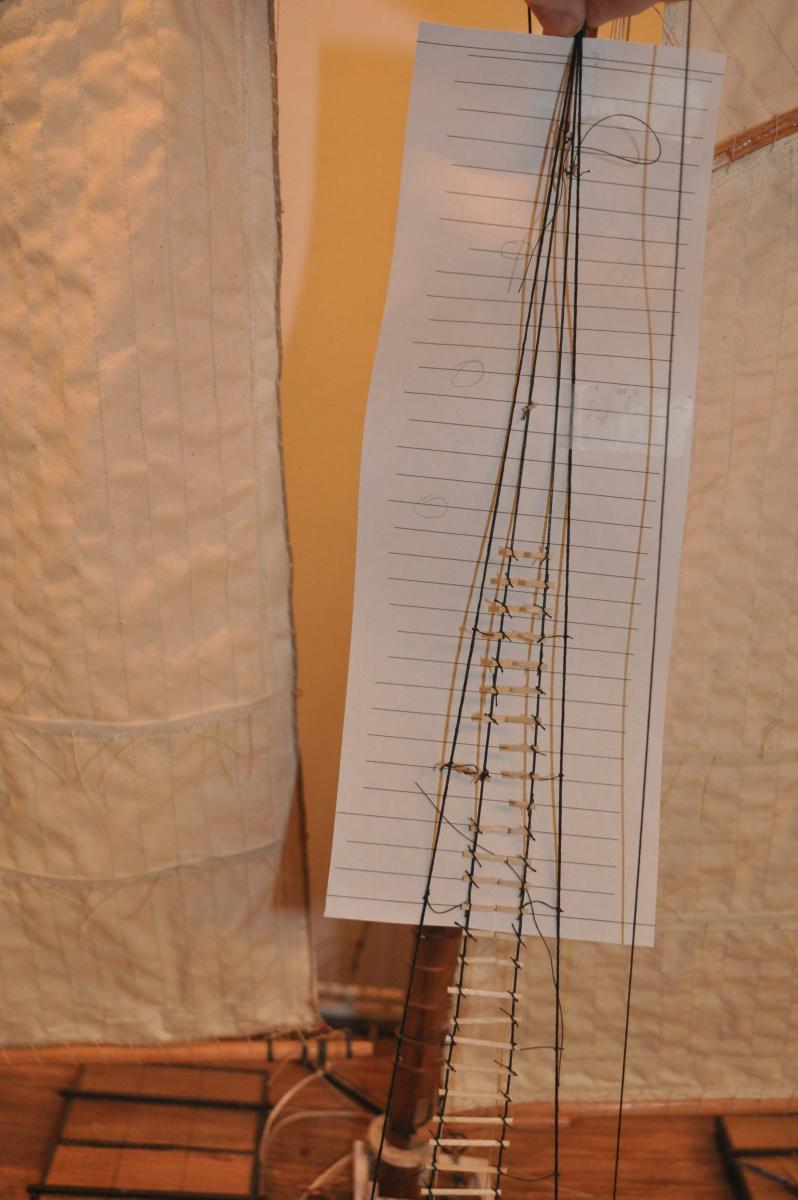
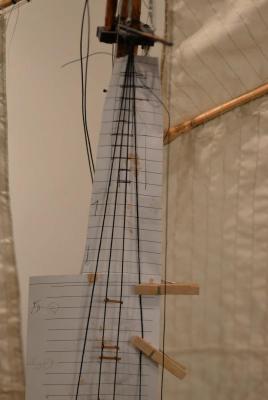
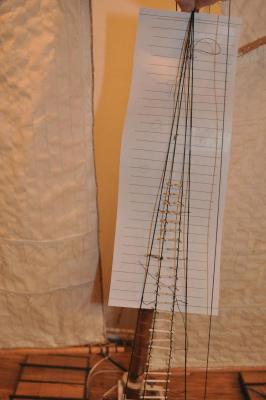
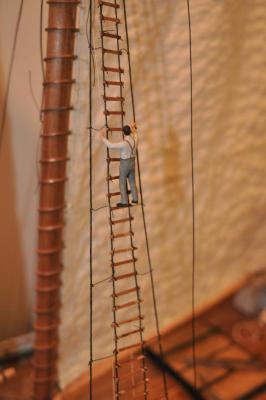
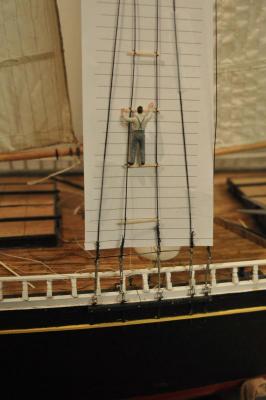
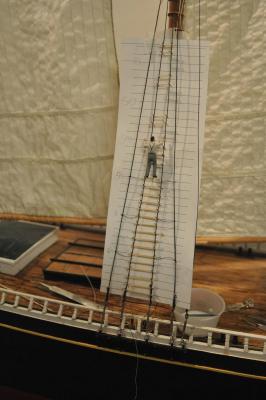
wow ratlines are not easy. I got near the top of the first line and realized that no one could climb these because the shrouds were all gathered and too tight. i was at 1/4 inch and had ten to go. oops here I had cut out the top half of installed ratlines because the angle would not work. I learned at this point too that putting on the slats with no stain caused another lessen learned. the little bit of white glue inhibits the stain and I can not do the back side. So next time stain all the slats! I am glad I am doing the intended back side first. I also needed to order 1/16 x 1/32 stock. Oh my 7 dollars for material and 7 dollars to ship ? with the shrouds loosened, I was able to complete the first mast. I love the sailor's shadow on the sail I even figured out how to approach this as a more successful production. By staggering up to every fifth slat I could set a pattern as follows. cut threads for all ties and then tie the surgeons knot loose for up to seven slats.They are tied and rady in the photo measure and cut seven slats...yes pre-stained this time ...and lay then out as in the photo dab of watered white glue and set the slat and pull tight the two threads, add another dab of glue and work up This way I could work two masts at a time. I did two sessions each or up to 28 in one day. As I got better it looks like a possible job to achieve time wise. I realized however that even this approach was just not right, so I went back and dug out the more detailed plans for the Cora Cressy to see how this works. yes the shrouds are bunched but only at the highest possible point as they come around the mast. this is to keep the loops horizontal. So on the third mast I carefully counted and saw that the top slats cover more shrouds. Here I marked the paper pattern for the slats going up. first we cover to the forward shroud and then cover all 4. let's see how they come out. cheers

-
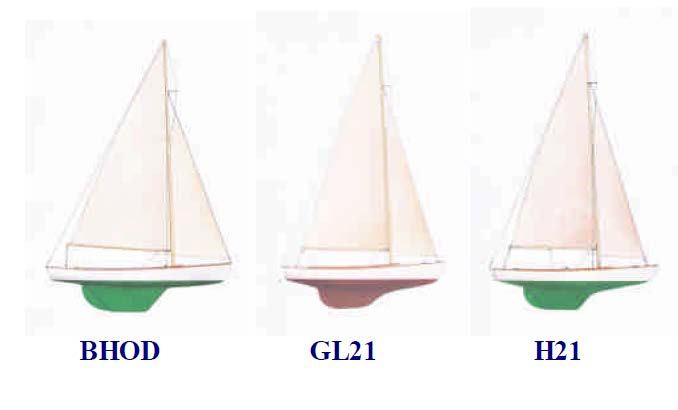
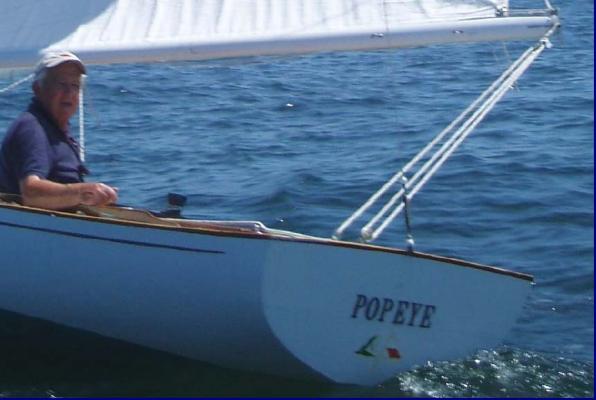
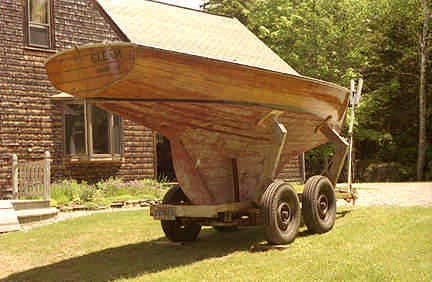
OK back at my desk and a need to add a little more to the history I left out the following predecessor story. In the 5 years prior to the naming of the BHOD, January 1938, there had been several boats designed. There were 4 built at 20 feet also designed by Hendel. They started with center boards but were all converted to keels. Popeye, 1935, is one of these boats and and was recently restored and sails again in the harbor. Here she is sailing away with her proud owner. One note is all of these Hendel boats have flat transoms As I left off in the last post....we had the Great Lake 21 built by Sonny Hodgdon. It was apparently two of the 20 footers like Popeye that were sent first to Lake Erie Then three 21 footers and possibly a forth were actually built here and shipped west. The first boat hull 01 shown in the last posting named Gleam when she returned to Maine was actually originally named Delilah. That distinction is important because Hodgdon 21 hull 01 Gleam remains Gleam and that could be confusing In the mid 50's, Sonny took an idea from his uncle Charles and started to build down the hull on the keel a bit. This revision evolved into the first Hodgdon 21. That is hull 01 Gleam. One difference is the rounded transom. He built several after 1956, and they mostly sailed in the Christmas Cove area at the mouth of the Damariscotta river. This area is next door to Boothbay Harbor but less protected. here is a Hodgdon 21 coming in the Damariscotta. Note the aluminum mast. This change took place in early 60"s when several of these boats were being built. The BHOD kept wooden masts until the 1973 switch to fiberglass. I will be thinking about how best to use an aluminum mast in my next build. I will leave the next steps in history to more research on fiberglass hulls , aluminum spars and newer sails to be included in the next build. I need to learn more about how all these three boats shifted to fiberglass. I have gotten from the Maine Maritime museum a print dated 1962 showing the time of early interest in developing what they then called plastic hulls.. The last wooden boats were built in late 60's. Ohio built formed plywood, presumably with glass as they had already changed the name to international 21. The Hodgdon 21 with its built down hull and minor change to add 4 inches in length made the fiberglass version in the early 70's. It was renamed the Christmas cove 21 and is popular today. The East Boothbay peninsula separates Linekin bay / Boothbay Harbor from the Damariscotta River, Driving down the peninsula one either goes east into the Damariscotta and the Christmas cove area or west into the Boothbay Harbor. There has been an on again off again rivalry between these clubs and the two boat classes. Naturally we each claim the better boat. I have to admit however that the last few time we raced the newer fiberglass CC 21's cleaned up. I end this entry with a great endorsement that makes us all proud L. Francis Herreshoff sums it up best in The Common Sense of Yacht Design writing, “the Boothbay 20 foot Class has produced some of the nicest small sailboats I ever sailed in; they are lively, comfortable, stiff and dry” (L.F. Herreshoff, 1948, pp. 62-65). anyway this research has been fun....now we need to get ready to finish and get ready to sail cheers

-
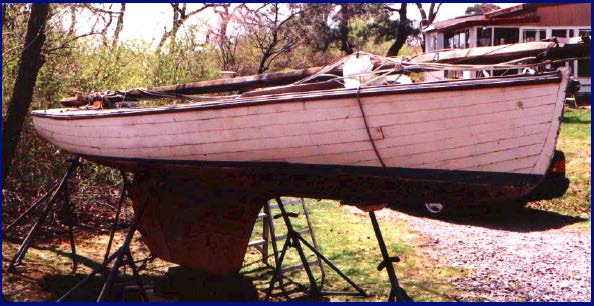
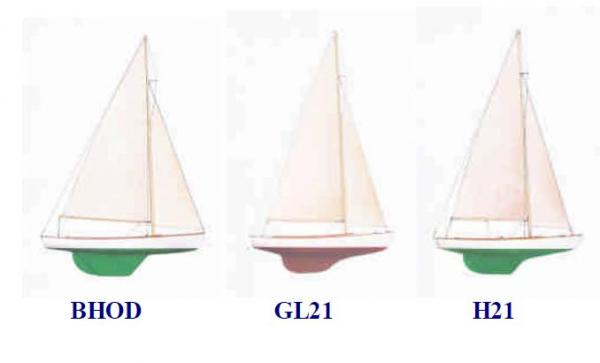
During the past few weeks I have been digging into more research about this class and the design progress. The short version is smaller 20 foot centerboard boats were tried in earlier years. I am not surprised they quickly evolved in 1932 to full keel versions as this is Maine and it is the Atlantic ocean out there. they were about 20 feet and varied slightly by builder. the shorter 20 footers remain the class of Casco bay near Portland. they were designed by Burgess. Then during 1937 while the Designers Burgess and Hendel were working on the Americas Cup Jay boat Ranger for the Vanderbilt team, they all sailed here in Boothbay. Herreschoff a regular to the summer region apparently collaborated a bit through Burgess as Hendel worked into November on the design challenge by the local yacht club. He later complimented the boats sailing qualities. [ not a bad endorsement ]. Loon was built for Hendel as the proto type. Hendel sailed her for years. She was recently bought by a true boat lover and restored in Massachusetts where she sails today. She is officially sail number 0. here Loon is as found stored in Portland Maine in 2001. here she is restored. She apparently is looking for a new home, I hope back up here. Norman Hodgdon built many BHOD boats both before and after the war. He also worked as did his brother on other classes. here is a lovely combined print by Kathy Bray of the three sister classes. Similar boats include the Great lake 21 built for the ....Mentor Harbor Yachting Club (MHYC) 45 miles or so east of Cleveland..After review two boats were ordered, built and shipped. They were apparent well received.... Hoping to buy additional Hodgdon Brothers sloops, a member wrote in a 1938 letter (Hendel Collection): “Believe it or not last year in open competition with four Stars and three 26- footers, one of our [GL 21s] beat them in point score in a series of eight races, boat for boat. This boat is very happy in our chop, which we get plenty of with every wind as we are racing in open water.” So, in 1939, to meet MHYC’s demand for more sailboats, Charles Hodgdon branded as the Great Lakes 21 (GL-21). Three sloops were built in 1939: Since then the McLeod group in Ohio took over. They built many and the Great Lakes 21 name was changed to International 21 around 1948-1949, as they were looking for a larger market. There are a few of these boats still in the area as they apparently had a fleet of 25 at Mentor Harbor Yachting Club as well in Detroit This is the first boat Gleam, ex-Delilah (GL-21 No. 1).She was built here in Boothbay and shipped west i assume 1939. After her long life in Lake Erie she came back home. First she was briefly owned by Maynard Bray of Maine's wooden boat school fame Gleam had several broken ribs, and needs sanding/paint, but has since been restored. I will edit in a photo and comment about Hodgdon 21 Popeye one of the originals. they predate BHOD by a few years . cheers got to run
-
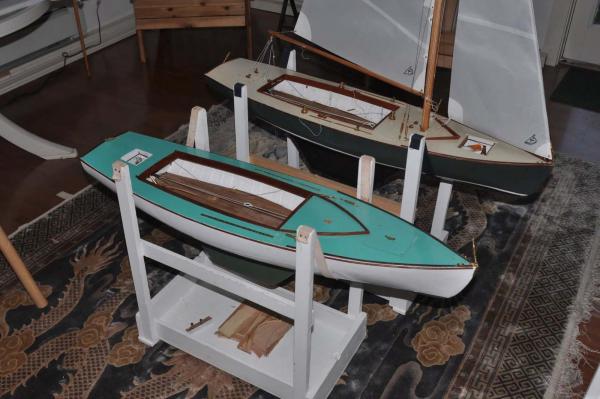
Wow sisters beautiful. I love watching your work with finishes. I struggle in that area and these two builds make such a great visual nice .....when is the regatta? cheers
- 258 replies
-
- 6
-

-
- buzzards bay
- herreshoff
- (and 1 more)
-
Kieth wow i just had a great half hour finding and reading this log. You are doing a great job with a difficult shape. I am intrigued with your method because I assume your hull is very thin and light. also I wonder if the the bulk head and balsa process could lead one to a plug for a gel coat hull. regardless I look forward to follow along as this looks like a beautiful yacht cheers
-
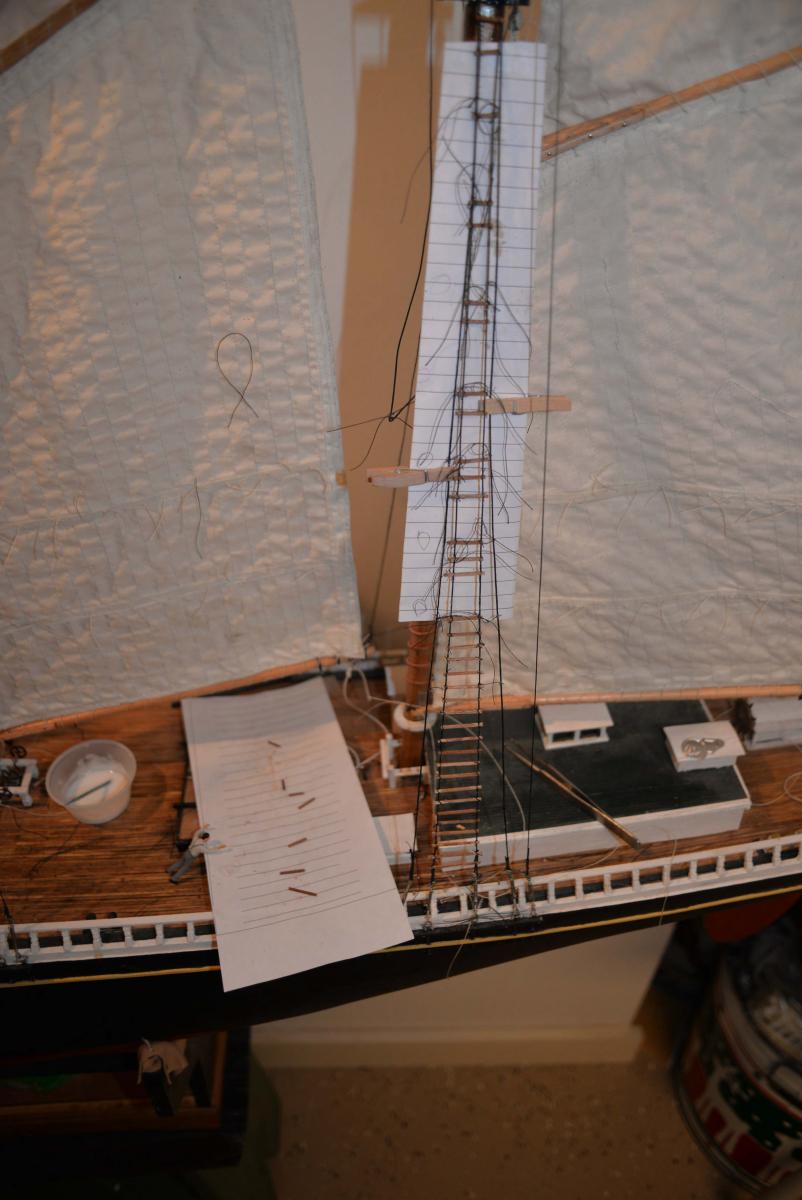
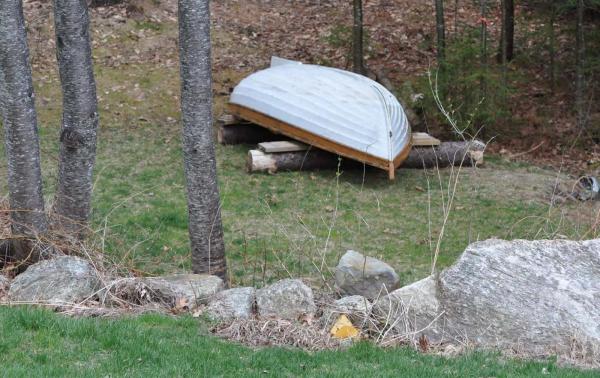
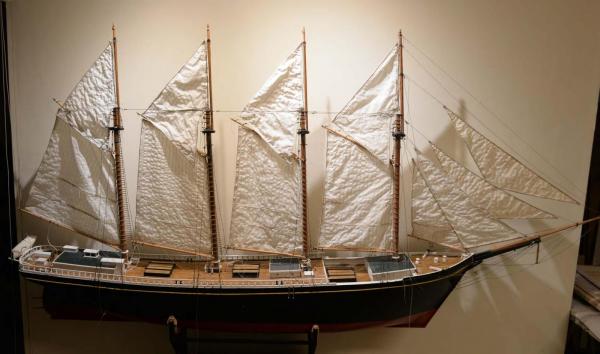
It has been many months since I have worked on Charlie. Since reviewing her sailing poor performance and the effort to get her around, I sort of retired her to the shop here she sits since last September. Now that I am done with heavy lifting on the BHOD sloops I have some time to catch up and see what I can do. Also my work style is to be happier if i am working on three or more things at a time. Confusing to many but it is good for me. Example I am also doing research , building a fast kit etc on the BOWDOIN, my planned winter build for next year as well. too early to start a log though. So I want to keep track of progress and problem solving on Charlie because as stated in the beginning of the log I hope to build replicas of at least one schooner built here in Boothbay Harbor. This is sort of an amateur practicum. These updates will not be many or often but when I get some time I need to continue to make her look great. More importantly I am learning more about these schooners so with some help I can build another better one. come summer all things will be set down other than racing sloops for real sailing. So what I am doing now is working on the planned back side of the model. Thus as I building things I learn here and then when I turn her around starboard, the main display side, will get a second chance. The first example is the head stays all need to be installed after I turn her around so they are in front of the sails. I may have trip lines but they are really for display. Also the top stay stay sails will be set after the standing rigging is completed. they fall out to port as well. maybe I should reconsider the stationery aspect of all this and make it possible to change tack for the display. Regardless standing rigging is the next priority. here I have added the missing shrouds and turnbuckles on the port side. Ratlines there are many discussions and I even found a topic on this wed site on ratlines. The consensus was 15 inches for merchant vessels. That would be 5/16 vs 1/4" in this scale. I have many photos and I must say they look even taller in the photos. On reason they could have been even taller is by this time there is only rare repairs that would require accessing the mast tops. All sailing is done from the deck level. Two detail books including the anatomy series on the four masters are all silent on this point. i have chosen 15 inches and it look right to me. Also with the advent of the turnbuckle and steel cable shrouds they ratlines were slats. I have chosen 1/32 x 1/16" strips to use and to tie and white glue them. I believe CA is death on lines and the diluted white fabric glue works good and fast. it also dries clear . I have decided to make a daily session. on the low end I will add 12 ratlines. it takes about an hour and is quite tedious. also it lets the glue set up. here I have done two sessions. taking pictures helps because I see too much line after snipping. I will need to come back with an ex-acto and trim better. I imagine i could use smaller thread. I am using this size because every 5th ratline gets the line extended out to the sides. Also I think after I stain the ratlines darker, the black line will look OK. we'll see OK of the races Cheers

-
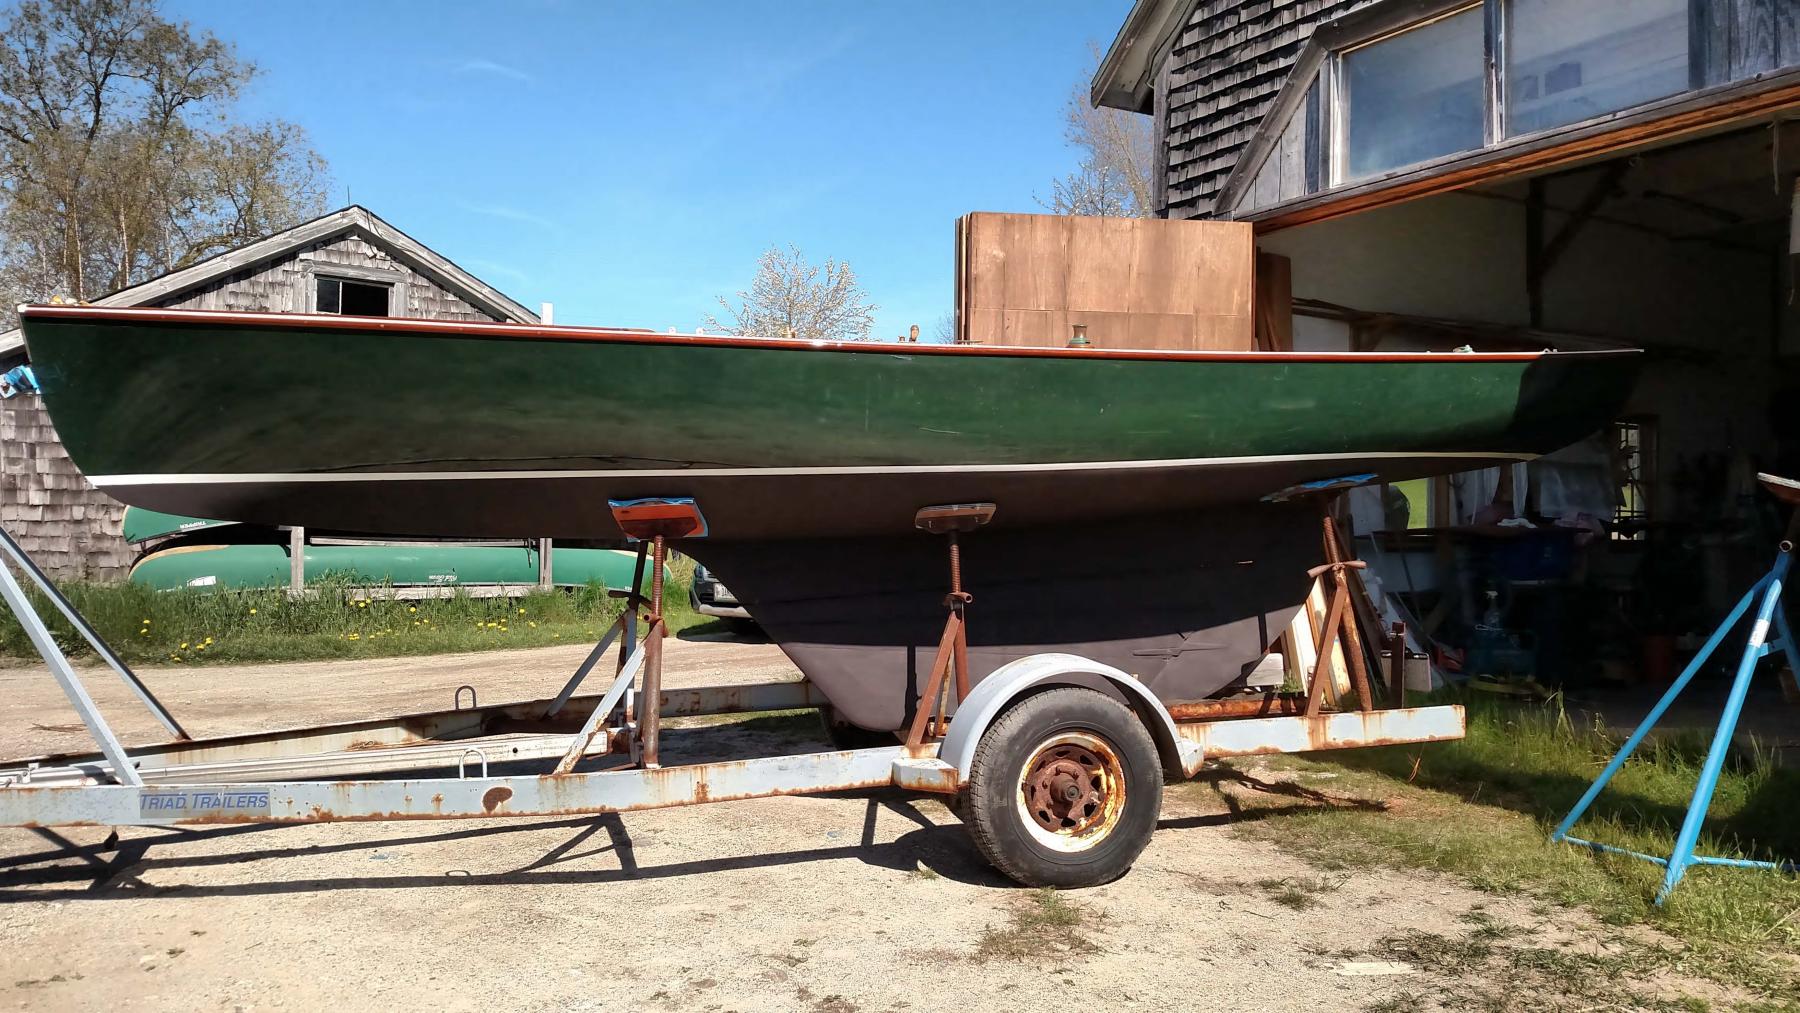
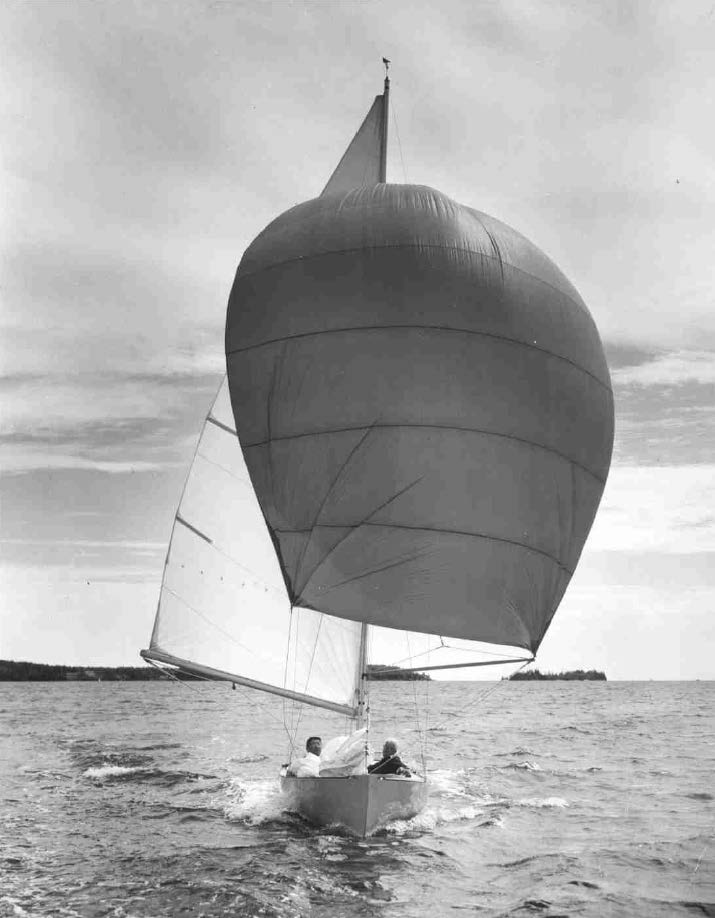
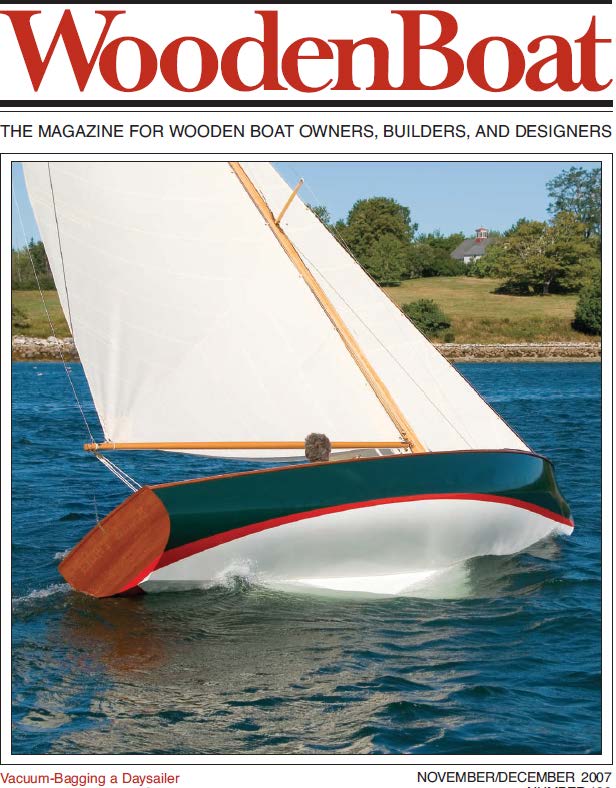
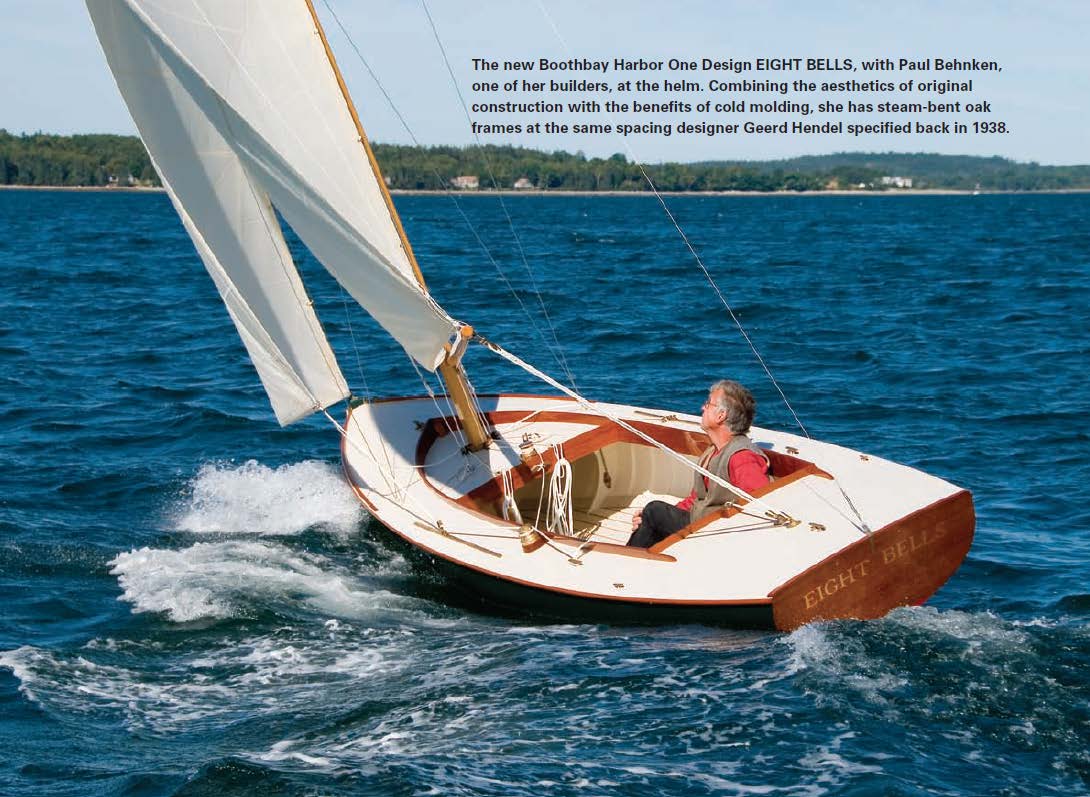
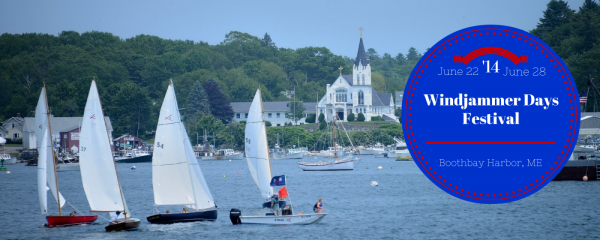
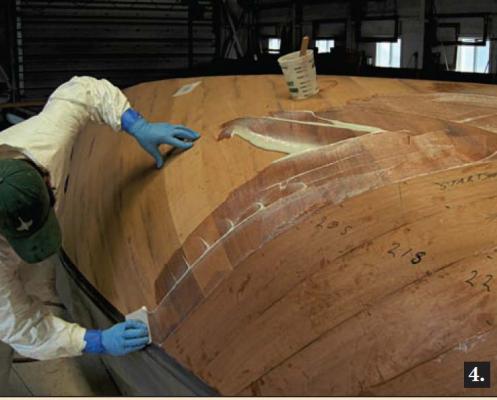
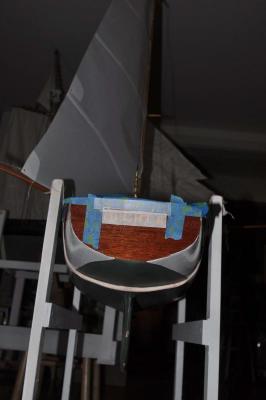
Hi all Today I want to share some things I have learned along the way regarding this class and the explanation of what the second hull represents. That also leads us to describe what other hulls remain unexplored. Each summer a festival is held in late June celebrating Windjammers. Several large schooners come to town and I shared photos last year in my Charles Notman Schooner log of Bowdoin and other local beauties. The Boothbay Harbor One Design fleet has a parade as an event that occurs among all that activity. I look forward to being in it this summer . One thing to note from this photo is we have 4 types of boat hull in our fleet. type 1 wooden hulls 1938 to the war year 1941, 21 boats were built including LOON the prototype. Bittersweet is hull 20 and was named Sea Rascal then. She was the last hull built before the moratorium, as Boothbay became a busy Navy yard in 1941-45. After the war another 17 wooden hulls were made up to the 1950's, The Hodgdon yard was a major builder of the fleet During the 1950's, The Hodgdon boat yard made their own design and called the Hodgdon 21. It is a BHOD except they built the hull down the fin keel a bit correcting a weakness inherent in a canoe hull design. In 1972 they changed that boat to fiberglass and it has since evolved into the Christmas cove 21 and many were built. BITTERSWEET Here is our boat as she sailed here in black and later in white as part of a small fleet until 2011. I showed earlier in the log her before and after reskinning photos and we are now completing her interior restoration work. Type 2 fiberglass In about 1973 Someone built the canoe hull design BHOD in fiberglass as well. Hulls 38 to 54 were made in fiberglass with a cork core. I plan to study this and learn the facts over this next summer. It sounds like another boat to build too. The design incorporated new aluminum masts and booms and corrected the rigging to include the lower spreader. Type 3 new fiberglass In 2006 permission was given to use the new Brooklin drawings to build a separate plug and then fiberglass hulls here is a detail showing that the new fiberglass built hulls have new Harken racing gear, travelers winches etc. they come either wood or aluminum mast but new rigging. FYI they are sweet and so far they are hulls 54 to 57 Type 4 cold mold ceder and glass EIGHT BELLS hull 11 In 2006 there was an effort by a family to recreate their boat Eight Bells. They commissioned the Brooklin yard to generate drawings and molds to cold form a new hull . A key part of that story is shared in this article in Wooden boat. How about that photo....now you see one reason we love these boats. You can see the forms for each rib and the strip planking. Here you see layer two in cedar veneer. Here is the outer layer also in cedar. And here you are off sailing Another family bought both Bittersweet [ see above] and Osprey with the idea of taking them to wooden Boat to be born again. They were also given permission to use the new drawings. OSPREY hull 26 rebuild work done in Wooden Boat school here she gets named...good stuff. reprieve..osprey out of the shop off for a sail After all of this we get to a point where I can understand what I did with two sets of drawings going into this modelling . My second model used the 2006 drawings created for and used in rebuilding both Osprey and Eight bells. Example; remember the plywood bulkhead holding the chain plates. To make a collage so to speak, I took the lovely mahogany transom of eight bells and Newport Blue Classic deck color of Osprey and created a fun boat. here we are in the sail loft...it is time for naming. the proto-type unnumbered sails are bent first and then..... can you see it? it is a bit actually corny, but I called her OUGHT 6 to honor the year of the design of her birth. I have a challenge now to come up with a sail number. Hull 6 still sails i will get more input first. so sorry for long wind but I am using this log to collect my learning about this wonderful class. cheers


-
wow thank you guys it is so great to know I am not alone here in this pursuit. I must say though comments are over kind as I get a few moments from time to time to view your incredible work. I have so much to learn. example...my varnishing is horrible. oh well if we have fun, learn something and then get to sail around the harbor this summer all is good here is a fun photo of 1955 races cheers

-
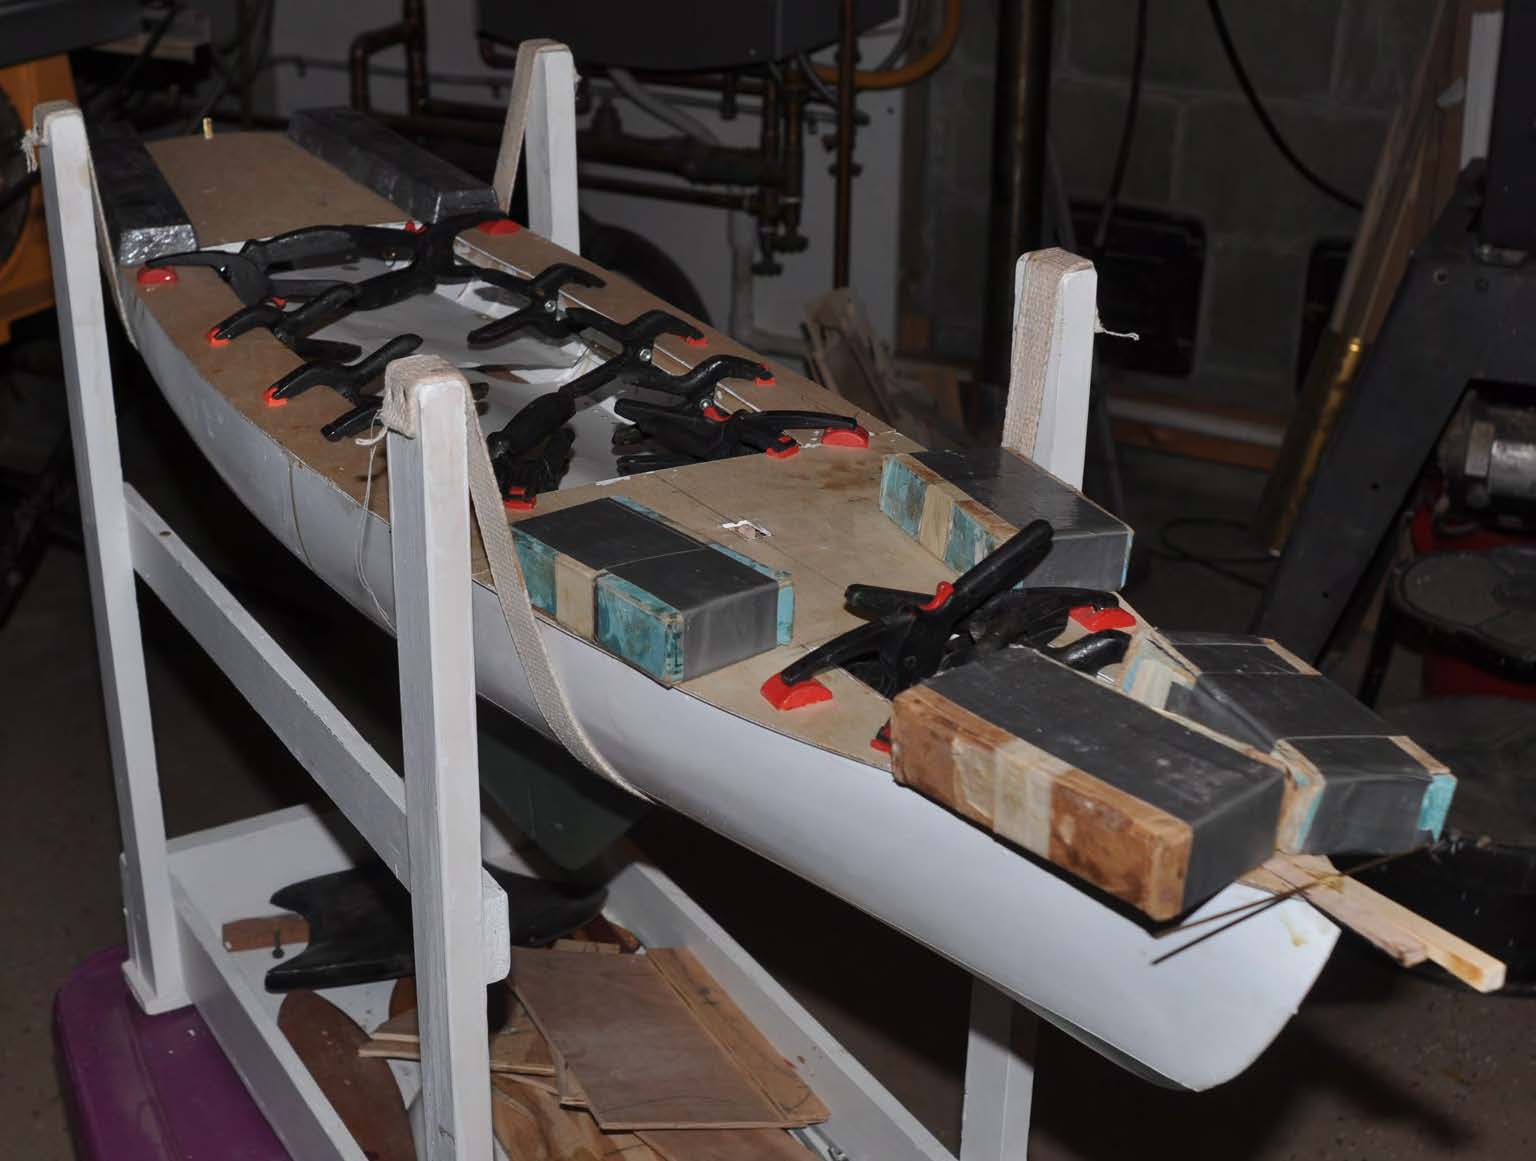
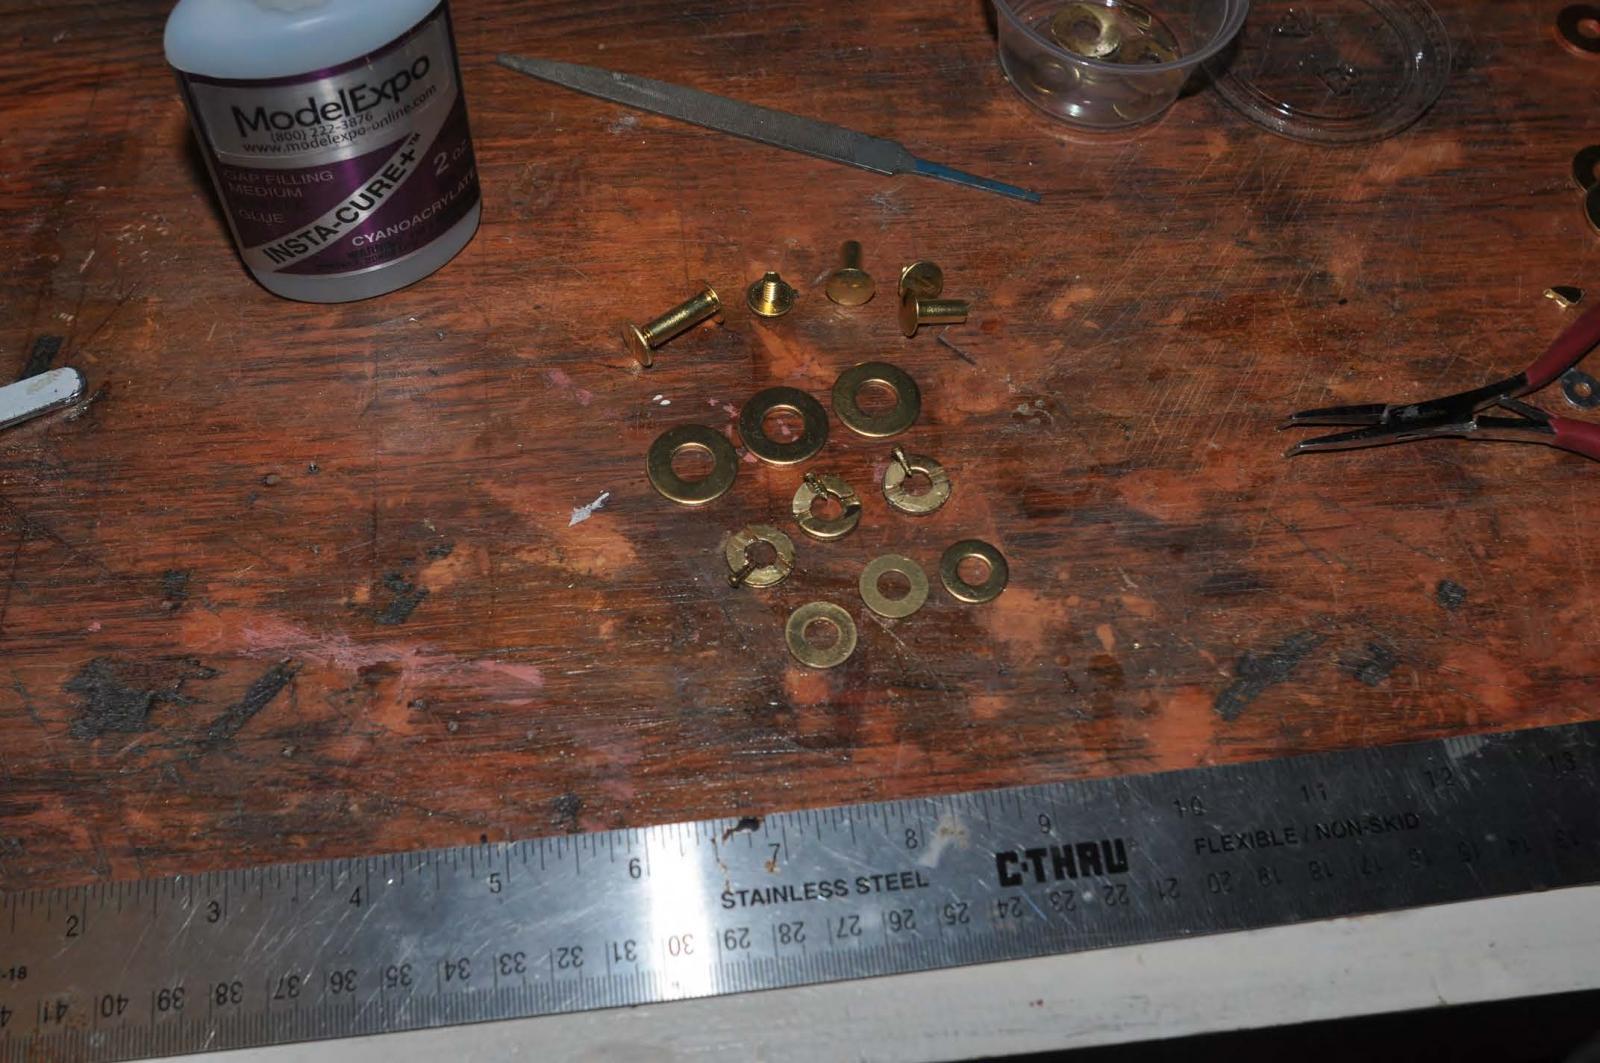
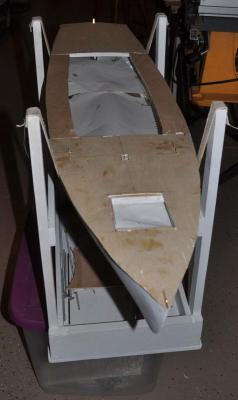
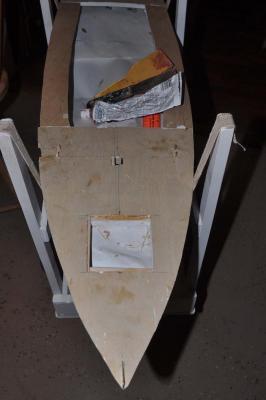
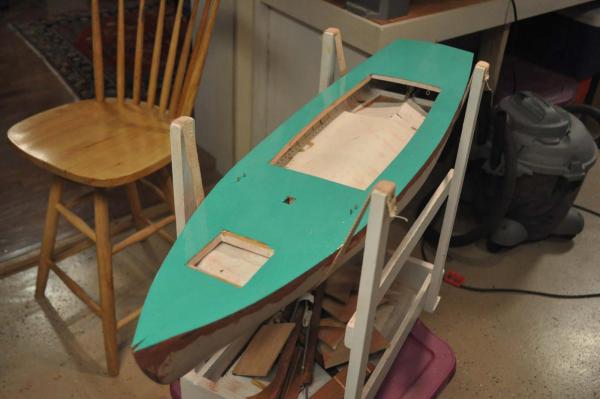
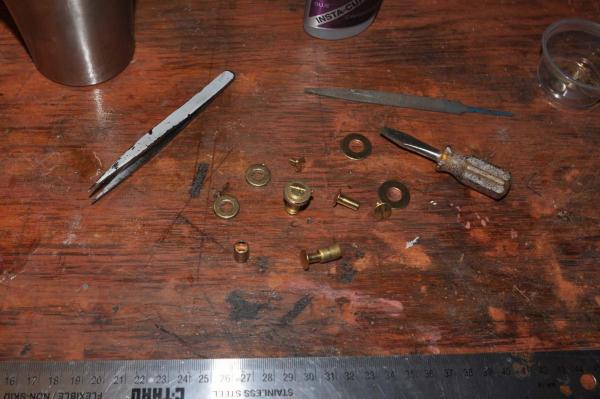
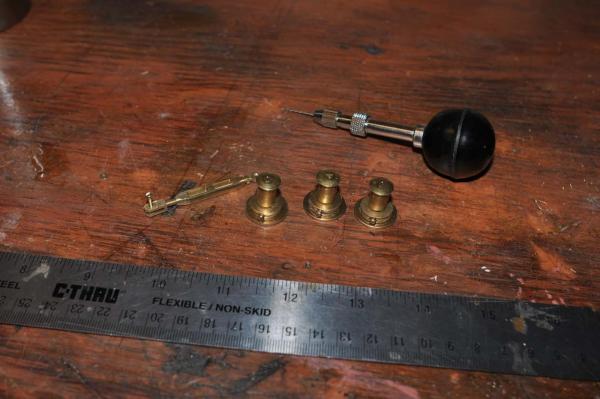
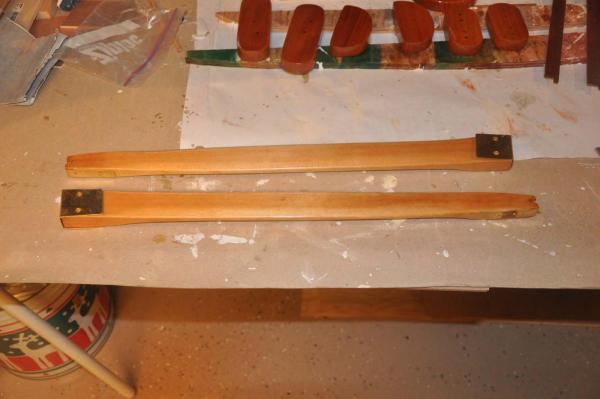
Well all it is time to bring things up to date. Hull 2 has come a long way. She even has a name, but let's catch up first; we left her with deck framing ready for deck. I decided that I could do all of the deck in one go. I am trying to make this easier and faster...ha ha so we are are all set...right?? opps!!! something is wrong. Somehow the fore deck move about 1/8" to starboard. Thank goodness it will be painted. Here is the fix. A little cutting and a little auto finish putty. This is what separates me from the real modeling guys. OK a little deck paint and we are off to the races. The color and material are real deck epoxy that David had in his shop. It is the deck color of Osprey the real boat of the 2006 design built at wooden Boat school and now on the web looking for a new home. You can see her in the earliest posts. let's see how she cleans up. now time for more work on getting fittings to a production process. The idea is to make this process less daunting and try to get others to try. the spreader is better this time as I used screws and not tiny rivets. This jumper strut is just like the first one on Bittersweet. The mast head is also the same as before Making these little parts is so easy after all the trial and error of the first time. Building two models at a time has a few benefits. I wanted the winches to become an easy production this time. I resupplied my washer collection and got to work. Here the base washers with their set pins are in place ready for final glue up. Here I am turning the head of the posts down to fit inside the base washers and making the barrel tubes. The head being actually screwed in squeezing the barrel between top and bottom make them quite stable. here in just one sitting, and a few cups of coffee we got all three winches done. The unusual foredeck winch on Bittersweet with a jam cleat on top is not normal and will not come the second hull. Honestly however i wish the base washers were just a bit smaller OD. OK we are just about coming out of the shop. everything is on except the mahogany rub rails. They have since been installed. The whole hull has been repainted,but a few more touch ups are in order. I have decided for this second hull to honor the effort sponsored by a long time local family to create a new 2006 design document that allowed them to cold form a new hull to give Eight bells a rebirth. She is shown early in this log and was built at Brooklin yard in Maine. There are articles about her in Wooden Boat magazine.[Issue #199 Nov/Dec 2007 DIGITAL ] There is also a second boat, Osprey, mentioned above and also shown before in this log. It is the second boat built from this design and being built at wooden boat school is also documented. This model [ hull 2] therefore represented the 2006 design. Please notice the combing connects with the mahogany splash board that curves to a point. This cosmetic change nicely identifies these boats as a rebirth of a great class. so stand by as in the next post. she gets her name cheers


-
wow Michael...this is really great to see. My current large scale build is plywood deck by design. I did a king plank deck once but it was smaller scale bass wood planking. You however are doing a big scale and a great job of it. Thanks for sharing your 'grout' method. a good lesson. cheers
-
Michael As a resident of Boothbay Harbor, I welcome to return any time. If you come in the summer, let's go for a sail in the harbor. I can show you several herresshoff. we have some pretty good eats here too. cheers
-
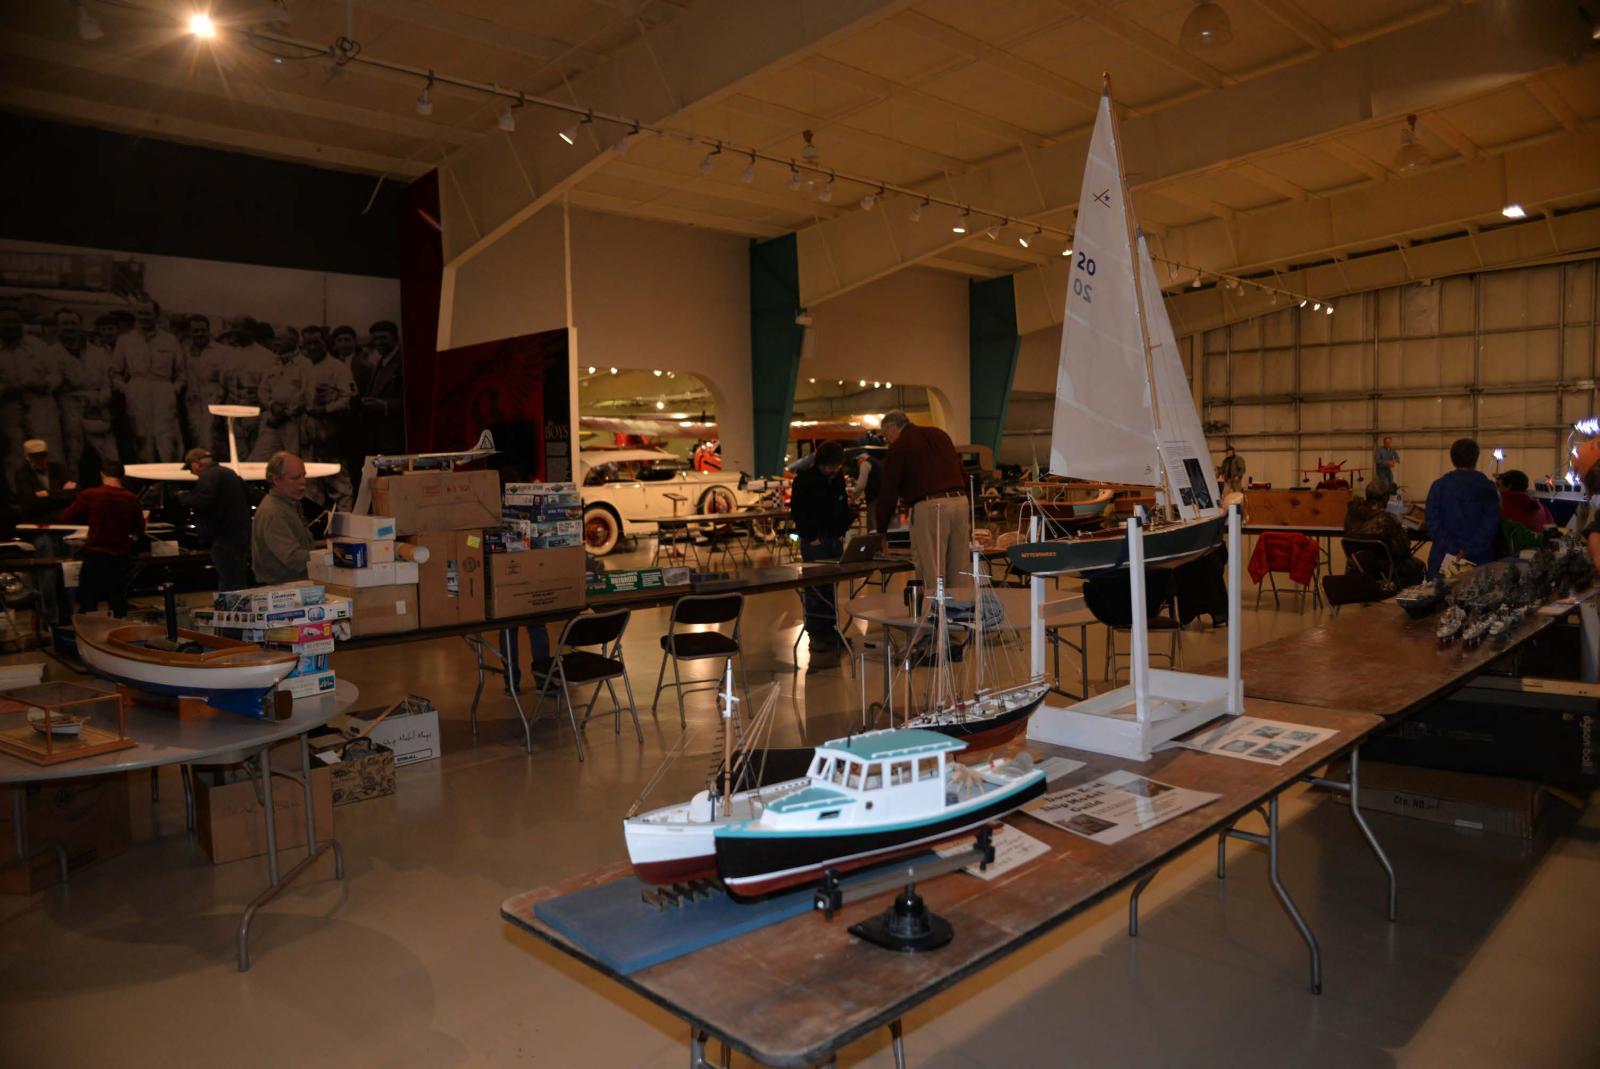
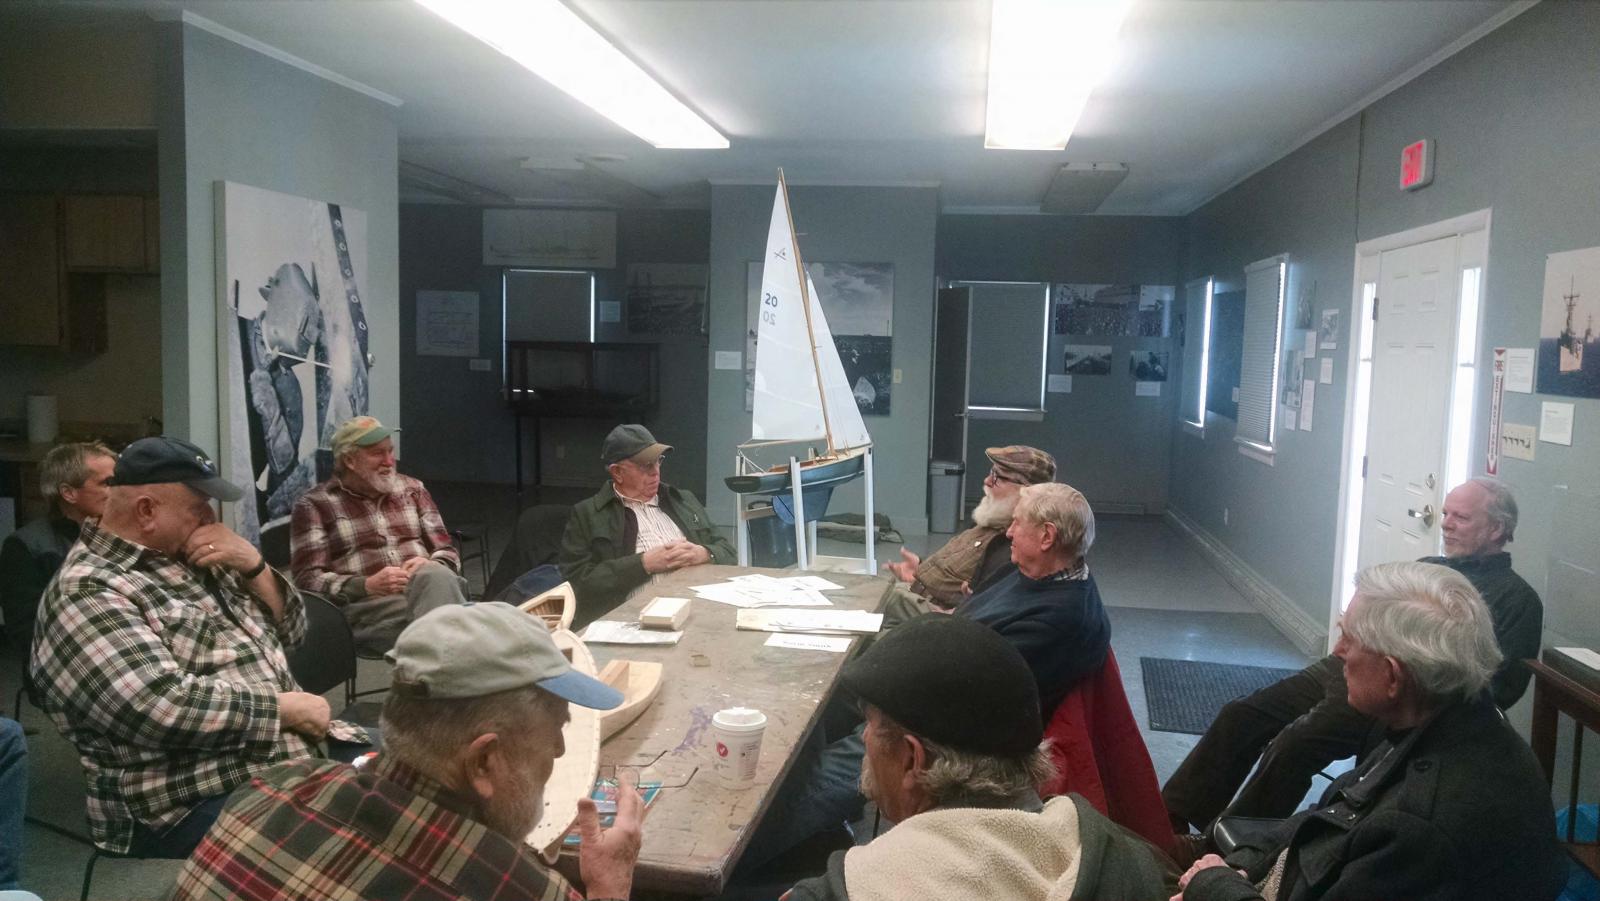
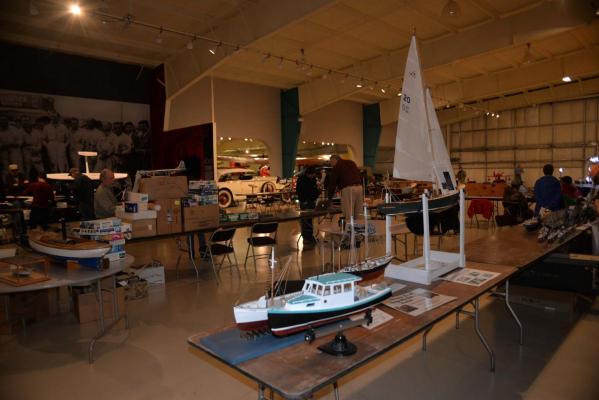
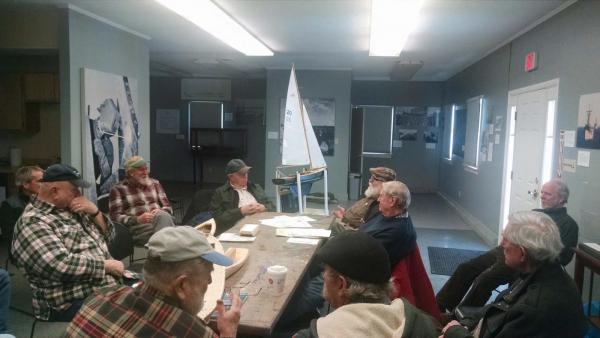
I wanted to share the results of taking Bittersweet Jr to a meeting of like minded modelers to see what they thought about sailing her. Downeast Shipmodelers Guild I got to take Bittersweet jr to our monthly meeting of the Downeast Shipmodeler's Guild at Maine Maritime Museum. It was fun until we got to the point that several guys agreed with the concern that just because she is at scale, the sailing rig and ballast could seriously impact the helm. Unlike a typical pond yacht I can not adjust anything above the deck. The consensus was to make a few different options and sail them before " finishing them. another concern is I may need to add a stiffener to the foot of the jib, perhaps plexiglass. Oh well more to think about. cheers
-
Bob thanks for your clarification on a need to consider both the water resistance and the area of the keel.[ plus added sailing keel and maybe the rudder] for this size boat. This should affect the weather / lee helm issues. I know this is quicksand...so On this boat I aligned the center of the keel bulb with the center of displacement to keep the boat flat. I am focusing the weight on the displacement. I know that the inch pounds of moment from the 5 pound lead keel at say 11 inches down is what will keep us upright. However the sailing keel that i have now will clearly move the CLP forward from the real hull design. I had hoped that in this size i could not worry about it. Your advise is well timed because I have not made these parts yet. I may need to make the sailing keel narrower or further back with just the bulb projected forward. I need to think more about this. thanks for the wake up call PS thuis may have contributed to the lee helm of the big Charles Notman schooner last summer too cheers jon cheers
-
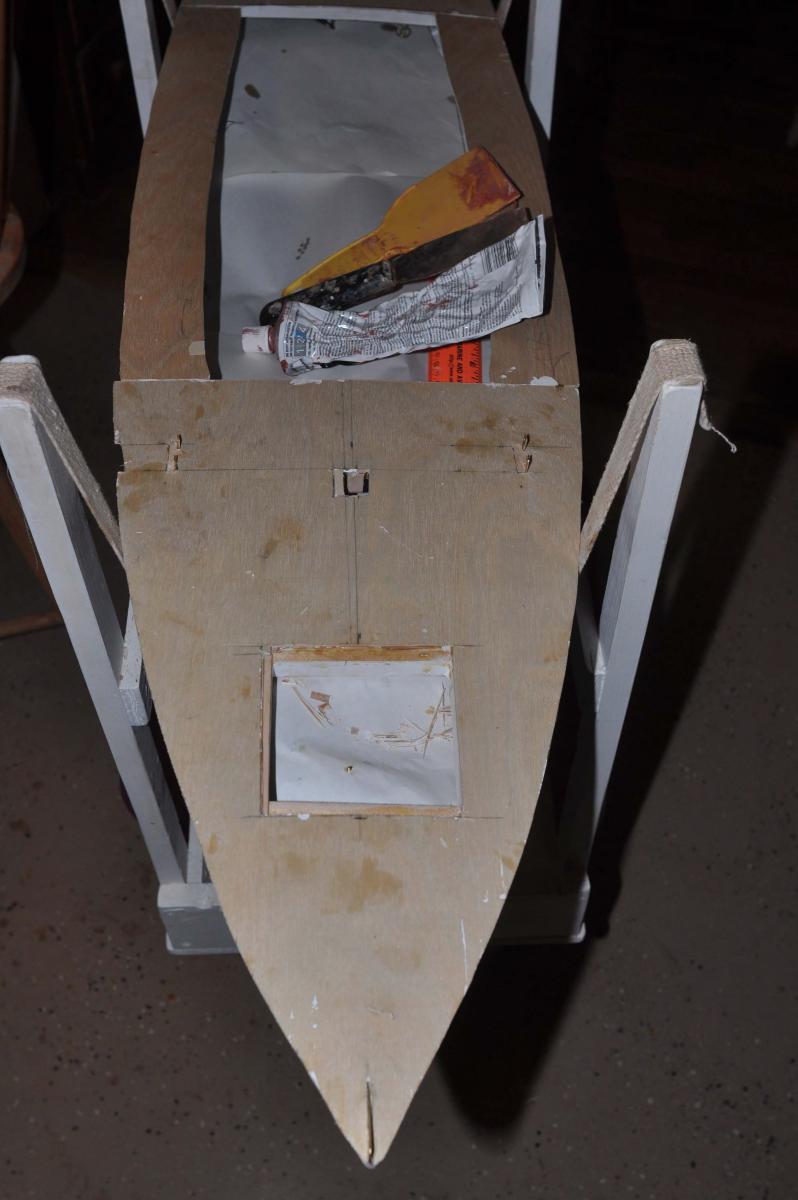
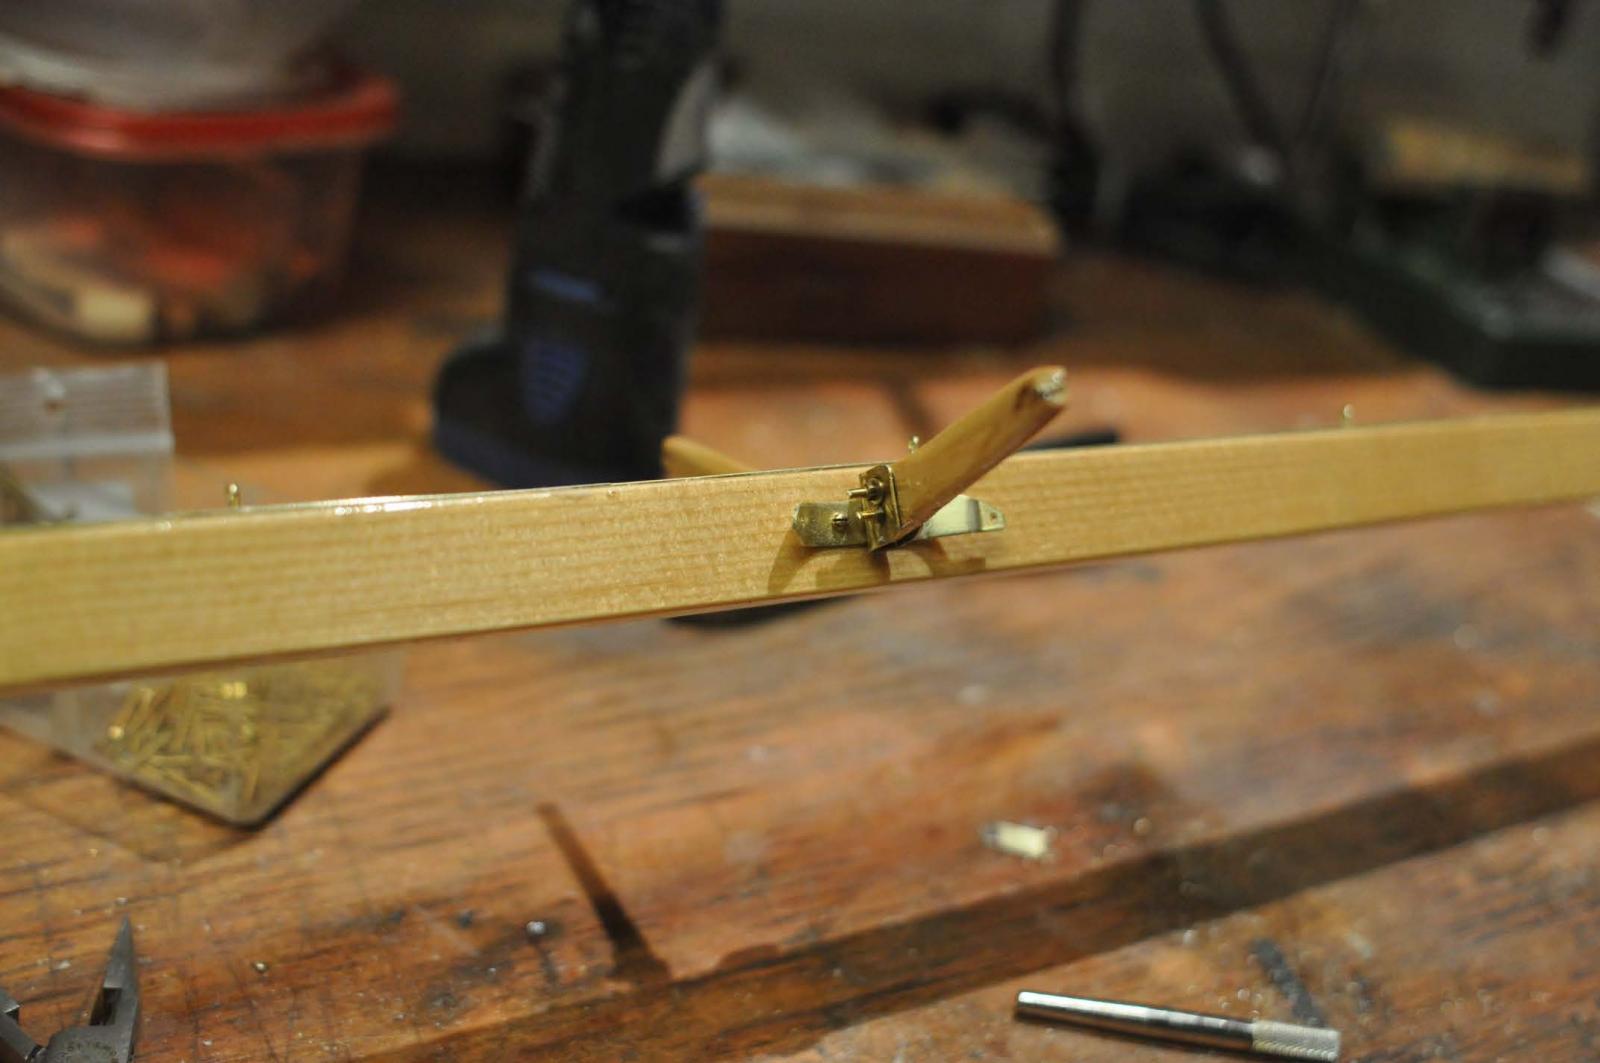
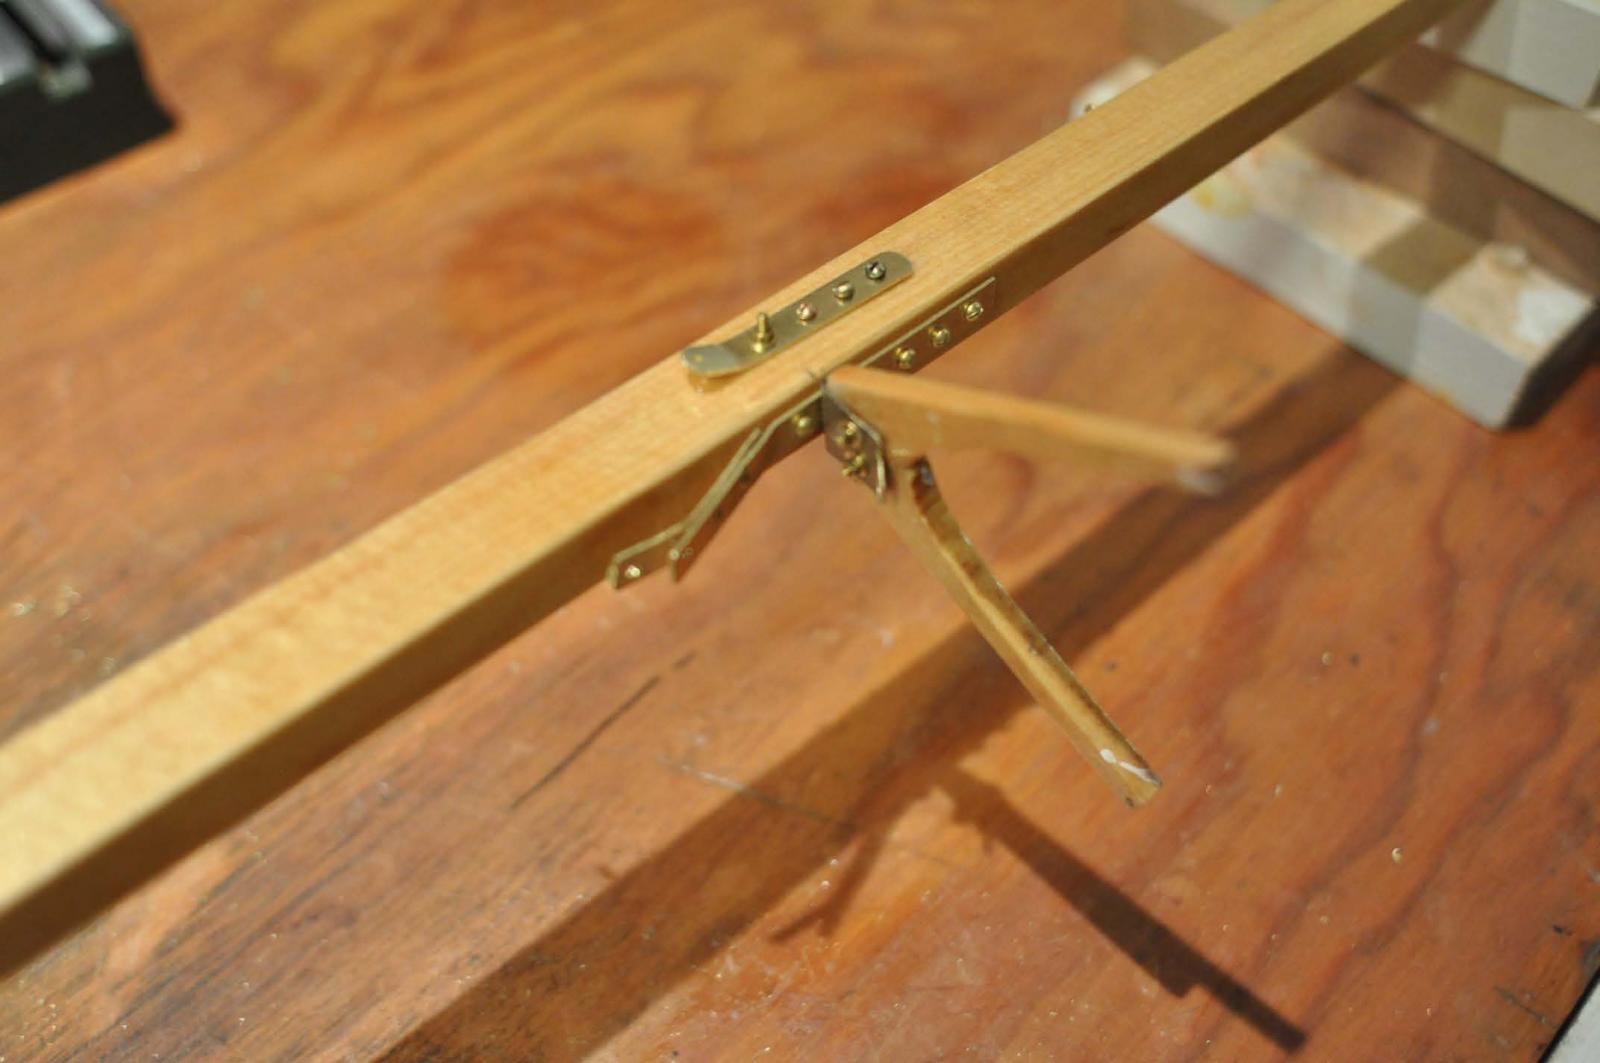
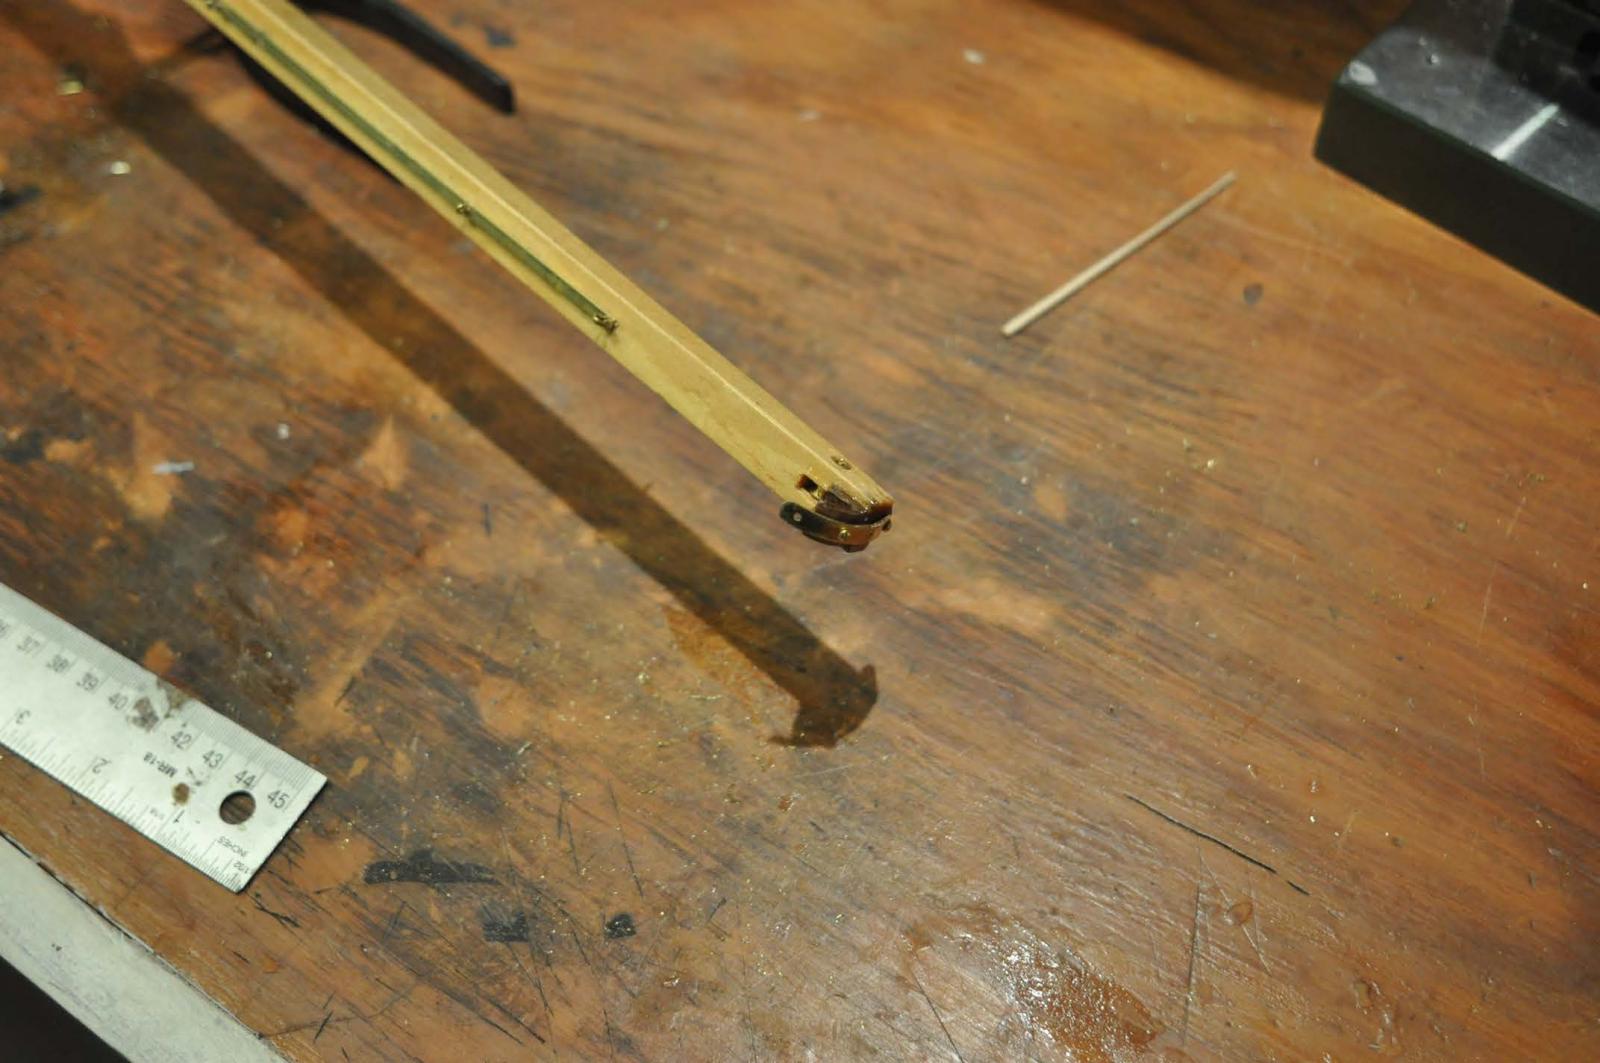
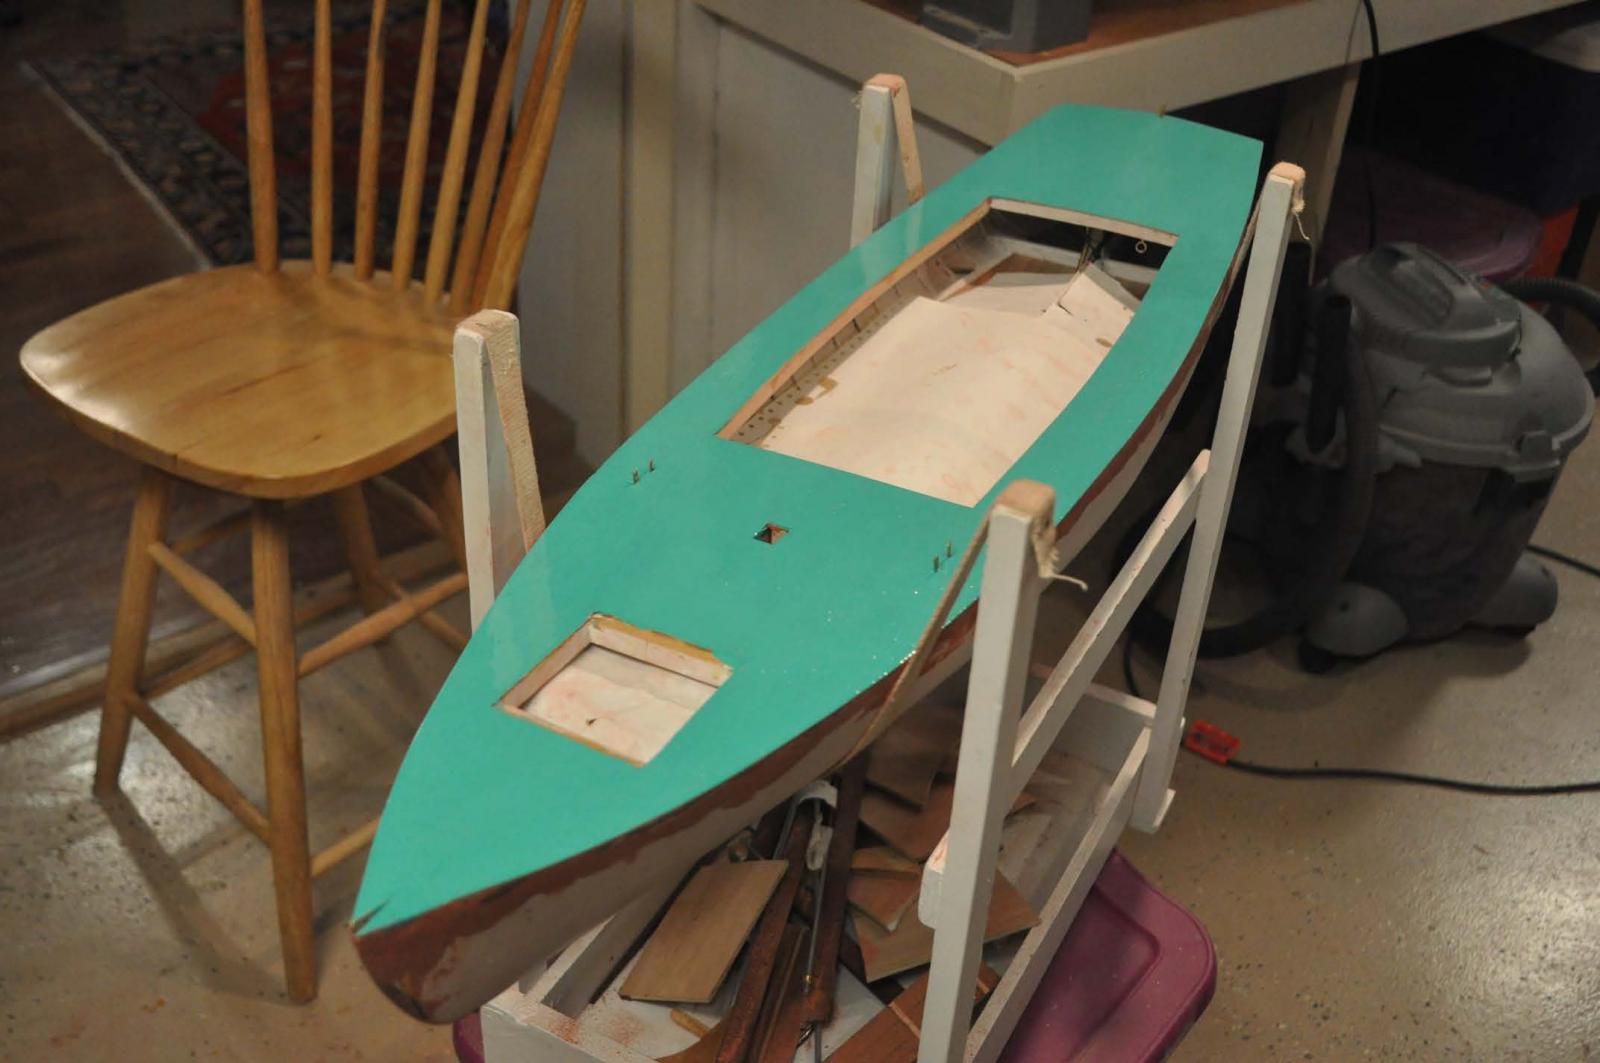
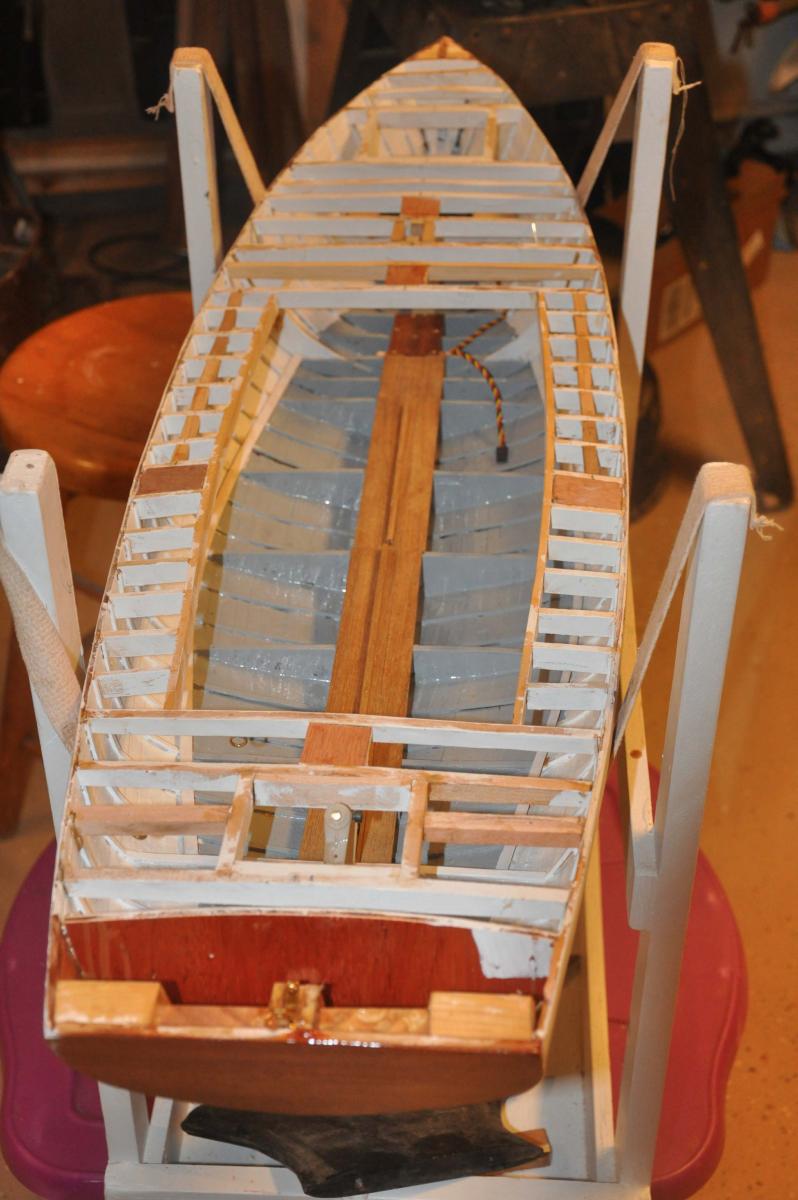
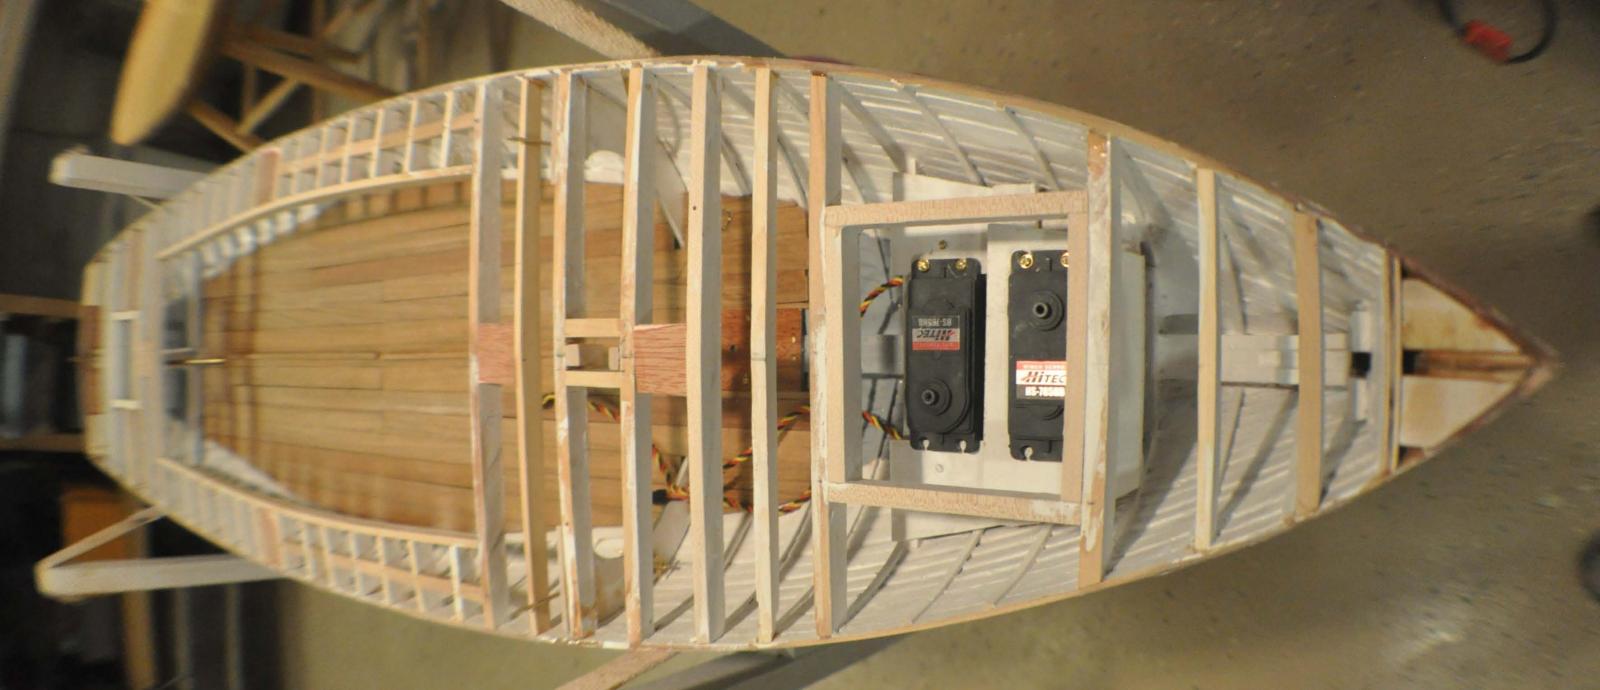
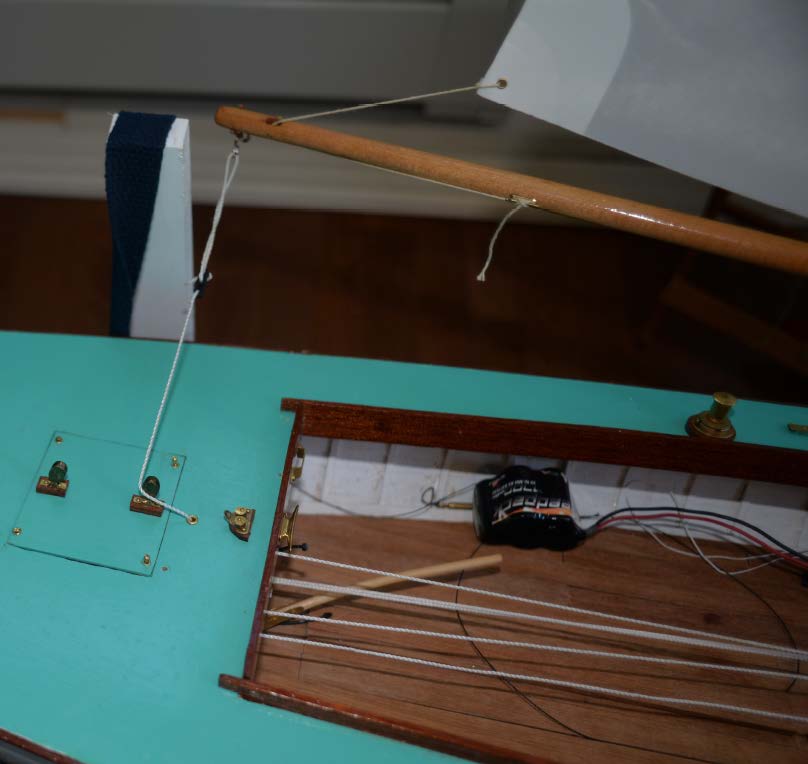
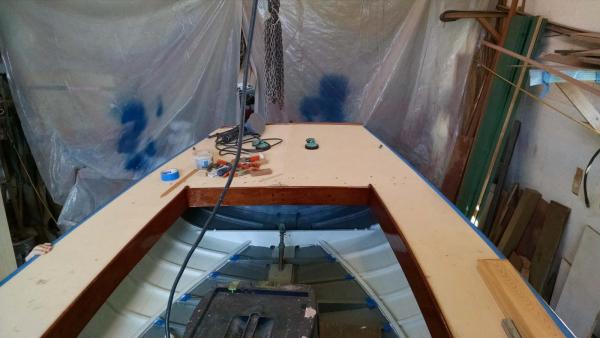
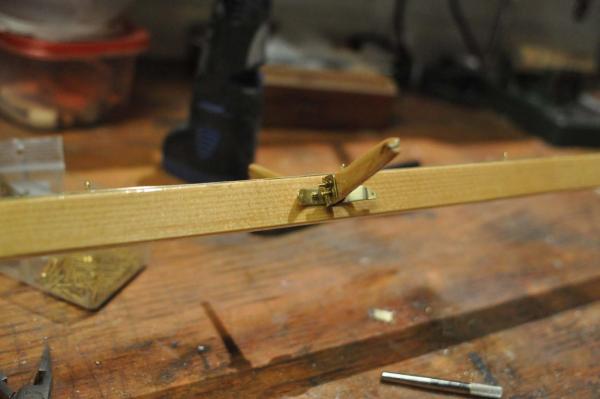
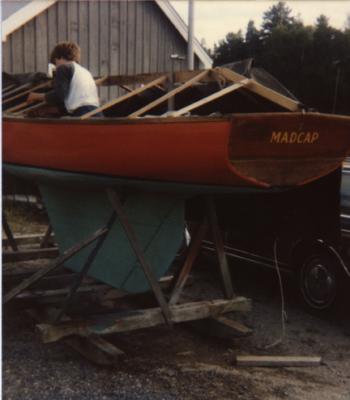
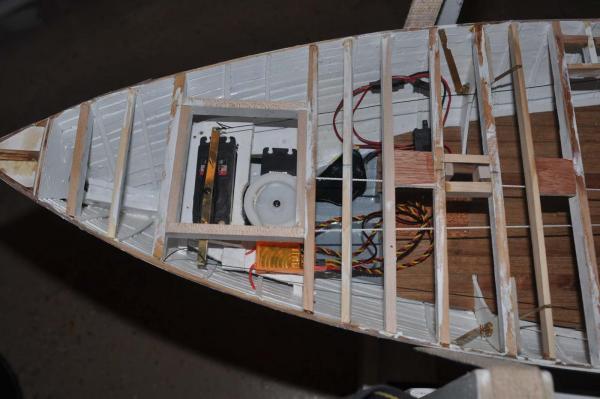
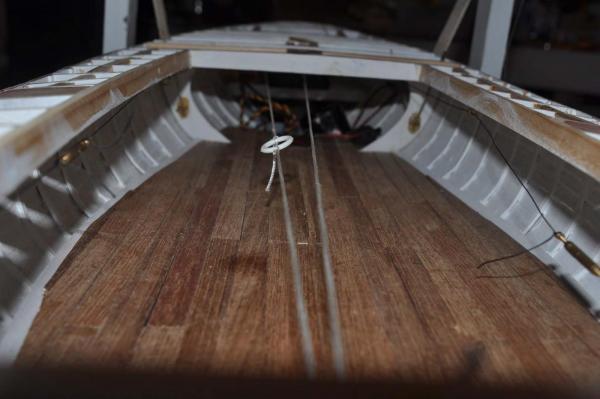
Well it snowed again all day, so we had time to do a few things. Now that hull one is done cosmetically, I need to focus on sailing. Some of this effort I am comfortable with and some I am on new ground. working the real boat I finished the new spreaders and got them up to David. I gave up on the design of 1/16" by one inch rivets and put screws in to hold the strap at the shroud end. David laughed and said if the boat builders made models they all would used little screws. The shroud gets moused when set up and then all remains as is. I left the big clips without drilling the wood. That all gets set at 5 deg up and 10 deg back, which is easier to do with shroud supporting it during installation. I look forward to that as it also means spring will be here. working the keel and ballast I previously showed in the log a trial using the 5 pound [ per side] bulbs for the bigger Marblehead boats on Bittersweet. Now a need to decide how much weight and get ready for the casting. The boat calculates in CAD to displace about 8 pounds of water. That is half of a Marblehead, but the Marblehead is only 8 inches longer and 25% more sail area. I settled on roughly 2.5 + [ per side] calculated from cad and then added a little more wood to the mold in the photo. I figure I can file it down if I need. It also is smaller and a little better than the earlier mock up. Unfortunately though the center of effort [COE] over the center of gravity [cg] of the bulb puts the whole sailing keel forward. I am not sure calculation of the area of the keel vs. the COE applies at this small size. The keel being forward is not surprising considering the position of the lead in the real keel is also forward . If I simply copied the lead keel it would be to little and too high [ 5 inches] to create much resistance to the wind. I feel much better getting the " moment arm" down to the 11.5 inches equal to the marbleheads. With an open cockpit we do not want to go too far over. too much info but just to share we are going into this aspect of design with an open mind. Now to the servos. they work but not very well in Bittersweet junior. My friend Tom the guru suggested changing the rudder to a see saw to make the pull more direct. So I am determined to get the second hull right before digging into the first boat to make revisions. I decided to put in the sole before the deck this time. I hope I don't drip on the teak with the epoxy glue or paint. this was the first attempted fix. I changed the elevation of the 2 servos, one low one high, so the rudder arm could swing and the drum lines go over. in really working the servos today I could not get it to work very well. I needed to extend the rudder arms to get more pull. That meant reversing and putting the rudder on top . after several tries I finally figured this out. Here I have put the sail drum low and back and the rudder arms extended and raised . it works yippee the sail loop works because I upgraded the bungee cord into a triple shock cord. I also got rid of the little pulleys that kept hanging up and the forward fair lead. I soldered two rings......it took four tries to get two rings and added a hook easy to access through the rudder hatch. here we see the sail loop over the complete sole/ nice and simple....I hope A little more history I found some more images of old Bittersweet here we see sail number 20 sailing by. the link does not clearly identify the name but the number is the number. here we see MADCAP One of Bittersweet's earlier names. I am excited because that may be a mahogany transom....


-
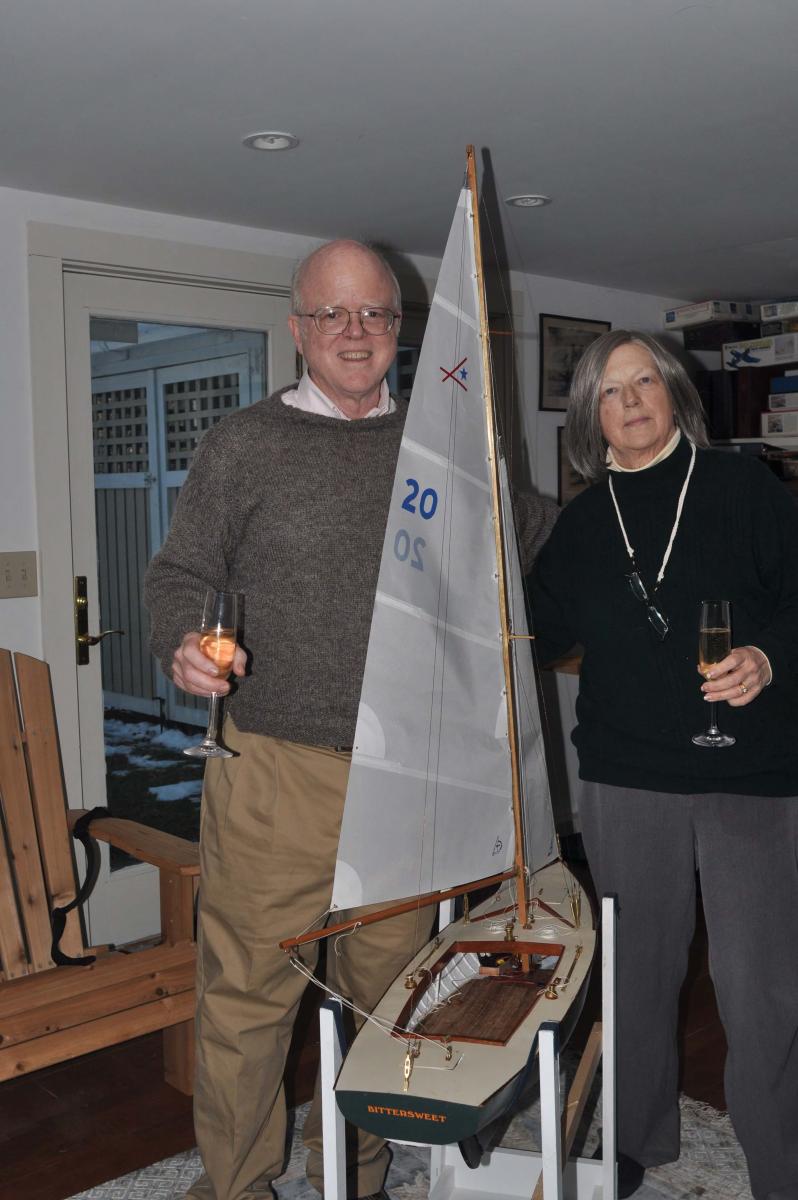
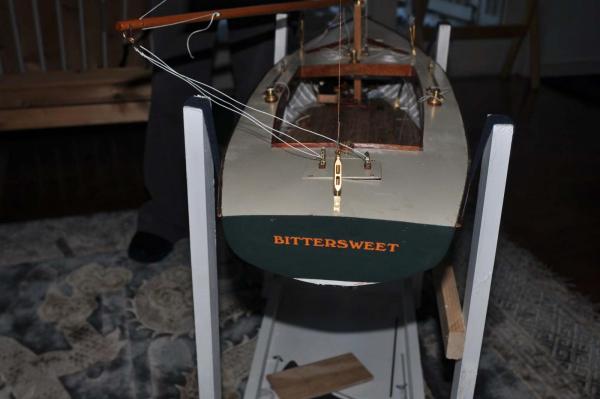
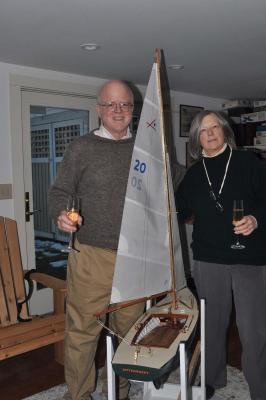
Yesterday was eventful. after a busy day out we came home and Christened Bittersweet Jr. I actually got the rear admiral and friends to visit the sail loft. after much discussion with David and color design with the boss lady we settled on Internet ordered gold with red out lined for naming of Bittersweet. They sent us the full size for the real boat and scaled down to fit on the model. With a little ceremony and drum role she is named.... of course it's a great excuse to open some bubbly. one down....though more work on the sailing controls and ballast etc.. and one to go cheers jond
-
thanks guys well the Superbowl is over and more snow on the way. it is a good chance to focus on making the sailing parts work and get hull 2 moving along cheers