barkeater
-
Posts
411 -
Joined
-
Last visited
Content Type
Profiles
Forums
Gallery
Events
Everything posted by barkeater
-
If you are talking about furniture (steering wheel, ships bell, catheads etc.), I pin these with one of the brass-colored nails they include in kits. For glue I use cyanoacrylate on the nail shank and a small bit of wood glue on the wood parts where applicable (areas free of varnish). Rich
-
Mohogany plank bending
barkeater replied to Bontie's topic in Building, Framing, Planking and plating a ships hull and deck
I use room temperature water, but I would think 20 minutes should do it for 2mm. Mahogany tends to be a bit brittle. Don't overly force it. With a tight bend you may need to partially bend it and repeat your water bath before bending more. Rich -
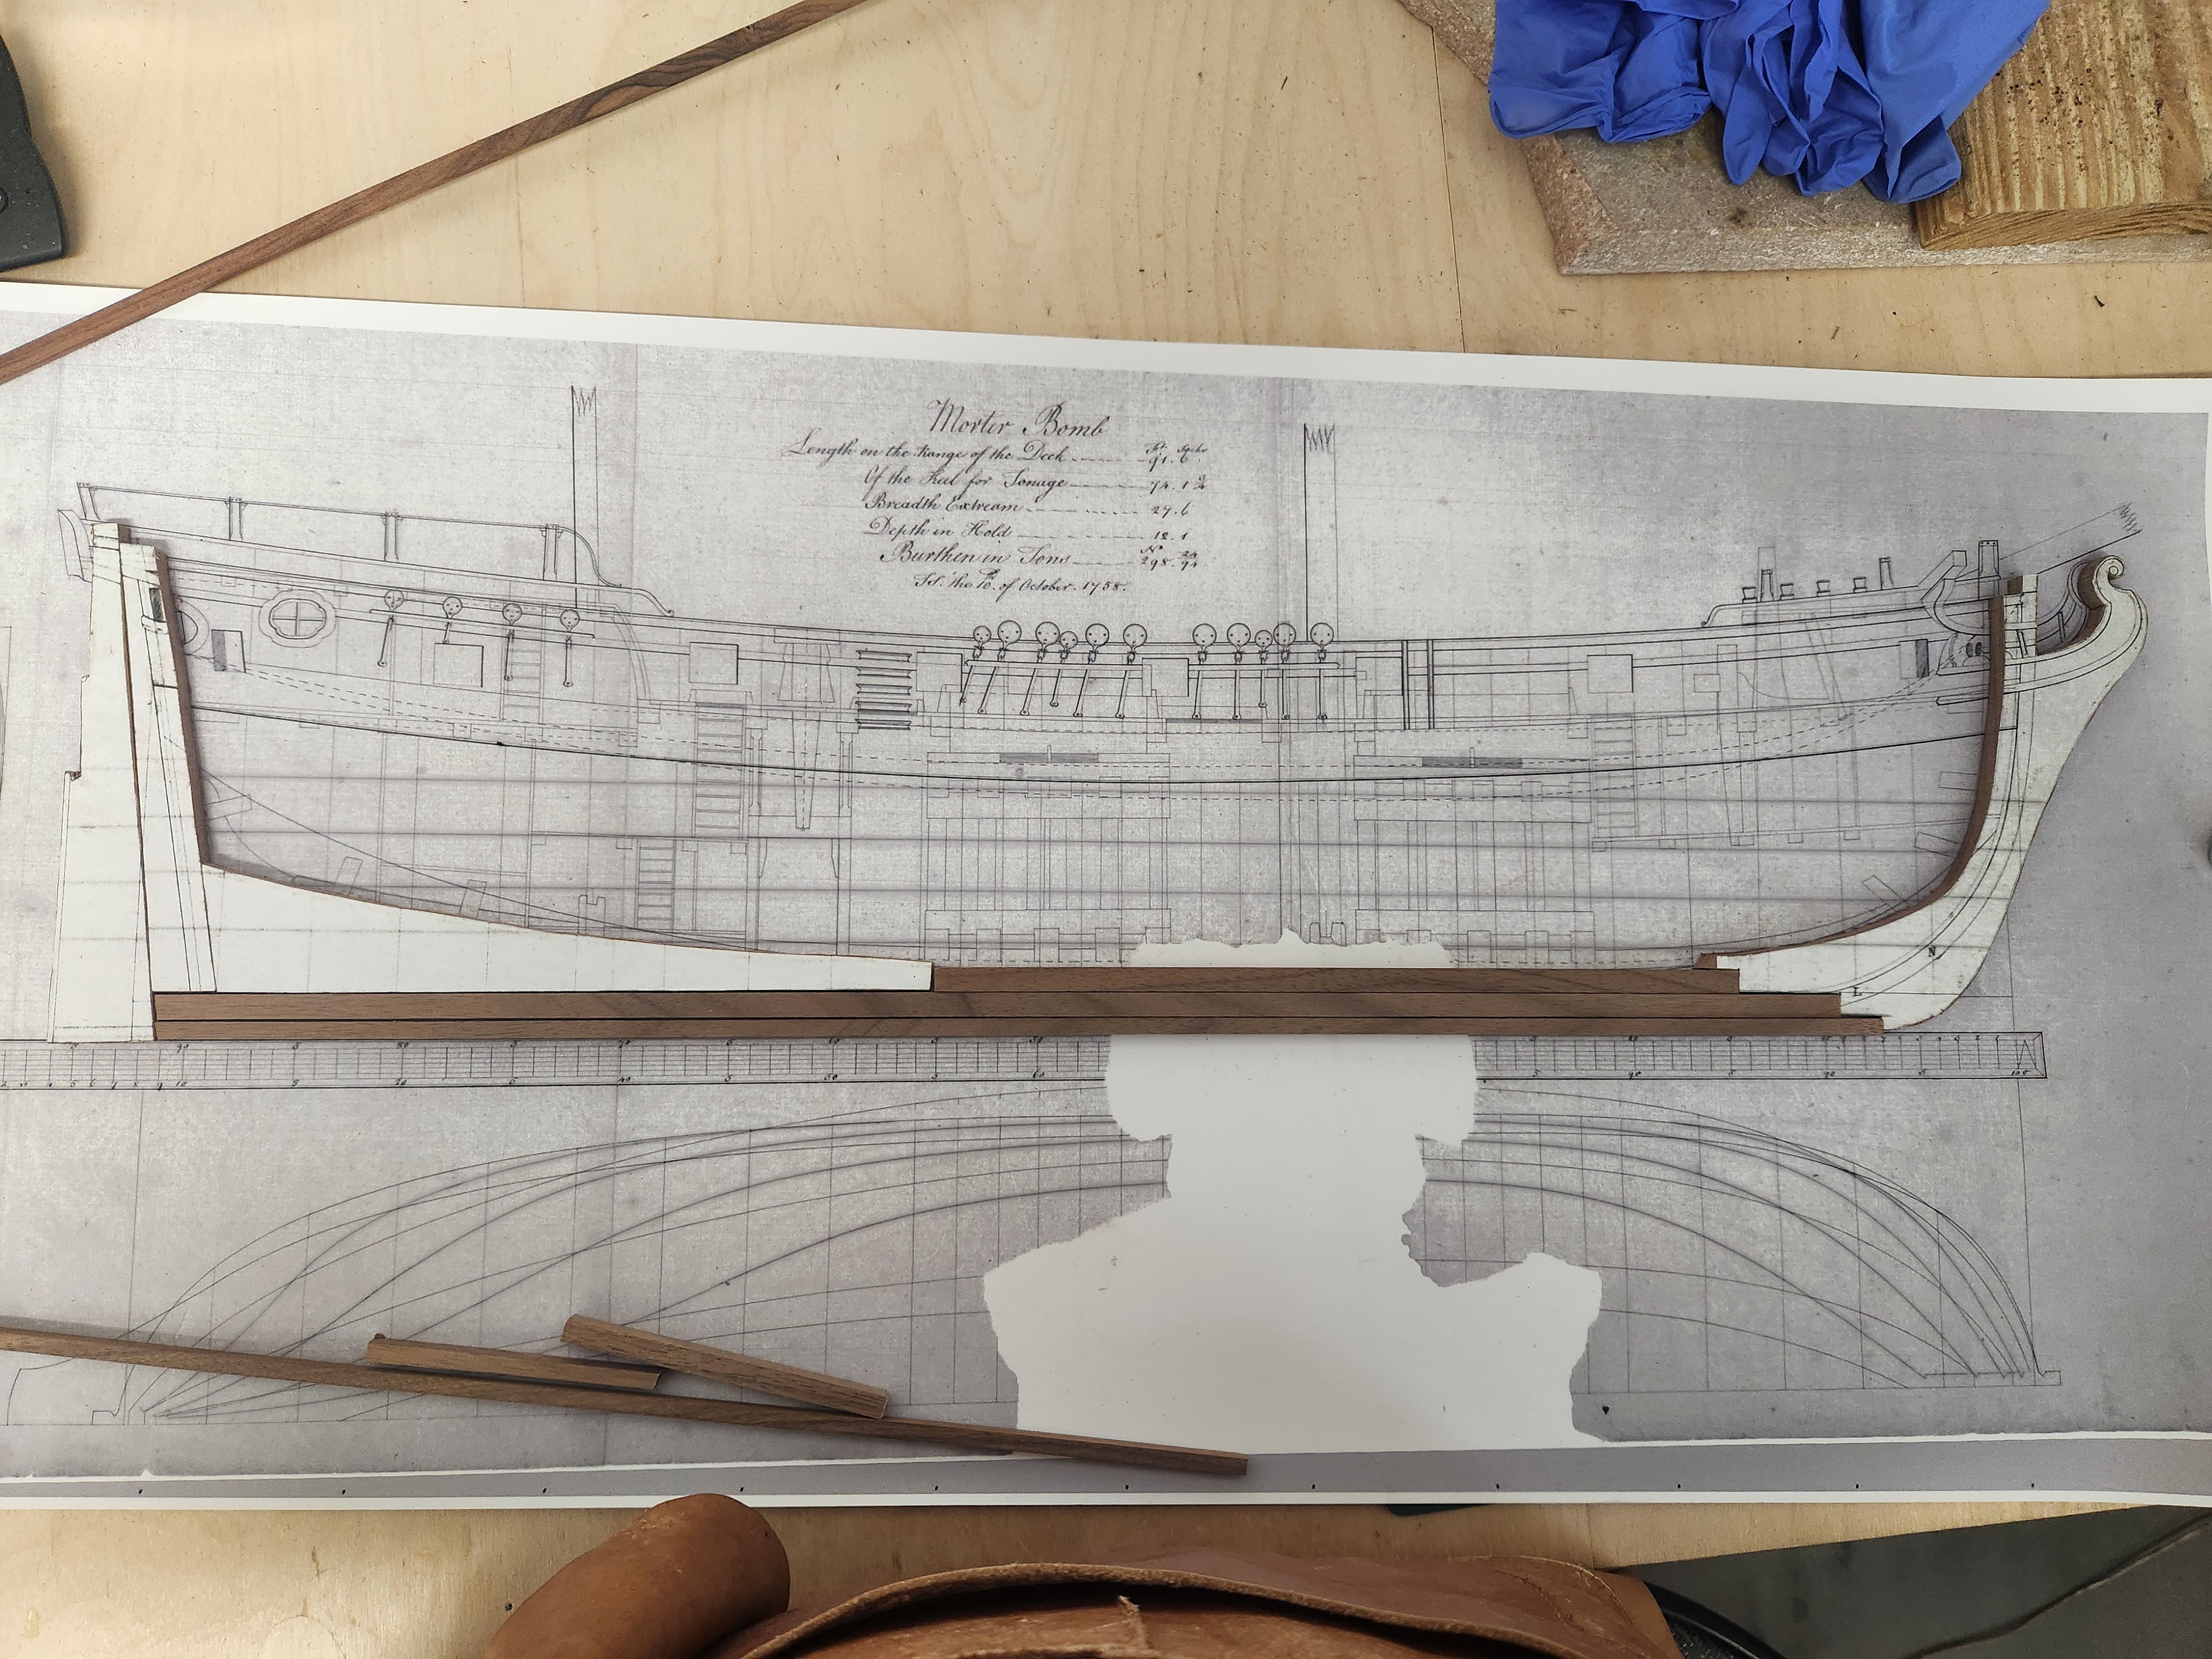
The Carcass bomb vessel saw action in the Seven Years War as well as the American Revolution. Horatio Nelson served on her as a midshipman during the arctic exploration of 1773. The build will be double plank on bulkhead. Plans are from the National Maritime Museum. It will be as originally commissioned with mortars which were removed for the arctic exploration. Rich
-
The Mossy Shipyard by Bryan Woods - 1:1
barkeater replied to Bryan Woods's topic in Non-ship/categorised builds
Congratulation. I redid part of a barn two years ago for my workshop and love it. Rich -
Question re: Rigging Multiple Blocks at One Location
barkeater replied to GGibson's topic in Masting, rigging and sails
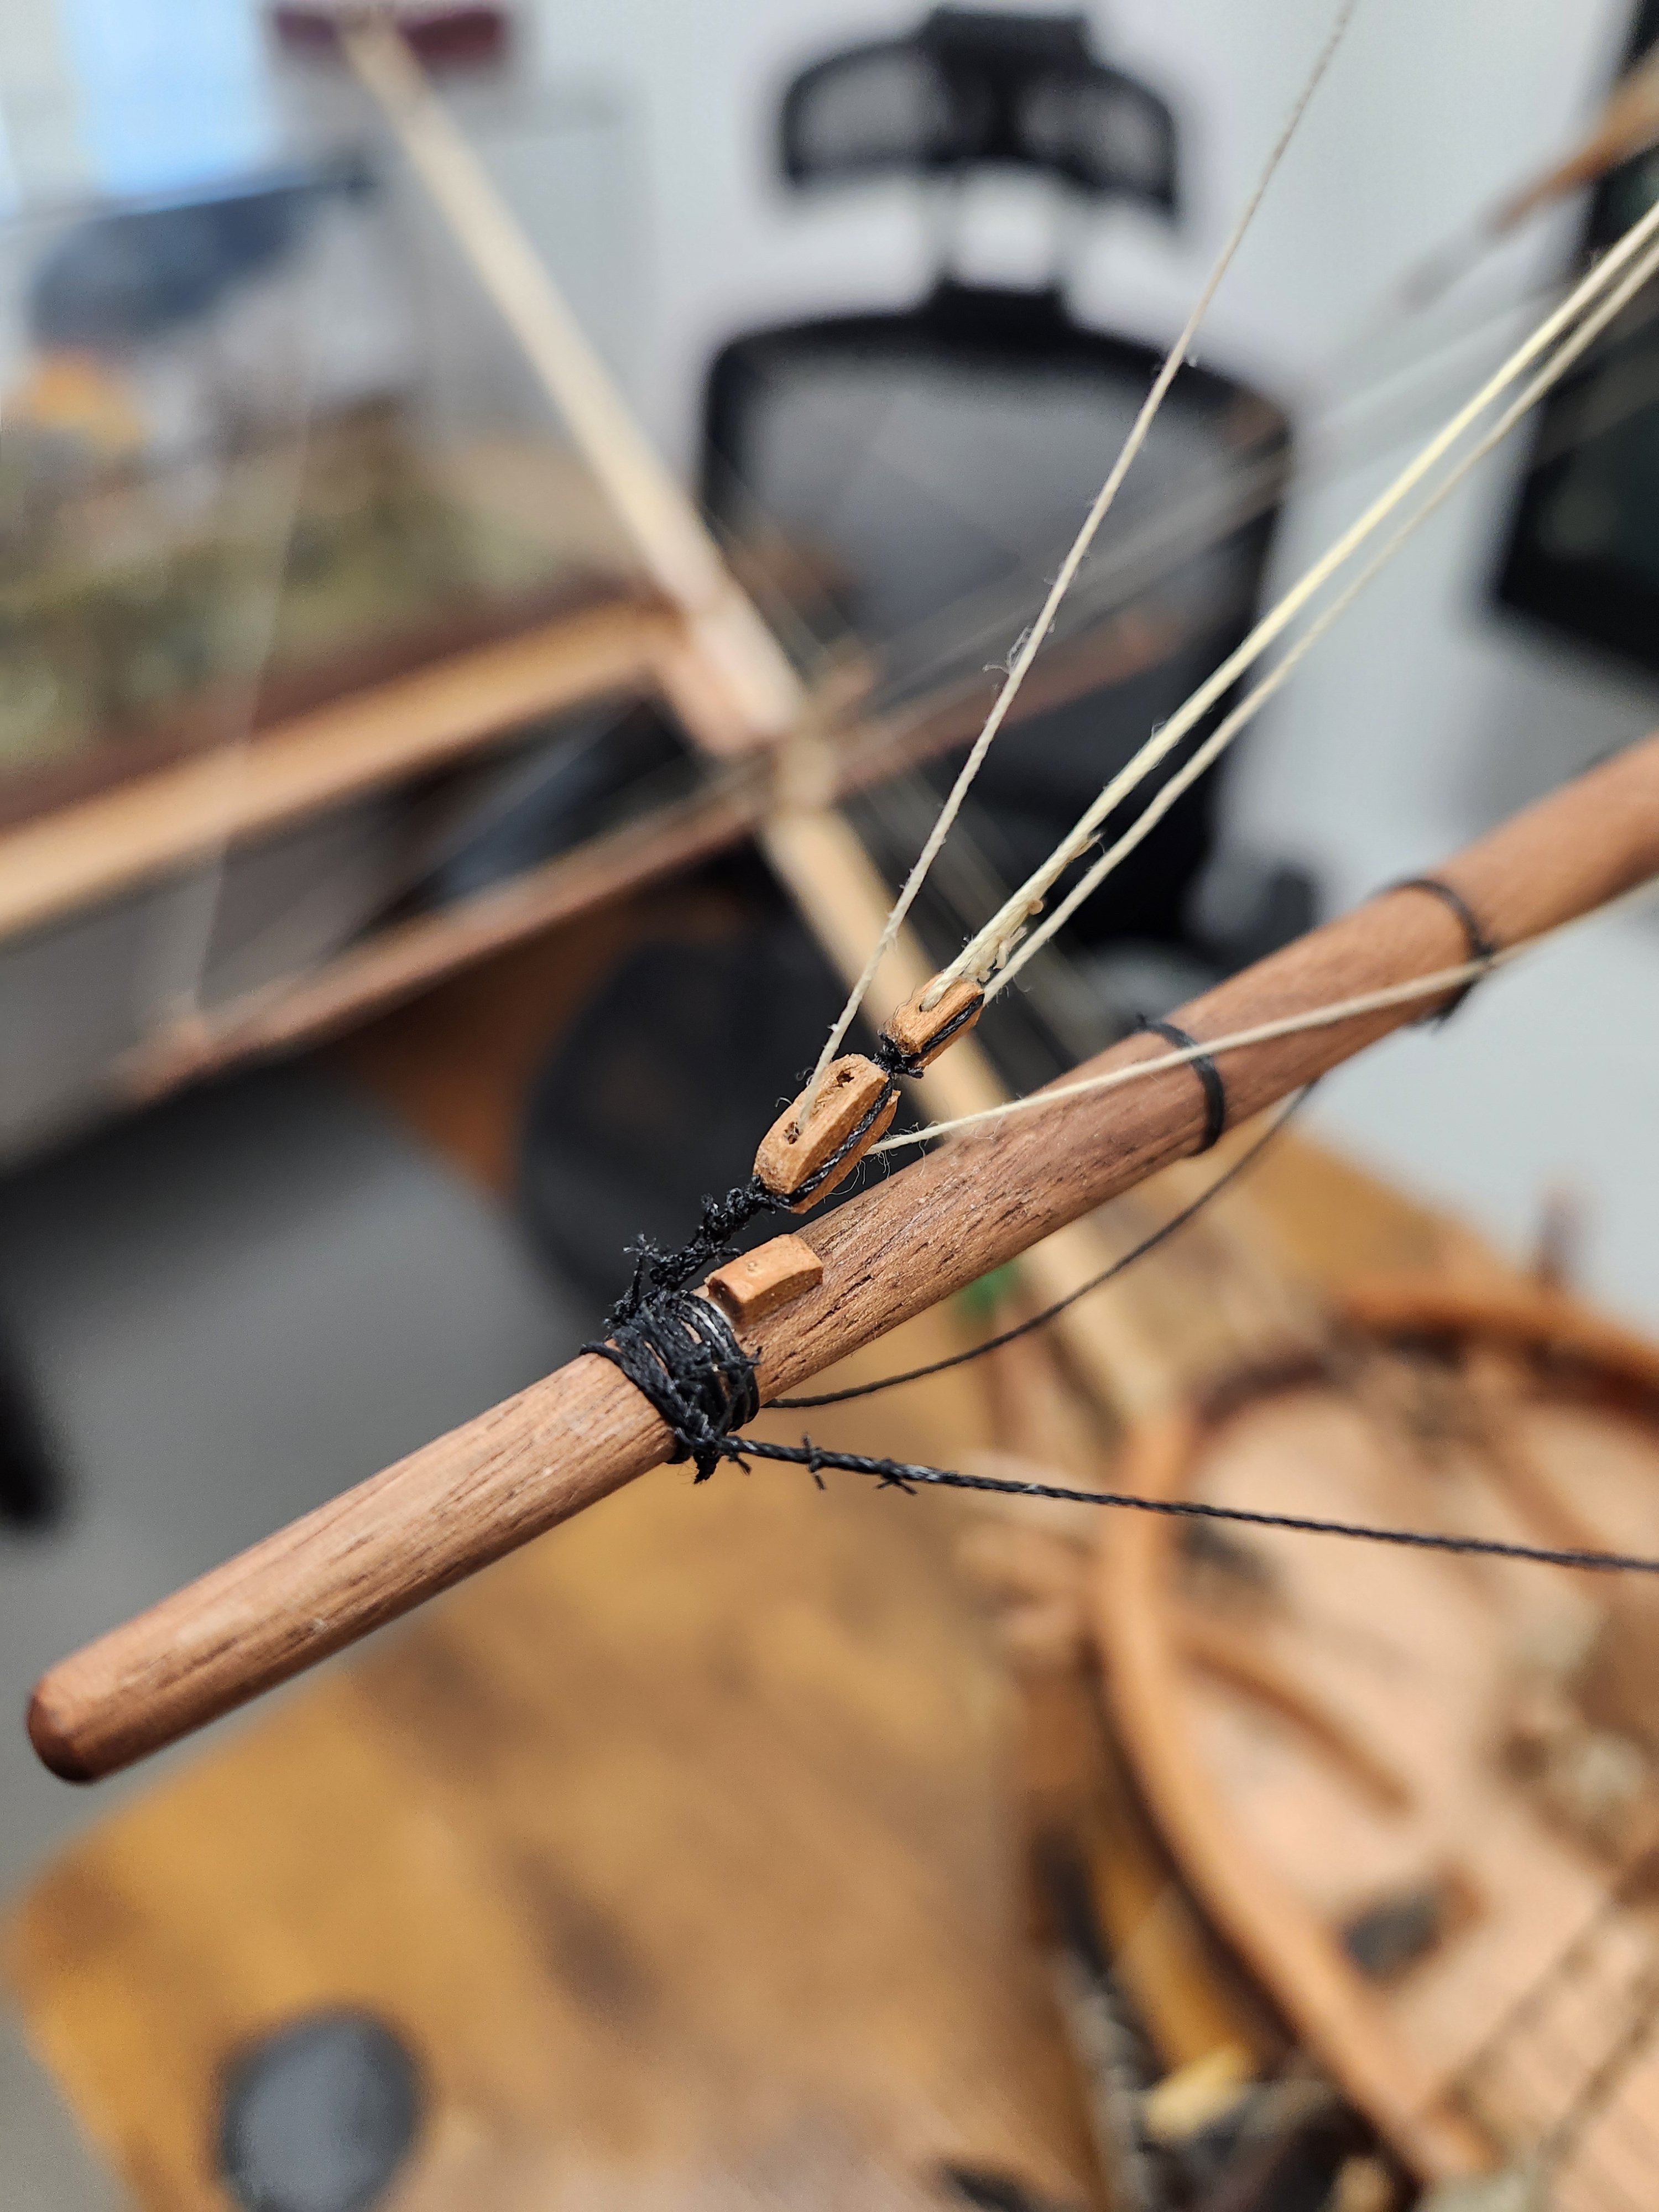
Gregg, I noticed in your drawing that there isn't a yard arm cleat. I don't know where you are on your build, but these help your lines from slipping when under tension. They are a lot easier to do before the yard is hung. They are easy to fabricate, I first drill the cleat for the trenail. Then I glue it in place and drill into the yard itself then insert a glue coated trenail. They varied over time and country of origin. The ones I did would be from 1660 to 1815 according to James Lees "The Masting and Rigging of English Ships of War Rich
-
Question re: Rigging Multiple Blocks at One Location
barkeater replied to GGibson's topic in Masting, rigging and sails
Easier would be to do each block on their own line going round the yard twice then lashing the afferent and efferent portions tight to grip the yard. If you do the two-block idea one line with the third used to tie it all together it becomes more complicated. Especially tying in that third line while keeping the other two tight to the yard. For looks you want all blocks to have the same length, and this is a lot easier to do doing one at a time. Added to this, you want your port to match your starboard. Easier to get it exact if you match up port and starboard blocks one at a time. If you really want to put 2 on 1 use a clove hitch and do the third separate. Rich -
Whats the best book on rigging for a beginner?
barkeater replied to Stuka's topic in Masting, rigging and sails
Well, not a lot of Petersson fans out there. In 1/64th scale you are not going to be able to copy exactly how the rigging was done. Be aware that some of the knots at that scale cannot be seen or identified with the naked eye. Rich -
Whats the best book on rigging for a beginner?
barkeater replied to Stuka's topic in Masting, rigging and sails
Try, Lennarth Petersson "Rigging period ship models" Rich -
I install all sections of the masts and platforms prior to adding the shrouds. Even if you tied in the shroud just distally, you still have to have the platforms in place as your lines need to go outside of the crosstrees and bolsters. Plus, you attach the shrouds in a specific order. The order could get messed up if hanging free for any length of time. You have to leave enough room to fit in the heel of the topmast or topgallant and this is tight. Easier to fit the lines one at a time rather than all at once and still keeping them looking neat and in correct order. Also, the topmast and topgallant have to a fit tightly together and adjustment with shrouds in place may make it more difficult. You want to get your masts all aligned midline and with the correct angle. I feel for me this is easier to set this up all at once and glue it rather than doing it in stages. Rich
-
Need thread about 0.1mm in diameter
barkeater replied to Doug McKenzie's topic in Masting, rigging and sails
You could try fly tying thread. It comes in many colors and thicknesses. Rich -
scissors, shears, cutters for rigging
barkeater replied to palmerit's topic in Modeling tools and Workshop Equipment
I use fly tying scissors to cut the thread I use to splice or seize the lines which is 6/0 or 136 denier. For cutting the lines themselves which are heavier I use Bonsai scissors. Rich -
I've used Mahogany on builds. You are correct in that it has a tendency to crack or split when bending. I soak in water or steam in the microwave in a wet paper towel then use an electric bender. If using the microwave be sure not to put your face in the steam as I found out I was allergic to Bolivian Rosewood this way with a rash that looked like poison ivy. My advice is to bend it in stages if it is cracking on you. Put a little bend then resoak or steam and bend it a little more until you get the bend you need. I also use Ebony which wants to split a lot and I get it to work with the same technique. Rich
-
Actually, your planking for a first build is not bad other than you needed to taper more. You can either taper or drop a plank. Tapering won't look good but since this is the first planking of a double plank, it won't show. Dropping a plank at the bow and perhaps the stern would also work and again since this is the first planking, it won't show. Either way just try to get it smooth without using too much filler. For your second planking I would suggest the following. You should have 17 planks if the final plank width is the same as the first planking. You can divide up into battens but with only 17 plank runs what I would do is measure in mm the length you have at each bulkhead. This gives you the taper you need overall for the hull. . Pencil the numbers on the first planking right at the bulkheads where you won't be affixing the next planks. Do a run of say 4 or 5 planks and then remeasure and adjust your taper. Another 4 or 5 and remeasure. This allows you to taper gradually and not plank yourself into trouble with the taper. I used this on my Badger and L'Unite and prefer it over dividing up into battens. Rich
-
Another vessel from the revolutionary era that was probably colonial built was the armed brig, Badger. This may not fit you needs as it was Admiral Nelson's first command seeing service during the war in the West Indies.
-
The lines you indicate are not actually part of the shrouds but rather separate single or double blocked lines whose blocks are hooked or spliced to eye bolts in the channel. This arrangement would be used for yard lifts, braces, tyes, clue lines et al. The use of blocks allows for tension adjustments to rigging or raising and lowering of the yards. Your rigging plans should show further elucidate their relationship to the masts or yards Typically, they would be tied off to a belaying pin, cleat or stanchion. The one in the middle in this case has the line originating from the single block at the channel then spliced to the line going from the other block through a third block and the probably belayed to a pin rail. Rich
-
Modelers Central carries Beech strips. Just checked and they have 14 different sizes in 950 mm lengths. Unfortunately, in 1 mm the widest they have is 5 mm. I've ordered from them before and was satisfied with product and shipping time. Rich
-
I third Chuck's recommendation. If you want to see what beech decking looks like, look in thread "snapshot of members current builds". I've put a few pictures of L'Unite in there as I've been doing the build and it has beech planking. Rich i also secom
-
My newest Challenge
barkeater replied to James Flynn's topic in Building, Framing, Planking and plating a ships hull and deck
The right side is the bow, and the left is the stern in the first image top left. The figure directly below is a puzzle to me as it is different. Maybe somebody else knows. Also, the lines are not the ribs but rather depict the contour of the ship. Ribs are more numerous however if you are going to do a plank on bulkhead and not a plank on frame, you can use the lines for your bulkheads. Richard This was already answered as I was formulating an answer. Did not intend to repeat. -
Problems with blackening brass
barkeater replied to Desertanimal's topic in Metal Work, Soldering and Metal Fittings
The brass blackening agents work as a powder coating on the surface and therefore could be and was pulled off when you stuck tape on. You can help keep the powder coating on by using a sealant. I always give any blackened part an overcoat of Testor's Dulcote (non-shiny) which locks it in. The more you handle blackened parts the greater the risk of removing the coating and I would never use tape on them. Richard -
Hello. I'm assuming that you want to use the pin pusher for planking. Please correct me if I'm wrong. Having said that, you will find two groups of people here, those that use pins and those that don't. I'm in the latter group. I use an electric plank bender to get the shape to the plank I'm working on and then just glue it with wood glue. If correctly formed you can just hold it place for a minute and move on. For really tricky spots add a tiny bit of cyanoacrylate which sets up in seconds but be careful as it stains wood and is hard to sand out as it penetrates. With pins, you risk splitting the wood and, in most cases, they have to be removed. Pins also leave holes so if you are doing your second layer in a double planked model you then have to deal with the holes. I do use pins to attach furniture and where I want to simulate a bolt, but that is about it. I do use tree nails on my second planking but here I glue the plank in place then drill a hole with a pine vise and insert the tree nail. For your info, a #72 drill bit usually works well with the pins you get. Have fun and best of luck. Richard
-
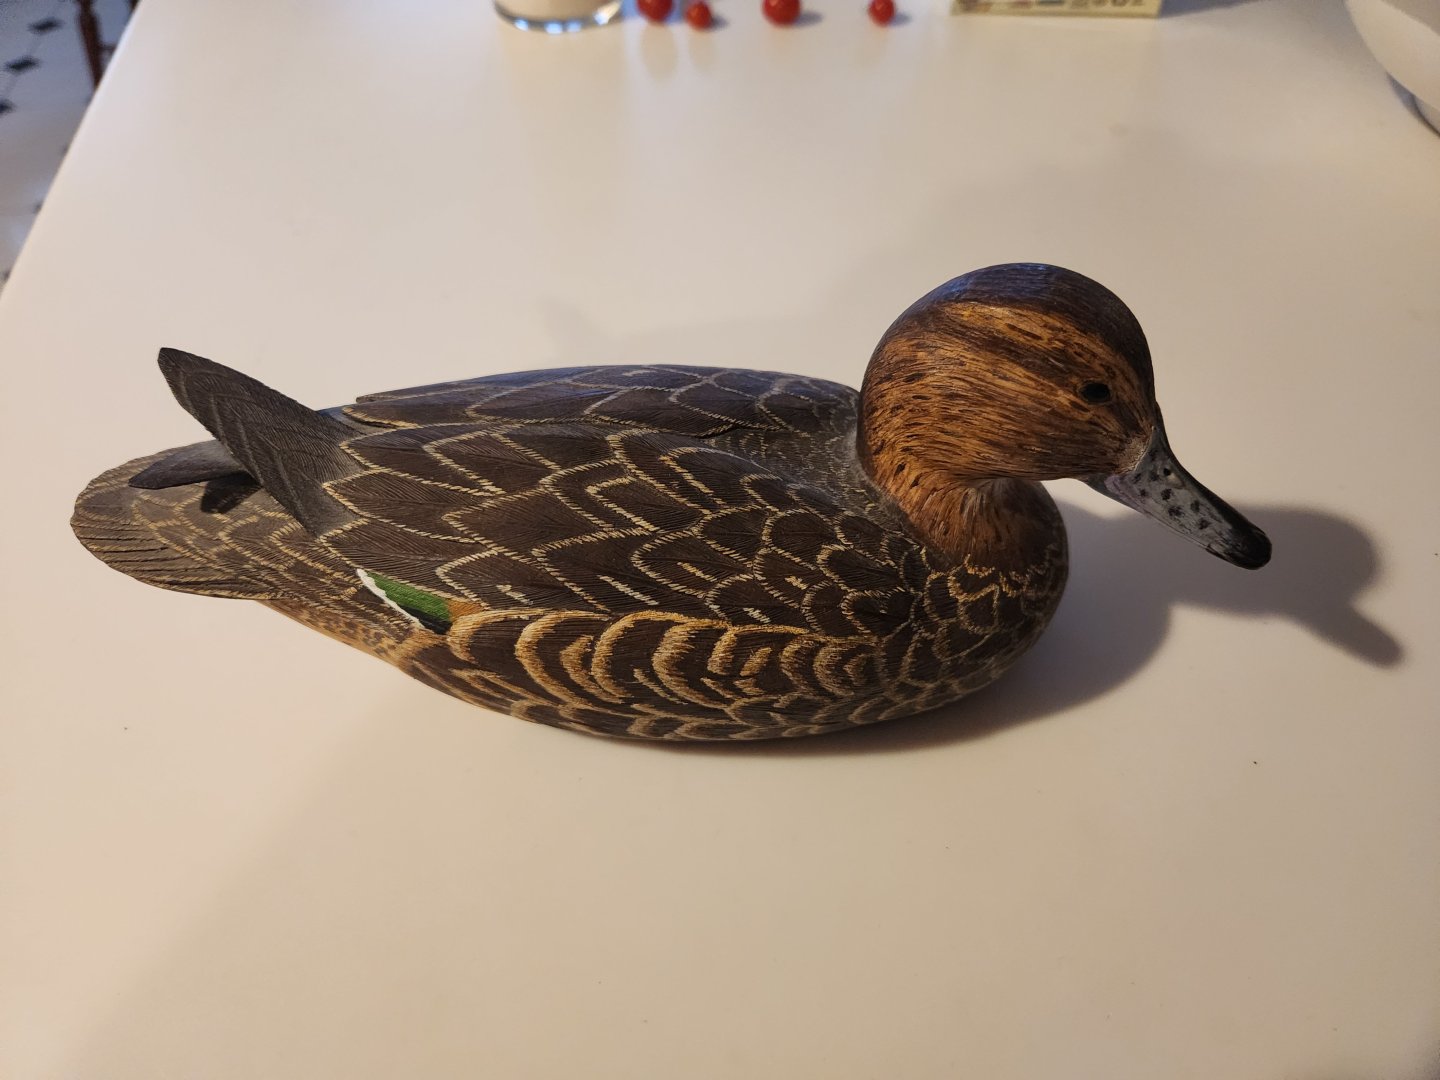
As a follow up, this is a green wing teal hen made from basswood. I used gesso from an art store and painted over. None of the detail was lost. Notice that you can make out each individual barb on the feathers which had been burned into the wood using a hot knife. I don't know if this would work for you but gesso, at least in my hands, does not obscure detail and gets rid of the fuzzies. Richard
-
Duck carvers who use basswood almost exclusively use gesso as an undercoat to acrylic paint. It gets rid of the fuzzies and gives a nice clean surface to paint over. I don't use basswood except internally, and I don't paint my models except decorative pieces, but I have used it in carving decoys, and it worked. Richard
-
You are talking about the checkerboard pattern floor covering depicted in captain's cabins. This was made from painted sail canvas. Richard
-
In answer to the matte finish question,. The one I use Testors Dulcoate is brushed on. It does coat nice and evenly if that was your concern.
-
Rik, To get the best results, put the parts in acetone (nail polish remover), then into distilled water and finally into the blackener after drying. Don't touch with your hands. I coat them after drying with a matte finish (testors dulcoate) which I feel helps to lock in the coating. If I have not gotten sufficient blackening when I take them out of the blackening agent, I just leave them in longer. Also, the thicker the wire I'm using seems to take longer. I can't think of an explanation for this, it is just an observation. Finally, I've found that even though two pieces are supposed to be the same metal (brass, copper, silver) if they are from different sources they will blacken differently. Your model looks great. Rich