DONATION DRIVE - SUPPORT MSW - DO YOUR PART TO KEEP THIS GREAT FORUM GOING!
×


barkeater
-
Posts
411 -
Joined
-
Last visited
Content Type
Profiles
Forums
Gallery
Events
Everything posted by barkeater
-
I'm with you on the unpainted wood. I have used both walnut, and cherry for planking as well as red heart, mahogany, yellow heart and ebony where appropriate. I like birch for decking, but I know others don't like it. For accent and decorative areas, I have used bubinga, purple heart, leopard wood, rosewood, tulip and even maple. Carving and complex curves I go with pear which is easily workable but lacks any grain detail and frankly looks boring to my eye. I like it when you can see variations in color and grain when going from piece to piece and pear is monochromatic and dull. I'm sure there are some others I use which I can't recollect now but as you can see, I like to use a variety. Rich
-
Welcome to the forum. Sounds like you've got a good start. Rich
-
Trouble with scuppers
barkeater replied to wmherbert's topic in Building, Framing, Planking and plating a ships hull and deck
I never realized they were painted. Since they were made out of lead, I always assumed they were. grey and make them out of brass coloring them using brass black. Since I like the look of natural wood with trenails visible, I don't have to worry about matching paint colors as I only paint decorative carvings. Rich -
Construction of Masts for 18th Century 'Ships of the Line'
barkeater replied to tmj's topic in Nautical/Naval History
To give the complex construction appearance to the mast I used the wood (? cedar) from a box of cigars where they use it to divide the top and bottom layers of cigars. It is really thin and flexible., I did not need to cut into the mast to fit it. I just cut it to the shape I wanted using the illustration Gregory shows above, wrapped it around and glued it in place using pva. Richard /\
-
Estimating the size of a mast top
barkeater replied to Dan DSilva's topic in Masting, rigging and sails
If you want to do a round top, from Lees "Masting and Rigging" Appendix I "When round tops were carried the following were the proportionate widths of the bottom of the tops based on the length of their respective topmasts: Main 0.28, Fore 0.29, Mizen 0.27 and Sprit 0.4." Hope this helps. Rich -
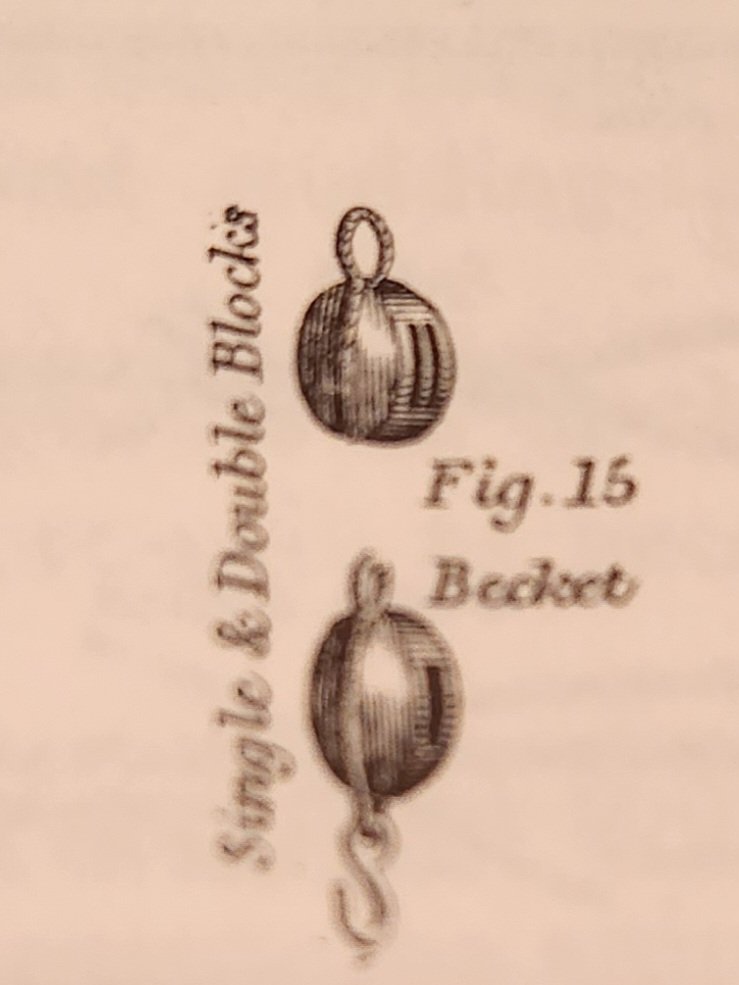
Bill I was not quite sure what you were referring to at first. The picture is from Biddlecombe's The Art of Rigging. I don't do beckets to connect the block to a line. I will form a loop when attaching to an eye or hook doubling up the line after it has run through the eye and seize both the going and coming portions together. I work in 1/48 scale with my single blocks measuring 2x2x3.5mm. In forming a loop to attach to a line, I'd have to form the loop around something the diameter of spaghetti for scale and you really would not be able notice it unless you used magnification. I try to put as much detail into my work as possible but for me, putting in a becket for a block to line attachment just doesn't seem to be worth the added time, effort and aggravation. I attach the line (example: yard lift) to the block continuing the end of the line around the block as the stropping and then seize it to the line as I described earlier. Rich
-
Bill I use thread for stropping my blocks. I make my blocks with a groove to fit the thread Then I serve or secure the two ends using smaller thread (fly tying thread works well) with multiple overhand knots (5-7) and then hit the knot and the stropping block thread lying in the groove with thinned pva (wood glue). I the snip one of the two ends. The other end is your rigging line, or you can attach to an eye bolt, hook or whatever. When a block is part of the chains, I use silver wire which I mold around the block to the correct shape then remove the wood block, silver solder and blacken with brass black. Rich
-
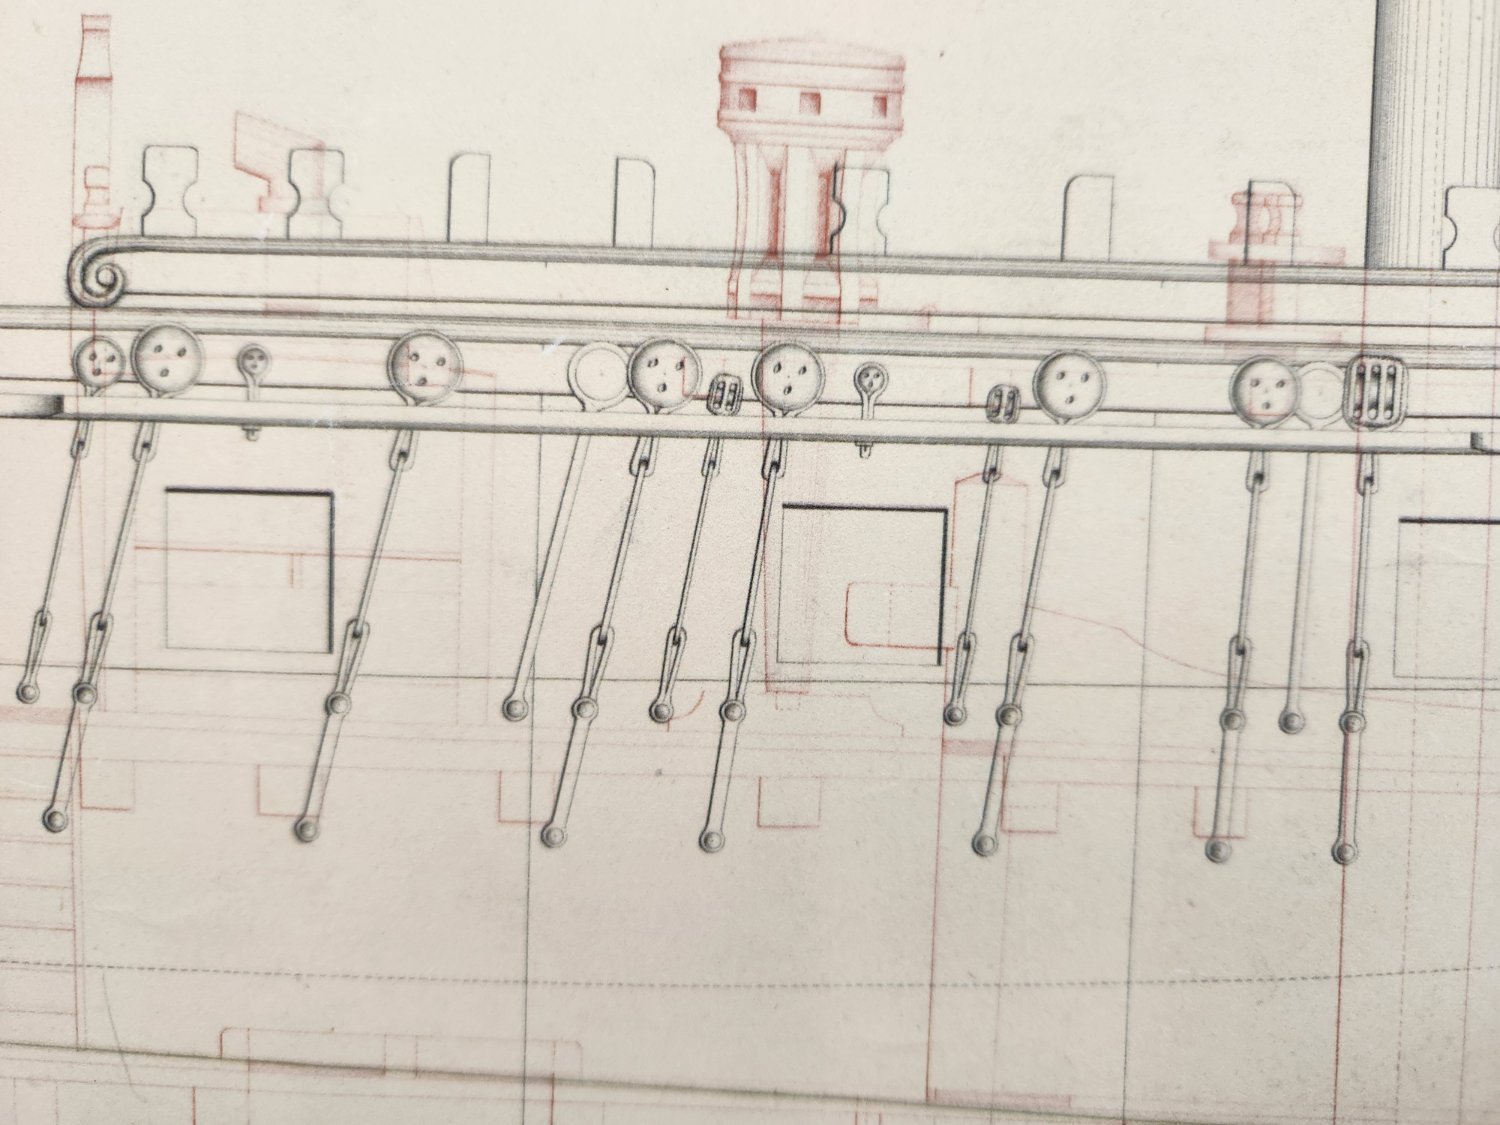
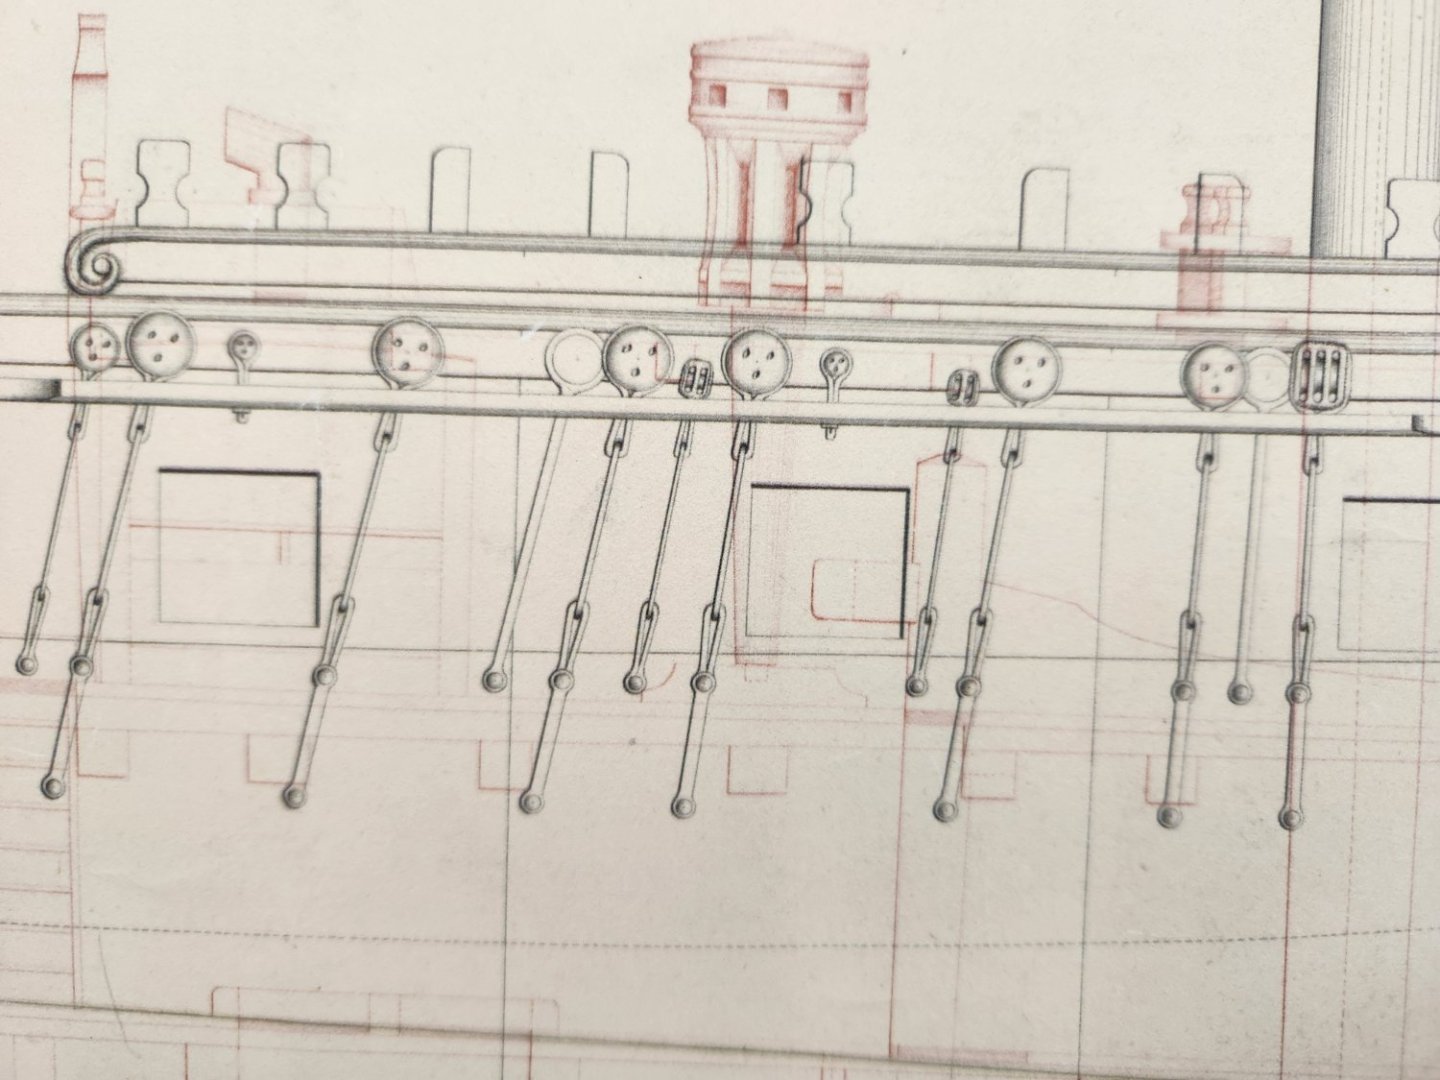
I've looked at the picture again. The shading noted comes from the wood and not the rim so therefore it is perfectly consistent with the hoops being empty. The different shading, I think is a draftsman's color key to either these being on an inner row, as they overlap with adjacent deadeyes, or denoting that they were not functioning as deadeyes with the standing rigging. The inboard structures are depicted in red as a color code. Also, they are depicted as having a strip of metal rather than chains. There is one in the mizzen chains which is identical except smaller. Why would the draftsman render them one way and then have to come back, erase the metal strip and then redraw with chains? If he did not finish them, you would see chains. I do agree that the edges of the wales do not extend through and can't fully explain this. It could possibly be that they used stamps to indicate deadeyes and similar structures on the draft and this did not allow for a see through. Not sure if or how stamps were used but it makes sense that they would be. Or it could be that they had a flat piece of wood in them, but this would render them useless. If empty they could be used for belaying or in hauling lines. Richard
-
Druxey, Thanks. I would never have guessed that they were metal rings with an empty center. Do you have any idea of their use? They are bolted to the ship so it looks like they were meant to take a line. Richard
-
Well done Druxey. She did have 32 canons however she also carried 4 carronades on the foredeck. Richard
-
The vessel is the Unite built 1787 and those plans are the "as taken". She was French built and then captured by the British. She was refitted with alterations and relaunched retaining her name. She carried Admiral Nelson to the Mediterranean to take over command of that fleet. I am building her according to the British retrofit plans wherever changes are shown however the chains are only shown on the pre refitting plans so I'm going with them. She was rated as a 36 gun ship by the British. Plans are from the British Maritime Museum. Richard
-
Need a little help. While there are deadeyes and sheaves illustrated, there are also rounded shapes like deadeyes but they are not pierced so they could not be used as such. Also their strapping is different. Does anyone know their use? Have tried to look them up in various books but can find nothing.
-
Microfiles (flat) work well for squaring up the cap. Agree, that if you are starting with a square and then tapering to a round, your cap has to be cut down to be smaller than the tapered mast so it does not get you out of cutting it down. If you start with a square piece, just round it, taper and then square up your cap. Alternatively, you could just taper a dowel but just be sure it is straight and not warped before you start. Richard
-
Wood putty from your local hardware store would be fine. Just be sure that your gaps are not to big as your want to glue your second planking to wood and not putty which does not have the holding strength. Also sand well so you have a smooth surface without bumps or ridges. Richard
-
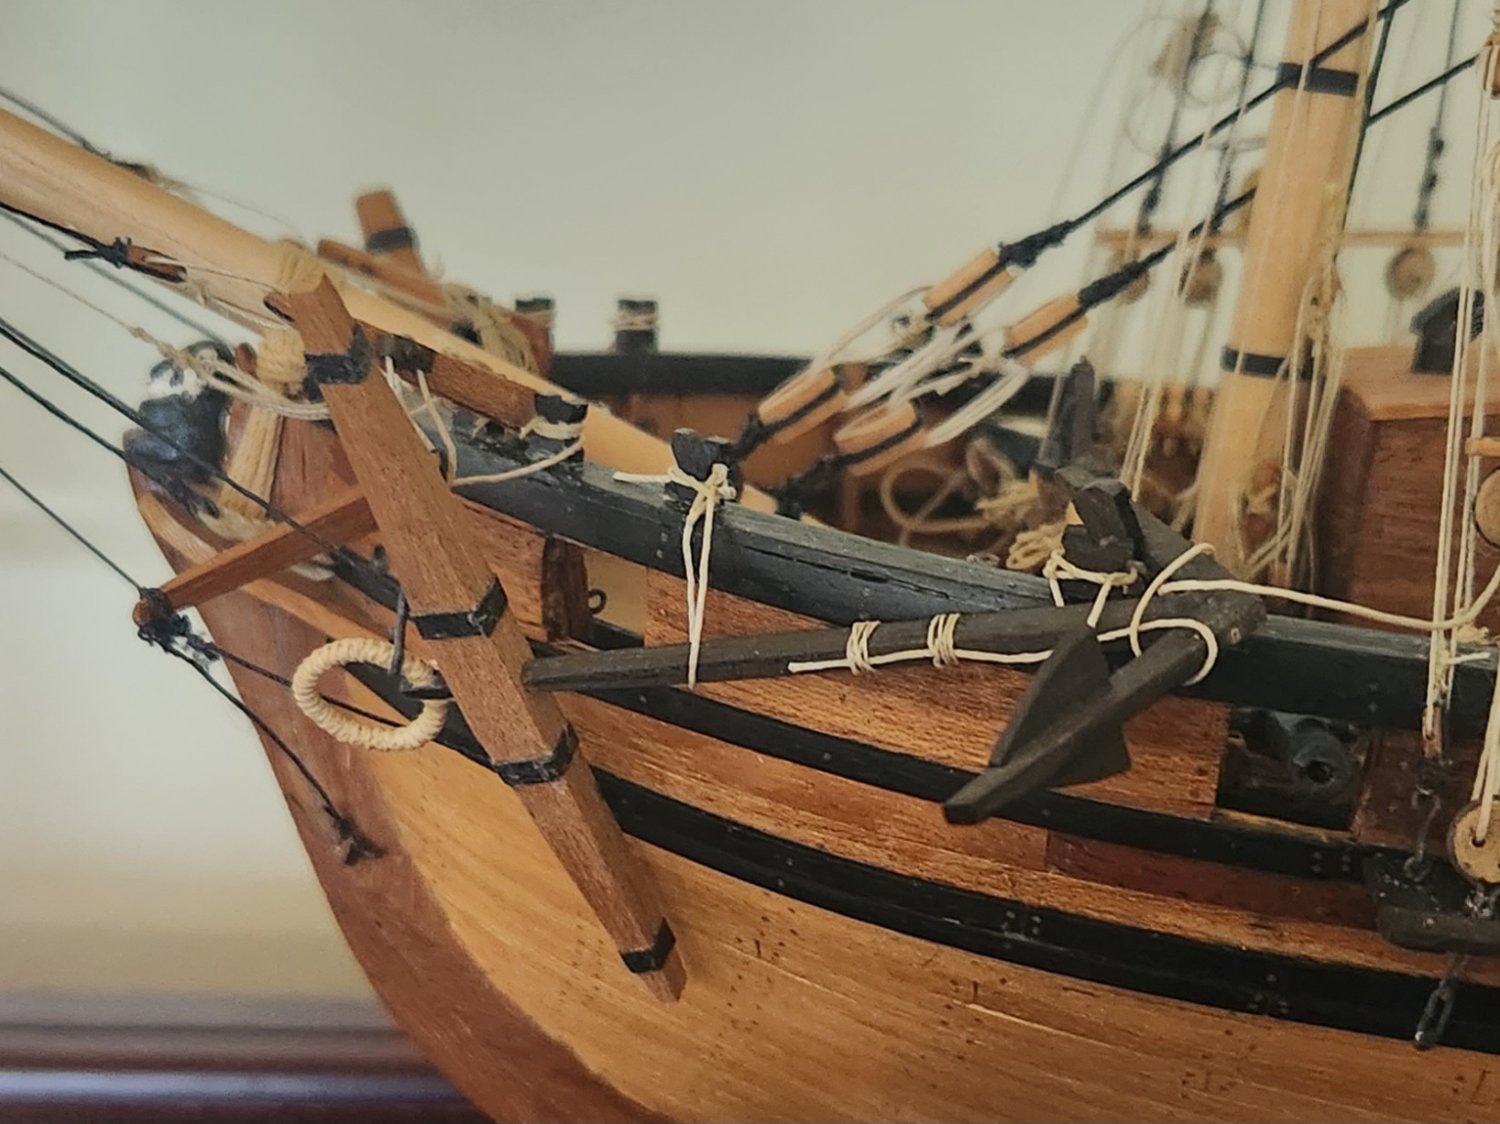
As an alternative, this anchor was made out of ebony and shows the puddening. Richard

-
Gluing on planks
barkeater replied to rudybob's topic in Building, Framing, Planking and plating a ships hull and deck
Are you heat bending your planks. If not then that might be your solution. I don't use cyanoacrylate just white (carpenters glue). CA I'd bet is causing your quick drying time. Richard -
I'm sorry but I have no experience with plastic ship modeling. Hopefully someone can answer your questions. I would think you would install the deck before priming and paint your cleats and other items before attaching but these are only guesses. Richard
-
Which vessel/ kit? You'll get better answers if we know exactly what kit you're asking about. Richard
-
Shaving down planks
barkeater replied to rudybob's topic in Building, Framing, Planking and plating a ships hull and deck
If you are talking about tapering a hull plank, then yes. Also put the tapered edge against the already done course of planks and leave the unshaved plank free. Doing it this way lets you know if your taper is clean of bumps or dips rather than find out that you need to redo or touch up the shaved edge after you've glued it in place. Richard -
The trick for me is holding (mashing) it down with a probe angled across the coil while I make the next coil with another probe or tweezer. You have to keep pressure on all the time then hit with a drop of the pva and put a weight on top until it dries. Also there was a thread awhile back on making a jig out of wood which you should be able to find. Richard
-
Grant, I agree with Henry on the use of fly-tying thread for your seizing's if that is what you are asking. It comes in many colors so matching your line should be no problem. Size 6/0 should work in most cases. I work in 1/48 scale. What scale are you in? I seize by making a loop of my seizing thread, passing the thread through the loop 3 times and snugging it down. Then I do a double loop and snug it down and finally an additional double loop and snug it down. These have all been laid touching one another but not overlapping. Then I hit them with a 50% pva to water solution, let it dry and snip my loose end. The results look good simulating the 7-9 turns Henry noted, and you do not add any significant bulk to ruin the outline. Richard
-
New member, long time ship modeler
barkeater replied to Old Navy's topic in New member Introductions
Welcome aboard. Richard -
Thanks for posting the pictures. I'm a little further from Portsmouth. 😁 Richard
-
I'll second the scroll saw recommendation. What you can use are wood sheets. They come in about 20-24 inches in length and say 4 to6 inches in width with various thickness options (1/8, 1/4, 1/2 inches). There are many varieties of wood that you can get depending on your needs. I have used Modelers Sawmill which is one of our sponsors and was very pleased with the pear wood I got. I have also used Rockler and they are good. I have also bought wood elsewhere which was not planned evenly causing me a big headache. Strips for planking can be purchased from multiple sources. A thickness sander is great as is having a mini table saw to rip planks but if you are just starting scratch building then a scroll saw should be your first purchase. As for having somebody cut out the keel and frames, I would think that if you even found someone to do it, the cost would be prohibitive. Richard
-
Good evening from New Jersey USA!
barkeater replied to Funkingonuts's topic in New member Introductions
Welcome Michael from another Jersey guy. Richard