HOLIDAY DONATION DRIVE - SUPPORT MSW - DO YOUR PART TO KEEP THIS GREAT FORUM GOING! (Only 36 donations so far out of 49,000 members - C'mon guys!)
×


Shipyard sid
-
Posts
1,106 -
Joined
-
Last visited
Content Type
Profiles
Forums
Gallery
Events
Everything posted by Shipyard sid
-
 Hello Keith Thanks for visiting my log. It looks like things are going very well with your build. Good luck with your coppering Keith. DAVID
 -
Greeting everyone Well I am still on my journey around the hull tidying up and repairing the gunport lids etc. I started to fit the davits on the starboard side but messed them up and binned them, so I will return to them later. I have reached the stern facia after touching up the paintwork on the quarter gallery, and had to refit some of the trim that had came loose on the facia itself. Tonight I fitted the three stern lanterns and will now start to work my way down the port side hull. Here are a few photos of the lanterns which completes the facia. Thanks for your comments and for viewing . Here's a few photos. DAVID
- 439 replies
-
- 8
-

-
- victory
- caldercraft
- (and 1 more)
-
Hello Jerry Well you are still moving along at pace. Yep this is when those rigging lines start to really get in the way, and you start going cross eyed. Well done with all your yards , you will soon be back at the pointy end, or in my state the blunt pointy end. I have just finished tidying up the stern facia and adding the 3 lanterns. Keep enjoying it. Slowly and very carefully now. DAVID
-
Greetings Erik Looks like everything is coming along fine, and join the club with the stern facia. I reckon we have all damaged it. It's no problem as you will be fitting the second skin over it later in the build and all is hidden. Keep enjoying it DAVID
-
Greetings chaps Thanks a lot Lawrence for your your visit. I just been reading your log and your progress is excellent . Thanks a lot Boyd, you just take your time, your build is something special. DAVID
-
Hello Jerry Yep I got that article off you a while back. I think I have got it sorted . We have just been talking about the size today , and the admiral asked me if I could shorten the pole at the front to make it a bit smaller. DAVID
-
Greetings all Thanks for viewing and replies everybody. Jerry I have the davits made and they are a simple fit as is the rigging of them. So I will have two boats hanging there. The other two???? I don't know , but definitely not hanging off the stern. Display case ???? There is a topic on this that may help, DAVID
-
Greetings all Well things have really slowed down now. I have finished all the work I intend to do on the deck apart from a bit of repair work on the buckets , and a broken handrail on one of the stairways . All the ratlines need a lot of attention which will take a while. I am now starting to work my way around the hull from the starboard bow and have repaired all the gunport lids as far as the ships entrance. I have just finished adding the first anchor and next the second anchor and onward to the stern. Thanks for viewing and all your comments. Here's a few photos .DAVID
- 439 replies
-
- 6
-
-
- victory
- caldercraft
- (and 1 more)
-
Hello Boyd It's awesome !! A brilliant build. You are building something special for yourself. Just keep posting lots of photos for us all to enjoy Boyd. DAVID
-
Hello rich Well it's looking very good, and you are certainly buzzing along. Keep up the good work and enjoying your build. DAVID
-
Well hello Jerry. Well it all appears to be going well. Excellent work and soon the mizzen, and then back to the pointy end. I am really working at slow pace now. I am slowly working my way around the hull refitting gunport lids, touching up paintwork and at the moment fitting the anchors, and the davits are ready to fit, so there's still lots to do. I have got to say the amount of progress you have made in such a short time is amazing. Just keep on enjoying your self Jerry ...regards DAVID
-
Hello rich Well it's coming on fine. The plank lengths are 85mm and to create a four butt shift see page 10.......planking the upper deck... Keep enjoying yourself.. DAVID
- 414 replies
-
- 1
-
-
- caldercraft
- victory
- (and 1 more)
-
Hello Paul Yep it's looking really smart . Make sure you can remove the pins after the planking. I am probably totally wrong but are you using an ipad for your photos, or are they deliberately sideways and up side down to show the planking. Keep up the good work and enjoy your build. DAVID
- 708 replies
-
- 1
-
-
- victory
- constructo
- (and 1 more)
-
Hello Boyd Yep the top ones are excellent, and the same quality continues. Well done. DAVID
-
Hello Boyd Well that is really coming on, and those wales look excellent. Well done Boyd. DAVID
-
Hello Gary Well done with your second planking, and not to much trouble smoothing off for the copper tiles later. Keep up the good work and enjoy yourself. DAVID
-
Greeting everybody Not a lot to see considering what I have done over the last few weeks. Everything has been tightened off, and I have completed all the netting. I have started adding the coils of thread whatever the term is, and more or less completed the poop deck, but as you can see the netting has been bashed about and needs a good sorting out, plus the two block and tackle on rear of the driver boom has also loosened off. I have belayed the rigging that runs through hull to the cleats on the bulwarks on the gun deck . So my next task is to start fitting the coils around the main mast area. And guess what I have broke off for the fourth time!!!! ?? Yep the pointy end. This time it goes on last, yes I said that once before. Anyway I shall plod on and one day I will get there. I hope!!!!! Here's some photos , and thanks to you all for viewing and comments. DAVID
- 439 replies
-
- 6
-
-
- victory
- caldercraft
- (and 1 more)
-
Hello woody And here we go with another Victory. I wish you the best of luck with your build, and will follow your log with interest . And my suggestion to you is the same as others will suggest..... Take your time.... Have you got a place to display it ? your display case needs to be approx 60"L x 42"H x 24"W regards DAVID
-
Hello nick Nothing changes, the same excellent standard. The shrouds and ratlines are very neat and tidy. And the gauge works like a dream. I notice you have lost a lot of photos on your log, which as happened on a lot of logs, which is a shame. Keep enjoying your build. DAVID
-
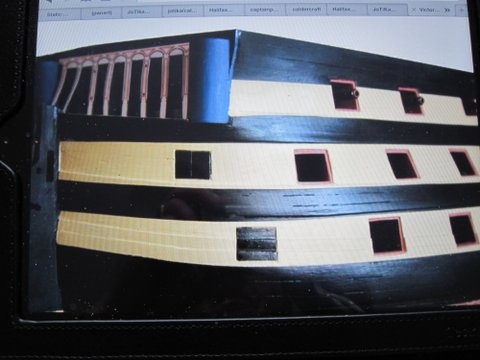
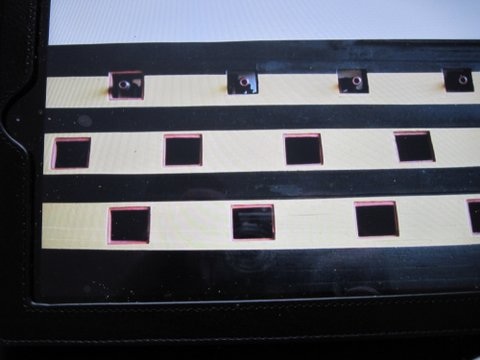
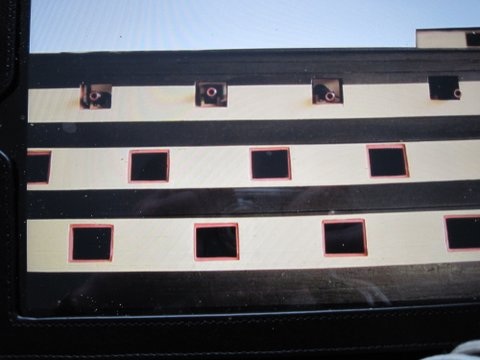
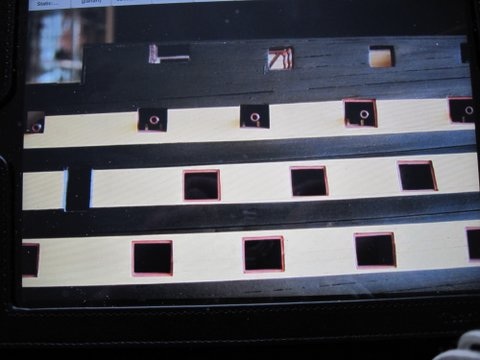
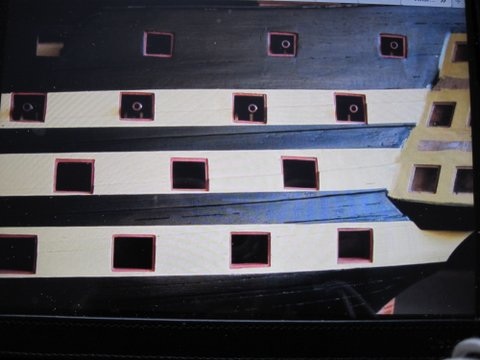
Hello Boyd It's looking very good so far. Well done. I just noticed Keith mentioning the run of the wales to you. Here are five photos showing the run of them from bow to the stern in sequence, but not size wise. However the photos do help to follow the run of them in conjunction to the gun ports if you understand. Keep enjoying your build...... DAVID
-
Hello rich Good that you have got your quarter galleries sorted. You can if you want leave them without the skins on until well on into your build if you want. Have a look at Gil middletons log page 2. It saves the chance of any damage during the next few years. Keep enjoying yourself. DAVID
- 414 replies
-
- 1
-
-
- caldercraft
- victory
- (and 1 more)
-
Hello paul Well done. You have made a fine start on your build. Just keep enjoying yourself, but take your time. There is lots of victory builds going on, so if you have any questions during your build just ask. I shall follow your build with interest . Regards DAVID
- 708 replies
-
- 1
-
-
- victory
- constructo
- (and 1 more)
-
Greetings Jerry Well this is excellent work, it really is, and very instructive with clear photos. So soon the main mast yards. Keep enjoying yourself , but careful as you go., Well done Jerry. DAVID
-
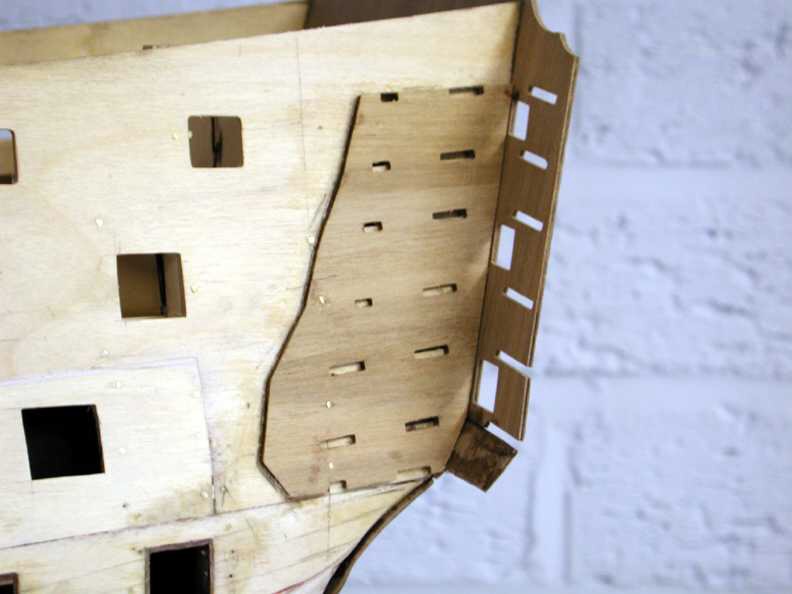
Hello rich The second photo is from jotikas own build. I don't know if this will help. It is a few years back since I fitted mine but is there not two slots to help with the alignment ? I may be wrong. The only photos I have are with the outer skin fitted as in the first photo. Hope this helps. DAVID. I will delete this post if you want me to once you have read it

-
Hello primo dude l I think what you are asking is were are the ribs positioned on the main keel ( 19 ) ... Plan sheet number one shows you all the rib positions and page 4 of your manual will lead you through the assembly. Keith is building the billing boat victory and not the caldercraft, and it will be a totally different assembly. Have you set up your build log yet???? If not it will be the best thing to do, so we can watch your build progress, and better understand any query you may have.. Regards DAVID
- 104 replies
-
- 1
-
-
- victory
- billing boats
- (and 1 more)