


JerryTodd
-
Posts
858 -
Joined
-
Last visited
Content Type
Profiles
Forums
Gallery
Events
Posts posted by JerryTodd
-
-
There's five more tubes to go; two for the main tacks, two for the fore tacks, and one for the driver sheet. There's potentially four more, for the fore and main trys'l sheets, but I'm not setting those unless I get more radio channels. They're close enough to my hatches that it wouldn't be difficult to add them later.
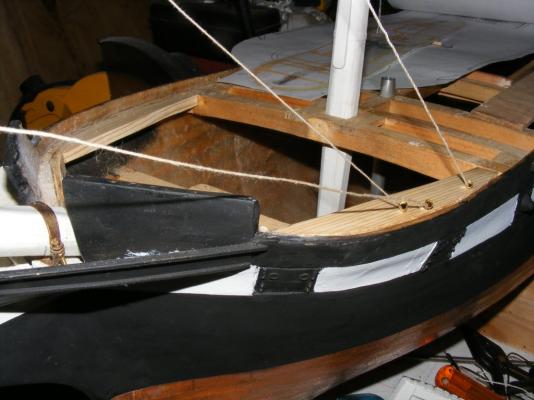
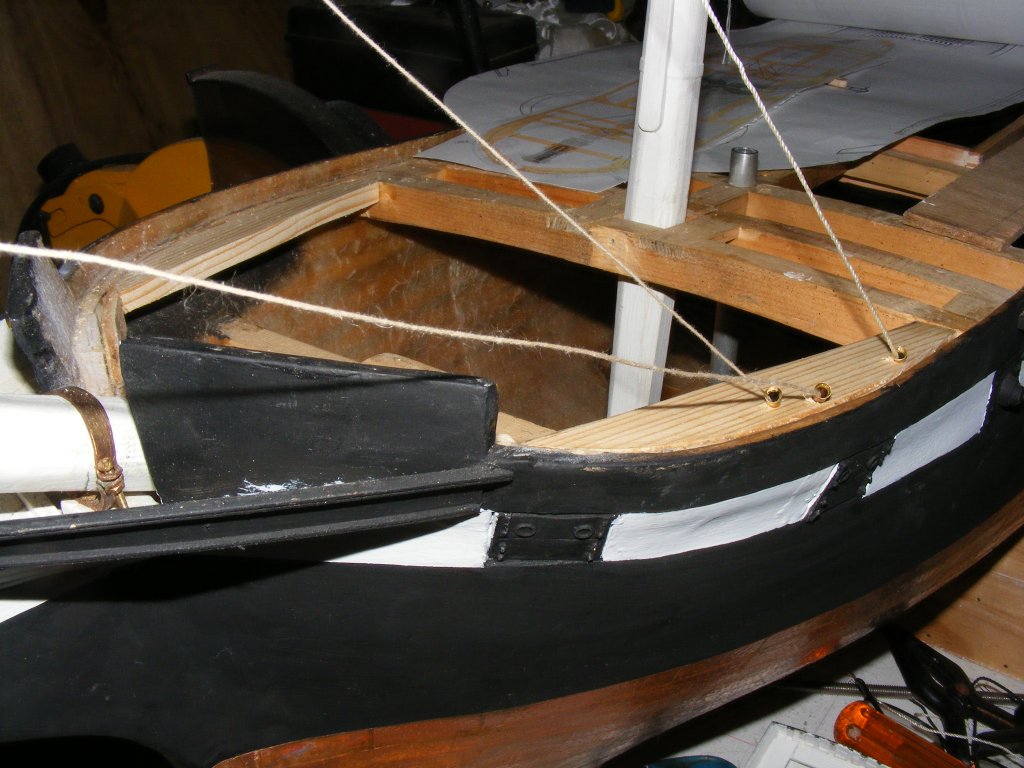
I installed the aft boomkins. They're made of this hard mahoganyish stuff that came from some shipping pallets. They're glued where wood meets wood and two brass pins reenforce each of them, one into the hull, and one into the quarter gallery. A small gap where they pierce the hull got filled with epoxy putty. The main brace and main sheet both anchor here, and return to a block here, before coming inboard.
BTW: Lee's calls these boomkins, but references the first mention of bumkins as 1680, and they're also referenced as bumpkins. I'm going with boomkins,
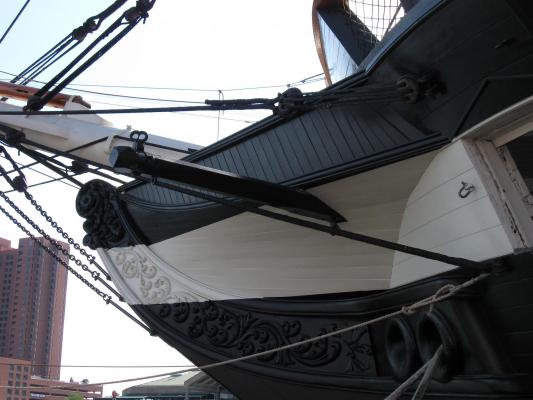
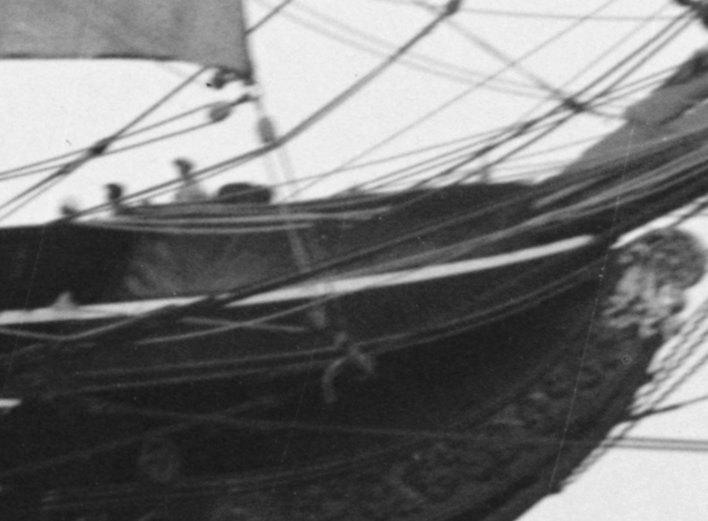
Again, staring at photos, paintings, and picture of the ship today to figure out how they were attached, shaped, and their dimensions. The 1888 deck plan shows them at least, and that helped with dimensions, but the forward boomkins are another story.
The paintings and earliest photos seem to back up the size and placement of the forward boomkins as they are on the ship today. Unfortunately they aren't something I can just walk up and measure, so this morning has been spent staring again, at photos from every source and angle, trying to extrapolate where they go, and how long they are.
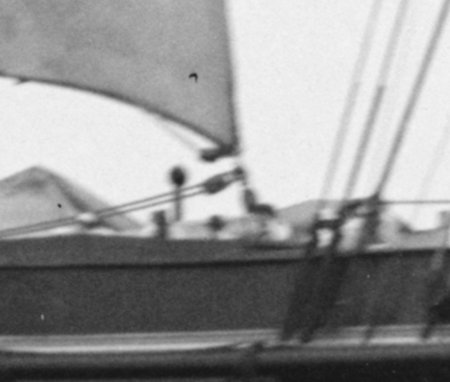
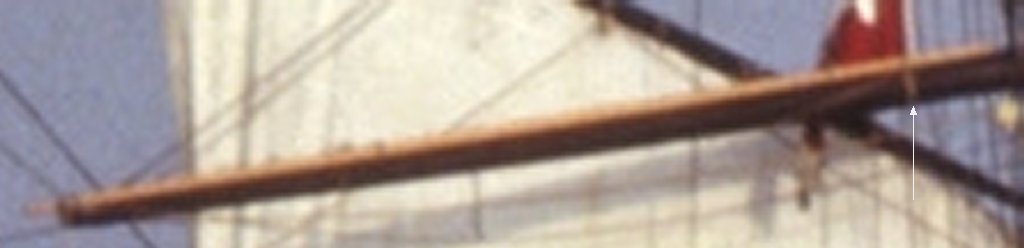
My best image with all sails set is fortunately a high res one as well. Here's a version that's about 14% of the size of the image I'm working with:

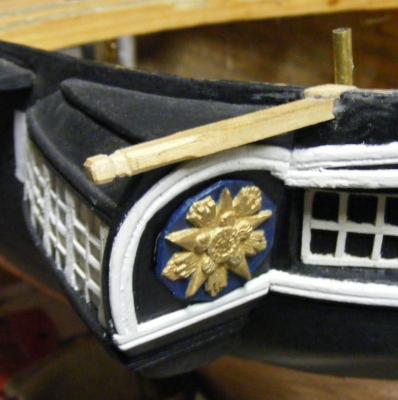
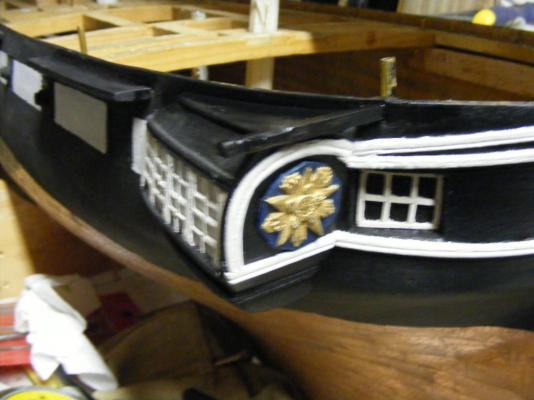
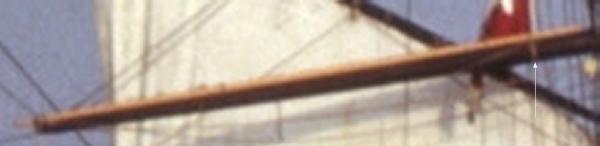
From this image the main tack actually comes down to the deck inside the bulwarks almost at the foremast.
The fore-tack goes through a hole in the forward bulwark

For the fore and main courses on the model, if I set them, the tacks are the more important control lines. The sheets merely hold the sail back against the wind, but the tacks pull that windward clew forward when sailing on the wind. If it doesn't function, the sail will back. This attaches a lot of import to the forward boomkins, especially in being strong enough to be up to the job.
Well, it's off to cut tubing and drill holes

- JerryGreening, mtaylor and hexnut
-
 3
3
-
Still working on the plumbing, added some blocking to support said plumbing; getting a little closer to permanent installation of the sub-deck. I also stared at two paintings and a series of photos of the ship with sails set to try to figure out where jibs sheet and where the tacks and sheets run. I think I've got it now.

- mtaylor and qwerty2008
-
2
-
Is there a clinker boat on your menu?

-
Since the pipes for the fore-corse and tops'l yard braces go through the main pin rail, I need to make the thing to get everything properly lined up.
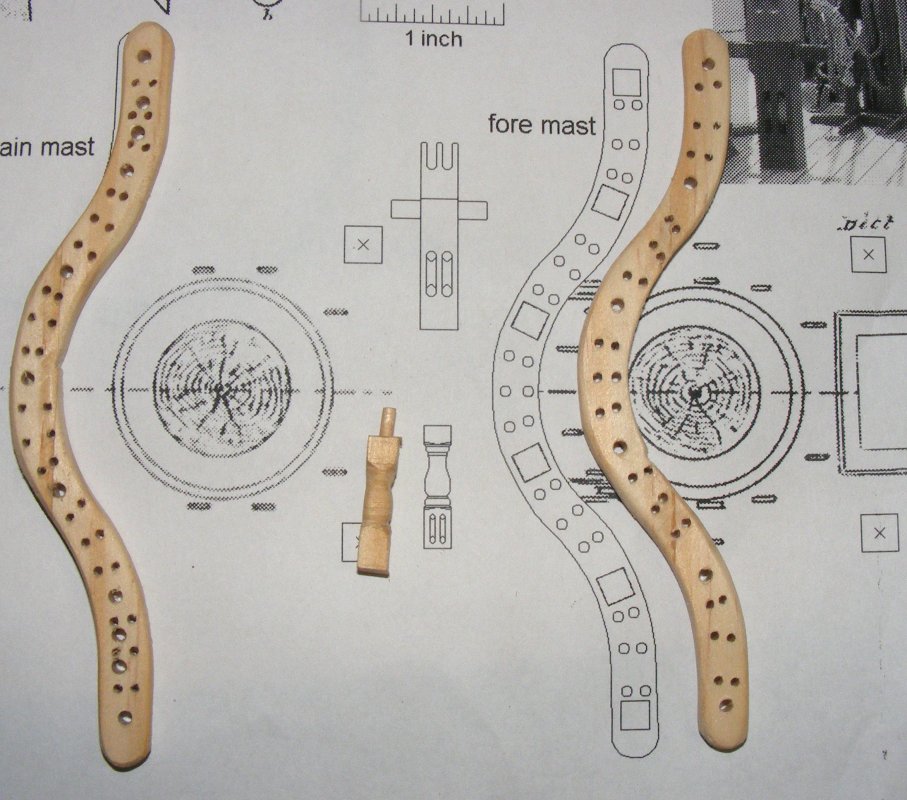
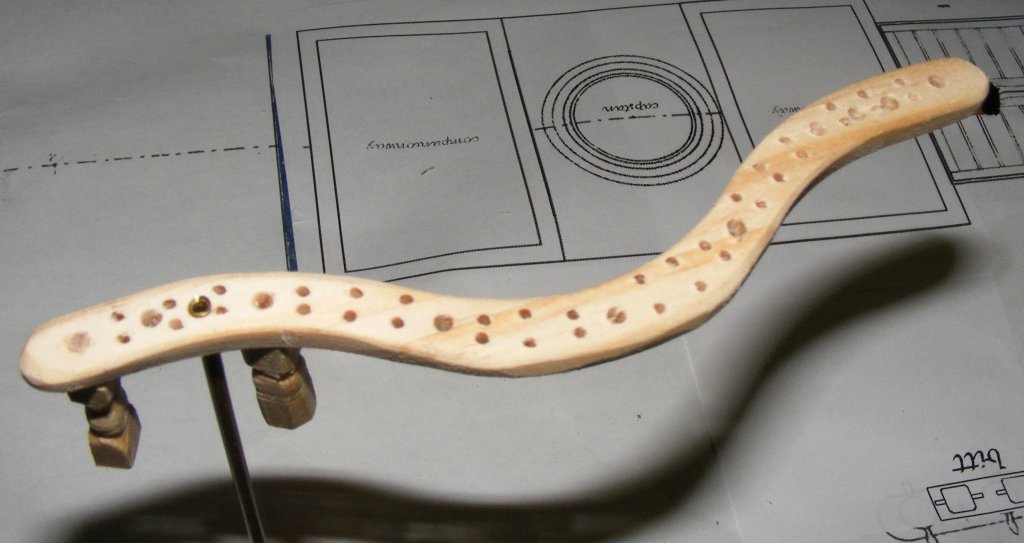
I recently made a sea chest for a reenactor participating in the event at Fort McHenry last weekend and have a bit of scrap "select" pine from it already cut to 3/16". I printed and pasted the paper patterns for both fore and main pin rails, cut them, and drilled them with 1/16" holes for the belaying pins. Some larger holes were drilled for the stanchions which will be fastened with wood dowels except for three or four that will have brass rod all the way through to the deck. Four additional holes were drilled in the main rail for the brace pipes.

There's 13 total stanchions between the two pin rails all of which are turned and have two sheaves in their bases - they do not pivot. They are 3/16" square and about 3/4" long (changing for the deck camber)

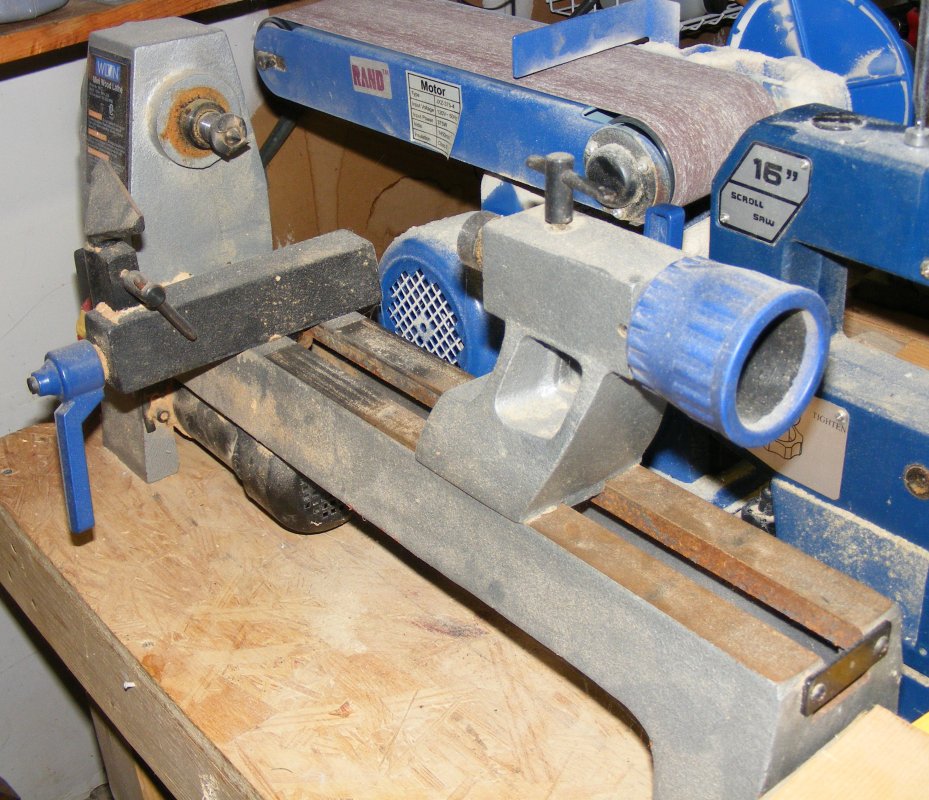
My lathe doesn't have a chuck; I have a big 4-jaw thing for it, but it requires shimming and balancing or it'll make the whole bench jump around the shop. So I took a shot at turning a couple of stanchions on my drill-press. That'll work, but I have to do one at a time rather than a stick of four or five. I also need to get together some implements to get a better and sharper finished turning.

I did get some 1/16" ABS sheet to make the flanges for my new winch drums, being I can't find the set I made before I moved. Now I have to find my sheet of 1/8" plastic for the drums themselves - which I think is in my storage unit. I want to rig up the braces and test it all in operation before I epoxy everything down and lay the subdeck.
- mtaylor, qwerty2008 and egkb
-
3
-
As a big boat modeler (links below) I just had to stick my nose into this conversation.
As for kits, the Emma C Berry as a schooner and the yacht America are about 4 foot long and though meant to sail, can be built as static models. They aren't very detailed, but they can be.
There's a few kits on simple boats, Skipjack, Muscungus Bay Sloop, Sharpie Schooner, etc that can be enlarged to what ever size you like. Trace the parts, get them enlarged, cut them out and follow the instructions for the kit.
If you're looking for a very large sized model like 5 or 6 foot on deck, I don't think there's any kits out there, and you'll have to go scratch - like I did.
-
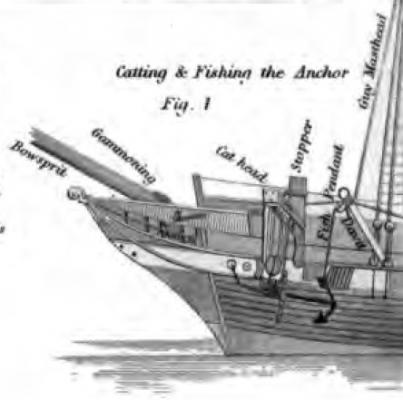
I finally found something with the fish davit in it; Biddlecombs Art of Rigging 1848
-
I tune it to middle C
- SailorJohn, capnharv2, mtaylor and 1 other
-
4
-
Yes, though there's normally a sort of socket on the channel (I originally said deck, I meant channel) where the davit is seated when in use. Photos of US ships often show an iron davit that looks like a boat davit near either cat head, and some vessels have something of a cargo boom sort of set-up at the forward base of the foremast, that just stows up against the mast.
PS: Lee's says there sometimes a socket or shoe at the billboard to allow the davit to be used there.
I'm still trying to find any reference to it in American seamanship works of the period, like Luce's Seamanship, with no luck so far.
-
Thank you.
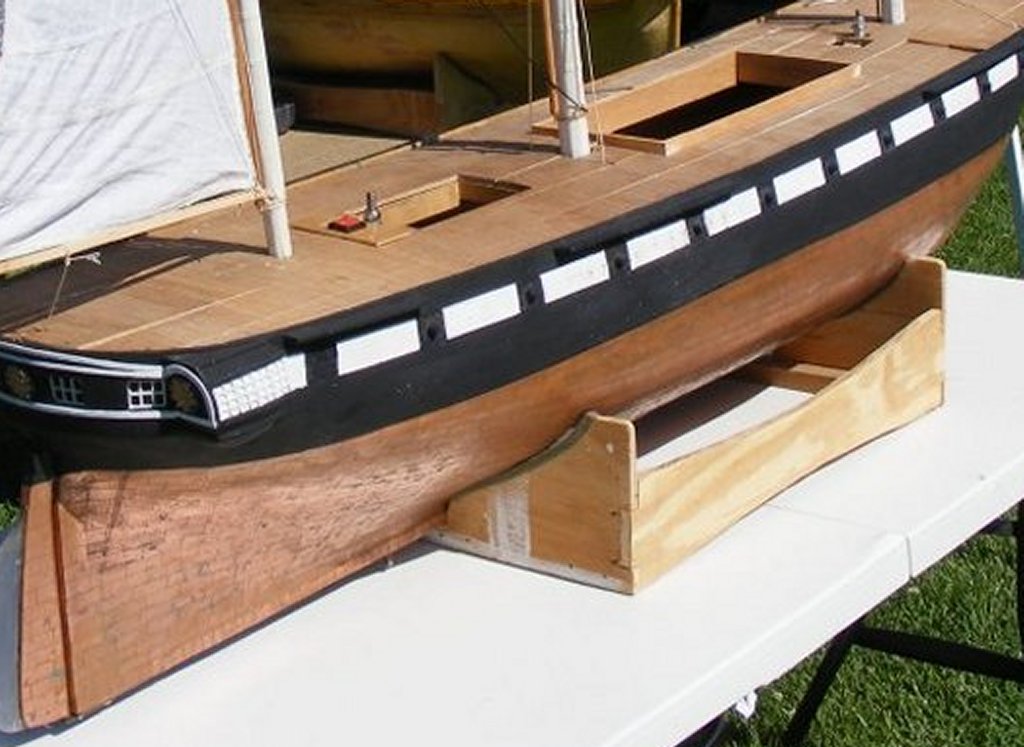
She's been in the water five times now; the first two as a bare hull, and the last three under sail, albeit, jury-rigged. She'll very probably sail again before being completely finished, but her deck should be installed and with a little more sail set next time.

- dgbot, michael mott, Omega1234 and 2 others
-
5
-
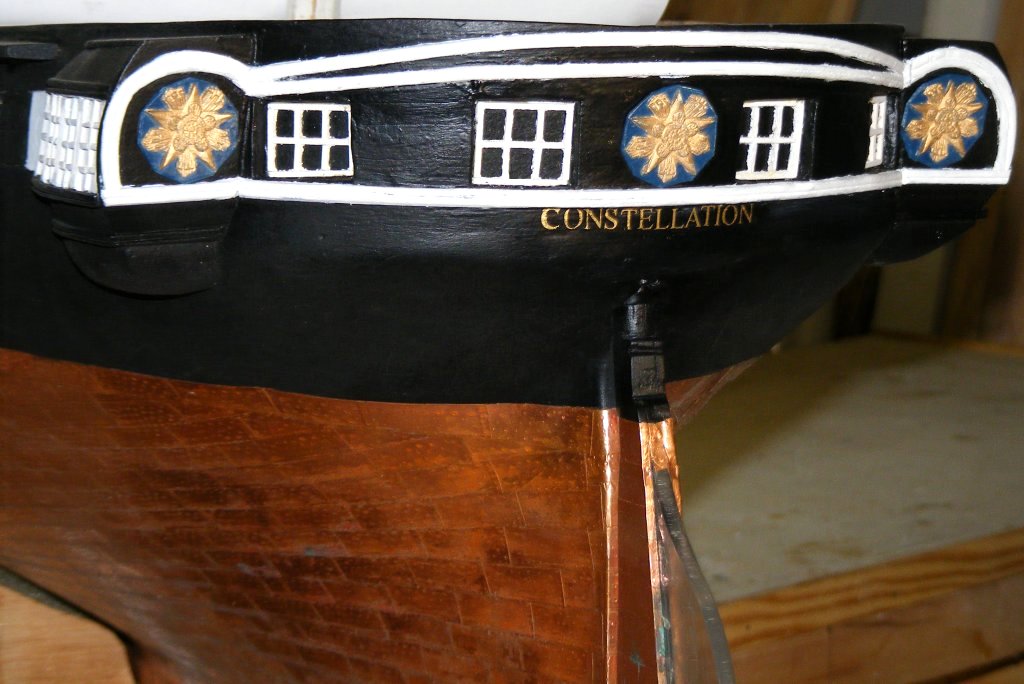
Ordered some gold 5mm Times Roman dry transfer letters from Letraset in the UK a month ago - they just arrived yesterday and I wasted no time getting Constellation's name installed on her stern.

The clear coat hadn't dried so the hull looks a little glossy.
- qwerty2008, dgbot, mtaylor and 2 others
-
5
-
I've read and heard what you would call seaman's slang use terms like "He was a full tops'l taller than his comrades." But I never caught this particular reference. Never too old to learn I guess.
Funny, I've read everything Forrester wrote except that one, guess I'm gonna have to slide over to Abe Books and hunt one down.
-
Sure it wasn't a t'gallant stays'l?
What book? What period?
-
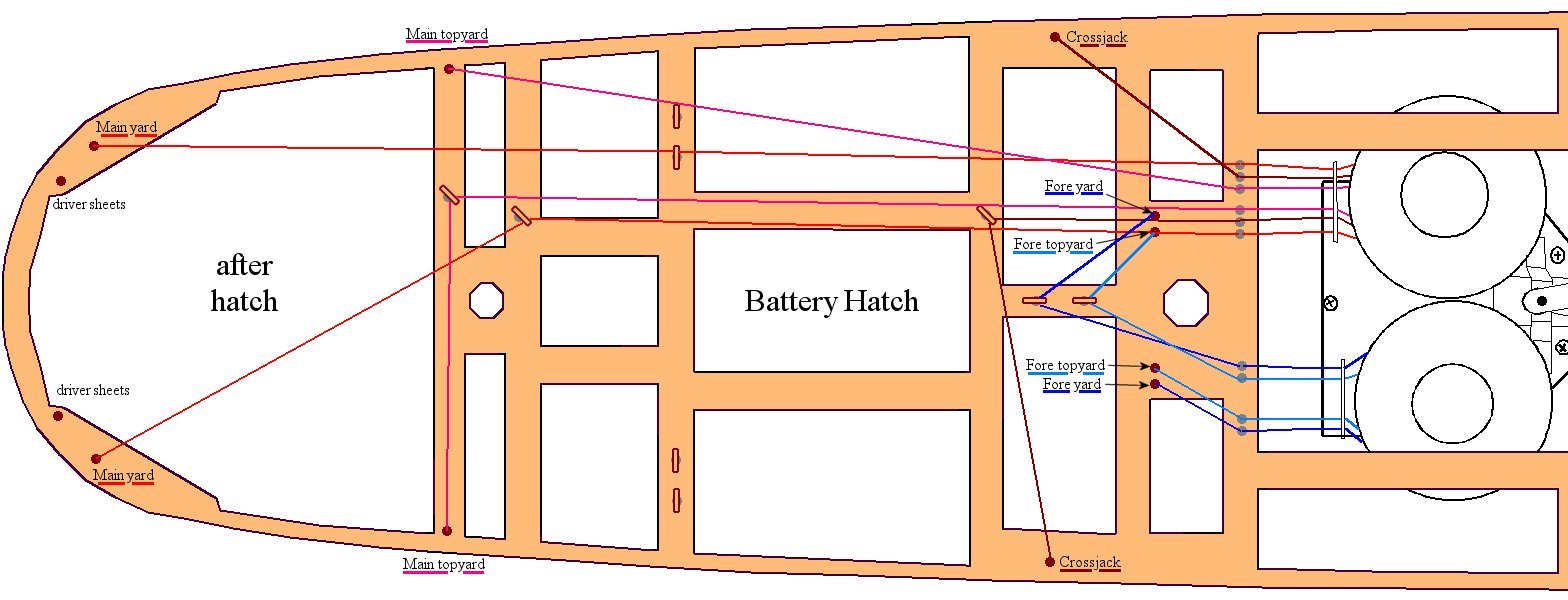
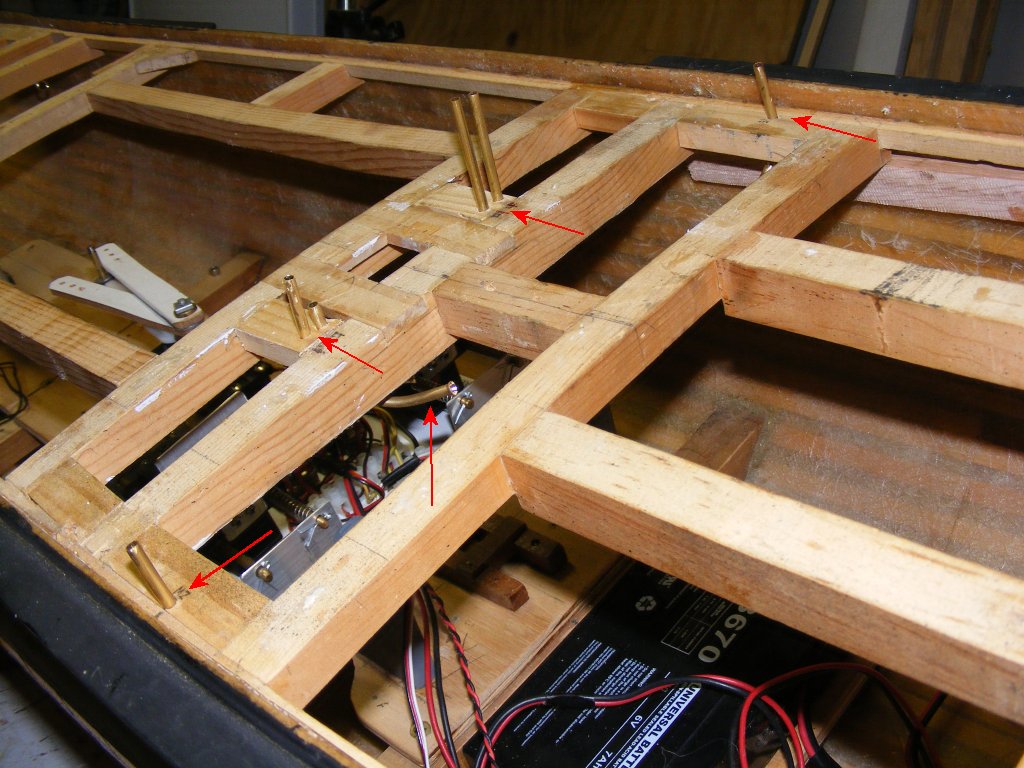
I've been working on routing the braces below deck so they don't tangle and interfere with each other; so they don't obstruct hatches and other operations, like the rudder; and in a layout that I can service the system when needed through the planned hatches without having to tear up the deck. That's the plan for this spaghetti puzzle I've been working on.
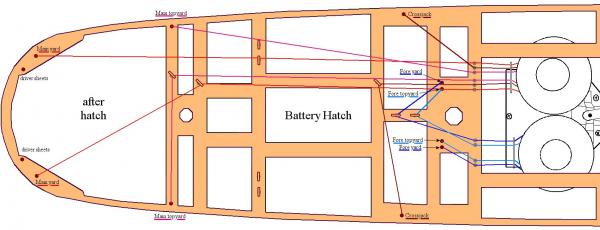 Fore & Main brace diagram showing how braces are routed below decks.
The port-side main brace will be rerouted so it doesn't obstruct the planned after hatch.
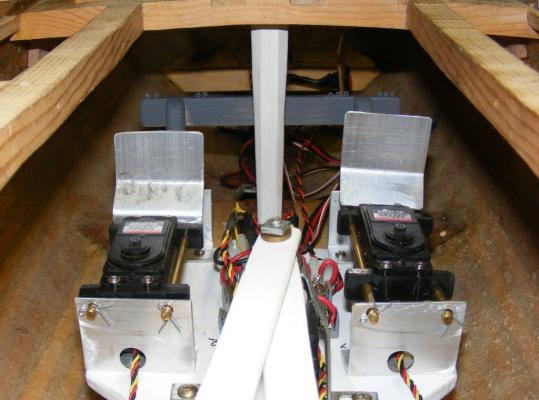 The gray riding bit beyond the winch servos is the brace fairlead bitt, for want of a better name.
The fairleads mounted on the winches keep the braces on the correct flange of the drum, the eyes on the bitt turn the braces to their through-deck destinations.
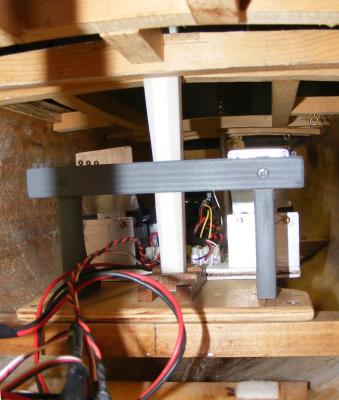 View from aft. The bitt is made of white pine. The knees are glued and screwed to the deck, not the servo-tray. The cross beam is just screwed to the knees.
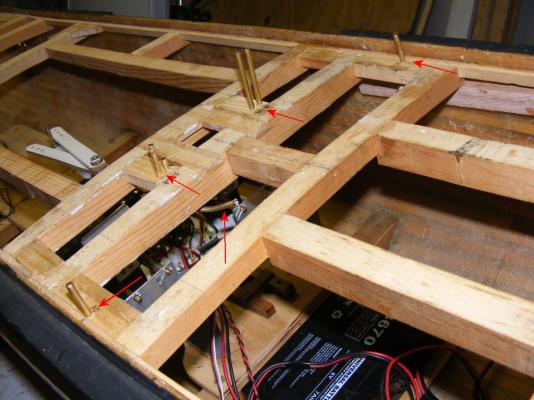 Red arrows point out through-deck fairleads of brass tubing. Amidships are the foremast brace fairleads, and outboard are the crossjack fairleads.
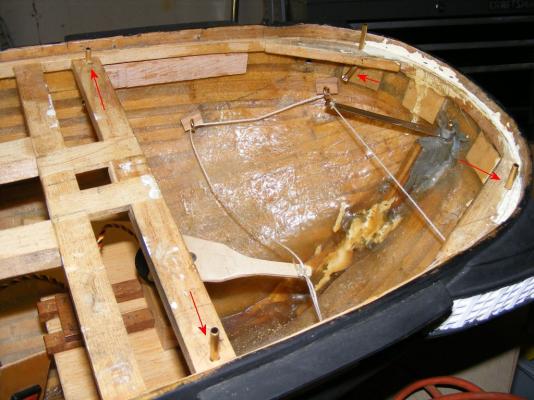 On either side aft are the main brace fairleads, and forward (left) are the main tops'l yard brace fairleads.
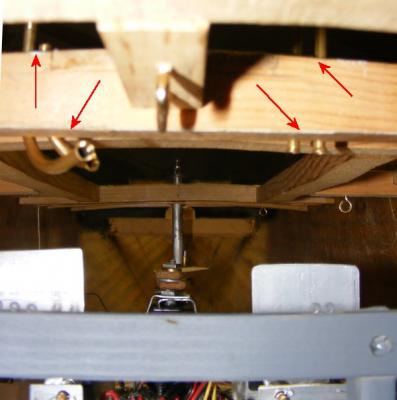 The fore brace and the fore tops'l yard braces from inside the hull. The foremast winch is on the right of the image. The other winch operates the main and mizzen braces.
- mtaylor, captainbob, dgbot and 4 others
-
7
-
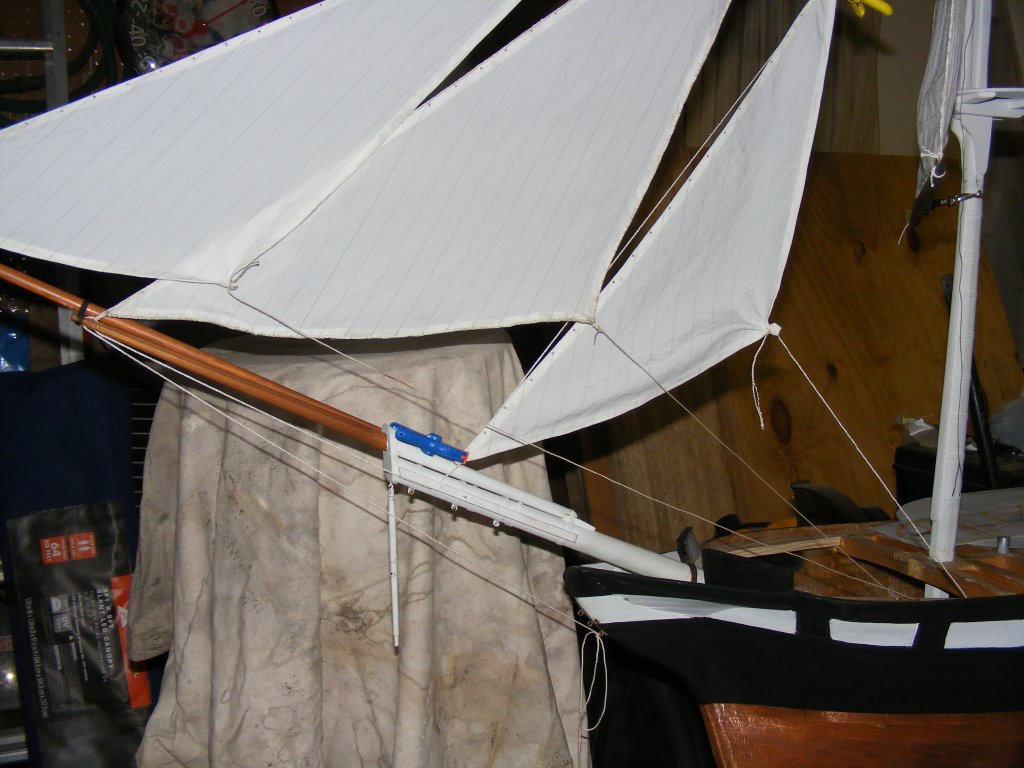
I get a lot of questions about the sails on my RC sailing models, a surprising number actually. Since answering requires repeating myself a lot, I decided to plop it all into a web page I can direct folks too.
I wouldn't mind some feedback, questions will help me fill in anything I missed.
-
This copper's been on since June of 2010. It's spend several hours in salt water and a couple of swims in fresh water. It's handled quite often by my grungy paws, and it's finally getting to where I want it to look.

-
Sound's right, it looks like 3 x the diameter of the boom, which I imagine to be 6-8" But you only need a couple or 3 turns, which is about all the line they leave you up there for the job.
 real boat
 model boat
- GrandpaPhil, qwerty2008, mtaylor and 2 others
-
5
-
You know you have like 3 feet of lashing on those stuns'l booms
-
This is detailed in the Constellation thread (see my signature for a link)
It's photographed outside in bright sunlight after the sample had dried. One of Constellation's t'gallants is there for comparison.
I think this gray will be good for Macedonian's sails.

-
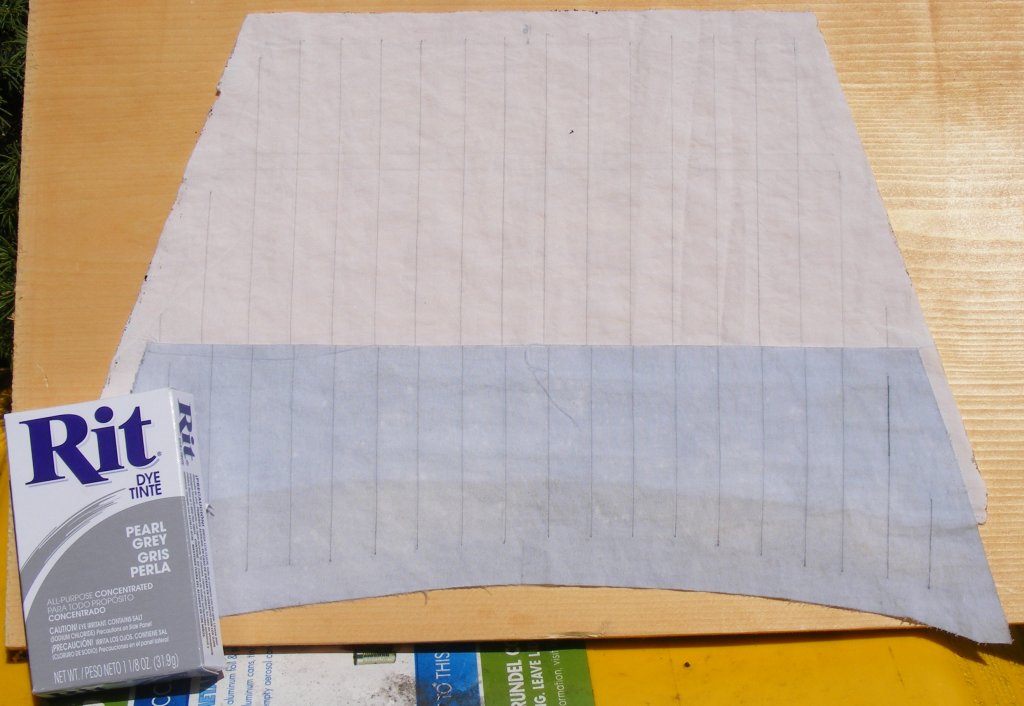
I've been meaning to do this for some time. I was in a craft store looking for modeling paint for the LST when I happened on a box of Rit Pearl Gray fabric dye.
A lot of modelers dye their sails to "age" them. They use coffee, tea, wood stains, all of which are fine except they all tend toward the red/brown tints. Flax sails, and military sailing vessels used flax sails, tend to age into the grays.
I was going to try a tiny bit of black dye, but finding a proper gray was fortuitous. Constellation's sails are made from white Supplex - bright white burn your retinas if you look too long white. I want to gray that brightness down a bit, not necessarily make them look 10 years on blockade duty off Ushant gray - that I'll save for Macedonian.
So, I filled a 12oz cup with hot tap water, stirred in a teaspoon of dye, and lowered a scrap of Supplex into the mix. Stirred it around, took it out and placed it back in, and stirred it some more. I gave it a full 3 minutes on a timer, and here's what I got.
This is photographed outside in bright sunlight after the sample had dried. One of Constellation's t'gallants is there for comparison.
For Constellation and Pride I think I'll go for 1 minute in the vat, though I think this will be good for Macedonian and Gazela.
- lambsbk, qwerty2008, michael mott and 2 others
-
5
-
-
The Manila he refers to isn't the garbage sold under that name today.
-
I'm not familiar with Pride II's set-up, but, there's several lines that might make-off at the jaws:
The lower hoop lacing, needed because of the rake of the mast and because the main lowers as opposed to the fore which brails up.
Gaff peak flag halliard, sometimes two, one each side
The main's out-haul goes through the boom to a block and tackle which makes off here usually, if there isn't a cleat on the boom for it.
Pride 1's main tops'l's tack made off here sometimes.
Topping lifts don't normally make off here, but I've seen it done.
-
Vicky is a static model, not a working ship
-
They're tarred, like it or not. Get up there and try to slop the shrouds and NOT do the rats.
BTW: The lanyards are tarred too.


Constellation 1856 by JerryTodd - 1:36 scale - RADIO - First Class Sloop of War
in - Build logs for subjects built 1851 - 1900
Posted
I was looking, and expecting, to find the main tack going to a block on the fore channels, and then through the bulwark. My issue with that is that no such mechanism for getting it trough the bulwark is shown on the 1888 deck plan. The plan does show the fore sheet sheave assembly through the bulwark, which actually is set up for two lines, and another aft of the main mast, though I have no idea what that one is for.
I just installed the tubes for the main tacks, and tried it out - it actually works quite well at that location. Now there's only 3 more tubes to install.