Ulises Victoria
-
Posts
1,790 -
Joined
-
Last visited
Content Type
Profiles
Forums
Gallery
Events
Everything posted by Ulises Victoria
-

Attaching dead eyes to masts
Ulises Victoria replied to Victory_Aus's topic in Masting, rigging and sails
Hello there. I think you mean blocks, as this is what I see in your photo. Hope this helps you. Ulises -
Thank you Greg. Just sent a long PM to you. Just keep the "Likes" coming
- 786 replies
-
- 1
-

-
- Royal Louis
- Finished
- (and 1 more)
-
Tilting Table on Byrnes Saw
Ulises Victoria replied to jhearl's topic in Modeling tools and Workshop Equipment
Instead of trying to do that cut using the tilting table, why not do it without it and just lying the wood flat on the saw table at the angle you want? I'm not sure I understand your case and I hope I'm making sense here. -
Thank you Arthur. Good point. Haven't thought about gluing to the adjacent planks. Guess I will have to think about it in the time the boxwood arrives. Maybe gluing a boxwood wale and immediately removing the section above. Will see. I got some black nails with really small heads. I'm thinking about using them both to hold the planks while the glue dries and for looks, but that's just the plan. I'll let you know how it goes.
- 786 replies
-
- 2
-
-
- Royal Louis
- Finished
- (and 1 more)
-
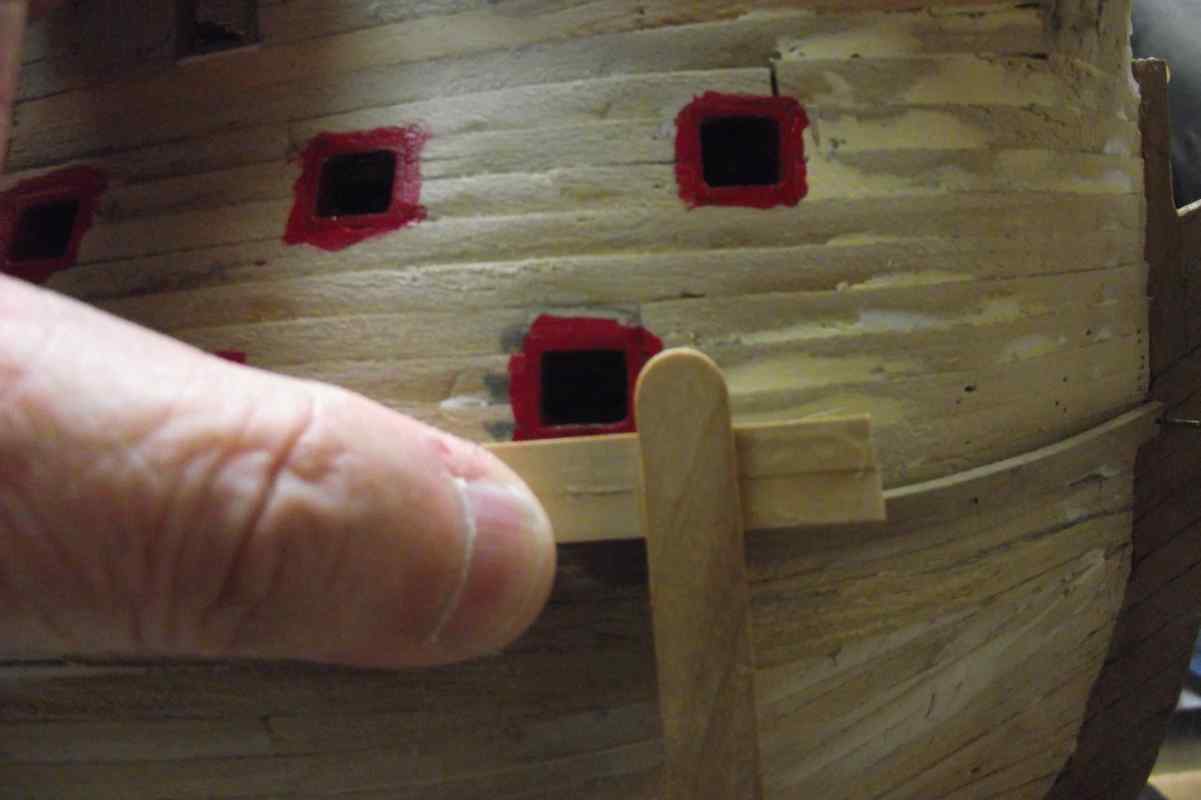
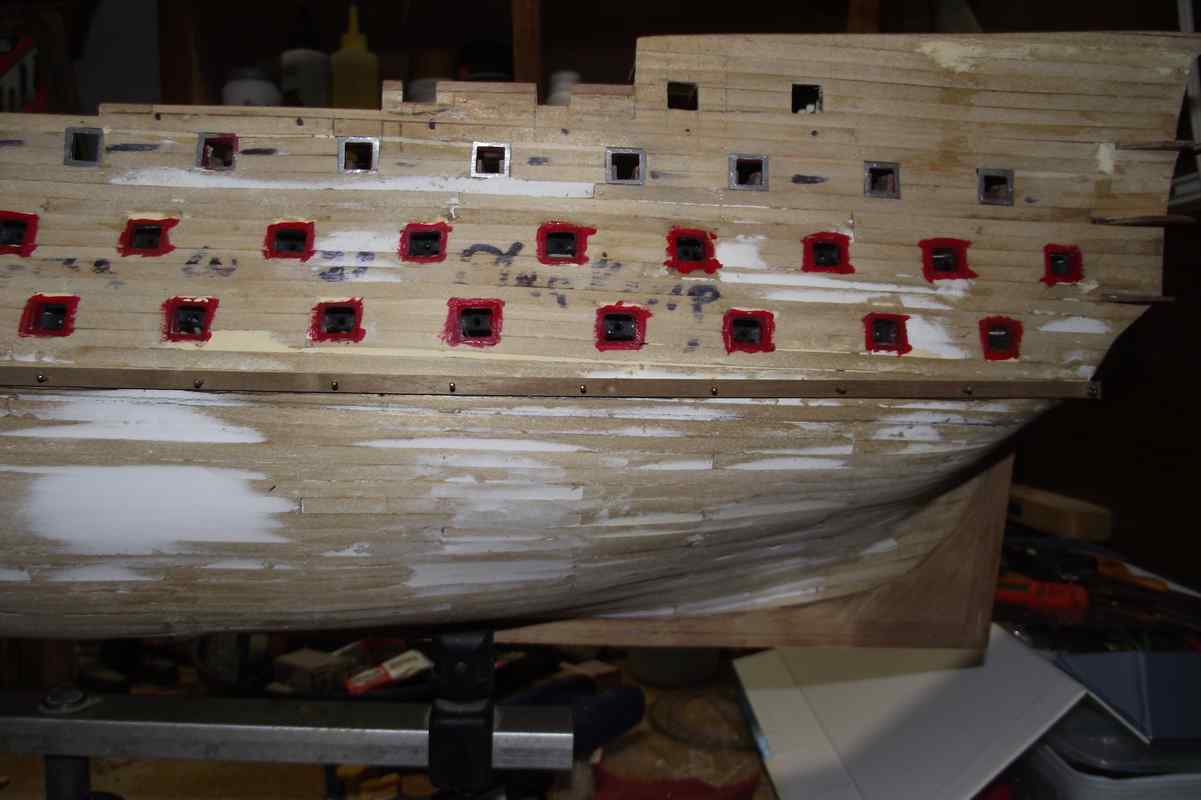
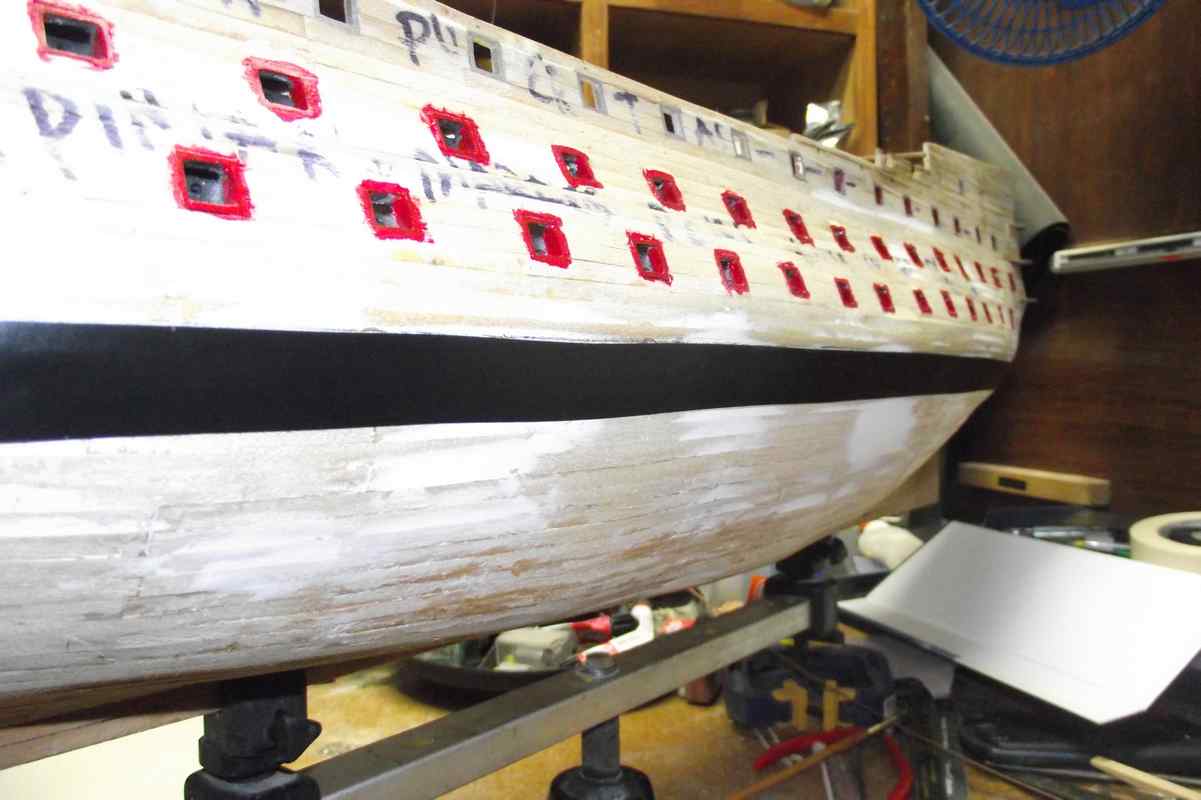
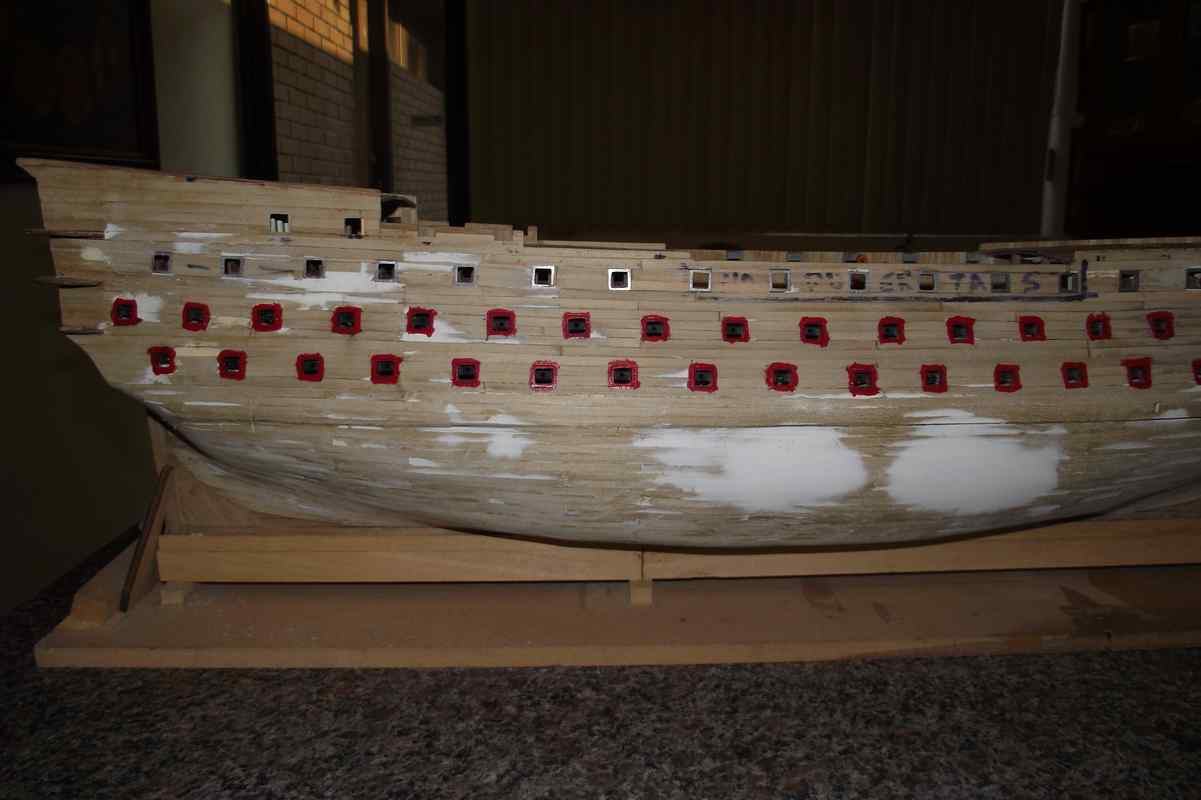
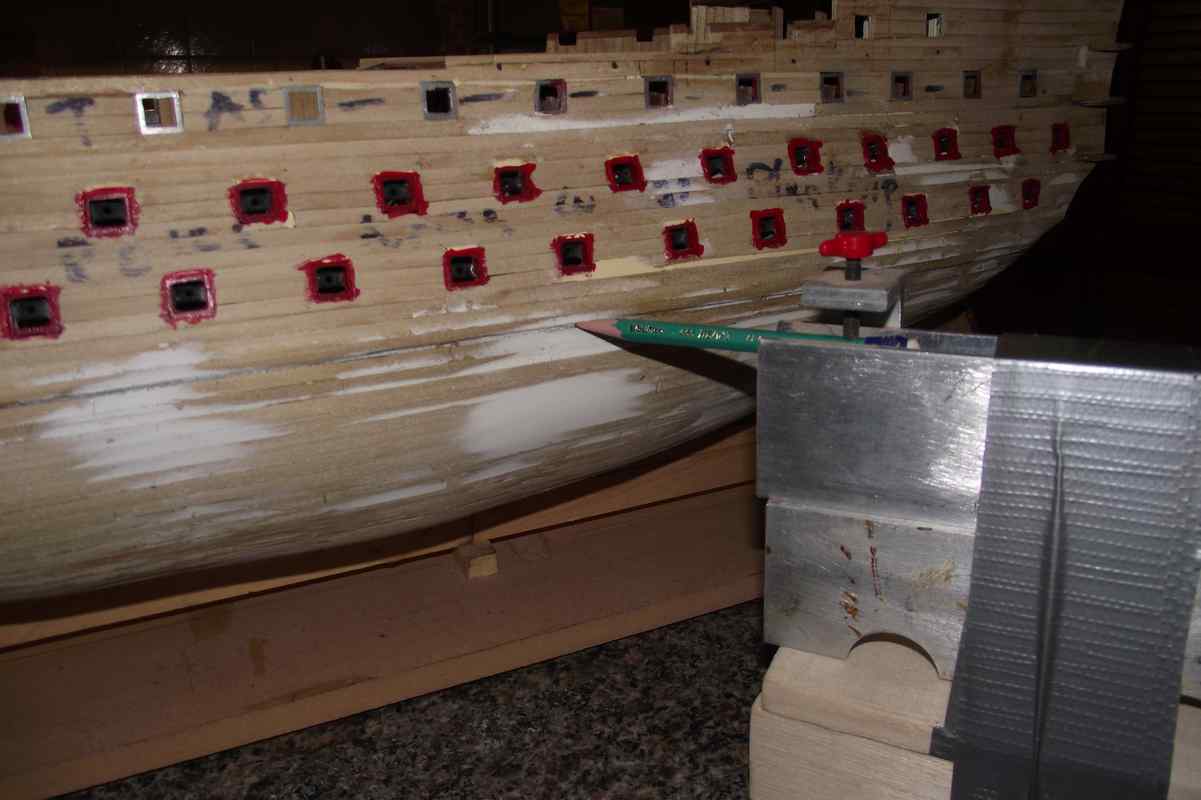
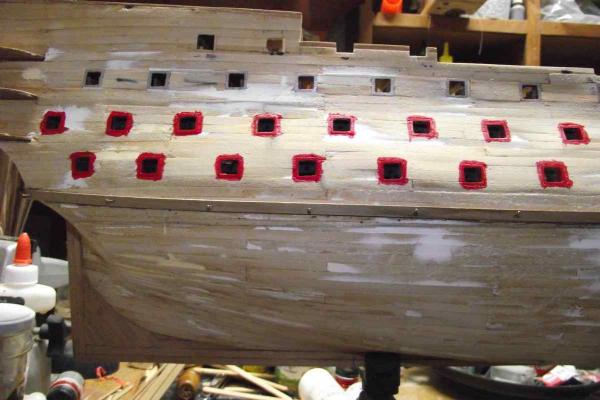
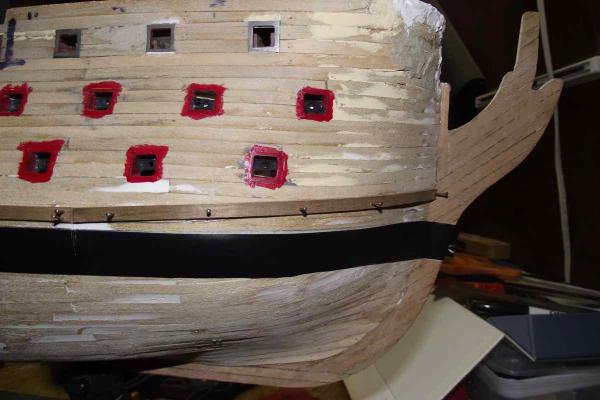
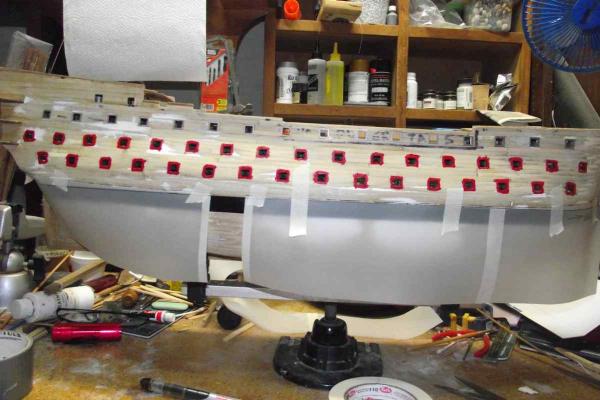
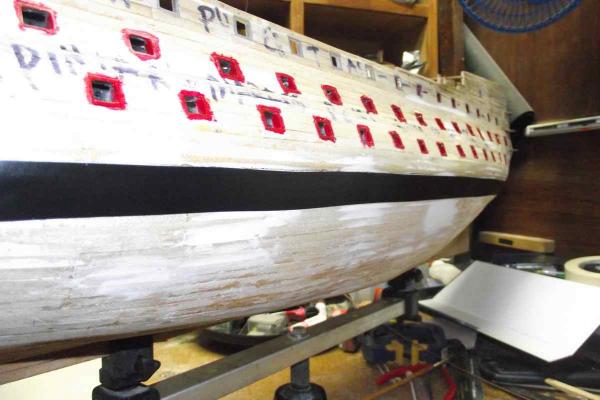
Small update. I placed the three strips of wood that form the main wales on both sides of the ship. You will see a very simple jig I'm using to further locate the exact place of the upper strip with respect to the cannon frame, in this case. Not truly necessary, though. I don't like how the walnut spills and breaks when inserting nail near the ends, even though I pre drill a hole for the nails. So I ordered some 2 x 5 mm boxwood strips from Crown Timberyard. (See add in home page) Remember these wales are placed here temporarily and only to determine the shape and line of the wales. They will be further adjusted when final gluing and nailing is done. By the way I have to send kudos to Jason of Crown. I sent an email asking for a quote on 2 x 5 mm boxwood in the morning, and by around 3:00PM the order was in the mail. These wales, by the way, are going to be blackened using a product called Rub'n Buff ebony color. This is a paste that you... well.. rub'n buff and gives a very nice satin finish and does not penetrate the wood. I also got some really thin black nails. I won't be using the brass shown in photos.


- 786 replies
-
- 12
-
-
- Royal Louis
- Finished
- (and 1 more)
-
Proxxon Saw Table
Ulises Victoria replied to derekuk's topic in Modeling tools and Workshop Equipment
Forgive me for stealing the thread. Can someone do a side by side comparison (in performance, not price ) between the Byrnes and the Proxxon table saws? -
Sjors... your comments are ALWAYS welcome. And all the other's as well. Really appreciate seeing people following my build and clicking the like button.
- 786 replies
-
- 4
-
-
- Royal Louis
- Finished
- (and 1 more)
-
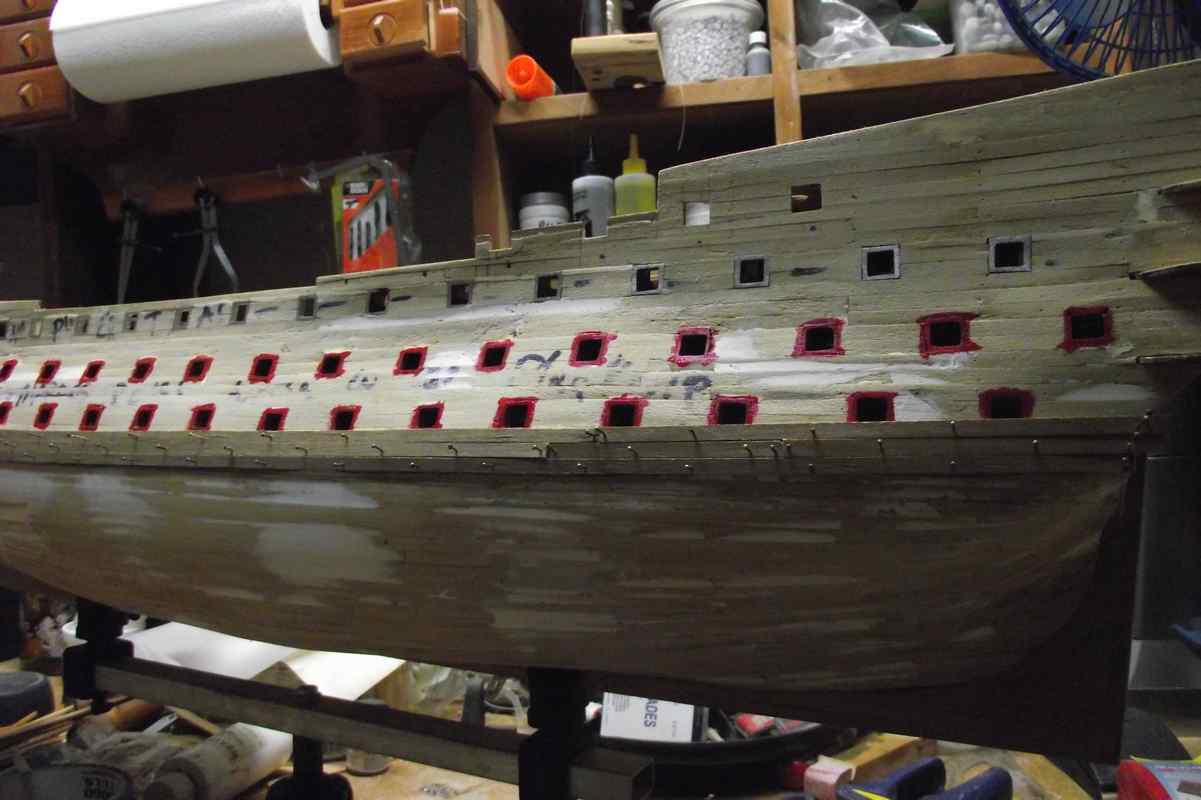
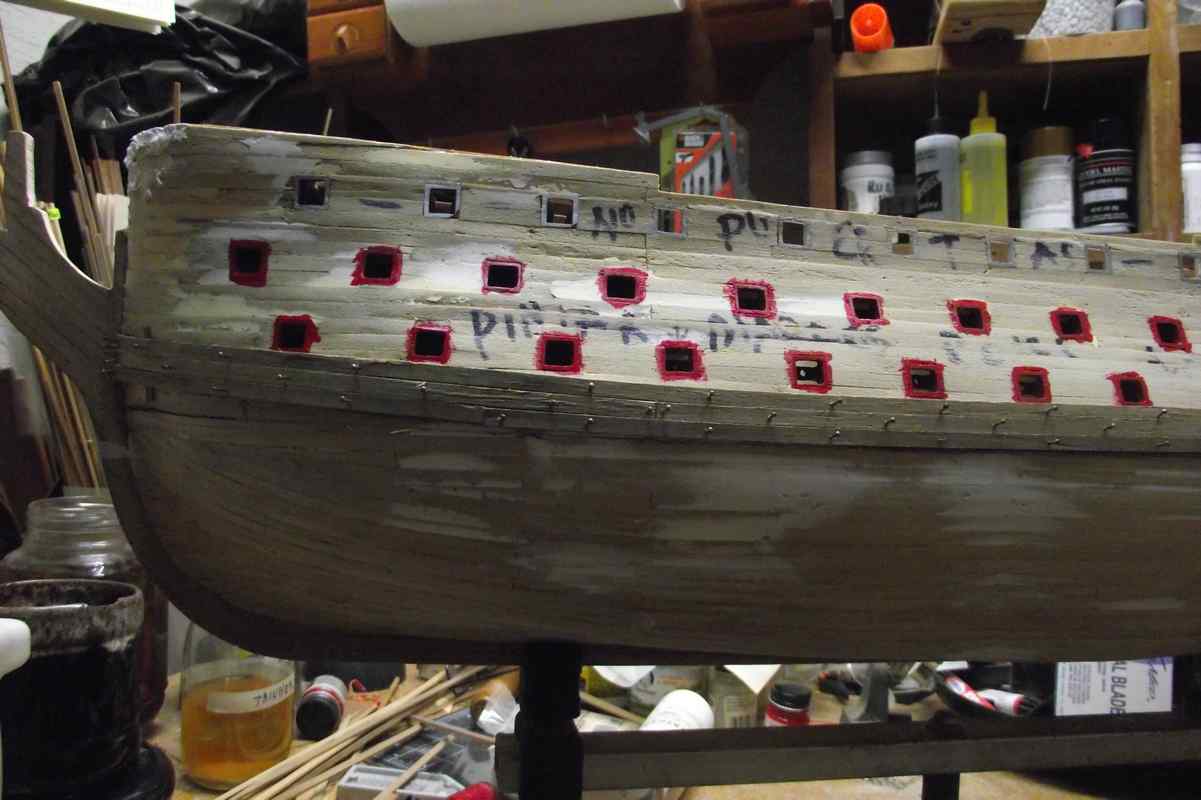
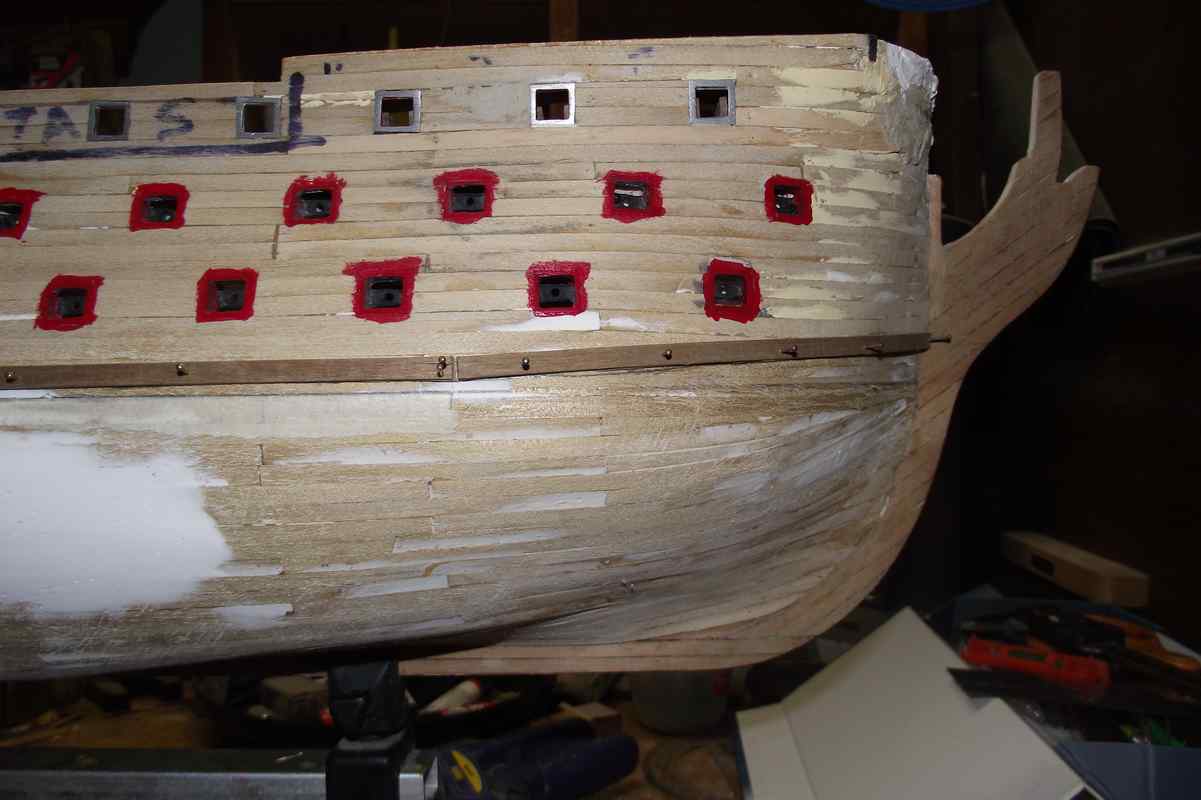
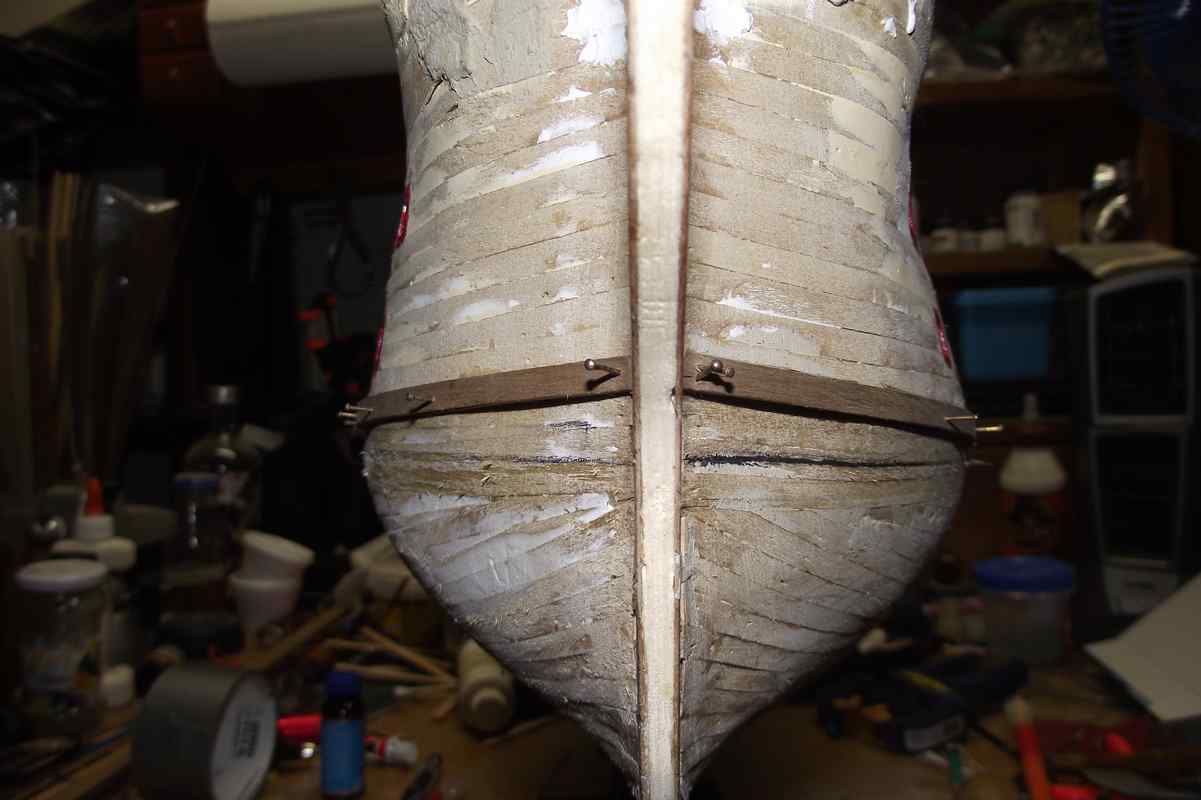
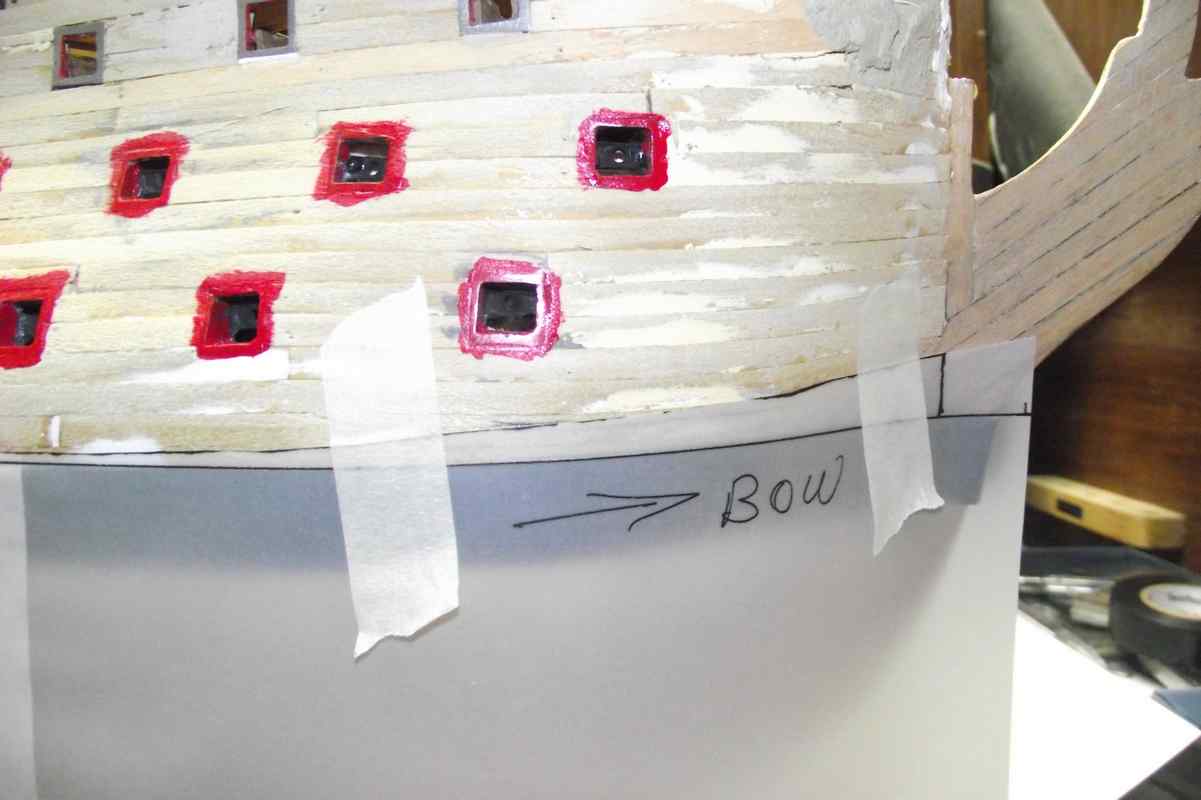
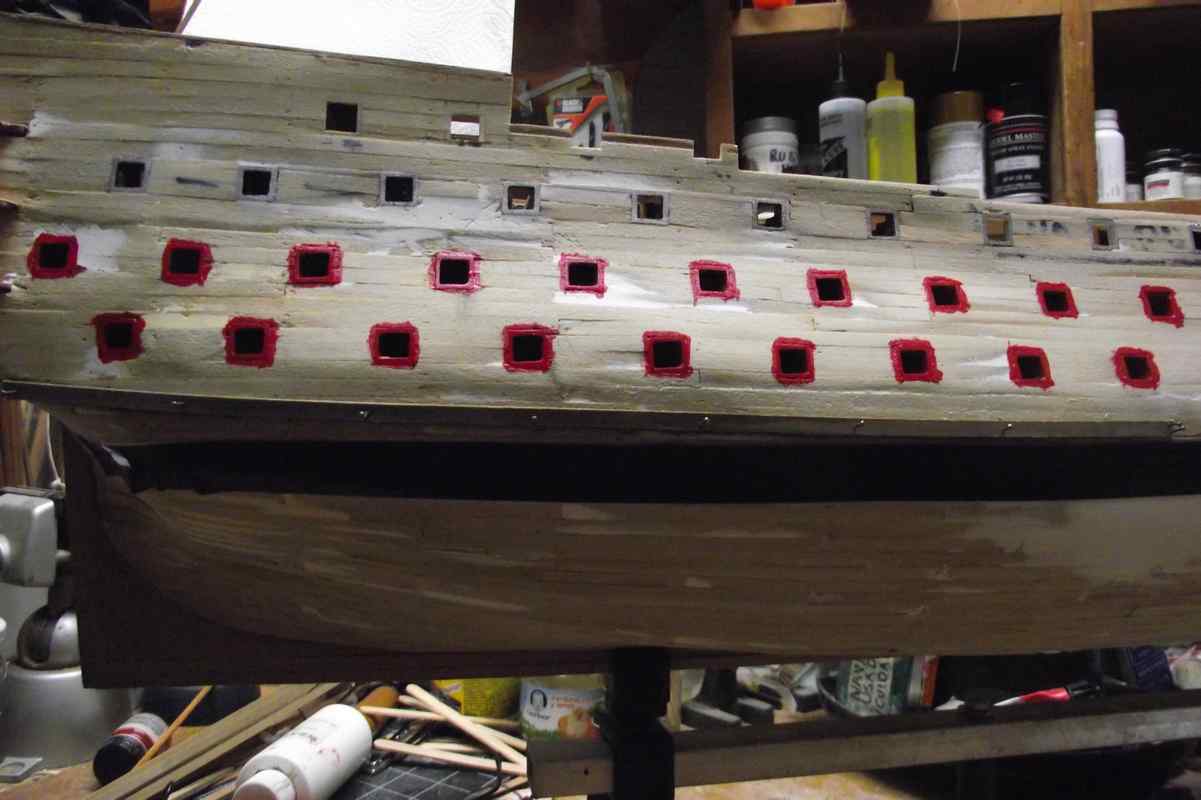
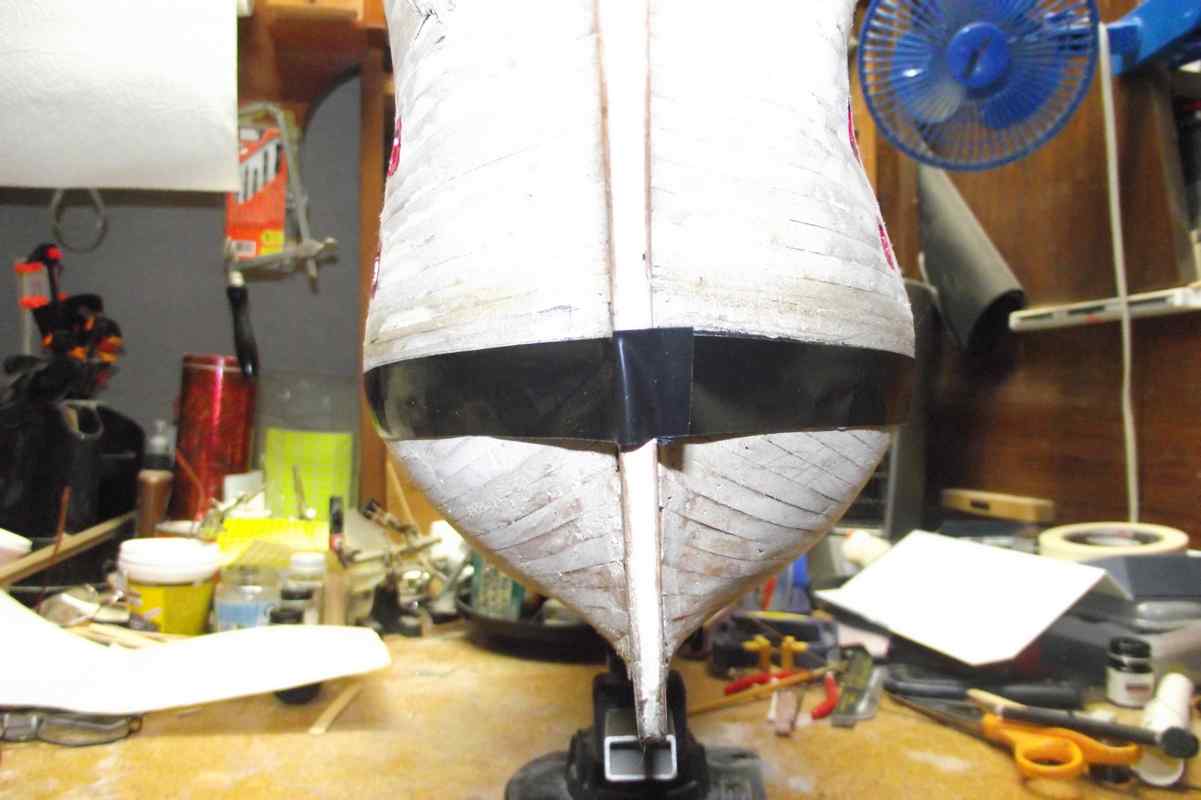
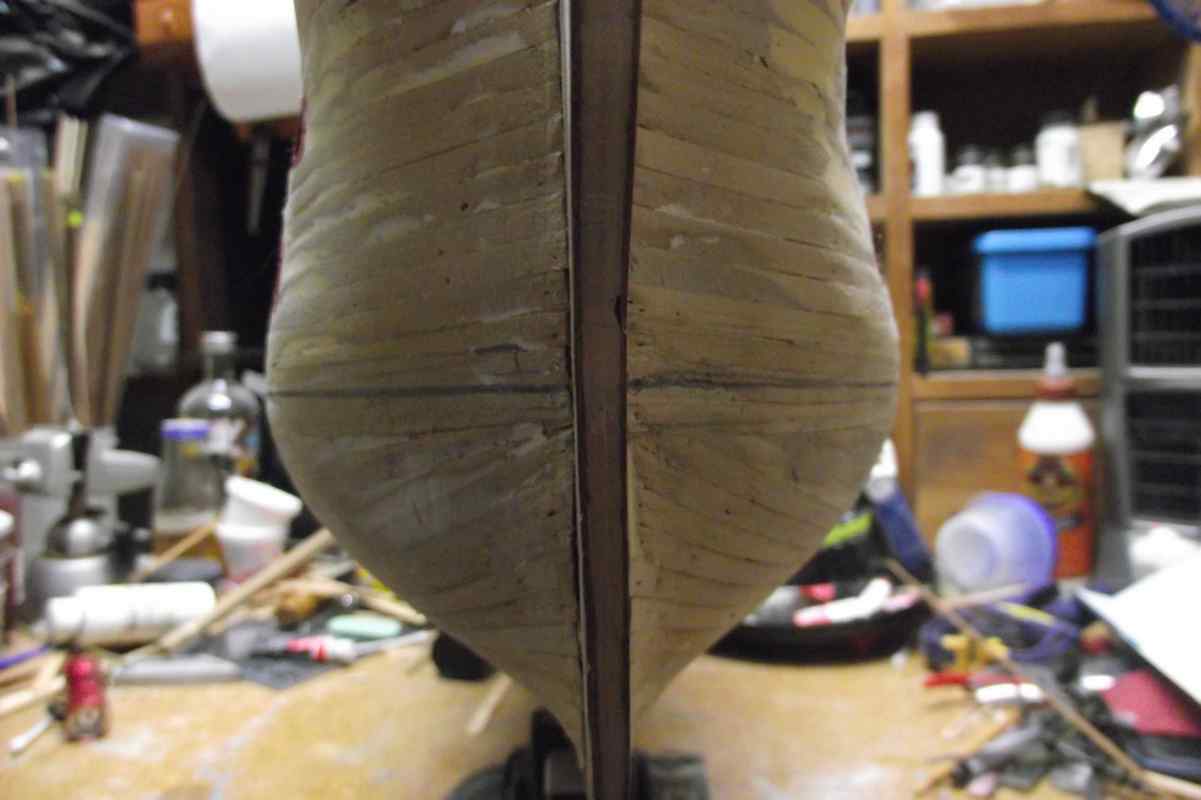
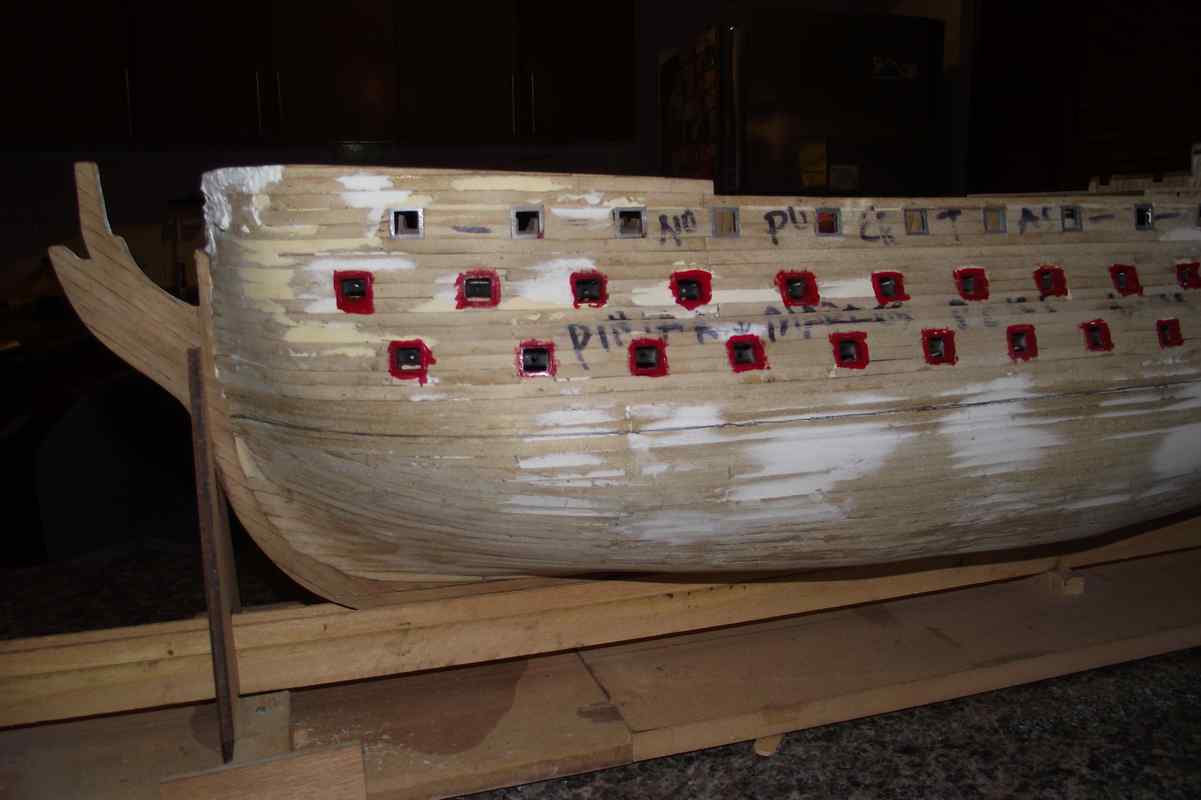
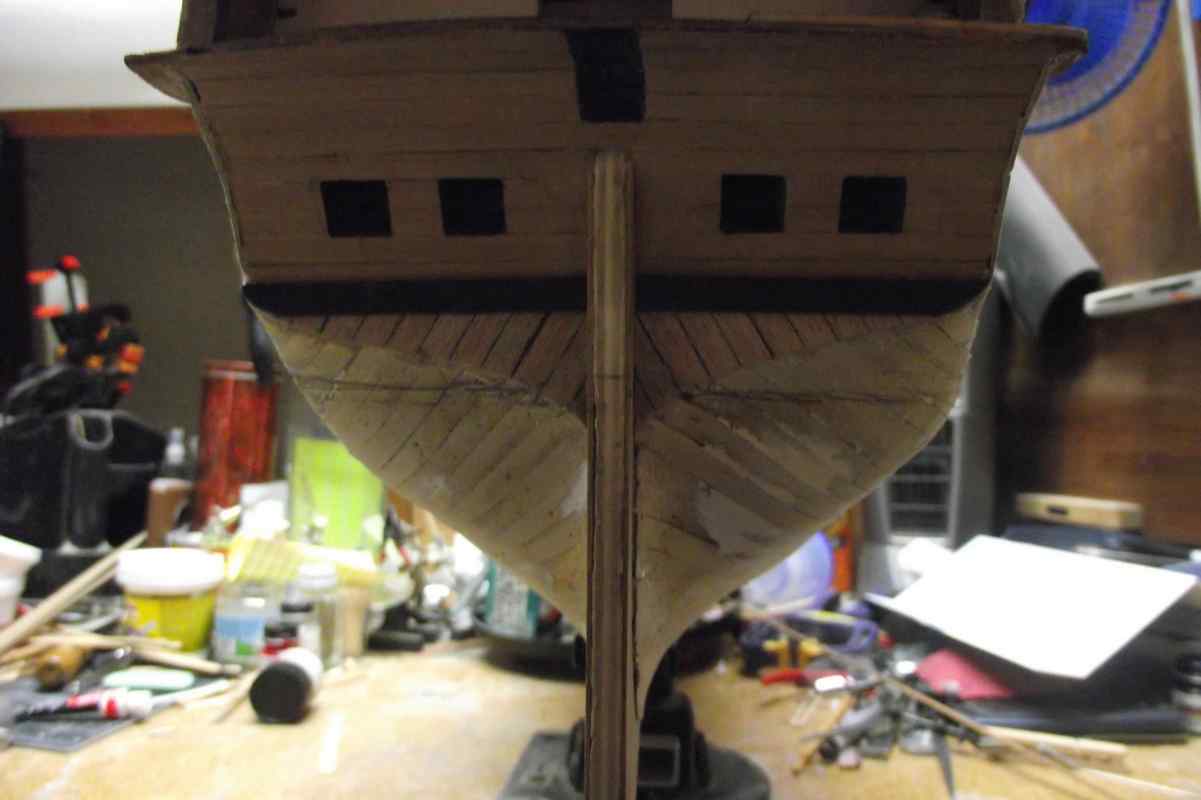
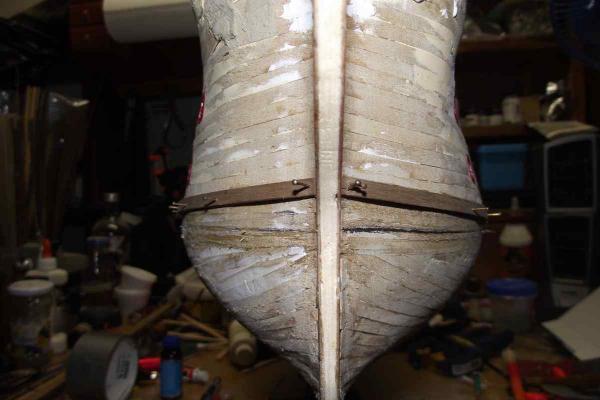
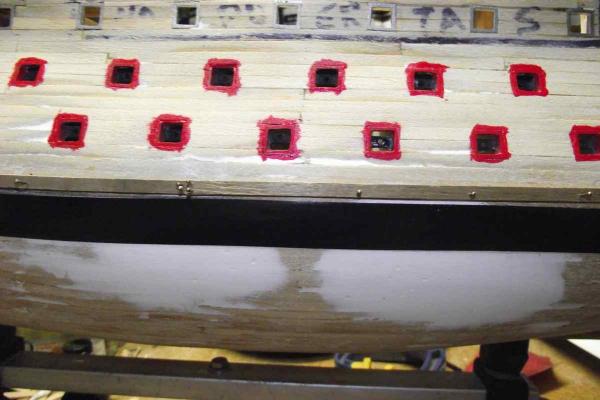
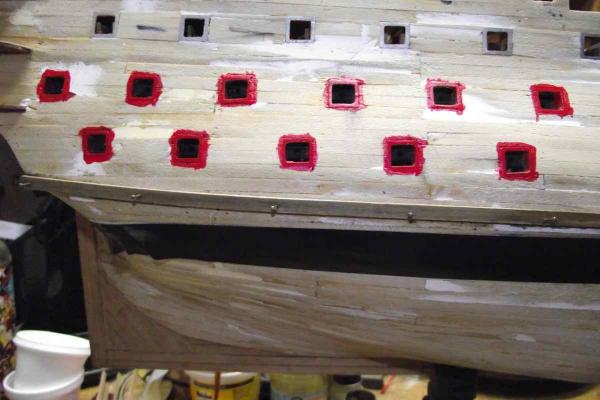
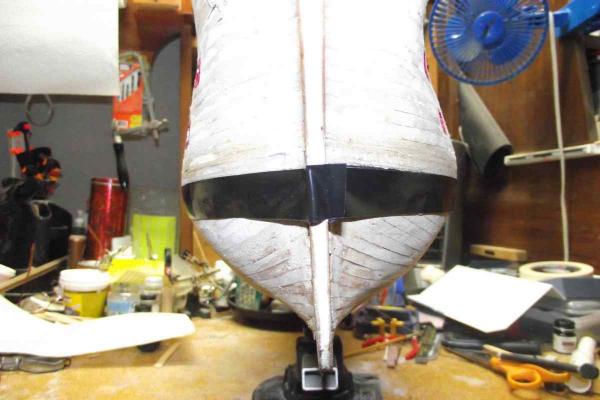
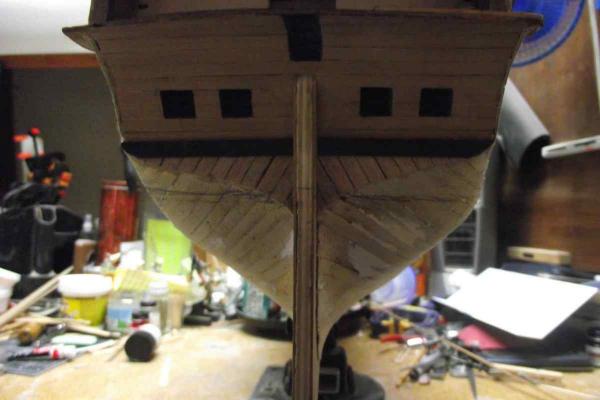
Arthur: Thanks a lot. I really don't know what I did It just seemed the most logical thing to do. Here are some photos of the laying (not yet glued) wales on both sides and from the front. The rough look in the front photo is from the masking tape tearing some of the wood. Costas: Thank you for visiting. I'm aware of the fire at the Mamoli factory, however, I am not so sure they are actually "out of business"! Their web page is up and they even advertise some "NEW" models.


- 786 replies
-
- 5
-
-
- Royal Louis
- Finished
- (and 1 more)
-
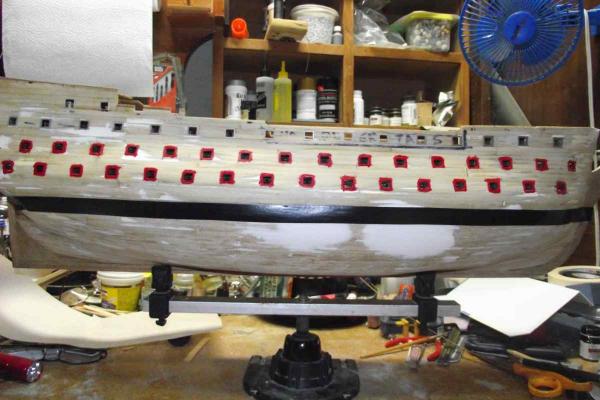
Hello Sjors. Not sure what you mean. The tape (black) follows the waterline. The wale follows a different path.

- 786 replies
-
- 2
-
-
- Royal Louis
- Finished
- (and 1 more)
-
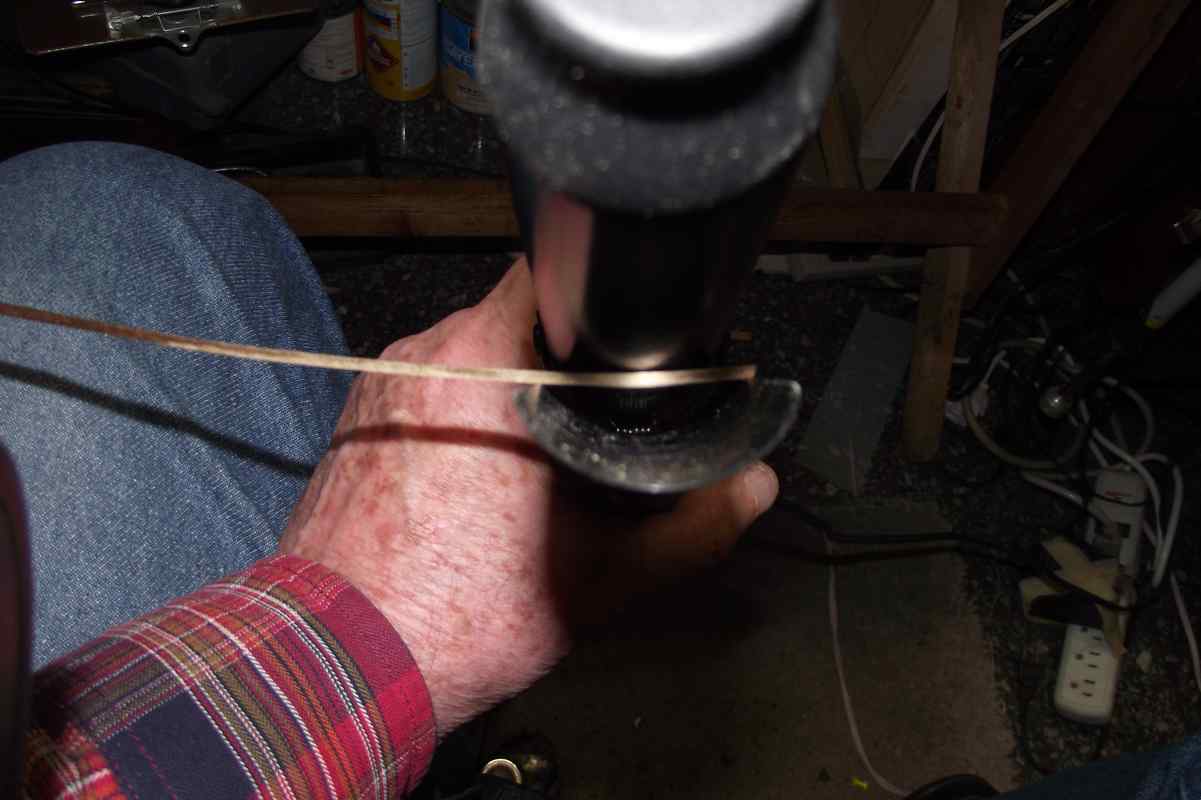
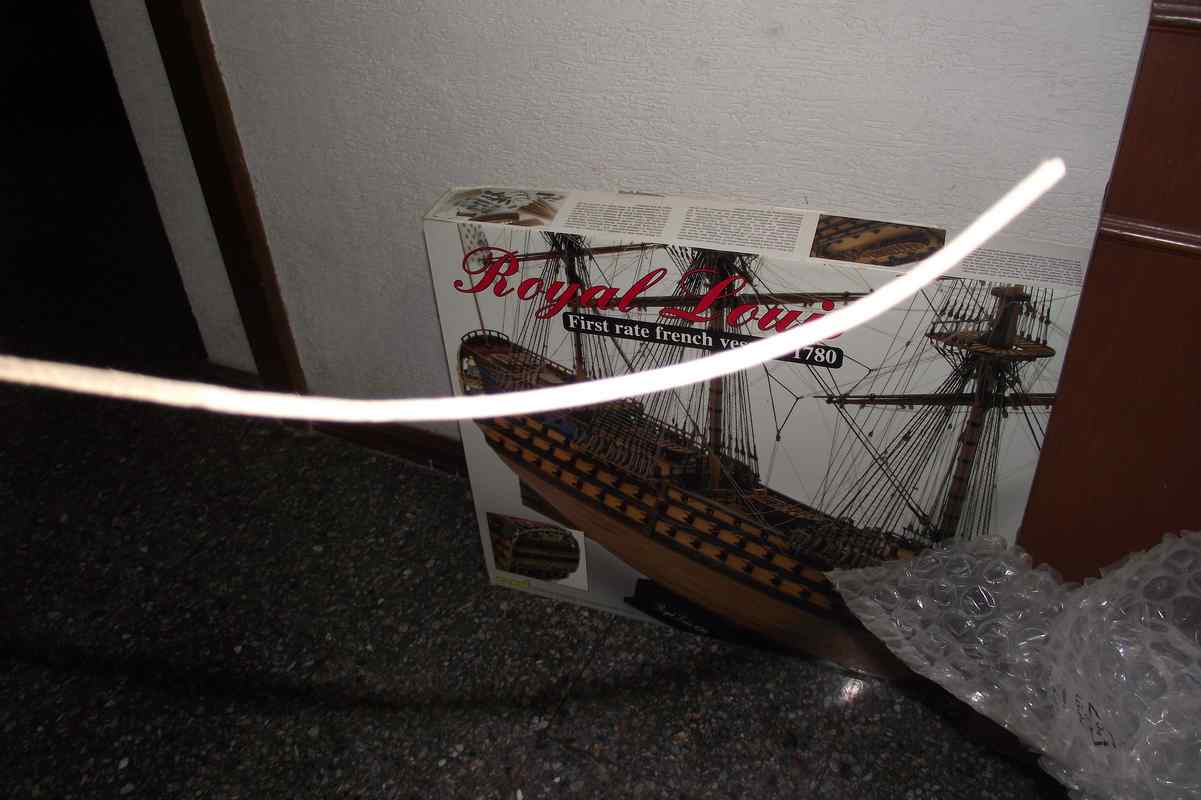
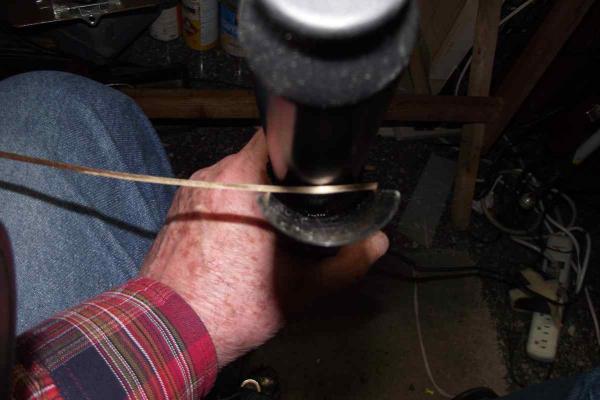
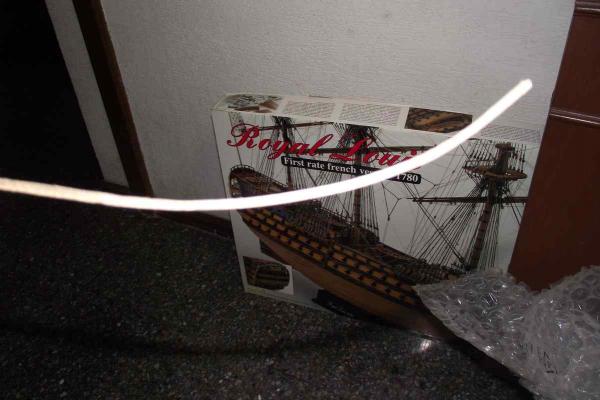
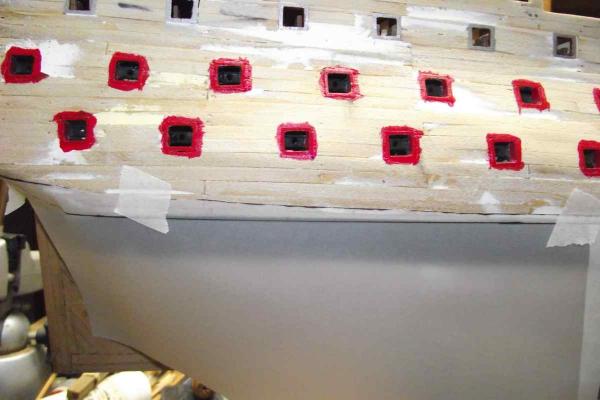
First wale dry fitted. I just dry fit the first starboard wale. (Can I say dry fit if the wood is wet??? ) There is no glue yet here whatsoever, so minor adjustments can still be done. I consider this a critical step in the planking job. I'm doing it very slowly and with utmost care. First segment of stern wale Bending the wood using a hair curler for the bow section where the curve is more pronounced. This is 2mm walnut. Not easy to bend. It takes some time but a nice curve can be made for the bow section.

- 786 replies
-
- 7
-
-
- Royal Louis
- Finished
- (and 1 more)
-
Hello and How old are you? It may take you many years to comply with just the first line of your quest : Learning and reading about every nautical term ever invented, and the history of ships from around Egyptian times (earlier if there were ships in Mesopotamia. There is so much stuff related to this hobby.
-
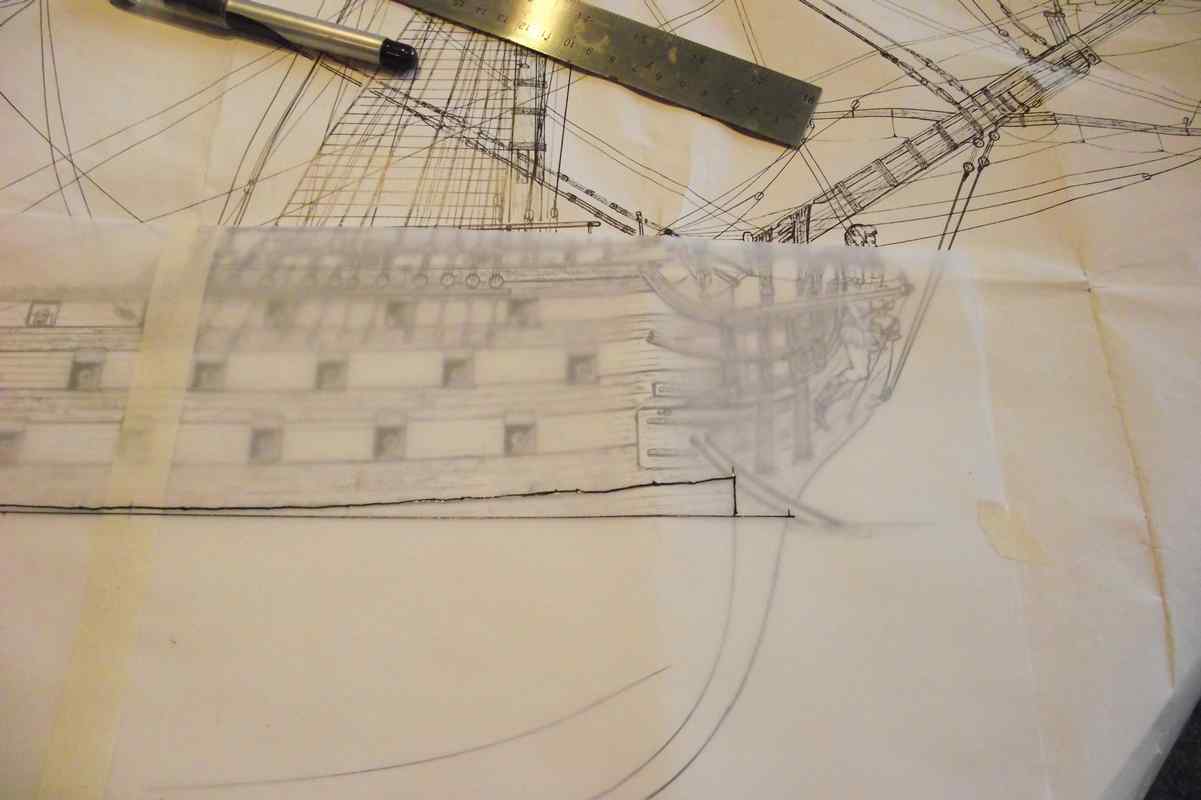
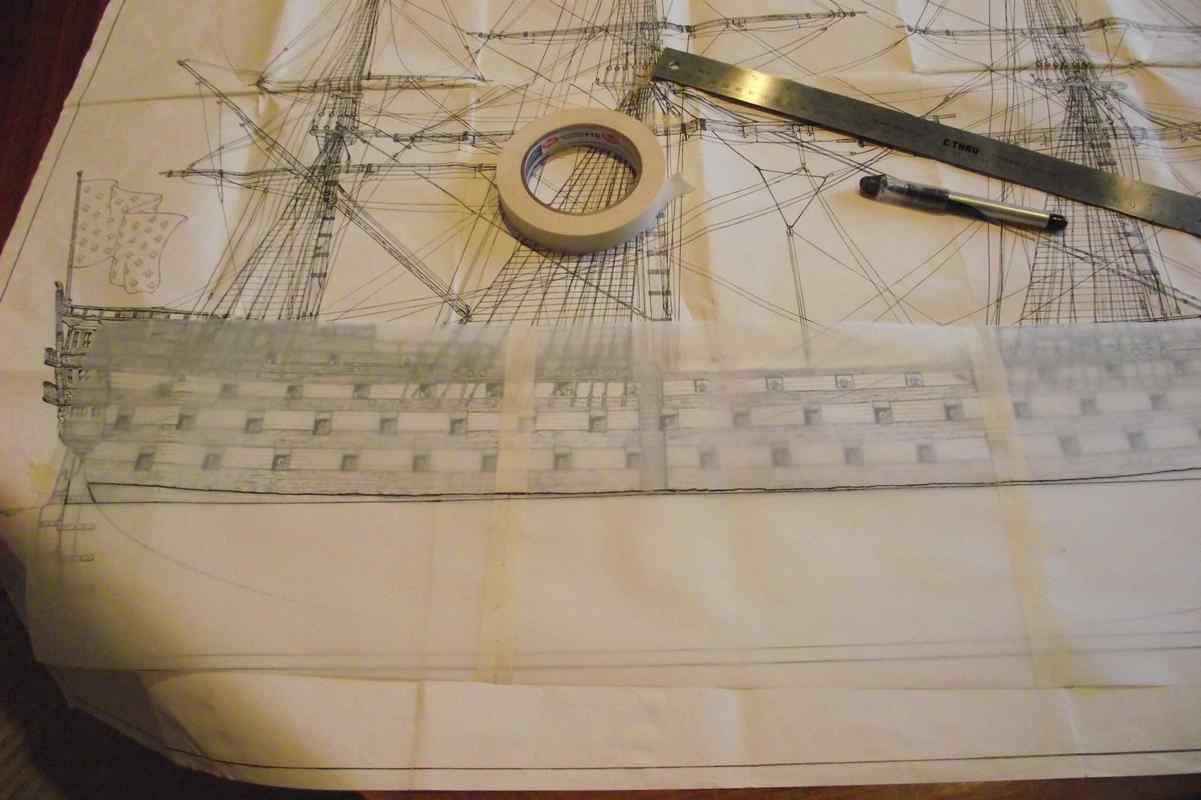
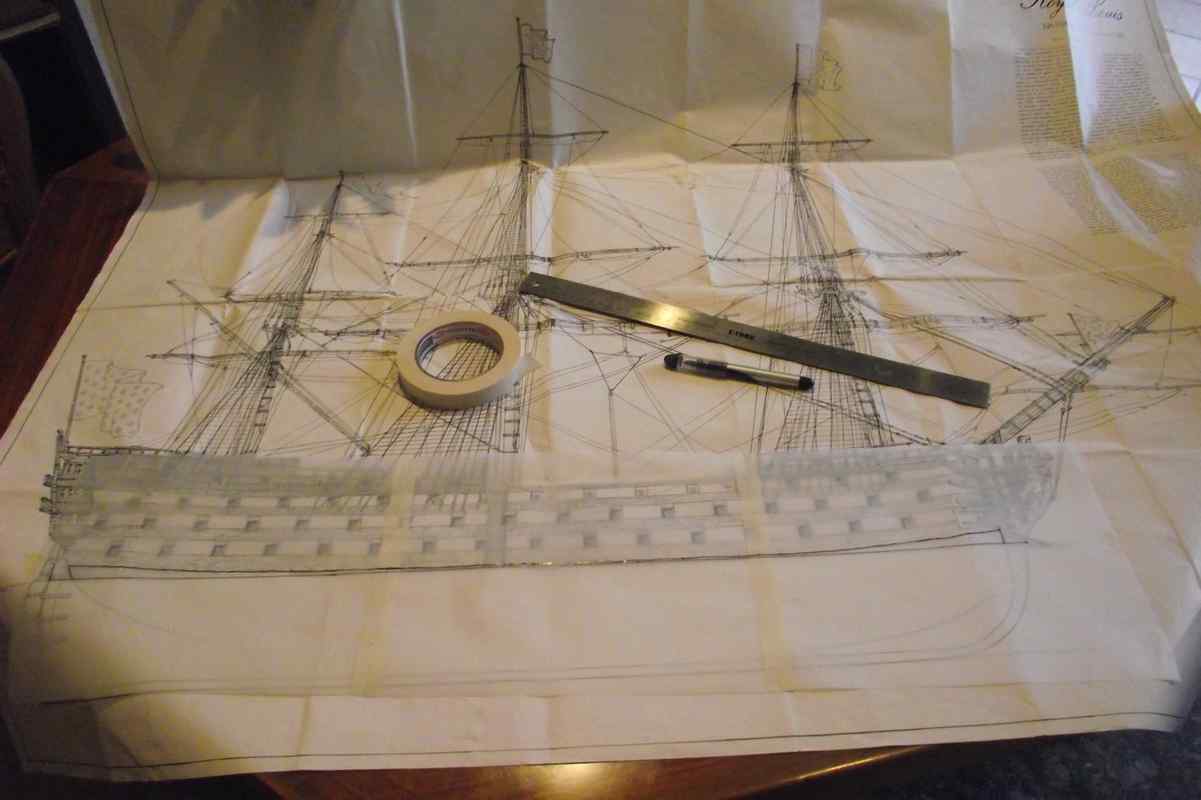
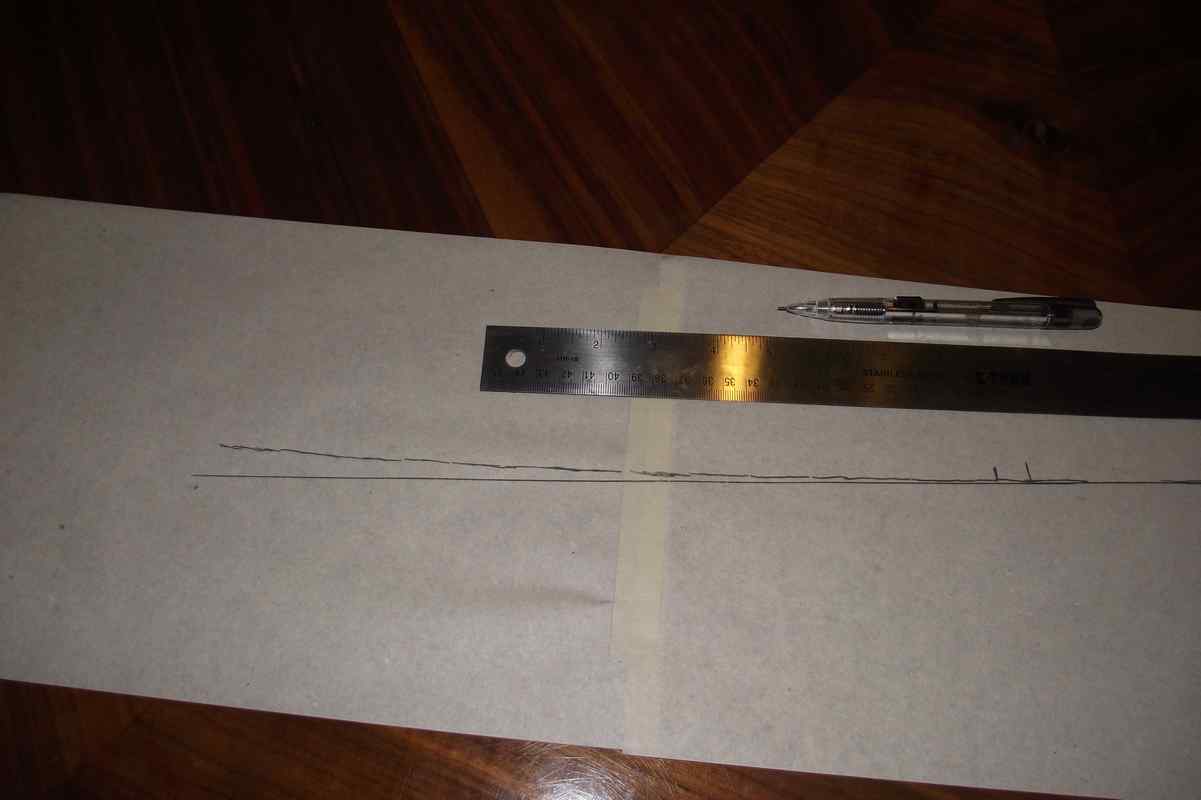
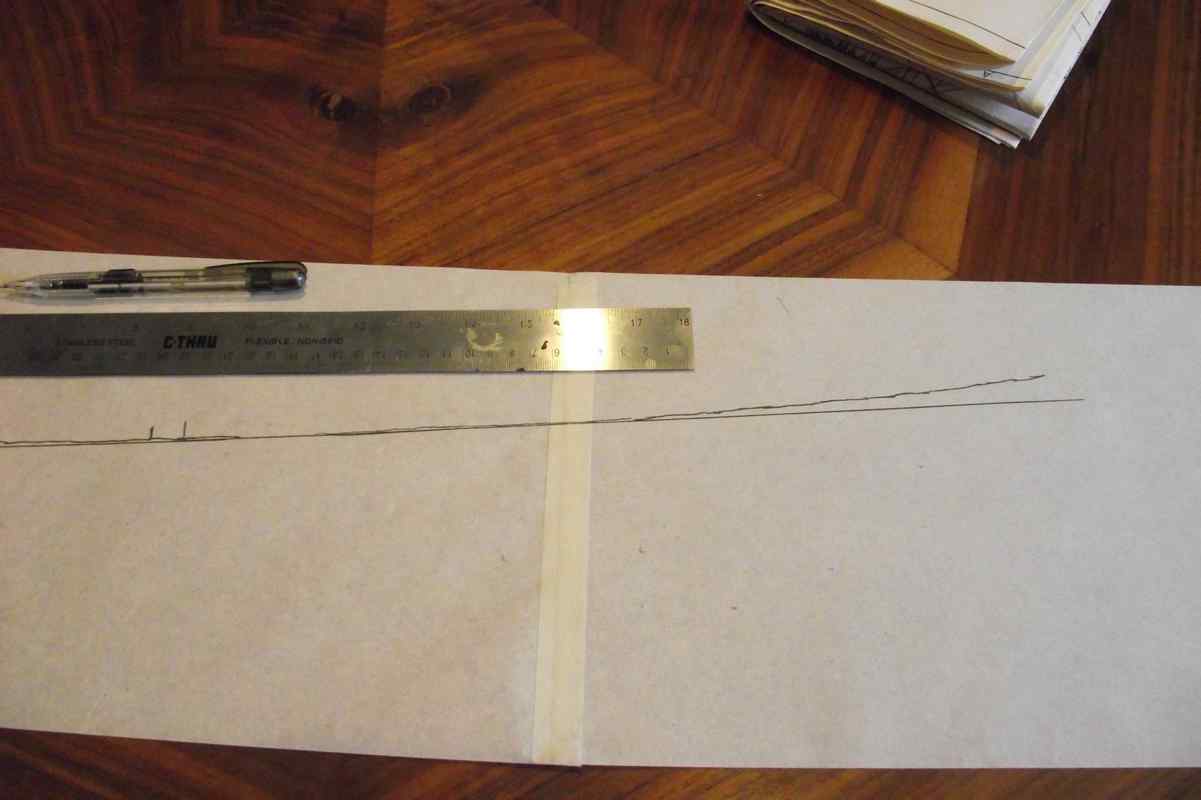
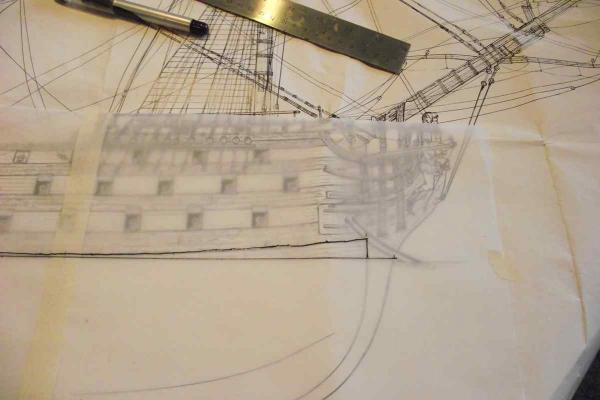
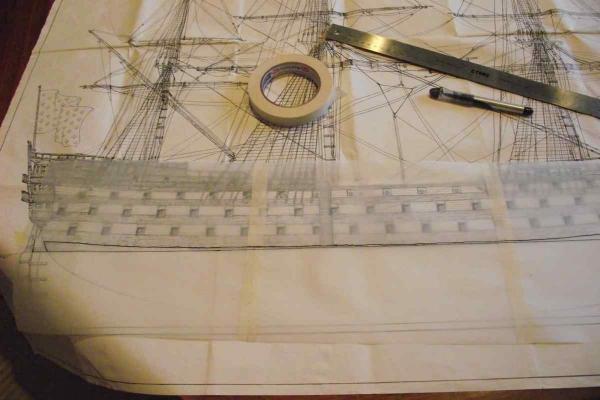
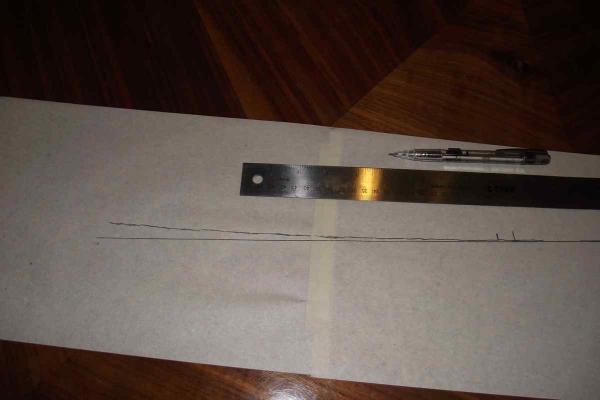
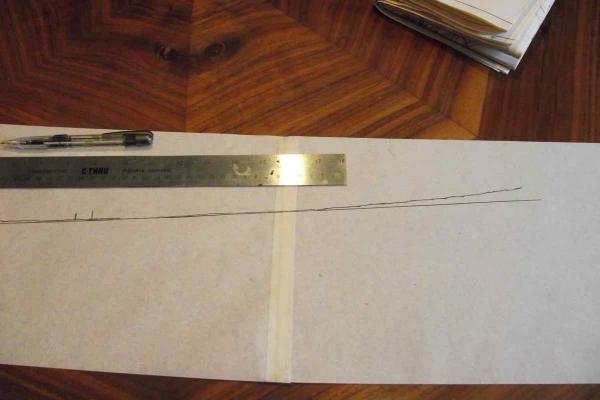
I did again the drawings, this time using semi-transparent paper. I have now a nice guide to start placing the first wale.


- 786 replies
-
- 7
-
-
- Royal Louis
- Finished
- (and 1 more)
-
I used black electrical tape to delimit the waterline, so I can have a better contrast when using the waterline line to match the same in the paper. I might do the drawing again using a more transparent paper. Update to follow this week.
- 786 replies
-
- 4
-
-
- Royal Louis
- Finished
- (and 1 more)
-
Sjors: I may not have explained myself right. I'm not thinking about using any paint. Just cut the paper in the shape of the wale and tape it on the hull using the waterline as a guide. Then I will use the shape cut in the paper to place the first wale. Hope this is more clear.
- 786 replies
-
- 3
-
-
- Royal Louis
- Finished
- (and 1 more)
-
Thank you Sjors. I was thinking to cut the paper at the wale line, then fix it aligning the straight waterline. This way I could place the first wale following the contour of the paper. What do you think?
- 786 replies
-
- 1
-
-
- Royal Louis
- Finished
- (and 1 more)
-
I used some sheets of paper and carbon paper, (Yes! Believe it or not I have a box full of that stuff. ) to transfer the waterline and profile of the main wale from the drawings. Now I have to find a way to actually use this information on my ship.
- 786 replies
-
- 3
-
-
- Royal Louis
- Finished
- (and 1 more)
-
@George: I really hope so! @Keith and Arthur: Thanks for the comments and tips. @Sjors: I was awaiting your comment with some apprehension! Glad you like it!!! And thanks all for the likes!!! Ulises
- 786 replies
-
- 2
-
-
- Royal Louis
- Finished
- (and 1 more)
-
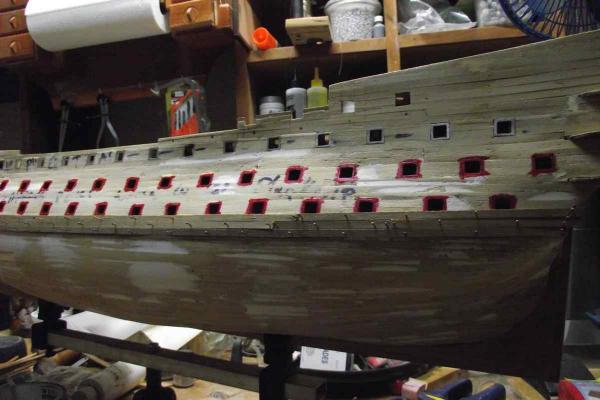
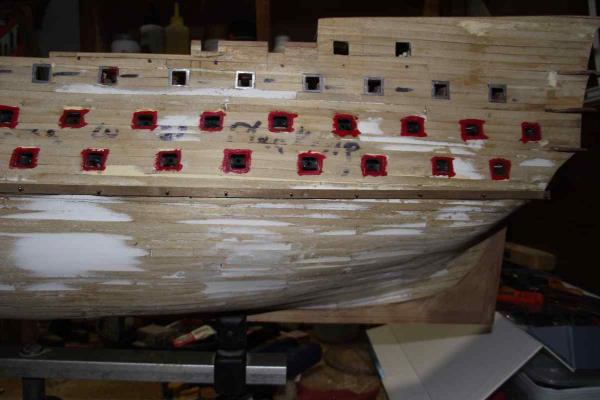
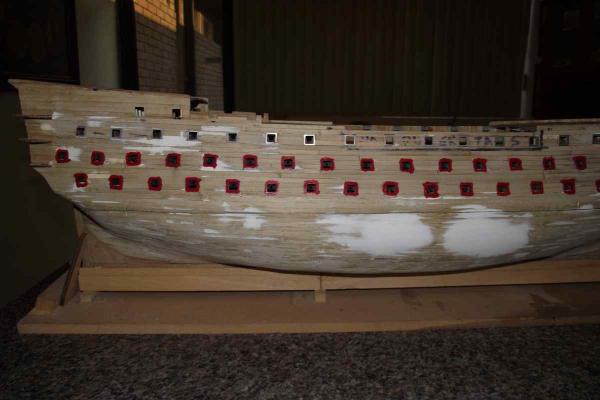
Small update. Sanded the hull to the best of my abilities. Those large white spots were large depressions. I just found out that the second planking is 1mm thick, not the .5 I am used to. Not sure if this will make a favorable or not difference. .5 planks are used only in the upper part above the first line of cannons. I also marked the waterline using an improvised jig. I know Model Expo sells a 5 dls. jig, but I didn't want to wait. I have no excuses now... next step, is the placement of the main wale, thus starting the second planking. GULP!!! Close enough?


- 786 replies
-
- 8
-
-
- Royal Louis
- Finished
- (and 1 more)
-
I tried to use 2mm blocks in my Vasa. I couldn't handle them, and being a semi pro fingerstyle guitar player I can brag about nimble fingers.
- 1,616 replies
-
- 3
-
-
- caldercraft
- agamemnon
- (and 1 more)
-
Sjors. Your ship is coming along really nice. That deck planking looks very real. Are you planning to add sails? If so, furled, fully displayed, or just partially displayed? What size of blocks did you use for cannon rigging? I have the impression the rigging is going to be a real treat. Congratulations on the job you've done so far. Ulises
- 1,616 replies
-
- 2
-
-
- caldercraft
- agamemnon
- (and 1 more)
-
I bought this item several years ago. This thing does not suck, it just blows. (No pun intended) It is a very strong and powerful blowing machine. http://www.amazon.com/gp/product/B001J4ZOAW/ref=oh_aui_detailpage_o06_s00?ie=UTF8&psc=1
-
Securing the lanyards of the deadeyes
Ulises Victoria replied to dafi's topic in Masting, rigging and sails
What a nice video. Thank you!!!! -
I'm 66. Do I need say more? I remember that in order to play certain games, you had to tweak your autoexec.bat and config.sys files, and manually load the drivers for the mouse and video card in DOS. How many of you have not the slightest idea what I'm talking about?
- 396 replies
-
- 9
-
-
- Idea
- Bright Idea
- (and 1 more)
-
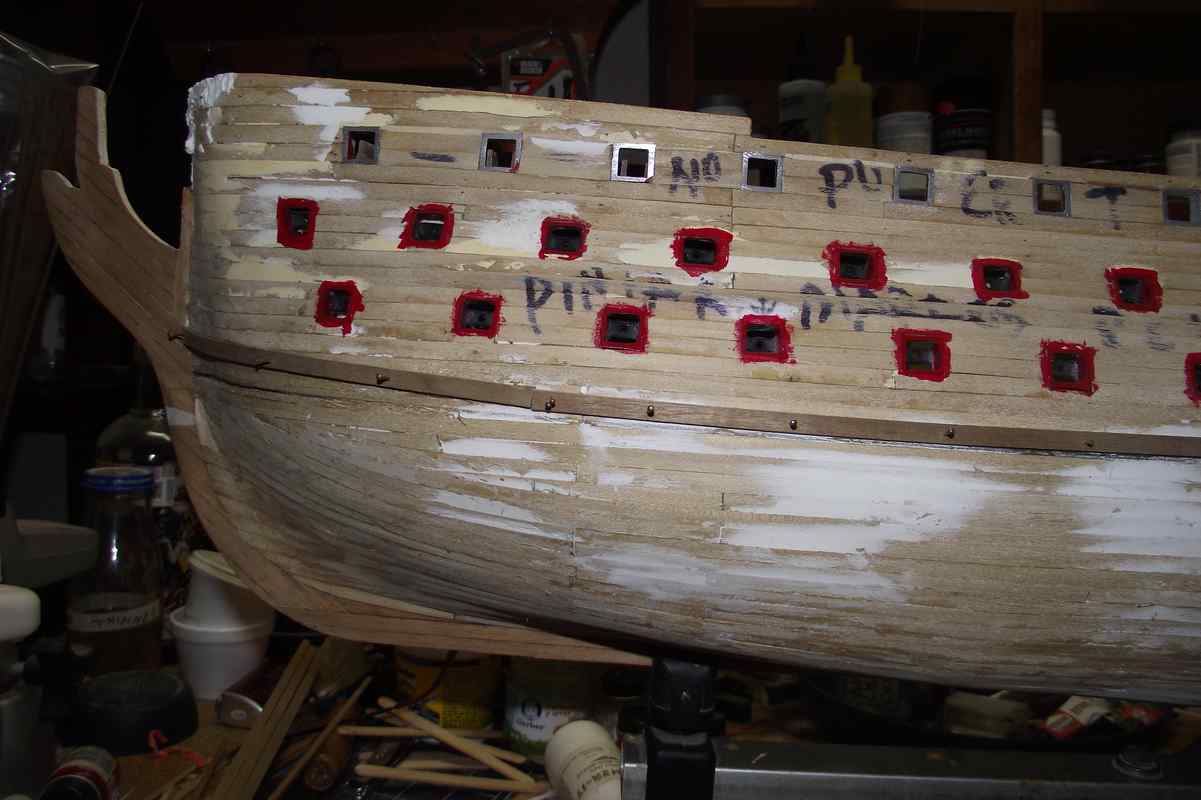
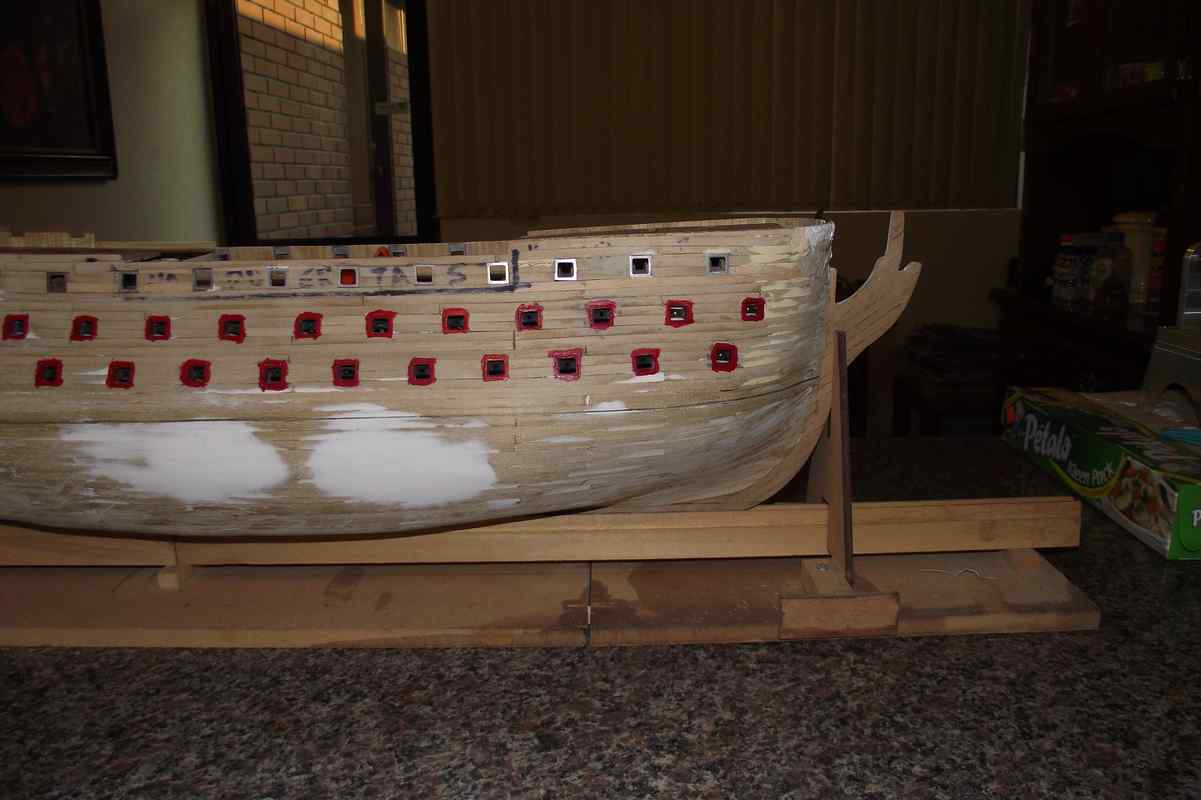
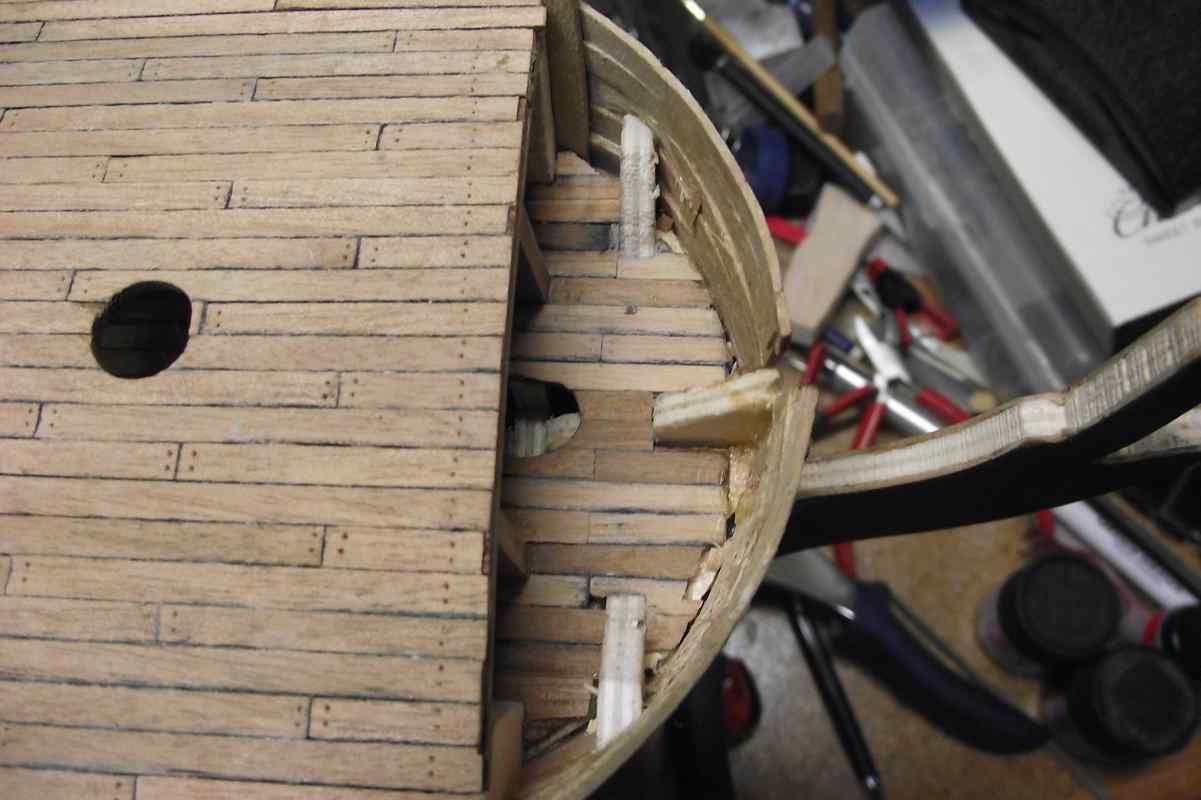
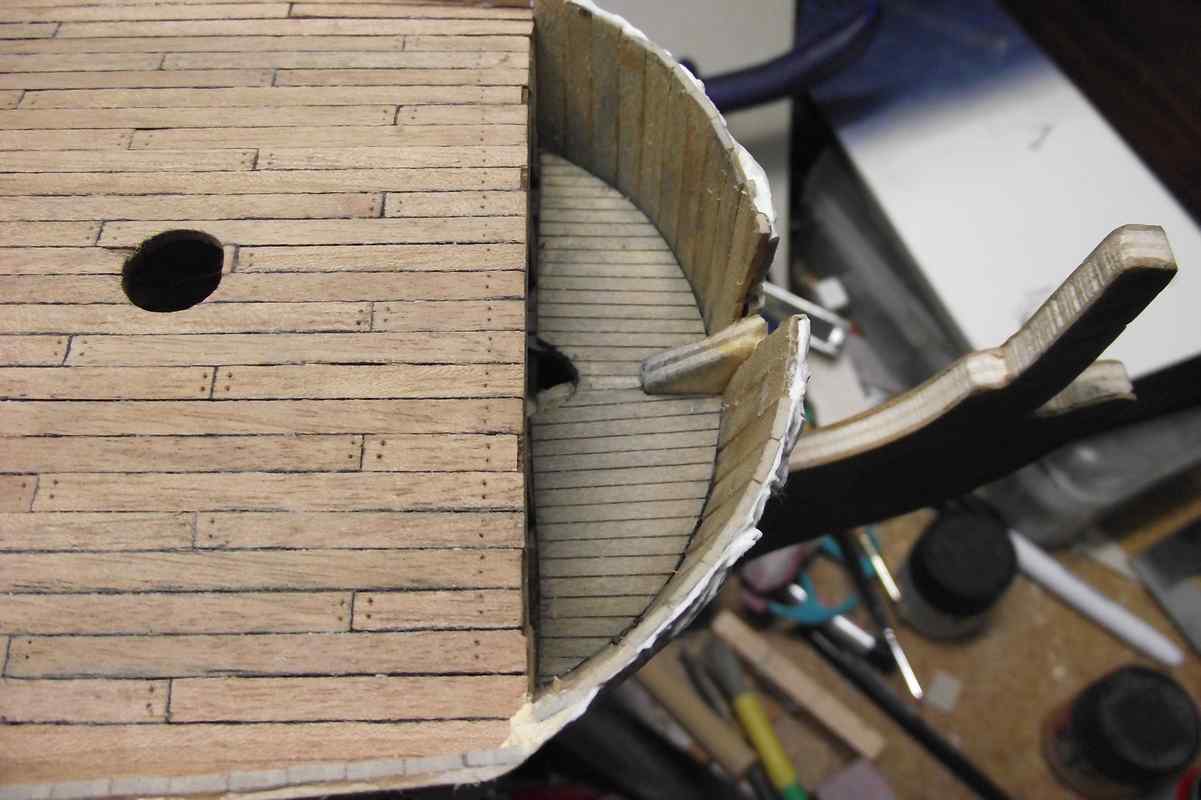
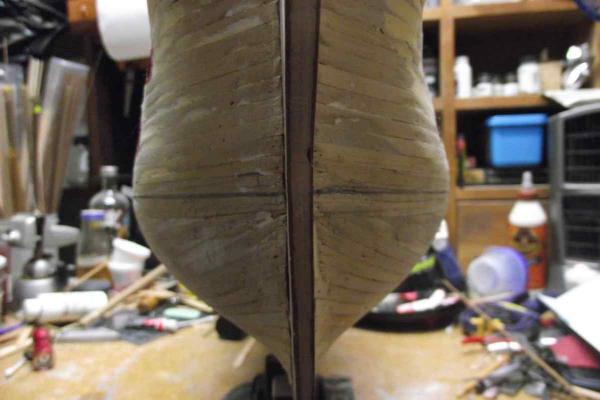
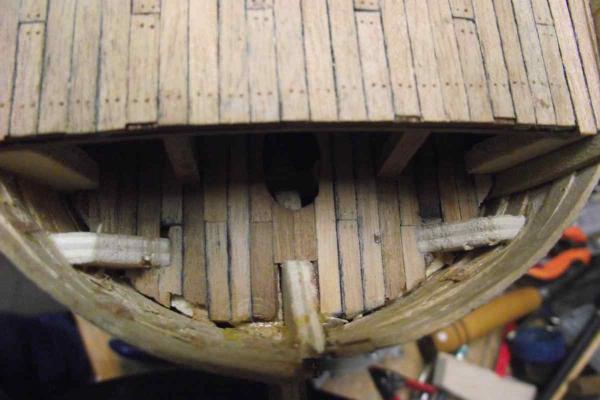
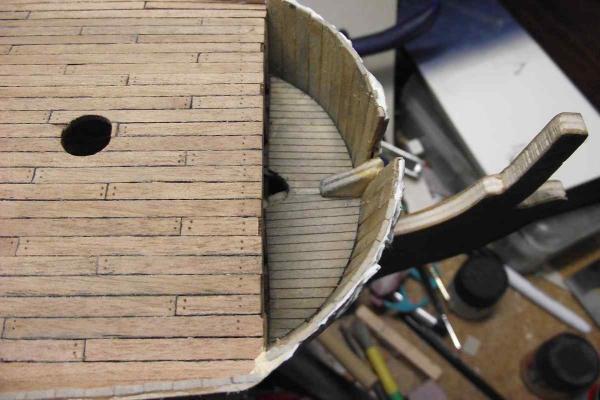
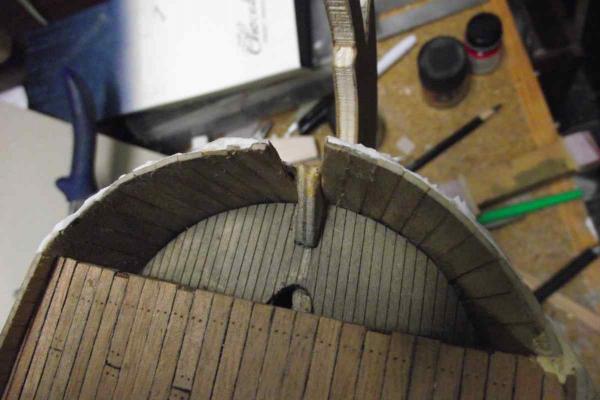
A couple of "before and after" photos. To sand down the filler in the hull of my Royal Louis I have to go outside and do it in my pen turning workshop, but being the weather cold and damp I just don't feel like it. So I worked a couple of days in an area that was haunting me since don't know when (the "before" photos). This area in the bow was horrendous and I finally got to fix it. It still needs the final second planking over the vertical reinforcements, so it's not still totally finished, but at least it looks better now. Before: After:

- 786 replies
-
- 10
-
-
- Royal Louis
- Finished
- (and 1 more)
-
Is this a one or two layers of planking kit? In any case, re-planking is possible if you take the care to check which planks are under level and which above level. One and the other can be fixed by either sanding down or adding pieces of scrap planks vertically over the frame. Not sure if this will help. Best regards.