-
Posts
52 -
Joined
-
Last visited
Content Type
Profiles
Forums
Gallery
Events
Everything posted by Marsares
-
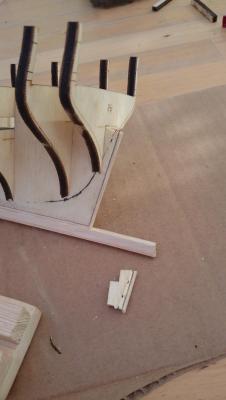
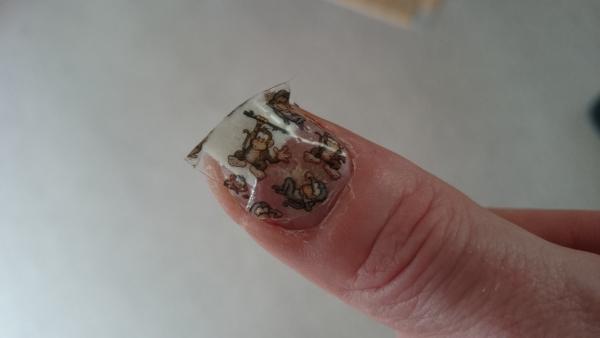
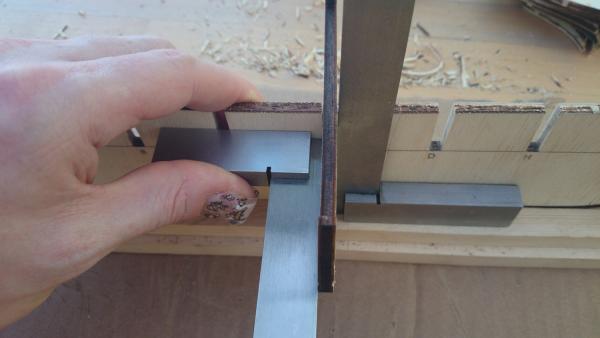
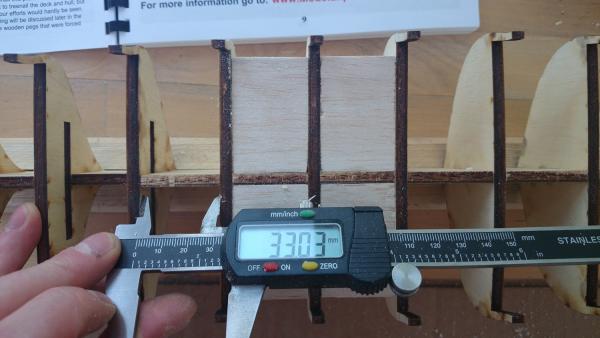
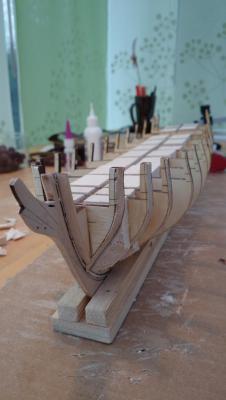
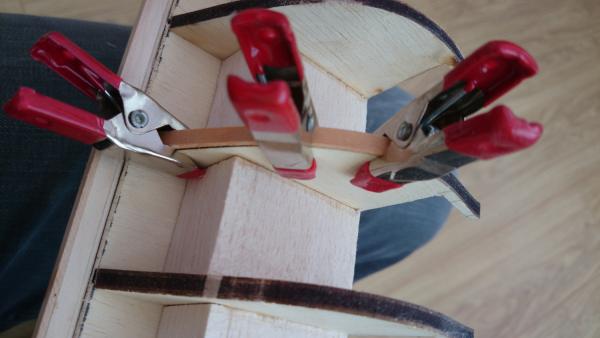
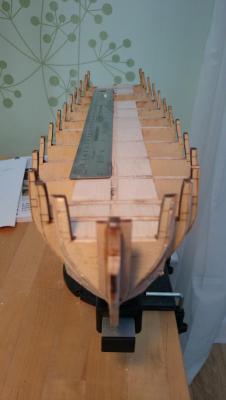
USS Brig Syren Part 4: Bulkheads, Minor Tantrums, Bulkhead Fillers and Repairs Step 1: Bulkheads Whilst I successfully completed the first chapter of the manual, the work so far didn't quite look like a ship as it was rather two-dimensional, so I was excited to start carving out the bulkheads from their laser-cut homes. This was very easy to do with a sharp hobby knife, although fitting them was a bit more time consuming. Once I had cut them, they didn't fit straight away as the fit was too tight. Nothing that couldn't be solved with a needle-file and after a few bulkheads I got the hang of it. Rule of thumb: once you've filed away the laser-char, you're very close to the money. Obviously, the main rule of ship building still applies: take little off and measure often. I'm now starting to get in the habbit of cutting/filing/chiseling away tiny amounts and constantly checking if it fits before you go too far. It's easier to take material off than to add on! You're looking for a snug fit, without having to force the bulkhead into place. Be careful, they're incredibly fragile (see my minor tantrums later on... haha!) It's also important that if you're filing to ensure that you're filing under a 90 degree angle. If you maintain this, chances are that the bulkheads will slide in under a more or less 90 degree angle onto the bulkhead former almost naturally. The less you deviate from this, the less you have to re-align the bulkheads with the bulkhead formers later on. Once I dry fitted all my bulkheads and measured them up, only one needed minor re-alignment so I marked this one up for later. Once I had dry fitted all the bulkheads suddenly the shape of the Syren materialised. It's a rather amazing moment, as suddenly you grasp what it is you're building. I checked the ship from all angles to ensure that the lines seemed right and that nothing was out of order and then took all the bulkheads out again. I then proceeded to glue them in place with white carpenters glue. I've read on several other blogs that people got their alignments wrong and because they started at the stern or the bow, the alignment exacerbated as they proceeded as they measured from bulkhead to bulkhead. Instead, I opted to start in the middle so that creep would be minimal. I've also got out my trusty square angles and held each bulkhead in place whilst I glued them with carpenters glue. I made one mistake though, which I still regret. When I fitted one of the first bulkheads the dry fit was fine but with glue it didn't slide as far as it should have and ended up sitting 1mm too high. I tried to pull it out again, but it got locked into place. This will definitely impact the outer shape of the hull, but I'm confident that I can fix this (see repair later on). What I did from there on instead was to dry fit a bulkhead, and then add a few daps of CA where the bulkhead and bulkhead former meet. Step 2: Minor Tantrums All good so far and confidence was building. Until disaster struck! Well, not quite disaster but the first time I experienced this my heart certainly skipped a beat. Whilst putting the final bulkhead in place (at the stern) I pressed it too hard and the back piece snapped off. Certainly not a happy bunny, but after some meditation and some deep breathing I regained my composure, got the CA glue out and stuck it back into place. My hate/hate relationship with the basswood continues. It is just too fragile for something as structural as the bulkheads or the bulkhead former. I find this the major drawback of the kit so far, for the amount of money that you spend on this kit you would imagine that they'd provide some better quality wood. And it's not like I'm careless, as nearly everybody seems to experience this. Over the last two days I've also managed to snap 3 bulkheads, again not a major disaster but it wouldn't have happened if the wood would have been better. I do wish I had stuck to my original idea of replicating the bulkhead former and bulkheads in harder wood, but what's done is done and I'll persevere. Other than that, I managed to cut my thumb with the hobby knife. Some crocodile tears and stamping on the floor later and the Admiral showed up, gave some TLC and stuck a nice kiddies monkey plaster on my thumb. I also asked for a magic kiss but she declinded. Bah! Step 3: Bulkhead Fillers With the bulkheads firmly in place and my thumb looked after, I could now measure, cut and fit the bulkhead fillers. In order to ensure that the bulkheads would be square to the former, they had to be the exact same width on the port and starboard sides. I first measured the required distance between the bulkheads, as close as possible to the bulkhead former as if the bulkheads weren't squared to this, you'd still get the right measurement. The rest was rather straight forward. I ensured that I cut the bulkhead fillers a little bit too thick and then sanded them on either side to get rid of the saw markings. Once they were all dry fitted, I took my calipher and measured everything to ensure that it all made sense and checked the angles of the bulkhead former to the bulkheads themselves with a square angle. When I was happy that it was all as it should be, I took each balsa block out one at a time and glued them in place with some carpenters glue. Given that my balsa blocks weren't totally square, I couldn't nicely align them with the top of the bulkheads so I left them sticking out a bit above the bulkheads as shown on the photo. I then took a large and small sanding block and proceeded to sand the top of the bulkhead fillers off until I hit the bulkheads and former themselves. The laser charring is actually quite useful in this instance as the moment you start sanding that away, you know you're at the right spot. This took about an hour, in spite of the balsa being very soft, but it's an awkward spot to sand as you're surrounded by the very fragile bulkheads. For once though, I managed not to snap one off! Once done, I ended up with a perfect smooth plane where I can later on place the deck planking on. What's more, once I took it out of the keel holder it didn't move out of shape and maintained it's perfect straight lines. No banana-shaped Syren clearly! I placed a metal ruler on top of it to make sure that I wasn't hallucinating but nope, perfectly straight it was indeed! I'm a happy bunny. Step 4: Repairs As I mentioned, when I glued one bulkhead in place it didn't slide down far enough as the carpenters glue got sticky. As a result, the shape of the hull wouldn't be right so I steam-bent a strip of wood and glued it on either side of the bulkhead. Plenty of clamps ensured that it stayed in place and once I'll start fairing the hull I should be able to sand it down until I achieve the right profile. That's it so far. I've also made some mock-ups for the deck planking and simulated caulking for the lower deck. Eventually I settled on using black paper between the deck planks as it gave a much more uniform look, but I'll post about that next time when I conclude this piece of work and the fairing of the hull. Kind regards, Martijn.
-
Thanks for all the responses all! @David: indeed, I guess I came to the same conclusion. I've packed up my 12-set of chisels that I specifically bought for this, guess I may have to invest in a sharpening stone as well. :-) @Andy: I'm glad you're finding my blog useful. I think I've read every existing Syren blog over and over again, it helps so much to read how others are approaching the ship building business. I've picked up numerous tricks and would be delighted if people find my build log as useful! @Augie: very good point about the sills. I was aware about the importance of establishing a natural run that is mirrored on the other side of the ship, but was mostly focussed on the horizontal plane whilst perhaps being at danger of ignoring the vertical plane. I'll do some measurements to ensure that it's located in the correct vertical position, thereby giving sufficient space for the waterways. Great tip, thank you! Kind regards, Martijn
-
She's turning into a beauty, Robbyn. Well done! I'm a few steps behind you so I'm looking at your log often to see if I'm overlooking something. I guess getting the run of the temporary strip right is what will make or break the look of the ship in many way. I'll be spending a fair bit of time on that I guess!
-
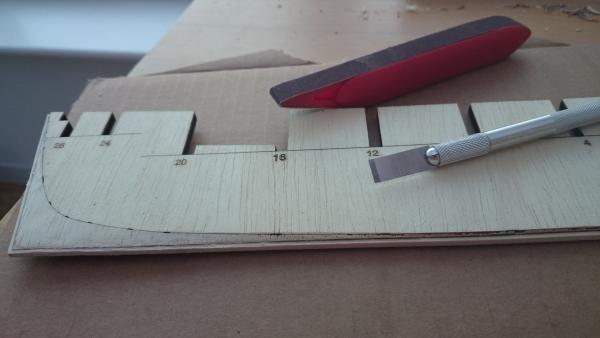
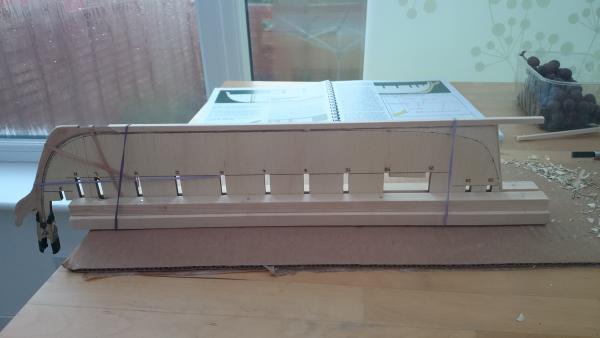
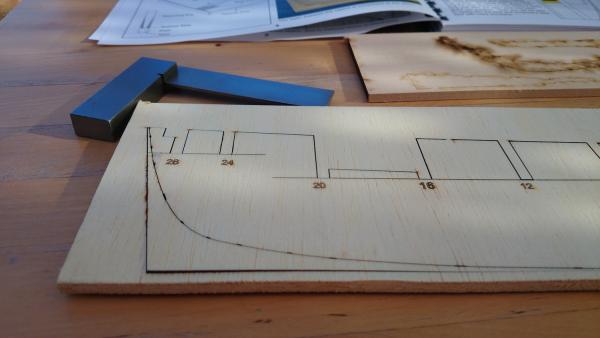
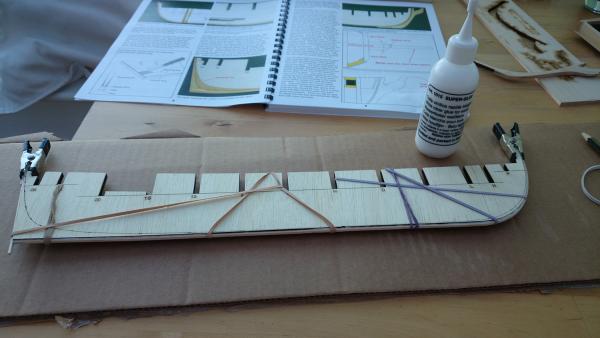
USS Brig Syren Part 3: Bearding Line and Keel Step 1: Bearding Line With the rabbet glued on the bulkhead former and left to dry overnight, it was time to draw the bearding line on port side of the bulkhead former, using the punctures that the laser made as a guide. Following that, I tapered the bulkhead former from the bearding line down towards the rabbet whilst trying to ensure a smooth transition. Once again I found that the wood was very soft, which wasn't a problem in its own right as it meant that it was easy and fast to work with, but that it was also very fragile. Especially on places where the bearding line and rabbet were very close to one another, the wood just disintegrated whilst slicing it with my very sharp hobby knife (see the right hand side on the photo). Now, I don't think this will be a problem whatsoever for later down the course, but I don't think basswood and I will become best friends. I'd rather spend more time on a harder wood and achieve a clean finish with a sharp edge, rather than working with cheap wood that throws so many limitations your way. In the end though, I achieved a result that I was happy with. I've spent quite some time on this, as it feels that it's one of those foundational activities that could create a lot of problems further down the line if not done properly. After some trial and error I found that chiseling didn't produce good results because the wood is so soft, instead a hobby blade with a sharp rectangular blade did a much better job, followed by some sanding with a fine grade paper. Step 2: Keel Once I was happy with the previous step, I proceeded to glue the stem knee onto the bulkhead former. This was a pretty straight forward step. When the wood glue was somewhat dried up I proceeded to glue the keel in place. This proved to be a bit more tricky given that the keel was very straight, yet the bulkhead former was pretty warped as I explained in my previous post. Sometimes in life, things happen for a reason though and I was happy that yesterday I skipped ahead to Chapter 2 and actually made a keel holder. Sticking the bulkhead former upside down in the keel holder straightened it out and thus allowed me to glue the keel in place, whilst ensuring that the rabbit has a consistent depth on either side. Some elastic bands did the trick for the rest. All in all, not as much progress as I was hoping for but the work on the rabbet and bearding line will come in good stead further down the line I'm sure! Thank you also for all your kind remarks, it's really encouraging that people are interested in progress. Also, if you see me making a silly mistake, do shout! It's my first time, so I'm bound to make some! ;-) Kind regards, Martijn.
-
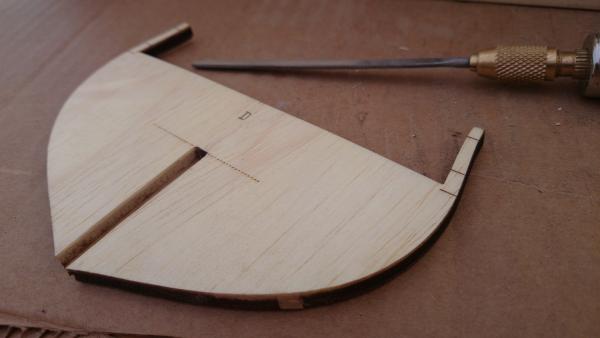
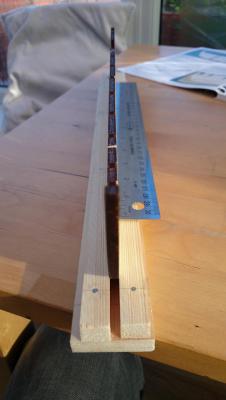
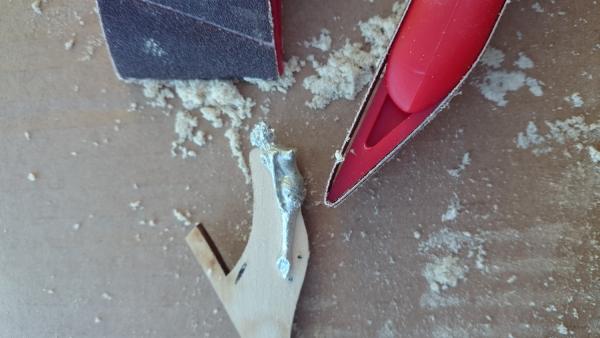
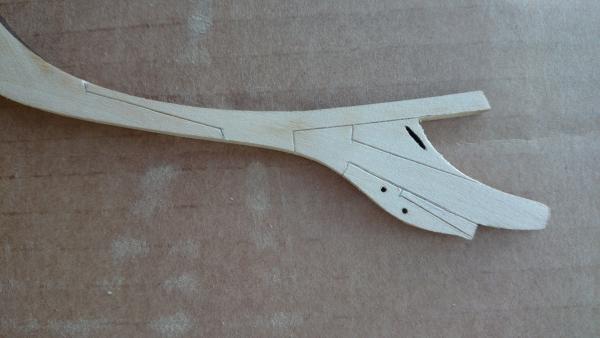
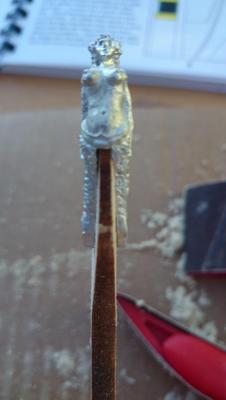
USS Brig Syren Part 2: The Bulkhead Former, Rabbet and Stem Knee Step 1: Bulkhead Former and Keel Holder The first thing that I noticed when I unpacked the bulkhead former was how warped the wood was. Granted, I've seen worse on the forum, but I wasn't quite expecting this. Secondly, the wood appeared very soft to me and indeed very fragile. I've read lots of stories how people experienced that certain parts snapped off and I now understand how that could easily happen. I contemplated for a moment to cut my own bulkhead former and bulkheads from some other and stronger wood, but given that I don't have a proper scroll saw (yet!) I parked that idea and decided to run with what was in the box. Should things snap, I can always make my own. In order to get rid of the warping in the wood I skipped ahead to Chapter 2 in the manual and created a keel holder. Luckily I had some pieces of wood in the shed (the benefits of 4.5 years of DIY in my previous house) that were ideal for the job. Ideal, expect the fact that they were warped as well. Luckily, my trusted metal ruler was true and straight so after some measuring and bending of the wood whilst I glued and nailed it to the base I managed to get the warping out of the wood. After inserting the bulkhead former into the keel holder I put the ruler next to it and voila.... as straight as it can be. It's amazing how exhilarating and fulfilling little things like this can be. I can already see that this will be a nice hobby! Step 2: Rabbet After I was satisfied that the warping can be negated with the keel holder and then later on fixated by adding bulkheads and bulkhead fillers, I proceeded to cut the rabbet to size (leaving it slightly oversized), soak it in luke-warm water for 10 minutes and then leave it to dry on the bulkhead former whilst held into place by clamps and elastic band. Another observation was made: the clamps that I have bought are rather strong and leave indentations in the wood, so a note to myself was made to in the future put a piece of scrap wood between the clamps and the final wood. Furthermore, once soaked, the wood was incredibly easy to bend. I wonder if pear will have similar properties, as I intend to be using that for my hull planking. Alas, the pear has not yet arrived so I can't test. Step 3: Stem Knee The manual stated that the stem knee needed to be tapered in order for the figurehead to fit on it. So I took the sexy vixen Syren out of her plastic bag, lingeringly ran my fingertips over her and gazed upon her shapely curves until I felt a tap on my shoulder and got the evil eye from the Admiral. With a blush on the cheeks I remarked how warm the conservatory was and that it was a purely professional relationship that we had. Anyways, quickly moving on I placed the Syren roughly where she would sit and traced a rough outline around her, thereby ensuring that I would not get too excited whilst sanding and end up eating in the edge that will lie against the rabbet. With a big contour sander I proceeded to gently taper the stem knee, often checking with the figurehead to ensure that I don't go too far. This seems to be one of the key principles of the hobby: measure and check again and again and again. After a while I ensured a smooth fit between the stem knee and the figurehead.I noticed that the bottom part of the figurehead will need some gently manipulation in the future as she will probably interfere with other elements of the ship as she currently would sit. I'm not sure in how far this will matter, as I'm intend to try to carve a new figure head as I'm not too impressed with the quality of the casting but given that I've never ever carved anything, at least I got a fall-back option. Happy with the results I realised that the stem knee in reality would not have been a single piece of wood and remembered that on one of the building logs I saw that somebody added some fake lines to simulate that the stem knee was constructed of multiple pieces. Of course, with my scatter brain, I had no idea whose log it was so after trawling through most of them I saw Dubz' log again and noticed that he was the one who did it. By the way, Dubz, your log has been a great inspiration for me so be prepared that I'll be regularly plagiarising your work (copying is the most sincere form of flattery they say!).... After some delicate measuring I traced the outline with a pencil and then played around a bit on a scrap piece of wood with a hobby knife. I noticed that the cut would be too fine to notice, but that when tracing it with a micro awl with moderate pressure, I got the result that I was looking for. I then traced the lines that hit the edge of the stem knee towards the flip-side of the piece of wood and replicated the exact same pattern. I learned that when tracing something, you have to hold your tool of choice very closely against a ruler as otherwise it may jump out of place and follow the natural grain of the wood. Luckily, the one time this happened it wasn't very noticeable! That's the progress so far, not bad for a couple of hours work I guess. This evening I'll be once more reading up on Chapter 2 (always good to read ahead) and hopefully tomorrow I'll find some time to taper the bulkhead former between the bearding line and the rabbet, and to glue the stem knee and keel and to temporarily tape the false keel. Kind regards, Martijn.
-
USS Brig Syren Part 1: Introduction After we finally finalised the house move, unpacked and gave everything their new home (except the cats, who are wandering around restlessly and are desperate to go outside and work on their tan), the time arose to give the Syren its new home. So for the second time, the box was unpacked, all the various tools and materials were organised and put away in a structured fashion and the build began.The admiral pops every now and then into the shipyard as she has no idea what to expect, but probably more so in order to check that I'm not yet nerd-raging and throwing a tantrum - and perhaps throwing some bits and pieces around. I've managed to disappoint her so far, but I'm sure the time will come sooner or later! Each and everyone of you probably have seen the following a million times by a million people, but as it's the first time that I've ever done anything like this I'm going to pretend that you're as green as me and post way more detail than anyone would be interested in. It's a learning curve for me and if I can share my learning (and mistakes I'm sure) with others, than so the better. I also plan to do a few things that are not part of the kit such as proper tree nailing, using a different type of wood for hull and deck planking, hopefully some spiling for the hull planking, trying my hand at some carving in order to replace some of the castings that I'm not happy with (this is most likely the stage that the Admiral will see tools flying around), making my own gun carriages and some others bits and pieces that I haven't decided on. I'll keep you posted on the high and lows! So... without further ado, lets progress to the real work. The shipyard is more or less up and running, the coffee machine is all fired up and all the plans, materials and tools are laid out! Kind regards, Martijn.
-
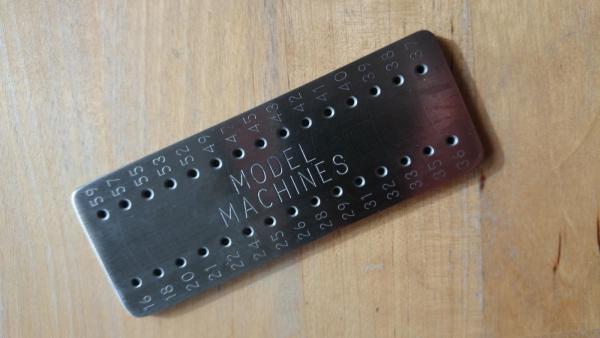
No progress yet as I decided to wait with the build until after the move as I didn't want to move a very fragile hull and potentially break it in the process. It's been very frustrating as I'm dying to get my hands on it and to start working, but we're moving this weekend so after that I can start in earnest. We'll have a very nice conservatory next to the living room, and I've already claimed part of the conservatory for my working area. Until then, this is the sorry progress that I've made: packed everything up again! :-) Positive news though as my drawplate from Model Machines arrived as I'm planning to do some proper tree-nailing on the hull in due course. Very pleased with as it's solid quality. Anybody has any hints for using this? I've been told bamboo skewers work the best if you're aiming to use the smaller holes...?
-
Thanks, Jason. That really answers my question. I think the IBS/E + MB200 + KT70 makes for an excellent rotary/drill combination from the reviews I've read so far, and your experience seems to underline that. I'd like to it the MF70 mill in due course, but that'd be of a later concern once I start to modify kits more in preparation for scratch build. I'm quite some years away from that though I'd imagine!
-
Nice progress and she's certainly starting to look like a beauty! Thanks for the in-depth explanation on how you made the stamp for the copper banding. Out of curiosity, are you using the Proxxon IBS/E with the MB200 drill-stand? I'm thinking about acquiring this - probably with the KT70 compound table - and was wondering how you felt its performance is?
-
I'd like to say, Ron, that your build is an inspiration for myself and - no doubt - many others. My Syren kit just arrived and although it will be my first build, I intend to add various levels of additional detail and do some element of scratch building of minor parts where I feel confident enough in order to get my skills up. Little things matter, and your blog has given me some very good ideas around how to construct the sheaves in the bullwarks, build the catheads, etc. Very impressive and thank you!
-
Interesting approach of re-creating the quarter galleys. I just received my Syren kit and am not very impressed by the Britannia castings either, especially the side quarters and over the weekend was mulling over how I'd get to a better end result. You may just have provided the answer!
- 227 replies
-
- syren
- model shipways
-
(and 1 more)
Tagged with:
-
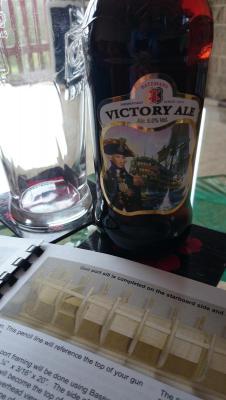
Thanks everyone, really looking forward to the journey ahead. In no rush to complete it, as they always say: enjoy the journey rather than the destination! Progress has been slow at the shipyard but plenty of activity in the adjacent pub where plans, manuals and other build logs are eagerly studied before the tools are taken up. Of course, all this is done whilst consuming a certain amount of themed ale! :-)
-
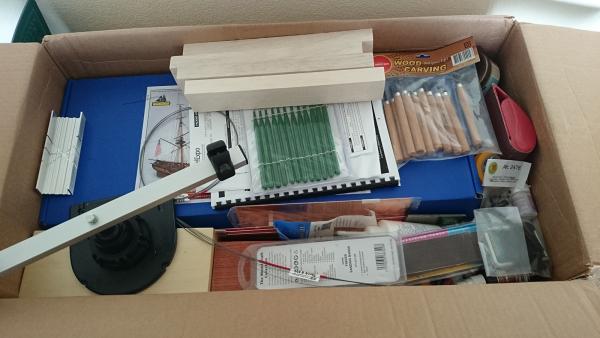
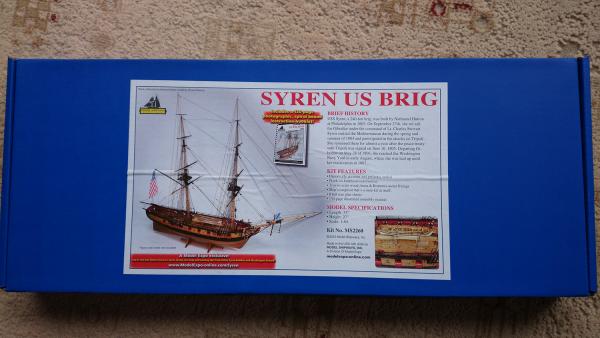
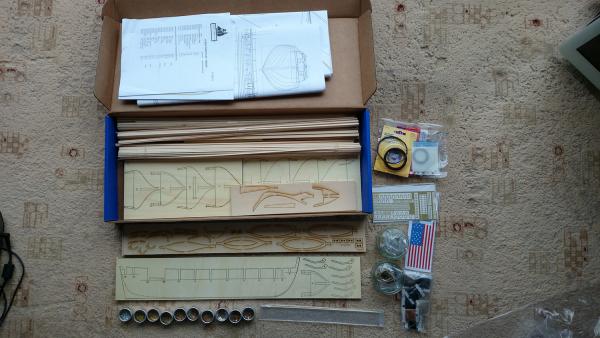
Wahooh! ... it arrived! After a long wait, my US Brig Syren finally managed to paddle across the pond and land in the UK. An interesting mix of nerves and excitement, but all good! I've decided to go for this particular kit as it's a model from a period that I particularly like, so it should keep me motivated throughout the long haul that I'll have ahead of me. Furthermore, as a total beginner I was looking for something that would be doable, yet be challenging whilst providing enough support through an excellent manual, the designer's presence on the forum here and a plethora of excellent build logs of other members. I also was keen on a plank-on-bulkhead model as it felt that it would stretch me a bit, whilst not being as challenging as a plank-on-frame model. The Syren it thus was. Yes, yes, I know... yet another Syren blog. 🙂 I've spend today unpacking everything (including some new hand tools that I had to order as my DIY equipment is too big and clumsy), categorising and counting everything. To my surprise, everything seems to be there although I had 11 pieces of a particular timber bit, rather than the required 17. I'll pick that up with Model Expo, no doubt they'll whiz over the missing 6 pieces. I don't think it'll hold me back any time soon though. I'm expecting progress to be slow. I'm a stickler for detail and a bit of a perfectionist, so things like this tend to take longer with me anyways. I also want to use it a bit as a test-bed for developing my modelling skills, so I want to try certain things on the ship that are perhaps a bit more advanced such as a bit of spiling of the hull planking, proper use of stealers and drop-planks, detailed tree-nailing and perhaps some other things, just to get my teeth stuck into it. Besides that, after ordering the kit we found out that my girlfriend is pregnant, that I got a new job which I'll be starting soon and that we're moving home. Yes, timing is impeccable as always with me! 🙂 It's like Xmas came early... or more likely, very late in this instance! Sorting, categorising and counting everything against the inventory log. A bit nervous about how small some of the pieces are, especially with my clumsy hands. Luckily I got some really good tweezers that should help me out! Kind regards, Martijn.
-

HMS Sussex by mij - Scale 1:48
Marsares replied to mij's topic in - Build logs for subjects built 1501 - 1750
I'm quite a number of years away from even considering my first scratch build although this is what I will be working towards, therefore I hope you don't mind if I tag along. Keen to learn as much as I can about this incredible hobby. ... and, the cherry does look nicer than the tulipwood to be honest. Wise choice, albeit a very brave one. -
Thanks Nigel, you're a life-saver. Been googling for days and somehow didn't find that site. The wood that they do in sheets are: cherry, lime, obechi, mahogany, maple, plywood, pear, tanganyka and walnut. Now debating between lime and maple for the hull planking when spiling, with likely pear or tulip wood for deck planking. Also looking to invest in a Proxxon table saw like yourself. Kind regards, Martijn
-
Being UK based as well I too struggle with finding a good supplier for wood strips and sheets as I am after beech, cheery, pear or tulip wood for my hull planking. In reality looking for a wood that holds a clean edge, does not dent too easily, yet can be worked on mostly with handtools and is avaikable in the UK. Which suppliers do you guys use in the UK?
-
Amazing build, Drazen! I'll be following closely how you progress as - being Dutch myself - de zeven provincien is the ship that eventually I'd like to build myself. I'm some way off that though, very new to the model ship building hobby so will have to get some kits underneath my belt first before I even contemplate replicating what you're doing!
- 487 replies
-
- ship of the line
- 80 guns
-
(and 1 more)
Tagged with:
-
At first I thought making something out of bone was a bit macabre but when I realised how you were turning it into true art, you've certainly won a fan. The level of detail that you put into everything is quite mindboggling and I tip my hat for that.
- 241 replies
-
- royal caroline
- yacht
-
(and 1 more)
Tagged with:
-

ROYAL CAROLINE 1749 by Doris - 1:40 - CARD
Marsares replied to DORIS's topic in - Build logs for subjects built 1501 - 1750
Your quality of work and eye for detail is beyond comprehension. I salute you for your work and humbly bow.- 883 replies
-
- royal caroline
- ship of the line
-
(and 1 more)
Tagged with:
About us
Modelshipworld - Advancing Ship Modeling through Research
SSL Secured
Your security is important for us so this Website is SSL-Secured
NRG Mailing Address
Nautical Research Guild
237 South Lincoln Street
Westmont IL, 60559-1917
Model Ship World ® and the MSW logo are Registered Trademarks, and belong to the Nautical Research Guild (United States Patent and Trademark Office: No. 6,929,264 & No. 6,929,274, registered Dec. 20, 2022)
Helpful Links
About the NRG
If you enjoy building ship models that are historically accurate as well as beautiful, then The Nautical Research Guild (NRG) is just right for you.
The Guild is a non-profit educational organization whose mission is to “Advance Ship Modeling Through Research”. We provide support to our members in their efforts to raise the quality of their model ships.
The Nautical Research Guild has published our world-renowned quarterly magazine, The Nautical Research Journal, since 1955. The pages of the Journal are full of articles by accomplished ship modelers who show you how they create those exquisite details on their models, and by maritime historians who show you the correct details to build. The Journal is available in both print and digital editions. Go to the NRG web site (www.thenrg.org) to download a complimentary digital copy of the Journal. The NRG also publishes plan sets, books and compilations of back issues of the Journal and the former Ships in Scale and Model Ship Builder magazines.


