

jhearl
-
Posts
355 -
Joined
-
Last visited
Reputation Activity
-

 jhearl got a reaction from jay in Bluenose II by Heronguy - Artesania Latina #20500 - Scale 1:75 - 2nd build
Doug -
Thanks for pointing that out. They definitely seem to be typos in that case. E and W are right next to each other on the keyboard.
I'll correct the practicum today in case someone else winds up downloading them. Sorry for any confusion I caused.
Cheers -
John
-
jhearl got a reaction from jay in Bluenose II by Heronguy - Artesania Latina #20500 - Scale 1:75 - 2nd build
Those turnbuckles came with the kit - Model Shipways Glad Tidings.
-
 jhearl got a reaction from uss frolick in Book Suggestions
One author I like a lot is James L. Nelson. He has a couple of series starting with The Guardship. The action in that book takes place in and around Tidewater Virginia during the colonial period, so a bit different than the English novels. By Force of Arms, the first book in a different series takes place in New England, again during the Revolutionary War period. Light reading, but for me, real page turners.
Cheers -
John
-
 jhearl got a reaction from Heronguy in Bluenose II by Heronguy - Artesania Latina #20500 - Scale 1:75 - 2nd build
Doug -
Thanks for pointing that out. They definitely seem to be typos in that case. E and W are right next to each other on the keyboard.
I'll correct the practicum today in case someone else winds up downloading them. Sorry for any confusion I caused.
Cheers -
John
-
 jhearl got a reaction from Jack12477 in Bluenose II by Heronguy - Artesania Latina #20500 - Scale 1:75 - 2nd build
Perhaps I can help to clear up your confusion on the use of the term "wye." I checked the practicum and I only used that term once on page 4 of part 7 where I wrote:
You may want to consider making a simplified sheet horse band (also called a main sheet wye) for the main sheet on the main boom. Jenson shows that fitting as a sheet horse band on page 37 in the illustration of the Main Sail Sheets. In The American Fishing Schooners by Howard I. Chapelle, there is a drawing on page 541 and on 542 of the same fitting, which he labels as the Main Sheet wye. Of course, BN2 is a Canadian vessel, so it's possible that term was not used there. I don't have information with regards to that. When it comes to bands with eyes elsewhere I wrote: As you are making up your spars, you’ll want to add the necessary bands and eyebolts to which blocks for rigging will be added. One might easily conclude that I meant there should be eyebolts on bands, but what I didn't say as clearly as possible is that there are bands with eyes and in other places, eyebolts. For example, there are eyebolts at the top of each mast to which blocks are attached for the gaff peak halyards. There are no bands with those eyebolts. Note, too that I used a simplified form of bands with eyes by simply making eyes from wire and inserting them into the bands (made from paper strips) rather than making the style that would require soldering as you did. I felt that the simplified method would be much easier for the novice modeler.
I can offer a suggestion for making soldered mast bands with eyes. You can find the diameter of the spar where you want your band to go by wrapping a piece of paper around the spar and marking the spot where the overlap occurs. You can then transfer that dimension to your brass strip, cut it to length, and bend it into a circle. It's best to make that cut with a jeweler's saw because you're going to want to solder that joint and the two ends need to be flat and square so they will join together perfectly. Then, you can make "ears" out of another piece of the same strip brass. Make them longer than necessary so you can file a pin on one end that will fit into a hole you drill in the mast band. You can leave the other end square until you have soldered everything. You can also wait to drill a hole in the "ear" as well. Once you have everything cut, insert the ears into the band, put small bits of paste silver solder on each joint including where the band comes together, and hit it all with your torch. Of course, you will have to devise some way to hold all the pieces in place while you solder. I use a soldering board that I can stick pins into. Also, if you leave the ears quite long, you can bend the end away from the band to a 90 degree angle and that will keep it straight as it's lying on the soldering board. After soldering, you can cut the ears to length, round off the ends, and drill holes in them to make your eyes.
I don't have any photos that would illustrate the steps I've outlined, but below are a couple of photo of some bands done in this way. Hope this is useful.
Cheers -
John
-
jhearl got a reaction from Heronguy in Bluenose II by Heronguy - Artesania Latina #20500 - Scale 1:75 - 2nd build
Perhaps I can help to clear up your confusion on the use of the term "wye." I checked the practicum and I only used that term once on page 4 of part 7 where I wrote:
You may want to consider making a simplified sheet horse band (also called a main sheet wye) for the main sheet on the main boom. Jenson shows that fitting as a sheet horse band on page 37 in the illustration of the Main Sail Sheets. In The American Fishing Schooners by Howard I. Chapelle, there is a drawing on page 541 and on 542 of the same fitting, which he labels as the Main Sheet wye. Of course, BN2 is a Canadian vessel, so it's possible that term was not used there. I don't have information with regards to that. When it comes to bands with eyes elsewhere I wrote: As you are making up your spars, you’ll want to add the necessary bands and eyebolts to which blocks for rigging will be added. One might easily conclude that I meant there should be eyebolts on bands, but what I didn't say as clearly as possible is that there are bands with eyes and in other places, eyebolts. For example, there are eyebolts at the top of each mast to which blocks are attached for the gaff peak halyards. There are no bands with those eyebolts. Note, too that I used a simplified form of bands with eyes by simply making eyes from wire and inserting them into the bands (made from paper strips) rather than making the style that would require soldering as you did. I felt that the simplified method would be much easier for the novice modeler.
I can offer a suggestion for making soldered mast bands with eyes. You can find the diameter of the spar where you want your band to go by wrapping a piece of paper around the spar and marking the spot where the overlap occurs. You can then transfer that dimension to your brass strip, cut it to length, and bend it into a circle. It's best to make that cut with a jeweler's saw because you're going to want to solder that joint and the two ends need to be flat and square so they will join together perfectly. Then, you can make "ears" out of another piece of the same strip brass. Make them longer than necessary so you can file a pin on one end that will fit into a hole you drill in the mast band. You can leave the other end square until you have soldered everything. You can also wait to drill a hole in the "ear" as well. Once you have everything cut, insert the ears into the band, put small bits of paste silver solder on each joint including where the band comes together, and hit it all with your torch. Of course, you will have to devise some way to hold all the pieces in place while you solder. I use a soldering board that I can stick pins into. Also, if you leave the ears quite long, you can bend the end away from the band to a 90 degree angle and that will keep it straight as it's lying on the soldering board. After soldering, you can cut the ears to length, round off the ends, and drill holes in them to make your eyes.
I don't have any photos that would illustrate the steps I've outlined, but below are a couple of photo of some bands done in this way. Hope this is useful.
Cheers -
John
-
jhearl got a reaction from jay in Bluenose II by Heronguy - Artesania Latina #20500 - Scale 1:75 - 2nd build
Perhaps I can help to clear up your confusion on the use of the term "wye." I checked the practicum and I only used that term once on page 4 of part 7 where I wrote:
You may want to consider making a simplified sheet horse band (also called a main sheet wye) for the main sheet on the main boom. Jenson shows that fitting as a sheet horse band on page 37 in the illustration of the Main Sail Sheets. In The American Fishing Schooners by Howard I. Chapelle, there is a drawing on page 541 and on 542 of the same fitting, which he labels as the Main Sheet wye. Of course, BN2 is a Canadian vessel, so it's possible that term was not used there. I don't have information with regards to that. When it comes to bands with eyes elsewhere I wrote: As you are making up your spars, you’ll want to add the necessary bands and eyebolts to which blocks for rigging will be added. One might easily conclude that I meant there should be eyebolts on bands, but what I didn't say as clearly as possible is that there are bands with eyes and in other places, eyebolts. For example, there are eyebolts at the top of each mast to which blocks are attached for the gaff peak halyards. There are no bands with those eyebolts. Note, too that I used a simplified form of bands with eyes by simply making eyes from wire and inserting them into the bands (made from paper strips) rather than making the style that would require soldering as you did. I felt that the simplified method would be much easier for the novice modeler.
I can offer a suggestion for making soldered mast bands with eyes. You can find the diameter of the spar where you want your band to go by wrapping a piece of paper around the spar and marking the spot where the overlap occurs. You can then transfer that dimension to your brass strip, cut it to length, and bend it into a circle. It's best to make that cut with a jeweler's saw because you're going to want to solder that joint and the two ends need to be flat and square so they will join together perfectly. Then, you can make "ears" out of another piece of the same strip brass. Make them longer than necessary so you can file a pin on one end that will fit into a hole you drill in the mast band. You can leave the other end square until you have soldered everything. You can also wait to drill a hole in the "ear" as well. Once you have everything cut, insert the ears into the band, put small bits of paste silver solder on each joint including where the band comes together, and hit it all with your torch. Of course, you will have to devise some way to hold all the pieces in place while you solder. I use a soldering board that I can stick pins into. Also, if you leave the ears quite long, you can bend the end away from the band to a 90 degree angle and that will keep it straight as it's lying on the soldering board. After soldering, you can cut the ears to length, round off the ends, and drill holes in them to make your eyes.
I don't have any photos that would illustrate the steps I've outlined, but below are a couple of photo of some bands done in this way. Hope this is useful.
Cheers -
John
-
 jhearl got a reaction from popeye the sailor in Bluenose II by Heronguy - Artesania Latina #20500 - Scale 1:75 - 2nd build
Perhaps I can help to clear up your confusion on the use of the term "wye." I checked the practicum and I only used that term once on page 4 of part 7 where I wrote:
You may want to consider making a simplified sheet horse band (also called a main sheet wye) for the main sheet on the main boom. Jenson shows that fitting as a sheet horse band on page 37 in the illustration of the Main Sail Sheets. In The American Fishing Schooners by Howard I. Chapelle, there is a drawing on page 541 and on 542 of the same fitting, which he labels as the Main Sheet wye. Of course, BN2 is a Canadian vessel, so it's possible that term was not used there. I don't have information with regards to that. When it comes to bands with eyes elsewhere I wrote: As you are making up your spars, you’ll want to add the necessary bands and eyebolts to which blocks for rigging will be added. One might easily conclude that I meant there should be eyebolts on bands, but what I didn't say as clearly as possible is that there are bands with eyes and in other places, eyebolts. For example, there are eyebolts at the top of each mast to which blocks are attached for the gaff peak halyards. There are no bands with those eyebolts. Note, too that I used a simplified form of bands with eyes by simply making eyes from wire and inserting them into the bands (made from paper strips) rather than making the style that would require soldering as you did. I felt that the simplified method would be much easier for the novice modeler.
I can offer a suggestion for making soldered mast bands with eyes. You can find the diameter of the spar where you want your band to go by wrapping a piece of paper around the spar and marking the spot where the overlap occurs. You can then transfer that dimension to your brass strip, cut it to length, and bend it into a circle. It's best to make that cut with a jeweler's saw because you're going to want to solder that joint and the two ends need to be flat and square so they will join together perfectly. Then, you can make "ears" out of another piece of the same strip brass. Make them longer than necessary so you can file a pin on one end that will fit into a hole you drill in the mast band. You can leave the other end square until you have soldered everything. You can also wait to drill a hole in the "ear" as well. Once you have everything cut, insert the ears into the band, put small bits of paste silver solder on each joint including where the band comes together, and hit it all with your torch. Of course, you will have to devise some way to hold all the pieces in place while you solder. I use a soldering board that I can stick pins into. Also, if you leave the ears quite long, you can bend the end away from the band to a 90 degree angle and that will keep it straight as it's lying on the soldering board. After soldering, you can cut the ears to length, round off the ends, and drill holes in them to make your eyes.
I don't have any photos that would illustrate the steps I've outlined, but below are a couple of photo of some bands done in this way. Hope this is useful.
Cheers -
John
-
 jhearl got a reaction from Nirvana in Bluenose II by Heronguy - Artesania Latina #20500 - Scale 1:75 - 2nd build
Perhaps I can help to clear up your confusion on the use of the term "wye." I checked the practicum and I only used that term once on page 4 of part 7 where I wrote:
You may want to consider making a simplified sheet horse band (also called a main sheet wye) for the main sheet on the main boom. Jenson shows that fitting as a sheet horse band on page 37 in the illustration of the Main Sail Sheets. In The American Fishing Schooners by Howard I. Chapelle, there is a drawing on page 541 and on 542 of the same fitting, which he labels as the Main Sheet wye. Of course, BN2 is a Canadian vessel, so it's possible that term was not used there. I don't have information with regards to that. When it comes to bands with eyes elsewhere I wrote: As you are making up your spars, you’ll want to add the necessary bands and eyebolts to which blocks for rigging will be added. One might easily conclude that I meant there should be eyebolts on bands, but what I didn't say as clearly as possible is that there are bands with eyes and in other places, eyebolts. For example, there are eyebolts at the top of each mast to which blocks are attached for the gaff peak halyards. There are no bands with those eyebolts. Note, too that I used a simplified form of bands with eyes by simply making eyes from wire and inserting them into the bands (made from paper strips) rather than making the style that would require soldering as you did. I felt that the simplified method would be much easier for the novice modeler.
I can offer a suggestion for making soldered mast bands with eyes. You can find the diameter of the spar where you want your band to go by wrapping a piece of paper around the spar and marking the spot where the overlap occurs. You can then transfer that dimension to your brass strip, cut it to length, and bend it into a circle. It's best to make that cut with a jeweler's saw because you're going to want to solder that joint and the two ends need to be flat and square so they will join together perfectly. Then, you can make "ears" out of another piece of the same strip brass. Make them longer than necessary so you can file a pin on one end that will fit into a hole you drill in the mast band. You can leave the other end square until you have soldered everything. You can also wait to drill a hole in the "ear" as well. Once you have everything cut, insert the ears into the band, put small bits of paste silver solder on each joint including where the band comes together, and hit it all with your torch. Of course, you will have to devise some way to hold all the pieces in place while you solder. I use a soldering board that I can stick pins into. Also, if you leave the ears quite long, you can bend the end away from the band to a 90 degree angle and that will keep it straight as it's lying on the soldering board. After soldering, you can cut the ears to length, round off the ends, and drill holes in them to make your eyes.
I don't have any photos that would illustrate the steps I've outlined, but below are a couple of photo of some bands done in this way. Hope this is useful.
Cheers -
John
-
 jhearl got a reaction from Canute in Book Suggestions
One author I like a lot is James L. Nelson. He has a couple of series starting with The Guardship. The action in that book takes place in and around Tidewater Virginia during the colonial period, so a bit different than the English novels. By Force of Arms, the first book in a different series takes place in New England, again during the Revolutionary War period. Light reading, but for me, real page turners.
Cheers -
John
-
 jhearl got a reaction from mtaylor in Book Suggestions
One author I like a lot is James L. Nelson. He has a couple of series starting with The Guardship. The action in that book takes place in and around Tidewater Virginia during the colonial period, so a bit different than the English novels. By Force of Arms, the first book in a different series takes place in New England, again during the Revolutionary War period. Light reading, but for me, real page turners.
Cheers -
John
-
jhearl got a reaction from mtaylor in Recommendations For A Good Milling Machine
I also vote for Sherline. I had one of the little Proxxon mills and almost never used it. For me, it was too small and too limited. Since getting the Sherline mill, I have used it much more than I ever expected to. I would advise getting the DRO option. It's much easier to use than trying to count turns on the handwheels. Definitely get the rotary table (#3700). I used it just a while back to make a ship's wheel. The tilting angle table (#3750) is very useful too. I'd recommend getting one of the mill packages because you'll need all that stuff anyway and it will be cheaper. A 5400 DRO package and the two accessories I mentioned will put you well over your budget however. Adding CNC would be considerably more.
I bought my mill (and lathe) through Discount Campus. They have better prices than Sherline Direct. http://www.discountcampus.com/store/sherlineonline.htm
Cheers -
John
-
jhearl got a reaction from Canute in Recommendations For A Good Milling Machine
I also vote for Sherline. I had one of the little Proxxon mills and almost never used it. For me, it was too small and too limited. Since getting the Sherline mill, I have used it much more than I ever expected to. I would advise getting the DRO option. It's much easier to use than trying to count turns on the handwheels. Definitely get the rotary table (#3700). I used it just a while back to make a ship's wheel. The tilting angle table (#3750) is very useful too. I'd recommend getting one of the mill packages because you'll need all that stuff anyway and it will be cheaper. A 5400 DRO package and the two accessories I mentioned will put you well over your budget however. Adding CNC would be considerably more.
I bought my mill (and lathe) through Discount Campus. They have better prices than Sherline Direct. http://www.discountcampus.com/store/sherlineonline.htm
Cheers -
John
-
jhearl got a reaction from popeye the sailor in Bluenose II by Heronguy - Artesania Latina #20500 - Scale 1:75 - 2nd build
You might want to look into getting a pocket-sized automatic center punch. They are about the size and shape of a mechanical pencil and are spring loaded, so you set the point of the punch on the brass, then push down until it "pops" to make a mark (indentation) in the brass. Then you can drill and your bit won't wander. Far easier than trying to figure out a way to hold the brass while you hit a punch with a hammer. Avoid the larger automatic punches meant for heavier material. They have much stronger springs and will make too large an indentation.
Cheers -
John
-
jhearl got a reaction from Nirvana in Bluenose II by Heronguy - Artesania Latina #20500 - Scale 1:75 - 2nd build
You might want to look into getting a pocket-sized automatic center punch. They are about the size and shape of a mechanical pencil and are spring loaded, so you set the point of the punch on the brass, then push down until it "pops" to make a mark (indentation) in the brass. Then you can drill and your bit won't wander. Far easier than trying to figure out a way to hold the brass while you hit a punch with a hammer. Avoid the larger automatic punches meant for heavier material. They have much stronger springs and will make too large an indentation.
Cheers -
John
-
.thumb.jpeg.fc5d633a7b34428fcf19419a73d56d55.jpeg) jhearl got a reaction from EricWilliamMarshall in Bluenose II by Heronguy - Artesania Latina #20500 - Scale 1:75 - 2nd build
jhearl got a reaction from EricWilliamMarshall in Bluenose II by Heronguy - Artesania Latina #20500 - Scale 1:75 - 2nd build
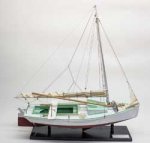
As Mark Twain said, more or less, the rumors or my demise have been greatly exaggerated! Still alive and kicking although a bit more slowly every year. I retired in September of last year and have been enjoying lots more time to work on models. I still maintain the website and am currently working on a scratch build of a Chesapeake Bay buyboat.
Doug - looks like your BN2 is coming along well.
Cheers -
John
-
jhearl got a reaction from jay in Bluenose II by Heronguy - Artesania Latina #20500 - Scale 1:75 - 2nd build
You might want to look into getting a pocket-sized automatic center punch. They are about the size and shape of a mechanical pencil and are spring loaded, so you set the point of the punch on the brass, then push down until it "pops" to make a mark (indentation) in the brass. Then you can drill and your bit won't wander. Far easier than trying to figure out a way to hold the brass while you hit a punch with a hammer. Avoid the larger automatic punches meant for heavier material. They have much stronger springs and will make too large an indentation.
Cheers -
John
-
 jhearl got a reaction from Elijah in Bluenose II by Heronguy - Artesania Latina #20500 - Scale 1:75 - 2nd build
You might want to look into getting a pocket-sized automatic center punch. They are about the size and shape of a mechanical pencil and are spring loaded, so you set the point of the punch on the brass, then push down until it "pops" to make a mark (indentation) in the brass. Then you can drill and your bit won't wander. Far easier than trying to figure out a way to hold the brass while you hit a punch with a hammer. Avoid the larger automatic punches meant for heavier material. They have much stronger springs and will make too large an indentation.
Cheers -
John
-
jhearl got a reaction from Heronguy in Bluenose II by Heronguy - Artesania Latina #20500 - Scale 1:75 - 2nd build
You might want to look into getting a pocket-sized automatic center punch. They are about the size and shape of a mechanical pencil and are spring loaded, so you set the point of the punch on the brass, then push down until it "pops" to make a mark (indentation) in the brass. Then you can drill and your bit won't wander. Far easier than trying to figure out a way to hold the brass while you hit a punch with a hammer. Avoid the larger automatic punches meant for heavier material. They have much stronger springs and will make too large an indentation.
Cheers -
John
-
 jhearl got a reaction from grsjax in Tools You Can't Live Without
If you go to a hardware store, you can find locknuts with plastic inserts that you can use to replace the ones on the headband. The locknuts will not loosen up once you put them on. Just be sure you know what size thread you need before you go to the store.
Cheers -
John
-
 jhearl got a reaction from shipman in Tools You Can't Live Without
If you go to a hardware store, you can find locknuts with plastic inserts that you can use to replace the ones on the headband. The locknuts will not loosen up once you put them on. Just be sure you know what size thread you need before you go to the store.
Cheers -
John
-
 jhearl got a reaction from Eddie in Tools You Can't Live Without
If you go to a hardware store, you can find locknuts with plastic inserts that you can use to replace the ones on the headband. The locknuts will not loosen up once you put them on. Just be sure you know what size thread you need before you go to the store.
Cheers -
John
-
 jhearl got a reaction from davyboy in Tools You Can't Live Without
If you go to a hardware store, you can find locknuts with plastic inserts that you can use to replace the ones on the headband. The locknuts will not loosen up once you put them on. Just be sure you know what size thread you need before you go to the store.
Cheers -
John
-
jhearl got a reaction from Canute in Tools You Can't Live Without
If you go to a hardware store, you can find locknuts with plastic inserts that you can use to replace the ones on the headband. The locknuts will not loosen up once you put them on. Just be sure you know what size thread you need before you go to the store.
Cheers -
John
-
 jhearl got a reaction from John Allen in Tools You Can't Live Without
If you go to a hardware store, you can find locknuts with plastic inserts that you can use to replace the ones on the headband. The locknuts will not loosen up once you put them on. Just be sure you know what size thread you need before you go to the store.
Cheers -
John