


AON
-
Posts
2,874 -
Joined
-
Last visited
Content Type
Profiles
Forums
Gallery
Events
Everything posted by AON
-
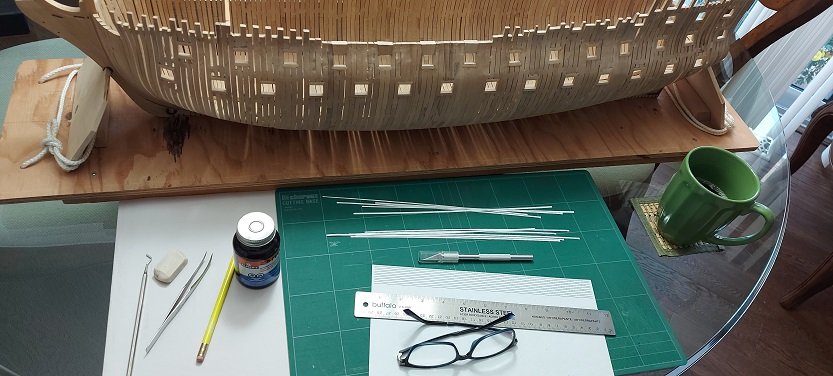
 Started work on the side counter timbers on Saturday. Tried again yesterday. My third try today. I made the blanks deeper today so I had something to hold and pin. I also took a piece of pine 2x8 and made a support shelf to rest the timbers on. Took me until today to imagine that. I drilled and pinned these to the wing transom so I could transpose the hull outboard shape. Then I pencilled in the molded depth I will cut these shapes tomorrow to near the correct molded depth leaving something to sand.... because I enjoy sanding so much.
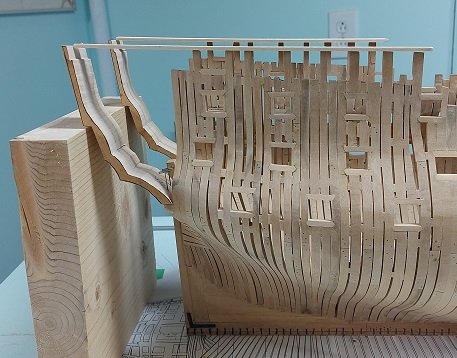

-
I always back off the blade when I'm done so setting them flat on the table isn't an issue but while the blade is extended I lay it on its side.
-
Hold on a minute! You live on a paradise island in the Caribbean and you need a get away cottage? 🤔 When are you going to post a schedule for your modeling pals to visit? Obviously we just want to see you model in person 😎
-
Those joints look pretty good from the cheap seats.
-
I was hoping you would have received an answer regarding the ladder/capstan issue. I believe the handles/spokes/spikes were only installed when the capstan was being used to do heavy work like raise the anchor, otherwise they'd be stowed away to create clearance for the crew to get around, eat meals and rig their hammocks for sleeping. If this is indeed the location of the capstan and the ladder (as depicted on the plans), the ladder must have been removable so the capstan could be operated, just like all the interior bulkheads (cabin walls) were removable and stowed away to create clearance for the guns to operate. They had more than enough crew to handle it, and tons of space to temporarily stow it off to the side.
-
The photos are excellant. The movie was about 1 second. Is that what you intended? The pencil marks for the drop plank locations seem to look better but you best wait to hear from someone more experienced!
-
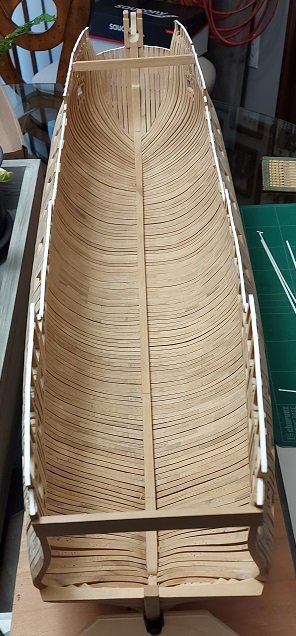
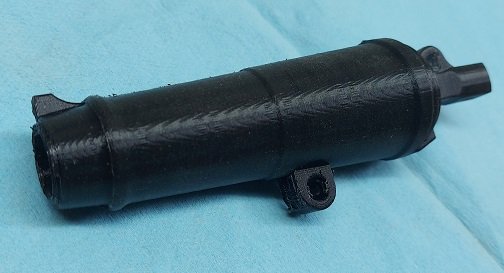
I am not certain how others manage but I left my frame timber tops thicker (molded depth) than what the contract called for as 3/32" is quite delicate and I am quite clumsy. Now that I have the gunports in it was time to sand them to the proper thickness... but being a visual fellow I needed something to guide me. Now some time ago Druxey had mentioned these were 6" wide. Being so smart I looked at the contract and it read 5-1/2". Now that I am wiser I re-read the contract and discovered they range from 4-1/2" (stern timber) to 6-1/4" (beakhead) with those in between being 5-1/4" or 5-1/2"molded depth. And having some (albeit limited) experience I realise this is 0.070" to 0.0978 or a mere 1/64" difference... and no one is going to measure it on the model so I decided 3/32" nominal depth for all locations was acceptable. (why do I question him?) I cut strips of paper 3/32" (0.094 or 2.4 mm) wide. Rubber cemented them to the top of the timbers so I could see the shape and thickness. Sanded and removed the paper and residual cement. Now I will be giving everything another sanding before I complete the framing at the stern. Meanwhile (yesterday) I 3D printed my 32 Pound carronade barrel at 1:12 scale... another side project.
-
I am in complete agreement with Flyer .. but then I will always chose the flying Bellerophon when offered a choice.
- 366 replies
-
- 3
-

-
- bellerophon
- victory models
- (and 2 more)
-
Merci beaucoup mon ami. 🙄 It seemed a rather long haul.
-
Refer to the PDF. There is a short part with photos on how easy it is to do.... after I was shown how. You wouldn't believe the dumb ways I tried.
-
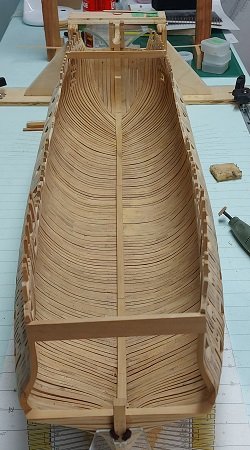
All gunports cutout and sills (cills) installed. Looks as though I'll need to remove two top timbers for the carronades on the forecastle... but I'll get my final sanding done first.
-
As we say up here.... now you're cooking with natural gas. Quarter them, draw them and stuff them! 😉
-
Golden Hind by Rock_From_Korea - 1:48
AON replied to Rock_From_Korea's topic in - Build logs for subjects built 1501 - 1750
You are doing a wonderful job! Really enjoying your log progress reports. -
I use bamboo skewers from the grocery store. If using bamboo shoots I was told to use the middle pith not the bark.
-
Looks like your off to a good start with your supplies. Here is everything I know about treenails, Trenails, Trenels or Trunnels (a couple images shifted when converted to a PDF but I think you can figure it out) Treenails - Alan O'Neill - 15MAR2022.pdf
-
Mariner's Astrolabe, full scale, AON
AON replied to AON's topic in CAD and 3D Modelling/Drafting Plans with Software
Thank you Bruce! The NRJ article in vol 2, issue 1 (1950) by L.H. Harding is an interesting read.- 36 replies
-
- 3
-
-
- Navigation
- Instrument
- (and 1 more)
-
Mariner's Astrolabe, full scale, AON
AON replied to AON's topic in CAD and 3D Modelling/Drafting Plans with Software
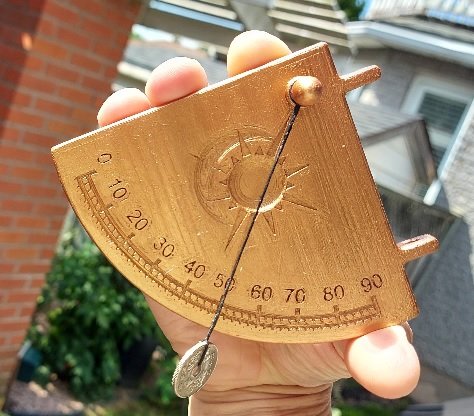
My last posting for this build. An early quadrant. first my inspiration then my finished 3D print. I used a Japanese 50 Yen piece for the weight as it already has a hole in it and I didn't want to deface a coin. The string is eye spliced at both ends, the upper part passes through a hole and flips over the post. The lower is spliced through the coin. The inset images are the sun and the moon. And that's all for this build. Thanks for visiting.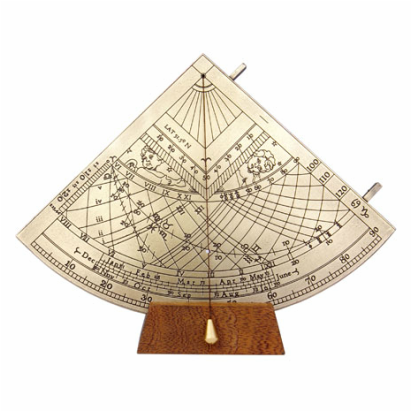
- 36 replies
-
- 7
-
-

-
- Navigation
- Instrument
- (and 1 more)
-
Mariner's Astrolabe, full scale, AON
AON replied to AON's topic in CAD and 3D Modelling/Drafting Plans with Software
Thanks Canute. Seems our posting were at the same time!- 36 replies
-
- 3
-
-
- Navigation
- Instrument
- (and 1 more)
-
Mariner's Astrolabe, full scale, AON
AON replied to AON's topic in CAD and 3D Modelling/Drafting Plans with Software
Should also mention that if I used it at night, reading the elevation of the north star (Polaris) from the horizon I would not subtract the angle from 90° as it is exactly the latitude of my location. I printed an early quadrant the other day. Painted it yesterday, and with the temperature feeling like 39°C today I will likely finish it off and post some photos here to close this build off.- 36 replies
-
- 3
-
-
- Navigation
- Instrument
- (and 1 more)
-
Mariner's Astrolabe, full scale, AON
AON replied to AON's topic in CAD and 3D Modelling/Drafting Plans with Software
Had a nice sunny day yesterday so I tried out my astrolabe. First I set my sundial onto a solid flat board, aligned it to magnetic north which for us is very close to true north and levelled the board. Then I watched and watched and..... Eventually at about 1:17 PM (DST) the shadow was straight under the pointer meaning the sun was pretty darn near directly over head. I took a reading.... 64° subtract that from 90° gives me 26° correct this for the tilt of the earth on 6 Aug 2022 (add 16.57°) gives me 42.57°N.... my latitude well not quite. According to GPS my Latitude is 43° 1' 12" N (43.02°) That is about the accuracy of a mariner's astrolabe. Now to figure my Longitude If I had a clock set to UT or GMT I'd have read the time and it would have been about 5 hours and 17 minutes (5.2837 hours) difference from my reading of 1:17 PM (DST) The earth rotates 15° per hour so 5.2837 x 15 = 79.255° According to GPS my longitude is 79° 15' 18"W or 79.255°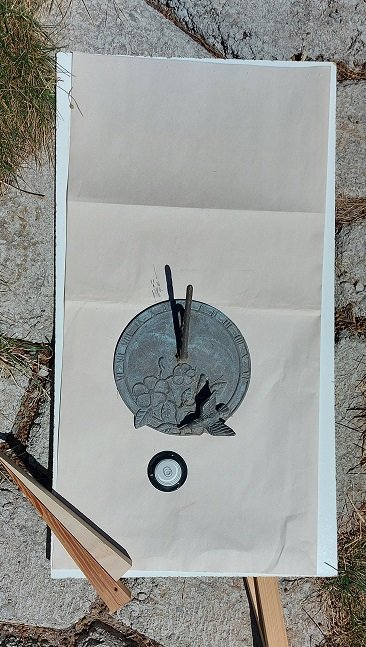
- 36 replies
-
- 9
-
-
-
- Navigation
- Instrument
- (and 1 more)

