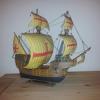
waspy Posted December 25, 2015 Share #1 Posted December 25, 2015 So, Christmas has been and the family has been gone long enough for me to examine my Victory. I've known it was coming for a while, so I've spent the last 2 months studying all I can from build logs here and all sorts of other places. I've made several plastic kits of sailing ships in the last few years, but nothing on a level of detail like this, and I've never modelled with wood at all - thankfully most of my Christmas wish list of tools has been filled by my wonderful kids! Having never seen any other wooden kits for comparison, I don't know how this one compares with others, but my initial impression is "WOW" at the amount and quality of the materials, instructions and plans! I know the "pack-shots" have been done before, but I aim for this log to be complete as possible. I know I'll have tons of questions as I go along, but from what I've seen of you wonderful people here, there'll be no shortage of helpful answers to all I can think of. I know this kit is kind of large and advanced for someone with know experience with wooden ships, but I have always loved the Victory, and only live 20 miles along the coast so am well placed for plenty of visits to Portsmouth as I go to give me the incentive to get it right! At the moment I intend to leave it unpainted and build it pretty much like the box as I love the look of the different colour woods, but that might change if my planking isn't as pretty as I hope. More family engagements tomorrow but thats followed by another week off work, so I hope to make a little progress before work kicks off again in the new year. Regards to all, Waspy MEPering, Kevin, Rainbow and 1 other 4 Quote Current build: HMS Victory - Constructo - First wooden model Link to comment Share on other sites More sharing options...
Seventynet Posted December 25, 2015 Share #2 Posted December 25, 2015 (edited) Great Christmas gift Waspy. I'm excited to see another Victory builder on here. Best of luck with it. Ian PS, what scale is it? Edited December 25, 2015 by Seventynet Quote Builds in progress - Speedwell - by Syren Ship Model Company Builds completed - Hayling Hoy - Naval Cutter Cheerful - by Syren Ship Model Company - Cape Cod Catboat - by Bluejacket - Gokstad - by Dusek - Ship's Boat - by Dusek - Brazzera - by MarisStella Link to comment Share on other sites More sharing options...
waspy Posted December 25, 2015 Author Share #3 Posted December 25, 2015 Great Christmas gift Waspy. I'm excited to see another Victory builder on here. Best of luck with it. Ian PS, what scale is it? Hi Ian. it's 1:94 scale I meant to put that in the title, but can't seem to edit the title now.... Quote Current build: HMS Victory - Constructo - First wooden model Link to comment Share on other sites More sharing options...
johnjones728 Posted December 26, 2015 Share #4 Posted December 26, 2015 Great kit I've got this kit and look forward to your build Quote Link to comment Share on other sites More sharing options...
waspy Posted December 26, 2015 Author Share #5 Posted December 26, 2015 so, with the grandkids exhausted and despatched off home earlier than expected, I cracked on with some ship-building... made myself a stand/vice to keep the the keel as straight as possible and with the aid of some lego bricks, glued and squared the bulkheads to the false keel. most of the bulkheads were a bit loose, so I used some .5 mm fillets to fill any gaps in the slots. next......to experiment with the planking on the lower decks (that will never be seen) to try and work out the best way to replicate the caulking..... Waspy Kevin, MEPering and ScottRC 3 Quote Current build: HMS Victory - Constructo - First wooden model Link to comment Share on other sites More sharing options...
S.Coleman Posted December 27, 2015 Share #6 Posted December 27, 2015 Nice start. For caulking I use a HB pencil and rub it along the edges of the plank. I will precut about 20 or so deck planks then clamp them all together so I can hit 20 planks at a time. Hope this helps. ScottRC 1 Quote Regards, Scott Current build: 1:75 Friesland, Mamoli Completed builds: 1:64 Rattlesnake, Mamoli - 1:64 HMS Bounty, Mamoli - 1:54 Adventure, Amati - 1:80 King of the Mississippi, AL 1:64 Blue Shadow, Mamoli - 1:64 Leida Dutch pleasure boat, Corel - 1:60 HMS President Mantra, Sergal Awaiting construction: 1:89 Hermione La Fayette AL - 1:48 Perserverance, Modelers shipyard Link to comment Share on other sites More sharing options...
waspy Posted December 27, 2015 Author Share #7 Posted December 27, 2015 that was always going to be my first method - and it seems to be working great - except I found a 2B pencil worked better. HB was fine for the treenails. QUESTION: what is the best varnish/finish for the decking ? Quote Current build: HMS Victory - Constructo - First wooden model Link to comment Share on other sites More sharing options...
waspy Posted December 29, 2015 Author Share #8 Posted December 29, 2015 lower and middle decks planked and installed I simulated the tree nails in the lowest decks, but to be honest, I think I prefer the look of the deck without them but I'll make a final decision once I've put a coat or 2 on this deck to make sure Gotta be honest, when I opened the box and started reading all the instructions and pictures I was rather overwhelmed and wondered if I'd taken on way more than I was capable of......but with the first little hatch cover completed, I'm feeling much more confident! Waspy Kevin, ScottRC and MEPering 3 Quote Current build: HMS Victory - Constructo - First wooden model Link to comment Share on other sites More sharing options...
S.Coleman Posted December 29, 2015 Share #9 Posted December 29, 2015 The decks have come up great. I like the gratings on your first hatch. Well done. Quote Regards, Scott Current build: 1:75 Friesland, Mamoli Completed builds: 1:64 Rattlesnake, Mamoli - 1:64 HMS Bounty, Mamoli - 1:54 Adventure, Amati - 1:80 King of the Mississippi, AL 1:64 Blue Shadow, Mamoli - 1:64 Leida Dutch pleasure boat, Corel - 1:60 HMS President Mantra, Sergal Awaiting construction: 1:89 Hermione La Fayette AL - 1:48 Perserverance, Modelers shipyard Link to comment Share on other sites More sharing options...
S.Coleman Posted December 29, 2015 Share #10 Posted December 29, 2015 Some people use a wipe on poly as a treatment for bare wood. As it comes up great. Quote Regards, Scott Current build: 1:75 Friesland, Mamoli Completed builds: 1:64 Rattlesnake, Mamoli - 1:64 HMS Bounty, Mamoli - 1:54 Adventure, Amati - 1:80 King of the Mississippi, AL 1:64 Blue Shadow, Mamoli - 1:64 Leida Dutch pleasure boat, Corel - 1:60 HMS President Mantra, Sergal Awaiting construction: 1:89 Hermione La Fayette AL - 1:48 Perserverance, Modelers shipyard Link to comment Share on other sites More sharing options...
waspy Posted December 29, 2015 Author Share #11 Posted December 29, 2015 newbie mistake #1 .... made my first set of steps without sanding the burn marks off the stair rails first. hopefully there is enough spare rail left for the rest! Waspy MEPering, Kevin and ScottRC 3 Quote Current build: HMS Victory - Constructo - First wooden model Link to comment Share on other sites More sharing options...
waspy Posted December 30, 2015 Author Share #12 Posted December 30, 2015 lower deck hatch covers, stairs and ammunition racks all installed. I used some pure button polish (thats been in my shed for best part of 20 years) which has brought the deck up just how I wanted .......but it's far too shiny on the sapele....gonna have to dull that down again Kevin, MEPering and ScottRC 3 Quote Current build: HMS Victory - Constructo - First wooden model Link to comment Share on other sites More sharing options...
waspy Posted January 1, 2016 Author Share #13 Posted January 1, 2016 some practical uses for Lego bricks in the build so far: And even as miniature sanding blocks to "holystone" the decks! MEPering, ScottRC and Kevin 3 Quote Current build: HMS Victory - Constructo - First wooden model Link to comment Share on other sites More sharing options...
waspy Posted January 3, 2016 Author Share #14 Posted January 3, 2016 progress so far: all decks on and planked and the first 3 planks on each side of the hull. So far I've only needed some slight bending with the plier-type plank bender.....won't be log before I find out exactly how tricky it is to bend them round the sharp curves Kevin, ScottRC and MEPering 3 Quote Current build: HMS Victory - Constructo - First wooden model Link to comment Share on other sites More sharing options...
waspy Posted January 6, 2016 Author Share #15 Posted January 6, 2016 I received some 2mm cannon balls from Cornwall model boats today.......probably a bit shiny for most of the purists round here, but I love how they look Kevin and MEPering 2 Quote Current build: HMS Victory - Constructo - First wooden model Link to comment Share on other sites More sharing options...
Rich.F Posted January 6, 2016 Share #16 Posted January 6, 2016 Welcome. and great work so far. I have built a Constructo kit a few years back great instructions, Keep it up Quote Rich. Builds in Progress: HMS Victory Completed Builds: Constucto Enterprise Future Builds 2021/2022 USS Constitution Link to comment Share on other sites More sharing options...
waspy Posted January 9, 2016 Author Share #17 Posted January 9, 2016 some progress......planking is a sloooow process but I'm getting there: all planked down to the lower gun-deck. I have to admit, that me and Jasper were worried about how rough the planking was.....but after a quick sanding I'm really happy with how it's going now Seventynet, MEPering and Kevin 3 Quote Current build: HMS Victory - Constructo - First wooden model Link to comment Share on other sites More sharing options...
waspy Posted January 26, 2016 Author Share #18 Posted January 26, 2016 Planking finally finished!! I always knew that planking was going to be a major challenge. There is a limit to how much reading up on the subject beforehand can teach you (at least for me) I learn by 'doing' and making mistakes.....and boy did I make a ton of mistakes. The most important mistake was being too 'heavy-handed' while fairing the bulkheads, which as you all already know was the root cause of a lot of the other mistakes to follow. I wasn't going to post any close-up photos of my work pre-sanding because, compared to most of the build-logs on here it's extremely rough and shoddy looking! .....but then I realised that new members coming here and just seeing perfect workmanship is actually quite intimidating and to see some photos of work done very wrong.....might make them feel a bit better about theirs the bottom 2 photos show the same planking after a very rough first sanding and the stem attached.....it will never win any awards, but I know by the time it's all sanded properly and varnished it will still be a model that I'll be proud to show my kids! and at least I know where I went wrong for next time......except that by the time I've finished this one and started another, so many years will have passed that I will probably forget most of the lessons learned now onwards and upwards to the bulwarks and gallant rails..... MEPering, Kevin, Rainbow and 1 other 4 Quote Current build: HMS Victory - Constructo - First wooden model Link to comment Share on other sites More sharing options...
donrobinson Posted January 27, 2016 Share #19 Posted January 27, 2016 You sure are moving on at a quick pace, nothing wrong with that planking. Looks just fine to me. I am enjoying following along Quote Completed: MS-AVS, Amati Trabaccolo, Dusek ship's boat, AL-Mayflower, Batelina - MarisStella, MarisStella-Trabakul Liburnian Novilara - MarisStella, 17th Century Battle Station, Ragusian Galley-MarisStella Current: Barque Stefano - MarisStella, On Hold: Amati Pegasus Link to comment Share on other sites More sharing options...
Seventynet Posted January 27, 2016 Share #20 Posted January 27, 2016 You have been doing a great job and really ripping along. You've certainly left me in the dust! I really like the run of the planks and how you tapered them up to the bow. Best, Ian Quote Builds in progress - Speedwell - by Syren Ship Model Company Builds completed - Hayling Hoy - Naval Cutter Cheerful - by Syren Ship Model Company - Cape Cod Catboat - by Bluejacket - Gokstad - by Dusek - Ship's Boat - by Dusek - Brazzera - by MarisStella Link to comment Share on other sites More sharing options...
Rich.F Posted January 27, 2016 Share #21 Posted January 27, 2016 Hull Looks Great, I sanded my my Enterprise a few time until i was really happy. , Once your happy with the sanding and the hull has be vanished, It going to make them beech strips stand out and look really nice. Keep up the good work Quote Rich. Builds in Progress: HMS Victory Completed Builds: Constucto Enterprise Future Builds 2021/2022 USS Constitution Link to comment Share on other sites More sharing options...
waspy Posted January 28, 2016 Author Share #22 Posted January 28, 2016 bulwarks and gallant rails all fitted. I cheated a little with the gallant rails: the plans called for some very sharp bends on some of the corners, but the mazonia didn't want to bend cleanly, so I squared them off, mitred them and then sanded the mitre to try to simulate the bend instead - certainly worked out neater than the bend did MEPering 1 Quote Current build: HMS Victory - Constructo - First wooden model Link to comment Share on other sites More sharing options...
waspy Posted January 31, 2016 Author Share #23 Posted January 31, 2016 A very productive few days - amazing what can be accomplished when you have the house to yourself! bow and stem reinforcements, transom, one side of the stern galleries and one side of the wales. For some stupid reason the instructions call for blue paper behind the windows and the clear acetate to be cut into each separate window! I did away with the blue paper which looked awful, painted the back black and sandwiched a single piece of acetate between the 2 transom pieces. going to get a bit busy at work for the next few weeks but hopefully I'll still find an hour or 2 in the evenings. Waspy MEPering 1 Quote Current build: HMS Victory - Constructo - First wooden model Link to comment Share on other sites More sharing options...
Seventynet Posted January 31, 2016 Share #24 Posted January 31, 2016 Looking very sharp waspy. Looks like you might be having some fun soon cutting out one or two gunports . Best, Ian Quote Builds in progress - Speedwell - by Syren Ship Model Company Builds completed - Hayling Hoy - Naval Cutter Cheerful - by Syren Ship Model Company - Cape Cod Catboat - by Bluejacket - Gokstad - by Dusek - Ship's Boat - by Dusek - Brazzera - by MarisStella Link to comment Share on other sites More sharing options...
waspy Posted January 31, 2016 Author Share #25 Posted January 31, 2016 thanks Ian.......gunports.....the idea of marking them out correctly is worrying me enough....let alone cutting the buggers out! Waspy Quote Current build: HMS Victory - Constructo - First wooden model Link to comment Share on other sites More sharing options...
challenger86 Posted February 2, 2016 Share #26 Posted February 2, 2016 Hey Waspy, Check out my Victory build progress, I've mentioned in there about the process of getting those gun ports done. Relatively straight forward and easy. Just need to keep blades sharp for carving out the little bits of the gun ports, after I drilled them out. Quote Current build: Duyfken Completed build: NS Mercedes Completed build: HMS Victory Completed build: Bluenose Schooner Link to comment Share on other sites More sharing options...
challenger86 Posted February 2, 2016 Share #27 Posted February 2, 2016 Also just noticing that you have your top deck in place, built already...what are your plans for the lower deck canons? Or are you modeling your cannon ports shut? Always an option. The build is looking mighty fine though!! Quote Current build: Duyfken Completed build: NS Mercedes Completed build: HMS Victory Completed build: Bluenose Schooner Link to comment Share on other sites More sharing options...
waspy Posted February 3, 2016 Author Share #28 Posted February 3, 2016 thanks challenger, I had already noticed your ideas for cutting out the gun ports and am planning to use the process the constructo version only has whole cannons in the waist that I can still access, the rest of the cannon on that deck are false cannons. Quote Current build: HMS Victory - Constructo - First wooden model Link to comment Share on other sites More sharing options...
challenger86 Posted February 3, 2016 Share #29 Posted February 3, 2016 Oh right, I forgot your kit was different than mine. Interesting how they differ in certain areas. Keep up the great work!! Robert Quote Current build: Duyfken Completed build: NS Mercedes Completed build: HMS Victory Completed build: Bluenose Schooner Link to comment Share on other sites More sharing options...
HIPEXEC Posted February 3, 2016 Share #30 Posted February 3, 2016 Constructo makes a very challenging kit. So far you seem to have mastered it. Nice work. I have the direct e-mail if you need help from Constructo. mcarracedo@diset.com Marcos Carracedo Good luck, Rich Quote Rich Rich USS Constitution by hipexec (Finished build) Virginia Pilot Boat 1805 (gallery - first build) USS Syren (USS Argus) by Hipexec Joshua Slocum's Spray by HIPEXEC Link to comment Share on other sites More sharing options...

Recommended Posts
Join the conversation
You can post now and register later. If you have an account, sign in now to post with your account.