Jump to content

Recommended Posts

Posted

INTRO: I promised my mother-in-law that I would make her a ship in a bottle for her big birthday coming up.


She deserves a modern sail yacht, not some crusty old schooner.    The Parsifal III  - built in 2005 by Perini Navi and refitted in 2012  - ought to do the trick. 

image.png.1343b8ee94772cd8136ccf6fdb63db91.pngimage.png.a6fb5922dd047c18b12c582aace20603.pngimage.png.09ad79e76f46a33da4e35b8dd7c88274.png


Similarly, my typical vintage whiskey bottles wouldn't fully speak to her charm;  and since I cant find a proper size bottle of grey goose (!!) I will use this sleek french water bottle!

thumbnail_IMG_5474.jpg.4962a9a898e82ce5c669929fccccf914.jpg


PART I: The Hull and Superstructures


thumbnail_IMG_5458.jpg.978589cc1c456f5fc657ae767d0a415c.jpg Starting with a hull blank.  I suppose this is more of an american style approach as opposed to european or japanese method using sagittal slices.


thumbnail_IMG_5460.jpg.8ef0c99e0754bd5370d8ba5f97c503fc.jpg  Mini belt sander to grind it close.

thumbnail_IMG_5462.jpg.d7dfcf8678dc25ac628de8046ab4c439.jpg  I do wear gloves.

thumbnail_IMG_5464.jpg.796419220883fceebd5b9dbb66dd153c.jpgSanded down to 320 grit, then primed.

thumbnail_IMG_5466.jpg.d03031c405e79c4b169fefbc0fb64a48.jpgI decided   once again to drill-route a channel into which the masts will lay flat aft.

thumbnail_IMG_5465.jpg.3cb4e1ff04b850223ce642939f1cd040.jpgThe two masts will each sit on their hinges at a different level from each other. Here the mizzen mast axle hole is drilled athwart, through the hull. 

thumbnail_IMG_5467.jpg.a97b6ac5bf7ded1f3efeddd92de1a35a.jpgWhile the main mast will hinge atop the deck.  I hope this split-level approach to the hinges will allow for an easier fold.


thumbnail_IMG_5472.jpg.a1902b195ba9889ce9cc62259055e85b.jpgMaking the cabin superstructure

thumbnail_IMG_5475.jpg.ec020ae0daf6c24179f931ce57708d51.jpgStraight lines are not my strong suit.  But its beginning to take shape.


Next: Masts & Rigging


thumbnail_IMG_5474.jpg

Posted

Part II: Masts and Rigging


thumbnail_IMG_5480.jpg.9e9b6e8df81b7a7b021e097d67373a5f.jpgMain and Mizzen masts. I used sail cloth and painted it white with acrylic.  Made it very stiff, but it think this workes to my advantage. I like cord ends atop my masts.

thumbnail_IMG_5481.jpg.406d4c9e7adaa959f6b37bc96bb9c490.jpgSuper structure - the fore is painted inlieu of glass, and the aft is truly aired out.

thumbnail_IMG_5482.jpg.06dc8d79f125c99b3acd9d9292a53d25.jpg simple hinge for the main mast - no way I could hide it.

thumbnail_IMG_5486.jpg.bec8a0b0c129c3d2c463bb196869bd74.jpgAll three sails up. The mizzen mast is hinged a level below, athwart the hull.

thumbnail_IMG_5494.jpg.58eacdfe7a22b3557722d86329275a69.jpgI had to figure out how to get the supr structure around the masts. I decided to drill a hole, and cut the roof across, then fit then on after the masts were up (in the bottle).


I figured using the tiny magnets would be perfect here.

thumbnail_IMG_5497.jpg.ee2003ecc8d0849b6b6366374593504b.jpgSecured with Bondic plastic welding and CA.

thumbnail_IMG_5498.jpg.68eb65150d028d5b45f2d159297f25b1.jpgHere lies the Main Mast Magnet's Mate: A flat peice of metal on the underside. But this was the easy part. What about the aft part of the superstructure? This would fall apart after the cuting across.

thumbnail_IMG_5499.jpg.84e4de897f380d3d57c21bd394ef2dcc.jpgSo I used Bondic on the port side - not the display side - to keep the top and bottom together after the cutting.

thumbnail_IMG_5503.jpg.e84e87e12db2f58dfae8b4d86176de61.jpgSame as above.

thumbnail_IMG_5505.jpg.bfb468a37d7c6ef14ec1c26a1f5c6fec.jpgSuccessful drilling and cutting. The top and bottom did stay together.

thumbnail_IMG_5507.jpg.207b57cac5aa5632fbc12593bce857a9.jpgAgain with the magnet, but this time I needed to secure it on the under side of the superstructure.

thumbnail_IMG_5508.thumb.jpg.69310735ca049fb7057e86538238f75f.jpgIts mate: a small peice of metal on the mizzen mast.  

thumbnail_IMG_5506.jpg.63e68d6749854905ef8c3d757b4e1df0.jpgThis is the idea; let's see how it goes inside the bottle.


The masts and rigging are really rather simple, which is great!  Practically fool proof.

The Bottle was stripped and cleaned of its labels; then I put in about 5mm of Encapso-K silicone to create a flat base.

The ship will be attached to the silicone with Sil-poxy, and even that I expect to go smoothly. 

But, it will be the attachment of the two superstructure pieces using magnets that will be the challenge, and all though a narrow  and long bottle!


Next: The Launch!


thumbnail_IMG_5485.jpg

Posted

Looking great!  I like that mini-belt sander.  Can I ask what brand that is?

Mike


Current Wooden builds:  Amati/Victory Pegasus  MS Charles W. Morgan  Euromodel La Renommèe  


Plastic builds:    Hs129B-2 1/48  SB2U-1 Vindicator 1/48  Five Star Yaeyama 1/700  Pit Road Asashio and Akashi 1/700 diorama  Walrus 1/48 and Albatross 1/700  Special Hobby Buffalo 1/32   IJN Notoro 1/700  Akitsu Maru 1/700


Completed builds :  Caldercraft Brig Badger   Amati Hannah - Ship in Bottle  Pit Road Hatsuzakura 1/700   Hasegawa Shimakaze 1:350

F4B-4 and P-6E 1/72  Accurate Miniatures F3F-1/F3F-2 1/48  Tamiya F4F-4 Wildcat built as FM-1 1/48  Special Hobby Buffalo 1/48  Eduard Sikorsky JRS-1 1/72

Citroen 2CV 1/24 - Airfix and Tamiya  Entex Morgan 3-wheeler 1/16


Terminated build:  HMS Lyme (based on Corel Unicorn)  


On the shelf:  Euromodel Friedrich Wilhelm zu Pferde; Caldercraft Victory; too many plastic ship, plane and car kits


Future potential scratch builds:  HMS Lyme (from NMM plans); Le Gros Ventre (from Ancre monographs), Dutch ship from Ab Hoving book, HMS Sussex from McCardle book, Philadelphia gunboat (Smithsonian plans)

Posted
9 hours ago, Landlubber Mike said:

Looking great!  I like that mini-belt sander.  Can I ask what brand that is?

Thanks Mike! Everything was going great until the launch - as usual.  I'll post the disaster and hopeful salvation in a few days once, the silicone dries and I clean up the mess.     


Re the sander, of course.  the sander was a gift from my brother Harry.  It has no names or brands or labels.  I searched for it on the web and appears to be a no-name product from Hong Kong.  If you look up 'mini belt sander' or 'mini polisher' you will see it.

Posted (edited)

Part III: The Launch and Repairs


thumbnail_IMG_5515.jpg.74c0b884829d83ece140f284e32d09d9.jpg I thought I was smart by measuring the height of the bottle with a stick. It's always hard to tell from the outside.  I don't want too much space, but I certainly don't want the masts too tall.


Once I was assured, I laid down a layer of sil-poxy atop the dry silicone base inside; It dries quickly


thumbnail_IMG_5516.jpg.309abbcb9b59c9092a4a0471ba427899.jpg The ship folds down easily, with no snaps or pops.


thumbnail_IMG_5521.jpg.b3c1fa3c3e1c611d0803bb9a92d1b7b3.jpg The superstructure attached on well with the magnets.

But, despite my stick measurement (!), the main mast is too tall (!!!). Still not sure how that happened.


This error led to all my problems.  


thumbnail_IMG_5527.jpg.d8e29d5756c99d2b92f628e726ae13ef.jpg By now the epoxy was curing, and I was trying desperately to move the ship back in the bottle where there was a bit more clearance for the main mast.


Meanwhile, the sil-poxy under the ship is strecching out all over the place as I try to maneuver the ship aftward in the bottle.  I tried getting more silicone-poxy where I needed it further back; but the more I put in, the sloppier things got.


I still need the ship to be fixed on the base, so that I could pull the masts into position and straighten the sails.


Out of desperation, I dripped in a thin second layer of clear silicone, to hopefullt set around the ship; it hardens very firm.


Unfortuantely, as i saw with the Caroline, when I pour the Encapso-K into a non-pristine environment, eg with a boat and epoxy tainting it, I run the risk of silicone not curing.   I was lucky that it eventually did cure, but it took several days instead of 24 hours. By then the new silicone base was covered in grit and particles, looking rather shabby. 


Eventually, I got her fixed in place in the back of the bottle.


thumbnail_IMG_5530.jpg.6306629ce8540beb2dc32ca53510e69a.jpg A 12" Hemostat clamp with a blade up top helped to cut the rigging in place.


thumbnail_IMG_5533.jpg.59dff0418d15d9fe48d6157c140046aa.jpg Looking much better after I cleaned the huge mess off the bottle.


thumbnail_IMG_5535.jpg.c5f39478c871c37c8f1604316556e238.jpg Cobbling together a base.


thumbnail_IMG_5543.jpg.4a624af99fc238e3e1ce9e4f43c254eb.jpg Kind of oblong shaped, but totatally custom built for this SIB.


thumbnail_IMG_5544.jpg.2bf6ebc10de3d320393e296c0b114822.jpg Possibly my favorite decision in this entire process: Lining the bottom with dark blue felt.


thumbnail_IMG_5550.jpg.1902909cb96a4e3cba090f831b3ec48f.jpg The blue gets pulled into the bottle,


thumbnail_IMG_5553.jpg.fdefda28cfed68afb8f1c4519cae481d.jpg She sits nice and snug,


thumbnail_IMG_5552.jpg.c57d75c8e81d0bdb3b4a7e992282a2b1.jpg in her cozy base.


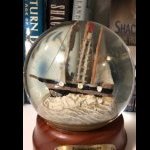
thumbnail_IMG_5551.jpg.61b634de9eb3637acb39ebbebf553c6f.jpg Both Mother in law and wife are very pleased! So am I!


Thanks for reading!


Edited by josh44
Posted

Wow, very nice!  Congratulations!!  I was getting nervous as I started reading your post, but glad to see it worked out in the end. 😁

Mike


Current Wooden builds:  Amati/Victory Pegasus  MS Charles W. Morgan  Euromodel La Renommèe  


Plastic builds:    Hs129B-2 1/48  SB2U-1 Vindicator 1/48  Five Star Yaeyama 1/700  Pit Road Asashio and Akashi 1/700 diorama  Walrus 1/48 and Albatross 1/700  Special Hobby Buffalo 1/32   IJN Notoro 1/700  Akitsu Maru 1/700


Completed builds :  Caldercraft Brig Badger   Amati Hannah - Ship in Bottle  Pit Road Hatsuzakura 1/700   Hasegawa Shimakaze 1:350

F4B-4 and P-6E 1/72  Accurate Miniatures F3F-1/F3F-2 1/48  Tamiya F4F-4 Wildcat built as FM-1 1/48  Special Hobby Buffalo 1/48  Eduard Sikorsky JRS-1 1/72

Citroen 2CV 1/24 - Airfix and Tamiya  Entex Morgan 3-wheeler 1/16


Terminated build:  HMS Lyme (based on Corel Unicorn)  


On the shelf:  Euromodel Friedrich Wilhelm zu Pferde; Caldercraft Victory; too many plastic ship, plane and car kits


Future potential scratch builds:  HMS Lyme (from NMM plans); Le Gros Ventre (from Ancre monographs), Dutch ship from Ab Hoving book, HMS Sussex from McCardle book, Philadelphia gunboat (Smithsonian plans)

Posted
On 2/3/2021 at 5:16 PM, Landlubber Mike said:

Wow, very nice!  Congratulations!!  I was getting nervous as I started reading your post, but glad to see it worked out in the end. 😁

Thanks, Mike!  I dont know about your SIBs, but for me all the work comes down to the planning and execution of the launch.  The better that is, then the less damage control and cleanup is required.  Still havent figured it all out, but I have anew plan for the next one!

  • 2 months later...
Posted

Hi Josh


Well done and I’m glad that your MIL liked it!  I too, was getting a bit anxious after reading your post relating to the disaster, but, as is always the case, Murphy’s Law is always just around the corner.  I’m glad that you got the problems solved.


I also liked the fact that you positioned the boat towards one end of the bottle, as opposed to the centre of the bottle.  It makes the viewer think that it’s got a long journey under sail ahead of it.


Nice job all around.


Cheers


Patrick

Posted
On 2/4/2021 at 8:24 PM, josh44 said:

Thanks, Mike!  I dont know about your SIBs, but for me all the work comes down to the planning and execution of the launch.  The better that is, then the less damage control and cleanup is required.  Still havent figured it all out, but I have anew plan for the next one!


On 4/30/2021 at 3:48 AM, Omega1234 said:

Hi Josh


Well done and I’m glad that your MIL liked it!  I too, was getting a bit anxious after reading your post relating to the disaster, but, as is always the case, Murphy’s Law is always just around the corner.  I’m glad that you got the problems solved.


I also liked the fact that you positioned the boat towards one end of the bottle, as opposed to the centre of the bottle.  It makes the viewer think that it’s got a long journey under sail ahead of it.


Nice job all around.


Cheers


Patrick

Thanks Patrick!  I agree with your view  and I do like how it looks offset like that. 
but truth be told, due to my miscalculation of the mast heights vs the bottle height,  that position was as close to the center of the bottle as I could get her!!! 🤫🤣🤫🤣

Create an account or sign in to comment

You need to be a member in order to leave a comment

Create an account

Sign up for a new account in our community. It's easy!

Register a new account

Sign in

Already have an account? Sign in here.

Sign In Now
  • Recently Browsing   0 members

    • No registered users viewing this page.
×
×
  • Create New...