MBerg Posted November 19, 2024 Author #31 Posted November 19, 2024 Time, for an update, but first I have a few questions. Unlike the dory, I'll be priming this one. I have both Occre and ME primers show below: 1. Instructions suggest spray on primer (eg. Rust-Oleum primer) - Should I buy some of that instead of brush on? 2. If I don't use spray primer, does the brush on primer need to be thinned similar to the paint? 2a. Is one better than the other between ME & Occre or is this more of a personal preference/doesn't matter type of thing? Log #9 - Row locks, rub rails, dagger board, rudder, thwarts Progress has been slow, but it has been. I enjoyed making the row lock pads, I find a lot of kit modelling is sanding off char and then sanding some more so it was nice to do a little carving, even though it was incredibly basic. They're straightforward, as is the rudder gudgeon pad. I clamped a block of wood and used an 'upside down' chisel blade to carve them, then clamped to drill them out and cleaned up. The rub rails are self explanatory, nothing special here, and the pads glued in place. It was nice to have some of the work on the thwarts done from earlier steps. All that was left was to sand down the width of the middle thwart. I already fit the forward and aft thwarts, they just need some cleaning up to take the char & edges off. Sanding the rubber went smoothly. However, it felt like I sanded the daggerboard for an eternity, and it still isn't as loose as I'd like. I'm trying to avoid it getting jammed in place once painted and installed. I feel like I've taken off enough thickness from the daggerboard, I'm going to try filing down the inside of the daggerboard case some more to make for a looser fit before painting. In a full shot up above you can see I still hadn't finished the tiller slot on the rear transom yet. I wasn't sure what to do with this yet since the instructions incorrectly stated a 3/8" file (I believe it's probably 3/16" as mentioned by at least one other). Rather than buying a file for this purpose, I wrapped a piece of sandpaper around my brush handle and sanded it out that way. This worked fine and is complete now (no picture). If I remember right, I believe I need to complete the dagger board 'stop', add the midship thwart 'retainers' and refine the remaining thwarts before I'm ready to paint. I'm keeping my eye on the price of the PROXXON Disk Sander TG 125/E as I feel like it'll be a nice first power tool to add. I believe it'll help with cleaning up char and more importantly getting precise angles that I sometimes struggle with. If anyone has an experience with it, or other recommendations I appreciate any input! Thanks for following, Matt robert952, king derelict, Jim M and 5 others 7 1 On the slip: Norwegian sailing pram On the drafting table: OcCre Polaris, Muscongus Bay lobster smack Completed: Lowell Grand Banks Dory
Jim M Posted November 19, 2024 #32 Posted November 19, 2024 (edited) @MBerg In my opinion is that you should use a lacquer based primer and spray it on. If you want to use an acrylic base primer, Monument Hobbies (ProAcryl) makes a fantastic spray primer. Similarly Mr Hobby (Mr Surfacer) with their Aqueous Surfacer 1000. I do really like Mr Surfacer 1000 lacquer primer for the first priming. It fills in the minor defects. The product is also available as spray. Before I lay down any paint I will sand and smooth out the primer with 1500 grit wet/dry sand paper. Finally I will then hit it with Mr Surfacer 1500 and then lightly sand after it is cured. I found the Model Expo paint to be grainy at best; the paint does not thin well, either with isopropyl or water or medium. When I paint with acrylics I always use a retarder, and I thin it to help the paint lay down smoothly. To thin I generally used both a retarder and acrylic thinner and/or medium. I do recommend that you seal your model with either a sanding sealer or shellac. If using shellac i thin it it 1:1 with isopropyl, then I sand lightly with 400 grit paper, and then apply a second coat to remove the raising of the grain. After that, I then prime and paint. jim Edited November 19, 2024 by Jim M Fixed typos, and grammer robert952 and Trumper07 2 In progress Lady Eleanor by JIm M - Vanguard Models - 1:64 On hold Norwegian Sailing Pram - Model Shipways 18th Century Merchant half hull planking - NRG On the shelf Muscongus Bay Lobster Smack - Model Shipways Peterborough Canoe - Midwest Products/Model Shipways Batelina - MarisStella Junco China - Disarmodel Completed Model Shipways Lowell Grand Banks Grand Bank Dory - Midwest Products/Model Shipways
MBerg Posted November 19, 2024 Author #33 Posted November 19, 2024 @Jim M that's interesting, I'll look a bit into it. So is the idea to seal the wood with shellac then paint over it as mentioned above? I haven't come across something like this yet,is it what's typically done on plastic models which is why it's sealed first? I see Mr surfacer is meant for plastic (thought I might be looking at the wrong thing,I only did a quick Google) robert952 1 On the slip: Norwegian sailing pram On the drafting table: OcCre Polaris, Muscongus Bay lobster smack Completed: Lowell Grand Banks Dory
Jim M Posted November 19, 2024 #34 Posted November 19, 2024 49 minutes ago, MBerg said: @Jim M that's interesting, I'll look a bit into it. So is the idea to seal the wood with shellac then paint over it as mentioned above? I haven't come across something like this yet,is it what's typically done on plastic models which is why it's sealed first? I see Mr surfacer is meant for plastic (thought I might be looking at the wrong thing,I only did a quick Google) I use Surfacer on plastic, wood and metal with no issues. The Dory I finish I used all of Mr Hobby paints. robert952 and MBerg 2 In progress Lady Eleanor by JIm M - Vanguard Models - 1:64 On hold Norwegian Sailing Pram - Model Shipways 18th Century Merchant half hull planking - NRG On the shelf Muscongus Bay Lobster Smack - Model Shipways Peterborough Canoe - Midwest Products/Model Shipways Batelina - MarisStella Junco China - Disarmodel Completed Model Shipways Lowell Grand Banks Grand Bank Dory - Midwest Products/Model Shipways
MBerg Posted November 19, 2024 Author #35 Posted November 19, 2024 Once again, I appreciate the response. One last question - I was given a 'wood conditioner' with the kit. This is strictly a pre-stain and has nothing to do with the painting process - is that correct? robert952 1 On the slip: Norwegian sailing pram On the drafting table: OcCre Polaris, Muscongus Bay lobster smack Completed: Lowell Grand Banks Dory
Jim M Posted November 19, 2024 #36 Posted November 19, 2024 2 hours ago, MBerg said: Once again, I appreciate the response. One last question - I was given a 'wood conditioner' with the kit. This is strictly a pre-stain and has nothing to do with the painting process - is that correct? I suspect it is a sealer of some form, but a sealer blocks staining. I normally stain first then seal the wood. robert952 and MBerg 2 In progress Lady Eleanor by JIm M - Vanguard Models - 1:64 On hold Norwegian Sailing Pram - Model Shipways 18th Century Merchant half hull planking - NRG On the shelf Muscongus Bay Lobster Smack - Model Shipways Peterborough Canoe - Midwest Products/Model Shipways Batelina - MarisStella Junco China - Disarmodel Completed Model Shipways Lowell Grand Banks Grand Bank Dory - Midwest Products/Model Shipways
MBerg Posted March 18 Author #37 Posted March 18 (edited) Log #11 - Painting Coming out of one of the most brutal winters I can remember, I'm looking to finish priming and painting the pram. I had already finished priming the interior, the exterior needed one more coat, and I also made the common mistake of not filling the last cut line on the transom before painting. Spoiler: the paint did not fill the line in, so I sanded back, filled and reprimed. However, I'm coming across an issue. When prepping to put the second coat of primer on the exterior, I noted it was thickening up quite a bit. Rather than using some 'bad' primer, I grabbed some of the OcCre stuff I had lying around. It seemed quite blotchy when applying it so I was immediately wondering if I made a bad mistake by switching primers halfway through. I let it dry overnight and today I noticed it's quick shiny. Now I'm wondering if I should've stopped after the first coat, and went to normal paint. Will this gloss cause an issue - did I screw it up by using 1 coat each of different primers, or is this just a normal characteristic of some primers? @Jim M P.S. Thanks again for the advise on painting. I'm still using a brush and the stuff with the kit, but I picked up some spray primer I'll use on the smack and hopefully develop some better painting skills for future projects. Pics of the sanded and filled transom + odd glossy primer for reference: Edited April 20 by MBerg robert952, ccoyle, Paul Le Wol and 3 others 6 On the slip: Norwegian sailing pram On the drafting table: OcCre Polaris, Muscongus Bay lobster smack Completed: Lowell Grand Banks Dory
palmerit Posted March 18 #38 Posted March 18 I used the Model Shipways supplied paint on my Dory, Pram, and Smack - even though I do have an airbrush and a bunch of Vallejo Air paints. The MS paint is not the greatest. I ended up watering it down and painting multiple coats. If painted in its "full strength" I'm sure I would have had globs and streaks. In some ways since the Dory, Pram, and Smack are all work boats, the rougher consistency (and relatively large scale) are probably okay. I can't imagine using their paints on a larger ship (at smaller scale like 1:64 scale). MBerg, Bryan Woods, robert952 and 1 other 4 Current Builds: Sherbourne 1763 (Vanguard Models), Ranger 1864 (Vanguard Models), San Francisco Bay Scow Schooner (Midwest Products), Gunboat Philadelphia (Model Shipways) In the Queue: Oseberg (Ships of Pavel Nikiten), Zulu 1900 (Vanguard Models), Endurance (Occre), Syren US Brig 1803 (Model Shipways), Duchess of Kingston (Vanguard Models) Completed Builds: Lowell Grand Banks Dory (Model Shipways), 18th-Century Merchantman Half-Hull Planking Kit (NRG), Norwegian Pram (Model Shipways), Endurance (Lego), Muscongus Bay Lobster Smack (Model Shipways), Grand Banks Dory (Midwest Products)
GGibson Posted March 18 #39 Posted March 18 Nice paint work, Matt. 👍 MBerg and robert952 2 Gregg Current Projects: Completed Projects: Waiting for Shipyard Clearance: USS Constitution 1:76.8 - Model Shipways Norwegian Sailing Pram 1:12 - Model Shipways Yacht America Schooner 1851 1:64 - Model Shipways Muscongus Bay Lobster Smack 1:24 - Model Shipways RMS Titanic 1:300 - OcCre (May now never get to it) H.M. Schooner Ballahoo 1:64 - Caldercraft Bluenose 1921 1:64 - Model Shipways Santa Maria Caravelle 1:48 - Ships of Pavel Nikitin
Jim M Posted March 19 #40 Posted March 19 @MBerg very nice paint. robert952 1 In progress Lady Eleanor by JIm M - Vanguard Models - 1:64 On hold Norwegian Sailing Pram - Model Shipways 18th Century Merchant half hull planking - NRG On the shelf Muscongus Bay Lobster Smack - Model Shipways Peterborough Canoe - Midwest Products/Model Shipways Batelina - MarisStella Junco China - Disarmodel Completed Model Shipways Lowell Grand Banks Grand Bank Dory - Midwest Products/Model Shipways
MBerg Posted March 20 Author #41 Posted March 20 Thank you sirs! Sounds like it's a non issue. On 3/17/2025 at 8:46 PM, palmerit said: the Dory, Pram, and Smack are all work boats, the rougher consistency (and relatively large scale) are probably okay. Agreed. I've been thinking similarly and less concerned with potential issues, while also trying to use this as as much of a learning experience as I can. Let's see how the top coats turn out. I'll look into airbrushing when getting to the bigger projects. robert952 and Ryland Craze 2 On the slip: Norwegian sailing pram On the drafting table: OcCre Polaris, Muscongus Bay lobster smack Completed: Lowell Grand Banks Dory
MBerg Posted April 11 Author #42 Posted April 11 (edited) Quick update: I’ve been making progress on painting and finally feel like I’m getting past the mental block I had with this one. Doing some research and reading responses here helped me find some clarity. This time around, I’m taking a different approach than I did with the dory. That one got about three diluted coats—this pram is now at six and still building. The white paint is part of the challenge, but it’s improving with each layer. I hadn’t realized a dozen coats could be normal when brushing acrylics. It’s not perfect—some uneven spots where it pooled—but good enough for a work boat at this scale. I plan to experiment with retarder, proper thinner, and sanding sealer next time, as Jim recommended. I’ll probably hold off until after the smack, but I’m also considering better-quality paint, since the ME paints seem a bit grainy and don’t thin well—possibly part of the issue. Either way, it’s a learning model, and I’m glad to be moving forward again. Thanks for following along. Matt EDIT: One my my biggest realizations is that acrylics dry so damn fast you can apply 3 coats in an hour. I also washed out an old container that I can use to batch thin paint for a day. Before today I was pouring onto a pallet, thinning, painting and tossing the rest. Batching it in a sealed container and not waiting 12-24 hours to apply the next coat is making a huge difference! Edited April 11 by MBerg robert952, Jim M, GGibson and 5 others 8 On the slip: Norwegian sailing pram On the drafting table: OcCre Polaris, Muscongus Bay lobster smack Completed: Lowell Grand Banks Dory
MBerg Posted April 14 Author #43 Posted April 14 Finished the exterior with about 8 coats - looking really good. Decided to tackle the inside tonight with the first coat... All I can say is - it's a good thing a lot of this is going to be covered by floor boards and thwarts. 😳 Bryan Woods, robert952, king derelict and 1 other 4 On the slip: Norwegian sailing pram On the drafting table: OcCre Polaris, Muscongus Bay lobster smack Completed: Lowell Grand Banks Dory
MBerg Posted April 15 Author #44 Posted April 15 Trying to keep the momentum going I made some more progress painting tonight. I probably painted for a good hour, slow and methodical. By the time I finished the initial coat, I still had plenty of paint left and other areas had dried so I just kept going back and overlapping. Not sure if that's good practice or not, but it seemed to work okay. Trying to spend a bit more time and energy on the areas that will be visible as well. yvesvidal, robert952, Scott Crouse and 5 others 8 On the slip: Norwegian sailing pram On the drafting table: OcCre Polaris, Muscongus Bay lobster smack Completed: Lowell Grand Banks Dory
palmerit Posted April 15 #45 Posted April 15 I definitely do multiple coats. Better to do multiples of diluted paint - especially for this thick MS paint - to get a nice flat pant job. With an airbrush, you have to do many coats. If you see color variation that’s likely because the primer layer is showing through a thick layer of paint. I’ve seen for painting plastic models, especially figures, that having a dark primer underneath show through a top layer of thin paint can be done to create highlights and lowlights. I suppose you could do the same on a model ship, but those highlights and lowlights wouldn’t be on flat stretches of hull. robert952 and MBerg 2 Current Builds: Sherbourne 1763 (Vanguard Models), Ranger 1864 (Vanguard Models), San Francisco Bay Scow Schooner (Midwest Products), Gunboat Philadelphia (Model Shipways) In the Queue: Oseberg (Ships of Pavel Nikiten), Zulu 1900 (Vanguard Models), Endurance (Occre), Syren US Brig 1803 (Model Shipways), Duchess of Kingston (Vanguard Models) Completed Builds: Lowell Grand Banks Dory (Model Shipways), 18th-Century Merchantman Half-Hull Planking Kit (NRG), Norwegian Pram (Model Shipways), Endurance (Lego), Muscongus Bay Lobster Smack (Model Shipways), Grand Banks Dory (Midwest Products)
MBerg Posted April 19 Author #46 Posted April 19 On 4/15/2025 at 7:57 AM, palmerit said: I suppose you could do the same on a model ship, but those highlights and lowlights wouldn’t be on flat stretches of hull. I bet that would work great on something like the flying dutchman which is supposed to be old, weather, and 'ghosty', but maybe not the most realistic for a ship unless doing some derelict diorama. Just finished the final coat of paint. I might need to do some touch-ups later, but the bulk of the painting is done. Looking ahead to gluing — do most people actually sand all the contact points back to bare wood after painting? I did this on my dory and it felt pretty inefficient: paint everything, sand it back down, glue parts together, then do touch-ups. I understand bare wood is important for a strong bond, but is there a better way? I’ve thought about taping off glue spots before painting, but with all the tiny areas involved, it seems like that would just complicate things even more. Next up: the tiller. That should keep me busy while the hull paint fully cures. I may need another coat on the rudder and centerboard as well. Ryland Craze, Bryan Woods and JacquesCousteau 3 On the slip: Norwegian sailing pram On the drafting table: OcCre Polaris, Muscongus Bay lobster smack Completed: Lowell Grand Banks Dory
palmerit Posted April 19 #47 Posted April 19 If I was going to glue something that's painted (or to something that's painted) I'd used CA glue before PVA glue. Don't know if that's recommended and instead you should be sanding before gluing, but I can't imagine gluing with PVA to something that's painted will work well. Current Builds: Sherbourne 1763 (Vanguard Models), Ranger 1864 (Vanguard Models), San Francisco Bay Scow Schooner (Midwest Products), Gunboat Philadelphia (Model Shipways) In the Queue: Oseberg (Ships of Pavel Nikiten), Zulu 1900 (Vanguard Models), Endurance (Occre), Syren US Brig 1803 (Model Shipways), Duchess of Kingston (Vanguard Models) Completed Builds: Lowell Grand Banks Dory (Model Shipways), 18th-Century Merchantman Half-Hull Planking Kit (NRG), Norwegian Pram (Model Shipways), Endurance (Lego), Muscongus Bay Lobster Smack (Model Shipways), Grand Banks Dory (Midwest Products)
MBerg Posted April 20 Author #48 Posted April 20 I think the problem with using CA glue on painted parts isn't so much that thee CA won't hold them together, but more so that the weakest part of the joint is not the paint adhering to the wood. I suppose it depends on the application. Some attachments would be a lot safer than others. Quick update on painting and progress: There was some slight paint bleed onto the white areas, but I was able to clean it up using an X-Acto knife — worked well for sharpening the edges. I also used a stick sander to remove paint from the contact points for the floorboards and thwarts, which I’ll be working on next. I’m thinking of using a combination of CA and PVA glue: PVA for the frame supports, and CA on the sides. Part of the reason is to avoid the tedious (and risky) job of scraping paint off the sides and potentially messing up the finish. But it’s also a learning project, and I want to test how well a painted-to-painted CA joint holds up. I find most beginners around here aren't new to modeling and are typically coming from plastics. Me being completely new to modeling, the painting is a whole new thing as well so I'm learning just as much about it than anywhere else. This was before some cleaning: The edges aren't perfect, but it turned out decent enough Bryan Woods, druxey, robert952 and 5 others 8 On the slip: Norwegian sailing pram On the drafting table: OcCre Polaris, Muscongus Bay lobster smack Completed: Lowell Grand Banks Dory
Kenchington Posted April 20 #49 Posted April 20 Really nice paint job! Too many look rough when viewed close up but yours looks great. Trevor robert952, halvoric, MBerg and 1 other 4 In progress: Norwegian sailing pram, by Model Shipways Completed: 1880 Gloucester halibut dory, based on Model Shipways Lowell banks dory
MBerg Posted May 3 Author #50 Posted May 3 Log # 12 - Floor board, thwarts and stern sheets With the wife getting sick, and isolating in the room I also work on my boat, I was playing single parent for a week and a half, but back to the pram this week. Made some decent progress. First off, I picked up a disc sander months ago for black Friday. Stupid me found a great deal in the UK and ordered it. Oh yeah, they don't use the same outlets as North America, forgot that tiny detail! I ended up keeping it and getting a transformer. Finally got to give it a proper go this week and I'm in love. It takes the char off in a split second, bevels precisely at any angle. It was great while working the floor boards. Just have to be careful not to take too much off, it goes through those little pieces like butter. The transformer works great. I thought I was going to have to send it back, but this was a lifesaver. I realized that since I sanded down the supports, there would be light wood between the board. I marked out where they seems would be and darkened them with a fine point sharpie My only regret is painted the thwarts. I like the look of the bare wood and matching the floor boards much better. The only reason I painted them was because it looks like they were painted in the instructions. At least it doesn't look bad, and they match the outer hull anyways. I also touched up a few small spots and put another coat on the center board, filed down the inside of the case a bit more to make room for all the paint. It's a bit on the tight side, but should work nicely. Just before stopping, I started on the tiller. This should be interesting - I don't recall seeing anyone having much success 'riveting' the brass. I think I'll give it a shot and see what happens. I'll spend a bit of time searching some logs for tips to see if anyone has done it successfully. Matt yvesvidal, JacquesCousteau, robert952 and 3 others 6 On the slip: Norwegian sailing pram On the drafting table: OcCre Polaris, Muscongus Bay lobster smack Completed: Lowell Grand Banks Dory
MBerg Posted May 3 Author #51 Posted May 3 Had some surprise free time today to work on the tiller. Instructions call for 3 pieces of 1/16" brass to complete it. So okay, tiller first, I nervously broached (a word?) out the hold I drilled to fit the 1/16" brass rod, then I look at the tiller extension. NO WAY a 1/16" hole will go through the extension, it's overall width is 1/16" So now I've got a way oversized hole in my tiller for the extension. I'll need to find a work around for this, but there are far to many of these stupid errors in the instructions. Especially for a beginner kit that had been around for this many years, it's very frustrating they haven't corrected these yet. Should have some time tonight to get the tiller glued together, and figure out what I'm going to do with this oversized attachment point. robert952, JacquesCousteau and Jim M 3 On the slip: Norwegian sailing pram On the drafting table: OcCre Polaris, Muscongus Bay lobster smack Completed: Lowell Grand Banks Dory
MBerg Posted May 4 Author #52 Posted May 4 Log #13 - Tiller, eyebolt, stay plates Messed up the tiller earlier today, so had to do an emergency disassembly. I glued the side pieces on the top and bottom, not the sides - oops. Got that fixed up tonight. Managed to cut the brass down and 'rivet' it. However, I definitely have too much brass sticking out. I would like it to be tighter to the wood, but I'm leaving it for now. One piece stated bending slightly so I stopped. The tiller extension is so fragile I didn't want to get too excited as I'd risk breaking it completely and being in a far worse spot. I cut the brass with a razer saw which was a little cumbersome, but worked well enough. I stole my wife's jewelry saw, but I think the blade was too large for this work. I used one of my smallest bits to start each hold and used a broach to open them up to the needed size. I'm glad David recommends the broaches and I bought some early on - they were a life saver here. I fixed the problem mentioned in the earlier post by fitting a small piece of 1/16" tube into the oversized hole. The 1/32" rod fits perfectly inside and clears the hold in the extension. 1/16" tube cut and fitted - though a touch long 1/16" tube with 1/32" rod in the middle Top side: I may attempt to cut or file back the excess brass that attaches the extension, but I'm leaving it as is for now. I moved onto the eyebolt, and stays. Fitted everything, and as others have said the brass 'nails' are far too large to pin the size stay plates. Leaving it as is for now, I'll have to pick up some needles or something to use instead. I have an order coming from Cornwall model boats and added some brass pins - hopefully they work. In the meantime I can always work on fitting the rudder and building the display board. robert952, yvesvidal, Kenchington and 2 others 5 On the slip: Norwegian sailing pram On the drafting table: OcCre Polaris, Muscongus Bay lobster smack Completed: Lowell Grand Banks Dory
Kenchington Posted May 4 #53 Posted May 4 I'm still working on my version of the pram's tiller. Good to see that you managed to make the kit-supplied one work! Too many others haven't. How did you get the brass through the tiller extension? I have no clue how that could be done! Trevor robert952 1 In progress: Norwegian sailing pram, by Model Shipways Completed: 1880 Gloucester halibut dory, based on Model Shipways Lowell banks dory
MBerg Posted May 4 Author #54 Posted May 4 (edited) 9 hours ago, Kenchington said: How did you get the brass through the tiller extension Very carefully and with sweaty palms! Marked out where it needed to go and scored it a bit with a mechanical pencil. I used a #72 bit (0.025"), positioned it as center as possible with a magnifying glass, drilled through, then used a broach to slowly open it up to 1/32" (0.03125). I thought I was going to break it many times, but surprisingly I didn't need to use the spare. I ended up being slightly off center, but made sure when drilling I was looking down the length of the tiller to make sure I wasn't veering off either direction. Before fitting the brass I filed the ends slightly so it wouldn't catch on any sharp edges and then just kind of twisted it into position. I touched the sides of the hole with diluted pva after the brass was in place. I'm not surprised that many haven't gotten this to work, this is incredibly small work! Have you tried yet, or in the thinking and planning stage? Edited May 4 by MBerg JacquesCousteau and robert952 2 On the slip: Norwegian sailing pram On the drafting table: OcCre Polaris, Muscongus Bay lobster smack Completed: Lowell Grand Banks Dory
Kenchington Posted May 4 #55 Posted May 4 1 hour ago, MBerg said: Have you tried yet, or in the thinking and planning stage? Not even that far. I'm trying not to think about it until I have the tiller itself done. And that has to wait while I get my (full-size) boat into the water and onto her mooring! But thanks for your explanation: Gives me something to try. Trevor MBerg, king derelict and robert952 3 In progress: Norwegian sailing pram, by Model Shipways Completed: 1880 Gloucester halibut dory, based on Model Shipways Lowell banks dory
MBerg Posted May 4 Author #56 Posted May 4 16 minutes ago, Kenchington said: that has to wait while I get my (full-size) boat into the water and onto her mooring! No problem, and not to get off topic, but what do you have? I just bought my first sailboat (siren 17) at the very end of last season and will give getting it in the water soon, then to figure out how the hell to sail it! robert952 and king derelict 2 On the slip: Norwegian sailing pram On the drafting table: OcCre Polaris, Muscongus Bay lobster smack Completed: Lowell Grand Banks Dory
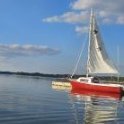
Kenchington Posted May 4 #57 Posted May 4 3 hours ago, MBerg said: what do you have? Mine's a Drascombe Longboat: That image is from last summer. Just got her back on her mooring this afternoon, with lots of work still to do to clean her up for the season, then get the sailing gear on board before she looks like that again! Trevor robert952, druxey, yvesvidal and 4 others 6 1 In progress: Norwegian sailing pram, by Model Shipways Completed: 1880 Gloucester halibut dory, based on Model Shipways Lowell banks dory
MBerg Posted May 6 Author #59 Posted May 6 Very nice looking boat. There's one similar a couple storage spaces over from mine. Nothing like a proper wood boat. Speaking of wood boats - What the heck is everyone using for 'nails' to hold the stay plates. I found some small flat head pins from Michaels. They aren't quite brass, but more of a gold color. I wanted to dry fit them to see if I was fine with with, but even those are too thick for the stay-plates. I also picked up some proper PVA. Until now I've been using gel since it's a bit more forgiving, but with some of these extremely small areas I'm finding it a little too thick. It was a bit messy applying to the 'fore stay'. It also seems to be giving off some sort of white residue on surfaces around it over time Kenchington and robert952 2 On the slip: Norwegian sailing pram On the drafting table: OcCre Polaris, Muscongus Bay lobster smack Completed: Lowell Grand Banks Dory
Kenchington Posted May 6 #60 Posted May 6 10 minutes ago, MBerg said: Nothing like a proper wood boat. So true! Especially if you can pay someone else for the annual maintenance. I owned a wood lapstrake boat back in student days. Lovely. But spring preparations usually extended through to almost September. Diomedea is mostly GRP, aside from teak trim and fittings, jatoba gratings, plus the sailing and rowing gear (pine, Douglas fir, ash, some oak here and there). Less maintenance and more sailing time 😀 MBerg and robert952 2 In progress: Norwegian sailing pram, by Model Shipways Completed: 1880 Gloucester halibut dory, based on Model Shipways Lowell banks dory

Recommended Posts
Create an account or sign in to comment
You need to be a member in order to leave a comment
Create an account
Sign up for a new account in our community. It's easy!
Register a new accountSign in
Already have an account? Sign in here.
Sign In Now