Modeler12
-
Posts
1,716 -
Joined
-
Last visited
4 Followers


Recent Profile Visitors
3,593 profile views


-
 SUBaron reacted to a post in a topic:
USS Constitution by Modeler12 - FINISHED - Model Shipways
SUBaron reacted to a post in a topic:
USS Constitution by Modeler12 - FINISHED - Model Shipways
-
FrankWouts reacted to a post in a topic:
Ryland Craze's Carving Attempts - #11 Blades
-
Django reacted to a post in a topic:
Seizing or whipping a line. Here is how I have done it.
-
ibozev reacted to a post in a topic:
Making rope coils
-
zoran reacted to a post in a topic:
Making rope coils
-
Patrick B reacted to a post in a topic:
Modeler12 carving attempt - Me too; I am willing to try almost anything.
-
Bill Morrison reacted to a post in a topic:
Is there a better #11 blade handle
-
 Although Jeff is no longer in the business of supplying wood for us, I hope he is still here and watching us. Thanks Jeff (again) for those great boards and pieces. You did well by teaching a younger fellow (not Chuck, of course) and the'kid' is doing a nice job as well as you did. Your instructions are well taken and saved. I use them without fail (well except about the dust problem, but that is my concern) If anyone knows who the 'kid' is . . . .
 -
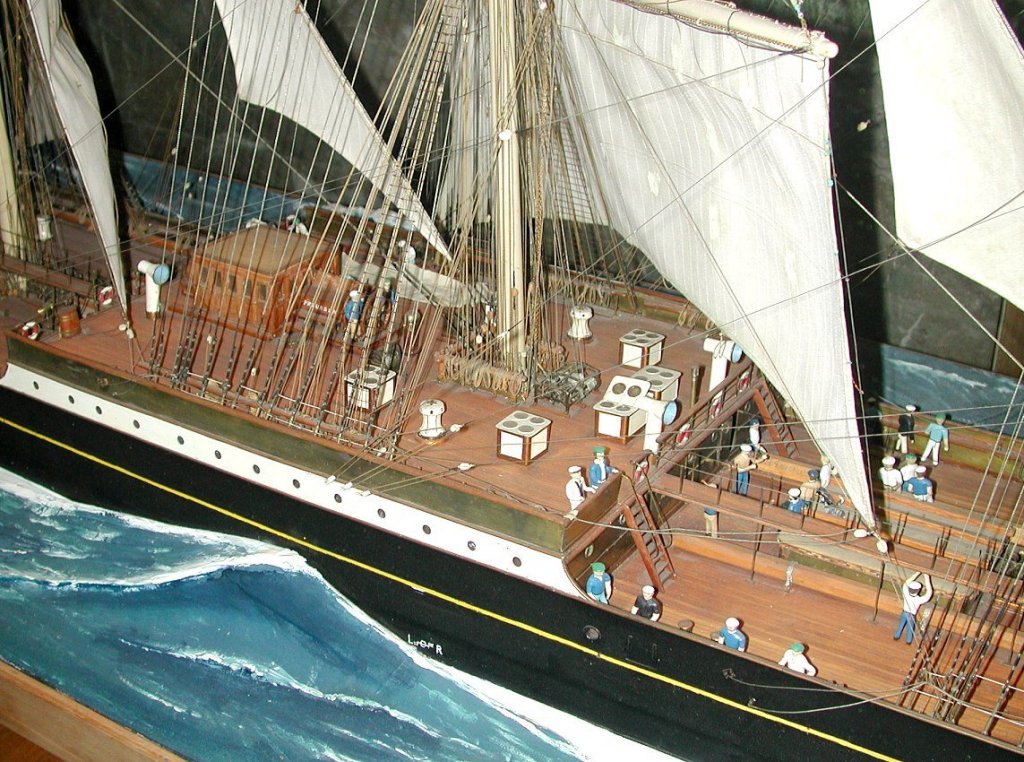
Have a look at this thread. The flags are 'real' and can be folded or crinkled to simulate the wind effects.
-
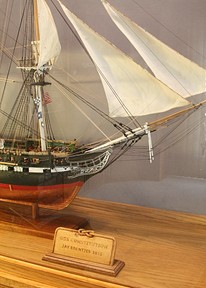
Mr Mackie, on his web site, shows numerous pictures of the model as well as a few facts about the sailing days. Too bad he does not give the artist who built this beauty any credit. If I have to, I'll go to the museum to find out who it was. I am sure this person must have built lots of other models.
-
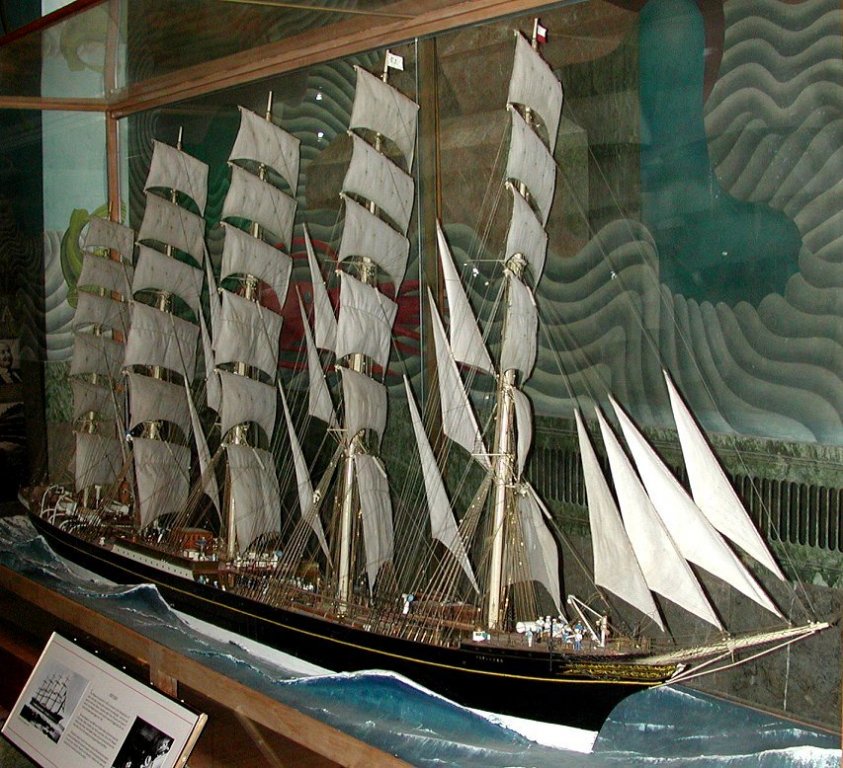
There is a great model of the five masted Preussen in the San Francisco Maritime Museum and I would like to know who built that. I know there is a sign with the model but I forgot to write the name of this marvelous builder. When I contacted the museum it was too late (Friday evening).
-
When stepping the masts you don't want to permanently glue them in place. Have the blocks on the keel in place to hold the bottom of the mast(s), then cut the openings in the deck and fit the mast(s) to be sure they are at the right angle(s) and then remove the mast(s) for a later installation. There will be lots of other things to do (such as adding deck furniture, rails, deck planking, etc.) and you don't want the mast(s) to interfere with those. The same applies to the bowsprit. To align the mast(s) you can use a number of methods described in this forum. Search.
-
Miniature Russian carving tools
Modeler12 replied to druxey's topic in Modeling tools and Workshop Equipment
Looks like great carving tools. I also would like the email address and was wondering how payments and shipping are handled. In particular, I like to see more details of the shape of each tool and if I could order some individually rather than a whole set. For 23 of those at $360 total I assume a price of $18 each would not be unreasonable. -
Your first comments about 'Jim's saw' cutting up to 3/8 inch thickness is a bit limited. The blades that come with the saw include a four inch diameter 'course', carbide tipped blade that cuts boards to 3/4 inch thickness very nicely. I have used that to cut slabs of hardwood, such as maple, blood-wood and poplar, and then used the 3 inch 'fine' blade to cut planking. Both cuts were very close to what I wanted and with some adjustments of the fence 'dead-on'. I have a larger saw but for this kind of work I don't use it. The Byrnes saw does it all. PS. It was an administrative error, I am sure, but I just got another bill from Thurston for blades I bought last year and paid for by card (the normal way with them). Keep your records (receipts)
-
Proportional Dividers
Modeler12 replied to Worldway's topic in Modeling tools and Workshop Equipment
It is interesting to see the two sides of this 'coin'. If you have used the proportional dividers for a long time, I can appreciate that you like them for various reasons. In my case, I have a pair and seldom use them, but so be it. When Jud mentioned his liking for the decimal system (rather than fractions, I suppose) I agree. But when he talks about using a slide-rule - - - - I have to grin because those are dinosaurs in my college collection. Slide-rules are as accurate as proportional dividers and even more difficult to use and understand (I know Jud, you add or subtract logarithmic values, etc.). The upshot is: if you like the tool you have, use it. If you want accuracy, calculate. -
Modeler12 reacted to a post in a topic:
Proportional Dividers
-
Proportional Dividers
Modeler12 replied to Worldway's topic in Modeling tools and Workshop Equipment
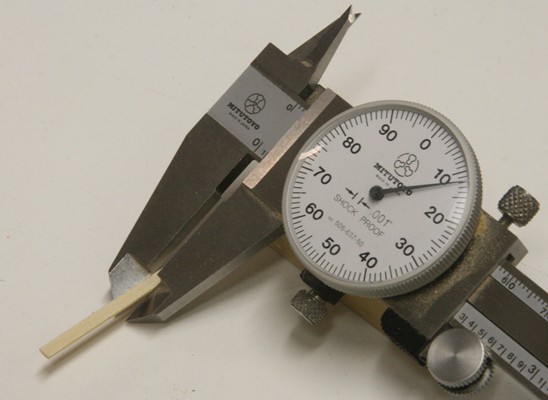
I might add a couple comments about the way I measured the planking problem I showed above. The length of the two openings (4.85 and 4.00 inches) was measured by using a piece of stiff paper. You can see that in the photograph. These dimensions were used in the calculation. The width of the planks was measure with a dial set of calipers (with a dial indicator) that is accurate to within 0.001 inch. There is no way that you can be that accurate with the proportional dividers. To pace off sets of repetitive dimensions on a chart it is cheaper and easier to use a simple pair of dividers: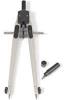
-
Proportional Dividers
Modeler12 replied to Worldway's topic in Modeling tools and Workshop Equipment
Ok, let me explain. Let me do this with an example, the hull planking of my cross section. If the planks need to be tapered because the space or opening as shown in the picture below changes along the hull lines, it is necessary to use the 'proportional method'. In this case, you measure the two dimensions of the opening and they are 4.85 and 4.00 inch respectively. Let's say the planks you have are 0.121 inch wide. What should the plank width measure at the other end? Obviously smaller if you put the wide end to the left in the picture. The proportional ratio is 4.00 divided by 4.82. Now multiply that ratio by the 0.121 and you get 0.100 inches, the width of the narrow end. Now you could have done this with the mechanical divider, but the accuracy becomes questionable because of the big difference in the size of the opening and plank width. -
Proportional Dividers
Modeler12 replied to Worldway's topic in Modeling tools and Workshop Equipment
I have two types of proportional dividers. The one shown below is a lot more accurate than my mechanical type and faster too.
-
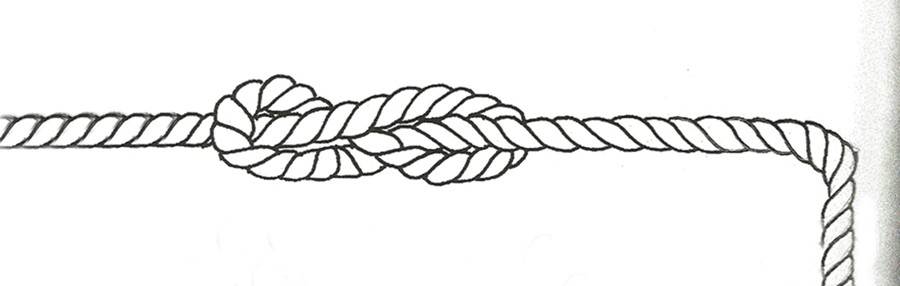
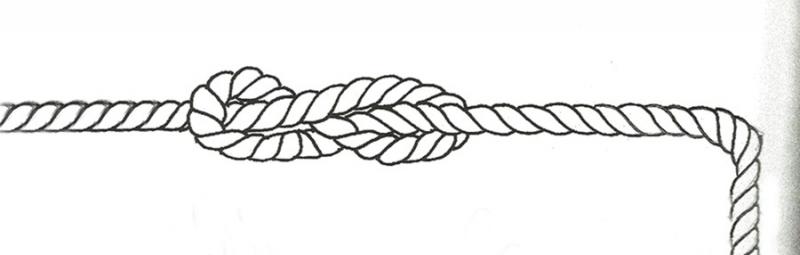
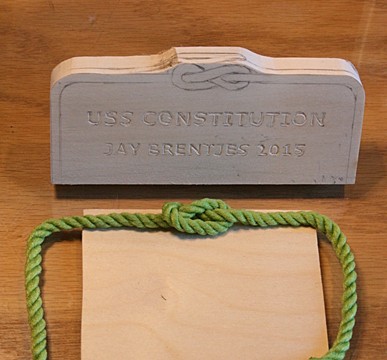
A word of caution about copying carving plans: 'don't always assume the drawing is correct'. Earlier I mentioned the book(s) by Lora Irish and how I found the examples very helpful. However, in her book of plans she makes mistakes. For example, the leaves of a rose are 'opposite' on the stem, not 'alternate'. Likewise those leaves are not lobed but serrated or toothed and much broader than hers. I realized this much later after I had carved her design. Another example is her plan for some rope, part of which is shown below. I wanted to use this for the border of a sign but noticed that the rope she shows reversed the lay on the other side of the knot. That's impossible. Likewise the knot is strange and not at all the way I tie a simple knot. So, I made a model and will change the design shown below to correspond to the green rope. The reason I decided to do this is that I wanted to do some 3-D carving. Sorry, I just realized that her knot is a figure eight knot. That is probably better looking after all, but the rope is still wrong.
-
Modeler12 reacted to a post in a topic:
Modeler12 carving attempt - Me too; I am willing to try almost anything.
-
Modeler12 reacted to a post in a topic:
Modeler12 carving attempt - Me too; I am willing to try almost anything.
-
Modeler12 reacted to a post in a topic:
Modeler12 carving attempt - Me too; I am willing to try almost anything.
-
Modeler12 reacted to a post in a topic:
Modeler12 carving attempt - Me too; I am willing to try almost anything.
-
Modeler12 reacted to a post in a topic:
Modeler12 carving attempt - Me too; I am willing to try almost anything.
-
Modeler12 reacted to a post in a topic:
Carving tools, books and carving woods discussion
-
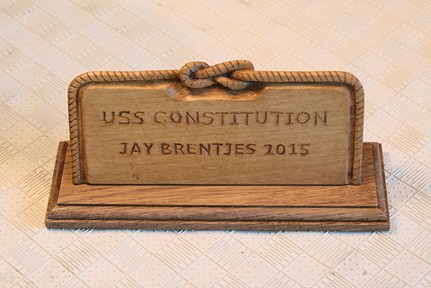
Thank you guys. The three projects thus far were fun and I learned a lot about carving and the tools involved. For future designs that involve model ship decorations I now have a better feel for what it takes. To be sure, what I have done so far is on a larger scale and I need to consider smaller tools in the future. But is that not what modeling is all about? We shrink the big things and try to duplicate them the best we can. Think big, work small. I do have one more project but I won't get into the details here. It involves making a display sign using wood and carved letters for my USS Constitution model. I was hoping to do that using a piece of the real ship but (alas) I don't have one of those pieces that was promised to me in the past. PS. Jim, the 'Rose of Sharon' is actually not a rose but a flower that is part of the hibiscus family. It just did not fit my design.

-
Just in time for Christmas. And a Merry Christmas to all of you. May the new year bring you good health and happiness with peace on earth.

- 47 replies
-
- 13
-