Search the Community
Showing results for tags 'agamemnon'.
-
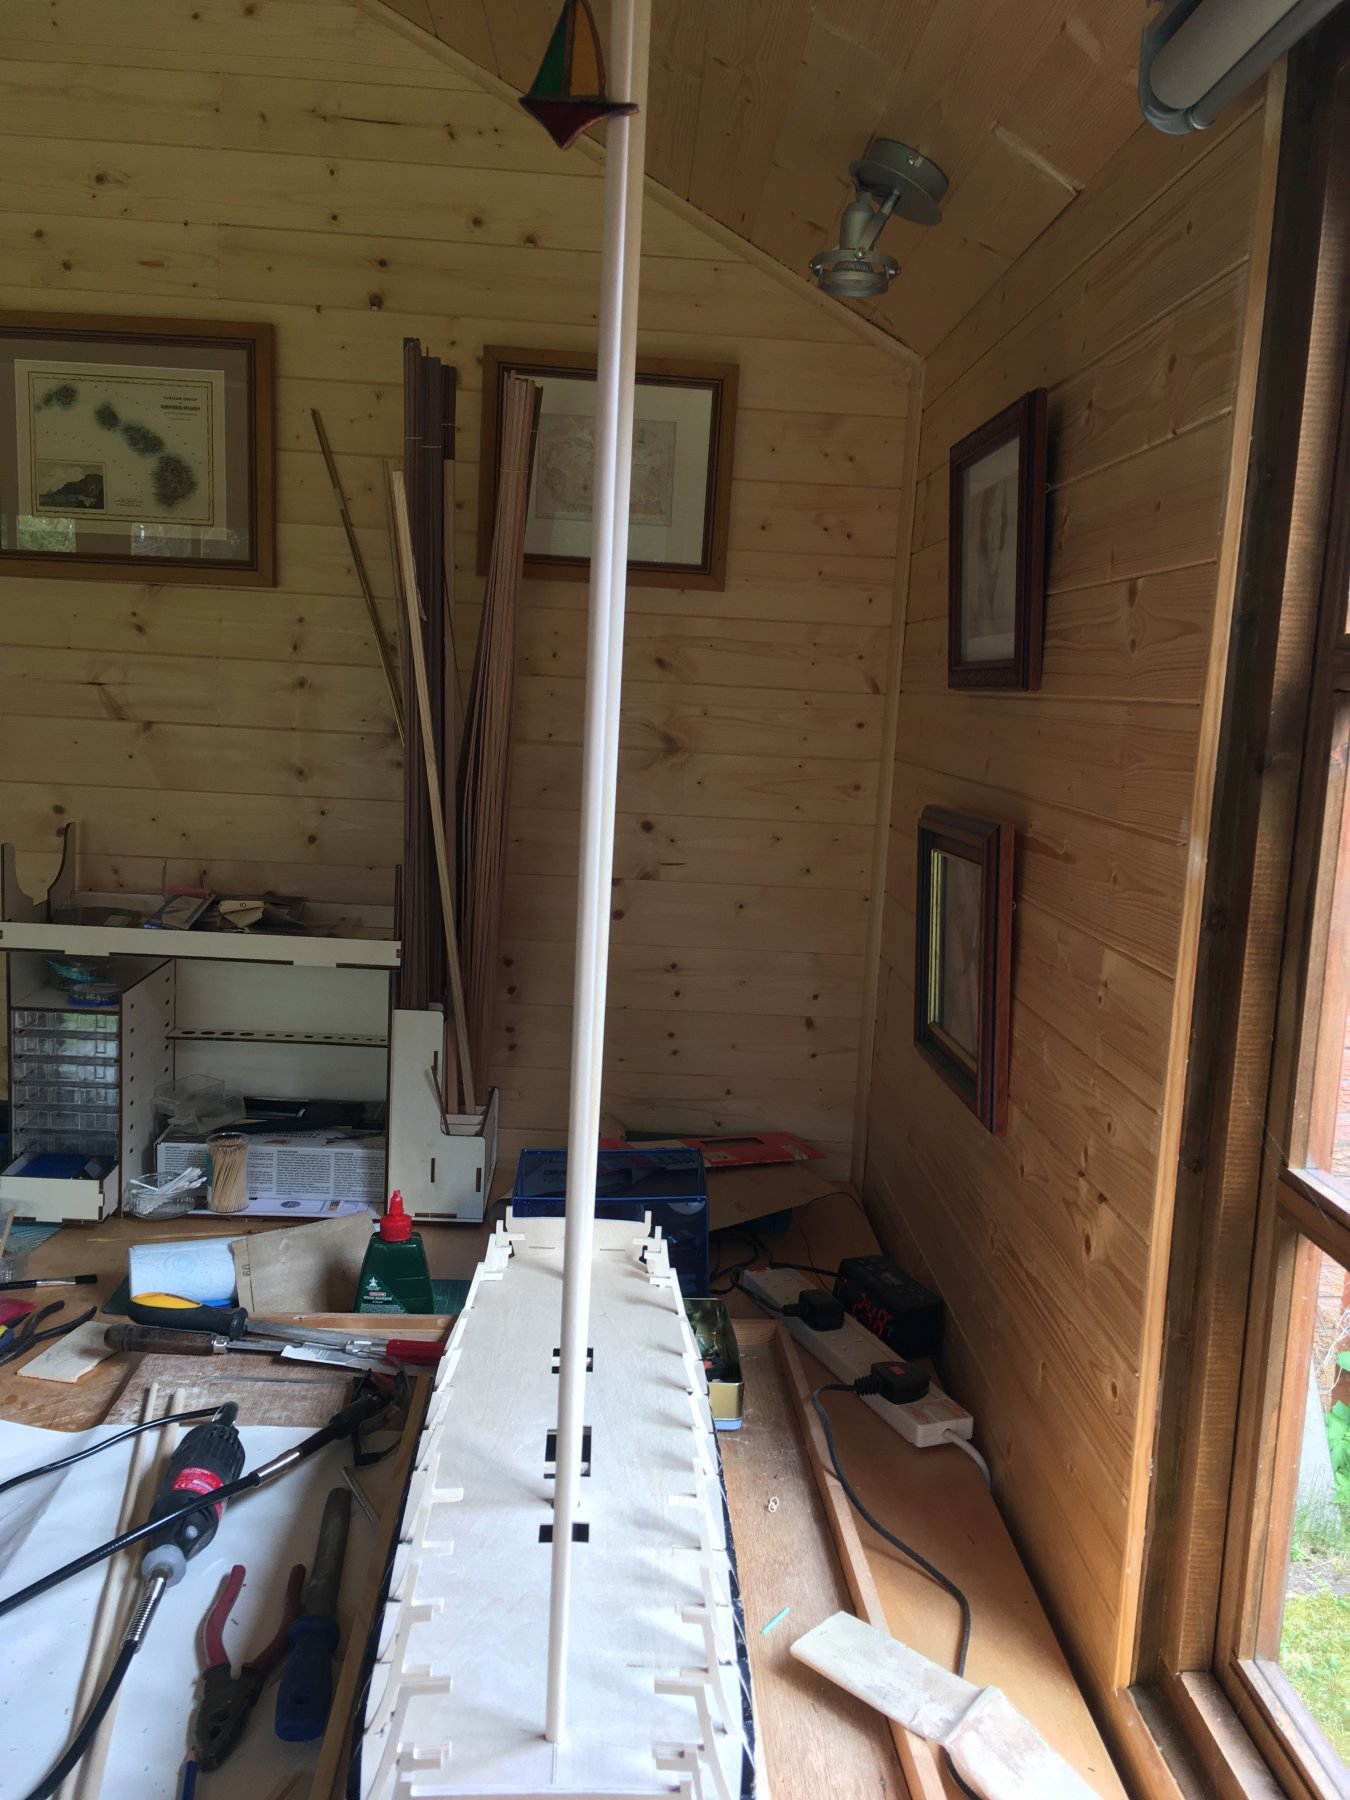
 Hello everyone. Yes, I am starting my second project. First one is in rigging stage and i love working with wood, so.... I bought this kit a while ago and i couldn't wait to unpack it and start modeling. My first ship of the line. I wanted to build this one 5 years ago but i knew i didn't have enough knowledge or practice so i had to start with something smaller like endeavour. The wait is over, lets get to the work.
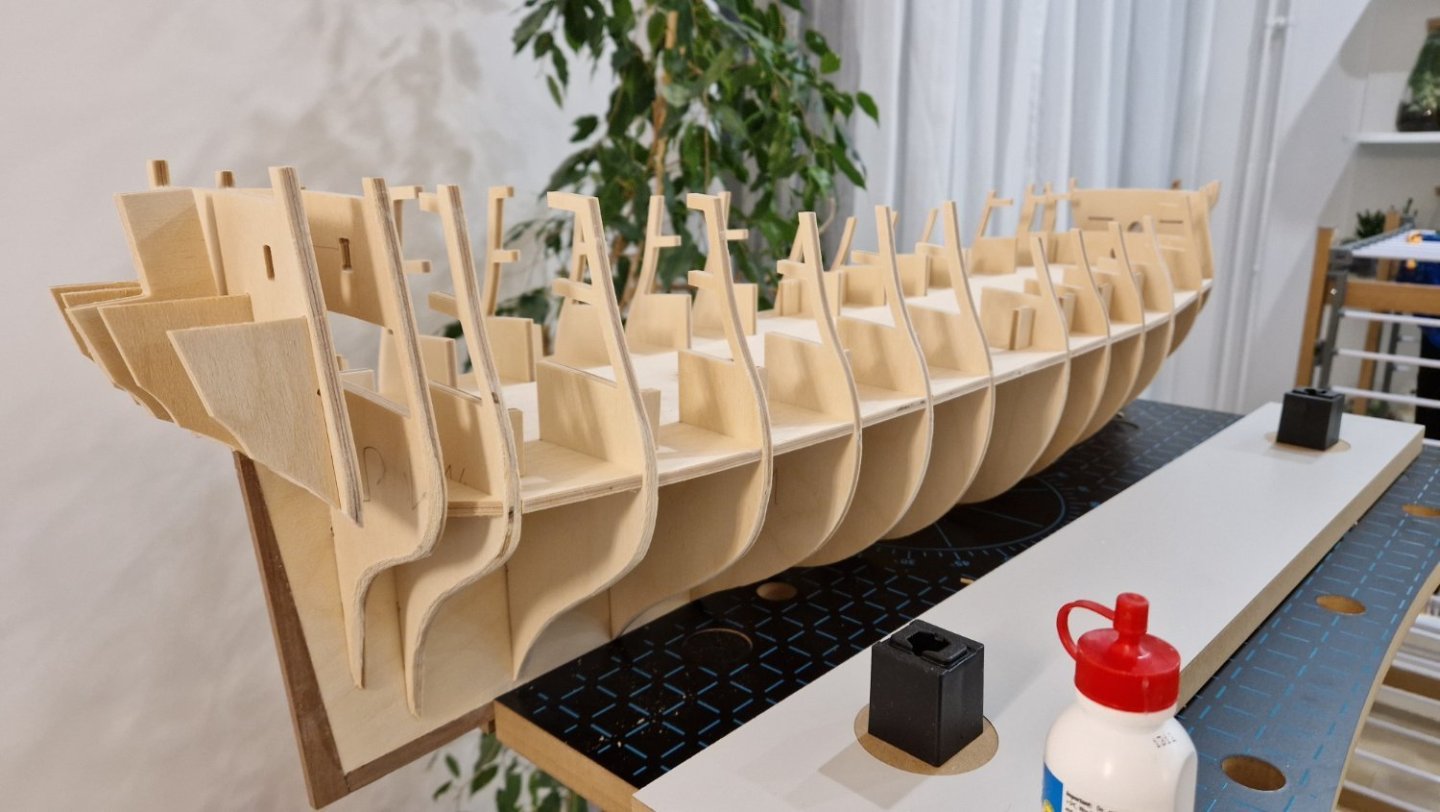
-
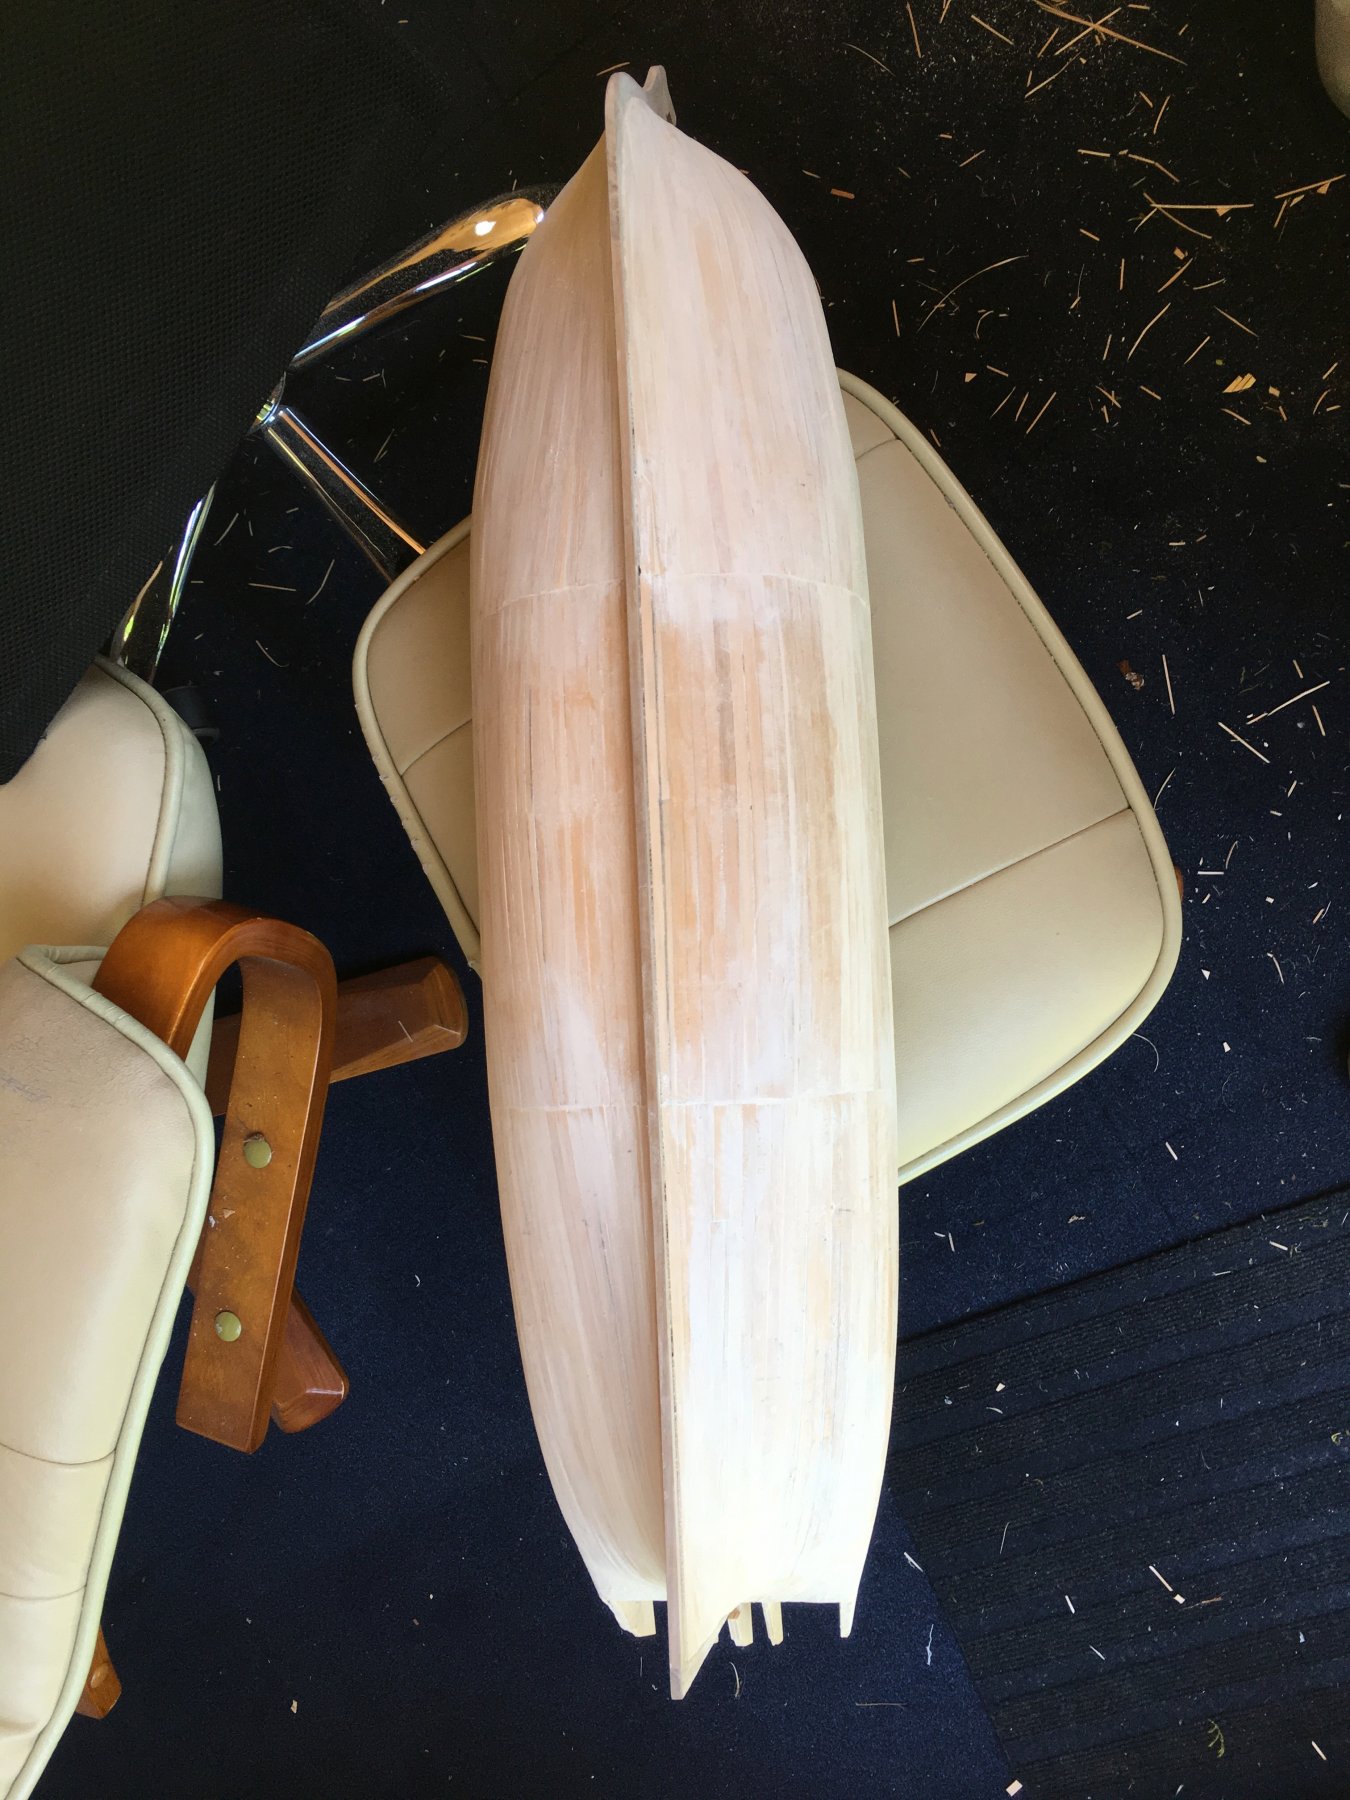
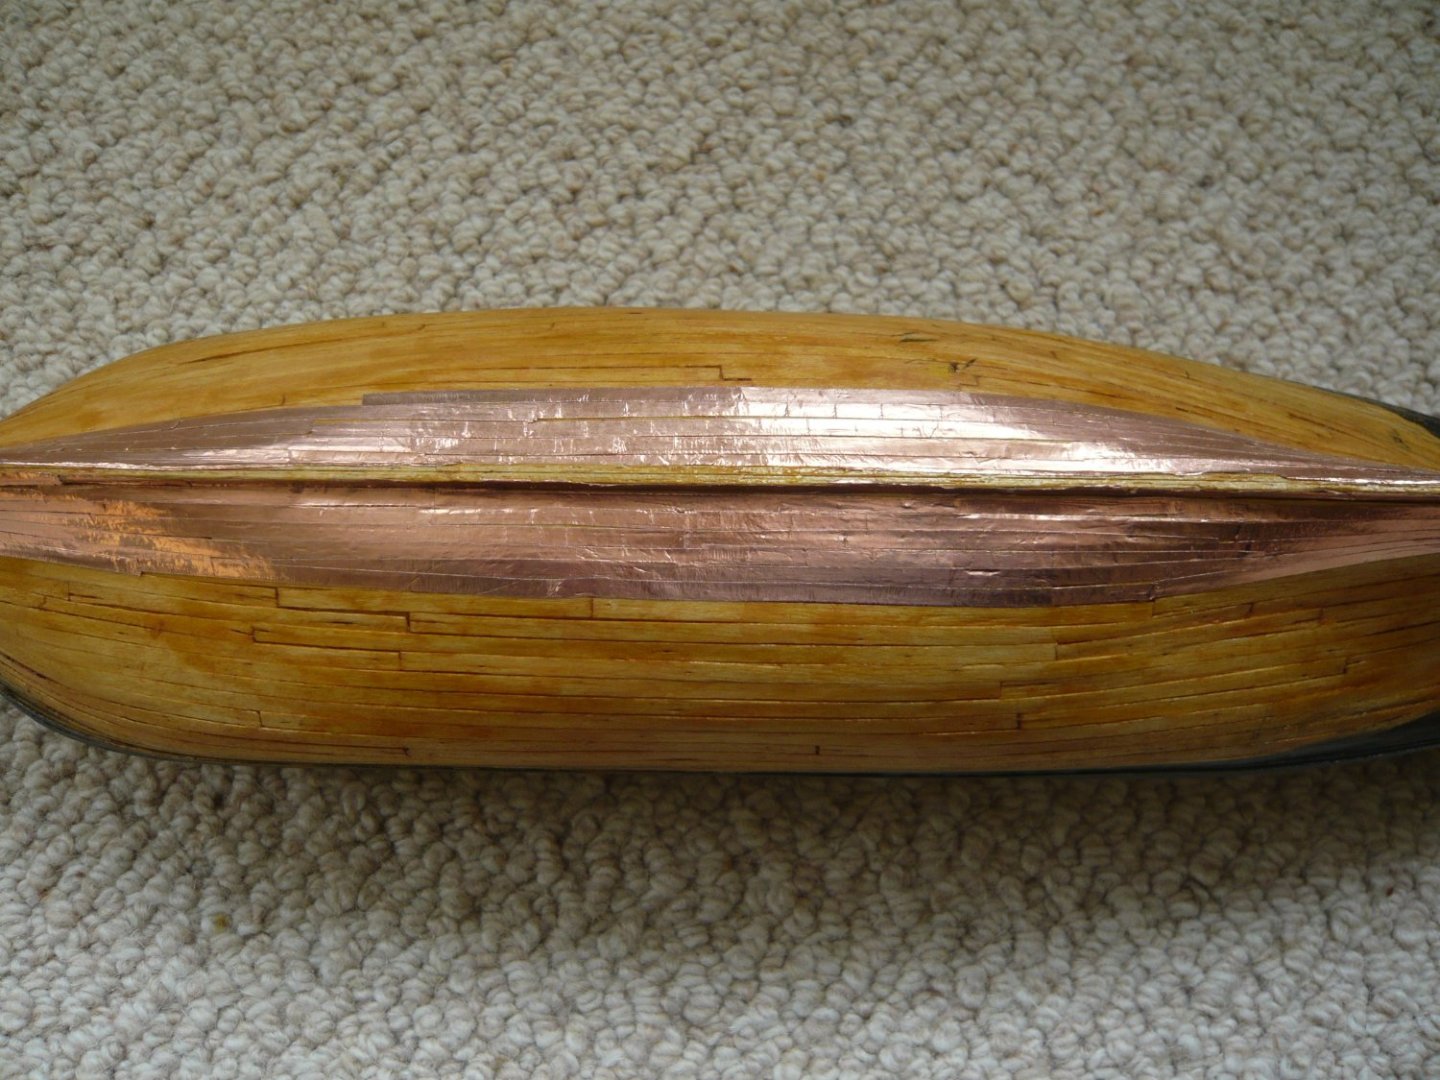
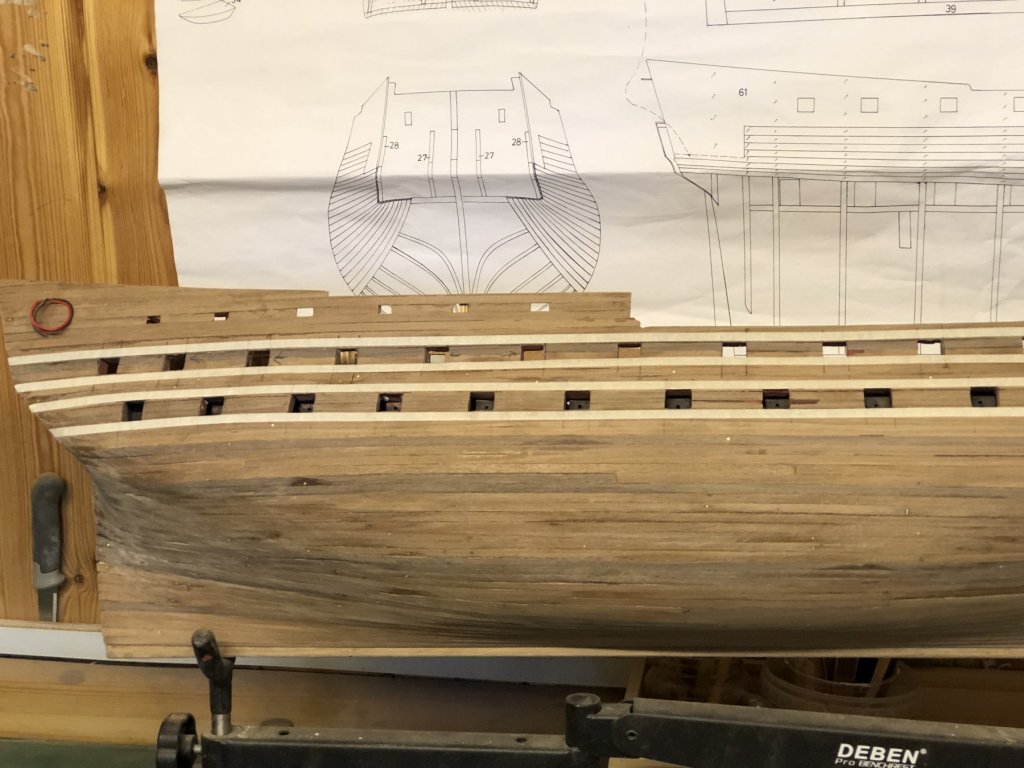
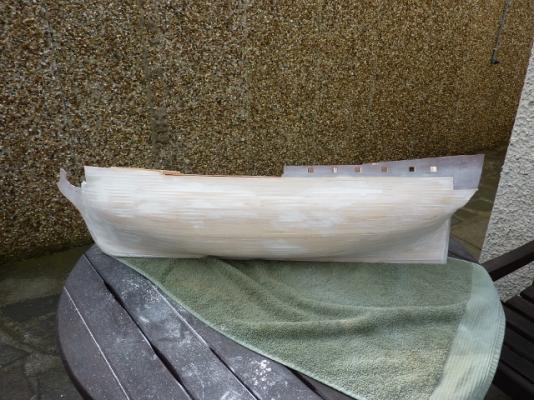
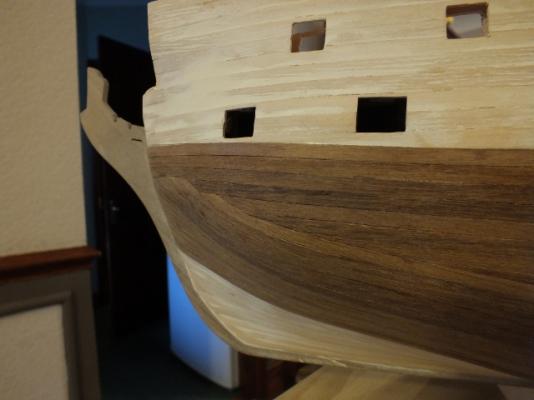
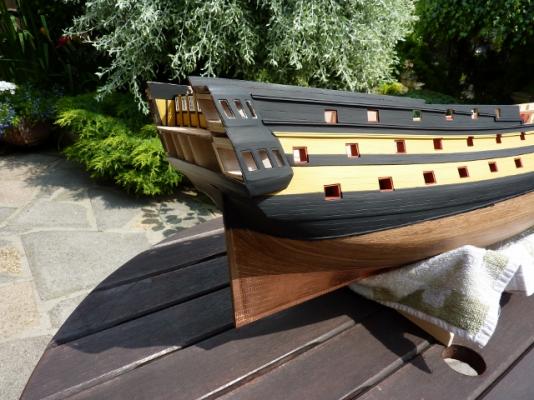
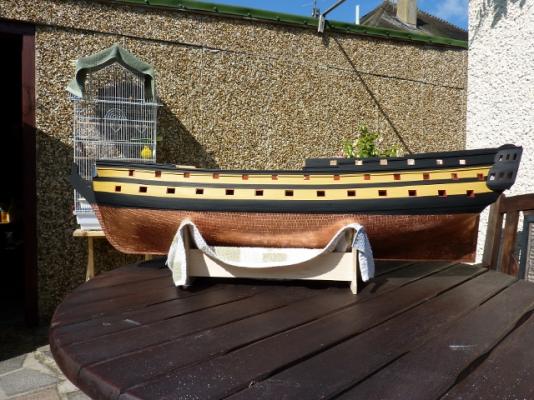
 My present project is a model of Agamemnon. Why? Are there not enough models of this ship? Well, as a 64 gun ship, Agamemnon is not too big. At a very small scale of 1:150 there’s probably still room in the house. There’s even a book about her, by Anthony Deane, not that it contains much information about the design of the ship herself. And here are plans in the National Maritime Museum available online. There will, I think, be more differences between my model and the kit versions than just the scale. I should perhaps add that I am no photographer, but I’ll try my best. I’ve always built models on a bread-and-butter principle. That may horrify readers, but it was a standard late eighteenth-century method, and is advocated in what used to be (and in many ways still is) my bible, Barrot de Gaillard’s Construisez des modeles reduits de marine. What will probably appal even more is my use of balsa wood for the bread-and-butter core, but this does have advantages. It does not shrink or warp (as my surviving teenage models testify), and it’s remarkably easy to work. The photograph shows how depressingly crude the model is at this stage. The shot of my Sphinx possibly suggests that Agamemnon may come out all right in the end. Planking. It seems unnecessary to plank the whole of the hull, when all the underwater section will be coppered. But planking helps to smooth out any inconsistencies in the bread-and-butter hull. I have gone over the top to some extent, in that the wales are done in anchor-stock fashion. It may well not show once it’s painted, but since it can be done this way, why not? I did cheat, by cutting a single piece of wood in a zig-zag pattern. That way, it fits together neatly – almost too neatly. Coppering. The advice with a model on this scale is to avoid coppering. Nevertheless, I’m having a go. Many kit models have sticking-out pimples on their copper plates. These are presumably intended to indicate nails, but a look at a coppered ship, such as Trincomalee, suggests that the heads of the nails lay flat. Photos of City of Adelaide also show no sign of pimples or protuberant nails. The coppering of USS Constitution is new, but again, there are no pimples in the photographs I’ve seen. So, my model is to be coppered with 2 mm adhesive tape, made in China and bought through Ebay, with no attempt made to mark the nails. One problem is that the joins are very hard to see; I chose therefore, rather than using small pieces of tape, to mark the divisions by scribing them. It's important, of course, to make sure that the surface to be coppered is absolutely smooth. Being old-fashioned, I used French polish.
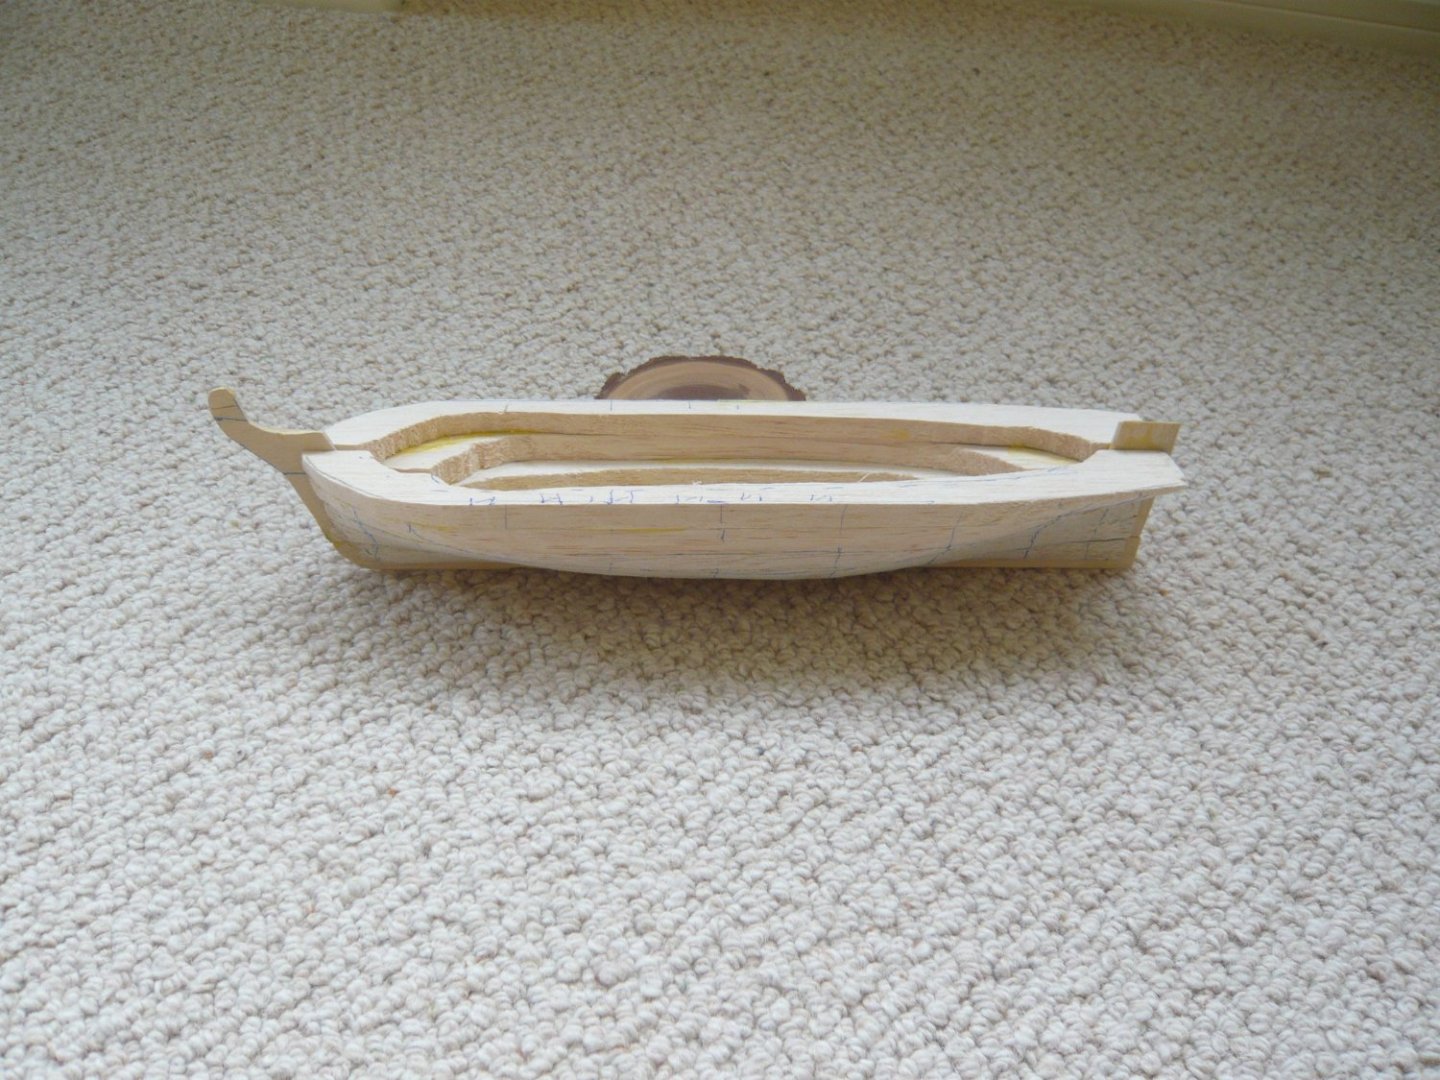
.thumb.JPG.7883e52014a85ab2388dfabd7e454b06.JPG)
-
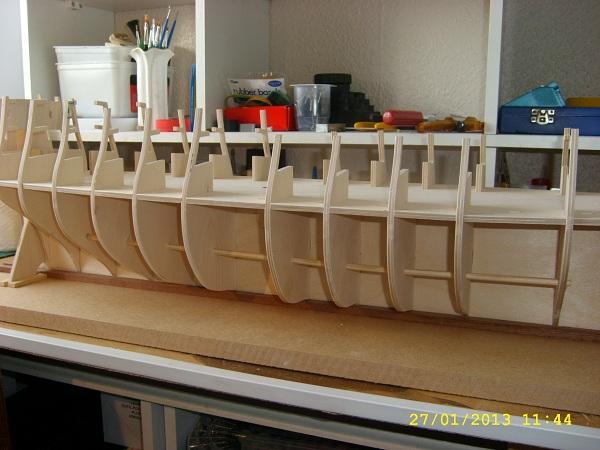
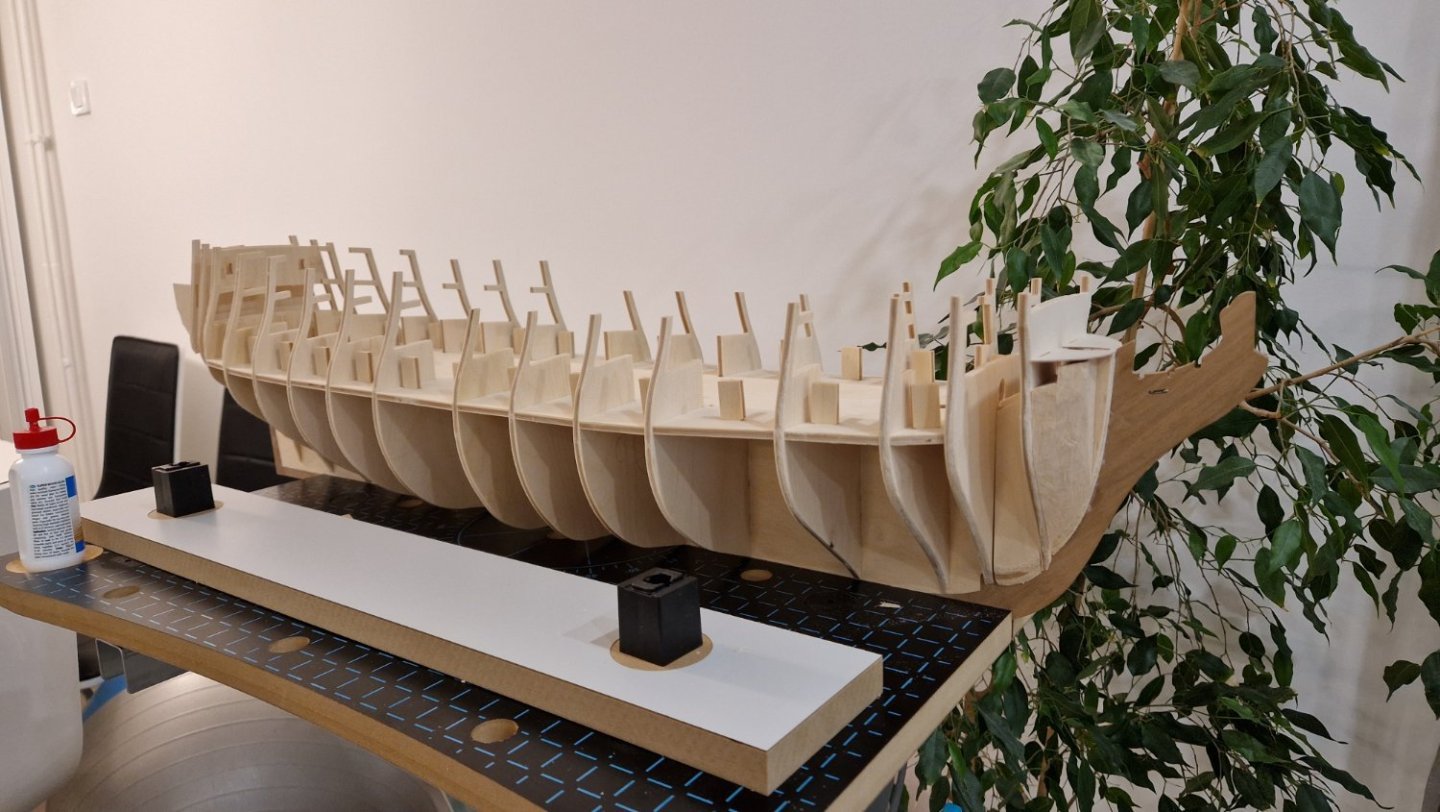
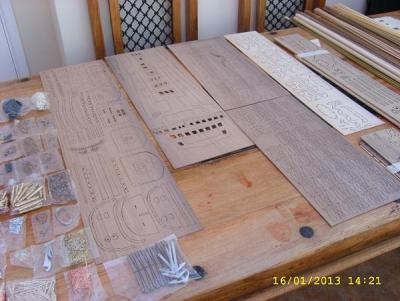
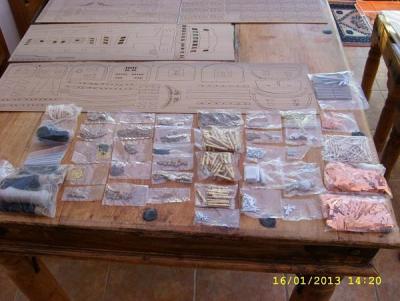
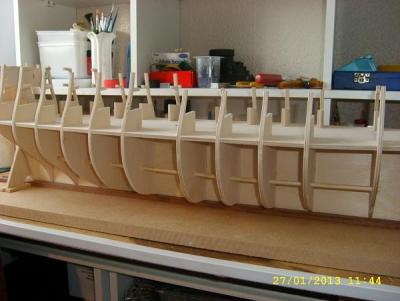
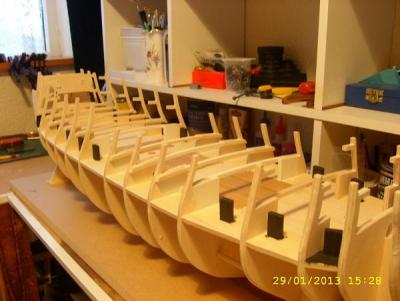
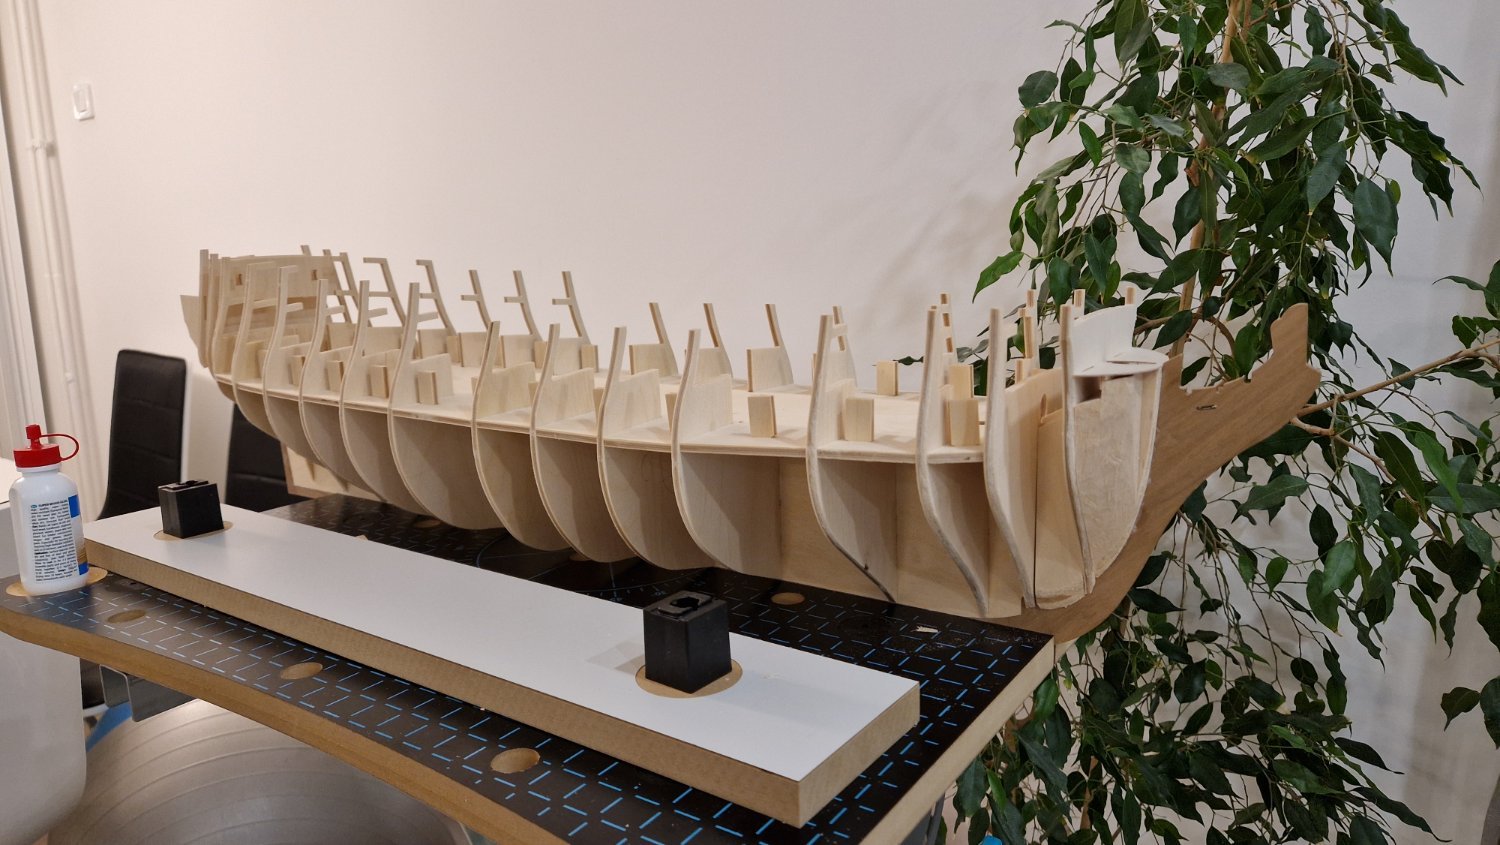
 Hi everyone! Last week I celebrated my birthday (53rd). From my wife I received HMS Agamemnon by Caldercraft. What a wife I have! To push me a little bit further I have decided to start a build log on my project in order to push myself and encourage others. I know there are so many skilled builders out there. I am perhaps not one of them but maybe I can help others avoiding the mistakes I eventually will do. I am a slow builder. I can be expected to put in 4-5 h a week into the project. The building instructions warns you to expect 1000-1200 h of building joy. With my tempo I will struggle for at least the next five years so be patient and enjoy my quest for the holy ship. So far I have dry fitted all the bulkheads on the false keel as well as lower gun deck and bevelled edges. The garage where I do the building is white with dust which slowly spreads in the house. I have to vacuum clean the garage before the wife retakes the birthday present… Whilst dry fitting I discovered that the upper side of the false keel is slightly banana shaped (not parallel to the bottom of the keel). It has its lowest height in the middle (around main mast) and the height by bulkhead 3 is different from that by bulkhead 14. I first thought this very strange. The height difference from the highest to the lowest point is slightly less than 10 mm. That is 64 cm in reality. Imagine dropping a cannon ball on a sloping floor like that. Sailors will lose their legs! Checking drawing 1 I realized the lower gun deck is bent into the banana shape of the upper side of the false keel. I cannot remember anyone commenting this on Caldercraft’s Aggy. I will now follow the drawings in hope that lower gun ports will be correctly located. Anyone who wants to comment on this? I suppose Caldercraft’s lower gun deck is not an exact depiction of the reality. Kind regards Henrik
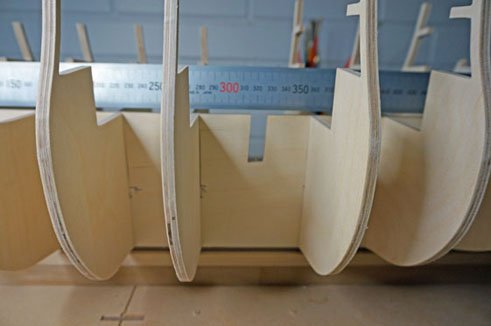
-
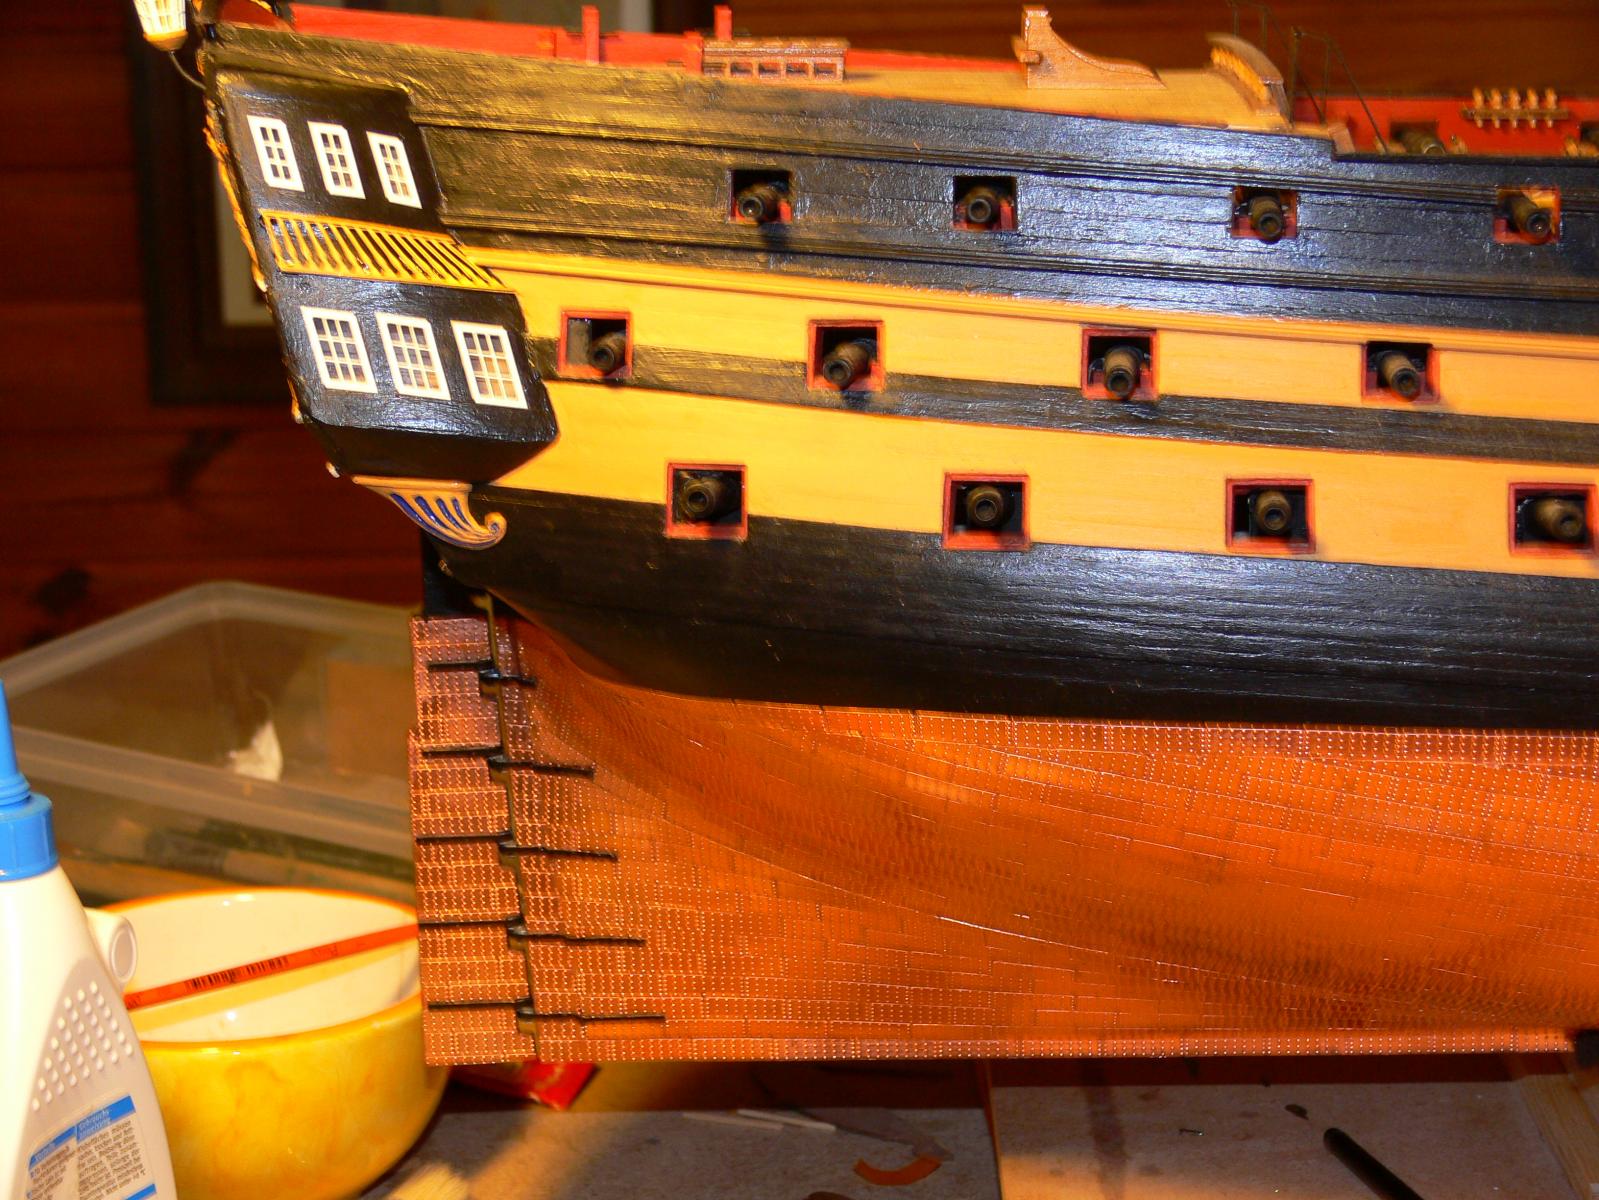
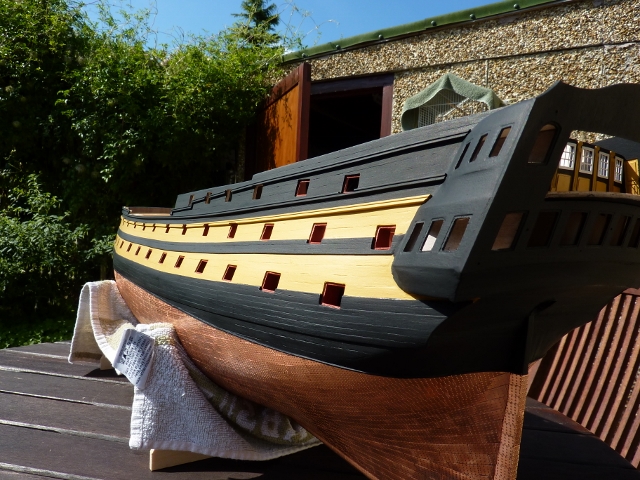
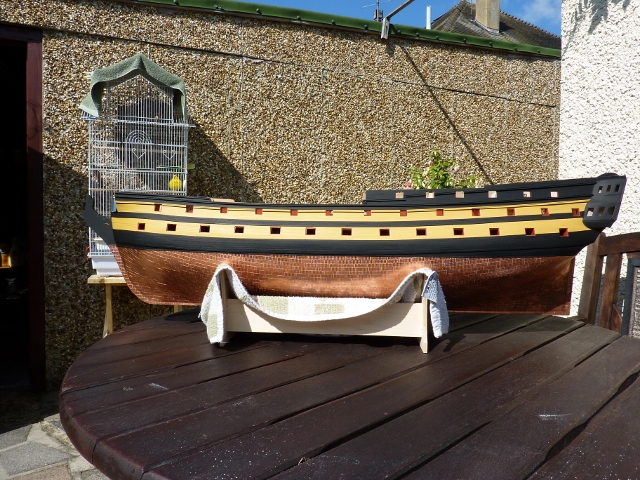
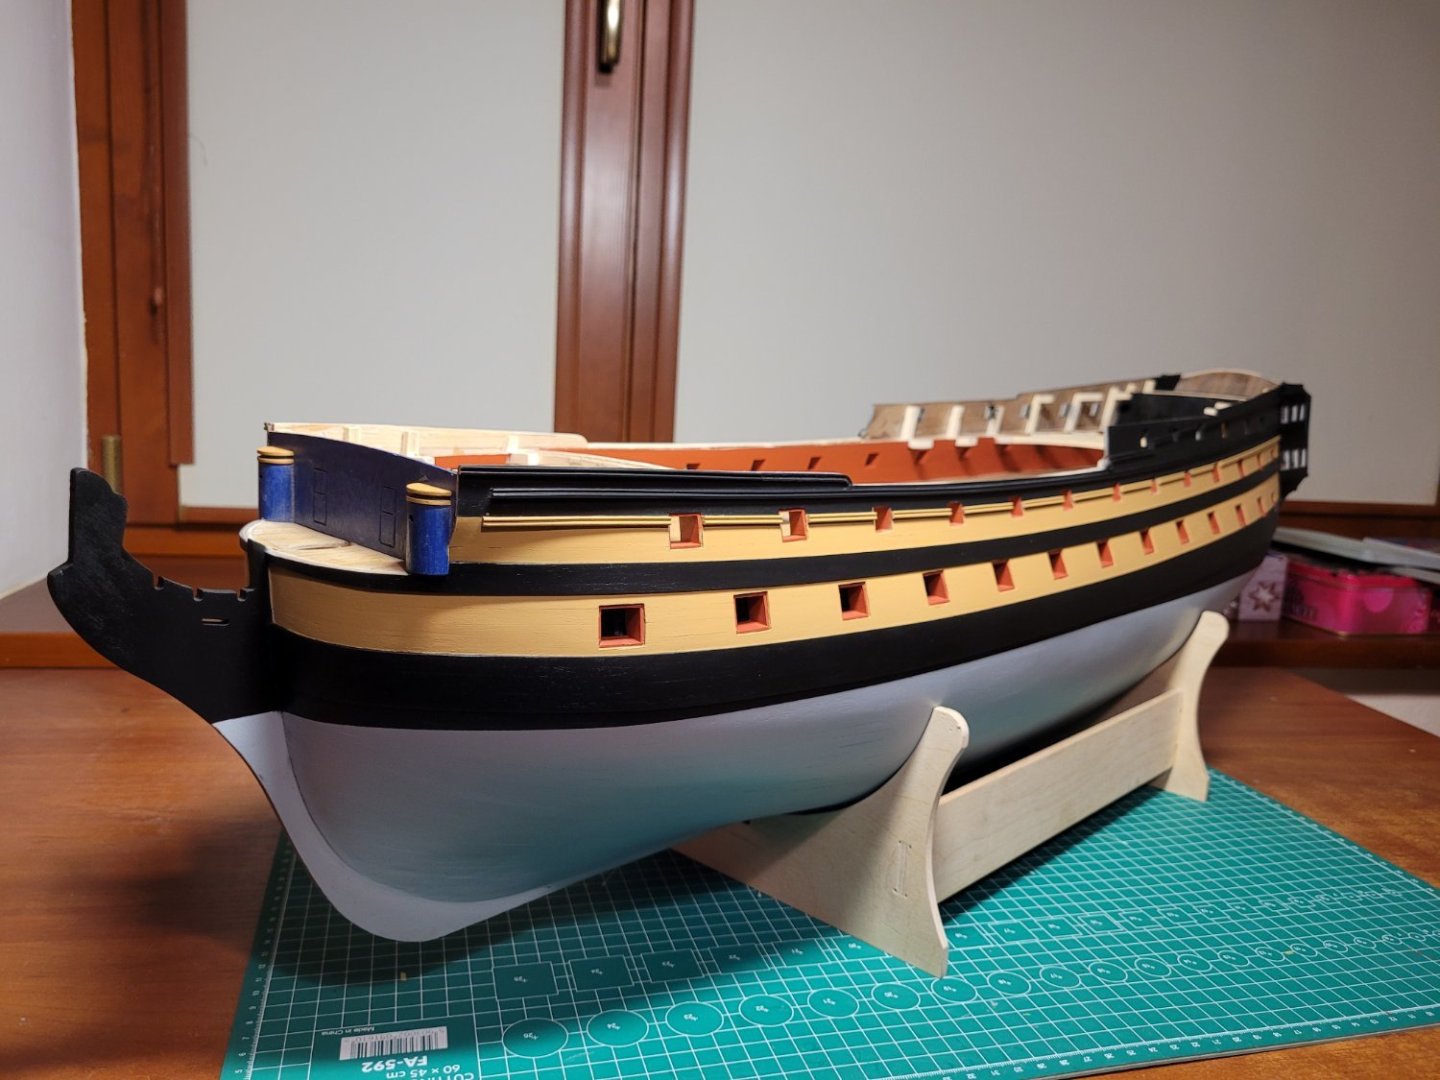
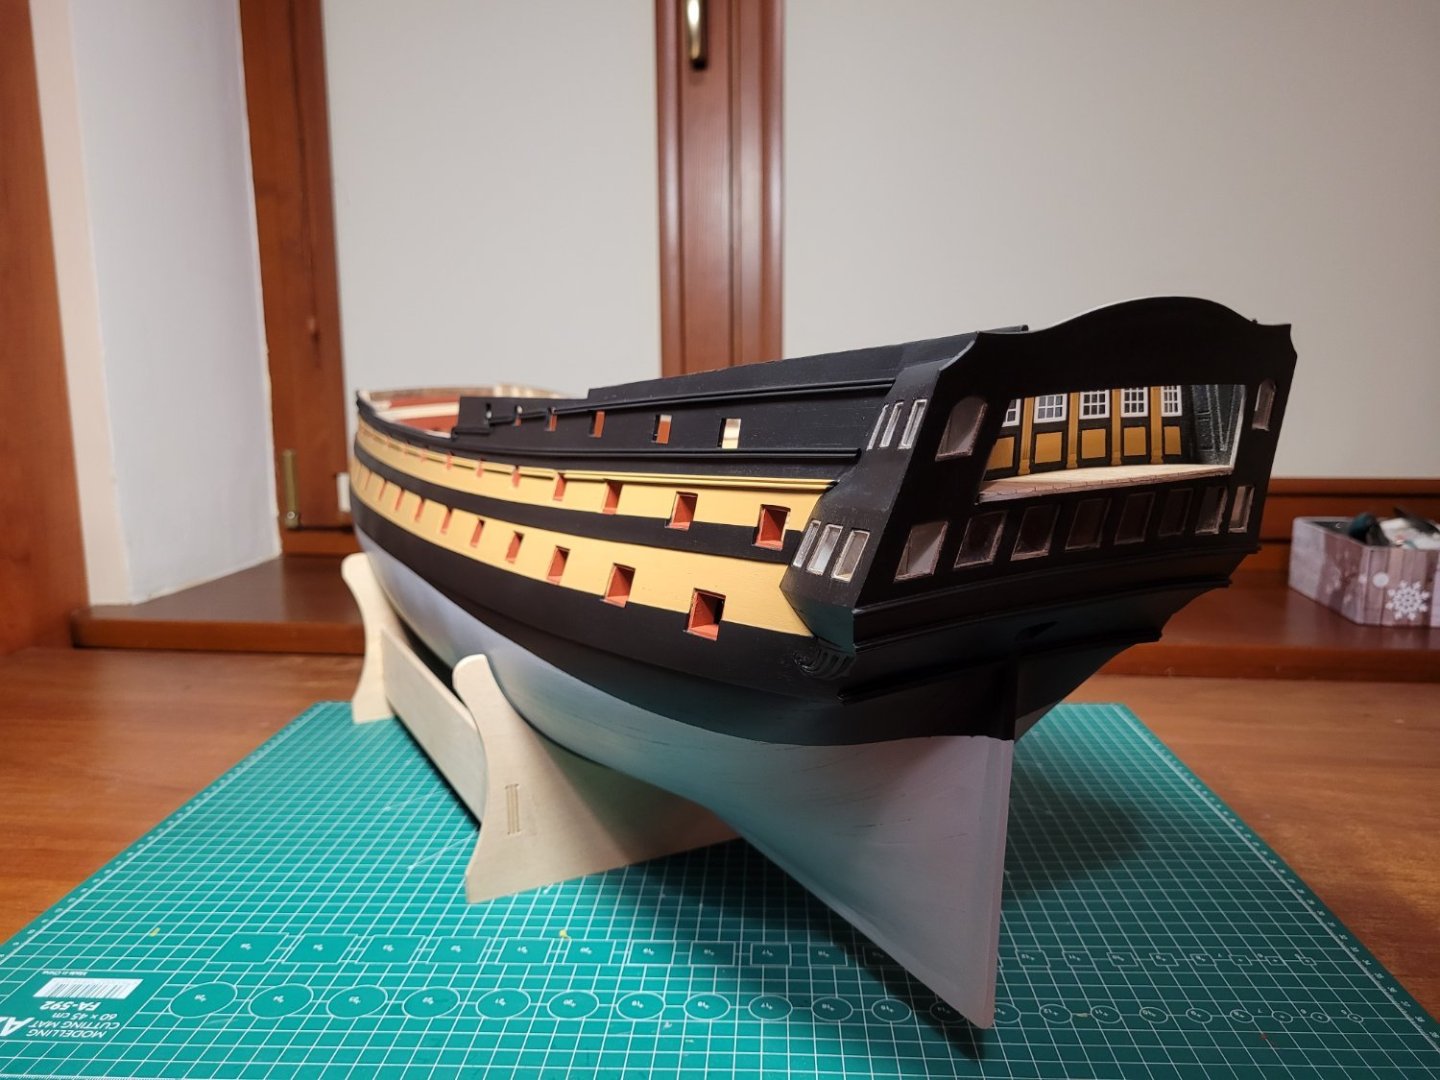
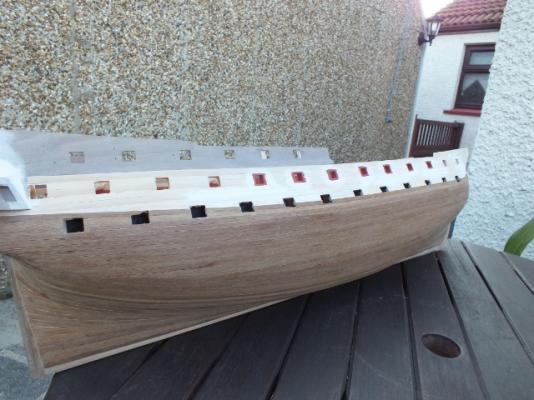
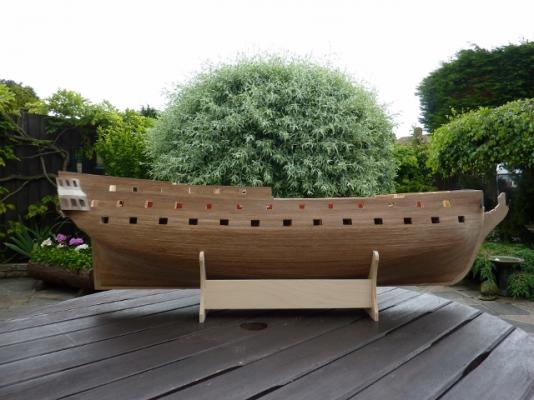
 Hello Everyone. I'd like to present my current build . It is HMS Agamemnon from Caldercraft . It is my second Caldercraft kit (first was HMS Victory) and overal fifth wooden model ( USS Constitution from Constructo , San Juan Bautista a partwork kit , ORP Błyskawica and DKM Bismarck - partwork from Hachette) . There are lots of avesome builds of this kit on Model Ship World . I was inspired by Vicnelson , Hennie ,Sjors , SaskienSoCal builds . I've been working on this kit for about one year . After I had finished first and second planking I've sanded the hull and fill gaps with Tamiya putty . Then the hull was sprayed with surfacer 1000 and afer that painted with admirality paints . Now I've started coppering the hull


-
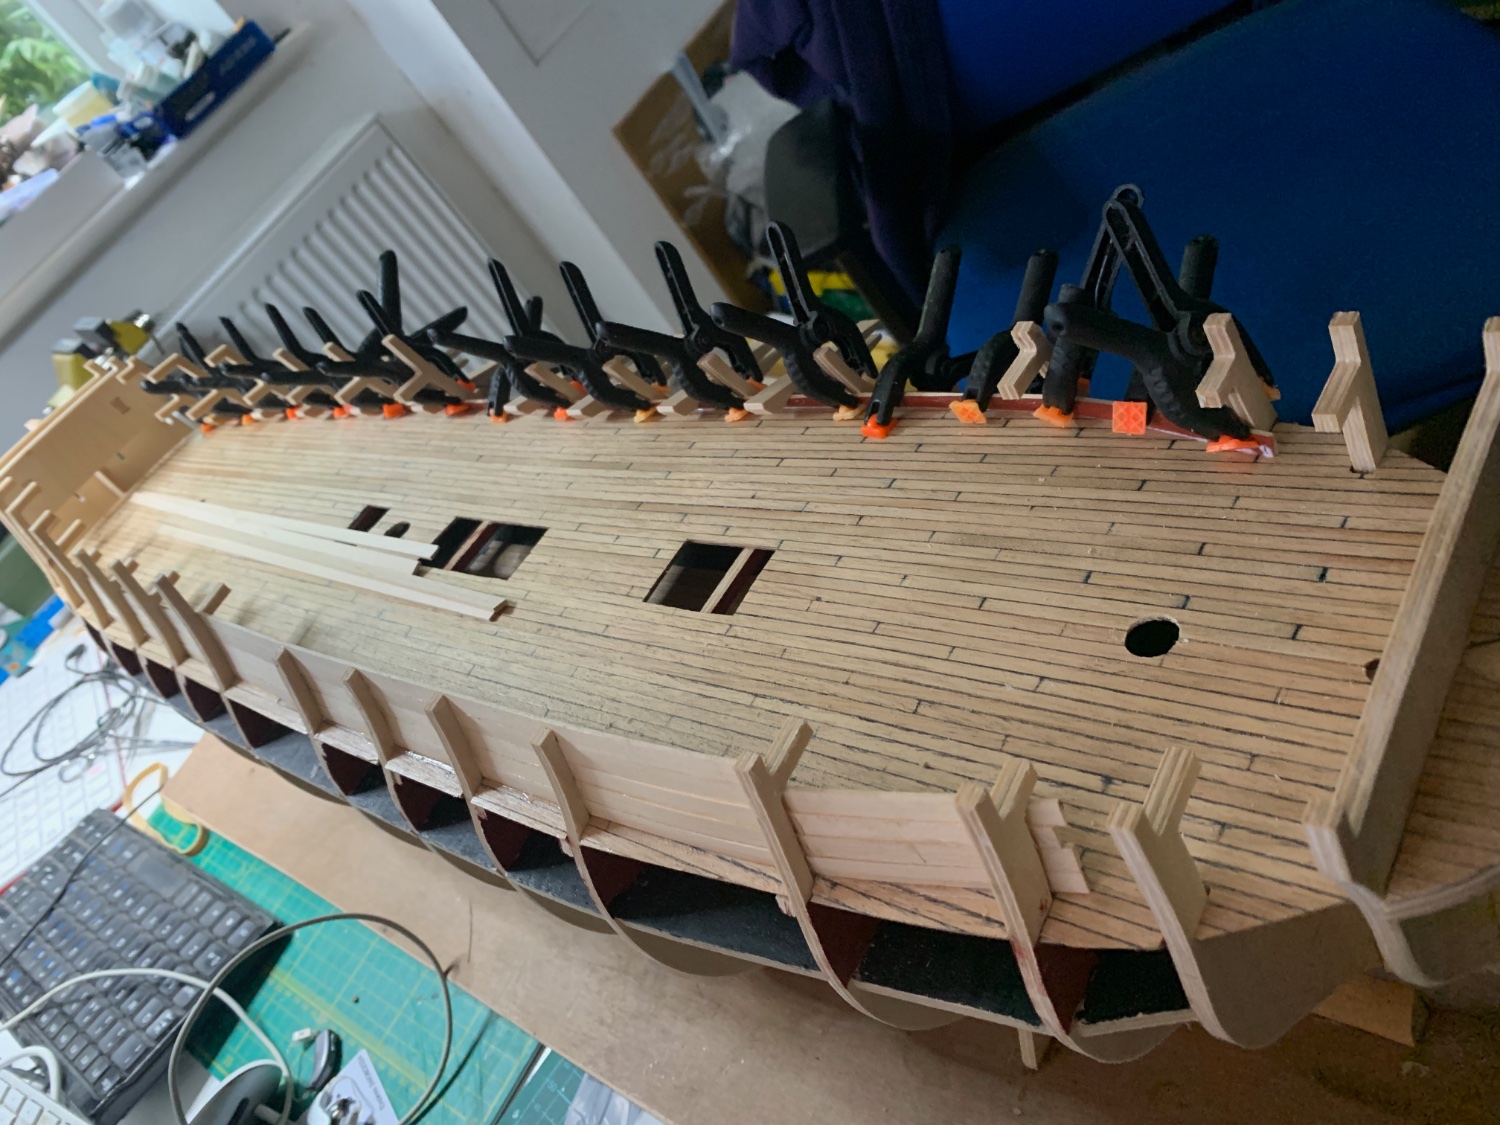
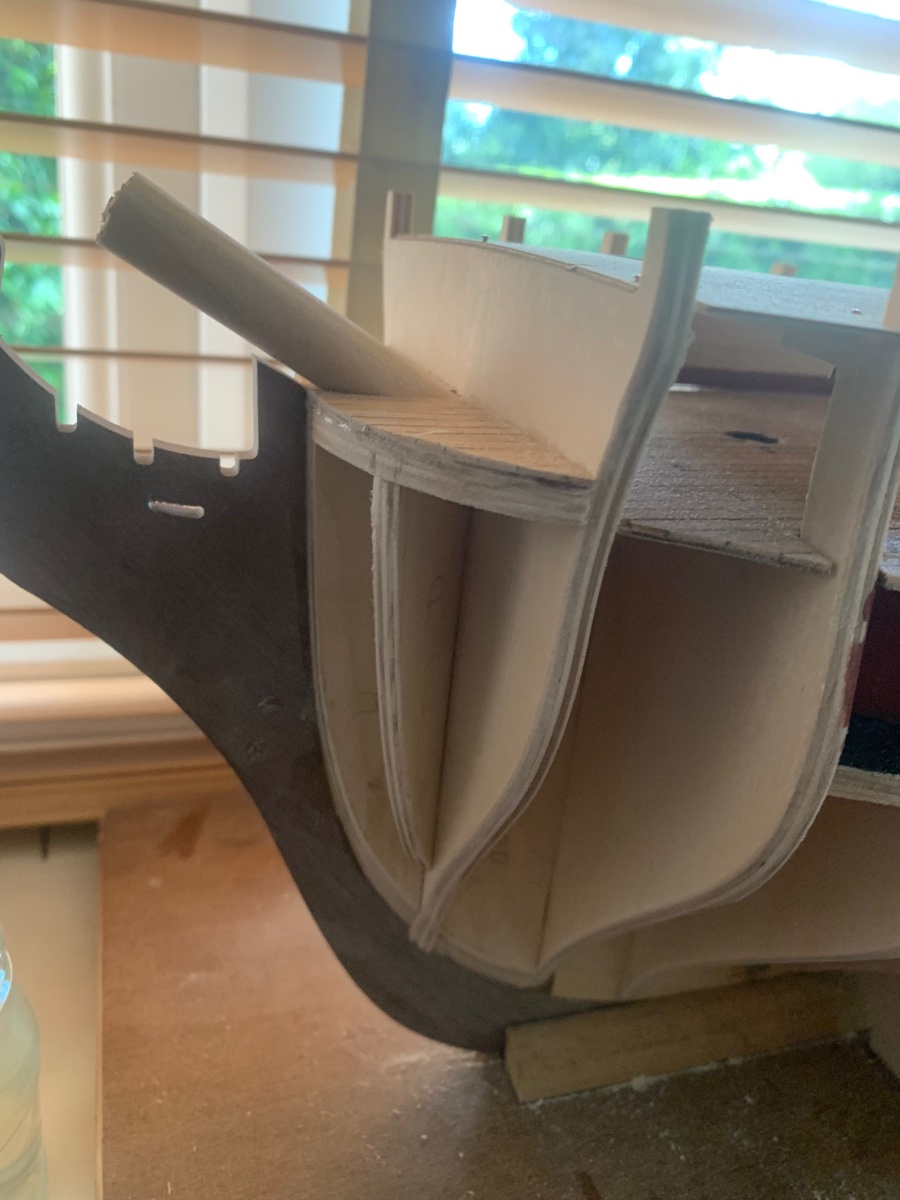
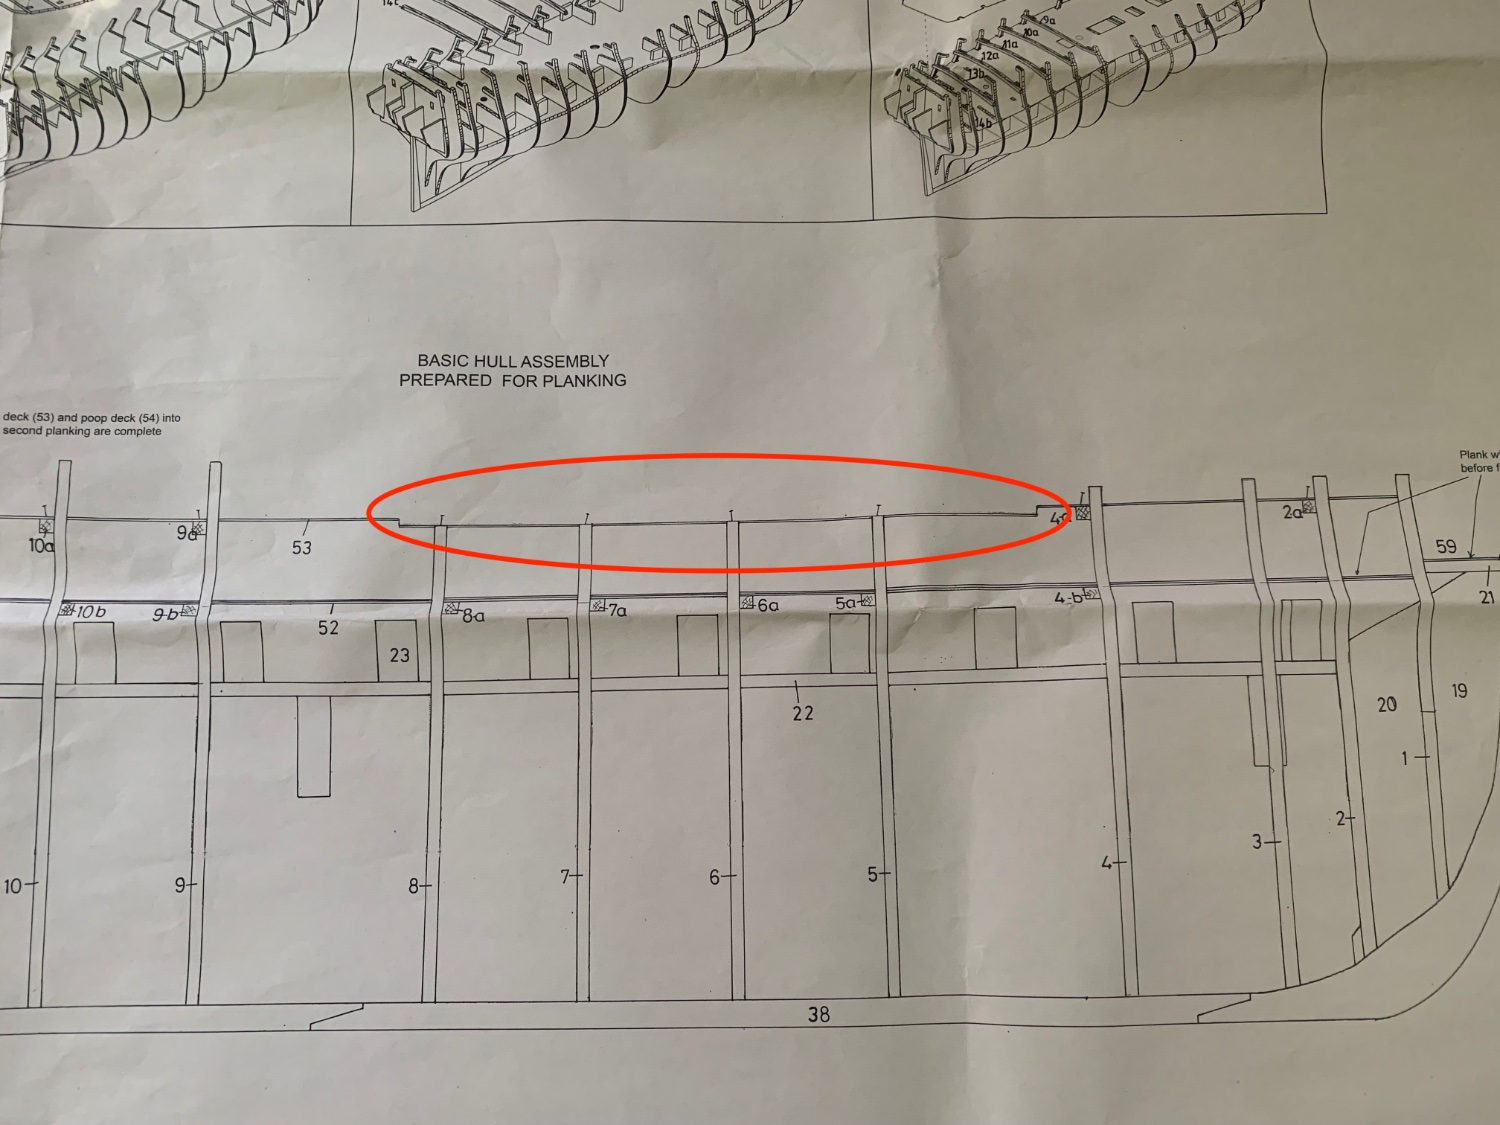
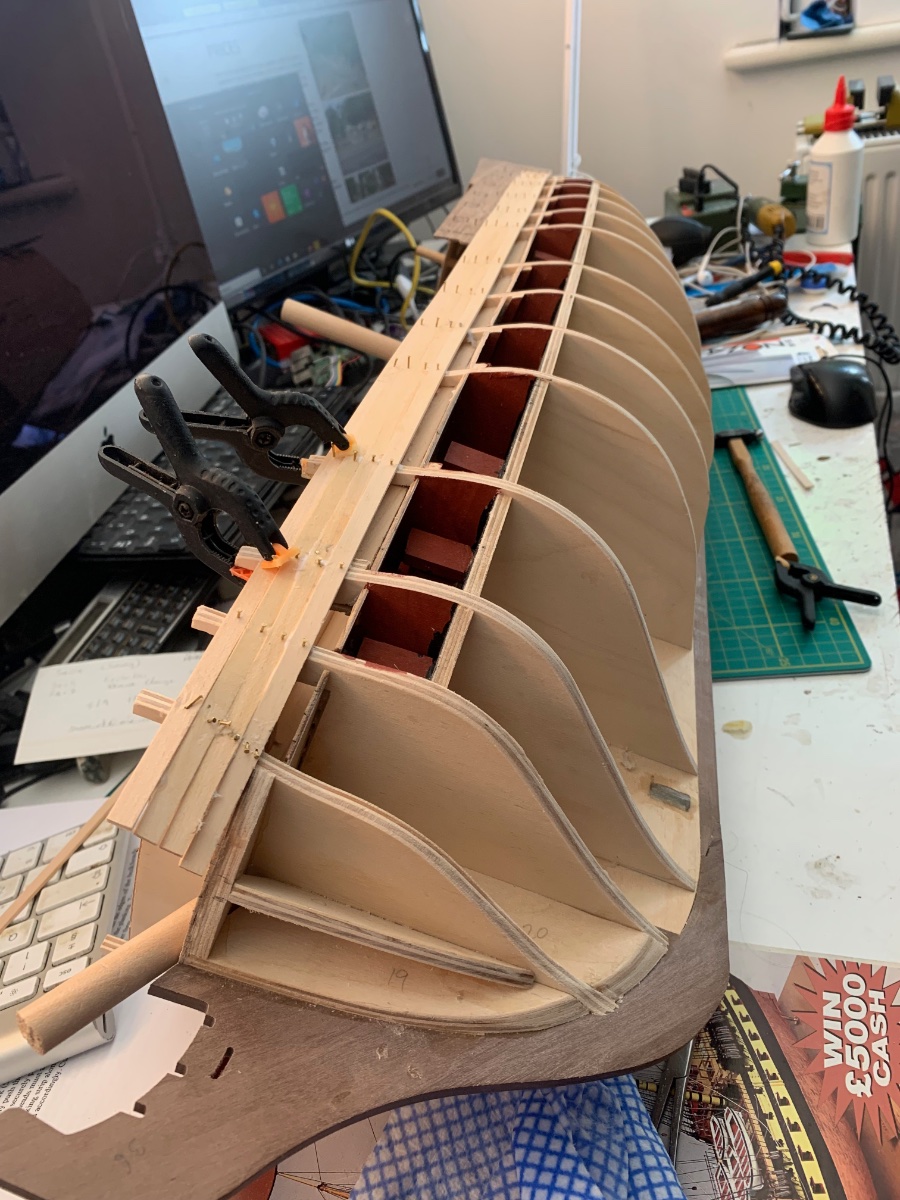
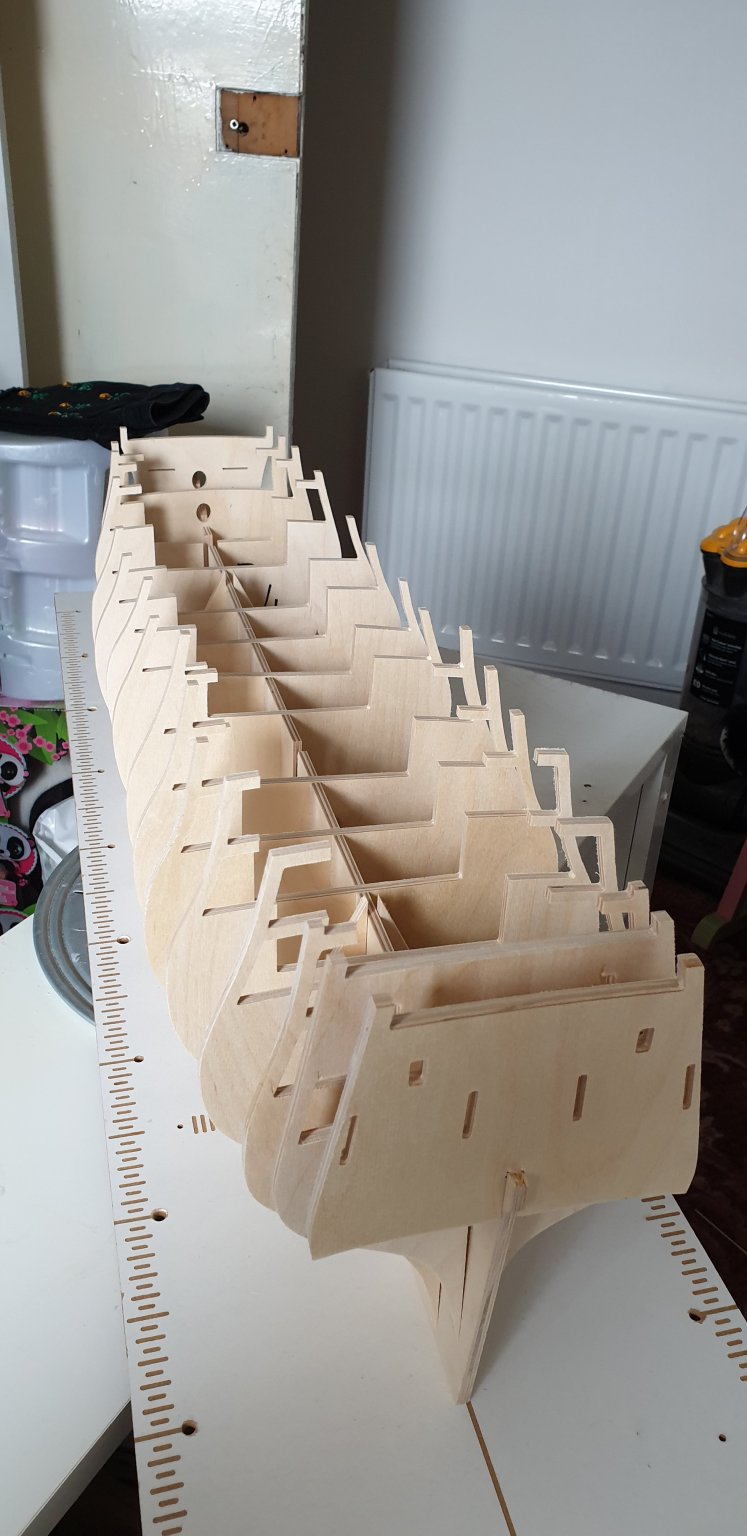
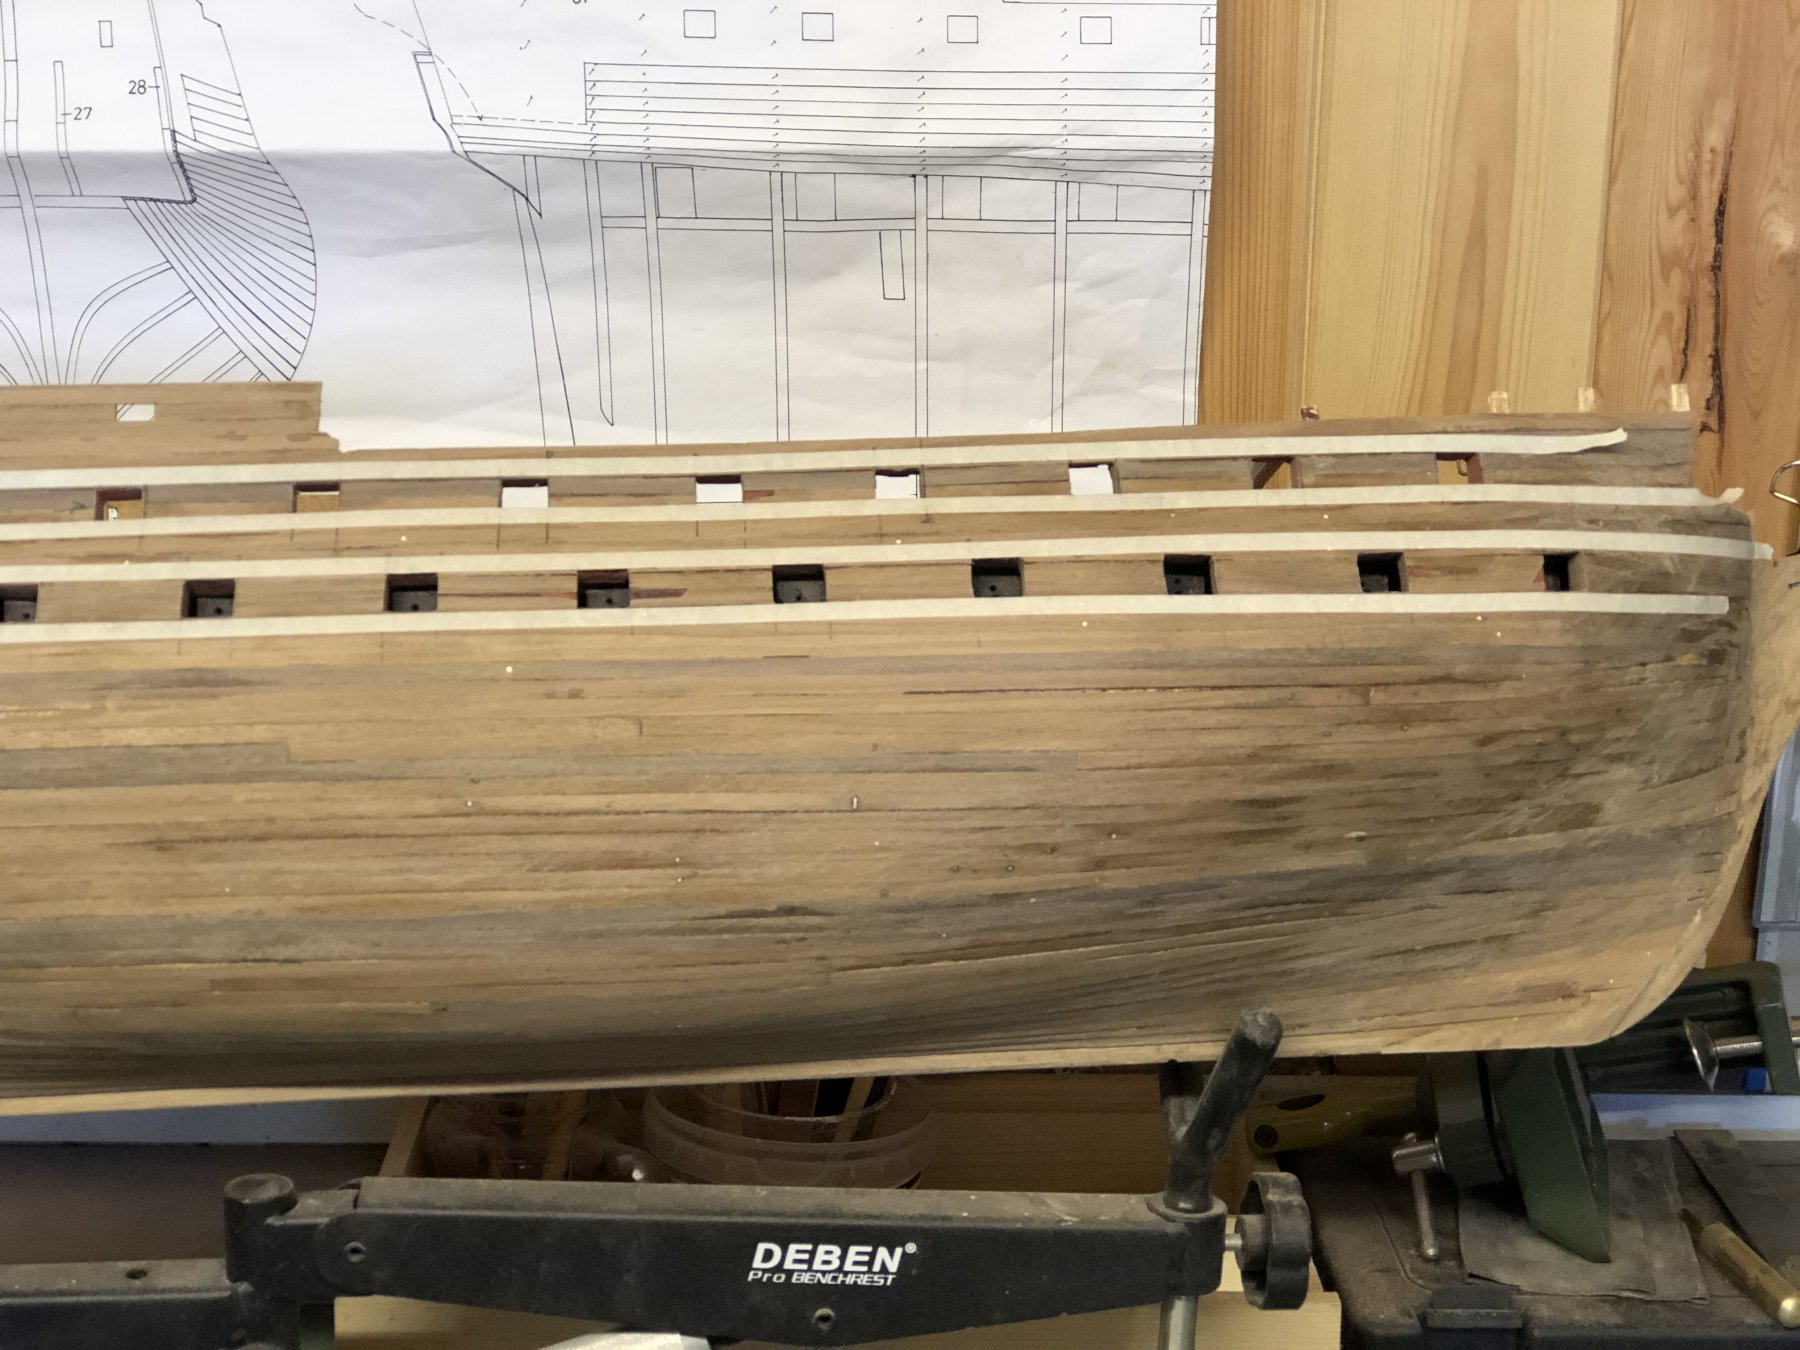
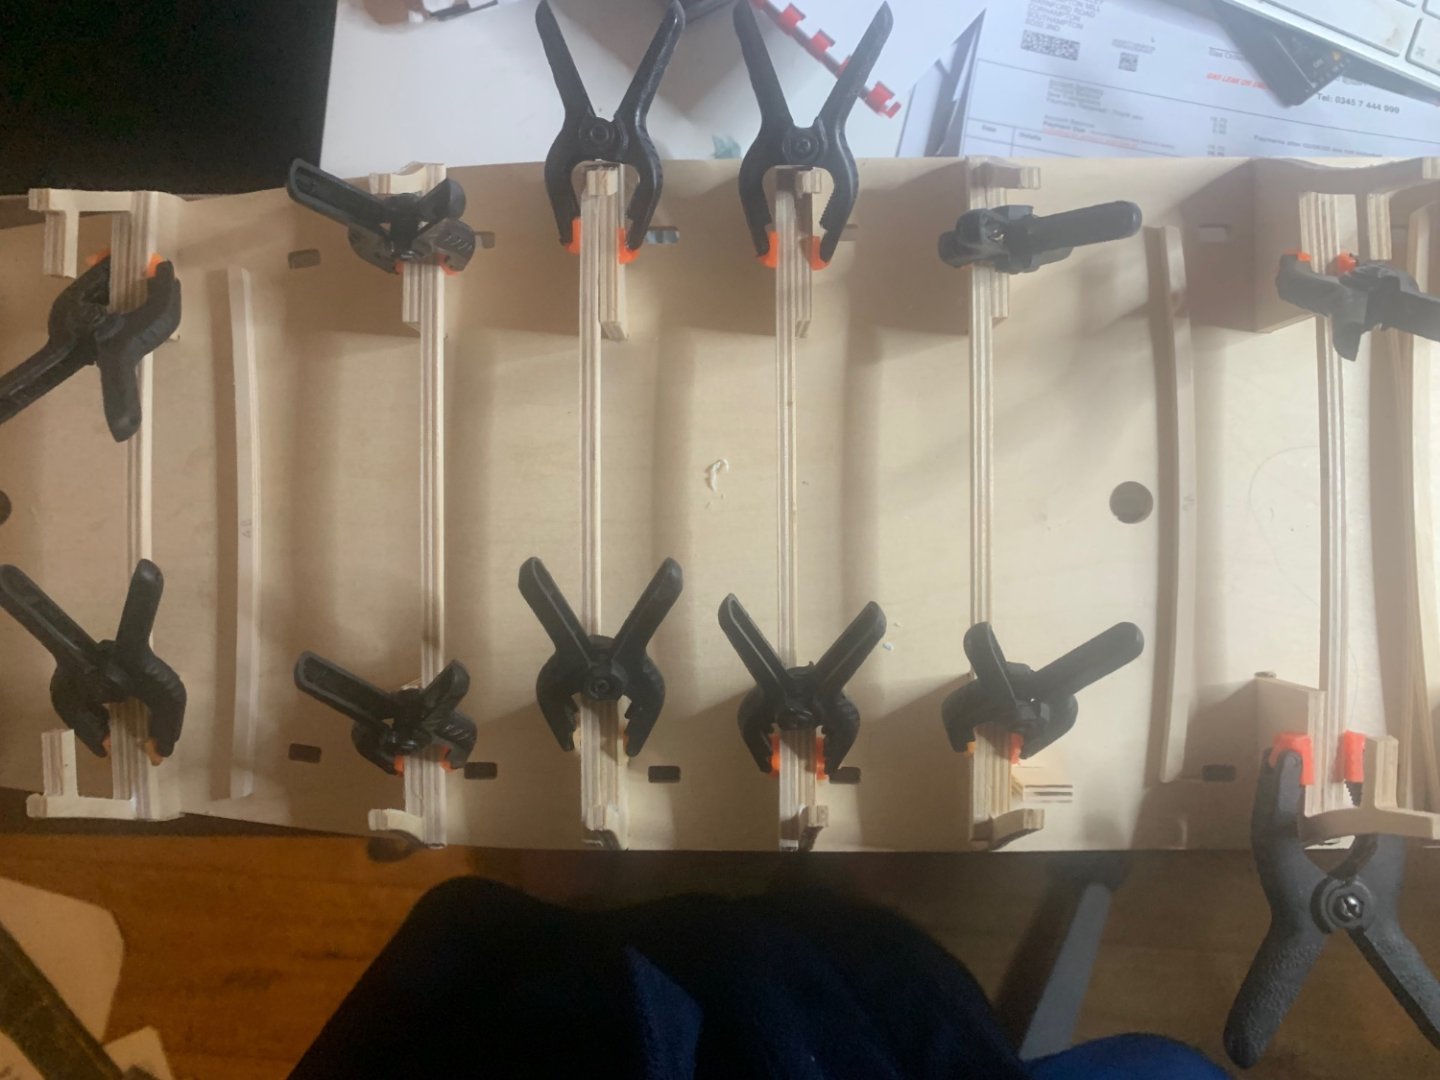
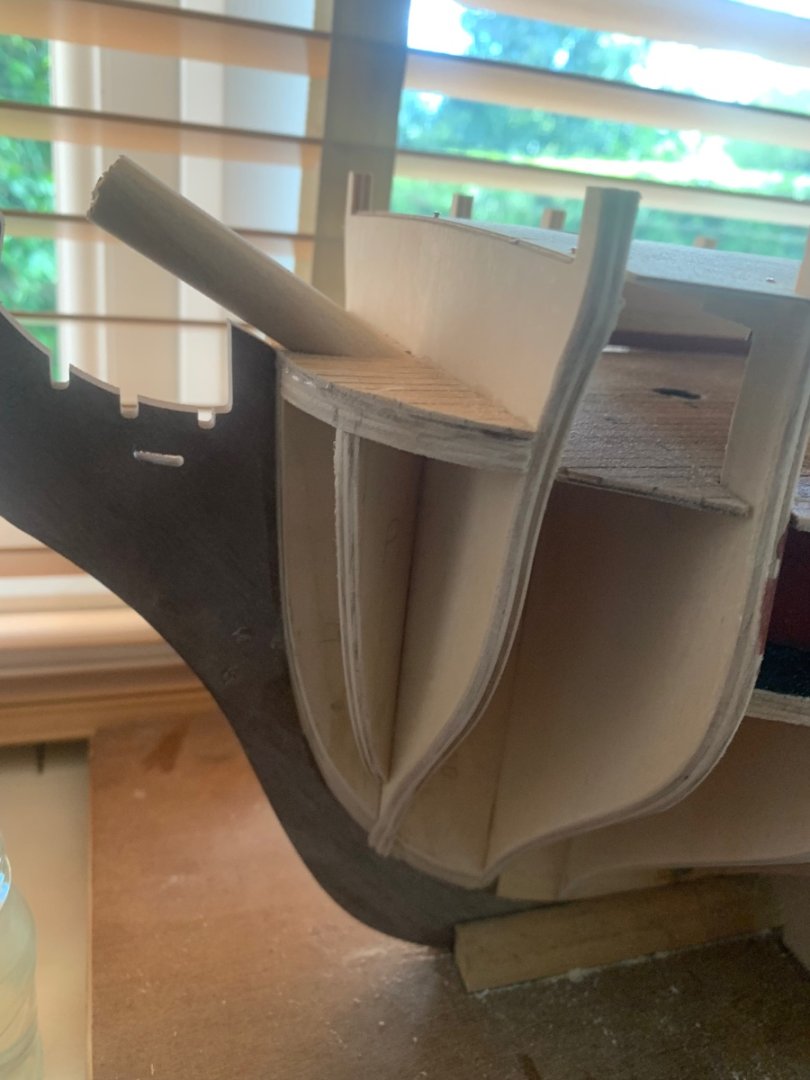
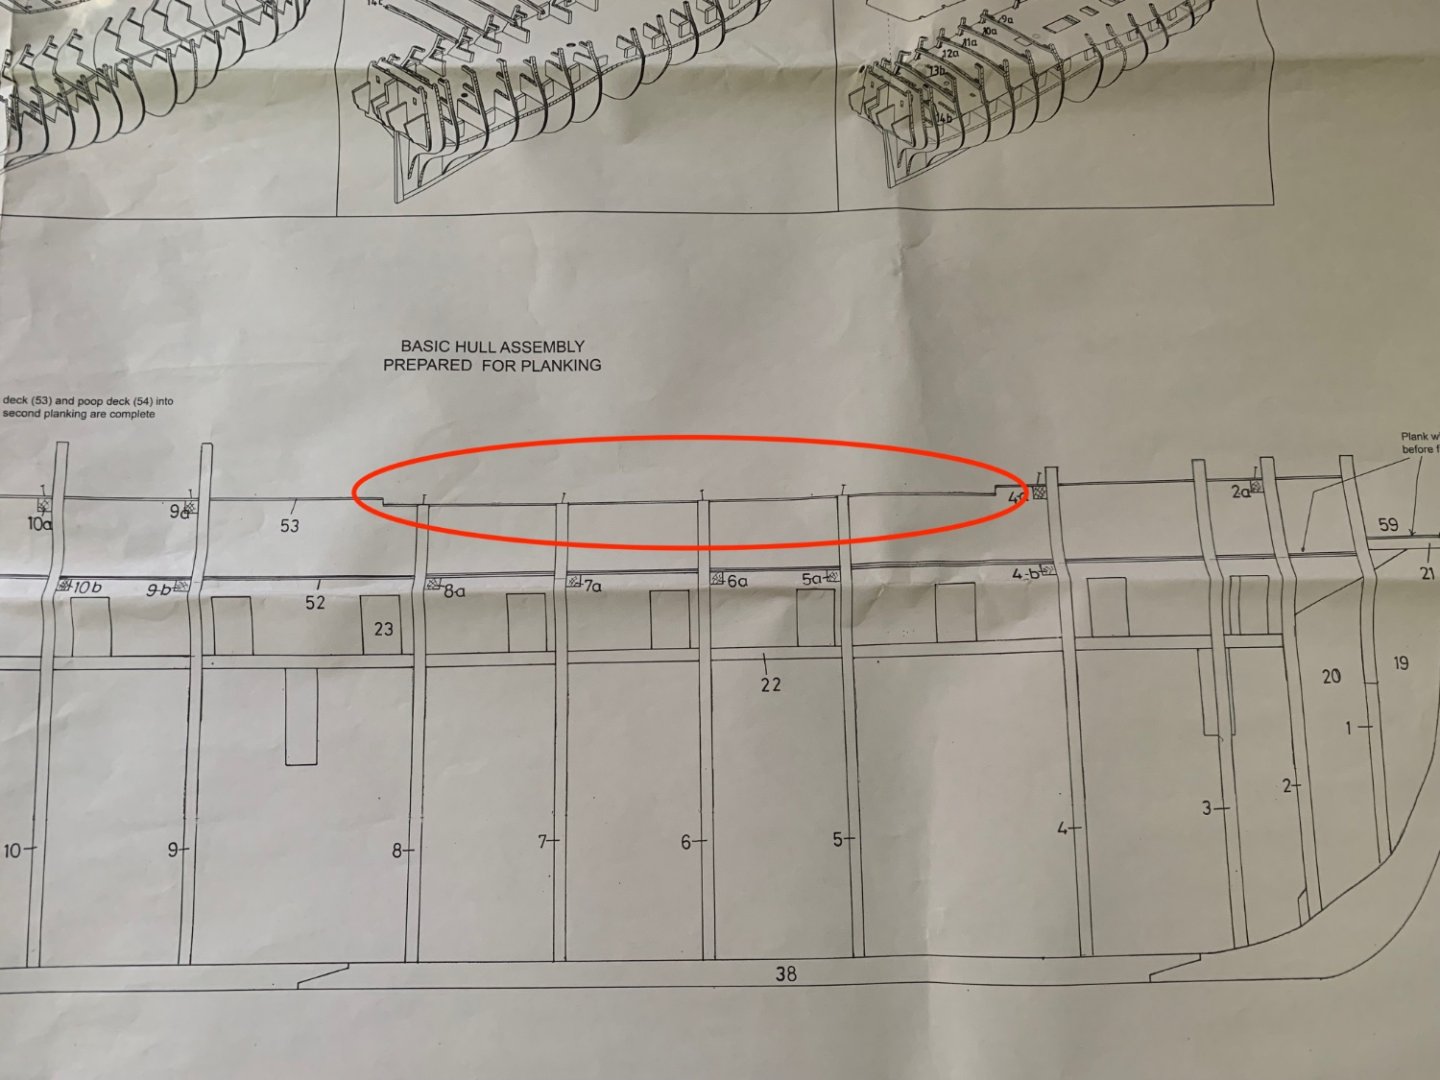
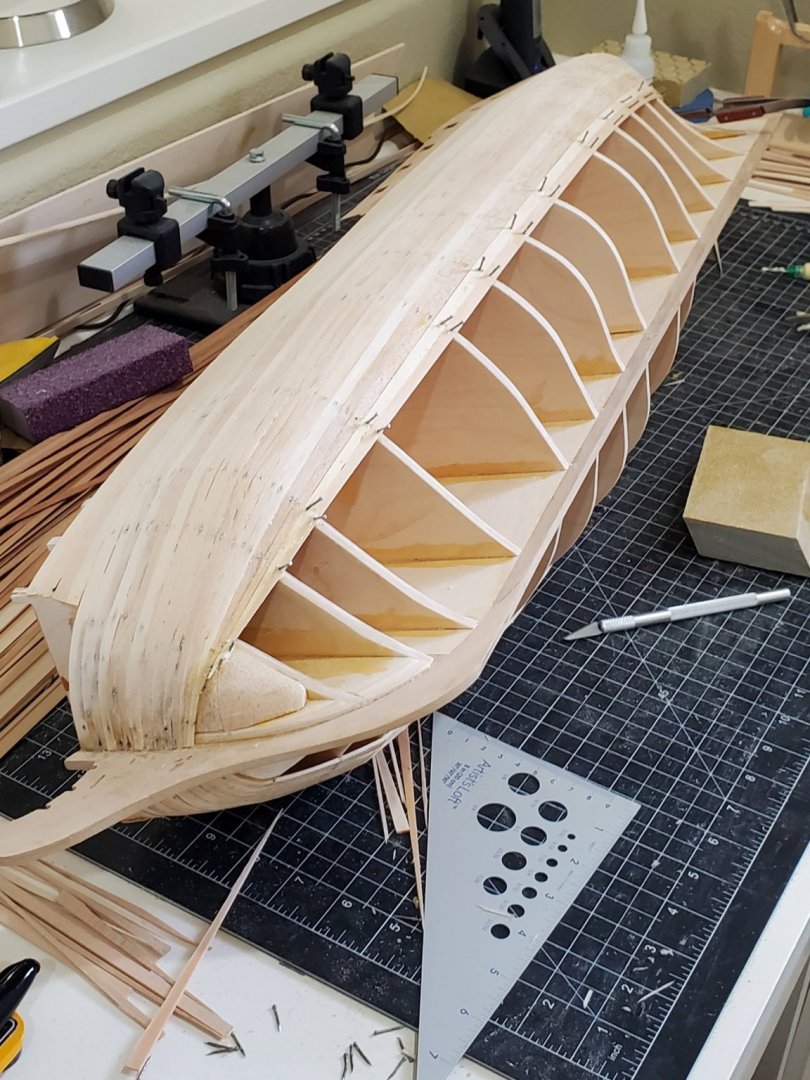
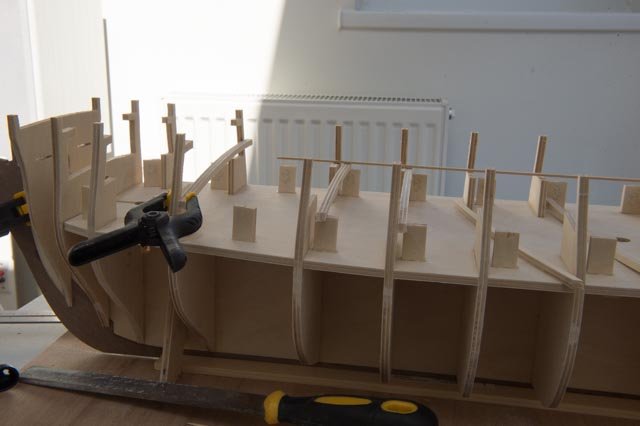
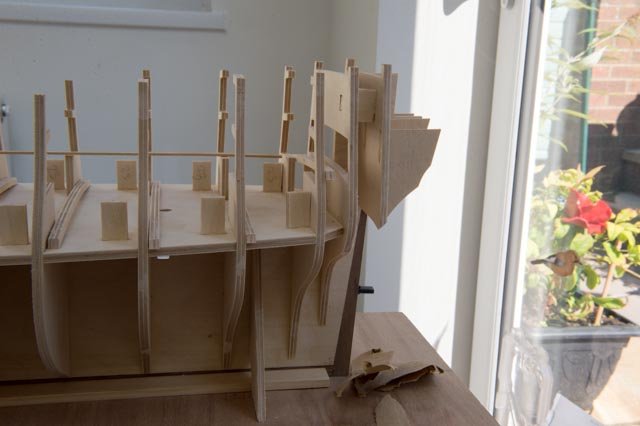
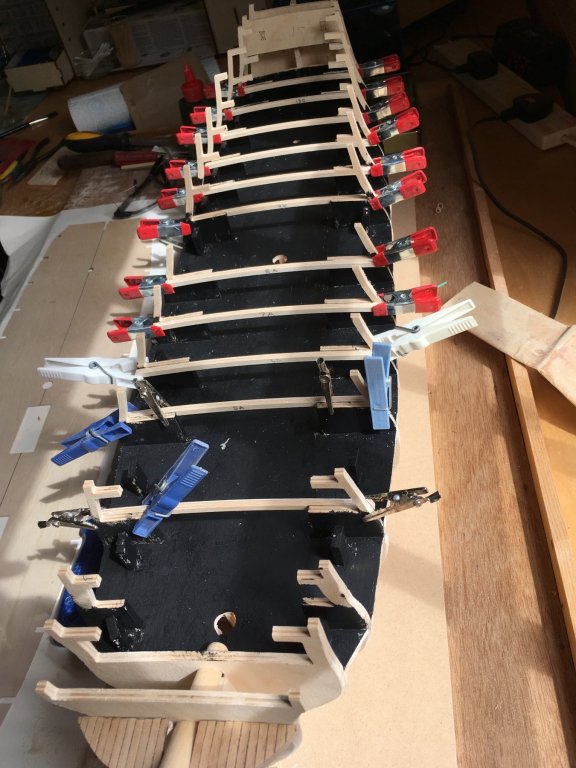
 Agamemnon is my third build over a period in excess of 20 years. To be honest I'm been a bit shy in posting anything up to now as I'm in awe of the quality of many of the builds that I've seen in these pages. But I've also gleaned a lot of valuable and essential information from other contributors and feel its time to fully join the community. I think its also a great resource to help with those, all too regular conundrums and confusions we come across. So here goes !! So a bit of history - I have been interested in building 'Aggy' since I came across the September 2001 edition of Model Boats (UK) which had a great review. Prior to this I'd always had an interest in models and particularly this naval period and have a fine collection of 1:1200 Napoleonic Naval war-games models (Langton Miniatures) but I saw this article, read it a dozen times and wanted to build in wood. However, I was sensible enough (back then) to realise that Aggy was not an ideal 1st build. So I ordered HMS Jalouse as an introduction. Loved it. It took me about 20 year to complete mind - sat for many years half rigged until I finally found time after the kids had grown up to compete it (I nicknamed it HMS Lockdown!! - there were some benefits.) After completion I was keen to embark on another build. I still had the 2001 magazines. Still not sure I would have the stamina for HMS Agamemnon I embarked on HMS Pickle as an experiment. A huge shout out to MSW contributors here particularly @flyer 's build log. 15 months later and I'm looking for the next build....Luckily a big box was already under my bed. 21 years after seeing that mag it was time..... So I'm about a month in. Frames built. Gun deck installed. Inner planking in place. And today I started the 1st planking. All fairly straightforward so far. But a couple of points of note. I thought long and hard about Treenails and decided not to model them. There is a thread somewhere on this forum discussing this which I'll link to if anyone is interested. But basically decided that on visible decks a lot of effort was made to cover Treenails - less so on functional gun decks. So having visible Treenails was not necessarily accurate, even though they look nice!. I have not yet fitted the stern post and took the opportunity to taper the ply at the stern to allow the planks to run smoother to the transition with the stern post and rudder. This is something that is called out in the instructions for Pickle - 'Bearding' and worked very well. Inner wall planking where it terminates at bulkhead 3 seemed wrong. Its not clear whether this butts up to BH3 or lies inside BH3. I did it inside but realised that this would make for a peculiarly shaped gun port when this was cut later. Being a lot thicker at the bow end. So I added a filler piece to BH3 and reran the planking to this so it now runs parallel to the line of the deck and future outer planking. I also added an extra 45 degree bulkhead in the bows as I think this will aid the shaping of the 1st planking in that area. I was slightly confused by the plans for the upper deck - they seem to show a step down between BHs 4 and 8 but no mention anywhere else about cutting the deck. Looking at other build logs @Sjors @TrunkMonkey seem to lay flat so I think an error in the plans or an earlier version. Although the magazine article also lays this flat. Finally, today I started on the 1st planking for the 1st 5 planks and am noticing a slight wave in the planking. See pics. I think the phots exaggerate it and its actually a fraction of a millimetre so can be sorted in the filling & sanding phase. Also I've only done the port side so far so will need to see if the same is true on the Starboard. It may be the bulkheads themselves were not exactly aligned. So end of first post. Hopefully first of many with every expectation of months & years of build ahead. Some pics below with apologies for my cramped & messy workspace!! Malcolm
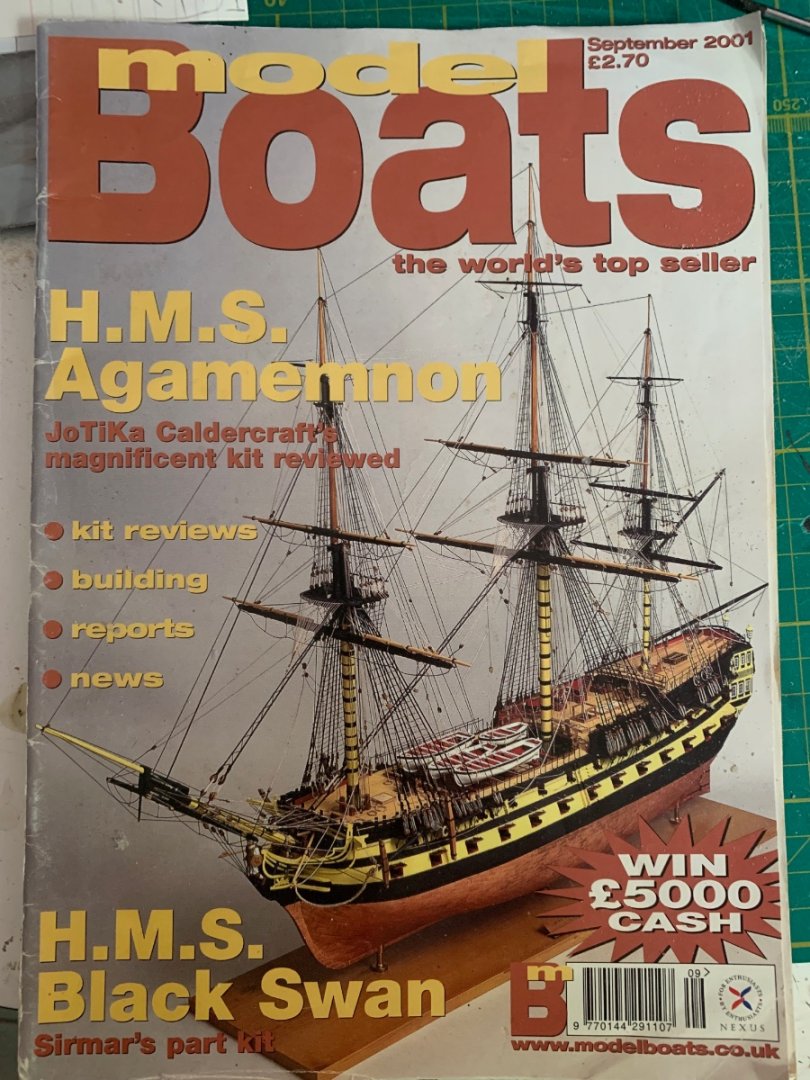


-
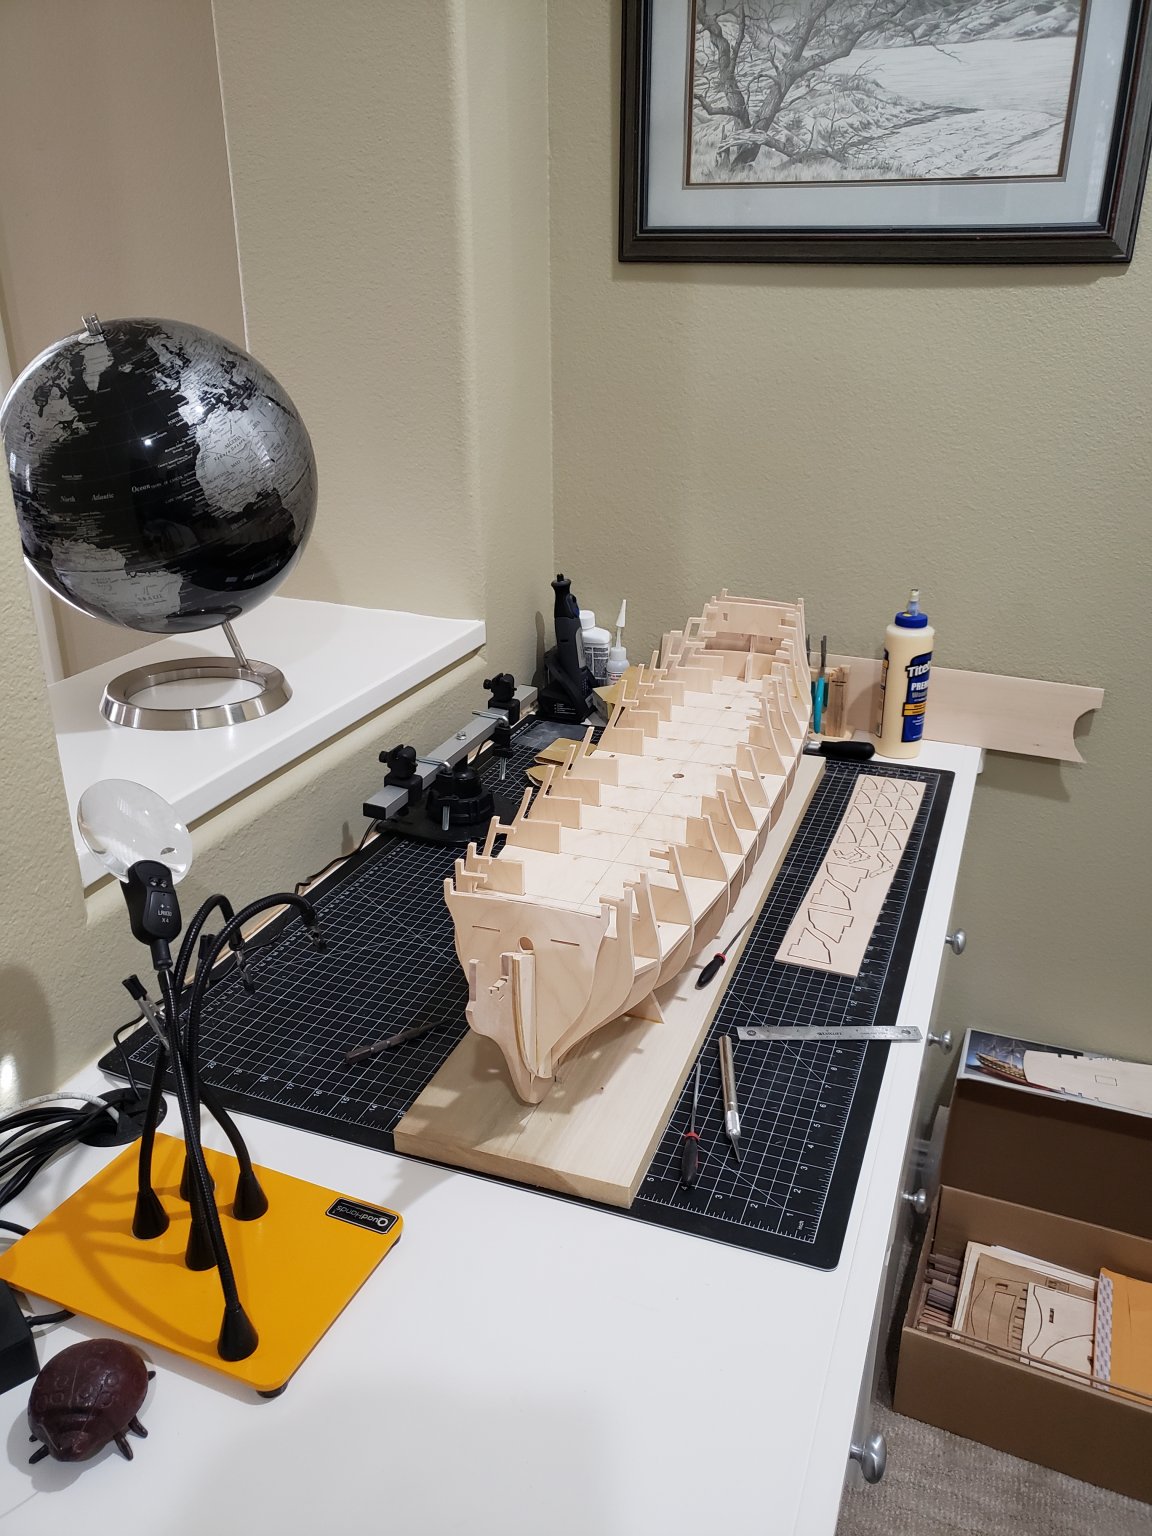
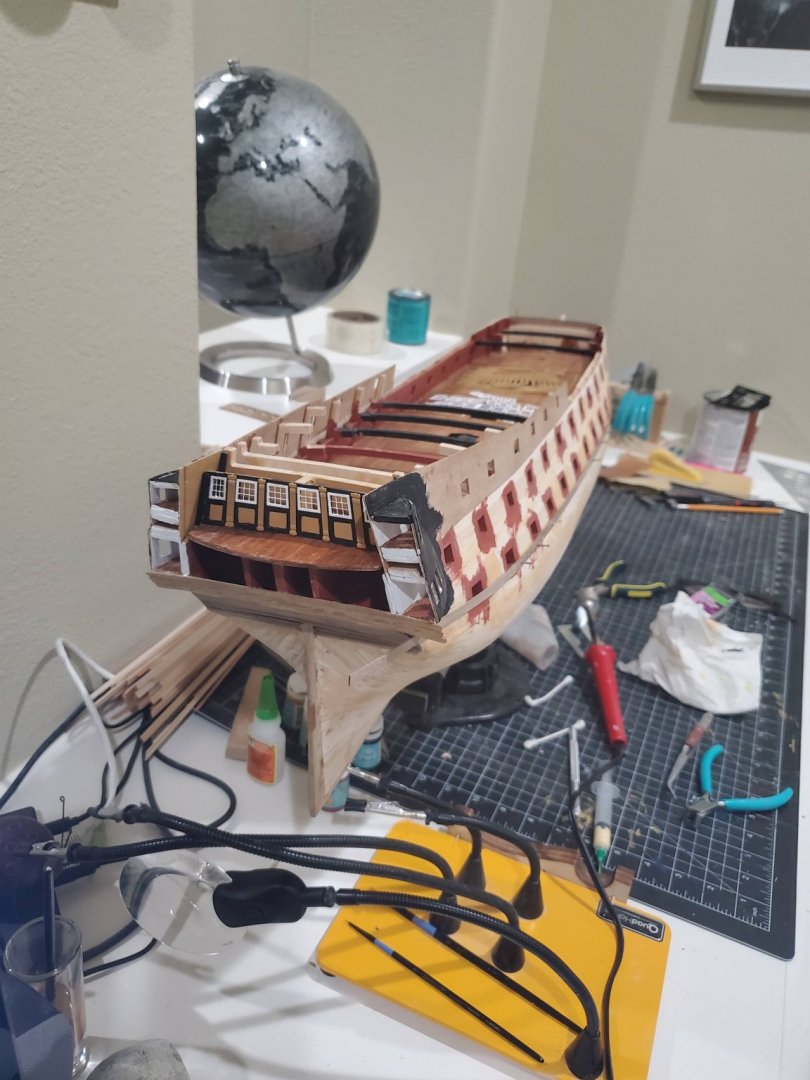
 I mentioned in another post that a nearby fellow model builder asked me if I'd like to take on a partially built Agamemnon that his late father had started, but was unable to complete. I am happy to be the recipient of such a great kit. All the work that has been done on it is first rate, so it's just a matter of moving forward; nothing to be re-done. I'm really honoured that Peter Rumgay, a very skilled modeller, has entrusted me with his dad's unfinished project. I going to work on this kit simultaneously with my Speedy project. I've never worked on more than one project at a time before, and so far I'm enjoying the process. The key for me was getting properly set up and slightly changing my modus operandi. In the past, (mostly through laziness) I usually had too much stuff piled on my workbench, so it looked like a hoarder's workbench, sometimes to the point of leaving only the tiniest workspace. That just wouldn't work this time, so I have cleared it completely. Fortunately I have a lot of room in my shop so I set up two separate tables, apart from my workbench, and have one table dedicated to each kit, including plans and all parts. and just move over from the table the immediate things I need at any given time and then move them back. This makes it very easy to switch projects and keep everything organized. I should have been this organized all along. Here's the model as I received it. It would appear that the first order of business for me is the second layer of planking and I've made a start. I'm thankful for the other Agamemnon builders on the forum. I've been studying their build logs and I know I'll be turning to them again and again as I work through this very large undertaking. David
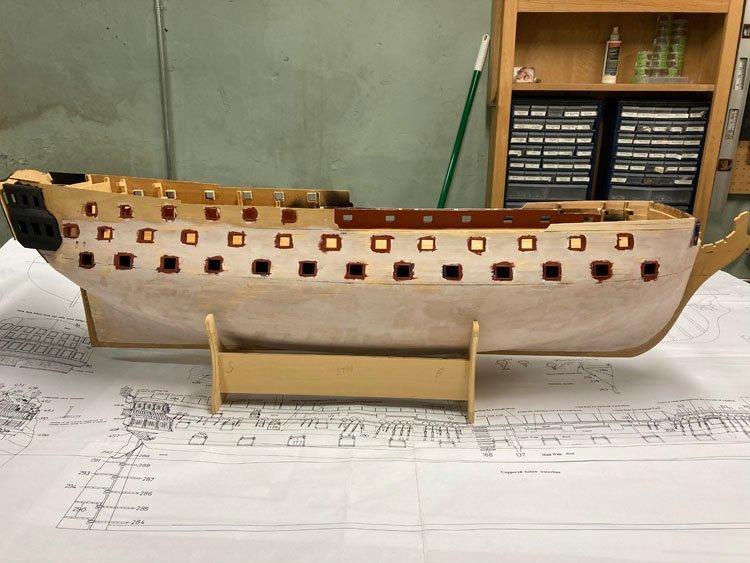
.jpg.dd9a03ceaaa4c37be311bf44597c931e.jpg)
-
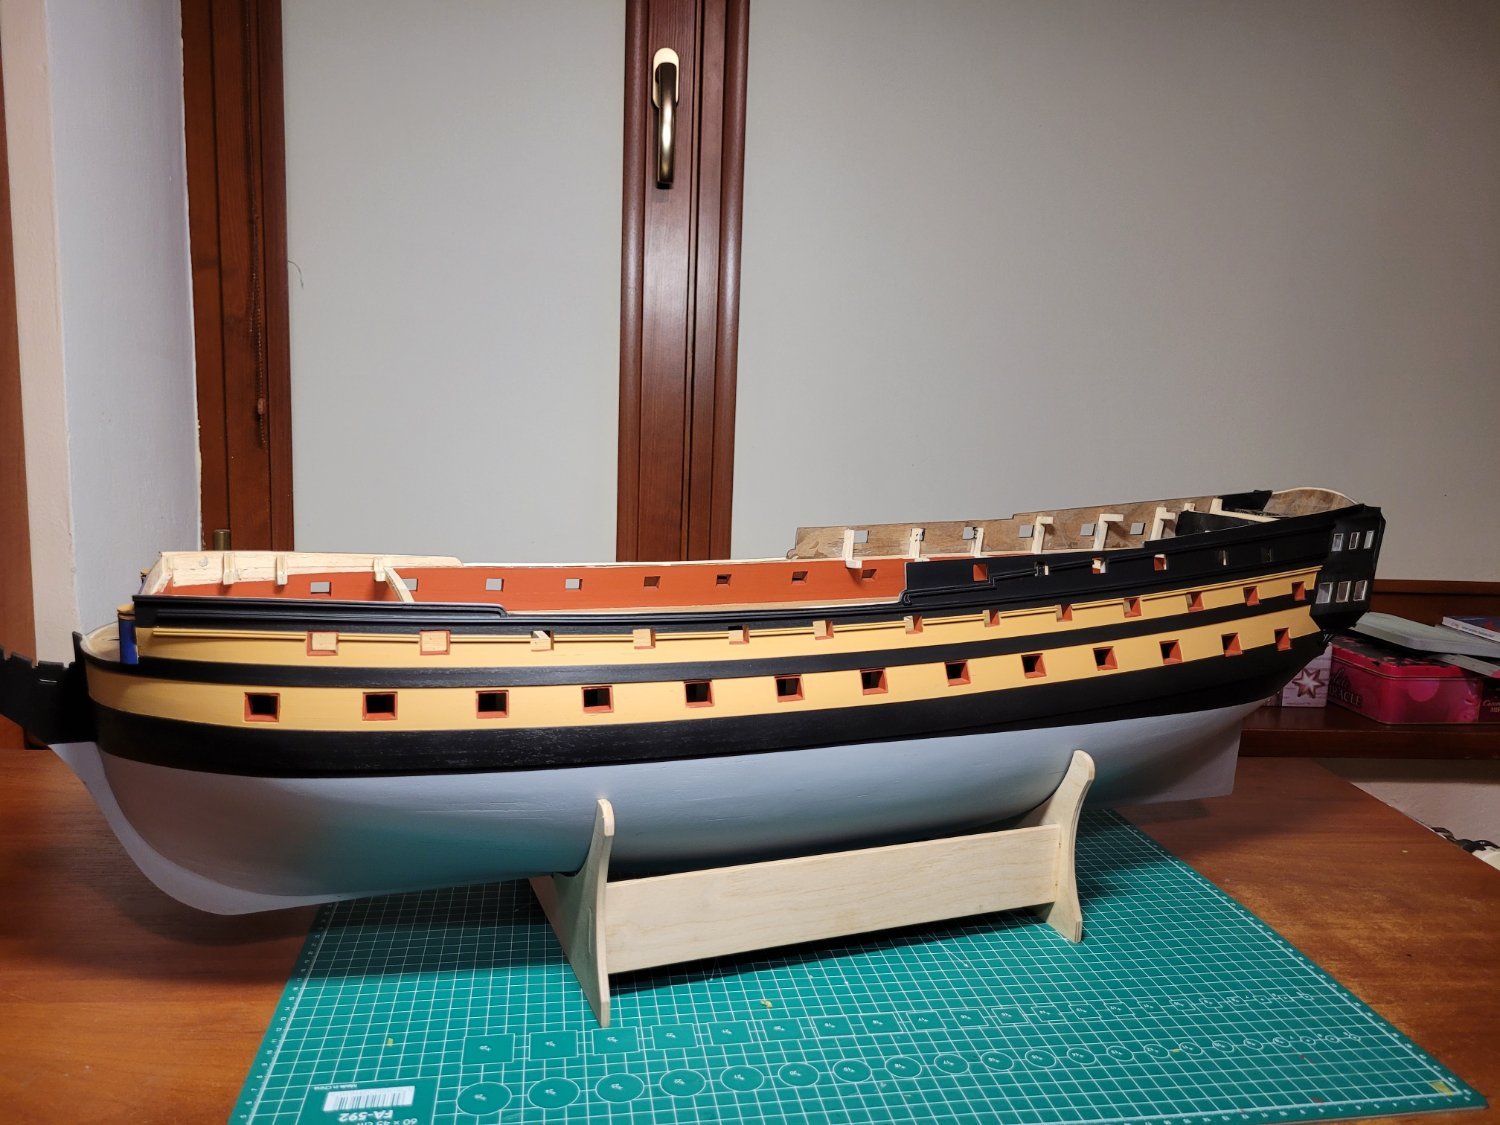
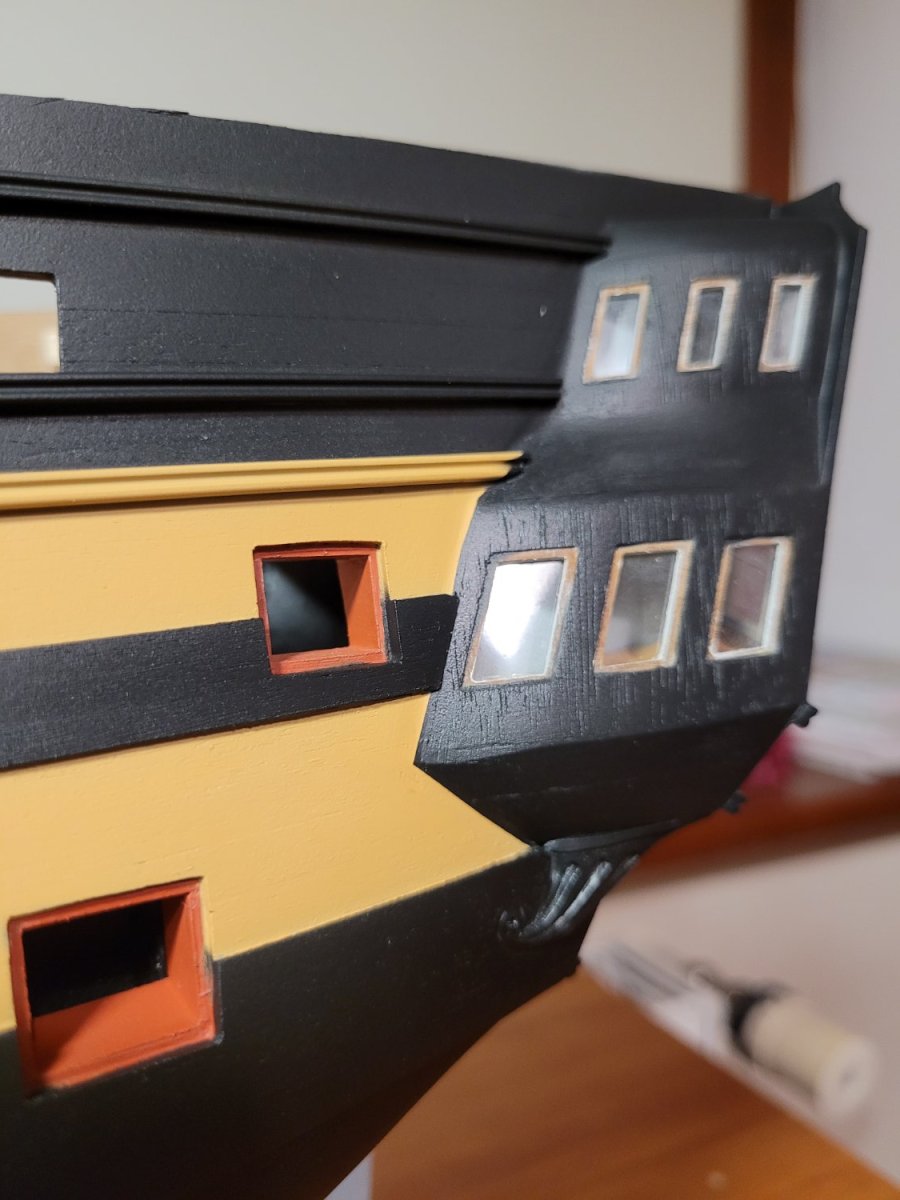
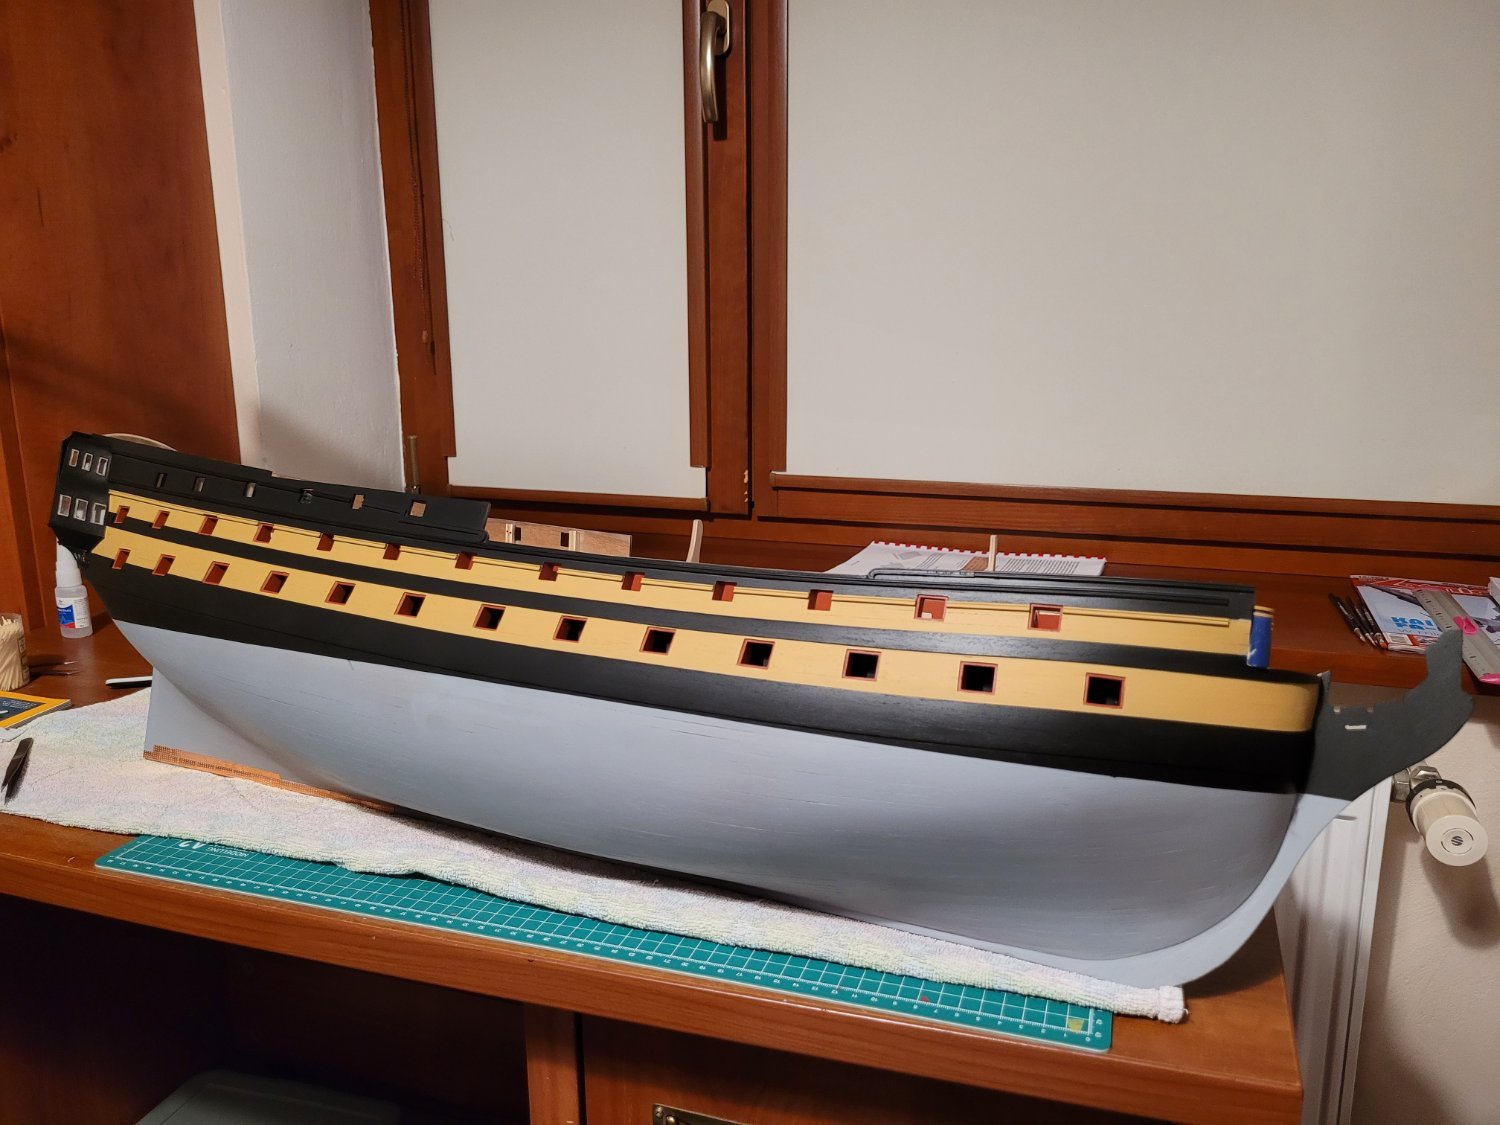
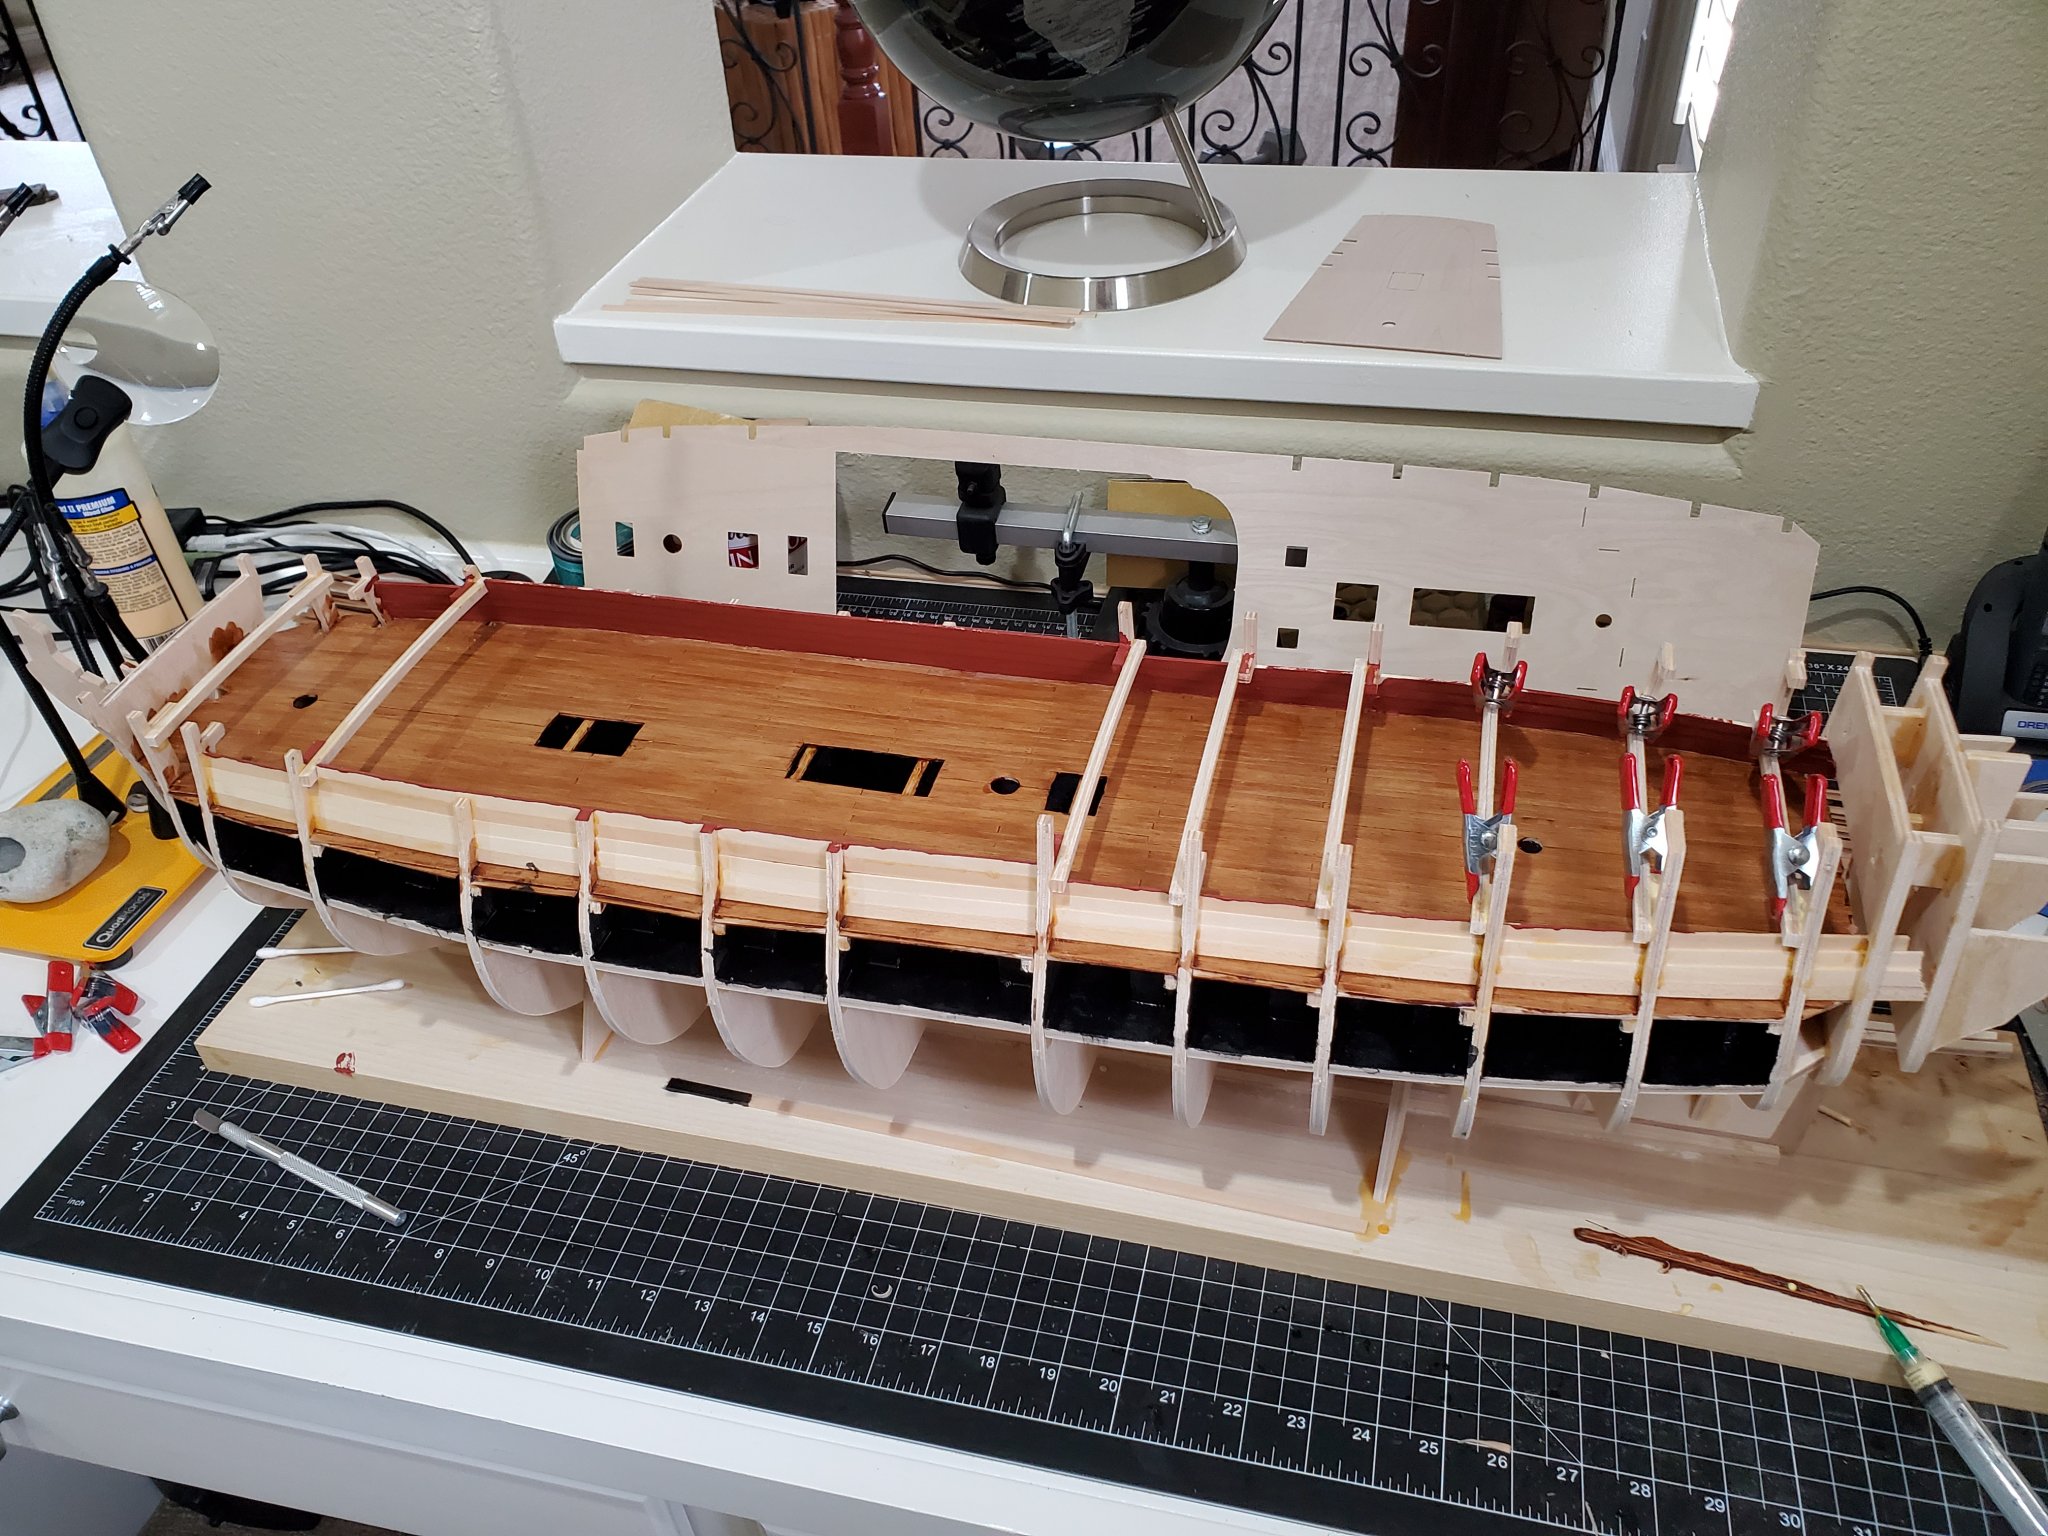
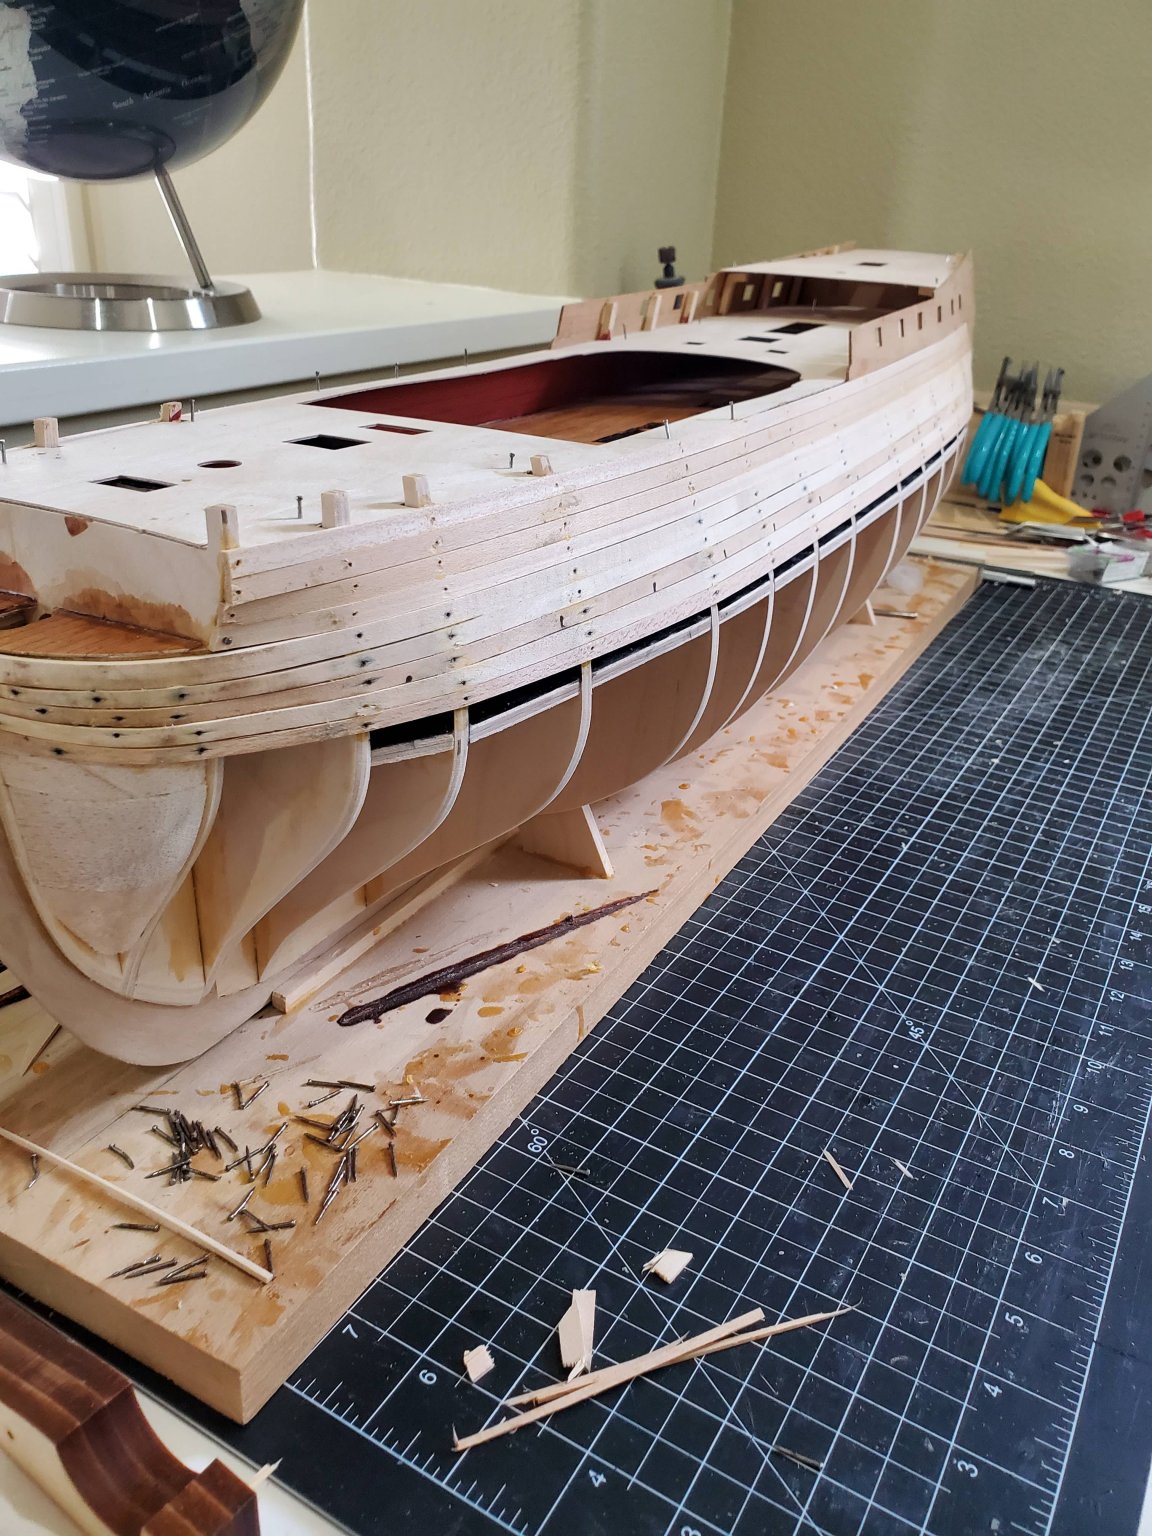
 Everyone: So to get the progress of my Caldercraft back into this folder, attached is my most recent progress of My Aggy. I have the stern and gallery windows. I now have the spar deck on and have begun planking the deck as well. Once I have that completed I will provide a updated pic of that as well Mike Draper Whitehorse, Yukon Canada
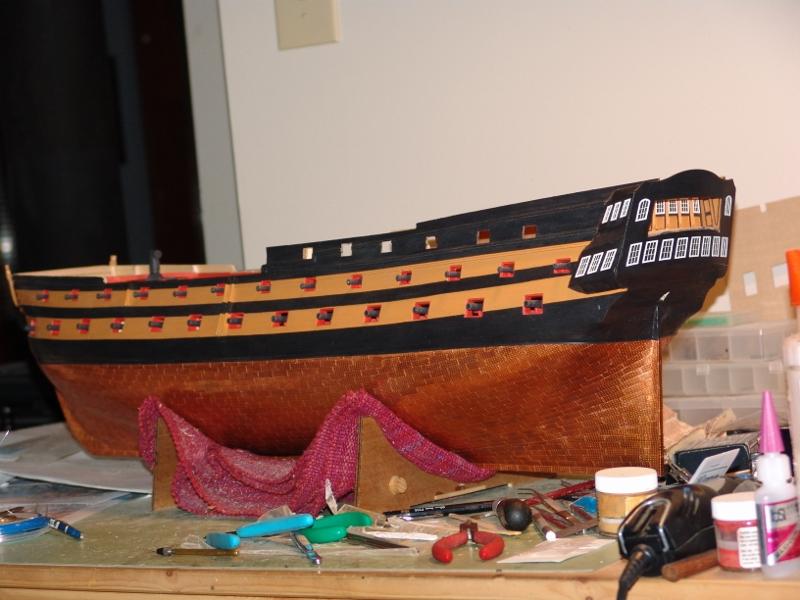
- 150 replies
-
- 8
-

-
- agamemnon
- caldercraft
- (and 1 more)
-
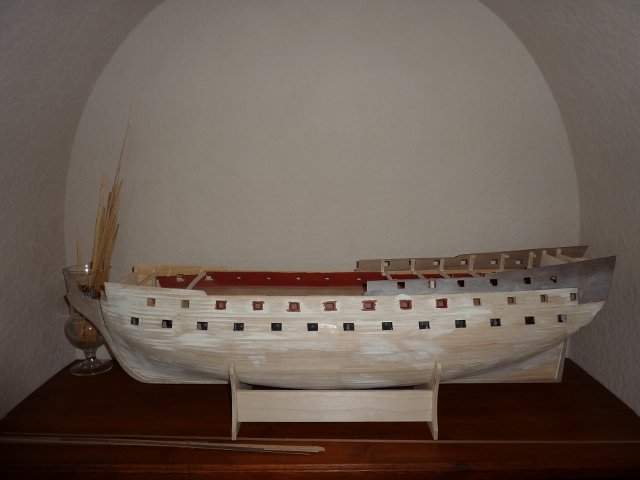
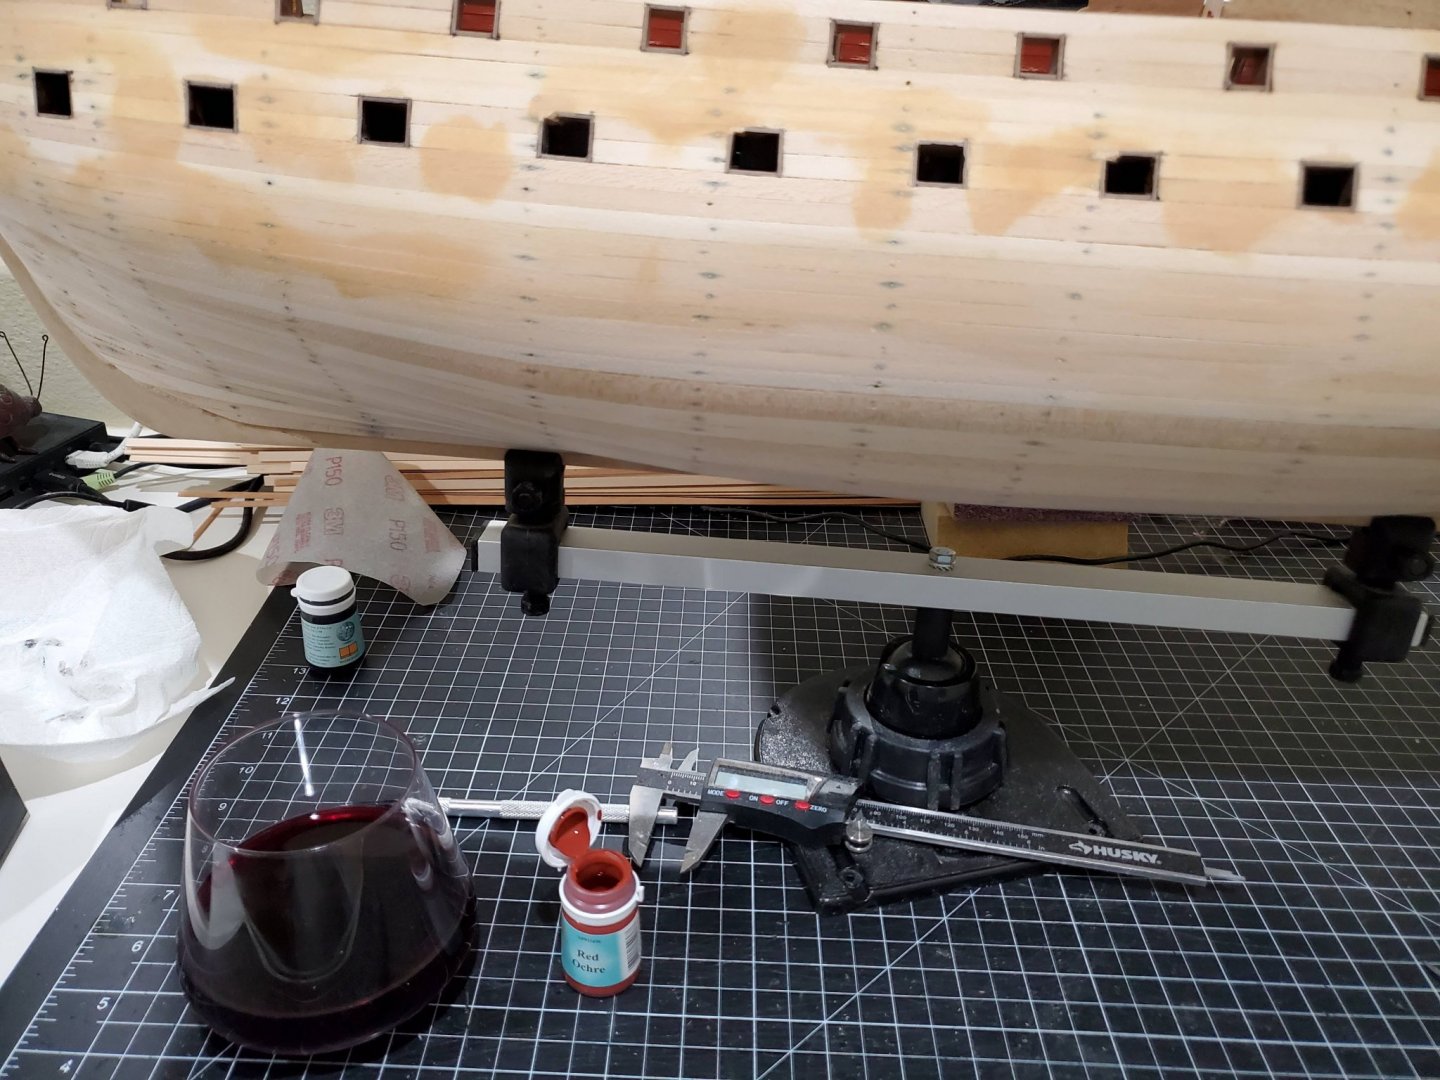
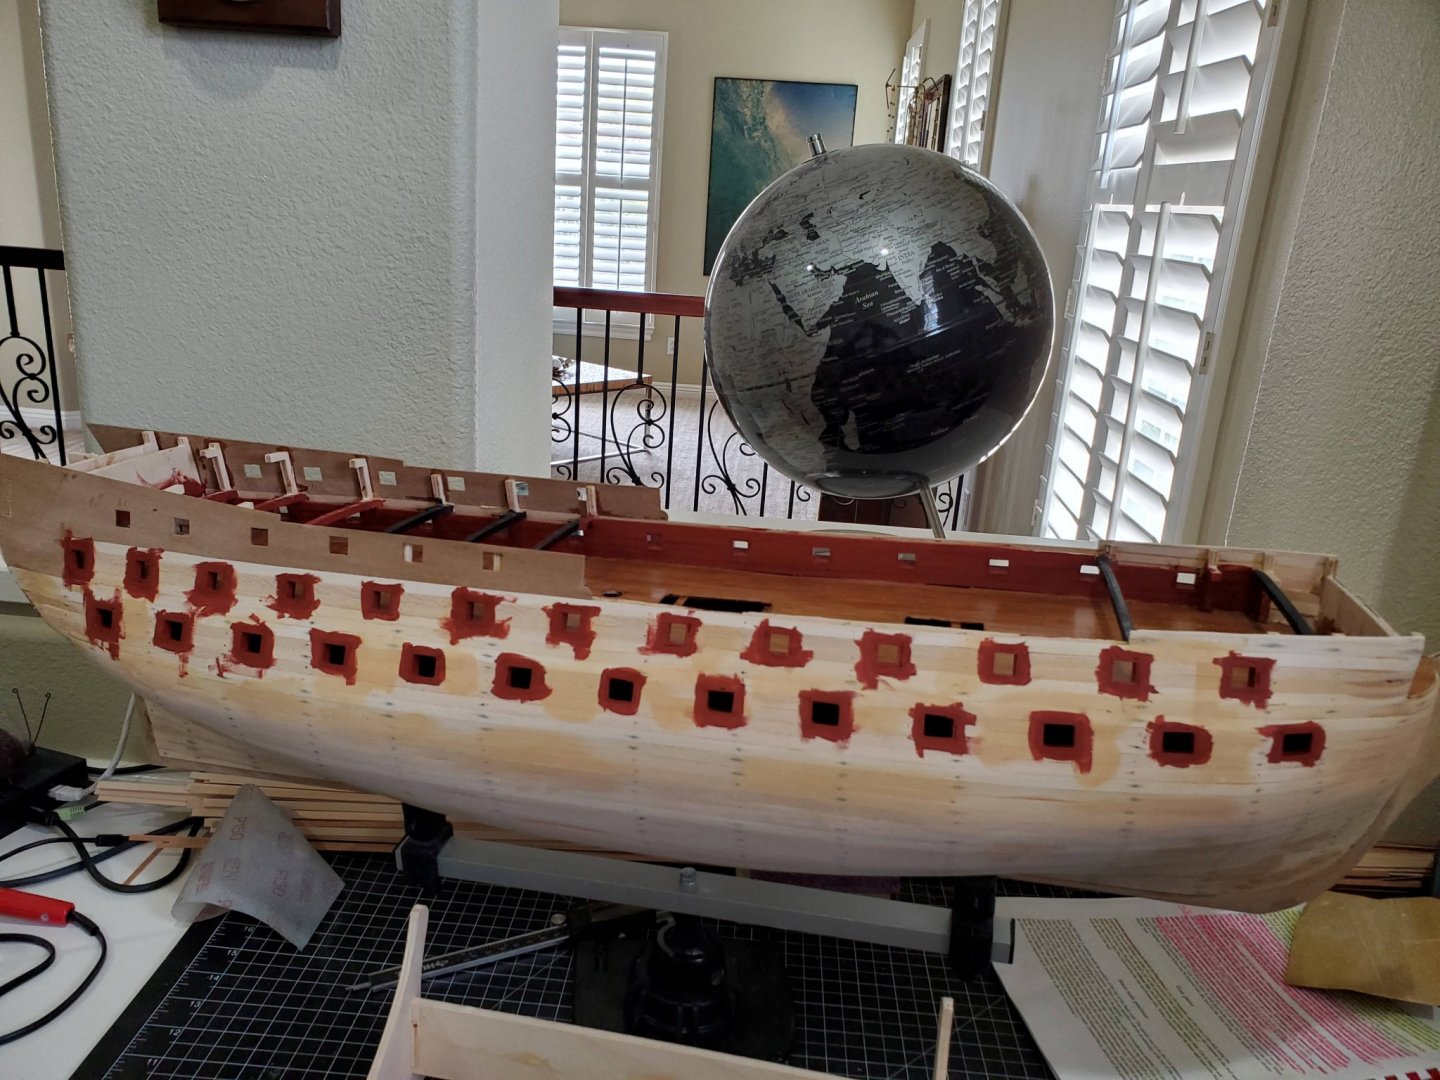
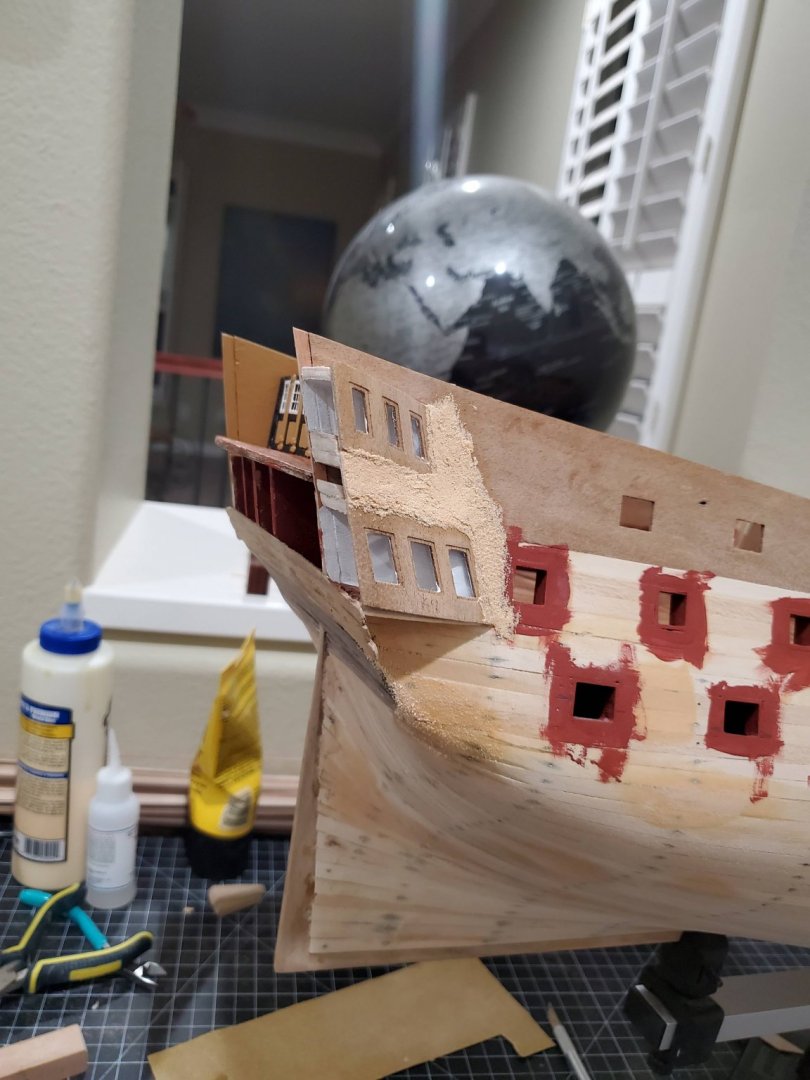
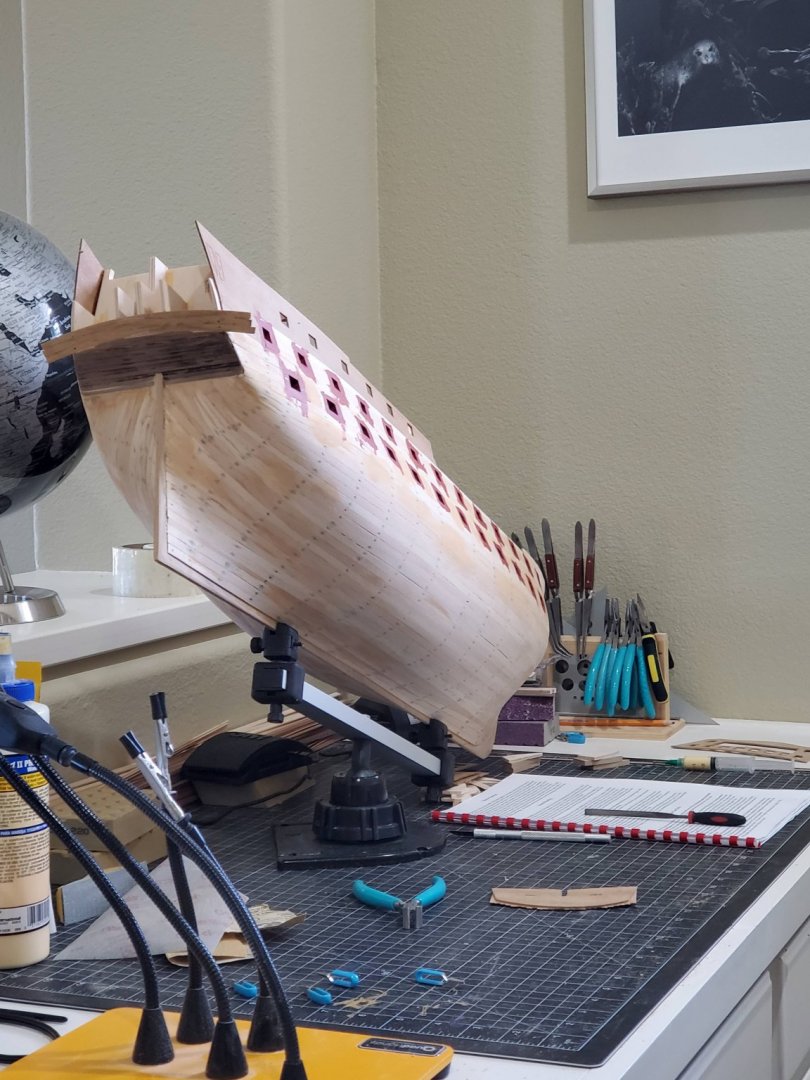
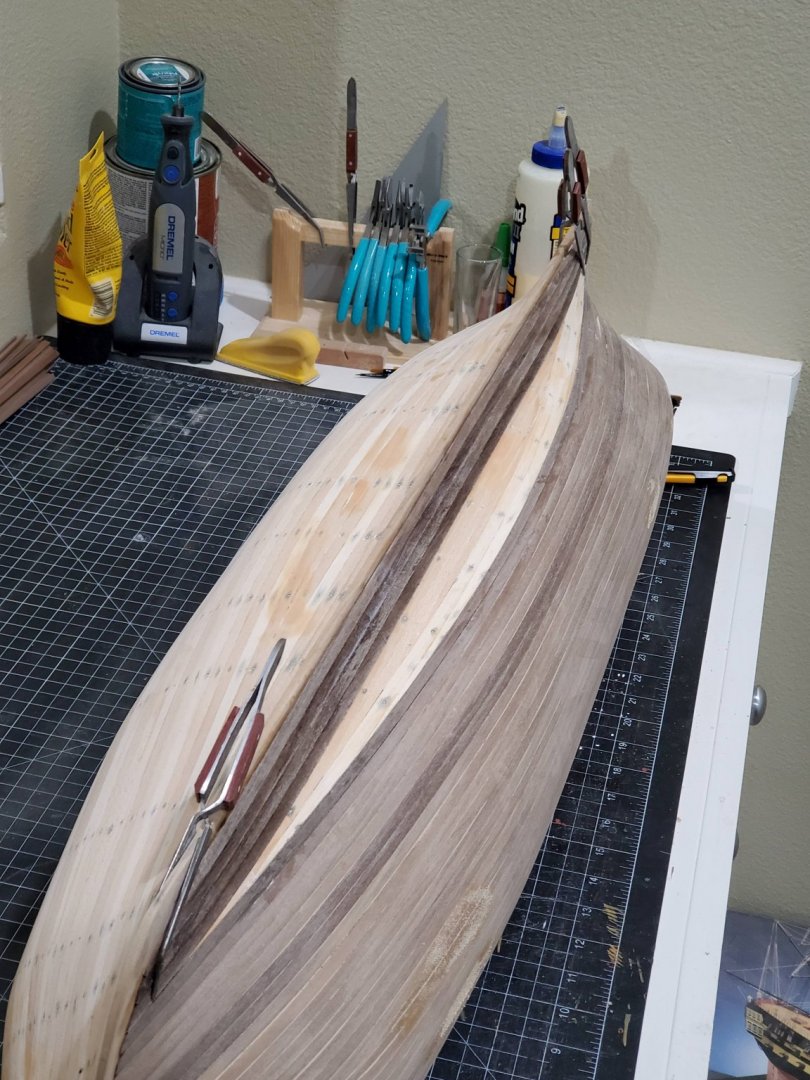
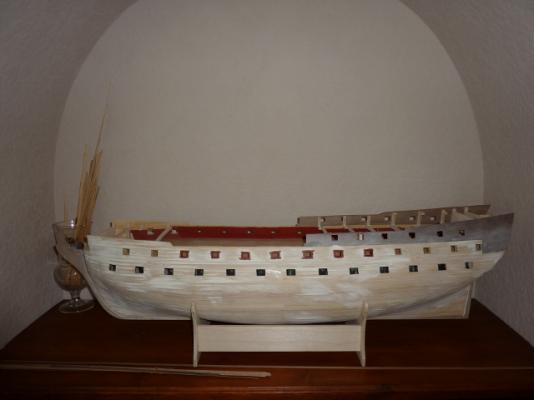
 After my Scharnhorst is finished, I decided to pick up HMS Agamemnon again, this kit was given to me by my wife and daughters about 10 years ago. I started it and after the first planking was done and the gun ports were cut out, the model was damaged during the rainy season because the first planking had come loose from the rafters and some of the rafters, the plywood had started to expand with all the consequences. After I had repaired the damage somewhat, I lost the sense of purpose and put her aside. In the meantime, I built the 1/100 Sms Emden and the 1/100 Sms Scharnhorst. So I started on the Agamemnon again. In the meantime, I made the second planking, gunwales and gun ports and added colours to the hull. I deviated from the colour scheme as suggested in the building description, but chose to paint her in the colours she was painted in the beginning of her career. Below some photos Say more than words. (Sorry for the disorder of the pictures)


-
 This forum has been a fantastic help as I've gotten back into model ship building after a good 15 year break! I purchased the kit from Modelers Workshop just after Christmas and figured I would post my progress to share the build and all the various mistakes and success along the way. First, I highly recommend Rick Shousha from Modelers Workshop. He was a tremendous help in getting the kit and all the basic supplies in the time of COVID where everything seemed to be scarce. His customer service was outstanding! In addition, watching others build logs was fascinating and extremely helpful. Special thanks to Henke, Ooglee and Kusawa2000 Aggie builds that were particularly helpful so far. Thanks for all the shares and ideas from the forums and happy to be doing the same along the way.
 -
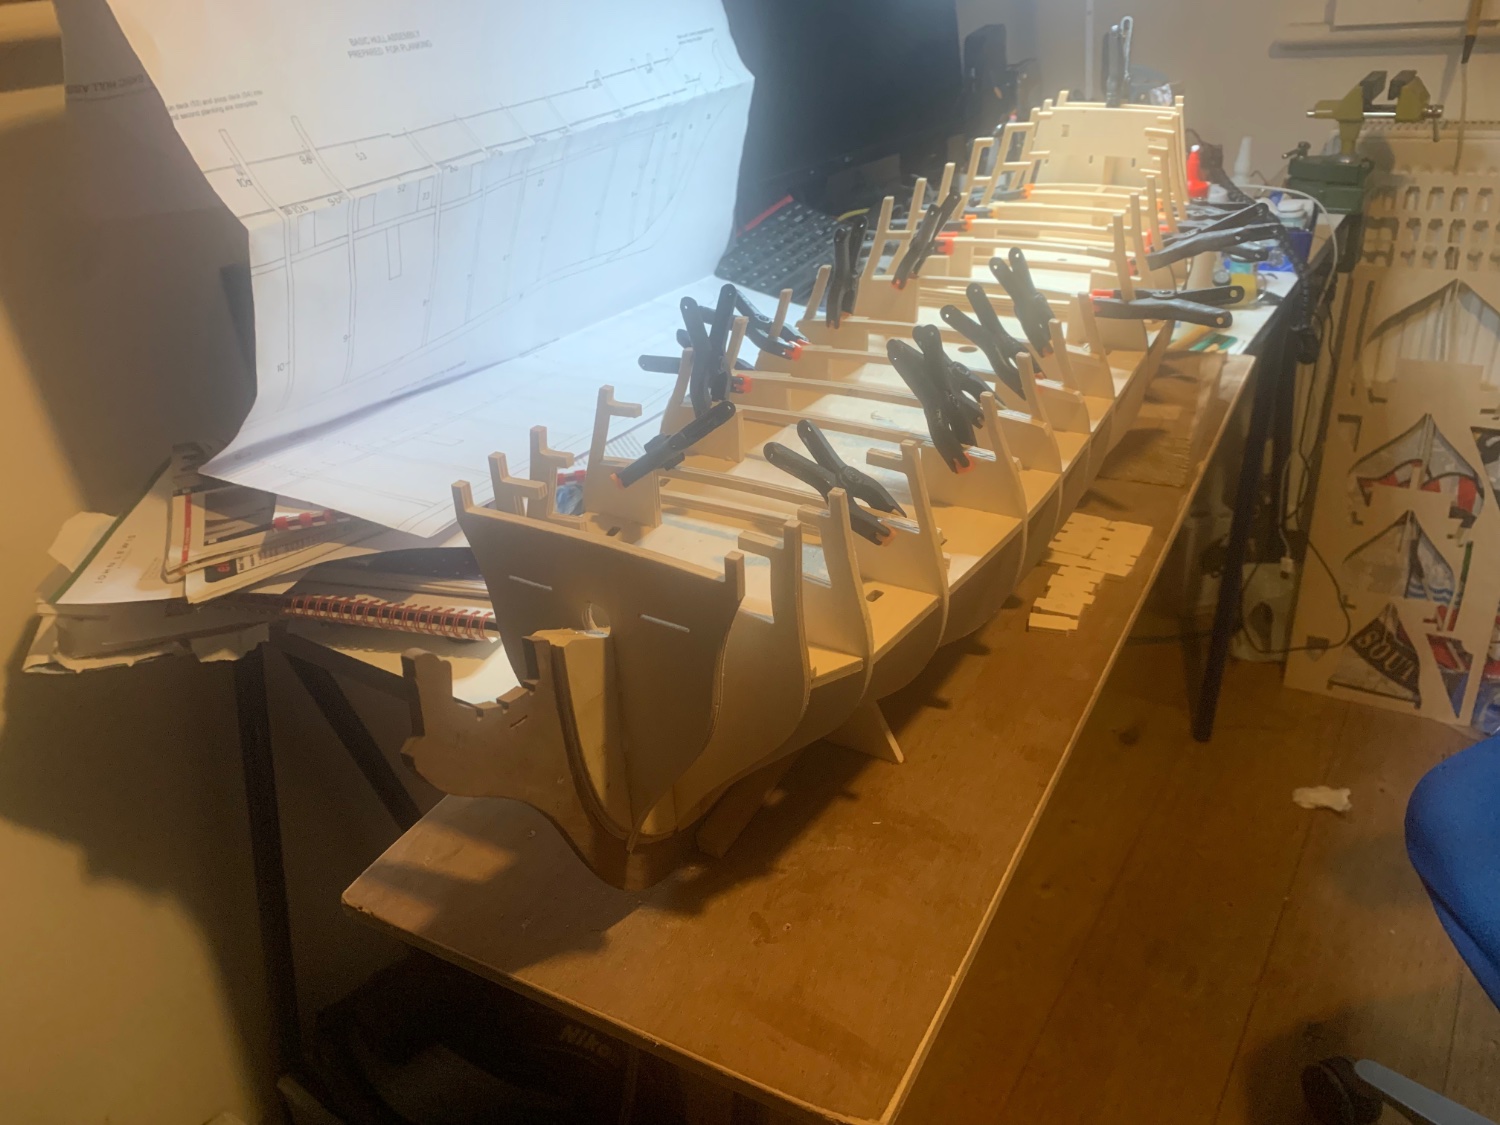
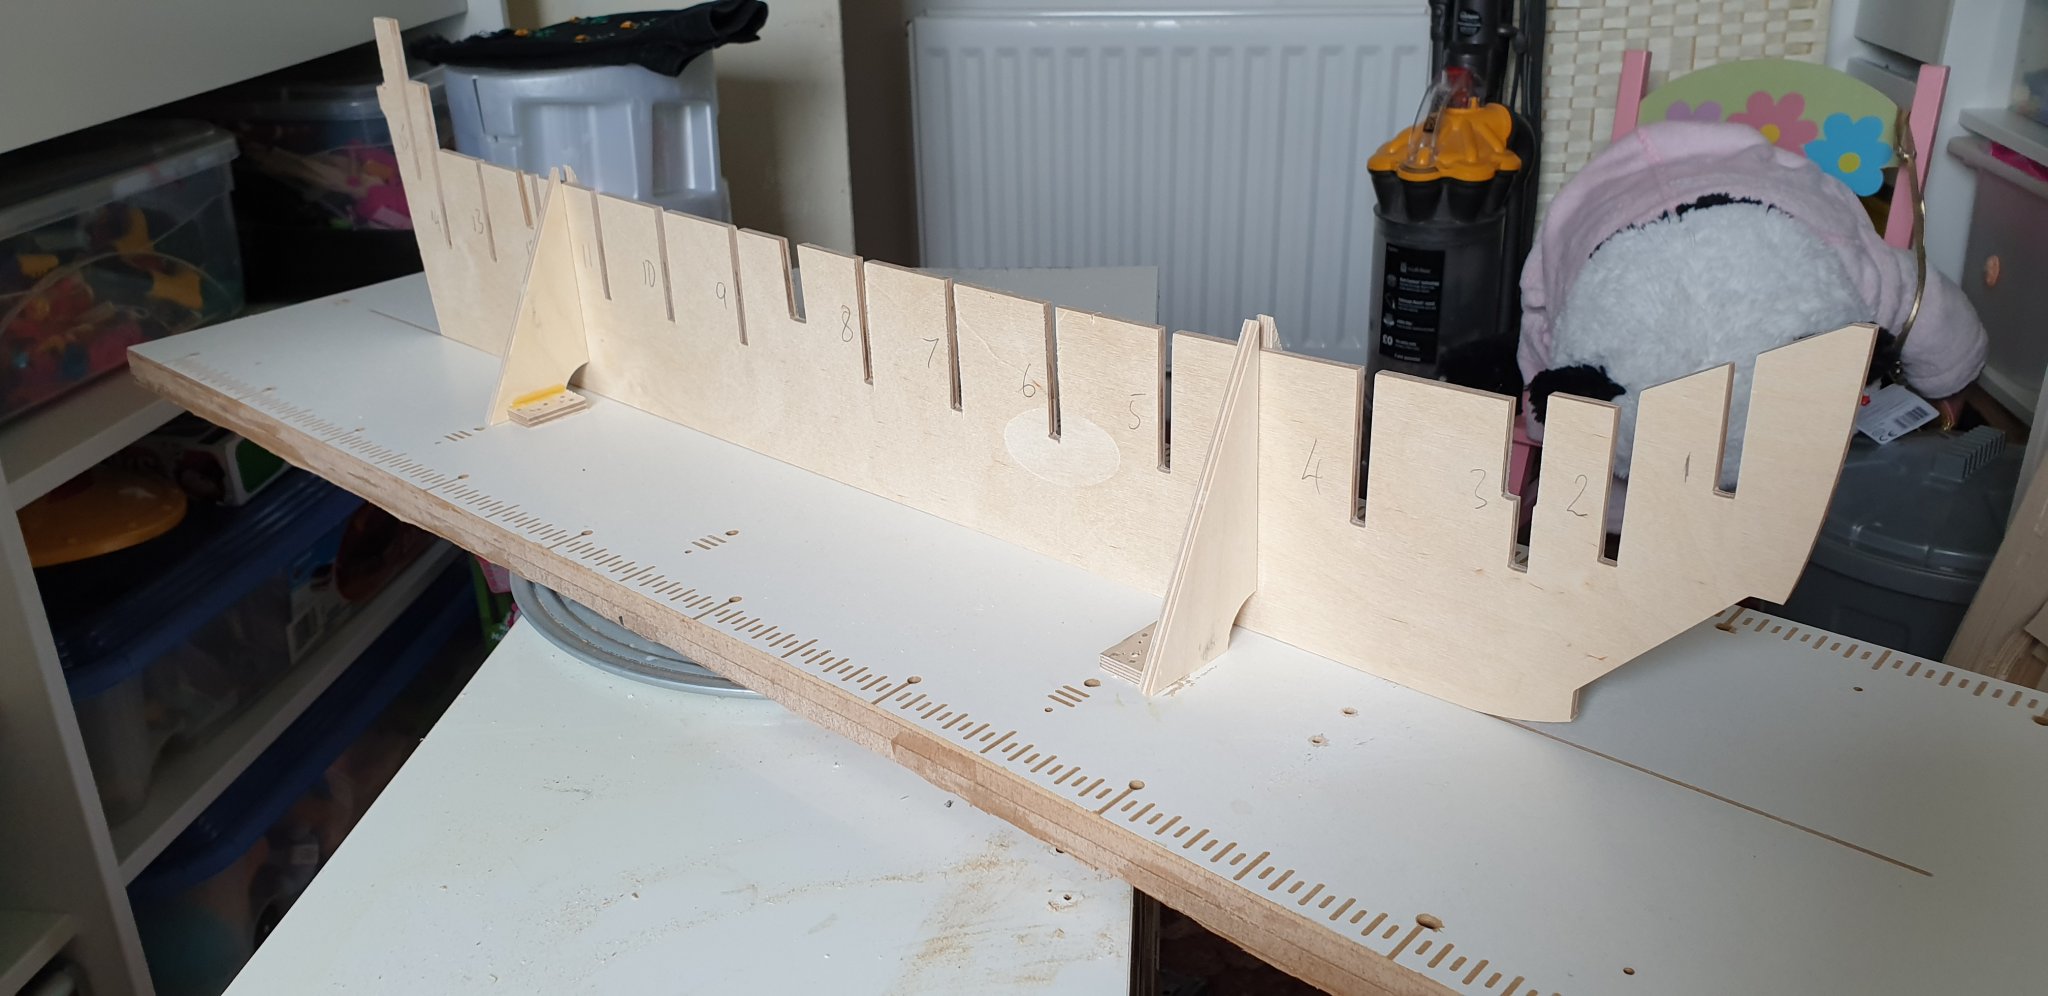
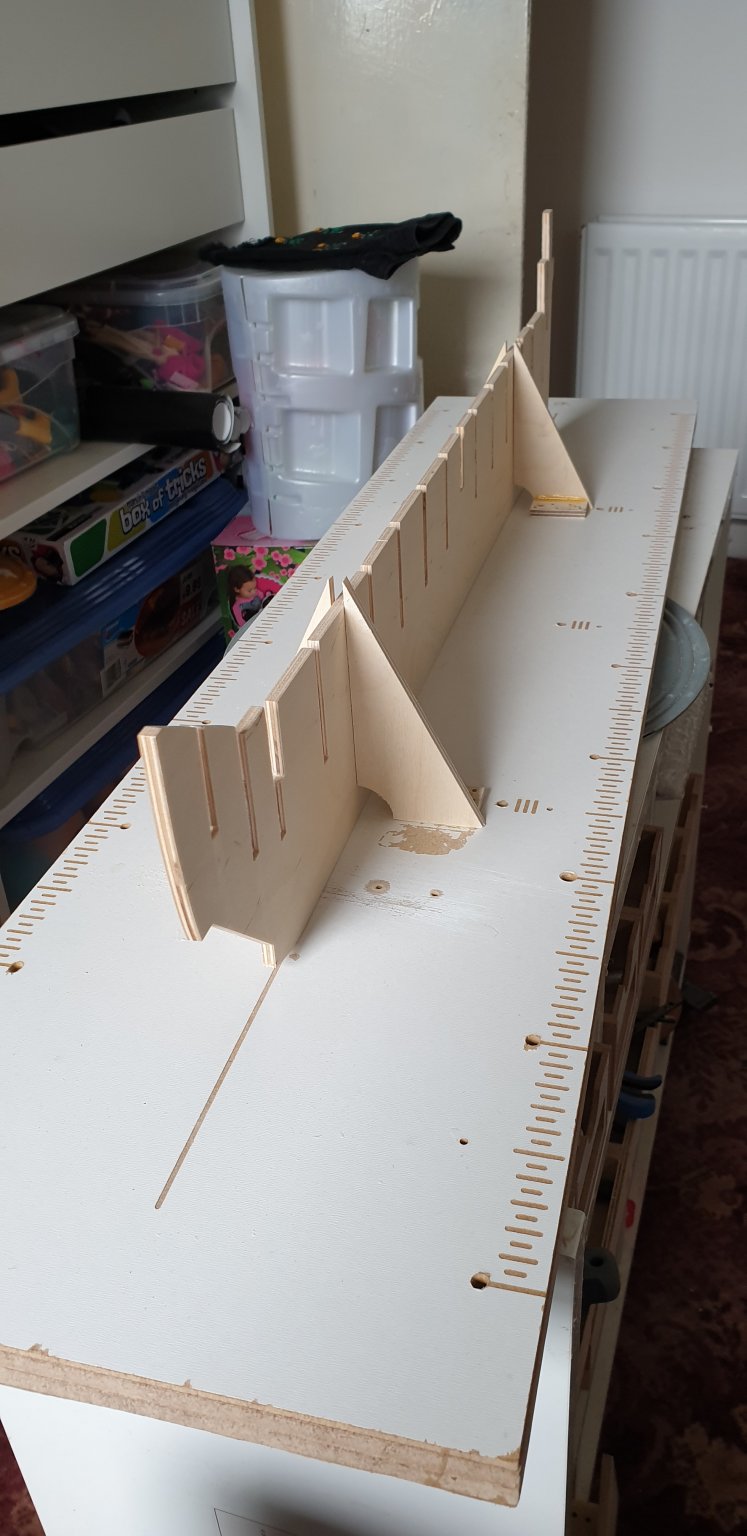
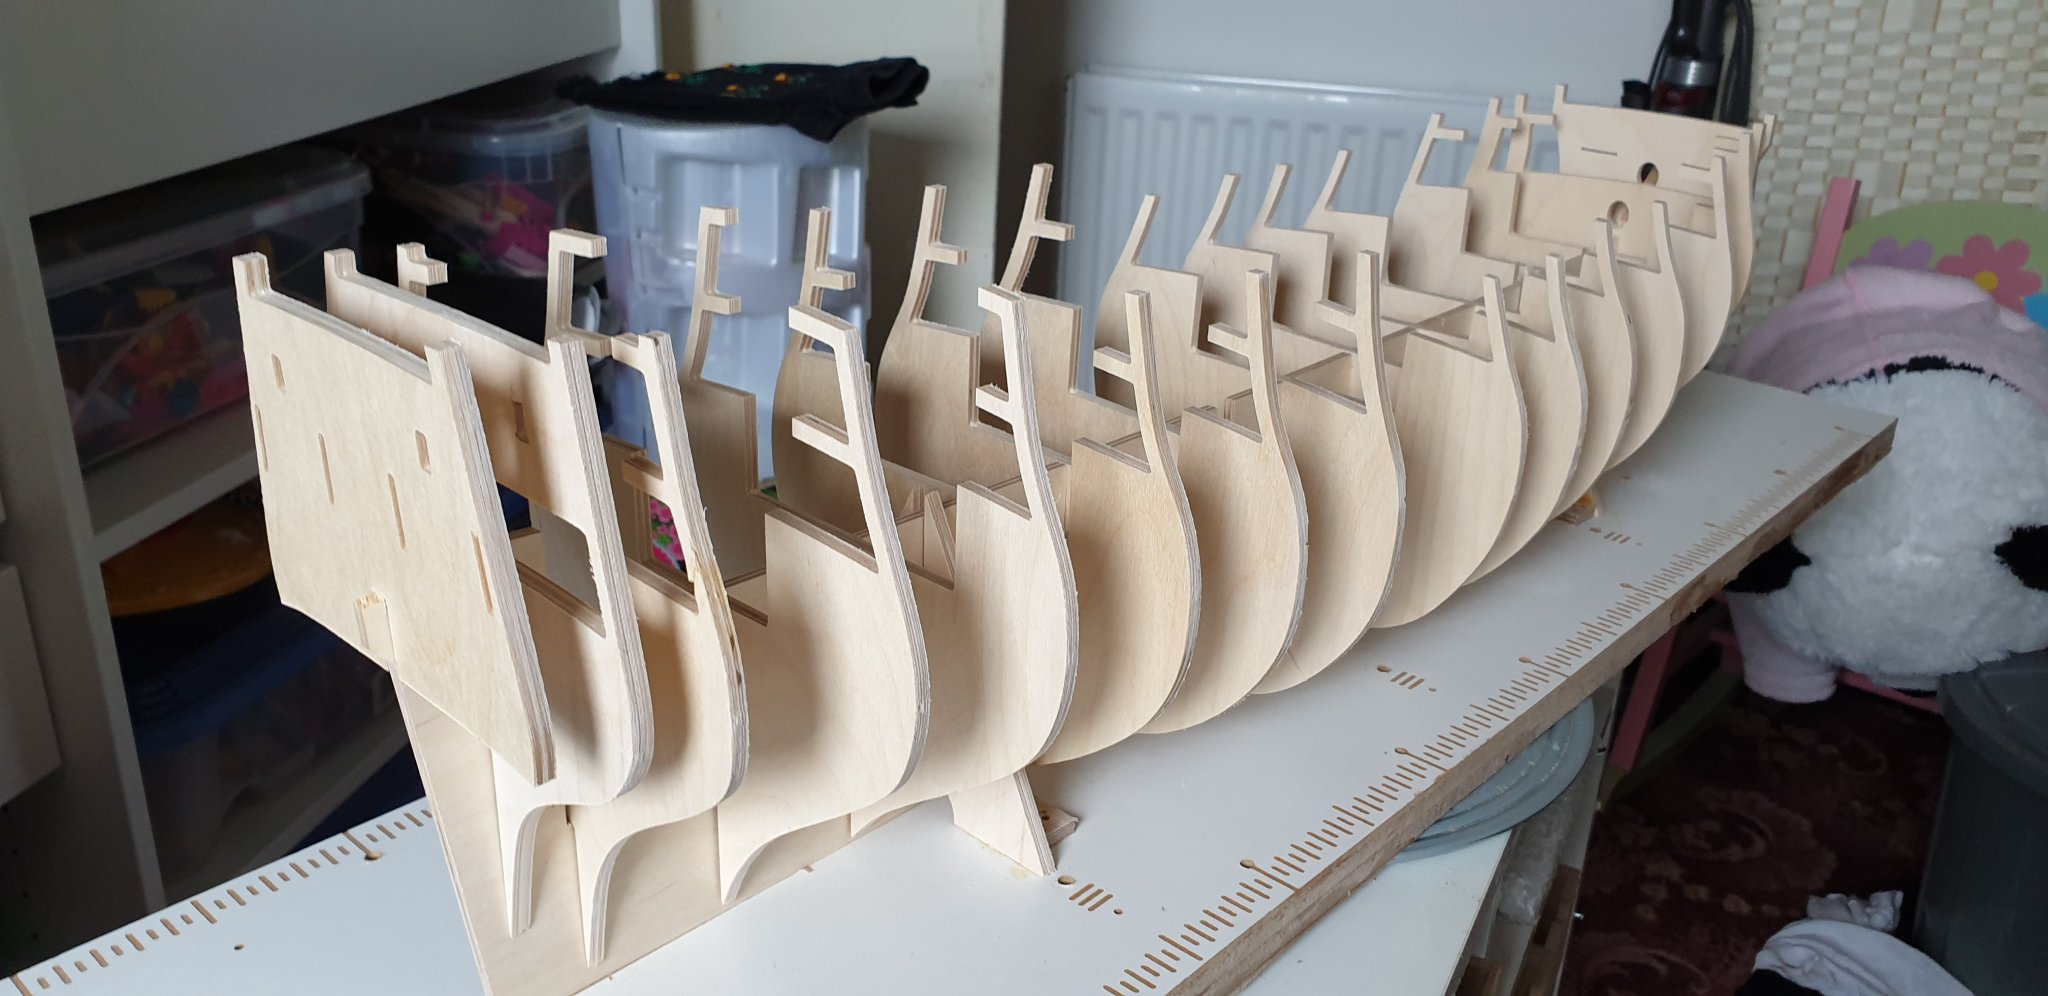
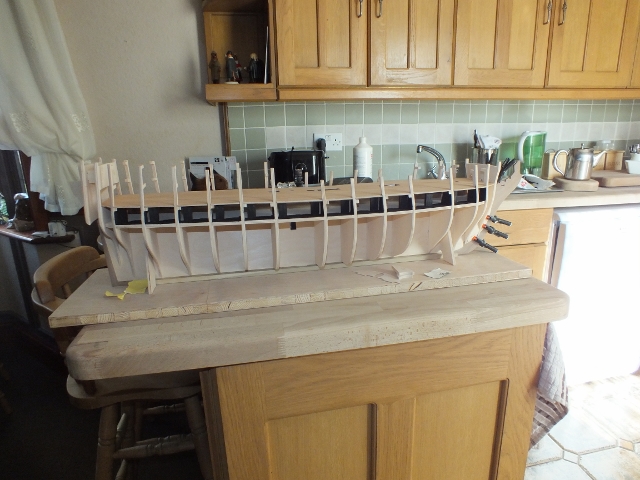
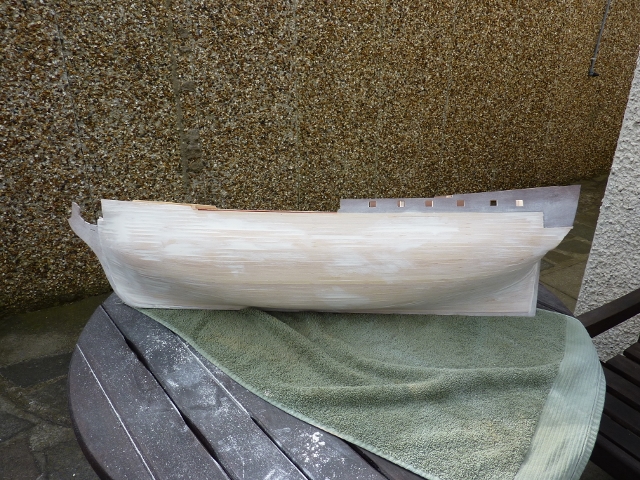
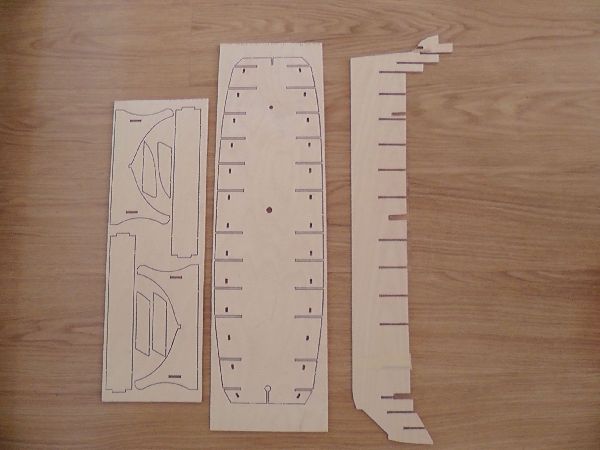
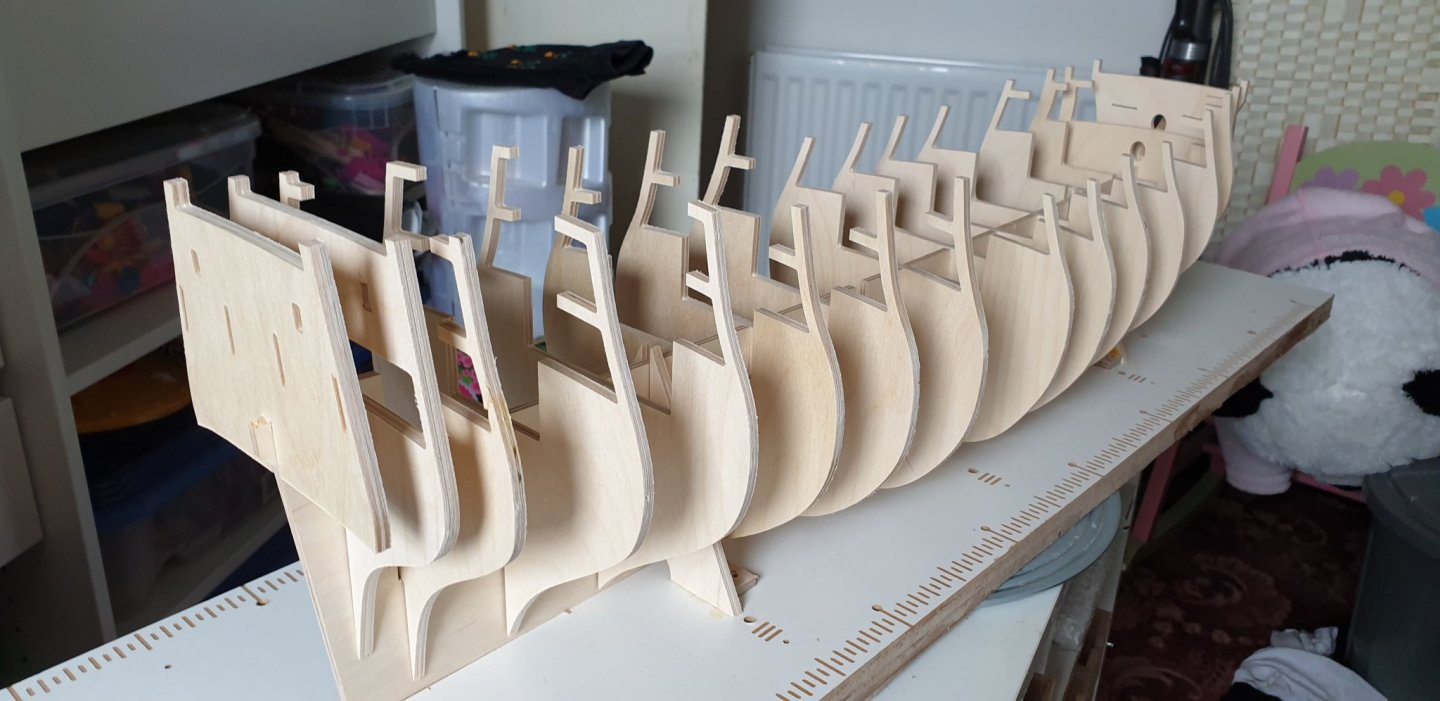
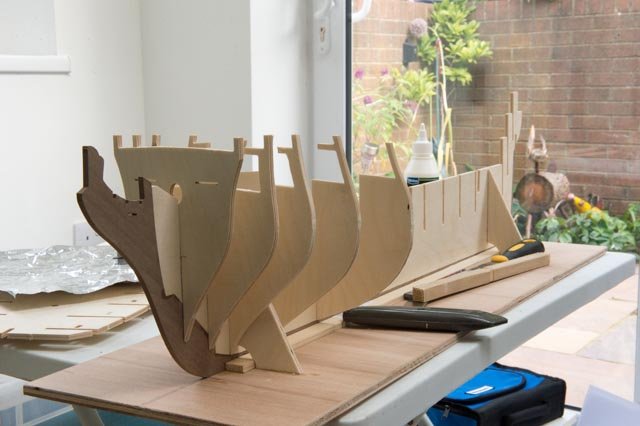
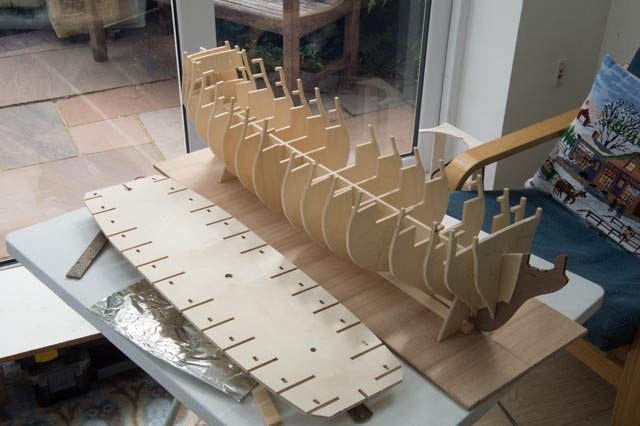
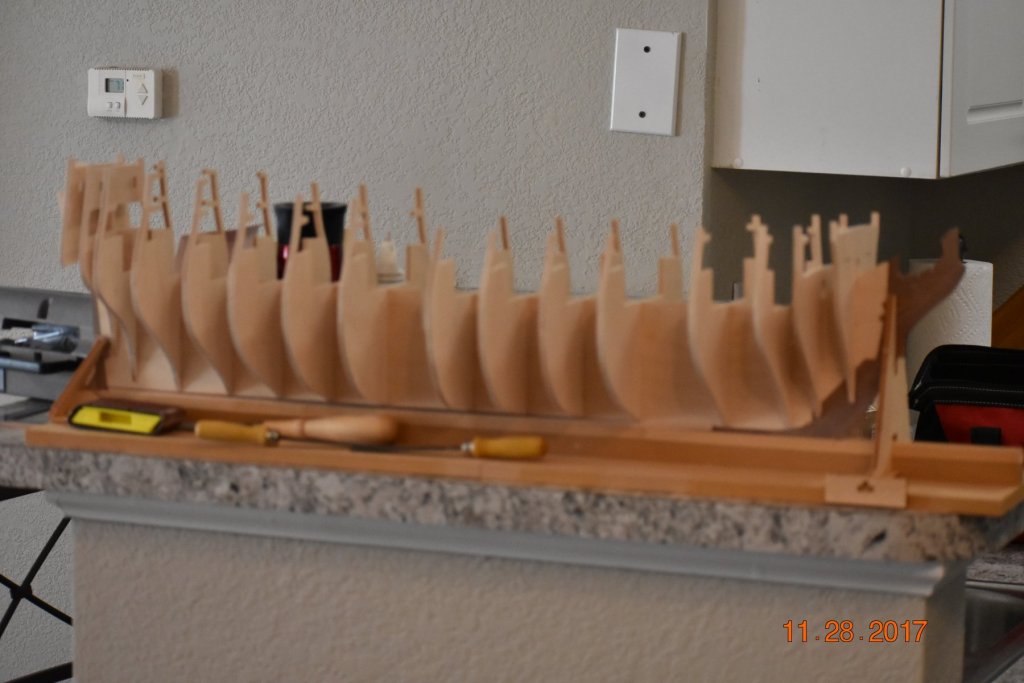
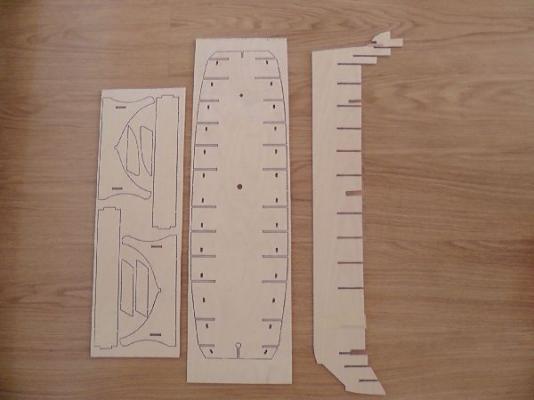
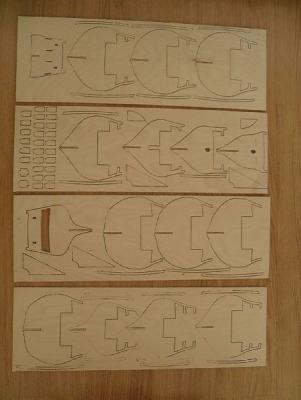
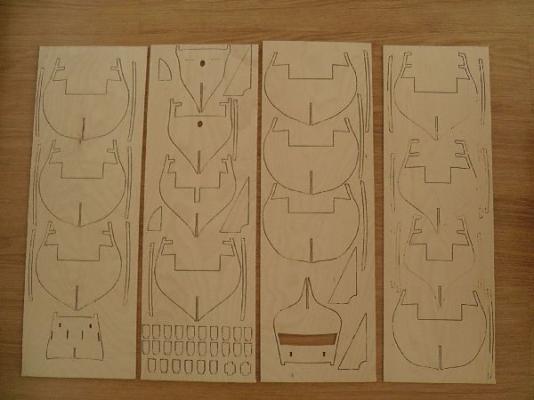
 Good afternoon all Well after reading so many excellent logs for some fantastic models, I have decided to build my own and share the experience... After a lot of reading research I decided to go with the Caldercraft HMS Agamemnon in 1:64 scale, please don't ask me for a reason,,, whilst reading through a lot I really liked the look of her, the more I read the more I liked,,, in addition I also liked the look of HMS Diana,, Diana will come later... Whilst I am not a beginner when It comes to modelling, I am a beginner when it comes to wood and ships, so please shout out when you see where I may be going wrong… This log hopefully captures my experiences both with kit and what I do to resolve any issues, I create and resolve So here goes,, These are the photos for the checking of the main keel and the bulkheads. As I planned on cutting into the bulkheads I required them to be fairly easy to put on and take off
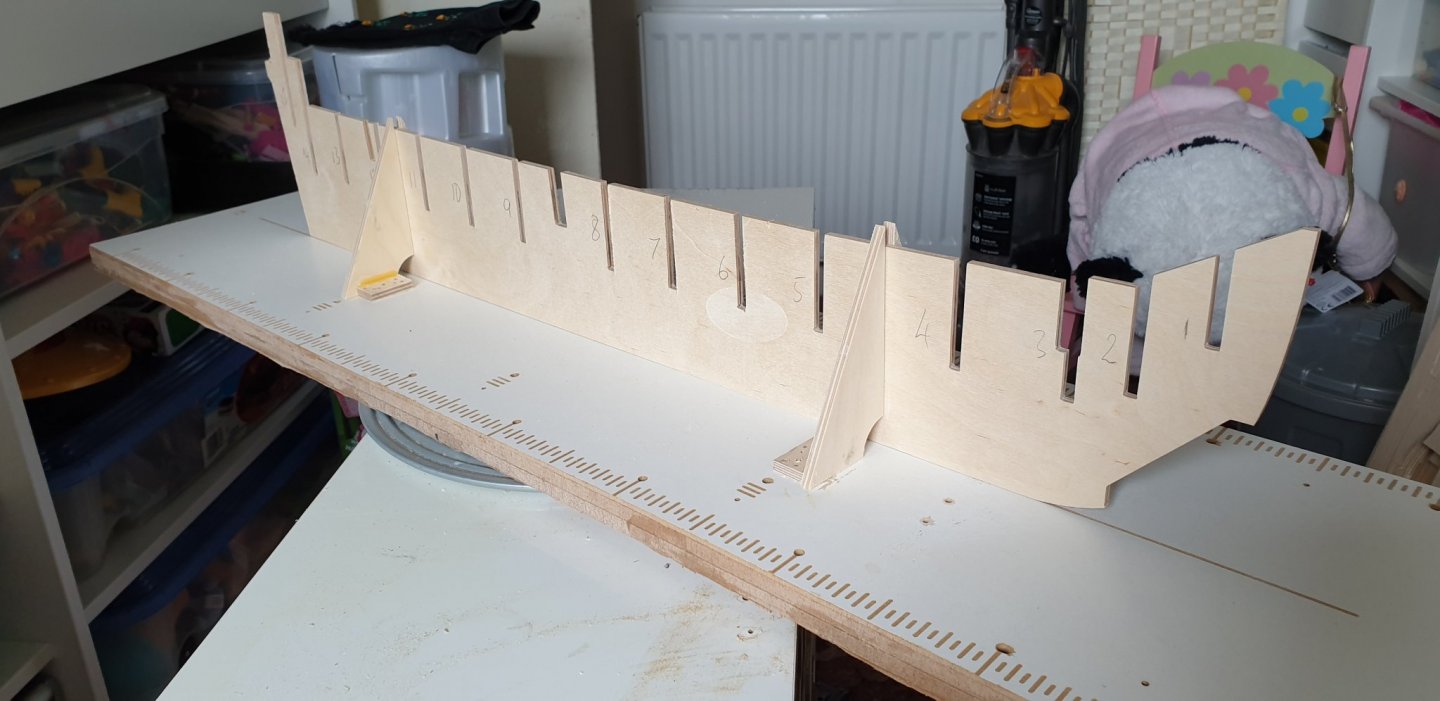


-
 Hello All, I've been 'stalking' a number of really well done build logs on the for the Caldercraft Agamemnon (Mobbsie, Henke, Vicnelson, etc.) so I thought I should contribute vs freeloading. This will be my second model ship, but the first in 30 years. My first was a Billing Boats Bluenose (of course I'm Canadian 😄) in 1990. Back then I needed something to do in the evenings while my wife finished studying for her nursing degree. My Bluenose has been on our mantle ever since and survived 7 moves over the years with only one major overhaul to repair accumulated damage. Fast forward 30 years, last fall I decided to jump back in to the water and go big with the Aggie, looking for a long term analog hobby. Progress was slow, but low and behold we seem to found ourselves in a pandemic and suddenly I seem to have nothing but time. A series of catch up photo's are included below to kick things off. Coincidentally, I'm almost exactly at the same point in construction as Henke (who appears to be much more skilled and patient than I am) so I hope to learn together a we continue. In general, I've discovered a few things so far. First, I would/should have spent more time fairing the bulkheads before and after gluing to the keel. I have a few lumps in the hull I would rather have not had to deal with but fortunately they aren't too visible. Second, I will be doing more dry fitting going forward. I made the same mistake Henke made by gluing the port and starboard bulwarks backwards (the etching outward), which I don't think it fatal. Finally, I would have been more patient getting the quarter galleries right. This has been the the toughest part so far. My wife an I will be doing our annual migration back north to central Saskatchewan at the end of this week, so I thought I should post this lump of pictures while I have a better internet connection here in civilization outside of San Diego. Please feel free to offer any constructive criticism or suggestions. I've got a thick skin! 😄 Regards, Trent


-
 Finally I managed to start a building log. I have unfortunately already more than 2 years behind me, so it is too late for the early stages. I have not figured out how to make good pictures yet, so these pictures are kind of a test....

- 122 replies
-
- 14
-
-
- caldercraft
- agamemnon
- (and 1 more)
-
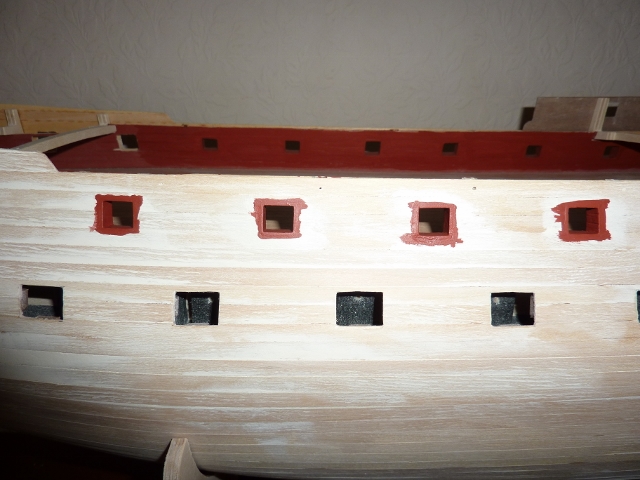
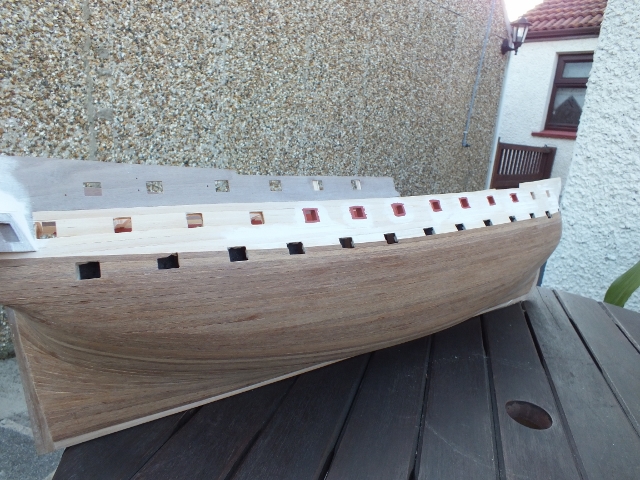
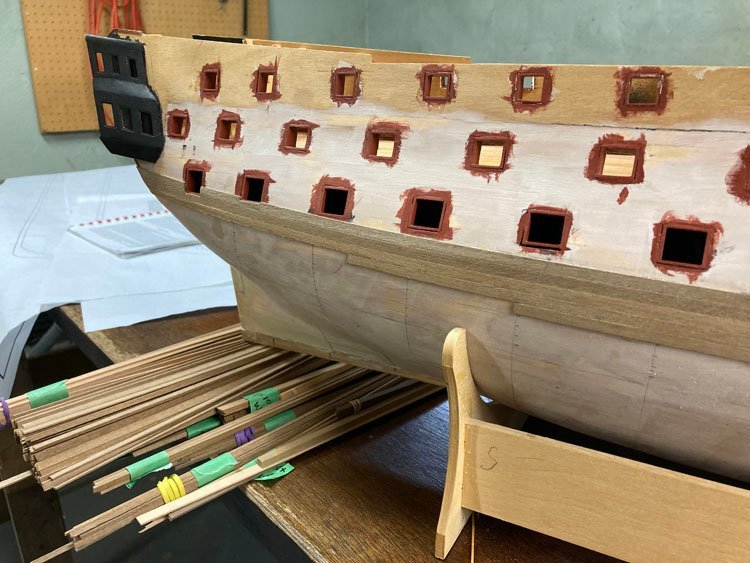
 Hi I acquired my Agamemnon kit from Jotika a few years ago. They are actually only 10 minutes away from where I live in Droitwich, really useful when looking for replacement bits and pieces. John is really good and has helped me out. Quite often taking the time to show me around the factory and the new products and improvements they are bringing in. And taking a look at the completed models in the showroom gives one a feeling of awe. Well initially me not not being totally prepared to be honest the build struggled or should I say I struggled. Now a few years later having a major declutter in my hobby shed I have reinvigorated my initial passion to build a scale model ship. I know it’s not the easiest kit to start with but with perseverance and help I am sure I will finally get there, even if takes a few more years. What has helped is the fantastic members and their build logs, without these the kit would still be in the box. I can only thank the members for their time and commitment it must of taken to compile the posts. I only hope that my meagre attempt might help another builder. Well the sunshine has spurred me on and I have now second planked one side and about a quarter of the way through the other. The hardest part has been the gun ports as you can see I still have a little making good on these. I would like to suggest to Caldercraft that they look at pre formed ply section like the Victory kit. It would make the build a lot easier for us newbies ! Sorry if I have blurbed on a bit but but I hope my log will help someone who has been going through the same issues as me, well here’s a few pics to start. My only hope for the next few weeks is to find the stand as this has disappeared from my shed or no doubt as the norm been thrown out by mistake. Thanks all Chris
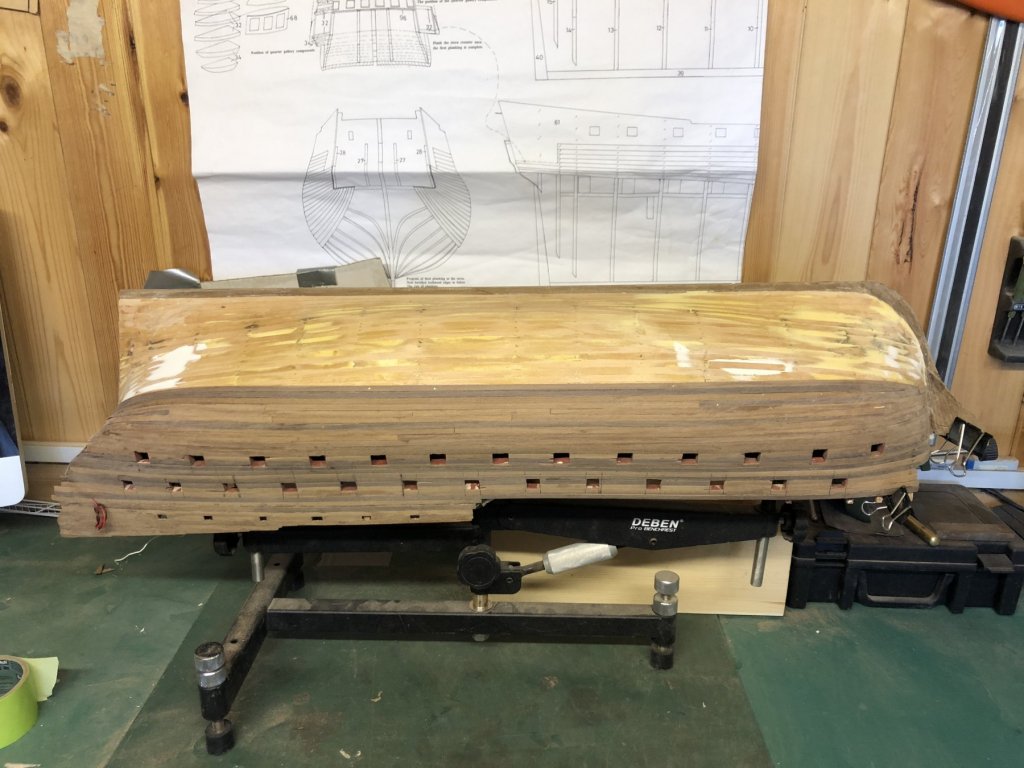

- 29 replies
-
- 8
-
-
- agamemnon
- caldercraft
- (and 1 more)
-
 Hello, this is the first time I have done a build log for a model so please forgive me if I get a few things wrong. I live in the North East of England in a little seaside town called South Shields. I was an electrical engineer & managed to take early retirement a few years ago to do a bit of adventuring before I got too old and broken. I started this model about 2 years ago but had to put it on hold as a few other project got in the way, like getting an extension built and making the loft space suitable for a model railway. I have built a couple of wooden models in the past from Billing boats so it was an obvious choice to go for something a bit bigger, what can go wrong! I have managed to take photos as I went along so I have something from each stage. Not sure what the protocol is for adding photos like file size or type. Here are a few pictures of the first phase. The main frames & the lower gun deck planking. I just did the part that could be seen through the hatches. My intention is to make the planking to look as authentic as possible with caulking and nails. That's all for now, I will add more pictures in the next few days until I have caught up with the build to date
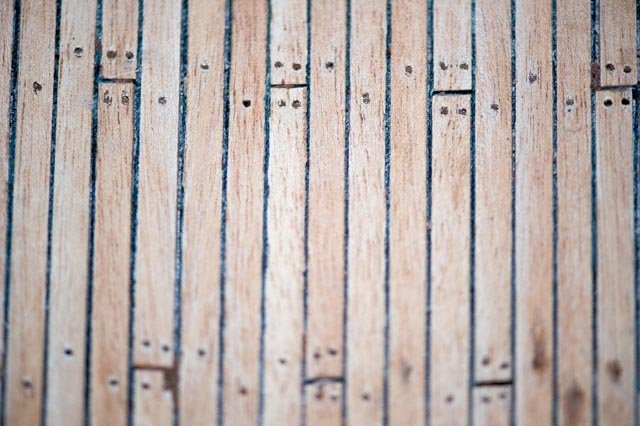


-
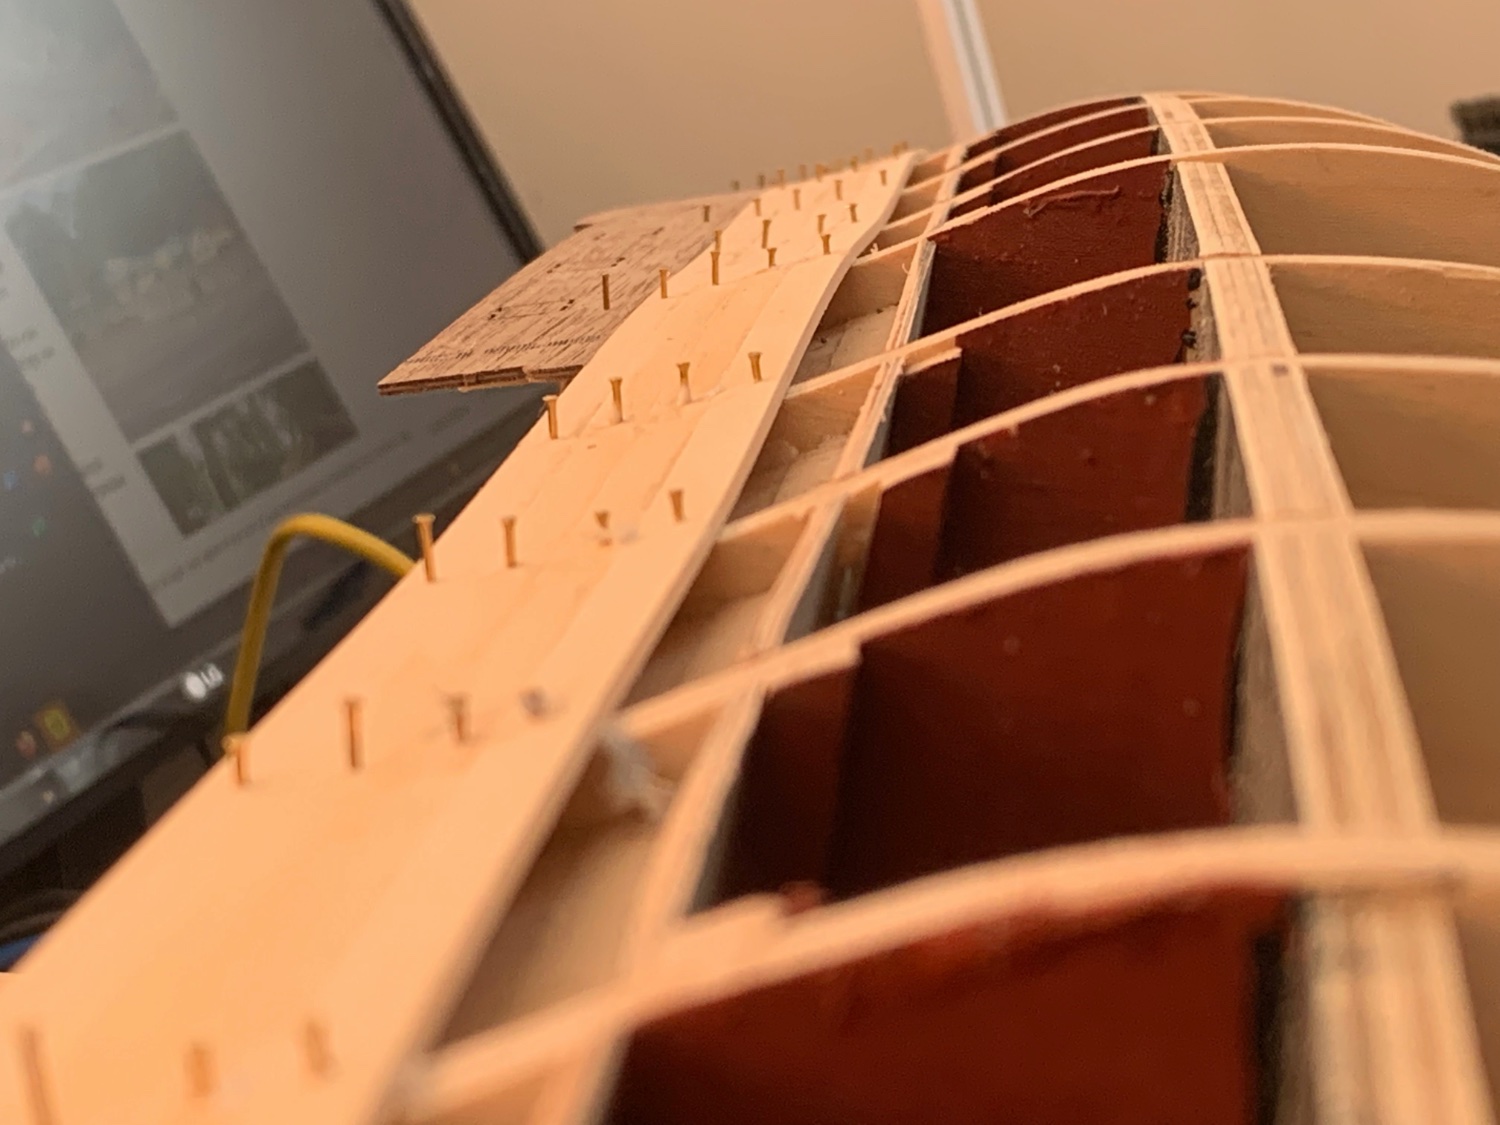
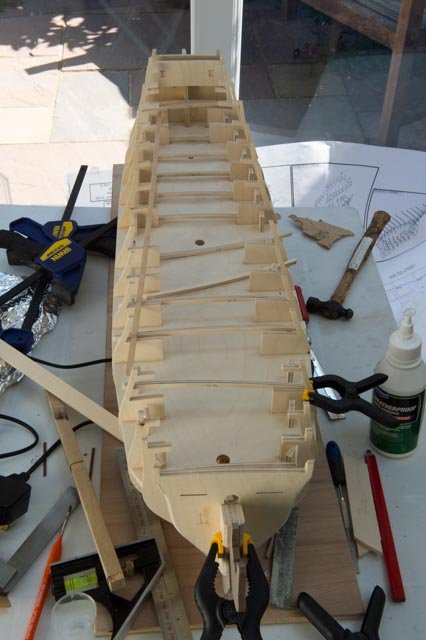
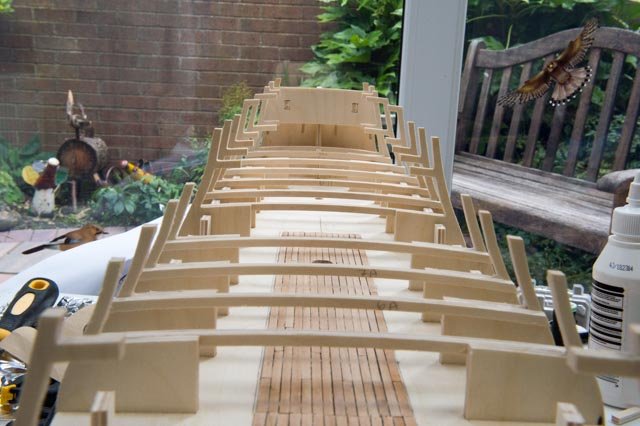
 Hi Guys, Here goes, as a newbie I dont have a clue as to what I'm doing so please bear with me !!!!!!!!!!!! I dont intend to rewrite the entire log and I dont have it saved so if anybody has any questions please dont be afraid to ask. Aggy arrived on the 16th January this year so I have been working on her for about a month now, progress has been steady but a little on the slow side compared to my usual build rate. The kit I find is very good in that everything fits as it should do if a little tight, theres a lot of sanding and rubbing down which is better than having a sloppy fit. The main problems I have had with her so far is a warped and twisted keel, These were resolved by putting a length of dowel down each side and glueing into position, this took out the warp, for the twist, that was taken care of when the lower gun deck was fitted so all in all I'm quite happy with the way that went. I have so far planked the lower gundeck beneath the companionway and hatches so that I dont see a bare deck, the upper gundeck has been planked useing 4 inch planks, a mistake I made here was to split the deck in two and plank seperately, I didnt put a master plank down the centre. The only thing in my favour is that there is very little seen of the upper gundeck so I think I will get away with that. The Top deck and Poop deck have been pinned on but as yet are not planked. I am in the middle of the first planking and am about half way, I am useing pushpins as opposed to 0.5mm pins to hold the planks in place so there is a lot of drilling, mind you there would still be the same amount of drilling if I used pins. I have now got to wait for the shops to open on Monday so that I can buy some more 1mm drill bits cos I busted the ones I did have, I tried 1.2mm but the hole is too big and the pins arn't gripped tight enough. Another problem useing that amount of pushpins is that your thumb hurts like hell, I'm gonna have to make some kind of padding. OK I'm gonna post some pics. Mobbsie I have placed Cant Frames in the stem as I was going to have trouble with the planking in that area, hopefully this will sort that out.


- 1,279 replies
-
- 9
-
-
- agamemnon
- caldercraft
- (and 1 more)
-
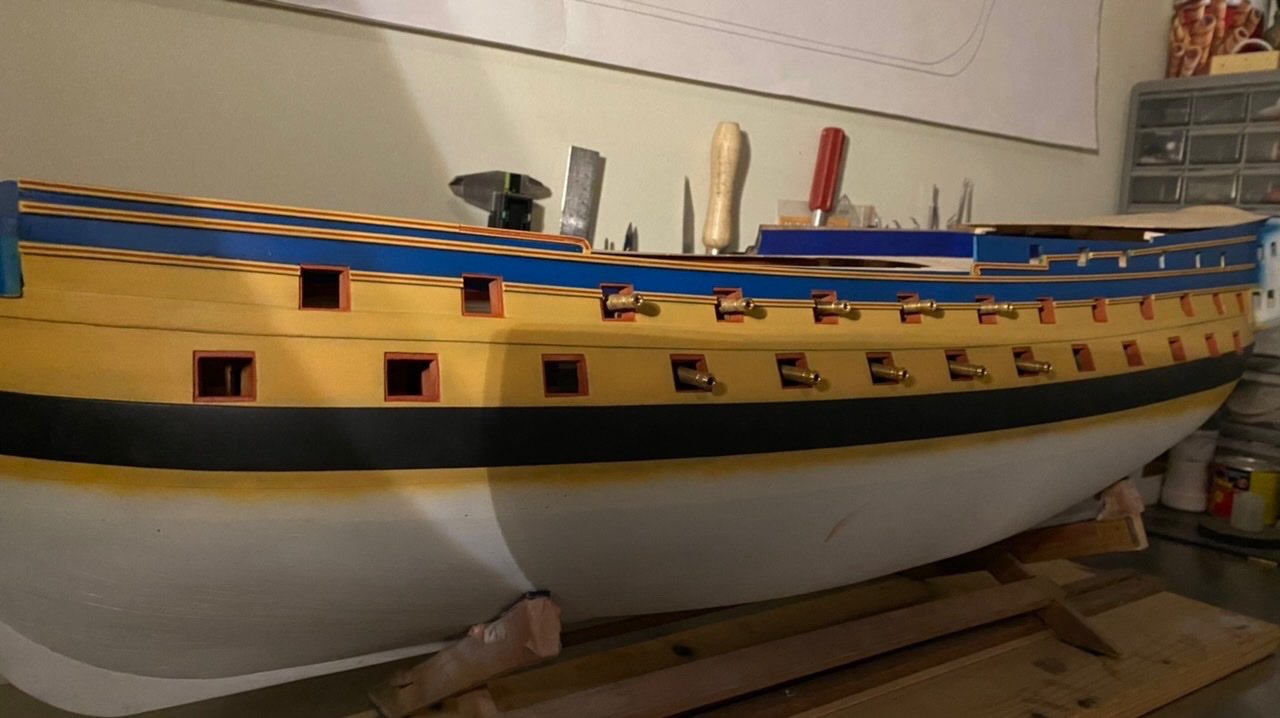
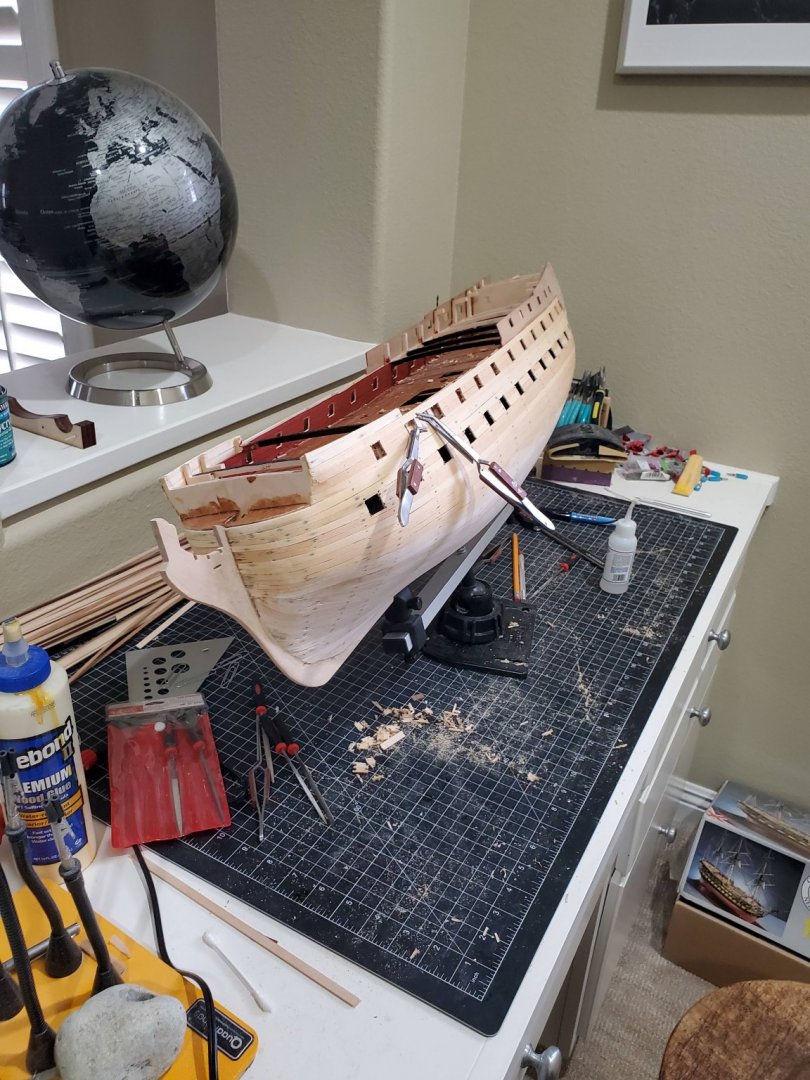
 I'm new to this forum, or any forum for that matter. HMS Agamemnon is my most ambitious model yet. Supplied by Cornwall Models in the UK. I was inspired to get this kit by Sandercott's build log http://www.sandercott.ca/modelships/agamemnon/agamemnon_build_page1.php and Harmut's log on Pete Coleman's site http://pete-coleman.com/forum/viewtopic.php?f=137&t=1593. I've been building model boats both wood and plastic since I was a wee one. I now prefer wood but still occasionally dabble in plastic, my last being a Tamiya kit of KGV completed in 2017. That said I'm still learning. My previous two kits came from the Del Prado magazine the Bounty and the Victory (1:100) which I enjoyed building but after seeing the very good quality of the Caldercraft kit I now realise these kits weren't all that great. Back to HMS Agamemnon (or Aggy as I call her when discussing my time in my 'man cave' to my wife - I think she understands) this was a Christmas present from her but I only started in early May due to other commitments (and waiting on some better weather to allow sitting for hours in a shed) but I have been getting on very well with the first planking completed and gunport construction underway just now. I've posted some photos which I hope others will enjoy and would appreciate positive feedback. I do have one initial question though - I've recently developed an allergic reaction to superglue (CA) and am now using Hypo cement as a replacement. Does anyone have a better alternative than this as I'm not looking forward to coppering the hull without a fast bonding adhesive. Vicnelson Photo 1. Starting on 4 May. Photo 2. Initial tructure complete and lower gundeck painted. Photo 3. making sure masts line up properly Photo 4. Upper gundeck planked Photo 5. 1st planking complete just some filling and sanding to finish. Gunports next...
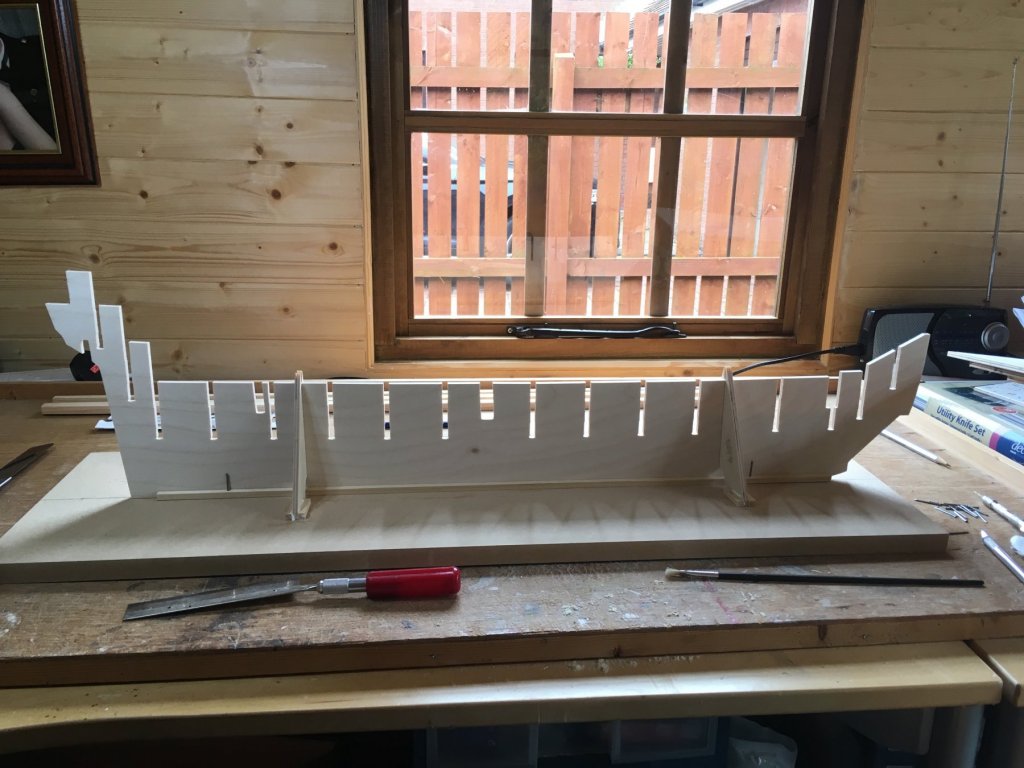

-
 Just opening a build log to get me underway. The kit is still in Auckland having travelled from Australia. I think I am in for a reasonable tax bill before Customs release her. It has been a week now and I am getting impatient to get the call from the post office to collect my hernia. That is not what I am nicknaming her yet, simply that I have heard the kit is very heavy. I read Mobbsie's build log. And once I saw the ship in the case I wandered what I had got myself into. It is huge! However, off to work to pay for the tax now. I shall update the log when I get it. All the best everyone. Eric
- 44 replies
-
- 1
-
-
- agamemnon
- caldercraft
- (and 1 more)
-
 In many respects I am a relative newcomer to the world of model shipbuilding. I recently completed, as my very first build, the HMAV Bounty (Caldercraft) and I am reasonably pleased with the end result. That said, it took me about eight years to complete the project; however in fairness to myself, the actual time spent actively working on the ship was closer to two years. Following retirement, most of my time has been devoted to building furniture, however, I recently sold my house and shop so woodworking had to be temporally suspended. Given the fact that I wanted to keep my hands busy, I dug the Bounty out of mothballs and began building. It took me awhile to get back into the rhythm of working in a smaller scale, but I soon rediscovered how much I enjoyed tinkering with these wonderful old ships. Given my limited experience as a modeler, the wisest course of action would have been to choose a much less ambitious project than the Agamemnon. I totally agree; but having found this website and after reading the building logs of such Master Builders as Sjors, Mobbsie and others, I knew that my next build would have to be the Aggie! ("Aggie" or "Aggy", I am not sure which is correct...but, since one of my degrees is from Texas A&M University, I'll go with Aggie). So, it is with this background in mind that I start this log. No doubt it will take me a very long time to complete this project and I am very confident that I will be calling upon the collective wisdom of this folks associated with this site to help me along the way. As you can see, I have the box with all of the necessary inventory, and I have started the build! Since I have never posted pictures before, I will close for now to be sure I understand the mechanics of the uploading process before I get too far ahead of myself. Thanks, Donn
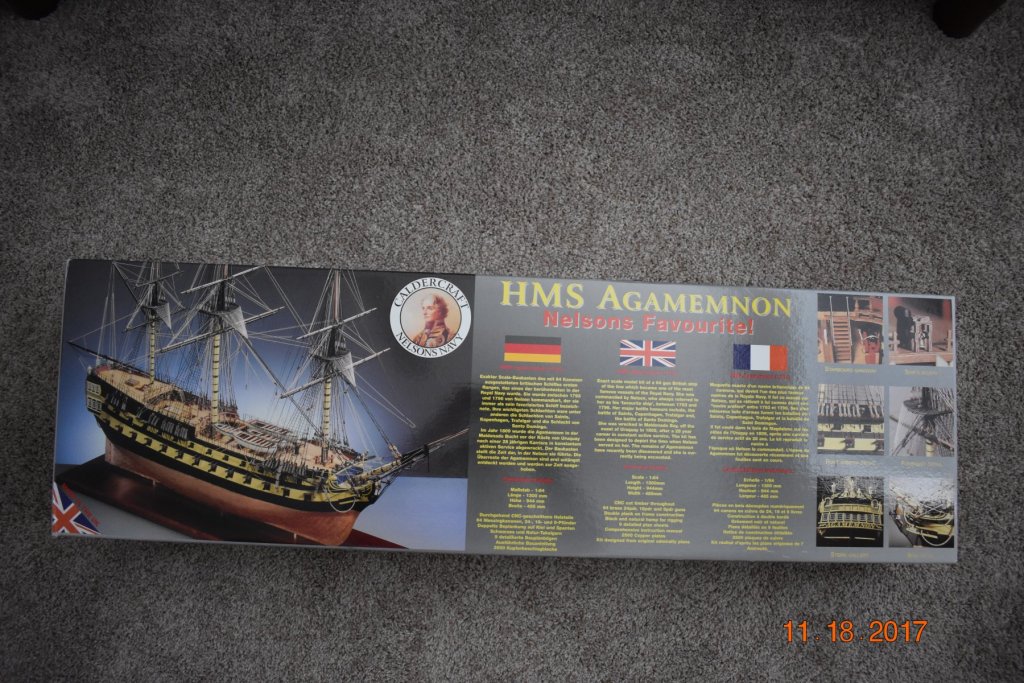
-
 Hello all, Thought it was about time I had a go at this. Not great with this sort of thing so hope this goes ok. Started my Agamemnon March this year, couldn't believe how big it was when the box arrived. This is my 3rd build, HMS Snake ( Caldercraft ) and Racehourse being the others. Followed Mobbsie and Decoymans Aggie builds and they have been a great help.


- 83 replies
-
- 12
-
-
- agamemnon
- caldercraft
- (and 1 more)
-
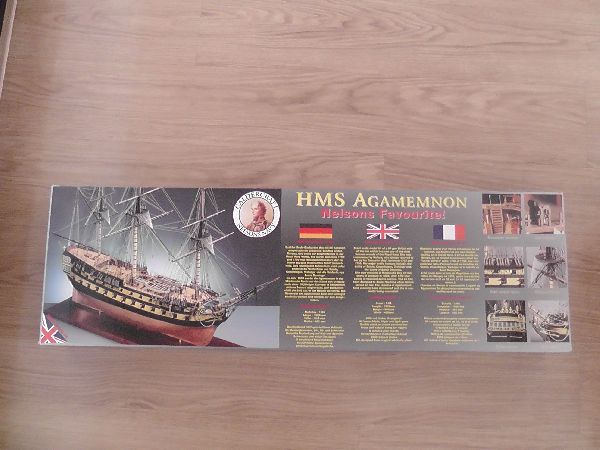
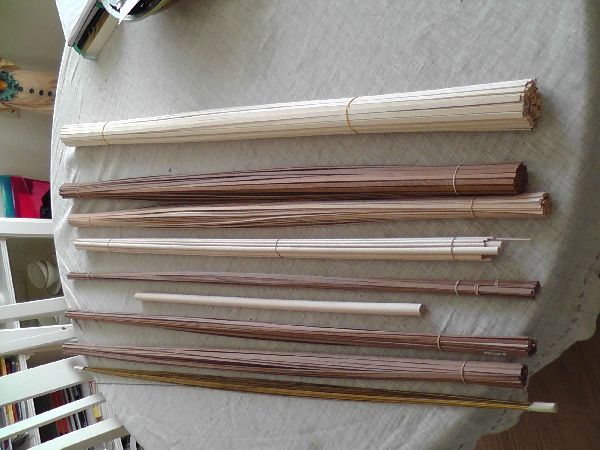
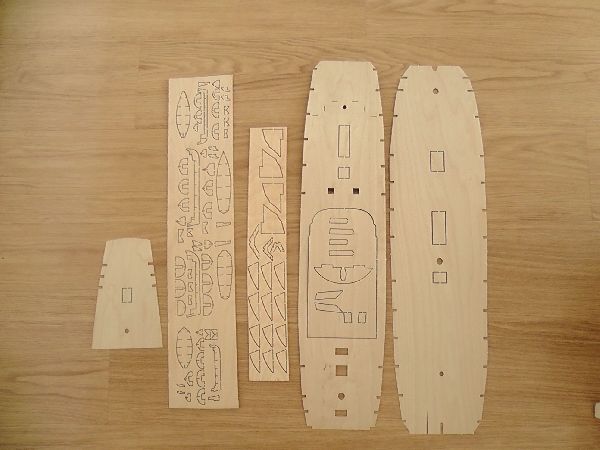
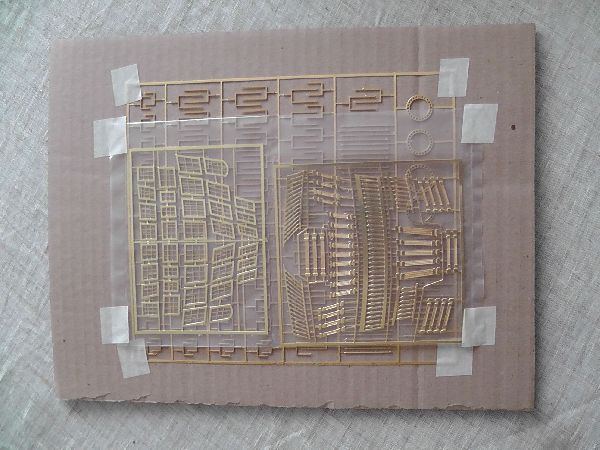
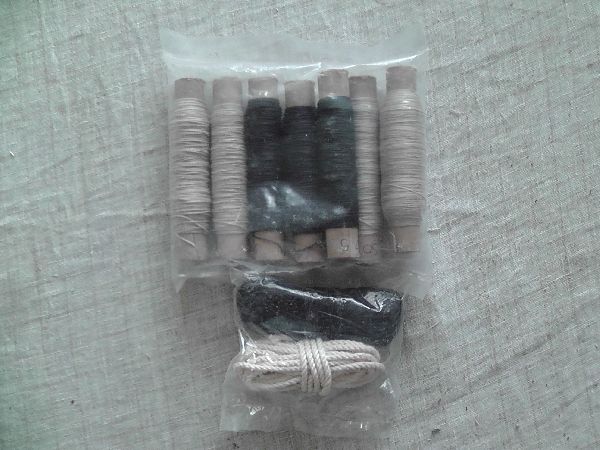
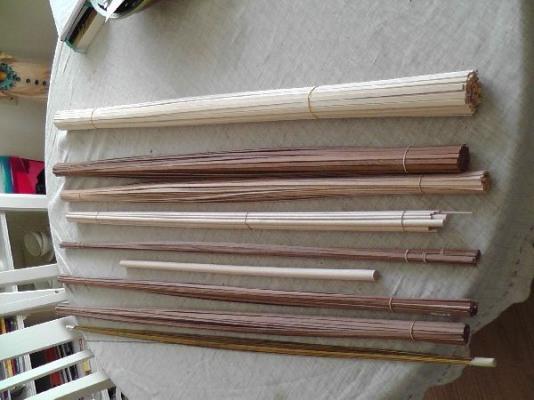
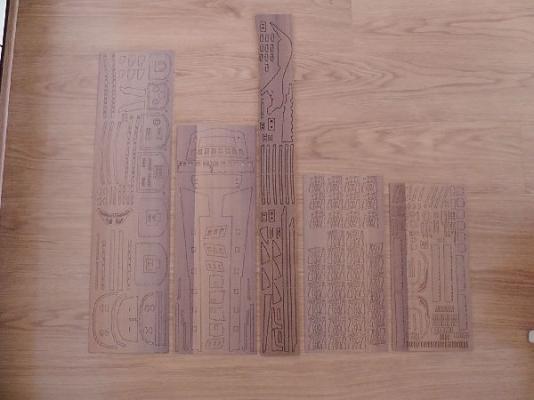
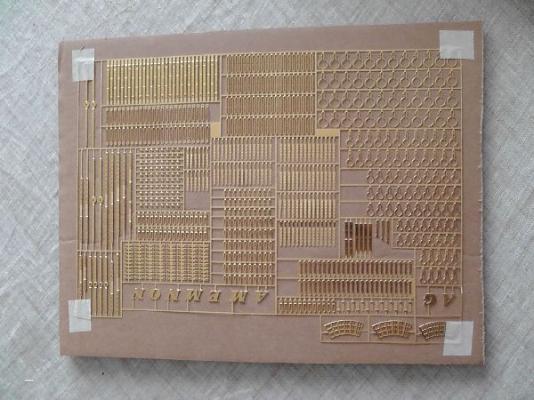
 Hello to you all fellow builders, As you know , Mobbsie has ordered the HMS Agamemnon for me and finally she is in dry dock in Schiedam. I will not start on her . I have first finish the Le Mirage. But when you have a new kit in the house , you want to show it. That's the reason why I open a build log…... First of course a little history lesson and later on the pictures of all the stuff that is in the box. When I start on her I know I need a lot of help and advise from all of you. I have a few great examples of other Aggy's and I know that Mobbsie will be there for me if needed. So let the lesson begins and hopefully it will not take to long when I can start building her. Caldercraft HMS Agamemnon 1781 1:64 HMS Agamemnon 1781 64 Gun 3rd Rate Ship of the Line 1:64 Scale. The Agamemnon was one of seven ships built to the same design, drawn by the same naval architect that designed the famous Victory, Sir Thomas Slade. Agamemnon was the third to be built in the class, the first two being Ardent in 1762 and Raisonnable, laid down in 1763. Third was Agamemnon, followed by Belliqueux in 1778, Stately in 1779, Indefatigable in 1781 and finally the Nassau in 1783. A Third Rate ship of the line like Agamemnon was an expensive warship to build. The construction of the ship’s hull with yards and masts fitted cost the Admiralty £20,579 (in today’s terms, approximately £12 million), a figure that did not include ordnance, sails, hemp, copper plating and other hardware. For three of the most crucial decades in British naval history, Agamemnon always seemed to be at the centre of the action, having no less than eleven battle honours. Agamemnon’s maiden voyage was on 9th July 1781 under the command of Captain Caldwell. Her first engagement was at the battle of Ushant on 12th December 1781 where the British fleet under Rear Admiral Kempenfelt defeated the French fleet and captured a significant number of ships, including the convoy the French were escorting. Agamemnon’s next major engagement was at the Battle of The Saints on 12th April 1782 where Rodney and Lord Hood’s fleet defeated Comte de Grasse’s French fleet. On 7th January 1793, Nelson learned from Lord Hood that he had been chosen to command his first ship of the line, the Agamemnon. Although initially disappointed that he had not been given command of a 74, Nelson soon grew fond of Agamemnon. Nelson wrote to his wife, Fanny. She was, he said, "Without exception one of the finest ships in the fleet, with the character of sailing most remarkably well". He also wrote after twelve days in a storm in the Mediterranean in "Gales and lumping seas but in Agamemnon we mind them not; she is the finest ship I ever sailed in, and were she a 74, nothing should induce me to leave her while the war lasts". Even a French Commander Admiral Alemand expressed the view that Agamemnon was one of the fastest ships in the British Navy. That, coupled with Nelson’s inspirational command made her a very potent fighting unit. Nelson commanded Agamemnon, or "eggs and bacon" as her crew affectionately called her, until 10th June 1796. In that time Nelson had proved to be a great Commander, tactically and physically. It was during his command of Agamemnon that Nelson lost the sight of his right eye. When at the Siege of Calvi in 1794 during the morning of 10th July, Nelson was hit in the face and chest by splinters, stones and sand that were thrown up by an enemy shell that hit a battlement during a shore action. On 13th June 1796, Nelson’s broad pennant was transferred to the 74 gun Captain at anchor in San-Fiorenza bay. He watched the worn out Agamemnon sail to England for a much-needed refit. She was refitted from the bottom up at Chatham. When re-commissioned in 1797 she was ordered to join Admiral Duncan’s squadron off Yarmouth, which was keeping watch on the coast of Holland. She was immediately caught up in the naval mutinies of that year. Agamemnon was however considered untrustworthy by Richard Parker the leader of the Nore mutineers and had the guns of the mutinous ships trained on her to ensure she did not ‘blackleg’. Subsequently in the proceedings that followed all thirteen of Agamemnon’s crew who were tried were pardoned. Agamemnon’s next major fleet engagement was the battle of Copenhagen on the 21st April 1801. Unfortunately she was grounded on a shoal for most of the action, but Nelson won the battle and a truce with Denmark was negotiated. On the 21st October 1805 Agamemnon took part in the battle of Trafalgar. When Nelsons favorite ship hove in sight a week before, with Nelsons old friend Sir Edward Berry in command of the Agamemnon, Nelson was delighted "Here comes that damned fool Berry! Now we shall have a battle." At Trafalgar the 27 British ships of the line defeated the Franco Spanish fleet of 33 line of battle ships in a victory that ensured British supremacy of the sea for the next 100 years. Later in Agamemnon’s career, she served in the West Indies, taking part in the battle of Santo Domingo, and then in South American waters. Agamemnon was wrecked in Maldonado Bay off the coast of Uruguay on the 16th June 1809. Divers have recently discovered the remains of HMS Agamemnon on the bottom of Maldonado Bay, after a six-year search by marine archaeologists. Strewn around the site are hundreds of copper plate, as well as a 24 pounder cannon, parts of the pumping devices as well as a significant amount of shot, bolts and copper nails. Also discovered was a silver pocket seal, complete with fob chain. On its face of translucent stone it bore a star shaped emblem with the name ‘Nelson’ in mirror image incised in a curve above. Agamemnon was laid down at Bucklers Hard in May 1777 and launched on the 10th April 1781. Her dimensions were as follows; Gun deck - 160 feet 2 inches Keel- 131 feet 10 1/4 inches Beam - 44 feet 5 inches Tonnage - 1384 tons Guns; Twenty-six, twenty-four pounder - Gun deck. Twenty-six, eighteen pounder - Upper deck. Twelve, nine pounder - Quarterdeck. Complement - 491 officers and ratings. The Caldercraft Agamemnon kit features: Double plank on bulkhead construction, Keel and bulkheads are CNC cut in Birch ply as are all the major constructional parts. Extensive use of CNC cut Walnut has been employed for the majority of visible structures and fittings. The wood strip pack contains Lime wood for the first planking, Walnut for the second planking and Tanganyka for the decks. Ramin dowel is supplied for the masts and yards. Walnut and etched brass stern gallery windows, with the remaining tafrail decoration in finely cast white metal. Scale brass cannon barrels with walnut carriages. Rigging thread is supplied in natural and black to rig the model as depicted in the photographs. Beechwood deck gratings and Walnut Blocks and deadeyes. Shroud cleats, trucks, stunsail yard brackets as well as CNC cut Walnut tops, crosstrees, trestle trees, mast caps and a wealth of unique detail parts. Copper plates are provided to sheath the hull bottom. Fully detailed full size plans and a comprehensive construction manual. Specifications: Scale: 1:64 Length: 1300mm Width: 490mm Height 945mm Planking: Double


- 1,616 replies
-
- 21
-
-
- caldercraft
- agamemnon
- (and 1 more)
-
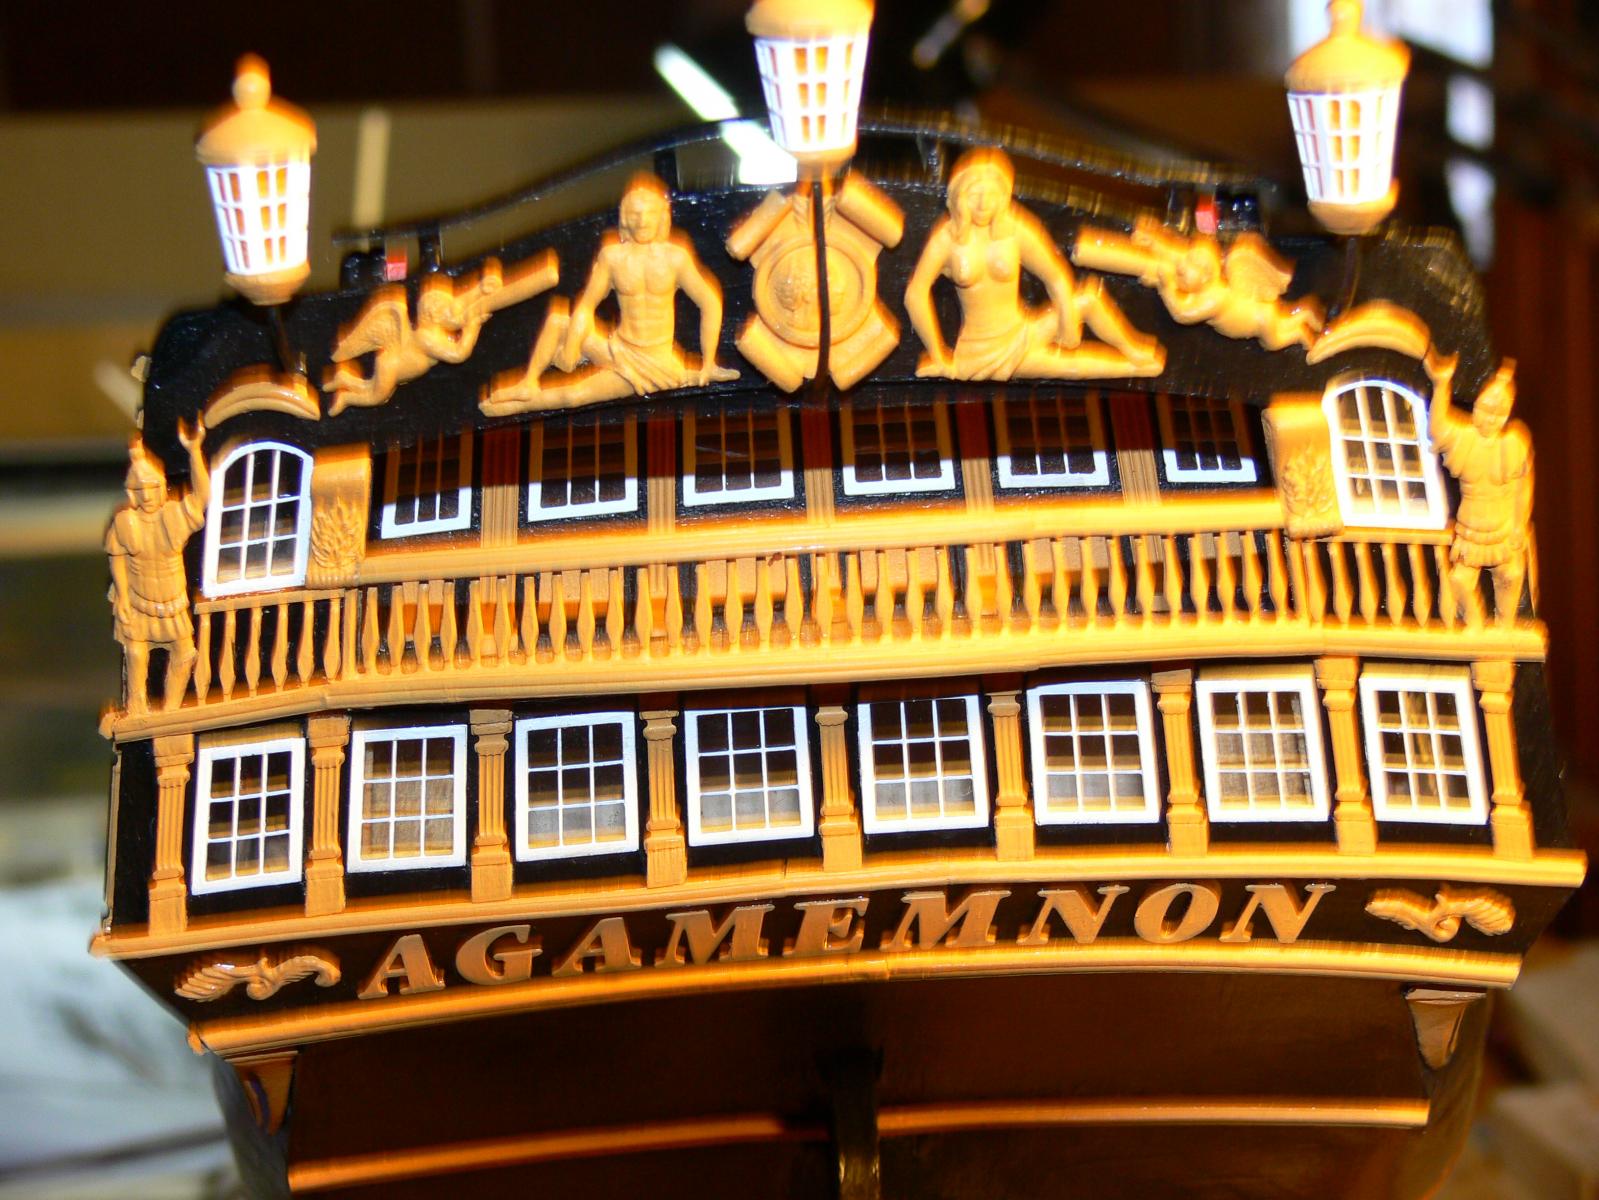
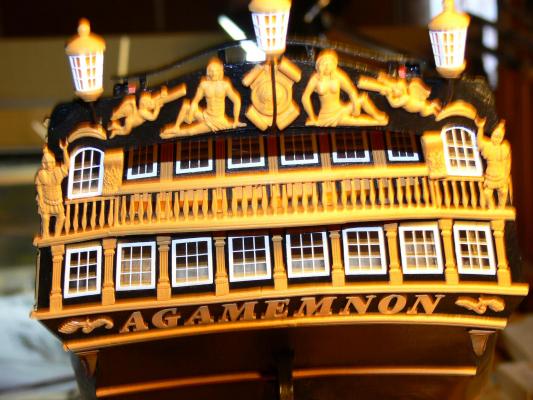
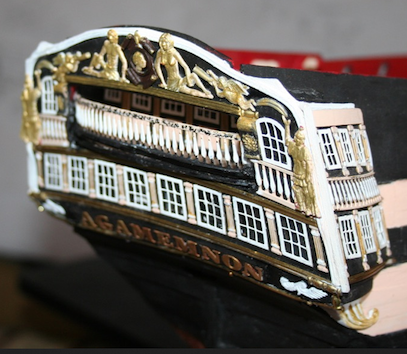
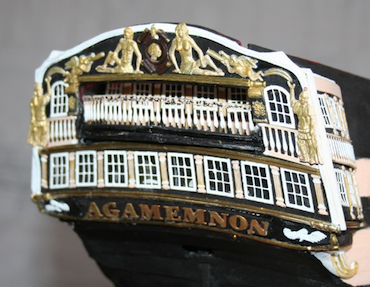
 My work on the HMS Agammemnon is progressing smoothly.I was not satisfied with the stern decoration of the kit, elements that were separated and glued without any link between them, lack of decorative parts, etc ..This is my attempt at modification which I am submitting to your appreciation. The lanterns are still missing.Thank you for your comments,Have a nice day,Alain
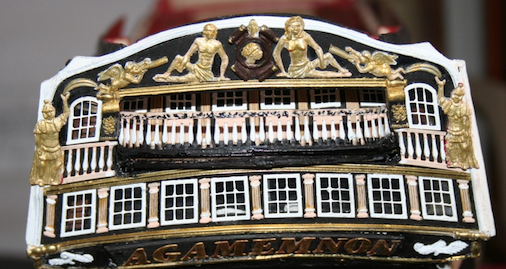
-
 Well, my first building log!! I started building my Aggy about 5 years ago, but by several circomstances I stopped building for a few years. For a year now I work every day one my Aggy. Plenty of time (retirement). I still have to figure out how to attache photos of my Agga. All fotos are 6-8 mb, so far much.
- 214 replies
-
- 5
-
-
- agamemnon
- caldercraft
- (and 1 more)
-
 I am running around this forum for a few years to learn, so its time to start a log about my build of the HMS Agamemnon. Started 2 years back, and since i am a slow builder i can show you all a collection of pictures to where i am at this moment. The hull isn't finished yet. My build took so long because i changed a lot on this ship. My decks will be opened like on a navy board model. First i have to climbe on board to make more pictures from what i have all changed More coming soon
-
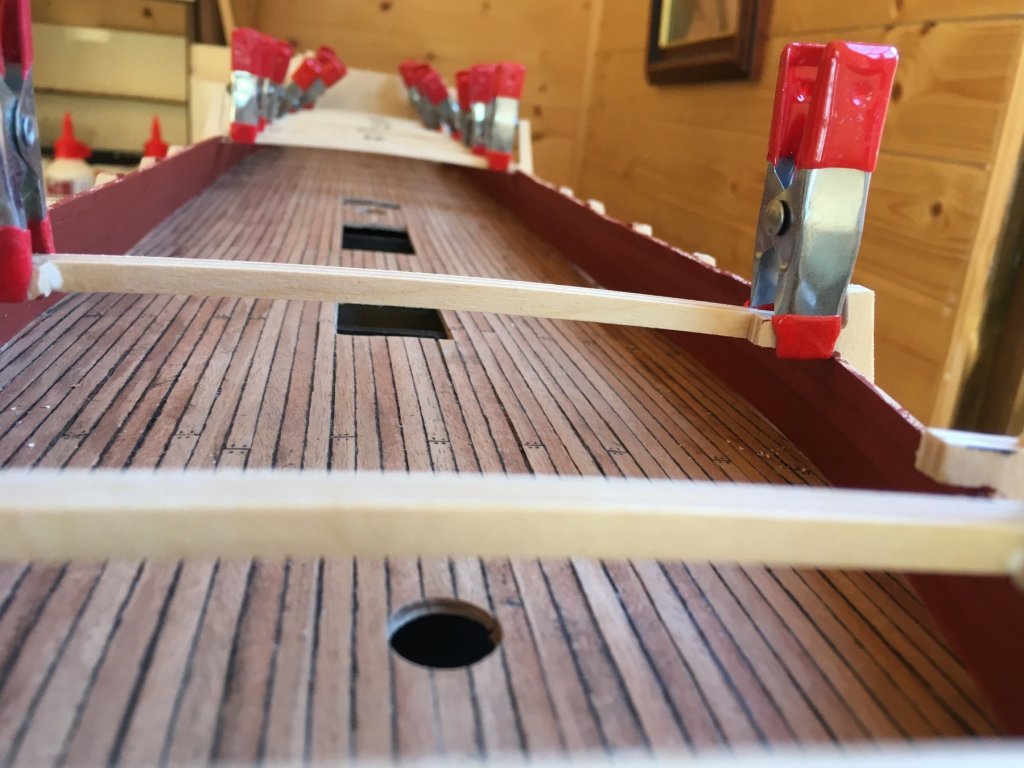
 Hello, I am glad to be back on the new forum after a long silence. I am a very very slow builder. I started my Aggie in 2010... Here are somme pictures of some previous steps and the present situation. I am making a first test to see if I can properly use the new features of the site. It seems it works. You see here the way I installed (temporarly) the pedestals. Here, some planking on the main gun deck, in case they should be visible from above. First half of the upper gundeck in position. Planking of the upper gundeck completed. The same varnished. I stop now. This is a first test. More pictures are coming later. I just finished the first plankig of the hull.


-
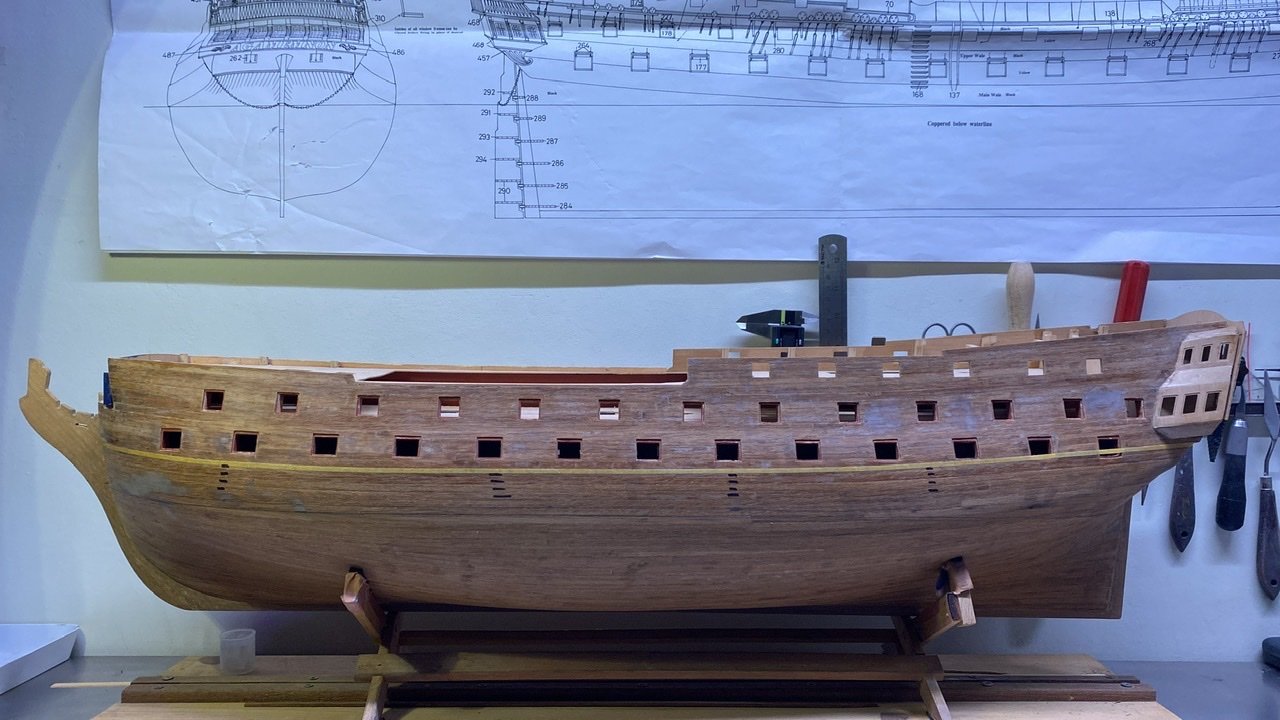
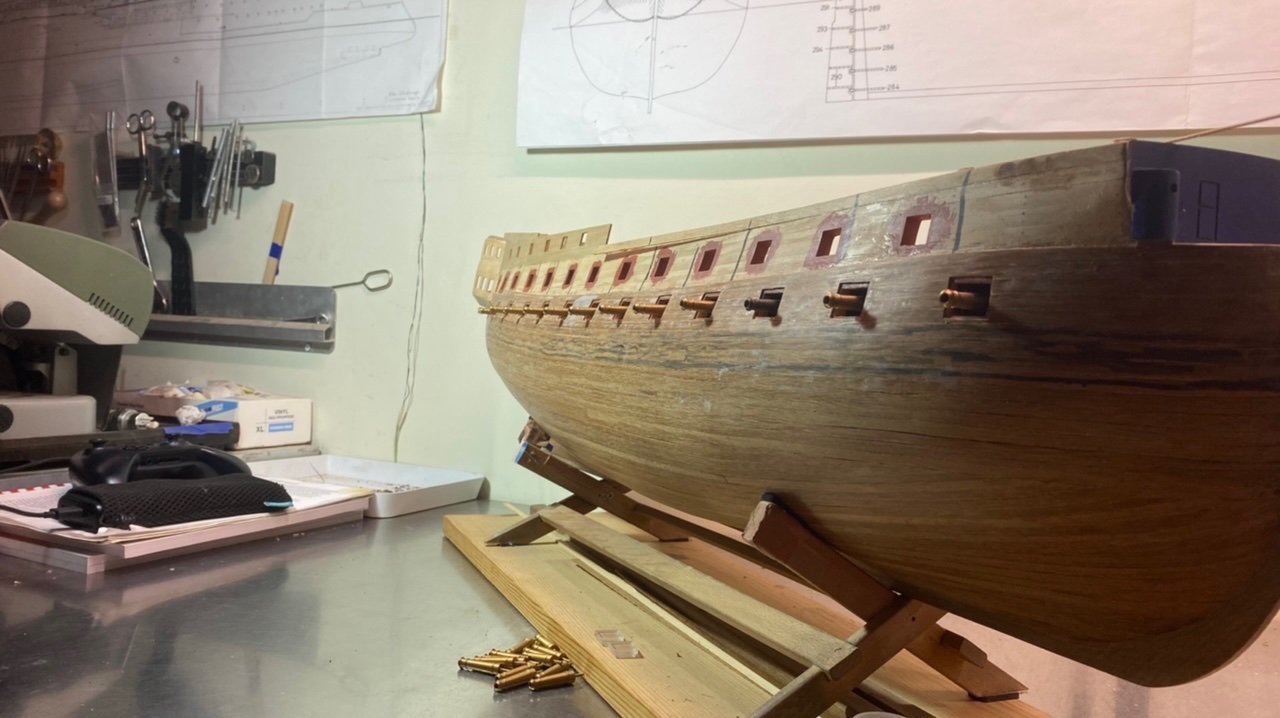
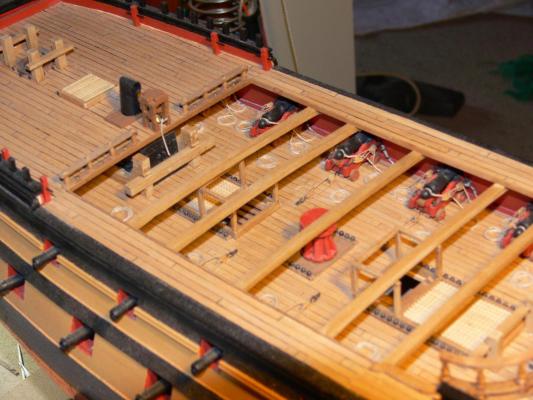
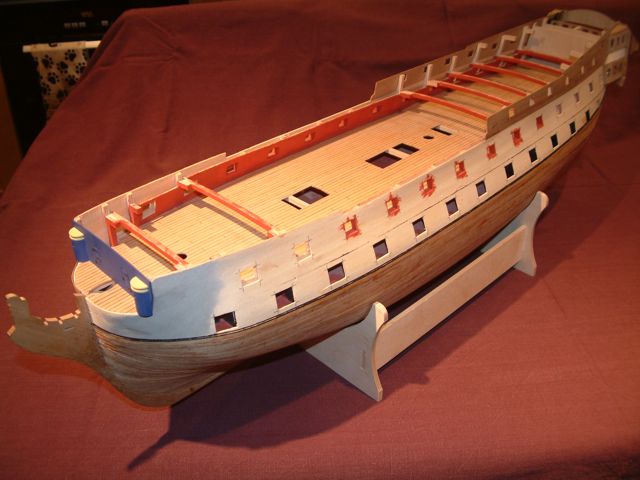
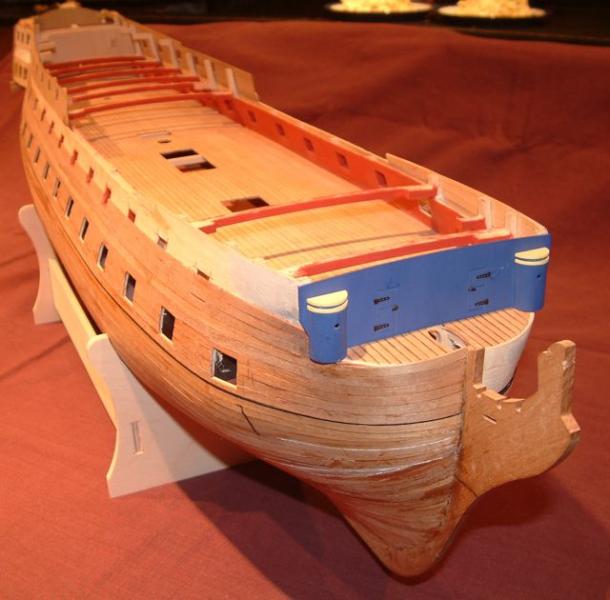
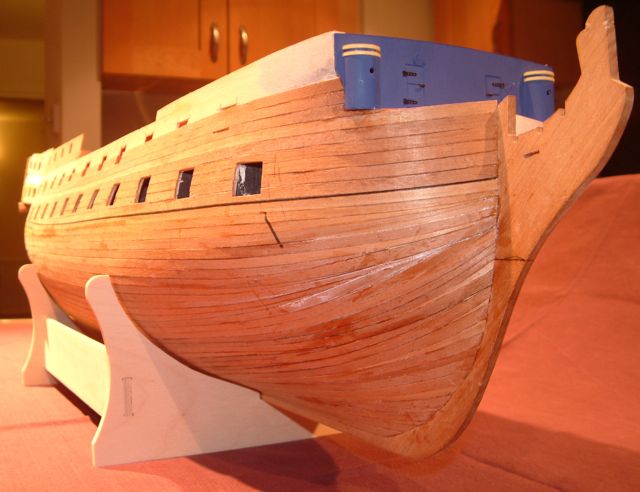
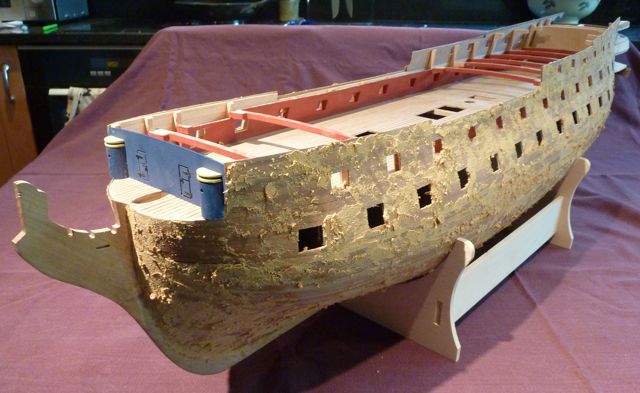
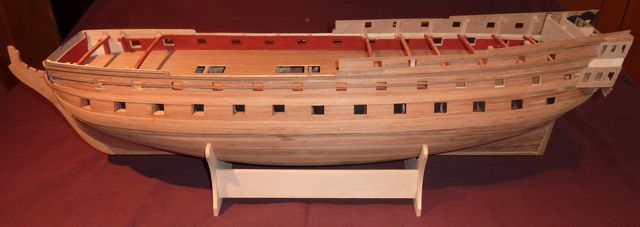
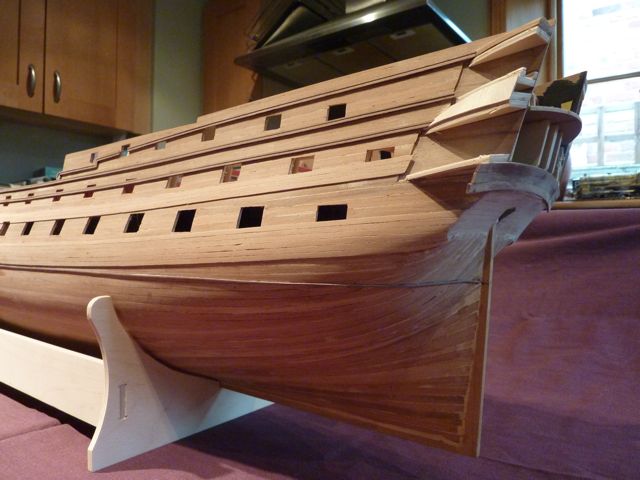
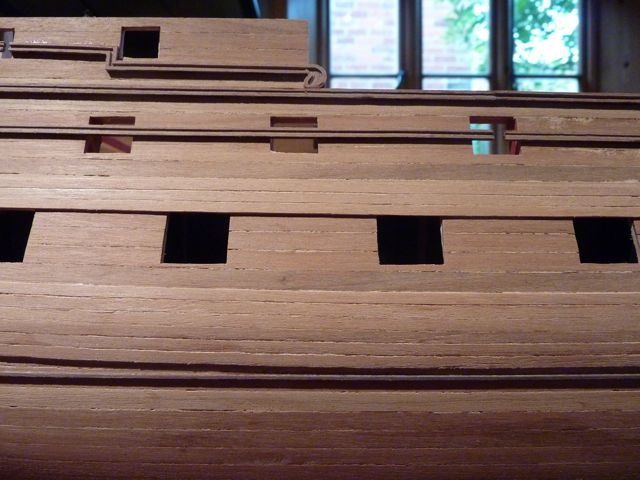
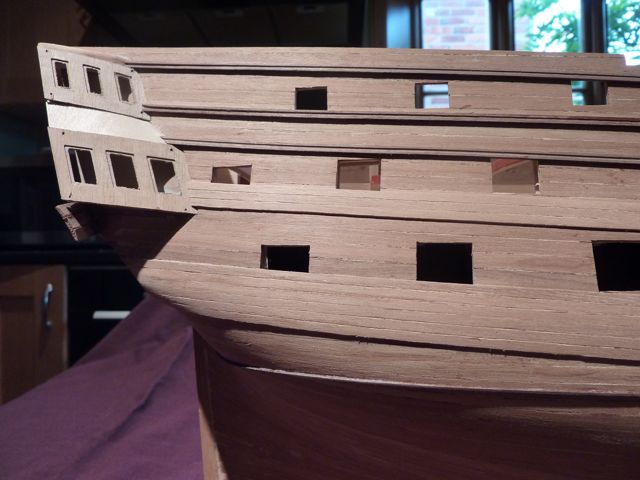
 This is my previous log - HMS Agamemnon the Seven Year Itch - reposted following the Great Crash of '13 (if you can remember it you weren't there...). In fact the earlier title was getting more and more out-of-date since the build has now taken me in excess of ten years and I'm still not finished, so a change to something a bit more prosaic was probably in order. I've done a few other bits and pieces in the meantime, mind you. I started taking photos of my model at the same time as I started my log. At this time I had got as far as completing the first planking and the second planking from the wales down to the keel. The quarter gallery patterns are temporarily in place to act as a guide for the planking. You can see that the main gun deck has also been planked. In this three-quarter view there is a noticeable patch of filler, which I added to the first planking to fair the bows to a better profile. Obviously none of it will be visible once the second planking is added. Another three quarter view, this time of the starboard side. I'm a bit further on with the second planking here. And another, this time from a lower viewpoint. I've included this shot to show how the second planking was not the tidiest ever. This was before I had read the articles in the Database and the helpful threads in the technical sections. Next time I aim to do a much neater and more prototypical job. Not that it mattered because I always intended to paint the whole of the hull, so more filler was an easy option.... And here she is, encrusted with wood filler before rubbing down. I think I could have been a bit more sparing really! However, after vigorous sanding she looked like this: I've added the wales and some of the mouldings, but not yet finished cutting out the gun ports. Finally here are some detail shots of the same stage. More in my next up-date.

- 35 replies
-
- 1
-
-
- agamemnon
- caldercraft
- (and 1 more)

.JPG.8439daa0fdd74e28872cd47af622461f.JPG)