Search the Community
Showing results for tags 'bounty launch'.
Found 21 results
-
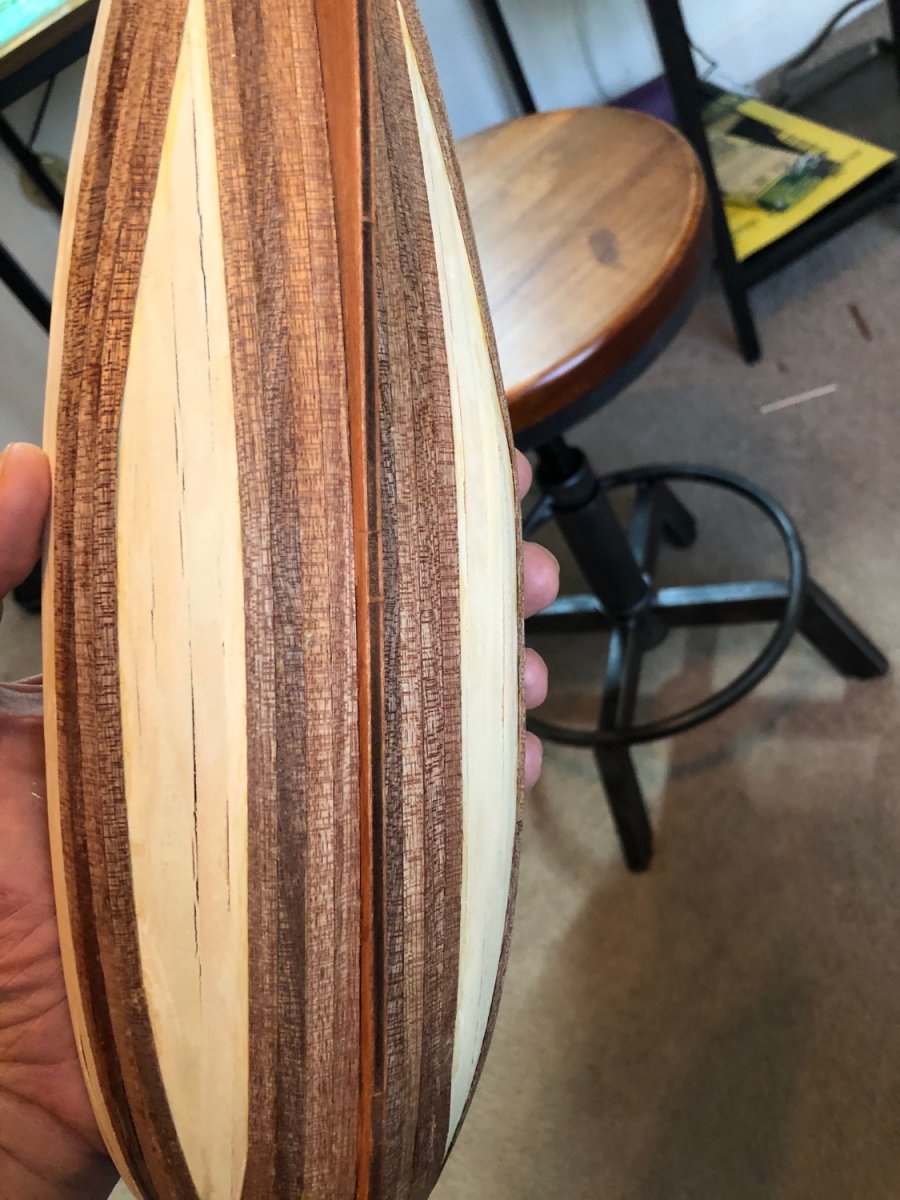
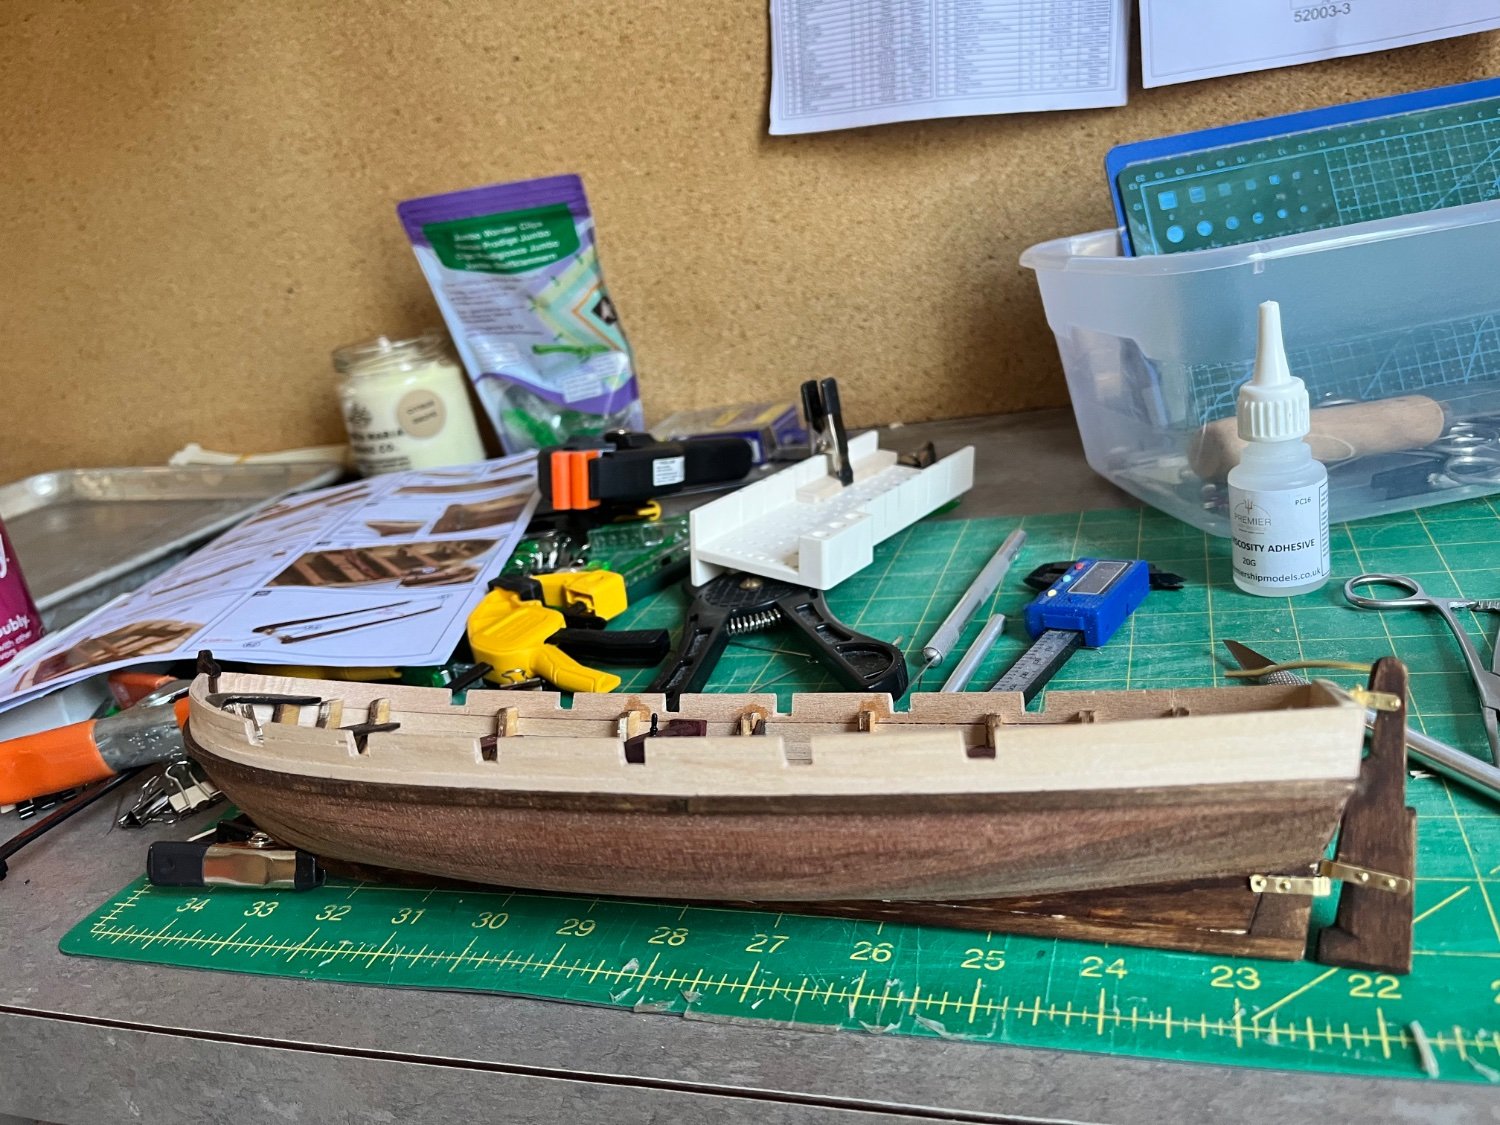
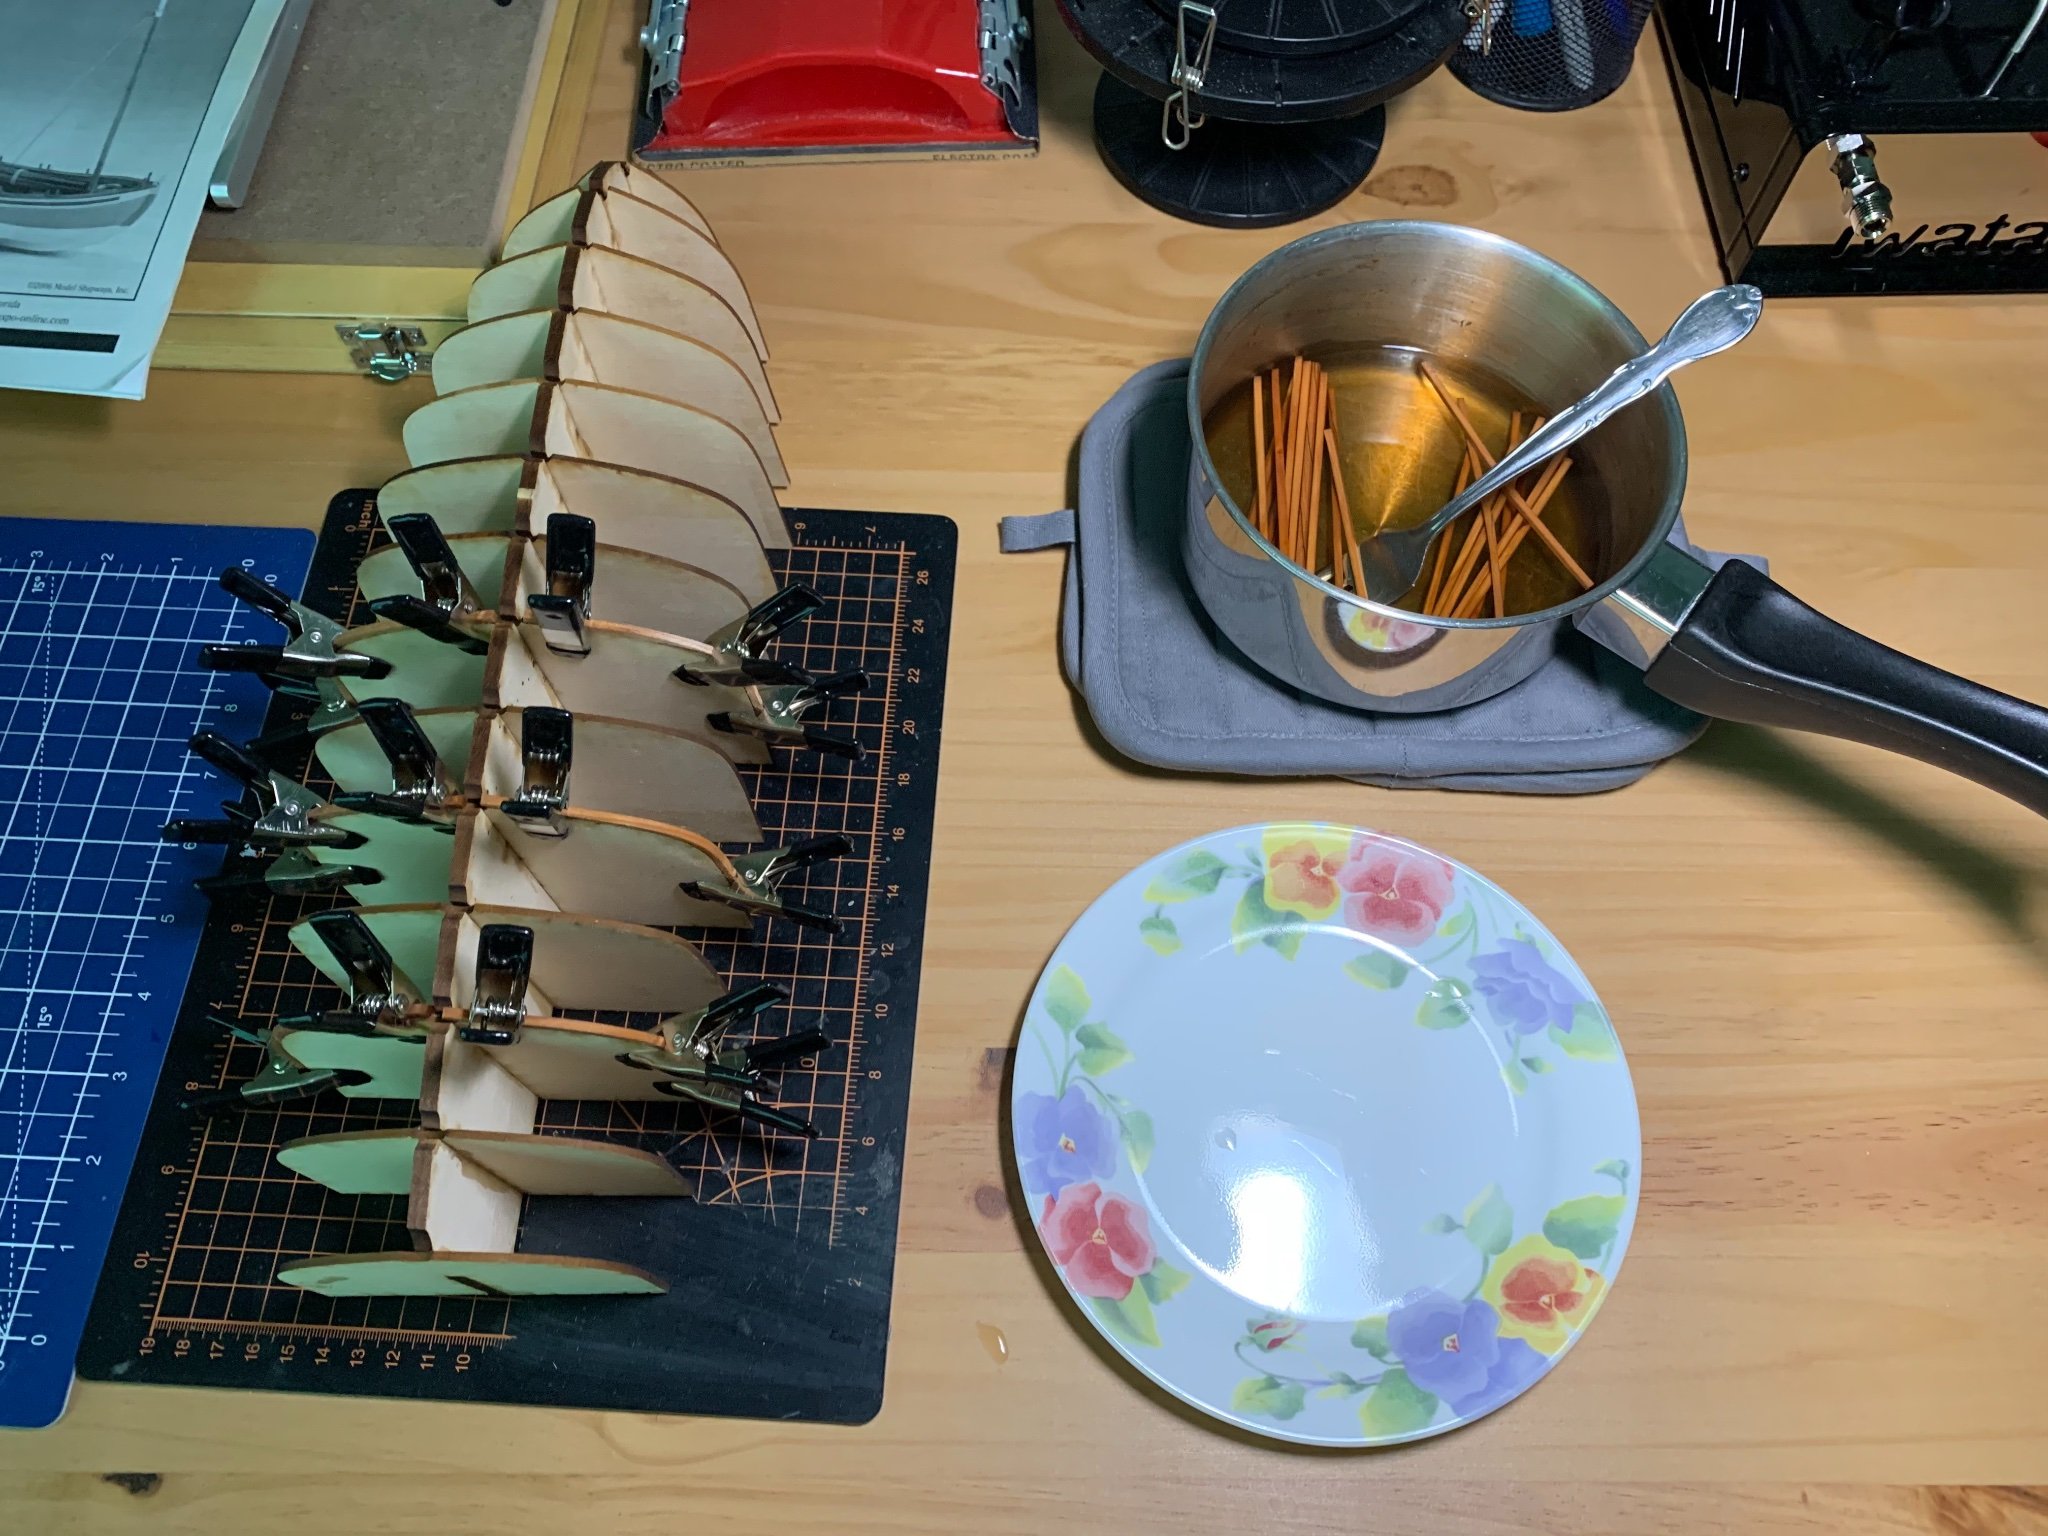
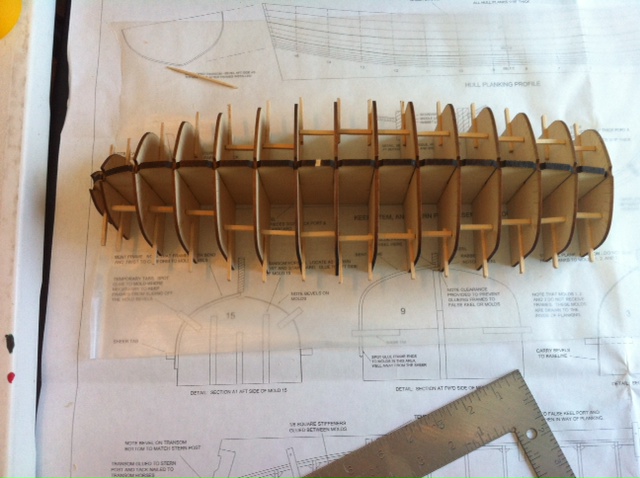
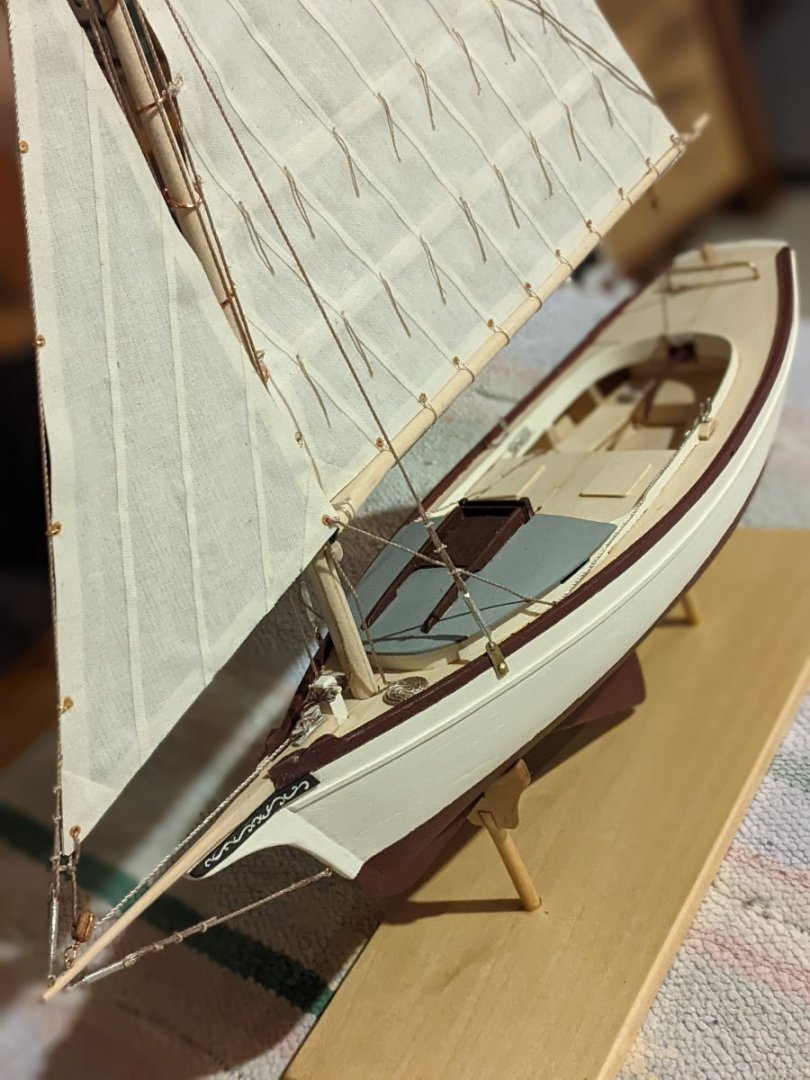
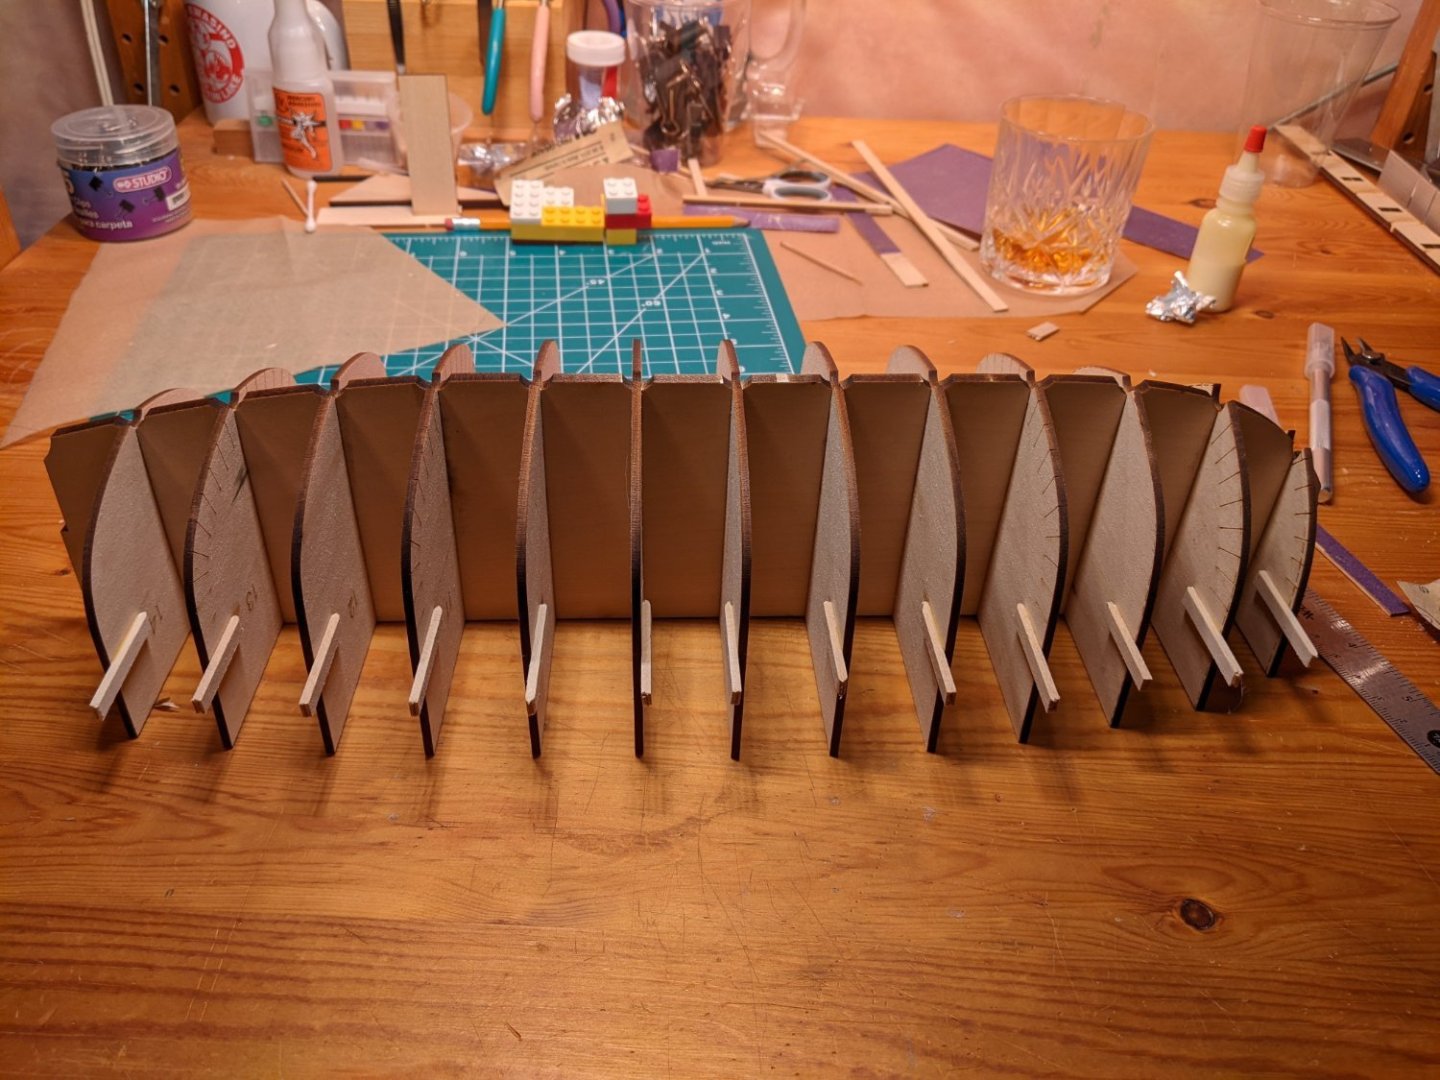
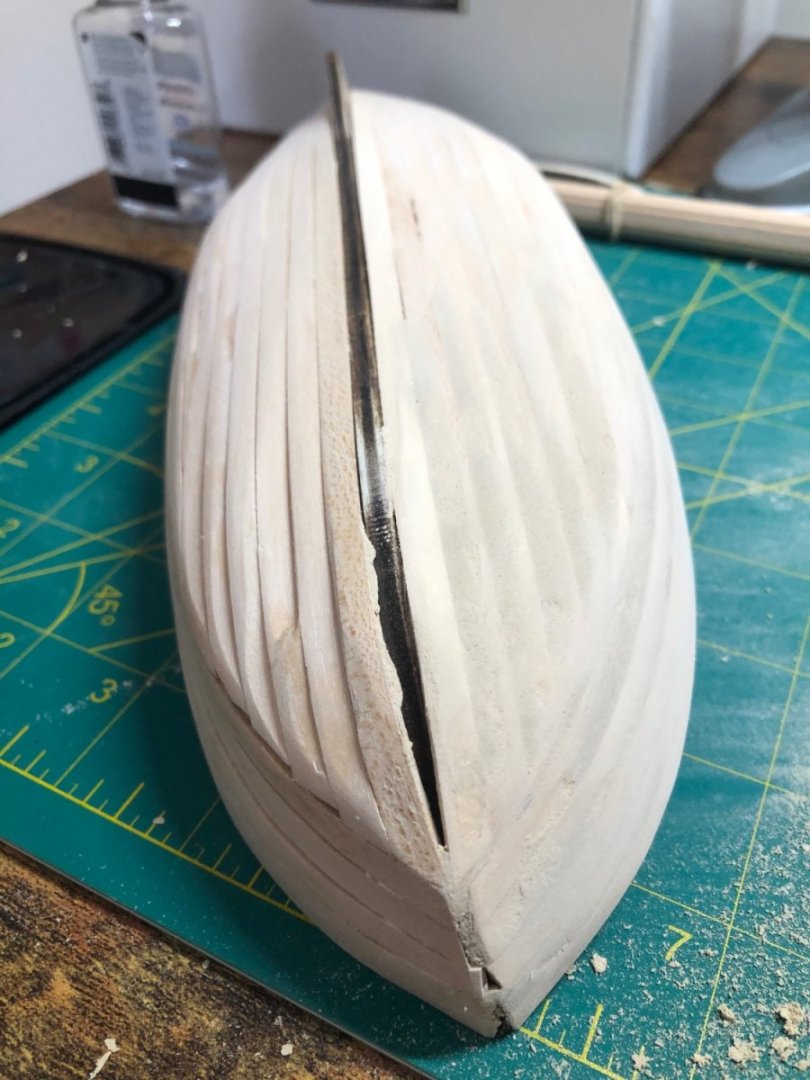
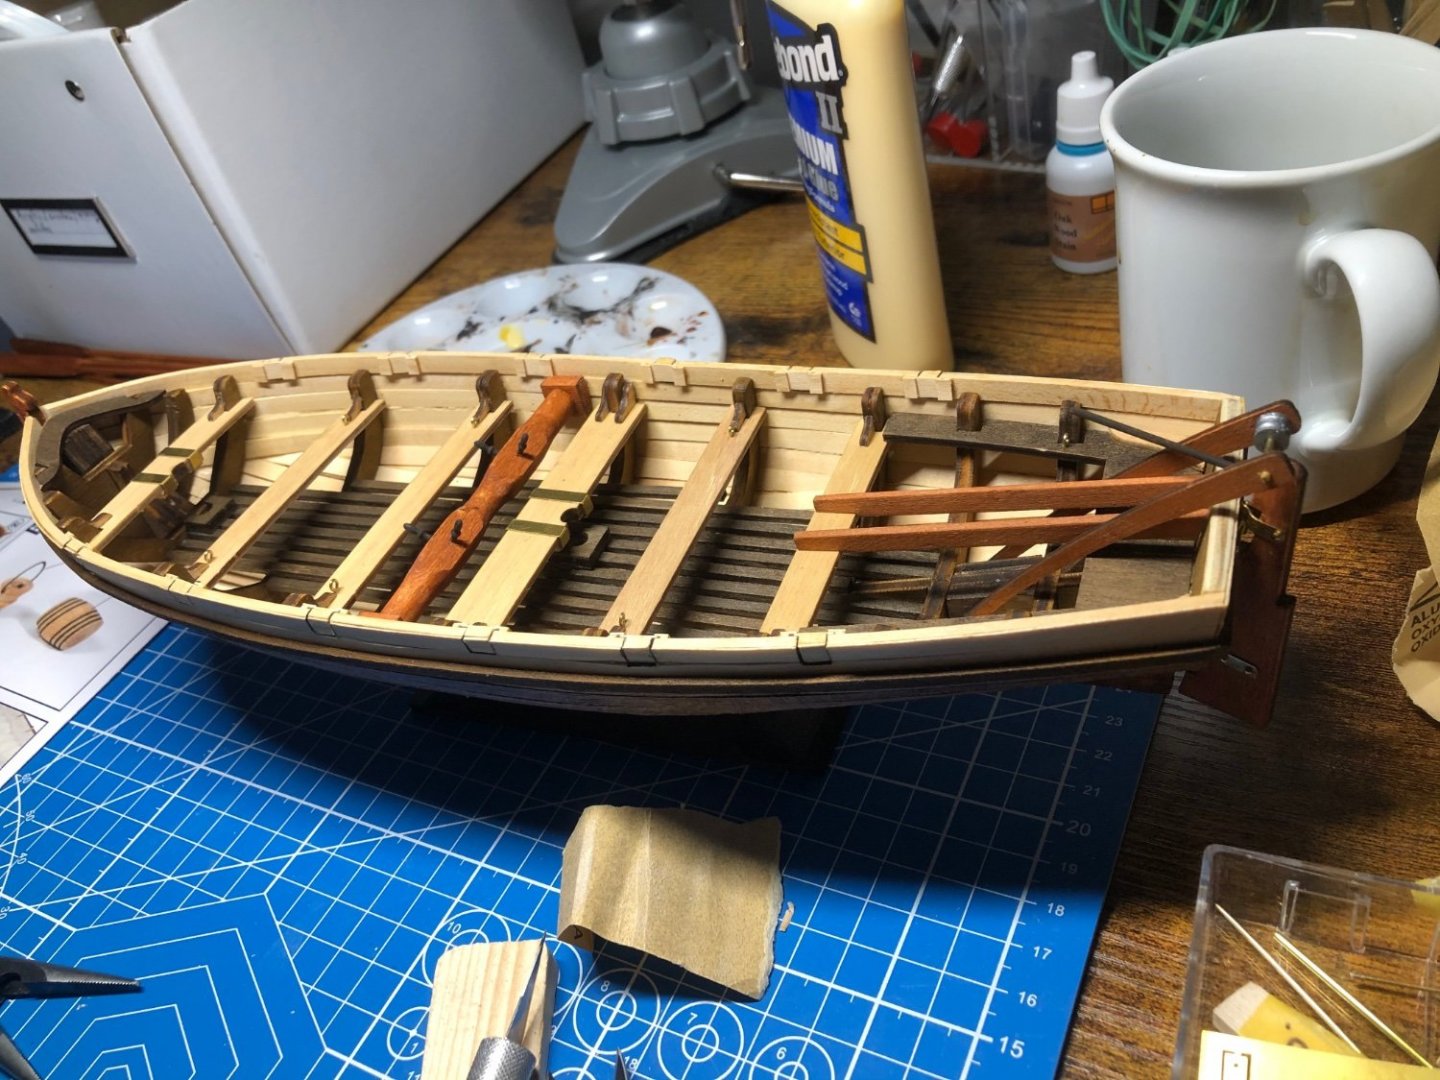
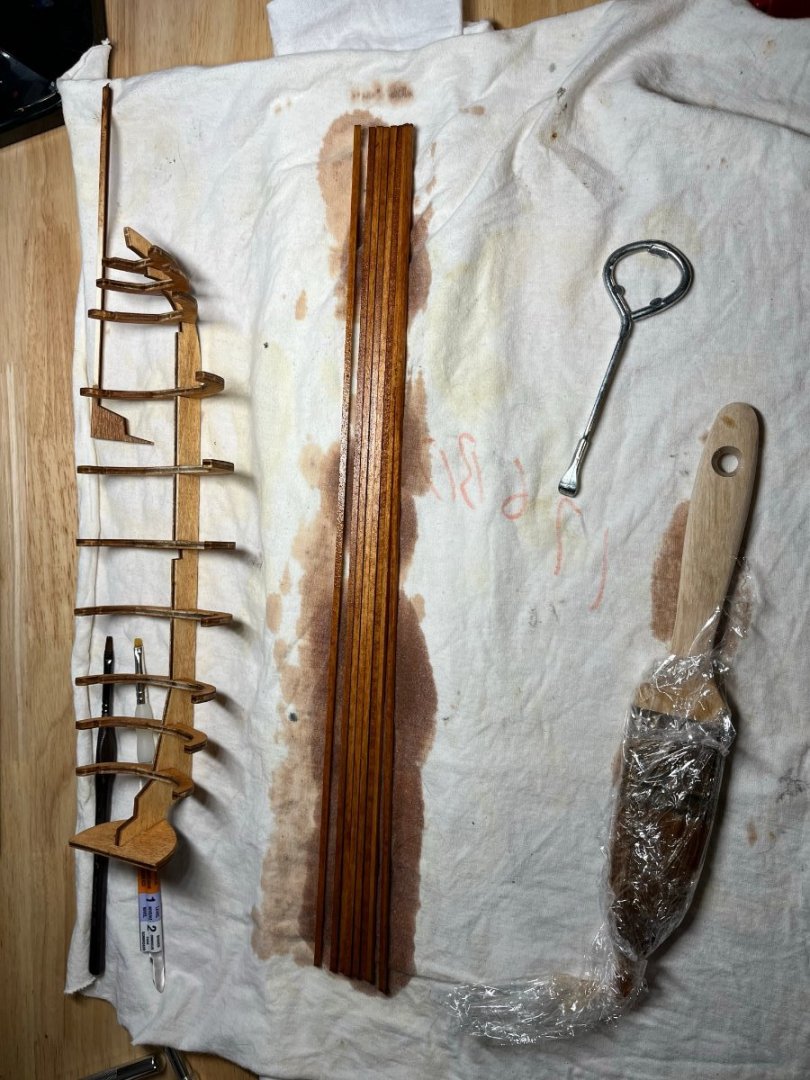
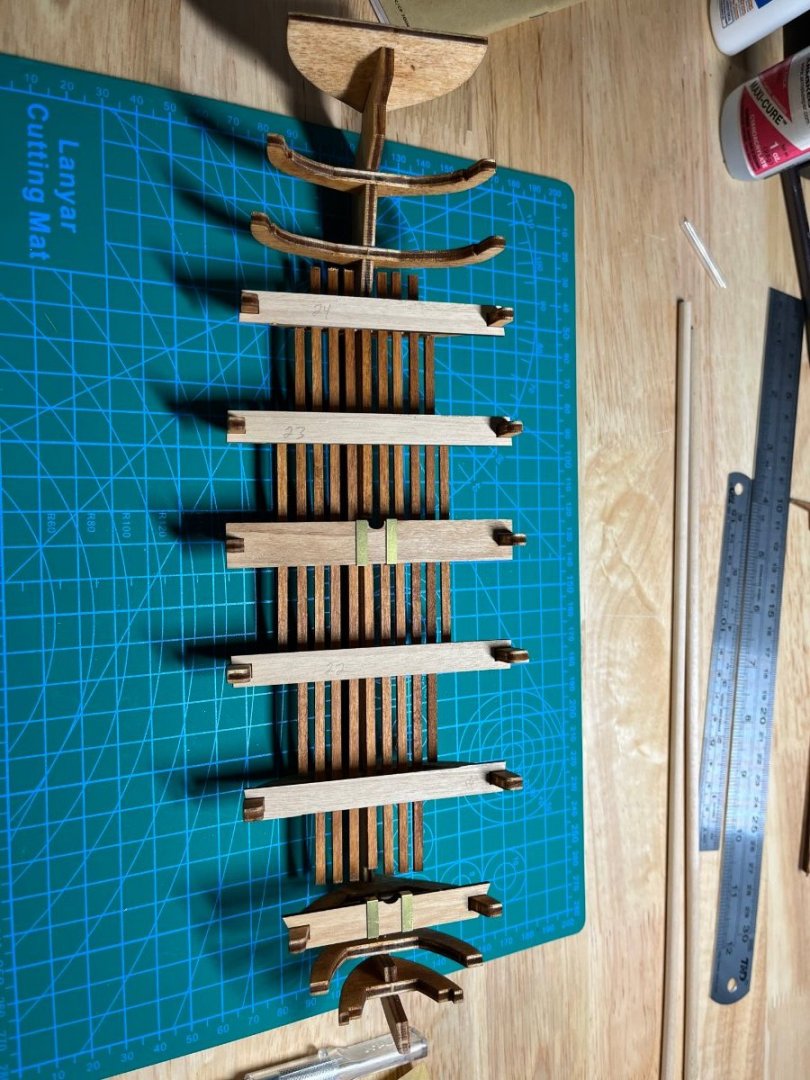
 I decided to post a build log for this model. I'm somewhat new to model ship building and modeling in general but I've completed three Model Shipways shipwright series with....okay results. The Dory, the Norwegian sailing pram and the lobster smack. What an awesome idea for newbies! I'm really glad I started with these models as I've learnt so many valuable skills (and made many educational mistakes). (Do they purposely make the models and instructions imperfect so we learn to overcome issues??) I was dreading the rigging on the lobster smack but found a couple of techniques on YouTube and came up with a couple of my own and I'm happier with the results. Still toying with redoing the halyards. Mods, please let me know if I'm not supposed to post my finished models here and l'll remove the pics. I was proud of each as I finished it. The Bounty Launch was a gift and, reading about it's history, I'm pretty interested! Amazing journey that I'll be reading more about. The kit is a bit different from what I'm used to. The instructions are more abbreviated and there are 4 GIANT pages of blueprints that have much useful information on them. After getting more familiar with the format, I love it! I've built the keel etc and am starting to build the molds. I have 3 concerns right off the bat: 1) they suggest staining the interior. Really? I thought staining was a recipe for blotchiness. I kinda count on paint to cover my mistakes. I'll have to decide if I'll stain or paint soon. 2) My keel does not perfectly match the false keel. See Pic. The gap isn't as pronounced on the other side due to the laser etching. I'm considering regluing the keel and stem despite the fact that I've cut the rabbit. Any opinions are apreciated! 3) Some of the molds don't seem to be tall enough near the stern. I'd expect them to be slightly higher than the false keel so that when they're shaped, the lower edge matches the line of the false keel. Should I glue these higher so that the low edge matches the line of the false keel? Okay, I apologize for the order of the pictures. I'll figure out how to post properly eventually!


-
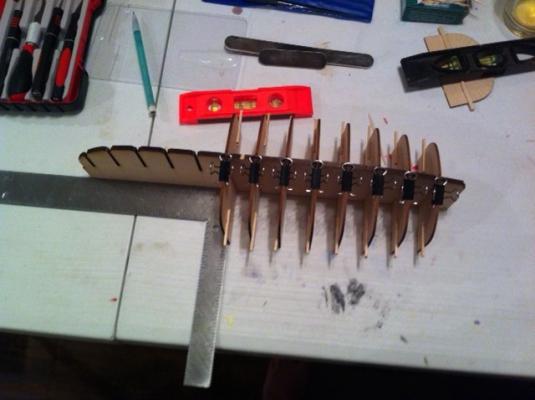
 After the Endeavour J-Class my next little project will be the Occre Bounty boat 1:24. Not that big and beutiful like the Endeavour but the history behind it is fascinating… So let‘s start: false kiel is set. And damn it’s not plane, slight left bend, saw this after assembling. Lets hope this will not be a big problem later on. Really like the ocre colours to stain the wood! They look great. thats it for the beginning. Some kiel parts and stabilizers next and then the happy planking part begins…I find the Occre planks much thicker than the amati ones, will probably be harder to work with.


- 20 replies
-
- 3
-

-
- OcCre
- bounty launch
- (and 1 more)
-
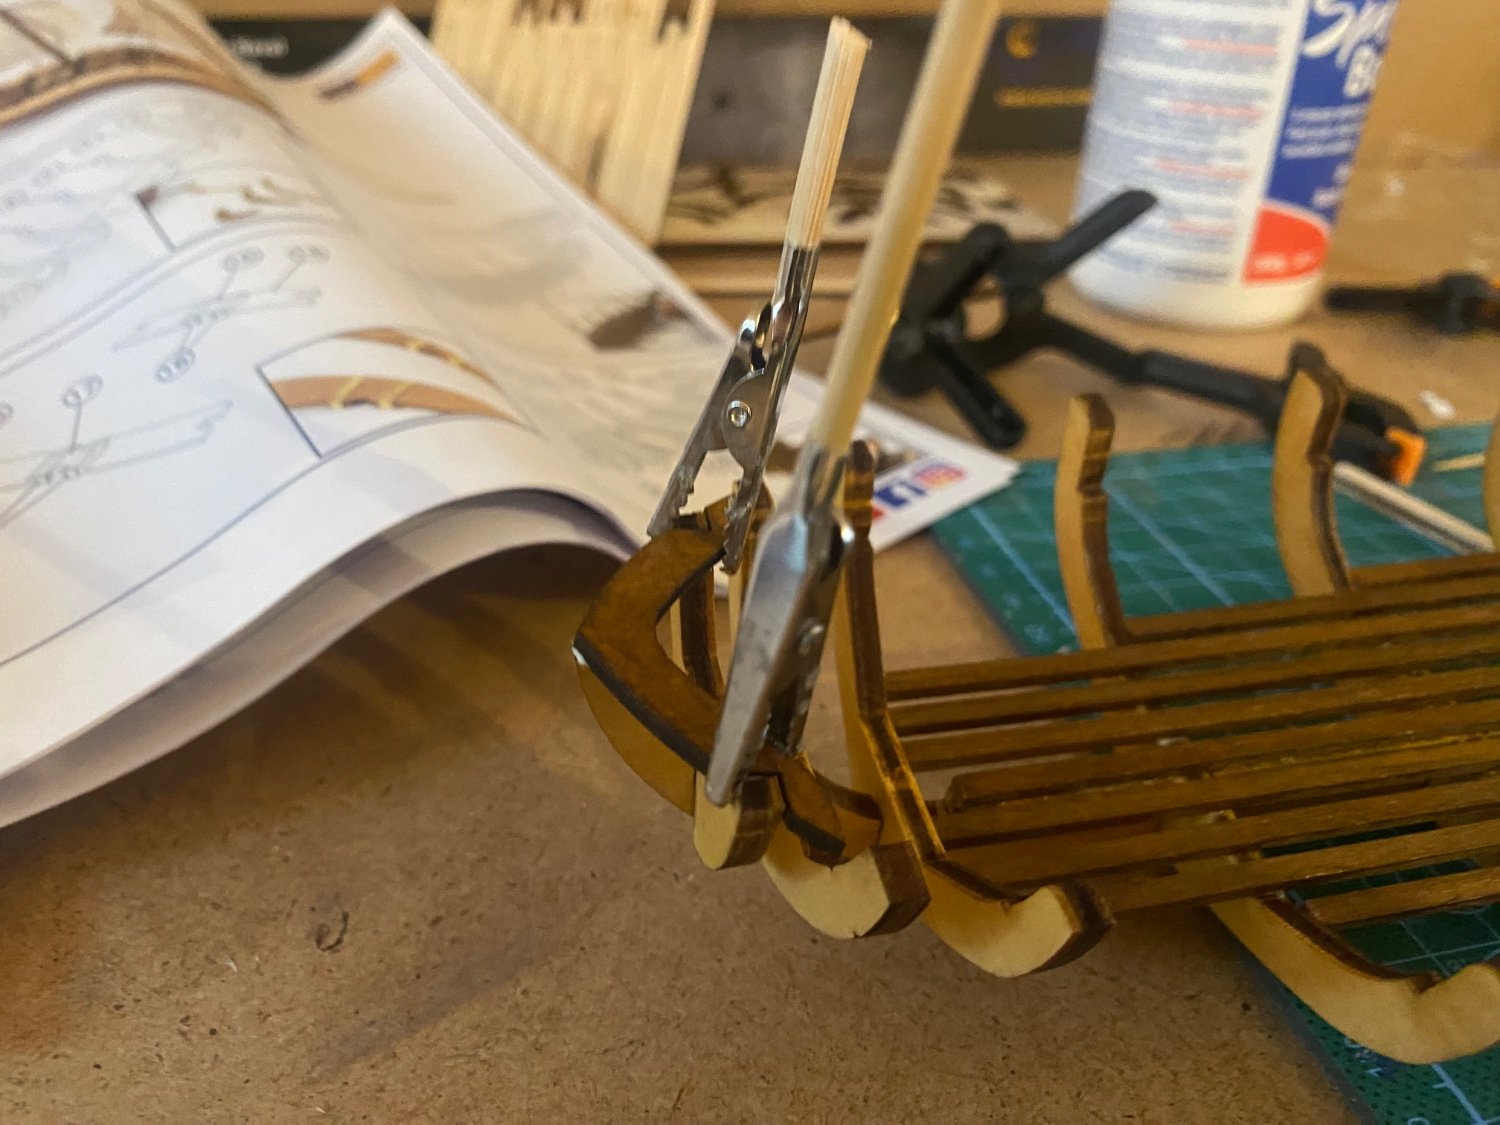
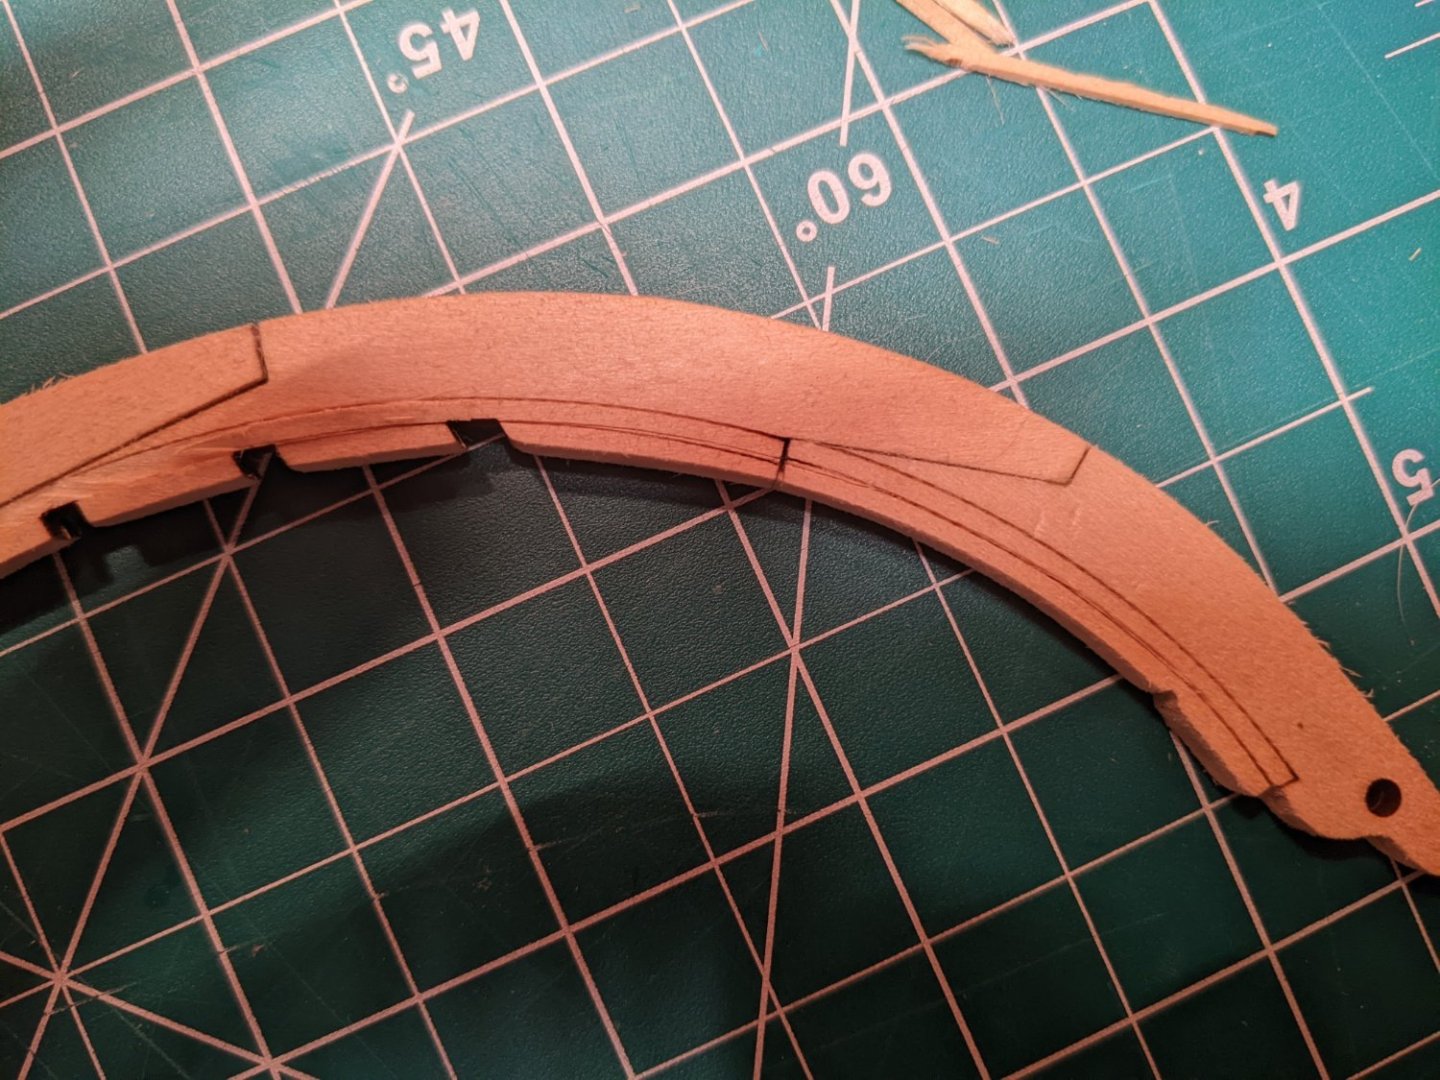
 Like so many before me, I am entering the world of wooden ship kits with the Model Shipways Bounty launch. This is not my first ship model, I have scratchbuilt 3 before this first attempt at an actual kit, but I am still mostly a beginner. Two questions have arisen right away that I am hoping to find advice on. Here is my workspace, just getting started with the sheer tabs glued on and the keel pieces laminated together. You may notice I've already stained the keel; I want to do the whole model stained, not painted. It makes more sense to me to stain ahead of time, before assembly, but this leads to my first question: (1) If I pre-stain the planks, will it be a problem for soaking and bending? Will the stain run or be otherwise affected by soaking and using a plank iron? The image below illustrates my next question: So it's quite annoying that MS laser-burns "trans" onto the outside of the transom, I guess just assuming that you'll paint over it. I thought I had sanded away the word before staining, but lo and behold, there is the little bugger. Guess I didn't look at the piece in the right light angle. So the question is, (2) Now what? I can't hardly sand this away, can I? Should I just turn the transom around and hope it isn't visible from the inside? See if I can find a piece of scrap basswood big enough to cut a duplicate? Thanks for any advice, I hope this log is worth following even though the kit isn't very unique.
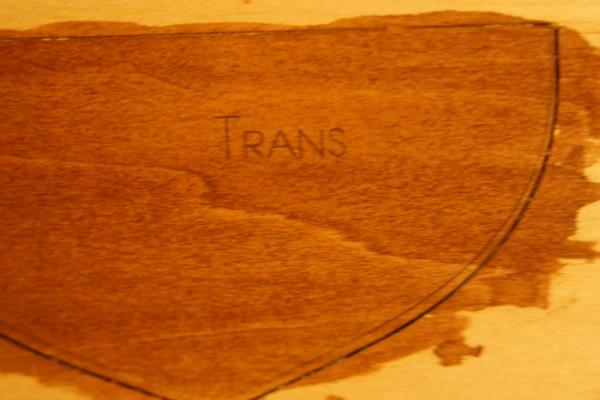
- 83 replies
-
- 2
-
-
- bounty launch
- model shipways
- (and 1 more)
-
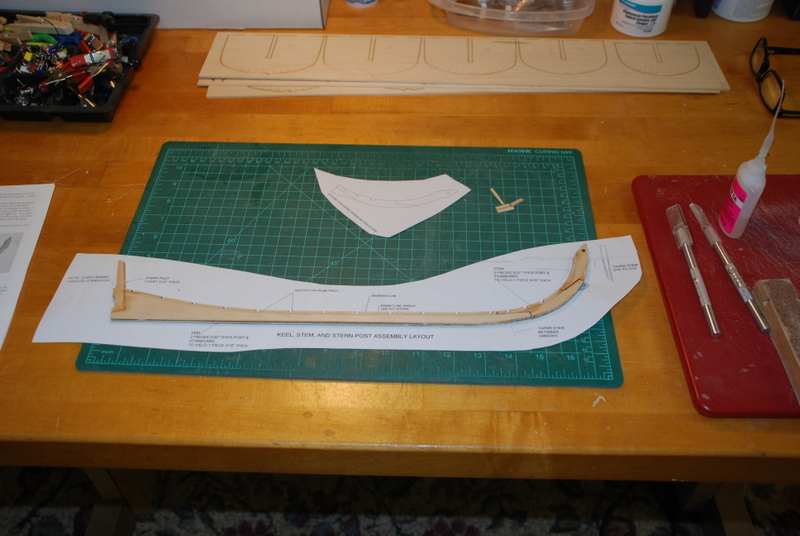
 Having nearly completed bashing a Deans Marine kit of an RC Destroyer, HMS Lightning, I started looking for a new project. I always loved the look of the wonderful wooden Men of War that I had seen at the National Maritime Museum at Greenwich in my youth. Sadly I do not think I’m ready to build one of those yet, so looking around the MSW website and reading loads of build logs in decided I would build a ships boat to help build up my skills. Both Allanyed and imustbecrazy inspired me to start this log, I have been hanging around on their logs over the last few days. The build logs of the Shipways 1:16 launch by Cap'nRatFink and keithW have also been invaluable in helping to decide what to build. Then there is of course Chuck Passaro's and his wonderful Medway Longboat kit, I wish I could afford that one. For better or worse I decided to go down the scratch build slipway. So I downloaded a lines drawing from NMM numbered ZAZ7848, this is alleged to be a copy of the drawing used to build the actual launch for HMS Bounty. Having used Fusion 360 for several years now I was comfortable in being able to import the drawing and produce a design that would enable me to make a scale model in wood. At first my idea was to output some g-code from the CAM section in Fusion and produce the keel and frames using my small CNC router. After a bit of test cutting on my scroll saw, I realized with something this simple I could do it as easily by hand. Also by doing it manually I would learn a lot more about working with wood which is sadly lacking in my skill set. So here we are with the drawing nicely hand traced in Fusion with the frames ready to export as DXF files to print out and scroll cut by hand.
-
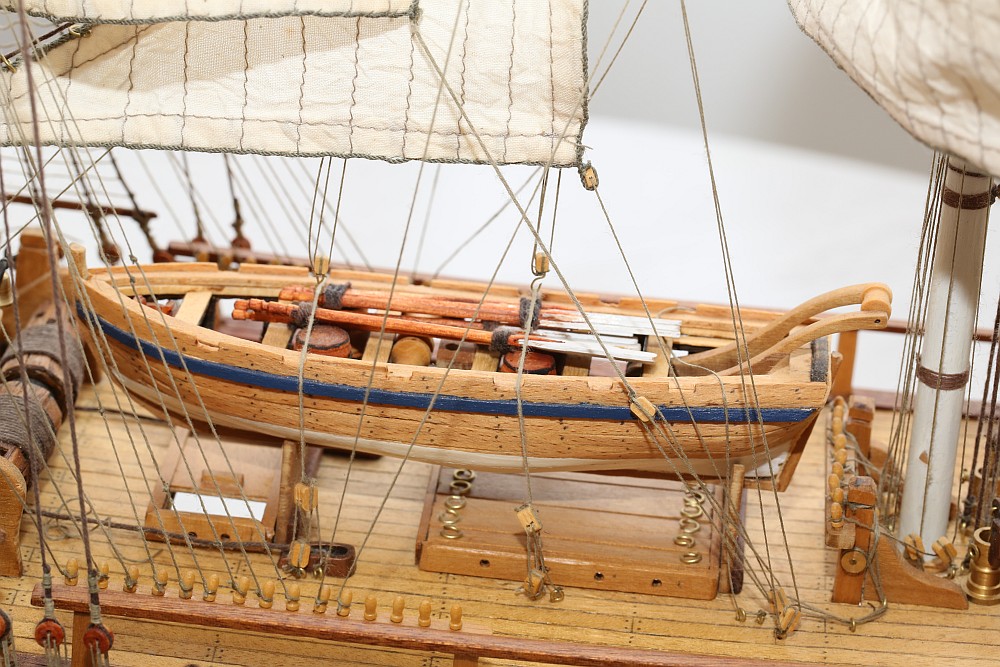
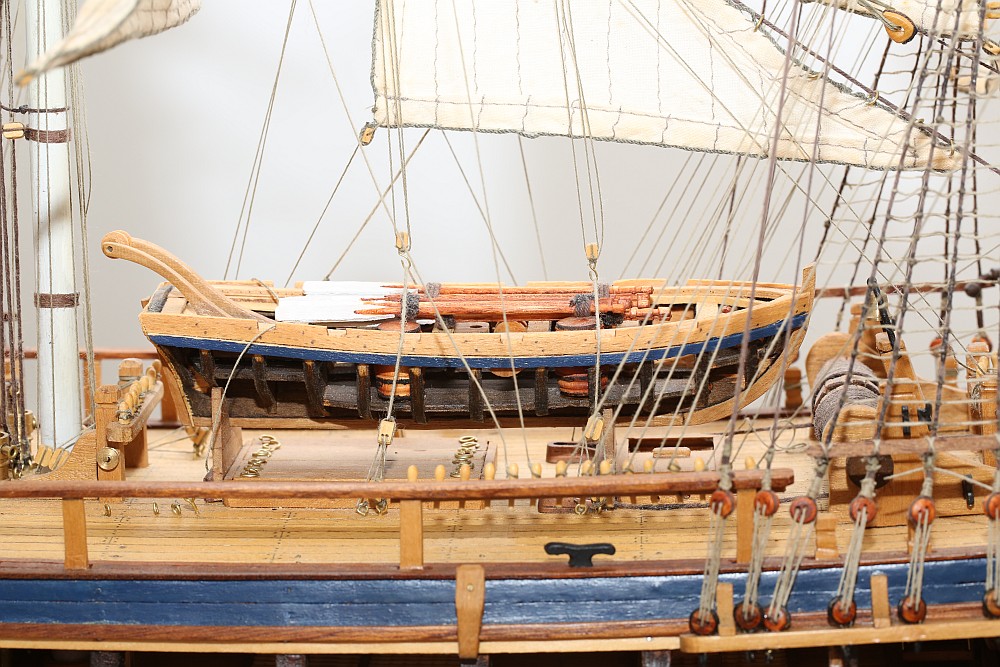
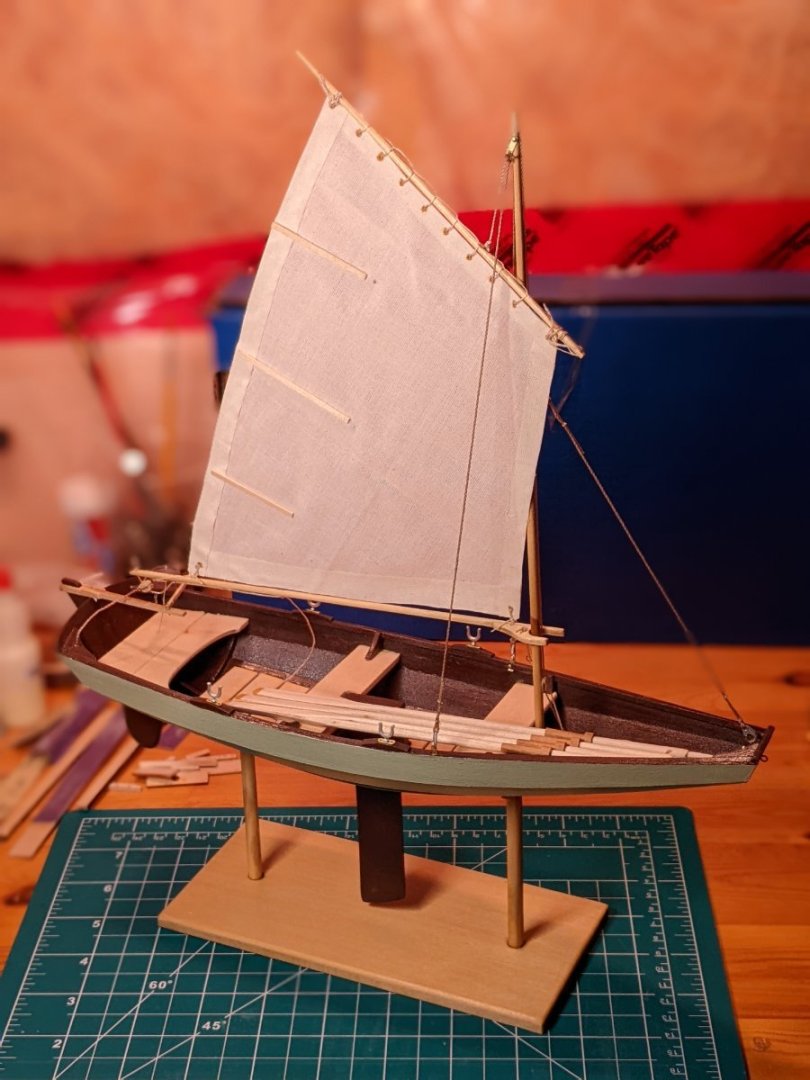
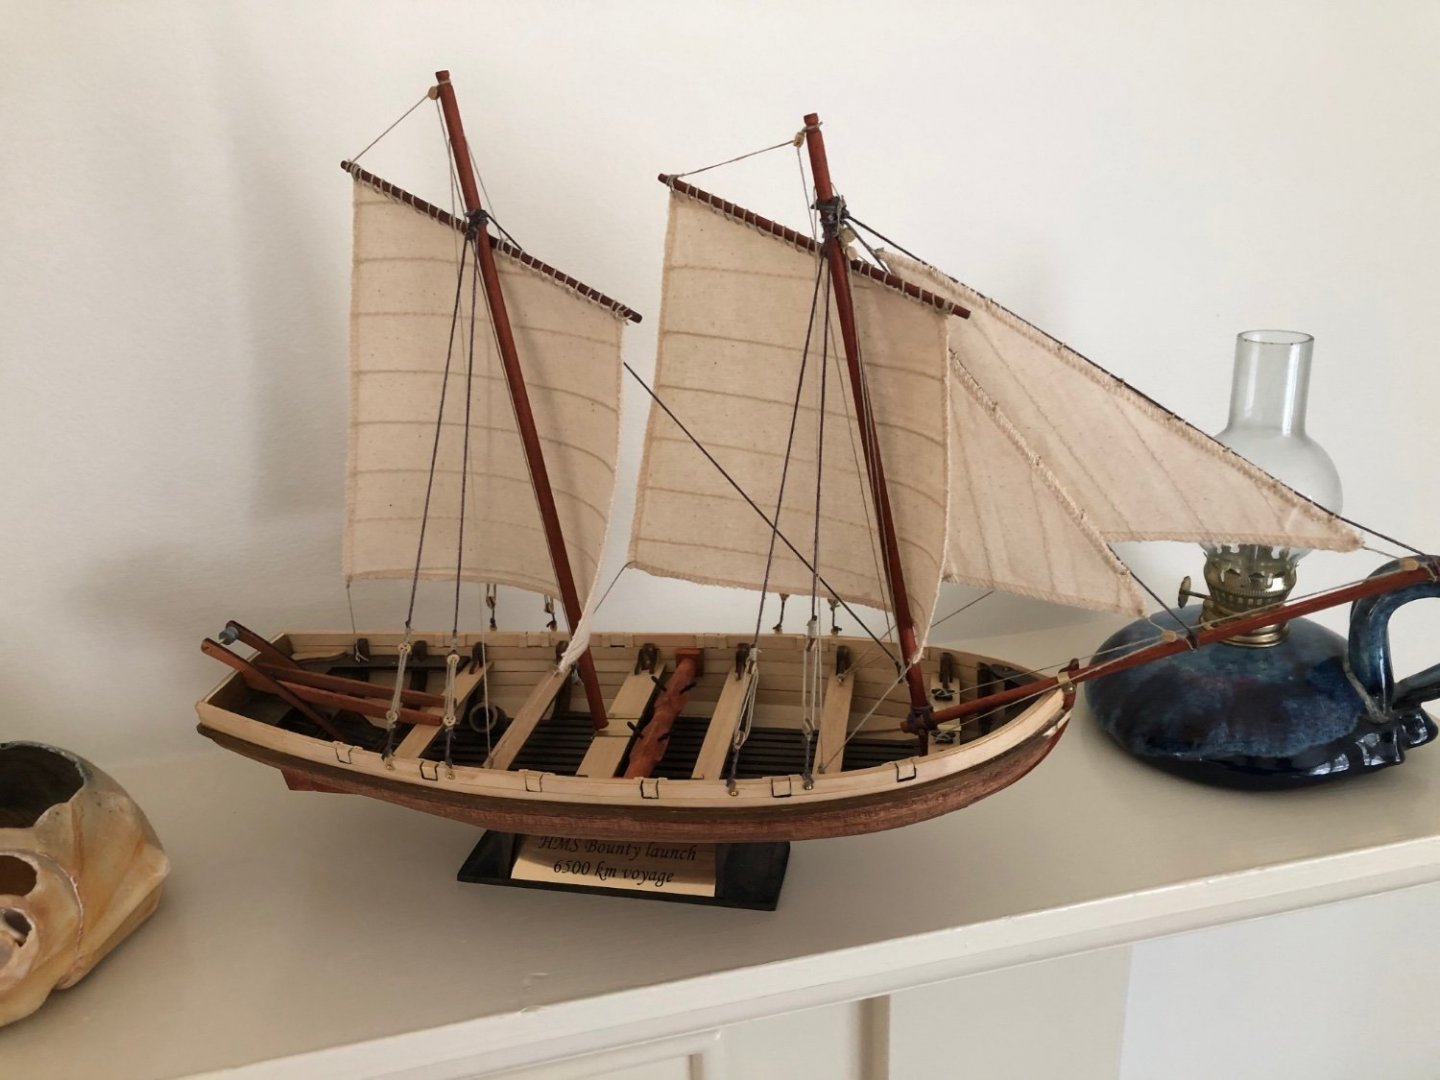
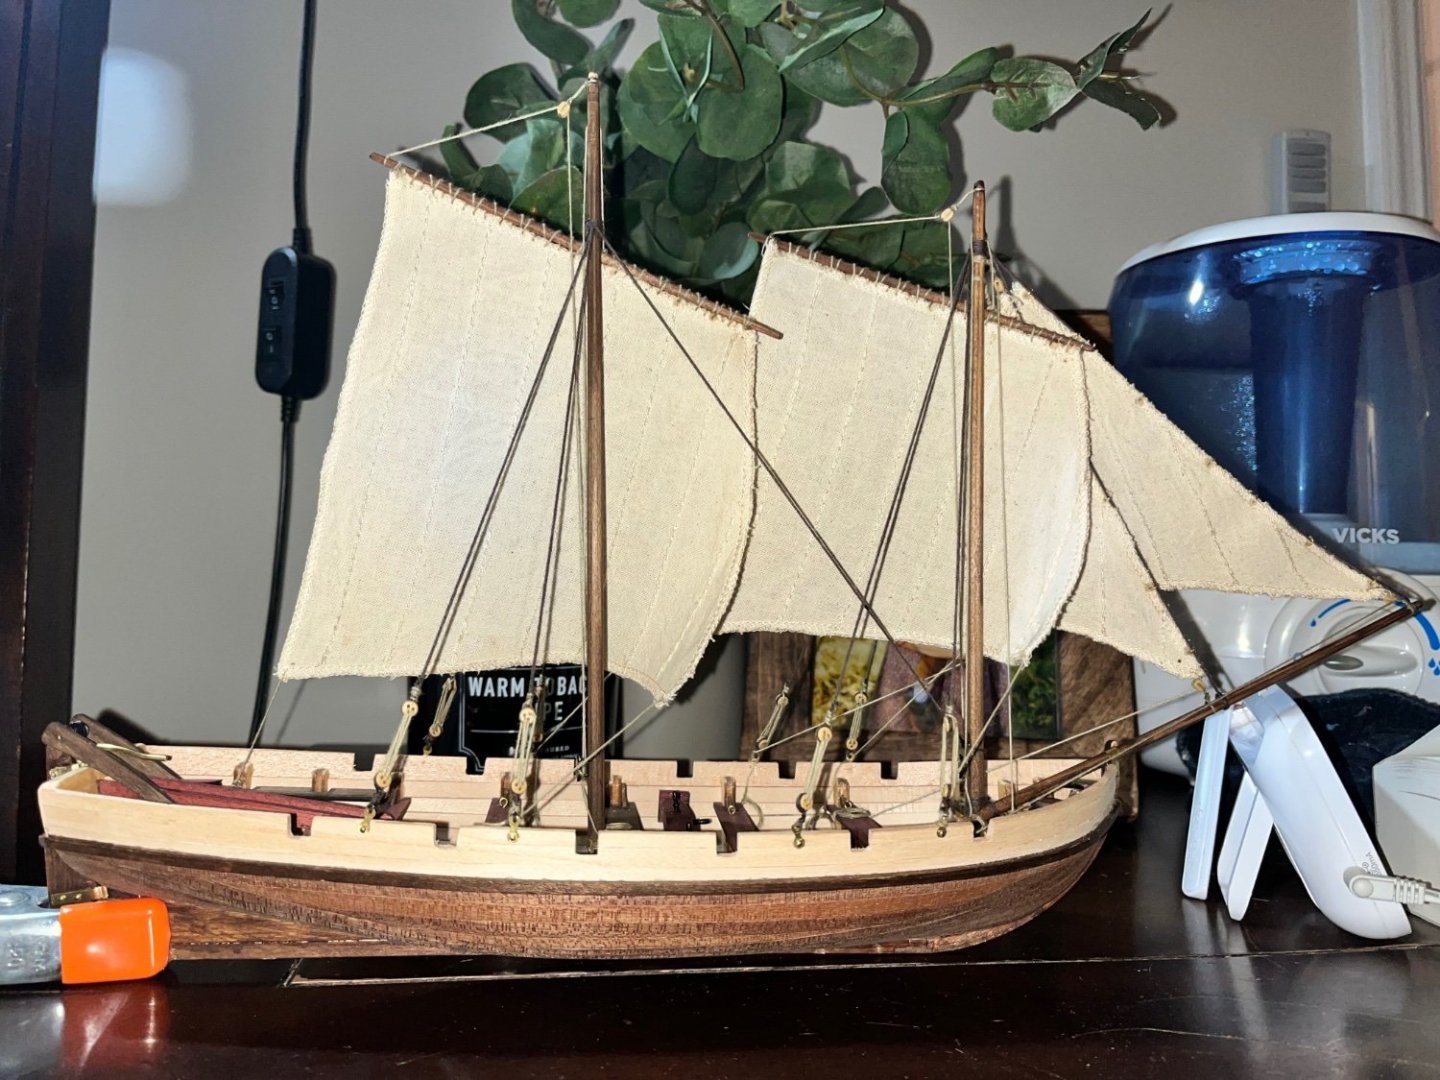
 Incredible story behind this boat: one of the greatest feats of seamanship, Captain Bligh's seemingly impossible voyage in a small open boat from near Tonga to Timor, 3618 nautical miles. lots of sanding I was confused by these cutouts for the oars. I added small blocks which can be inserted when the boat is under sail to increase free-board, which was already low in this overloaded vessel. Somebody build a full scale replica and used something similar to seal off these cutouts. Other options would have ben some posts seen in other models. Does anybody know which version is the historically most accurate? Very enjoyable build.


- 6 replies
-
- 5
-
-
- OcCre
- Bounty Launch
- (and 1 more)
-
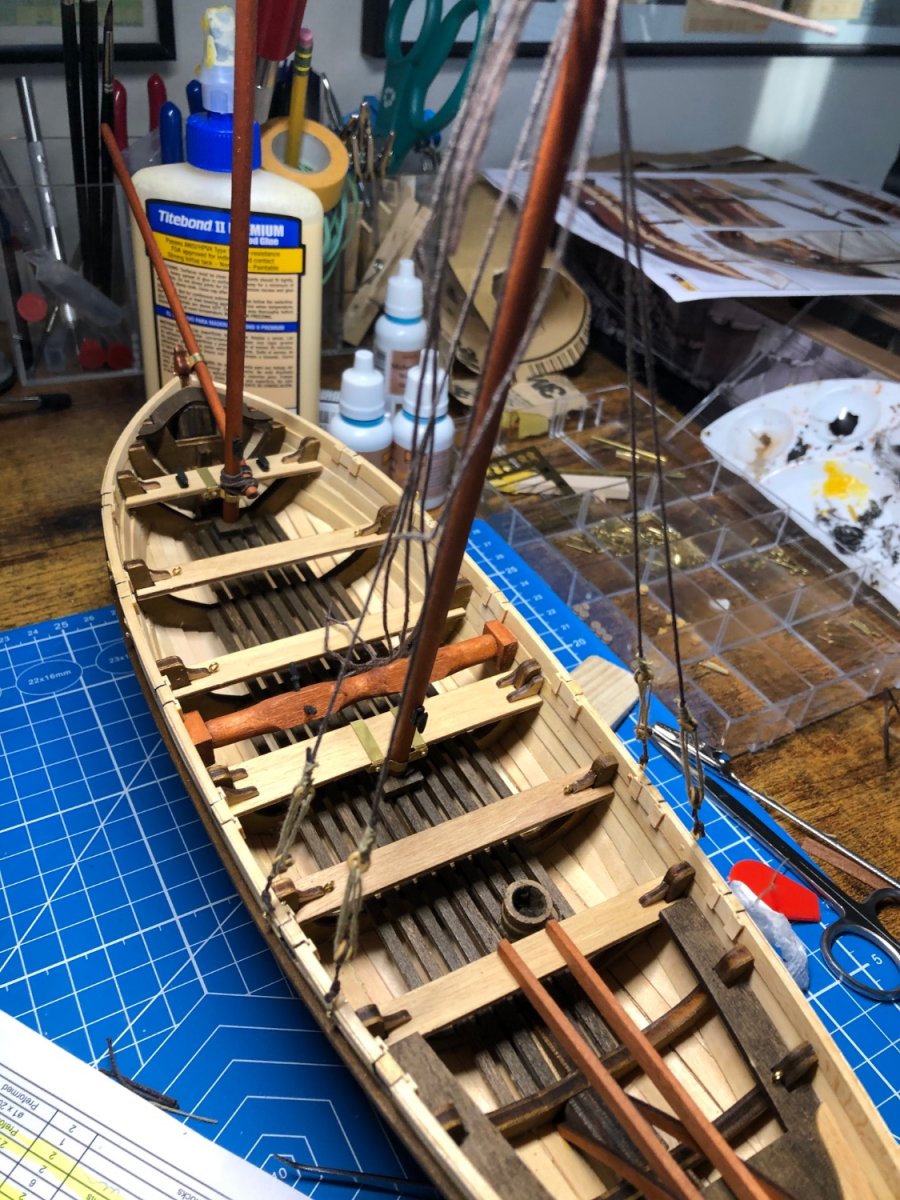
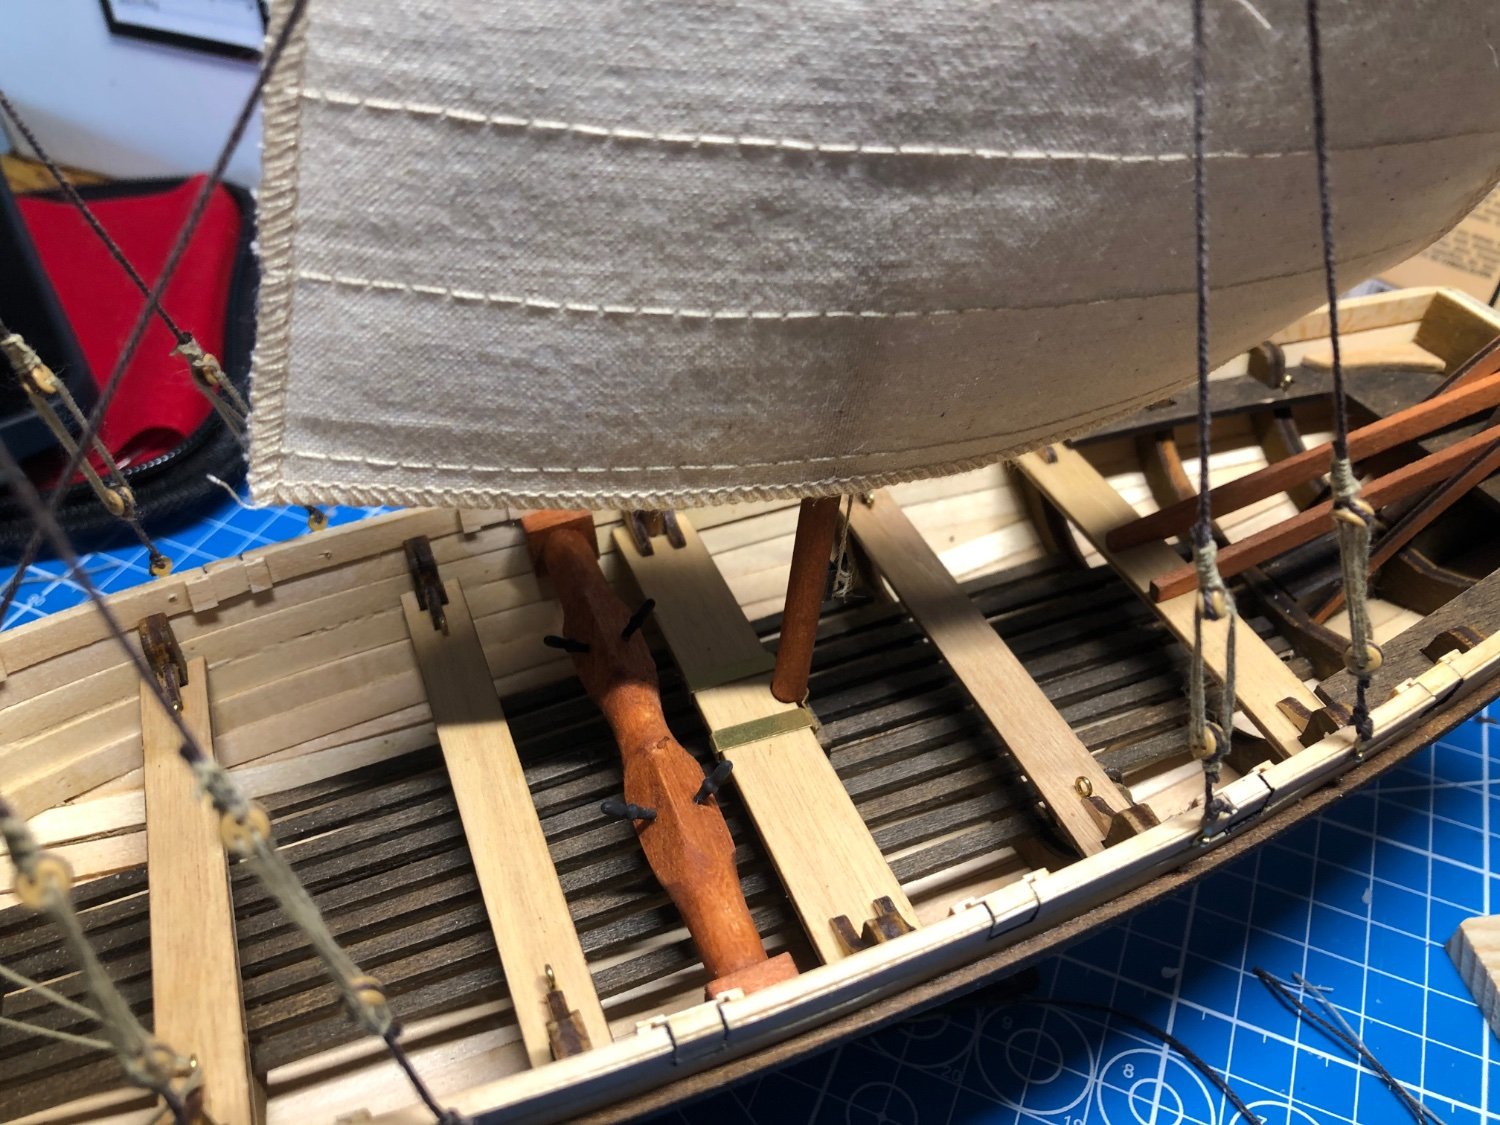
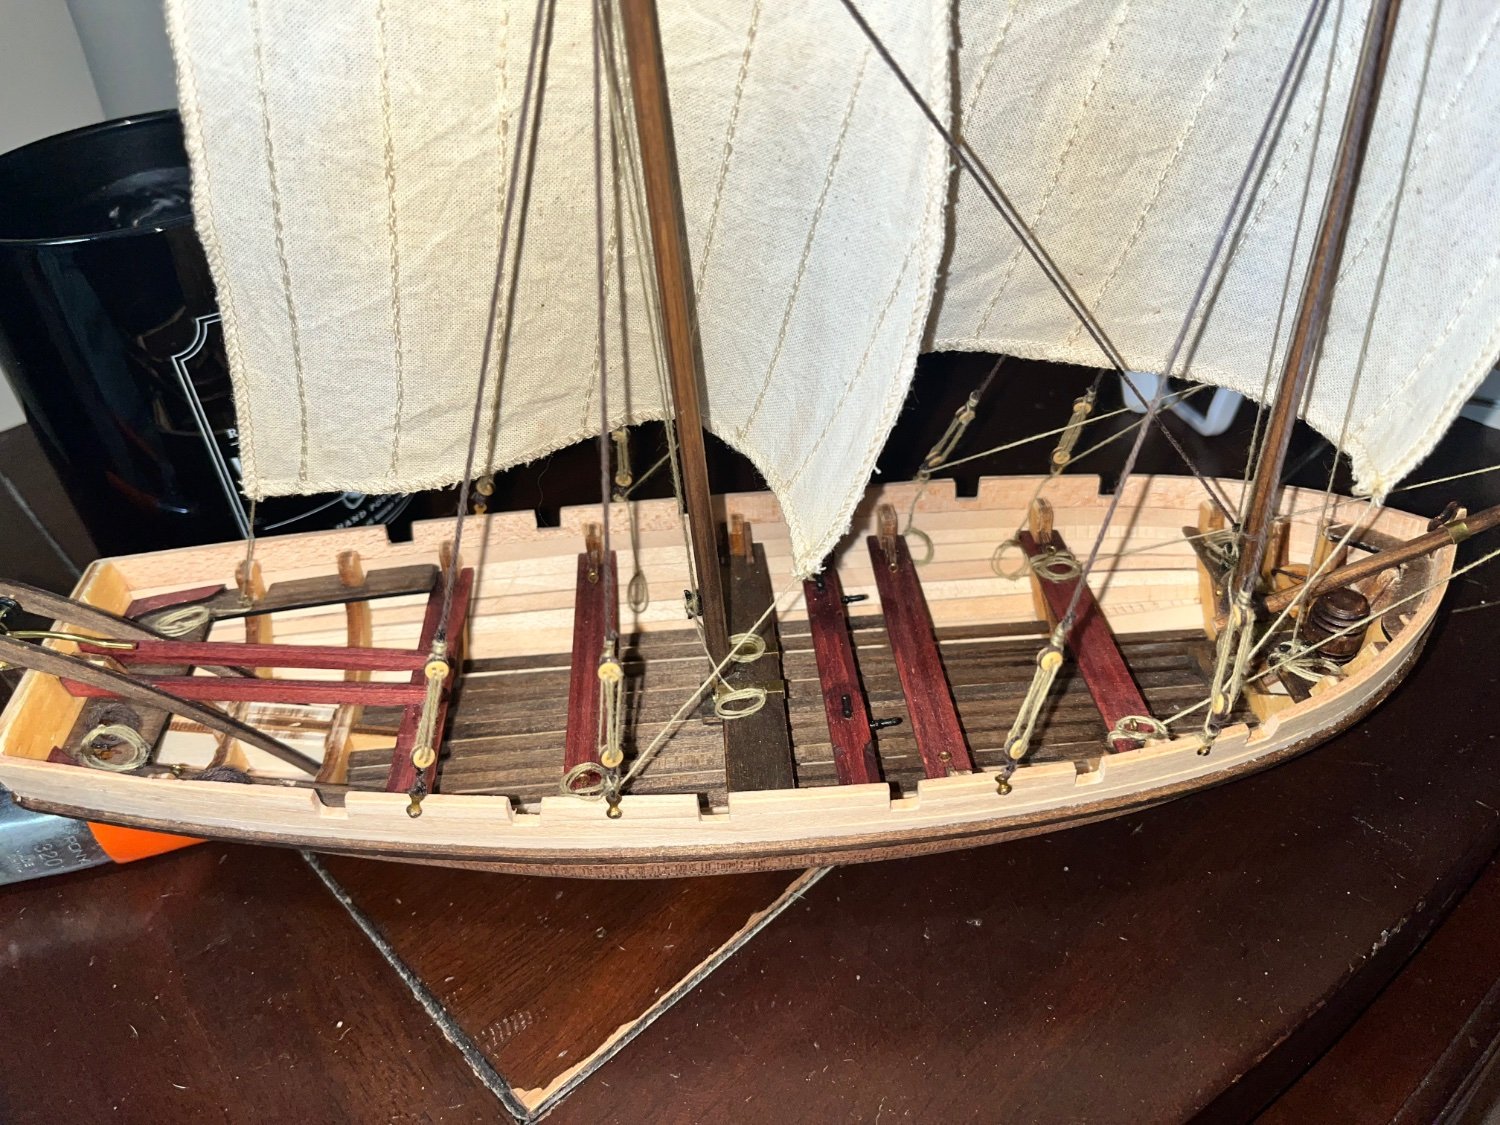
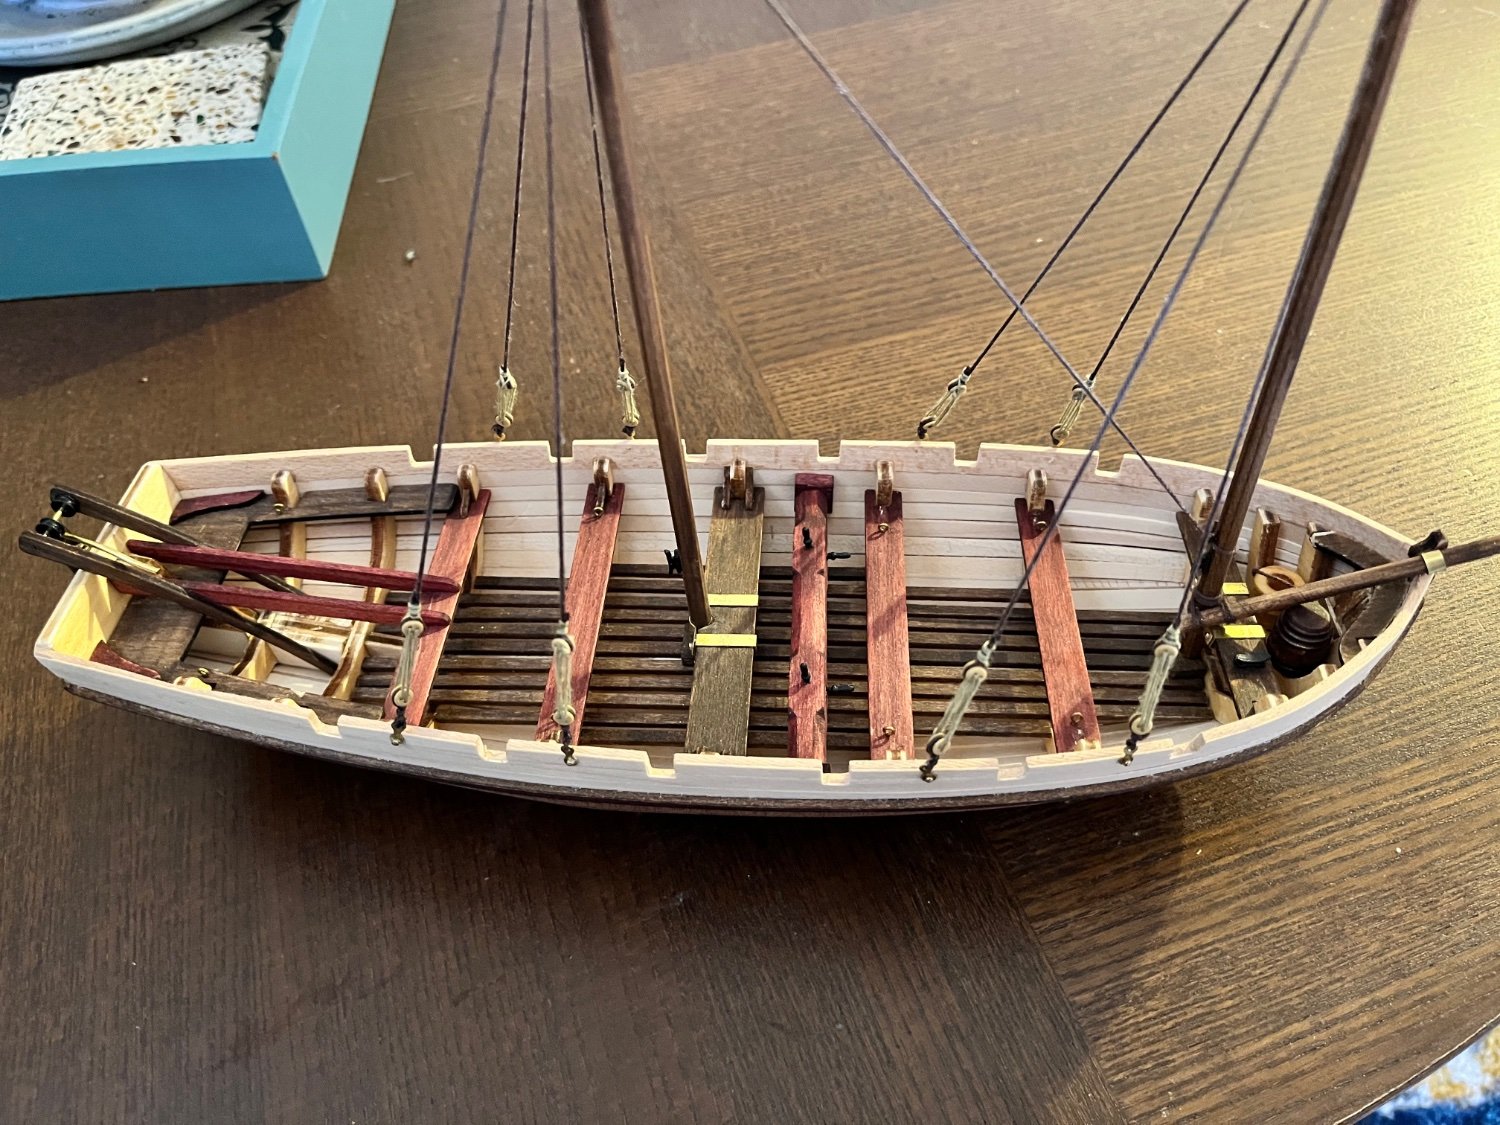
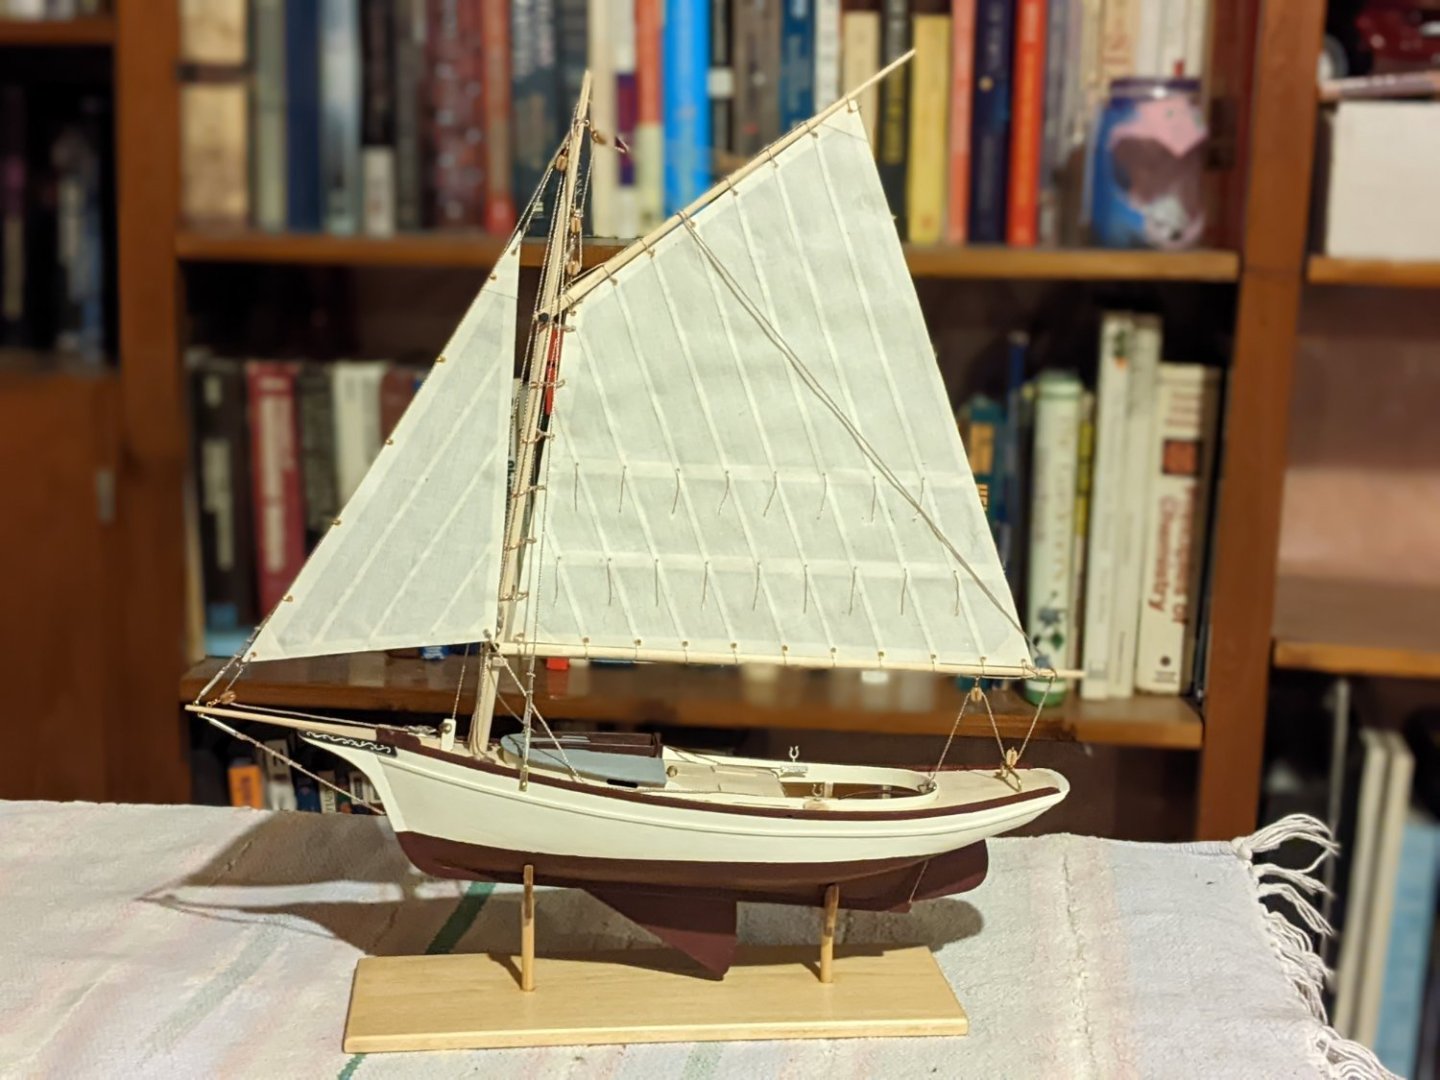
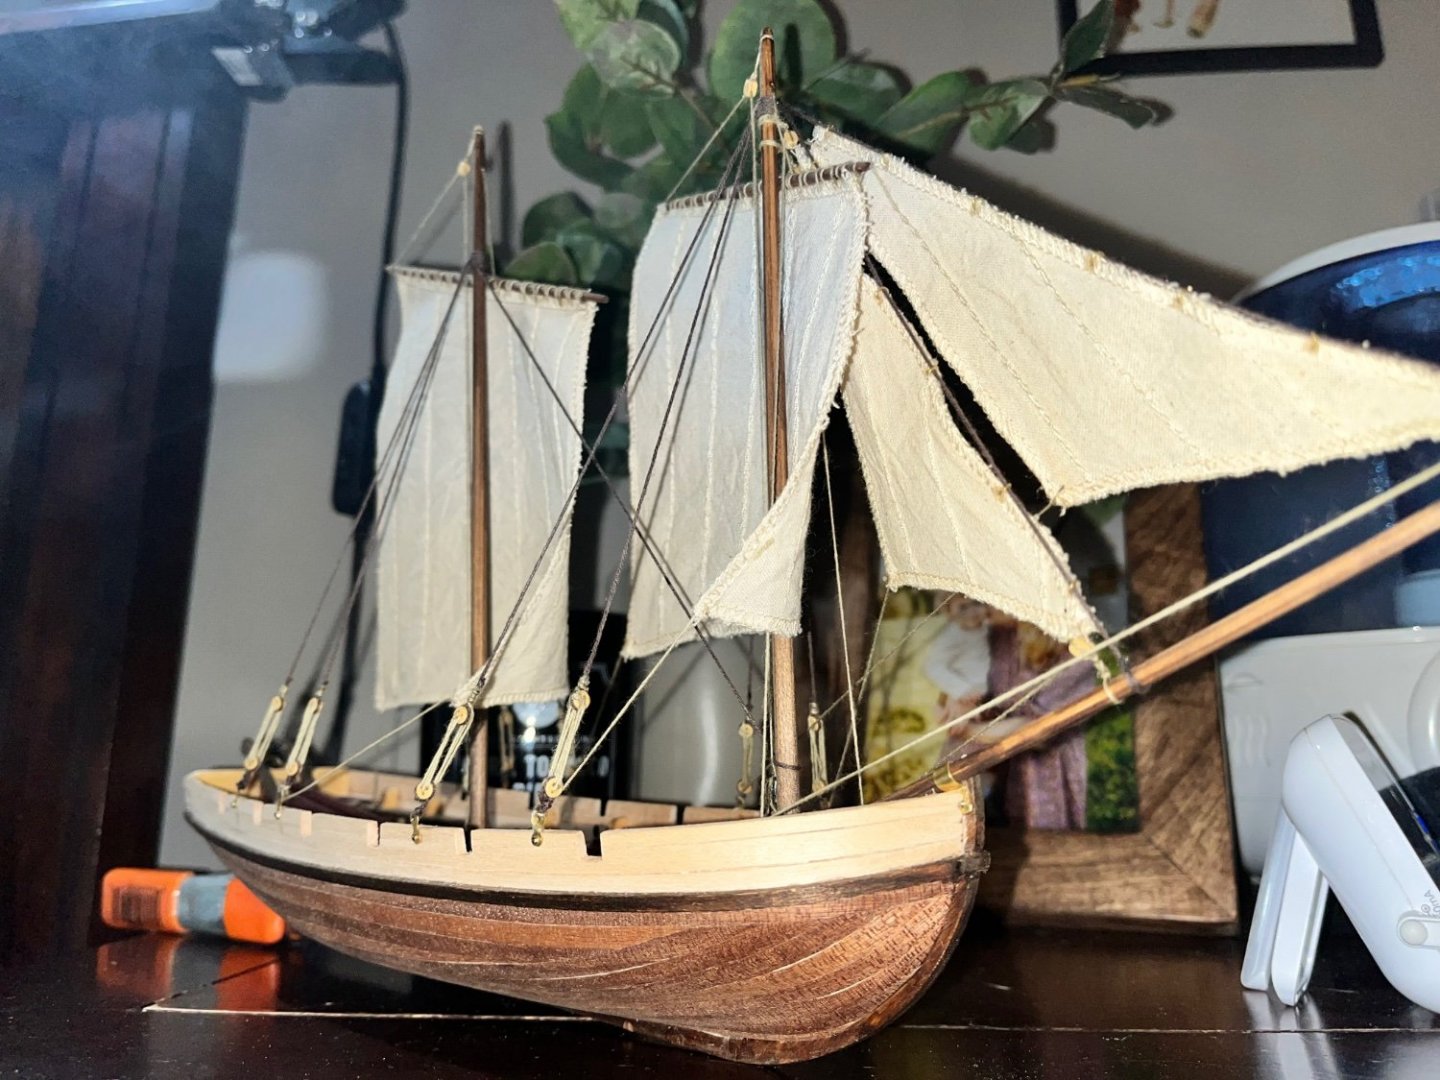
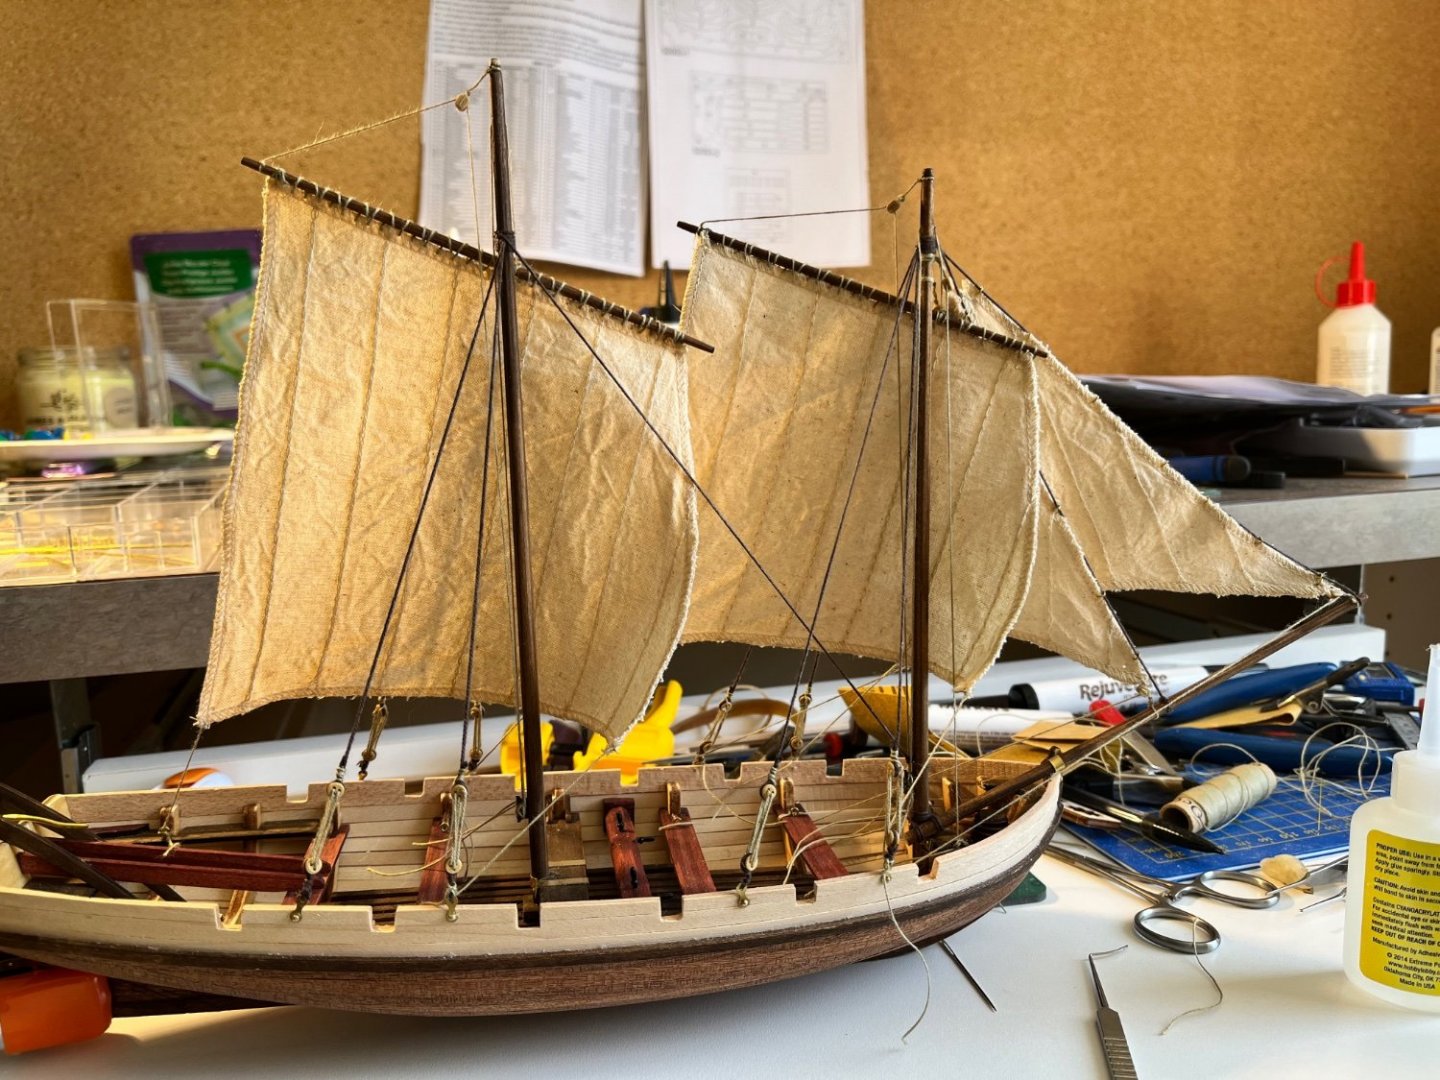
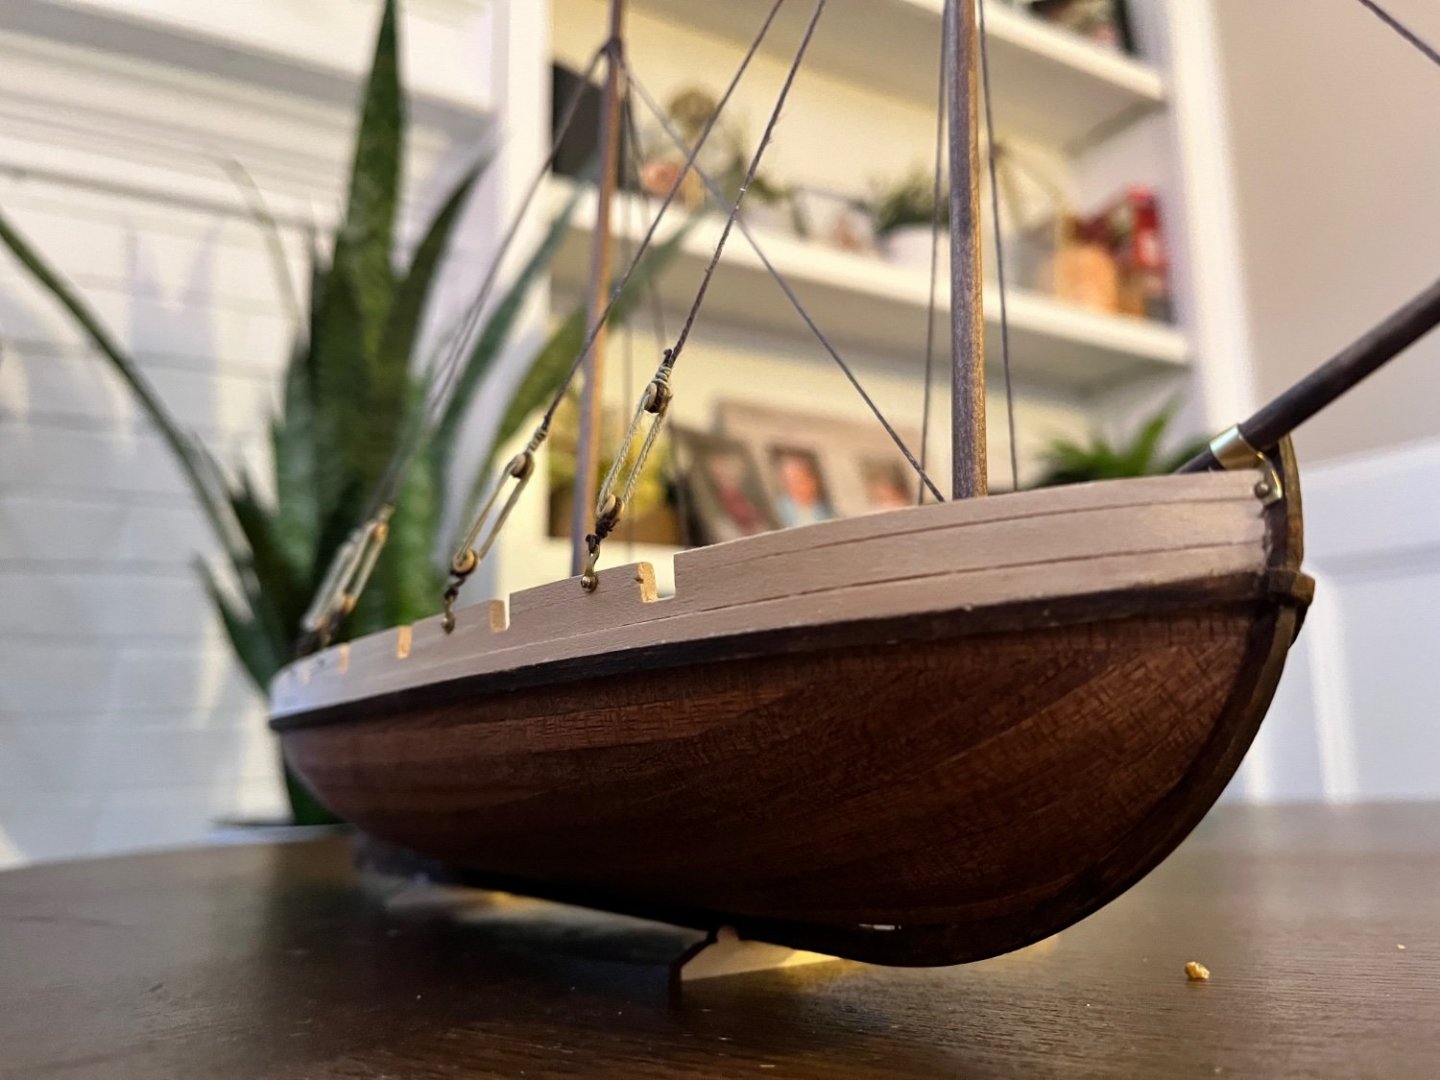
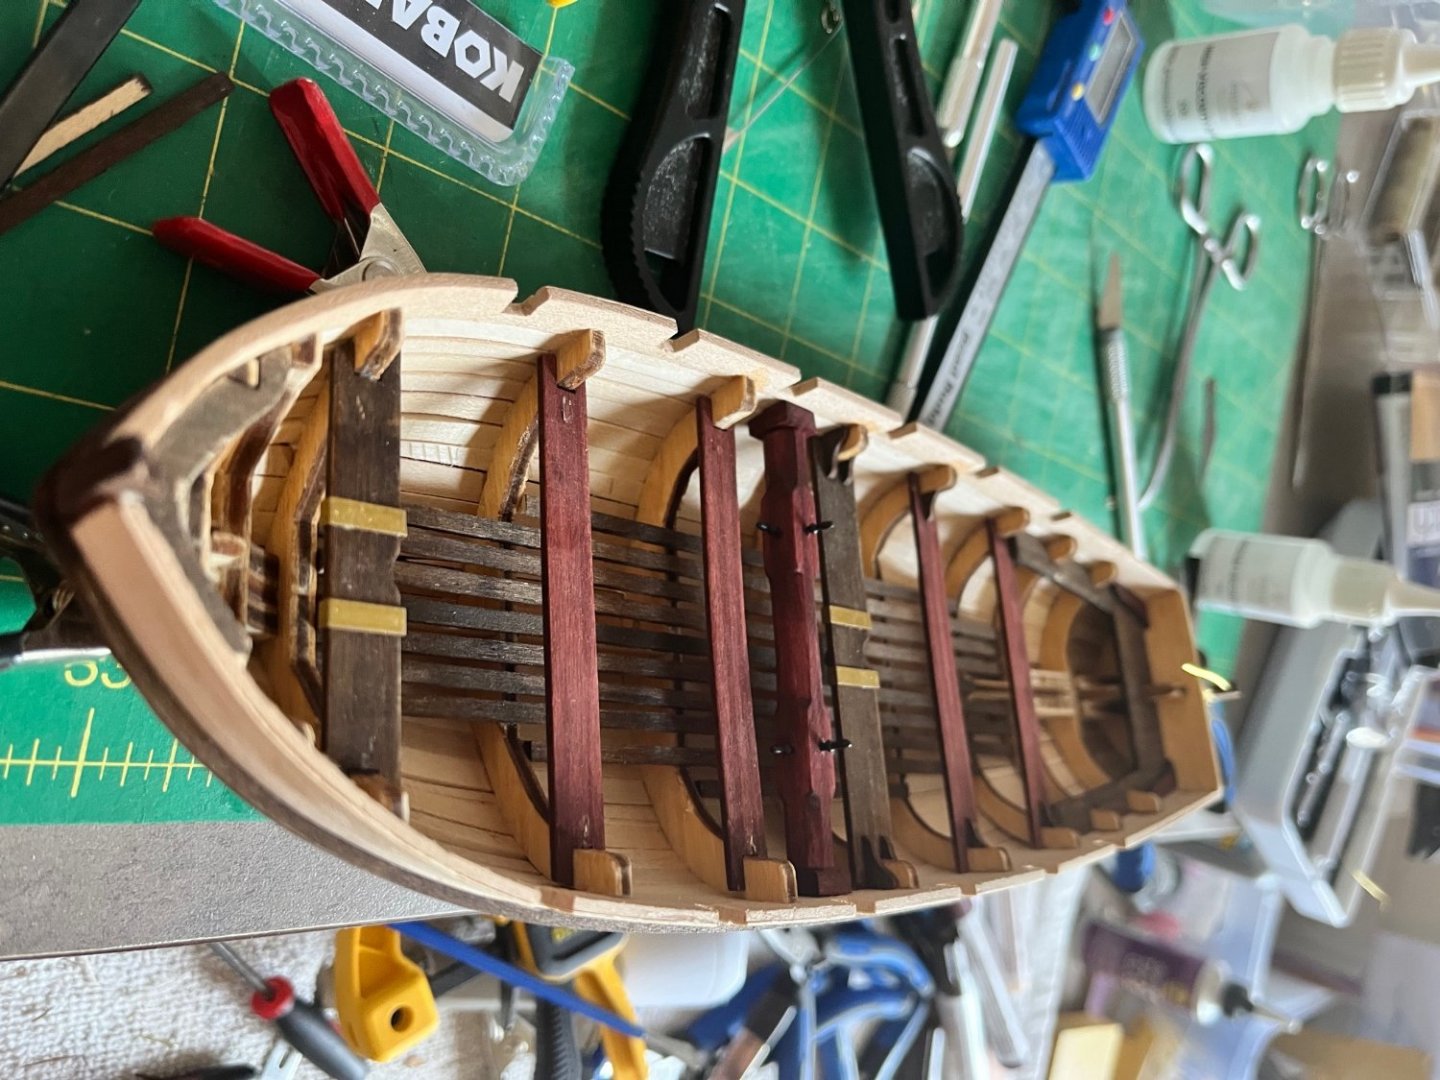
 Started this build about a month ago and have around 20-25 hours of work into it. This is my second build and I am quite pleased. planking still gave me a fair amount of trouble but I’m still happy with the result, especially since there is a second lining. I really didn’t understand why the instructions started with the flooring and thwarts prior to planking. Was hard not to scuff up everything when trying to clamp planks. Also made it hard to smooth out the inside hull. Love hate relationship with rigging. Especially doing the rope coils. Haven’t quite gotten that down yet. The instructions were also rather lacking when it came to smaller details and the rigging. I did really enjoy this build. And it was my first time sail rigging. Would love to get some feedback. Hope y’all enjoy. danimals
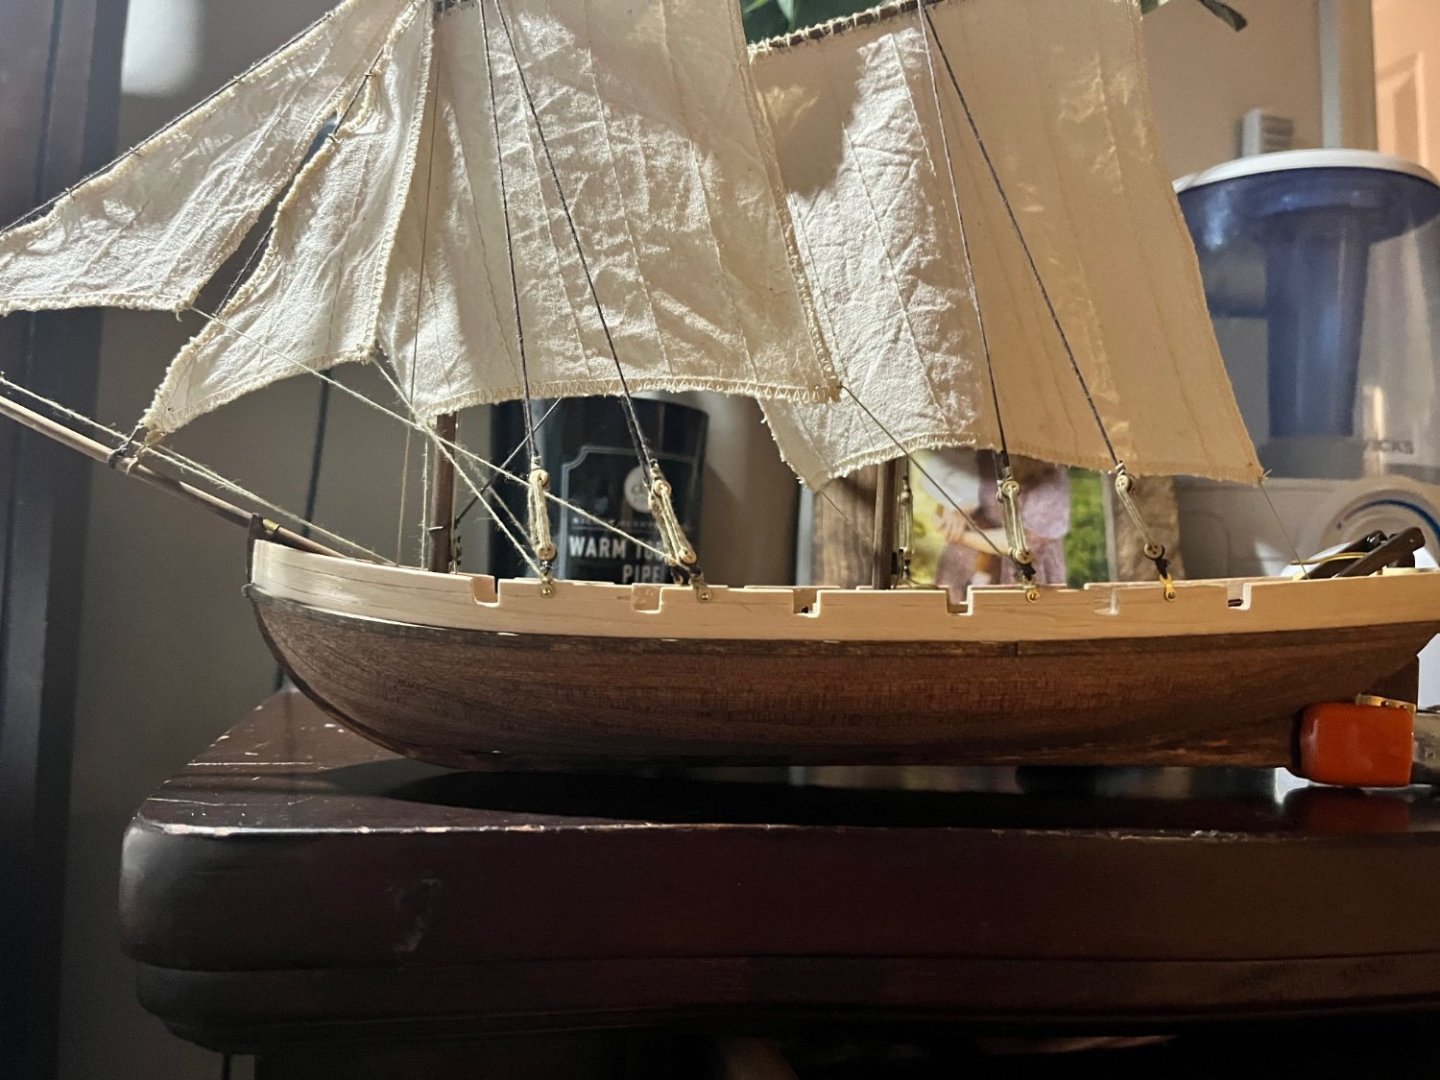


-
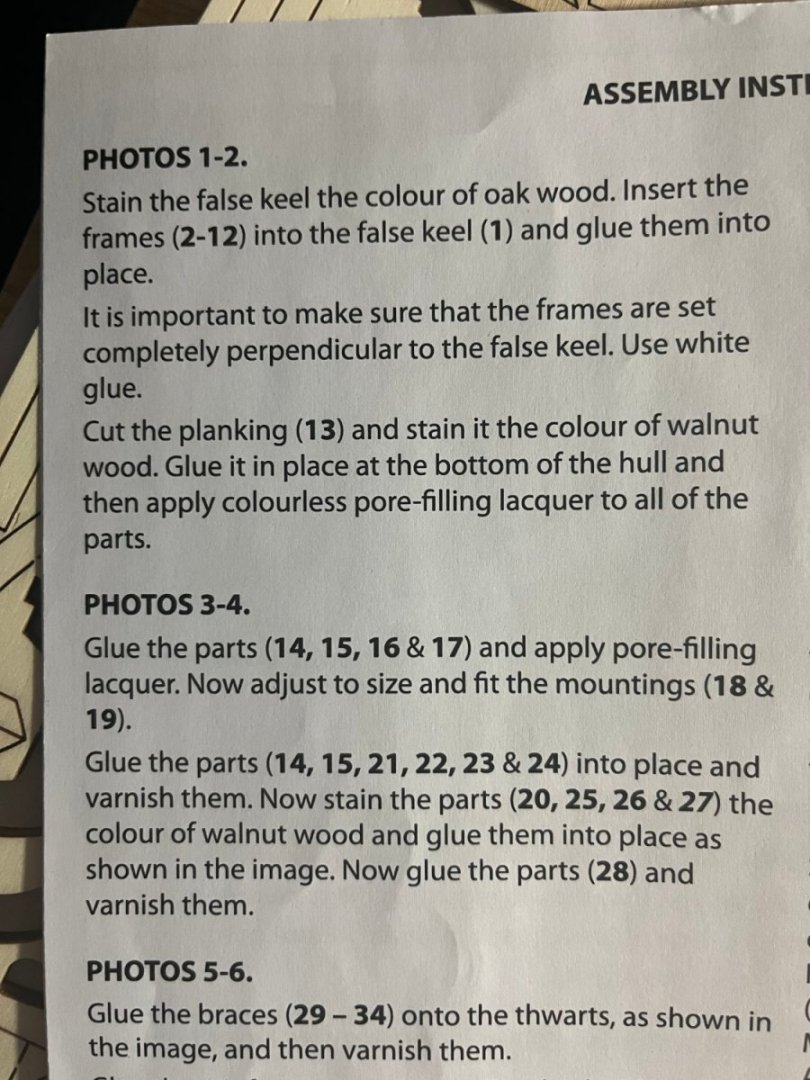
 I've had this kit sitting in my shop for almost a year with minimal work done. I'm finally motivated to jump into it and I'll try to post updates to this log as I go. All of my modeling experience is with plastic or resin - mostly Warhammer 40k stuff; I'm excited to work with wood but I'm out of my element a bit. I've already encountered a few instructions I'm unsure about, and I'm hoping to receive some guidance. Test fitting the first pieces. Glued and stained. Decking is cut, stained and glued in place. The parts list is tough to follow because the parts listed aren't actually what's included in the box. I had just enough wood for the decking when I was originally thinking I was short. Makes it harder for a newbie to inventory parts and figure out what's what. Seats are test fitted but not attached yet; thwarts are added for mainmast and foremast. My first questions are already happening in steps 1 and 2 unfortunately. I'm in the US (Menards and Home Depot nearby) and I'm not sure what products to get for "pore-filling lacquer" and varnish. Does anyone have product recommendations? In the first step - do I really coat the frames, false keel, and decking with pore filling lacquer? What's the purpose of this? Second - for varnish I'm just varnishing the seats but it doesn't appear that I'm supposed to stain them a more realistic color. Does that sound right? I'm wondering if maybe I should stain them the same "maple" color as the false keel and frames instead, and then apply varnish. Any recommendations would be greatly appreciated! That's all I have so far. I'm at a bit of a pause until I figure out the lacquer/varnish questions and then I'll keep going. These steps have been quite simple and I'm glad now I took people's recommendations and started on an easier kit. I know the real problems will start once I get started on planking. I'm not sure why most of my pics are showing up in portrait orientation. They're all landscape on my PC.
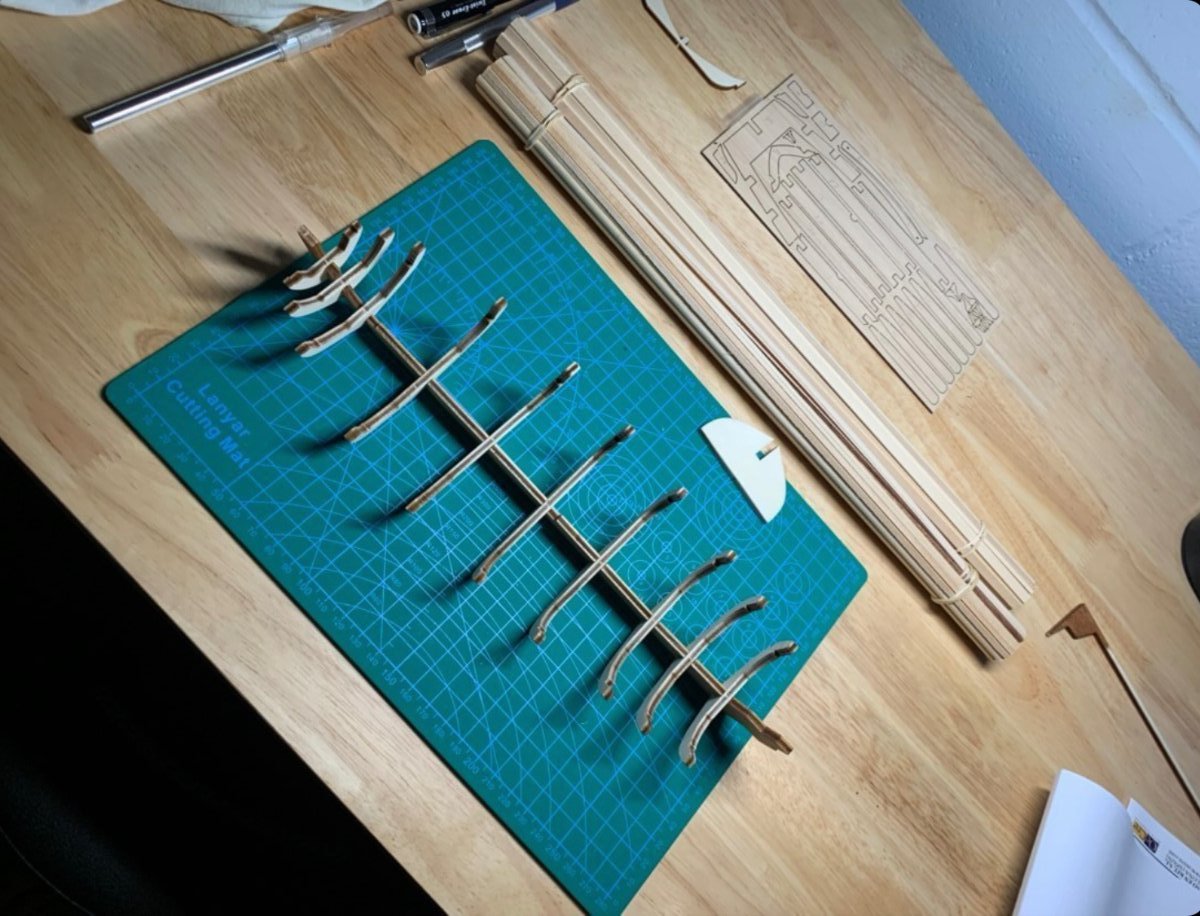


-
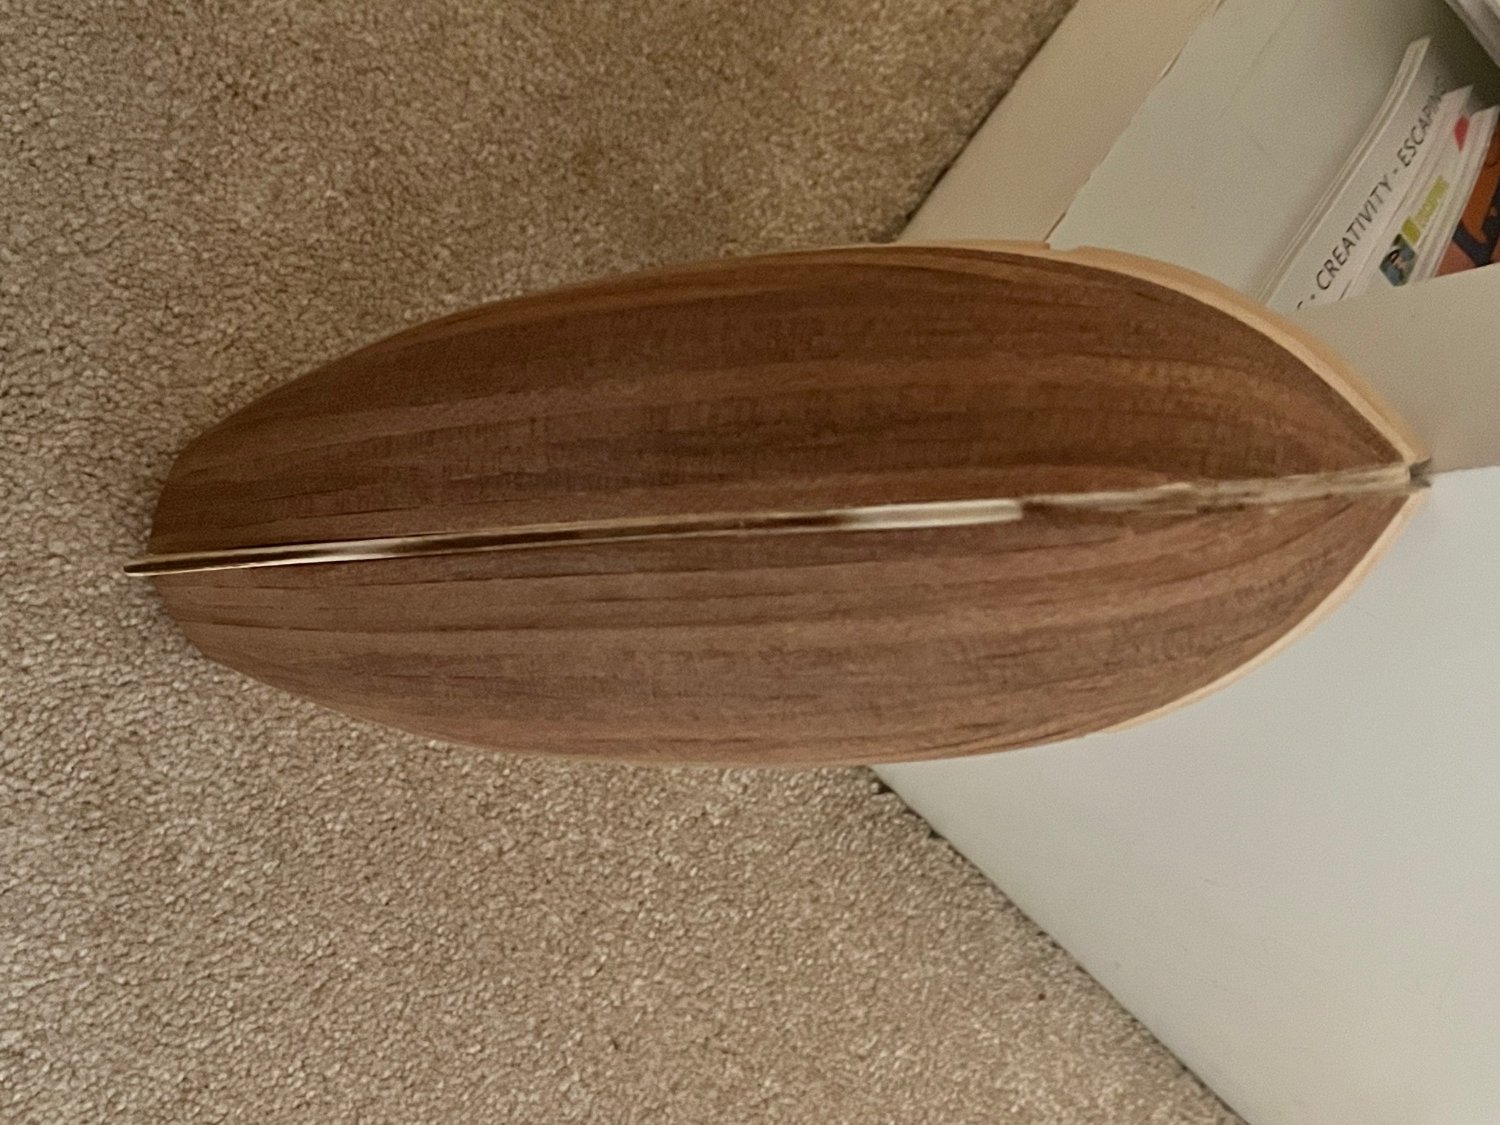
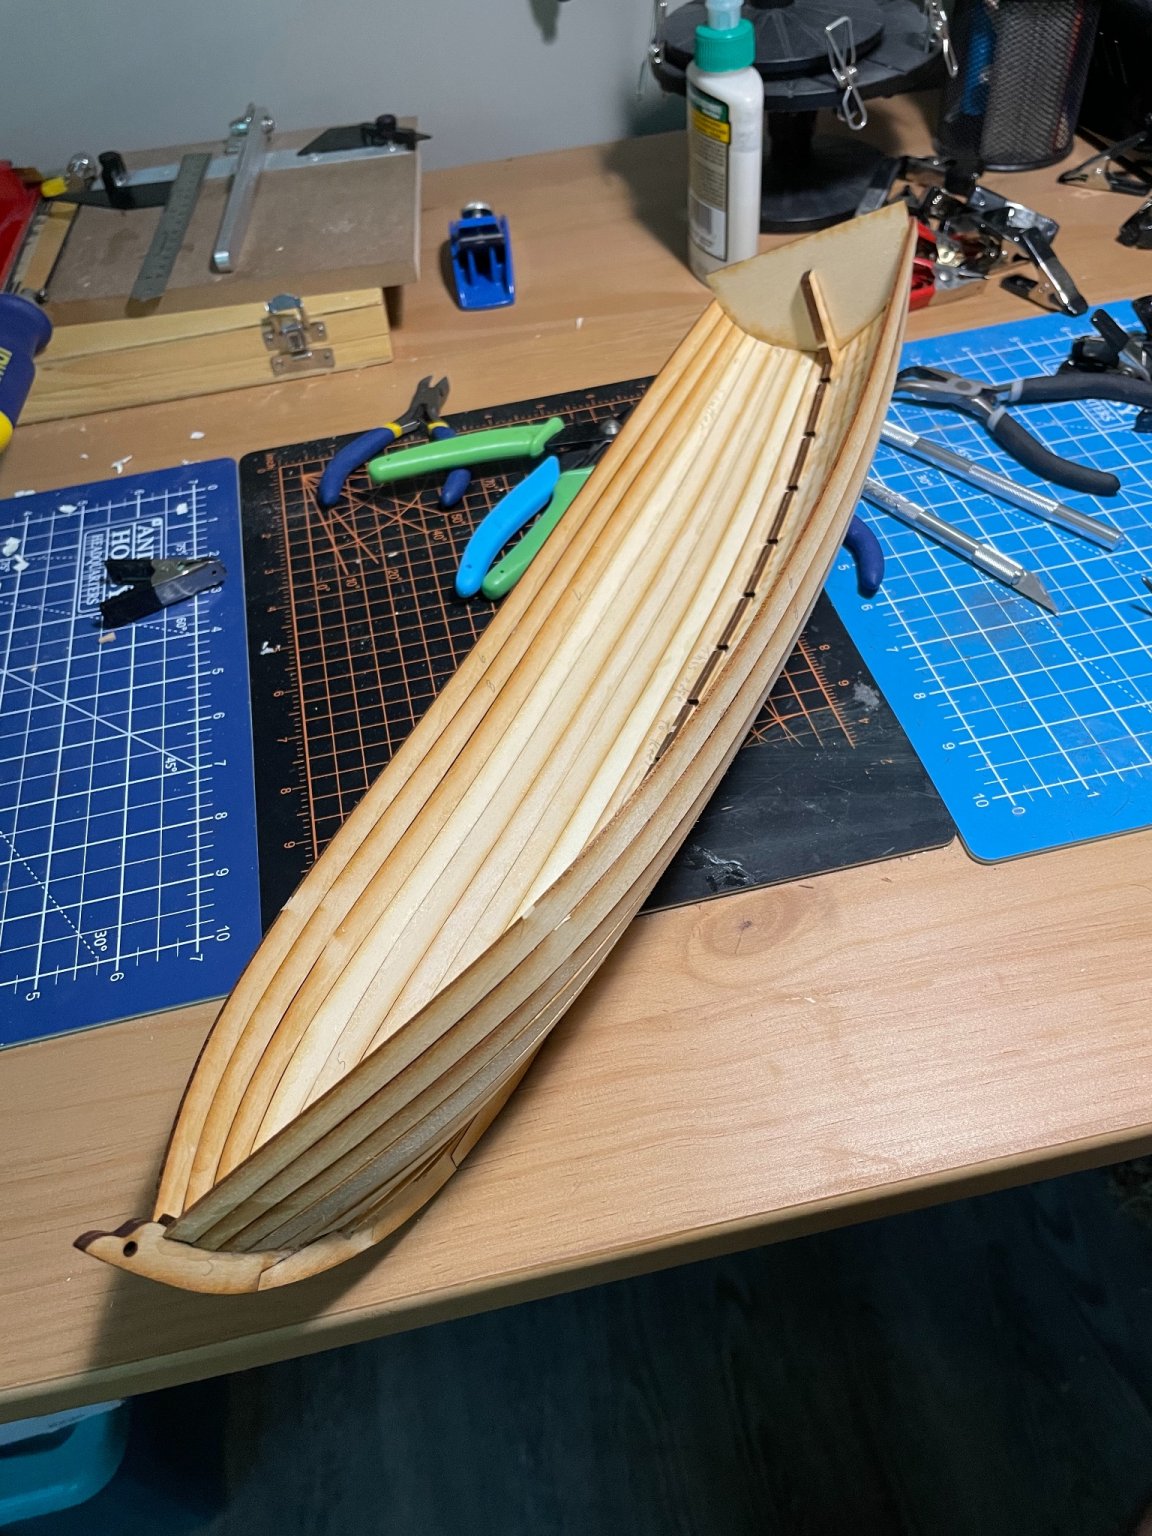
 Three thousand, six hundred and eighteen nautical miles. This is the distance Captain William Bligh was able to carry 19 men across the ocean in an open launch, only losing one man. It is for this reason I think the Launch is much more an interesting subject than the Bounty herself. This is a well known kit from Model Shipways, which I bought second hand on eBay. I started it back in May by assembling the keel and cutting the rabbet. It seemed like it would be an easy and quick project, until I began bending the ribs onto the frame. So I decided to lay the project aside till I had more experience and more patience. I picked up the project again yesterday, and assembled the building board as directed in the instructions. However, I just found it easier to begin planking the boat without regard for the frame at all, and the planks naturally found their shape. I ended up only using nine rows of planks, leaving off the sheer plank, because I had placed the garboard plank too far forward. May end up having to cut down the transom a bit. Here is the fully planked boat. It won’t be a fully accurate model of the Bounty launch when I’m finished, but I am happy with what I have so far.


- 5 replies
-
- 4
-
-
- Model Shipways
- Bounty Launch
- (and 1 more)
-
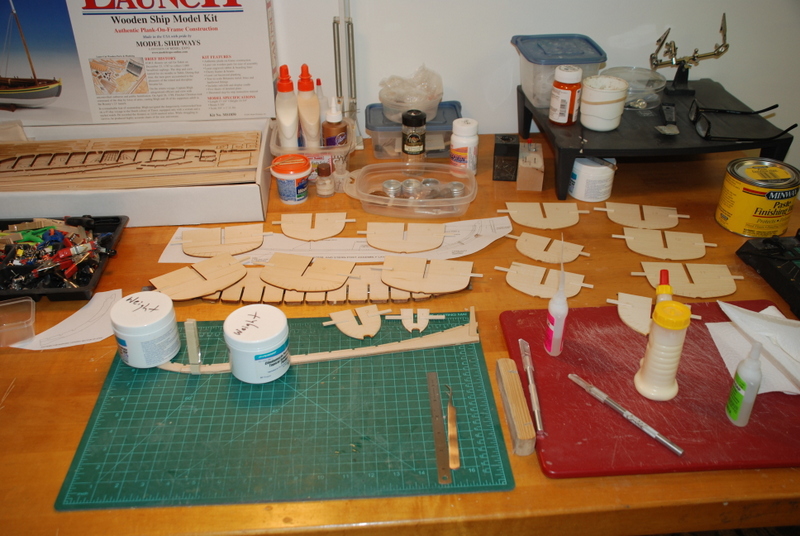
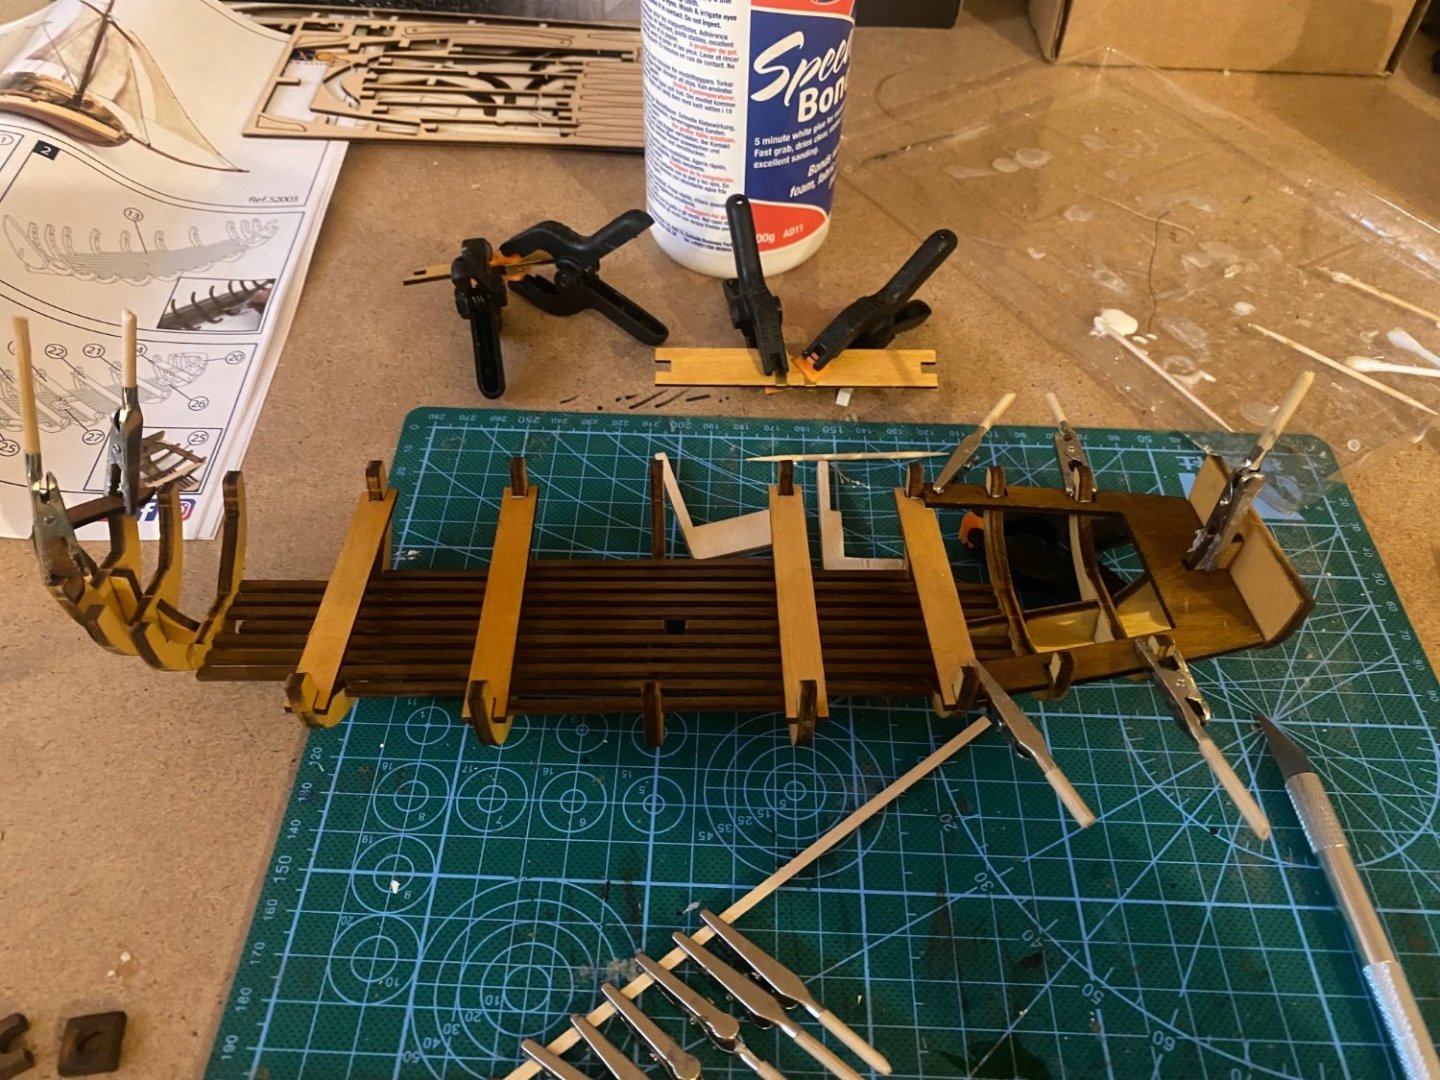
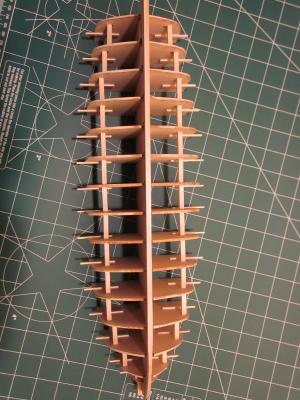
 Here is my build log for the Bounty Launch. I have been highly inspired by the wonderful work of teleman (Mario) on his launch, and I know this will not come very close to that level of craftsmanship.This is my fifth model in about as many years and the first that has been somewhat commissioned, as my wife asked me to make something smaller to go on the fireplace mantel. I plan to paint the exterior but leave the interior natural. If I get the birthday present I asked for, I'll be experimenting with a new airbrush for the exterior painting. I am really pleased with the contents of this kit. All of the planking has been laser cut, which will help me a lot as this is only my second POB model. I am going to try to use the supplied cherry for the frames, but if this proves too difficult to work with I will switch to basswood. Here is the start of the construction of the keel and stem: And here are the molds with the sheer alignment tabs added: Thanks for your attention.
- 153 replies
-
- 2
-
-
- model shipways
- bounty launch
- (and 1 more)
-
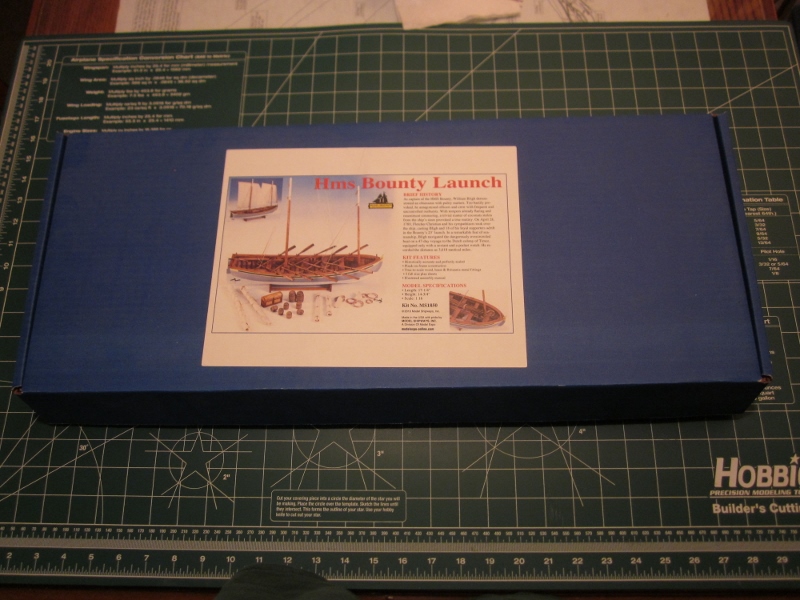
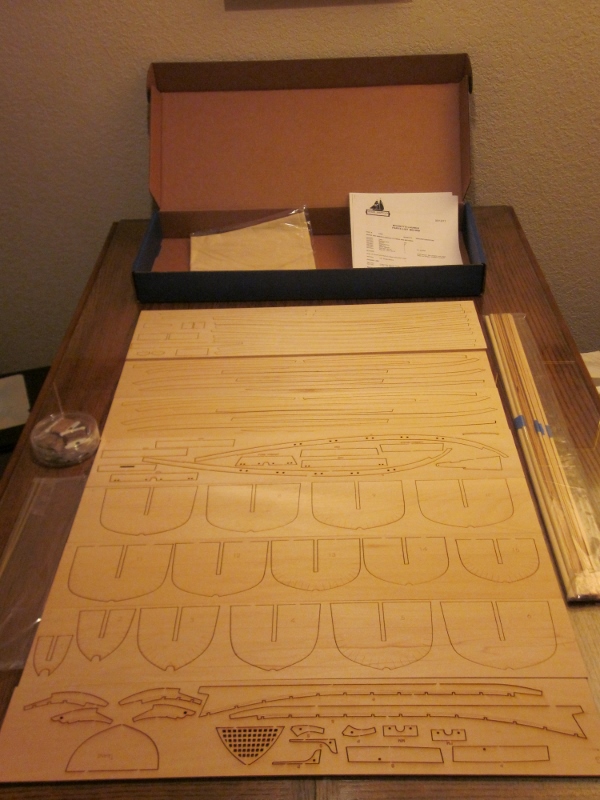
 Greetings all, My first foray into building a wooden vessel is this gem. I've been lurking a little while, as I've been evaluating my tool chest and selecting this build. Over the years, I've done any number of wooden structures and car kits, as a model railroader. Thought I should learn how to twist straight boards into boats aka planking. In my prior endeavors, we sealed and stained before we put any glue on any surfaces. Plus we had to fight warping wood ( due to using water based paints) with extra bracing. Should I treat the wood before any construction? Since this is primarily a basswood boat, should I apply some MinWax preconditioner? How about the cherry frames? Since I'll have to soak these to bend them, I suspect they get taken care of after the boat come off the mold. A few of the obligatory pix are attached: Kit box Some of the wood
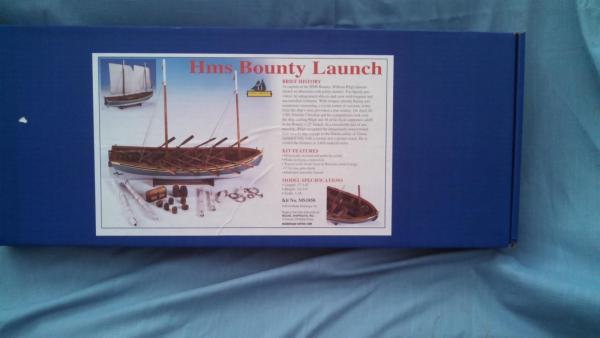
-
 Well I hope that i do not get in trouble by posting a build thread that is already completed. But it got blown away with the switch over to 2.0, but I know some modelers were refering to it so that is why I am doing what i doing.... It started out to just to try out POF, but once I started reading about Capt. Bligh and one of the greastest maritime true stories ever I decided to bash the kit, using all the reference i could find about the voyage. Knowing that the jolly boat was the first choice to put Bligh and his men into, but was rotted out so they were moved to the Launch. So here is my partake on building the launch. Hello All, I started the Launch a couple months back on MSW. So I thought I would start one on MSB so you can see what I am up to. I started building the kit per the kit instructions. But last week I decided to bash the kit to follow more to Mckay' drawing in his book n going by the draught. So since I am getting to 150+ pic's I thought I would add every 5th pic to bring you all up to date. Please any questions and/or advice would be welcomed. cheers Mario
- 53 replies
-
- 1
-
-
- bounty launch
- model shipways
- (and 1 more)
-
 First up, Welcome One and All !!! For now, my USS Constitution is currently on-hold - although some may (perhaps rightfully) argue that it hasn't even begun. (At this point, my Connie's boats are almost complete, bulkheads have been faired, keel pieces cut, but that's about it !!) I really must commence this log by stating that, to start with, I wasn't planning on doing another kit along the way. However, a number of circumstances changed my mind. First and foremost was that my expectations for my own work have grown exponentially since I joined MSW, and this is due purely to all of the amazing builds I have viewed here. Secondly, I feel there are a number of modelling skills which I need to work on before I could possibly hope to do justice to a proper rendition of Ol' Ironsides. (Especially with the number of Americans here on MSW, I well run the risk of irreparably damaging US-Australian diplomatic relations !!) Third, recently myself and a good friend were discussing a number of matters over a few beers (OK lots of beers !! It was Australia Day !!). At any rate, the topic came, somehow, to the Bounty mutiny. At some point, I brashly stated that "One day, I'll build you a model of the Bounty." To this, my friend replied that he would instead prefer to have a replica of the Mutiny longboat. (I should mention that this friend is aware of my modelling, and has seen - first-hand - how many years it takes me to do them.) It dawned on me that I could "kill two birds". And so I started to see what was around, read through a number of stunning builds of the same kit, saw some of the pitfalls that have been experienced, and also some of the "bashes" which others have taken to improve their own kits. (I am a kit-basher !!) As such, this build will be heavily influenced by the works of: UsedToSail, Cap'n Rat Fink, Amfibius, Meredith and others. Comments, tips and hints graciously accepted. EDIT: For ease of access, here is the link to the Bounty Launch "database" which I created during this build.
- 625 replies
-
- 4
-
-
- bounty launch
- model shipways
- (and 1 more)
-
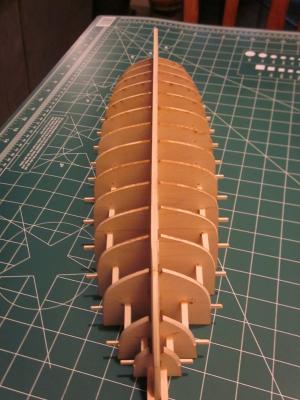
 Well, I've finally had time to reset the modelling table and start this project. I feel very confident with the overall process but already have some wood related questions. Here is my false keel: Sorry for the poor light. What l'm trying to show is that at the top edge (the one resting against the strait edge), is out of true by, litterally, 1mm (gap between it and the strait edge at the mid point). I have no idea if that's crazy unaceptable or within normal wood tolerances at this size and scale. The bottom edge is perfect. I've read about soaking and clamping parts such as this to strait edges etc but I really wonder if I mightn't make it worse rather than better. The other starting question is on laminating the two keel halves. The instructions caution against using wood glue, suggesting instead CA/super glue but I'd rather not the later if possible. If one is judicious with the amount of wood glue, and weight it down against a perfectly flat surface, is there that much danger of warpage? Also wondering if someone can suggest a good set of files? The ones I have now are too fine. Great for plastic, but no good for shaping wood. Thanks all....
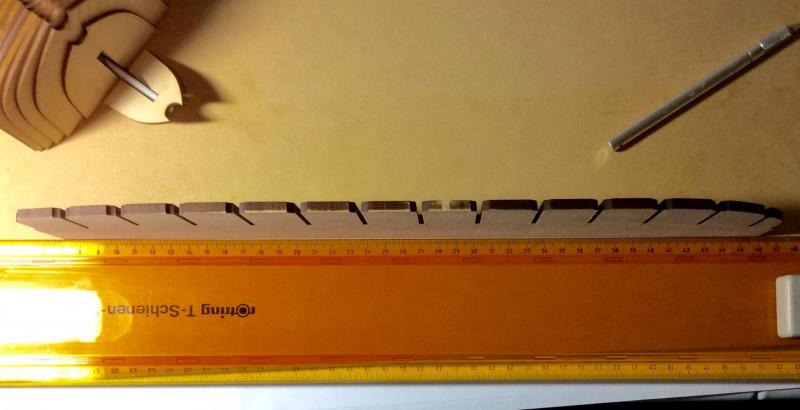

- 66 replies
-
- 3
-
-
- bounty launch
- model shipways
- (and 1 more)
-
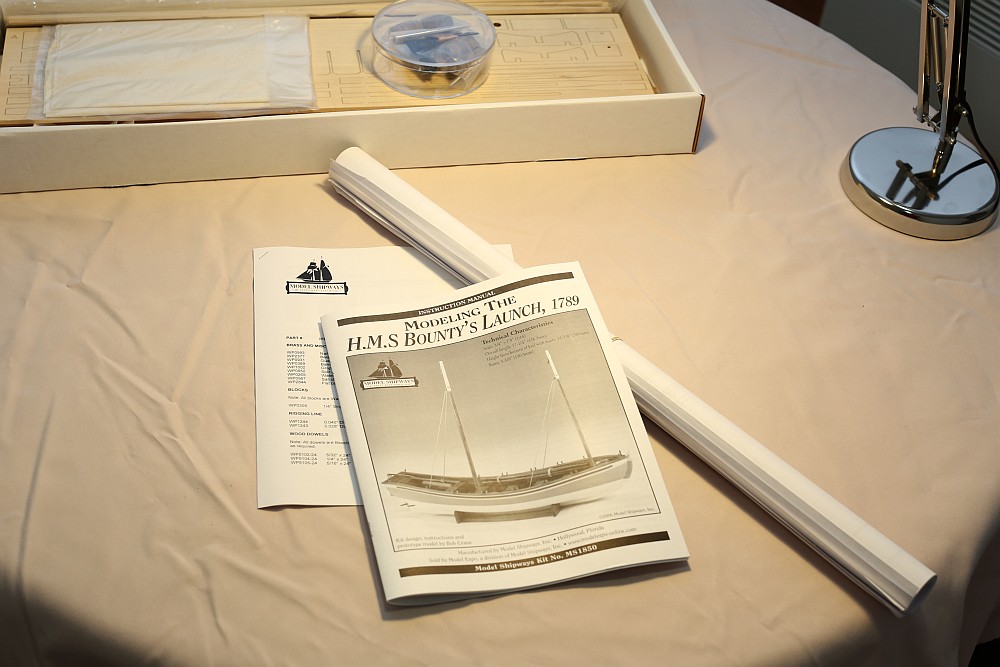
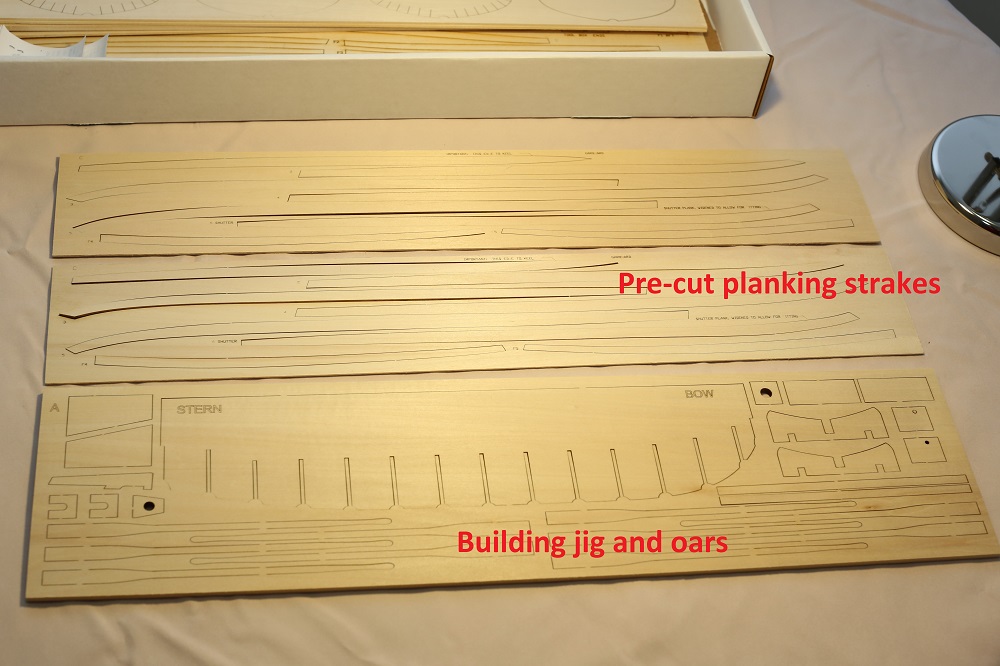
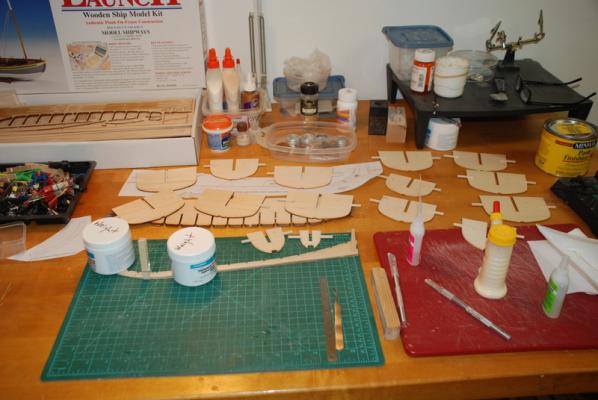
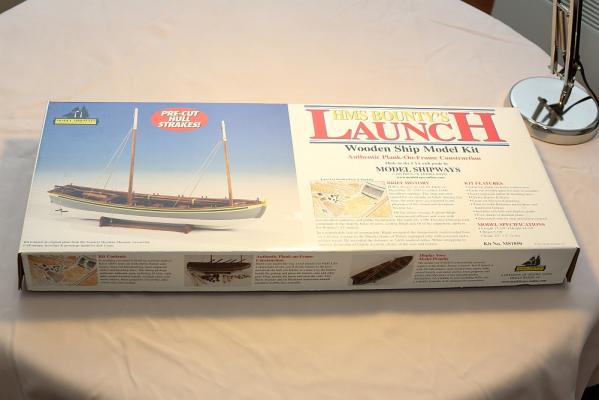
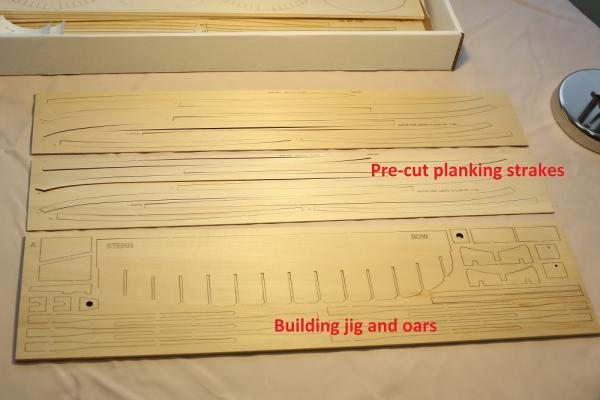
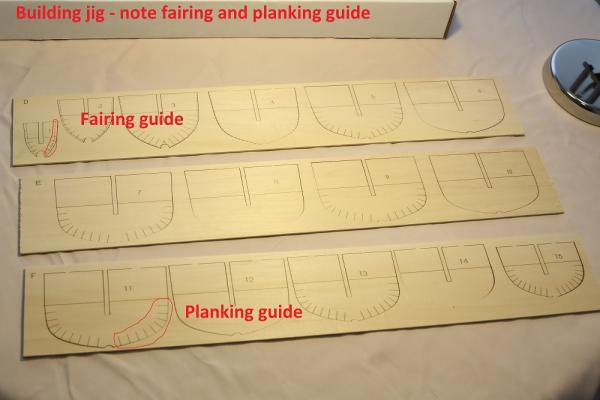
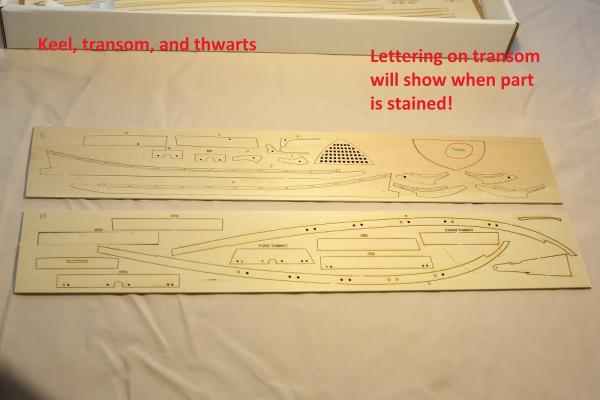
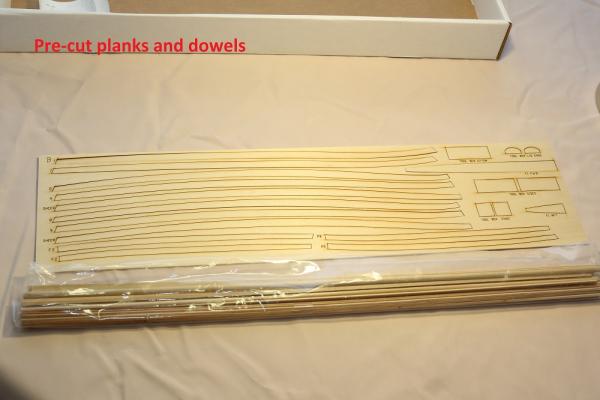
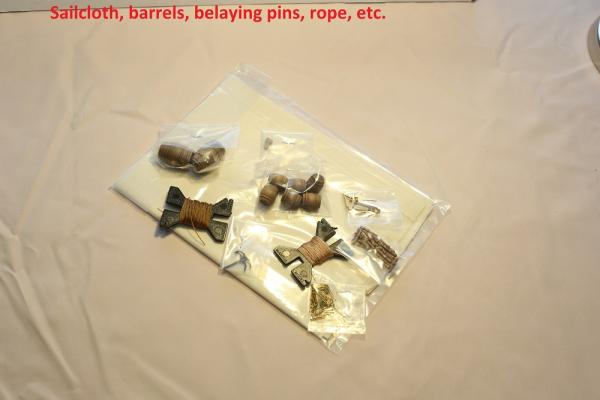
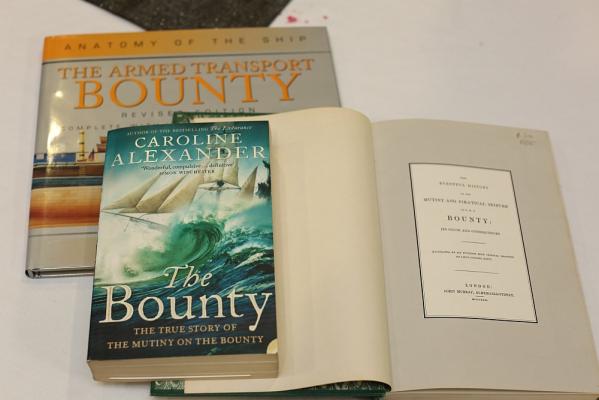
 I can honestly say that if I was not a member of MSW, it would not have occurred to me to build this boat. After admiring usedtosail's build, I did a search and found a wealth of other builds on MSW. I have pored over them in detail, and I managed to gain an appreciation of the kit's idiosyncrasies even before I started. These are the other build logs on MSW: Cap'n Rat Fink Meredith Tom Bombadillo usedtosail Many years ago, when I built the Artesania Bounty, I built a Launch as well. Here it is: What I wish to do is build a larger model of this launch, with missing planking on the starboard side, showing off the frames, admiralty style. I also plan to ignore the paint scheme as suggested by the kit (which I find to be rather ugly) and finish the boat to my liking. Along the way I will hopefully be guided by some reading material: Anyway, on to the model and unboxing photos. Photograph of the box. Instruction manual and plans. The manual can be downloaded from MS' website here. Up to now, I have been building kits by Artesania, Amati, etc. and have come to expect poor quality instructions in poor English. I was blown away by the detail in these instructions for such a simple boat. They even specify what type of blade you should use to carve the rabbet! Unfortunately, everything is in Imperial units, so I have been keeping my metric converter busy. The model is built on a jig. Pre-cut planking strakes are supplied. Bulkheads for the construction jig. Note the planking guide and fairing guide. The instructions tell you to fair the bulkheads to the dotted line. Easy enough to do. More parts. Note that the all builders of the Launch on the other logs complained about the laser lettering on the Transom, and here it is! Awful decision by the kit designer. I tried to sand the lettering off, but it goes down way too deep. Short of painting the transom (I wish to leave it stained and unpainted), some solution has to be found. More pre-cut planks. Finally, the sailcloth and various little accessories. ... and my pristine (for now) workplace with my new modelling lamp We're all ready, let's get started.
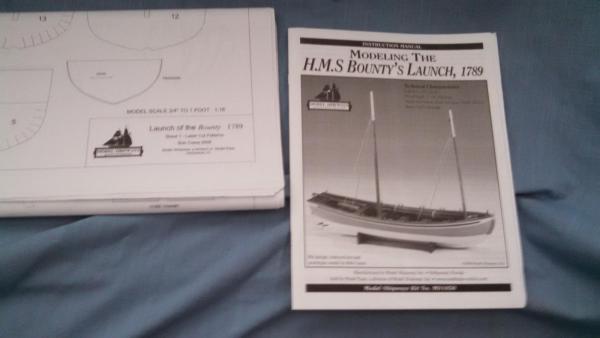
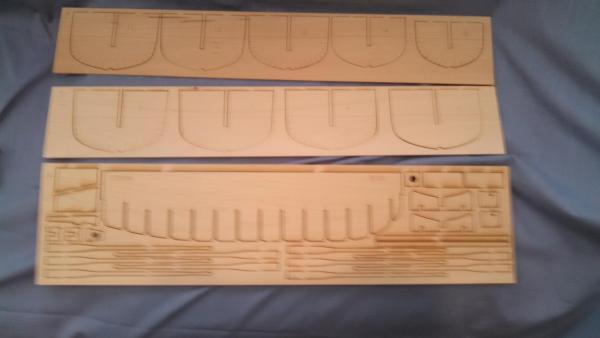


- 78 replies
-
- 1
-
-
- model shipways
- bounty launch
- (and 1 more)
-
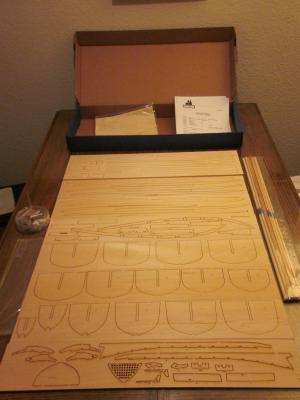
 First, thanks for taking a peek at my first build log. I have decided to put my MS Kate Cory on hold. I originally bought the Kate Cory kit in December of 1992. Since this kit is over 20 years old it doesn't really compare to the modern laser cut kits with great instruction manuals. It also helps that there are so many builders of the modern kits to get help from. I have just gotten started on it but I can see it will be a real pleasure to build. The parts are amazing compared to the crude wooden blocks and pieces for the old kit. I chose the Bounty Launch as a first planked project because of all the wonderful build here on MSW. Please feel free to nudge me in the right direction if I get off track. Only one picture so far. I only removed a few parts from the sheets and started to clean up the char marks on the edges. It is not heavily burned like some pictures I have seen. Looking forward to a fun build, Al D.
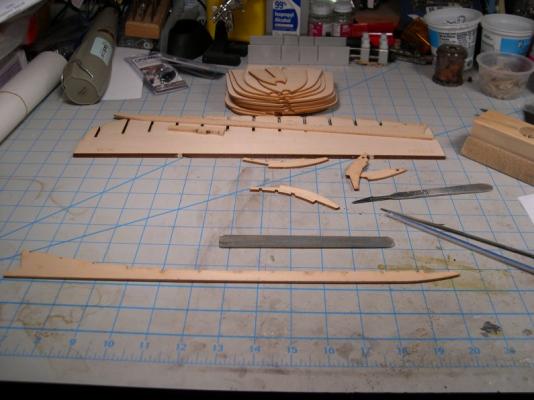
-
 Hello again. After careful consideration I have decided my next build will be the HMS Bounty Launch by Model Shipways. This will be my third build overall, after the most recent, the 18th Century Long boat. That was a delightful kit and let me hone my skills, even if it was in a small way. This should get me through Christmas and into the new year. Then Maybe I will have the courage to try something more ambitious. I pulled the Bounty Launch out yesterday after fondling my USF Confederacy all day Saturday. This kit has pre-made planks. This will let me see what a properly spiled and bent plank should look like and let me work it out and learn a few more things. I do understand there will be some conservative fitting and not just slap on a plank. I started the keel last night and got all of the parts laminated and ready to go. This kit, as good as the laser cutting seems to be, seems to laser cut with no room for sanding. I sanded the char off pertinent edges and when I went to fit the stem pieces they no longer fit the plans. Like I said, no room for sanding. I had read one other log and he stated the same issue. So, question. Would it be a good idea to shim at the scarf joints to build the parts out to fit the plans? The instructions say to explicitly follow the plans. Very well drawn and thought out CAD plans. So, if the parts were cut to CAD data, I could see how this would happen. So, the whole kit seems to be like this and I will need to be very careful. Question: How much of the char needs to come off to take glue properly? I sanded to just before totally bare wood. I will start to post pics very soon and I look forward to your ideas. I really like the friendliness and willingness to help on this site. I just wish I could contribute more and give back a little. OK, I am getting long winded. This is my official start, wish me luck. Paul
 -
 Here is my attempt at a build log. I missed the apparently customary box opening pictures but luckily remembered to snap a few pictures as I progressed over the weekend. Laminating the keel and dry fitting the jig. This was really straightforward. Assembling the jig. Everything just about fit out of the box. Only very minor adjustments required. Jig mostly complete. Following the advice in previous build logs, I used the #11 to score the rabbet and bearding lines, then used a curved blade to carve out the bulk of the material. A 1/16" square file was then used to finish the rabbet to a uniform depth and shape. Needs a light sanding and should be ready.


-
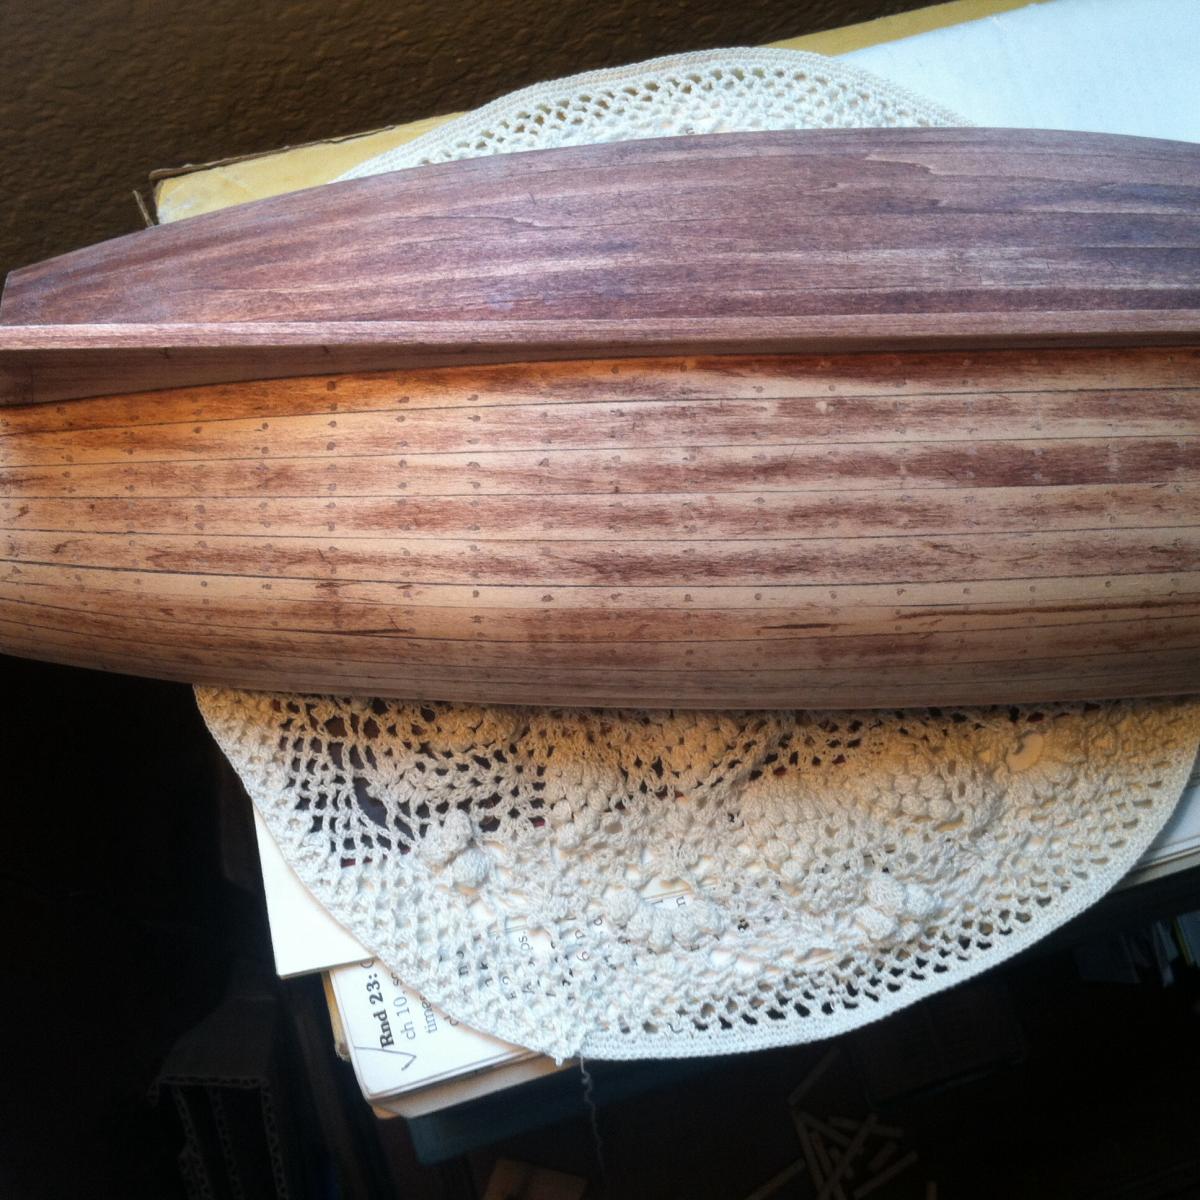
 Well this is some of my first pictures taken for this build. I stained all planks prior to glueing and then softly bevel sanded edges to achieve a tight fit. This however left me to insert a 3/16 plank and scribe my shutter plank to it, to my delight it's nearly invisible.
- 425 replies
-
- 10
-
-
- bounty launch
- model shipways
- (and 1 more)
-
 Well, got my kit today of the launch from Model Expo (probably the absolutely BEST and most customer oriented business I've ever seen). Skipped the intro of photographing the box/parts since you've seen many of those and all know what's inside the box. The only thing bad was two of the walnut belaying pins are broken. Just in case I need all 20 I'll talk to them tomorrow about replacements. They are quick on this kind of stuff so those will arrive well before I need them. I'm donating this to Dave's (Sawdust Dave) Wounded Warrior Project for auction so I want it to be really clean and as accurate as possible. As this is only my 1 1/2 build (didn't get the longboat completed because I got depressed about "wavy" thwarts and set it aside) I'm asking you guys to help me get this assembled well. One thing that will help is the rather large size of this model - 1:16. I will do my best to take pictures of every step as I go along and if you see something that is screwy (or gonna cause something screwy later on) PLEASE don't hesitate to tell me. I'm not a sensitive person (I've been called Spock and Sheldon(Big Bang)) and you are not going to hurt my feelings. TRUTH PLEASE - especially from the "masters" if they happen to see this build. It will be a few days before anything more shows up here - I've gotta finish at least enough of my new work table to get started, but stay tuned.
 -
 Welcome to my second build log.After several months of work on my U.S. Syren I've come to realize why many here on MSW work on several builds at a time. Currently I'm at a point where I need to do some wood working (rolling & tying hammocks is a tedious thing). My work so far has gone easily and quickly. The keel is assembled, Rabbet is cut, and the building jig is assembled and faired. The stem alignment blocks are spot glued and the keel has been dry fitted. So far I've had zero problems. The holes to pin the stem lined up perfectly. Now its time to roll a few more hammocks then install the transom horses and transom. I did a quick dry fit and it looks good. Attached are some pics Richard
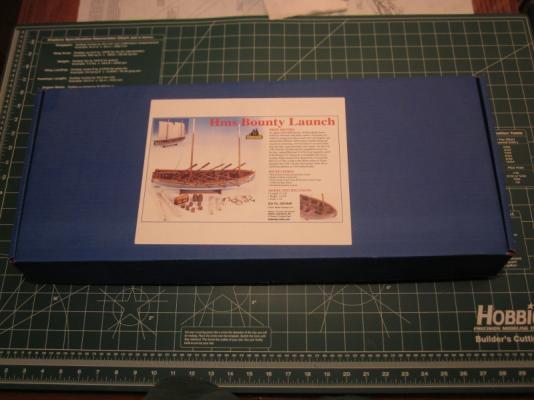


-
 Decided to have a little side project going on while I also work on my Syren. Need to have a ship build going during any "wait" time on the Syren. So all I have done so far is sort all the timbers... These imperial measurements aren't natural for me! - 1/8" and above I am fine with and can visualise - but anything less.. well as far as I am concerned its just "little" - I cant picture it. Silly thing is - I work with both imperial and metric all day with my work - but the scale is a whole lot larger. We all tend to refer to ID pipe diameter in inches....lineal measurements in meters....grinder sizes in inches.. drill bits and any "holes" in mm etc etc ec I do need a longer sorting box though - this one was originally made for the little 18th Century long Boat. Next time I take a trip out of here - I will get some more timber and MFD to build a much longer one. I find it very useful keeping things sorted. I have now cleared the table (lap top is only for MSE reference while I build and a few DVD's or music.. it usually lives on another bench) So.. I will start with a it of cleaning up laser burns and getting the bulkheads tabs glued and keel glued..