Search the Community
Showing results for tags 'cog'.
Found 11 results
-
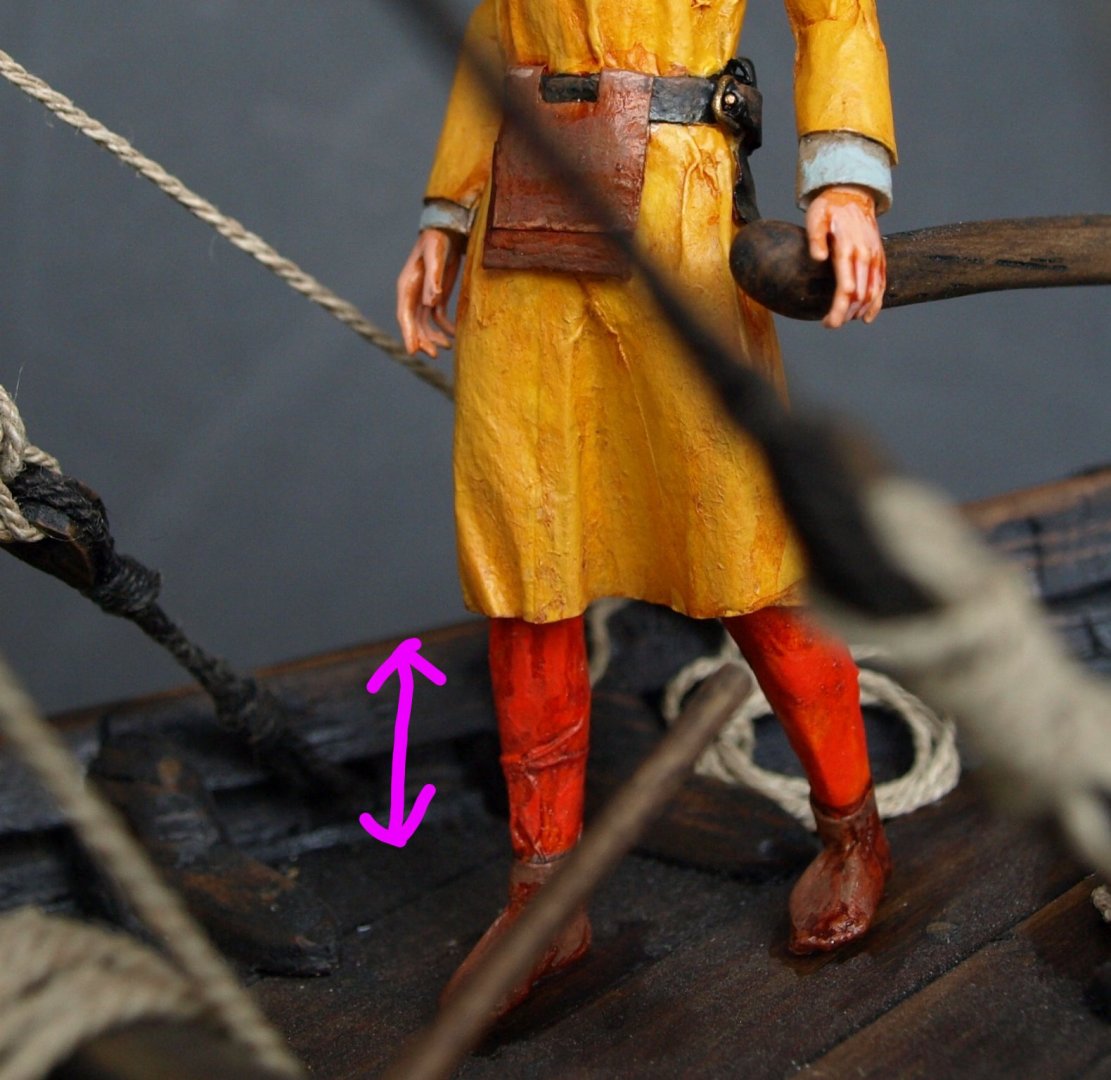
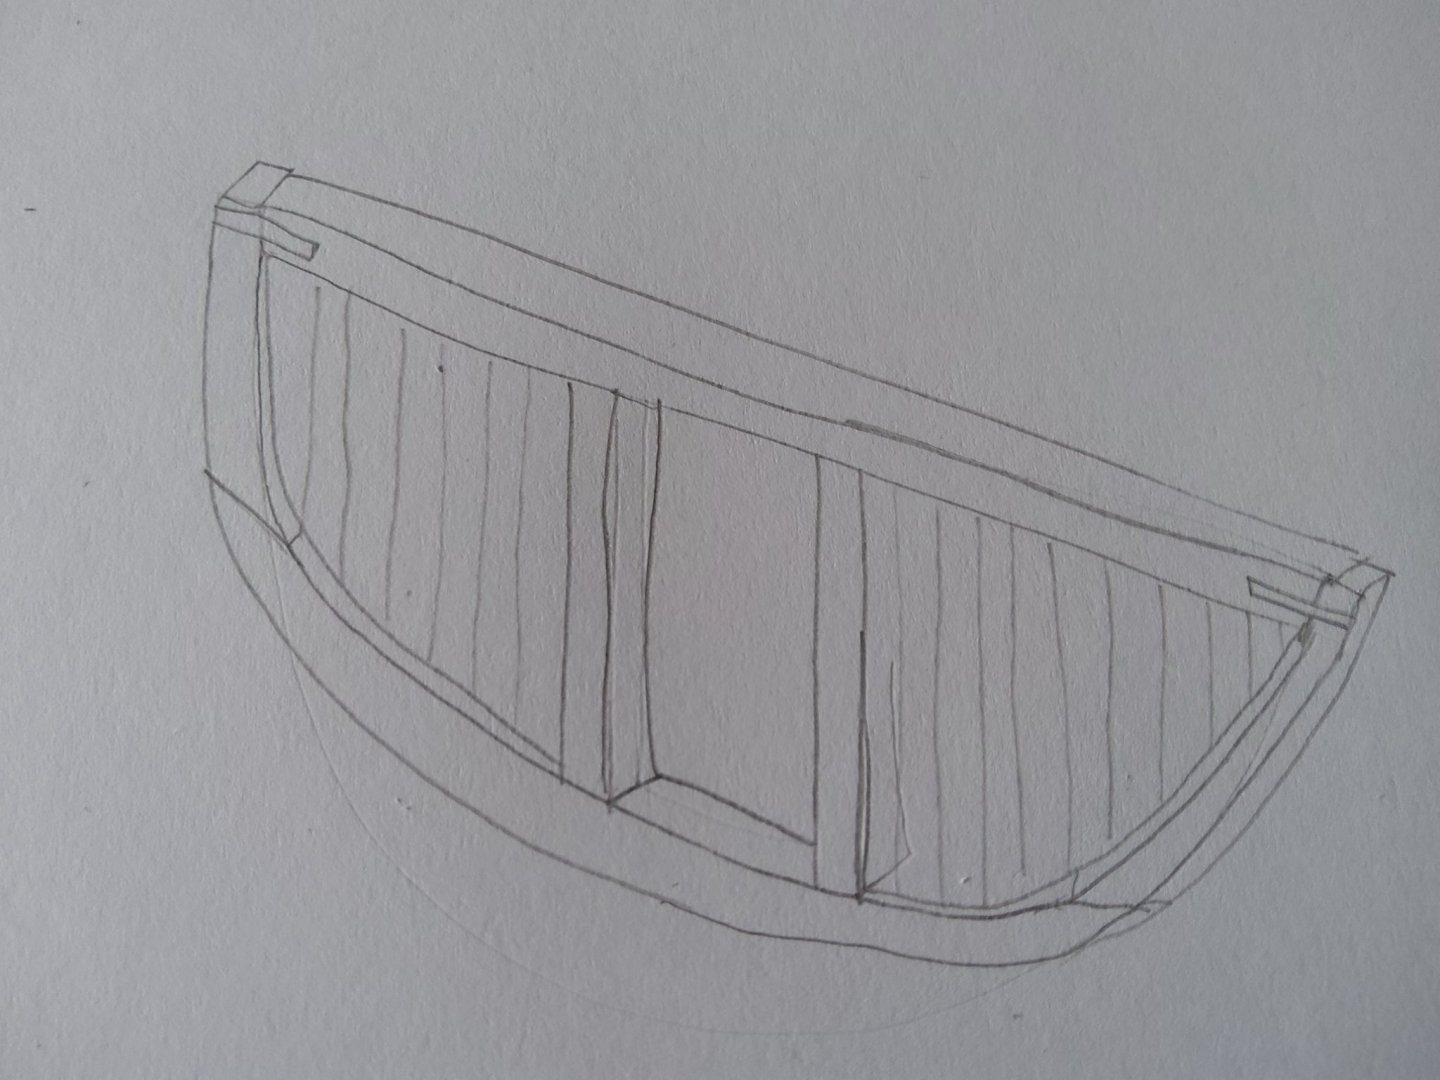
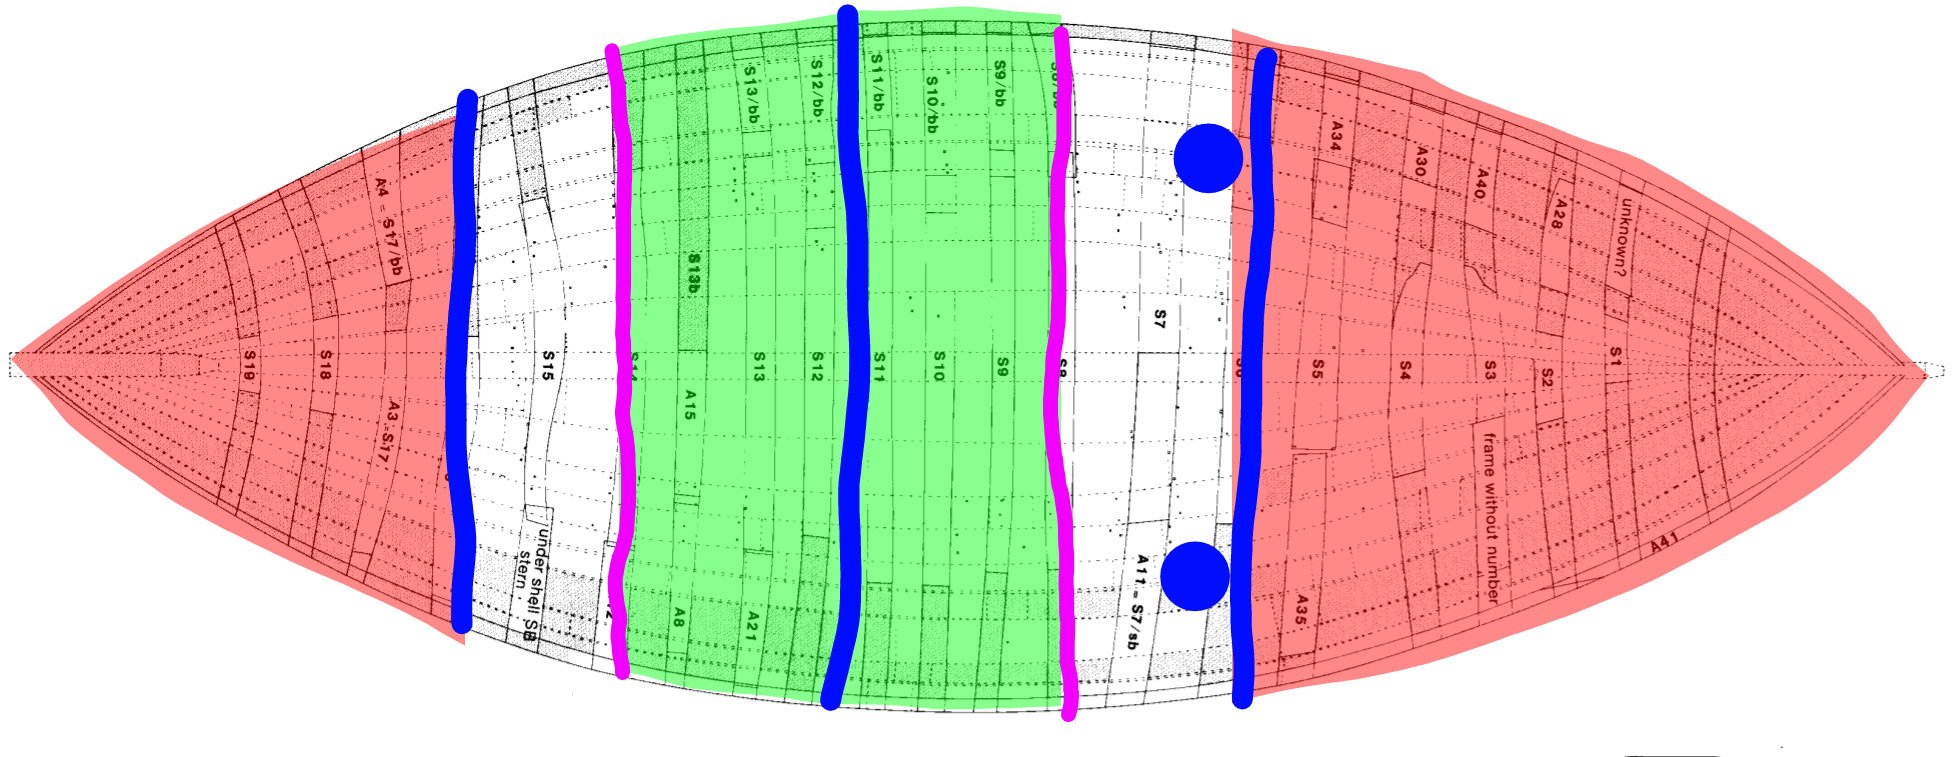
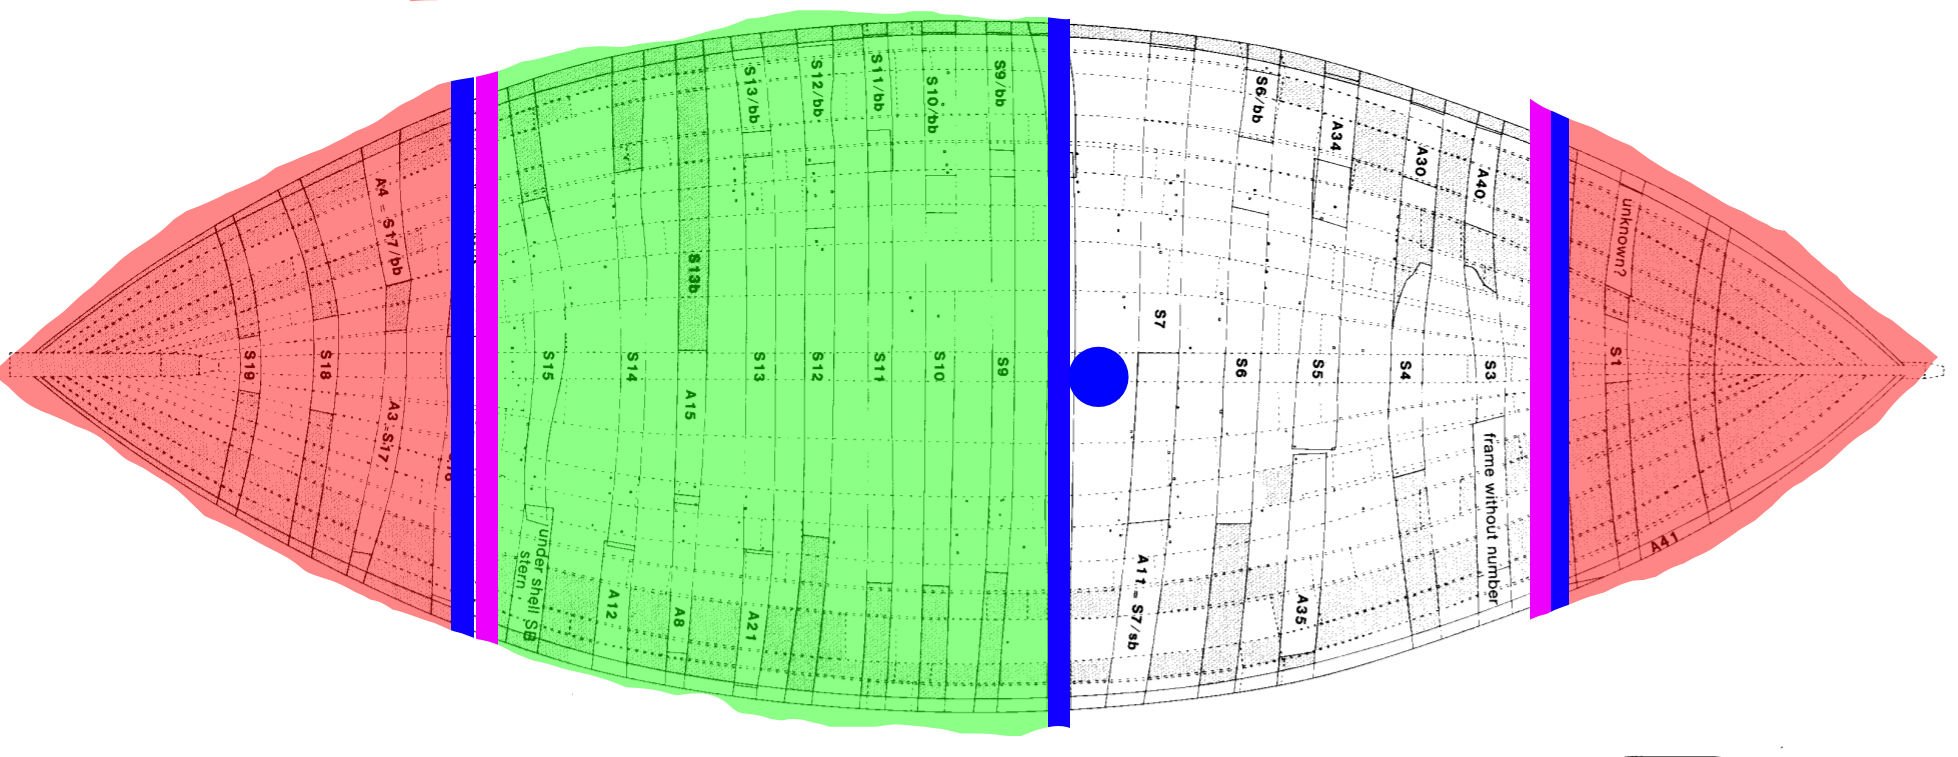
 So, I have just finished my build of a small 15th century cog and while I am pleased with the result, there are some things I wish I would have done differently. The only reasonable thing to do is to start over again 😛 Old build: I guess most people would start with a new ship, but I don't feel like I'm done yet with NZ43 and would like to fix some issues, and I would like your help to find them. Here is my list of changes, and I would very much like to hear your thoughts on them. Wood The old model used fir and it it was just as bad as everyone here told me. I will look for pear, but I guess I will not find it and use birch instead. I bought the old wood in planks, but now I have space to buy a small tablesaw and saw my own wood. But before buying it I will try sawing it by hand and see if it would be feasible as I like the idea of it. I don't liked how I soaked the planks in hot water, I think I will try a steambox this time. Scale One thing I really wanted to do with the old build was to use functioning nails, but the scale proved to be just too small. I think it will be better if I now make it 50% bigger length wise. (I thought 50% bigger than 1:20 would be 1:15, but apperently it is 1:1333... Not as a neat and round number as I had hoped. Calling it scale 7.5% sounds better.) Frames I didn't much care in the last build about where the joint between futtock and floor timber was and I built it frame first. Now I will build it bottom first, ie the bottom will be frame first and the rest shell first. This way the floors will be shaped and attached to the keel plank and the futtocks will be shaped and attached afterwards. I do not know how to do it, but I'm sure I will find a way Layout The hold was way too small in the last build. The layout was like this Red - decks Green - ceiling Blue - large beams and masts Pink - bulkheads My new proposal is like this instead The fore deck was way too big and it can be cut down a lot and lots of cargo can be stored there. The bulkheads are moved to where the decks begin and will be like this with twin stanchions, vertical planking and a door. This design is from the Almere 13 wreck. Perhaps a bulkhead also under the beam aft of the mast to seal off the ceiling area? And yeah, the bipod mast was a fun build, but I will ditch it for a normal single mast with a normal mast step. And I guess the lifting boom will also have to go. The old decks were not waterproof, but the new ones will be. Cleats The old cleats were thought of in the last minute and just wrong. I think I will integrate them in the knees on the decks. Sheer height over decks I have no clue of what this is called, but I'm talking about this measurement It is so small on my build. But increasing it means smaller decks and less storage space. How much bigger must this be? The Almere 13 wreck seem to have double the height, but that ship is also a bit bigger than mine. Any thoughts of other things I should fix?

-
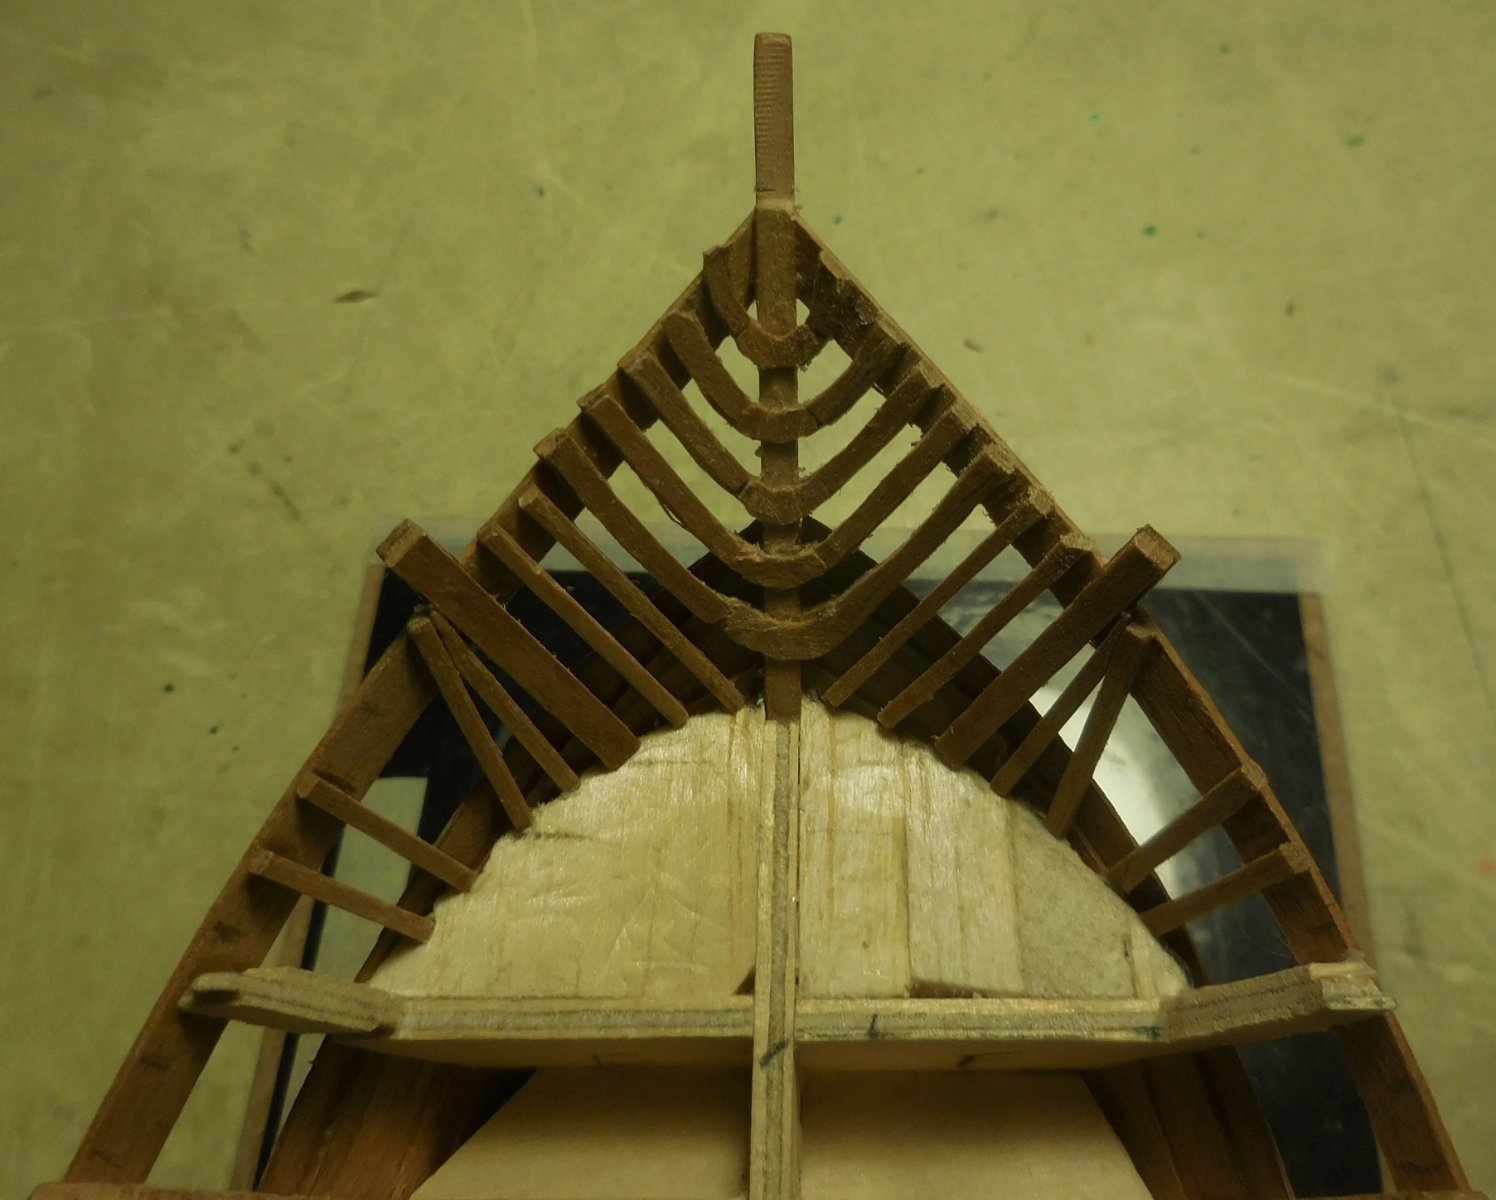
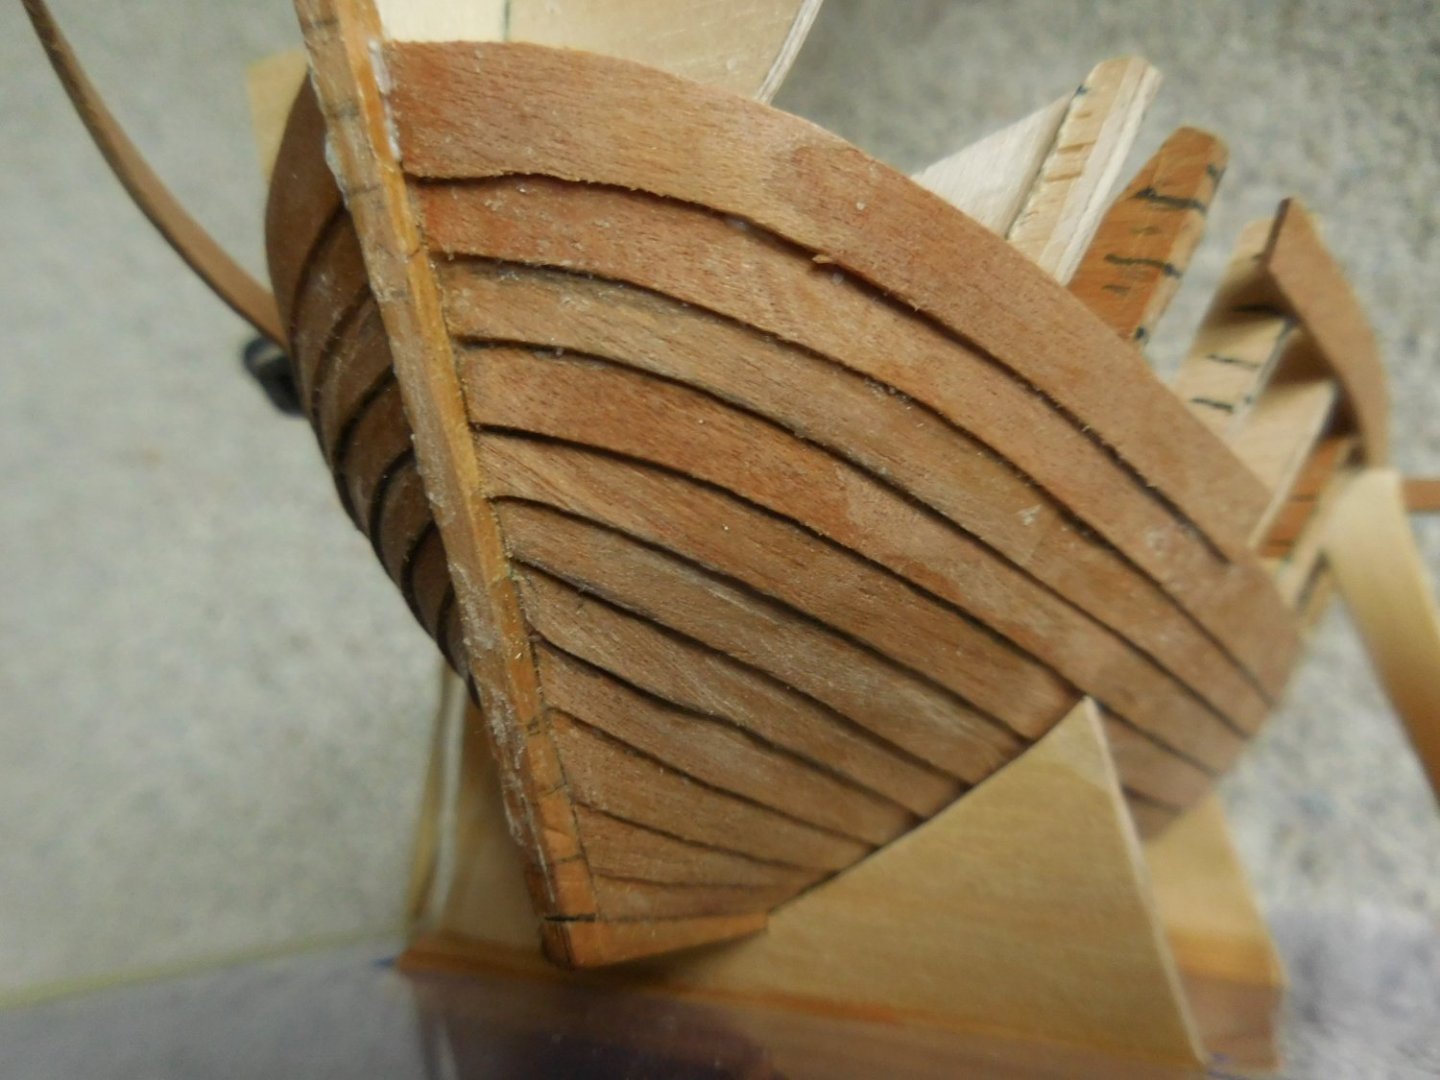
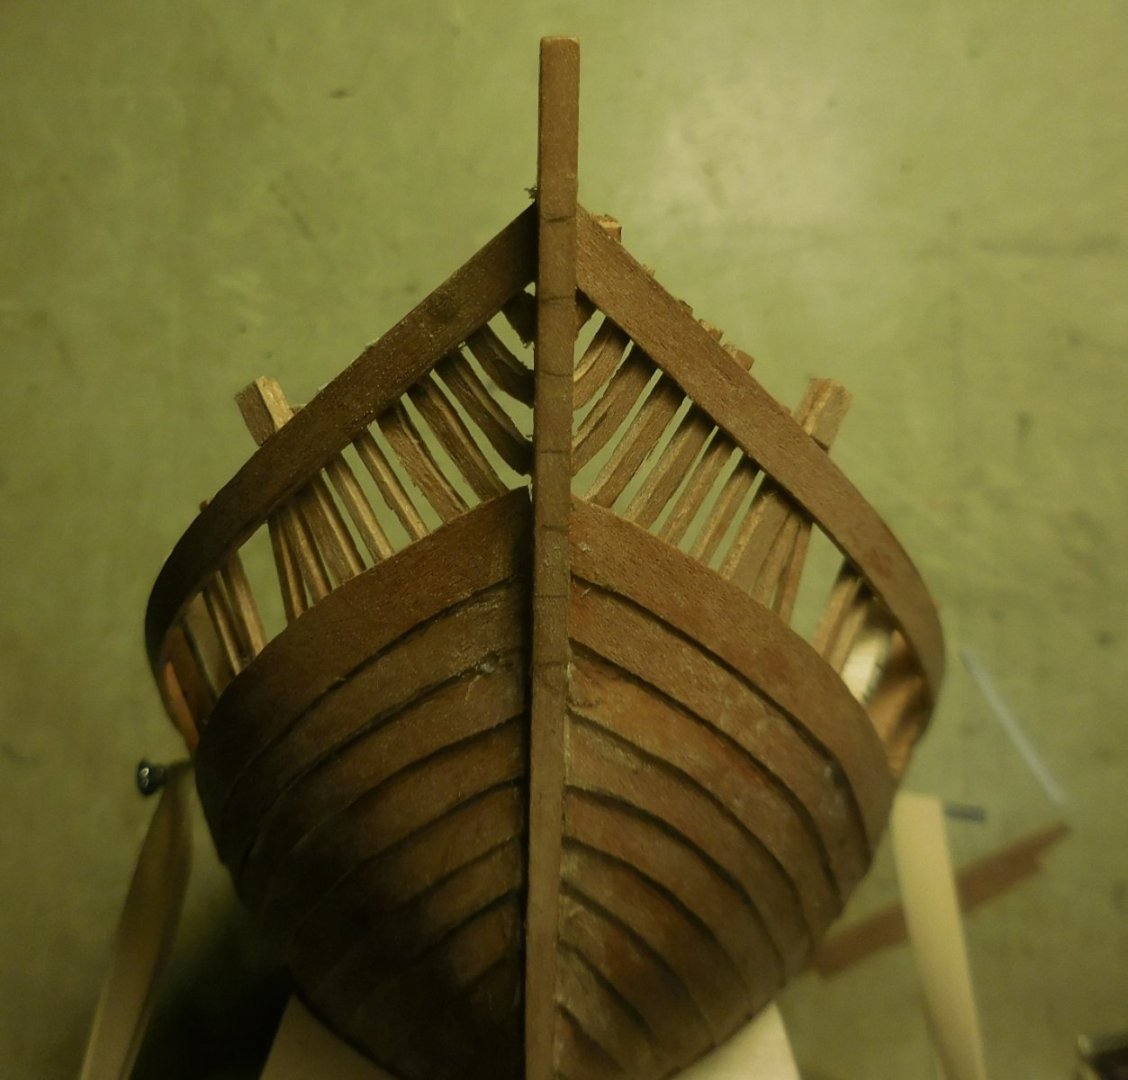
 In 2023 bouwde ik een model van een kogge, een schip dat van belang was voor de handel tussen ca 1250 en 1450. Ik bouwde hem, niet vermoedend dat het Stedelijk Museum in Zutphen daar lucht van kreeg. Men vroeg mij het model onderdeel te laten worden van een expositie over de Hanzetijd, waar dit schip een grote rol in speelde. Het verslag ga ik laten zien in drie delen. Ik maak op voorhand excuses voor mijn niet perfecte kennis van de Engelse taal, maar ik koos er toch voor dit in het Engels te doen. Er komen veel termen in voor die niet goed in computertaal in het Engels zijn weer te geven. RECONSTRUCTION OF A COG Scale 1 : 87, Built in 2023 This reconstruction is exactly based on the measurements and construction of an excavated shipwreck in Holland in 1983, registrated; Oz 36, known as Nijkerk II. The results were in 2021 published by the archeologist Karel Vlierman in 2021 ; “Coghen, kleene coghen ende schuten”.In this publication you find detailed drawings of the excavated parts and a reconstruction of the hull. The German book: ; “Die Kieler Hansekogge, der Nachbau eines historischen Segelschiffes von 1380”, written by Uwe Baykowsky, 1991, was a great help especially for the rigging and the missing parts of the ship such as the mast and the yard. The wreck is until now the most complete cog which is excavated, The starboardside of te hull was almost complete. A lot had to be reconstructed on paper but the result is very satisfactory. Combined with remains of other excavated cogs it was possible to build this model Dendrochronologycal the ship was build in 1320, and wrecked around 1355. No remains werd found of the mast, rigging and rudder. Only a few marks point to the posibility of a castle on the stern. In the publication of the excavation nothing is mentioned about the sailing capabilities, also the lenght of the mast is not reconstructed. Before I started I did a lot of investigation to Mediaeval pictures Mainly concerning the rigging, the mast and the sail. Planking the hull The model is made of Mahogany vener. Attached on a frame of triplex. The keel, bow and stern are made of pearwood, attached to the long middle frame of triplex On the middle frame I attached the frames at first on the righet side and filed them in the correct shape of the hull. After that I made exact copies of all the frames on the left side and attachede them also on the middle frame. I started planking at the keel. All excavations show that the first three planks near the keel were carvel built connected, but only in the middle. Going to the stern and to the bow this construction changed in clinker built planking. The rest of the hull is entirely clinker built. The wreck showed that the hull on each side consisted of 15 planks, clinker built. I made this amount also on the model. Every plank consists of three or four parts, just like the real excavated planks The bow during planking before sanding and filing On the sternpost curved timbers were nessesary. Here the timbers in paper, before making them in wood. Most wooden constructies on the deck consit of several layers of veneer, glued upon each othter until the exact thicknesses. Above the deck the planks are attached on a number of frame timbers which are visible above the deck. In the model I made the same amount as found in the real ship. The upper plank was needed to attache them. Before placing the frame timbers I removed stsp by step all the temporary upper triplex parts of the frames.
.thumb.JPG.e95a84a84657bfd8ad8809647c5e81d7.JPG)
.thumb.JPG.cb410a0ce1af055719883d50c649bd7d.JPG)
.thumb.JPG.6b2505d646b8500acc9de09982c5221d.JPG)
.thumb.JPG.bcf5e4b76cd150195c46240c25b3591e.JPG)

-
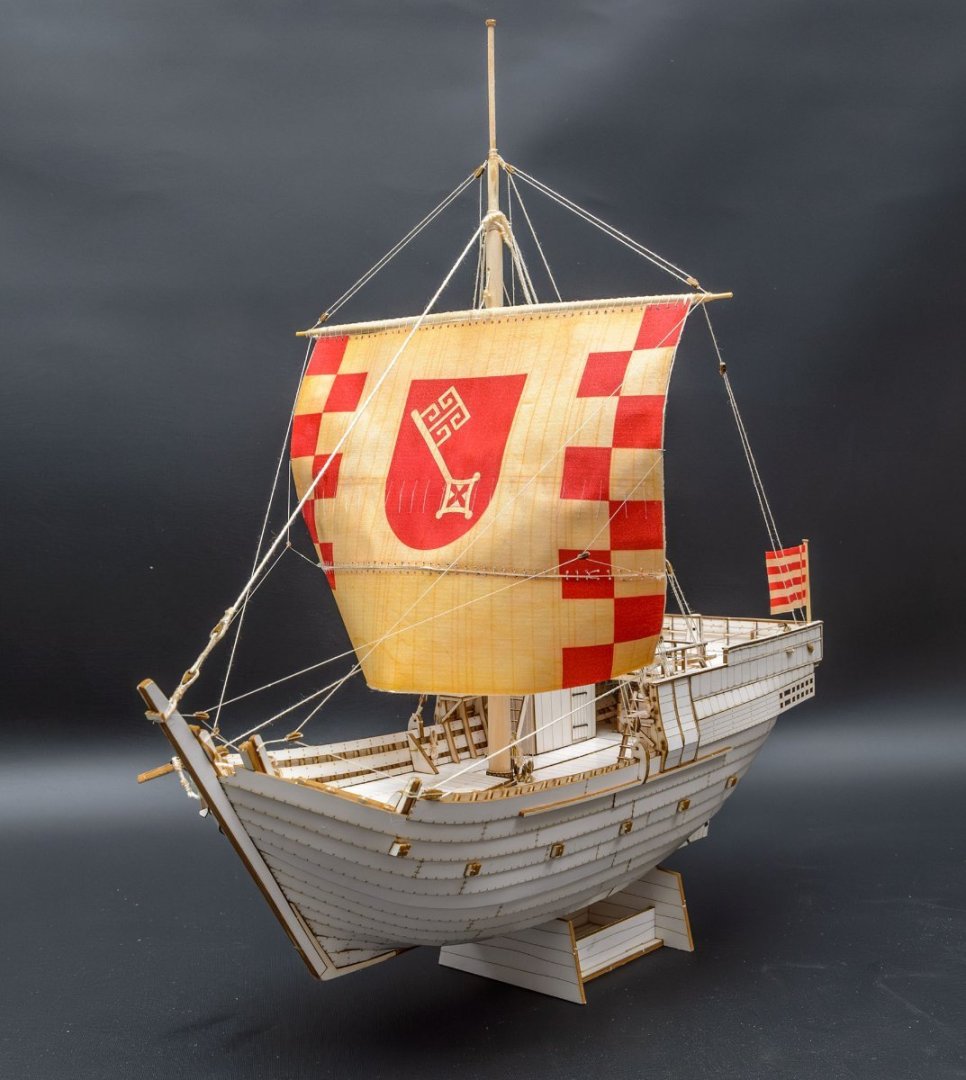
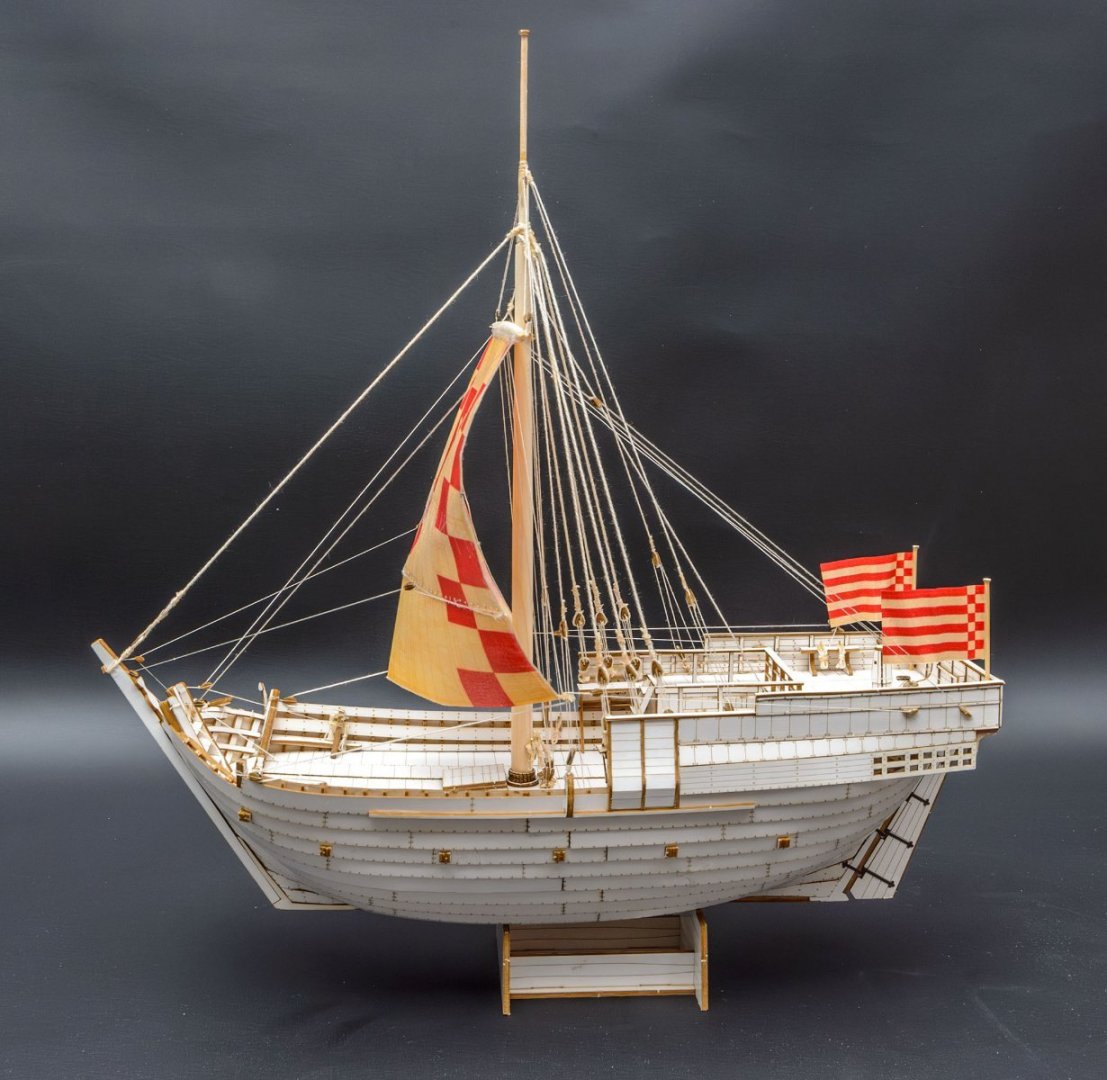
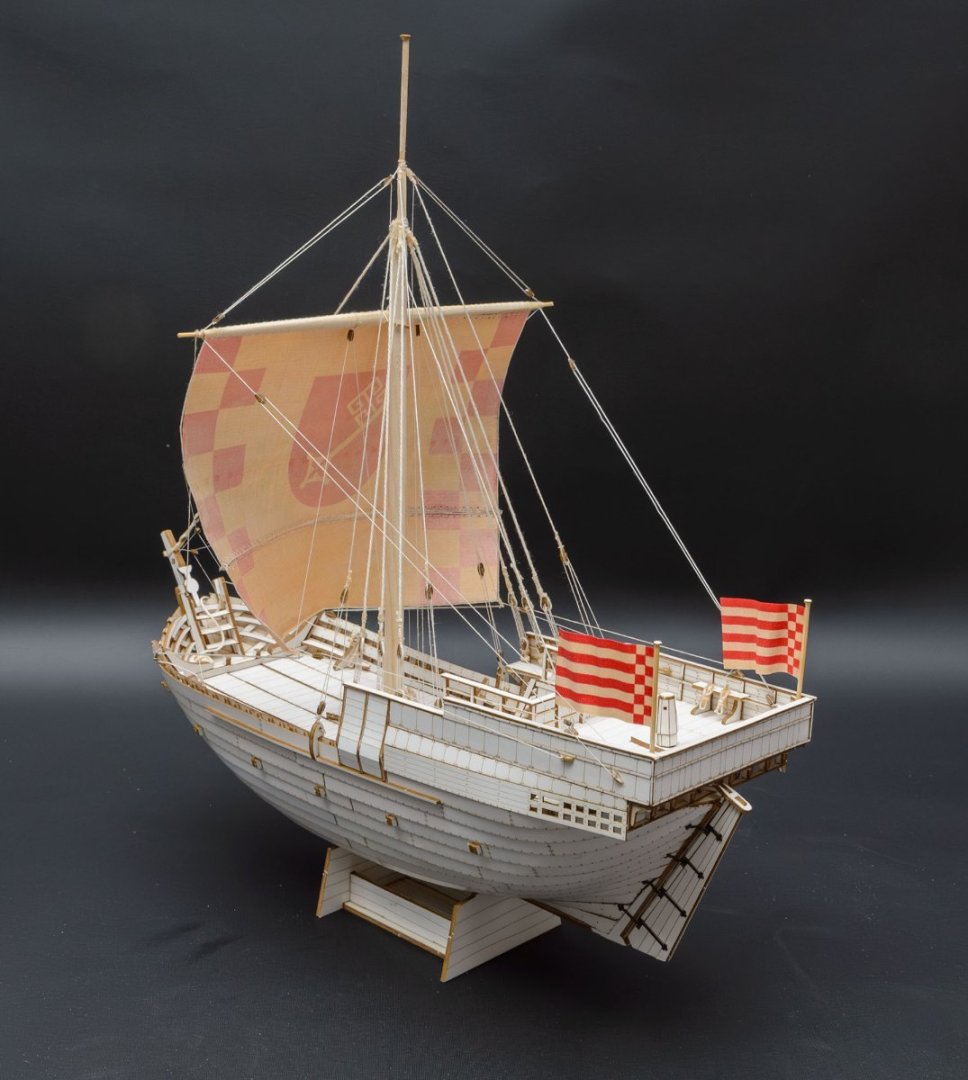
 Because I failed to build the Papegozan (Shipyard, ZL-005), I made the Hanse Kogge (Shipyard, ZL-048) in a week without painting. I found what was wrong and what I had missed before. - The Hanse Kogge (ZL-048) is a much more advanced kit than the old Papegozan (ZL-005). HK has two manual books, and the instructions are much clear and helpful. - The HK instructions has a very simple and fast painting method. I don't worry about painting anymore. - The method of assembly is much improved. The HK kit isn't a high-priced laser cut paper model. It is something in the middle of paper model kits and plastic model kits. If I had built the HK kit first, I wouldn't have failed the Papegozan kit. I recommend this kit as the best introductory kit for early Shipyard kits.
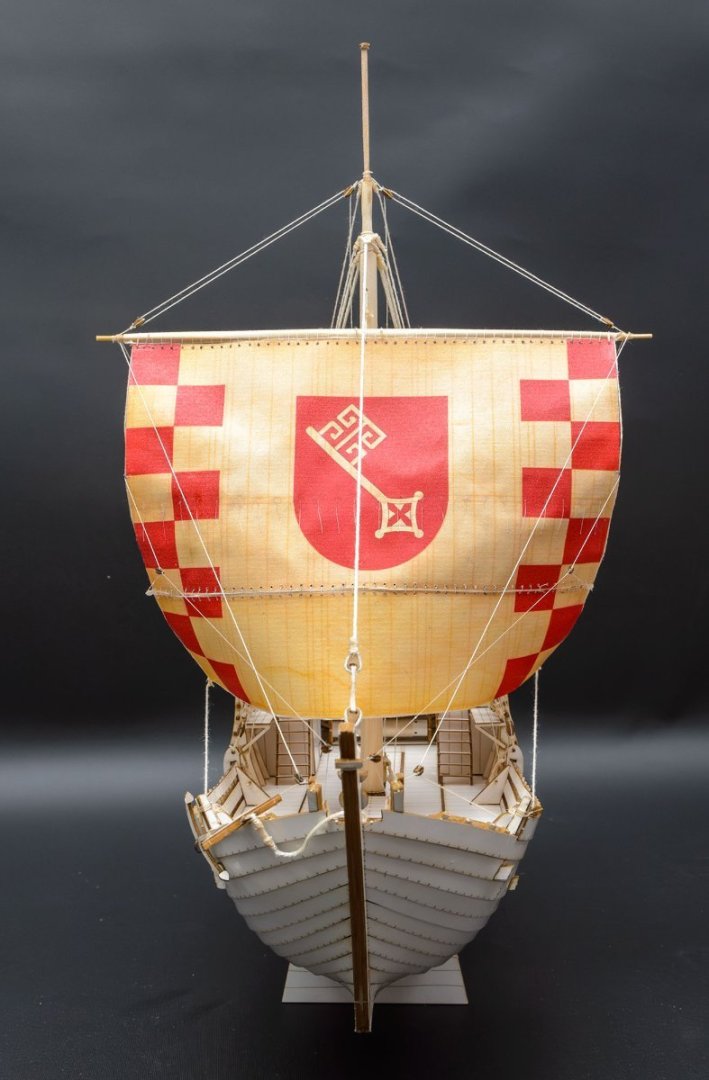


-
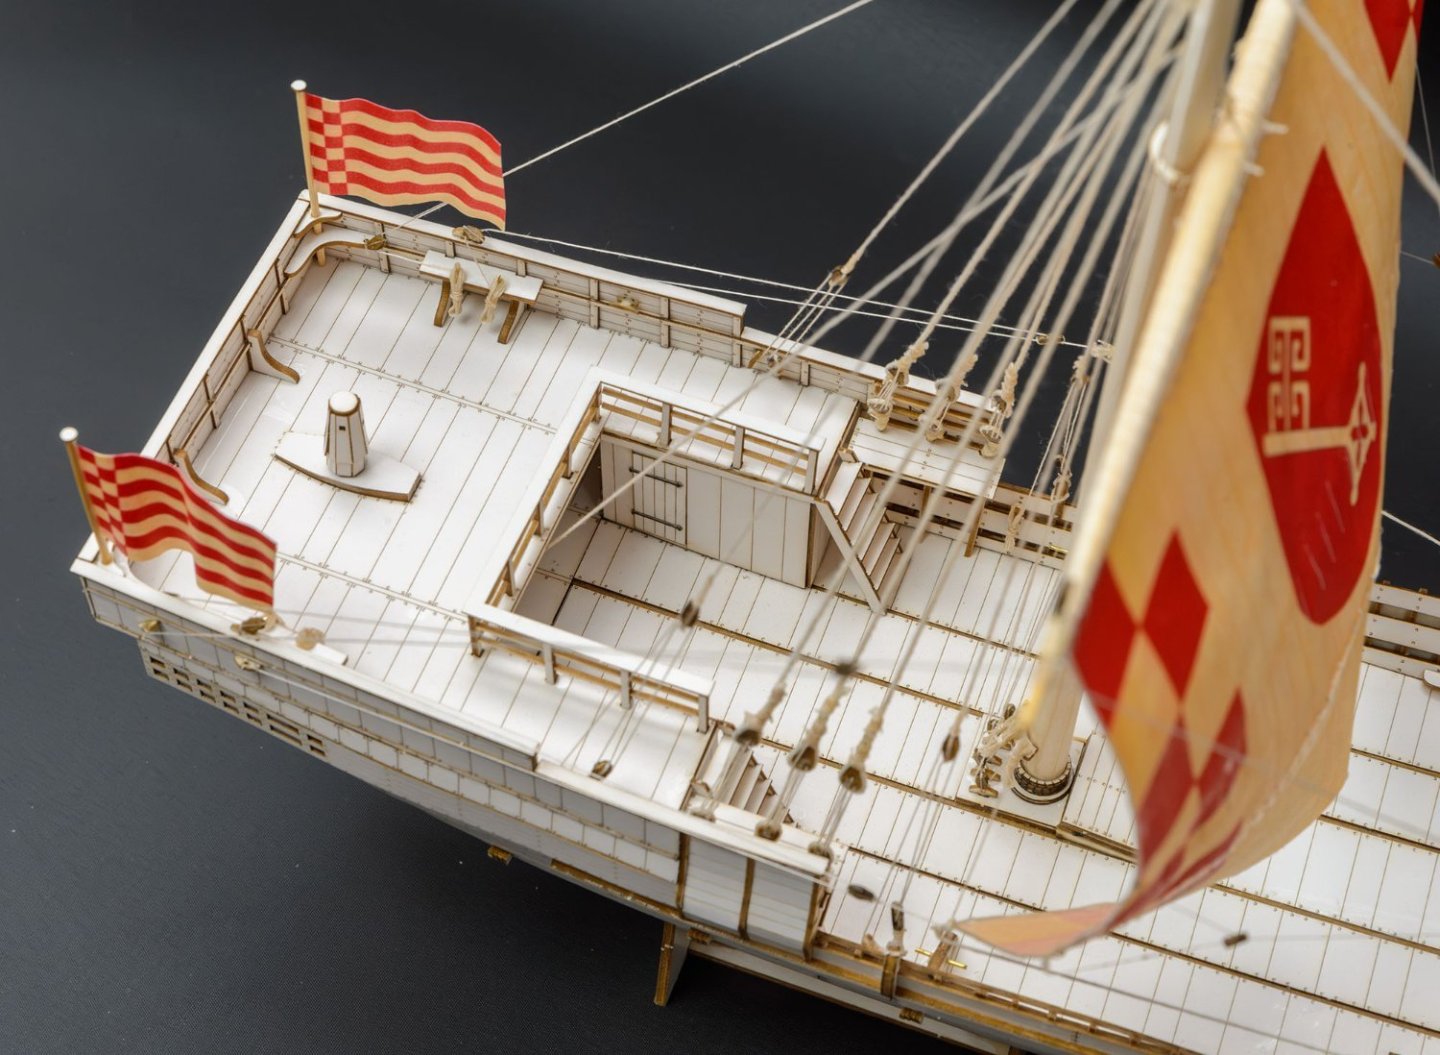
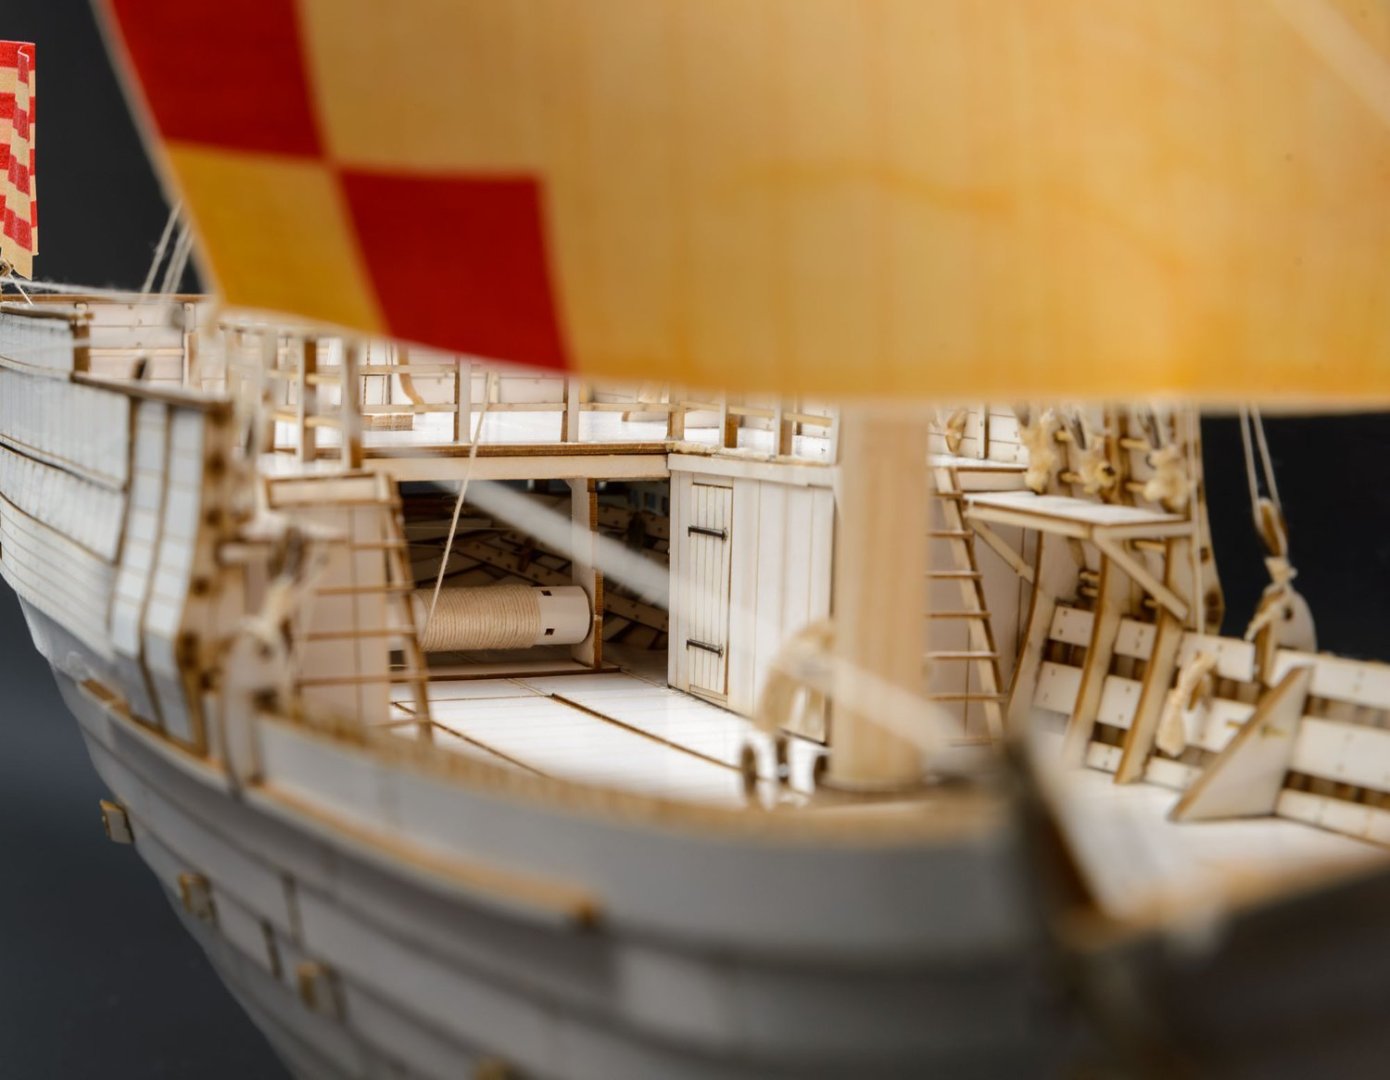
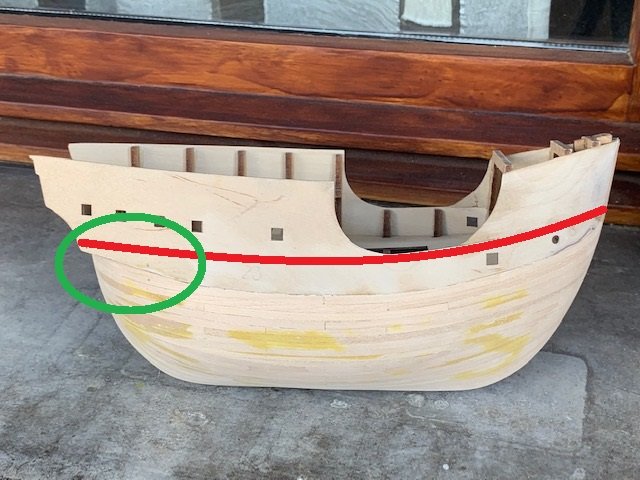
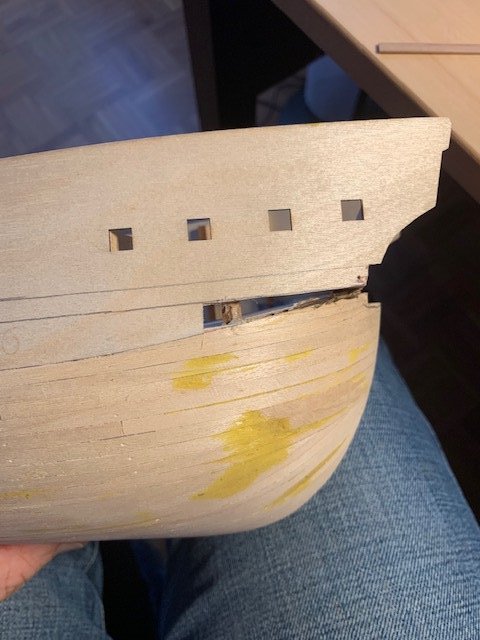
 Hi all, friends. It's been a long time since last time I laid anchor on this dock. I hope not to have lost my modeller's hand neither my english speaking. A few months ago I started a new model, the ancient spanish cargo "Mataro's cog" inspired to the Catalan ex-voto now exposed in the Rotterdam's naval museum. I'm used to scratch-buildings but wanting to spare time, I decided to buy the Amati proposal - that seemed a really well done kit. During my work, my scratch builder spirit popped out and I started to change many things - with the only limit imposed by the basic structure - trying to aim my model to the ancient paintings that show similar ships, as possible .... also adding to the model something that in my opinion couldn't be missing in a cargo vessel (e.g: a windlass or a capstan). As said, my work has already started, but I would like to show some phases of work that have already been completed, before to pass in "on time" mode. As I see, this is not the first log about this model so I'll not bore you, repeating what has been already said about the ship. Anyway, I'm available for any clarification and further information. I have been basing my work mostly on Heinrich Winter's drawings, as shown in his book (Delius Klasing edition) and photos of the museum's model. For shapes and coluours I based my work - as said - on ancient paintings. I think, first planking is not interesting, (if not, I'll post something about it) so I start with the first changing I did: the shape of the stern and the hight of the rear bulwark. The internal deck's course was uncorrected, and that fail has beeen reproduced by the kit designers on the external. Following the kit drawings and intructions I'd have had many problems at the moment to place the second planking on the bulwark. I hope you'll find all this interesting. Cheers Alessandro


-
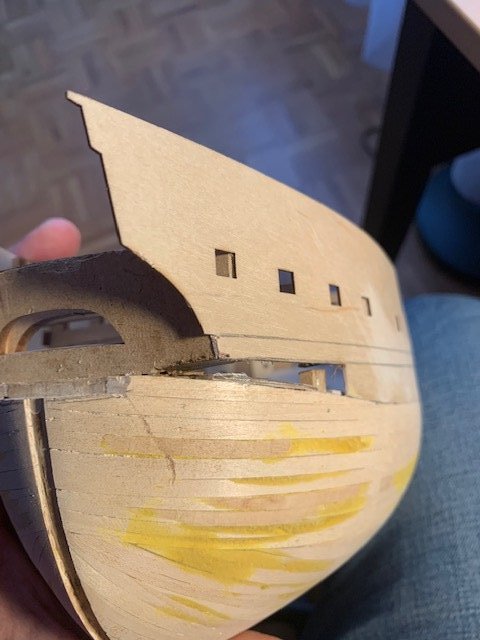
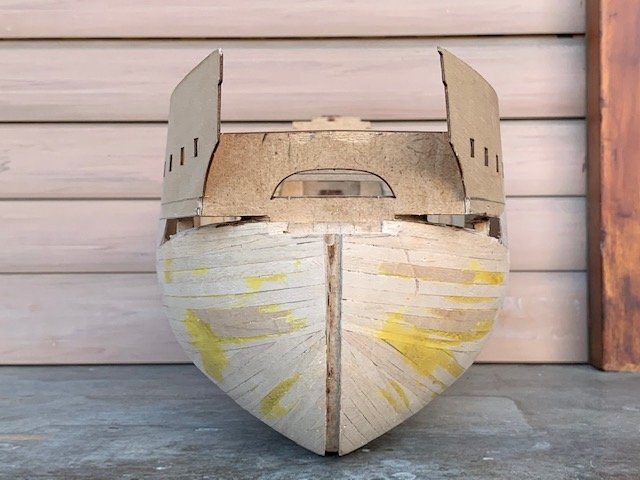
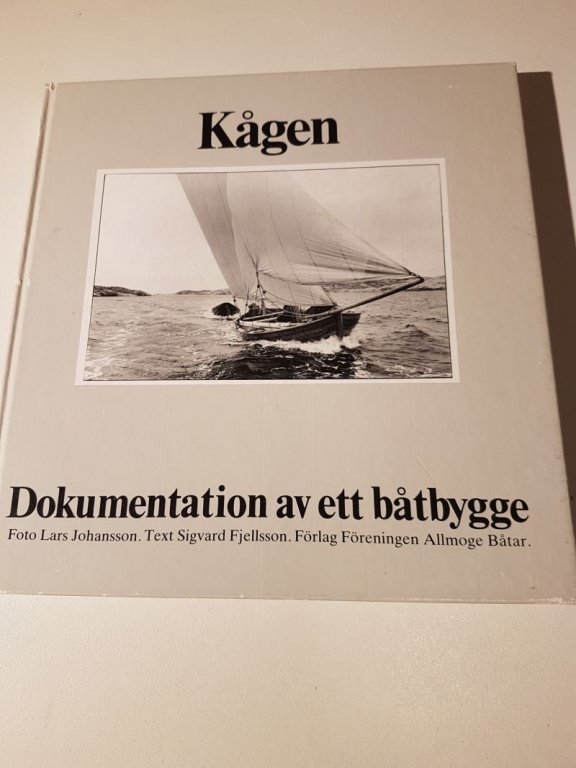
 It is not with little hesitation that I know start a build log. For me it is somewhat of a Pandora's box of feelings since I've been away from MSW for quite some time now. One thing caught my attention when I read the foreword in Ed's "Naiad" book, it seems that it is quite an accomplishment to build anything to scale between your graduation and retirement. Life tends to interfere all the time. Anyway, here we go... The object for my build log will be a working vessel from the Swedish west coast dated at about 1900. I've learned "Go small, go simple, go now" when it comes to long distance sailing. Applied to scale model shipbuilding that would translate to something of small real world dimensions and a rather simple type based on some source that you already have. In my case it panned out to be a "Kåg". For those not familiar with Swedish pronunciation of words (most are not, so don't worry) it originates from the Dutch kaeg or cog. Basically it is a fishing vessel. It was all about herring during 17th to early 20th on the west coast of Sweden. By the way, swedes are still a lot about herring marinated in more or less fantastic ways. You will find them on any decent "smörgåsbord". Included in my source is a couple of plans and the first tasks include some CAD to create plans that can be used to build something. Real world dimensions for this particular vessel is some 22 feet between perpendiculars with a width of 10 feet. Length over all will be some 9,5 meters. Scaled down 1:30 the hull will be 225 mm stem to stern with a moulded width of 96 mm. The clinker boards will be just shy of 1 mm thick, which I think is the smallest I could manage. Real world materials were oak for basic structure, top strake and details. The lower strakes were of pine. Mast and spars of fir. Materials for the scale model will be apple for basic structure, mast and spars and probably birch for the boards. So far the introduction. Over to the build. At this moment I have not produced any dust yet, only managed to create templates for the hull, keel, stem and stern. Starting up with CAD has a steep learning curve... The book: A picture of the vessel sailing (maiden tryouts): Keel, stem and stern. I will happily try to answer any questions and will also of course gladly take on any help and suggestions to aid in the building process.
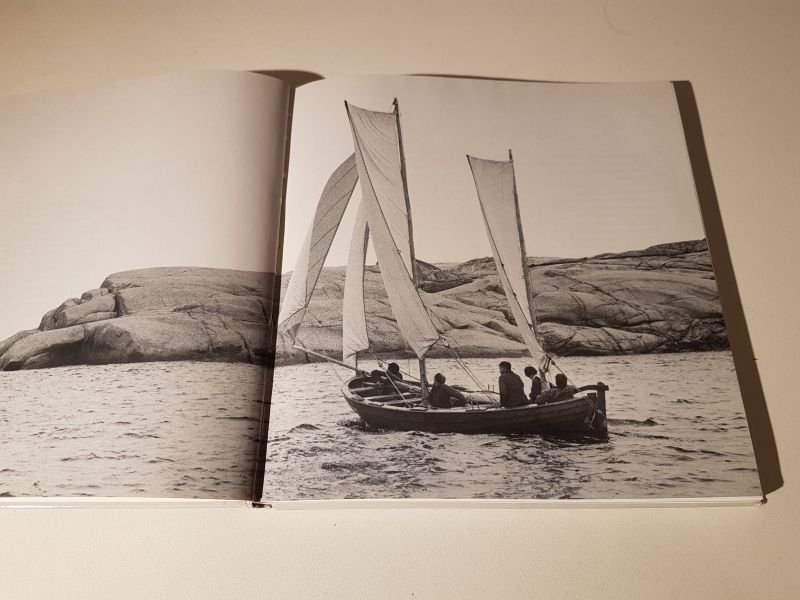
- 240 replies
-
- 22
-

-
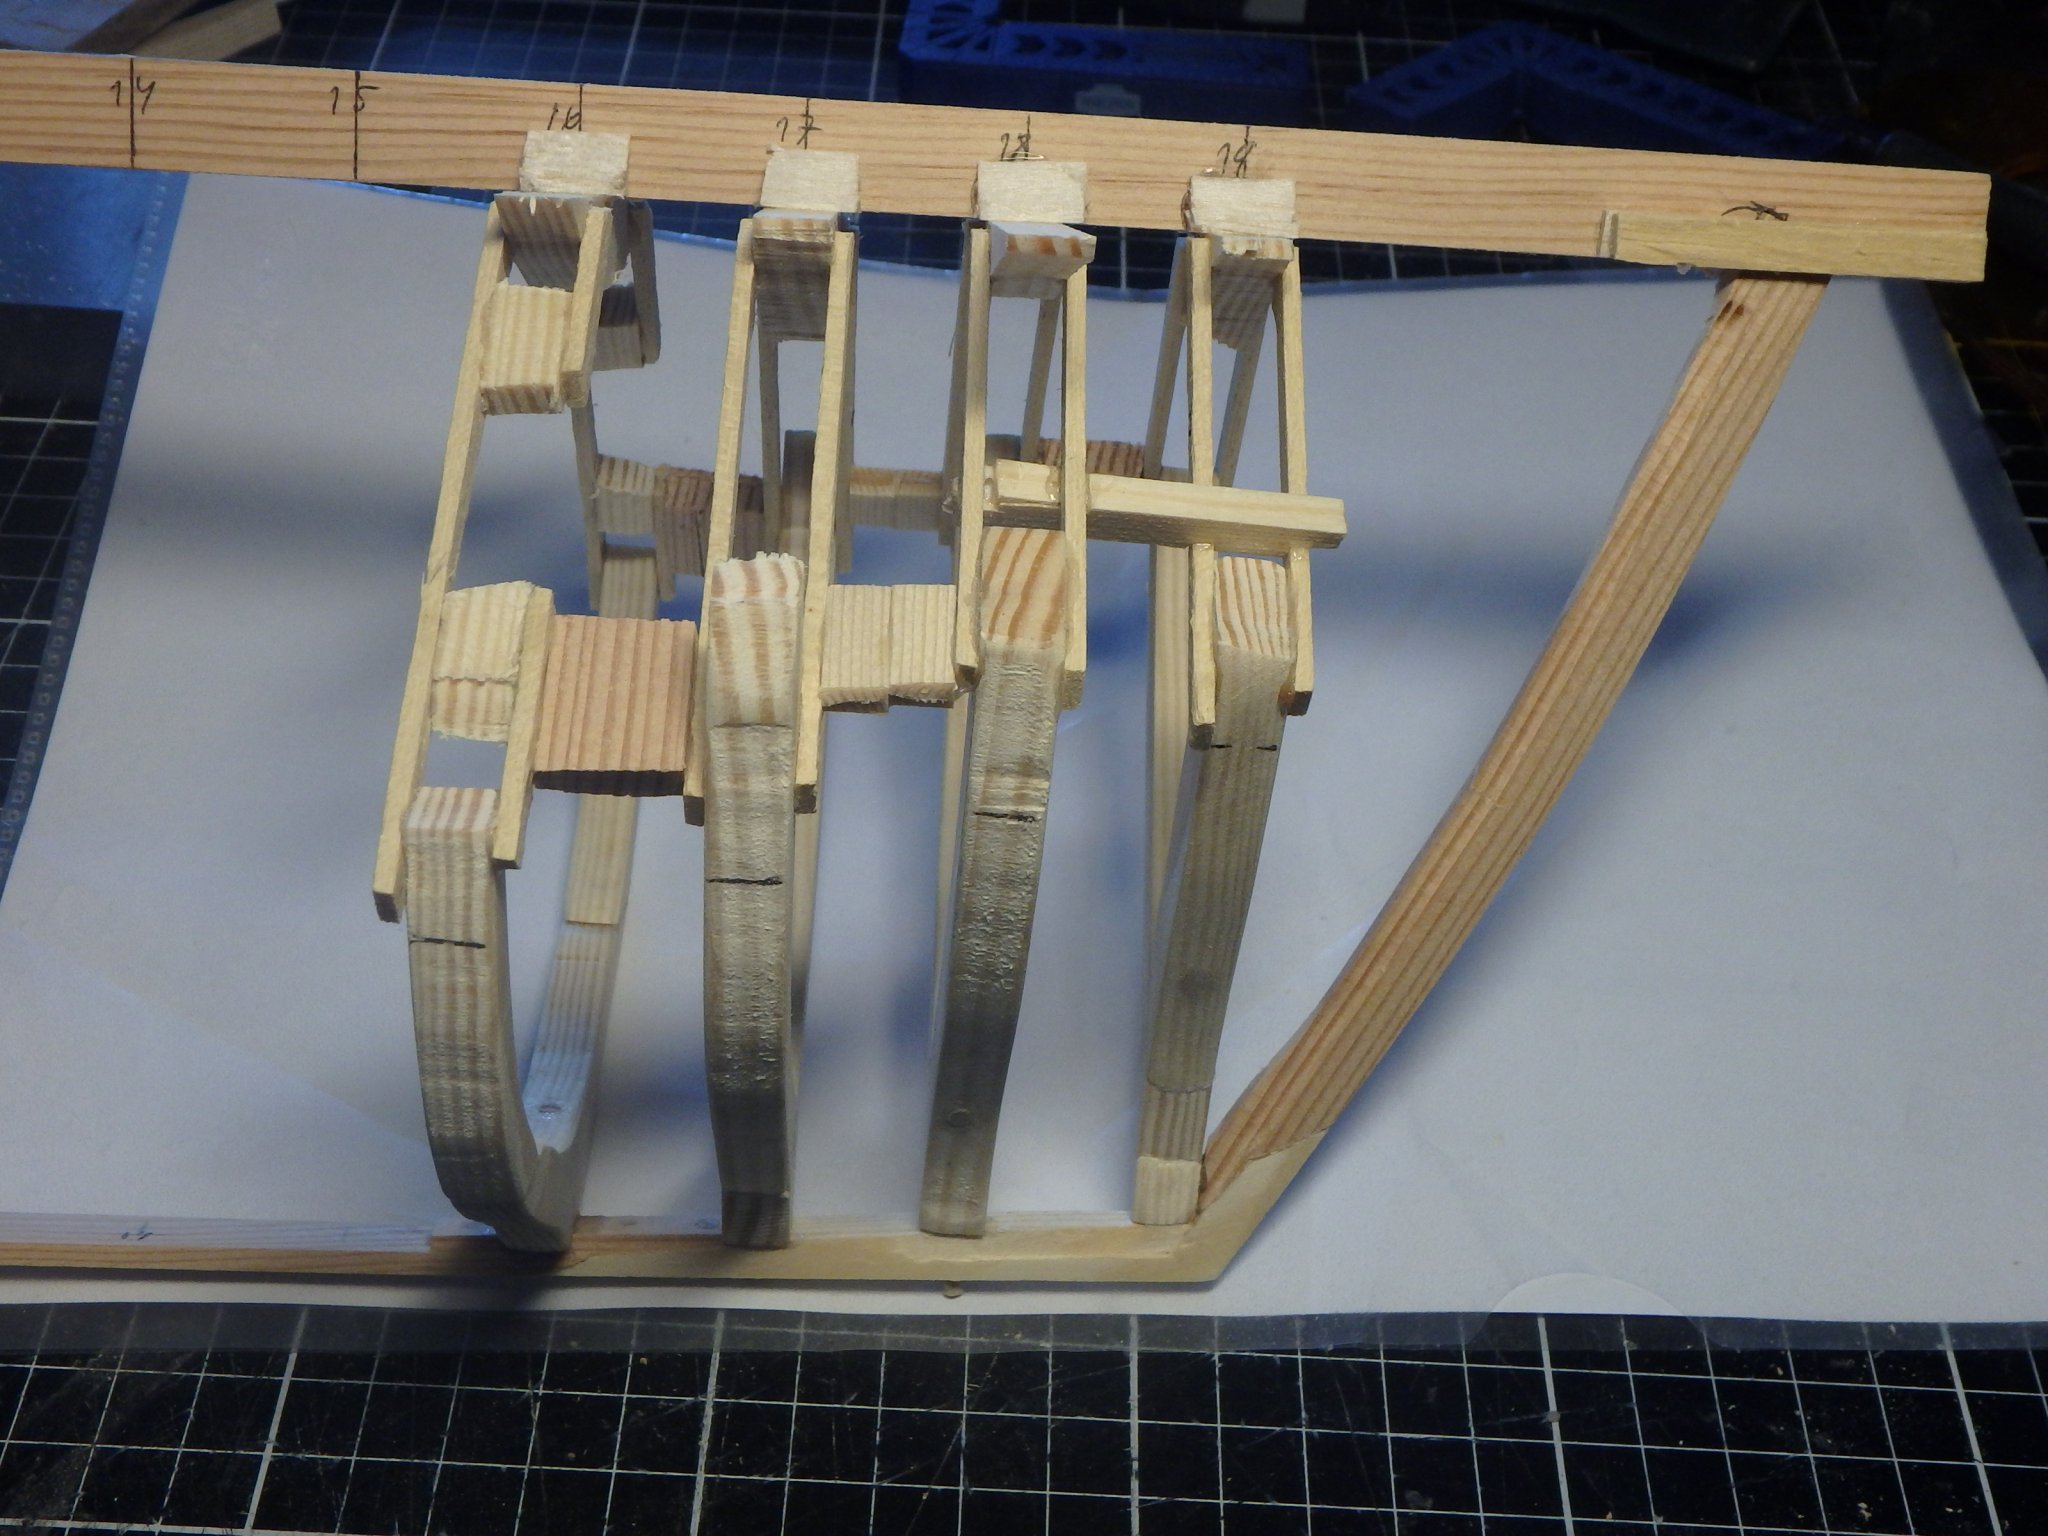
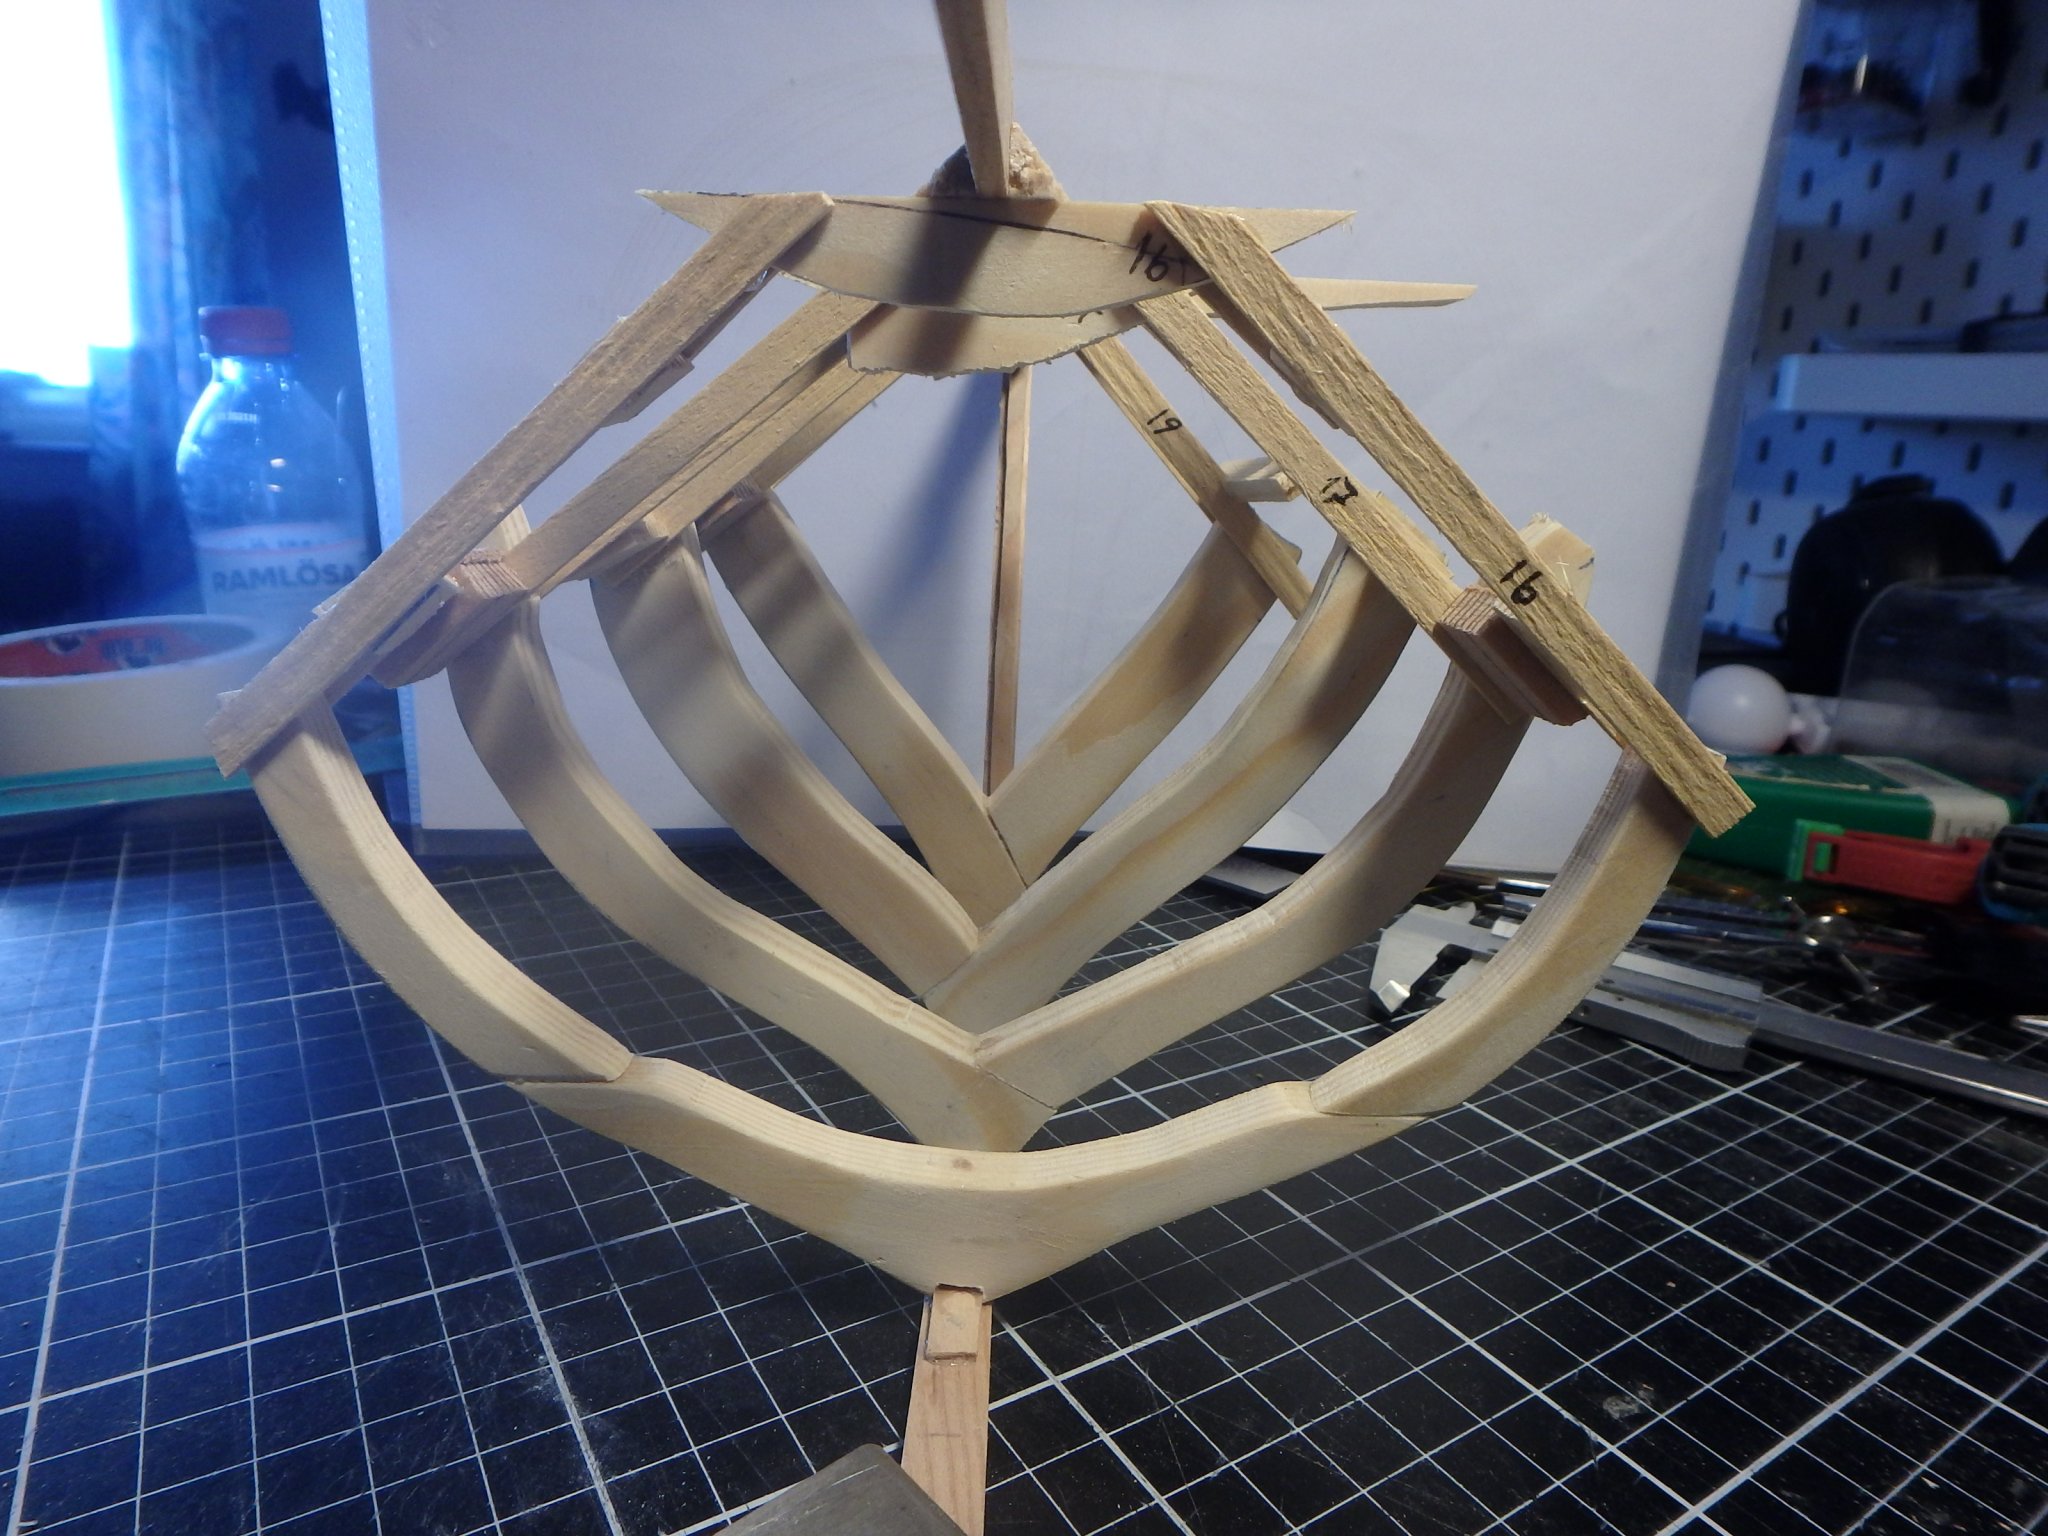
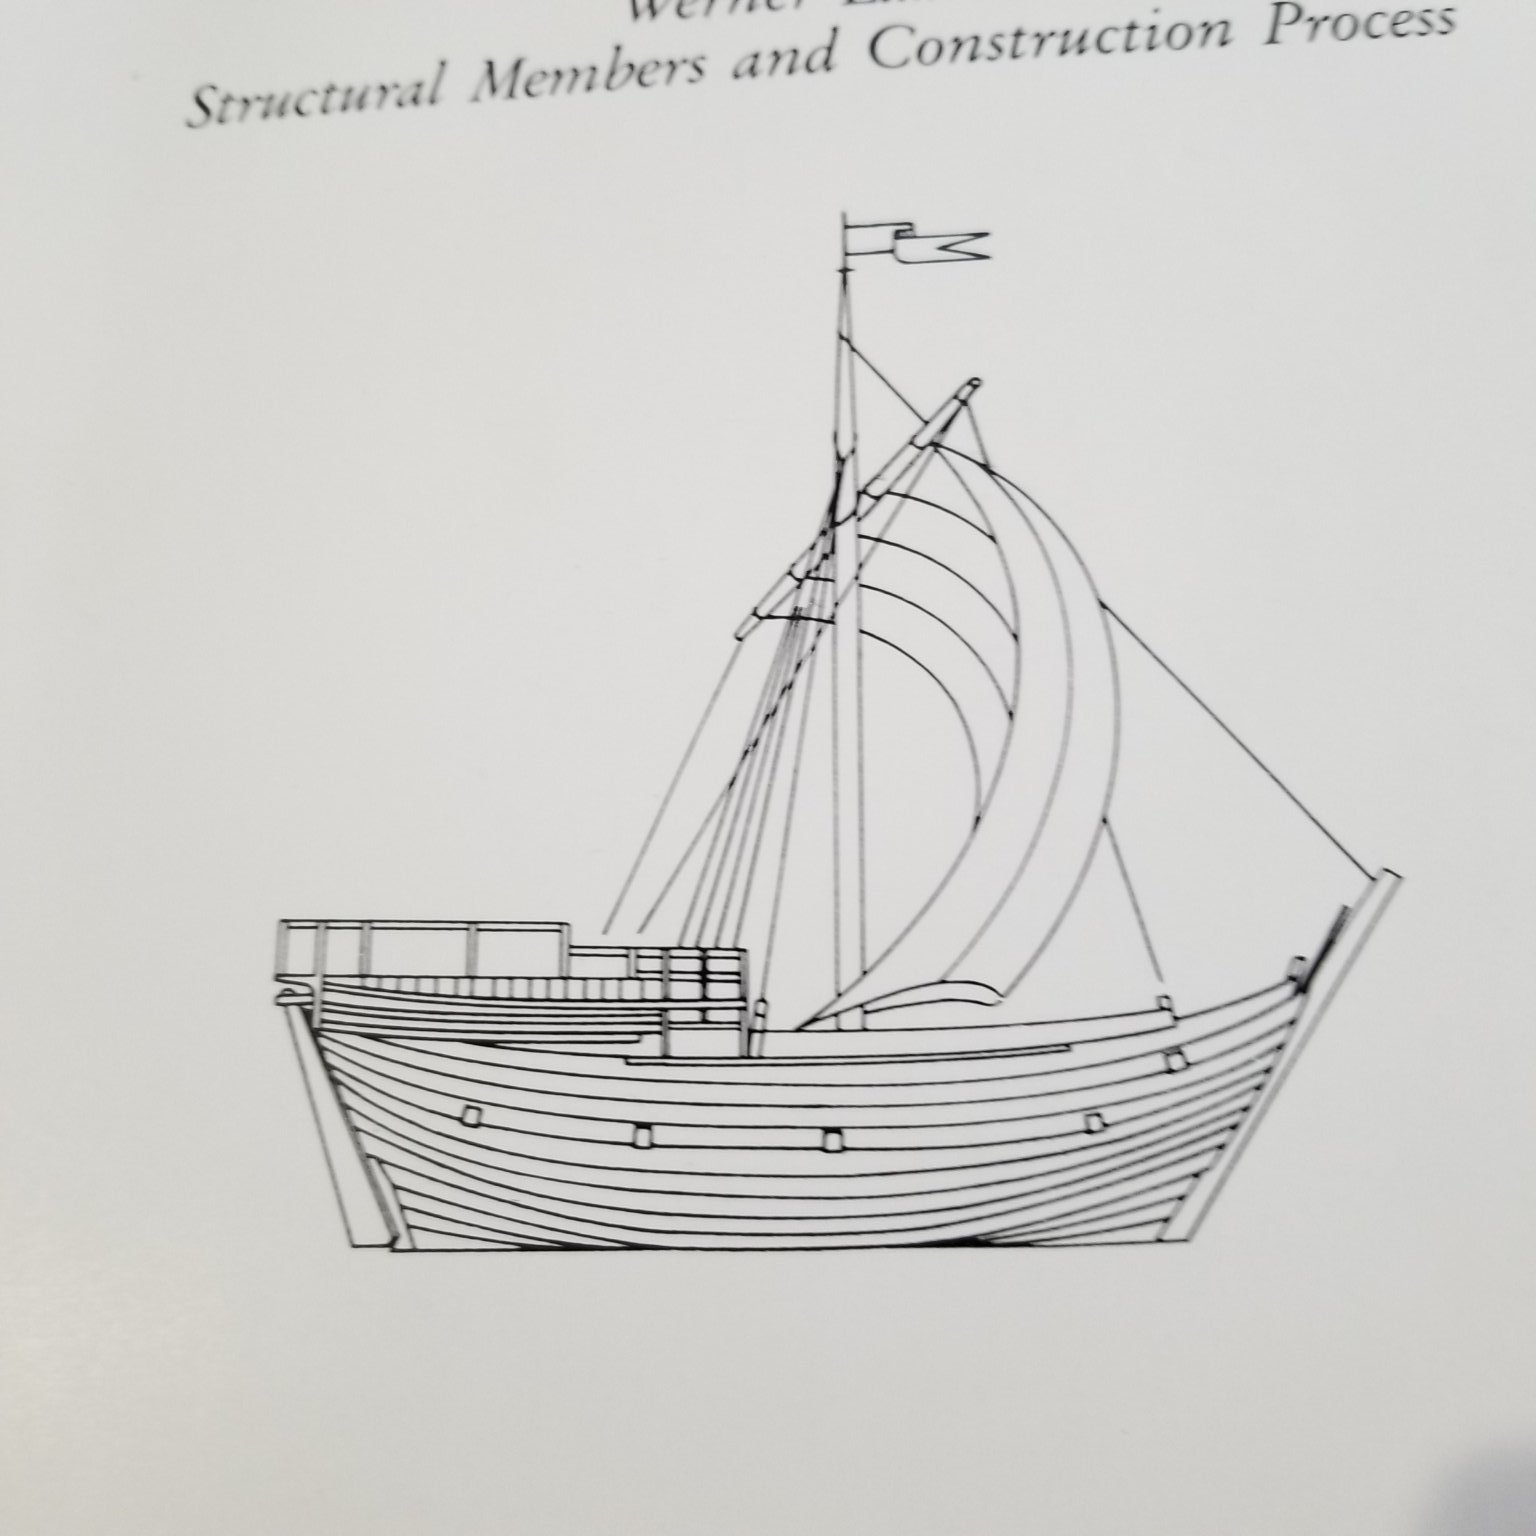
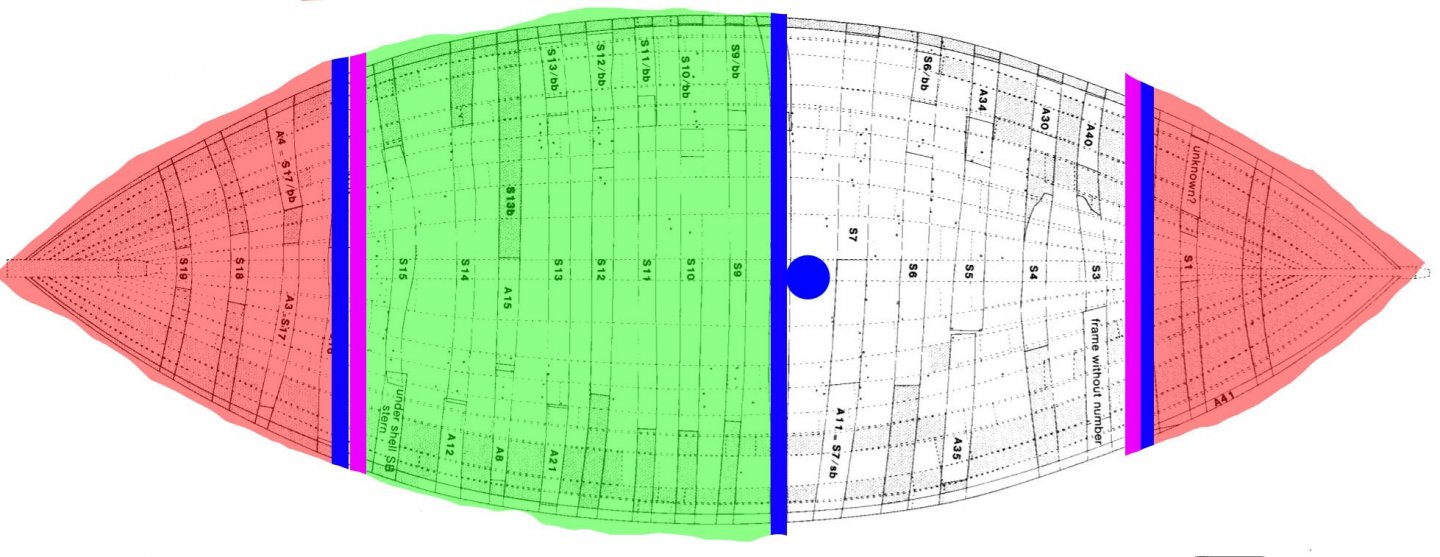
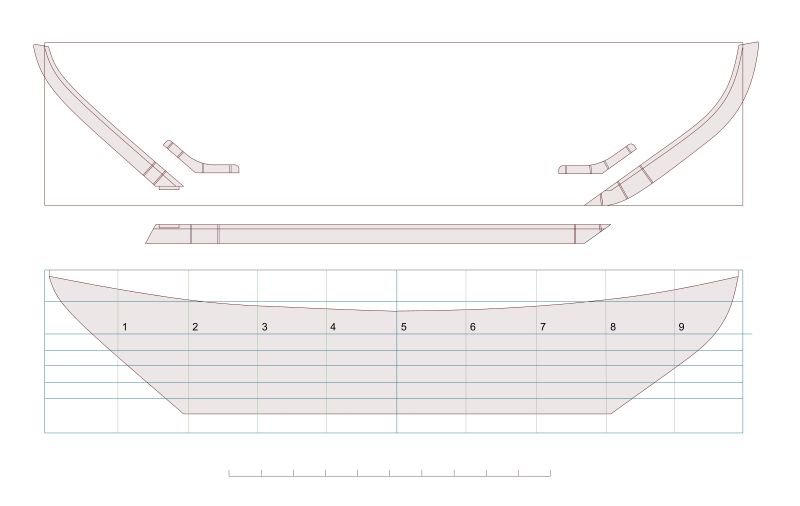
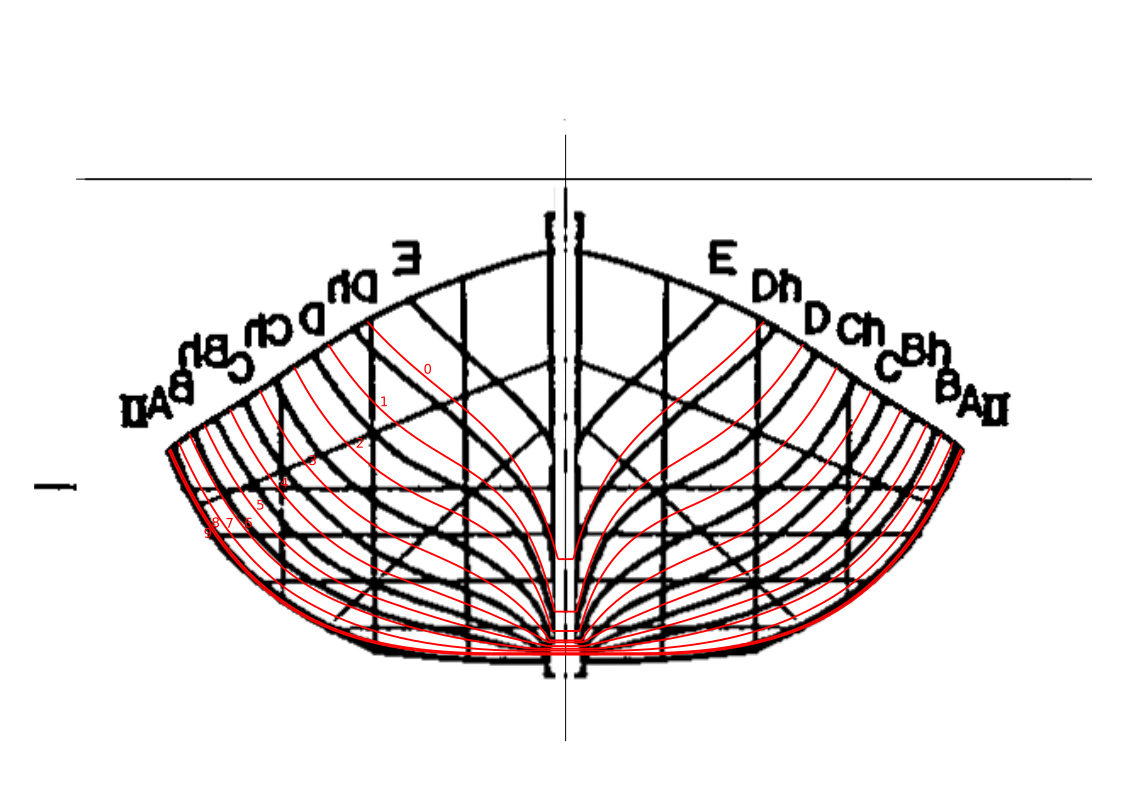
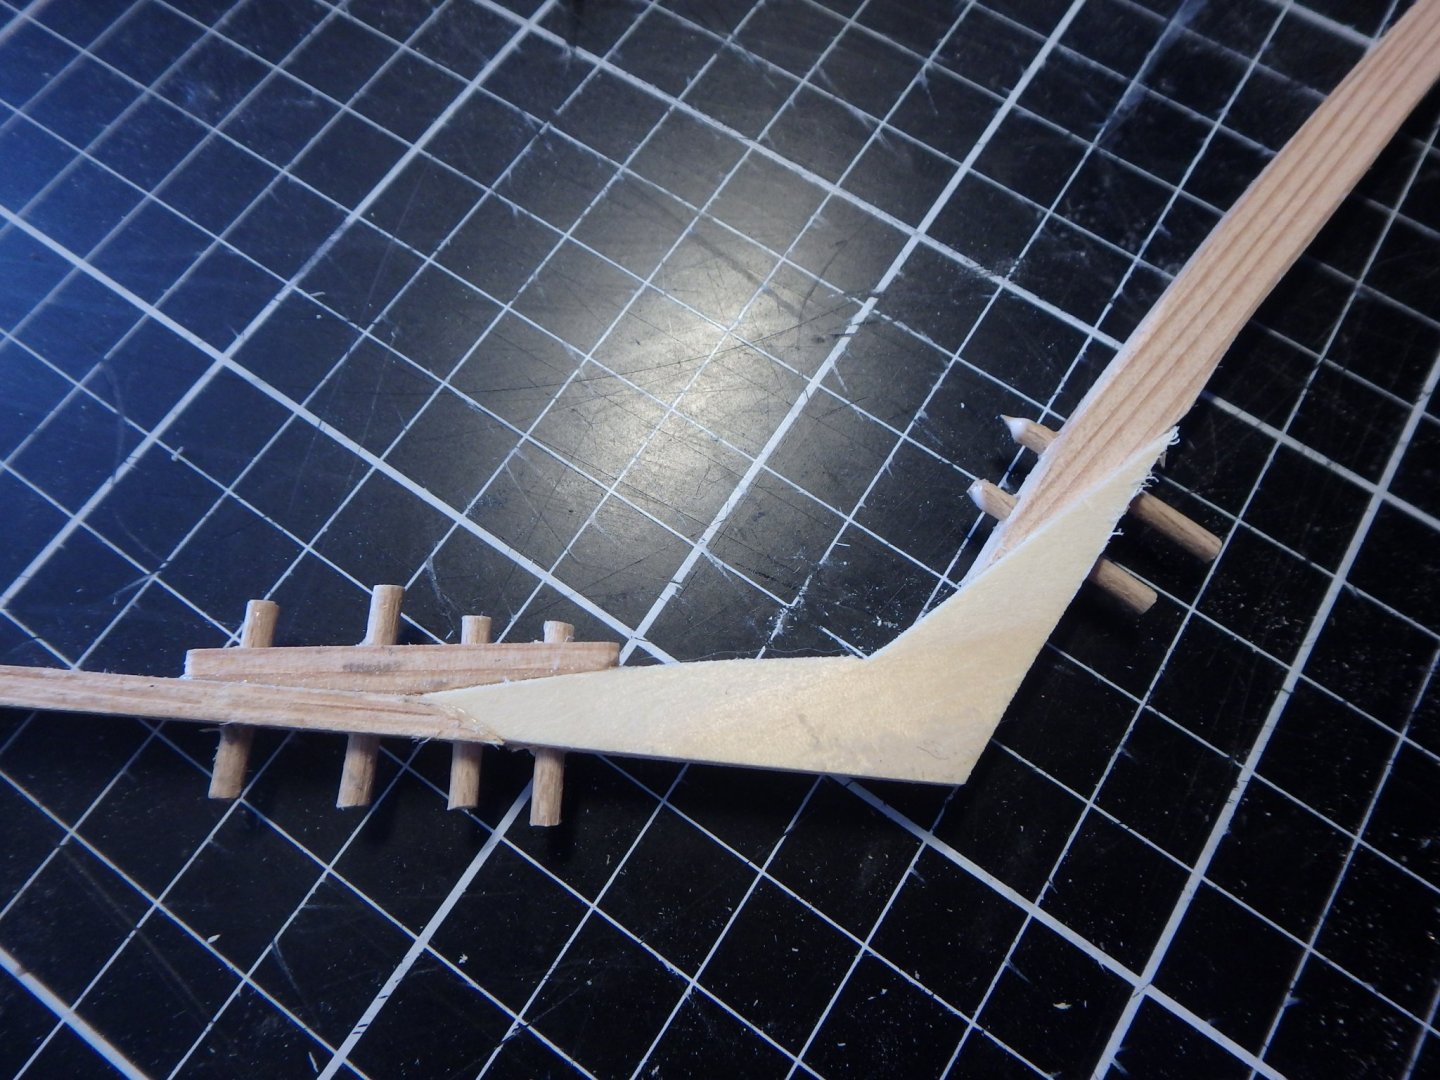
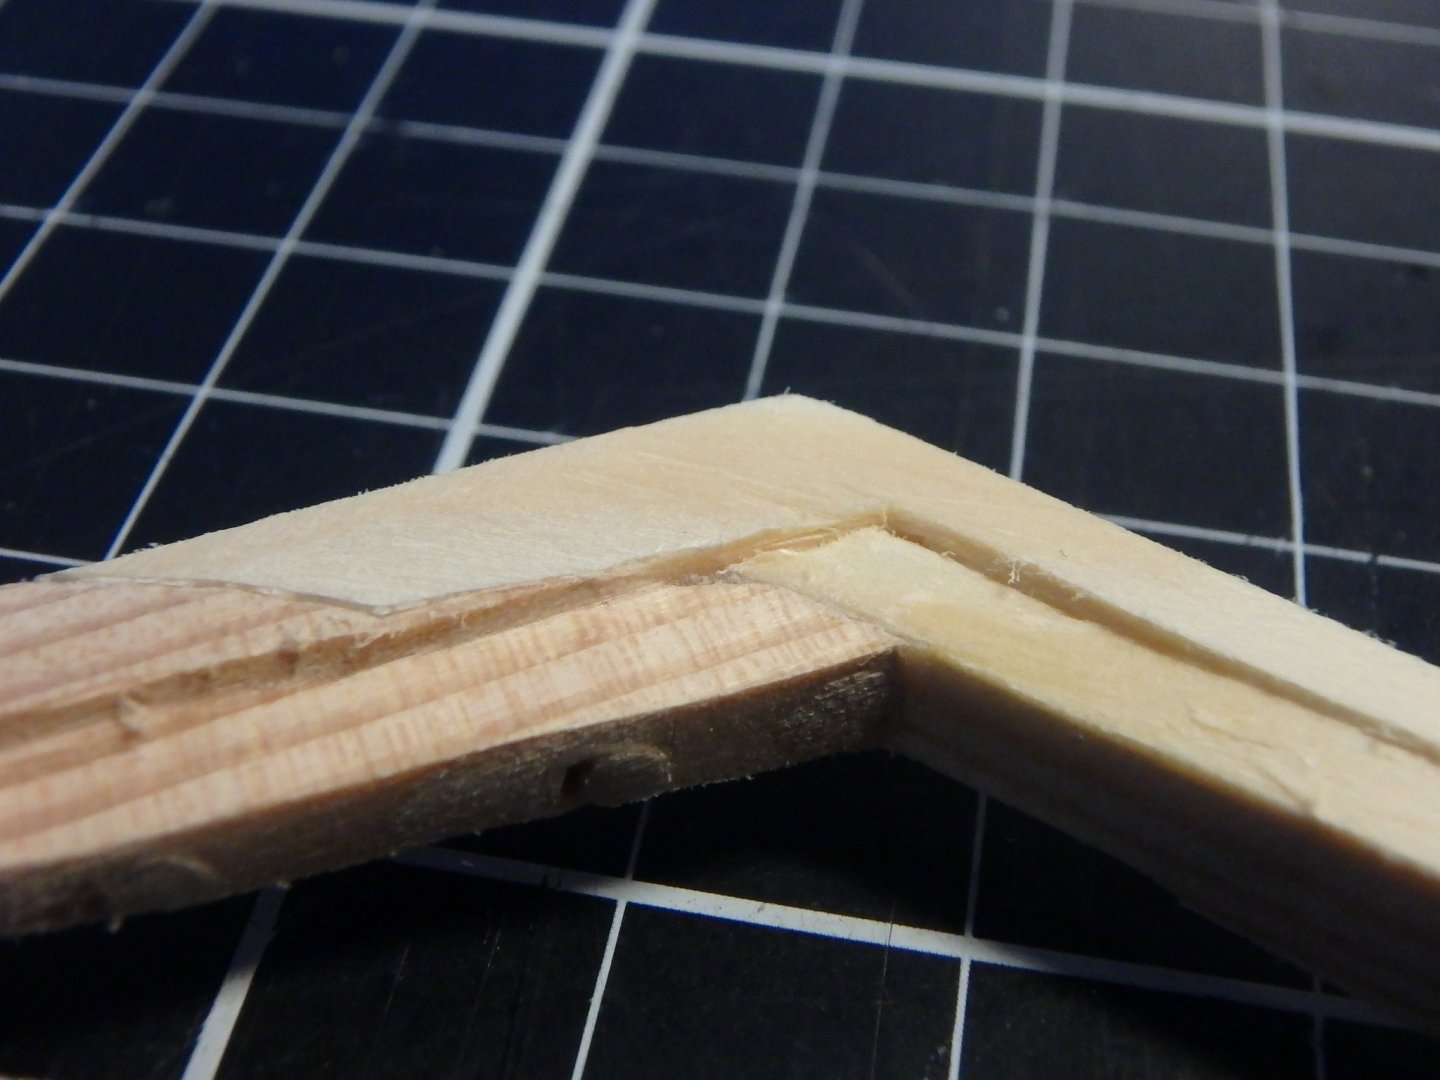
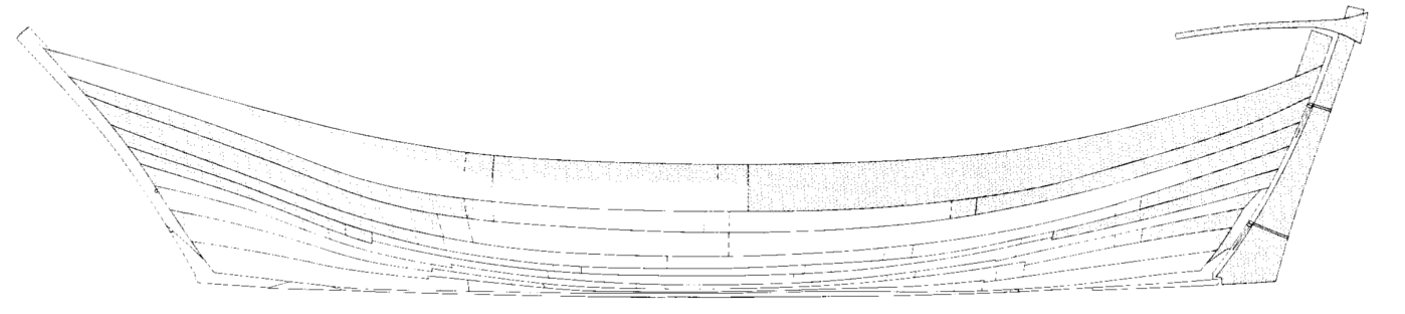
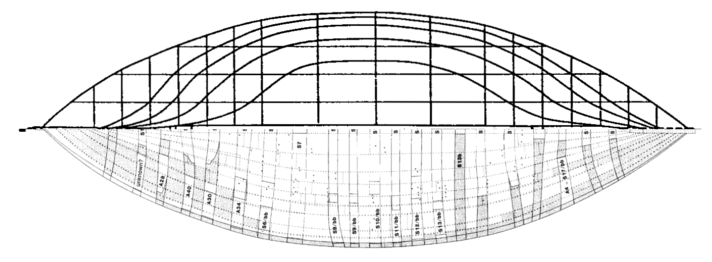
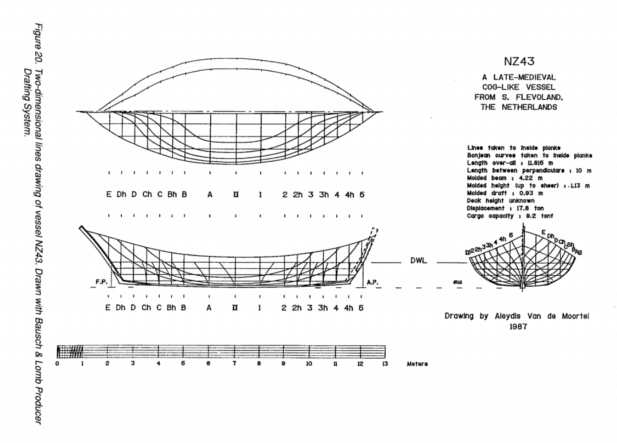
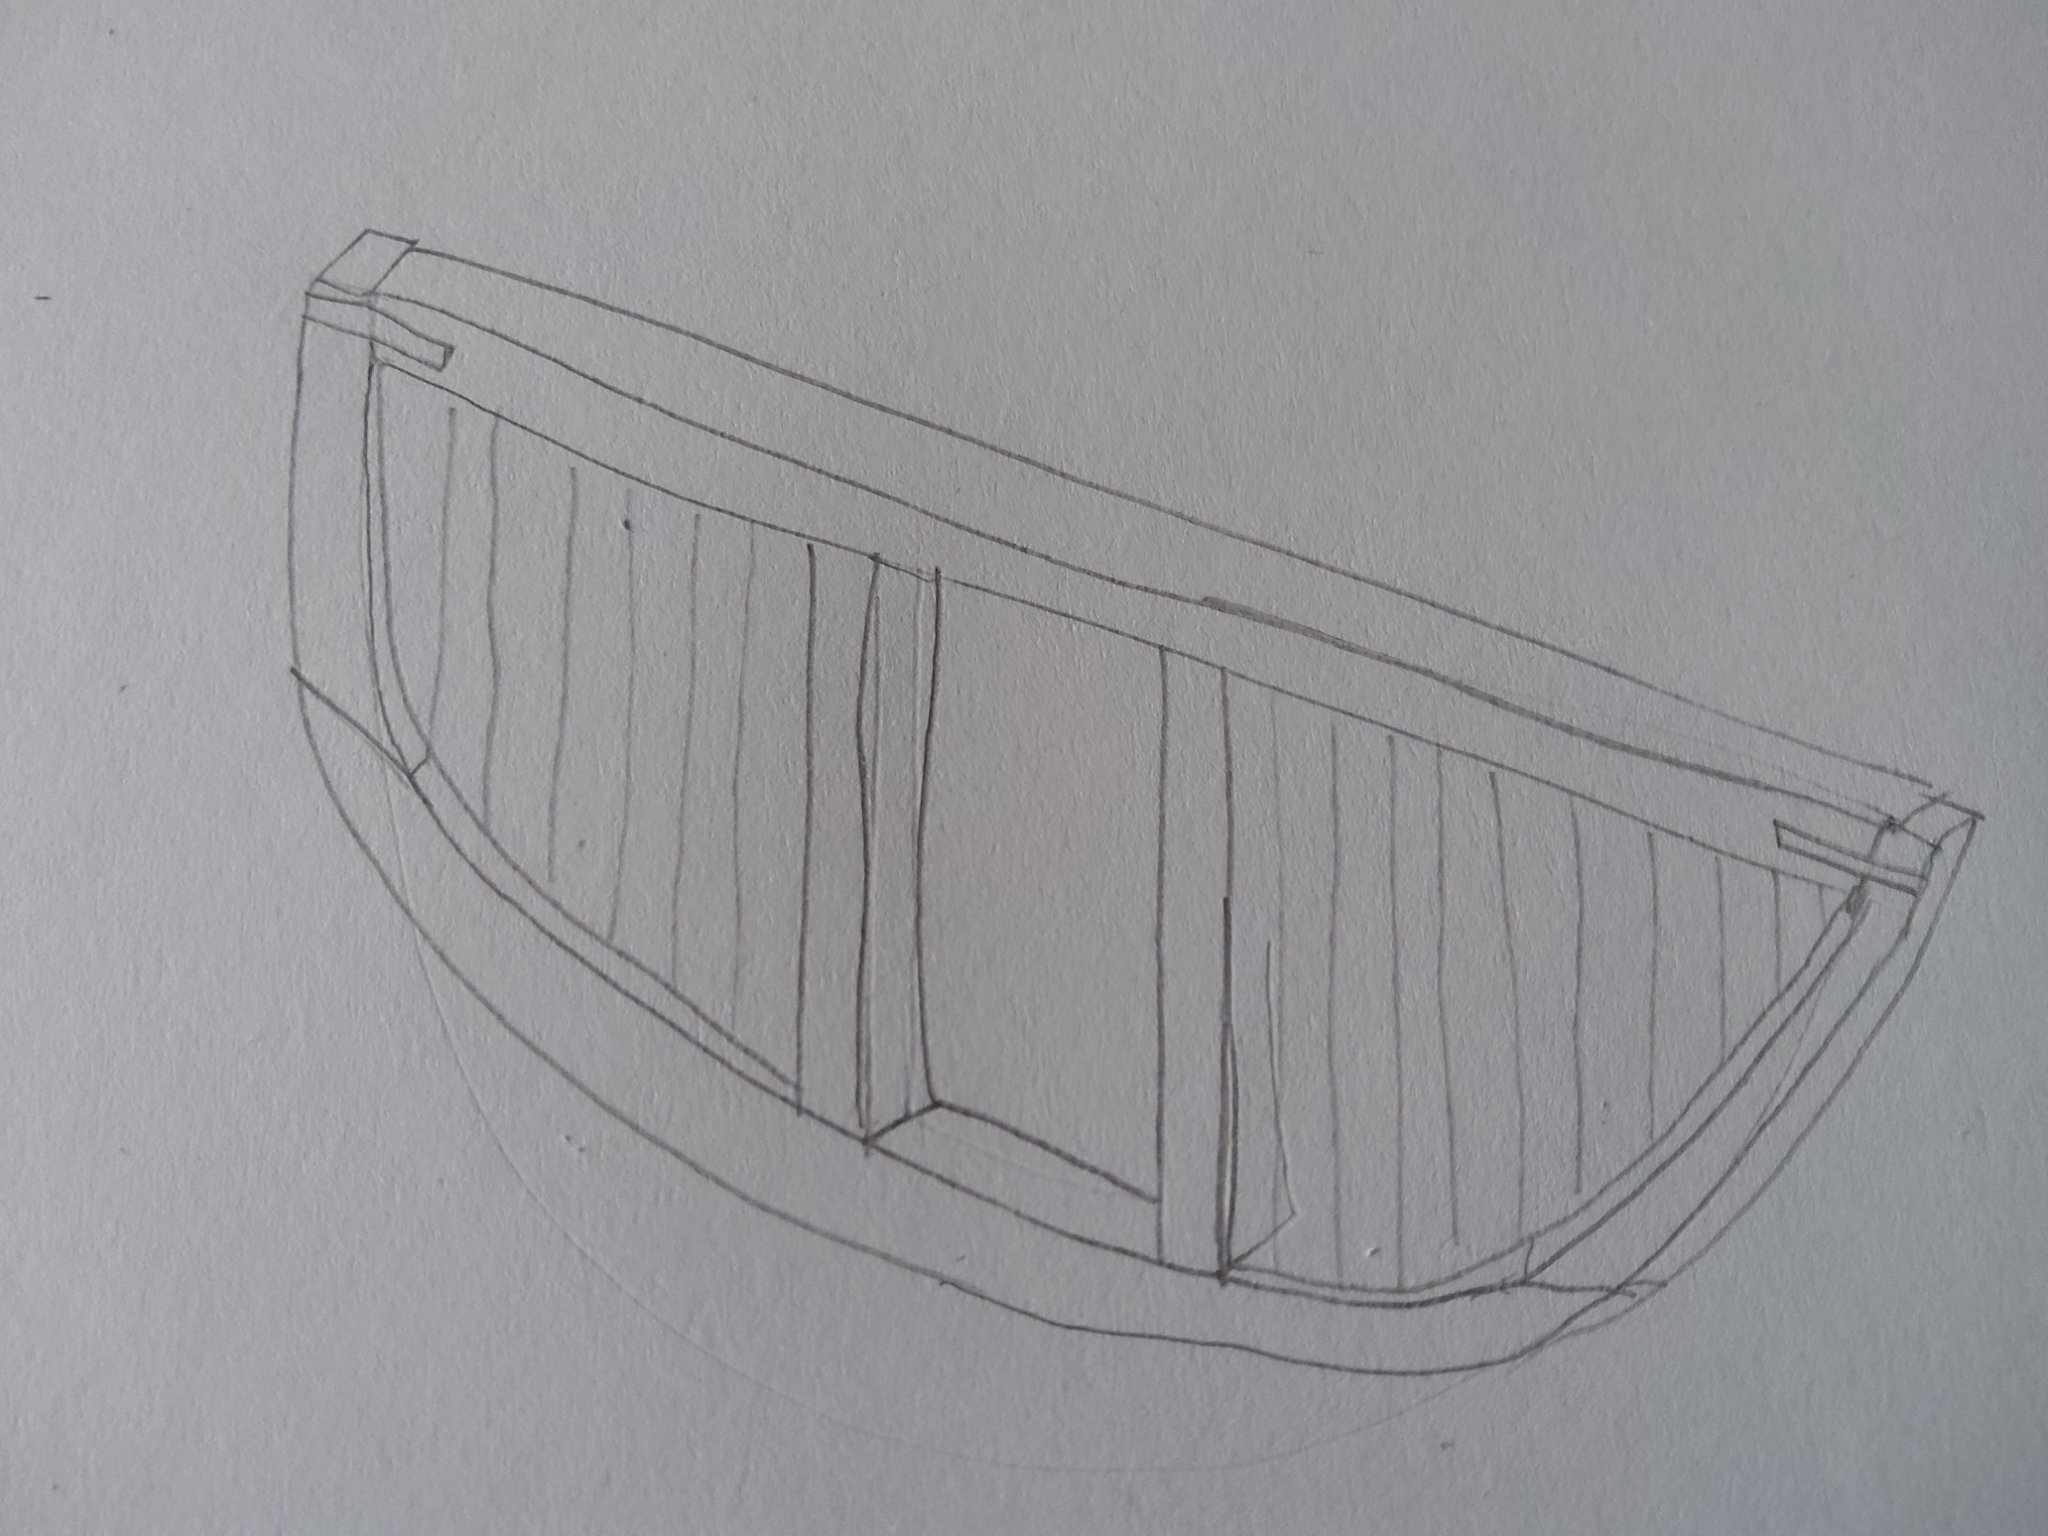
Hello, I just found this forum and find lots of information that help in my build, thank you very much. And perhaps I then also should make a build log of it. It is a scratchbuild of a small cog from around 1410 and it will be my third boat model and my first scratchbuilt. A month ago I started to watch the Youtube channel 'From acorn to Arabella' where they build a wooden ship and it made me also want to build one, but I felt that I don't have space for anything much bigger than around 2'. I dabble in medieval reenactment, so I wanted to find a ship from the 15th century and it must be small so the scale will be large so the wood working details will not be too small. Looking around I found a list of medieval wrecks and simply chose the smallest one from the correct time period. It was called NZ43 and was 11 meters or 36 feet. And then I found the thesis work 'A cog-like vessel from the Netherlands' not only describing the wreck in detail but also hypothesizing on how it might have looked when used. (it looks a lot smaller in this image, but the sailor stands on an aftdeck to control the tiller) Two of the most striking features that the author hypothesizes about are the bipod mast and the boom for lifting cargo. The planking will also be very interesting and challenging as some of the strakes will be flush midship, than lapstrake and than go back to flush in the ends. Let's see if I will be able to do this. And the strakes are of different widths which I think will look interesting. I chose the scale 1:20 as this would land the size to just under 2' and it will mostly be built in fir as I live in Sweden and it's readily available everywhere. The first step was to make plans. The thesis included this plan, but the sections just tell you the final shape of the hull and not what each frame looks like. (the thesis is readily available from the web, but I compressed the plans any way in case somebody worries about copyright infringement) This illustrates where the frames are and where the sections of the plan are. They do not line up. I imported the sections into Inkscape and extrapolated the shape of the frames. The black curves are the sections from the plan and the red ones are my frames. The general shapes are from the drawing, but how they connect to the keel plank is based on measurements of my model. The midship frames are made out of three pieces, floor and futtocks, and frames towards the ends just have the futtocks. Scrapwood is added as support. Some of the joints are also reenforced with treenails. I think that only the floors were sawn in the original and the futtocks were bent to shape, but I'm sawing them all. The spine of the ship consists of stems connected to the keel plank via hooks. The joints are reenforced with treenails. Rabbets are cut for the planks in the stems and hooks. I have to reenforce the model with something sturdy to fasten the frames to as the boat just have a flimsy keel plank and not a real keel . The frames are glued into place with wooden blocks connecting the frames. The lines on the frames show the top of the sheer strake and where the frames will be cut. You can see how the frames get thicker towards the ends, this is based on measurements from the wreck. The frames are not yet chamfered. I thought about doing it before fastening them to the model, but decided to try to do this afterwards with a dremel. Let's see how that works out...


-
 My current project is a cardboard model of a late 14th century Hanseatic cog (kogge). If you have followed my builds before, you will know that walking and chewing gum are not my strong suit. When I try to build a model AND document it with a build log, I usually get distracted. Here goes. Here is what is SUPPOSED to look like when completed. We'll see.
- 130 replies
-
- 4
-
-
- wütender hund
- hanseatic
- (and 2 more)
-
 Going to start on this. Wish me luck.
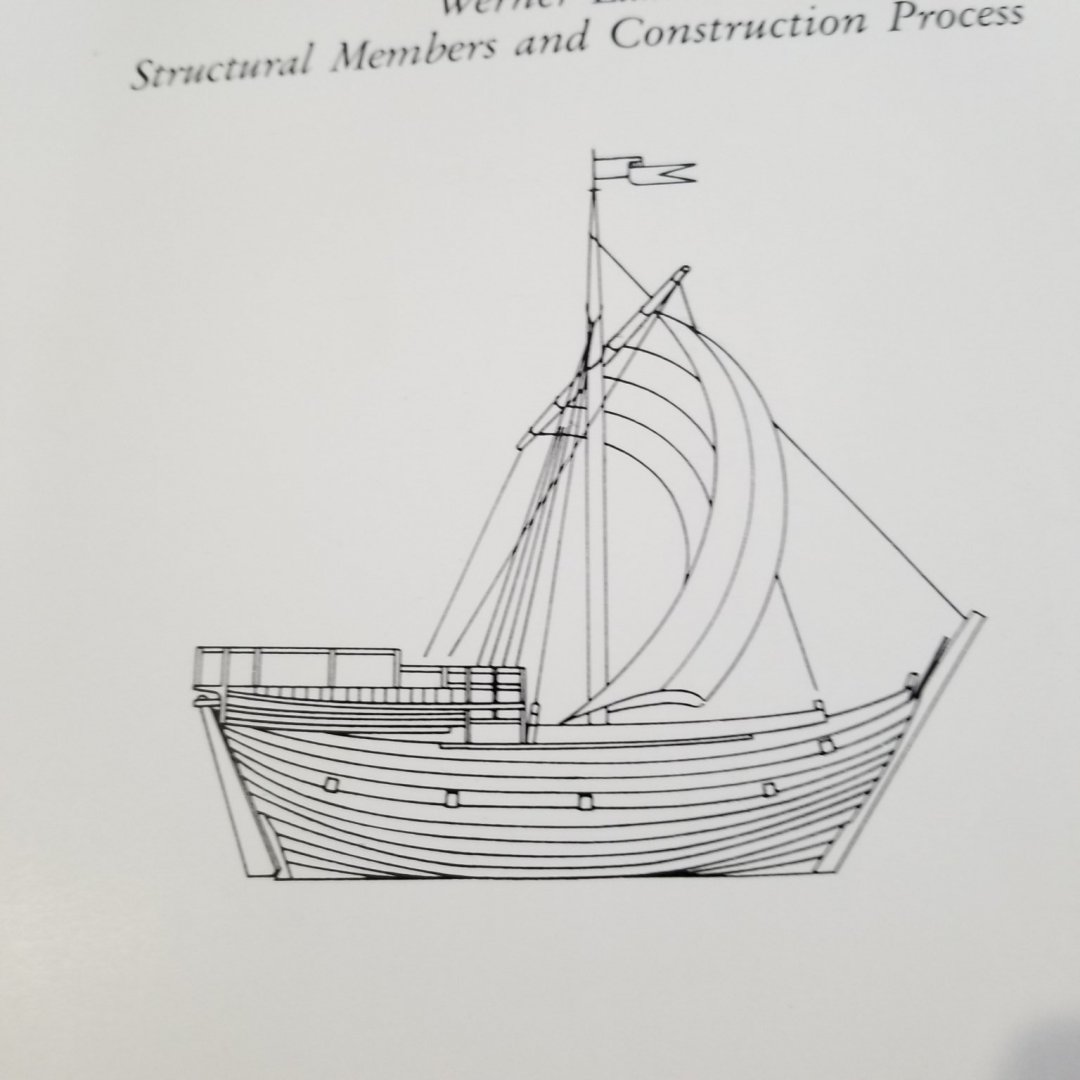
-
 https://blog.agesofsail.com/2020/06/18/new-wooden-kits-from-shipyard/?fbclid=IwAR0BasyN-l8-cXKHOKbuLbj7MttBj8jqRximbt7eHD6jgr-Ty1pUzaERZlY
 -
Has anybody else seen this? https://www.livescience.com/53744-photos-medieval-dutch-shipwreck.html It was discovered in 2012 and (I think) raised in 2016, but I never saw it. How did I manage to miss it? So, we have another cog to study and learn from. Very exciting. Steven
-
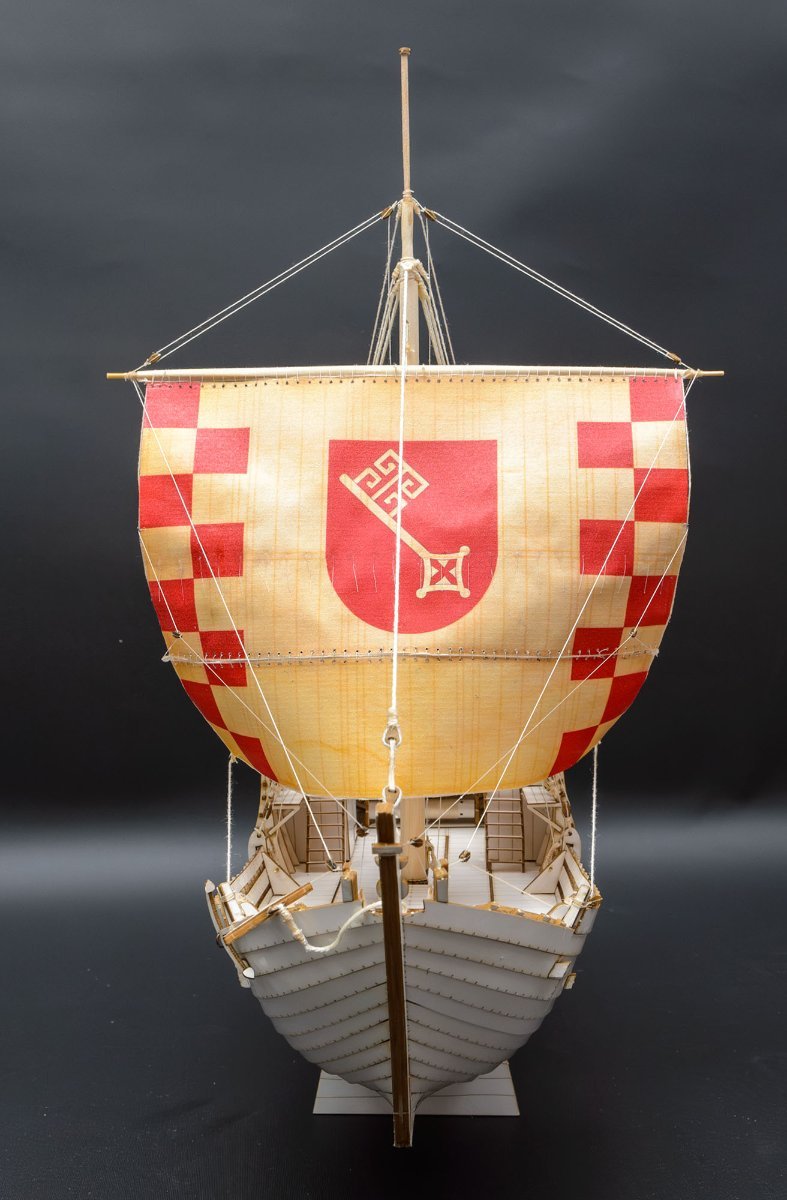
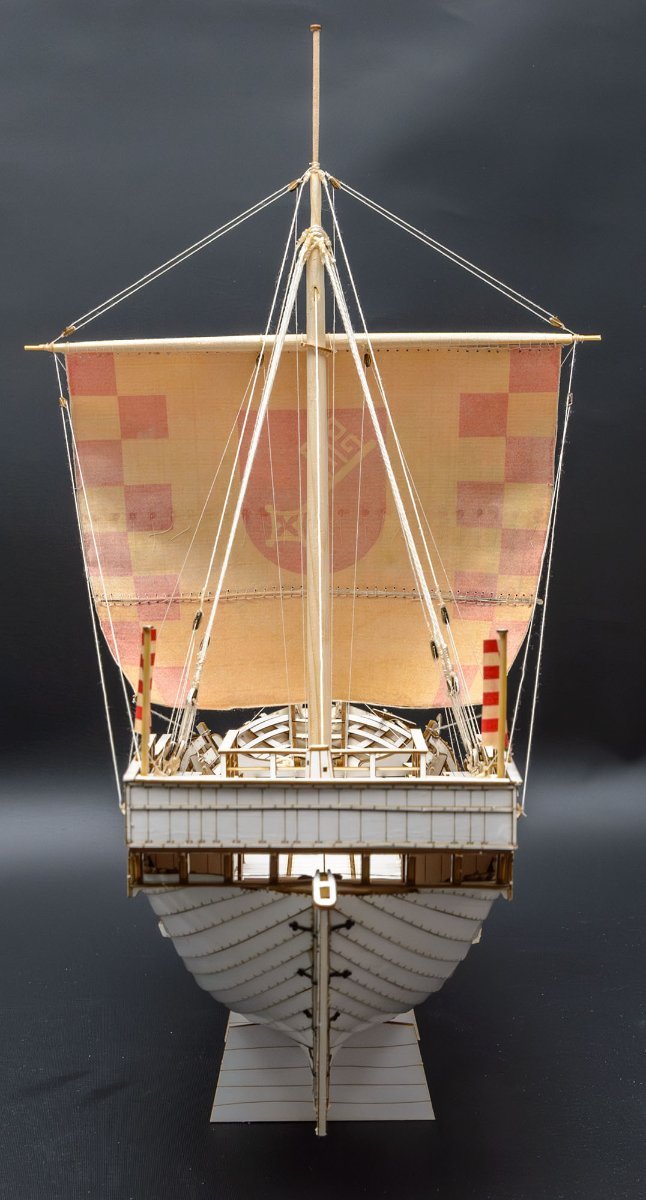
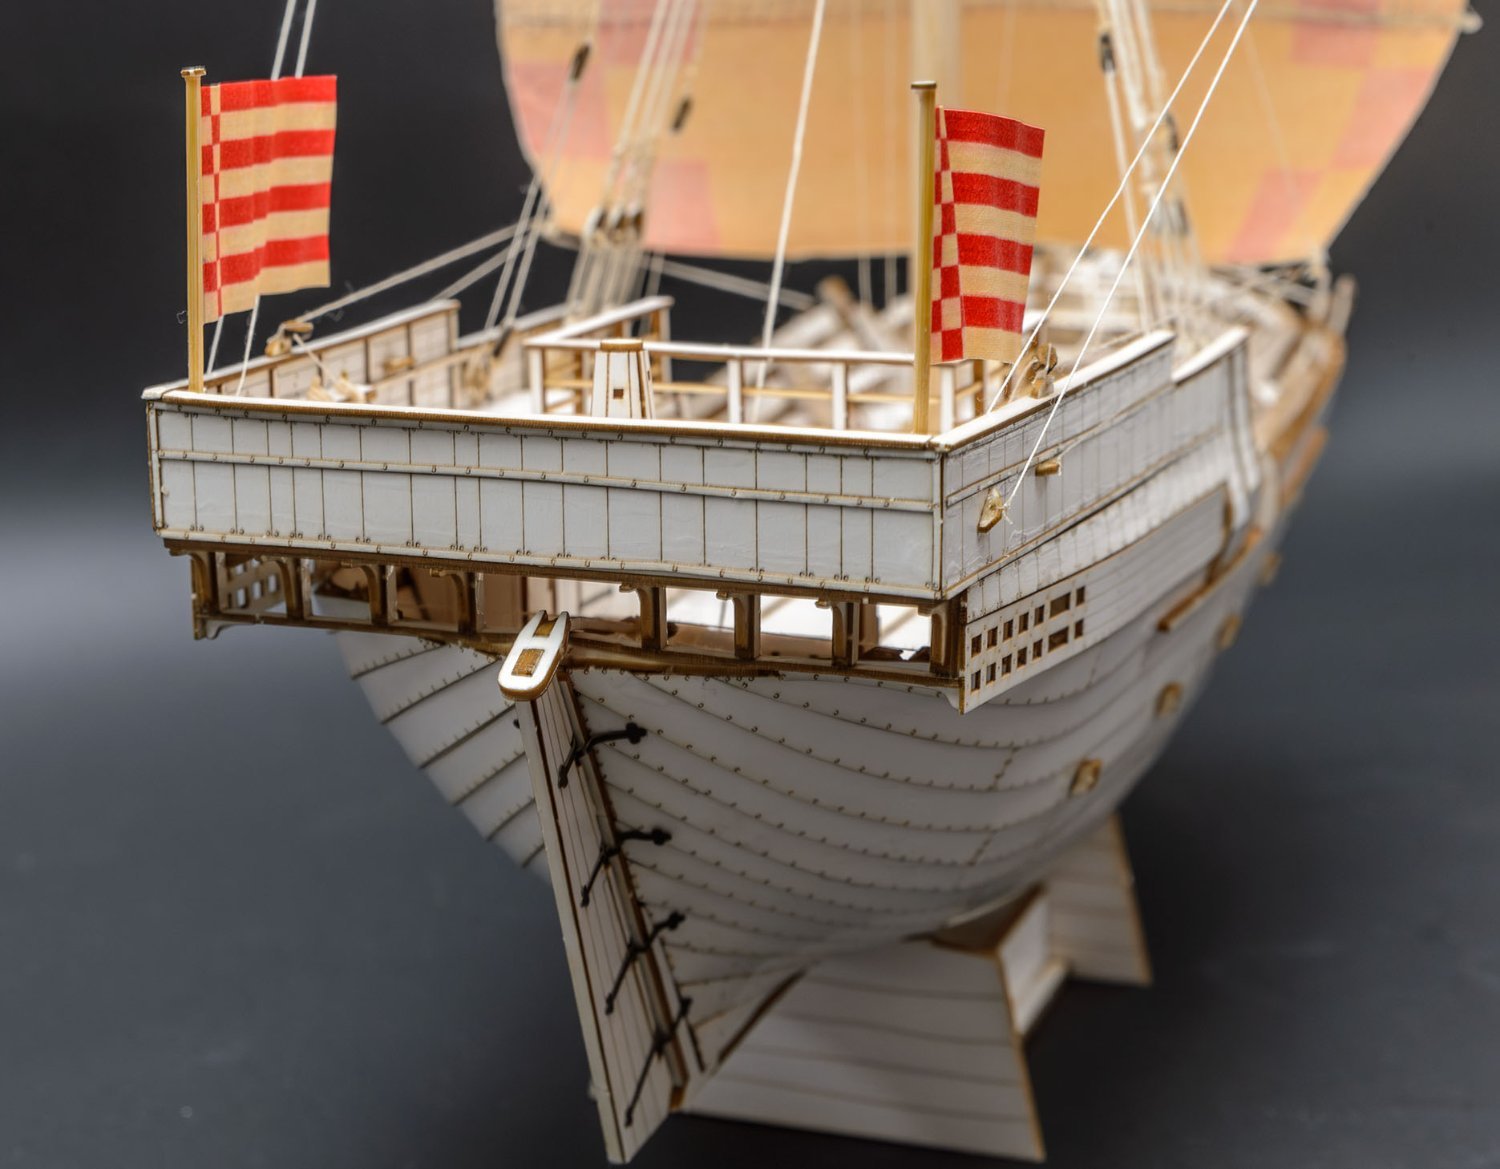
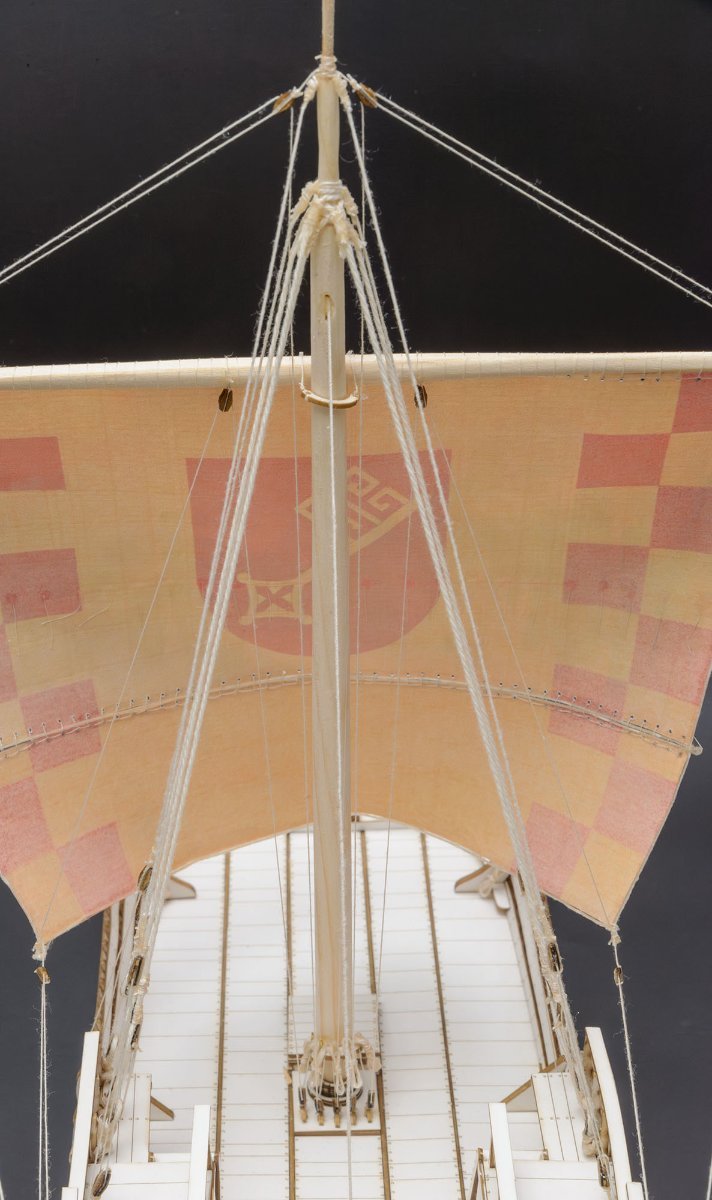
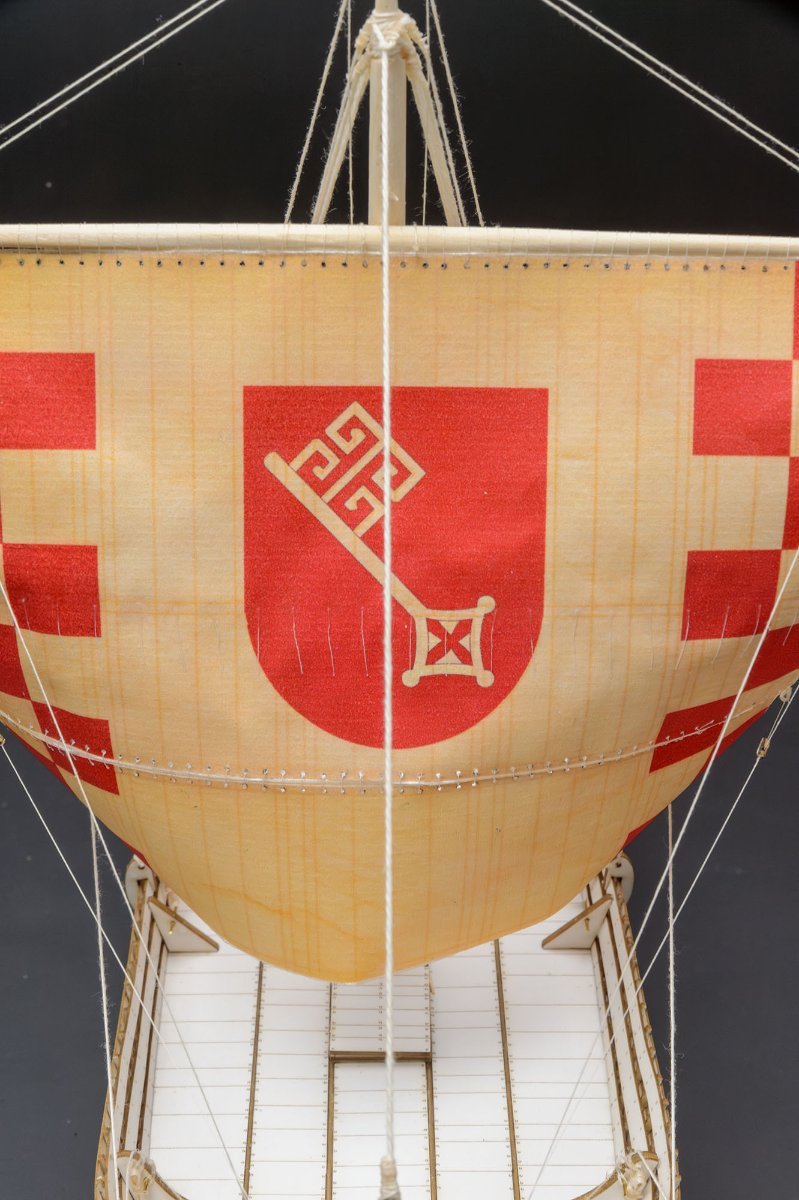
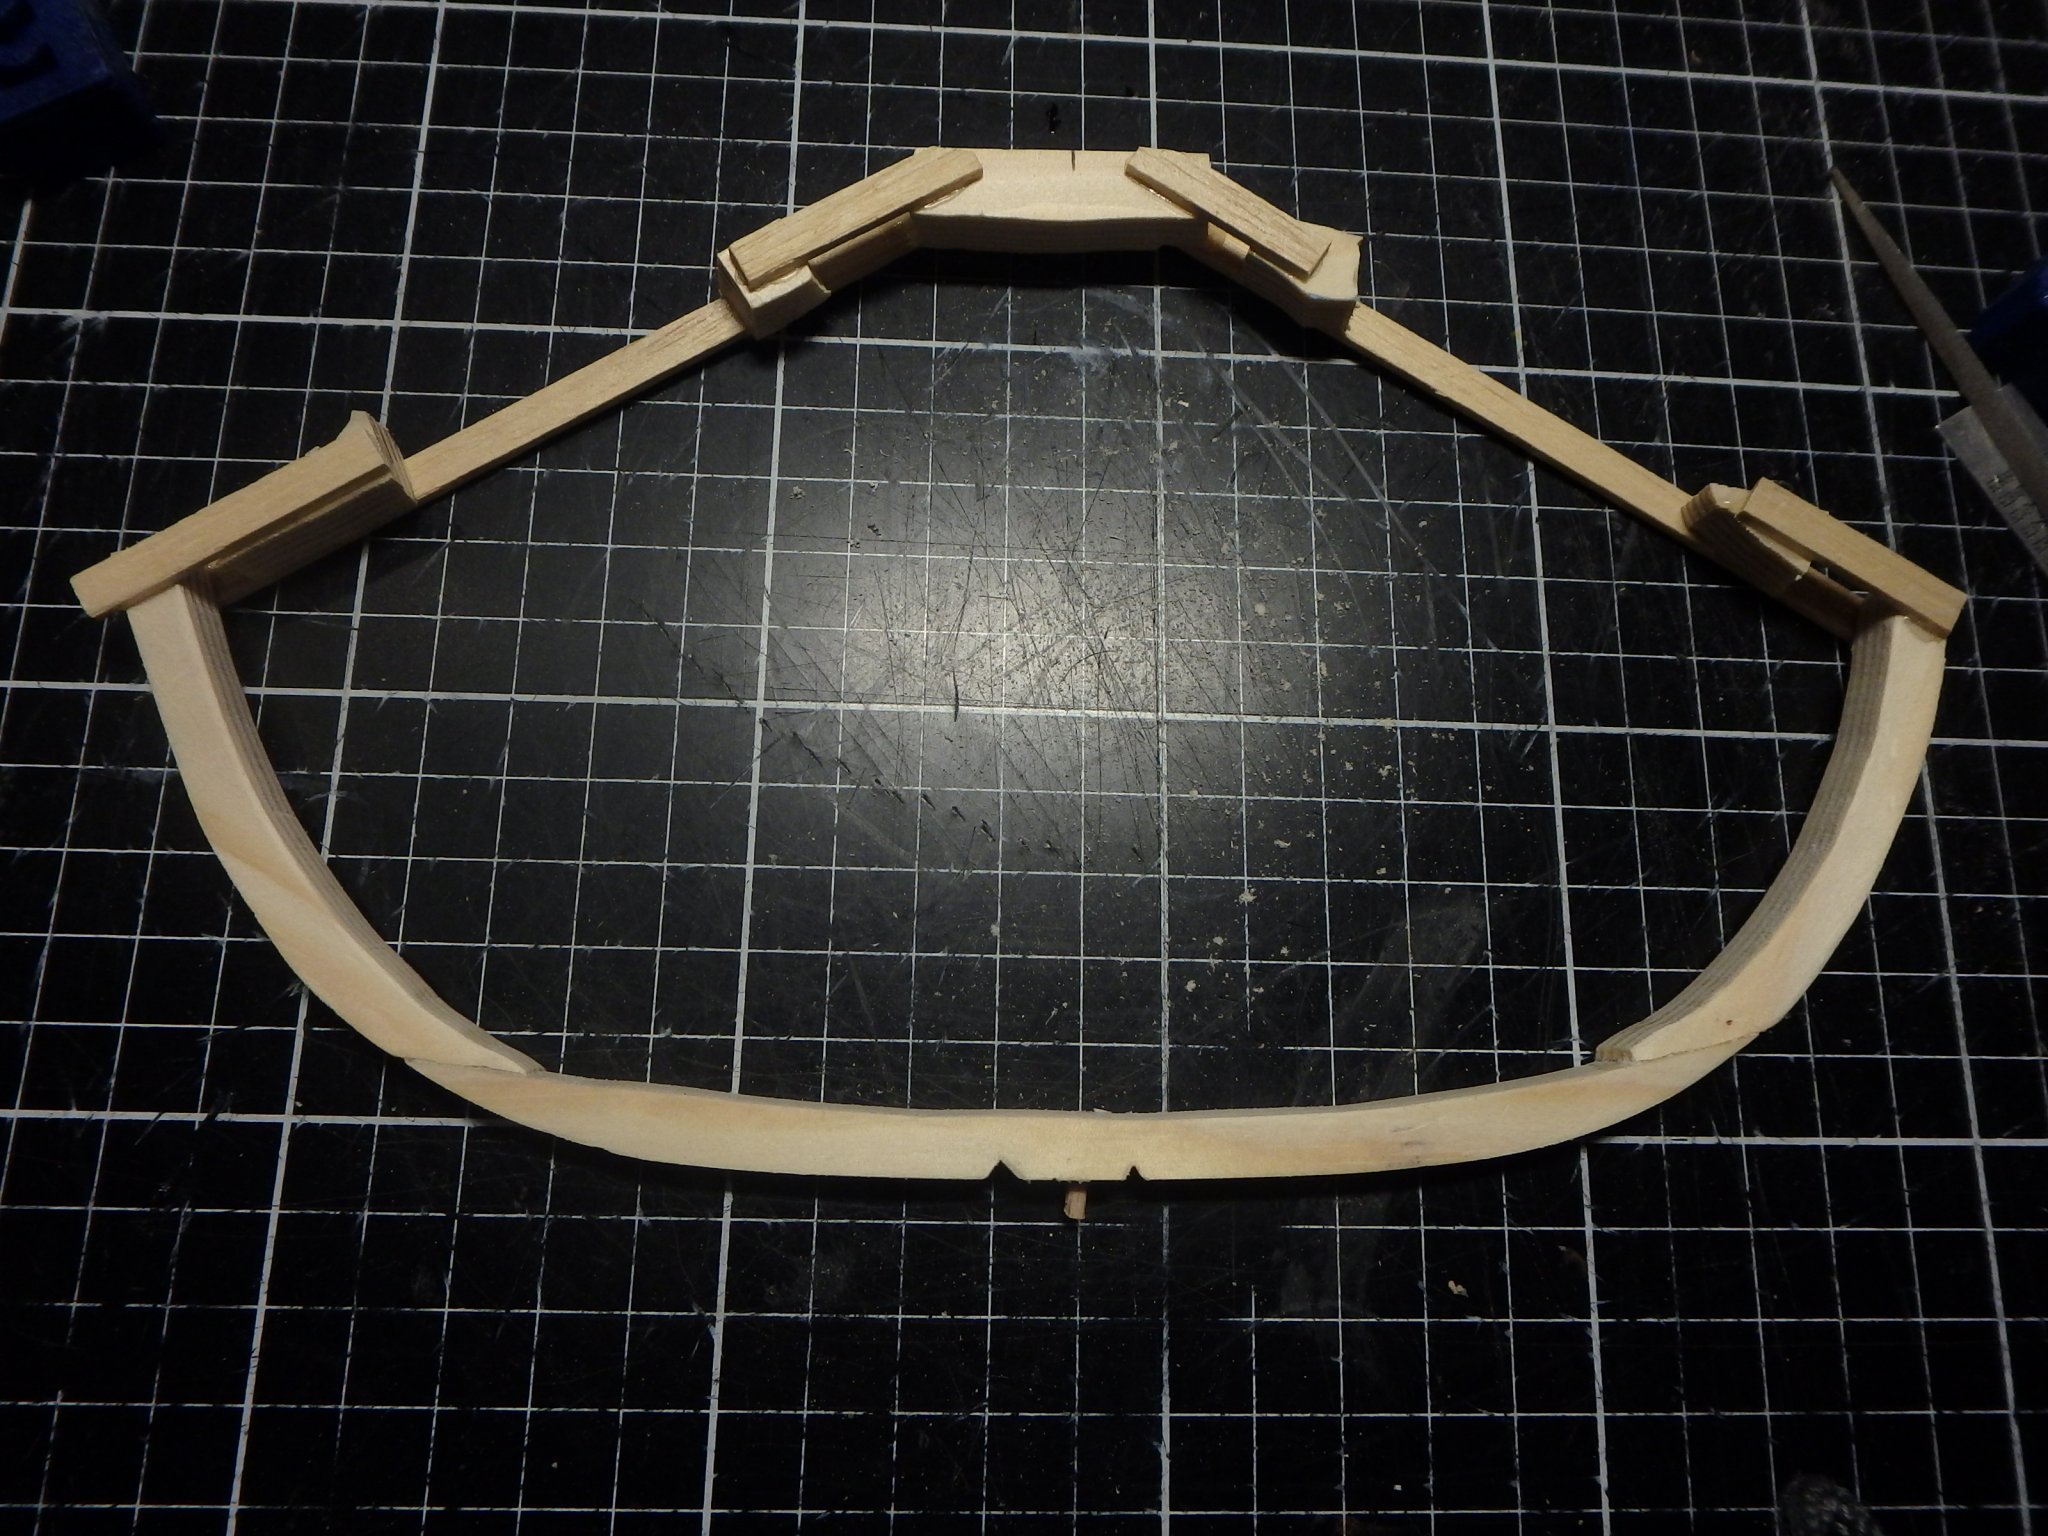
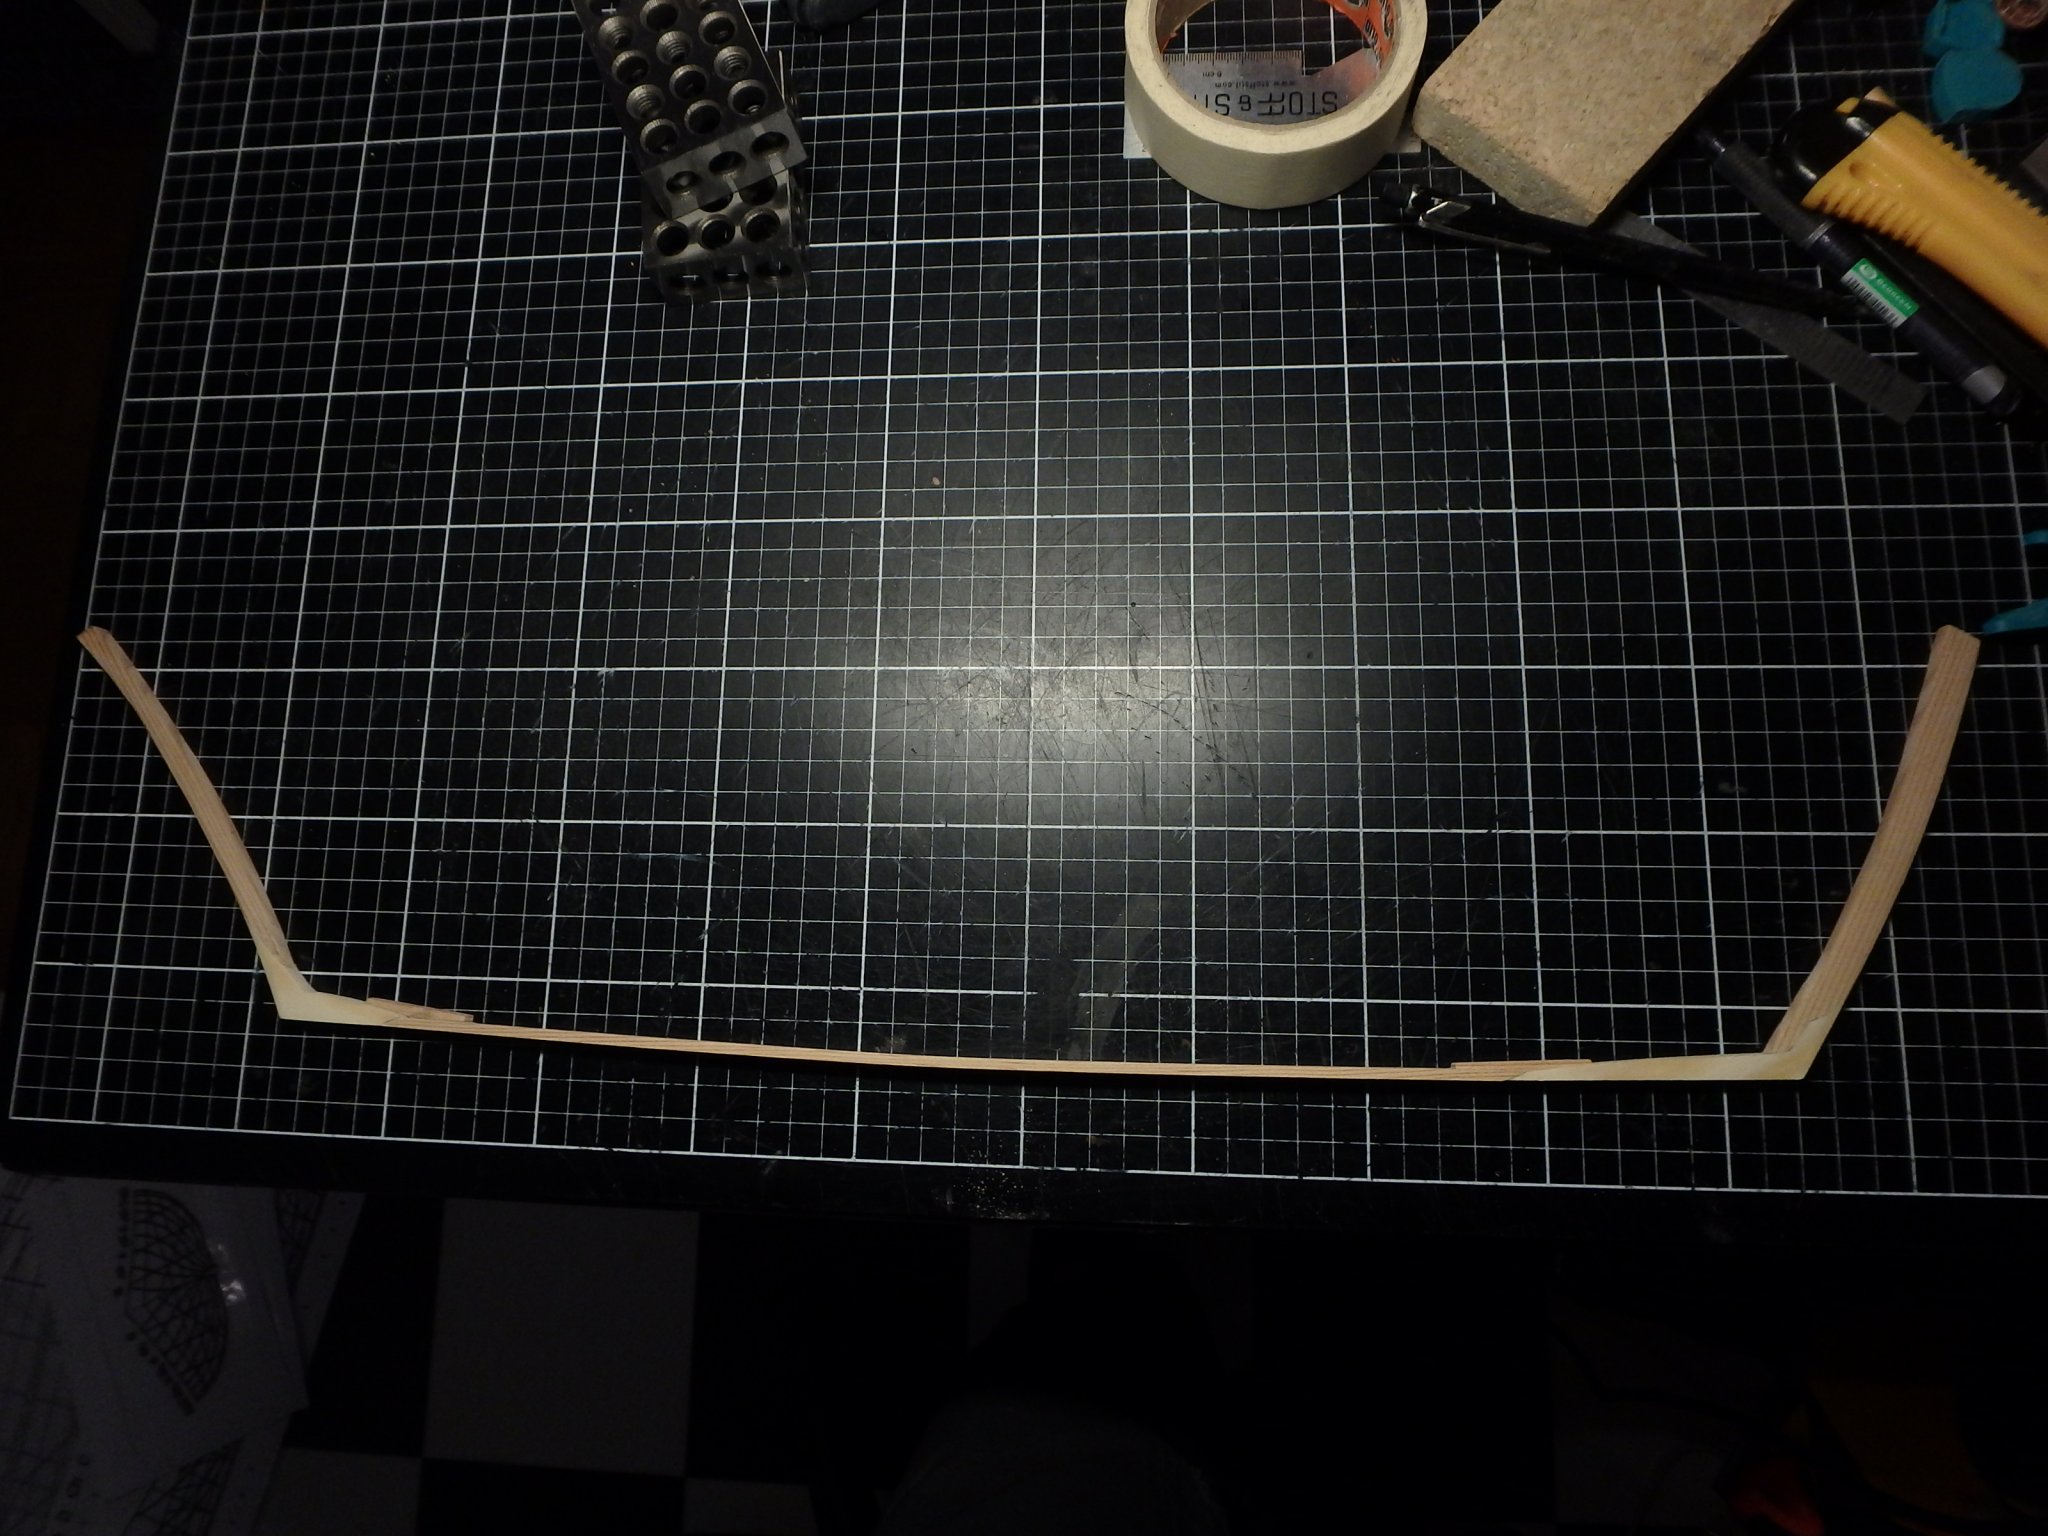
Dear friends, this evening I’ve found the time to restart my log. I propose you again the step by step building of an Hanseatic Cog. Perhaps it’s a Carrack or something close to it, as told me in the previous log, but I’ll continue to call it “Cog” as his designer did. I used Heinrich Winter’s plans (Das Hanseschiff im ausgehenden 15.Jahrhundert – Delius Klasing ed.), a bit modified with the evidences of some pictures of ancient paintings found in the web. During my work I've imagined to be on the Baltic Sea, where - between the '300 and early '500 lots of typical boats sailed the waves of what was one of the first forms of trade cooperation between cities belonging to different social and political entities: the Hanseatic League. I’ve decided to choose the city of Lubeck: my Cog will have its insignas (red and white colour). Now the ship is about 70% made, but I've managed building pictures, so this log will show the work from its beginning. The final ship will be, more or less, as shown in the picture with its upper parts red and white coloured. Regards, Foremast

.JPG.3ad771c5470d08fe3808dfe220ff4a23.JPG)
.JPG.5d3c6d4527d140b7174615be8ee48df8.JPG)
.JPG.8bdffdbaf118a0adace7a4683be30924.JPG)

.JPG.f882fd2a06aa97fd46627cfe206d3d51.JPG)