

Mark P
-
Posts
1,763 -
Joined
-
Last visited
Reputation Activity
-

 Mark P got a reaction from JohnE in Gun Port Framing
Hi Thistle;
The gun-port cills and lintels (also called cills, actually: upper cills) were aligned with the curvature (sheer) of the deck, maintaining a constant distance from the deck at the side of the vessel. The sides of the ports are at right-angles to the keel, parallel to the station lines (there are some exceptions, but this is by far the general rule)
This means that the gun-ports are not square, except for a few right amidships, but are actually a parallelogram shape, with the angles increasing towards the stern and bow.
To answer your question about guns moving: when they were not being used the guns were stowed by raising the muzzle to its maximum and hauling the gun tight to the ship's side. The muzzle then fitted into a curving recess cut into the back of the upper cill. The gun-tackles were lashed up taut, and an additional rope lashed around the muzzle and made fast to an eye-bolt in the side above the port.
Hope this helps.
All the best,
Mark P
-
 Mark P got a reaction from CaptainSteve in Gun Port Framing
Thanks Phill;
I've learnt a lot from the resources and people on this site; it seems only fair to do my bit to keep up the tradition.
Happy modelling!
Mark P
-
 Mark P reacted to WackoWolf in Gun Port Framing
That is what this forum is all about, we all learn from each other. To bad the rest of the world couldn't get along like we do.
-
 Mark P got a reaction from Seventynet in Gun Port Framing
Thanks Phill;
I've learnt a lot from the resources and people on this site; it seems only fair to do my bit to keep up the tradition.
Happy modelling!
Mark P
-
 Mark P got a reaction from dafi in Gun Port Framing
Hi Thistle;
The gun-port cills and lintels (also called cills, actually: upper cills) were aligned with the curvature (sheer) of the deck, maintaining a constant distance from the deck at the side of the vessel. The sides of the ports are at right-angles to the keel, parallel to the station lines (there are some exceptions, but this is by far the general rule)
This means that the gun-ports are not square, except for a few right amidships, but are actually a parallelogram shape, with the angles increasing towards the stern and bow.
To answer your question about guns moving: when they were not being used the guns were stowed by raising the muzzle to its maximum and hauling the gun tight to the ship's side. The muzzle then fitted into a curving recess cut into the back of the upper cill. The gun-tackles were lashed up taut, and an additional rope lashed around the muzzle and made fast to an eye-bolt in the side above the port.
Hope this helps.
All the best,
Mark P
-
 Mark P got a reaction from WackoWolf in Gun Port Framing
Thanks Phill;
I've learnt a lot from the resources and people on this site; it seems only fair to do my bit to keep up the tradition.
Happy modelling!
Mark P
-
Mark P got a reaction from CaptainSteve in Gun Port Framing
Hi Thistle;
The gun-port cills and lintels (also called cills, actually: upper cills) were aligned with the curvature (sheer) of the deck, maintaining a constant distance from the deck at the side of the vessel. The sides of the ports are at right-angles to the keel, parallel to the station lines (there are some exceptions, but this is by far the general rule)
This means that the gun-ports are not square, except for a few right amidships, but are actually a parallelogram shape, with the angles increasing towards the stern and bow.
To answer your question about guns moving: when they were not being used the guns were stowed by raising the muzzle to its maximum and hauling the gun tight to the ship's side. The muzzle then fitted into a curving recess cut into the back of the upper cill. The gun-tackles were lashed up taut, and an additional rope lashed around the muzzle and made fast to an eye-bolt in the side above the port.
Hope this helps.
All the best,
Mark P
-
 Mark P got a reaction from mtaylor in Gun Port Framing
Thanks Phill;
I've learnt a lot from the resources and people on this site; it seems only fair to do my bit to keep up the tradition.
Happy modelling!
Mark P
-
 Mark P got a reaction from Phill Elston in Gun Port Framing
Thanks Phill;
I've learnt a lot from the resources and people on this site; it seems only fair to do my bit to keep up the tradition.
Happy modelling!
Mark P
-
 Mark P got a reaction from Don9of11 in Gun Port Framing
Hi Thistle;
The gun-port cills and lintels (also called cills, actually: upper cills) were aligned with the curvature (sheer) of the deck, maintaining a constant distance from the deck at the side of the vessel. The sides of the ports are at right-angles to the keel, parallel to the station lines (there are some exceptions, but this is by far the general rule)
This means that the gun-ports are not square, except for a few right amidships, but are actually a parallelogram shape, with the angles increasing towards the stern and bow.
To answer your question about guns moving: when they were not being used the guns were stowed by raising the muzzle to its maximum and hauling the gun tight to the ship's side. The muzzle then fitted into a curving recess cut into the back of the upper cill. The gun-tackles were lashed up taut, and an additional rope lashed around the muzzle and made fast to an eye-bolt in the side above the port.
Hope this helps.
All the best,
Mark P
-
 Mark P got a reaction from uss frolick in Gun Port Framing
Hi Thistle;
The gun-port cills and lintels (also called cills, actually: upper cills) were aligned with the curvature (sheer) of the deck, maintaining a constant distance from the deck at the side of the vessel. The sides of the ports are at right-angles to the keel, parallel to the station lines (there are some exceptions, but this is by far the general rule)
This means that the gun-ports are not square, except for a few right amidships, but are actually a parallelogram shape, with the angles increasing towards the stern and bow.
To answer your question about guns moving: when they were not being used the guns were stowed by raising the muzzle to its maximum and hauling the gun tight to the ship's side. The muzzle then fitted into a curving recess cut into the back of the upper cill. The gun-tackles were lashed up taut, and an additional rope lashed around the muzzle and made fast to an eye-bolt in the side above the port.
Hope this helps.
All the best,
Mark P
-
Mark P reacted to Silkjc in 8-in-1 Power Tool
So I splurged and ordered one.
The main reasoning behind this is I do not have the space for the individual machines - yet. Being able to have the capability when required will allow me to transition to full scratch building.
This is the one I ordered, the version which is electroplated and higher power:
http://www.dhgate.com/product/tz8000mp-big-power-mini-metal-8-in-1-kit/257465868.html#cart_view-${count}-null
Once I get it, if anyone has any questions or would like detailed information let me know and i'll post it up here.
I will also probably order a 4 jaw chuck. Given the stock wood we get I'll assume this is pretty much essential.
-
Mark P reacted to WackoWolf in 8-in-1 Power Tool
It would be nice if you could post your feedback as to the ups and downs of this machine for others that might be interested in buying one.
-
Mark P reacted to Silkjc in 8-in-1 Power Tool
I've been researching these for awhile. This version is the higher power version which has a 60W motor instead of 20W.
There are several videos of it in action here, including cutting aluminium, hard wood and plastic.
https://www.youtube.com/channel/UCu2E1kV5TrDf8EvNbciF4SA
There is also a *much* more expensive 3-axis or 4-axis CNC version.
I am very impressed with the build quality from the video, and will probably end up getting one soon. After that I intend to add the CNC functionality myself.
Not a bad kit for a few hundred dollars.
This website has a chart showing the different models available,
http://www.dhgate.com/product/60w-12000rpm-electroplated-all-metal-heighten/245426392.html?recinfo=8,7,1#cppd-1-5|null:7
Excluding the newer CNC ones which can be found here (videos on youtube channel above):
http://www.thefirsttools.com/2-4-4-four-axis-cnc-drilling-and-milling-machine.html
Happy machining.
-
.thumb.jpeg.fc5d633a7b34428fcf19419a73d56d55.jpeg) Mark P got a reaction from EricWilliamMarshall in Dummy's Guide to Rigging
Mark P got a reaction from EricWilliamMarshall in Dummy's Guide to Rigging
Hi John;
There are at least two books, '18th century rigs & rigging' by Karl Heinz Marquardt, and 'The masting and rigging of English ships of war' by James Lees (which I can see that you have borrowed from the library [must be a good one, to hold such titles] but perhaps not yet read) which deal with the matter stage by stage. They start with the masts and associated rigging, then the yards and associated rigging, and then the sails and associated rigging. They finish with sections on different types of blocks, and belaying.
Neither of them has a glossary, unfortunately, which would be helpful for you; but you will read about shrouds and stays in association with the masts, and braces, lifts and halliards in association with the yards; then sheets, tacks and buntlines in association with the sails. By the time you have read Lees' book, you should have a thorough knowledge of the basics. Deeper knowledge can only come from re-reading, drawing rigging diagrams, and from rigging models.
Lennarth Peterson's book, by the way, despite its title, only deals with the rigging of one particular ship at one particular period. So whilst it is very good for a model of this type, for earlier or larger vessels, it is a somewhat limited source.
All the best,
Mark P
-
 Mark P got a reaction from AON in Dummy's Guide to Rigging
Hi John;
There are at least two books, '18th century rigs & rigging' by Karl Heinz Marquardt, and 'The masting and rigging of English ships of war' by James Lees (which I can see that you have borrowed from the library [must be a good one, to hold such titles] but perhaps not yet read) which deal with the matter stage by stage. They start with the masts and associated rigging, then the yards and associated rigging, and then the sails and associated rigging. They finish with sections on different types of blocks, and belaying.
Neither of them has a glossary, unfortunately, which would be helpful for you; but you will read about shrouds and stays in association with the masts, and braces, lifts and halliards in association with the yards; then sheets, tacks and buntlines in association with the sails. By the time you have read Lees' book, you should have a thorough knowledge of the basics. Deeper knowledge can only come from re-reading, drawing rigging diagrams, and from rigging models.
Lennarth Peterson's book, by the way, despite its title, only deals with the rigging of one particular ship at one particular period. So whilst it is very good for a model of this type, for earlier or larger vessels, it is a somewhat limited source.
All the best,
Mark P
-
 Mark P got a reaction from EJ_L in Dummy's Guide to Rigging
Hi John;
There are at least two books, '18th century rigs & rigging' by Karl Heinz Marquardt, and 'The masting and rigging of English ships of war' by James Lees (which I can see that you have borrowed from the library [must be a good one, to hold such titles] but perhaps not yet read) which deal with the matter stage by stage. They start with the masts and associated rigging, then the yards and associated rigging, and then the sails and associated rigging. They finish with sections on different types of blocks, and belaying.
Neither of them has a glossary, unfortunately, which would be helpful for you; but you will read about shrouds and stays in association with the masts, and braces, lifts and halliards in association with the yards; then sheets, tacks and buntlines in association with the sails. By the time you have read Lees' book, you should have a thorough knowledge of the basics. Deeper knowledge can only come from re-reading, drawing rigging diagrams, and from rigging models.
Lennarth Peterson's book, by the way, despite its title, only deals with the rigging of one particular ship at one particular period. So whilst it is very good for a model of this type, for earlier or larger vessels, it is a somewhat limited source.
All the best,
Mark P
-
Mark P reacted to lehmann in What is the difference between wood files and metal files
In general, all files work for metal or wood. However, very coarse files, such as rasps, are not useful for metal because if the bit at all they would require a lot of force to push. Rasps, are used for removing a lot of wood fast, but the surface will be rough, as in relatively deep gouges, or badly torn up is cutting across the grain.
Very fine toothed files tend to clog up when cutting soft metals such as brass and aluminum: an old trick is to rub some chalk into the file before working. It also helps to reduce friction.
For filing small metal parts, you'll need a fine tooth file, otherwise it will "catch" if there are only one or two teeth cutting. I find that the diamond coated files work well for these situations - they are more like sandpaper than files. Inexpensive sets can be found that will last long time unless you want to work in hard metals.
-
 Mark P got a reaction from Ray1981 in Dummy's Guide to Rigging
Hi John;
There are at least two books, '18th century rigs & rigging' by Karl Heinz Marquardt, and 'The masting and rigging of English ships of war' by James Lees (which I can see that you have borrowed from the library [must be a good one, to hold such titles] but perhaps not yet read) which deal with the matter stage by stage. They start with the masts and associated rigging, then the yards and associated rigging, and then the sails and associated rigging. They finish with sections on different types of blocks, and belaying.
Neither of them has a glossary, unfortunately, which would be helpful for you; but you will read about shrouds and stays in association with the masts, and braces, lifts and halliards in association with the yards; then sheets, tacks and buntlines in association with the sails. By the time you have read Lees' book, you should have a thorough knowledge of the basics. Deeper knowledge can only come from re-reading, drawing rigging diagrams, and from rigging models.
Lennarth Peterson's book, by the way, despite its title, only deals with the rigging of one particular ship at one particular period. So whilst it is very good for a model of this type, for earlier or larger vessels, it is a somewhat limited source.
All the best,
Mark P
-
 Mark P got a reaction from JRB9019 in Dummy's Guide to Rigging
Hi John;
There are at least two books, '18th century rigs & rigging' by Karl Heinz Marquardt, and 'The masting and rigging of English ships of war' by James Lees (which I can see that you have borrowed from the library [must be a good one, to hold such titles] but perhaps not yet read) which deal with the matter stage by stage. They start with the masts and associated rigging, then the yards and associated rigging, and then the sails and associated rigging. They finish with sections on different types of blocks, and belaying.
Neither of them has a glossary, unfortunately, which would be helpful for you; but you will read about shrouds and stays in association with the masts, and braces, lifts and halliards in association with the yards; then sheets, tacks and buntlines in association with the sails. By the time you have read Lees' book, you should have a thorough knowledge of the basics. Deeper knowledge can only come from re-reading, drawing rigging diagrams, and from rigging models.
Lennarth Peterson's book, by the way, despite its title, only deals with the rigging of one particular ship at one particular period. So whilst it is very good for a model of this type, for earlier or larger vessels, it is a somewhat limited source.
All the best,
Mark P
-
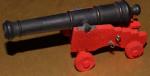
 Mark P got a reaction from Elijah in HMS Atalanta 1775 by tlevine - FINISHED - 1:48 scale - from TFFM plans
Hi Toni;
Thank you for sharing the pictures of the cannon, and all the rest of your log.
I made the cannon for my current project at a scale of 1:64. I then decided that I just had to build it at 1:48. So my cannon were consigned to the 'might use one day on something' box. But having seen the cannons you have made, and some of the others' work on here making them, I think that I would have re-made them anyway, as they just are not up to the standard that can be achieved.
Keep up the good work.
Mark P
-
Mark P got a reaction from mtaylor in HMS Atalanta 1775 by tlevine - FINISHED - 1:48 scale - from TFFM plans
Hi Toni;
Thank you for sharing the pictures of the cannon, and all the rest of your log.
I made the cannon for my current project at a scale of 1:64. I then decided that I just had to build it at 1:48. So my cannon were consigned to the 'might use one day on something' box. But having seen the cannons you have made, and some of the others' work on here making them, I think that I would have re-made them anyway, as they just are not up to the standard that can be achieved.
Keep up the good work.
Mark P
-
Mark P reacted to tlevine in HMS Atalanta 1775 by tlevine - FINISHED - 1:48 scale - from TFFM plans
The cannon were addressed next. My original intention was to cast my own cannon. But after looking at the dimensions of the cannon available through Syren, I decided to cheat and use his instead. Maybe someday... I also purchased Chuck's monograms to apply to the cannon barrels. I bored the barrels to the correct diameter and then blackened them in Birchwood Casey. Specifically, they were cleaned in isopropanol and blackened for approximately thirty seconds. They were then rinsed in water and wiped dry. The process was repeated five times. Finally, they were rubbed down with a paper towel. The monogram was applied with CA; Titebond did not hold. The monogram was "painted" with archival marker. Now it is time to mount the cannon barrel.
-
Mark P reacted to BANYAN in Bow Timber Joints and Other Miscellania
Hi folks,
Also on this holiday we took a look in at a National Trust House called Runnymede; which was at one time, the home of a very successful Whaling ship captain and owner of a fleet of whaling ships based in Hobart, Tasmania.
In there I found a couple of canvas mats/runners which I believe may have been made exactly like the ones in ships. they show Howell made these were with some very intricate patterns and look quite good. posted for interest.
cheers
Pat
-
 Mark P got a reaction from Canute in HMS Agamemmon a nice find
Hi everyone;
Another nice touch here is the name of the author! I thought he'd been dead for about 300 years!
All the best,
Mark P