

igorcap
-
Posts
226 -
Joined
-
Last visited
Reputation Activity
-

 igorcap got a reaction from Keith Black in Figureheads of sailing ships.
I got everyone together. Gods and heroes, beasts and monsters. Figureheads of sailing ships.
-

-
igorcap reacted to Craigie65 in Figureheads of sailing ships.
These are amazing. Are they 3D renders?
-
igorcap reacted to Chuck in The SainSmart 3020 CNC Router (300mm X 200mm Table Size) Un-boxing and Assembly - Thibaultron
Just test those before you cut anything. Depending on how accurate the work needs to be, probably 6 out of those ten will have the poi nt off-center. They will still cut beautifully but the cut line will be wider than your drawing by a lot. I regularly use those exact bits.
So I take each of the ten bits and test them by turning the spindle on. Then as I see a bit wobble I will mark the shaft with a sharpie and set it aside for less accurate use. You can easily see the wobble once you get a perfect bit that spins true. This caused me much heartache until I realized what a difference it makes.
If working with small parts this matters a great deal.
I mainly use 10, 15 and 20 degree V engraving bits.
-
igorcap reacted to Drazen in De Zeven Provinciën 1665 by Dražen - Scale 1:45
After refining the shape to get more 3D-effect and "contents behind the surface", I am ready with my decoration pattern.
Drazen
-
igorcap reacted to Drazen in De Zeven Provinciën 1665 by Dražen - Scale 1:45
The other side ready and checked on fit into the frame. I still have the coarse prototypes.
Drazen
-
igorcap reacted to Drazen in De Zeven Provinciën 1665 by Dražen - Scale 1:45
Since the pattern was not 100% clear, I needed to understand the forms. I made my own drawings about general shapes I want to get
Drazen
-
igorcap reacted to Drazen in De Zeven Provinciën 1665 by Dražen - Scale 1:45
The result after the actions...
Drazen
-
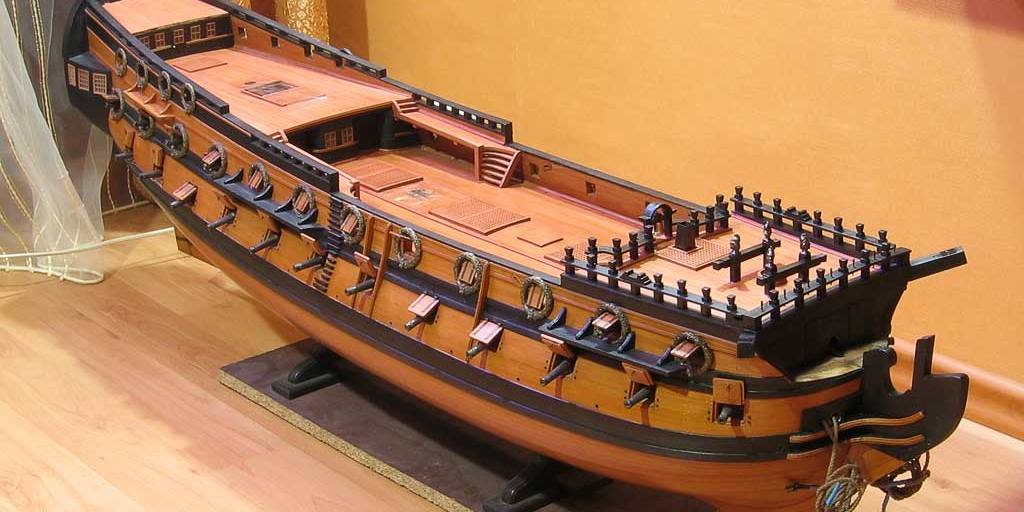
igorcap reacted to Siggi52 in HMS Tiger 1747 by Siggi52 - 1:48 - 60 gun ship from NMM plans
Hello and thank for your likes,
@ Jaager, thank you for your efforts. I don't think that your first thought is the solution. You would't see it at any model. Your second thought is may be the solution, but why did they give the wide only for the middle part of the ship.
I think that the given measurements are the widest part of the channels. If that is true also in 1745 is an other question. The mizzen channels are parallel to the ships side, there is given only a wide for the whole thing.
I found a drawing in Lavery's Ship of the Line I, the Centurion at page 71-72
That is what I thought was the meaning with design. To follow the lines of the ship. Ok, I would made the channels at the main mast to the aft end at least 4,8mm, so narrower then in the front. The measurements are from the drawing.
This are the fore and main channels from the Centurion. That model was build ca. 1745,
and her the same from the 60 gunner with no name
I'm sorry, but I haven't better pictures. I did't know at that time that it would be important. But with a little good will you could see that the fore channels are to the front narrower and the same for the main channels to the back.
I made some channels to look how much space is from the shrouds to the ships side, and I think there is much space. Even when the shrouds come in a little more. Here the channels have the same wide in the front and back. So I think I could made them to the front/back a little narrower to get that arch and follow the ships lines.
-
igorcap reacted to Siggi52 in HMS Tiger 1747 by Siggi52 - 1:48 - 60 gun ship from NMM plans
Hello,
now it is done, all port lids are at there place 😅, but not fast at all.
The next thing to do are the channels.
And here I have a question. In the 1719 establishment list is for the main channels a breath at the fore most end given and for the fore channels a breath at the after end. Fore the mizzen just a breath. But for all, so that the shrouds are clear of the gunnell (?)
From the pictures I have that could be, but I'm not really sure, at least for the fore channels. For the main channels I would say the picture show it, but not very much. Here the channels getting narrower at the end, because the stays going up more vertical and therefor clearer from the ships side. Why the fore channels should be broader at the end is not very logical for me. Here the last stays have nearly no ship sides. They are behind the castel at the ships waist.
But may be it's only kind of design?
-
igorcap reacted to archjofo in La Créole 1827 by archjofo - Scale 1/48 - French corvette
Hello,
I am very happy about the extremely nice comments from all of you and the many LIKES.
That of course motivates me a lot and gives me the feeling of being part of a really great community that pursues the same interests. Thanks again for that.
Continuation: Mizzen topgallant stay - Étai mât de perruche
As already reported on this topic some time ago (LINK), the monograph by J. Boudriot does not reveal in detail how the mizzen topgallant stay was attached. In this respect, I orientated myself on examples from relevant literature.
Before attaching the stay (model rope ø 0.46 mm), its length must be determined on the model, as it is guided over a single block (length 4 mm) and integrating the thimble on the model is not necessarily recommended.
The next picture shows the finished mizzen topgallant stay and the two-legged sling (counterpart for the lanyard lashing), which is attached to the trestle trees.
The lanyard for the lashing to fix the mizzen topgallant stay was set up with a simplified splice or fake splice (unfortunately I don't know the English name).
In the last picture you can see the finished lanyard lashing. A corresponding enlargement in the cut-out at the top left.
Sequel follows …
-
igorcap reacted to Egilman in 3d printing process
I was given a piece of advice, (and a demonstration of it) back in my tech school days that has always served me well.... My instructor, a retired toolmaker, told me that it isn't the tool that the craftsman uses, it's how he uses it.... Then, he took a 4 inch dia. bar of 4130 and cut a perfect #2 morse taper on it.. The lathe he used was a 150 year old South Bend that was converted from overhead belt drive.... It had 1/8" of lash in the cross slide lead screw....
What he said after the demonstration was it isn't the tool it's the operators knowledge of the tool and his skill in using it... The 3D Printer is a tool, the software is a tool.... WE need to learn how to use them correctly....
-
 igorcap got a reaction from FrankWouts in HMS ROYAL KATHERINE 1664 by Doris - 1/55 - CARD
Perfectly! Awesome!
-
 igorcap got a reaction from ed w in Lanterns. Practical use of 3D technologies
I received an order to make parts for the assembly of lanterns for a 3-deck French ship of the late 17th century. First, a 3D project was made. Then the transparent resin inserts were printed. The lid and base were first printed out of resin, then wax-ups were made from them, and finally a brass casting.
You just have to glue the grid of wires and brass strips
-
 igorcap got a reaction from Archi in Lanterns. Practical use of 3D technologies
I received an order to make parts for the assembly of lanterns for a 3-deck French ship of the late 17th century. First, a 3D project was made. Then the transparent resin inserts were printed. The lid and base were first printed out of resin, then wax-ups were made from them, and finally a brass casting.
You just have to glue the grid of wires and brass strips
-
igorcap got a reaction from Archi in Figurehead of the USS Confederacy (1778)
Figurehead of the USS Confederacy (1778). Scale 1:64
-
-
igorcap got a reaction from Archi in Figurehead of the USS Confederacy (1778)
Decor set for USS Confederacy (1778). Now in the wood (pear). Scale 1/64
-
 igorcap got a reaction from shipman in HMS Tiger 1747 by Siggi52 - 1:48 - 60 gun ship from NMM plans
Yes, your drawing is very much in line with the style of the original, as far as I understand it))
-
 igorcap got a reaction from mtaylor in HMS Tiger 1747 by Siggi52 - 1:48 - 60 gun ship from NMM plans
Yes, your drawing is very much in line with the style of the original, as far as I understand it))
-
 igorcap got a reaction from druxey in HMS Tiger 1747 by Siggi52 - 1:48 - 60 gun ship from NMM plans
Yes, your drawing is very much in line with the style of the original, as far as I understand it))
-
 igorcap got a reaction from Siggi52 in HMS Tiger 1747 by Siggi52 - 1:48 - 60 gun ship from NMM plans
Yes, your drawing is very much in line with the style of the original, as far as I understand it))
-
igorcap reacted to Siggi52 in HMS Tiger 1747 by Siggi52 - 1:48 - 60 gun ship from NMM plans
Hello, and thank you all for your comments and likes
It took three weeks to dare to paint again, I do not like it very much 😟 But at least it is done. Marc, I hope you sleep better this time 😉
But now it's done and the next thing is to install the gun port lids.
-
igorcap reacted to Kiyoo Iizawa in Making frame drawings and its adoption to laser cutting
6. Deployment to assembly jigs
The application of laser cutting techniques can be applied not only to accurate the parts, but also to the creation of jigs that ensures assembly accuracy during assembly. In the assembly of the framed structure model, it is necessary to assemble a large number of parts with accurate alignment, but it was also found that the jig plate for positioning which becomes the guide can be easily fabricated with laser cut using the several assembly drawings data.
It is possible to design the jig incorporate with the necessary ideas such as reproducing the notch shape to accurately holding the frame top, reproduction of the angle of the cant frame, the addition of various reference lines and so on. And because they can be easily applied to the jig configuration, the assembly of the hull can be made revolutionarily easier.
After several attempts, the latest design is applying the following features:
1) Cutout of the outer periphery of the jig plate
In the beginning, the outer periphery of wood sheet was used as it is. But since there is a possibility that the center position misaligns at the time of setting of wood sheet to the machine, it was finally decided to cut out the outer peripheral portion with a certain dimensions. By this, relation between outer frame and center line of the jig plates is always kept. Also, since it can be possible to accurately align the relative position of the stanchion and the fixing holes, it become easy to assemble the jig.
2) Preparation of the stanchions
In the beginning, it was assumed that the fixing stanchion of the upper and lower jig plate will be prepared by the builder oneself, and only the drilling position for fixing was displayed on design drawings. However, since the jig accuracy may collapse by the stanchion length and the accuracy of drilling hole, it was decided to prepare these stanchions as one of the elements of the cutting data. In addition, these were made to be able to put out the position accuracy even if only by fitting each other.
At our trial stage, only by inserting the six stanchions in each position, the relative position of the upper and lower plate can be secured without gluing, it seems enough for the assembly of the frame. If you are concerned about the looseness, it becomes more stable if you fix the front and rear of the jig simply with a rubber band or a string. I am only using masking tape to temporarily fix the stanchion and the board. The reason for a recommend that not fixing the stanchion in this way is to avoid that some of the stanchions disturbs the action at the time of such measurement and processing of the hull outer surface. Also, it enables to remove hull from jig for easier fairing and sanding of the entire hull.
3) Clarification of the reference position
The hull design has taken the method of dividing the midship position back and forth as zero position based on the contemporary design standards of the ship, but it was found that it is difficult to measure in actual assembly of the model. Therefore the reference position on the assembly was changed to start from the hull ends, it was to display the representative dimensions from there on the jig plate by setting the zero position at both ends so that accurate measurement can be made from either end.
The specific zero position is the fore top end of the stem and the aft top end of the sternpost. The hull (keel) support on front and rear the jig is also supported in this position.
4) Proper reinforcement and measurement guide
Although concept of the jig is well providing sufficient usage as mentioned above, it is recommended to attach a foot of aluminum channel as reinforcement. There is also an option to provide rails to guide the instrument for measuring the inside of the hull from the top.
In the process of prototype verification, this jig demonstrated great power in positioning the parts during assembly and in various measurements.
To be continued,
Kiyoo
-

 igorcap got a reaction from Mldixon in Lanterns. Practical use of 3D technologies
I received an order to make parts for the assembly of lanterns for a 3-deck French ship of the late 17th century. First, a 3D project was made. Then the transparent resin inserts were printed. The lid and base were first printed out of resin, then wax-ups were made from them, and finally a brass casting.
You just have to glue the grid of wires and brass strips