-
Posts
841 -
Joined
-
Last visited
Content Type
Profiles
Forums
Gallery
Events
Everything posted by robnbill
-
For me it depended on the gun set. For my Constitution it depended on the gun set, the 24 pound carronades had 2 sets of blocks and tackle on each side along with the breeching line. The 24 pound bow chasers had one set each side, the breeching line, and a block and tackle set from the rear of the carriage to the deck behind. Since none of this was part o the original kit, it required additional blocks and lines as well as installing rings on the cannon and carriages. I followed the diagrams in AOS for the Constitution. FYI, You can't go wrong ordering blocks and lines from Syren Ship Model CO. Chuck's work is amazing. Bill
-
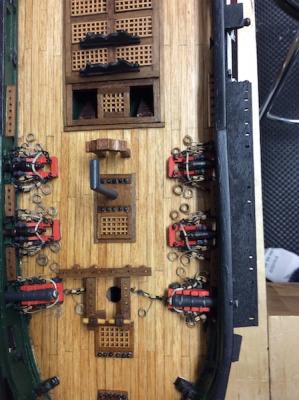
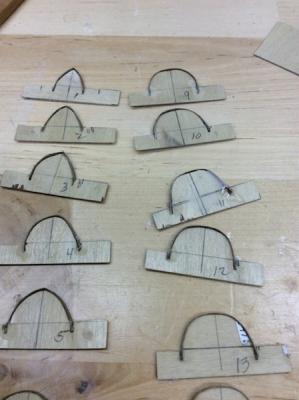
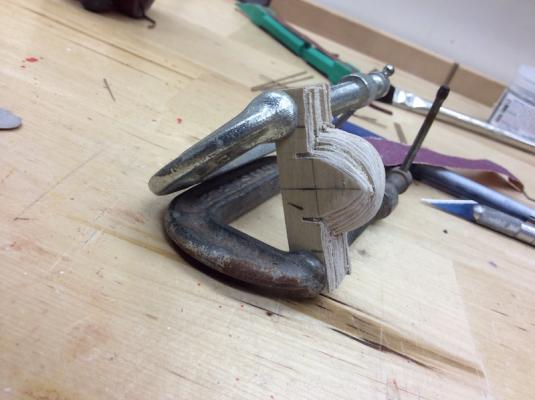
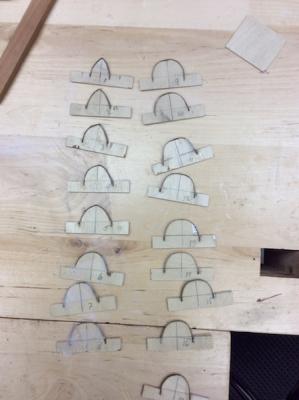
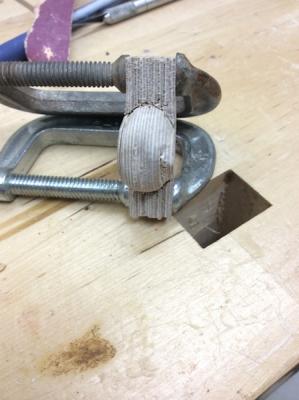
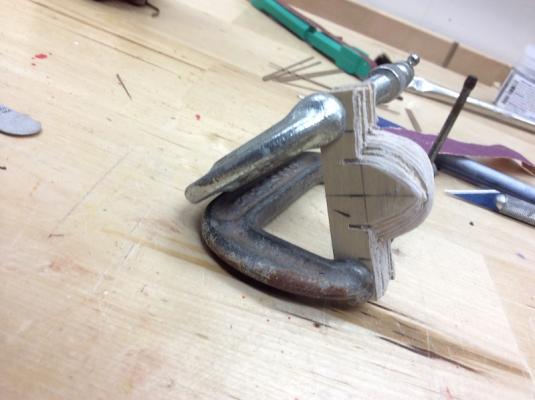
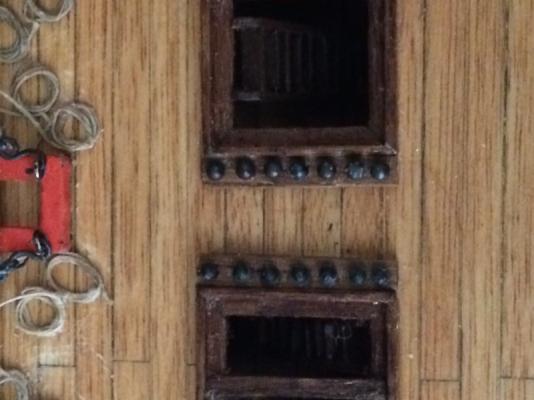
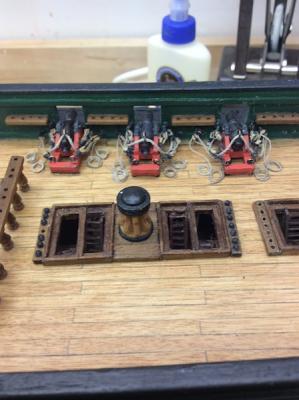
I started working on the ship's boats today. However, I also wanted to fix something that had been nagging at the back of my mind. I built binnacles for the deck based upon the photos from the ship and the AOS. They were not part of the Mamoli plans. However, when I finished them, I just brought them to a point. The photos have a rounded ball shape on top. I thought last night that I did get 1.6mm ball bearings that were too small for cannonballs, but were just about right for the binnacles. As luck would have it, I also had stained two of them black in my testing of the bearings for the cannonballs. So I used the Foredom to drill very small holes in the top (point) of each binnacle. I gradually increased the hole size until it was 1.25mm. Then I lightly sanded around the hole to level it a bit. Then a touch of thick CA, and dropped the darkened bearing on the hole. I like the way it turned out. I also cut the forms out for the ships launch. I cut some walnut stops into 80mm lengths then split it in half. I put these into an ammonia/water solution to soften while I cut the forms out on the band saw. I took all of the forms and clamped them together so I could true the lines up. Then I glued the ends of the strips in the slots and bent them around the form, cut off the ends and glued the other ends into the opposite slot. My plan is to cut a keel and notch it for the ribs. Then see how planking turns out. I am not betting that my first one will be a keeper, but I do think it will teach me a lot on what I do need to do to make the final boats. Here are some shots of both the binnacles and the ribs in the forms as well as a shot o them all clamped together for truing. Bill
- 335 replies
-
- Constitution
- Mamoli
-
(and 3 more)
Tagged with:
-
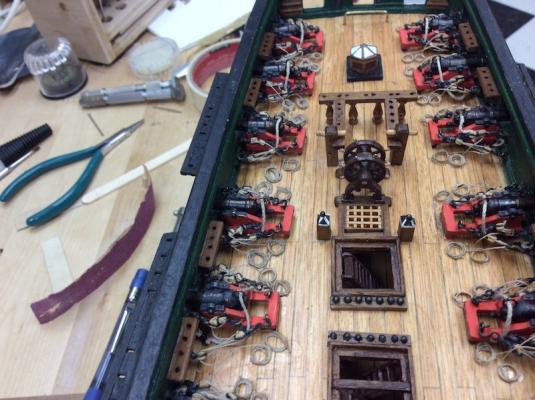
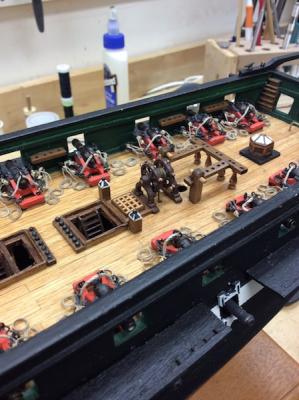
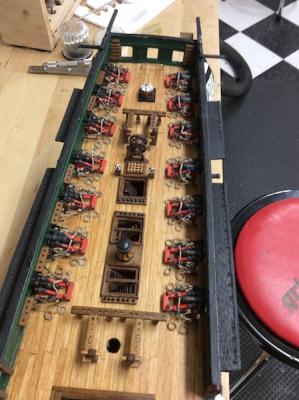
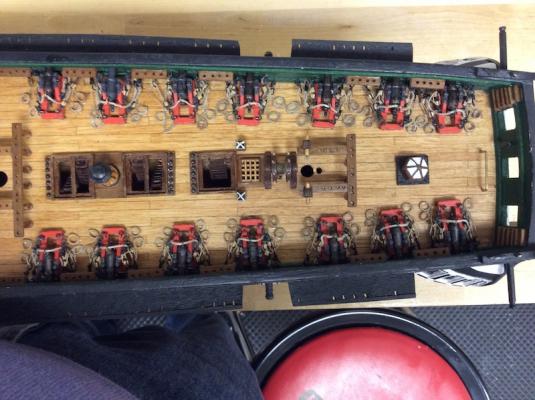
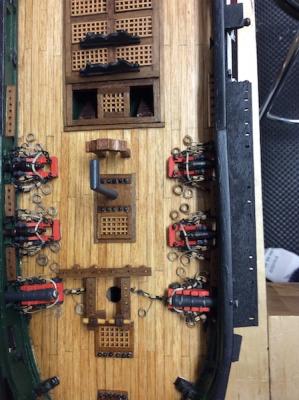
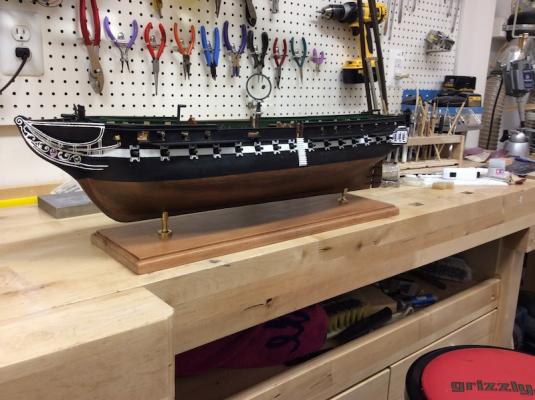
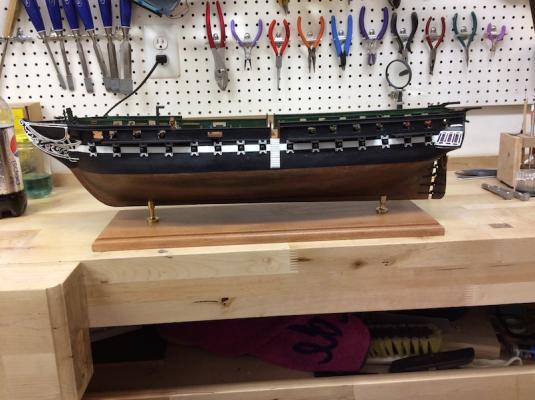
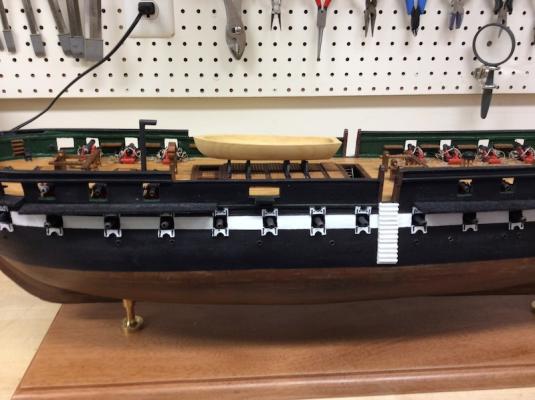
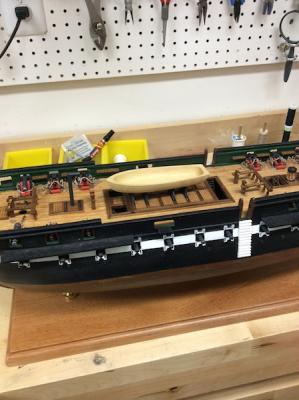
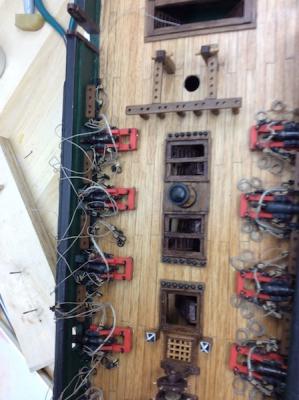
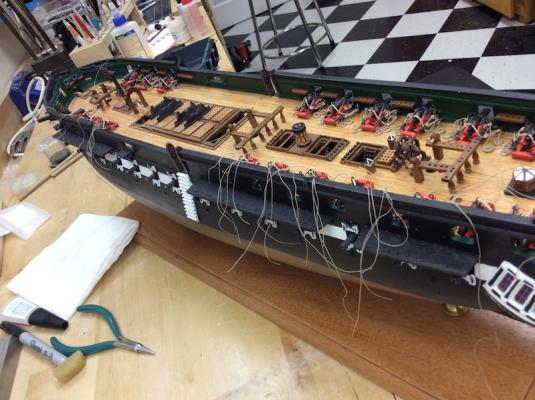
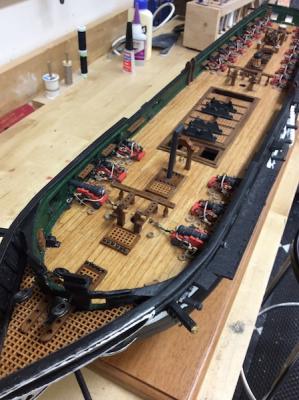
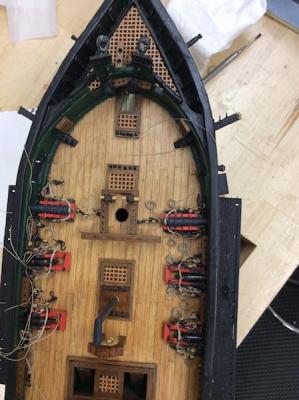
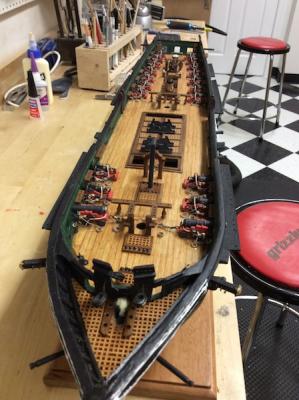
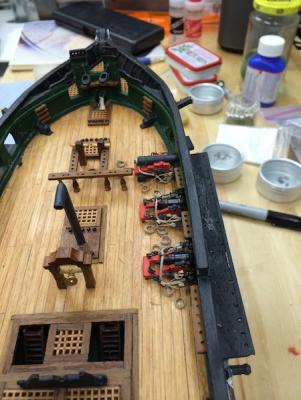
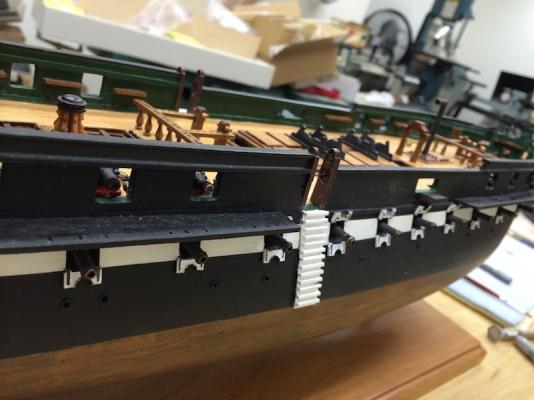
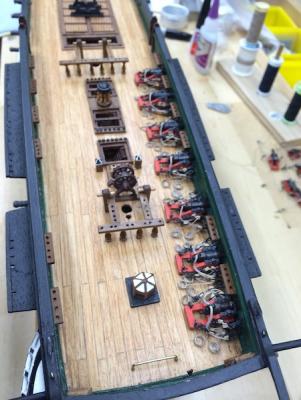
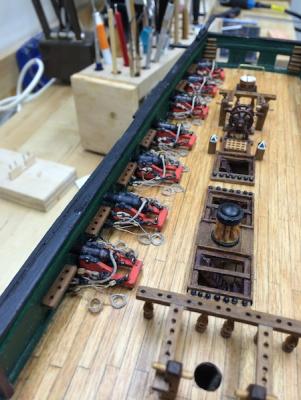
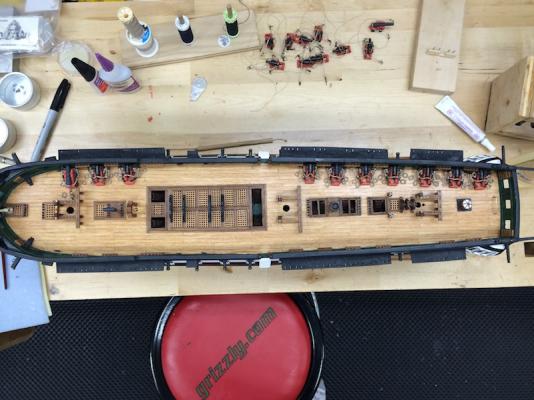
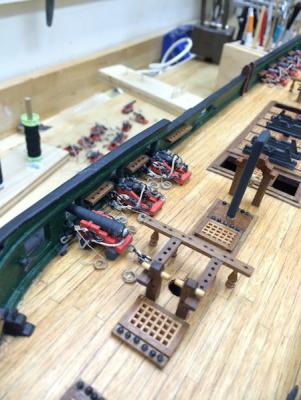
I completed all of the cannons today. There was a huge learning curve in these. Learning the best technique to attach them to the ship. What tools worked best, what order to attach the lines in etc. I also spent a great deal of the time getting everything staged ahead once I knew exactly how I was going to rig them. So the first 10 took 20 days, the last 10, two days. At least to install, they also had a lot of pre work done on them, rigging painting etc prior to the install. Now on to the ships boats. For comparison purposes, I placed the blank for the ship's launch in the cradle where it would be. As I mentioned previously, I do not intend to use these blanks, but rather to build the boats from scratch. We shall see what challenges these have in store for me. Thanks to Mort, Chuck, and all of you who looked in and gave me feedback on getting to this stage. I am proud of the way it has turned out to date and am looking forward to starting on the boats. Bill
- 335 replies
-
- Constitution
- Mamoli
-
(and 3 more)
Tagged with:
-
As one of the Mamoli kits under construction I will have to say that I am enjoying the Mamoli kit. The instructions leave a great deal to the builder. There are also flaws in them. For instance, the Spanker mast is shown too short in the kit. Without this forum, I would not have the model in the shape it is currently in (which is good shape I think). I have done a bit of bashing on the kit using AOS, this forum, past builders (thank you Mort) and other material such as that from the Navy archives. However, I would assume that most of the builders would also do the same. The wood is great in the kit. The fittings are hit and miss. Some of them are great, some of them I have discarded and built my own. The metal quarter gallery fittings were poorly shaped and required a great deal of finessing and bending and patching to make work. The kit did not come with enough material to rig the cannons but that was easily rectified - Thanks to Chuck and Syren Ship. While I have a lot of wood working experience, I have not had much ship building experience so I cannot compare the various kits, other than my reading of the MS instructions and looking at what others have done. I will be very happy with the Constitution once I complete it. However, I think that it is really what care you put into the build whether plastic, or wood that really makes a difference. Bill
-
I reached a milestone today. I completed the installation and rigging of all of the starboard cannons. Afterward, I touched up the deck a bit with the matte clear coat since both the CA and Epoxy are shiny. Hopefully the Port side will go a bit faster now that I do not have new ground to cover. I started rigging the canon on March 6th. So 20 days for 10 cannon. Hmmm... 2 days per cannon. It doesn't seem like it took that long but much of the time was spent working out exactly how I was going to rig them and batching the rigging. We shall see how the next 10 go. Anyway, much work still ahead. Bill
- 335 replies
-
- Constitution
- Mamoli
-
(and 3 more)
Tagged with:
-
Wow, by my count you did around 50 boats all said and done. You did an amazing job on them. I am in awe. I have a lot of ground to cover to get anywhere close to your boats. Luckily for me, since your Connie will be in Perth and mine will be in Chantilly VA, (Just outside Washington DC), no one will ever get to see the beauty of your work next to my ham handed attempts. You have geven me loads to work with. Bill
- 335 replies
-
- Constitution
- Mamoli
-
(and 3 more)
Tagged with:
-
Thanks Mort. FYI, I received the Lennarth Petersson "Rigging Period Ship Models" today. You were right in how great the book is. It is out of print. I was able to find a new copy on EBay. Today I was able to install all of the starboard cannons (with the exception of the bow chaser). I still need to coil the lines on a number of them, but I am making progress. Now that I have the rigging book, once I complete the ship boats, I will start working on the rigging. I have a question regarding the deck cannons. I have not found anything on recommendations for putting the various tools the crew used in loading and tamping the cannons. I see the various tools listed in the AOS. Should I plan on making some of these and putting them around the deck, or is there a place they would be stored on the spar deck or should I just ignore them all together? Anyone? Bill
- 335 replies
-
- Constitution
- Mamoli
-
(and 3 more)
Tagged with:
-
So I made great progress on the cannons today. I finished working on the block sets. I made all the rings and hooks and attached them to the sets. I also attached all of the training tackles (innermost sets). The gun tackles have been created and the hooks attached. The breeching lines were threaded through the breeching rings and the bulkhead rings attached to the ends. Now I need to start attaching them to the bulkheads. Another area I made progress on today was planning for the ship's boats. After reading through the literature, I am planning on making 4 boats. The two quarter gallery boats will be 30 foot whaleboats, the stern boat will be the 28 foot Captain's Gig. The Boat in the main hatch cradle will be the 34 foot launch. I have plans for building and planking boats from the Cutty Sark (thanks Mort) as well as an old plan given to me years ago. I was able to scan the ship's boat plans from the AOS, and will use the cross body lines to shape and cut the forms to create the planking forms for the boats. I used my spreadsheet to calculate how big the actual boats should be based on the scale and printed the scanned drawings with an 18.5% enlargement. This equated to printouts exactly the scale I require for the ship. So I should be able to take these and the plans I received from Mort on the Cutty Sark boats and create plans for scale boats. Any thoughts on the boats I have selected? There are so many different boats that have been used on the Constitution and the 1812 configuration had more than just the 4. Are the the best choices? I do not want to stack the extra boats on the main hatch like they did when they had more than 4.
- 335 replies
-
- Constitution
- Mamoli
-
(and 3 more)
Tagged with:
-
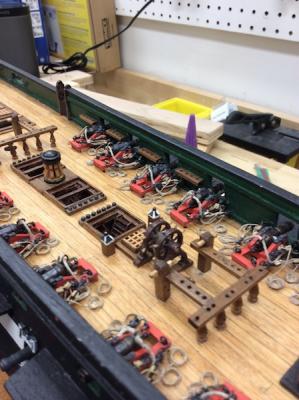
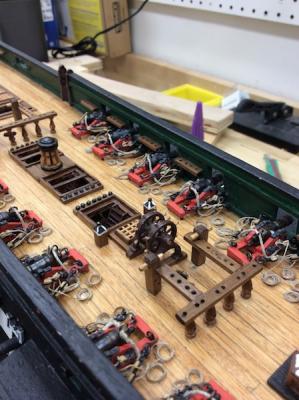
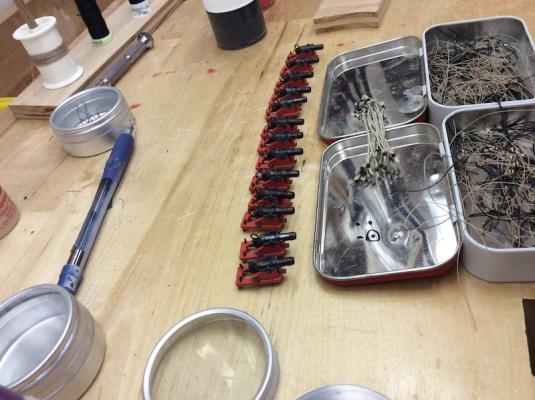
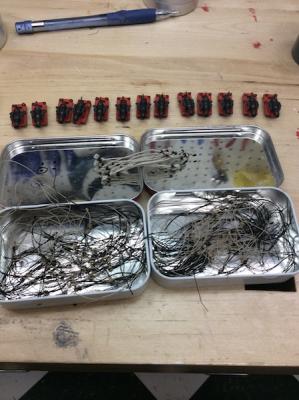
This morning I reassembled the cannon and touched up the paint. I have everything staged not to start the final push on the cannon installations. I wonder if anyone has input on the bow chasers. It appears from the AOS, that these were rigged with a single set of blocks on each side, the breeching line and a stern block and tackle set running somewhere. I like that, but am wondering where to attach the deck end of the blocks. I assume these could be under the forward mast fife rails or would it be into the base of the mast? Anyway, I have time to do more research before I get to them so anyone's input is welcome. Here is the set up for my canon rigging preparations. Each of the Altoids tins has the blocks threaded into left or right sets.
- 335 replies
-
- Constitution
- Mamoli
-
(and 3 more)
Tagged with:
-
Thanks and yes, according to what I read on the web you can get gunshot without lead and in the correct sizes. Unfortunately, when I contacted the gun ranges and shops in the area, I was unable to locate anything that would be small enough to work. BB's are around 4.5 mm so were over twice the sizer I needed. The pellets could have been ordered but the minimum order I could find was 5 to 10 pounds. WAY more than I would ever need. So the ball bearing route was the best choice for me.
-
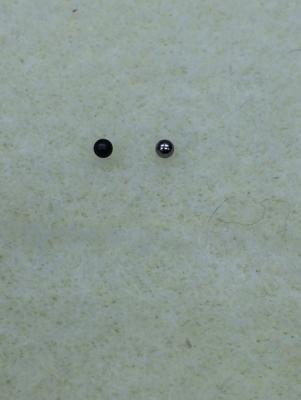
Hey Chuck, Sorry, I didn't realize what you used the Pickling for. Normally, for brass wire, I sand it with steel wool or very fine sand paper. For my cannons, I first soaked them in acetone, then used a buffer on them. So I should try your solution next time. I found the Novacan on Amazon. However, if there is a stain glass studio near you can find it there. It is commonly used to blacken the copper and solder to black on the windows. I am not sure if the ball bearings had a coating or it was just the chemistry of the balls. I am guessing that heating them to red hot oxidizes them slightly and make them work with the blackening solution. I used CA to glue the balls to the rack. I did notice that there is some shininess that I plan on coating with the same dull clear oat that I used on the hull. I tank I can touch up them with a brush. Since it appears that a couple of the postings were lost during the transition last night, here they are again. One shows the before and after of the ball bearing when blackening it. The other shows two of the deck racks. One has the old cannonballs (except for 1) the other has all new balls. I will touch these all up with the matt clear coat once I am done putting all the deck cannon in place.
-
I had to become creative in finding additional cannonballs for my USS Constitution (by Mamoli). The kit did not contain enough balls to fill the racks per the plan. The kit supplied balls were metal but varied in size from about 1.7 to 1.9ish mm. The only balls I could find were at Model Expo and they were 1/16th. These were too small and acrylic. Their other sizes were too large. Sounds like Goldie Locks! I looked at getting bird shot pellets, but really did not want to order 10 pounds of it to get a dozen balls. Instead, I ordered 2mm Diameter Chrome Steel Bearing Balls (G25 Ball Bearings VXB Brand) off of Amazon. I tried a number of different methods to blacken these. First I dropped them into a 100% solution of the blackening agent. This did not work, either due to the finish, or to a protective coating. Anyone want to sand very tiny cannonballs? Next I used the micro torch to flash the balls (very briefly) to red hot. Once cooled I put these into the normal 50% blackening agent solution and it worked great. So if anyone is looking for a cannonball solution, this is one.
-
One of the issues I have had with the kit was it did not contain enough cannonballs to fill the racks per the plan. Mamoli's balls were metal but were also not consistent in size - ranging from 1.6 to 1.9ish mm. When I started looking for additional balls I ordered the 1/16" balls from Model Expo. Unfortunately, or perhaps fortunately, they had equipment issues and could not produce the balls. These were acrylic but they were all I could find. In the meantime, I found Chrome steel ball bearings in both 1/16th and 2mm sizes on Amazon. I ordered these. I found the 1/16th balls to be too small. The 2mm look within the range of the Mamoli balls. To blacken them I tried a couple of things. I first just put a test set into the blackening solution straight from the bag. Even with full strength solution it did nothing to the finish. Either the finish or possibly a protective coating on the balls kept them from reacting with the solution. Anyone want to sand very tiny cannonballs? Not me! Instead I took my handy dandy micro torch out and flashed a couple of test balls to red hot. Then after cooling, put them into a 50% solution of the blackening agent. This worked well. So now I have the full compliment of cannonballs in the racks. This is what I ordered from Amazon - 2mm Diameter Chrome Steel Bearing Balls G25 Ball Bearings VXB Brand. Yesterday I completed installing two more cannon. This makes 5 in total or 25% of the spar deck's compliment. Today I am working on threading the remaining blocks to complete the remaining cannon.
- 335 replies
-
- Constitution
- Mamoli
-
(and 3 more)
Tagged with:
-
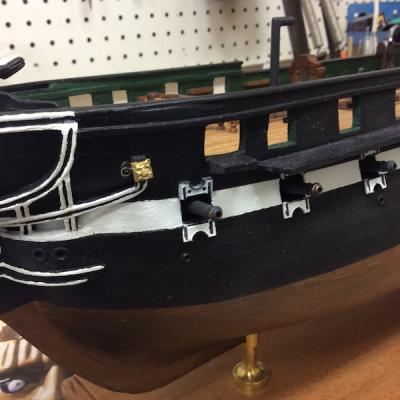
The last couple of days have been spent primarily on trying to come up with a satisfactory method for rigging the cannon. I believe I now have my method down. First I take the rigged block sets. For the outermost sets (these go to the stern of the carriage, I use a ring on one and and a hook on the other. Seizing the hardware to the lines adds too much bulk to the fittings. The blocks are already seized to the stropping threads. Seizing the rings and or hooks, make them large. I decided to try the same technique I used in making the hangers for the spar foot ropes. I tie the strops around a nail and apply CA. Then I cut off the extraneous thread leaving a small ring. This is what I put the brass hardware in (either the ring or the hook). For the innermost block sets, I use this technique on the bulkhead rings. For the cannon carriage, I thread the strops directly through the holes in the carriage and CA the knots there. I use epoxy to glue the cannon to the deck, then apply a thinned down version of the white glue to stiffen the ropes to allow me to loop them on the deck. I use a small nail set to wrap these around since it is tapered so once the rope is wrapped, I can push it off with tweezers and position it on the deck. Then I add a small amount of CA to hold the loops in place on the deck. I also tried my hand at carving with the rotary tool based upon Bill Short's carving techniques. I took some fairly fine grained wood that I had and cut it down to about 5 x 5 x 5mm. I glued these to a small piece of wood to stabilize them. I used the .5mm ball to carve a semblance of the cat face. Since the wood was not really suitable it was creating a lot of fuzz so I added a drop of CA to the face of it and let it dry. This hardened up the wood sufficiently to complete the carving. Once carved, I used a #11 Xacto blade to slice the face off, trim it to the 4x4mm size and glued this to the end of the cathead on the ship. I painted it gold. I tried adding the details of the back in black and white (per the Constitution photos) but it was too small to really show well. All gold still shows the face well.
- 335 replies
-
- Constitution
- Mamoli
-
(and 3 more)
Tagged with:
-
I worked on my configuration of the cannon rigging today. I measured the lengths of the sets needed to get to the bulkhead. I do not see anyway I can use hooks on the innermost sets since the cannons are all the way out so the sets are pretty short. However, I do think I will be able to use hooks on the outermost sets. Since these are also the most visible, I think this would look good. I set up a cannon set today and plan on trying the install tomorrow. I will take photos. If this works it will set the pace for the other sets and I will go back to do the first one I installed. Bill
- 335 replies
-
- Constitution
- Mamoli
-
(and 3 more)
Tagged with:
-
Kruginmi - That is sooooo funny! Talk about a photo only shows what you want to show. I spent most of yesterday cleaning up the shop. As I move into the rigging I found my bench was so messy I would put something down and be unable to find it without searching. So I realized the peg board was made up of holes so I could easily rearrange it. So that is what I did yesterday. I moved some tools into cabinets and other tools out in front where I could reach them quicker. I was thinking yesterday (as I did this), when I built the shop out, it was designed with furniture and other large items in mind. So all the tools are full size. However over the course of the build to date, I have used everything in the shop to one extent or another. Including the 8in jointer when I was taking down a chunk of Mahogany to make the mounting base. My woodworking hobby has consistently moved toward smaller and more detailed so ship building seems a natural occurring outgrowth of what I enjoy. Thanks for visiting the log. I will keep putting photos out there. Since I was just stropping and seizing blocks, there really wasn't much to take photos of.
- 335 replies
-
- Constitution
- Mamoli
-
(and 3 more)
Tagged with:
-
Today I concentrated on completing the stropping and seizing of the canon blocks. This done, I started working on threading the blocks alternating the right hand block sets with the left hand ones. My current plans are to complete the threading of all the cannon blocks then start working on mounting the cannons. Chuck was kind enough to review my configuration and told me my plan for coiling the blocks and tied around the middle would not be accurate since I also had the cannons rolled out into the firing position. I will instead coil the lines neatly on the deck, but not as neat as a Flemish coil.
- 335 replies
-
- Constitution
- Mamoli
-
(and 3 more)
Tagged with:
-
Well I built the serving machine. If anyone is interested in it, I have the link to the thread in the tools section below. It was a fun diversion from the rigging and one that will pay off as I start working on the shrouds. Now back to working on the single blocks. Bill http://modelshipworld.com/index.php?/topic/5980-serving-machine-from-scratch/#entry173206
- 335 replies
-
- Constitution
- Mamoli
-
(and 3 more)
Tagged with:
-
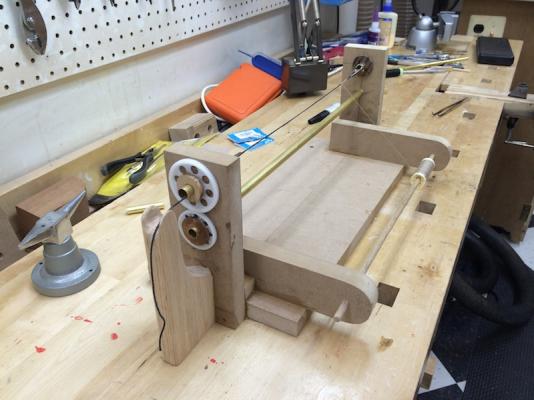
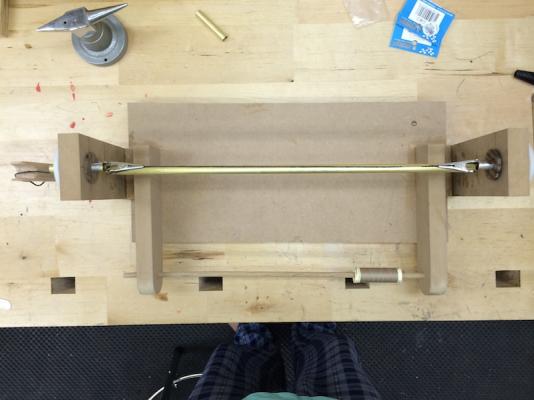
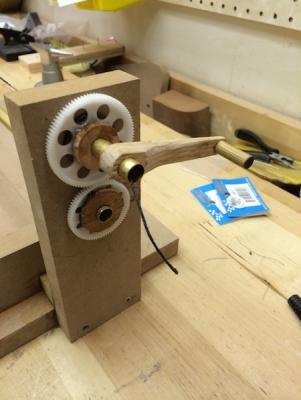
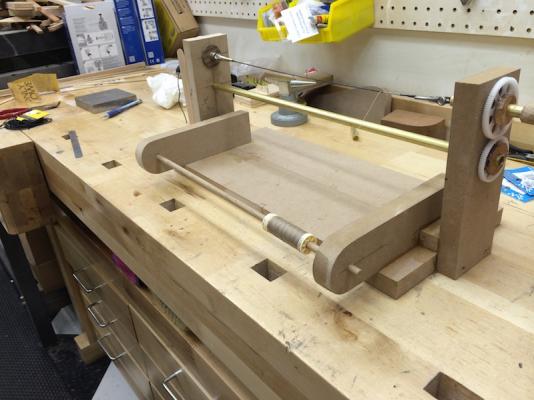
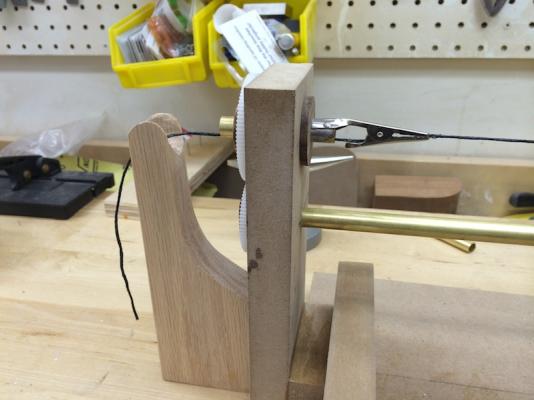
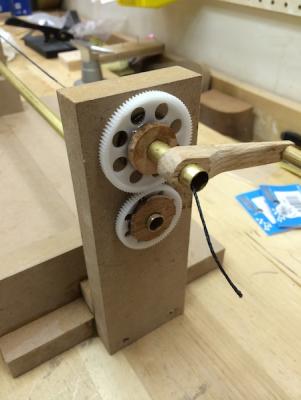
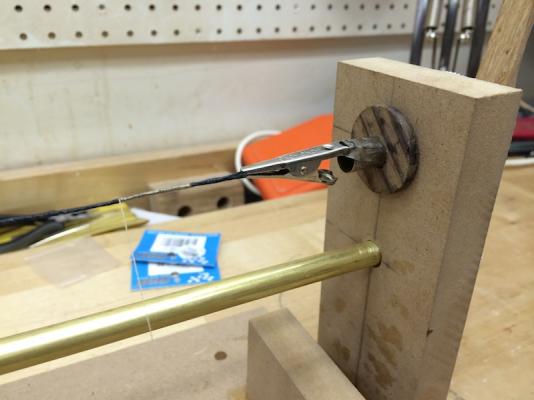
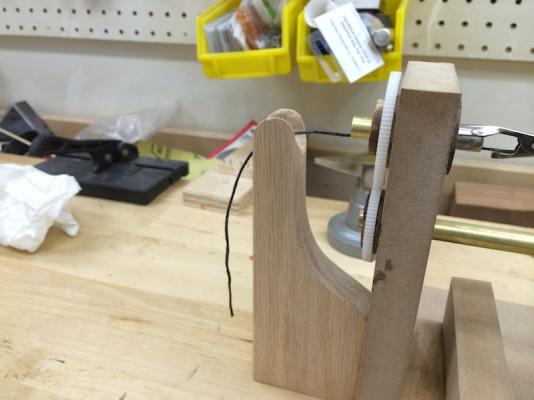
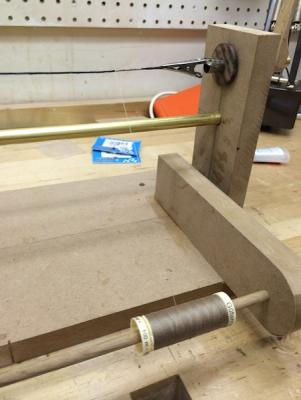
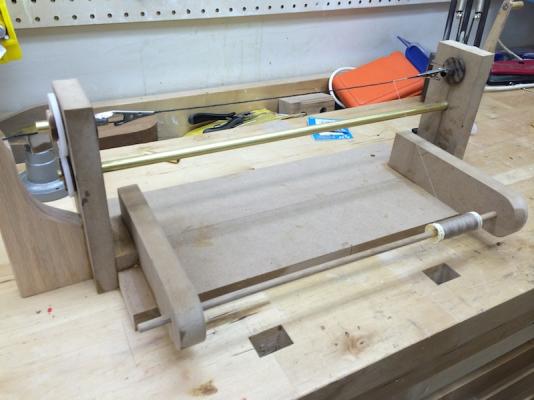
I decided to build my own serving machine. This is based upon the article "Modifications to Dobson's String-Along" in the Ship Modeler's Shop Notes II. I purchased 4 gears and a length of ⅜" Brass tubing from the local RC Model shop. The gears were $6 ea, and the tubing was $7.50. For the wood, I used scraps I had in the workshop. I made wooden washers by cutting some thin solid stock I had with a whole cutter then widening the center hole to just fit the ⅜" tubing snuggly. I sandwiched the gears between two of these and epoxied them together on the tube. For the top area, I took standard alligator clamps and filed the teeth out of them. I opened and shaped the ends to fit the outside circumference of the tubing. Then a silver soldered them to two short pieces of tubing. Since the line being served moves through either end of the machine, the length of line being served can be very long. The distance between the two alligator clamps is 11 ½ inches. The SMSH II, recommended tiring a weight to the end of the served line. This can be done should it need to be. There is a guide at the end of the machine to hold the line as it bends downward. Anyway, I thought I would share this with all of you in case there is anyone else out there looking to make a machine on their own. For the photos I used a lighter colored thread as the serving line so it would show up in the photos. Bill
-
I completed seizing the cannon double blocks today. I also visited the local RC Model shop and procured 4 gears and brass tubing. I plan on assembling a serving machine based upon the Ship Modelers Handbook design. I was able to assemble the basic frame and glue it up. I should be able to complete it tomorrow and try it out. I will post my results and some photos. If my plan works, this will be a pretty simple and fairly inexpensive machine to be built. Bill
- 335 replies
-
- Constitution
- Mamoli
-
(and 3 more)
Tagged with:
-
I joined the NRG this month and received the Ship Modeler's Shop Notes II as a free bonus. It has already paid off! Since I have been working on the cannon rigging, I have been using CA to lock the seizings in place. The problem was controlling the amount of CA that went on the seizing. The notes had a tool which was easy to build and allowed me to pinpoint exactly how much and where the CA was applied. Thank you Chuck for pointing out the March Membership Special. Today I tried a number of different banding techniques for seizing the blocks. One thing I really wanted to try was adding metal hooks to the blocks. I was able to drill a hole in the double blocks and add a small hook I created using the wire from twist ties, but I could not do it with the single blocks since the centerline was where the holes already were. Here is what I ended up doing. I waxed and cut the banding ropes for all the blocks in the batch I was working on. I wrapped them around two nails to bundle them before I cut them. This allowed me to standardize on the length of the ropes. Then I would take a block and place it on it's side on my finger and lay the middle of the rope in the groove on it's side. Then I would take the gluing tool and paint a tiny amount of CA to hold the rep in place. Then I set it aside to set for a few minutes while I worked on others. Once the entire batch was glued to the one side of the block, I returned to the first one and pulled the rope over the end and around the other side of the block then applied another small amount of CA. I worked my way through the batch. Then I took the first one and inserted it into my needle seizing tool, and seized the two ends to the block. I trimmed back the seizing loose ends but not all the way to the knot. I seized a batch, then took the gluing tool and added CA to the seizing. Then I trimmed the seizing cords flush with the knot. I tried a number of different banding techniques banding around the blocks with wire and ending with a hook, but really could not find anything I liked better than the rope seizing. Since the glue issue was fixed with the tool that is what I decided on. I spent the remainder of the day banding all the double blocks required for the cannon and started seizing them. Tomorrow, I will finish seizing them and start working on the single blocks.
- 335 replies
-
- Constitution
- Mamoli
-
(and 3 more)
Tagged with:
-
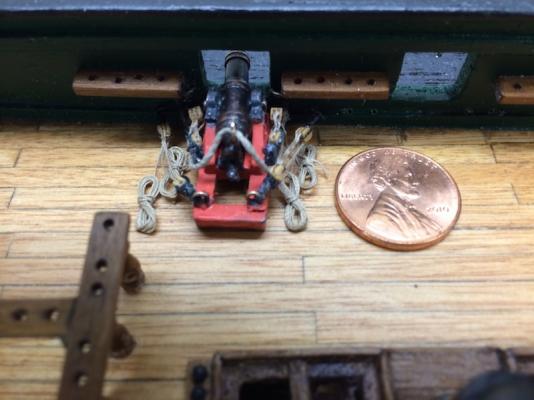
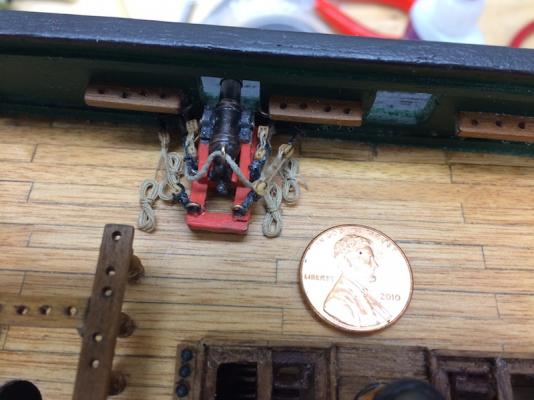
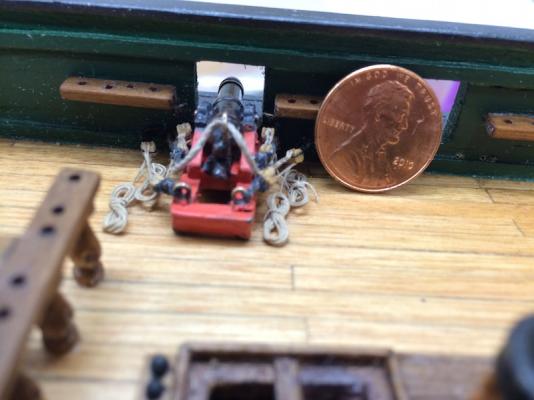
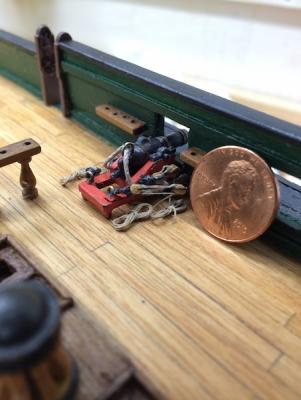
This morning I continued to rig the first cannon. As I mentioned in yesterday’s log, I decided to change the seizing material on the cannon end of the blocks to rope rather than wire. This looks better and is a bit more flexible until CA is added to fix it. Once this was completed, I drilled the additional holes in the ship on either side of the port hole I was going to do the initial fitting in. I chose the Starboard porthole just aft of the gangway. I removed the cannon from the jig and changed out the seizing’s. Then I returned it to the jig and used the jig to align the required rings to the bulkhead ends. Once these were attached I performed a test fitting on the ship. After I was satisfied, I proceeded to start gluing the rings into the bulkhead starting with the innermost blocks, then working my way out through the breeching line then the outermost blocks - alternating gluing first one side then the other. I then cut the extended rope ends from the blocks so they would reach the appropriate part of the deck. I glued these ends to the deck. For the coils, I took a large framing nail, and cut two pieces out of it. I drilled two equally sized holes in a small block with a slight distance between them. I used files and the rotary tool to round than end on each piece and polish the pins smoothly. These I CA’ed into the block. Then taking the same line I used in the blocks, I waxed a length, and wrapped it lightly around the pins. The sliding it off I added half twist to the coil and wrapped the end around it. The photos below show the current cannon installation. I have not yet glued the cannon or the coils to the deck. I wanted to give it a rest and look at it again tomorrow before I did that. However, I am pretty happy with the result. Since the Mamoli is a different scale than the MS most of you are used to, I thought I would add a penny to some of the photos for scale.
- 335 replies
-
- Constitution
- Mamoli
-
(and 3 more)
Tagged with:
-
I love the work you are doing on this. Once I get my cannons and spars done the ship boats are next on the to do list.
- 93 replies
-
- ships boat
- model shipways
-
(and 1 more)
Tagged with:
About us
Modelshipworld - Advancing Ship Modeling through Research
SSL Secured
Your security is important for us so this Website is SSL-Secured
NRG Mailing Address
Nautical Research Guild
237 South Lincoln Street
Westmont IL, 60559-1917
Model Ship World ® and the MSW logo are Registered Trademarks, and belong to the Nautical Research Guild (United States Patent and Trademark Office: No. 6,929,264 & No. 6,929,274, registered Dec. 20, 2022)
Helpful Links
About the NRG
If you enjoy building ship models that are historically accurate as well as beautiful, then The Nautical Research Guild (NRG) is just right for you.
The Guild is a non-profit educational organization whose mission is to “Advance Ship Modeling Through Research”. We provide support to our members in their efforts to raise the quality of their model ships.
The Nautical Research Guild has published our world-renowned quarterly magazine, The Nautical Research Journal, since 1955. The pages of the Journal are full of articles by accomplished ship modelers who show you how they create those exquisite details on their models, and by maritime historians who show you the correct details to build. The Journal is available in both print and digital editions. Go to the NRG web site (www.thenrg.org) to download a complimentary digital copy of the Journal. The NRG also publishes plan sets, books and compilations of back issues of the Journal and the former Ships in Scale and Model Ship Builder magazines.


