HOLIDAY DONATION DRIVE - SUPPORT MSW - DO YOUR PART TO KEEP THIS GREAT FORUM GOING! (Only 36 donations so far out of 49,000 members - C'mon guys!)
×


robnbill
-
Posts
841 -
Joined
-
Last visited
Content Type
Profiles
Forums
Gallery
Events
Everything posted by robnbill
-
 For a slightly different subject, for those of you following my build, I have been thinking about "the next one". If I built a kit, I was thinking about the MS Charles Morgan, but recently found the practicum and dissertation on the USS Brig Eagle scratch build. It looks like it would be a great step toward scratch since it is not too overly complicated and has, on the first scans, great instructions in the practicum and dissertation. It does not seem to be a boat that is often built. I like the history of it and the fact it was a contemporary of the Constitution. She was built in a hurry of green wood and was completed in 19 days. I daresay, if I do build her as my next one, it will be considerably longer. However, her role in the battle of Lake Champlain does also make her an attractive build. She has also had extensive underwater research done on her and was found remarkable intact given the manner she finally sank into the mud. SO there is a great deal known about her construction. Thoughts?
 -
Sorry for the lack of posts. The shipyard has been suffering under a work slowdown. It appears I might have torn my rotator cuff so this is slowing things down a bit. However, I am slowly working my way through the yards. I completed the spars for the main and fore masts today as well as the lower spar for the mizzen. The remaining spars have been turned and fittings, rings etc (other than rigging blocks) have been attached. I hope to have these completed in the next day or so then painting them. At that point, I will have no excuse but to start working on the rigging. This makes me a bit nervous since other than the cannons I have had no experience in this. I continue to read the AOS and the Rigging Period Ships as well as reviewing the plans. I do have the masts assembled and most of the rings attached. I am open to suggestions as to the directions to start with the rigging. Should I start putting the bow spirit assemble together, or work on the top ratlines etc before I put the masts on the ship. I will not be gluing the masts in, but could start with the lower standing rigging first if that is the best method. It seems most of the logs start forward and work backwards (other than Modeler12 who is putting sails on his). However, having all of the standing rigging attached and looped prior to actually assembling them seems to be beyond my experience and asking for much redo. Regardless of the order, I do plan on fully serving the forward standing shrouds and that of the other shrouds where running around the mast. Otherwise, I am going to be leaning very heavily on those here who have gone before. Thanks in advance!
-
Apparently 300k deeper if the guy on eBay get's what he is asking for! All great ideas. However, I did like how the green panels turned out for the bottom on mine.
-
Removing paint
robnbill replied to Don Quixote's topic in Painting, finishing and weathering products and techniques
You could try Acetone. Nail polish remover is generally diluted acetone. However, and this is a BIG however, if you are removing paint over anything you used CA on, it will also remove that. -
Hey all. I am back from our trip and am looking forward to picking up where I left off. I was able to visit the Naval/Maritime museums in Lisbon as well as Amsterdam. I also was able to go through the Rijksmusuem so was able to look at the gorgeous work that Ab Hoving has done. So I am newly energized and ready to tackle completing the spars and jumping into the rigging!
-
I have completed the turning and shaping for all the remaining spars. The lower main mast spar is completed and fit out (other than painting), the next one is nearly complete. The progress on the spars should speed up once the shipyard reopens. I tested various stains on the rigging I will be using for the standing rigging and really like the India Ink best. I was hoping to finish all the pars this weekend, but did not have the time to dedicate to them. Now Rob and I are headed to Florida to catch a real ship for a transatlantic cruise. We are planning on a visit the Naval museum in Lisbon as well as Amsterdam. So I get to see the exhibits shown in "Message in a Model"! So it is off to Florida. I will be back on line the latter part of May. Bill
-
I do not have a photo of all of them, but this one shows the 4 closest to the bulkhead.
-
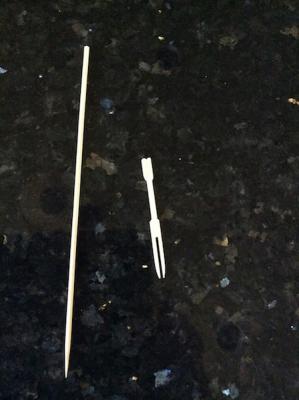
FYI, They make some bamboo forks (for olives and other condiments) that make ideal paddle material when paired with the bamboo skewers. Your work with the ship's boat really helped me in my construction. Thanks

-
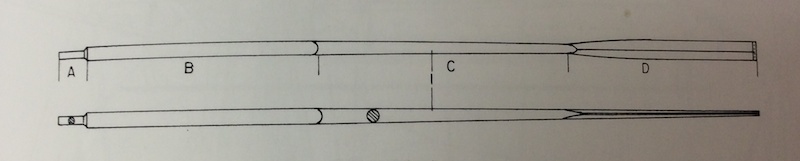
According to the Anatomy of a Ship: The 44 Gun Frigate Old Ironsides Here is the shape of the oars. The table below shows the lengths in feet from the charts in the AOS. Apologies but I did do some rounding. Boat Handle - A Loom - B Body - C Blade -D Overall Length 34' Launch 1 8 6 7 21 32' Cutter & Barge 1 7 5.5 7 20.5 28' Cutter & Whaleboat 1 6 7 6 20 26' Cutter 1 5.5 7 6.25 19.75 25' Gig 1 5 7 6 19 I hope this helps. It is what I am using to base my dimensions on for the Constitution. Bill

-
Dust collecting on Byrnes Machines
robnbill replied to stantona's topic in Modeling tools and Workshop Equipment
There are many articles on dust collection systems on the wood working forums. I did a great deal of research when installing the wood shop in our home since it was going into the finished basement, I wanted to minimize any dust leaking out into the rest of the house. There are two areas for dust, directly from the source and ambient. Directly from the source is where you attach the vacuum hoses to your machine and suction the hell out of it while it is operating. Ambient is the dust that escapes from the other side of the cut. For instance table saws tend to have a lot of extra dust thrown away from the saw despite the dust collection system running during the cut. This is especially true if you are using a zero tolerance plate since it does not allow much air to flow. So there really are two dust collectin systems. I have two boxes that hang from the ceiling on each end of my long shop that circulate the air through filters. This removes the ambient dust. I also have a large dust cyclone dust collection system that pulls from each tool. When I was researching installing it into the workshop there were two options for the piping. Metal and PVC. Metal was more expensive, but it allowed for larger ducting, which kept the suction going, it also kept the static charges from collecting and sparking in the system. Dust traveling a high speed through a PVC pipe will create static. This can discharge and result in the dust setting fire. This can be countered by running a grounding wire throughout the system, but that also is problematic since if there is a break in it, it no longer works and you would not know. The smaller PVC pipes also keep the suction down, so longer runs from the vacuum itself results in a system that just will not move dust. So the vacuum source has to be larger. Anyway, probably way more than you wanted. To know, but if you are looking into centralizing your system you need to take these things into account. Otherwise you will spend a lot of time and money and not get something that is workable. Bill -
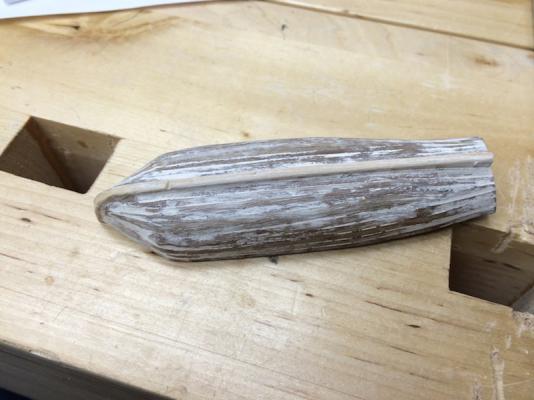
Thanks. Coming from you, that means a lot! Your Connie is setting the benchmark. I am working on completing the spars. I was able to finish turning them all yesterday. Today, I will start adding the various fittings and blocks to them in preparation for painting them. It will be interesting to see how the rigging goes. I followed the Mamoli plans and assembled the masts completely. Then I watched as you and Modeler12 rigged each section of the masts prior to putting them together. We shall see. The oars were easy to do. I used bamboo in both the skewer and olive fork flavors to assemble them. I turned the skewers on the lathe and sanded them to the proper diameter. Shaved the ends on two sides very slightly to allow for inserting into the slot of the fork. I cut the fork the correct length for the blade then glued them up. Once dried, i used the disk sander to shape the blades and the oar handle ends. I like the bamboo since it is very strong with small diameter wood. The downside, is some of the skewers are not round, or splinter when trying to sand them down. Luckily, I have a lot of skewers. Bill

- 335 replies
-
- 1
-

-
- Constitution
- Mamoli
- (and 3 more)
-
Thanks, it was not readily apparent from the plans. There was a detail of the 4 spars themselves, there was a part on the full size view that showed them installed down the sides. The AOS showed the typical connections, which is why I decided to use the pin and not ring on the booms. I fought the instructions on the MS version (that available for free on line) pointed only toward having a set only on the foremast, The Mamoli Plans clearly had sets for both the Fore and Main. I also found other ships with a set for each mast mounted on the sides. If you look at the following link for a youtube copy of a History Channel story on the Victory, at the 5:29 mark you will see a drawing of the HMS Victory with her stud sail booms deployed. This shows it very clearly how they were there and rigged. History Special on the Victory
-
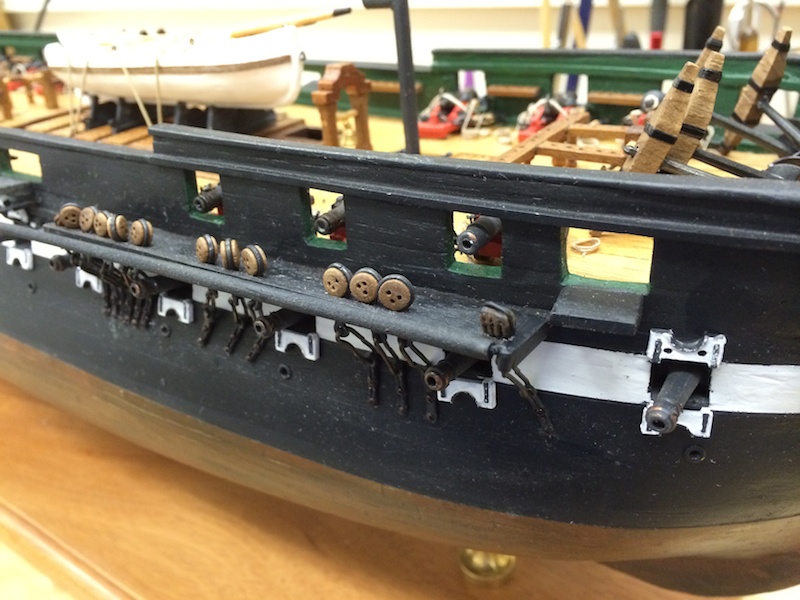
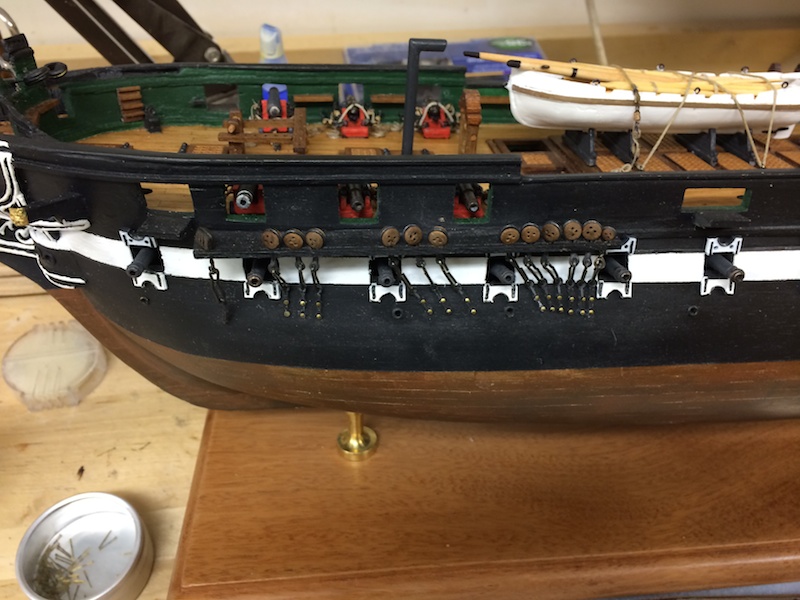
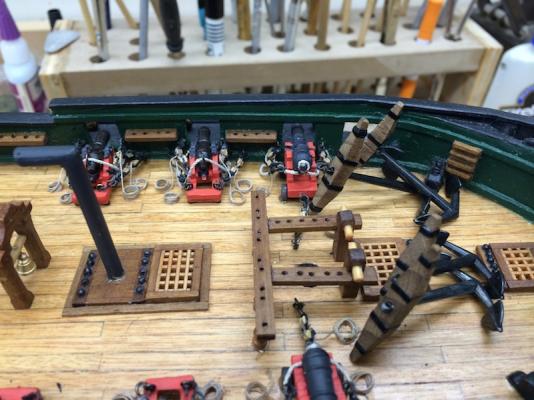
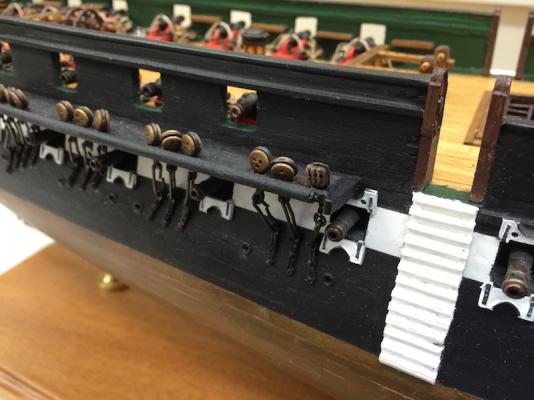
Today I created the swivel stun assail boom attachments and attached them to the ship. The plan called for using rings on the end of the stun sails and to mount them on hooks attached to the hull. The real ship has pins in the stun sail booms bent at 90 degrees and these stick through mounts attached to the channel. It also needs to have a bracket made to hold the end of the boom for the forward booms. The rear booms tie to the channels. I used some brass channel pieces and some small brass tubing. I cut the channels to length to mount on the forward side of the chain channels. To these, I soldered the small tube pieces. Then I ground the assembly down to shape it nicer than the raw channel. I sloped the sides of the channel down to the width of the tubes at the outer ends. I used some brass strips to create the brackets to hold the forward boom ends. I soldered 1mm brass rods on the end of the upper bracket to insert into matching holes I drilled in the hull just above the wale. The lower bracket brace I bent upward and glued to the hull. Since the rear booms end up straddling the midships and stern channels, I just tied the stern end of the boom to the channel. I did not feel that a hook would be seen at all. Also, since these are painted black they tend to blend in with the hull. However, I do like the way the booms look attached to the hull. I think the brackets came out like I wanted them to. I also have attached a photo of the four anchors sitting on the forward deck. Ready for installation.


- 335 replies
-
- 5
-
-
- Constitution
- Mamoli
- (and 3 more)
-
There are a number of build logs on the Mamoli cross section model if you search for them under the kit build logs forum. They may be able to help you or you can PM one of the ones who have built them.
-
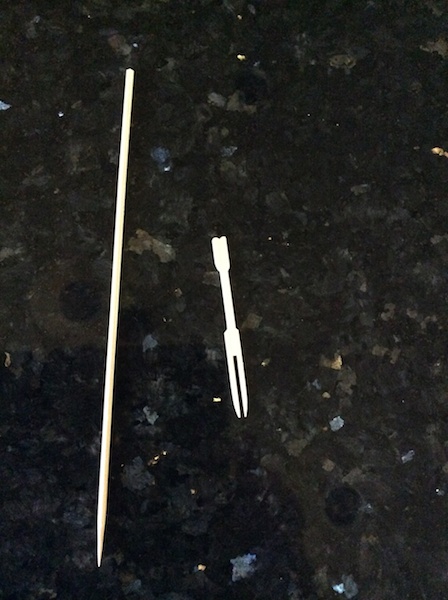
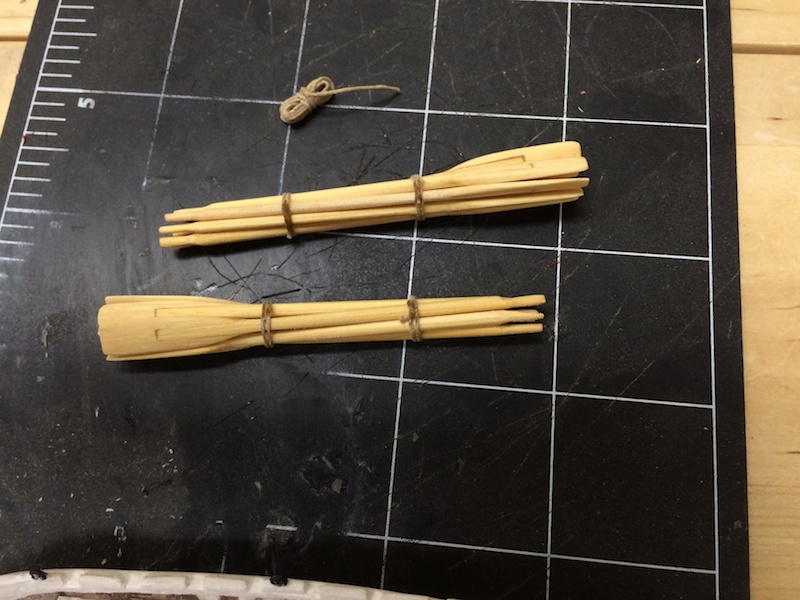
I found a neat trick using the Bamboo skewers and some Bamboo forks ( for olives etc). Both were already in my kitchen. I turned the skewers down to the correct size for the oar shafts leaving them slightly larger on the paddle end. Then I cut the bamboo forks down for the paddle. I sanded two opposite sides of the skewer where it would fit into the fork. Glued it all together then finished it with the disk sander. They turned out pretty well. I used measurements for the oars from the AOS since I am building the Constitution. I also was able to use some of the cut off pieces to shape the rudder and tiller from. Here are shots of the raw material and the bundled oars that I finished. I did not get shots of the build itself. I found these to be easy to work with. You are doing a great job on the boat and were the inspiration for my building the above boat from scratch following your lead. Thanks Bill


- 93 replies
-
- 1
-
-
- ships boat
- model shipways
- (and 1 more)
-
Can we send in requests? Gee, I am sure we could all come up with a list! Thanks Jay! Bill
-
Jay's videos have been tremendously helpful to me as well. Thanks Jay.
-
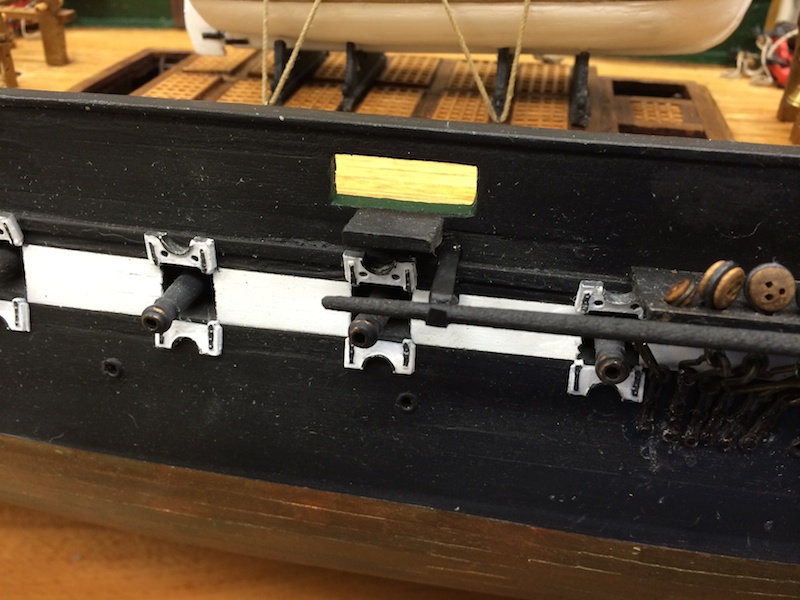
Also the line that the crew would be pulling would be from the bulkhead side. Otherwise, the crew would have t stand between the canon and the bulkhead to pull tyne line. Not many crew would fit there.
- 803 replies
-
- 2
-
-
- colonial cutter
- modellers shipyard
- (and 1 more)
-
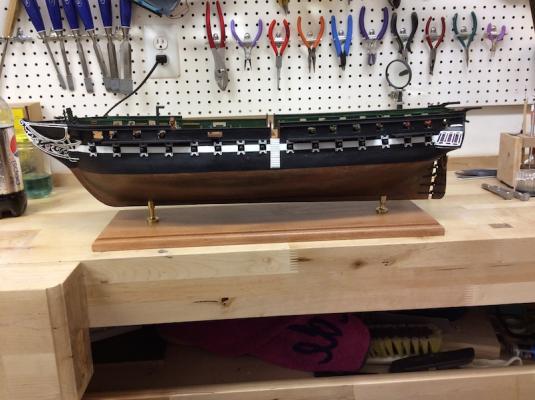
Today I completed the chain plate installation. Now I will turn back to the remaining spars. I was able to turn the 4 lower stud sail booms that will be mounted to the hull. I painted them black and put the rings one end per the plans, however, I am planning on modifying the mounts to be 90 degree rods per the AOS. I put the four anchors together today. I used 1/16 black stripe tape to add the banding on the anchor stocks. A funny thing happened today. Periodically I rummage through the kit box to see what parts are still in there. I do not believe they were sorted originally. A few weeks ago, I sorted everything using small tins to separate everything. As I am approaching the rigging, there are fewer and fewer parts remaining in the kit, other than blocks and deadeyes of course. In early February when I was working on the capstan, I did not see anything in the plans that indicated that there were any parts other than the spindle supplied in the kit. This is a running issue with the kit. The instructions are vague at times and it is difficult to see if I am supposed to make something or it is supposed to be supplied in the kit. So I pulled out AOS and cut the parts to complete the Capstan. Today, as I was rummaging through the box, I found all the small pieces that were suppled in the kit to make the capstan. Oh well, I enjoyed building it without them and it turned out pretty good. I have a number of days to go to complete the remaining spars. I currently have the foremast and spirit sail spars completed. I will work on the main mast spars tomorrow and work sternward from there. Bill
- 335 replies
-
- 2
-
-
- Constitution
- Mamoli
- (and 3 more)
-
Wow, I think I would have a dead cat! You might be able to pull the dent out by drilling a small hole and gluing a metal rod using CA or epoxy. That would allow you to pull on it. If you get it out far enough you could then possibly lock it in with more CA and fill using putty and sand.
-
I need advice on a rotary tool
robnbill replied to jdiven's topic in Modeling tools and Workshop Equipment
I guess it comes down to what you intend to do with it. If you want to carve, or are sanding/removing material, then for hardwood, you want to be able to run slower speeds. Hardwood will burn with a rotary tool running at higher speeds. Also, if you plan on doing work such as carving then you want to focus on the shape and weight of the hand piece. -
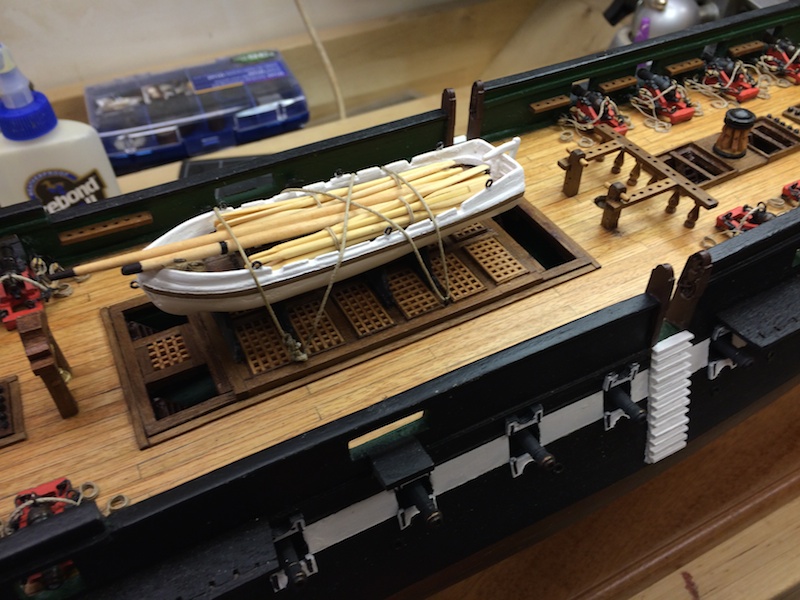
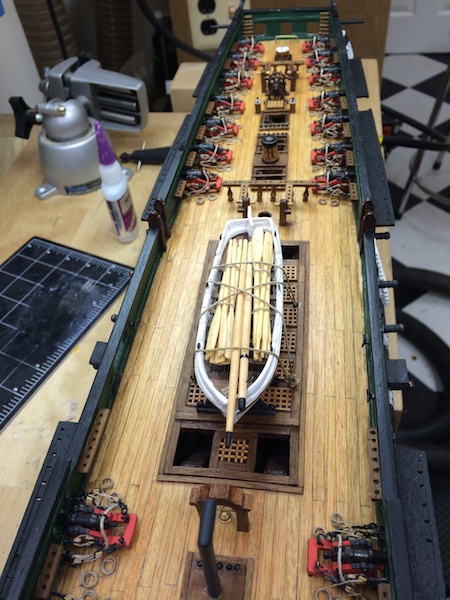
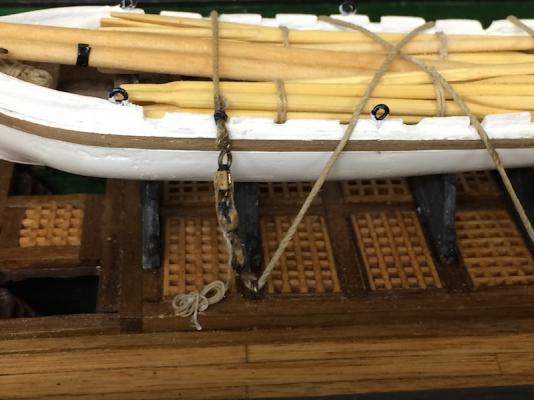
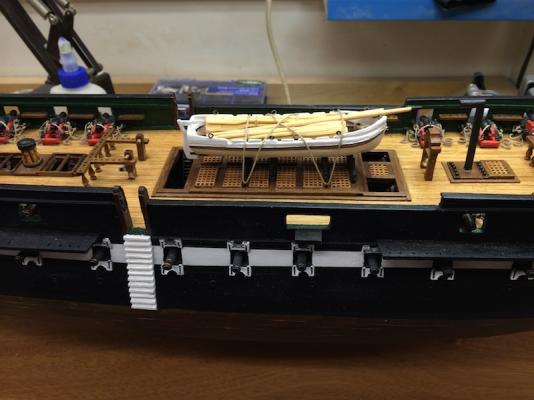
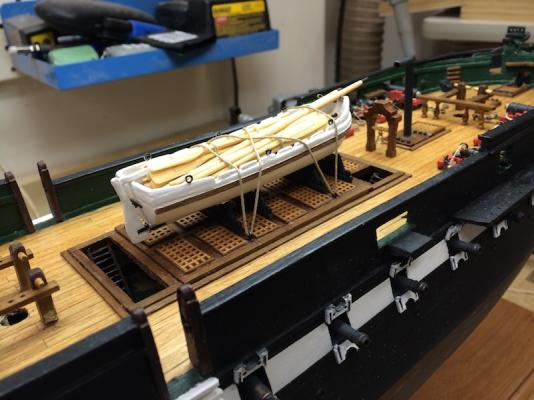
The Mamoli plans had the launch tied down over the main hatch literally with the line just being knotted together at the deck. I did not like that so I created a loop in each end and seized them and used two of the double blocks I used on the cannon rigging to create a block and tackle set with hooks on each end. These then hooked into the loops and cinched the line down. I coiled the remainder of the line up underneath the launch after tying the lines off with two half hitches. I like this better and it seemed a good solution. I also started putting in the chain plates. First I enlarged the chain plate channel holes to be large enough to accept the chain plates. I did this to all of them. Then I installed the chain plates for the port side foremast. I have the starboard side inserted but not yet mounted to the hull. Progress is good. Bill

- 335 replies
-
- 6
-
-
- Constitution
- Mamoli
- (and 3 more)
-
I need advice on a rotary tool
robnbill replied to jdiven's topic in Modeling tools and Workshop Equipment
I have a Foredom tool that I use a great deal and like. It is much more powerful than a Dremel and can use the same bits, but also has a foot switch for speed control. There are a number of different hand pieces to choose from. -
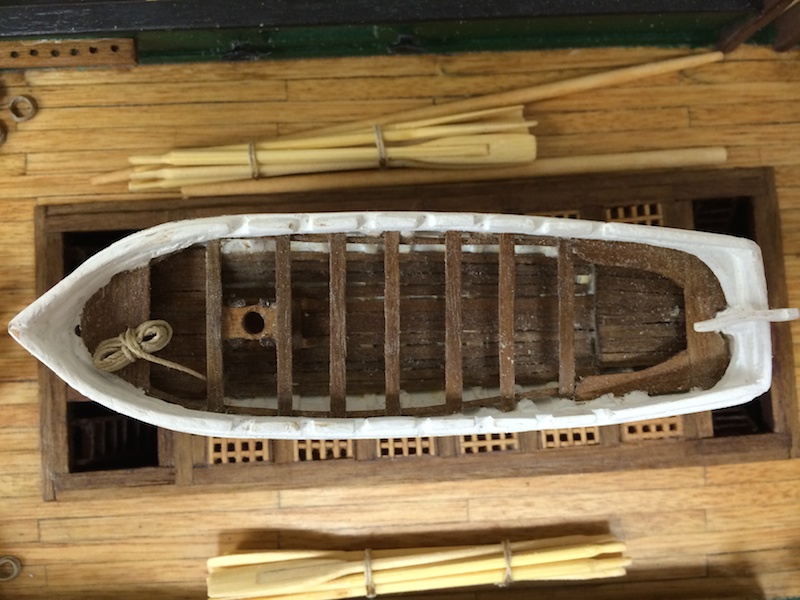
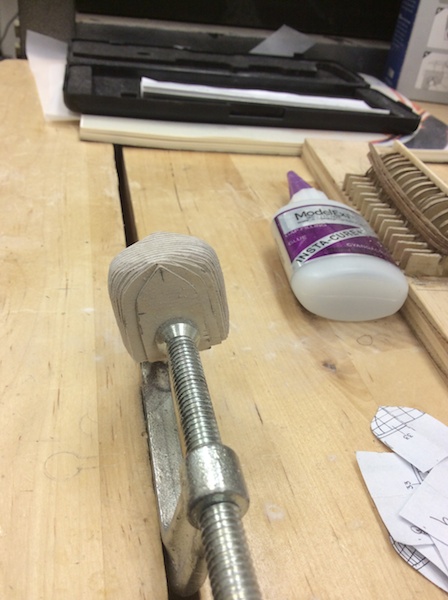
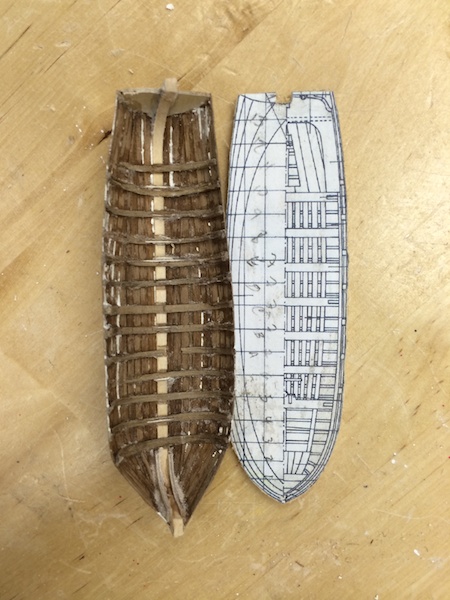
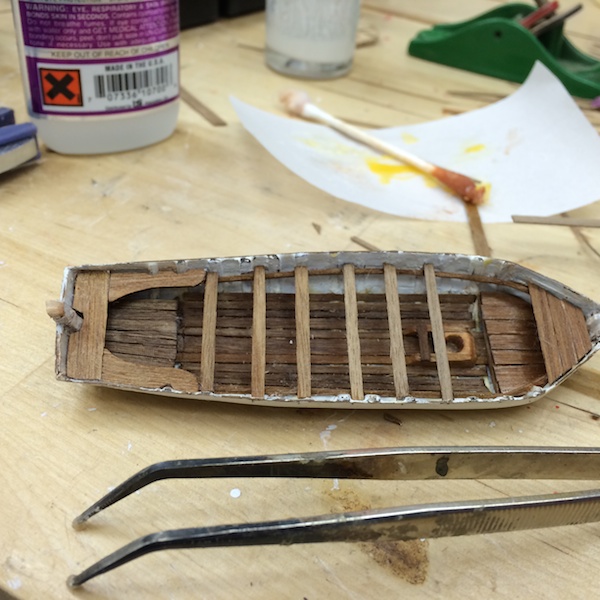
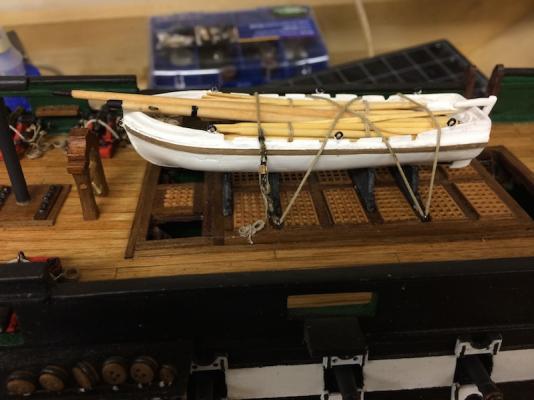
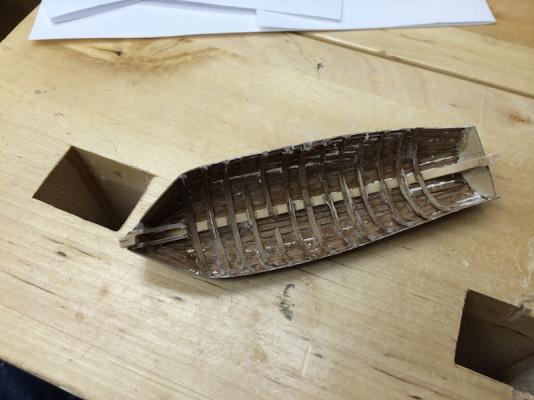
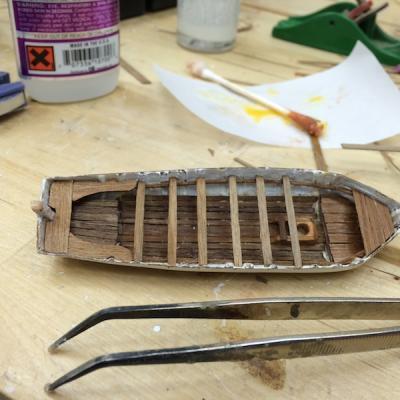
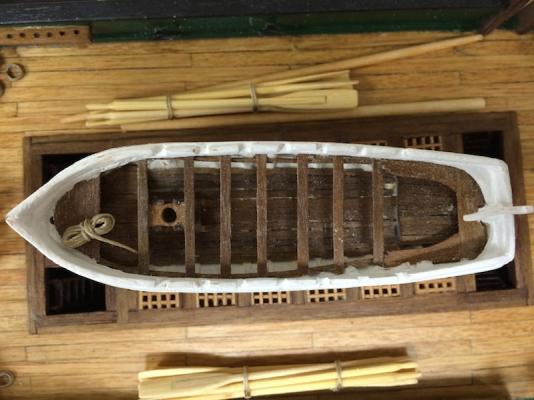
I have been remiss in updating my log, but have been actively working on the ship's 34' launch. As you know if you have ready this build log, I decided to build the ship's boats from scratch. Using plans for other ship's boats as a basis, I took the Anatomy of a Ship's hull lines for the 34' launch and used it to create the plans for the boat. I found that printing them at 118.5% gave me the actual size plans I needed. Also, if I printed the hull lines without any magnification, I was able to get the exact size I needed for the shapes allowing for the ribs and planking. So this is what I did. I took .5mm strips of walnut and thinned them down to the rib size and soaked them in a 50% solution of ammonia water before shaping them to the forms and gluing the ends to each. Once all the forms had ribs on them, I attached them to a backing board so I could plank. I used walnut than planked the hull. After cutting it loose and cleaning it up, I added the inner hull details. First the deck strips, then the platforms at the bow and stern. I added the seats and stained the inside details. I use the enlarged drawing to create the deck rails by cutting it out into two pieces and gluing it to the hull shell. Then I thinned it. I added the strip to create the oarlocks and the curved shaped to the bow and stern. Then I added rings where it seemed like they would be ended to rig the sails. I used forked toothpicks and bamboo skewers to create 14 oars stained them and bundled them into to groups of 7. This would be a full set of oars for the launch. I turned a mast that matched the step I put in the launch and also turned a spar for the lateen rigging. I added rings to the top of the mast for the two halyards. I also banded the mast just above the step and near where the spar would end up when sailing. I painted the ends of the mast and spar black. I used one of the flat bamboo forked toothpicks to create the rudder. For the hinges I flattened brass wire and shaped it into two "U"s that fit the stern of the launch and the lower part of the rudder. I soldered these to a small pin before mounting it onto the launch. For the upper hinge, I used a small strip of flattened brass and soldered a pin to it and bent it 90 degrees and interred it into the rudder before gluing it onto the hull. I did a final touch up of painting to the hull then did a test arrangement of the oars, mast, spar, and coil of rope. Once I was satisfied, I glued everything together and bound the launch to the cradle on the main deck. Now my plans are to work on the chain plates and the lower dead eyes.


- 335 replies
-
- 8
-
-
- Constitution
- Mamoli
- (and 3 more)
-
FYI, I am still in a big learning curve on these as well but one thing I found helped me was getting beading mats to work over. I put one on the bench where I am working and one on the floor underneath. The matt keeps things from bouncing and rolling. I bought them off Amazon they were pretty cheap. Also, don't forget to get the correct thread size for whatever blocks you get. I forgot and had to order some from Chuck since I did not have anything that would work in the small blocks. Bill