Mark Pearse
-
Posts
840 -
Joined
-
Last visited
Content Type
Profiles
Forums
Gallery
Events
Everything posted by Mark Pearse
-
 thanks everyone; Druxey, yes it is, but perhaps stab in the dark is better - I might market a technical book "sailmaking by the assisted gravity technique".
 -
Hi Jens, lovely project & a very pretty boat indeed. I think I've hear them called Junior Folkboats - the similarity is there but I think they pre-date the Folkboat design....?
- 39 replies
-
- 3
-

-
- kdy 15 juniorbad
- yacht
- (and 2 more)
-
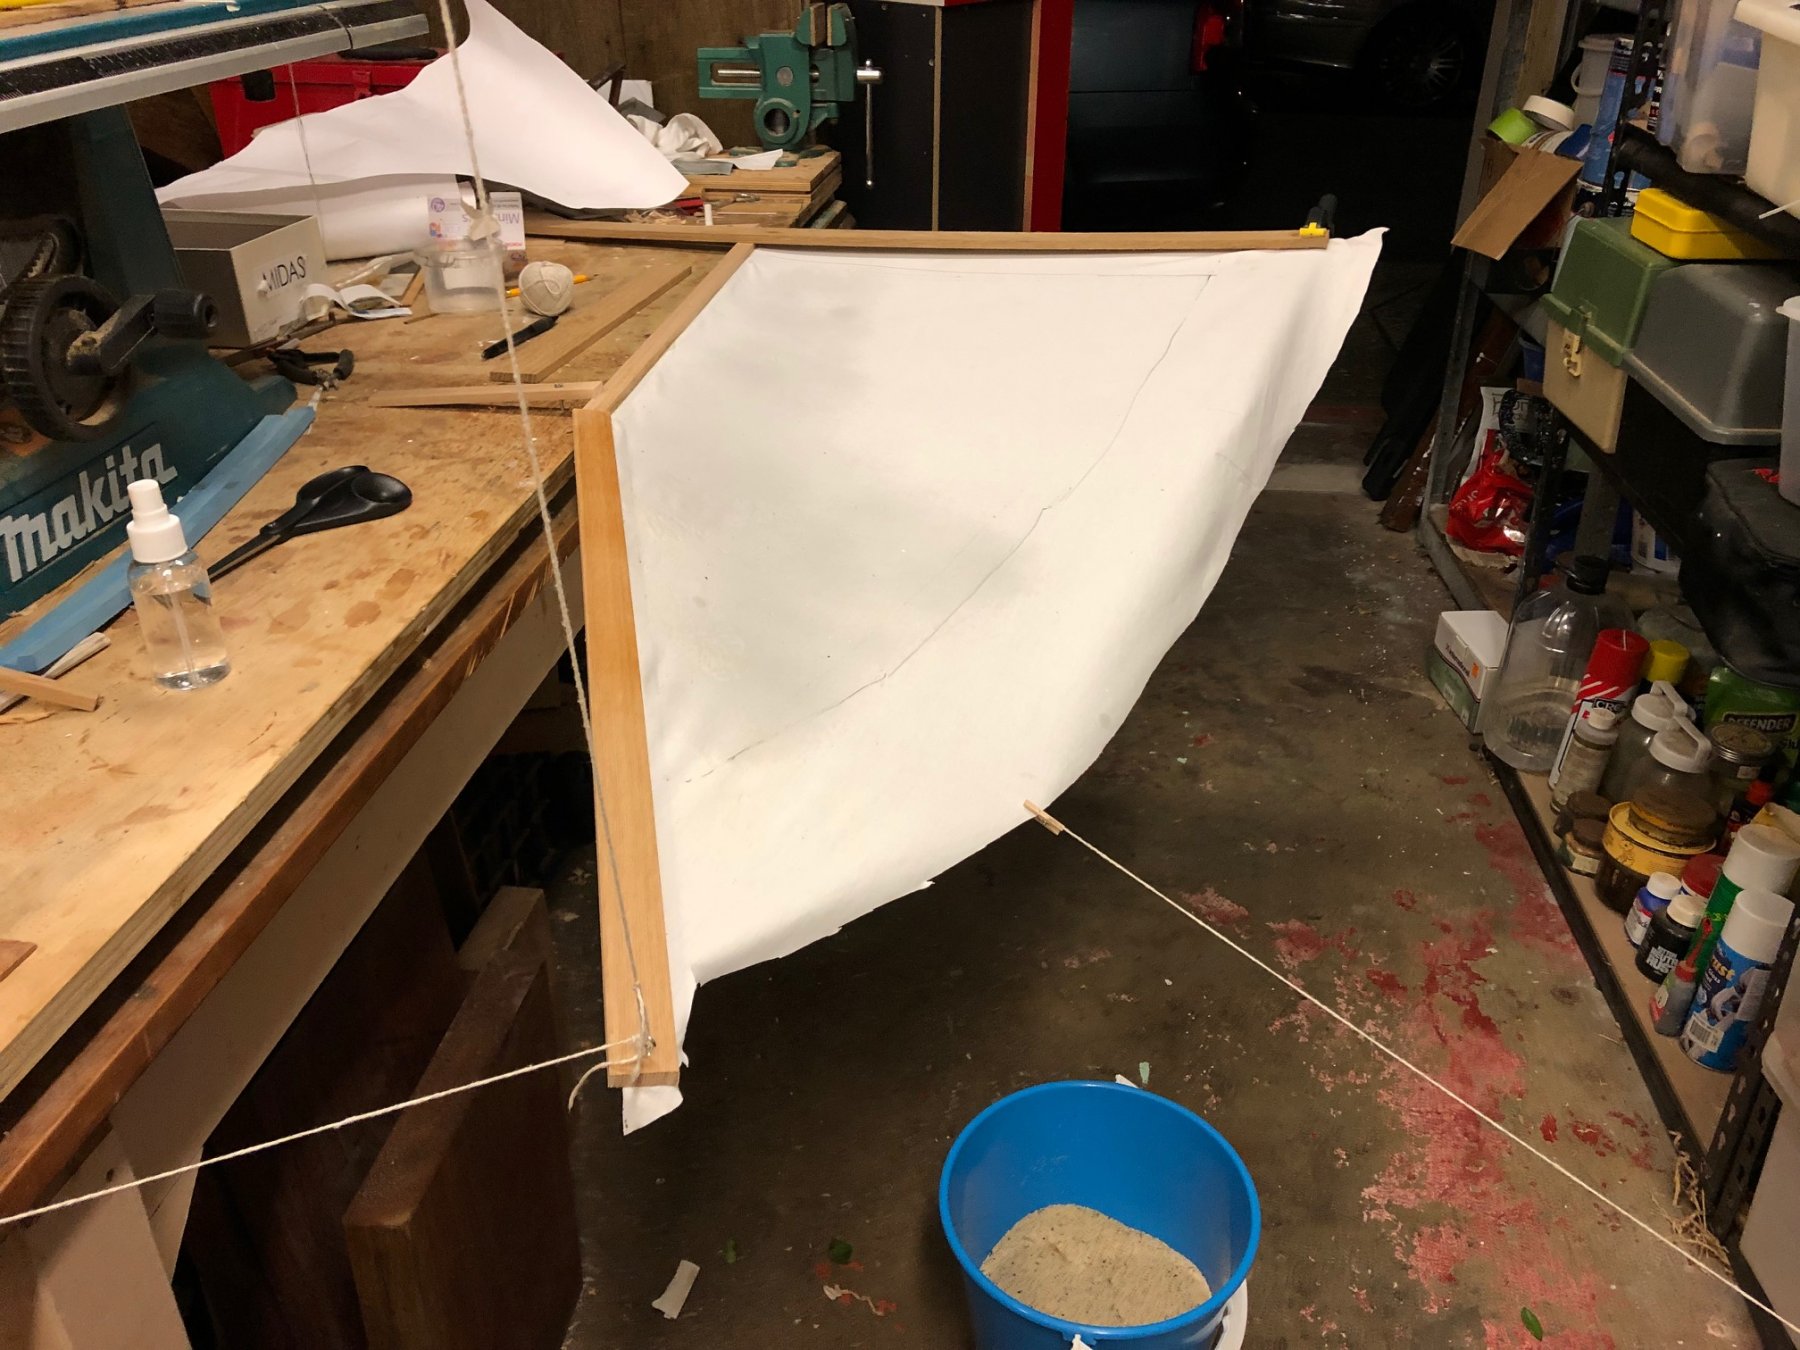
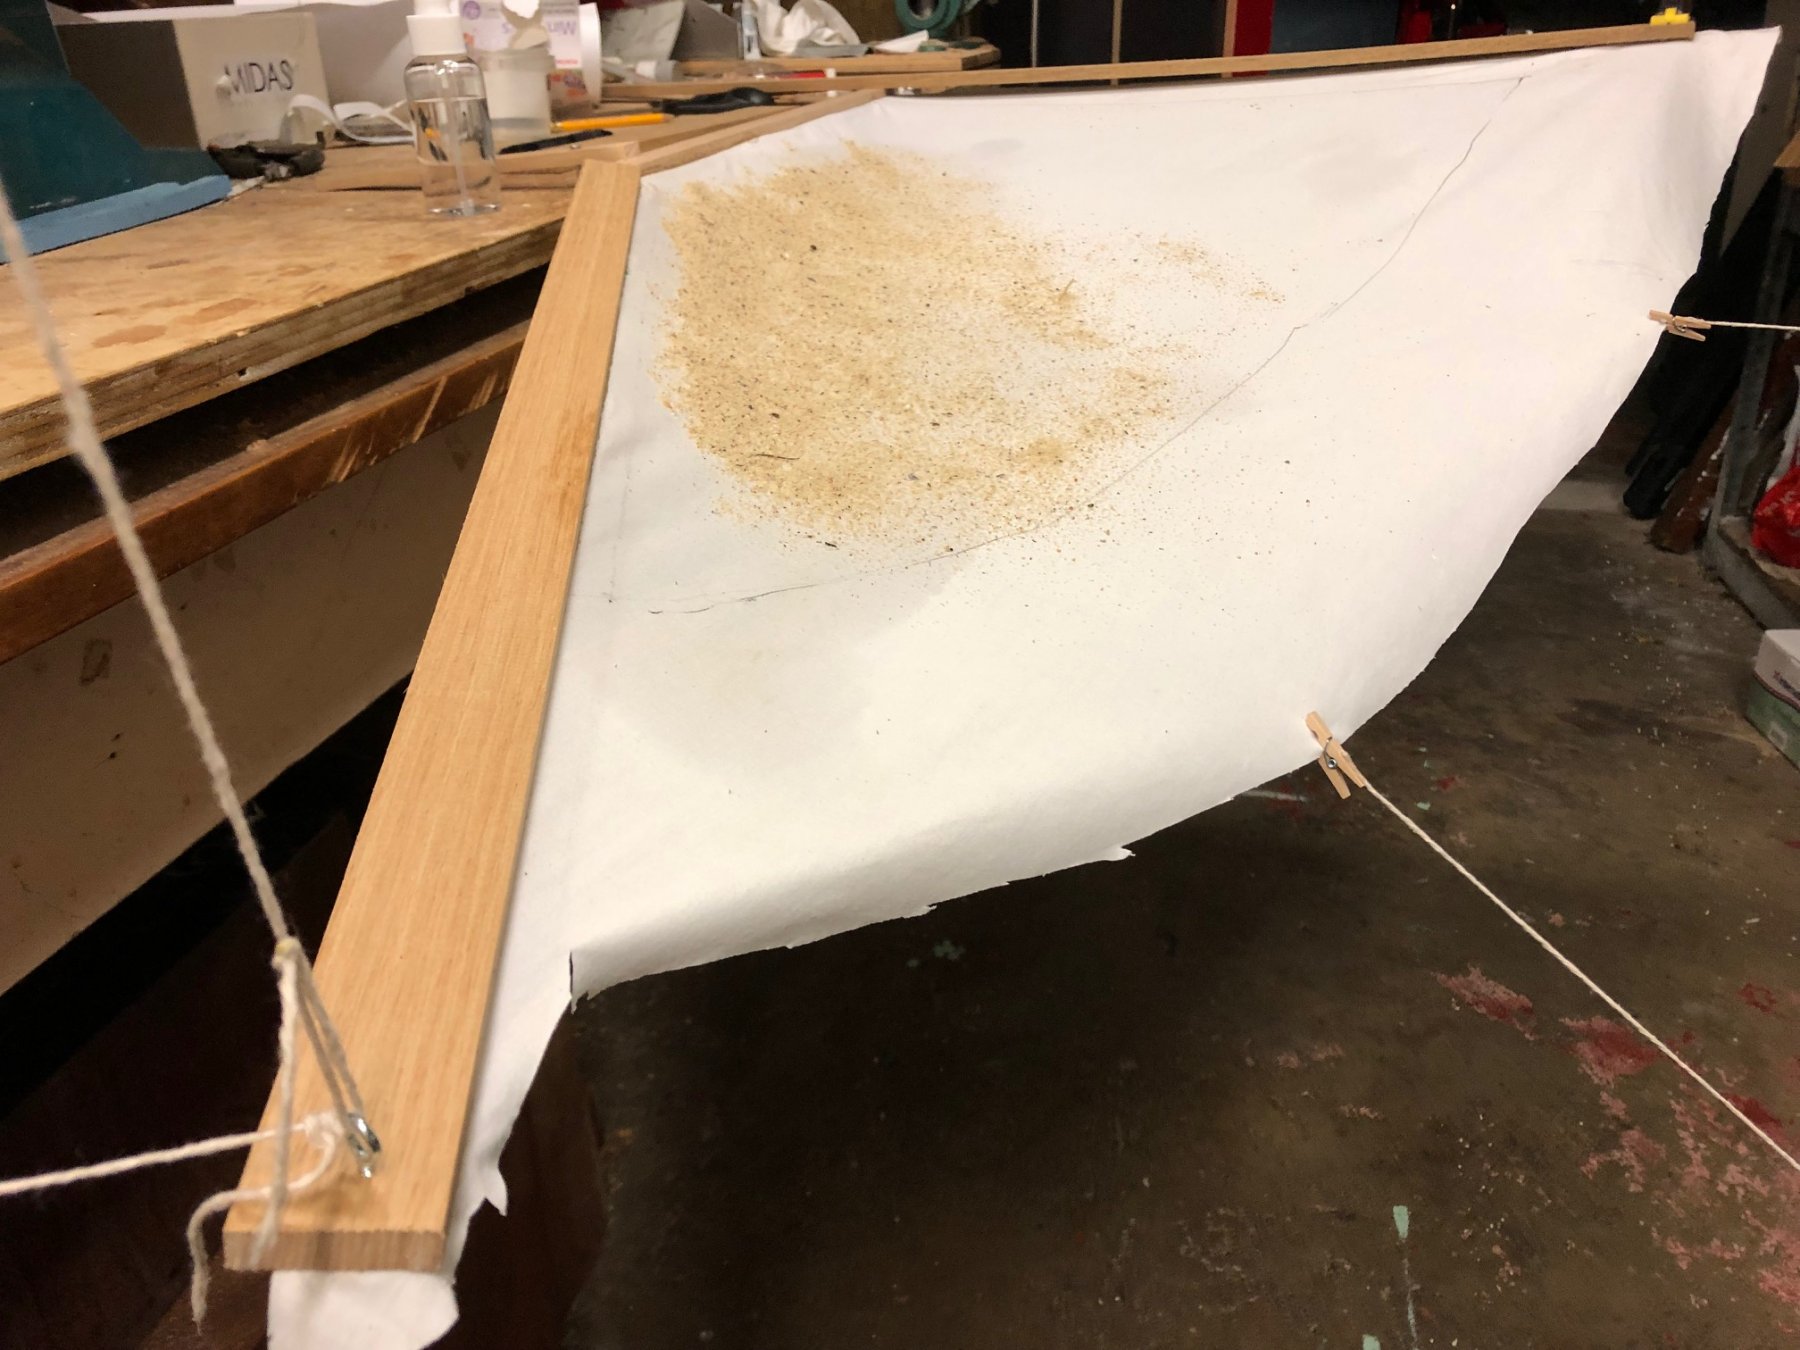
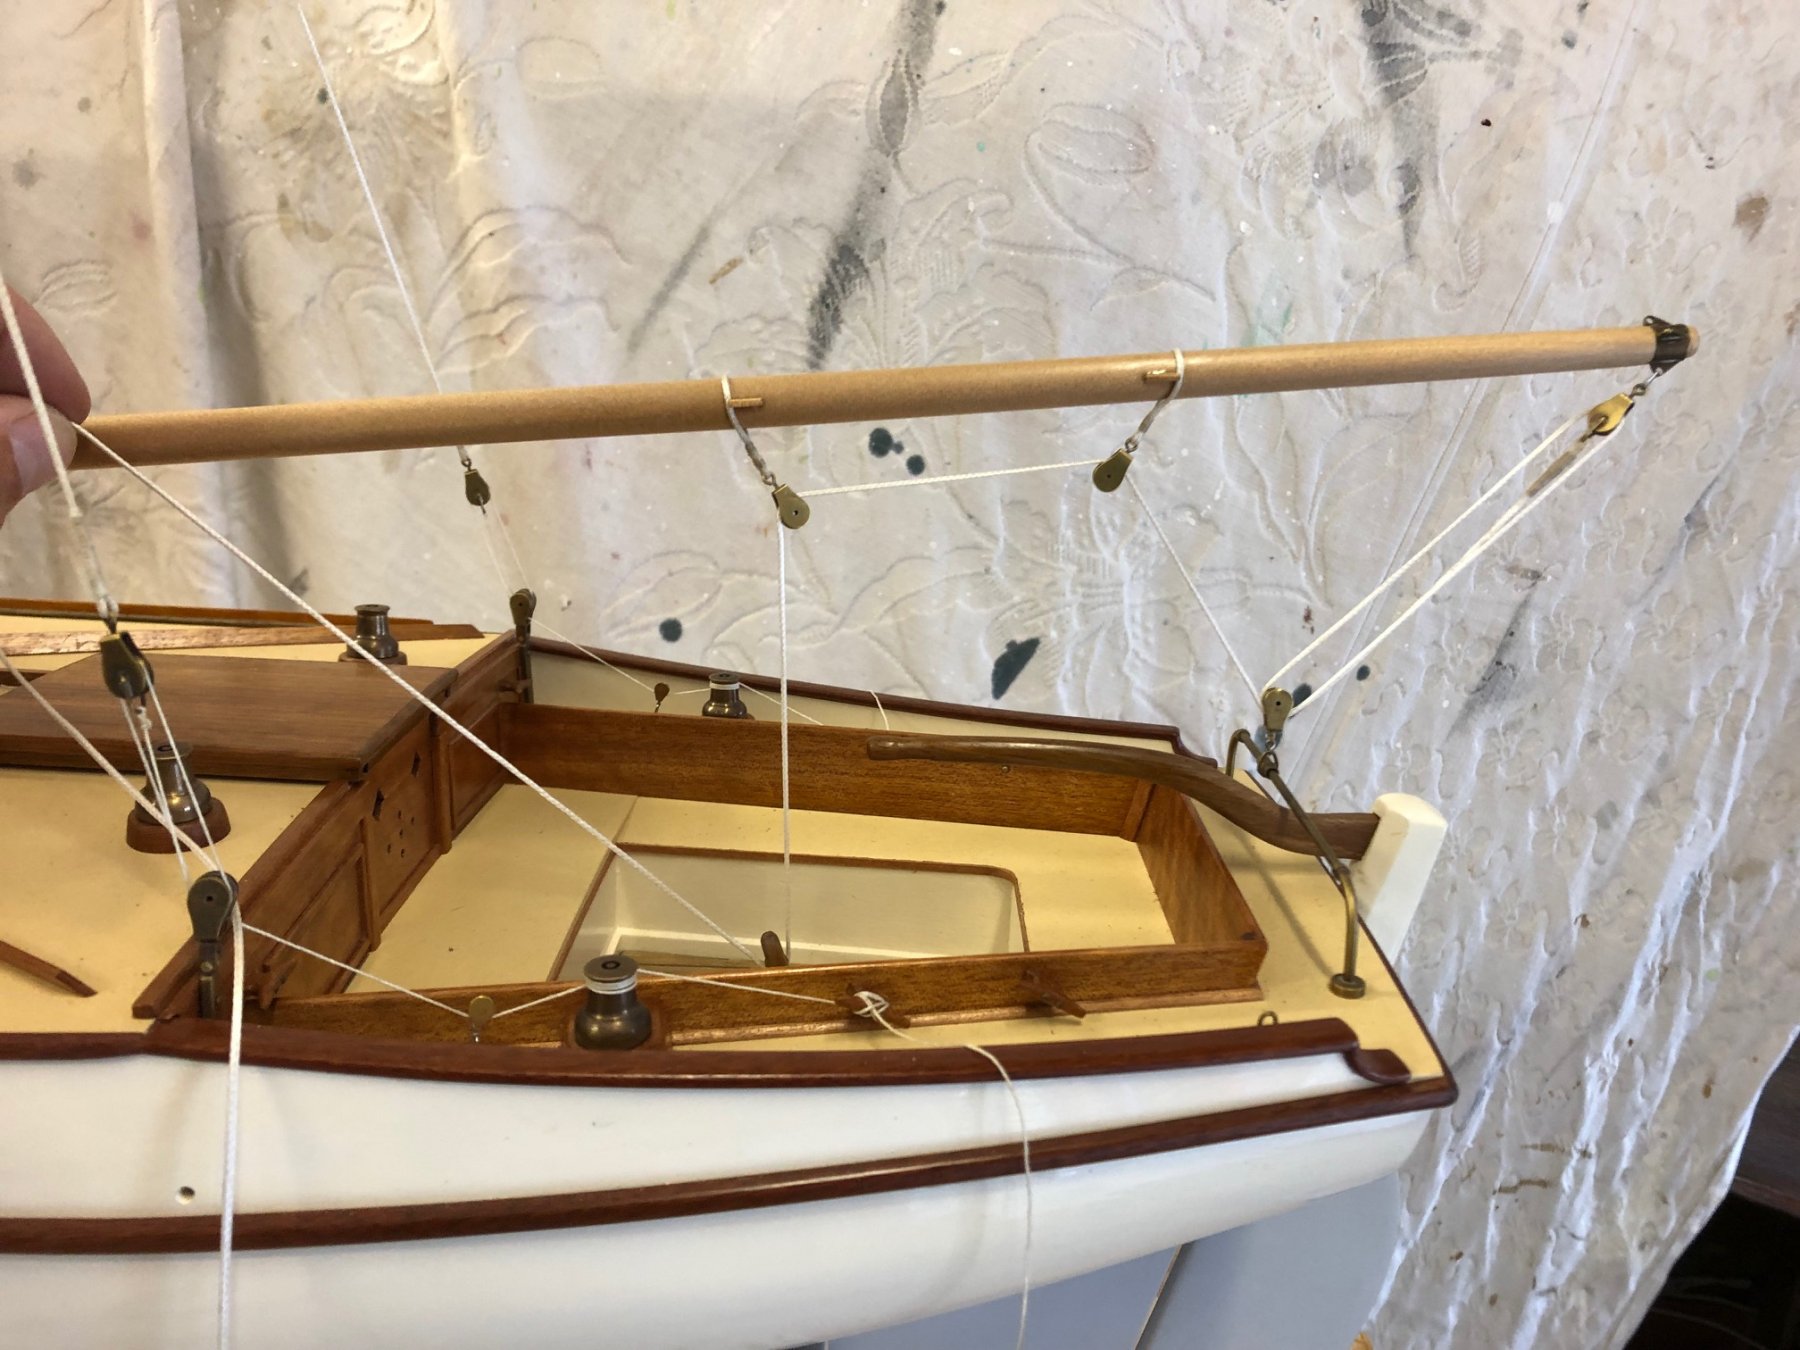
some progress on the sail mould, & Heath Robinson would be pleased...lots of string with knots, pegs & dodgy fixings Below shows the fabric suspended & tensioned here & there, the grey blotches are from water spray to soften the fabric, & hopefully will reshape a little as it dries; a hefty bucket of Bronte sand awaits. The good news is that the shape is about right - aerofoil shape towards the mast & gaff, & flatter towards the leech; with maximum belly in the upper part of the sail (in the photo the close timber is the gaff, next is the mast & the loose one below a timber strip furthest away is the boom). as it turns out, only a very small amount of sand was required; the shape looks quite good & my earlier estimate of the difference angle between boom & gaff was quite a lot more than here, but I will probably ease than suspension line a little more so the gaff lays out a little more After it's all dry the next step is to put some mixed Everdure epoxy resin into a spray bottle & spray it all, make small adjustments to the tension, add sand etc. When that's hardened a bit I'll lay some more fabric on the top with more epoxy, perhaps even 3 or 4 layers.


-
Minwax stains in Australia
Mark Pearse replied to vossy's topic in Painting, finishing and weathering products and techniques
Hi Chris I got a Minwax product (polyshades black stain/polyurethane) shipped to Oz through buy.com, & the approx 300ml tin cost $57, incl $21 shipping & customs. It's an excellent product, very black & thin, but I opened the tin & did 3 coats within 4 days & the 3rd coat had flecks of hardened polyurethane in it - so to salvage the work I had to strain it carefully & use it immediately. I was restoring a coffee table & the finish was to replicate the original black 1960s finish. Paint has much more 'build', & this product allowed a certain amount of visible wood grain texture to be visible. It's a great product but the problem above was a concern. Mark -
thanks Bob I have some clear shellac. I actually used the orange/brown quite a bit in the model on the timberwork, with a finishing wipe with satin polyurethane.
-
Hi Steven your sculptural skills are excellent, it's interesting to see the viking emerging.
-
thanks Bob, that's very helpful & a lovely model. It does change my thinking on cotton, but for now I'll press on as is. If I'm not happy, I have a 1940's cotton sail that's no good as a sail any longer, the fabric has a very tight weave & might work ok. Did you use glue to stabilise the rope rigging?
-
Hi Carl, yes that's what I was thinking, & in addition using sand to weight it as required. I think the hard part will be to be the balance between baggy shaped curves in one area & a flat curve in another - hence using sand, almost like being able to locally increase gravity.
-
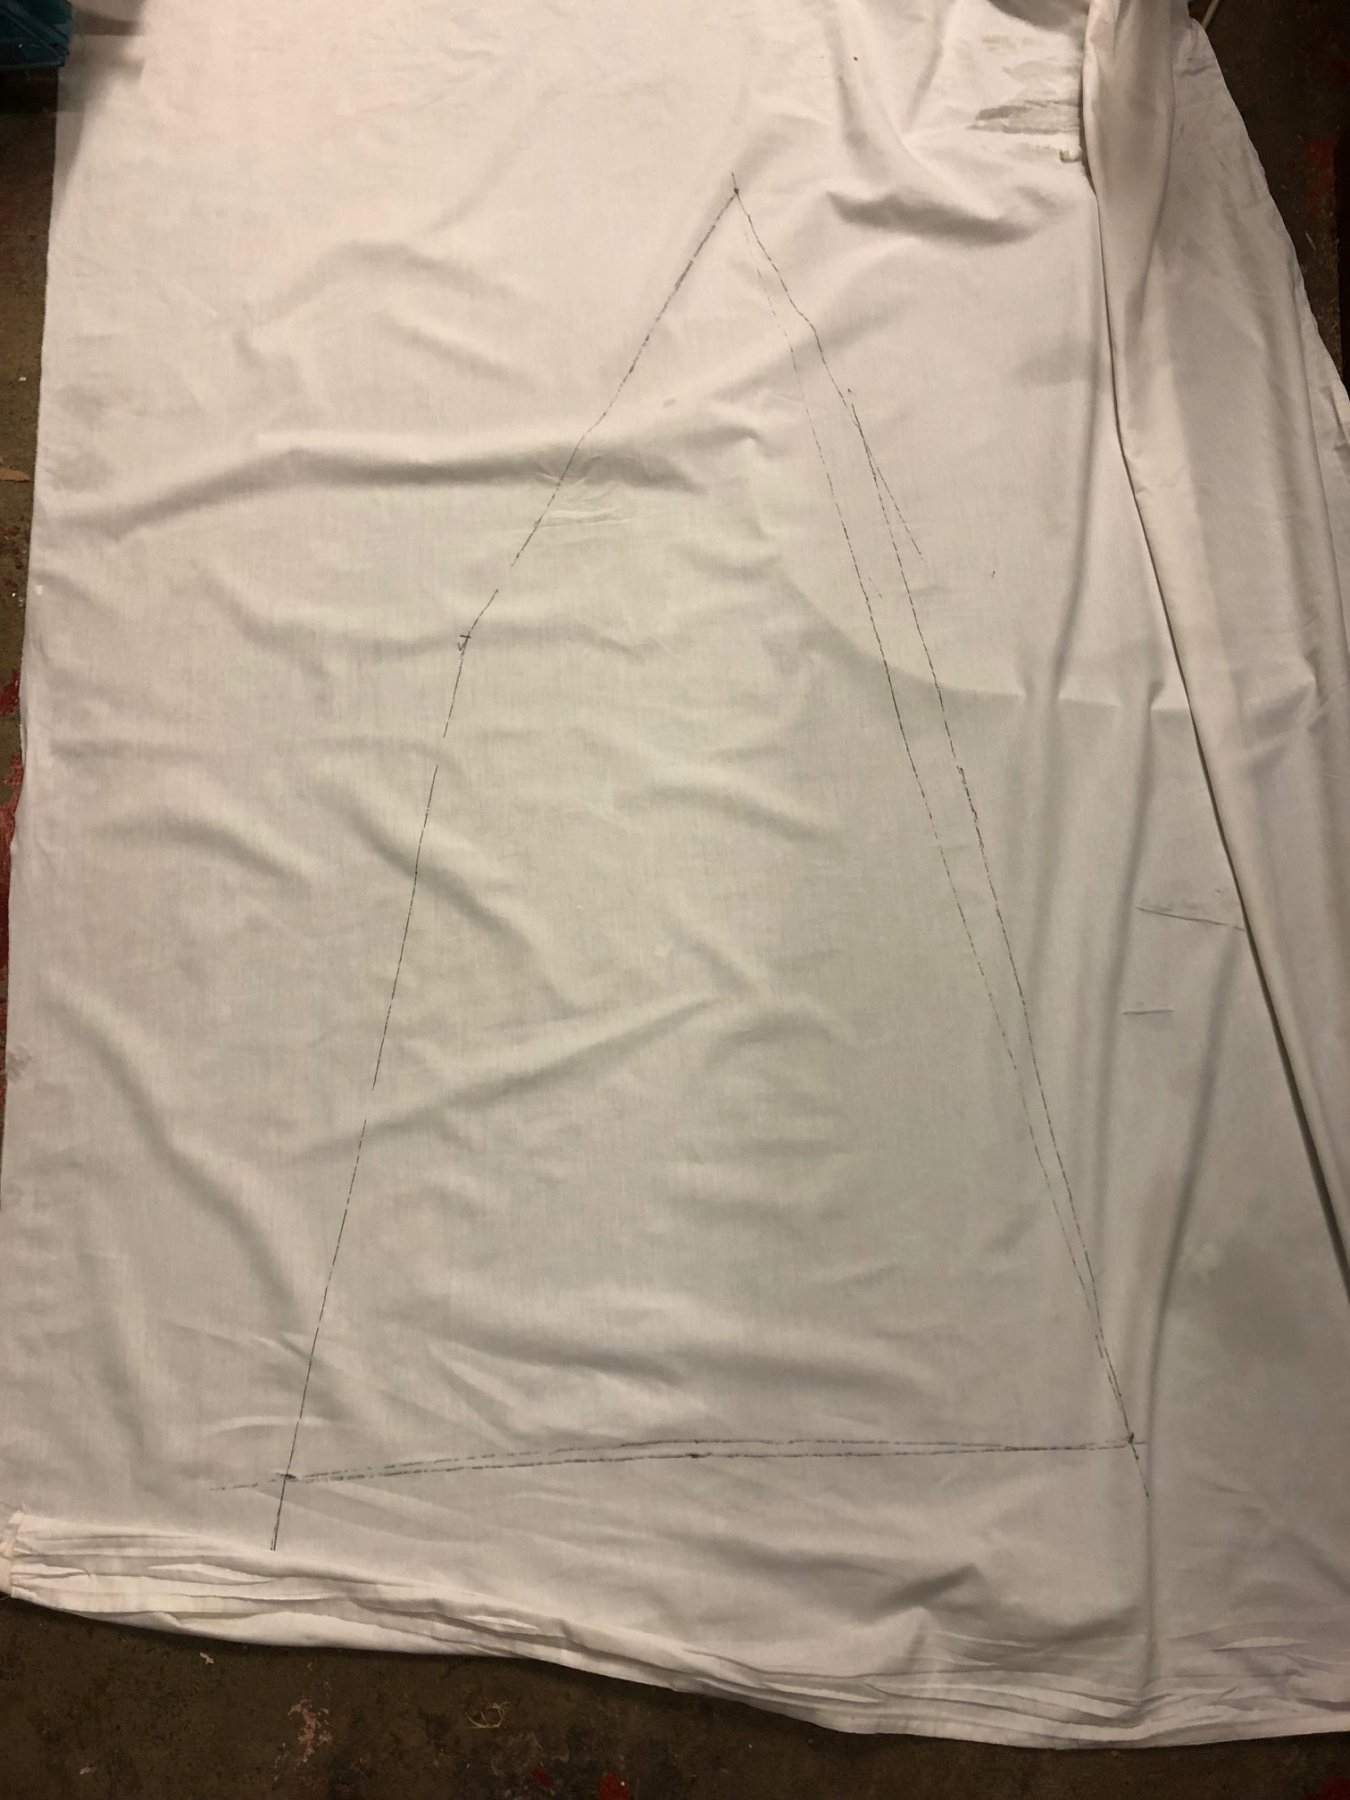
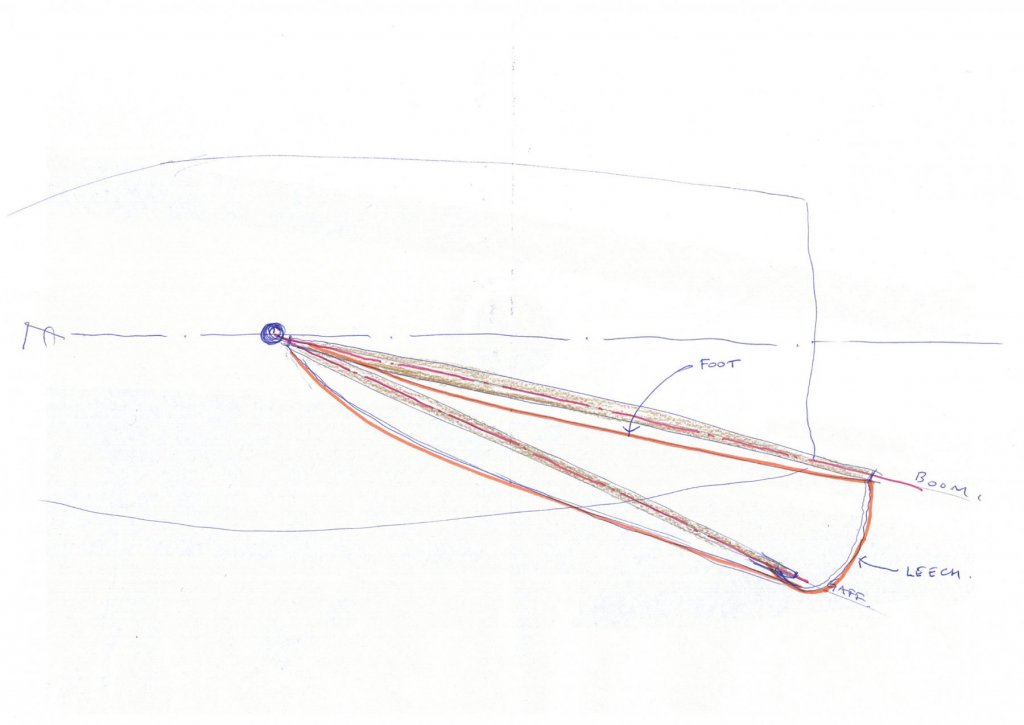
Thanks for the comments, all discussion will help me. PVA is strong but the form is large at around 800-900mm tall so I think it's going to be soft at that scale, & there's the problem of wet Silkspan on a PVA based form. You can dilute epoxy with acetone, but I'll use the one that's already mixed thinner, as it might be stronger than a home-made version - called Evidure here, I think it's International Paints (Azko Nobel). If I do get a good shape, I'll just keep laying in sheets with epoxy until I'm sure it'll be stiff. All thoughts would be very welcome. Below is a plan view of the curvatures I'm trying to get. The leech line isn't quite right but gives a fair impression.
-
15' Dinghy by Bedford - FINISHED - 1:1 scale
Mark Pearse replied to Bedford's topic in Non-ship/categorised builds
g'day bedford looks lovely - how do the sails fix to the spars in this boat? -
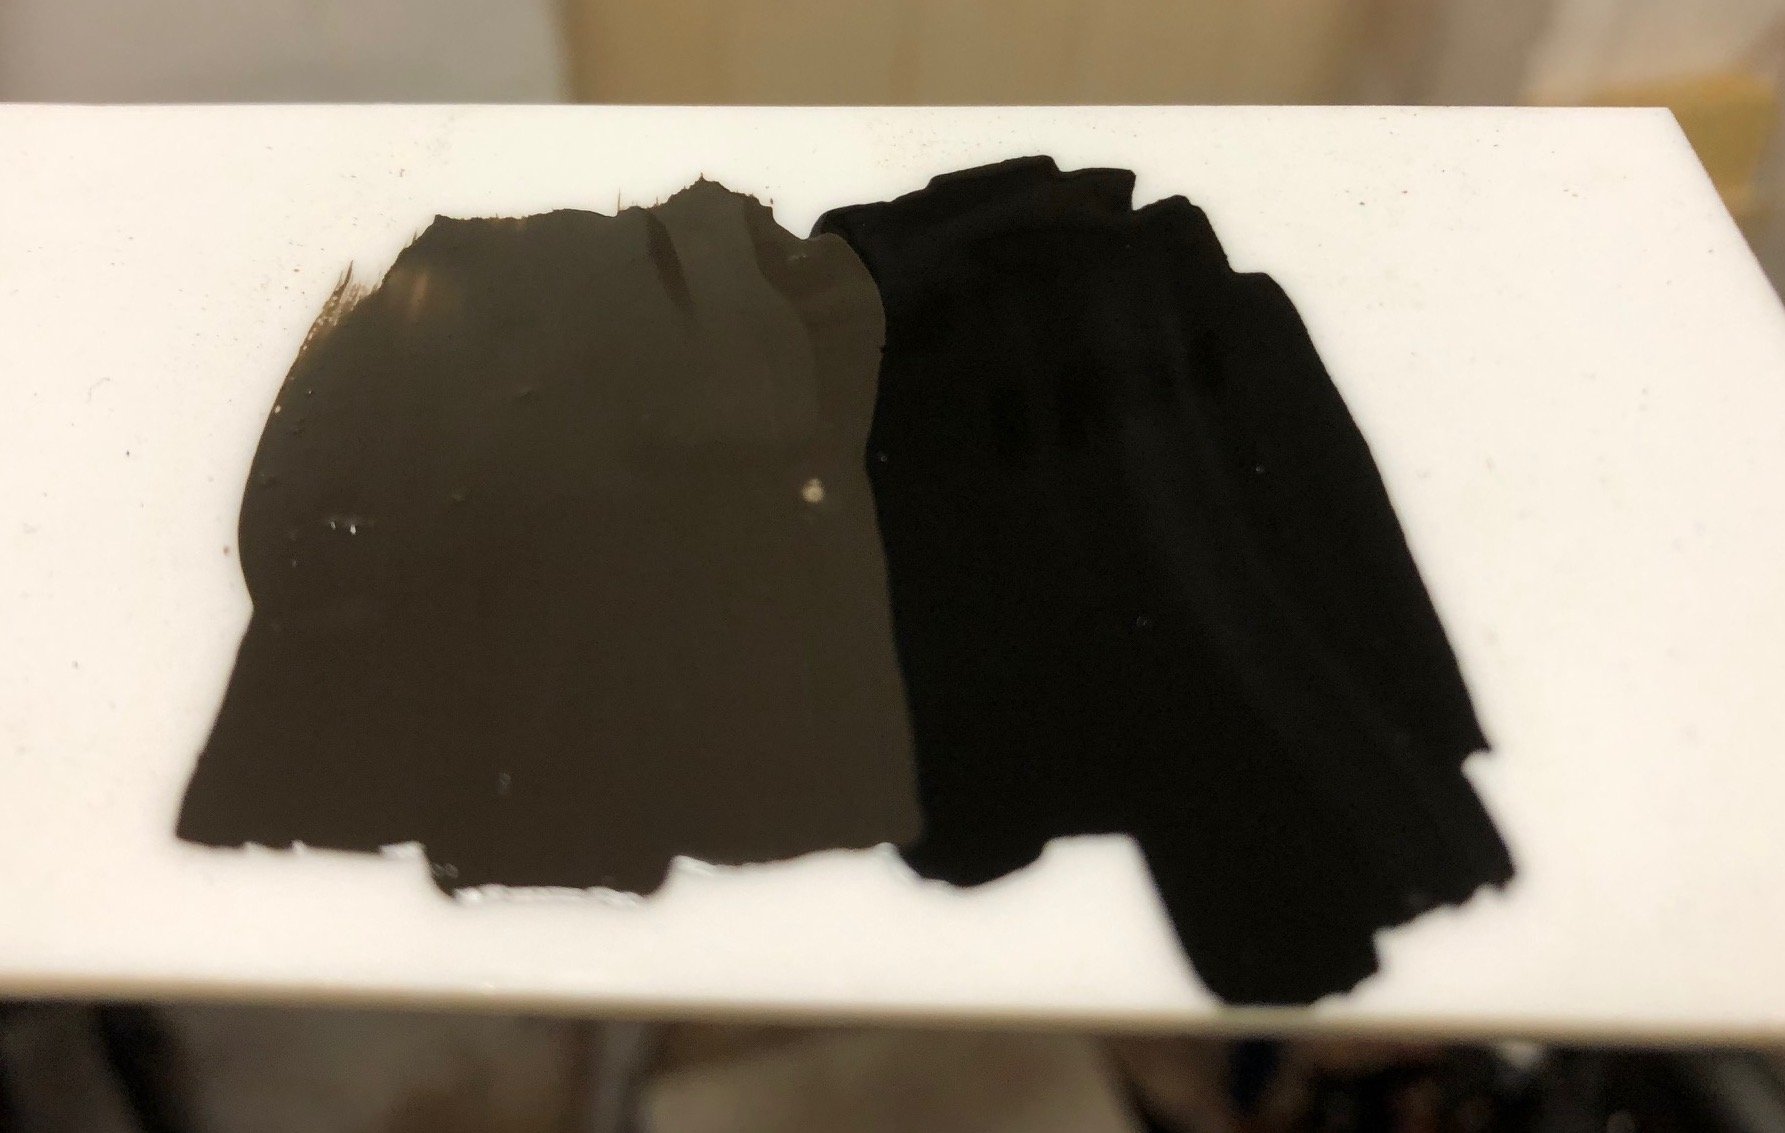
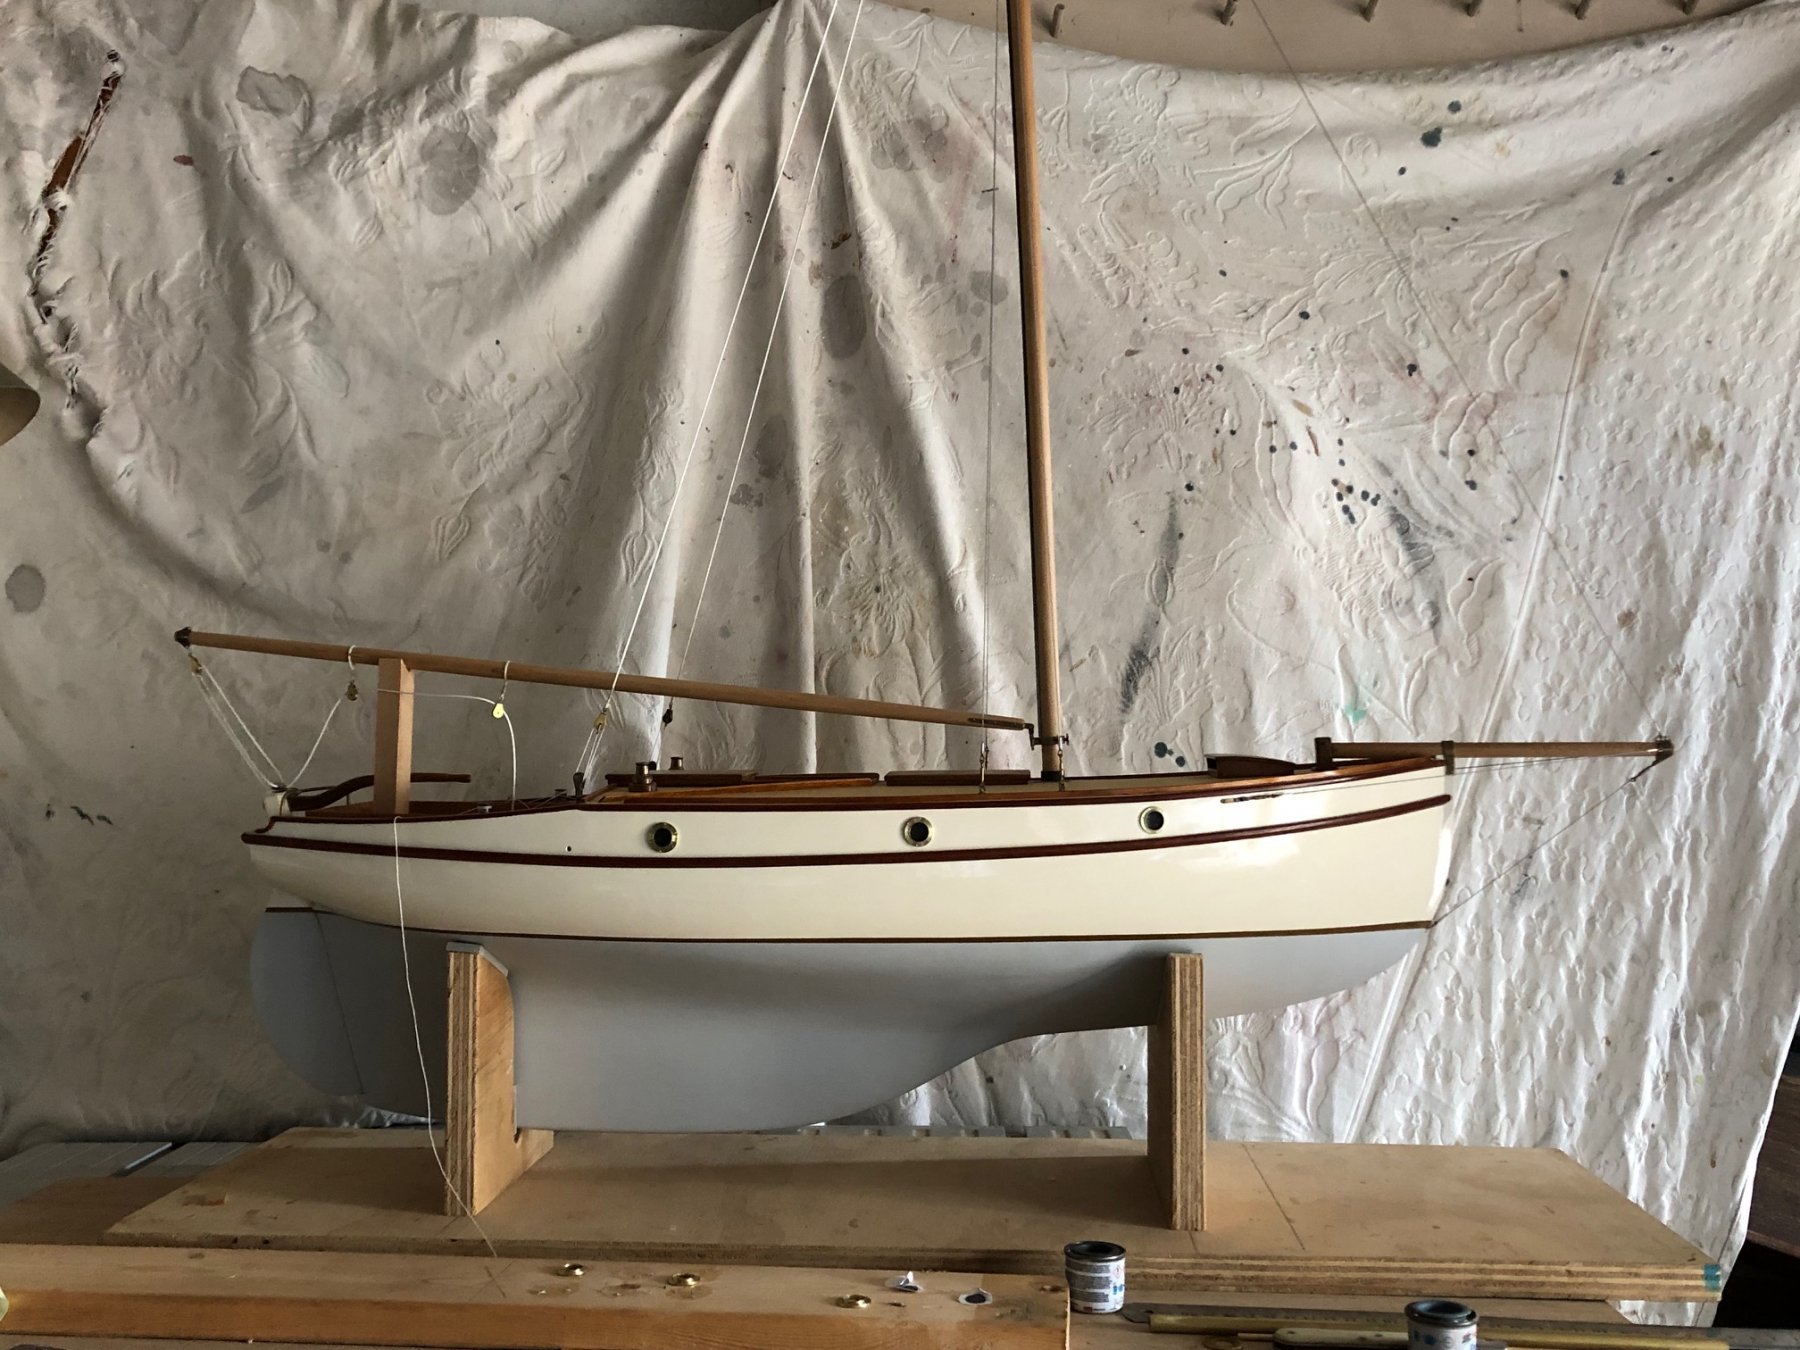
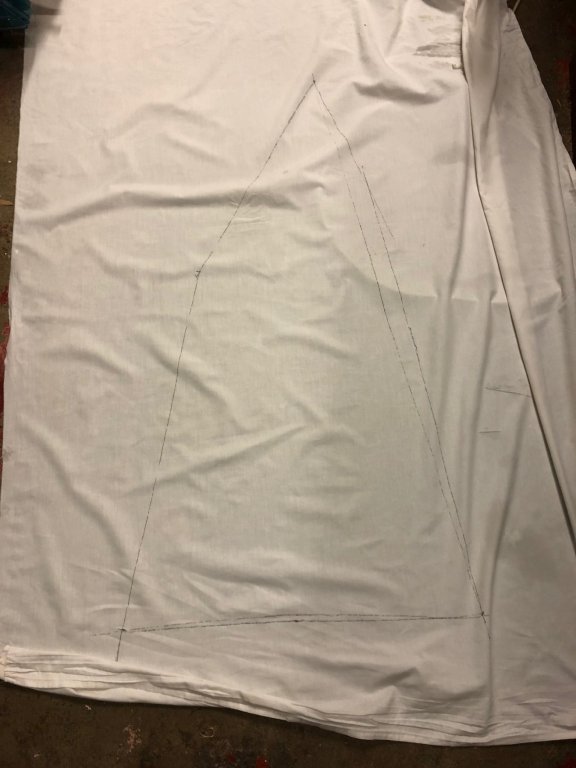
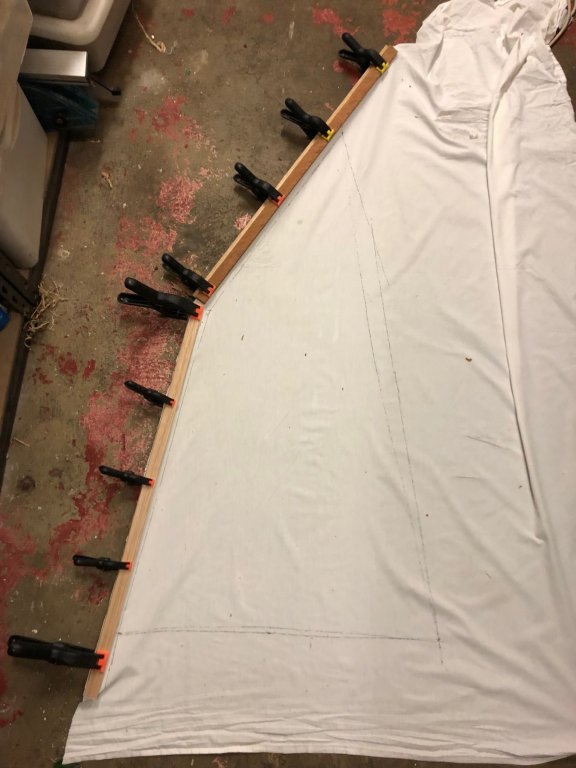
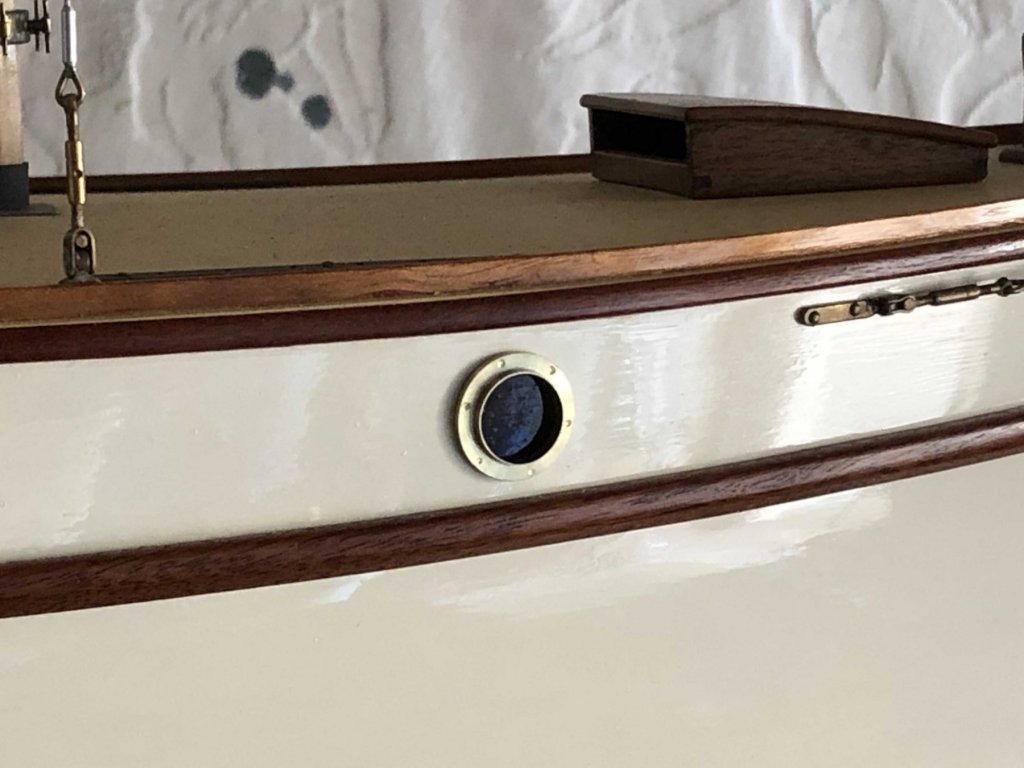
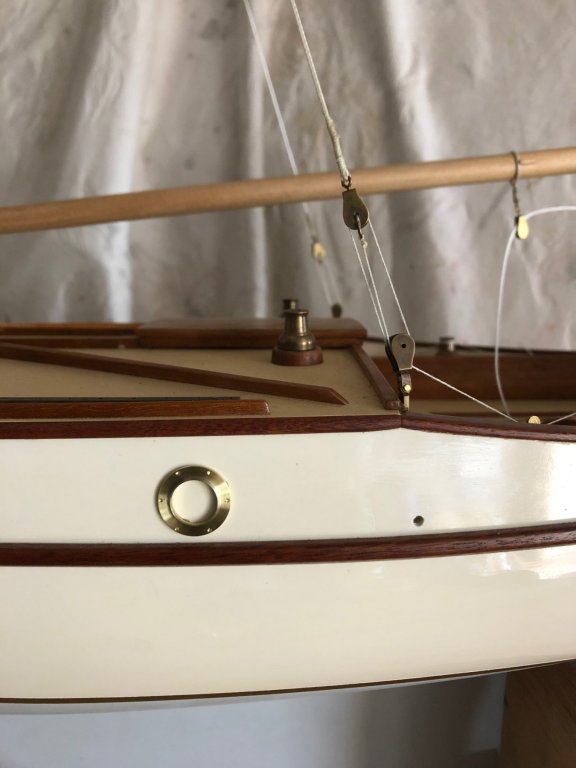
This is the porthole 'hole' colour, with black as a comparison: I've been thinking about how to do the sails, which are planned to be rigged & with the wind in them. So, my plan is to first make the mould to form the sails on & to use Silkspan. I considered balsa as a form but the cost would be very high, other cheaper timbers perhaps ok in cost but difficult to work. I'm thinking of fabric, set to a shape - at this stage I'm thinking of supporting & coaxing the fabric into a form & then saturating it with epoxy glue to set the shape. If it still needs to be stronger I'll add more layers on the back. I started with a piece of scrap cotton (or perhaps a polyester cotton blend), ironed it & roughly drew the mainsail profile. I cut some timber battens, then glued & clamped them to the edges for the mast & gaff spar - they will be the only straight sail edges. Note that the battens are about 100mm longer than that edge of the sail, I think it's going to help to have the sail mould be larger than the sail. The rough plan is to suspend it all, weight the fabric into the shape I want with sand & wet the fabric with water from a spray. I'm hoping this wetting will help the fabric to get a soft & curved form as it dries. When I'm satisfied I'll then apply epoxy, probably by delicately brushing from underneath. Seen from above, the gaff will be a different angle than the boom, by perhaps around 20º, the other parts will all be curved in various shapes & profiles. If this works I'm going to buy a lottery ticket.

-
Hi Vaddoc nice work. I suggest keeping the flanges as small as reasonable - these fittings don't need to be symmetrical if one flange has only one hole.
-
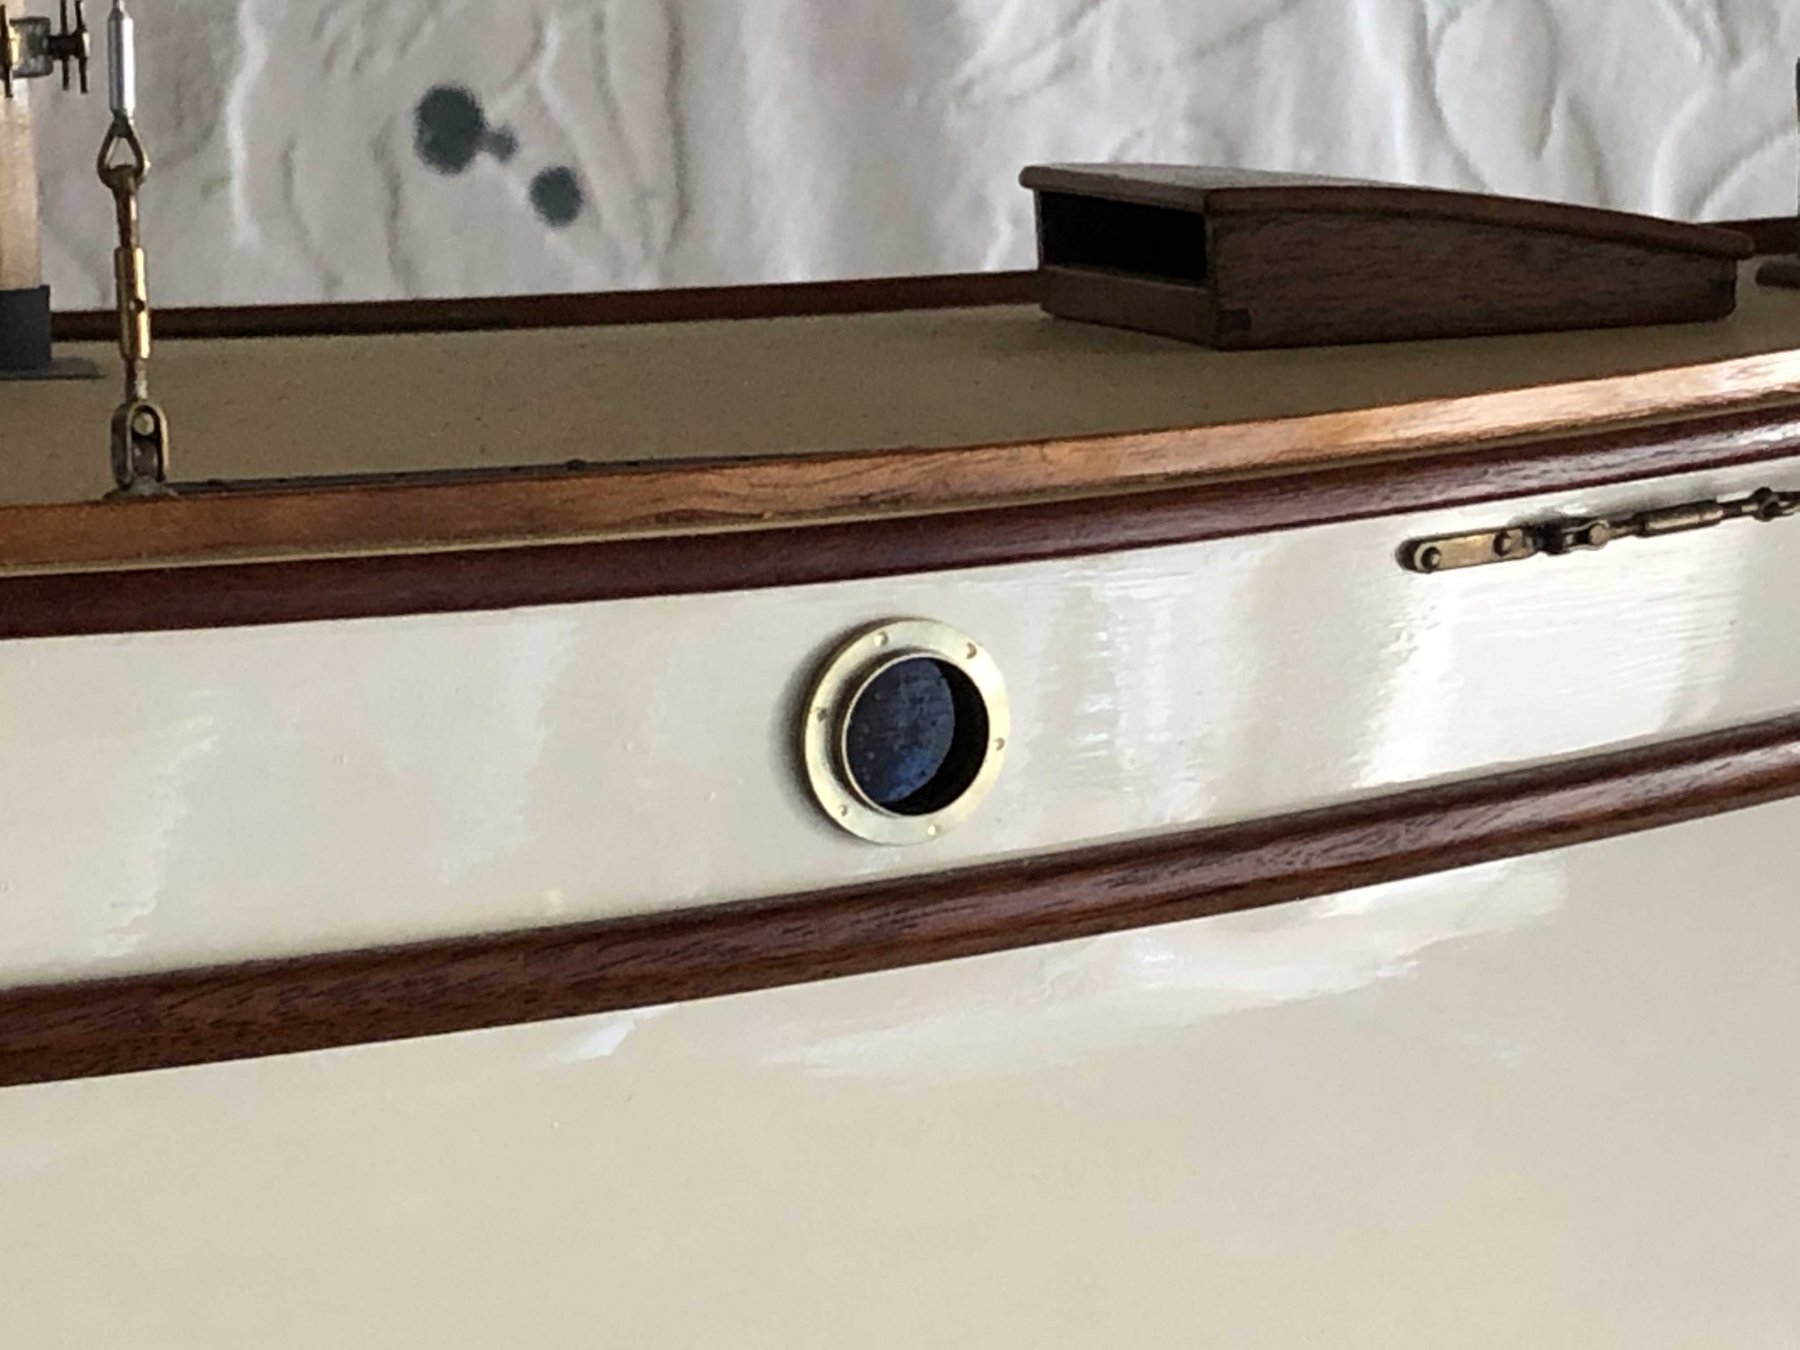
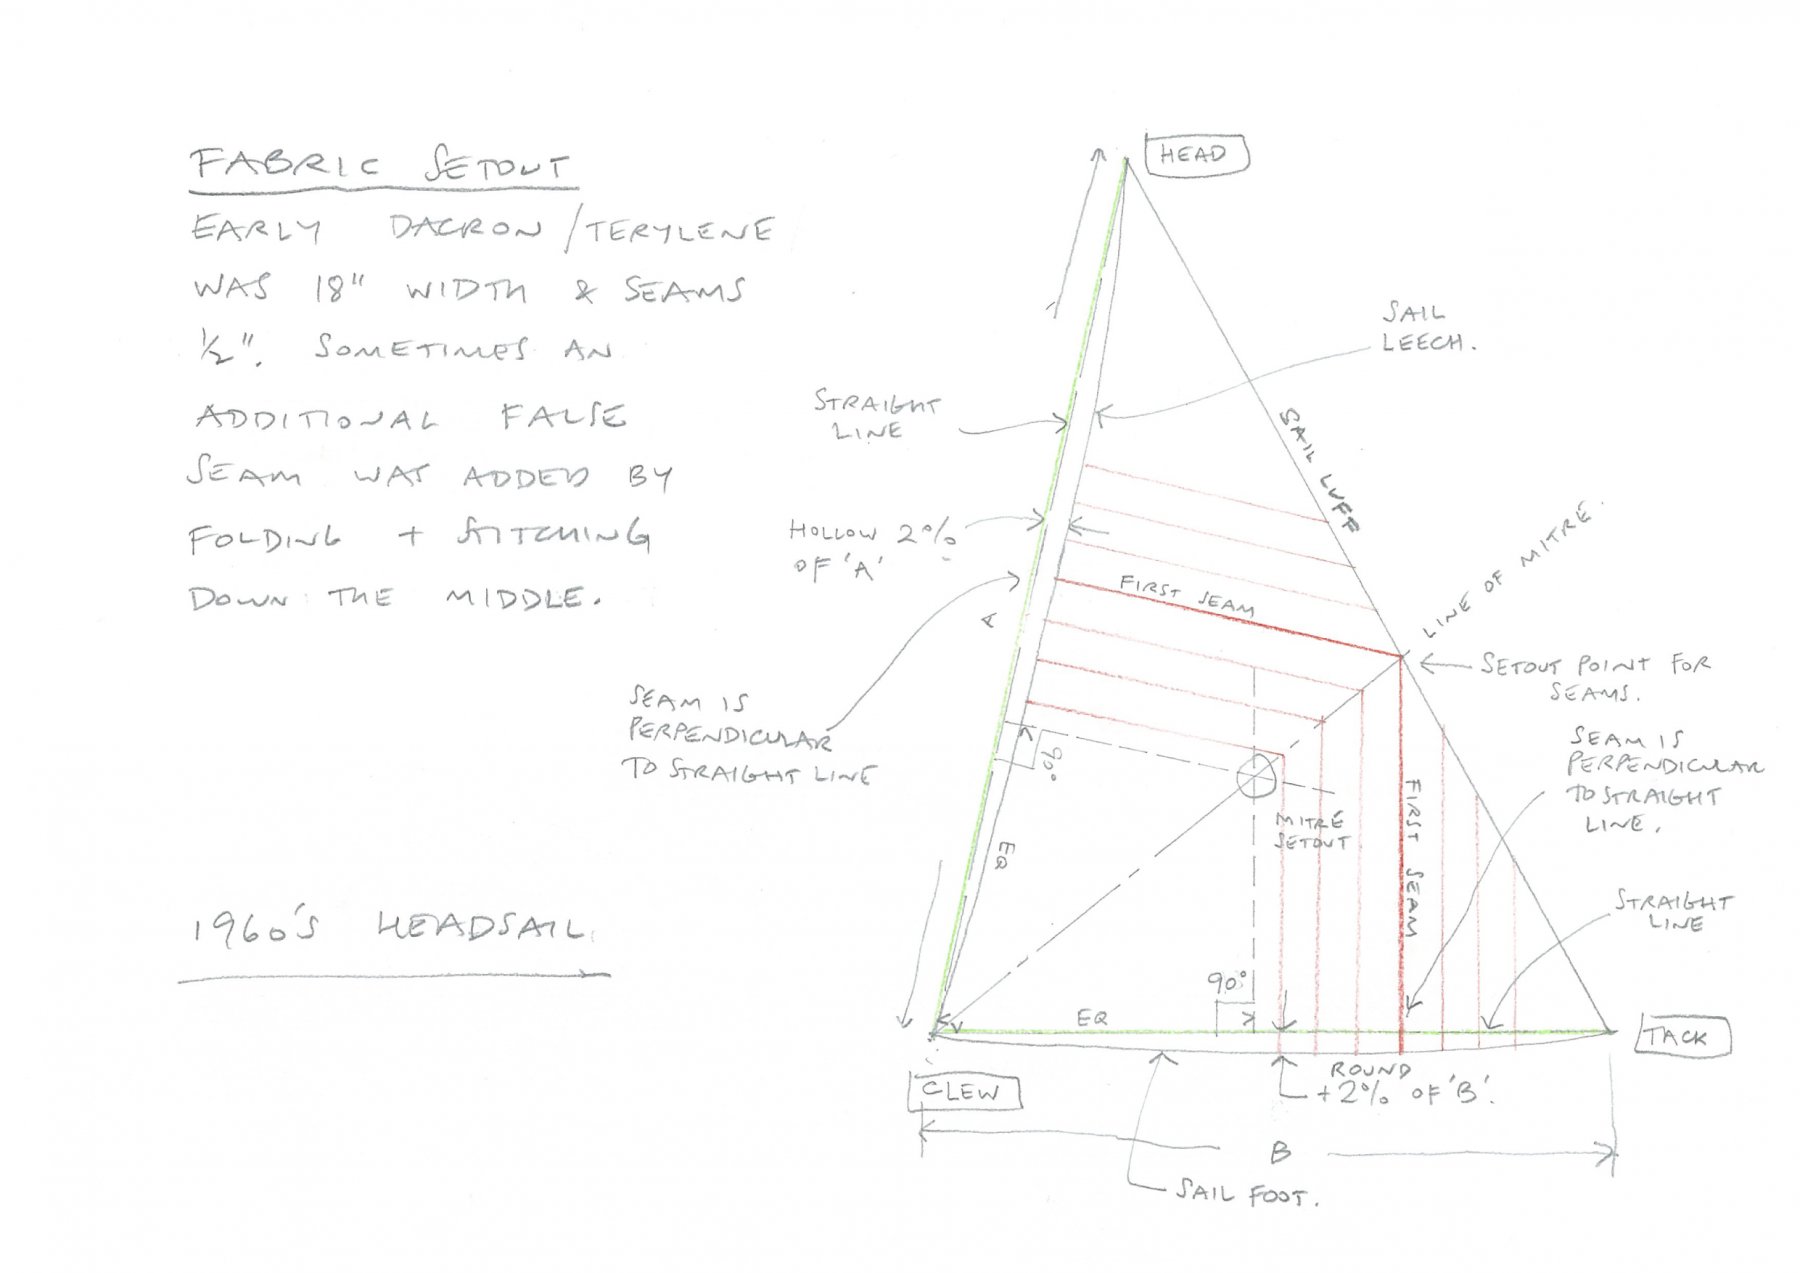
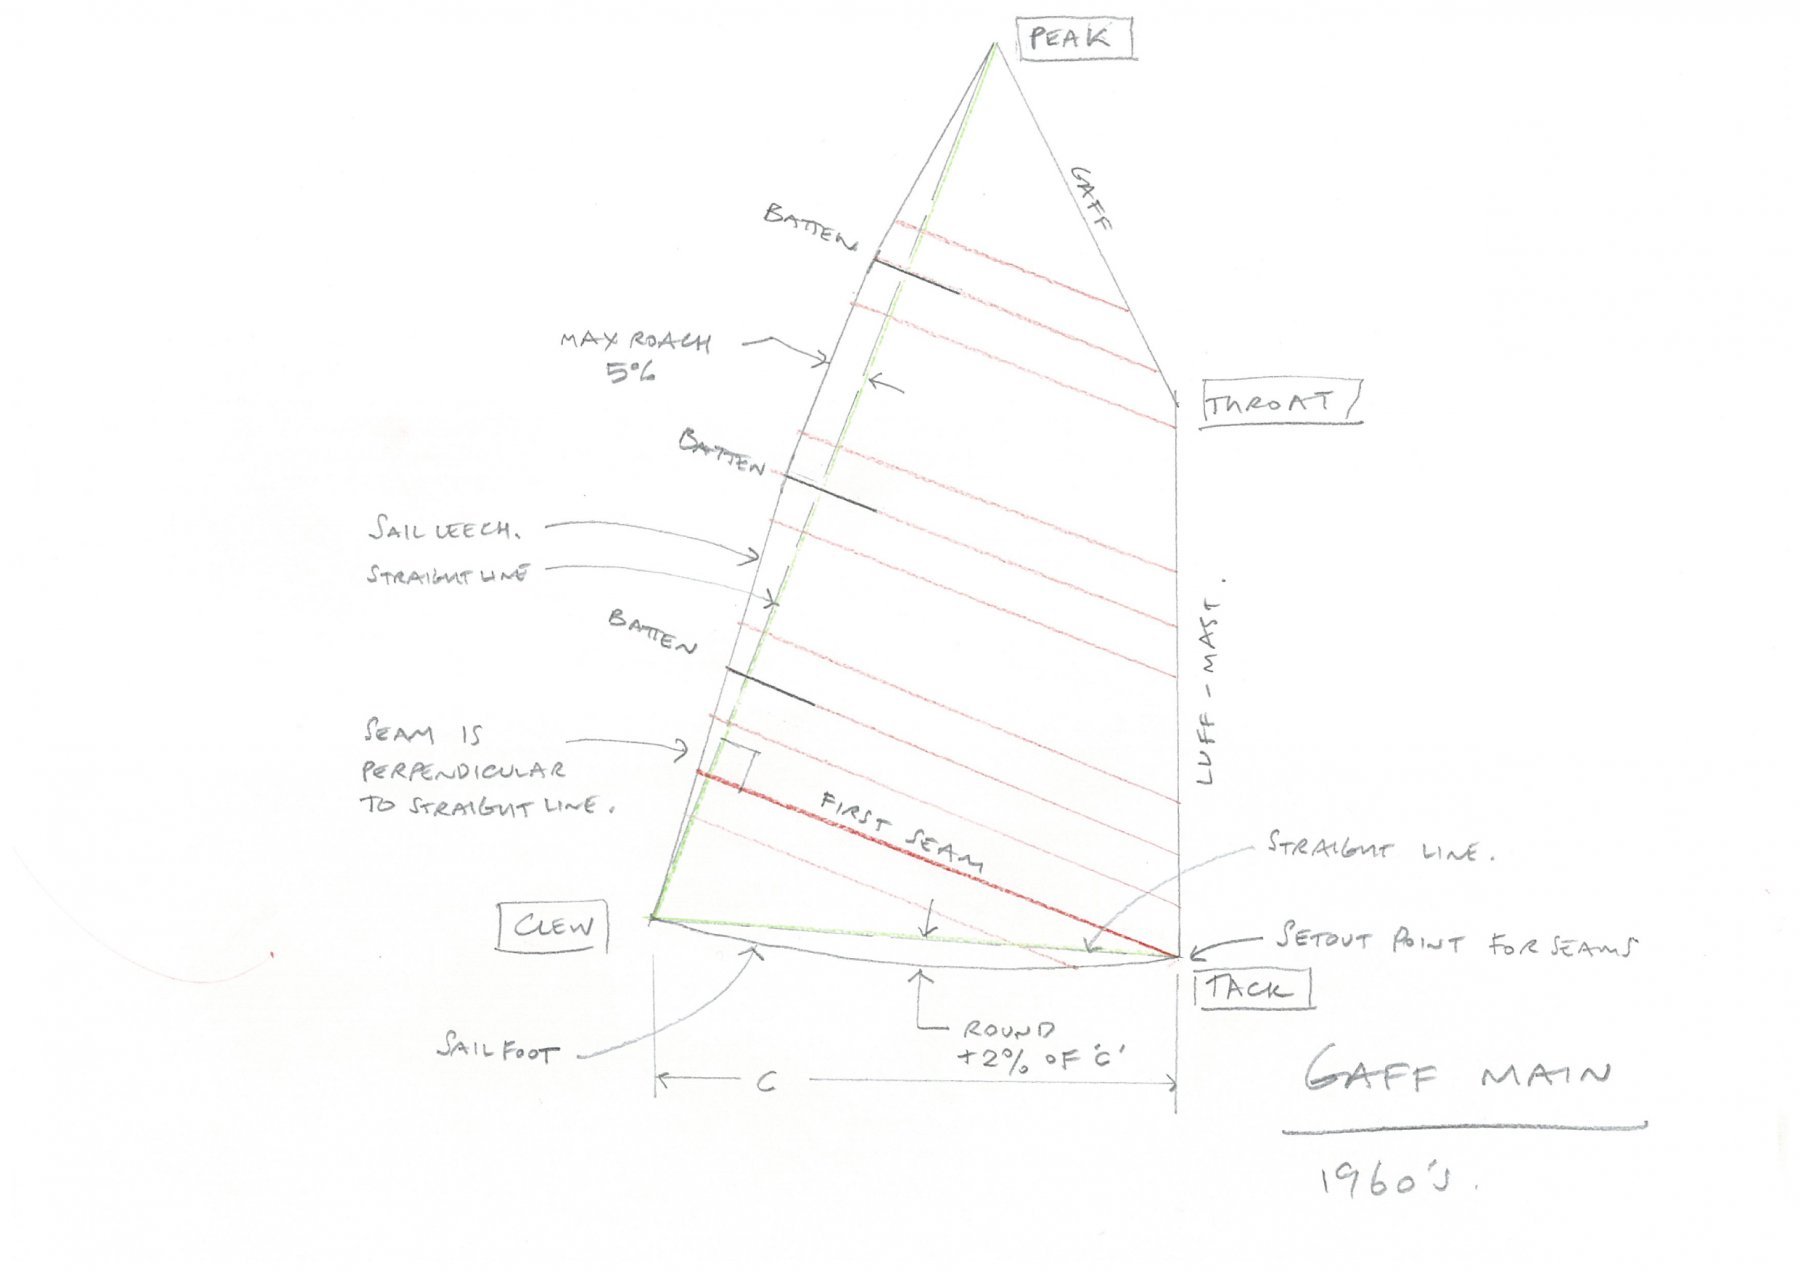
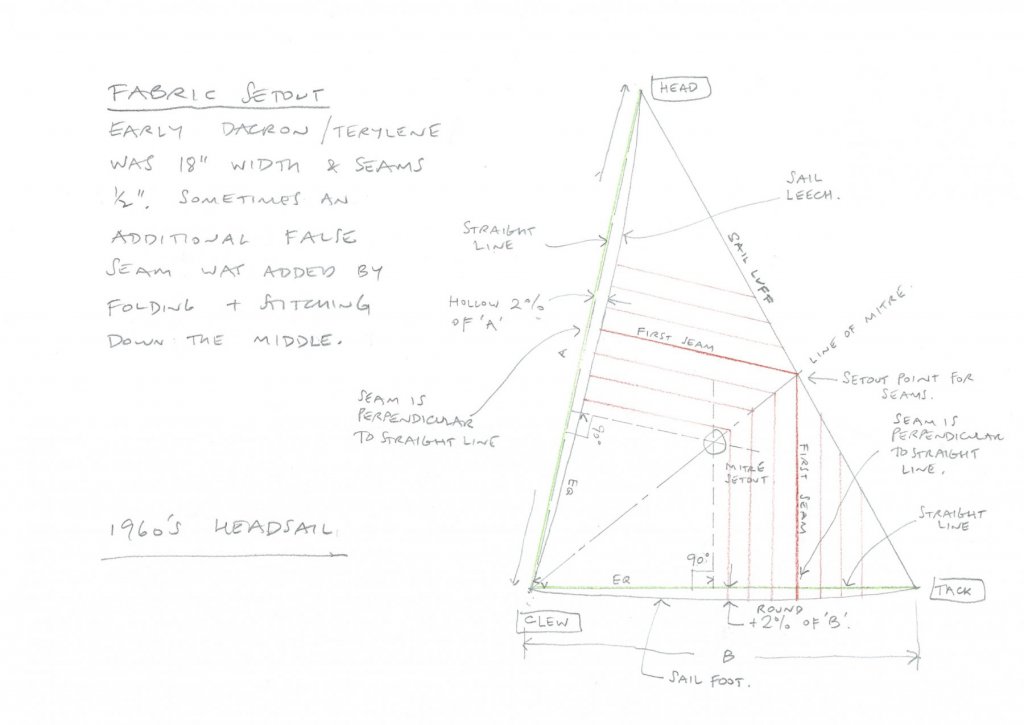
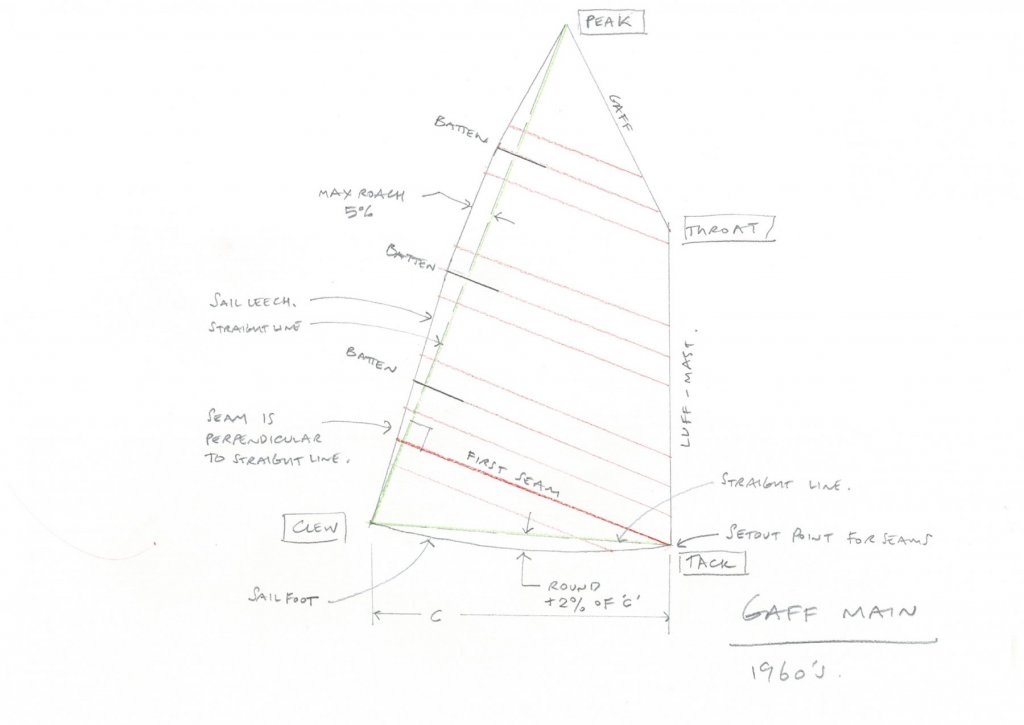
Thanks for the input MNL, that's a good idea. On this forum there's many magnificent models that are a full replica to scale, so each part is made. I haven't taken this approach, I want to show the last (& unbuilt) design by a little known amateur designer &, so giving the impression of an actual yacht is more important to me than making each piece. Part real scale work & part "if it looks right, it is right". By this measure, in some cases to show something that would exist could be wrong; my own rule was to imagine that I was standing say 10m from the actual yacht, & what would I see? So I was reconciled to perhaps not having glass - I was concerned that the reflection would be too visible. My observation from the actual is that you see the dark circle & perhaps a bit of reflection. Leaving the decision as late as possible, I painted a dark muddy brown spot in gloss enamel paint as a backdrop for the porthole "holes". To my eye, the effect is really good & I'm happy with it. Also, the darker paint does show reflection more than the cream colour, you can see that effect below. A bit on colour: I am very much against using black unless it is a black painted object, & even then I'd consider backing it off a little to achieve the scale effect of black - the further away you are from a black object, the black is affected by surrounding light & is very slightly taken away from black. For a hole, I think black would be too severe & not look right. I'll show a sample of the actual colour I came up with, compared to a piece of real black. The detail photo is poor because of the natural light conditions, low level of light. I've been considering the sails for a while, & after seeing how silkspan can be shaped to a curve in multiple directions, layered, coloured etc I'm going to try this material. My thought is that the sails should be 'set' as if with wind in them. The stand might need to be able to hold the model at a heel angle (as well as vertical), but that's for the future. This boat would have been built in the mid 1960s & I had a chat with a sailmaker Ian 'Macca' MacDiarmid, who's skilled at gaff sails. He said that by 1967 dacron (or terylene in UK & something else in Japan) was good quality & was used quite widely. The cutting of the sails for a boat of that era, & how the size & setout the seams is shown on the sketches below, which Macca explained. One thing not noted in the drawings is that the battens would be shorter than today, & for this mainsail he said 4 would be correct for the period & size of sail. I did the drawings because the information is straight from the horses mouth & might be useful to others. The setout for the headsail mitre is important (& is not by a perpendicular line to the luff), so the seams meet each other at the mitre - see the "EQ" (equal) setouts from the clew. Hope it's clear. Also: it's assumed the main is a loose foot, I'm guessing the foot round would be less (or zero) with a laced foot.

- 411 replies
-
- 15
-
-
thanks everyone, & thanks for the advice Capt Mac. In the last photos the brass is quite shiny (& in that light they are probably too bright), so I did some photos in natural light rather than the workshop bright lights. The effect is closer to what I was after (to look like polished brass), but I'm still wondering about the way the 'fixings' get a glint of shine. The cause is just the side light catching the angle of the dent. I might experiment with putting something into them like a small brass nail, to look like a counter sunk head fixing.

- 411 replies
-
- 15
-
-
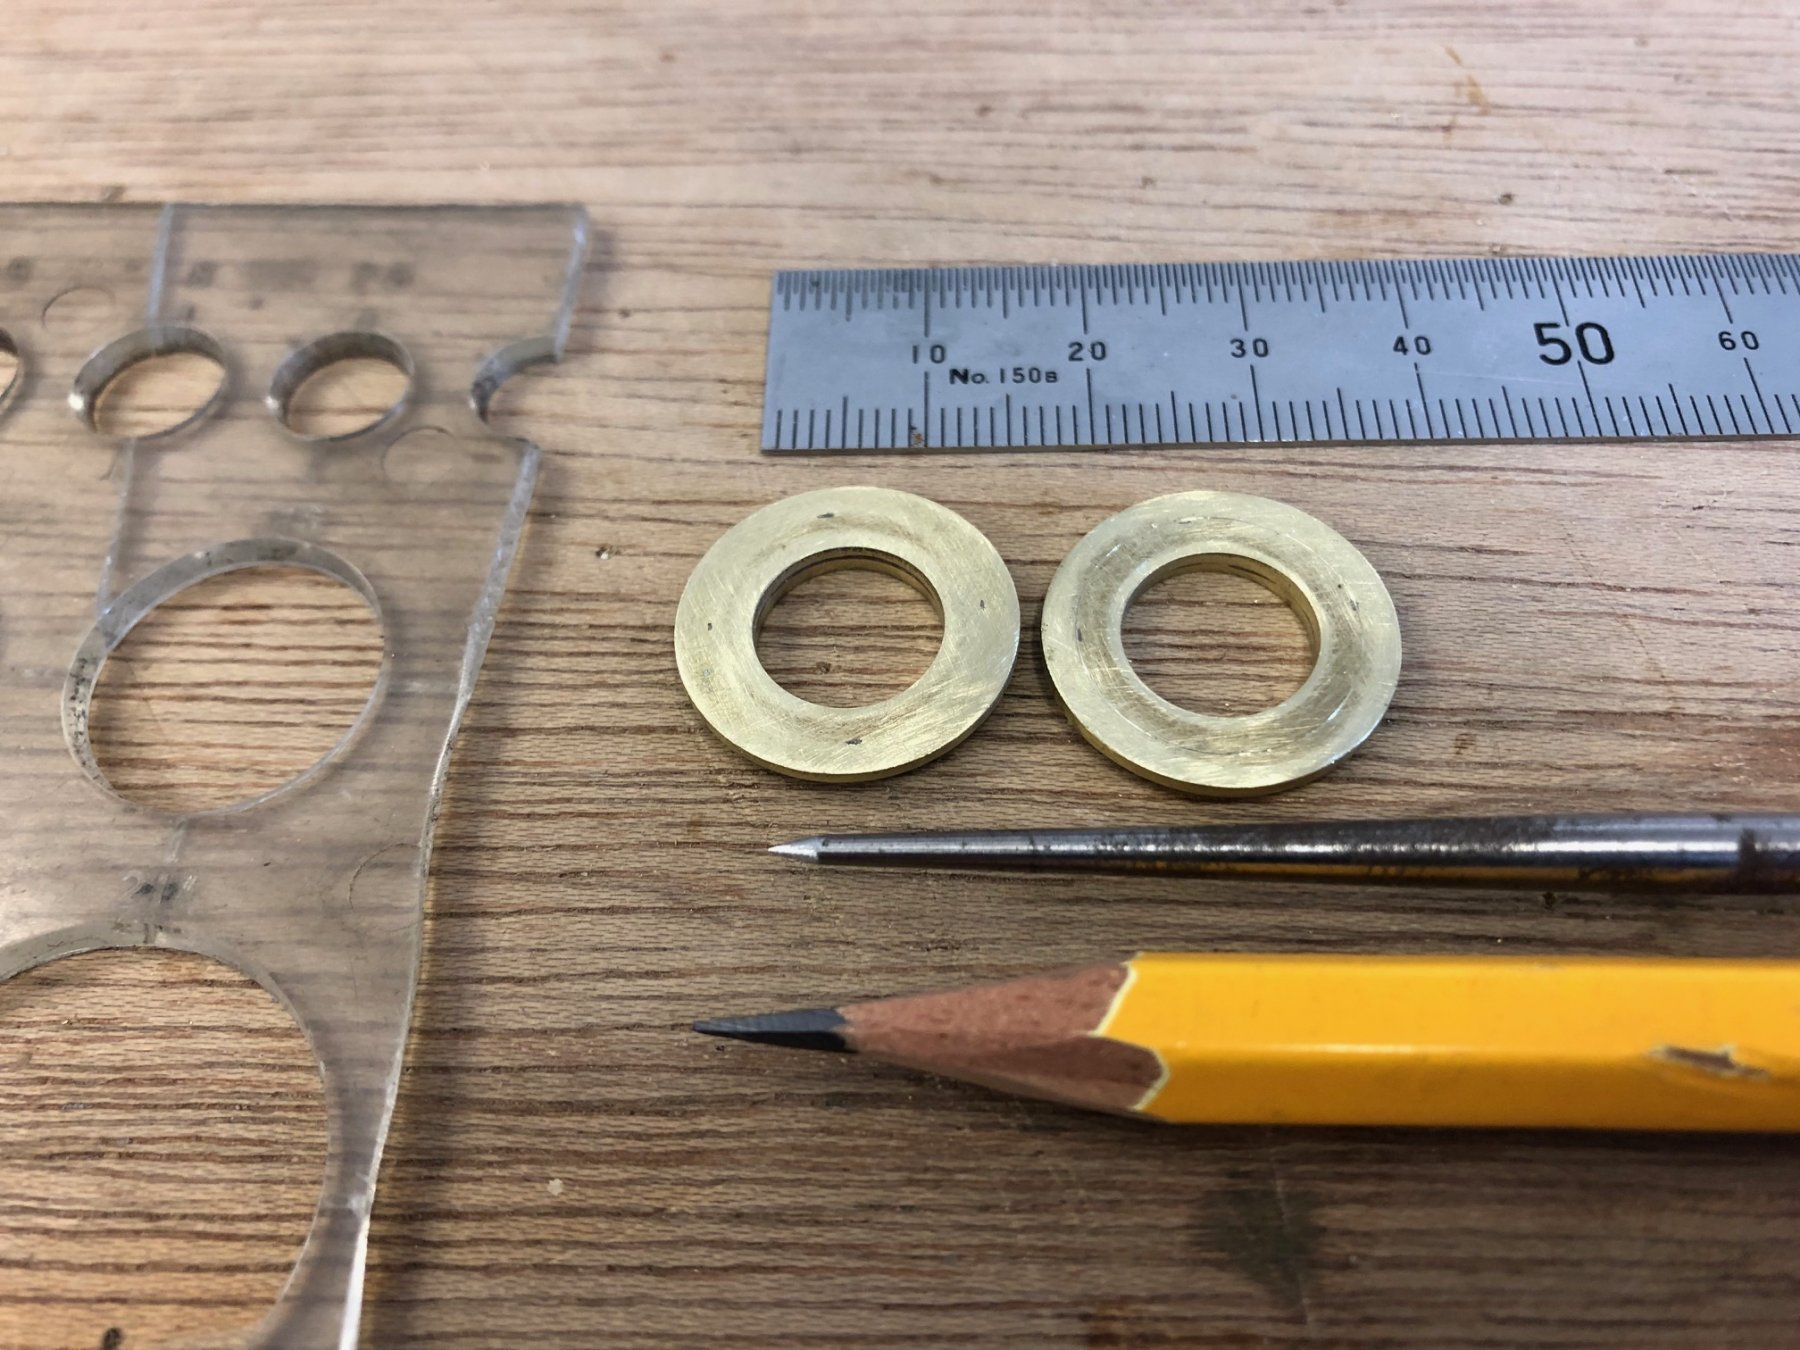
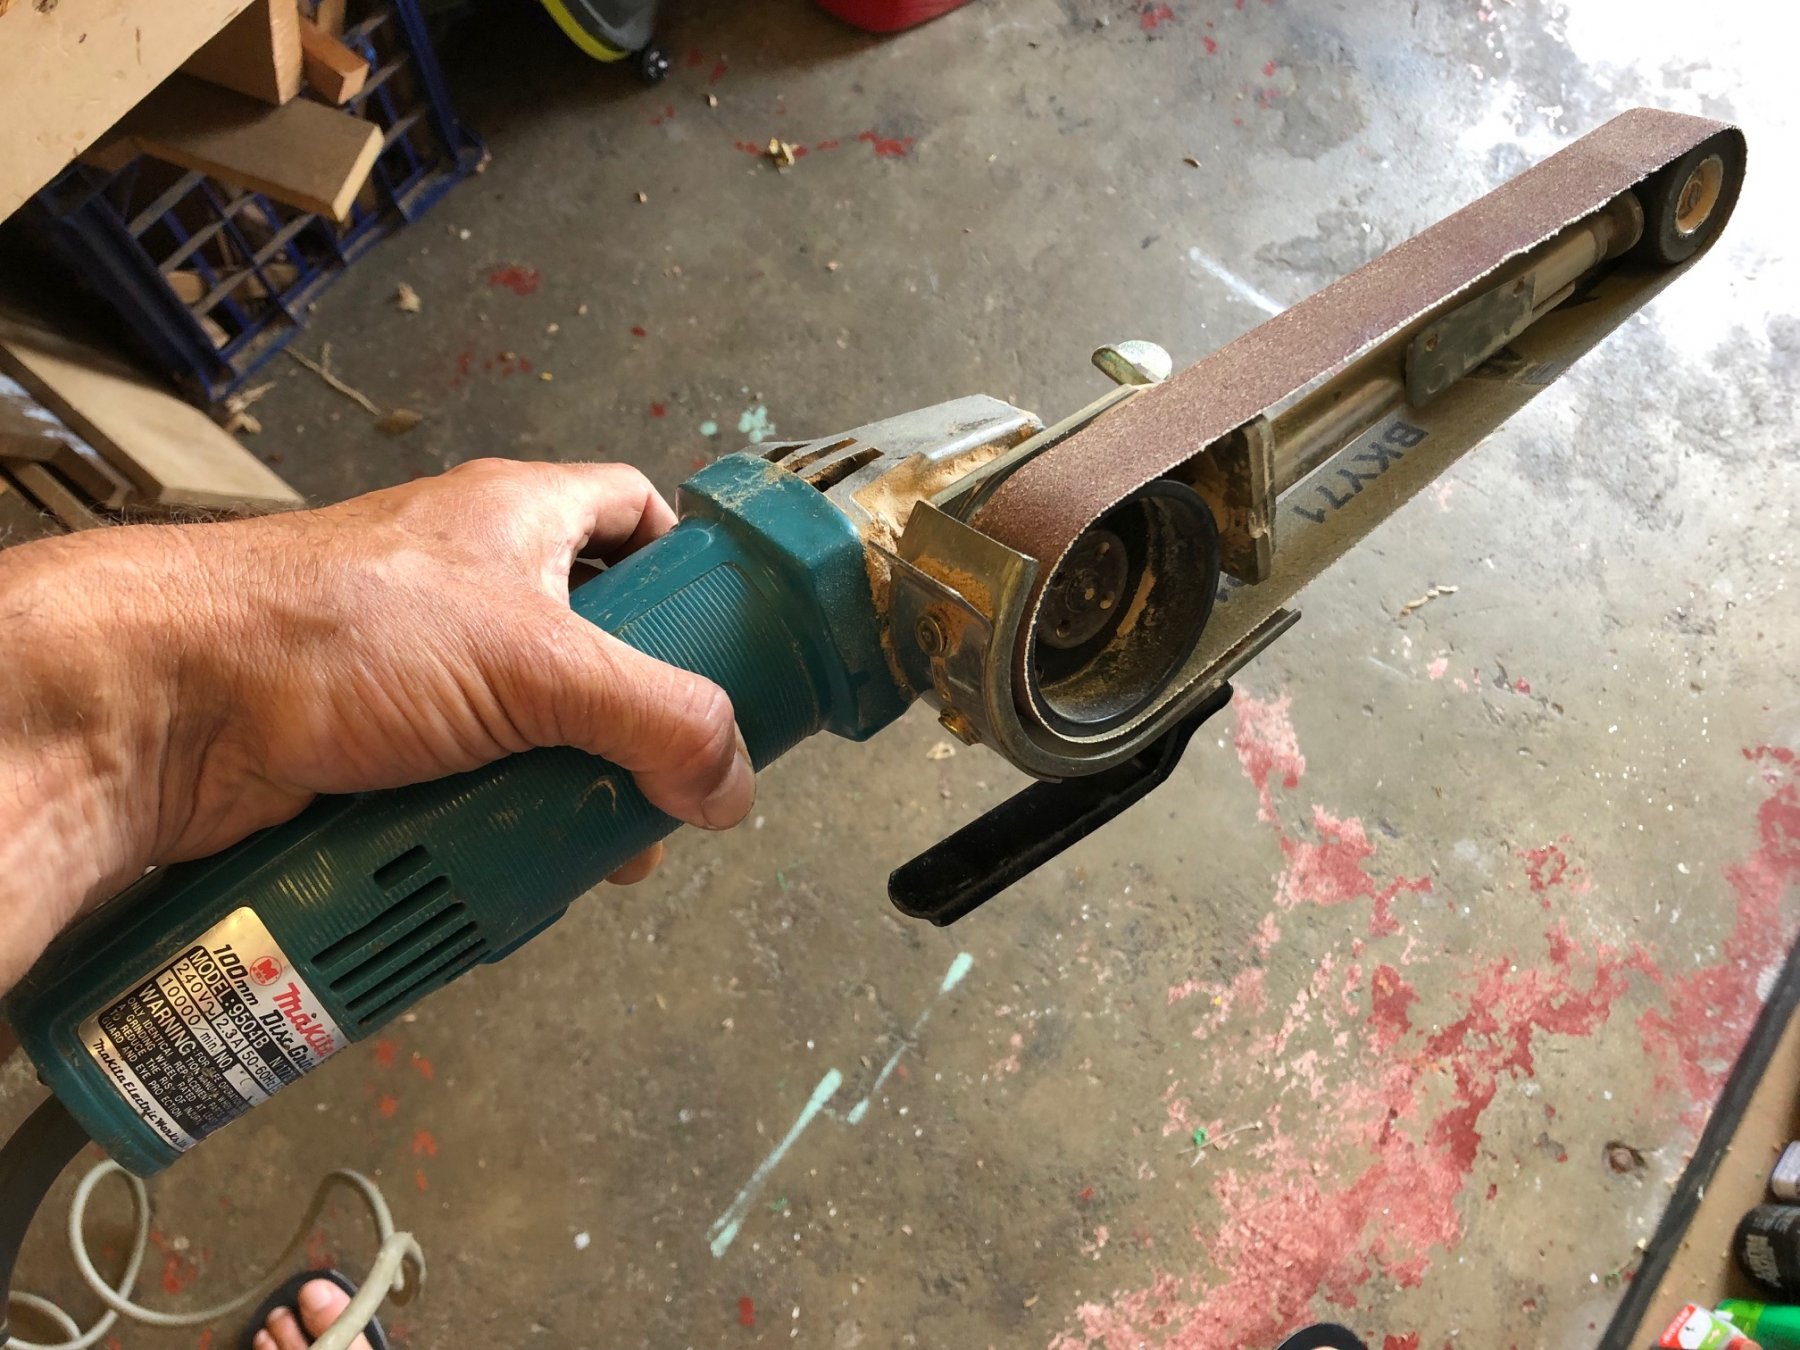
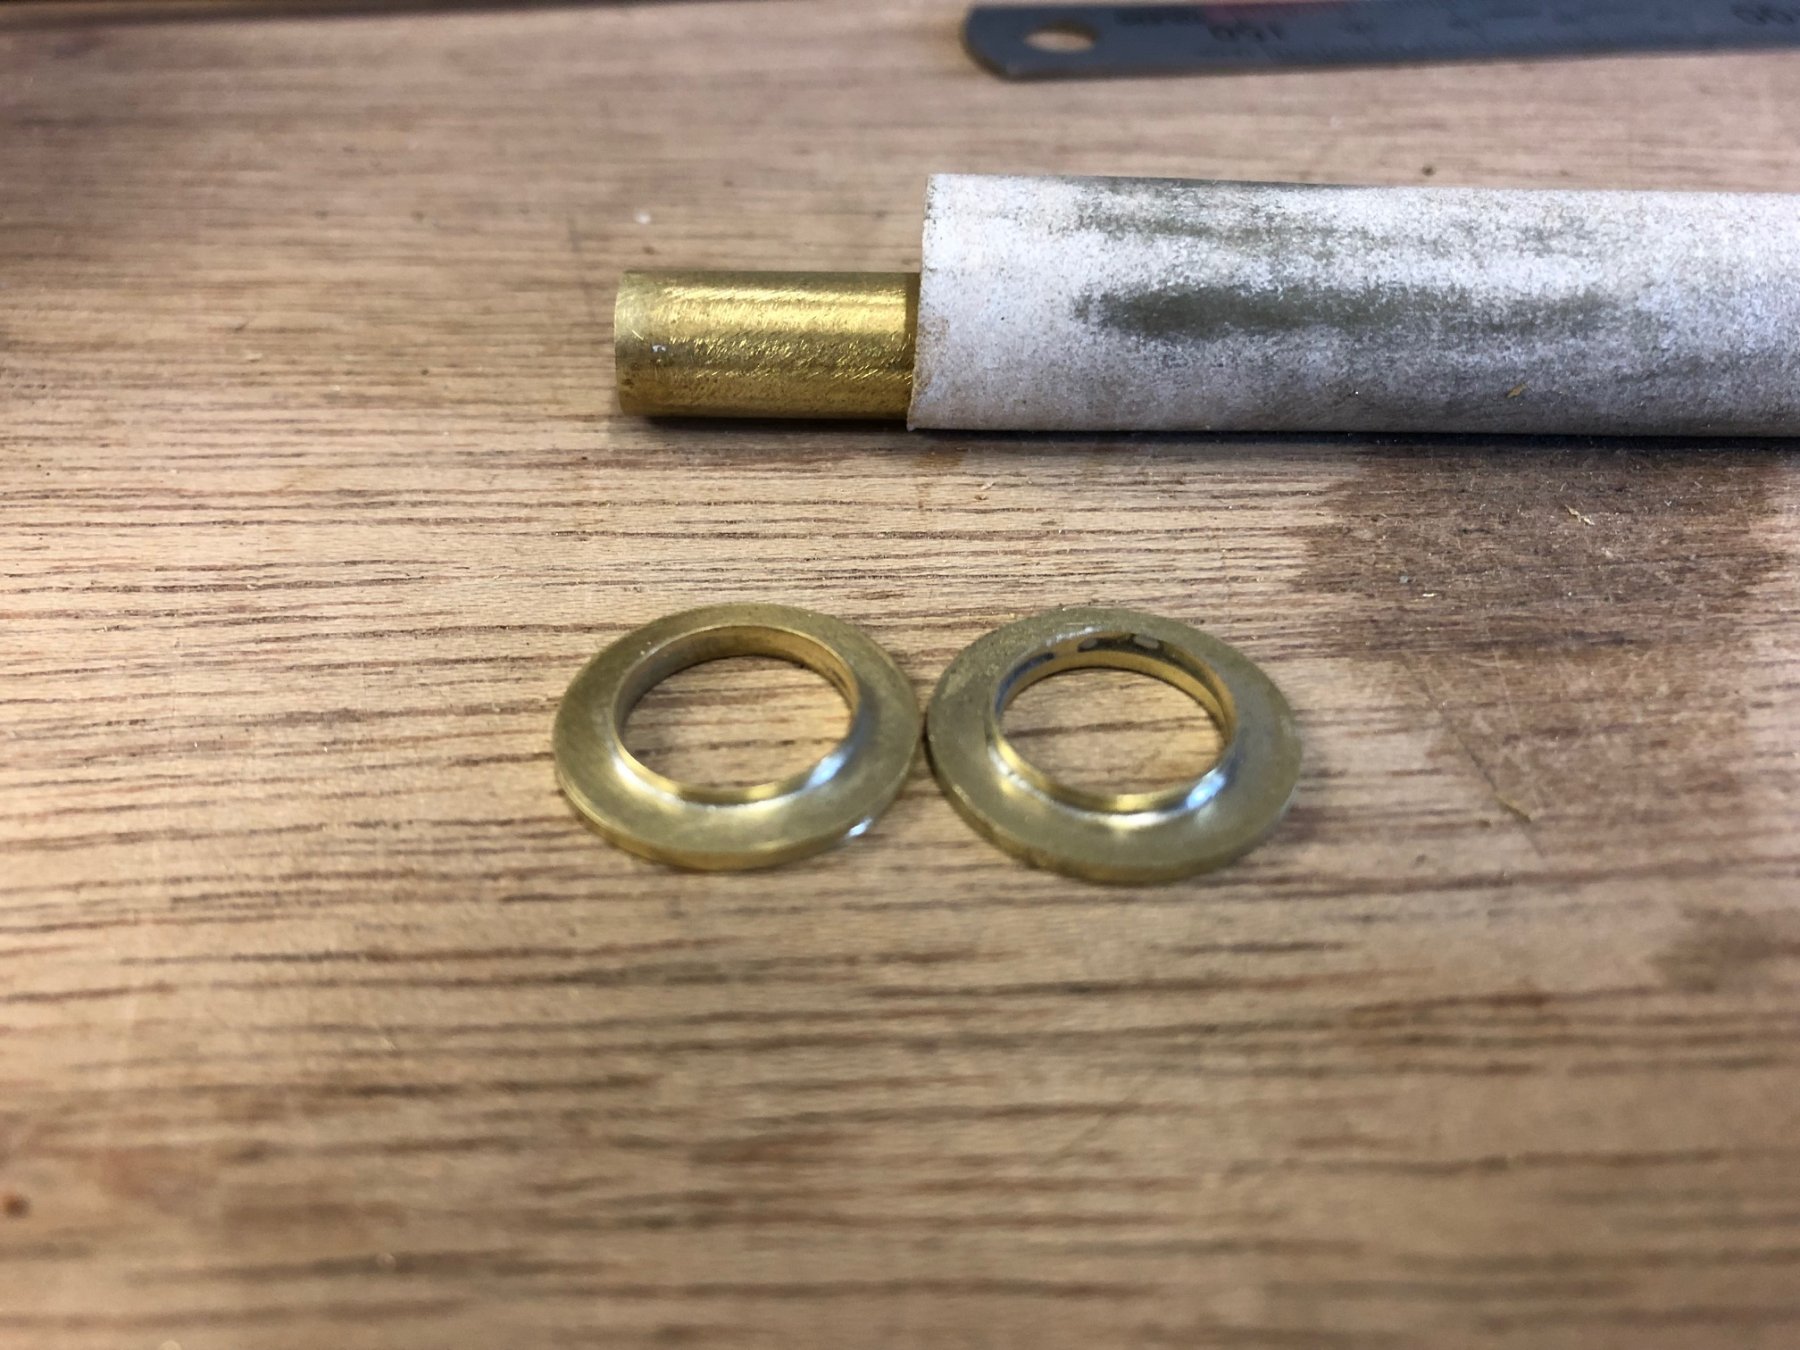
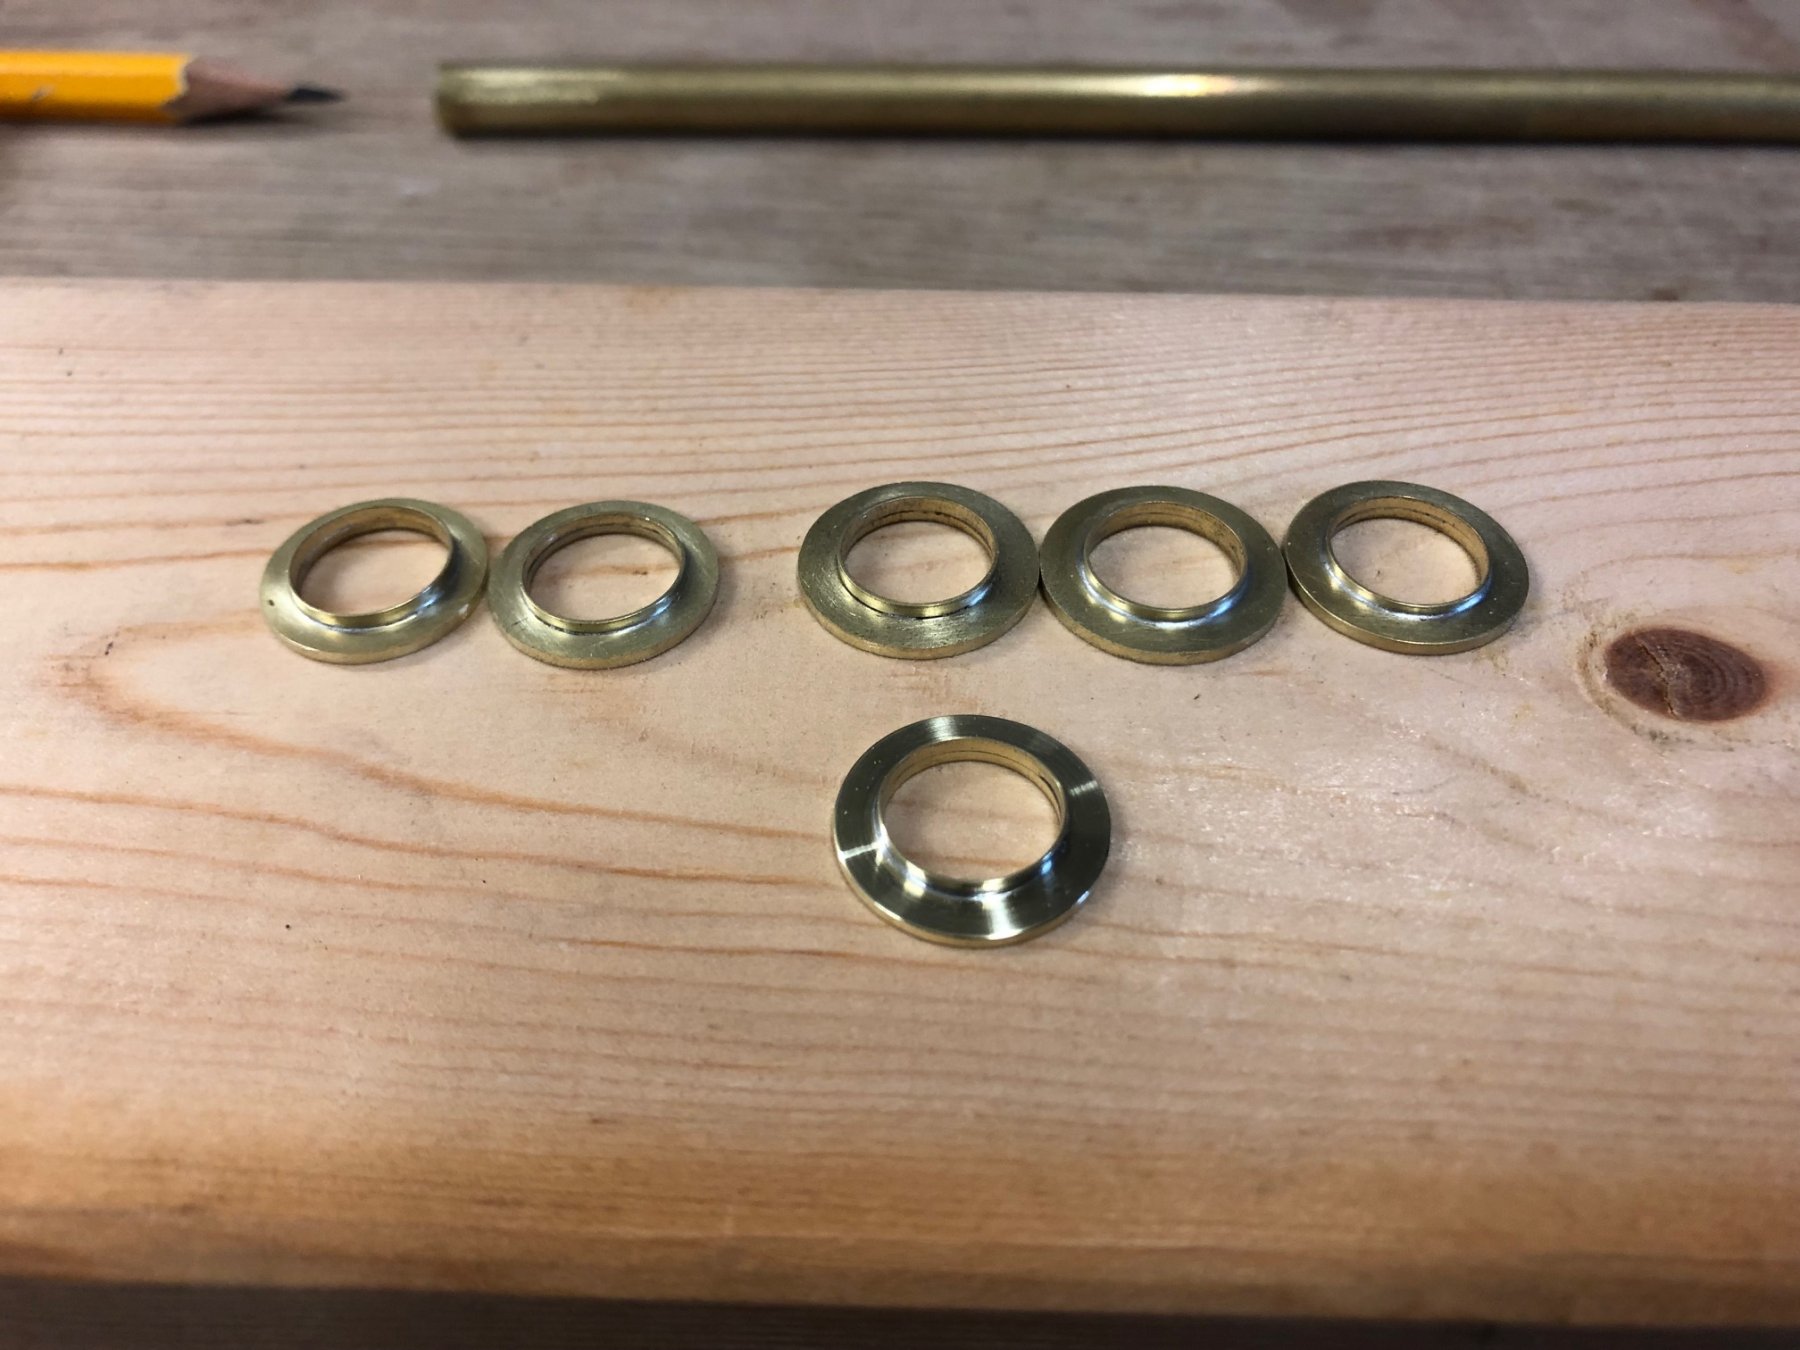
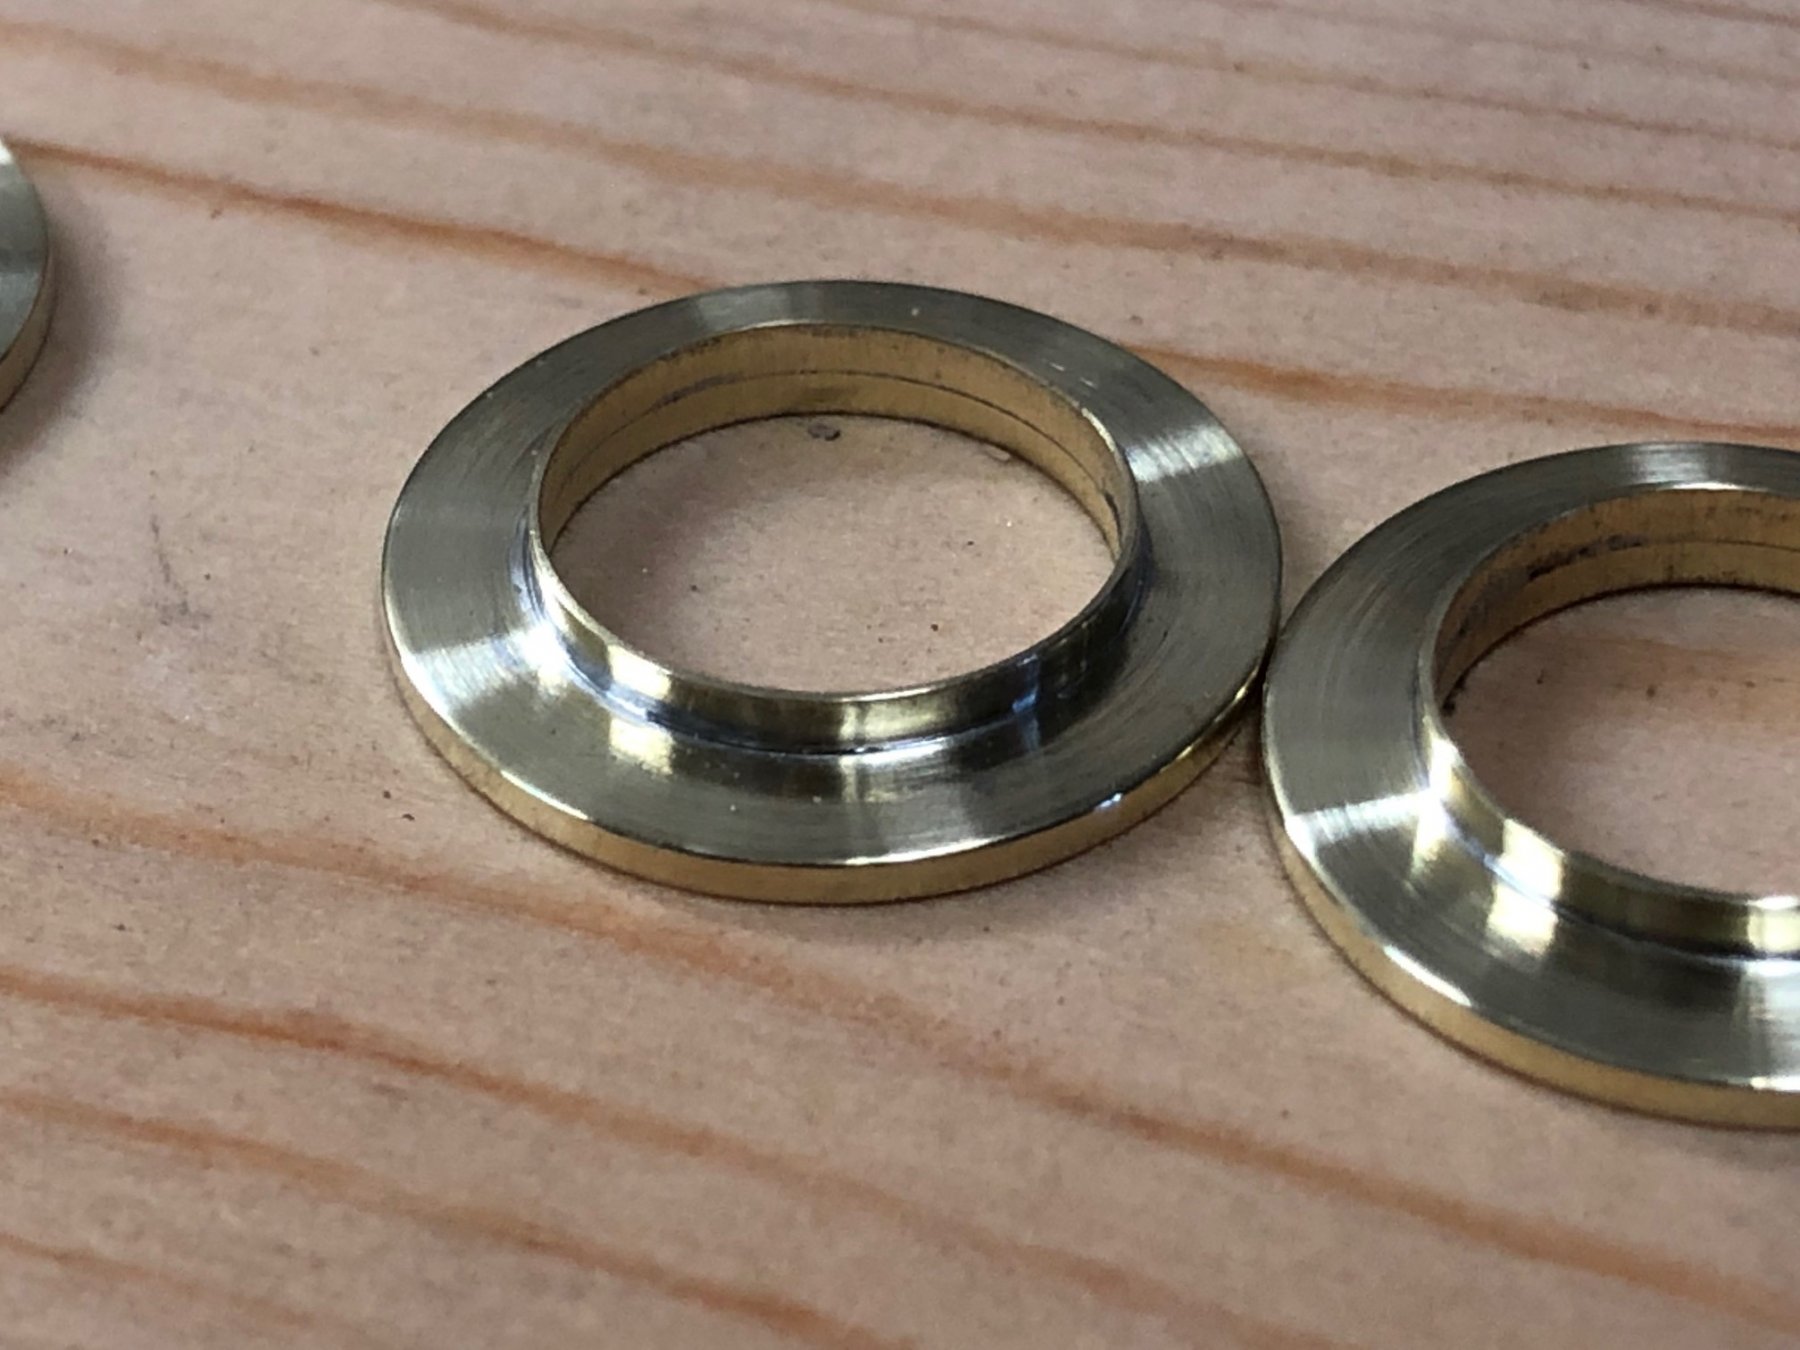
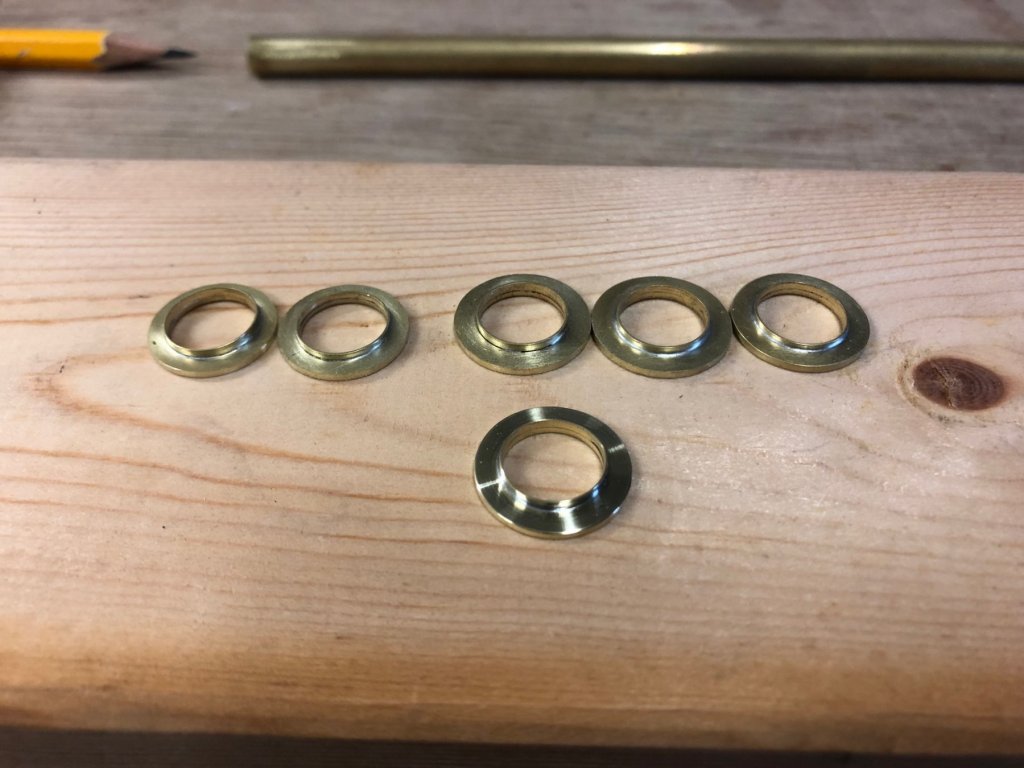
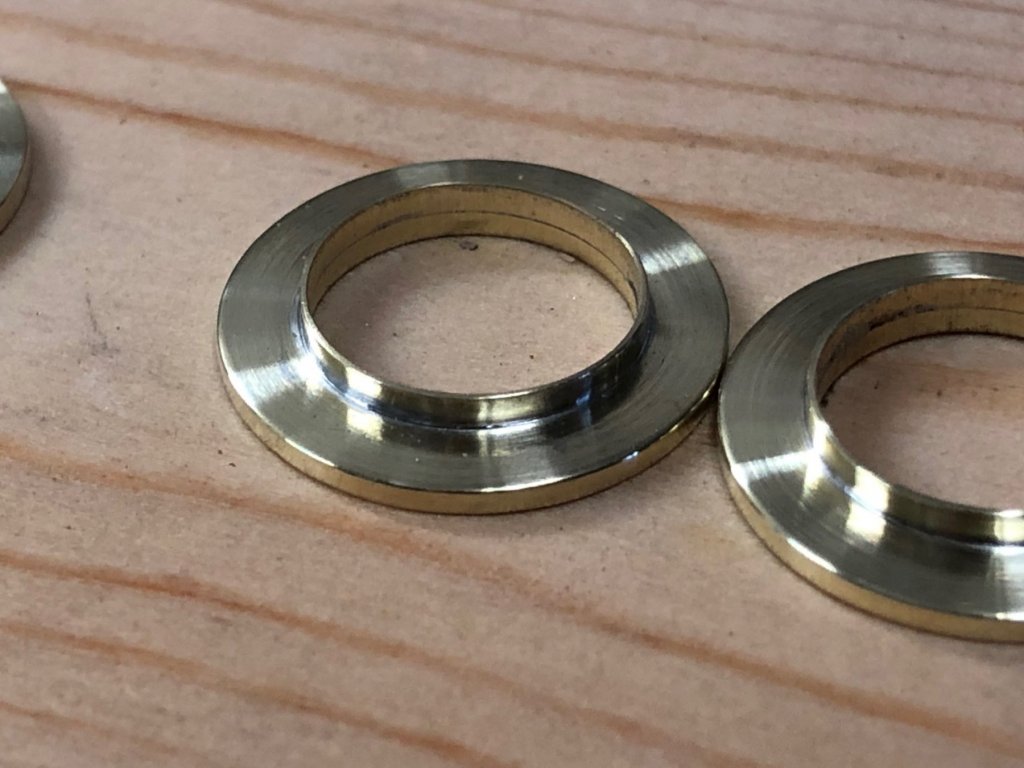
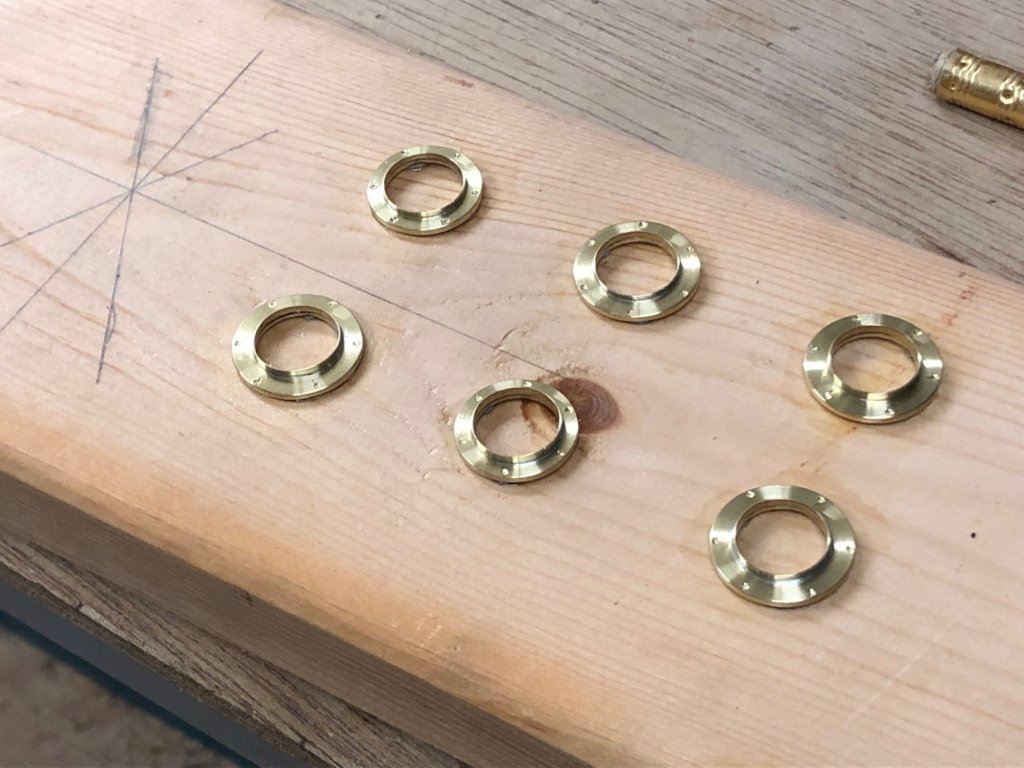
The portholes commenced in post #278 are almost done now, & in this case I'll show the technique. They are fabricated from brass washers & thin slices off a brass tube. The insides of the ports needed cleaning up, below shows finished & not finished: The overall diameter is too large, below are the forward portholes which are smaller. I marked the final size with pencil & scribed the circle of the final size. Next the tender mercies of the handheld bandsaw.....& try to sand to the line. Then to the high-tech linisher: Below there's 5 reduced in size, & one has also been linished. Close up They looked like they needed something more, so I drilled shallow marks to replicate fixings. They have also been coated with one coat of Humbrol satin clear coat. The designer - Cliff Gale - apparently always had his portholes to a high polish, so out of respect for that I'll replicate that with the clear coat on the brass. That's why I was being fussy about the visible finish. The drilled marks look a bit crude, & I'm hoping that the effect will be better when they are mounted. I'm not sure about the glass, but I recall in another post CD case plastic was suggested. thanks


- 411 replies
-
- 16
-
-
15' Dinghy by Bedford - FINISHED - 1:1 scale
Mark Pearse replied to Bedford's topic in Non-ship/categorised builds
that's looking very nice -
Thanks & best wishes everyone. Hi John I have mixed feelings about blue water racing, & I’m not sure about how much I’d enjoy a Hobart; but maybe one day. Vaddoc, thank you. I have made a bit more progress on the ports & they’re are going ok from low tech techniques. When back I’ll post some info on what seemed to work. Michael thanks also. The weather helm isn’t a lot if you judge by the angle of the tiller/rudder, but everyone agrees they have a heavy helm.
-
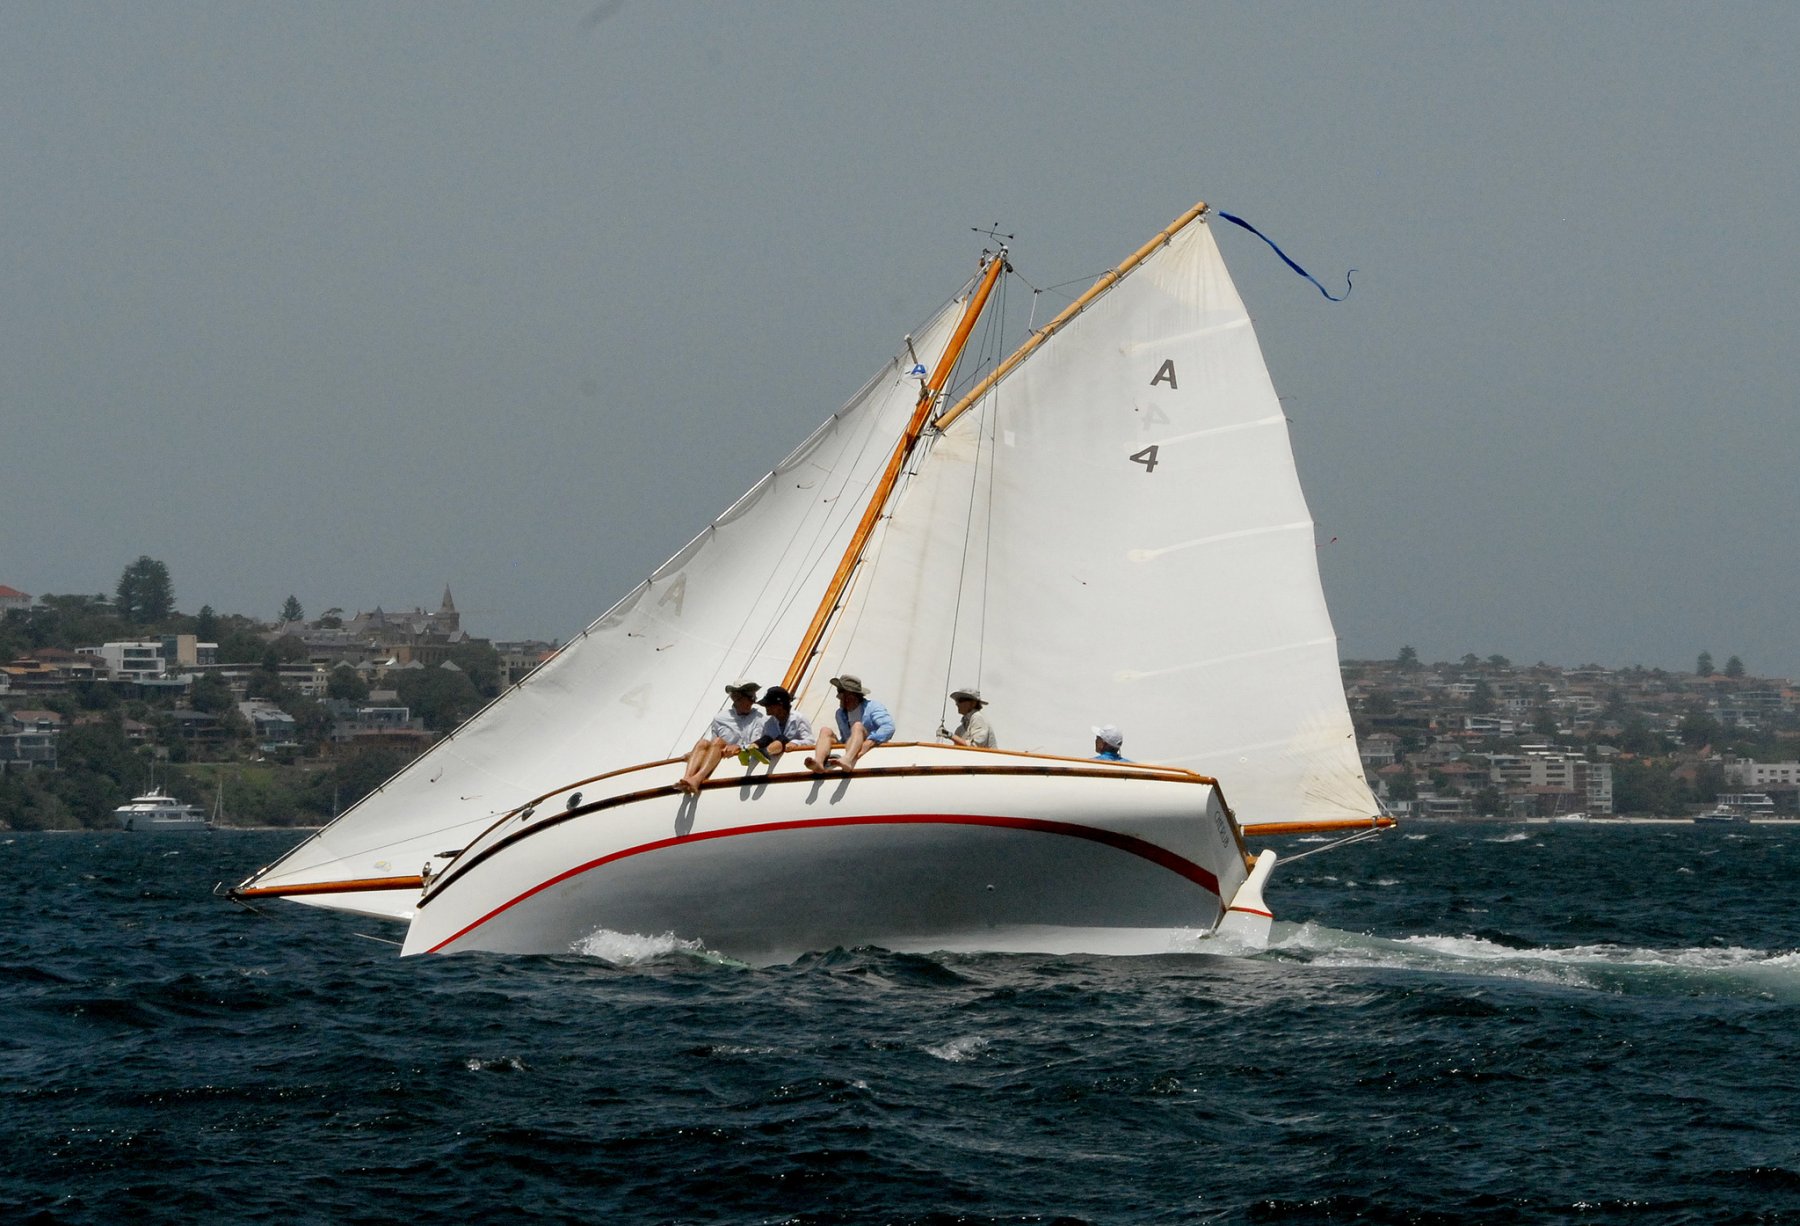
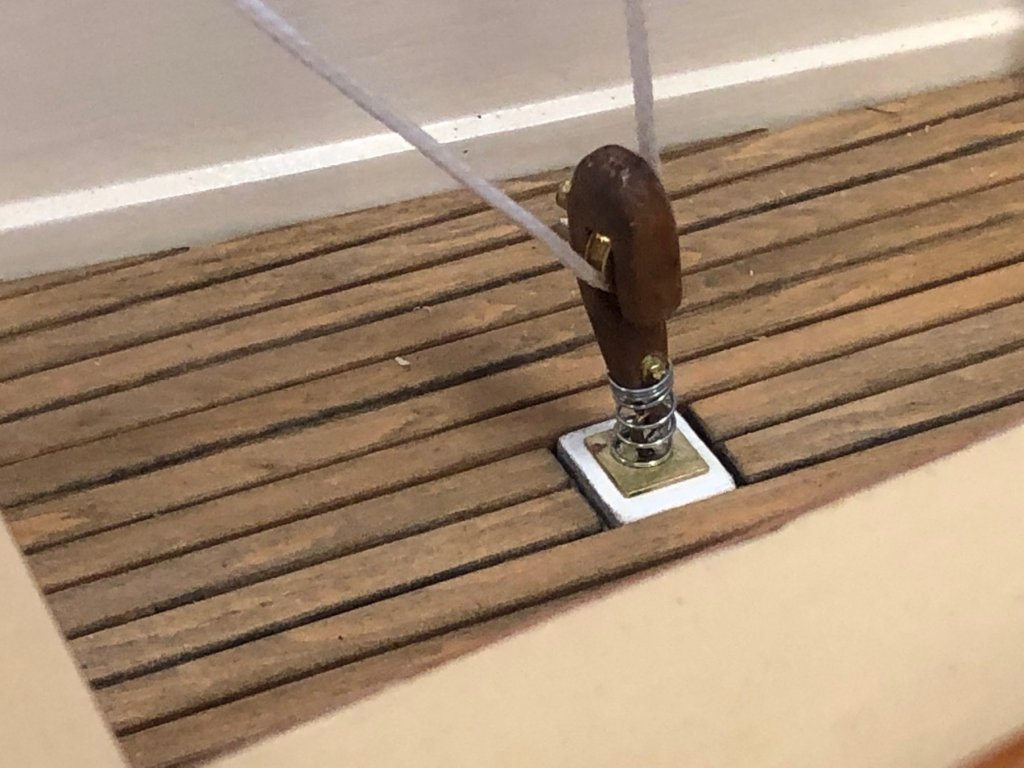
thank you for the feedback & visits Main sheet setup & cockpit block finished, or possibly. I might move the forward thumb cleats on the boom a little further forward, & might redo the lashing to make it a bit shorter. Some recent Sunday fun below, a lovely shot. The sky colour is interesting, they call it a black nor-easter. It happens when the usual sea breeze is reinforced by an approaching low pressure system & you get stronger breezes & this grey effect in a clear sky. All the best for Christmas, I'm off to Tasmania (by aeroplane...)


- 411 replies
-
- 18
-
-
HI John that's wonderful news. This is going to be a fascinating build, best wishes, Mark
-
thanks GL, that's what we call gum turpentine. Is the linseed oil you use plain or boiled?
-
that's very nice Is the turpentine gum turpentine or mineral .... & do you think it would make a difference? Mark
- 219 replies
-
- 1
-
-
- smack
- cross-section
- (and 2 more)
-
Hi Carl, the thin rings were soldered using standard solder, but I used the pre-mixed paste & wiped some of the paste onto the underside edge of the ring & lowered the ring onto the base part of the porthole; then lightly weighted the ring so that when the solder melted the ring wouldn't move. I used paste to reduce cleaning up. Perhaps there is a better way, but I'm not experienced at this fine soldering work.