MORE HANDBOOKS ARE ON THEIR WAY! We will let you know when they get here.
×


Mark Pearse
-
Posts
804 -
Joined
-
Last visited
Content Type
Profiles
Forums
Gallery
Events
Everything posted by Mark Pearse
-
 Hi Michael, regarding the stability stiffness, do you know if the hull is ballasted?
 -
Hi Samson thank you for posting it, the model looks lovely & captures the beautiful aesthetic balance of the design. I have never seen a Junior Folkboat but have admired them since I became aware of the design. There's quite a few International FBs in Sydney, but I doubt there are any 'Juniors', we race against the Internationals quite often. Mark
- 39 replies
-
- 2
-

-
- kdy 15 juniorbad
- yacht
- (and 2 more)
-
Keith that is a long hull, & what you can see of the lines are interesting. The rig is going to be dramatic indeed.
-
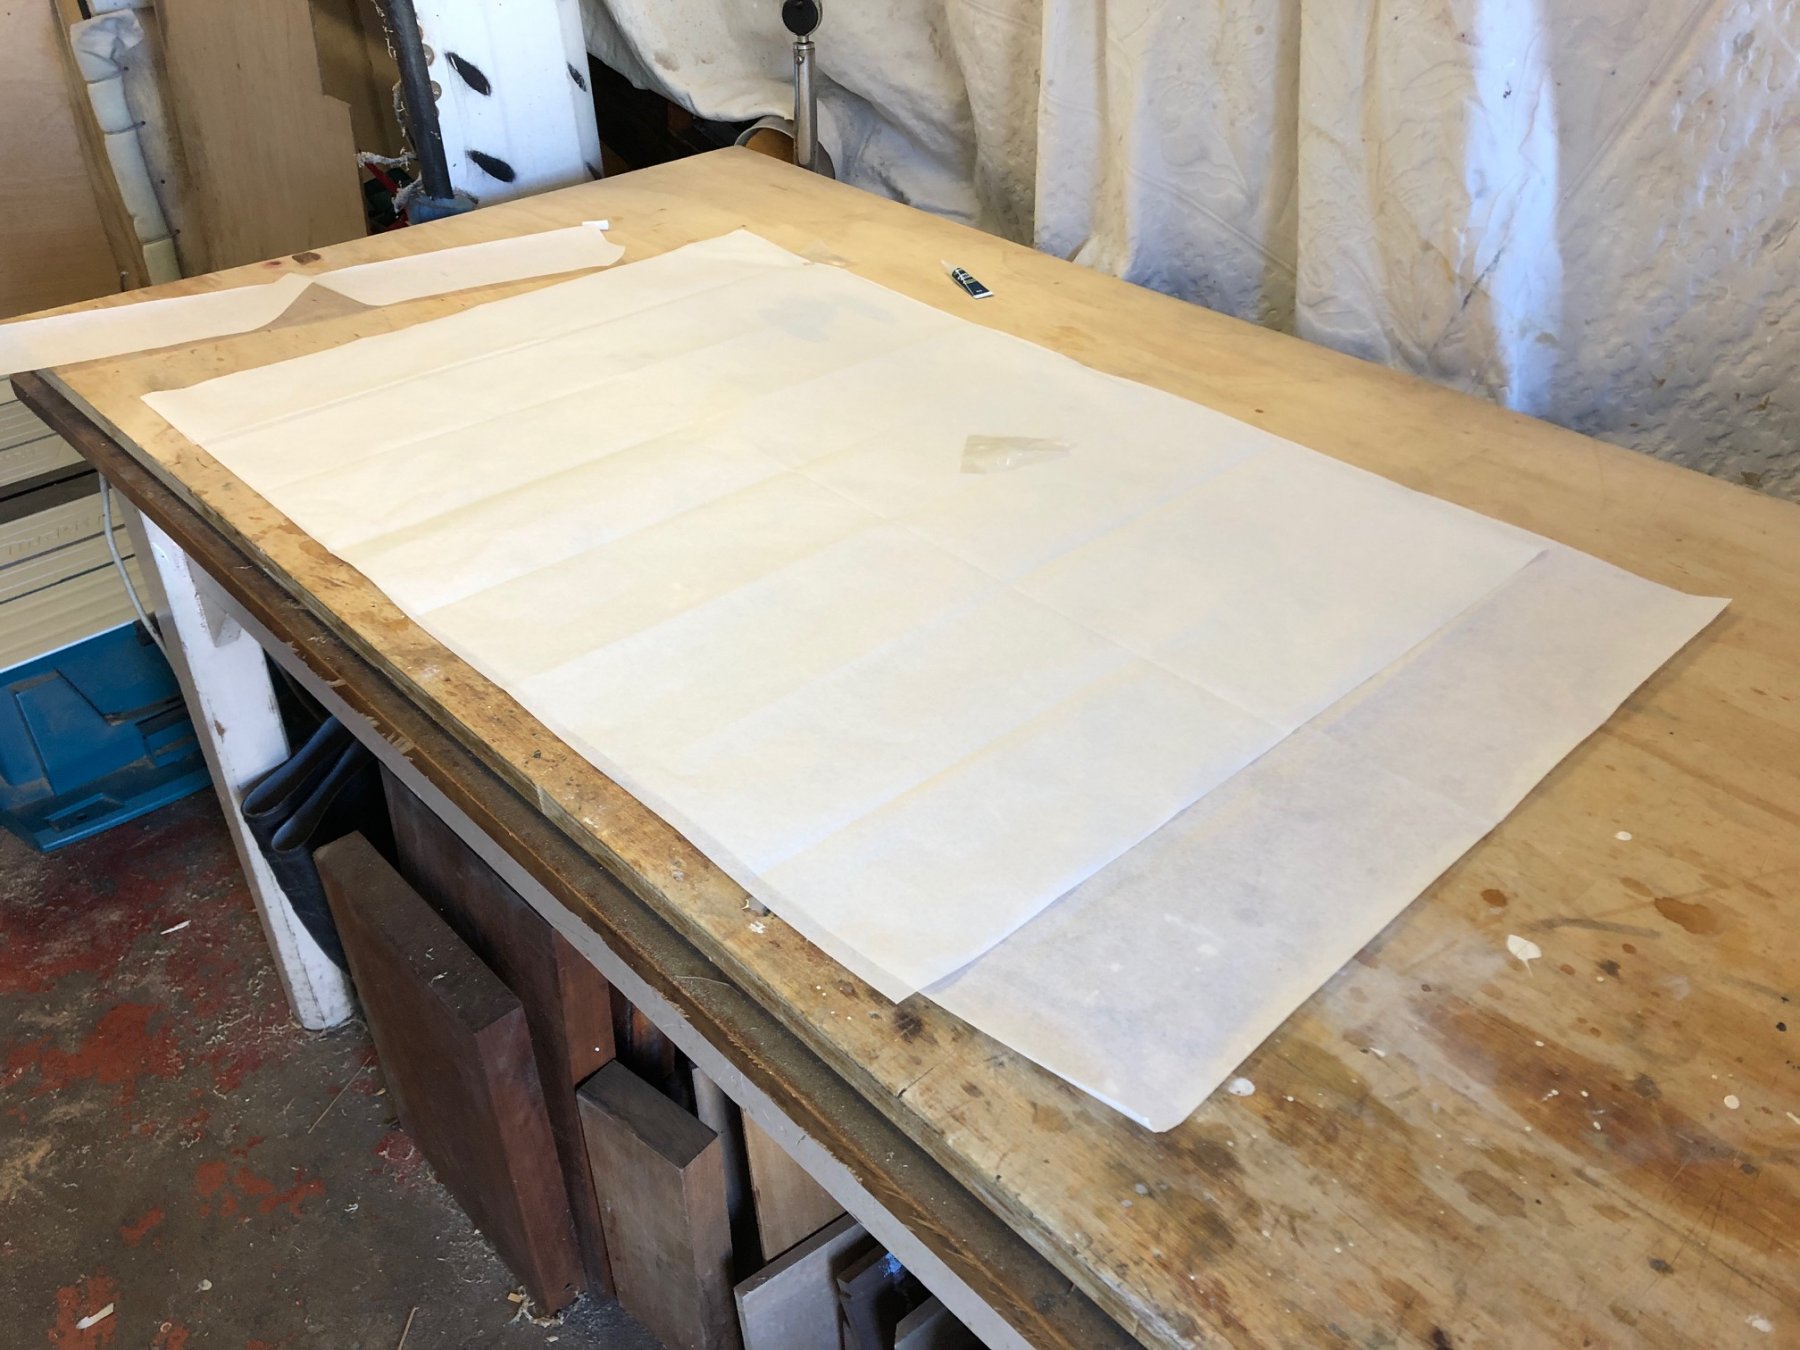
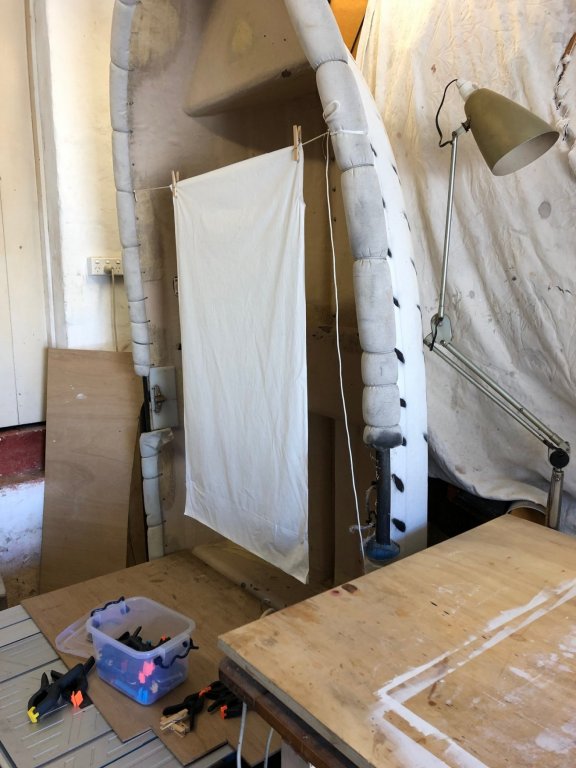
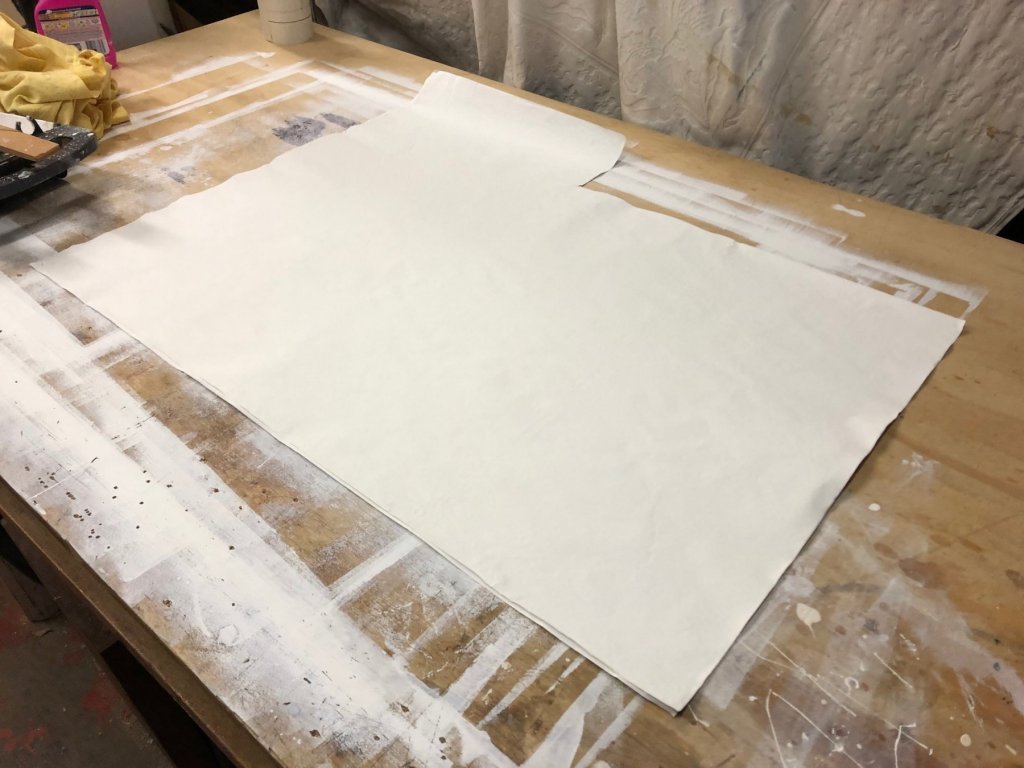
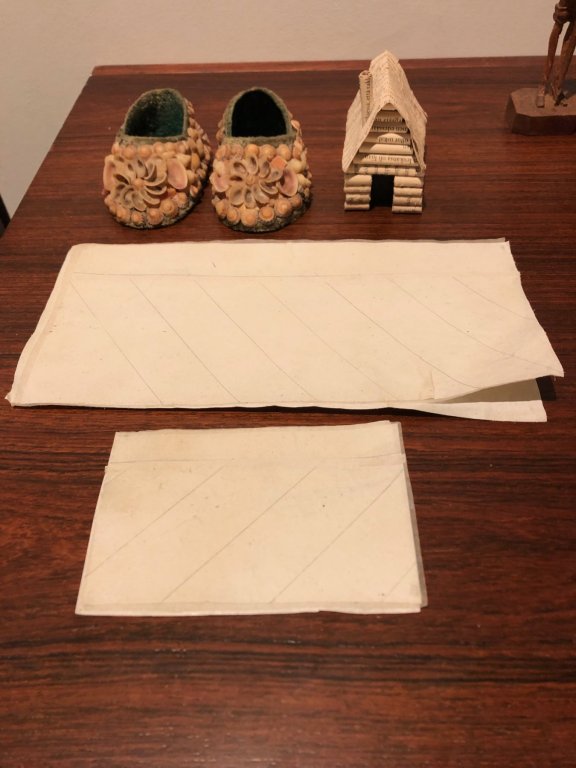
Hi Druxey - yes, staggering the joints is what I was thinking of, just thinking with some degree of trepidation. handling wet silkspan makes me feel like a 3 year old trying to handle household plastic wrap - you just know disaster is lurking. The Silkspan obviously has some ability to do compound curves, but not as much as I thought. The work area - I prep sanded lumps etc off the ply. The overlaps were done on opposite ends & a spot of CA glue to help sheet alignment. Once two sheets of Silkspan are painted & against each other it's quite difficult to move one without making a mess of it. I mixed acrylic paint plus about 10-15% plain PVA, painted this on one side of the first sheet in strips & quickly laid the second sheet on it before it had started to dry (it's been warm here). Then painted the top of the second sheet, & after about 5 mins I could turn it over & do the same on the other side. Then hung it up to dry. The colour is whiter than the previous sample, a creamy white with just a tiny dot of black to stop it being yellow. Then the other one (jib). I'm happy with the effect: the colour, texture, weight & feel are all good. This is one of the joints, not bad. I even like the wrinkles - they look like the wrinkles in dacron. It's not what I was imagining 3 weeks ago, but I'm pleased. Next is string up the sail sea, adding reinforcing latches, cringles, sail numbers.

- 411 replies
-
- 11
-
-
thanks, that's better: it's interesting to see the rig changes in between the 1926 & 1933 designs - the headsail is very small initially
- 39 replies
-
- 2
-
-
- kdy 15 juniorbad
- yacht
- (and 2 more)
-
the curved roach of the mainsail balances the curves of the hull beautifully; such a good looking boat would you be able to post a link to the website that has the original drawings?
- 39 replies
-
- 2
-
-
- kdy 15 juniorbad
- yacht
- (and 2 more)
-
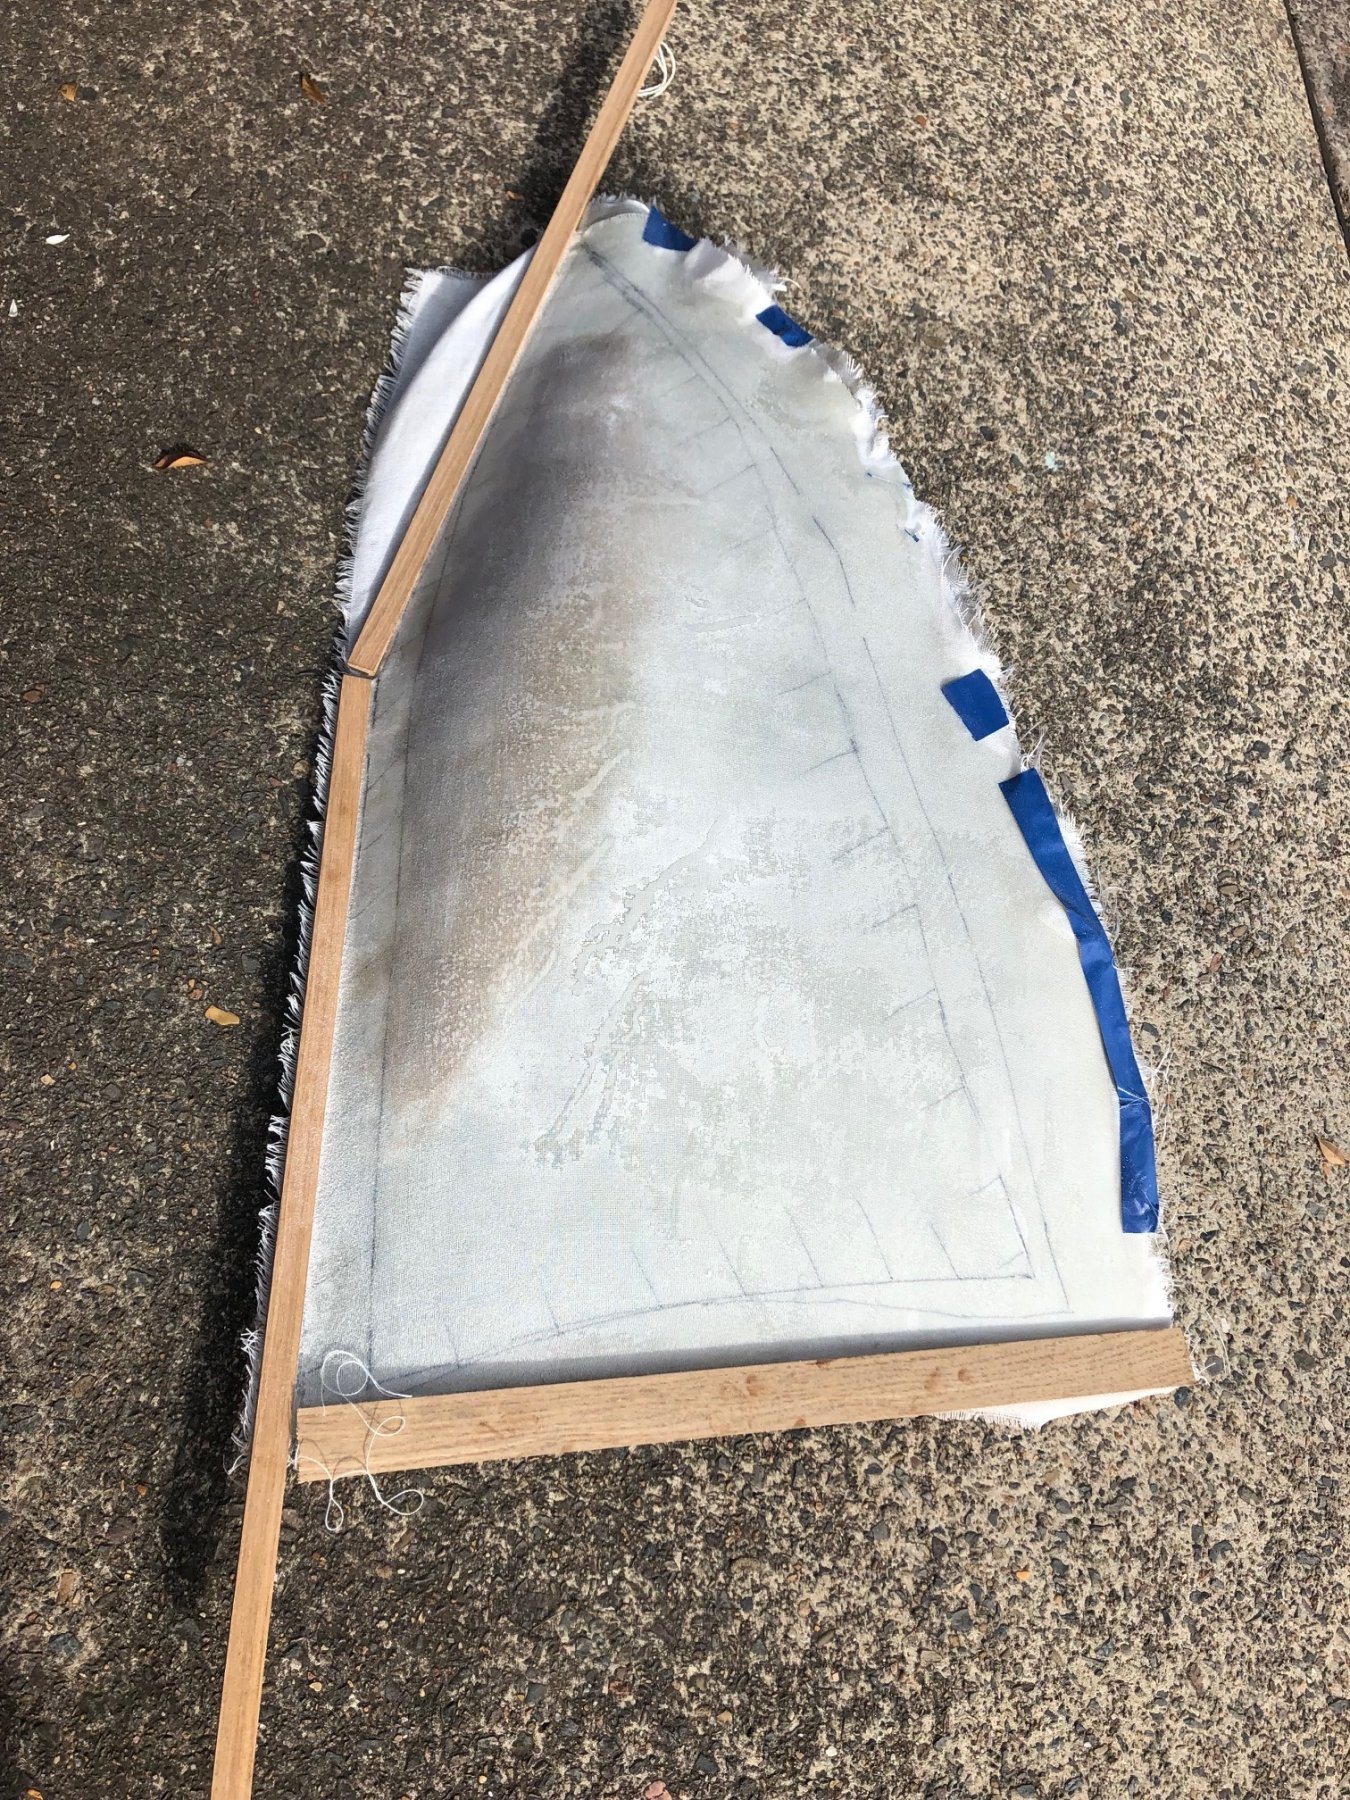
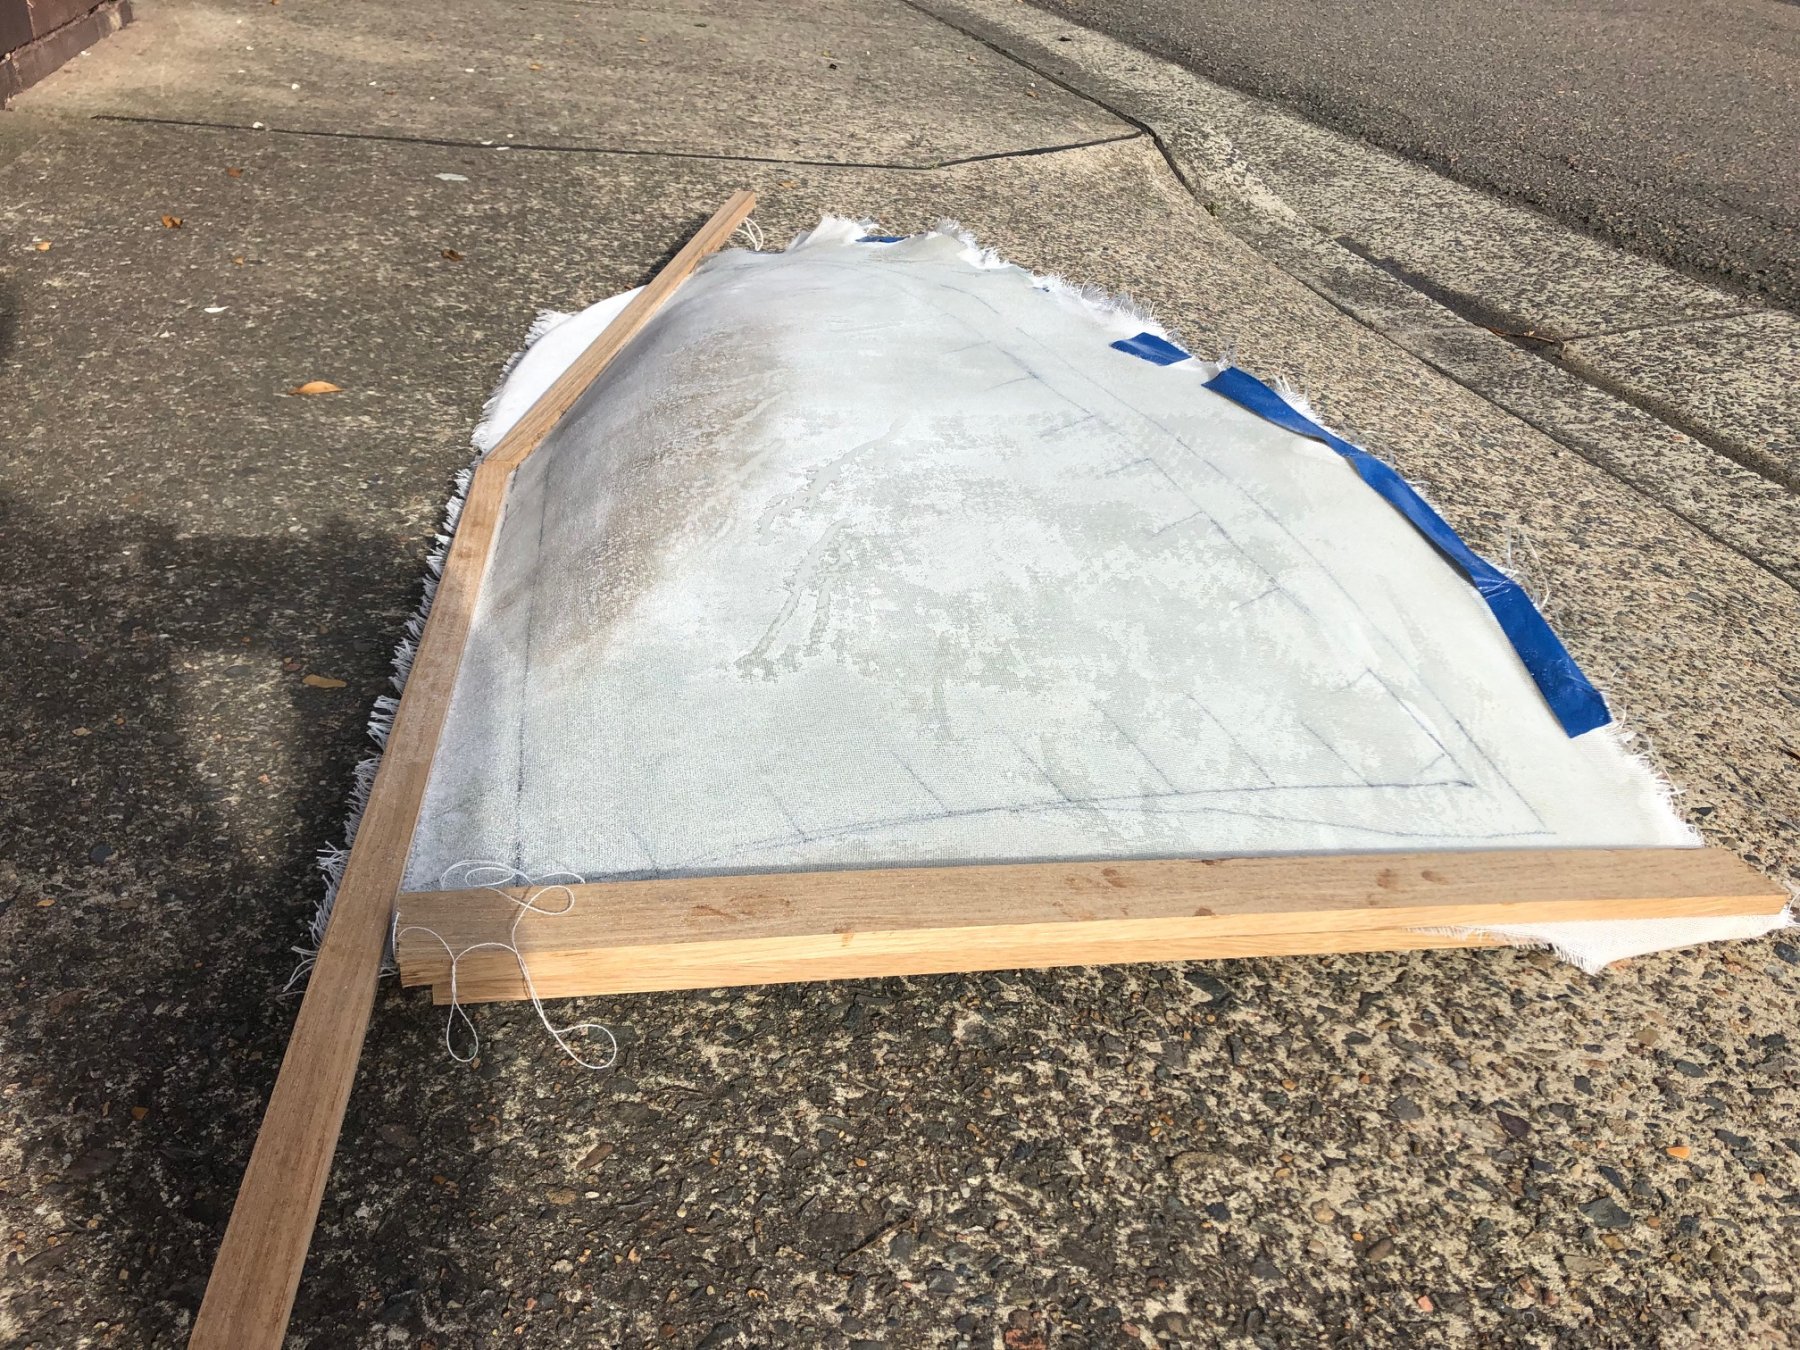
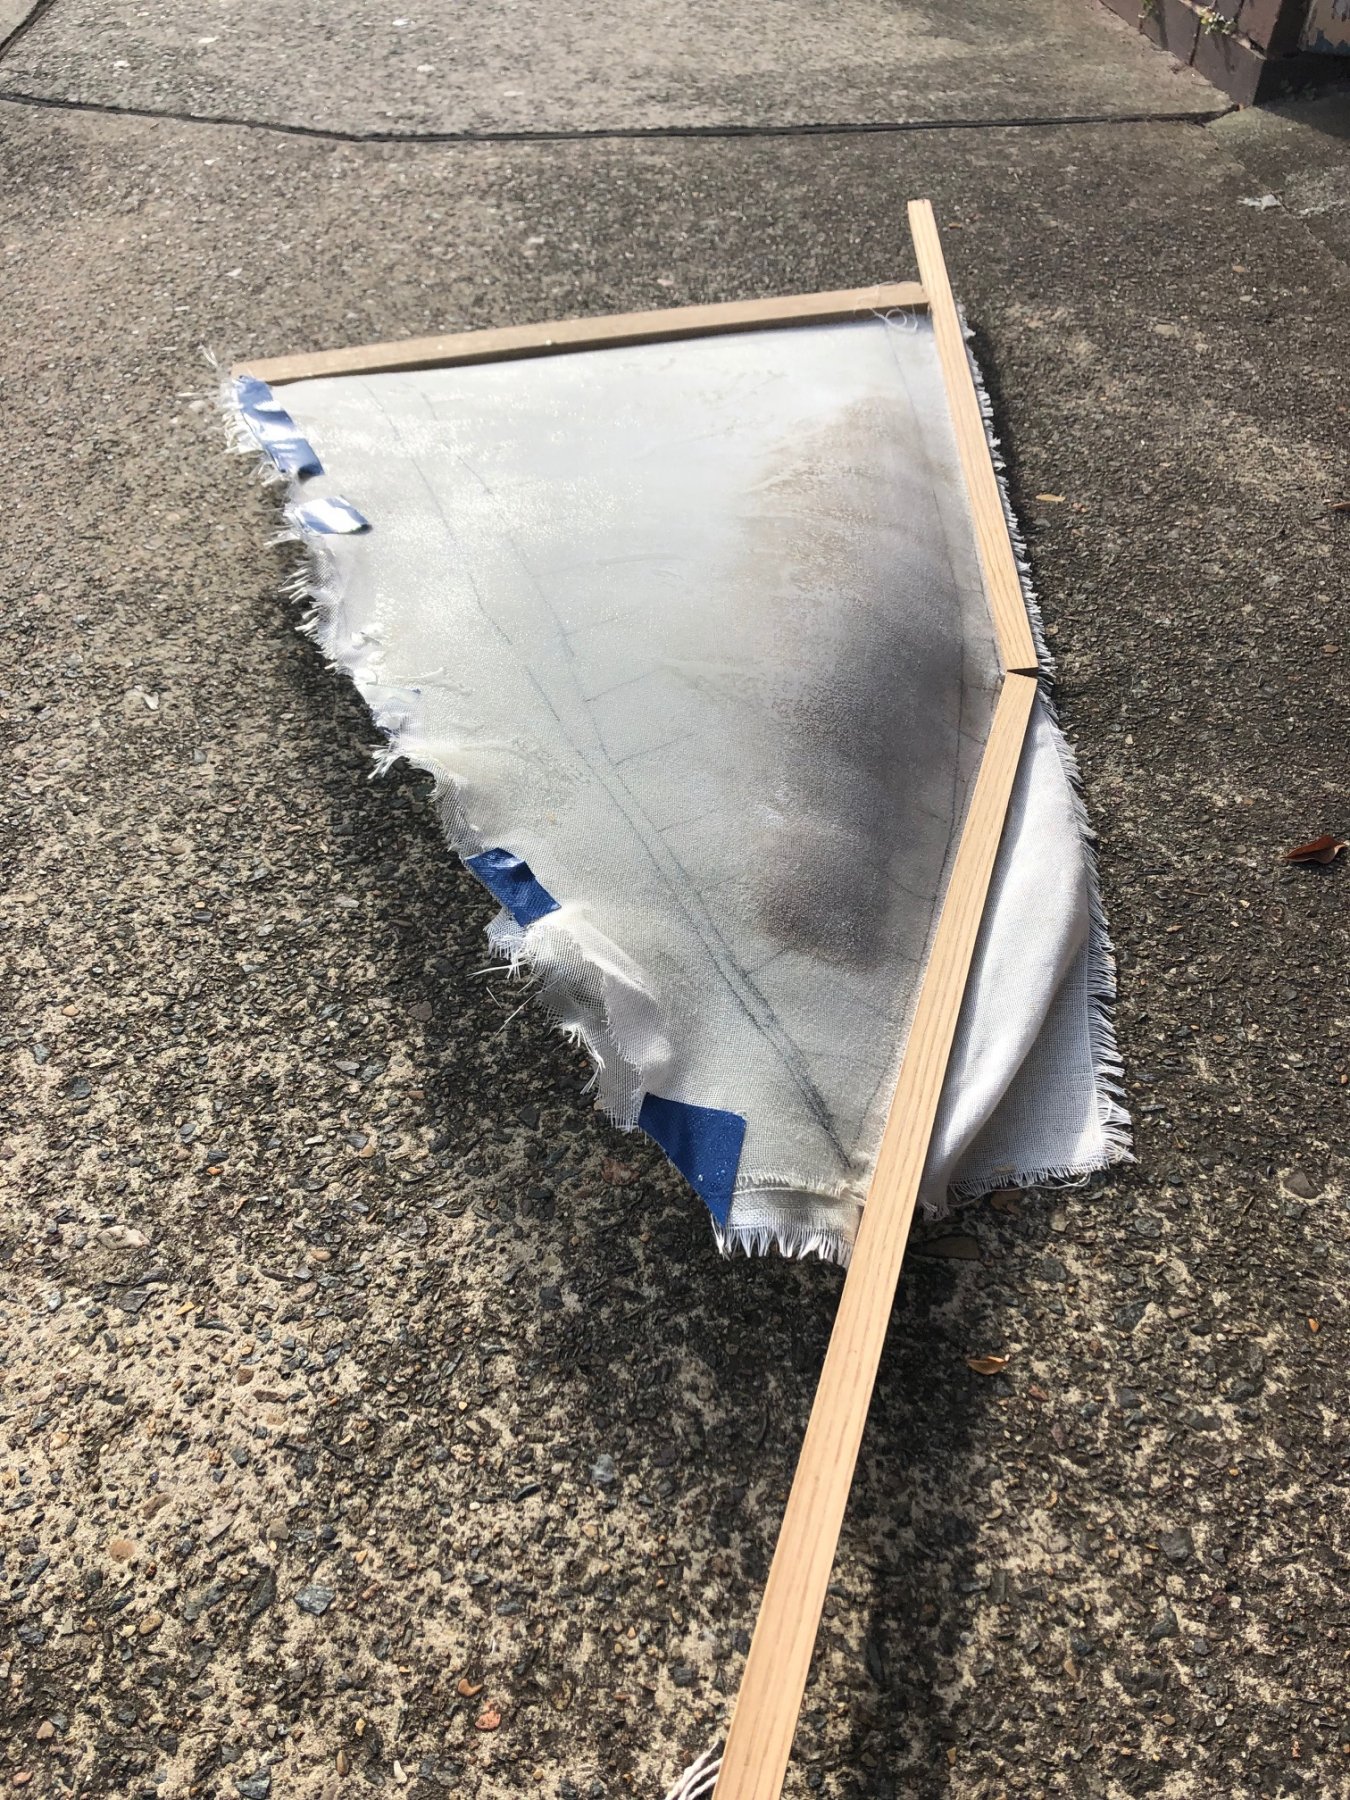
The curved form is great but I should have experimented with the Silkspan first. It really doesn't want to form a 2-way curved shape, or at least not one as curved as this is - but it does look & feel good. The process was: I painted some small sheets using flat acrylic paint in an off white colour, & after they had dried I laminated 3 layers using standard PVA diluted with about 20% water - with a small roller to apply the glue. It's quite difficult to laminate a second or third sheet when it's all on a curved surface, the wrinkles form because the curves are too great. The wrinkles aren't bad at all, a real dacron sail is quite wrinkled if it's had some work, but it remains flexible enough to not retain the curved shape. As an experiment I also gave both sides a couple of coats of a matt spray polyurethane based clear varnish, each time laying it back on the form to dry...no good. It yellowed a bit & didn't stiffen it up. One useful conclusion is that 3 layers of Silkspan is probably too thick, but 2 layers feels good, you can see a corner where I pulled the outer layer back. The videos I watched were for 1:48 models & this is 1:12, so really that's 16x the size. Good news is the 6H pencil lines are nice, & I think that if I tone some glue with grey paint I can do sail cringles by putting a blob on the sail & drilling or punching the centre out. So, I'll likely use a double thickness of Silkspan, laid flat. If it doesn't go well or if it's just too big to have up, then I can still furl the sails - the mainsail is a little taller than a 36" Silkspan sheet. The family might have something to say about it.....
-
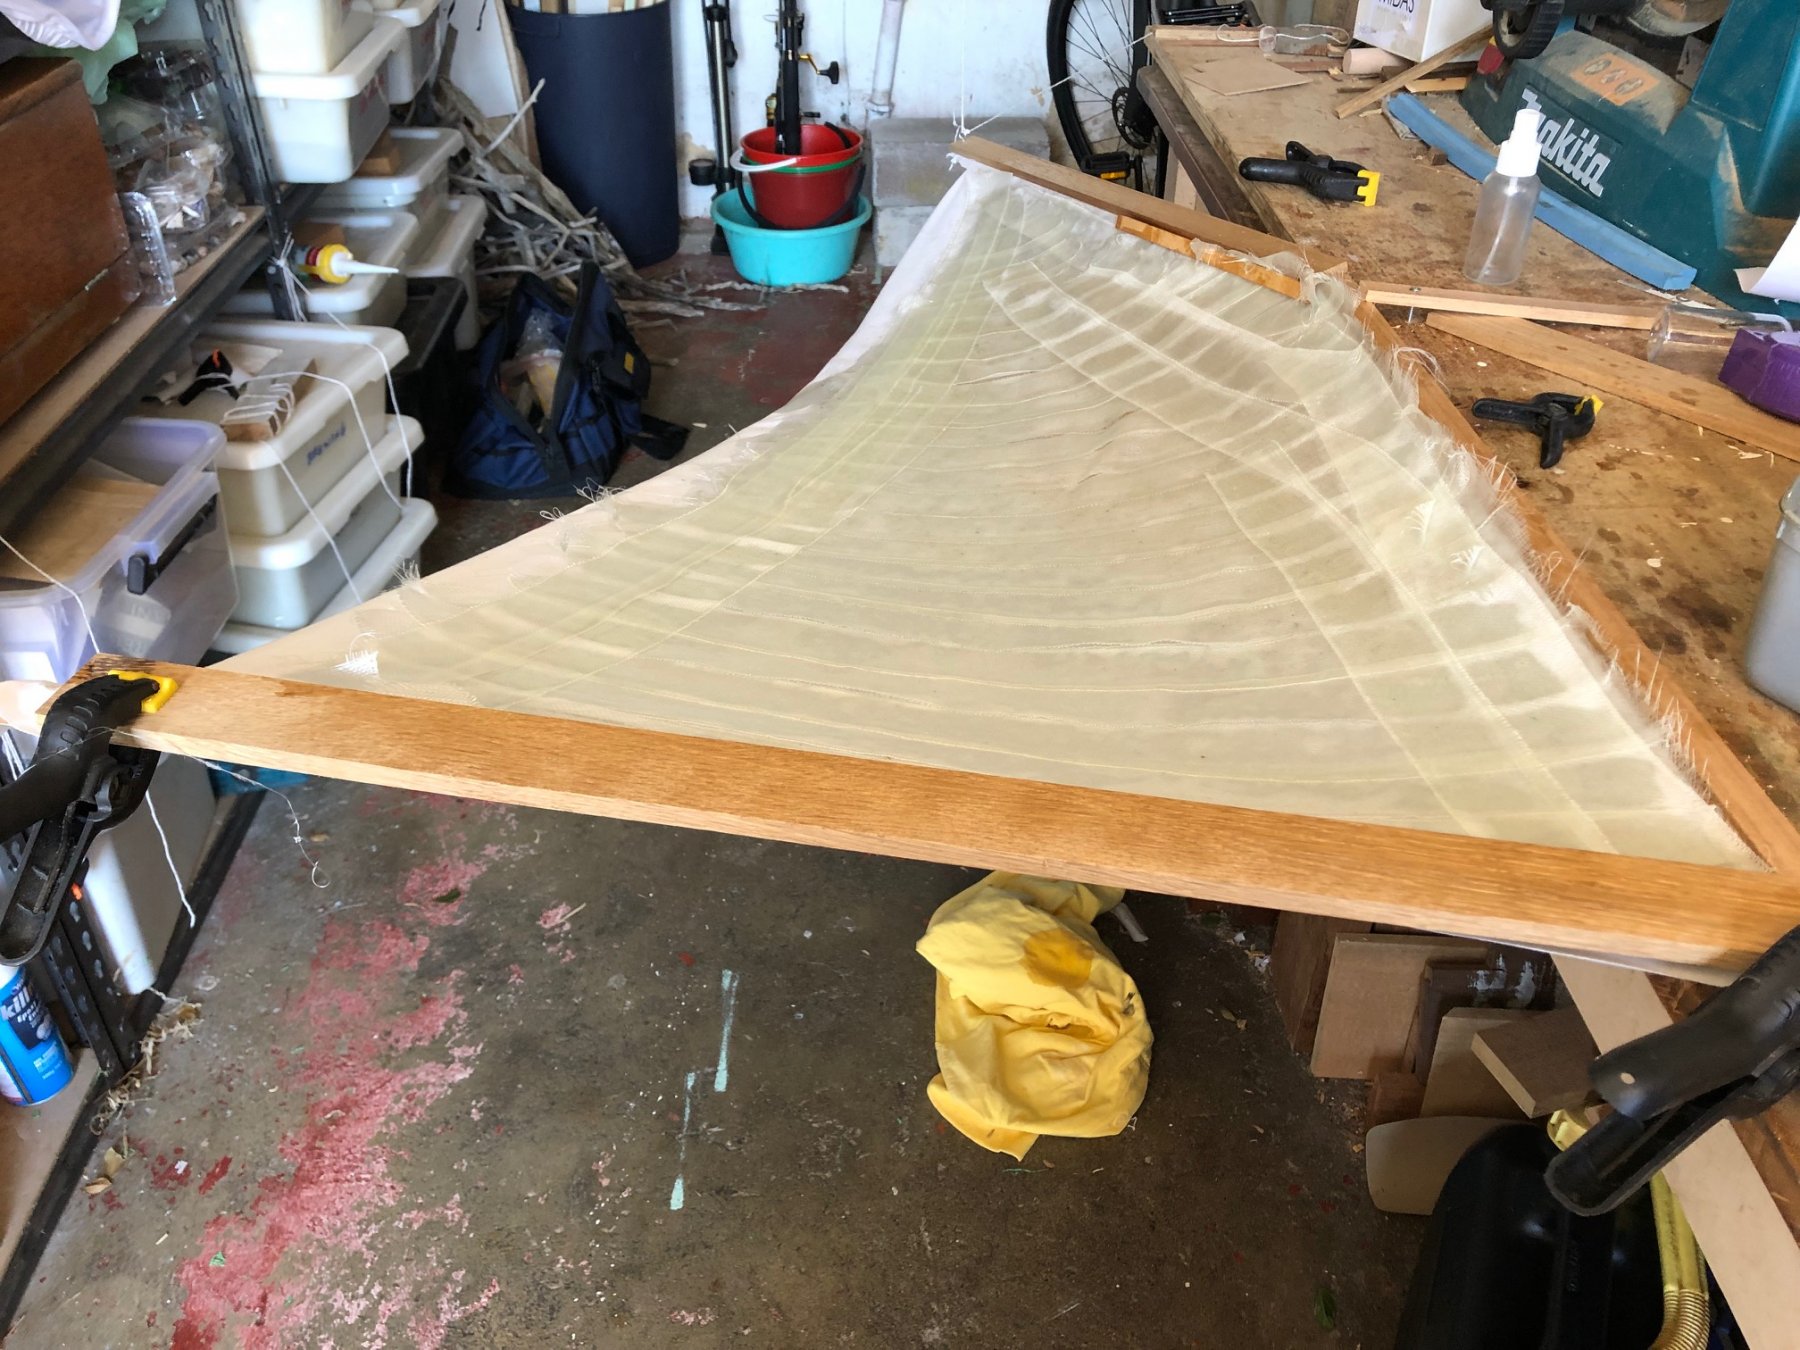
The dynel & fibreglass went well. At the time it appeared to be going very badly, the dynel needs a lot more edge support than the poly/cotton does. At the time it appeared that only the parts bounded by the timber sticks were going to work out, but I used pieces of string & lots of clothes pegs to pull the loose edge (the sail's leech in this case). The brown is beach sand, & it appears that the Dynel kept sagging a bit after I'd done it, the bagginess is just a little too much, so I'll adjust in the way the jib is shaped. Good news is that I reckon I can use this form for the jib as well. The photos don't fully show the shape, it's more even that it appears. I'm now doing a test of Silkspan as a sail - the Tom Lauria videos on youtube were extremely helpful. I emailed Tom via his website & he was kind enough to answer & give guidance. The videos show a 1:48 sail, using a single thickness of Silkspan. I am testing doing a triple thickness: the outside face of the outside sheets being painted, seams drawn in pencil, reinforcing patches & battens etc. Then lay them up on the form using diluted PVA as a bonding & stiffening agent. It will also tell me if the minor irregularities that are still visible on the form will matter or not. thanks

-
Hi GL that's very nice. Are you planning to finish the hull? Mark
- 219 replies
-
- 1
-
-
- smack
- cross-section
- (and 2 more)
-
Hi Keith, looks lovely already Do you know how they manoeuvred the top staysail & topsail when going about?
-
Hi Roger initially I did do that, but it was still very flexible. If the cloth was to be the actual sail that might be fine, but the plan is to build up a Silkspan sail over a curved form. It looks that the Silkspan part won't be as difficult as making the form. I think the reason it wasn't stiffer is that polyester/cotton mix of the fabric has poor tensile rigidity - my guess is that resin & fibreglass is rigid because the components are fairly rigid in compression & tension. The Dynel is a quite an open weave, so a test will see how well it holds the thicker epoxy. As part of the test I'll probably do part of it with a piece of fibreglass cloth on top & see both how rigid that is & how well the two together hold the resin.
-
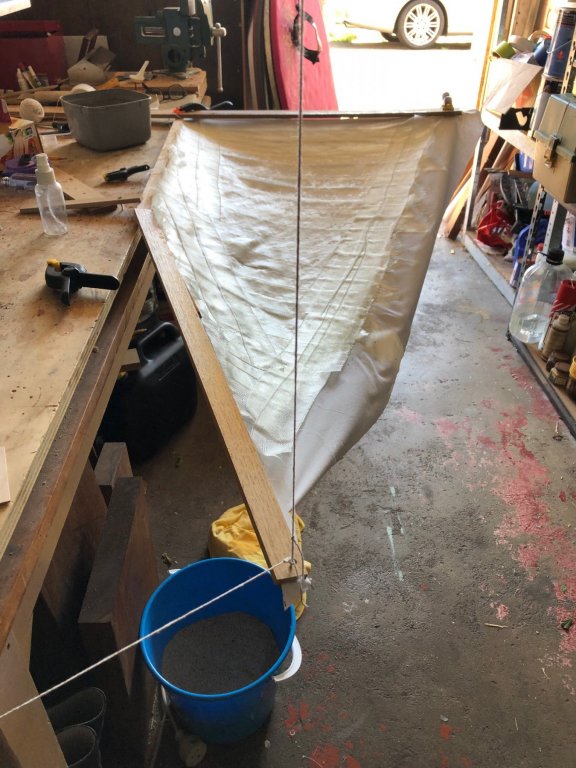
thanks for the assistance & suggestions. Keith, you'll be horrified that I had to use the www to find out what splicing the mainbrace means. Not always helpful, but a timely glass can help with thinking sometimes. I saturated the fabric with Everdure epoxy & laid on top some fibreglass tape that I had, then added more epoxy. Initially I was disappointed with the results, but in separating what worked from what hasn't I think I can get it to work. These things didn't go to plan: Everdure is too thin for this job, a more standard thickness epoxy would work better; the fabric is rippled on the underside (the face side of the form), I think because the cotton blend fabric stretched & the glass fabric doesn't. The Everdure has soaked right through the fabrics & didn't get held in the fibreglass, so the layer of fibreglass didn't't really bond too the fabric below. What I'm thinking is to use Dynel fabric for the lower layer & a sheet of fibreglass on top, then some thicker runny epoxy, applied with a brush. Possibly I'll do a small test to see if I need to put a sheet of plastic film below the Dynel. The good side is: the sail shape is very nice, this view is as if looking up at the sail & the twist at about the throat height looks good to my eye. You can see how the fibreglass hasn't bonded. thanks

-
thanks everyone; Druxey, yes it is, but perhaps stab in the dark is better - I might market a technical book "sailmaking by the assisted gravity technique".
-
Hi Jens, lovely project & a very pretty boat indeed. I think I've hear them called Junior Folkboats - the similarity is there but I think they pre-date the Folkboat design....?
- 39 replies
-
- 3
-
-
- kdy 15 juniorbad
- yacht
- (and 2 more)
-
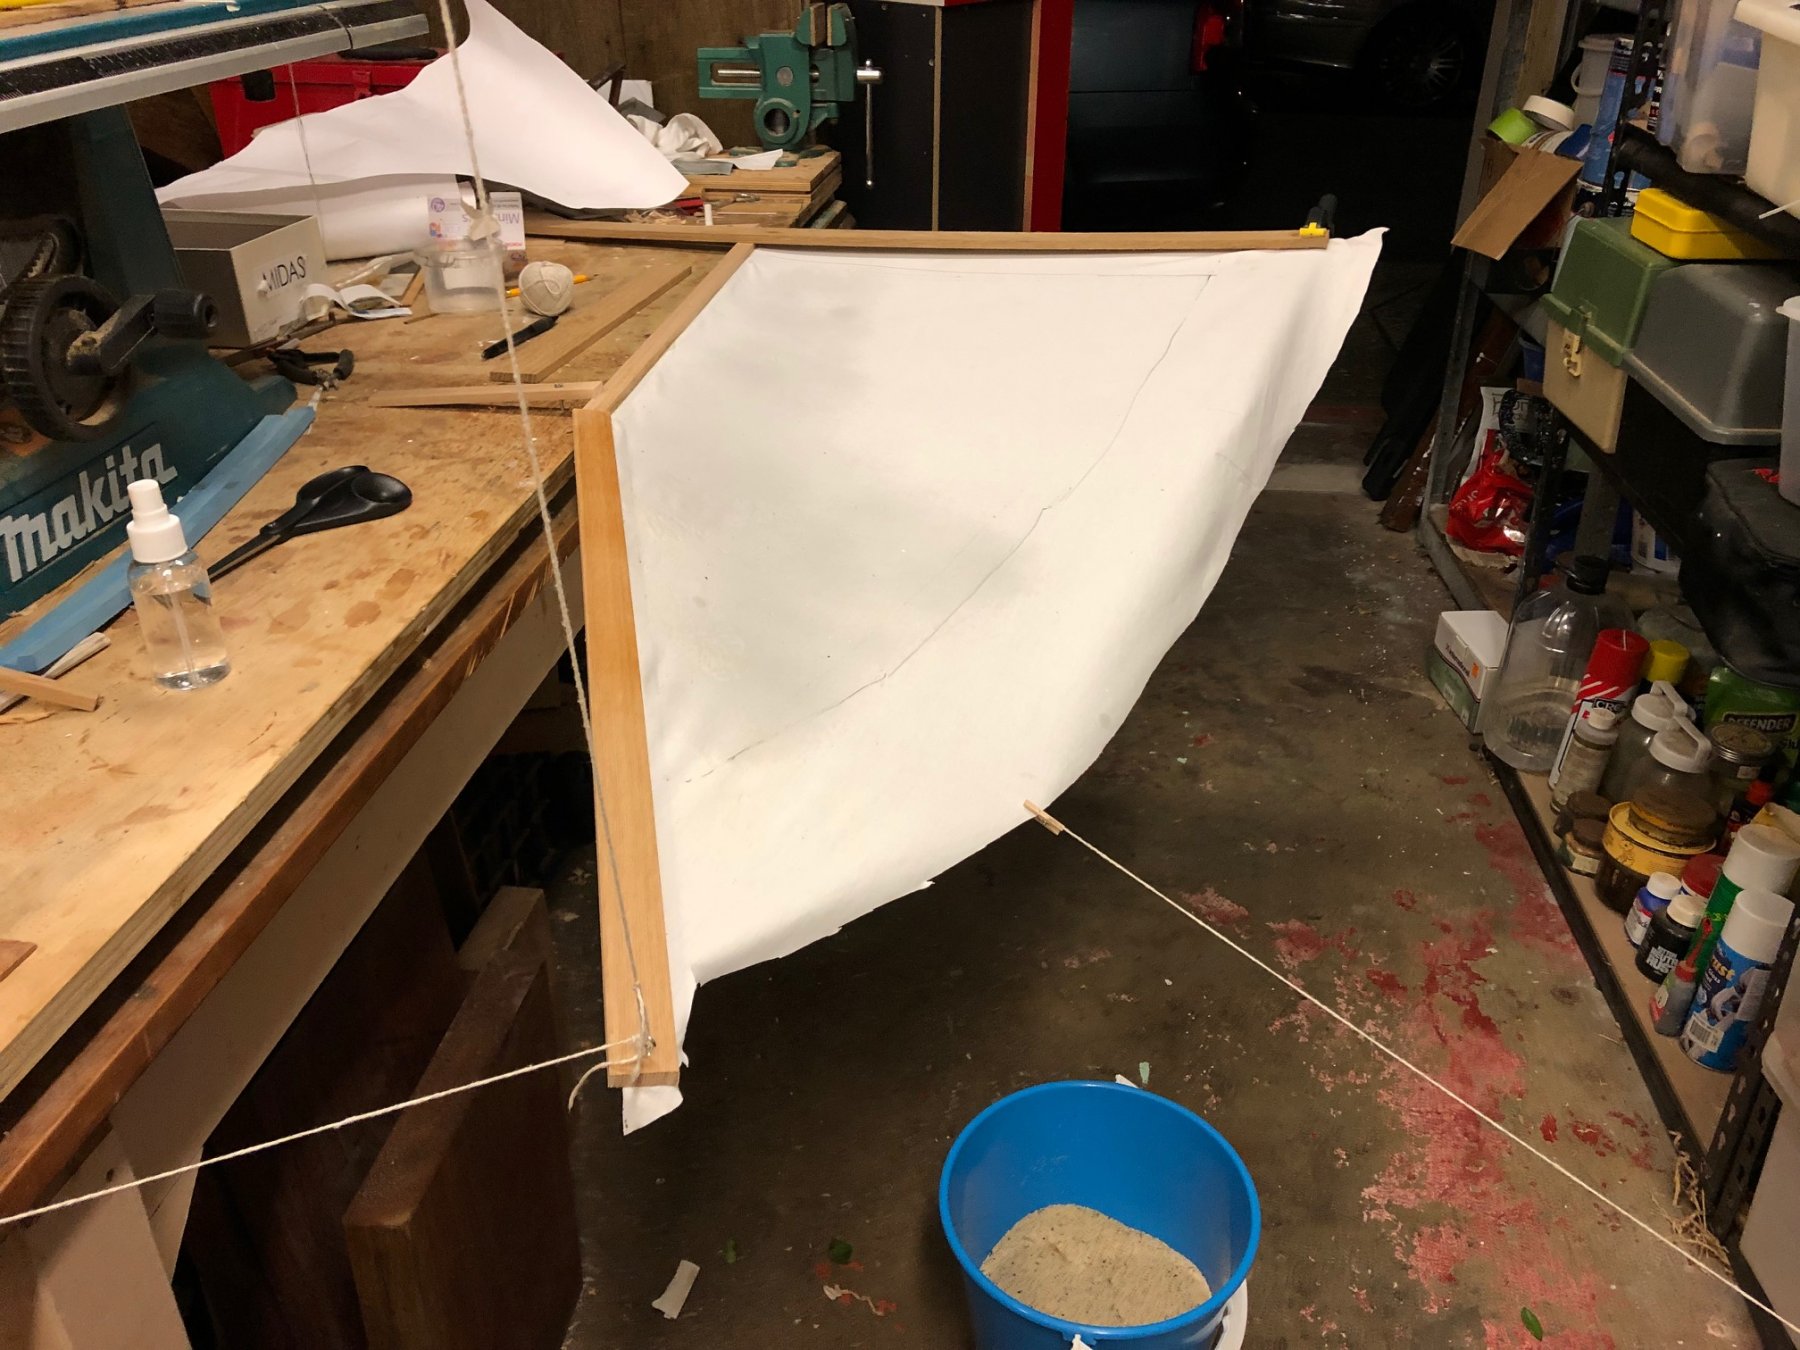
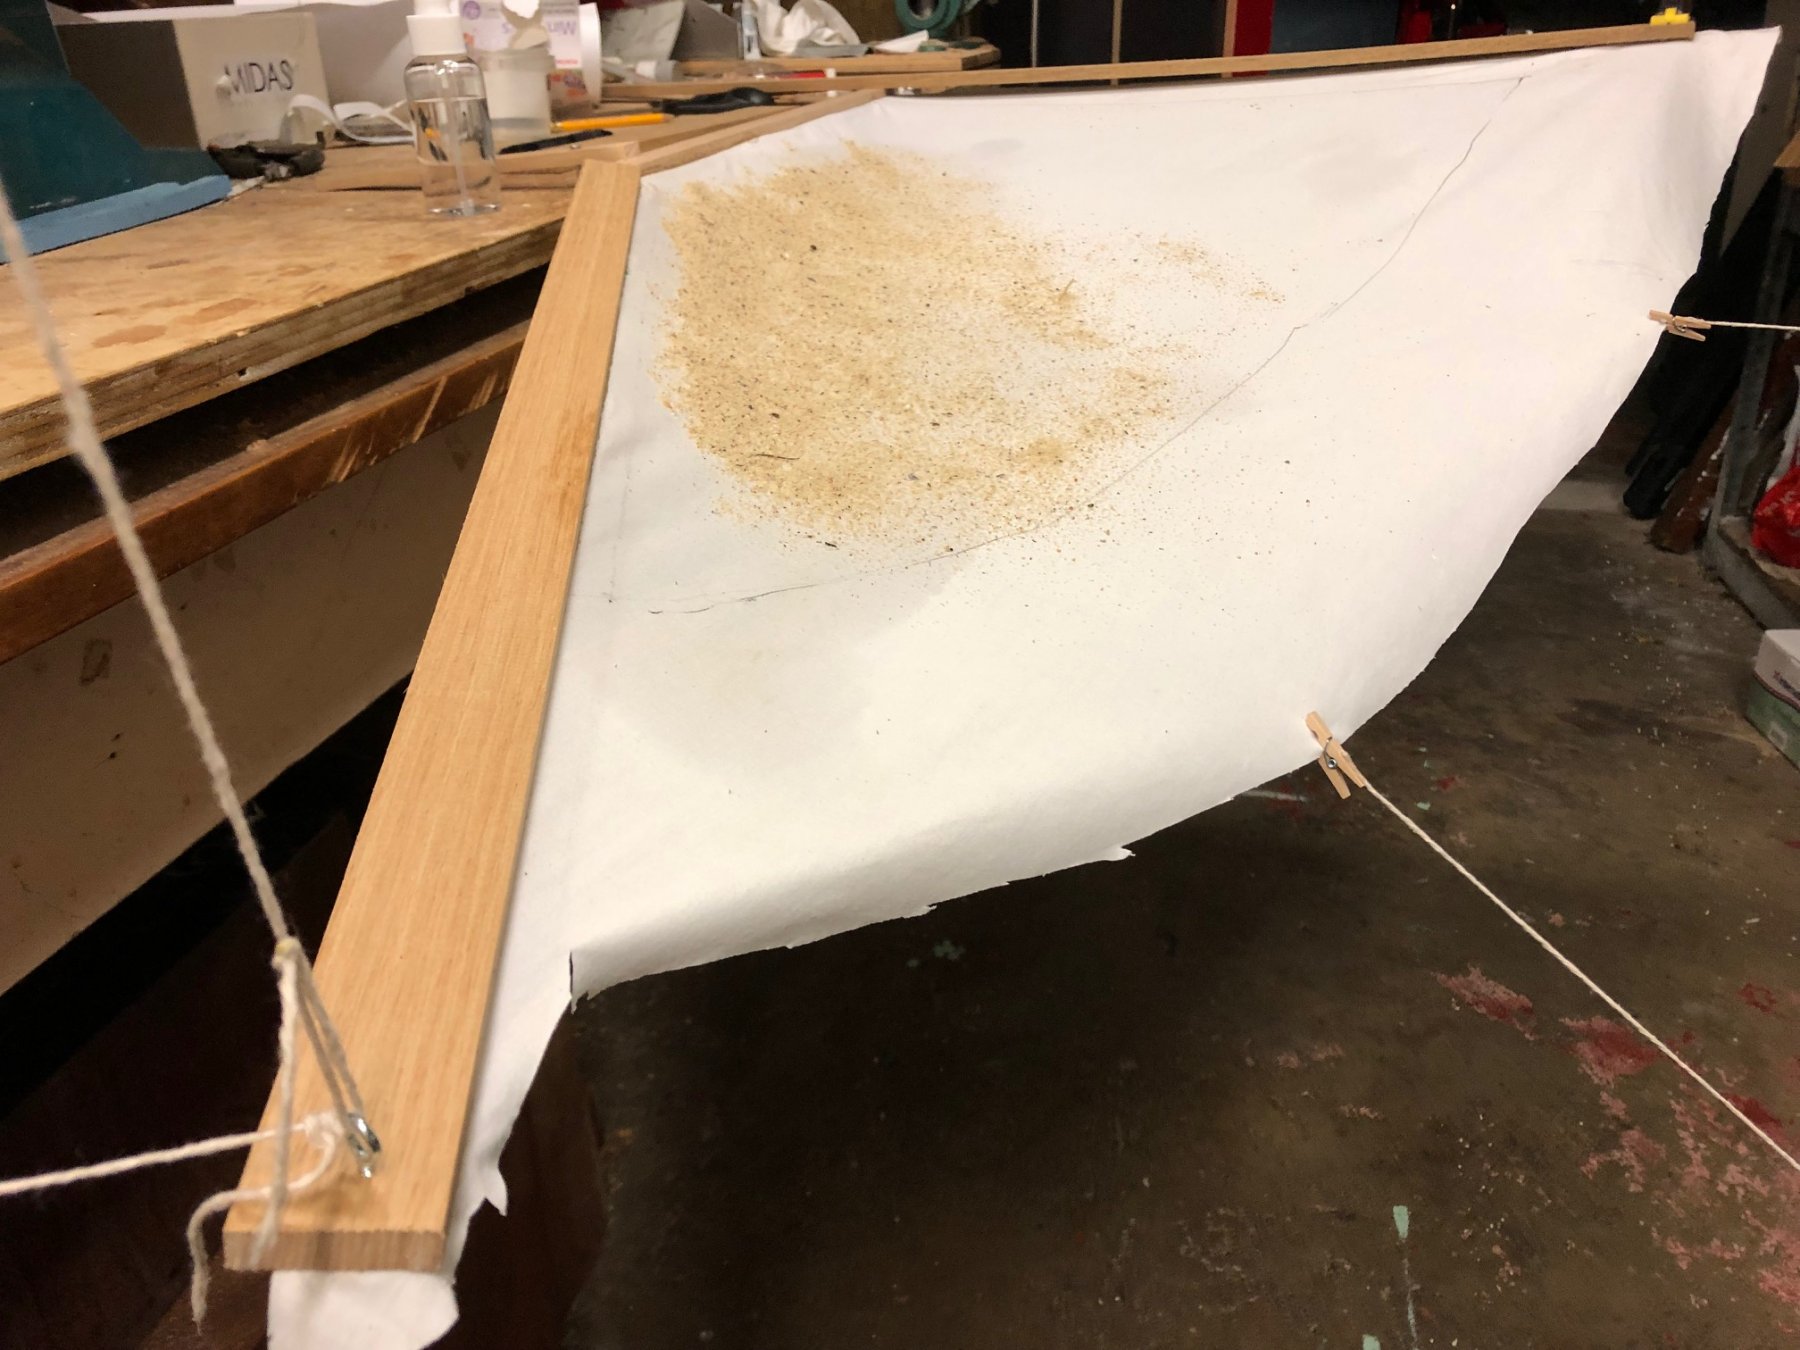
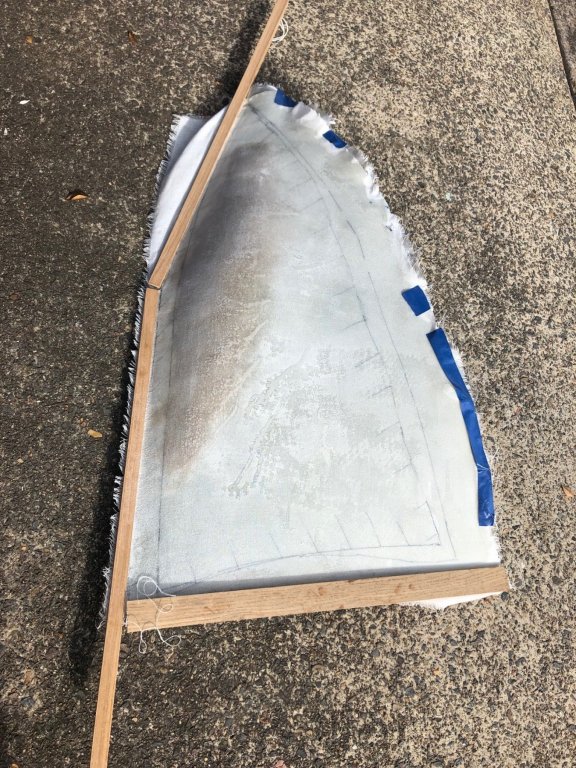
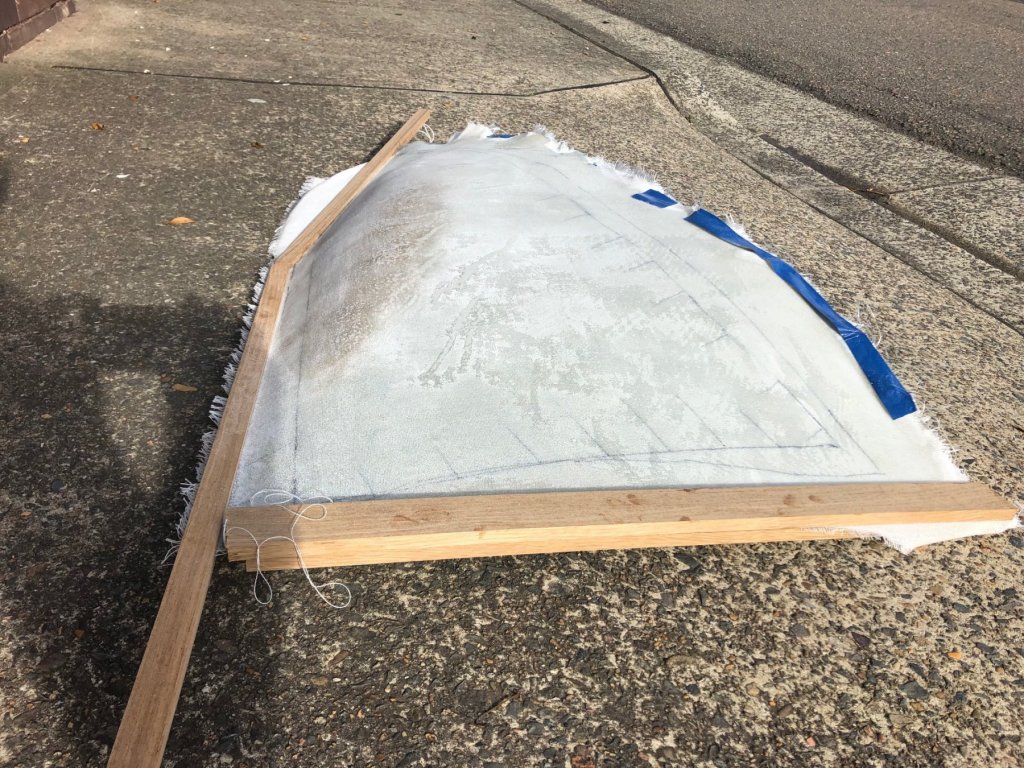
some progress on the sail mould, & Heath Robinson would be pleased...lots of string with knots, pegs & dodgy fixings Below shows the fabric suspended & tensioned here & there, the grey blotches are from water spray to soften the fabric, & hopefully will reshape a little as it dries; a hefty bucket of Bronte sand awaits. The good news is that the shape is about right - aerofoil shape towards the mast & gaff, & flatter towards the leech; with maximum belly in the upper part of the sail (in the photo the close timber is the gaff, next is the mast & the loose one below a timber strip furthest away is the boom). as it turns out, only a very small amount of sand was required; the shape looks quite good & my earlier estimate of the difference angle between boom & gaff was quite a lot more than here, but I will probably ease than suspension line a little more so the gaff lays out a little more After it's all dry the next step is to put some mixed Everdure epoxy resin into a spray bottle & spray it all, make small adjustments to the tension, add sand etc. When that's hardened a bit I'll lay some more fabric on the top with more epoxy, perhaps even 3 or 4 layers.


-
Minwax stains in Australia
Mark Pearse replied to vossy's topic in Painting, finishing and weathering products and techniques
Hi Chris I got a Minwax product (polyshades black stain/polyurethane) shipped to Oz through buy.com, & the approx 300ml tin cost $57, incl $21 shipping & customs. It's an excellent product, very black & thin, but I opened the tin & did 3 coats within 4 days & the 3rd coat had flecks of hardened polyurethane in it - so to salvage the work I had to strain it carefully & use it immediately. I was restoring a coffee table & the finish was to replicate the original black 1960s finish. Paint has much more 'build', & this product allowed a certain amount of visible wood grain texture to be visible. It's a great product but the problem above was a concern. Mark -
thanks Bob I have some clear shellac. I actually used the orange/brown quite a bit in the model on the timberwork, with a finishing wipe with satin polyurethane.
-
Hi Steven your sculptural skills are excellent, it's interesting to see the viking emerging.
-
thanks Bob, that's very helpful & a lovely model. It does change my thinking on cotton, but for now I'll press on as is. If I'm not happy, I have a 1940's cotton sail that's no good as a sail any longer, the fabric has a very tight weave & might work ok. Did you use glue to stabilise the rope rigging?
-
Hi Carl, yes that's what I was thinking, & in addition using sand to weight it as required. I think the hard part will be to be the balance between baggy shaped curves in one area & a flat curve in another - hence using sand, almost like being able to locally increase gravity.
-
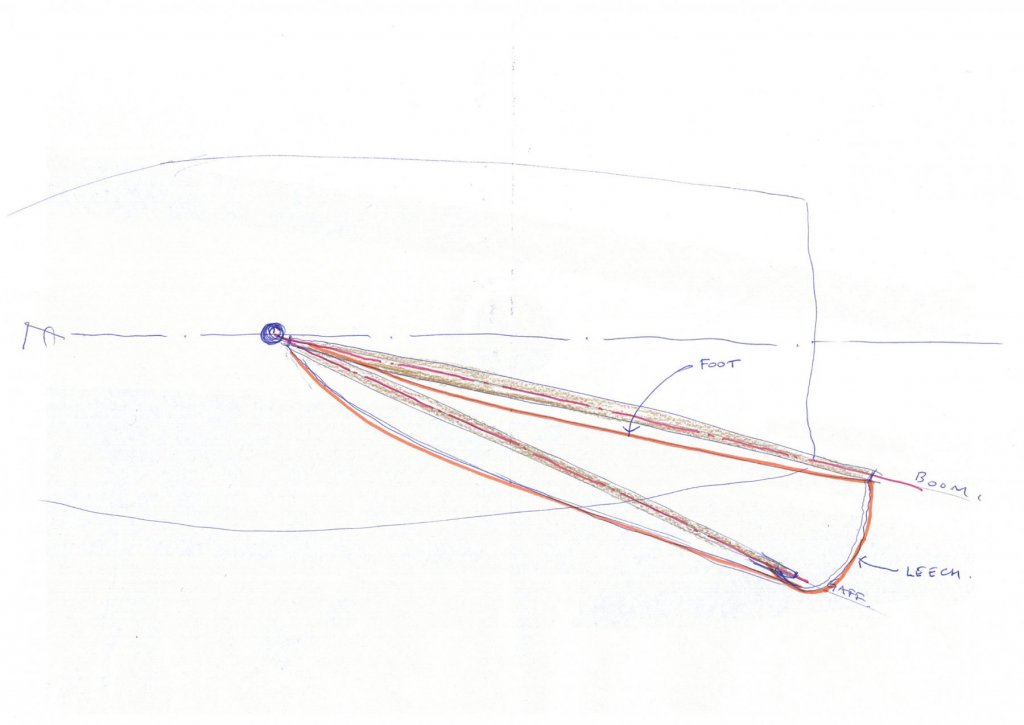
Thanks for the comments, all discussion will help me. PVA is strong but the form is large at around 800-900mm tall so I think it's going to be soft at that scale, & there's the problem of wet Silkspan on a PVA based form. You can dilute epoxy with acetone, but I'll use the one that's already mixed thinner, as it might be stronger than a home-made version - called Evidure here, I think it's International Paints (Azko Nobel). If I do get a good shape, I'll just keep laying in sheets with epoxy until I'm sure it'll be stiff. All thoughts would be very welcome. Below is a plan view of the curvatures I'm trying to get. The leech line isn't quite right but gives a fair impression.
-
15' Dinghy by Bedford - FINISHED - 1:1 scale
Mark Pearse replied to Bedford's topic in Non-ship/categorised builds
g'day bedford looks lovely - how do the sails fix to the spars in this boat?