HOLIDAY DONATION DRIVE - SUPPORT MSW - DO YOUR PART TO KEEP THIS GREAT FORUM GOING! (Only 13 donations so far - C'mon guys!)
×


Mike Dowling
-
Posts
1,234 -
Joined
-
Last visited
Content Type
Profiles
Forums
Gallery
Events
Everything posted by Mike Dowling
-
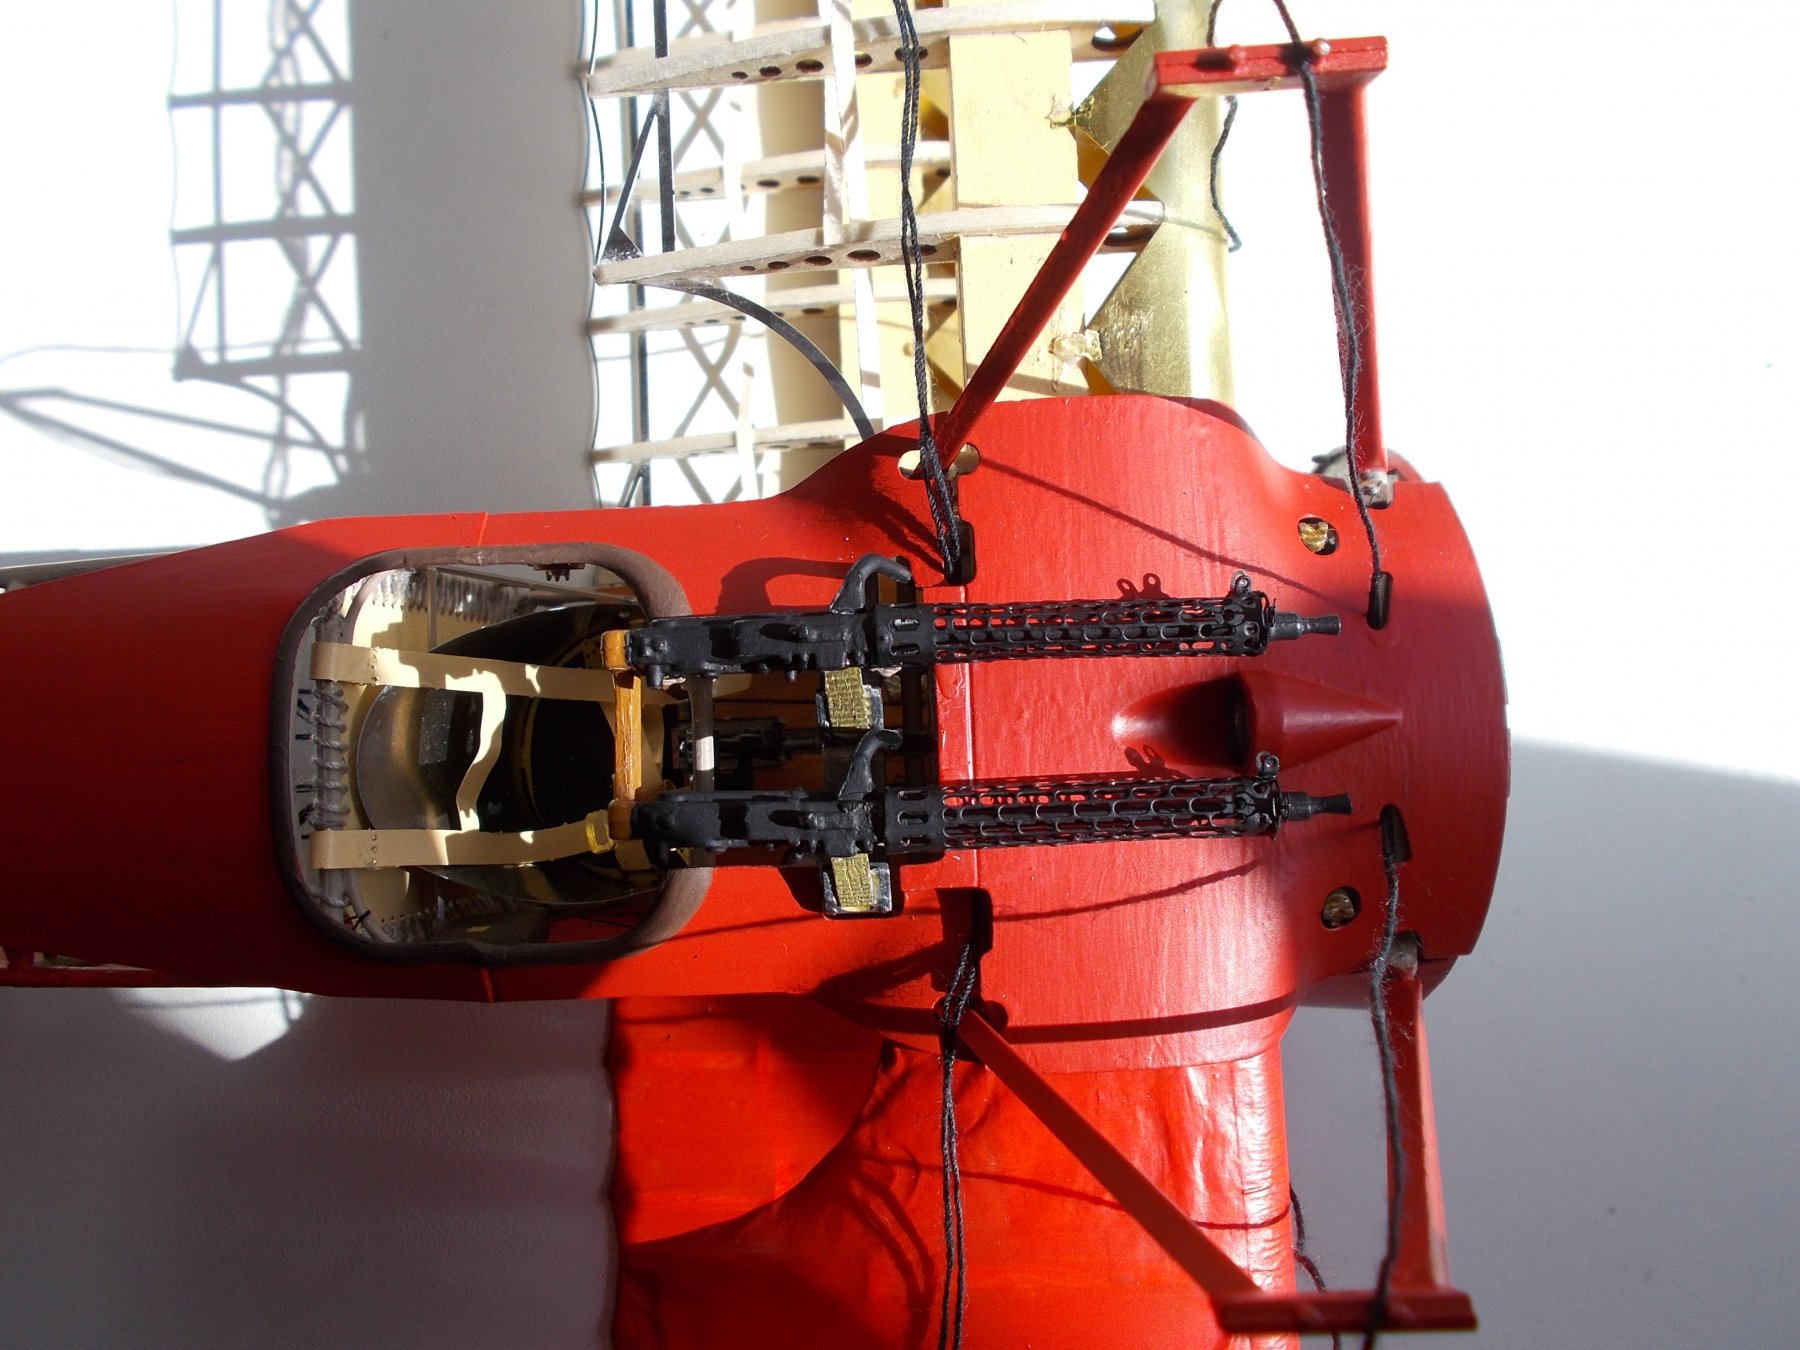
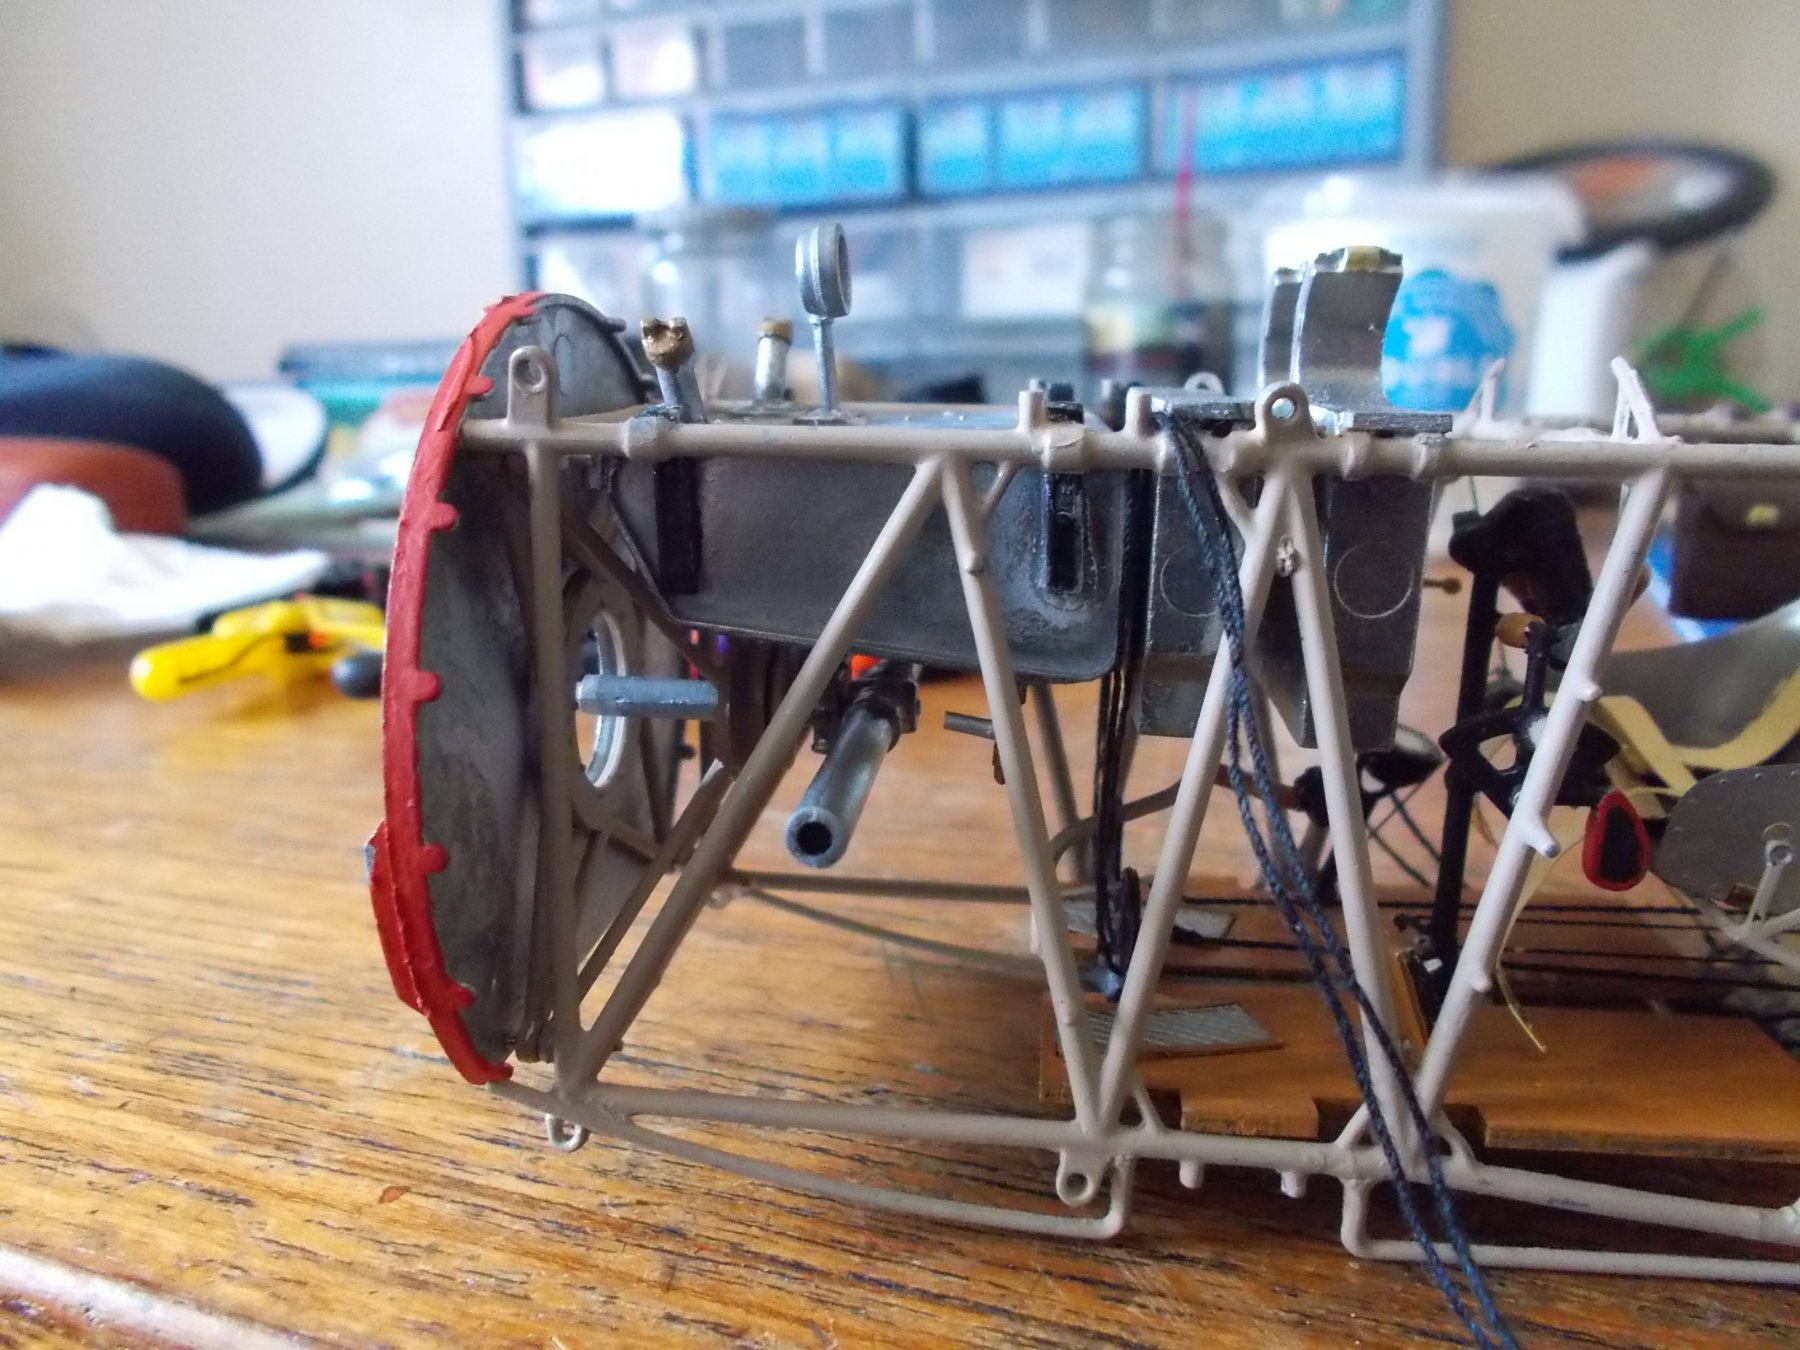
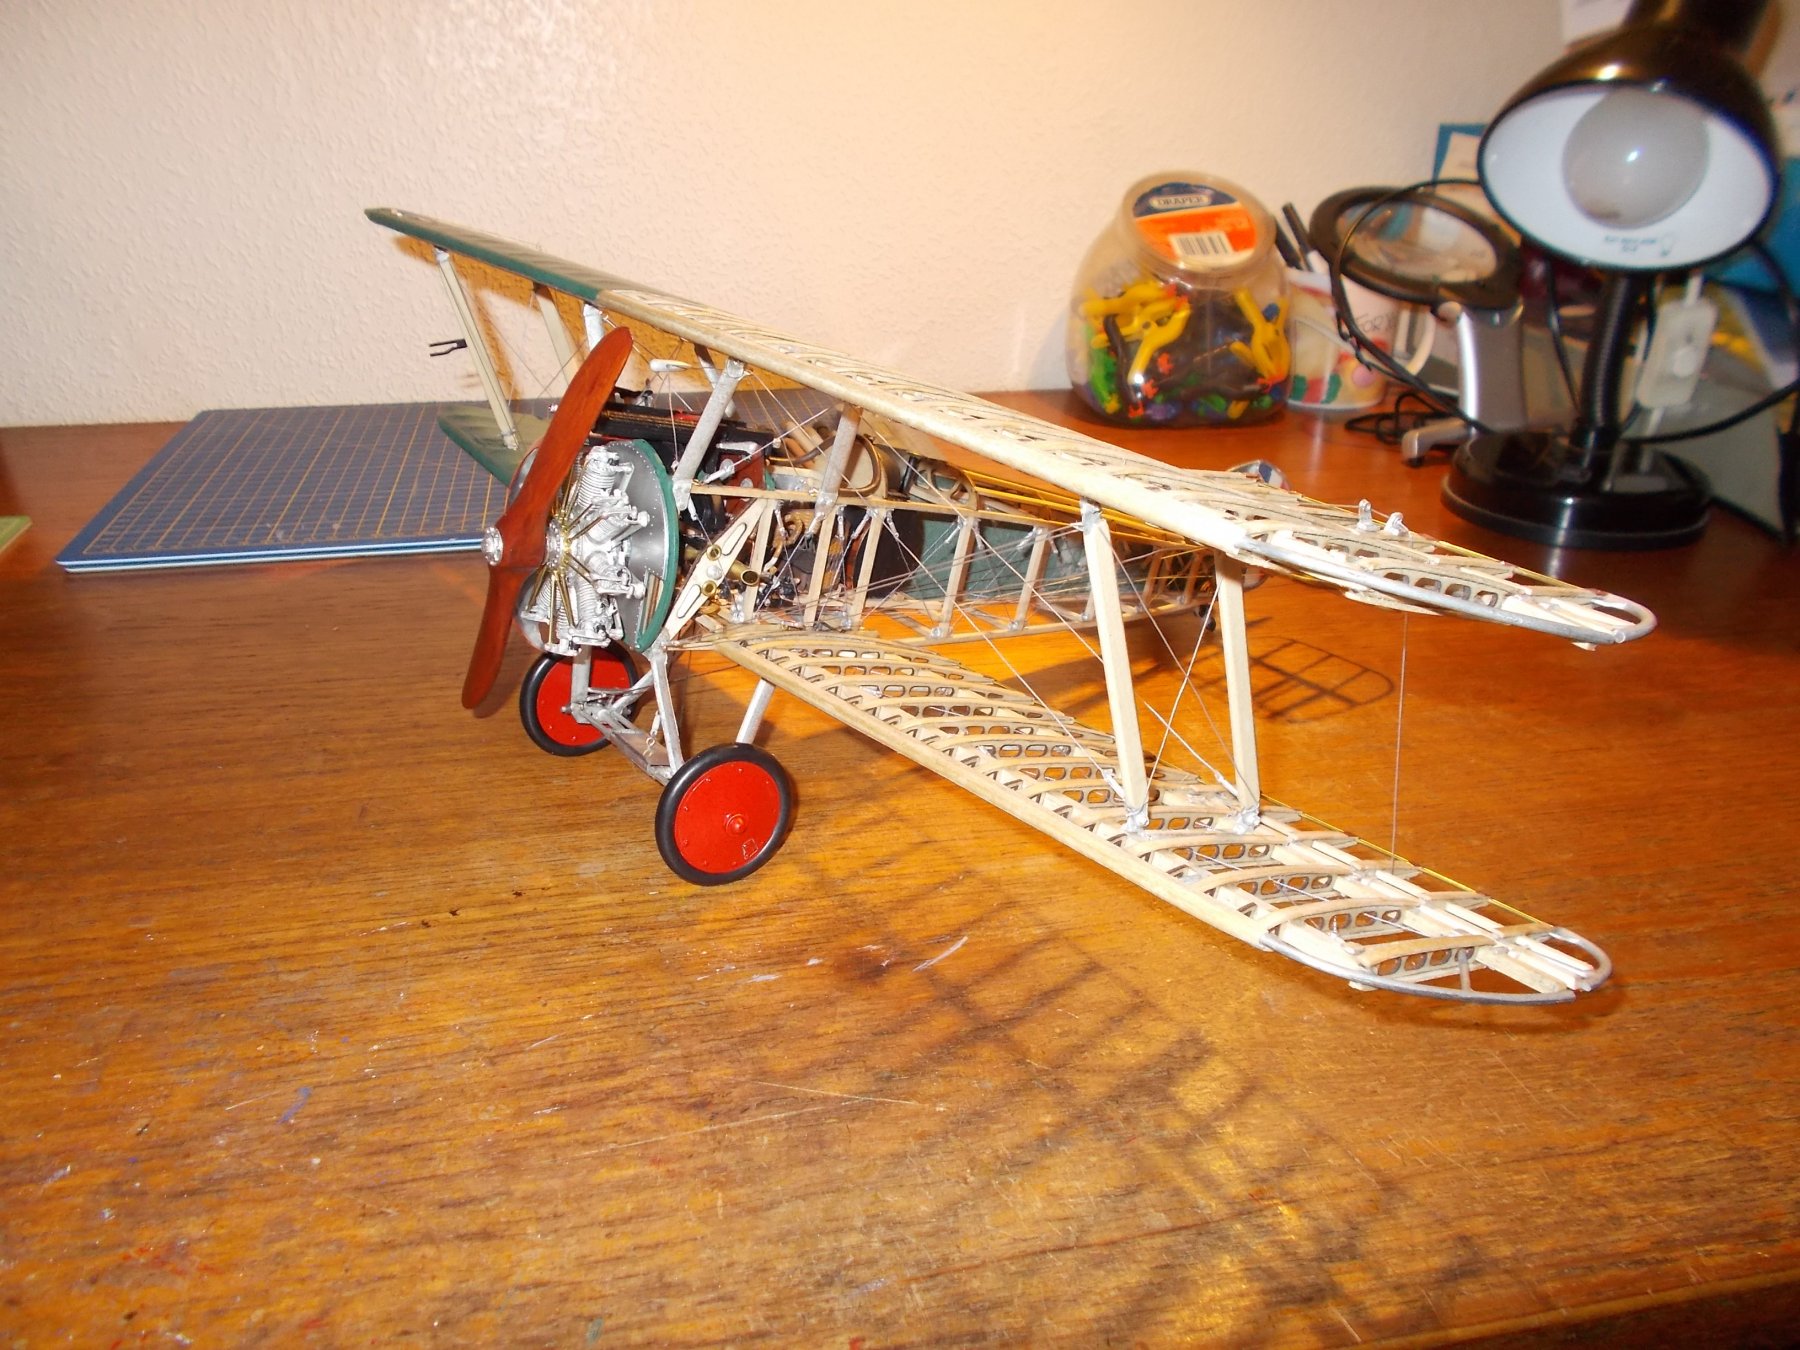
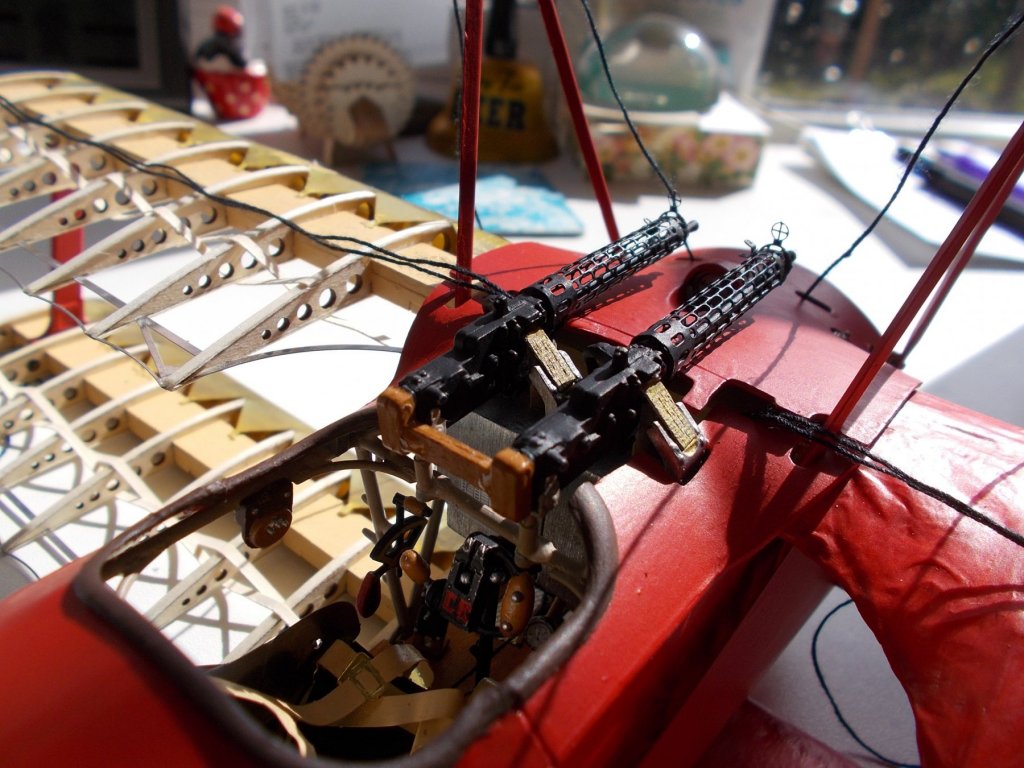
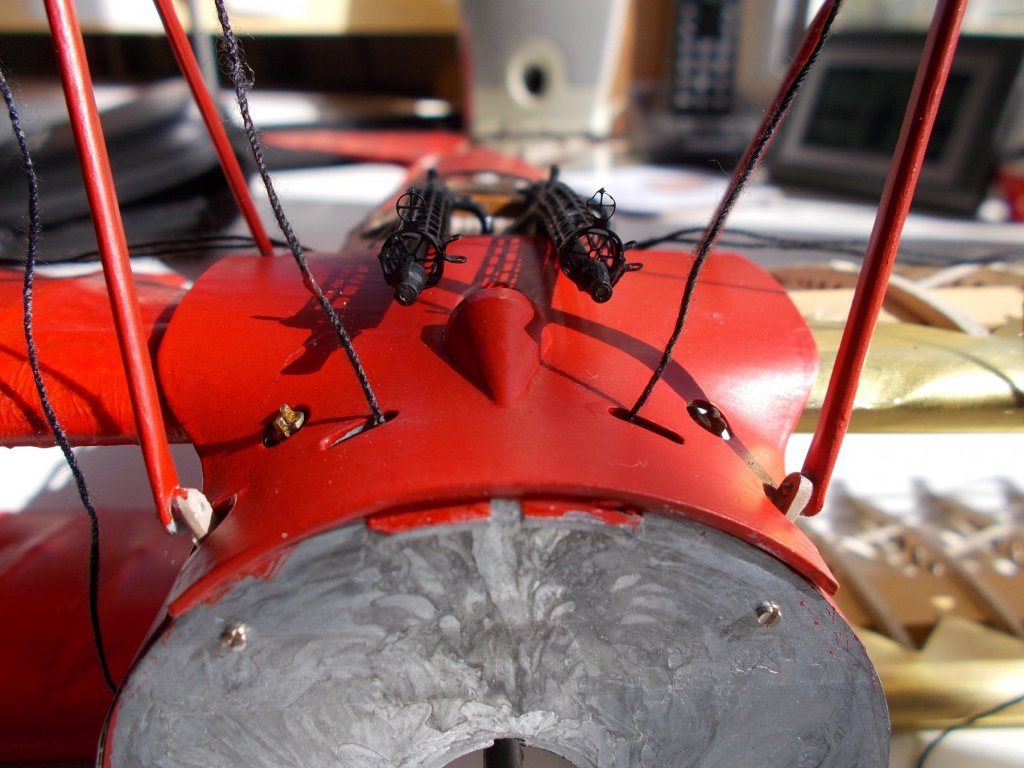
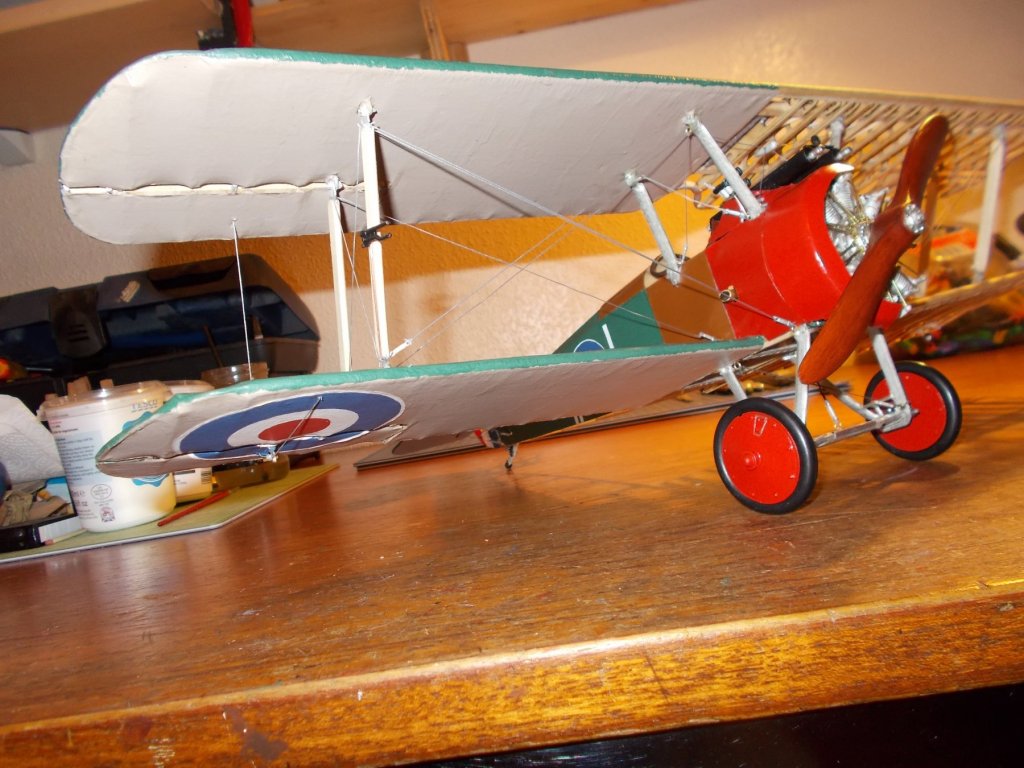
There has been a slight problem with the kit. The cowl that goes over the fuel tank etc sits a wee bit too high at the back. It fits fine at the front and I notice on the instructions photographs that the discrepancy is there as well so it's not my fault. As a result the machine guns also sit about 3mm too high so I have had to modify their mounts somewhat. It's taken me ages but I think they look ok now and won't look too noticeable. I should say that the guns themselves were an absolute beast to make up. Rolling brass is great fun and those cross hairs are so tiny they would break in a breath.

- 141 replies
-
- 12
-

-
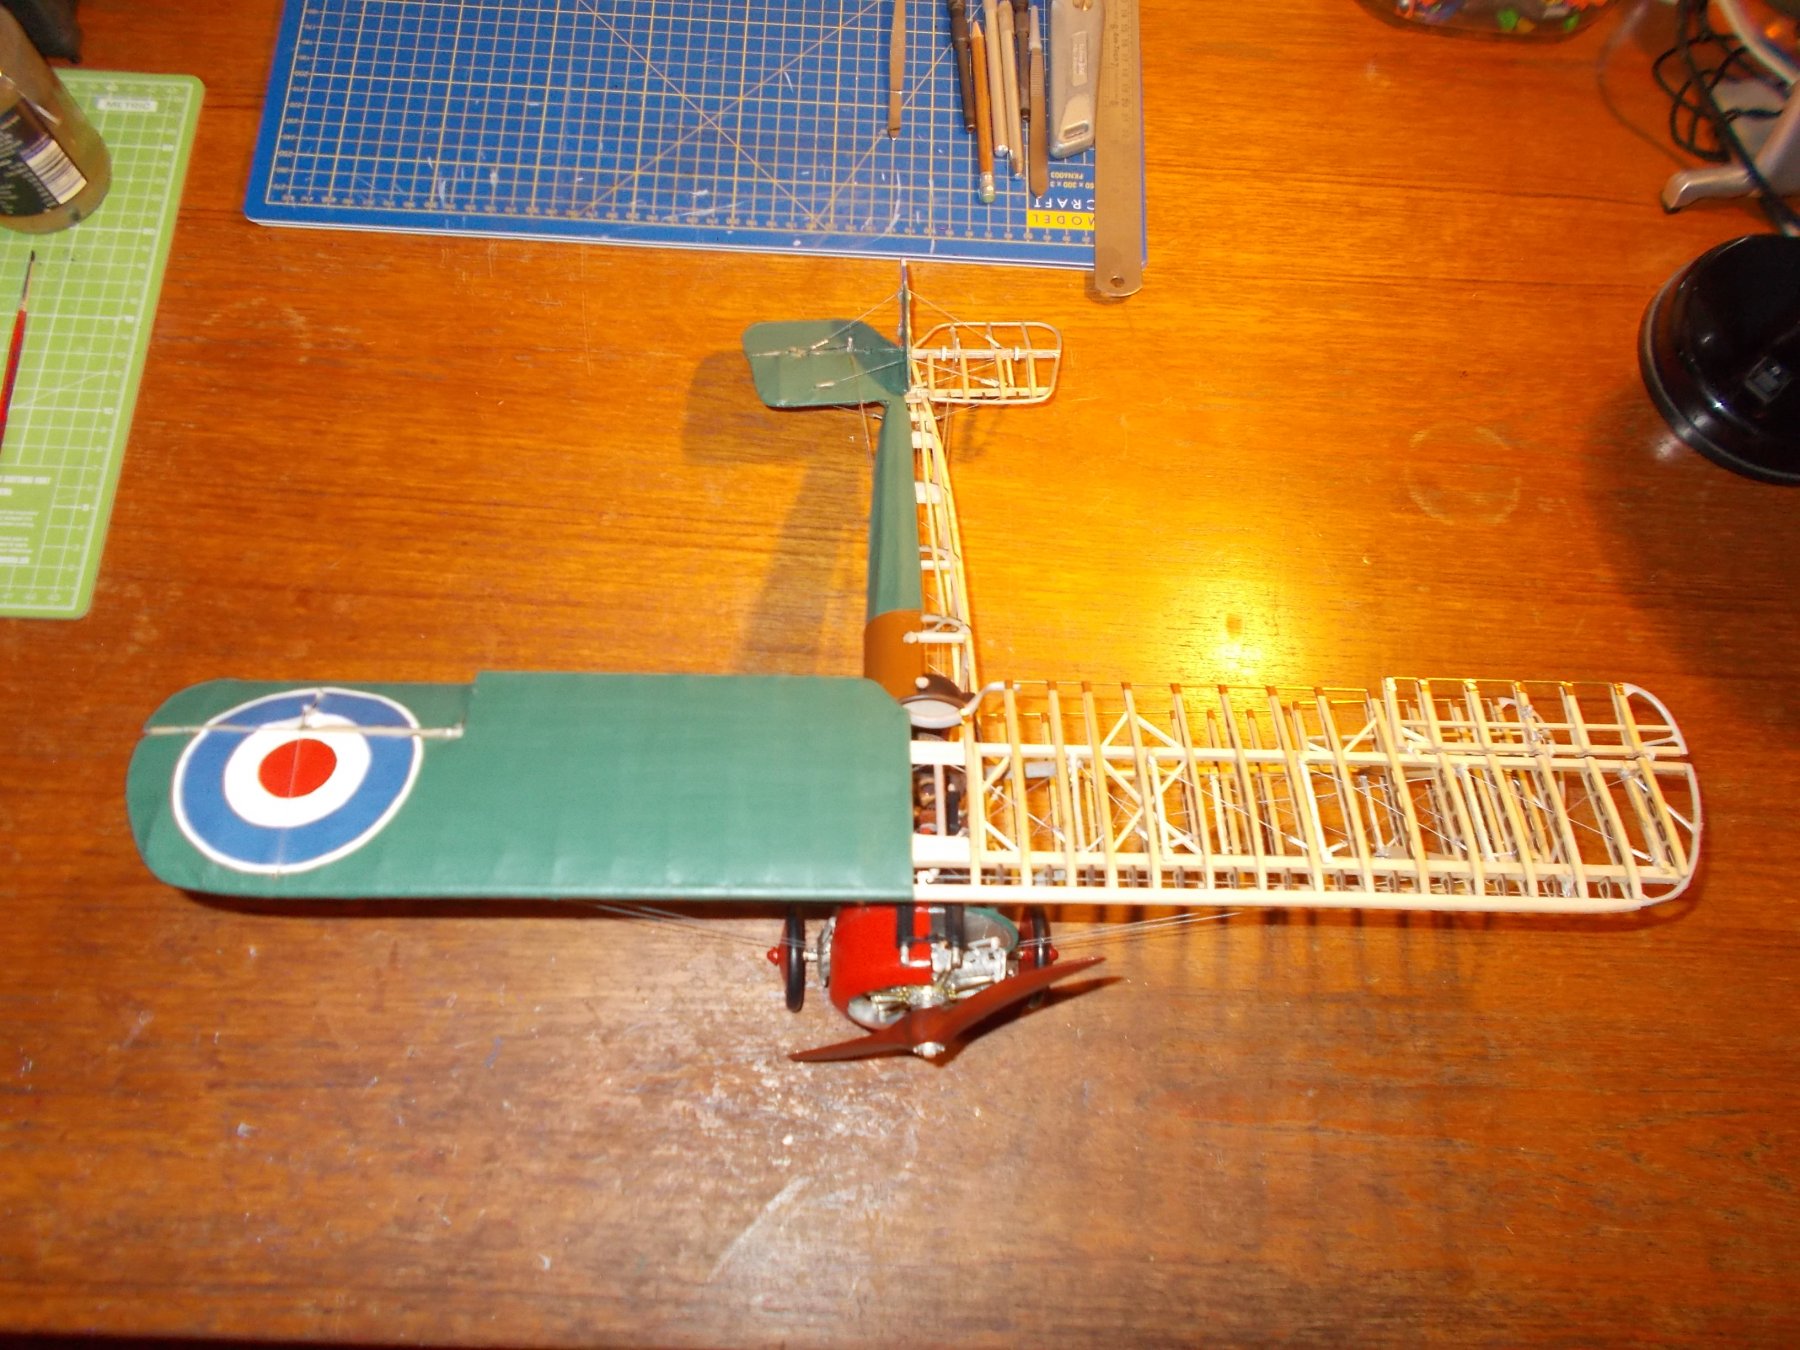
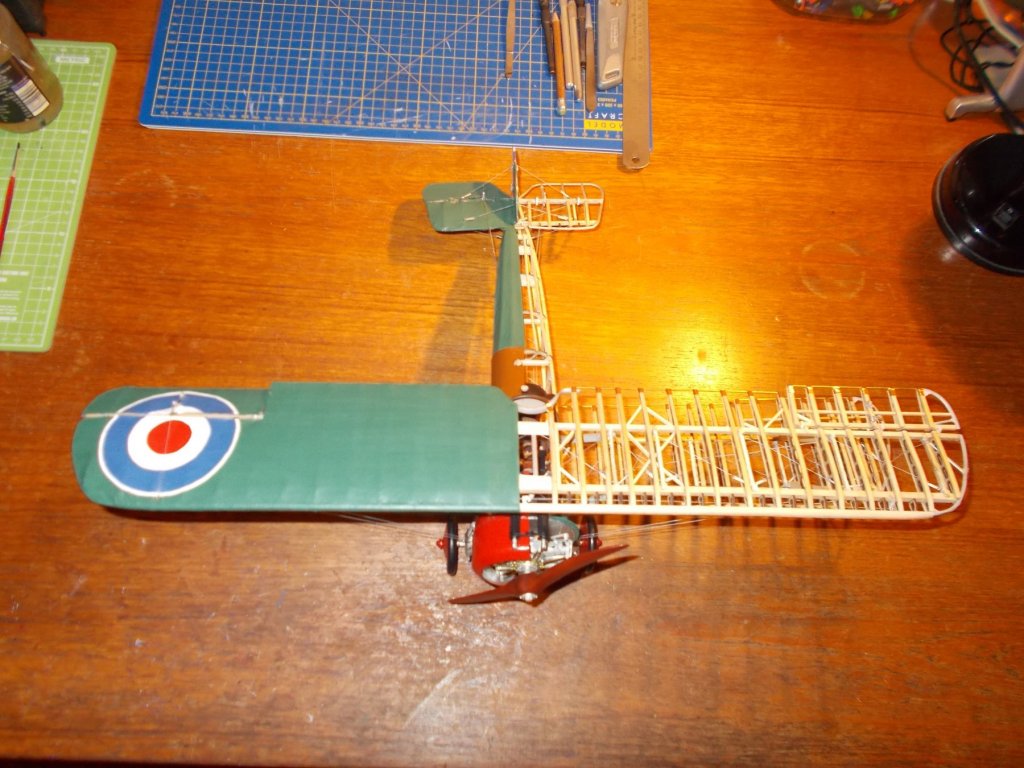
The reason is that I painted the Sopwith in the livery of Arthur Brown who was credited with shooting down the Baron so Iwanted the Fokker to follow the story so to speak.
-
Well so much for my covering skills ! The next stage as far as I was concerned was to cover the tissue with dope and then paint it. Bad mistake. I am sure that is how I did it when I was making flyable planes in my youth. Anyway I had to rip it off and do it again hence the delay in a post. The way to do it is as follows. Cover the wing with tissue as tight as possible without tearing it. Wait for it to dry. Then paint it gently with dilute PVA. That makes it go all soggy and look dreadful but, when it dries you have a lovely tight smooth finish. Then apply two coats of dope/laquer and then paint it with the required colour. So, my third attempt looks like this and at last I can start putting bits together.

- 141 replies
-
- 13
-
-
I know it's a pain but I have to agree with Kevin. I am quite sure you will manage it.
-
No wing stitching for me - far too clever. Th 'battle damage' is a hole for the wing strut. I think that makes it deliberate damage.
-
Just like that, good old tissue and dope. I did try painting the side without dope. Disaster ! I had to rip it off and start again. Dope first, paint second - lesson learnt.
-
I might have expected that from you Carl !!! Sorry Torbogdan, don't know your real name, the lading edges are made from brass. I wish they were thinner as they are a beast to bend and if you don't get it right they tend to twist the wings. I have finally decided to do as I did before and half cover the plane. I have already started and will post a few pictures tomorrow.
-
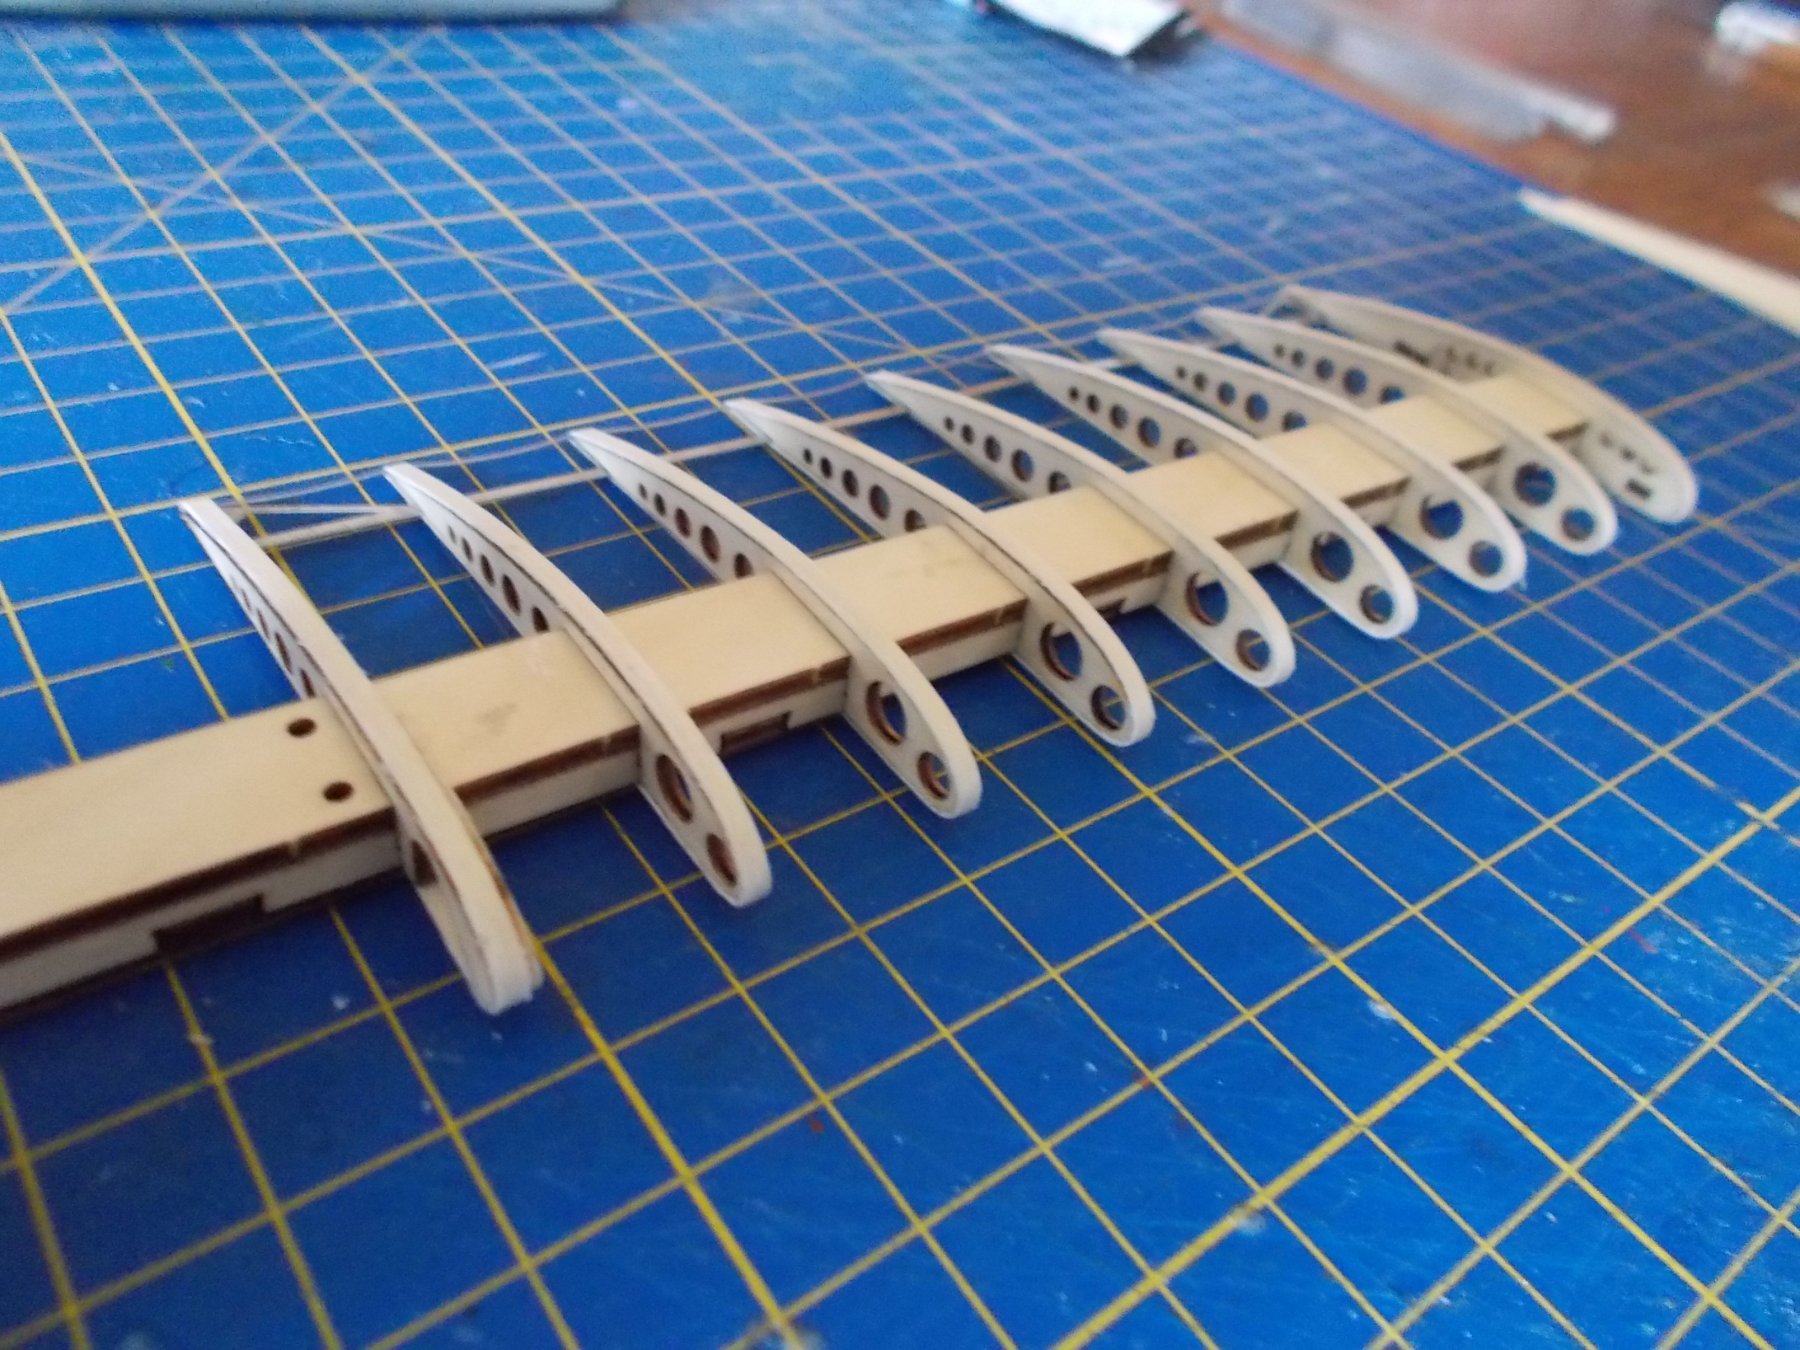
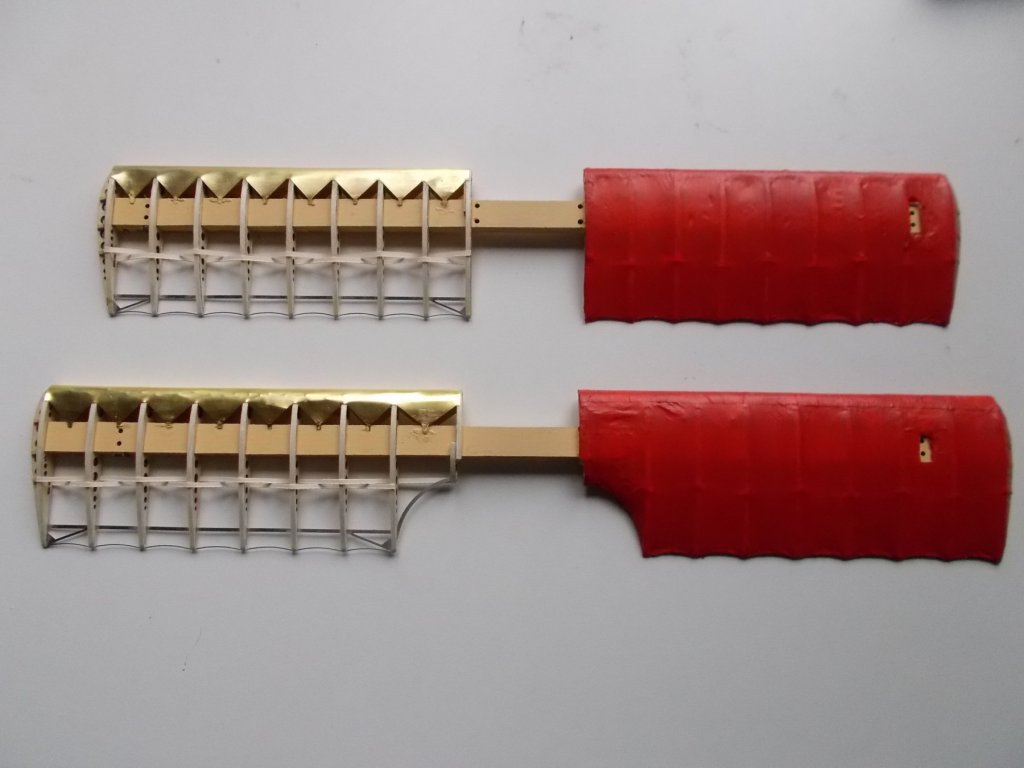
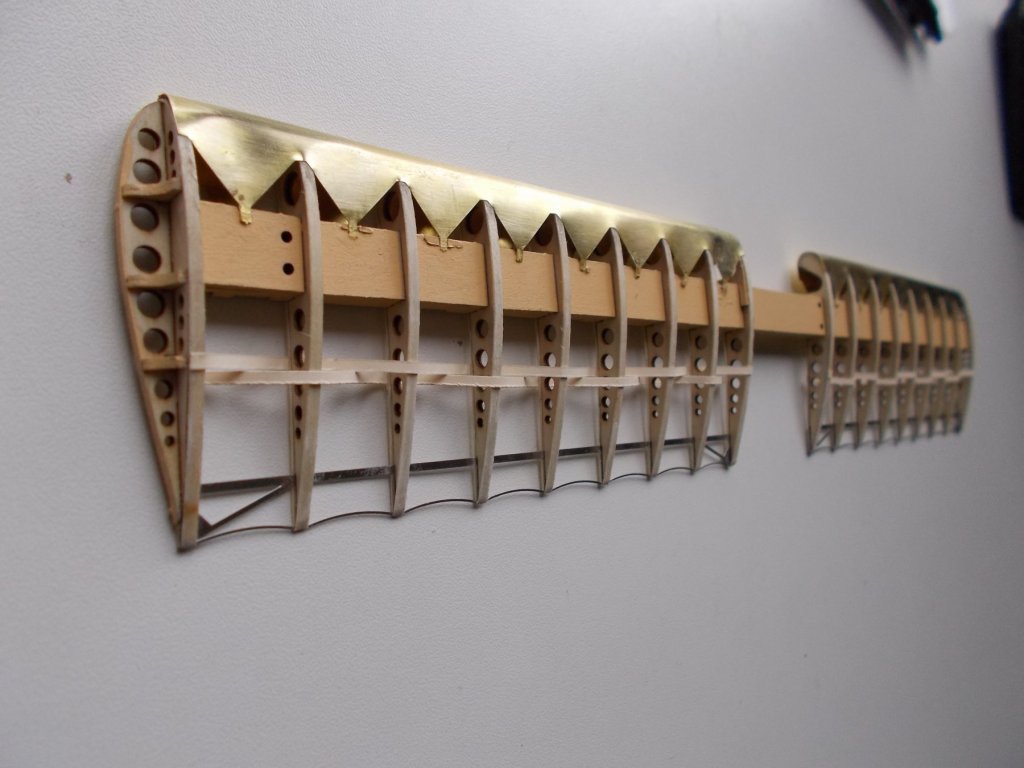
Apart from relocating the fuel tank in the correct position (!!!!) the bottom wing is done unless of course I decide to cover half of it.


- 141 replies
-
- 12
-
-
Making models is much for fun than job hunting !!
-
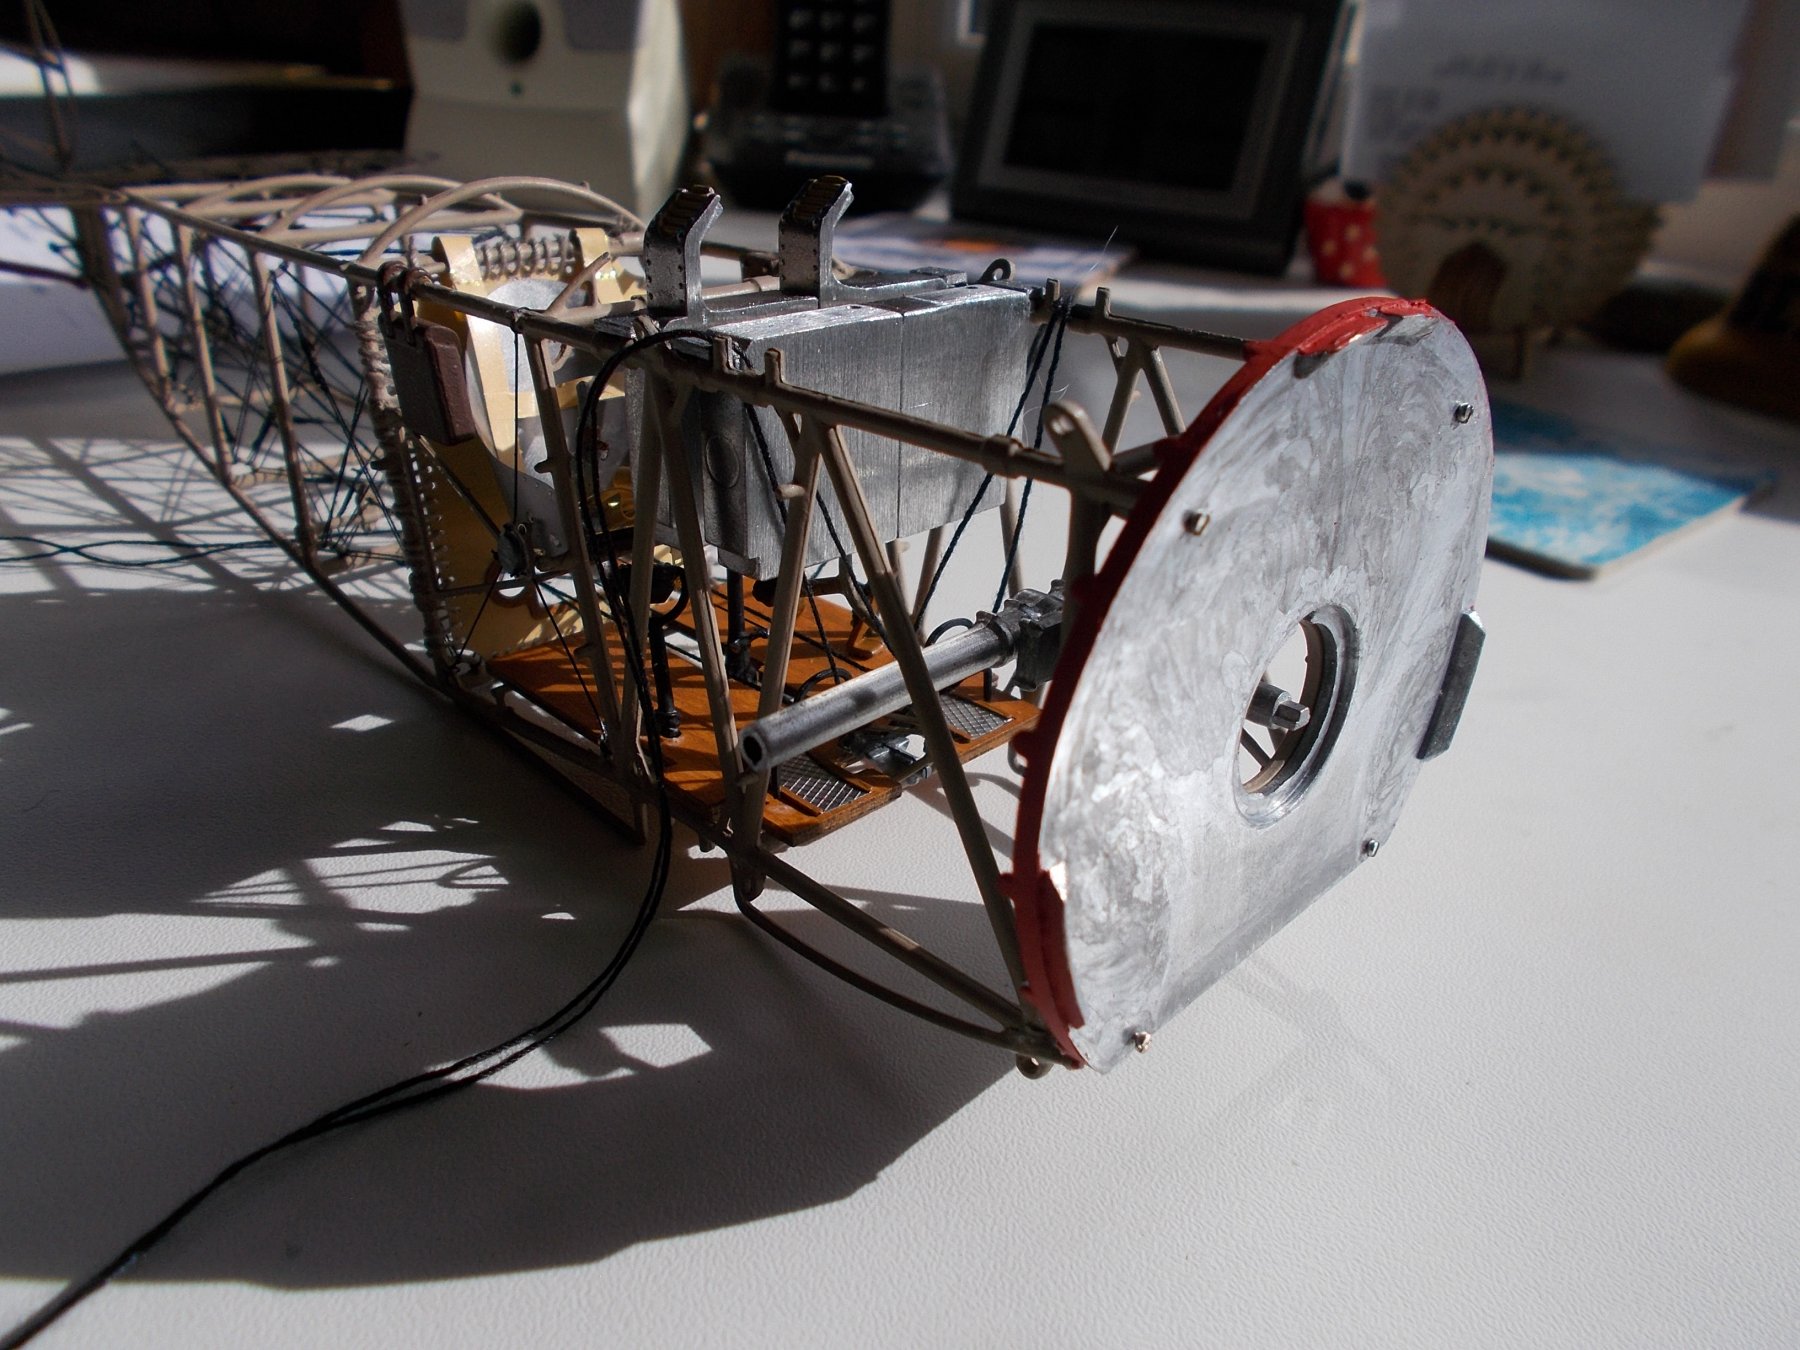
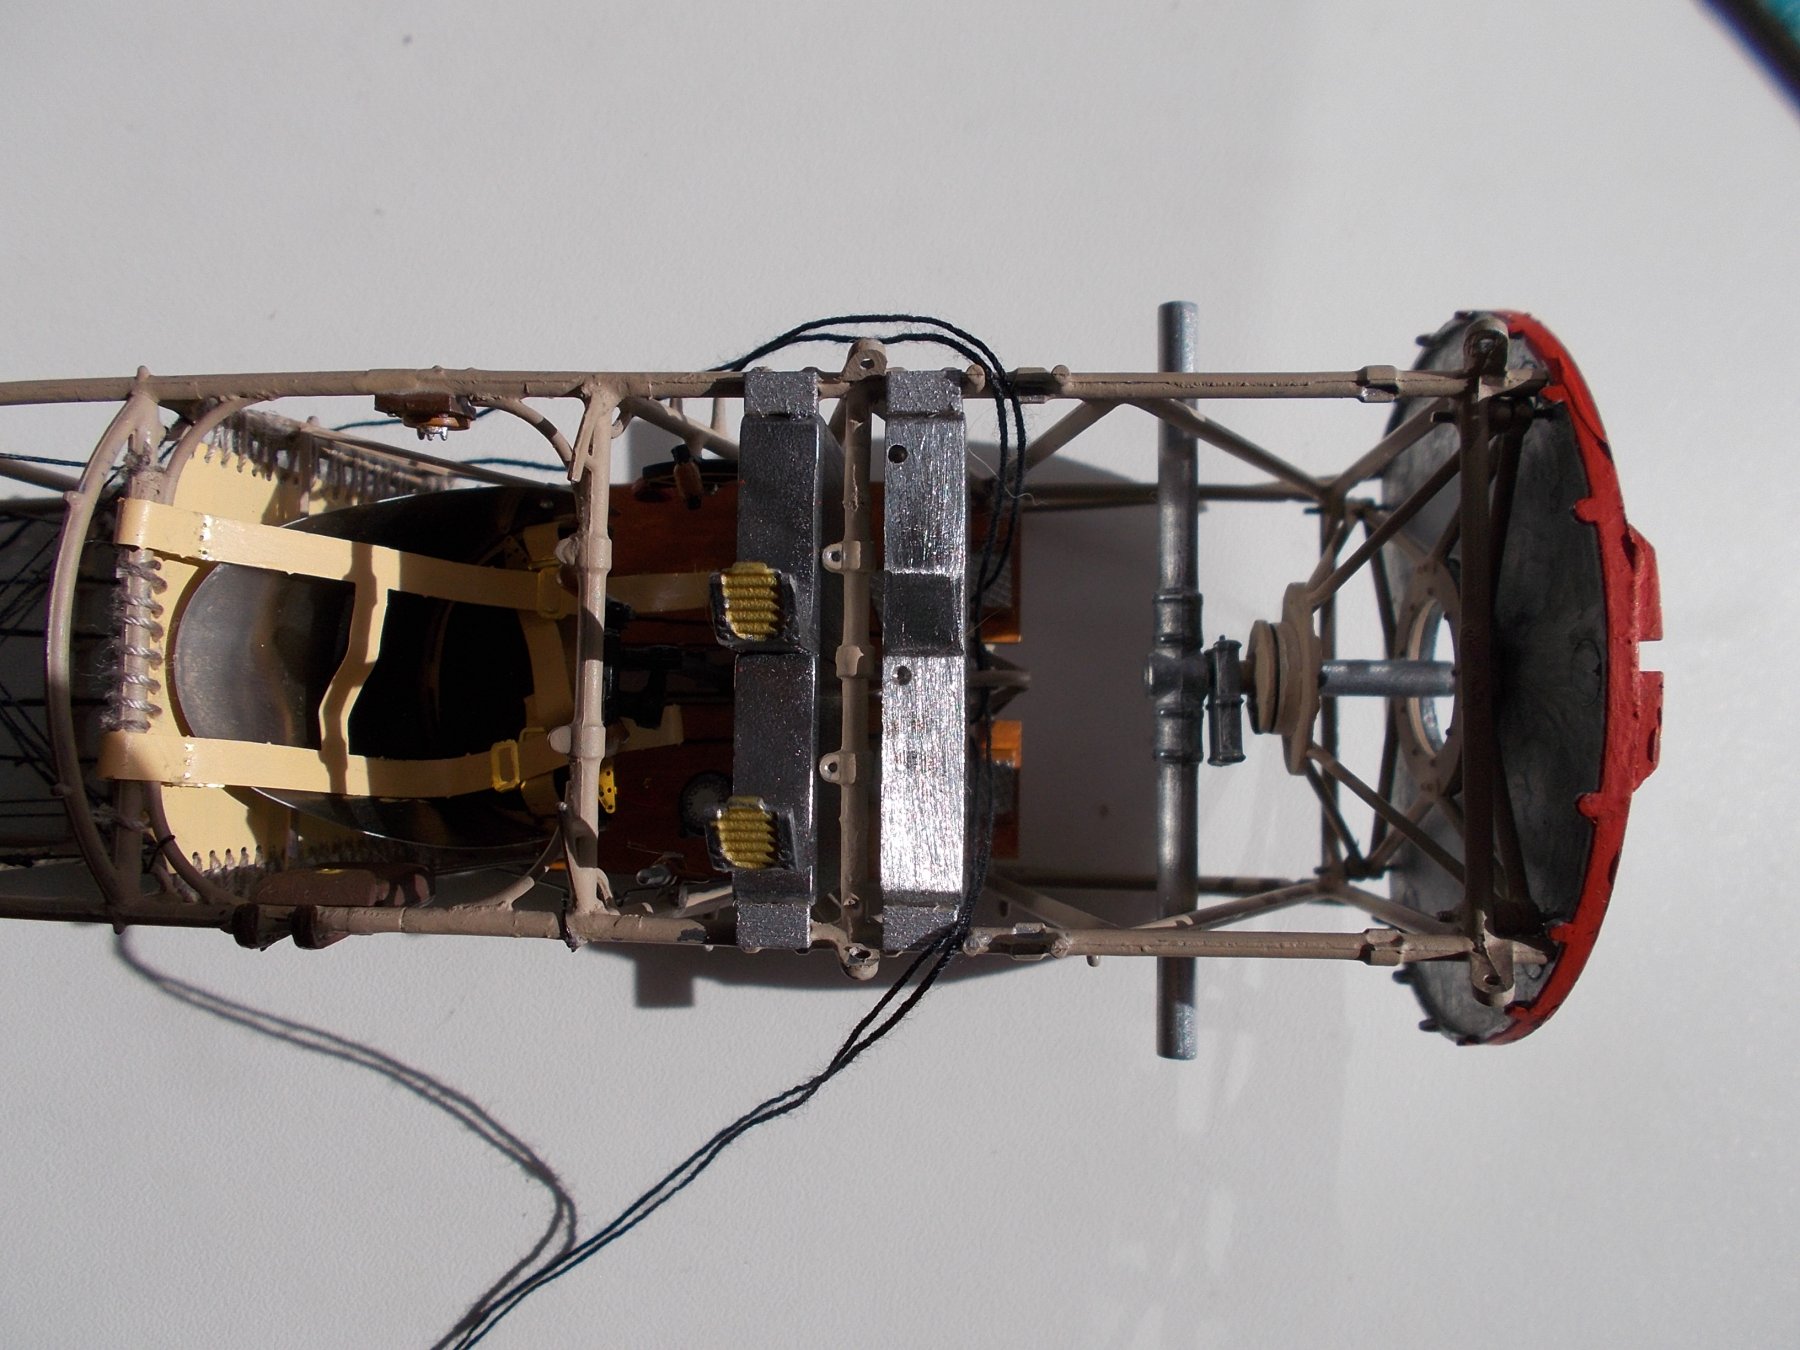
I discovered today that I had put the fuel tank in backwards !! Not a wonder I had to file so much off it. Anyway, situation remedied !
-
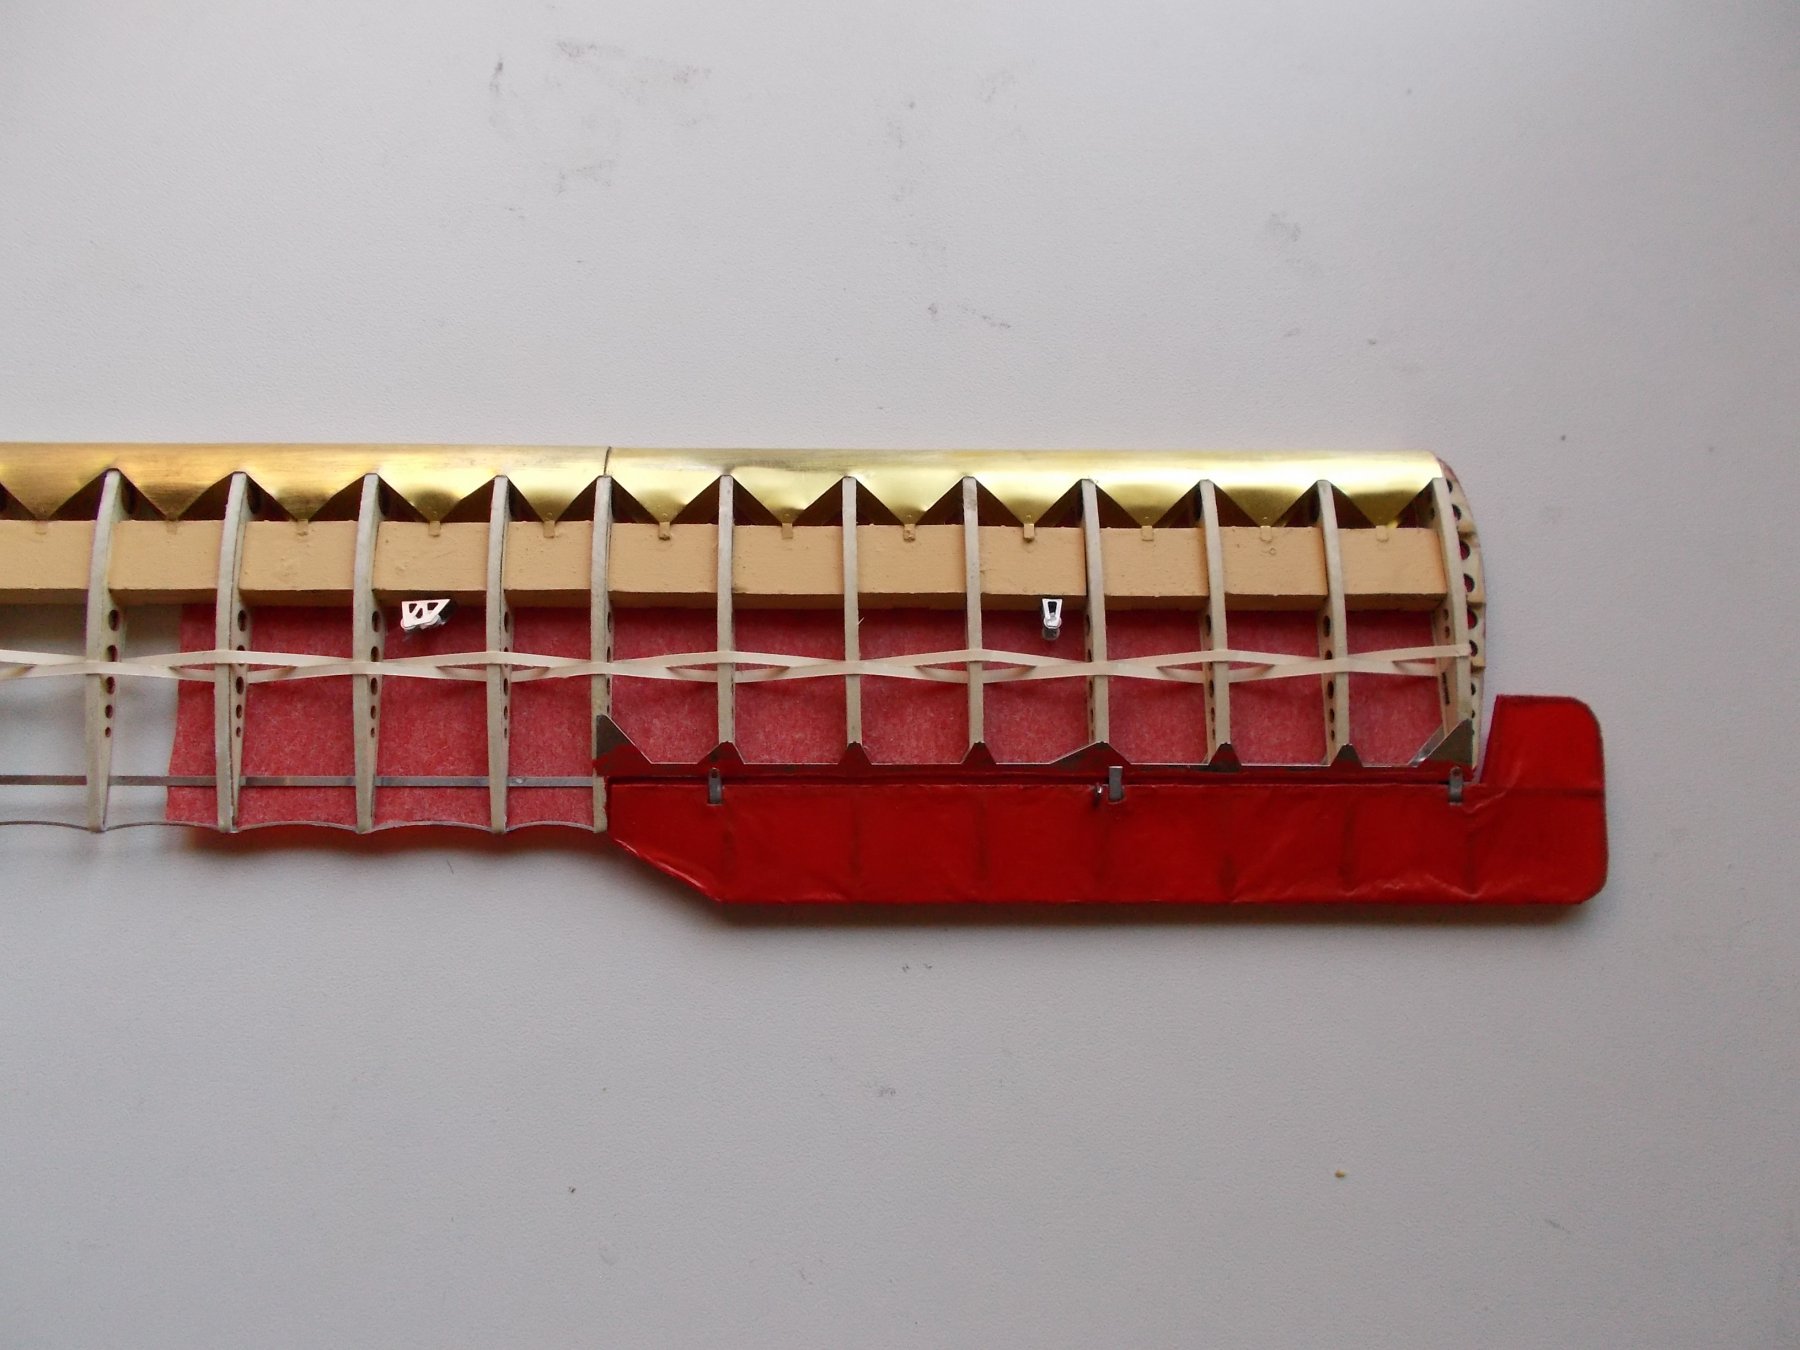
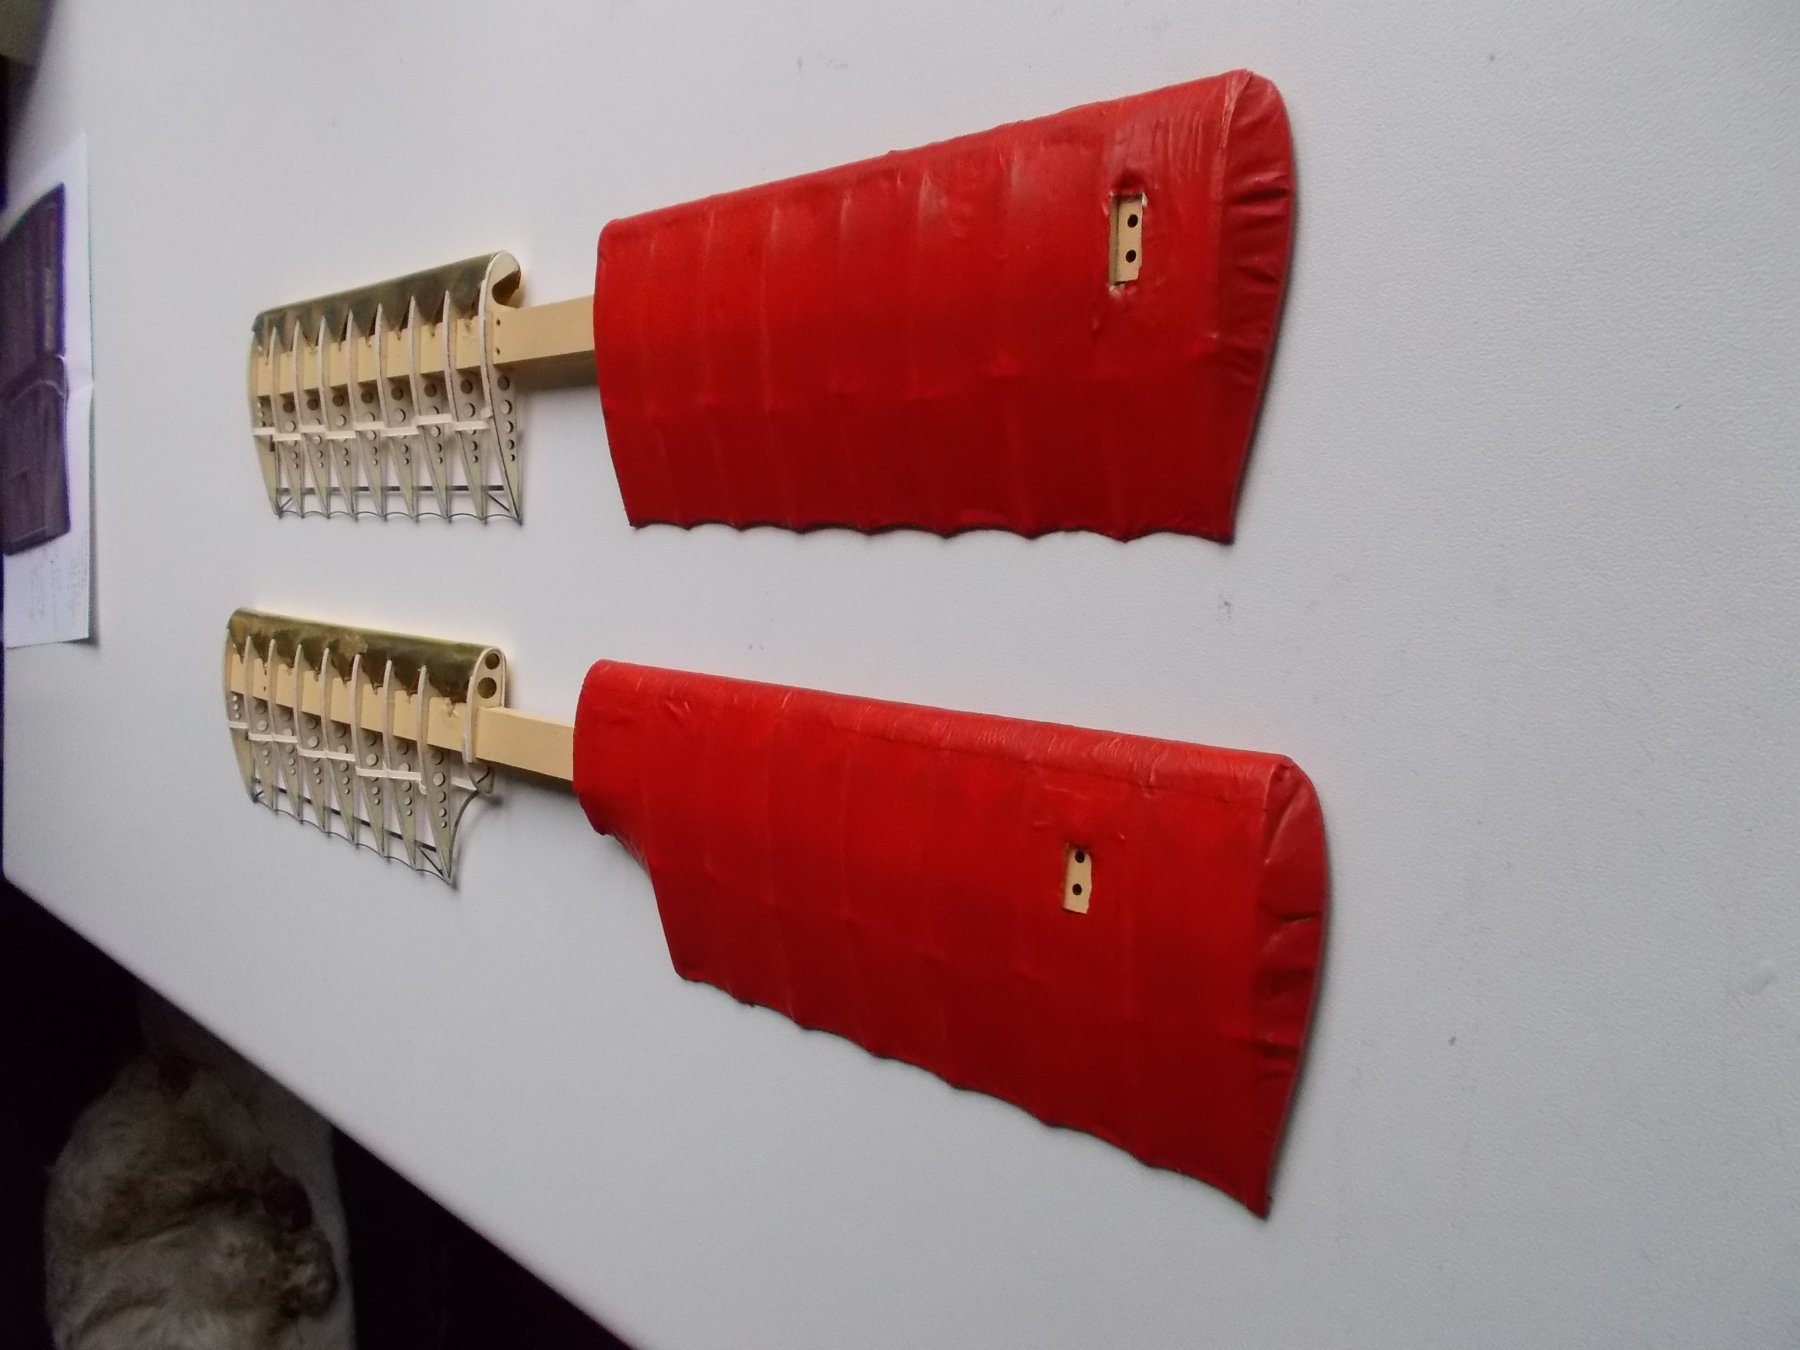
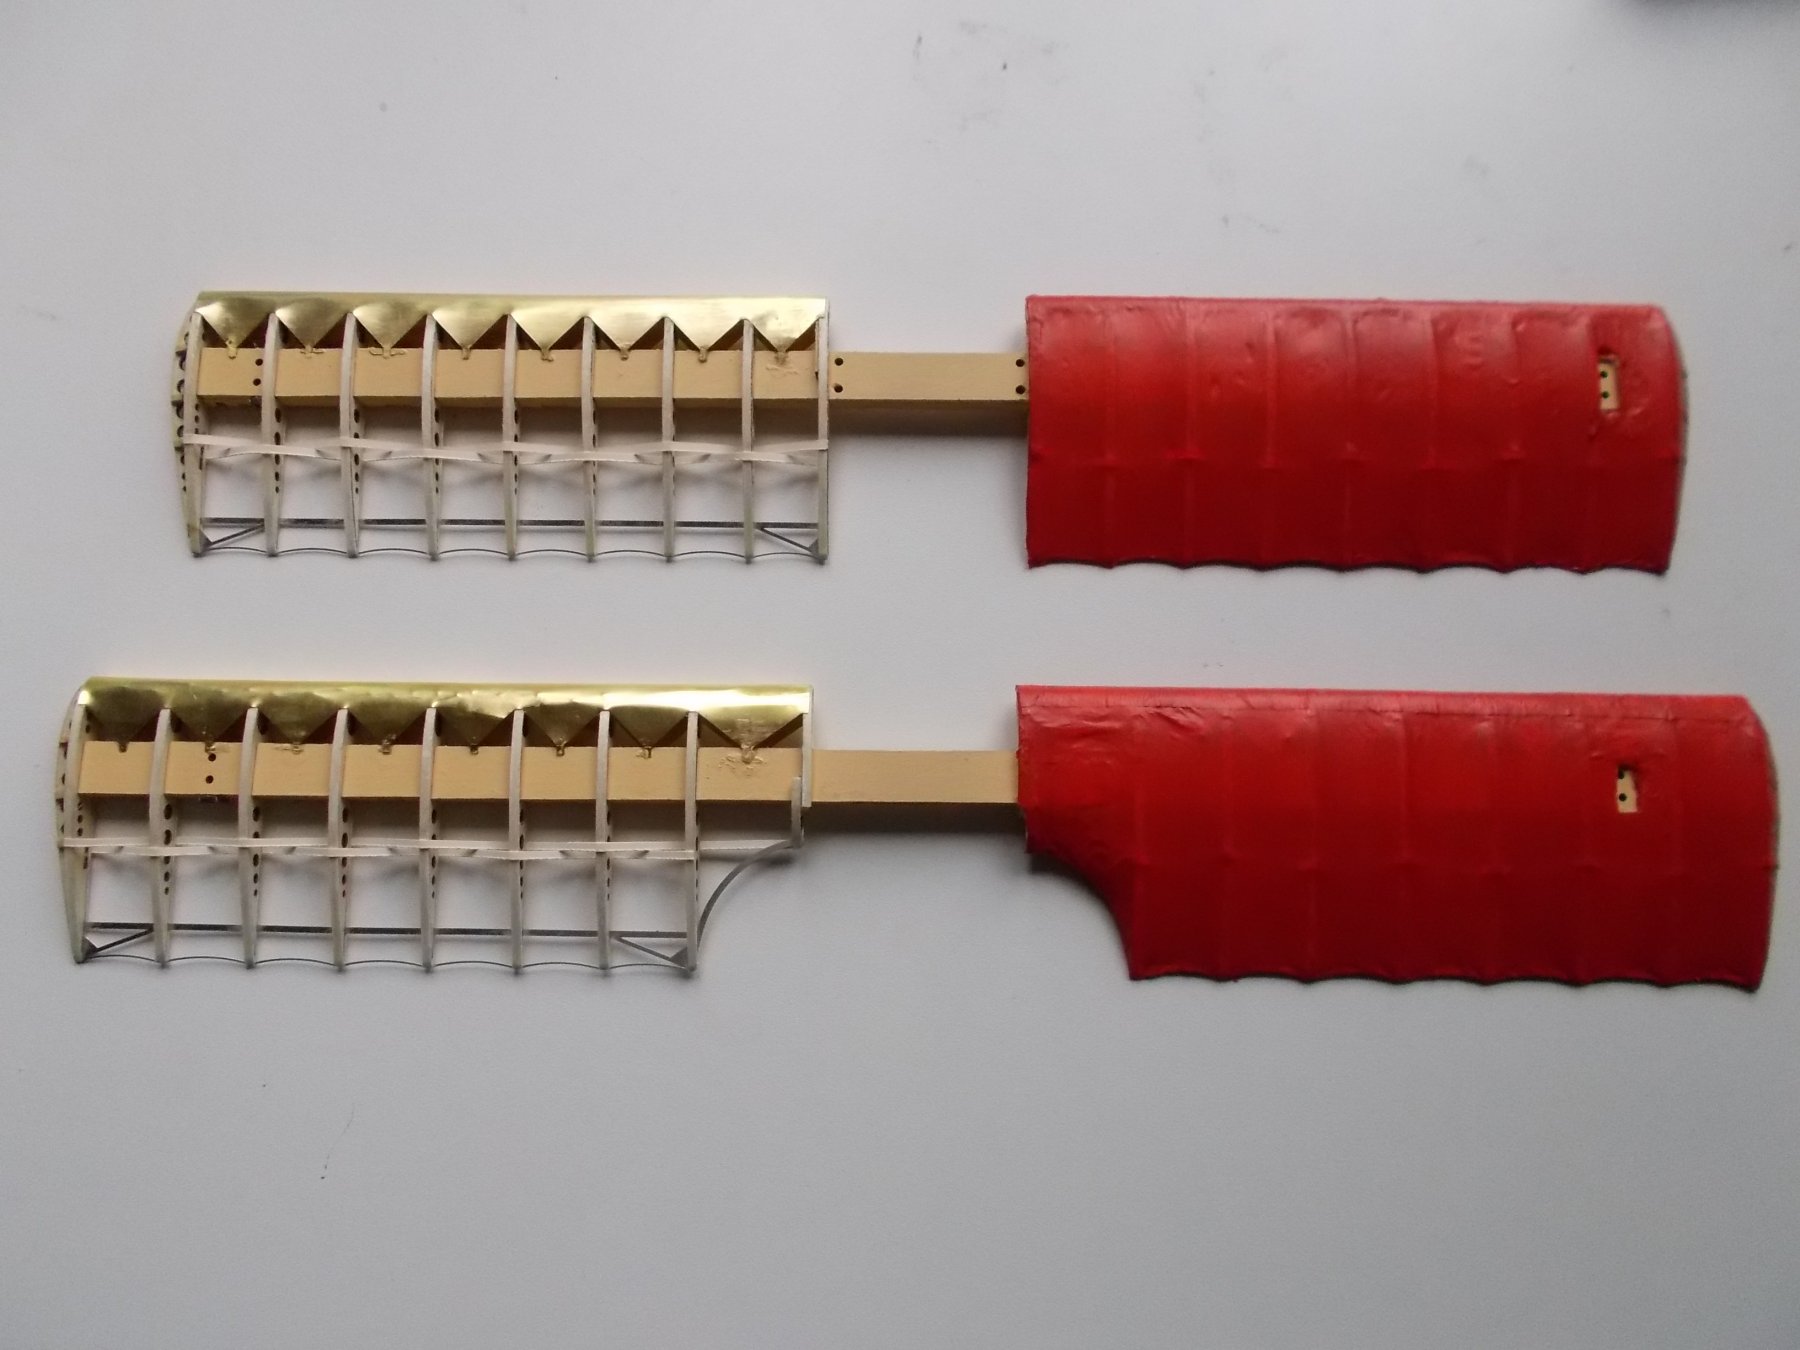
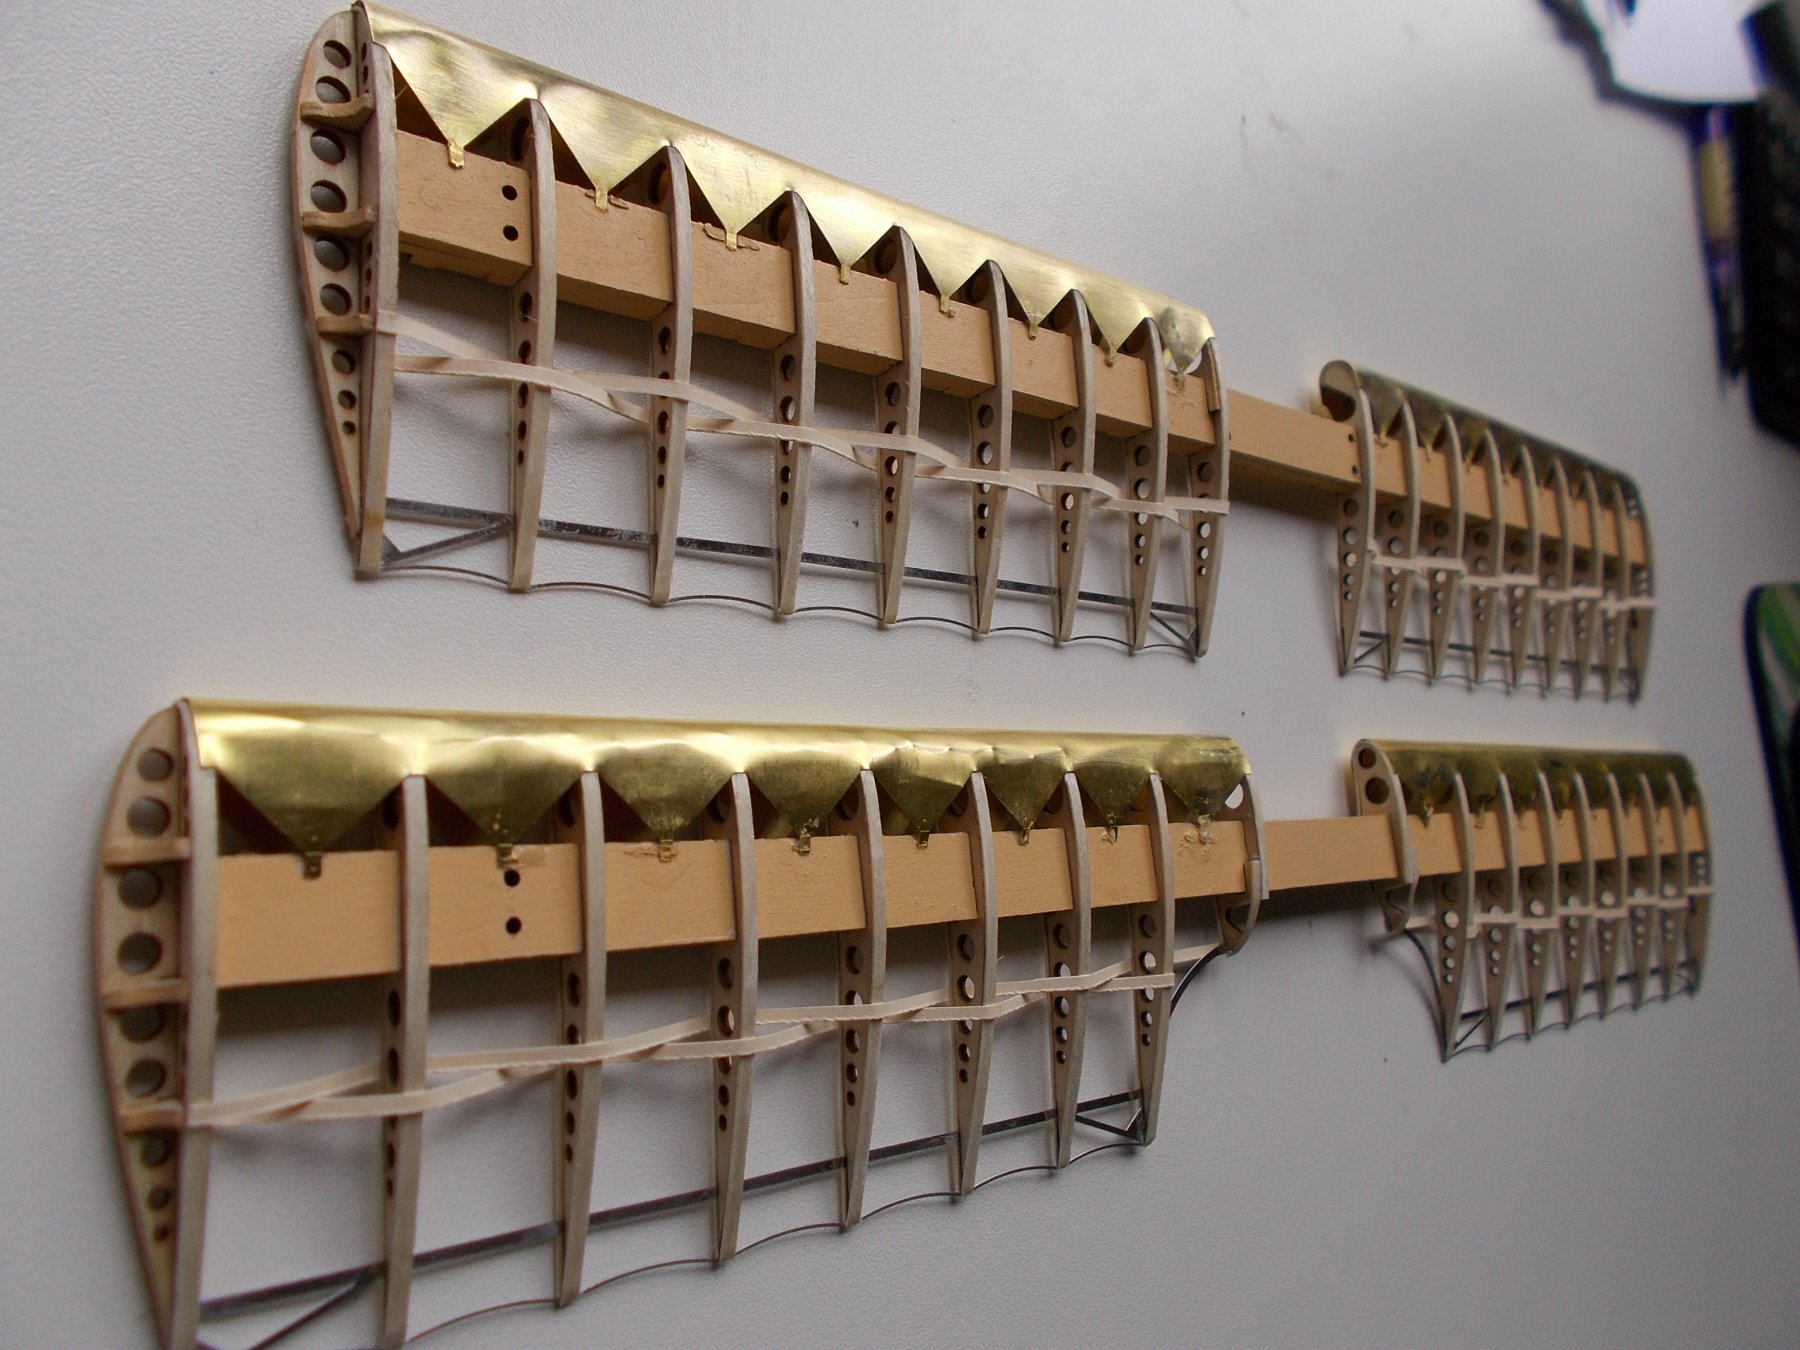
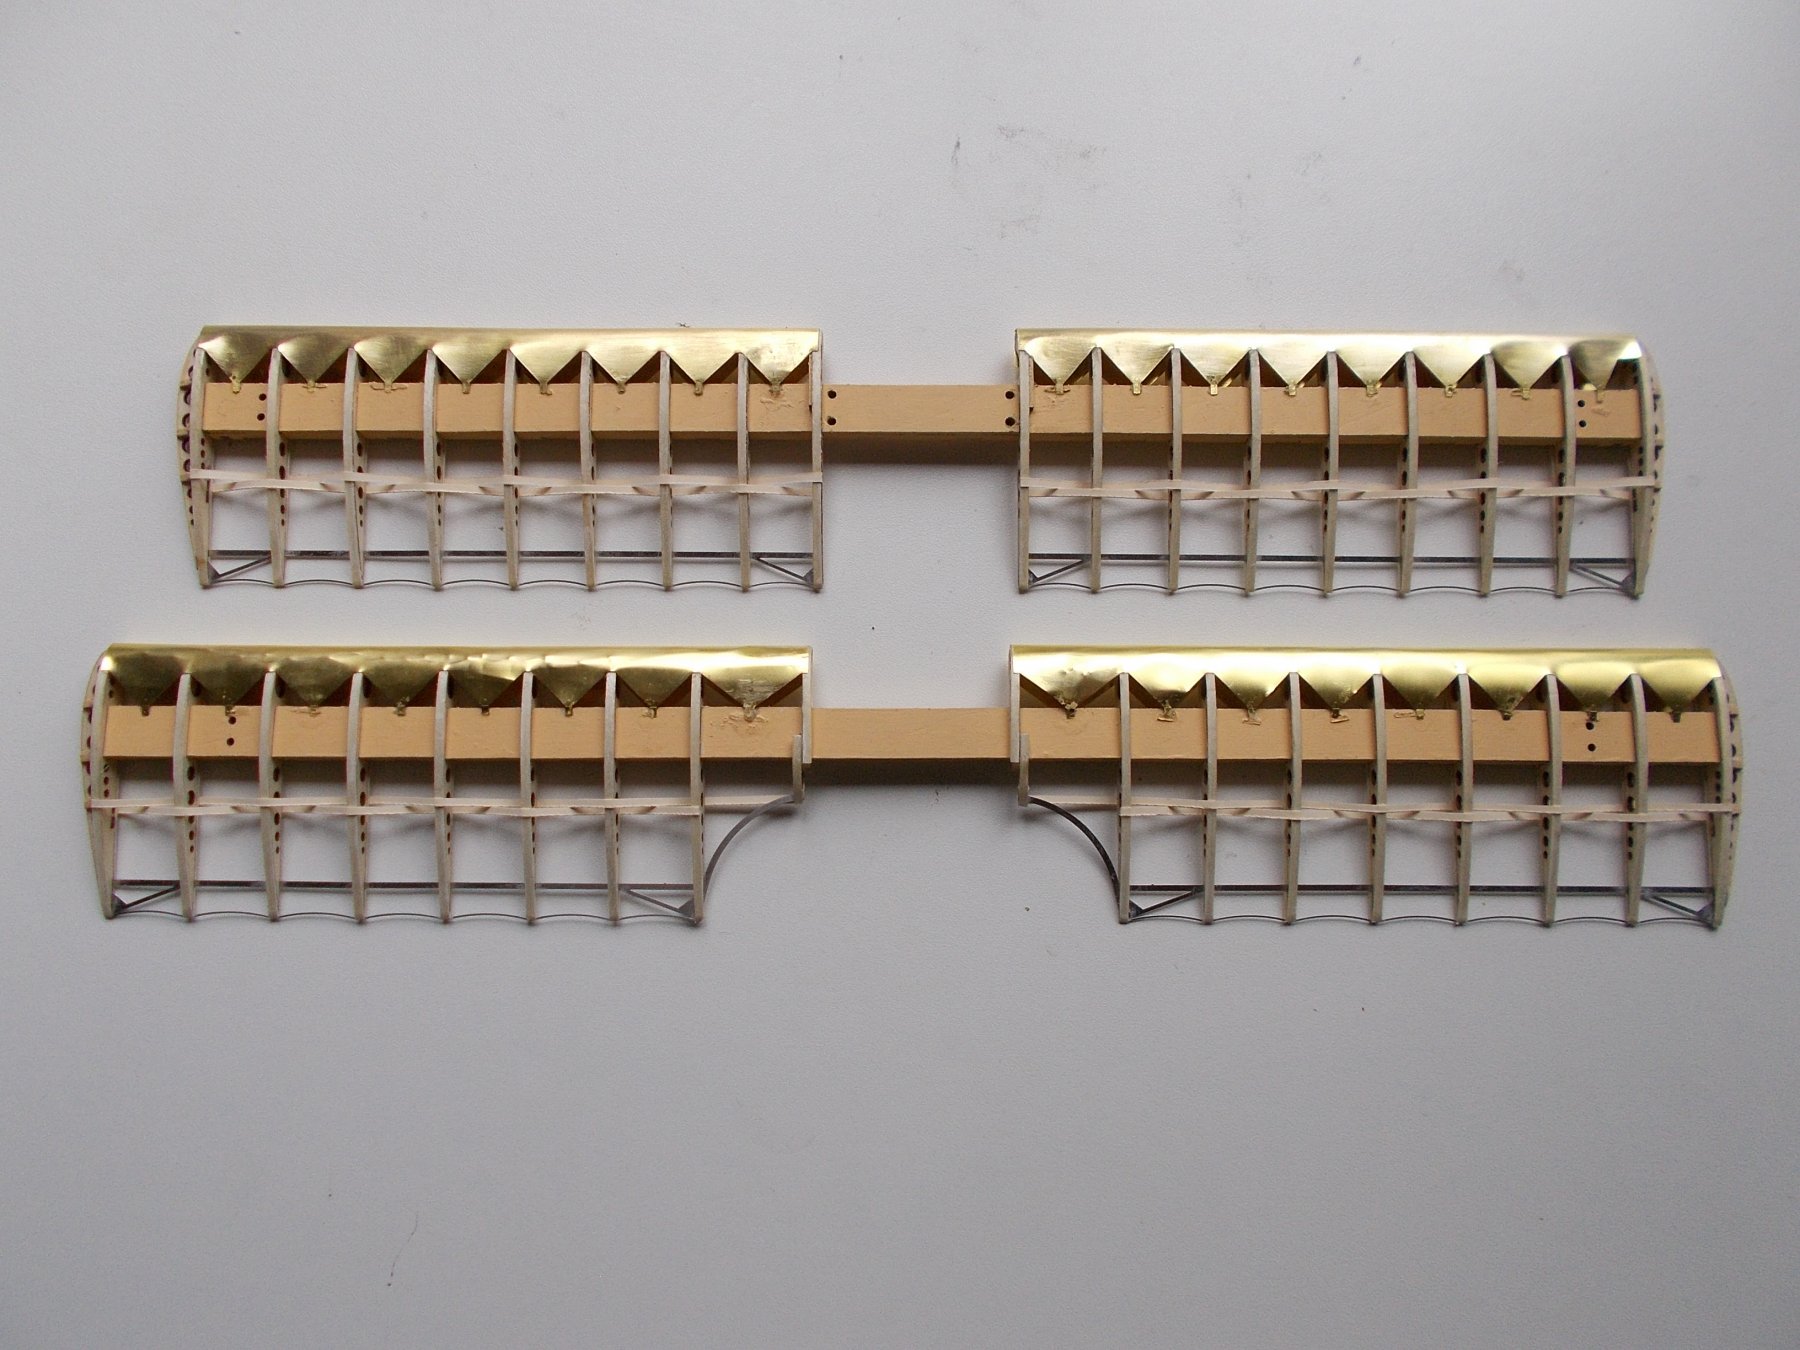
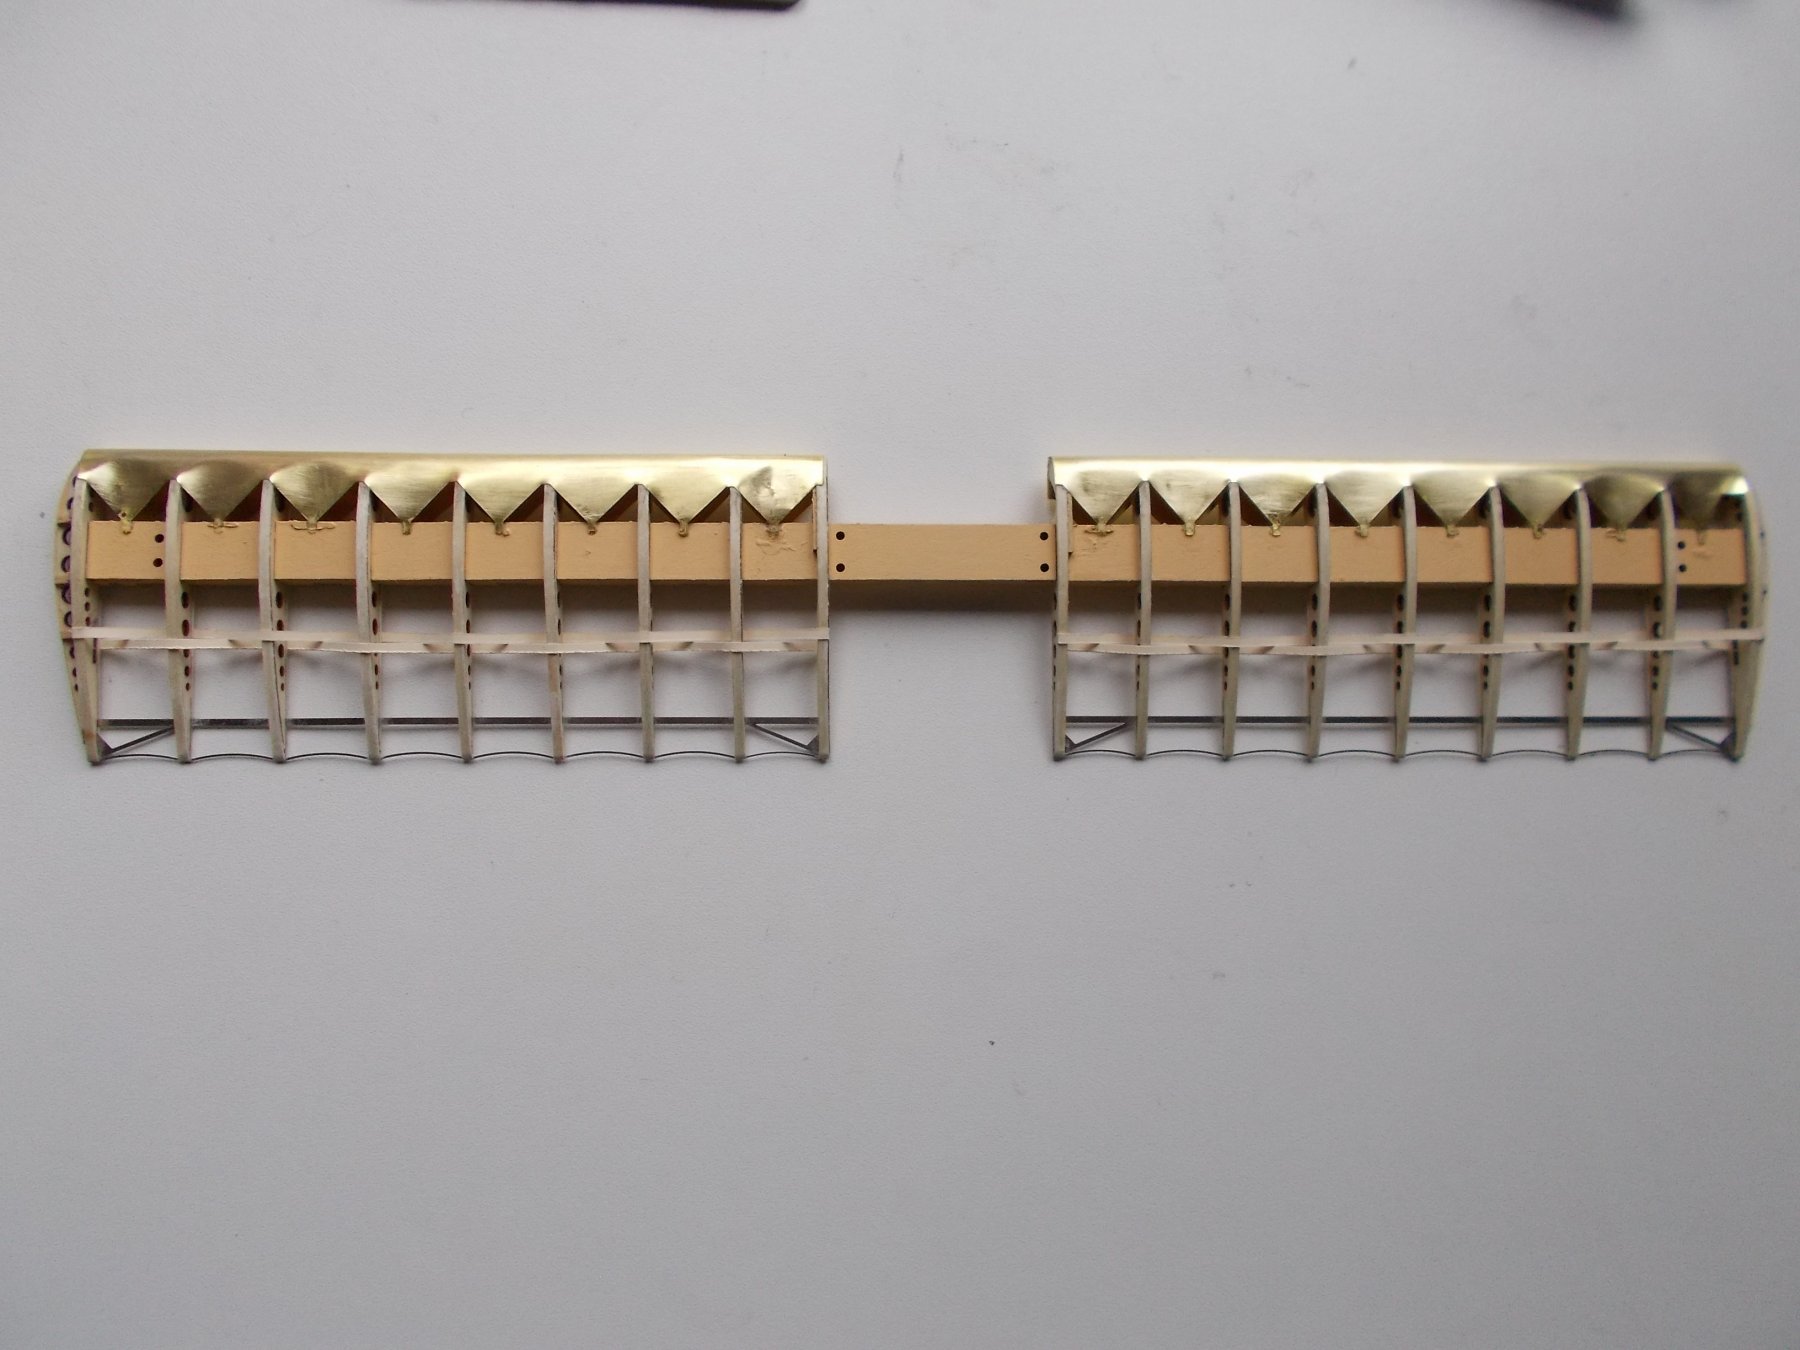
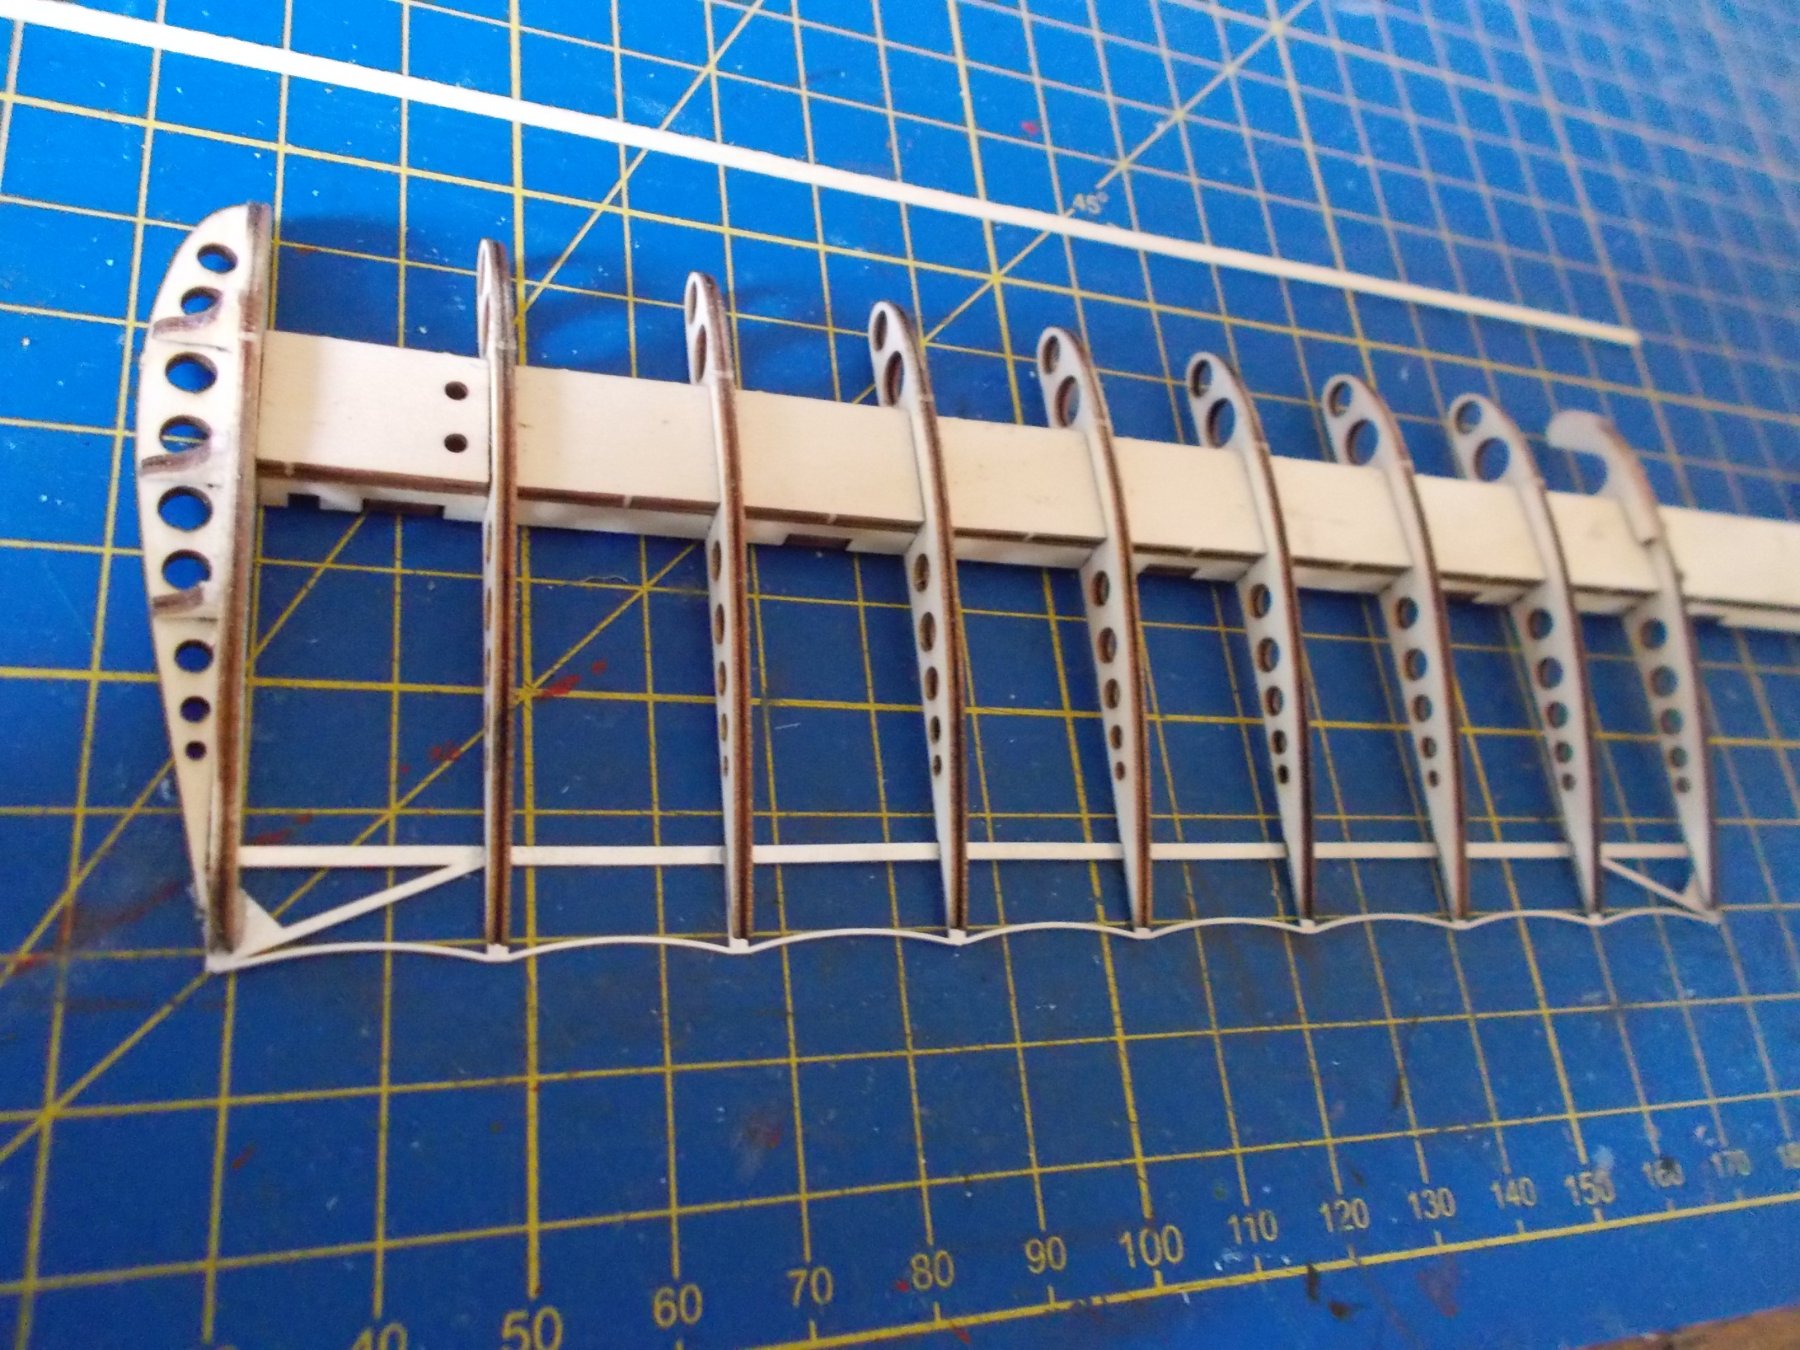
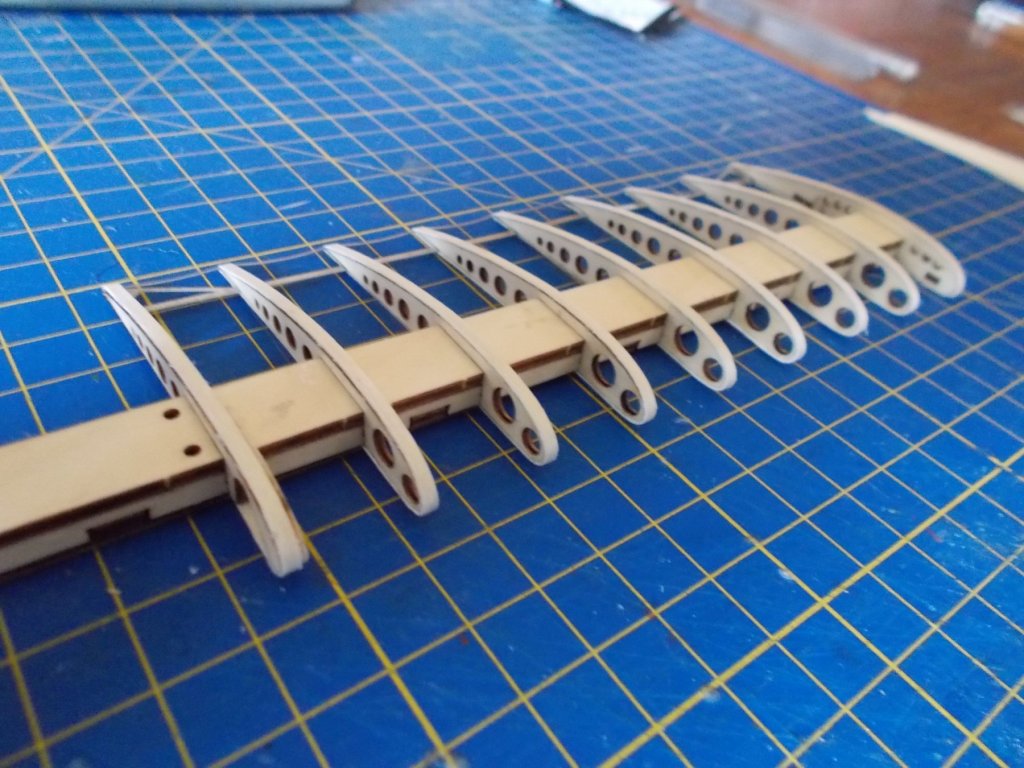
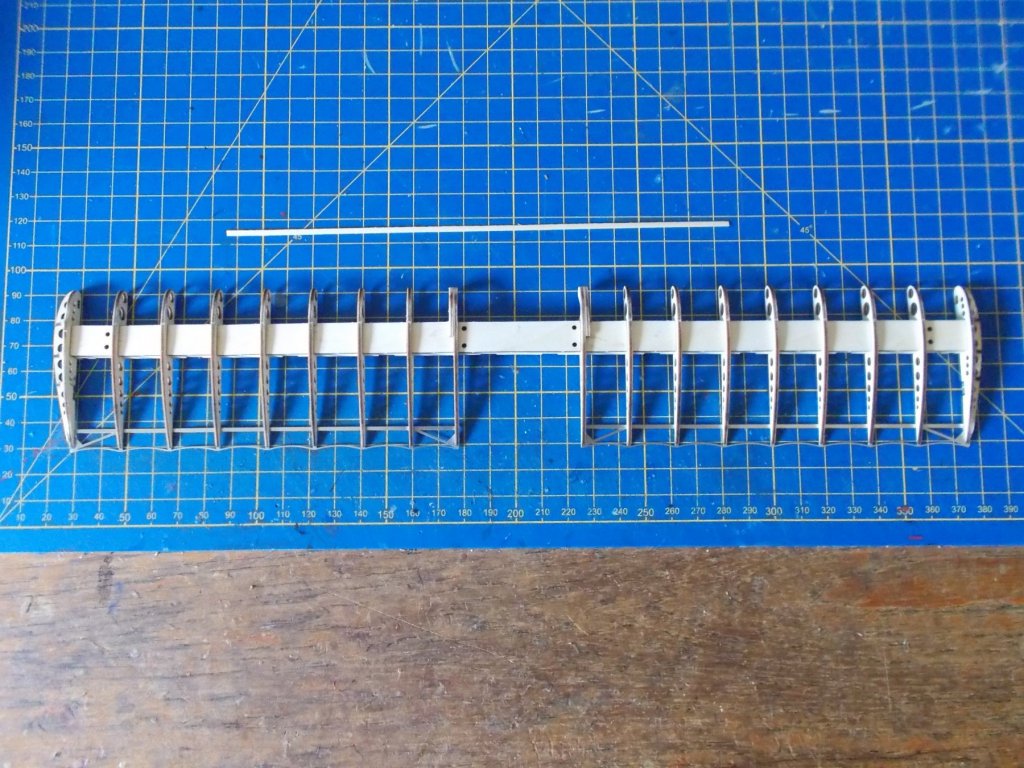
The trick was to soak them first and then put them on and work around the bend very slowly. The result, 18 capped ribs and no breakages !

- 141 replies
-
- 13
-
-
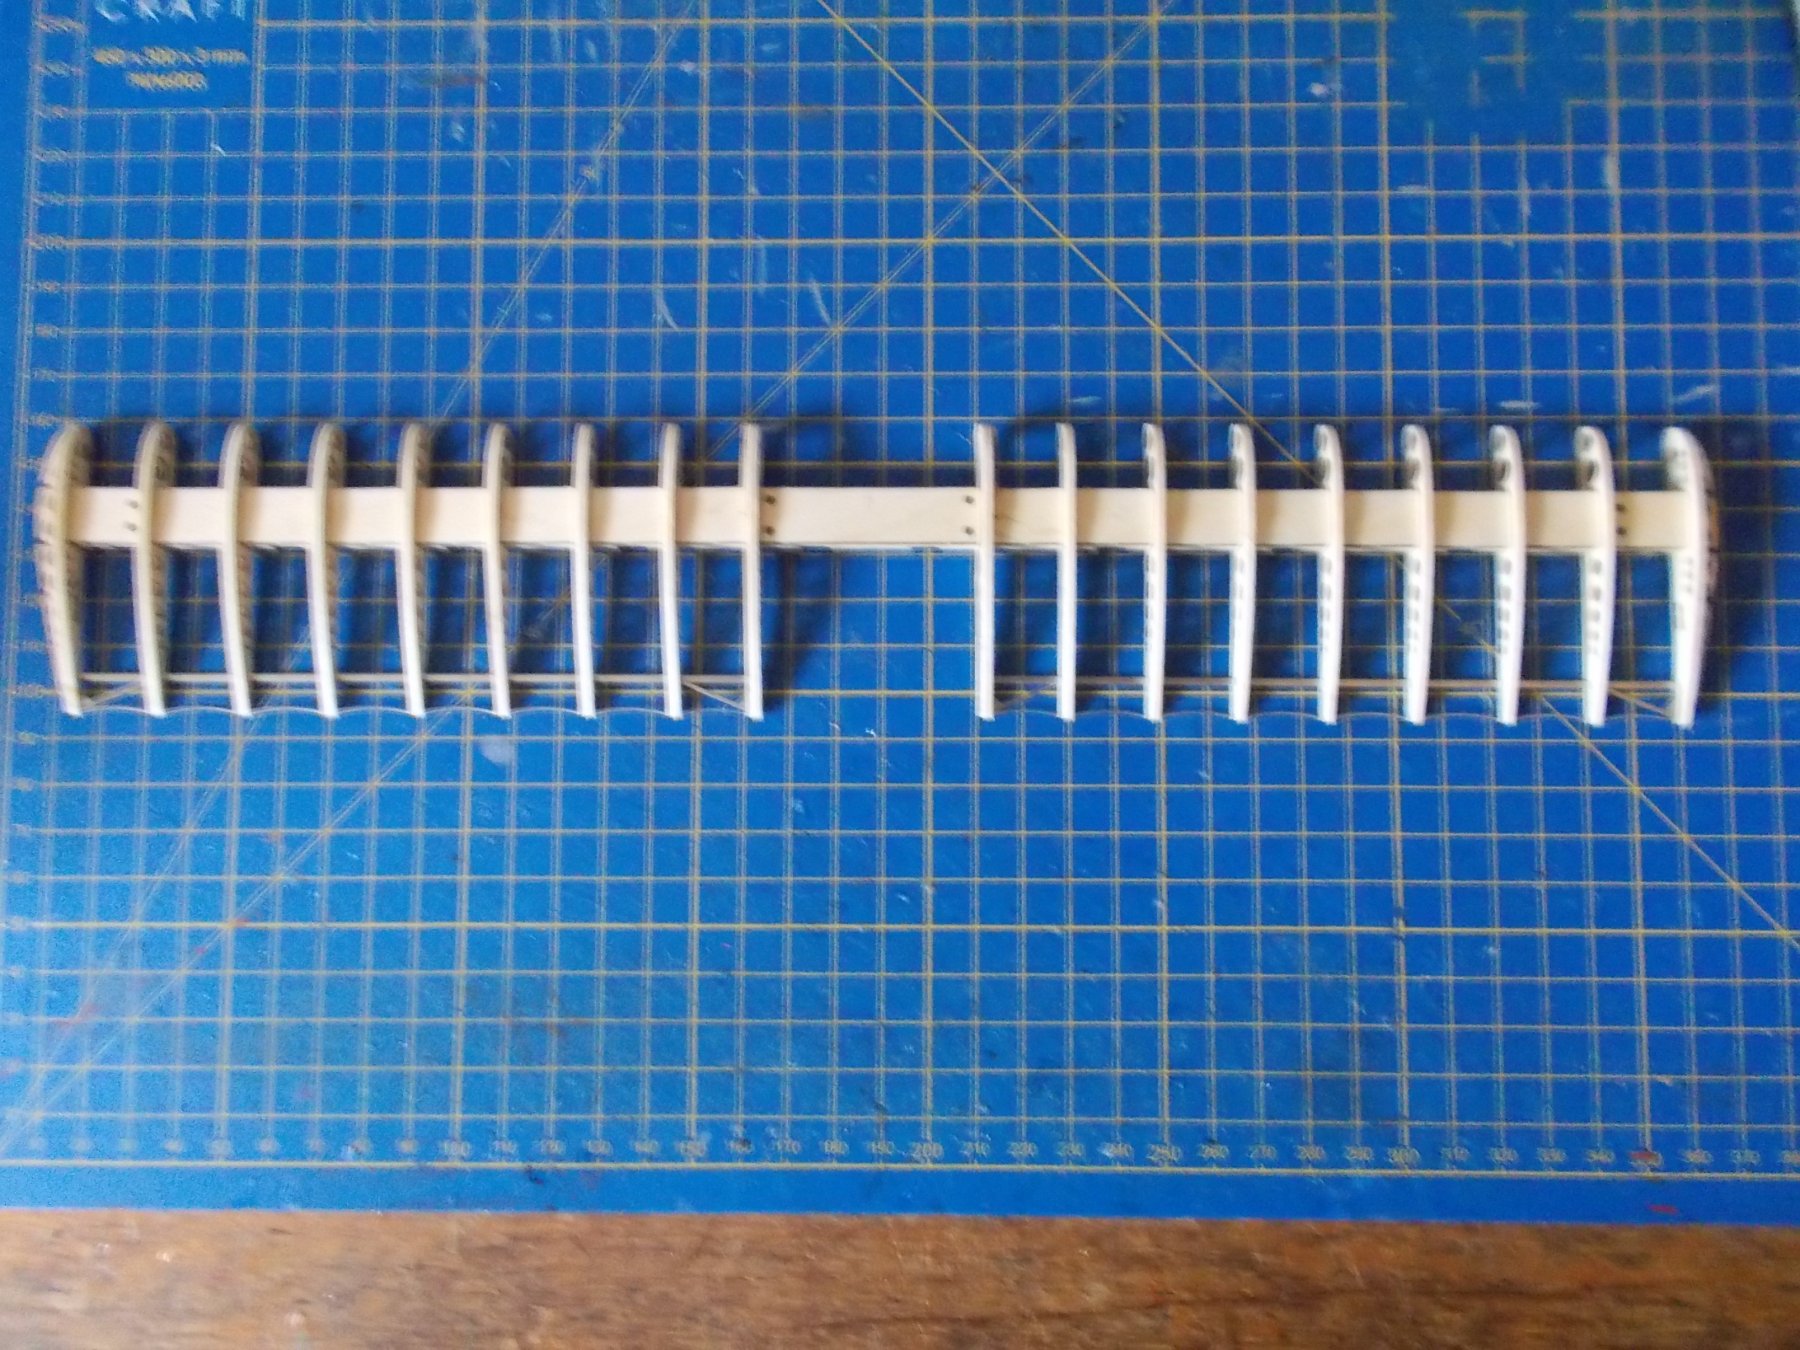
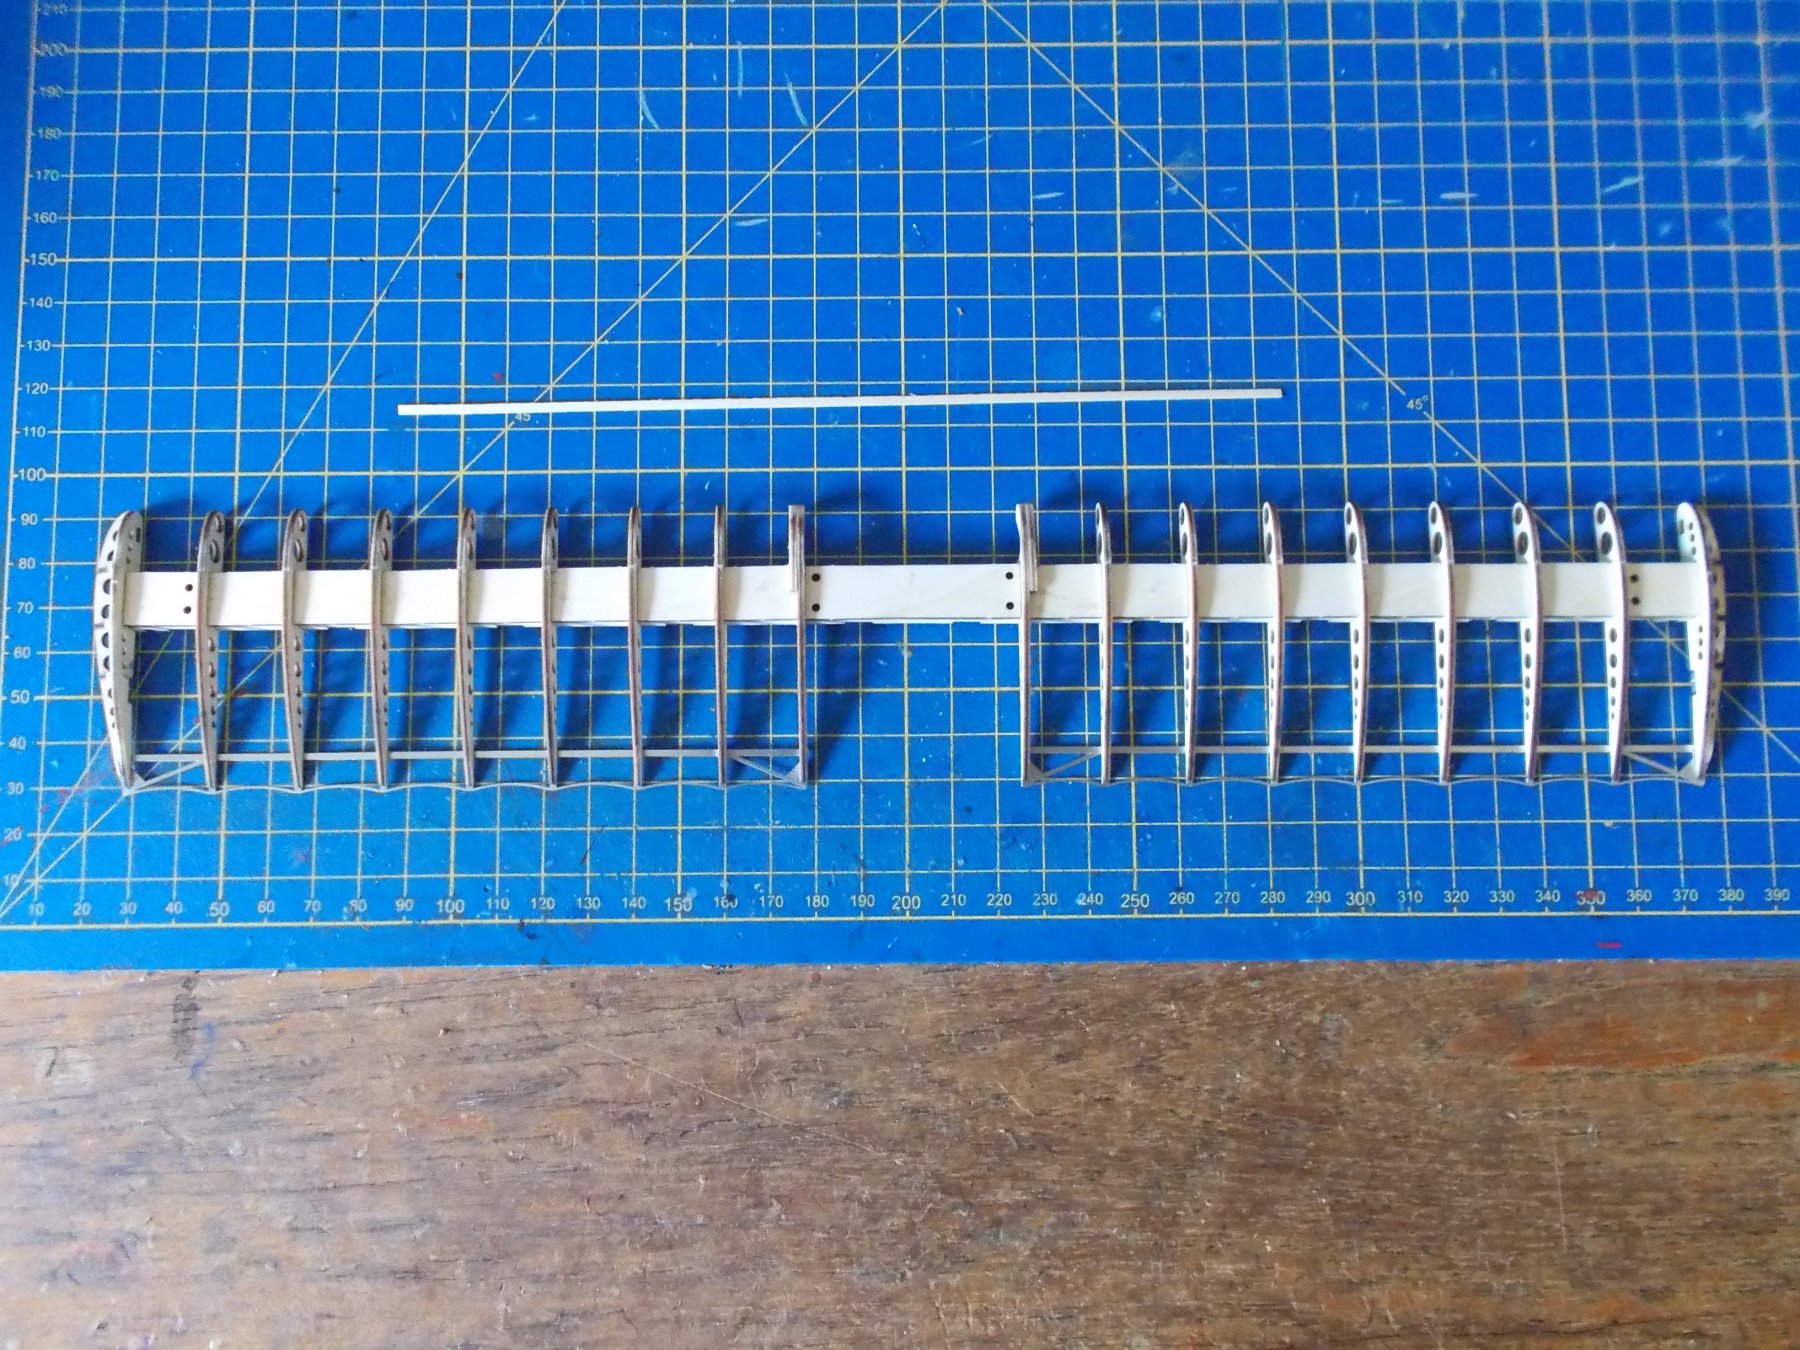
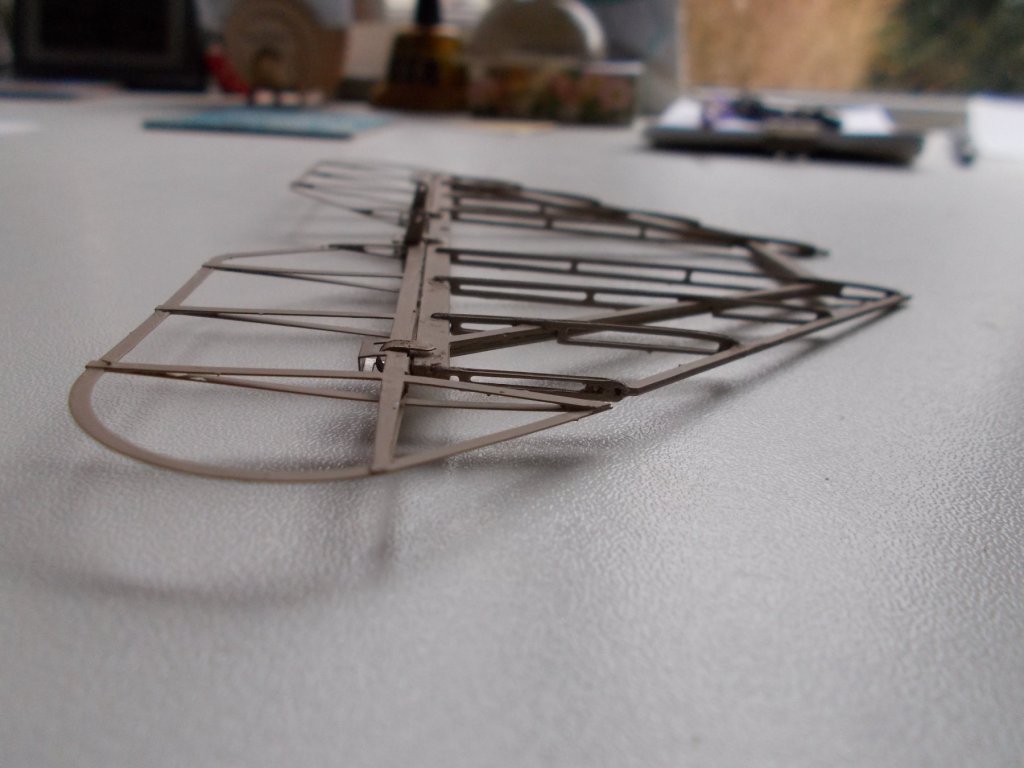
I am still thinking about the covering - or not. All thoughts welcomed. I have started the lower wing. Next stage is to cover the the ribs all round their edge with teeny weeny wood strips !! How many do you reckon I will break ?

-
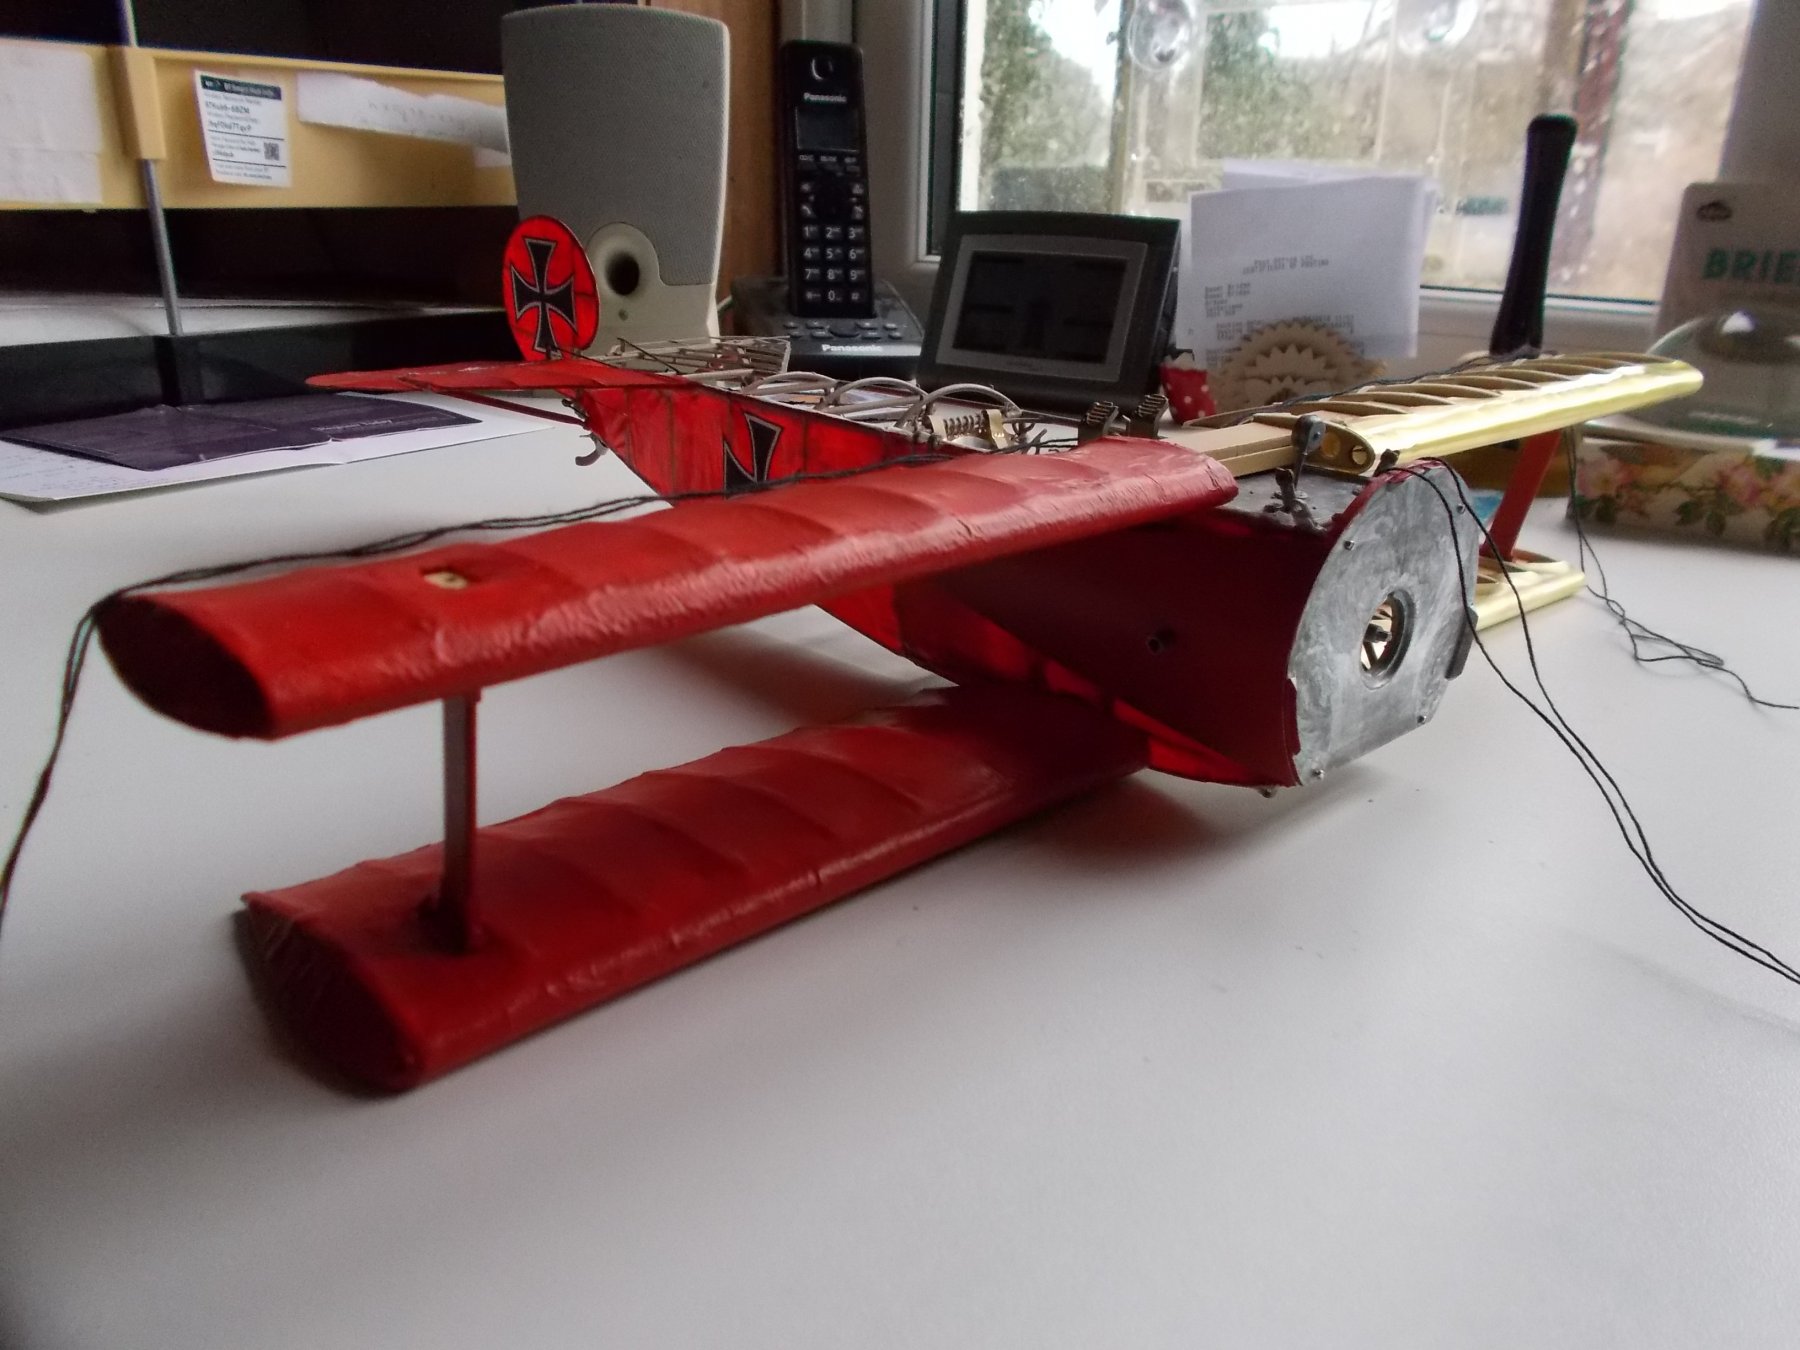
Now look folks, maybe you don't understand what I am trying to decide about, but, for those who haven't sen the Sopwith - this is what I mean.

- 141 replies
-
- 11
-
-
That's one idea but the bank manager won't like it.
-
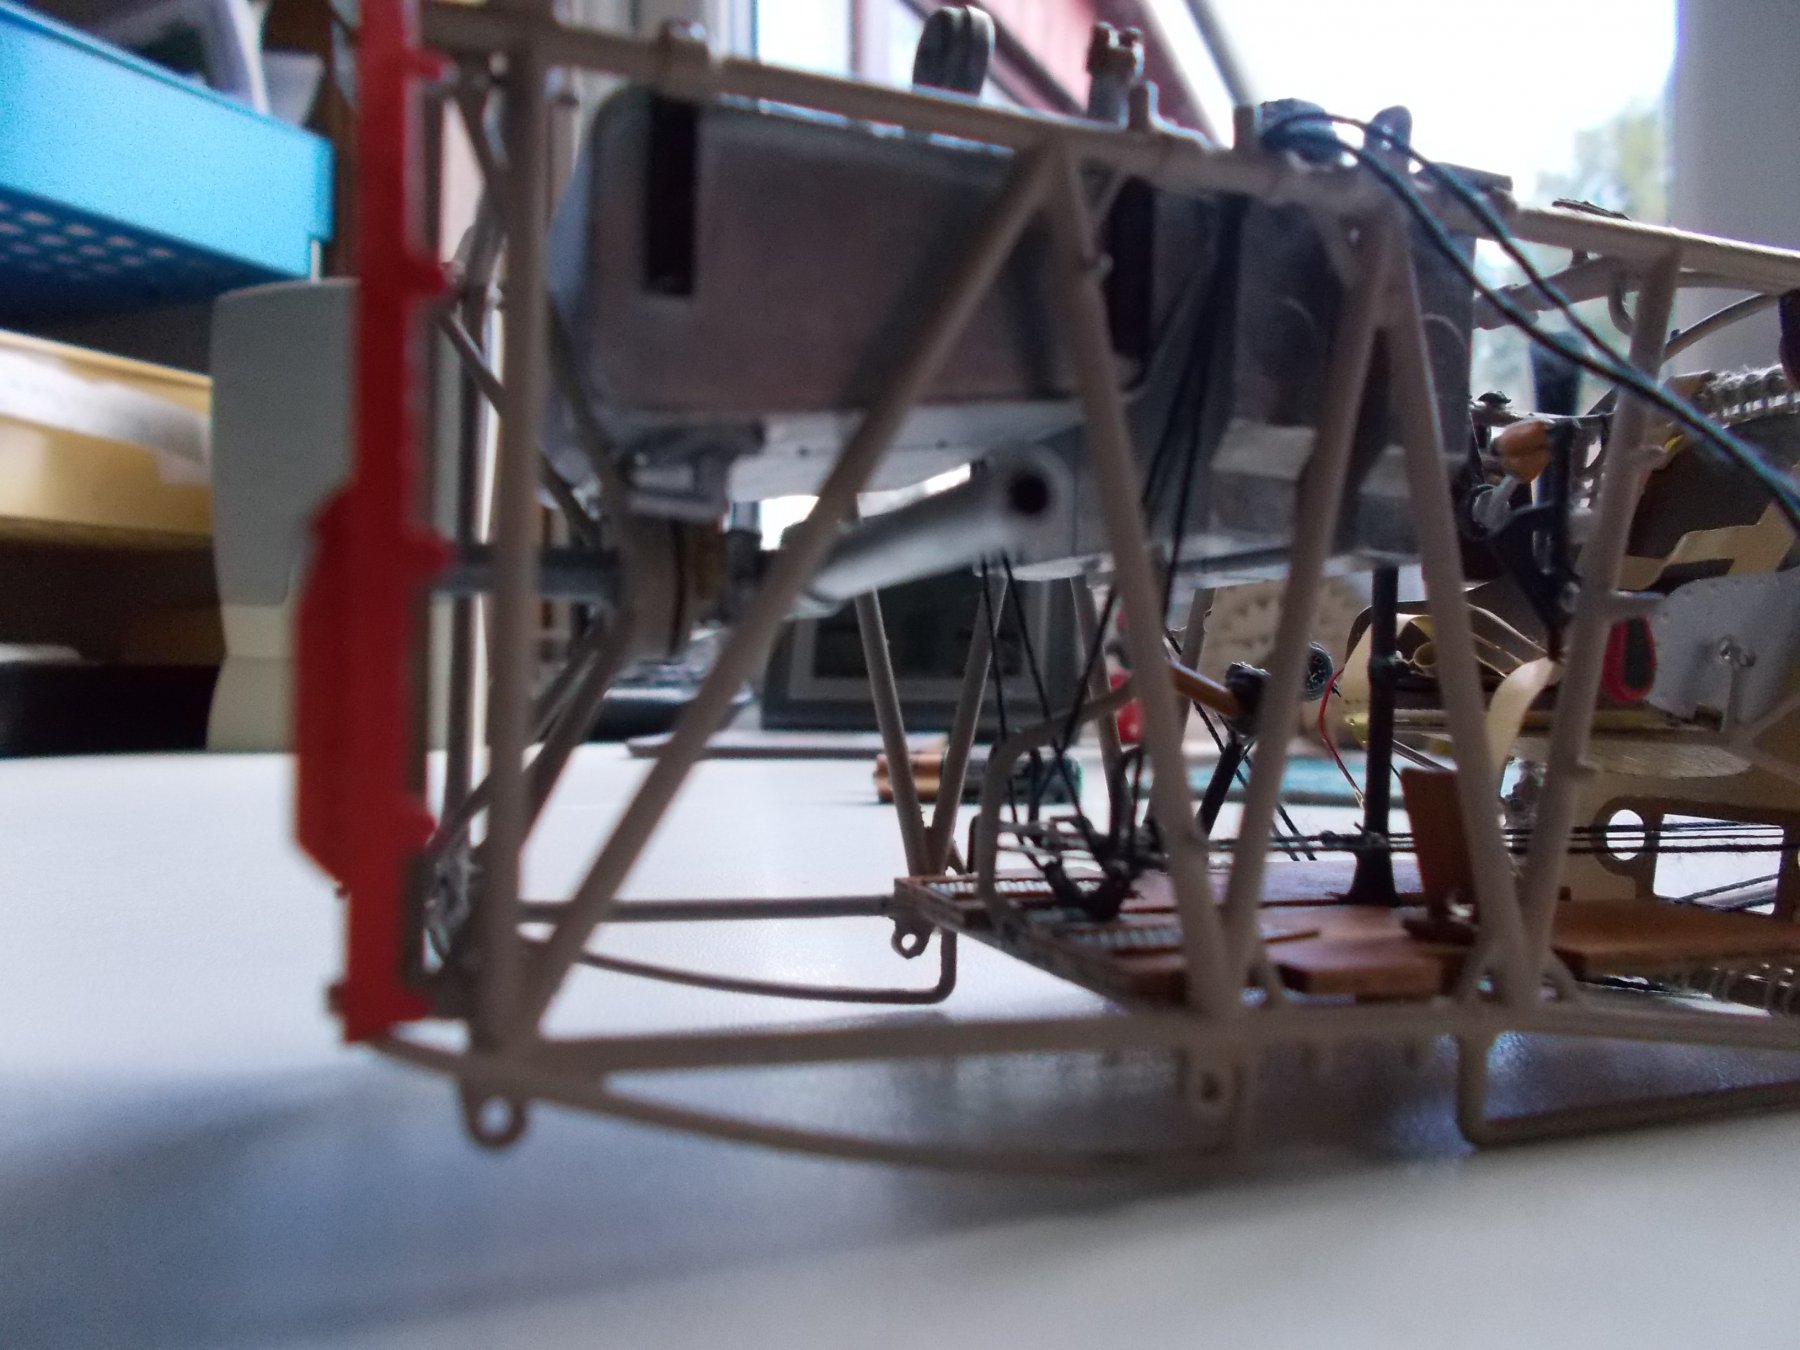
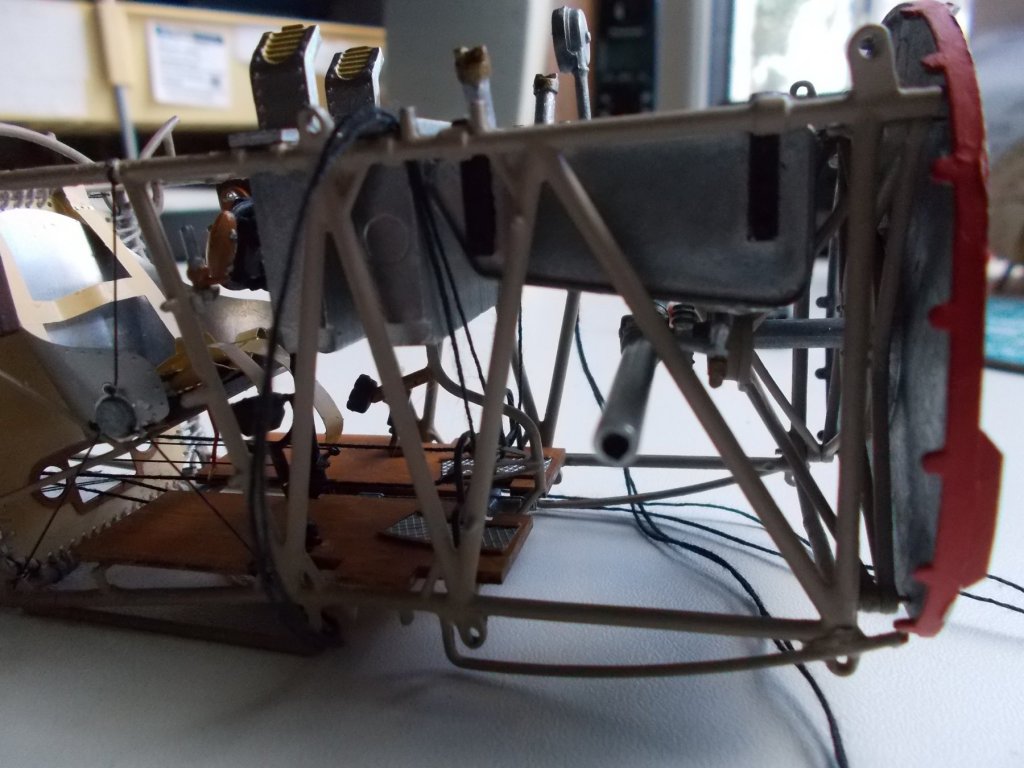
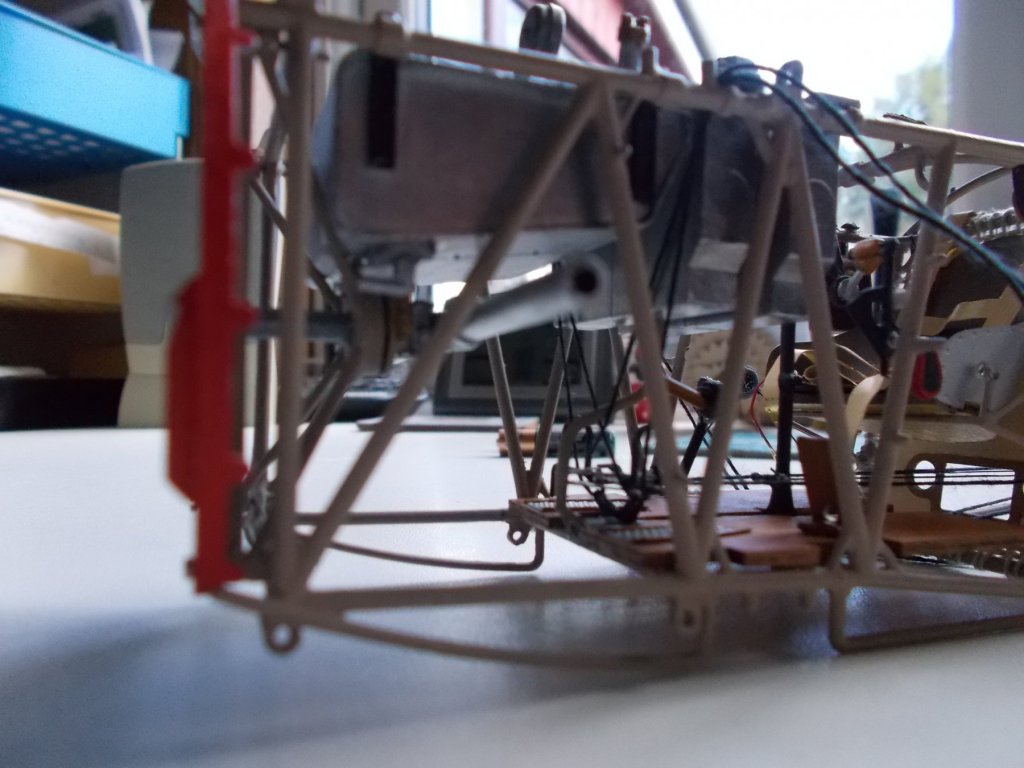
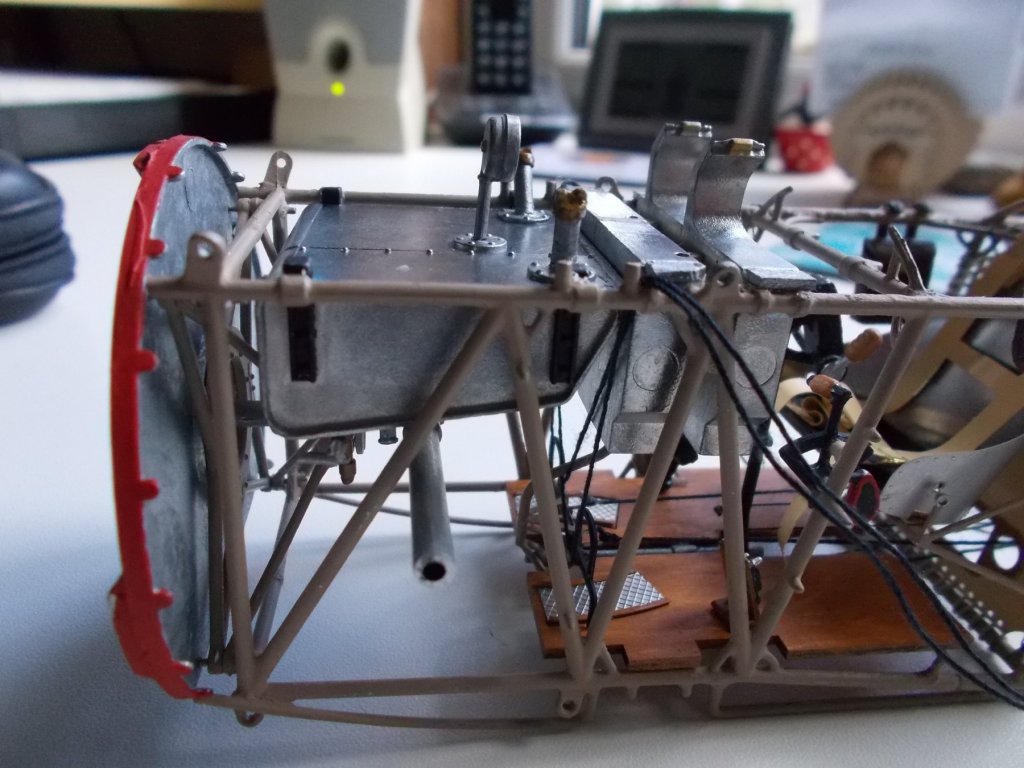
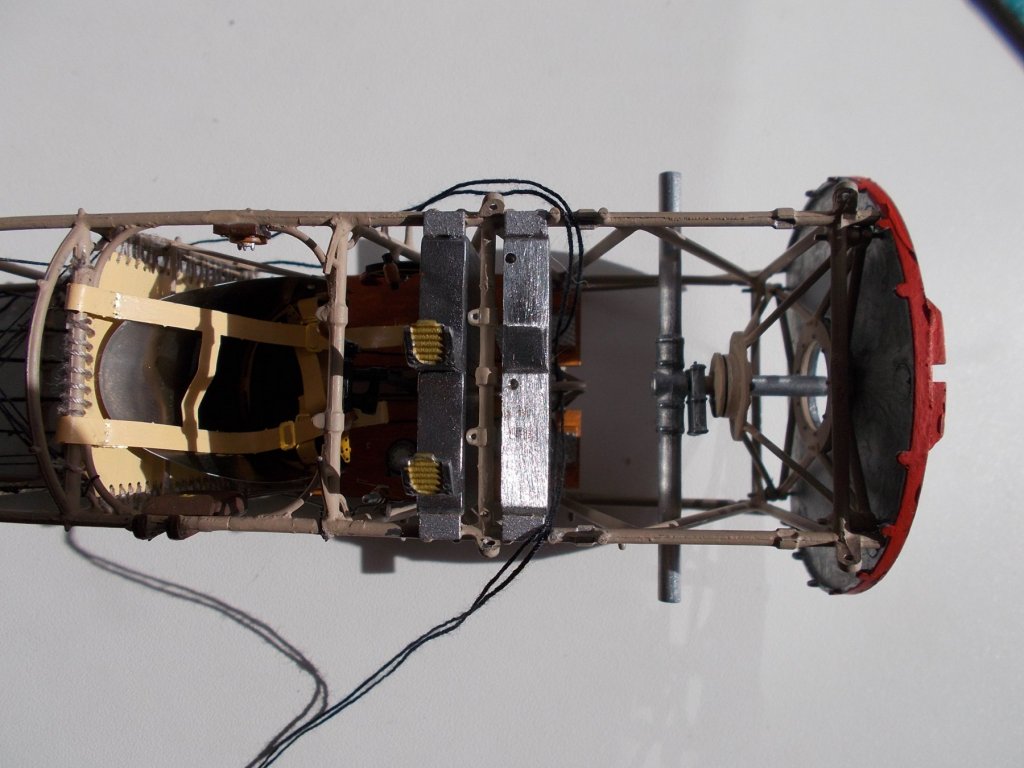
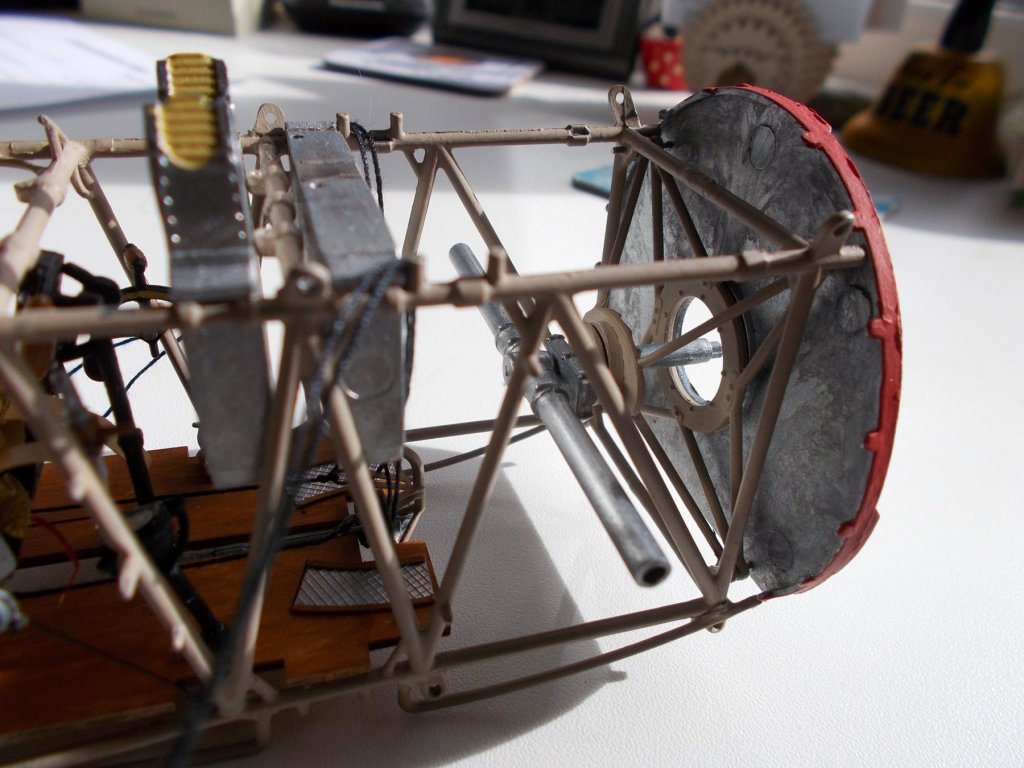
The magazines for the guns, the oil and fuel tanks are installed. The fuel tank was huge struggle as in order to fit it I had to file away quite two quite big areas on the underside to accommodate the legs on the firewall mount. I got there in the end. The firewall is held on by four 0.5mm bolts theoretically with nuts on. There is no way on this planet I could get the nuts on so I just had to cheat and glue them. They would be very hard to see anyway. Basically the fuselage is now done except for 'wood' panels to go on the sides - they are made of metal but have to be disguised as wood. This depends on whether I cover half or not which is where I need your help viewers ! Otherwise the next stage is to start on the lower wing.

- 141 replies
-
- 14
-
-
You really are doing a marvellous job on this.
-
I must admit to being in a bit of a dilemma now. I know what you mean Boyd but I was only going to cover half the plane like I did with the Sopwith. All the insides would show from one side and likewise for the wings. What do others think because I can't make up my mind ?
-
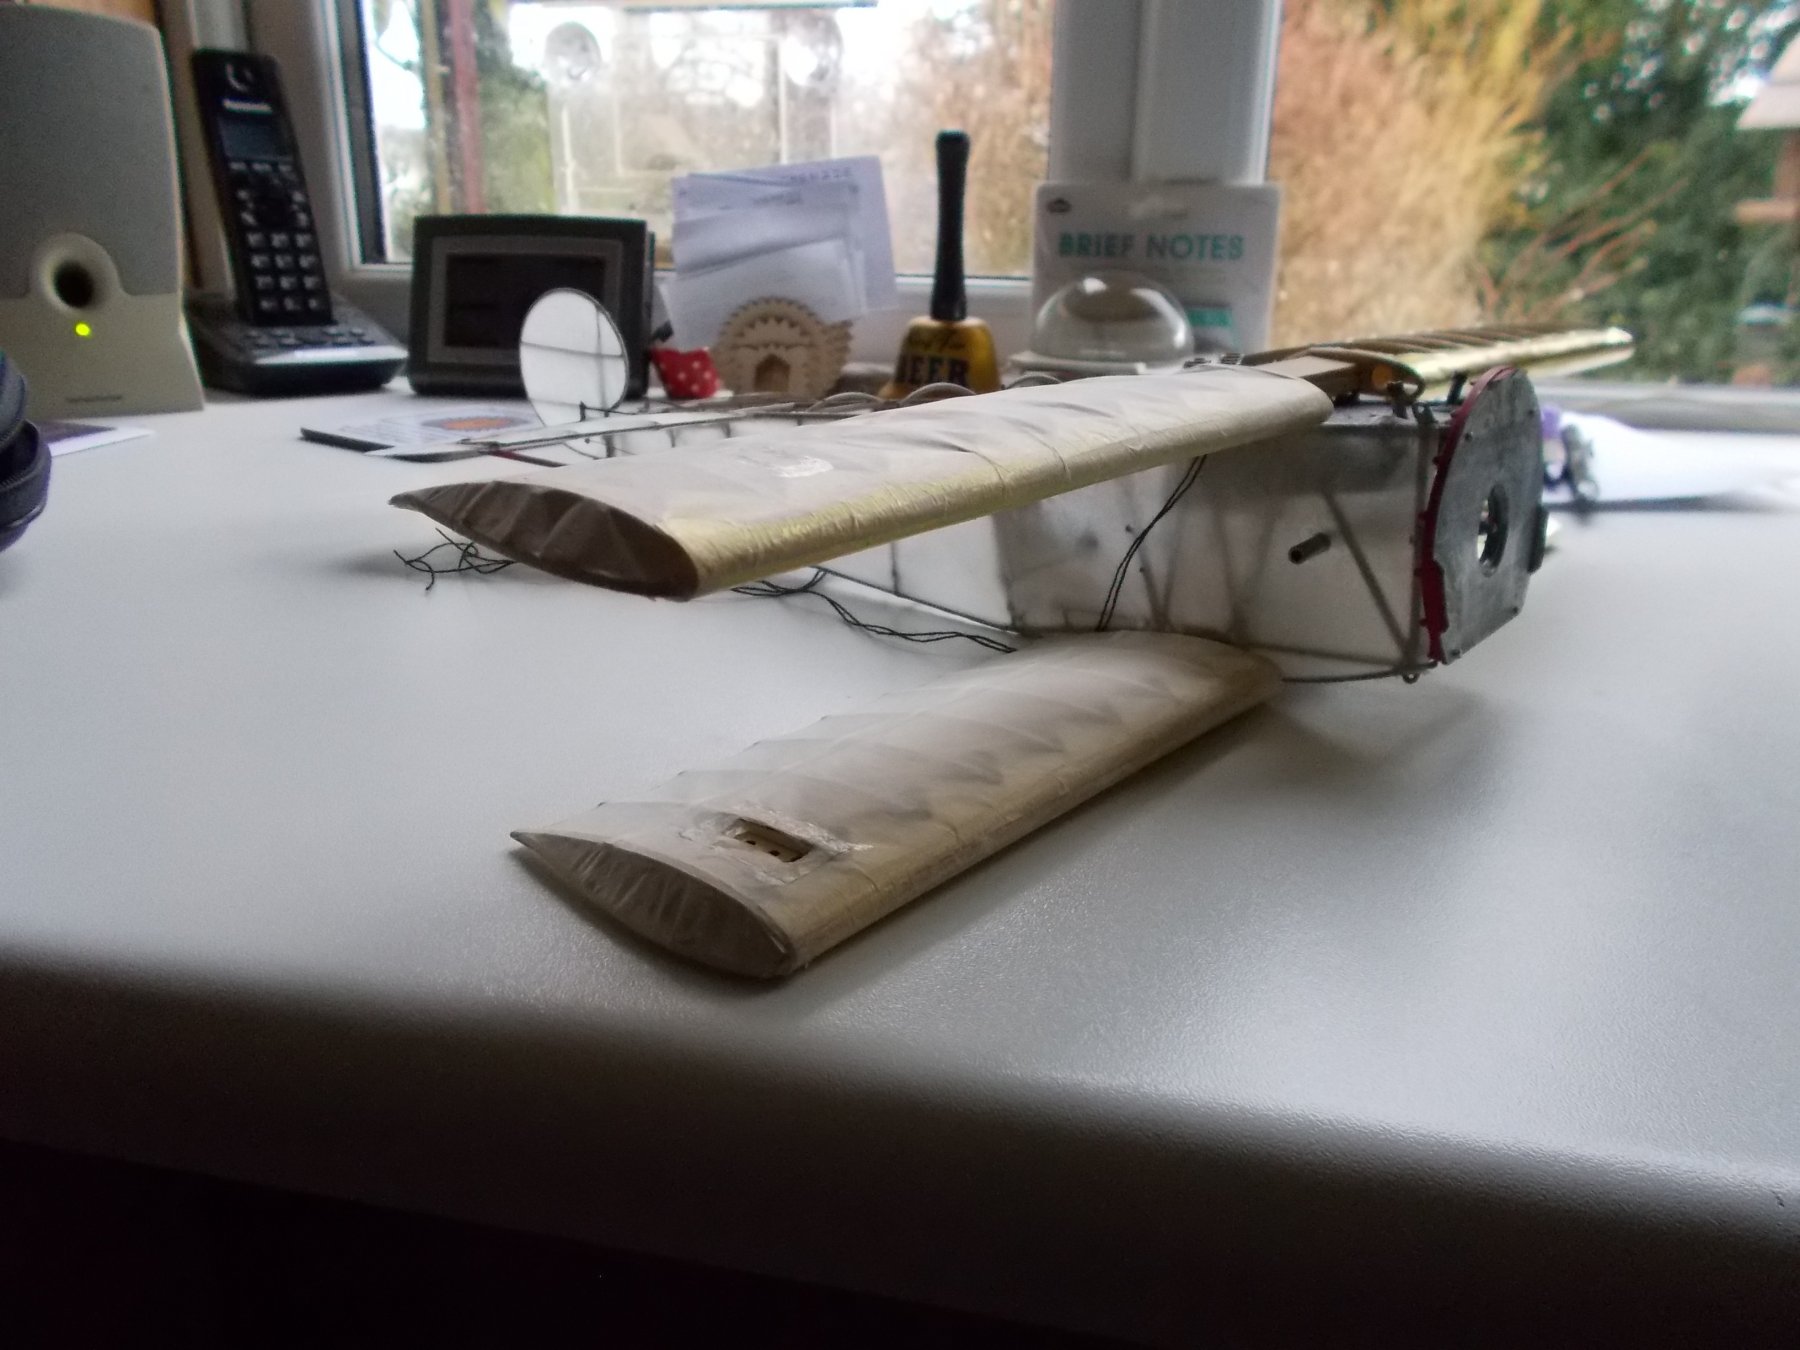
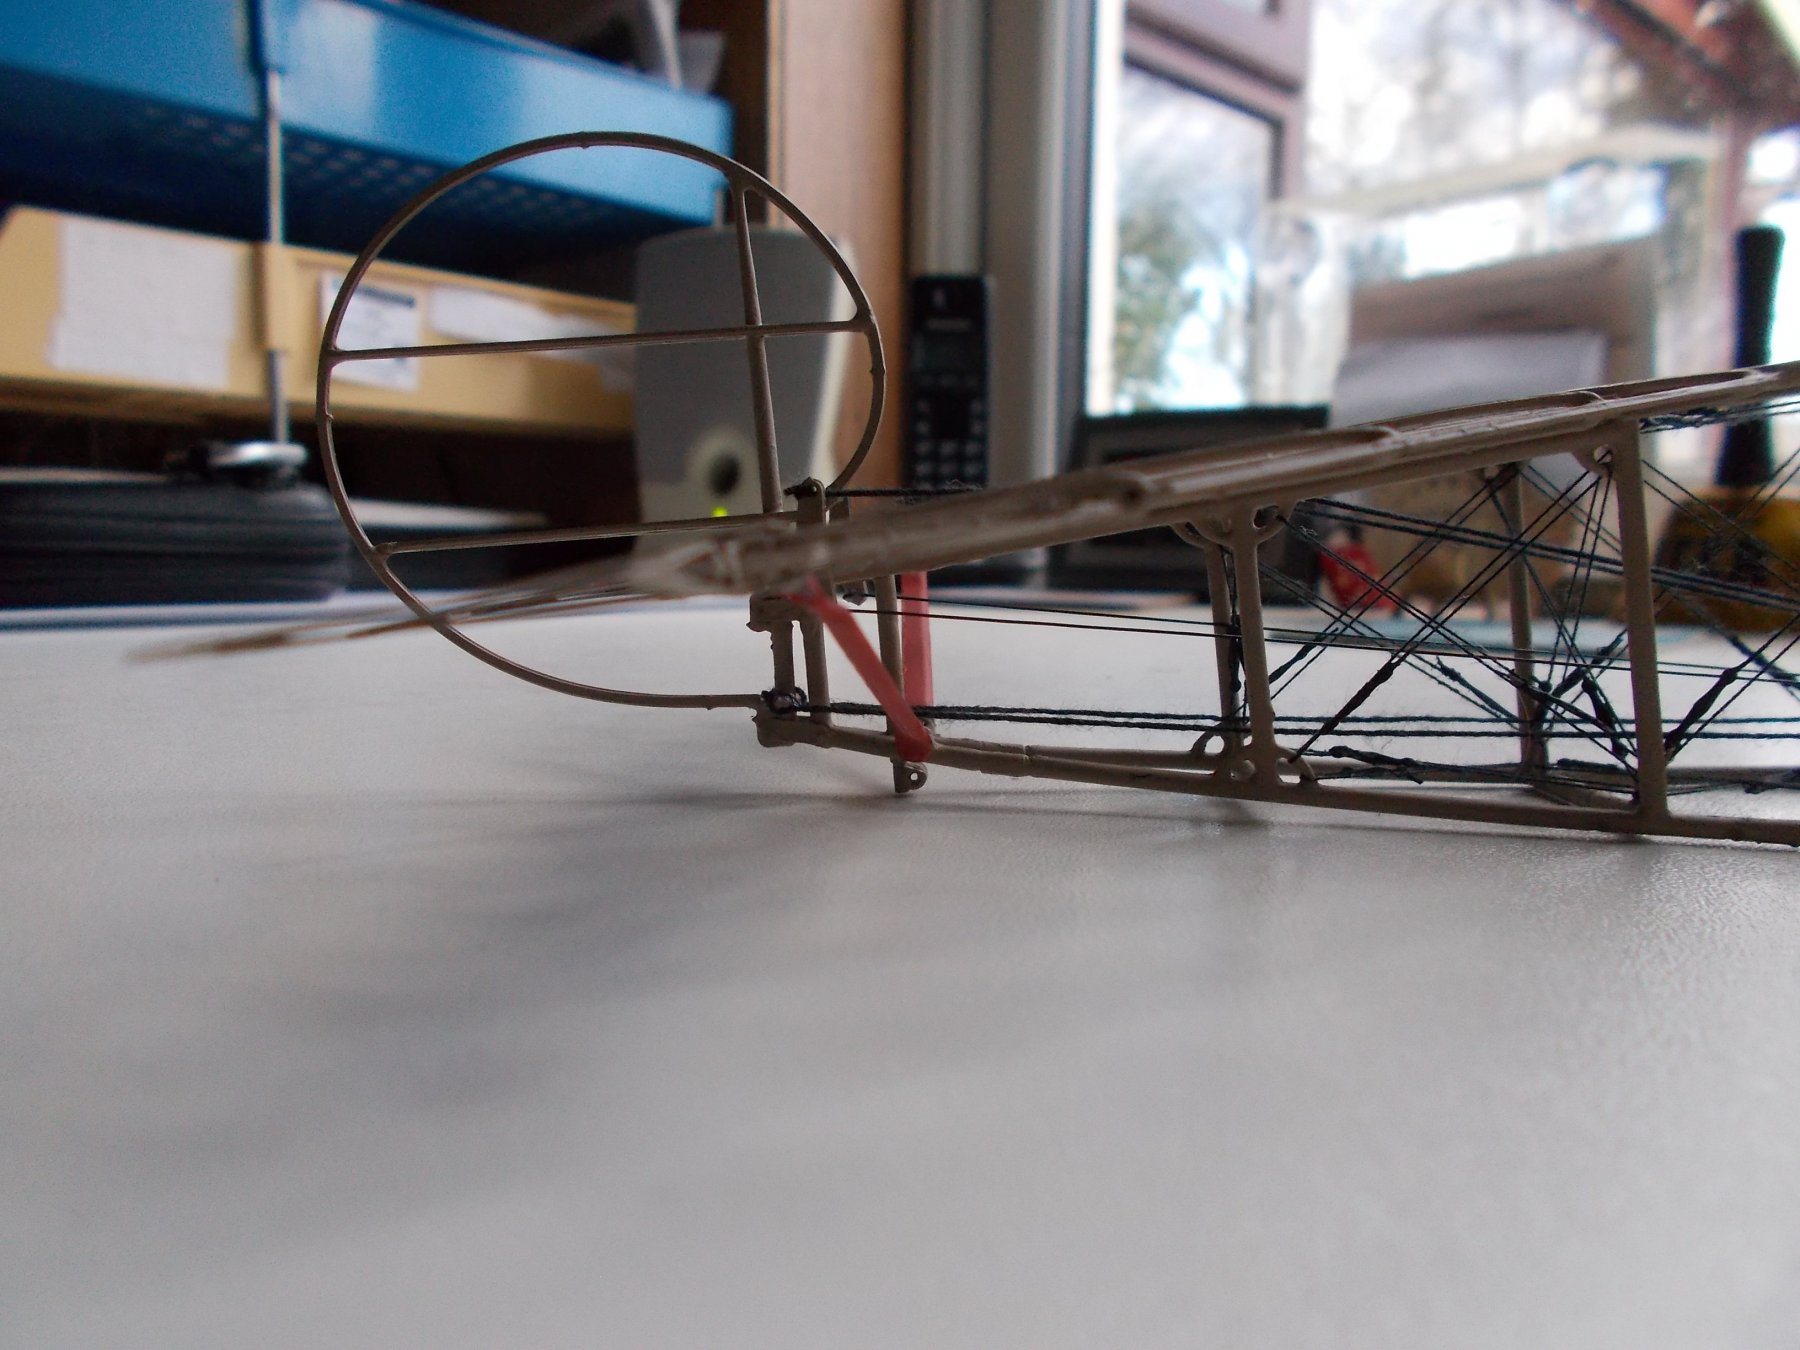
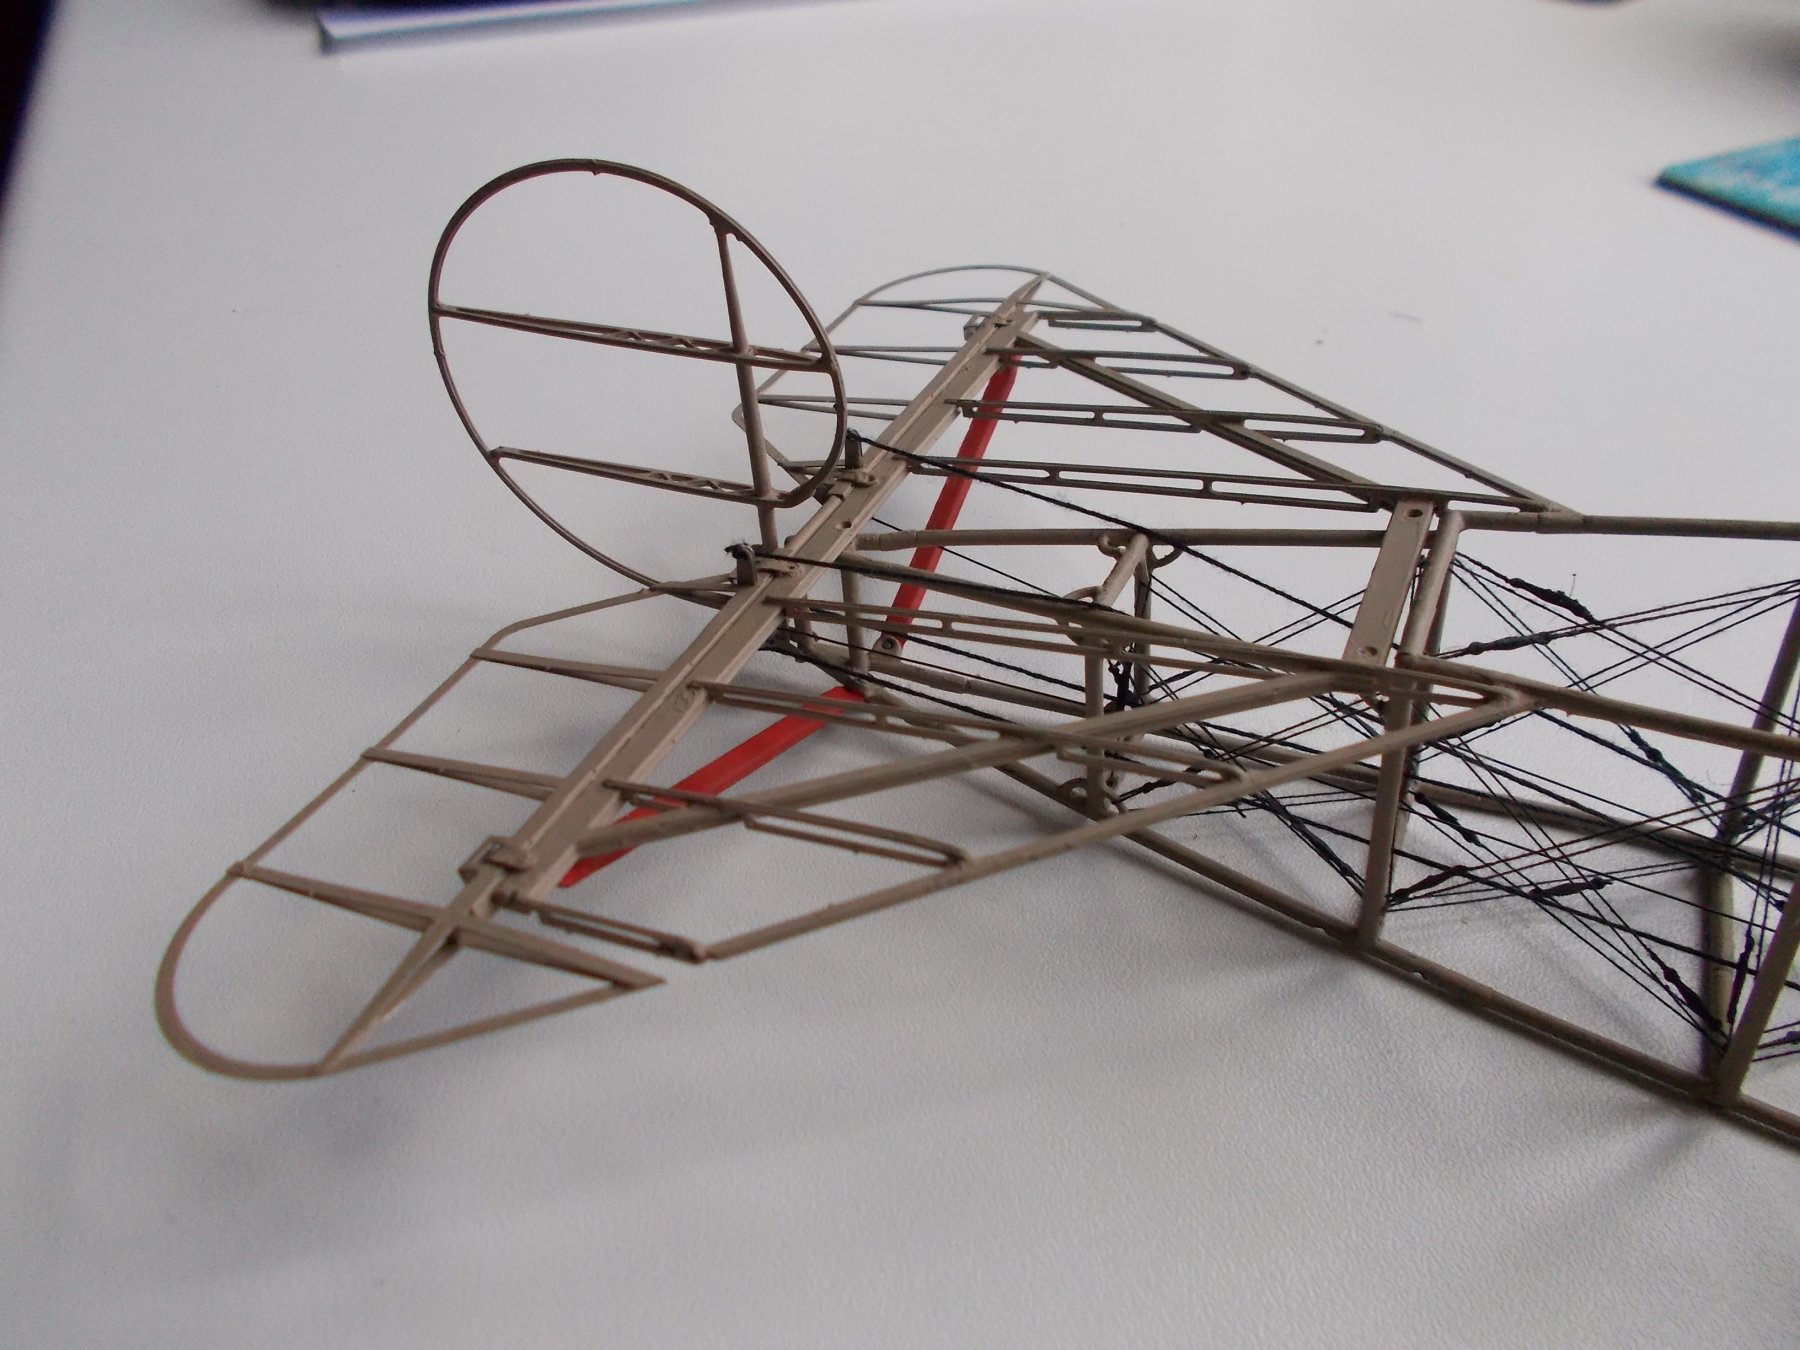
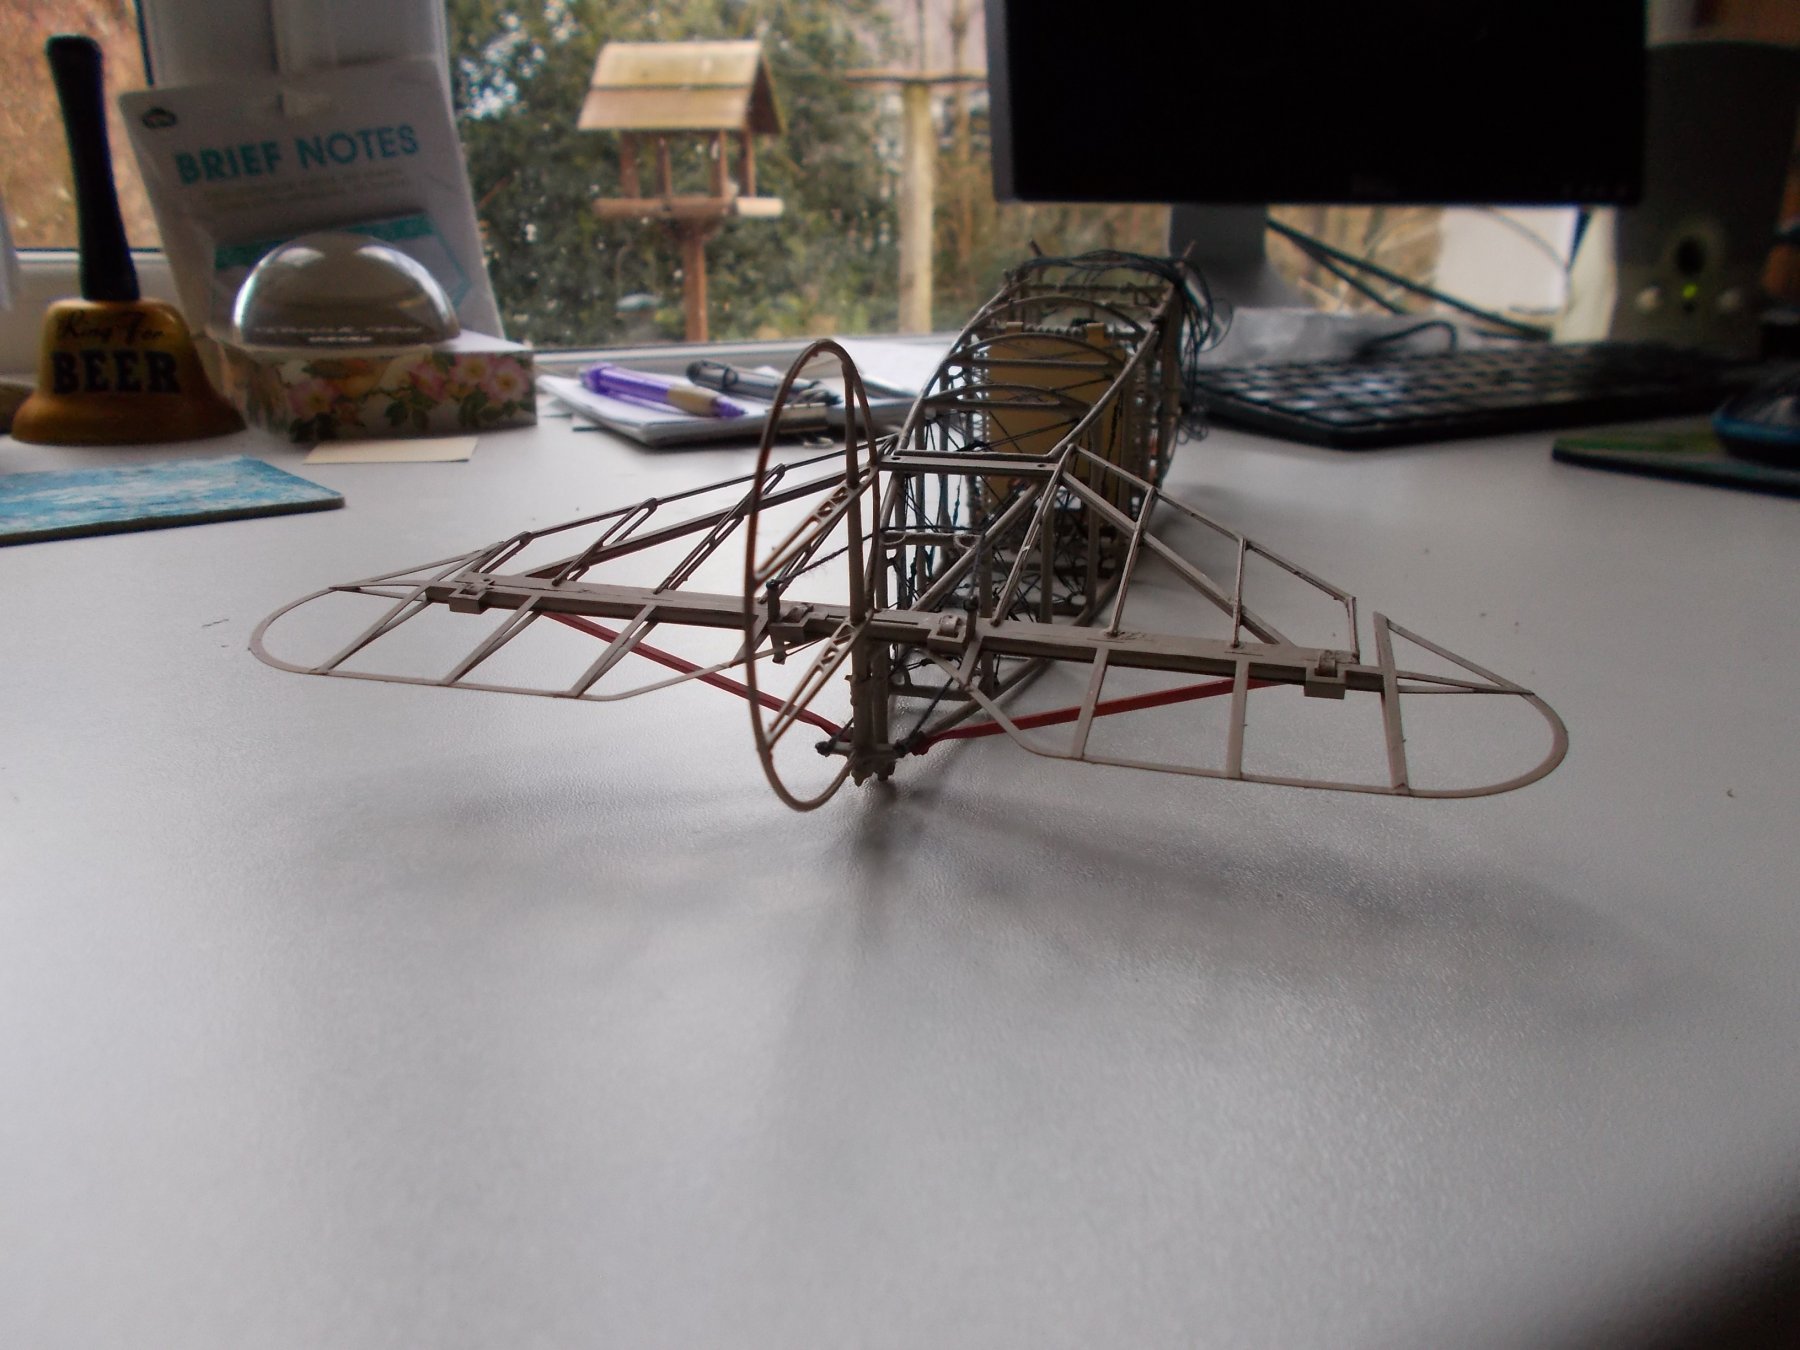
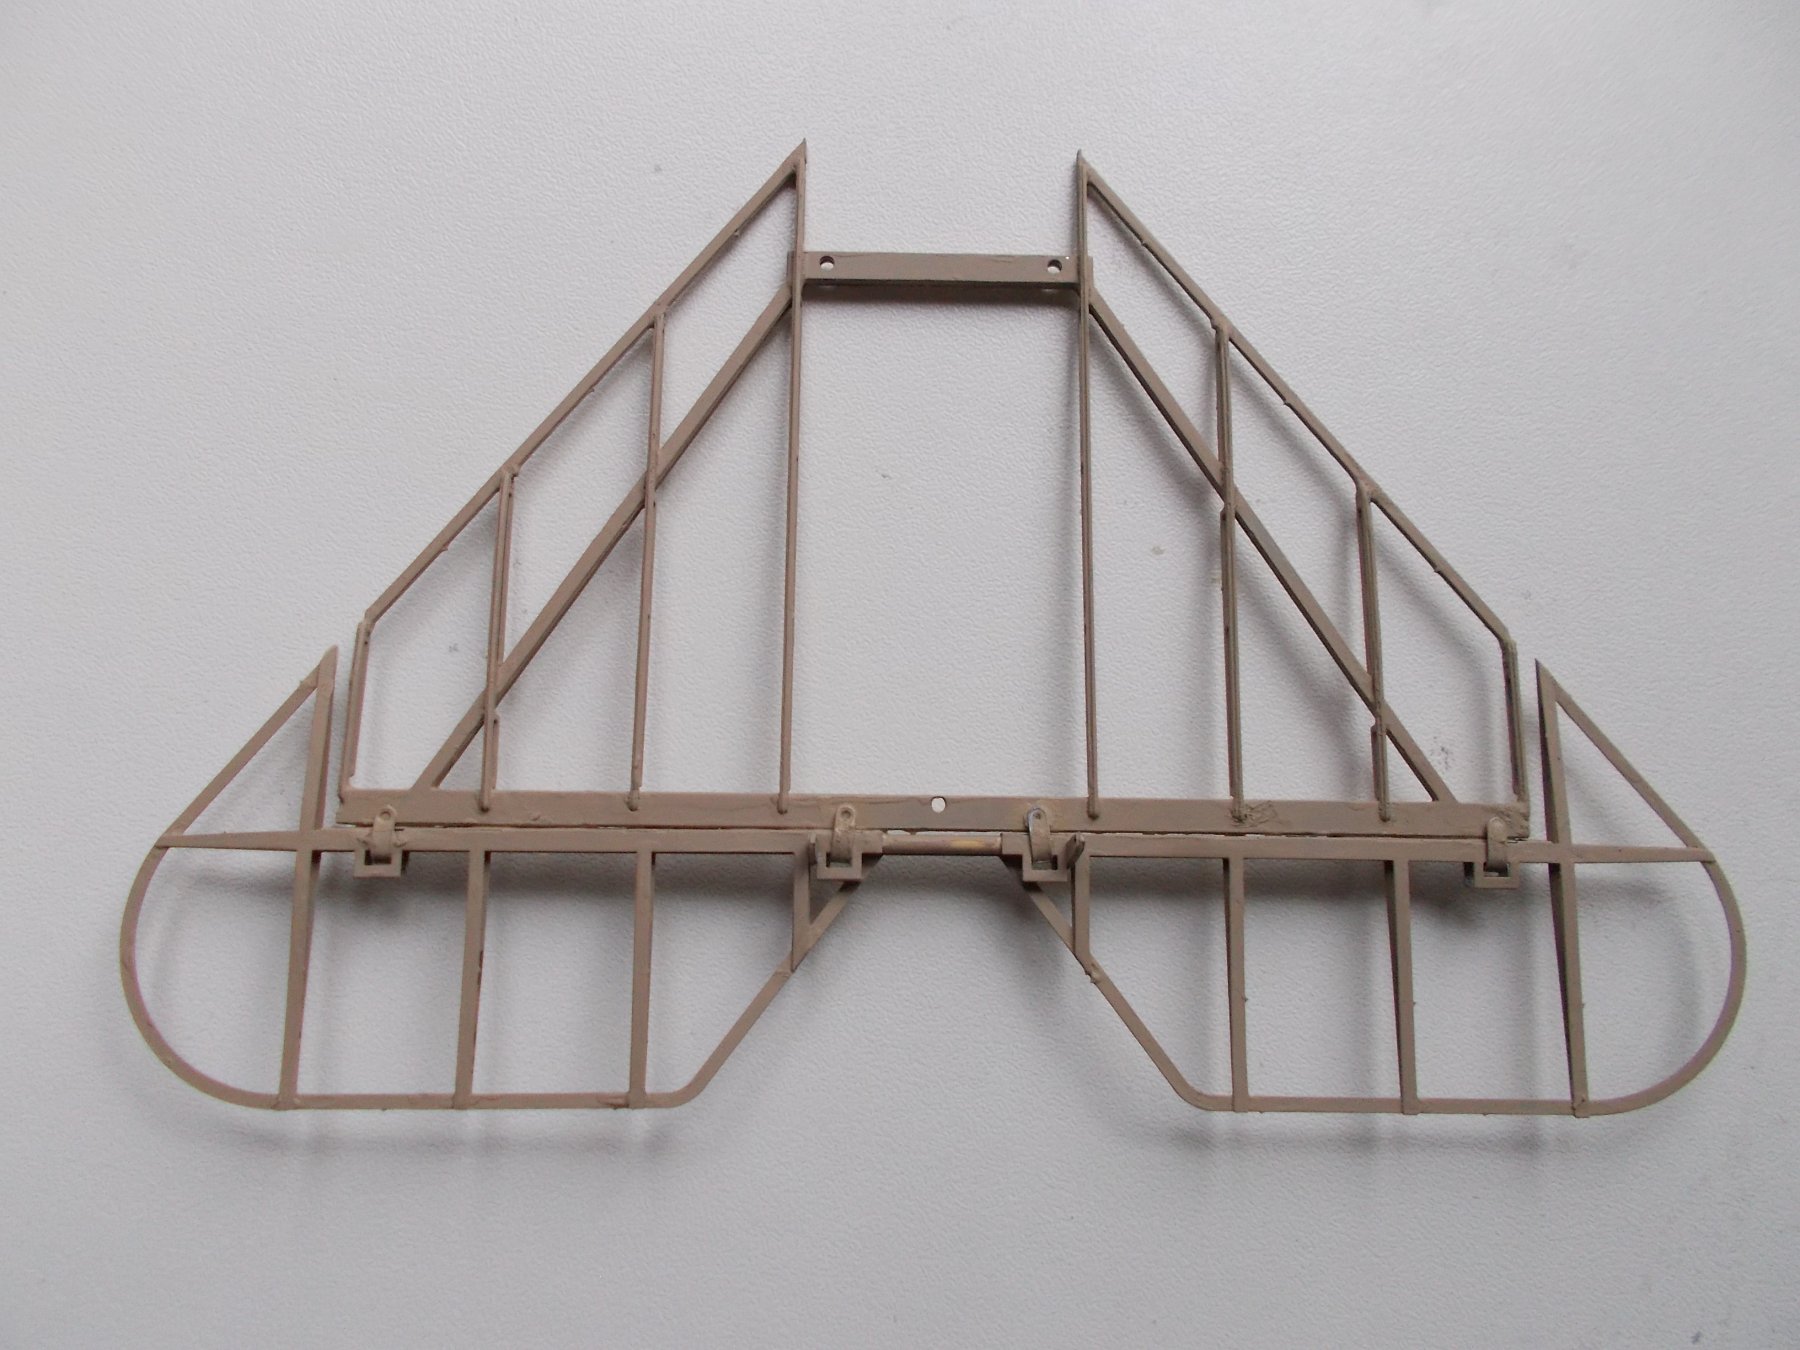
We have a tailplane !

-
You are more than welcome Piet and thank you for the interesting information. I think Boyd that piano wire was used for the bracing, in the Sopwith anyway.