


usedtosail
-
Posts
2,403 -
Joined
-
Last visited
Content Type
Profiles
Forums
Gallery
Events
Everything posted by usedtosail
-
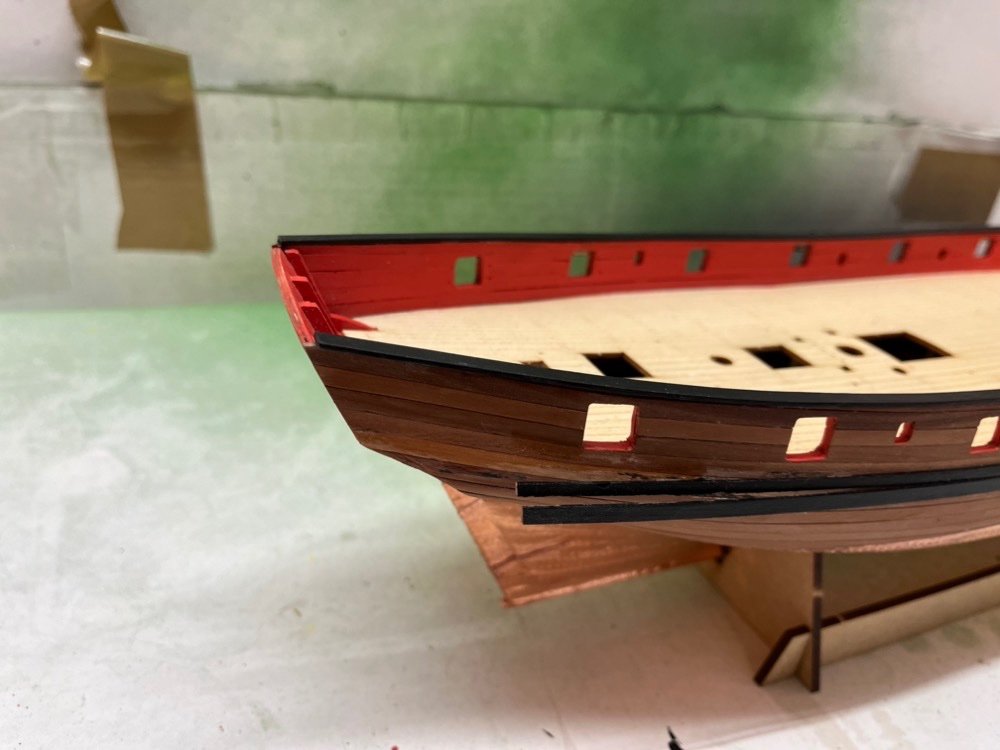
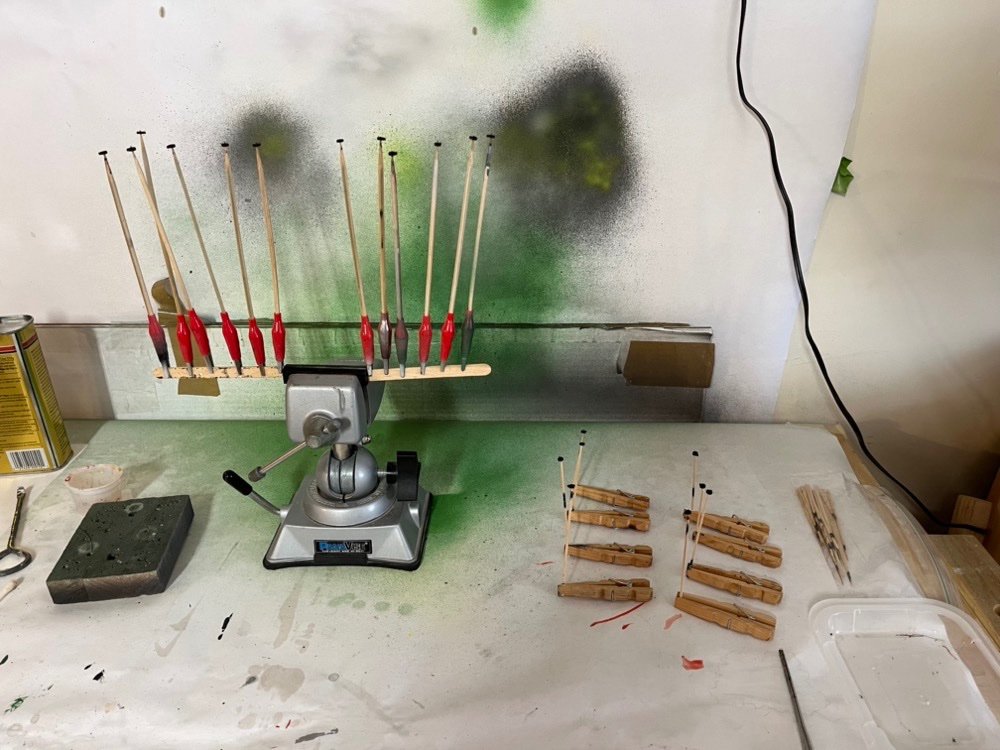
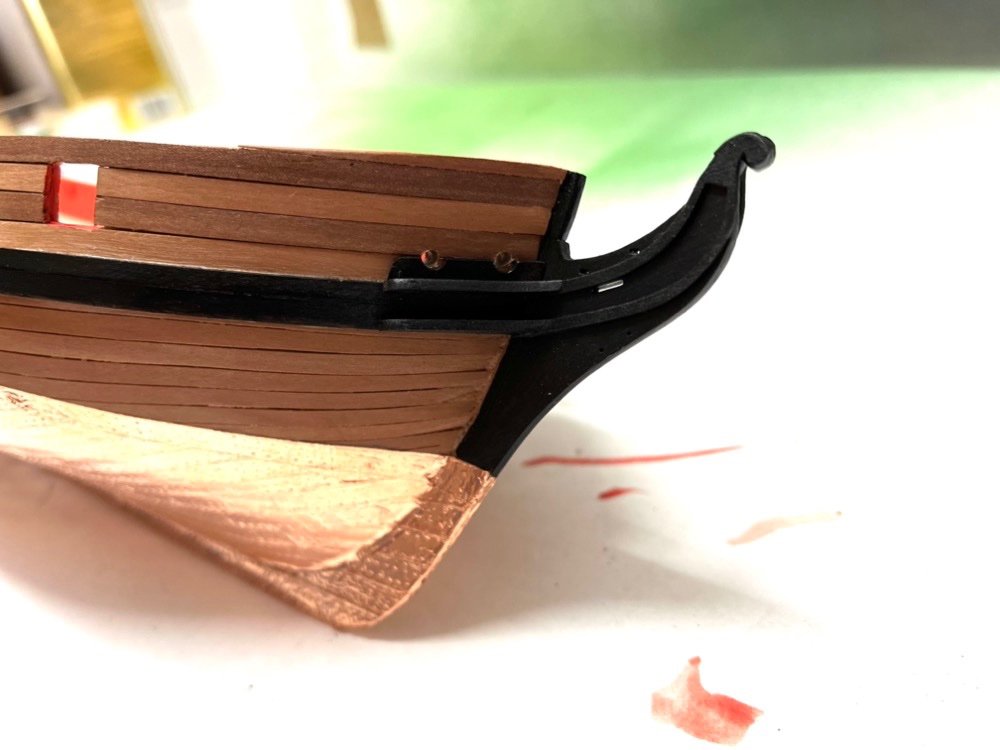
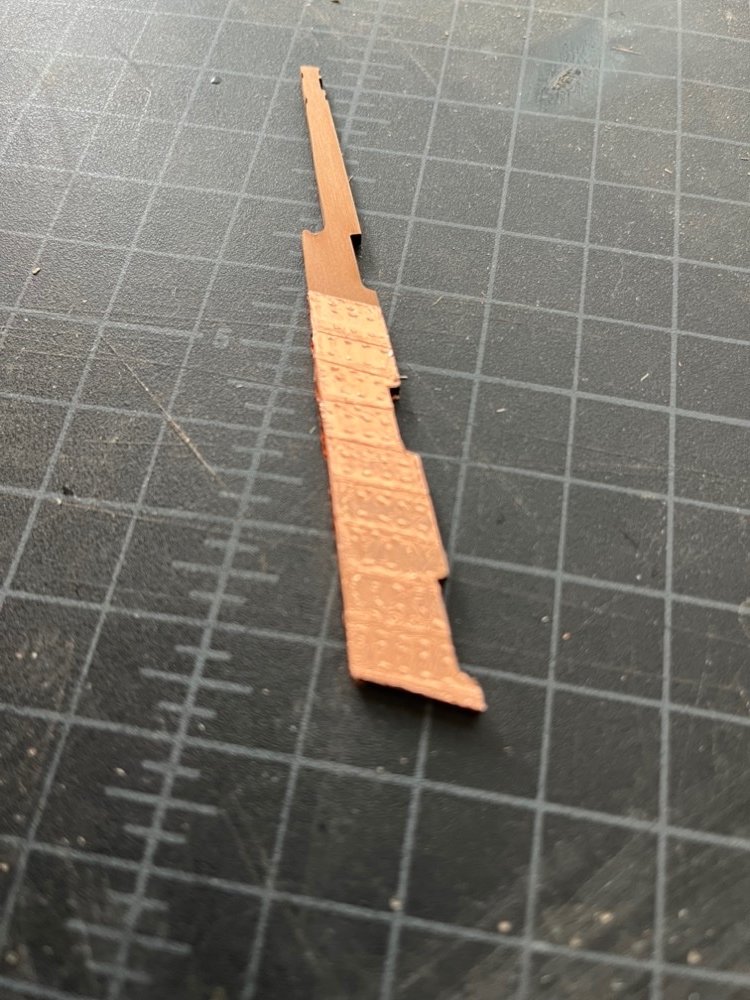
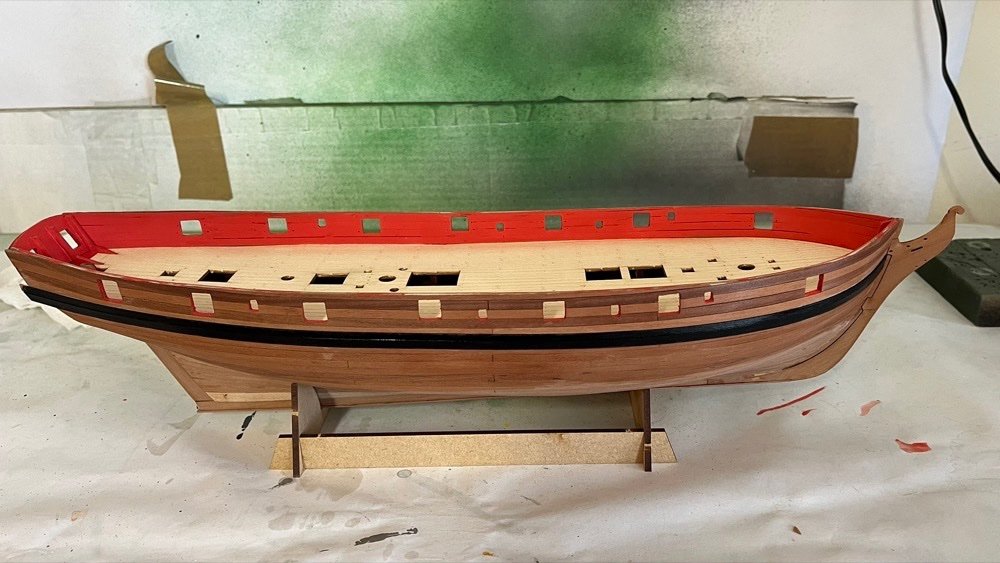
 Thanks Theodosius. I hadn't thought about the channels yet. I think for most of the length of the hull the wale was in the right place, based on the guide marks supplied on the bulwark extensions. It was probably the last couple of inches that were too low. Here is the corrected wale planks and fashion pieces. I need at least another coat of black paint on them and a little clean up on the hull planks. I cut the three sails (spanker, main and fore topG) from the frame. For these sails I separated them but did not cut them at the edges when removing them from the frame. I found it was easier to cut the excess sail material from the sails while they were off the frame. Cutting around the loops was still a bit tricky. Here are the sails ready to use. I have put the sail making equipment away until I have the masts and spars made, as I need more accurate dimensions for the courses and topsails. I have approximated these dimensions from the plans but since it takes many weeks to make each sail I want to make sure I don't have to remake any.
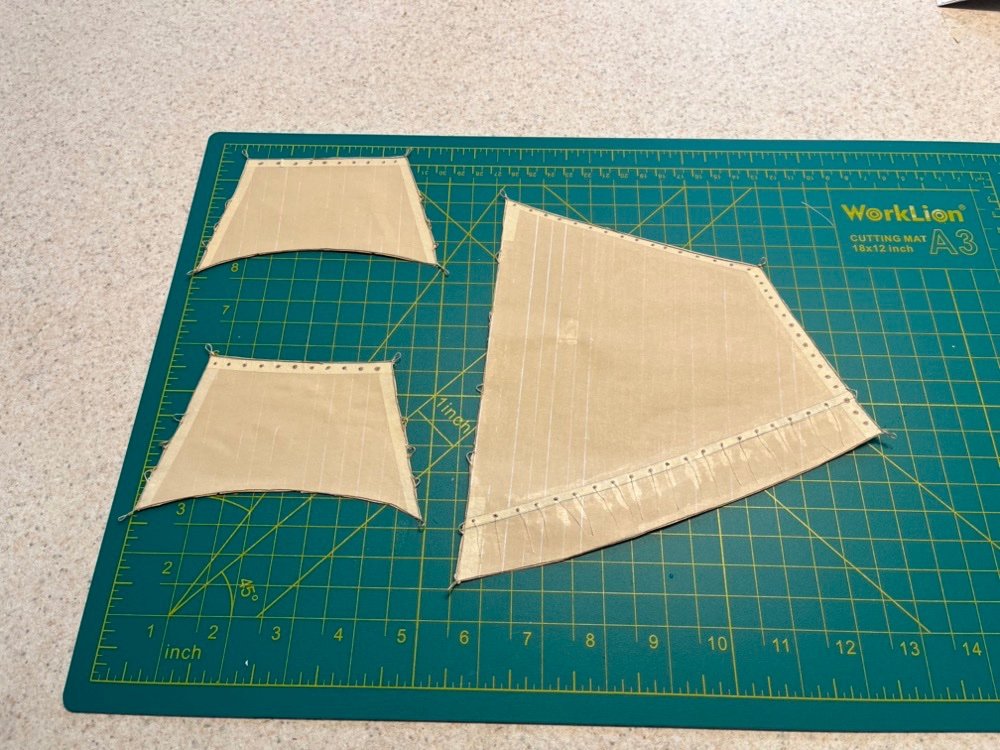
- 144 replies
-
- 8
-

-
- HMS Speedy
- Vanguard Models
- (and 1 more)
-
That is a very interesting looking ship. Different and nasty looking. Will the kit come with masting and rigging? Thanks for the great new designs and kits.
-
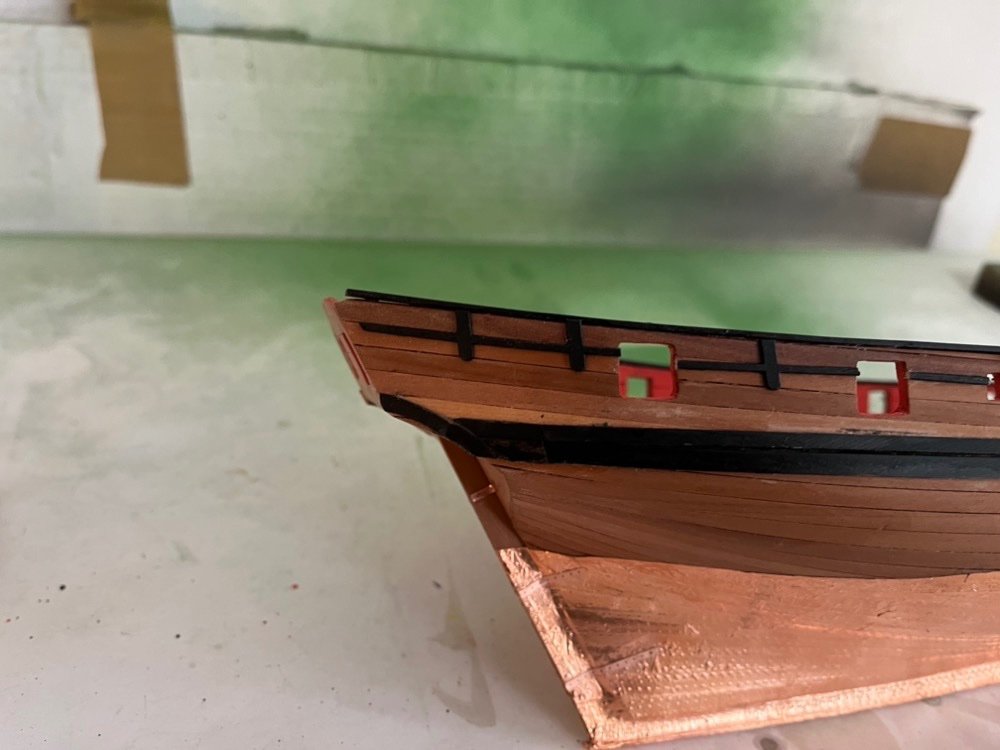
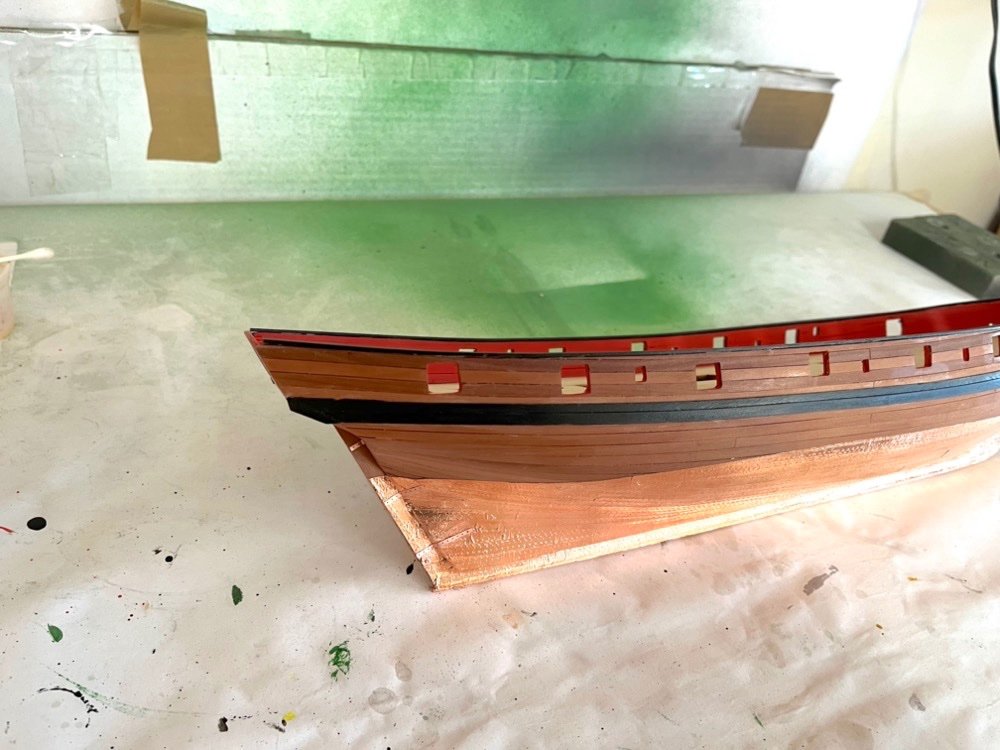
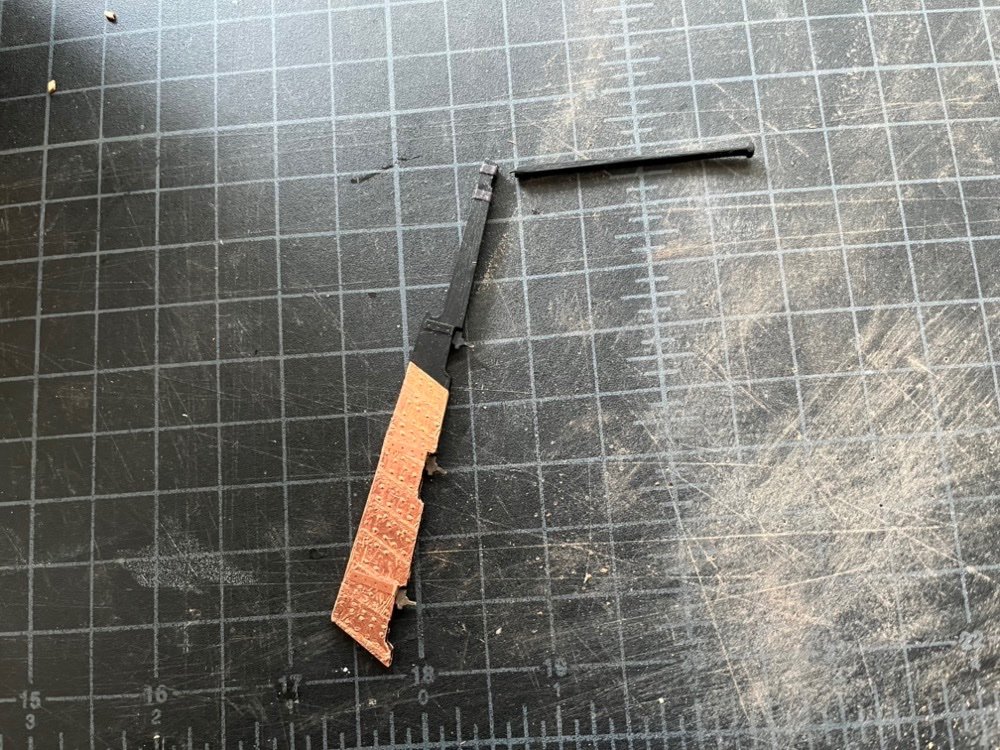
I was looking through the Speedy build log by @Theodosius yesterday, which is a really nice build of this model, and saw that when I added the wale planks I let them get too high at the transom. As shown in the plans, the lower edge of the wale should be even with the bottom of the lower transom piece. I knew something was wrong because of the way the fashion pieces looked. So I did some surgery this morning. I carefully pried the wale planks up from the hull, cleaned the glue off the hull planks, cut the wale planks back to clean up the ends, and touched up the wipe on poly on the hull. I used the holes in the laser cut sheet to trace new fashion pieces onto a piece of pear wood and cut out the new ones with an X-Acto knife. I plan to cut the plank extensions to exactly fit the fashion pieces, or at least fit better than the previous ones did.
- 144 replies
-
- 6
-
-
- HMS Speedy
- Vanguard Models
- (and 1 more)
-
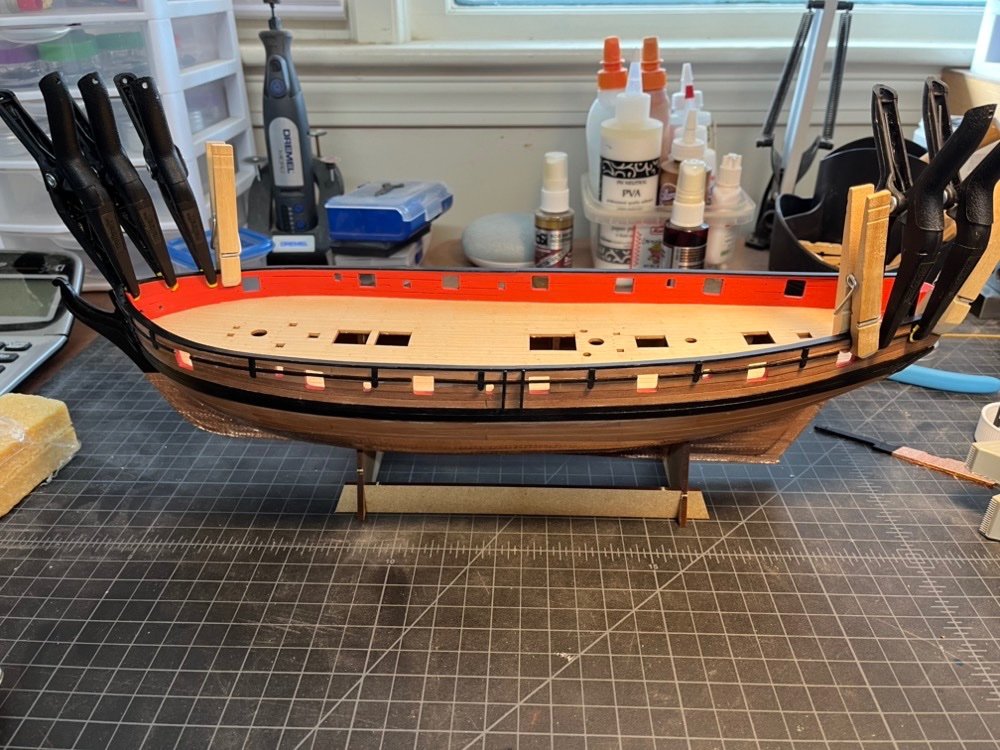
I have started adding the side "trim" pieces that have part of the swivel gun supports. I have just added the last piece on the port side and the front piece on the starboard side. The kit comes with laser cut small strips of wood that go over the swivel gun supports but I will be using a 1mm square strip of wood that I painted ochre to cut out small pieces instead. In anticipation of the step after that, I removed the swivel gun bases that sit on top of the rail, cleaned them up, and painted them black on the top and sides. I have been securing the reef points to the spanker using diluted acrylic matte medium. I finished the back side and am close to finishing the front side. I still need to trim these to length and replace one that I took off because it was too short. Finally I added a coat of wipe on poly to the new cradle after assembling it. I also rubbed some black paint into the lettering on the plastic name plate. I am not sure if I will use it but if I do I will trim it down.
- 144 replies
-
- 8
-
-
- HMS Speedy
- Vanguard Models
- (and 1 more)
-
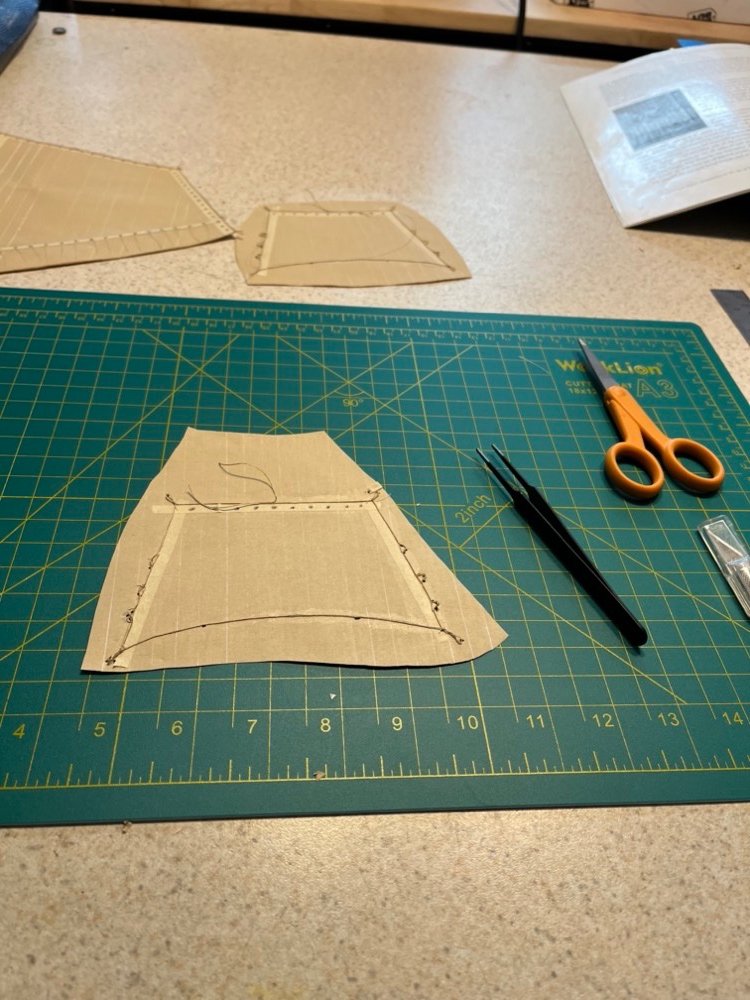
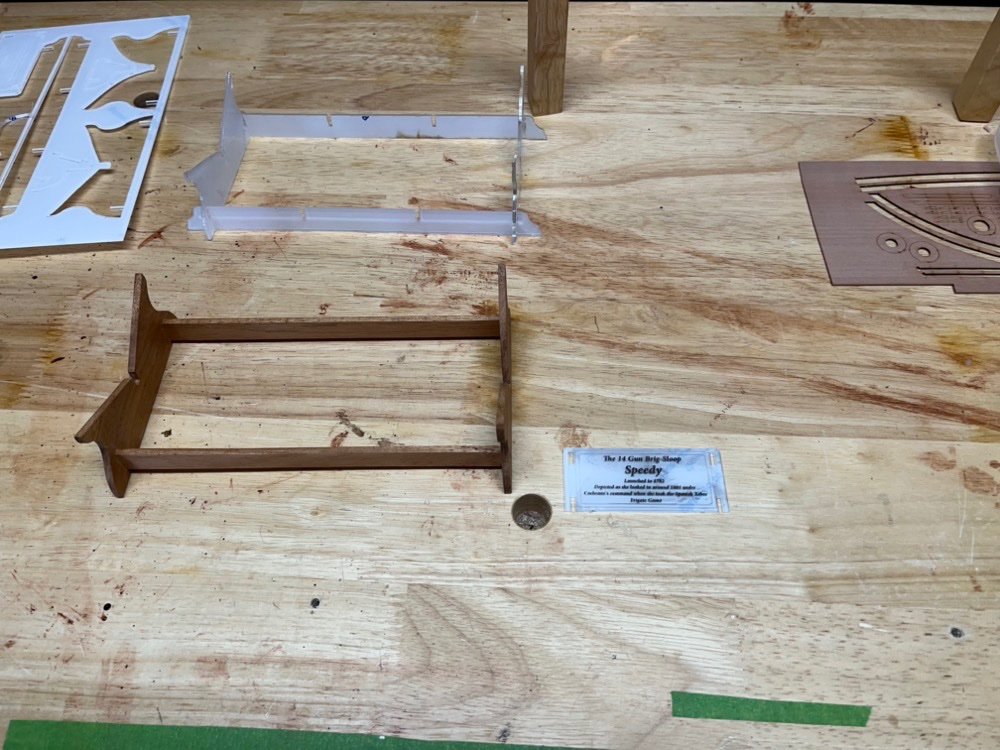
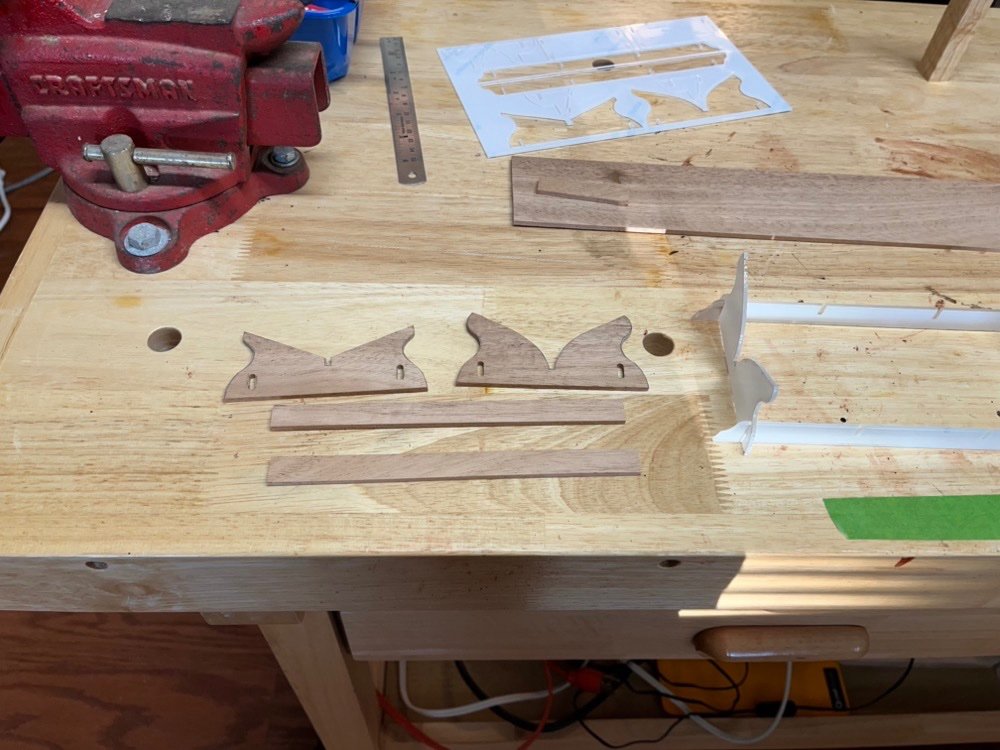
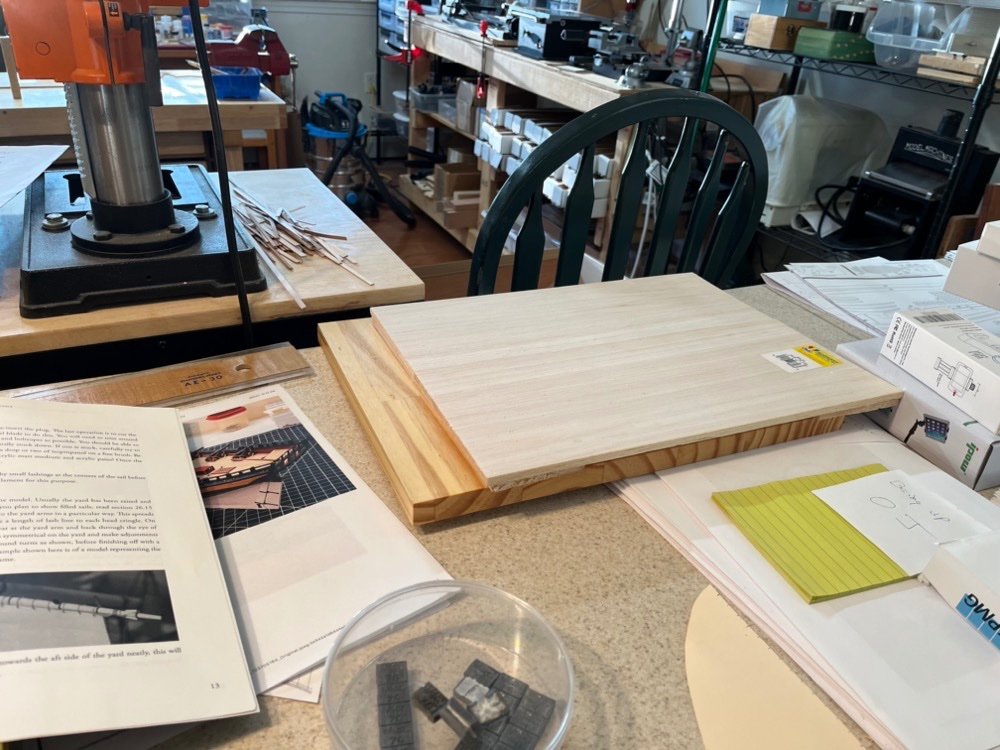
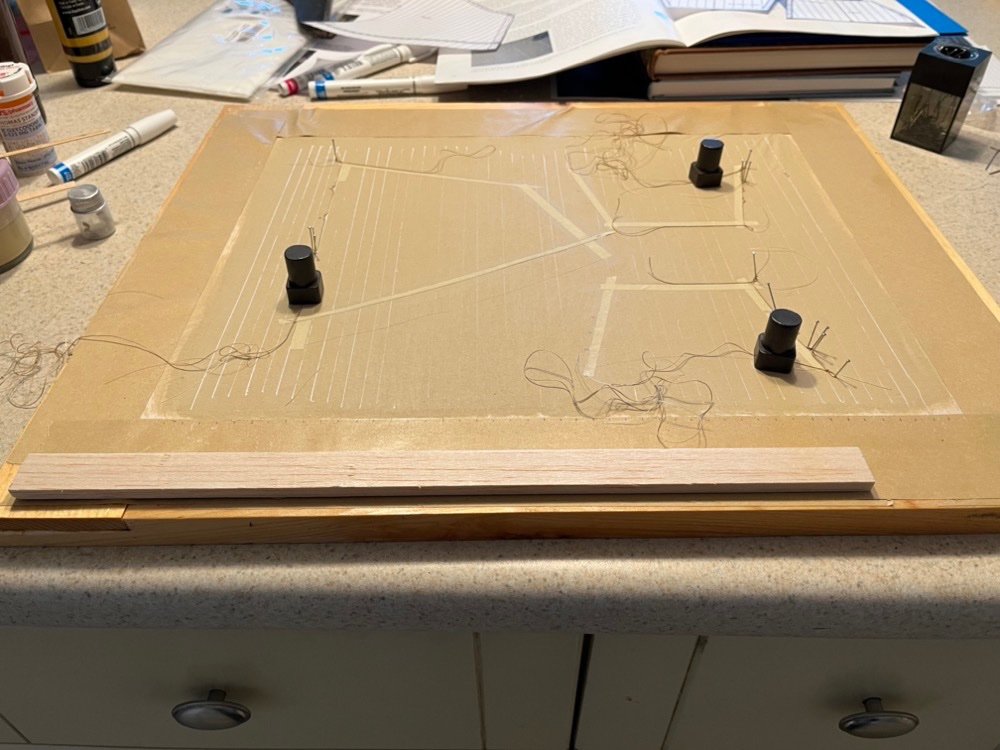
I am making progress on three fronts. I trimmed the aft ends of the wale planks then added the fashion pieces to finish them off. On the three sails I have been working on, I finished adding the bolt ropes with all the loops and added small pieces of line across the loops. I added the reef points to the spanker after pushing holes through paint for the grommets. I am in the process of using matte medium to fix the knots of the reef points and hold them down to the sail so they fall correctly. Here is a picture of the balsa inset I made to hold the pins better when adding the bolt ropes and loops to the sails. And I have also started making a new cradle for the finished model. I used the plastic cradle ends pieces and traced the shapes onto 1/8" mahogany sheet, then cut them out with a jig saw and sanded them with a sanding drum in the drill press. I milled the slots into them for the cross pieces and have squared them off with a square file since this picture was taken. Next up for the hull is to add the trim pieces that contain the swivel gun supports. I also need to trim the reef points and cut the individual sails out and make the cross pieces for the new cradle.
- 144 replies
-
- 7
-
-
- HMS Speedy
- Vanguard Models
- (and 1 more)
-
drilling hole through wire
usedtosail replied to BETAQDAVE's topic in Metal Work, Soldering and Metal Fittings
Dave, I also had a torch like that which was hard to light and never stayed lit if I did start. I then found this pencil torch which works a lot better. You have to use a lighter to light it but it only has one switch that you don't have to hold down.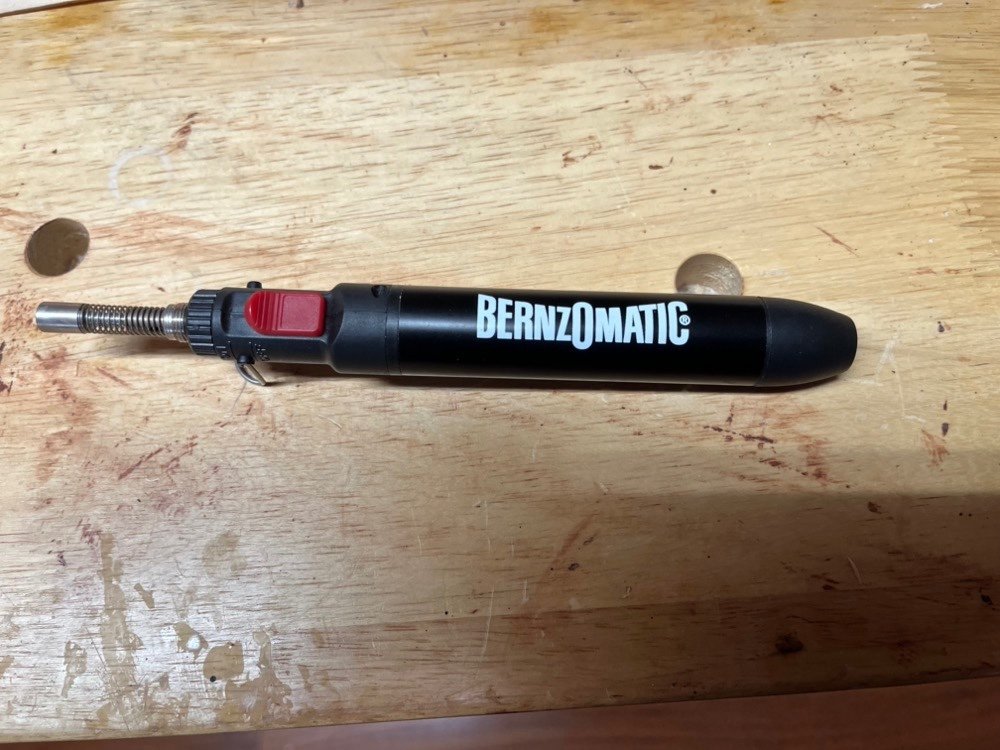
-
That's a great solution for the gun carriages.
-
Yep those pictures surfaced during the last Constitution refit, I think, which was after I copper plated my Connie. I should have made dents instead of bumps but I didn't and I am not changing it now on this model. Enough said.
- 144 replies
-
- 1
-
-
- HMS Speedy
- Vanguard Models
- (and 1 more)
-
I a had some thin silk span which I didn't like. For these sails I am actually using something called tea bag paper, which is the same or similar to silk span I read. Here is the link to the paper I bought from Amazon: https://a.co/d/jfCkwMM I know this is controversial and I thought about leaving the copper foil smooth, but I wanted some texture on them. When I built the Constitution model many years ago there was a discussion on this forum about how the copper plates look on the real ship, and that's where the idea of the raised "bumps" came from. In fact I used the same jig I did for the Constitution build. I could have used the ponce wheel on the front of the foil to get indents instead of bumps if I wanted to but I didn't. I may smooth down the bumps a bit with a burnishing stick but maybe not. Some sad news on the sail making. 🥲 This morning while tightening the bolt rope, I managed to drop my tweezers onto the middle of the spanker and put a hole in it. I am going to continue making the sail, maybe just for practice, but I also may try patching it after it is cut out. I am also going to keep the sail templates over the sails as I work on them so if I drop something again maybe it won't go through the template as easily as the tea bag paper.
- 144 replies
-
- 2
-

-
-
- HMS Speedy
- Vanguard Models
- (and 1 more)
-
I painted the cheeks and added the painted hawse hole pieces. I used a series of small to large drill bits to drill the hawse holes through the bulwarks. I was having trouble getting the pins to stay in place while creating the loops in the bolt rope on the sails. I had some 1/4" balsa wood sheets laying around so I used them to make a new inset for the sail frame. I cut two 6" wide pieces for the top layer, which fills the whole frame, and some smaller strips for the bottom layer that holds the top pieces together and raises it 1/4" so the top layer is 1/4" from the sail, which is high enough that the sail doesn't touch it. I glued them all together and placed it in the frame (forgetting to take a picture of it). The pins stick into the balsa wood easily and stay upright even when the bolt rope is tensioned. This addition will make adding the bolt ropes much easier.
- 144 replies
-
- 6
-
-
- HMS Speedy
- Vanguard Models
- (and 1 more)
-
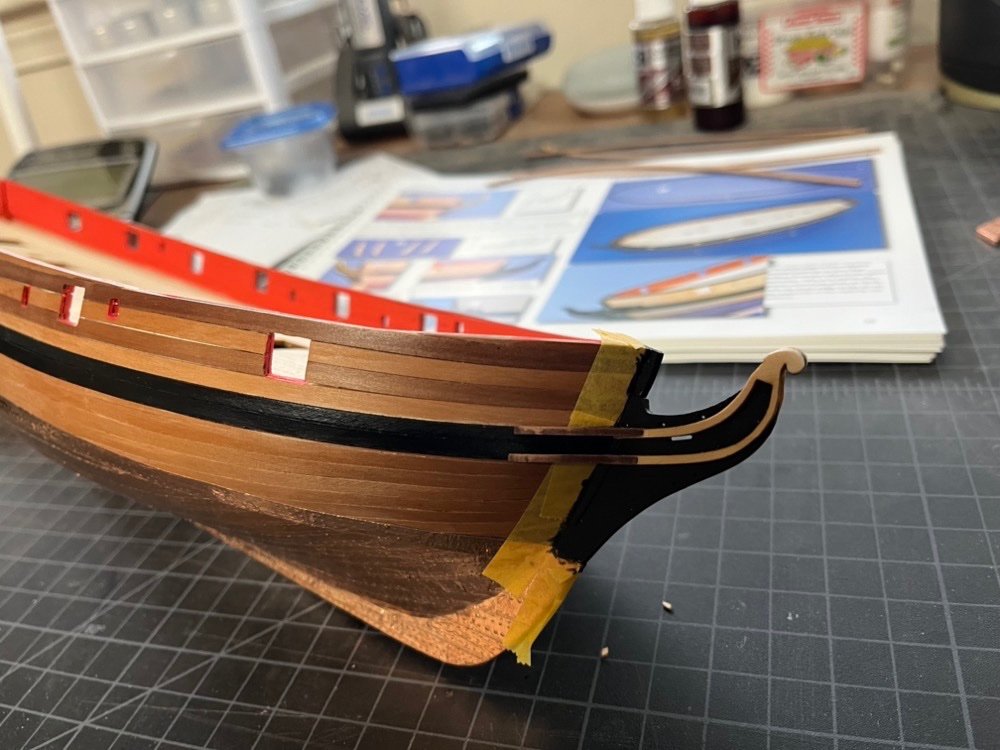
I finished up the rudder and tiller and added the pintles and gudgeons. These will be added to the hull later. I added the cheek pieces to the bow. These will be painted black next along with the hawse hole pieces and the top rails. I am working on the spanker and both topG sails, which I can make from the same piece of stretched silk span. I am currently adding the bolt ropes. I also transferred the hand drawn plans to the computer so I can have an electronic version of the sail plans and if I have to change the dimensions slightly, which I expect to have to do for the topsails and courses, it will make that task a lot easier.
- 144 replies
-
- 10
-
-
- HMS Speedy
- Vanguard Models
- (and 1 more)
-
Again I used the copper tape instead of the photo etched copper pieces for the rudder.
- 144 replies
-
- 9
-
-
- HMS Speedy
- Vanguard Models
- (and 1 more)
-
And finished up the starboard side this morning. Next up is building and attaching the rudder.
- 144 replies
-
- 14
-
-
- HMS Speedy
- Vanguard Models
- (and 1 more)
-
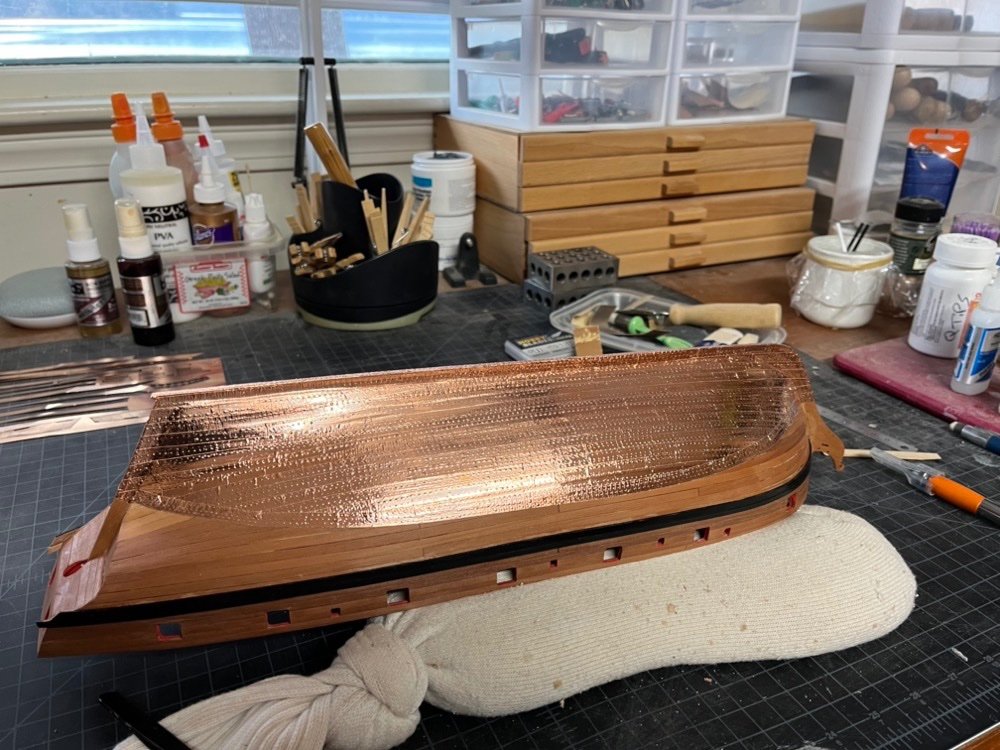
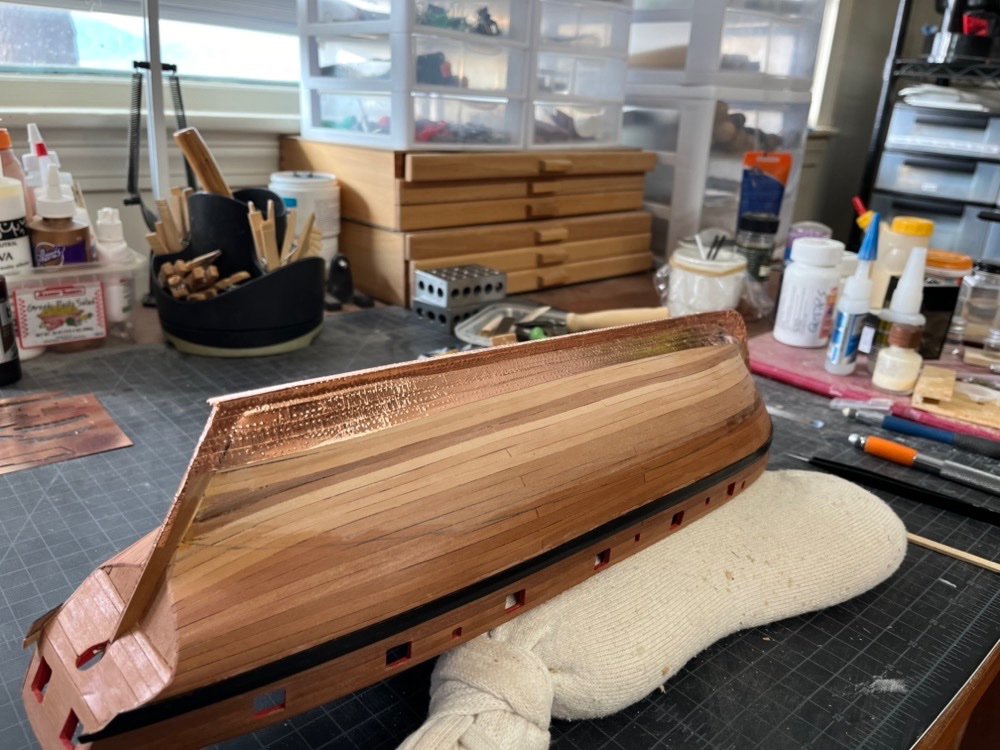
I finished adding the copper foil to the port side and have started on the starboard side this morning.
- 144 replies
-
- 8
-
-
- HMS Speedy
- Vanguard Models
- (and 1 more)
-
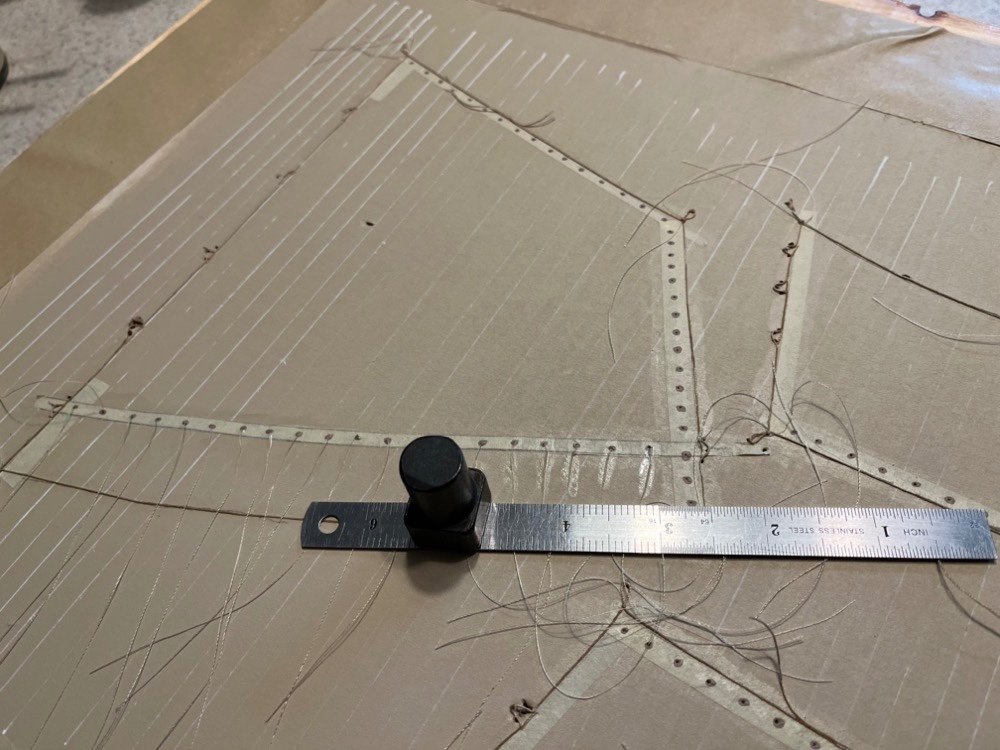
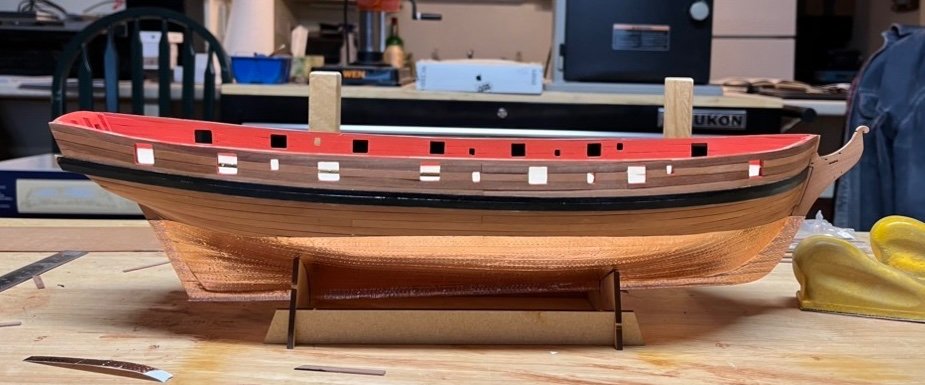
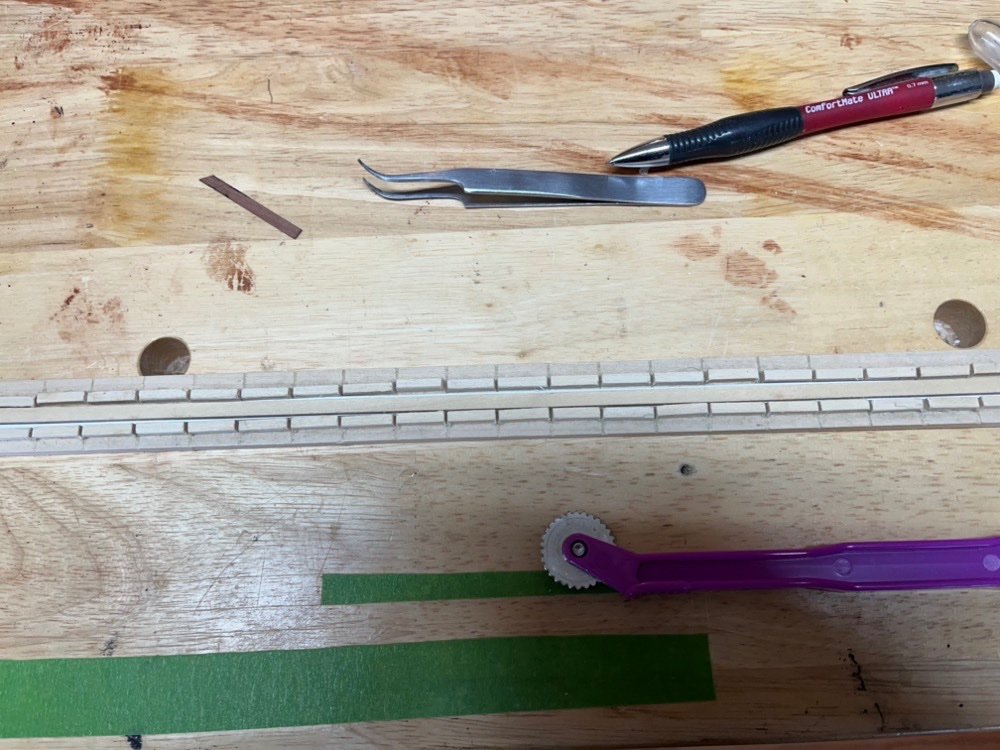
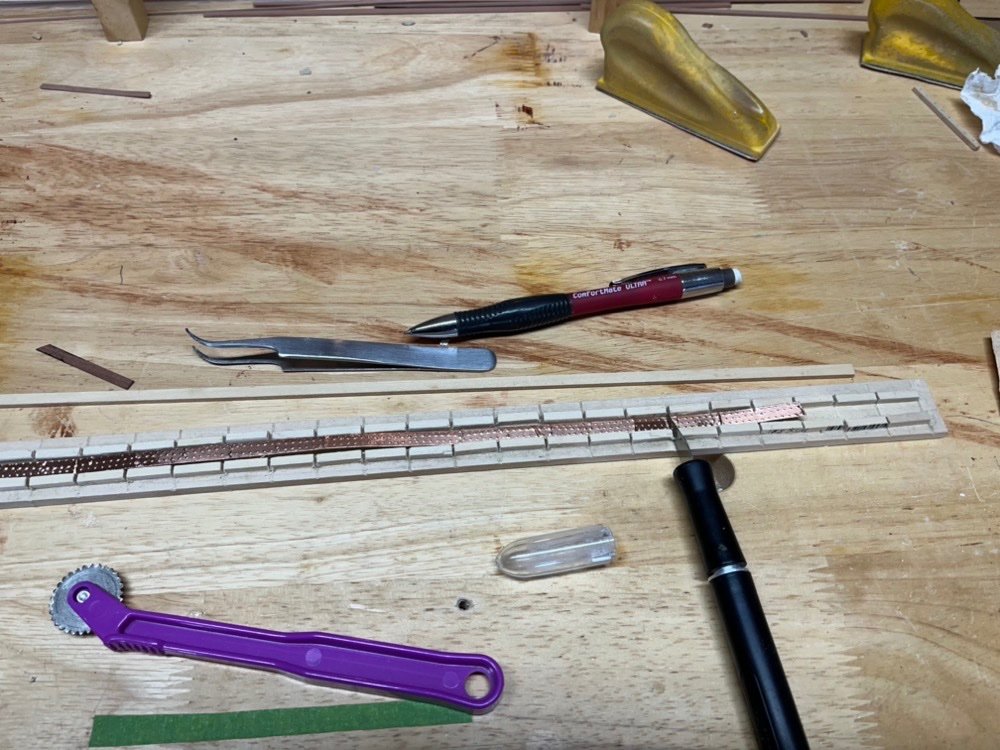
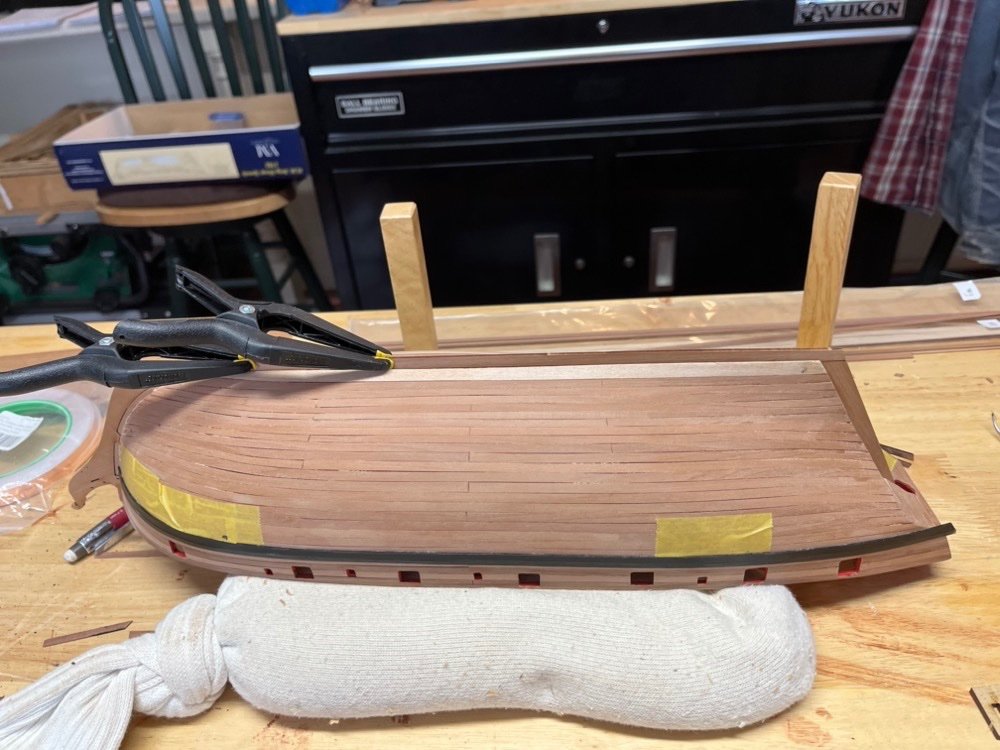
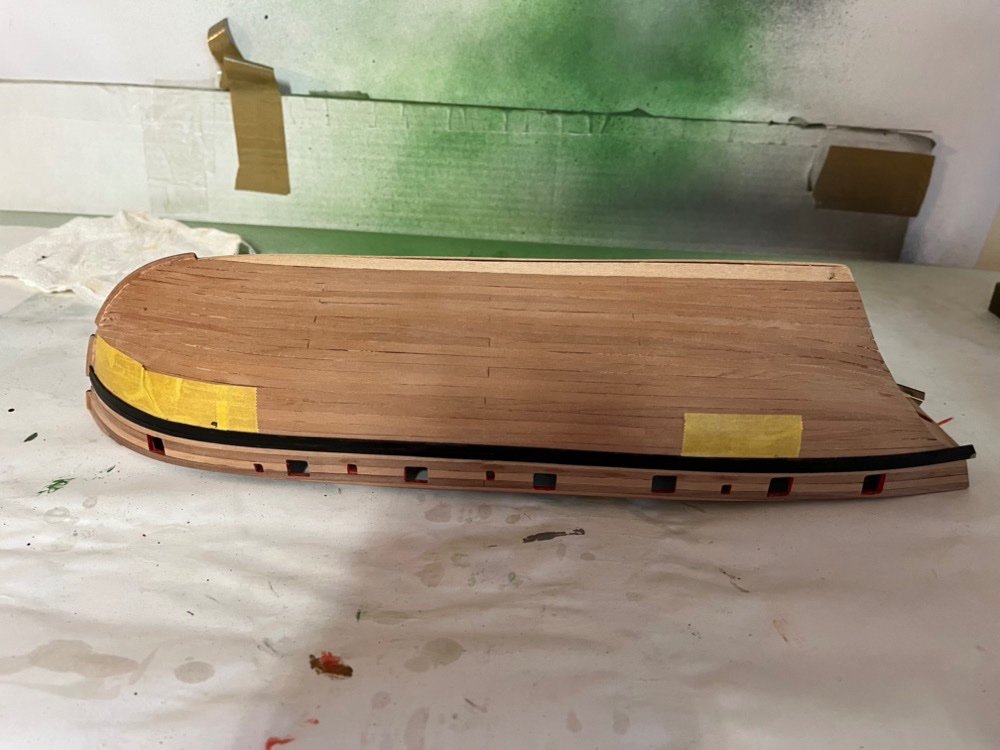
I added a strip of pear wood under the keel, then marked off the waterline. I put the hull in the supplied cradle then used a laser level on a tripod to visualize the water line on the hull. I marked positions of the line on the hull with a pencil and used masking tape to connect them. I then ran a pencil along the edge of the masking tape to mark the water line. The next task is to add the copper plating to the hull. The kit includes some photo etched copper pieces for the keel and two rolls of copper foil for the rest of the hull. I have used copper foil before and I like its flexibility. I tried gluing the photo etched pieces but found that they are too stiff and kept coming off the hull. So I discarded them and am using the foil for the whole job. I am applying the foil directly to the wood as it seems to hold very well without any finish on the wood. I had made this jig when I built the Constitution for marking the foil and it turns out the plates for this model are the same size, so I am using it again. I put a piece of copper tape into the jig copper side down, then place a strip of wood over it as a guide. I run a ponce wheel down each side holding it tight to the wood strip. I then remove the strip and carefully run the ponce wheel down the center of the jig. I then mark the edges of each plate by running the ponce wheel through each of the openings between wood blocks on the jig. I then turn the copper strip over and offset it slightly and mark the plates with the back of an X-Acto knife in each opening. It takes only a few minutes for each strip. I attach them to the hull in strips so it easier for me to keep the lines of plates straight. Before adding the first strip at the keep, I ran a strip down the bow and along the bottom of the keel and back of the stern post, wrapping the excess around each side. I then started add the copper strips. Here are the first few on the port side. I burnish the strips down with a rounded off piece of basswood to finish the process. The "dimples" may be oversize but I like the look better than smooth copper tape.
- 144 replies
-
- 6
-
-
- HMS Speedy
- Vanguard Models
- (and 1 more)
-
Sorry I don't know the answer to that question.
-
I gave the hull above the waterline a coat of wipe on poly. I also did the same on the deck. I am going to add the copper foil to the hull below the waterline but I don't know yet if I will add them over the bare wood or give the wood a coat of primer first. I cut out the two sails from the silk span using an X-Acto knife. I cleaned then up a bit and glued down the bolt ropes in a couple of spots that had come up. I am going to make the spanker sail next as I can get the dimensions from the plans.
- 144 replies
-
- 15
-
-
- HMS Speedy
- Vanguard Models
- (and 1 more)
-
I marked the waterline on the hull today, using a laser level on a tripod. I also finished the last step on the sails which was to paint spots along the front edge and then drill holes through the spots for the grommets. I found that it was better to use a T pin to push a hole through the paint instead of drilling a hole. The next step is to cut the sails out and trim the reinforcement pieces and bolt rope ends.
- 144 replies
-
- 4
-
-
- HMS Speedy
- Vanguard Models
- (and 1 more)
-
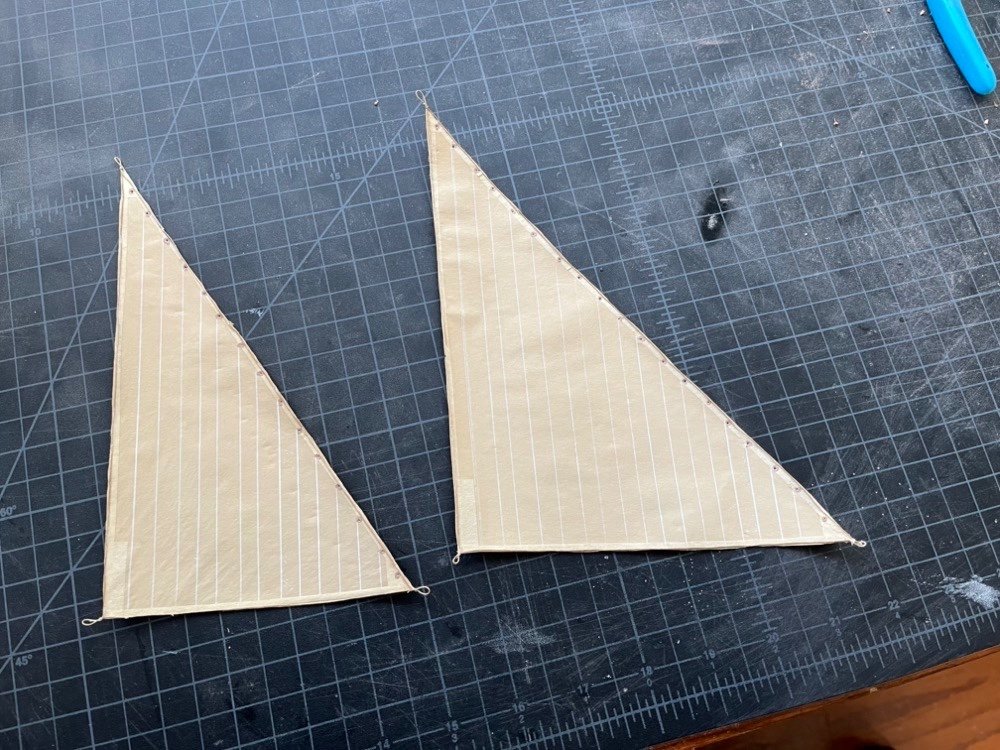
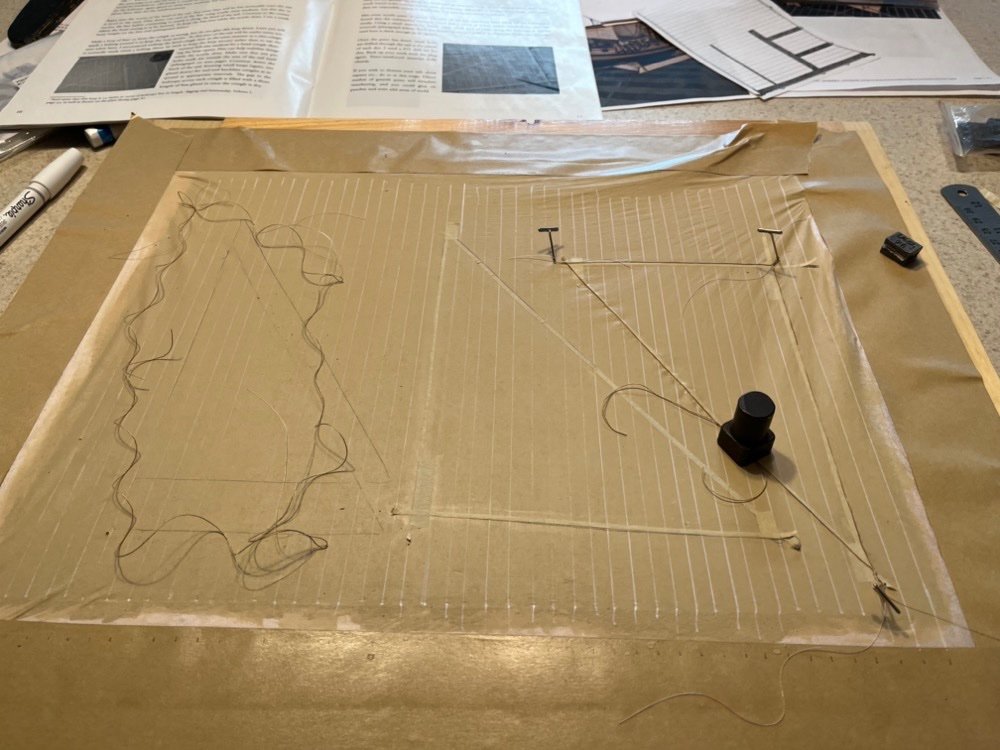
After touching up the paint on the inside bulwarks, I removed the masking tape on the deck. There were a few places where the bulwarks paint bled under the tape, but I was able to scrape it off with an X-Acto knife and some small riffler files. I then added the prow, keel, and stern post pieces. I used the edge of a flat file to file a groove into the stem so the stern post fit flush to the hull. I used a combination of medium CA and wood glue on these pieces. I traced the outlines of the jib and fore stay sail onto the piece of silk span on the frame. On thing I found out the hard way how easy it is to inadvertently punch a hole through the tightened silk span. Luckily I still had enough left to use for both sails, since they are triangular. I cut out the reinforcement strips and glued them on with diluted matte medium. When everything dried and tightened back up again, I cut some 0.021" tan line, that corresponds to about 1.3" at this scale, for the bolt rope for the jib. I seized a loop and started gluing the bolt rope on using a less diluted matte medium than I did for the reinforcement pieces, using small weights and T pins to keep the bolt rope in place. I then seized another loop and glued more of the bolt rope on, then one more loop and the rest of rope. For the other sail, I seized three loops on before starting to glue the rope on. The seizings are loose so I can adjust them at each corner as I glue it around. I'll use the matte medium to fix the loops at the same time as I glue the rope down. Happy Thanksgiving to all who celebrate it here in the US.
- 144 replies
-
- 8
-
-
- HMS Speedy
- Vanguard Models
- (and 1 more)
-
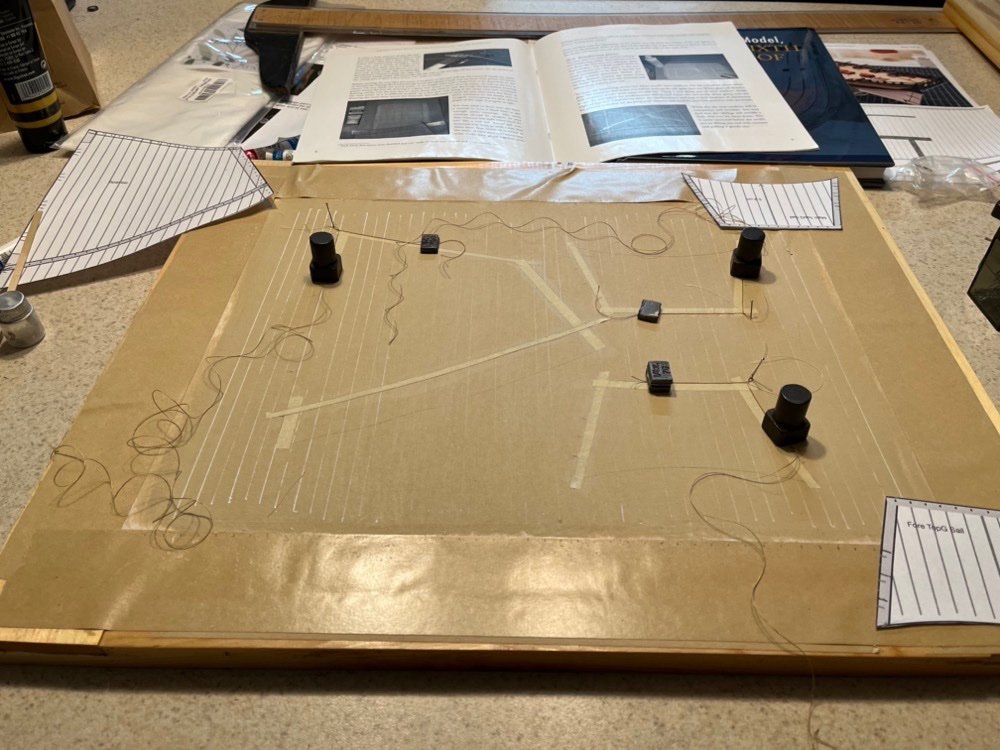
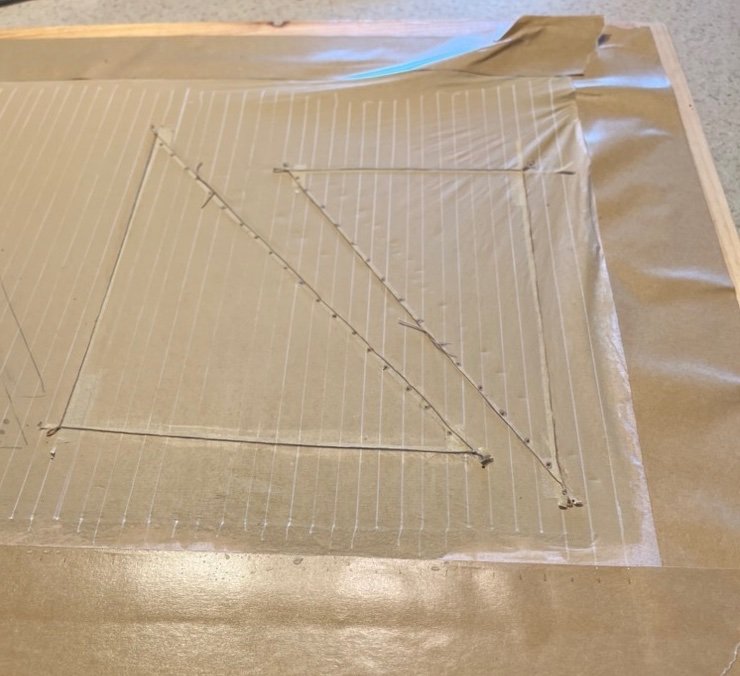
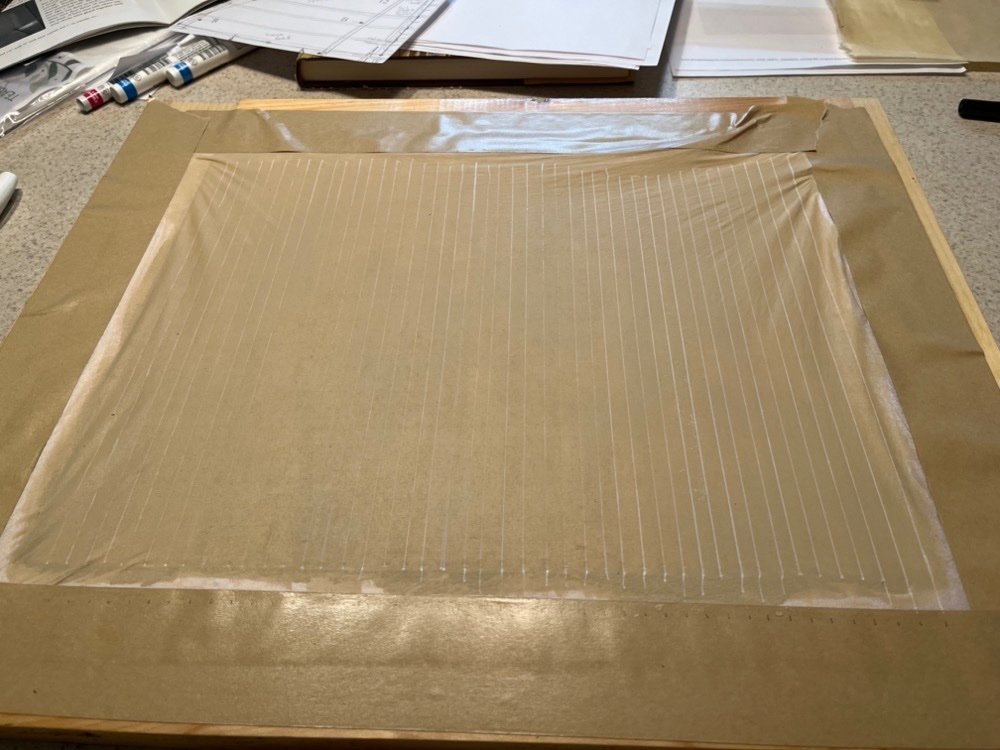
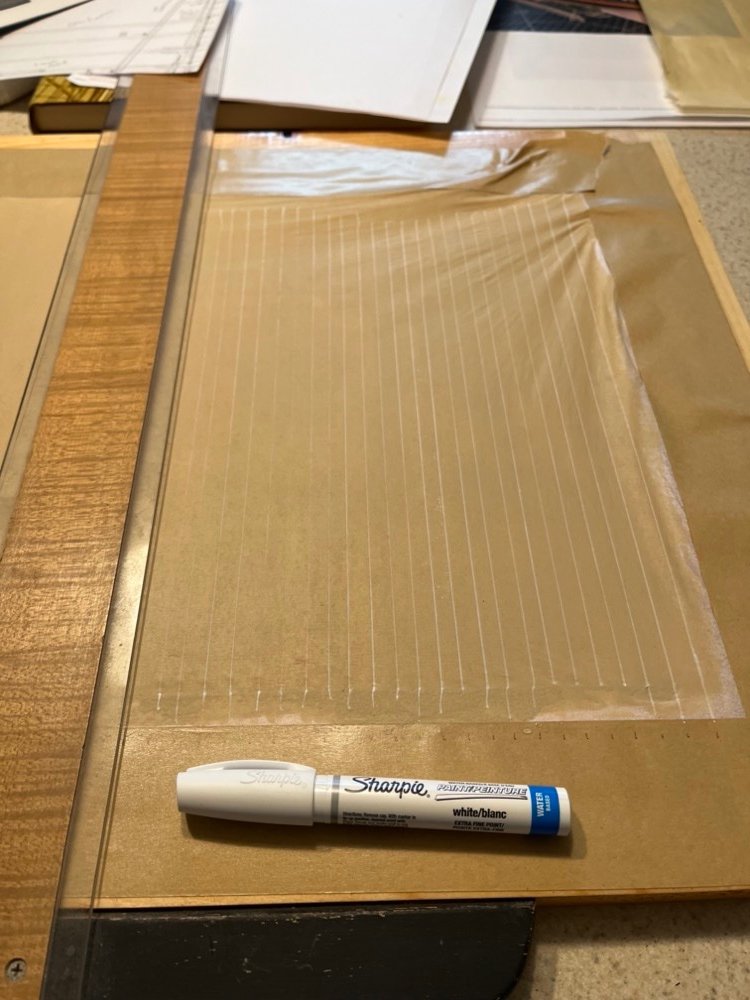
I am so saddened to see the news about Jim Byrnes this morning. I never met him in person but from what I have heard he was a great guy and will be greatly missed. My condolences to his family and friends. I finished adding the wales to the hull, then gave them a sanding to even them out. This took off some paint in spots, so I masked where it was needed and gave the wale pieces another two coats of black paint. I left the ends at the transom long, as these will be trimmed back when I add the fashion pieces later. Next will be touching up the inside bulwarks paint again, then adding the stem, keel and sternpost. On the sails experiment, I mixed up some unbleached titanium white paint with a little burnt umber and yellow oxide and lots of water so it was very thin. I gave the silk span three coats of this and let it dry between each coat. As per the TFFM instructions, I cut this one out of the frame and will use it for the reinforcement strips. I repeated the procedure with another piece of silk span, but this time left it on the frame after painting it. I then made up a tick strip for the cloth spacing, with 21/64" divisions. I transferred these to the bottom tape and used a T square along the bottom of the frame to draw the lines for the clothes. Instead of using an ink pen I tried a Sharpie white paint stick and was very pleased with the result. I know they are whiter than they should be, but I like how even the lines came out. I will let this dry then use it for the head sails, as the size of these is not as precise as the square sails.
- 144 replies
-
- 9
-
-
- HMS Speedy
- Vanguard Models
- (and 1 more)
-
I am adding the wales to the hull. I started on the port side, which is not the display side. I bent a 3mm and a 4mm strip of pear wood to fit the hull, then deviated from the instructions. I painted them black before gluing them on the hull, because I think that will make it easier to keep black paint off the hull planks. I will probably still need to sand them after gluing but then I can touch up the black paint on them with a small brush. I may still mask them off depending on how much painting they will need. I prepared those strips by running them through the Byrnes thickness sander so they are the same thickness. I am using wood glue to glue them to the hull and clamps to hold them while the glue dries. I luckily used a light strip of wood as the plank under the wale so it easy to line up the first strip with the edge of that plank, which is the correct wale position. Here is the bow section glued on and drying.
- 144 replies
-
- 7
-
-
- HMS Speedy
- Vanguard Models
- (and 1 more)
-
Chris, congratulations on your success and the growing pains that go with it. I am sure you will be able to get them all worked out. I hope you can get back to the design tasks, as I have the feeling those are your real passion. And I can't wait to see the new designs. Your kits are so much fun to build.
-
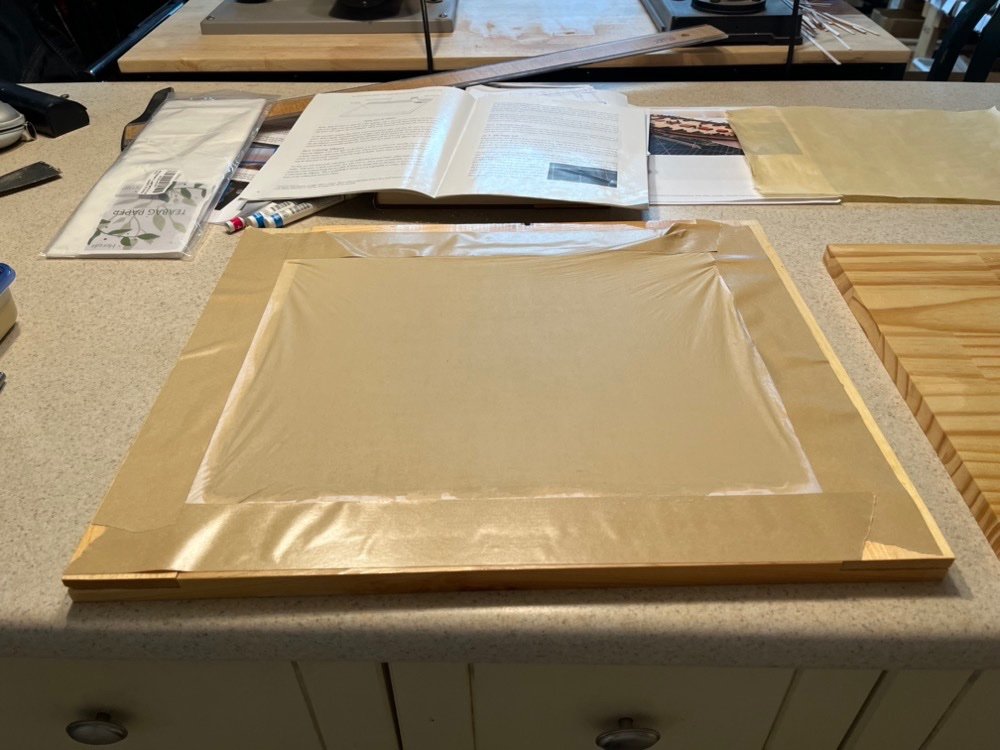
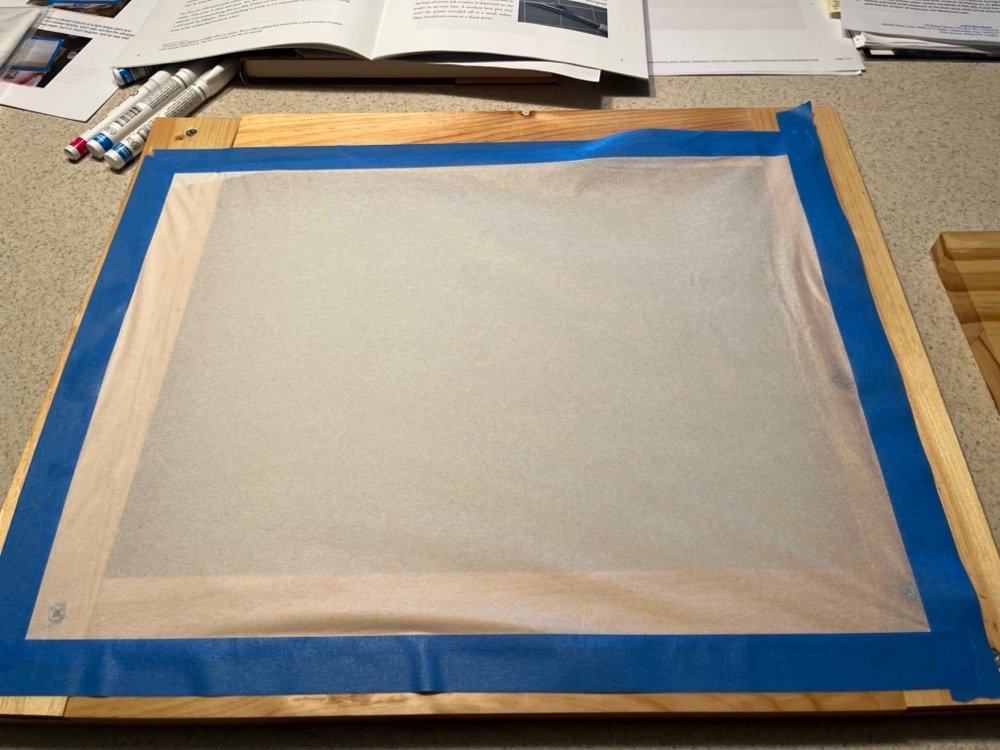
I let the silk span dry overnight and it tightened nicely. I had ordered some gummed tape to hold this down which has arrived since I took this picture. I re-taped the silk span down and wetted it with a spray bottle to remove the waves on the sides.
- 144 replies
-
- 3
-
-
- HMS Speedy
- Vanguard Models
- (and 1 more)
-
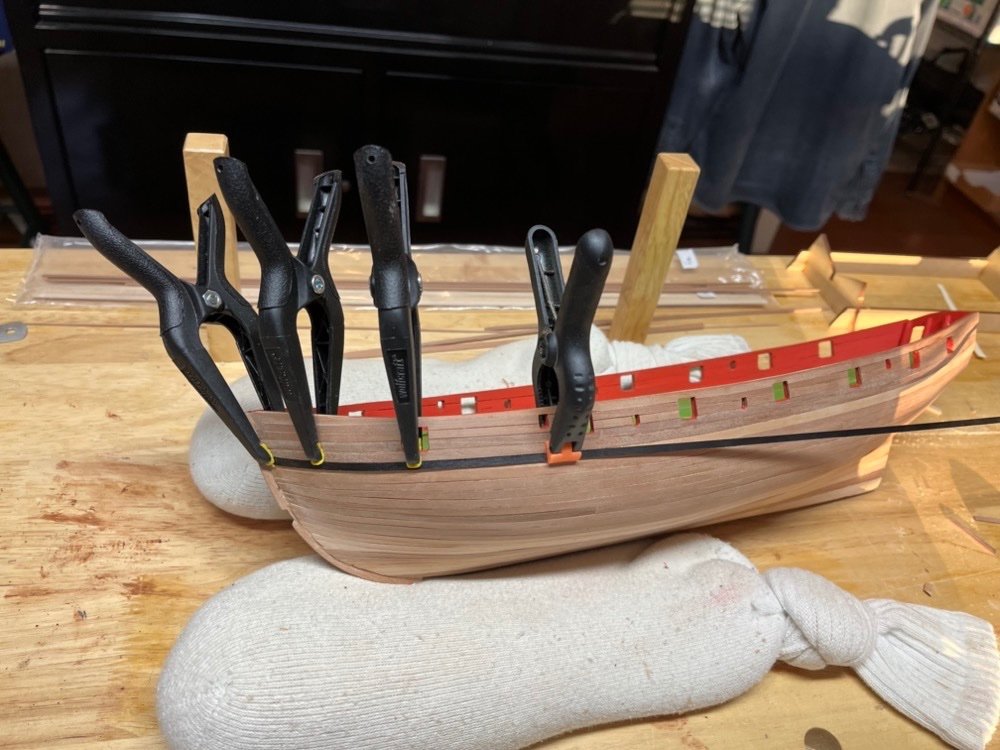
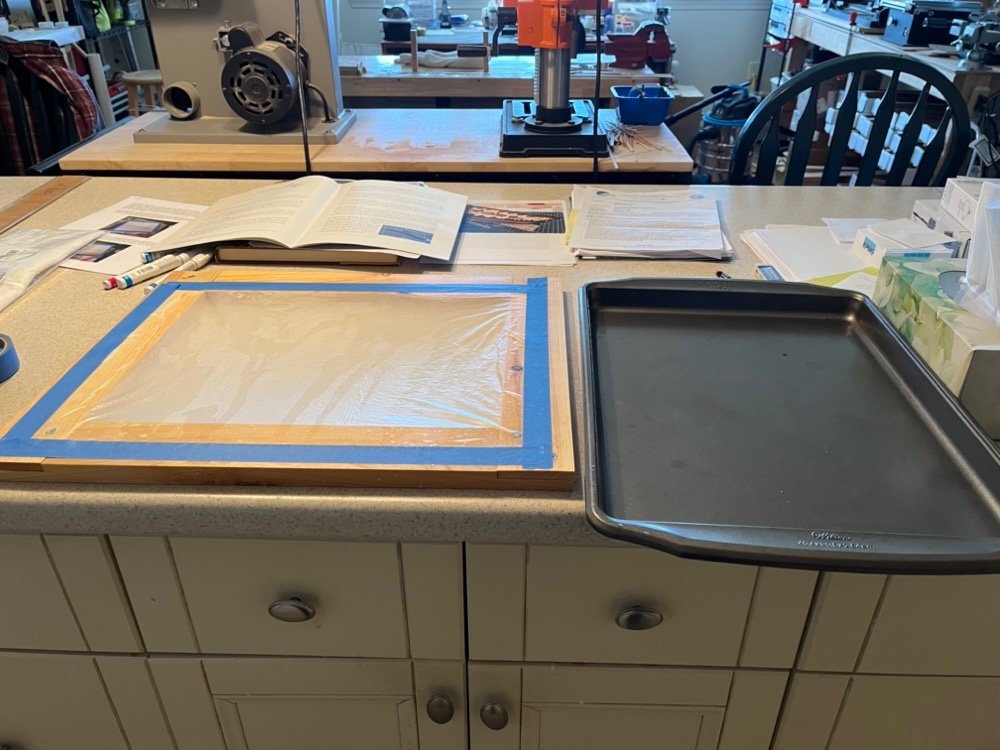
I received the silk span I ordered so it was time to start experimenting with it. I first soaked a piece in a small tray by folding it first, which was a mess. Once that stuff is wet it wants to really stick together and there was no way to unfold it. So I borrowed my wife's oven pan and soaked another piece flat in it. This worked much better. I was able to transfer it to the frame, tape it down and remove the insert while it dries. I'll see tomorrow how much it tightens up.
- 144 replies
-
- 6
-
-
- HMS Speedy
- Vanguard Models
- (and 1 more)
-
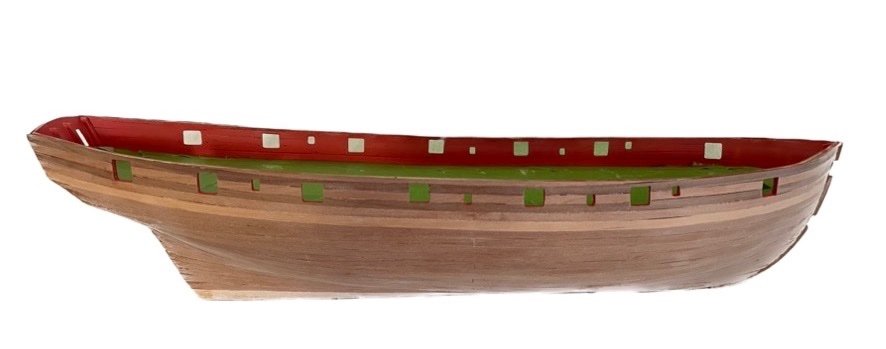
I finished opening up the gun and oar ports. I made a rectangular sanding stick that fit inside the gun ports and used it to square them off. I gave the hull a final sanding then gave the inner bulwarks another coat of red paint. I also carefully painted the insides of the gun and oar ports with the same red paint. I am now ready to add the wales.
- 144 replies
-
- 8
-
-
- HMS Speedy
- Vanguard Models
- (and 1 more)