


threebs
-
Posts
157 -
Joined
-
Last visited
Content Type
Profiles
Forums
Gallery
Events
Posts posted by threebs
-
-
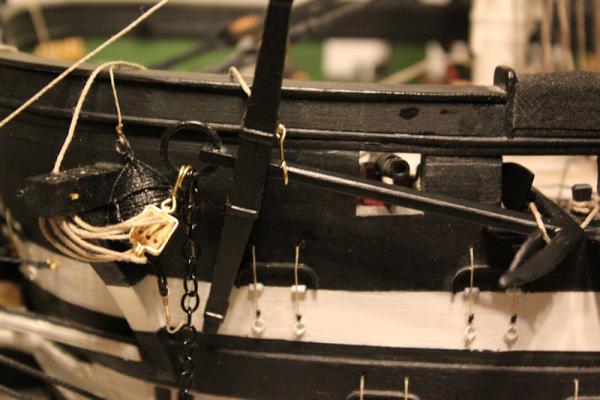
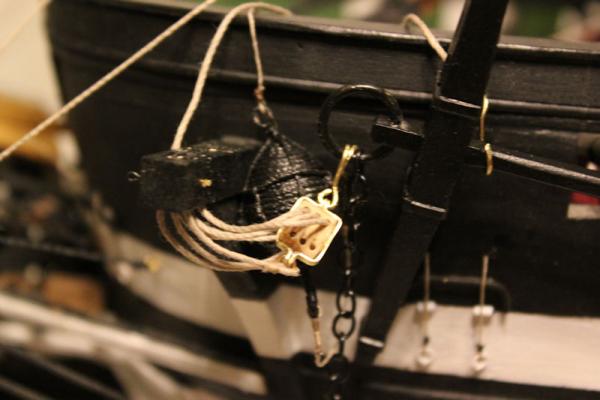
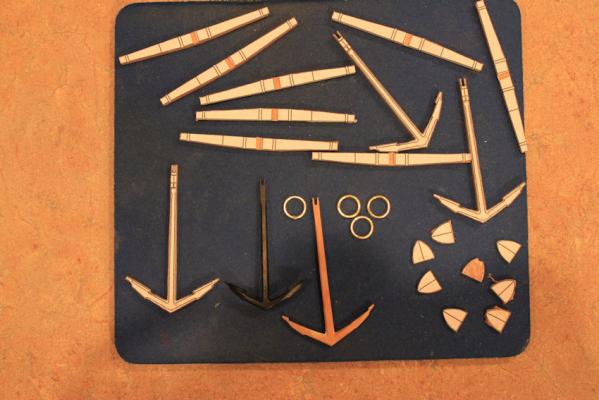
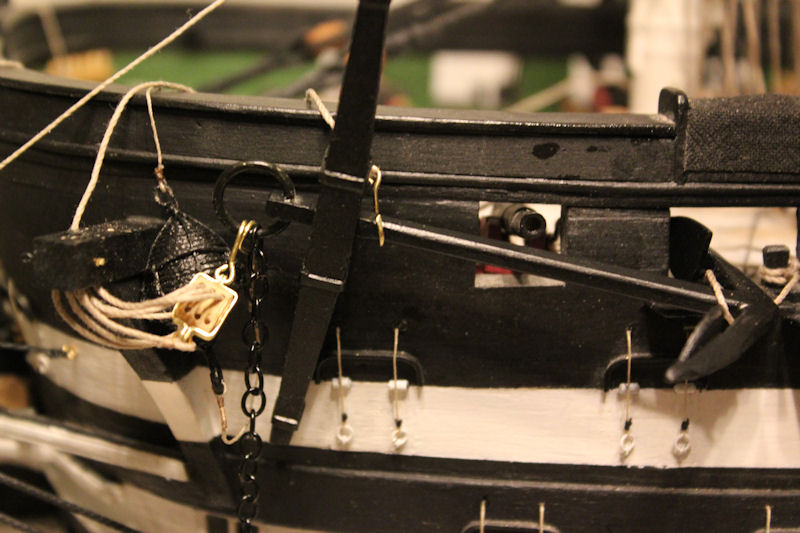
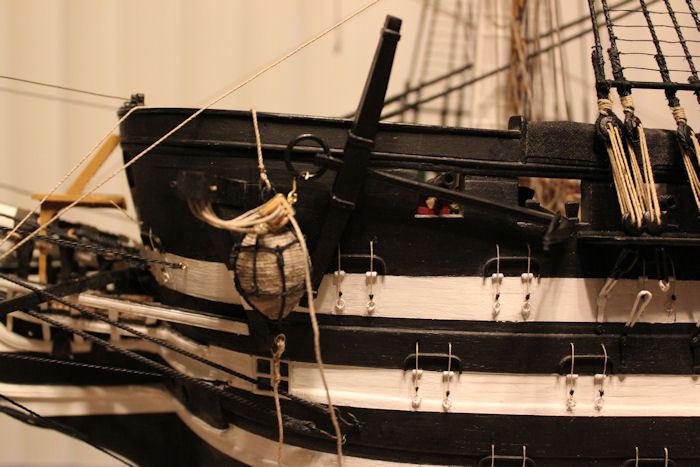
Here are some photos of my anchor area. Have the other side and the sheet anchors to do yet. Also, I did find a couple of ship boat sites, I will also try the ones you have mentioned.
Any way here is my first attempt.


- Elmer Cornish, WackoWolf, mtaylor and 4 others
-
 7
7
-
OK, thanks. But, isn't the "base", octagonal in this case, on the fore mast chain wale up against the hull or, on the hull abutting the chain wale, it appears so in Lee's book on masting and rigging?
OH! Am I glad I checked your Constellation build? I was just racking my brain as to how to proceed in building my ship's boats! This is great, everything I need is right there. I book marked the page right away! I am going to search for Glen's Constitution build to see his posts on the boats. I am not so good at searching this sight, seems I get something different from what I want every time I try.
-
As I have been working on the anchors and buoys, I have been reading up about the fish davits. Not many photos of ships using them. Is it safe to say the are only used to drop, lift and stow the anchors and are otherwise stowed away themselves? As I am rigging the anchors in a stowed position, do I really need to make them?
-
Made a mistake about Victory's lower gun deck battery. She has 32 pounder long guns, not 24's. Even so the height difference is only 1-1/2".
-
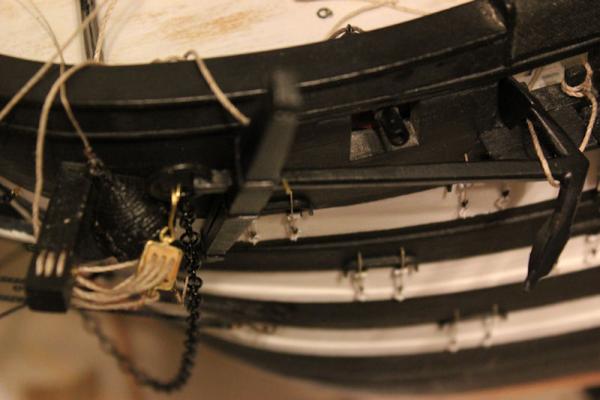
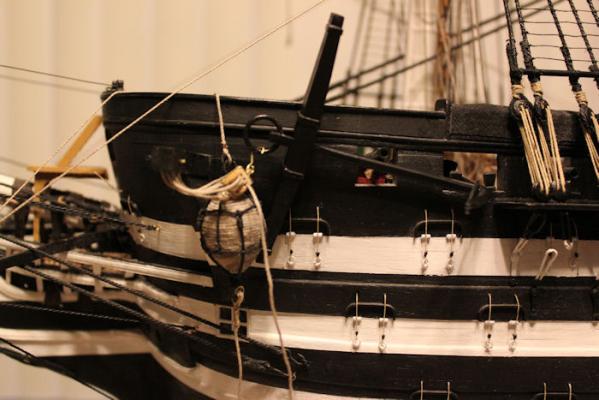
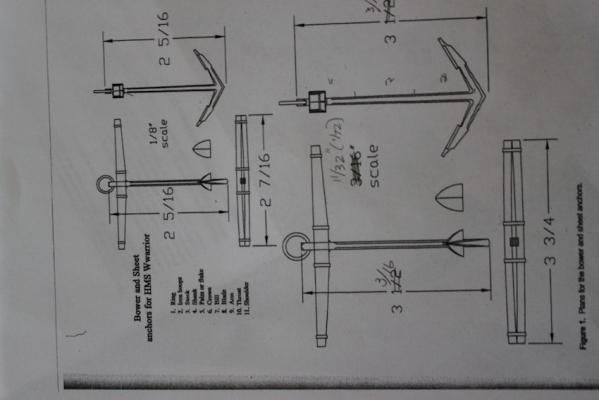
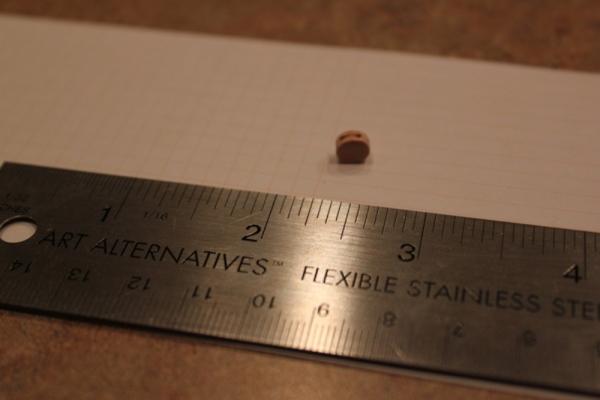
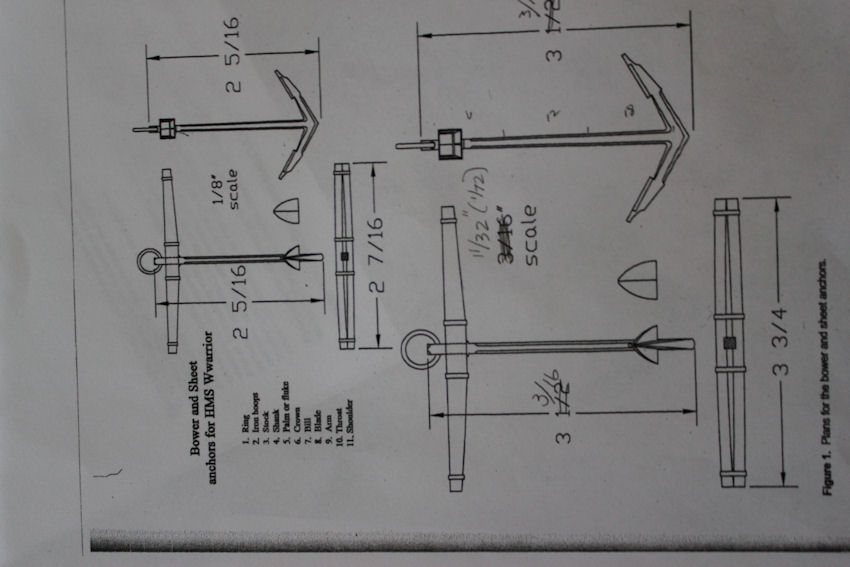
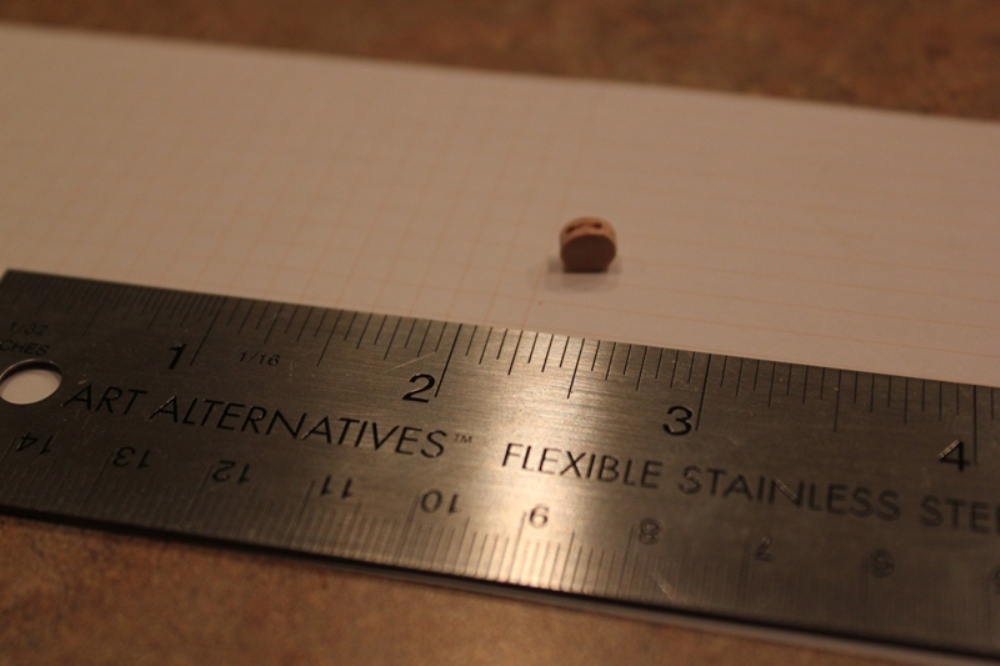
yes, I was afraid of that. I did some divider measurements (which I should have done instead of eye balling it) of a buoy in an article in Ships in Scale volume XXI number 3 May/June 2010. I compared the length of the buoy to the height of a gun port. The article is about making anchor's and is where I got the plans for the anchors I made. The HMS Warrior (the ship in the article for which the anchor's were made), carried 24 pounders on her lower gun deck, as did Victory. With a caliber of 5.84 inches, using a formula of 6 times the diameter of the shot, a 24 pound gun port is about 35 inches, just short of 3 feet. Using that measurement, in photo above and the diorama photo in the article. it looks like the buoy is somewhere between 4 to 4-1/2 feet, or 1-1/2 times the height of the port. I placed a 3/4"X1/2" piece of scrape in place of the 1" buoy I made and it looks way better in proportion. I am going to make new buoy's 4-1/2' or just over 3/4".
Thank you for your input, it is very helpful to get other views and suggestions!!
-
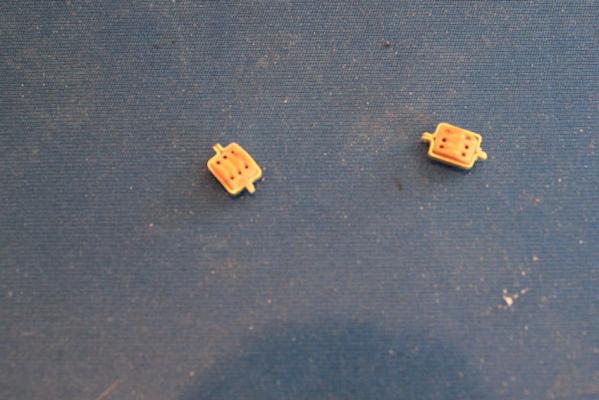
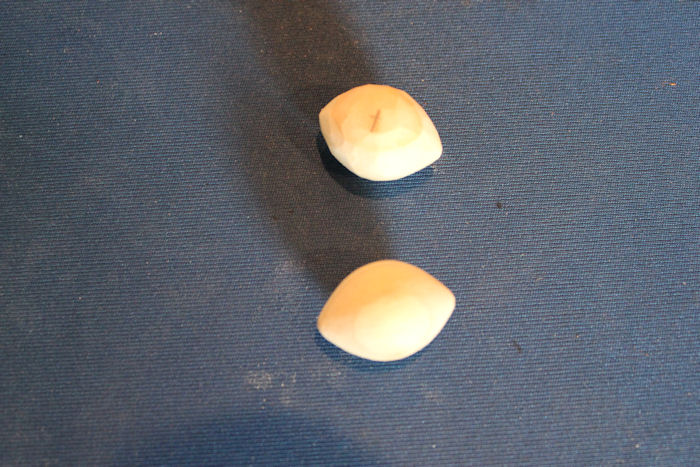
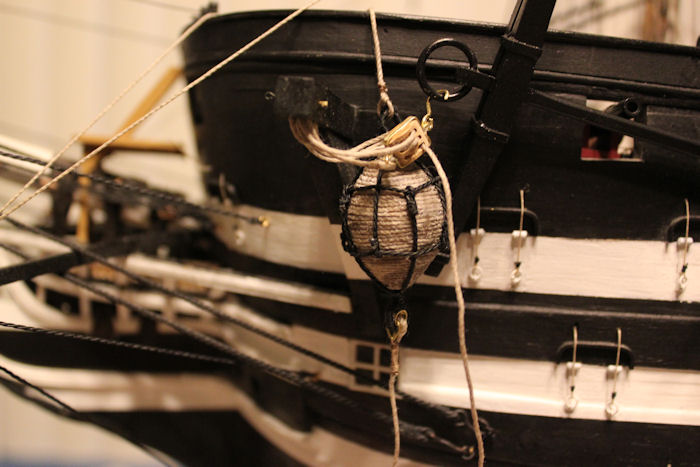
OK. I didn't get any suggestions about puddening the anchor ring so,I am going with my hunch that it wasn't done with a chain.
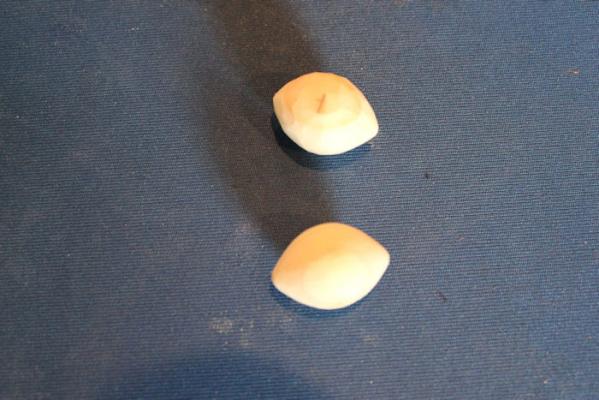
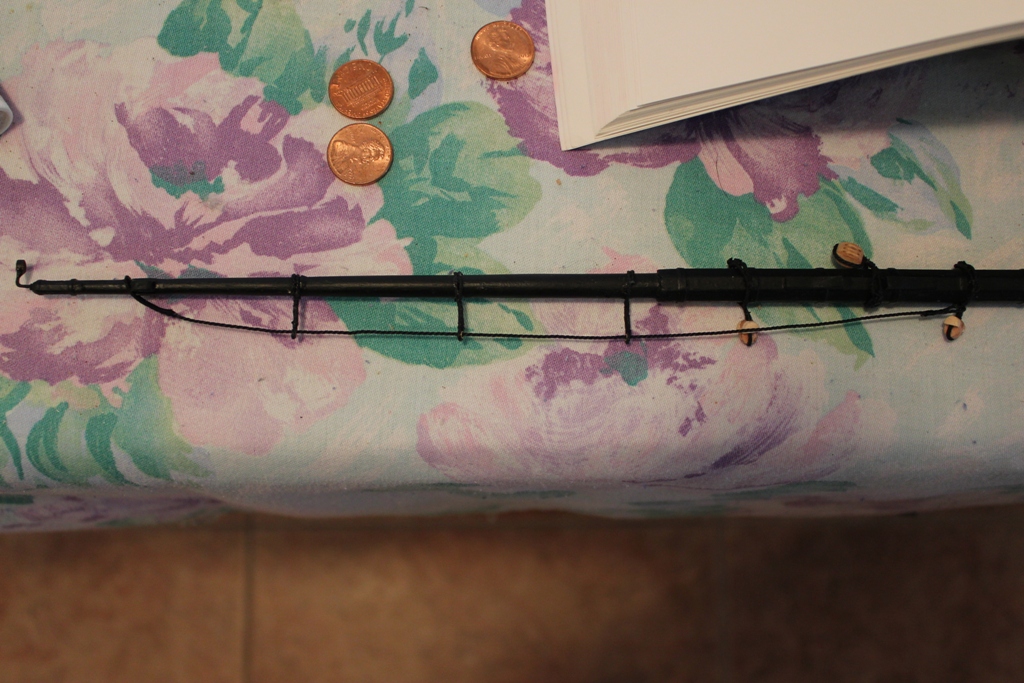
HOWEVER, I do need input on if I made the anchor float to big? It looks OK, I guess, needs painting to simulate the tar it would have been coated with, but other wise I think it is fine. What do you think? Oh, it is 1 inch long, so six feet on real ship.

- Elmer Cornish, JerryTodd, trippwj and 6 others
-
9
-
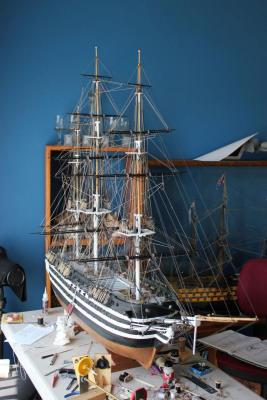
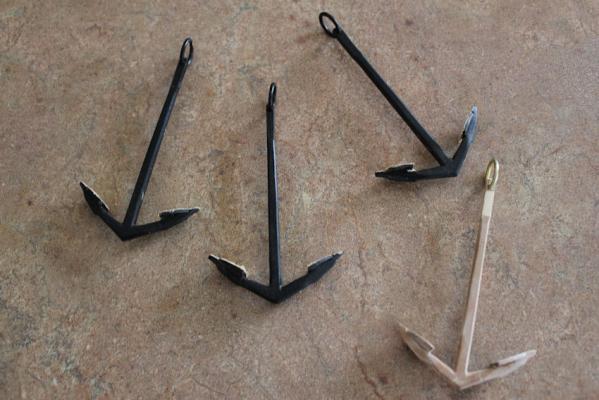
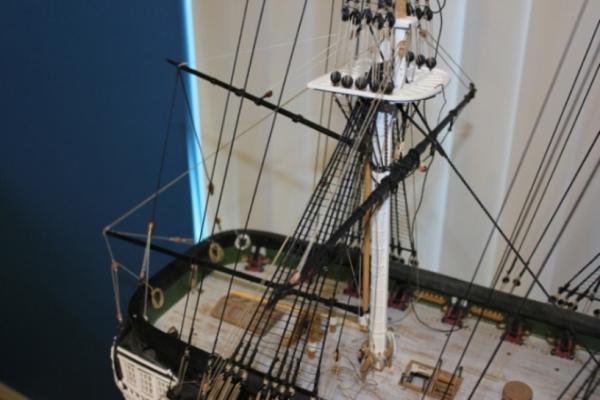
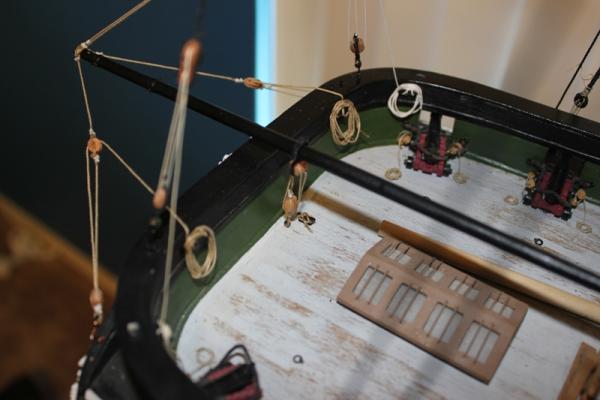
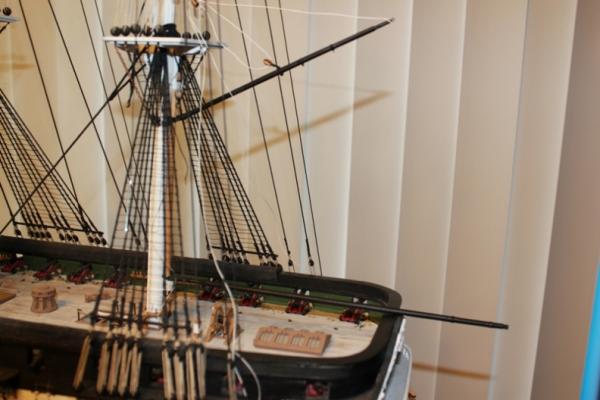
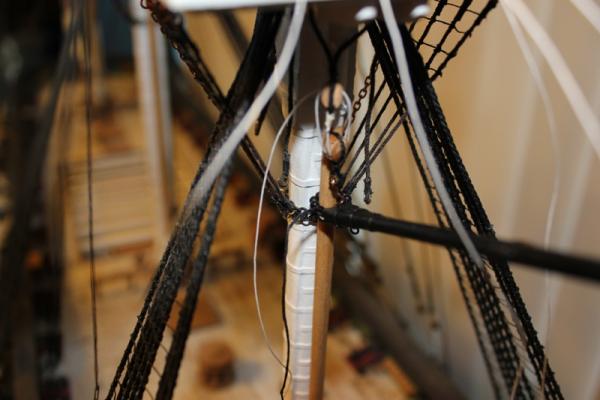
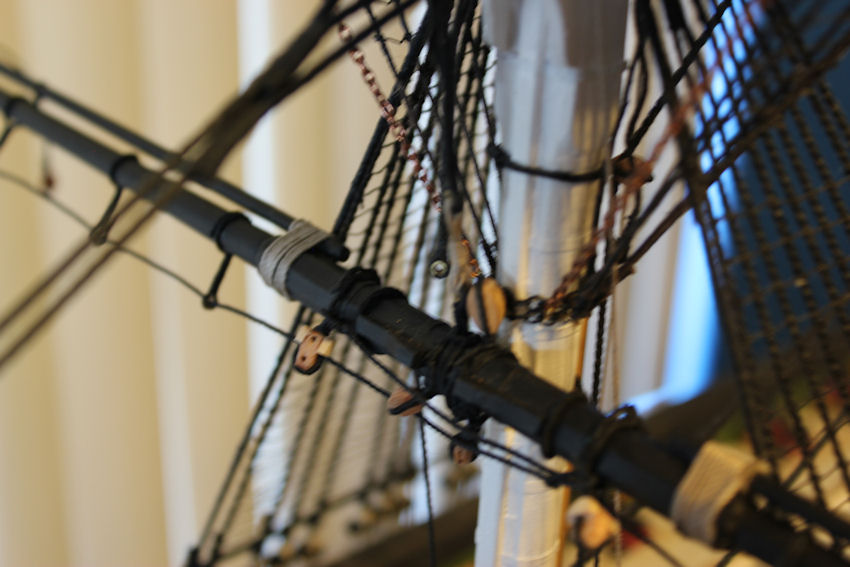
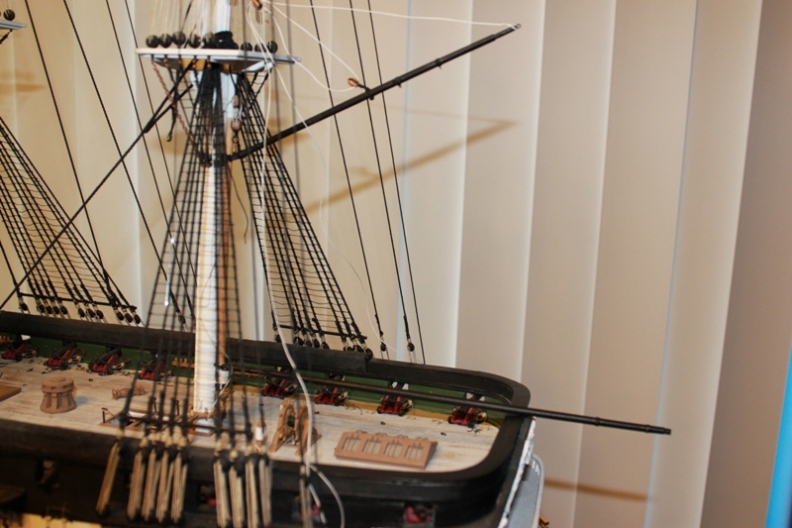
I have some photos of my progress. ALL of the rigging I am going to do is done. The photo of the whole ship does not include the spreaders or it's rigging, nor the bumpkin stays. I need to ask a question here to see if anyone knows weather or not I need to add "pudding" to the anchor rings? As this ship used chain in place of rope, I suspect the chain would wear away the rope wrapping on the anchor ring pretty quickly I would imagine. I suspect the rope wrapping on the ring was needed when a rope was used to reduce wear on the rope where in rubbed on the ring? The measurements on the anchor plans were reduced from 3/16th to 11/32 scale. I made a previous set of anchors that were too small, ah well, I can always use them on my USS United States when I build her. I will start her when I begin rigging my Columbus.


- qwerty2008, WackoWolf, mtaylor and 5 others
-
8
-
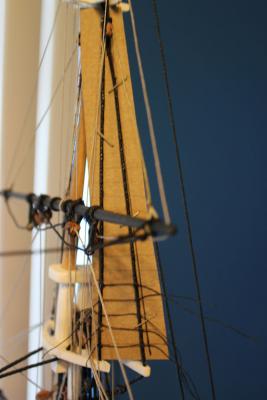
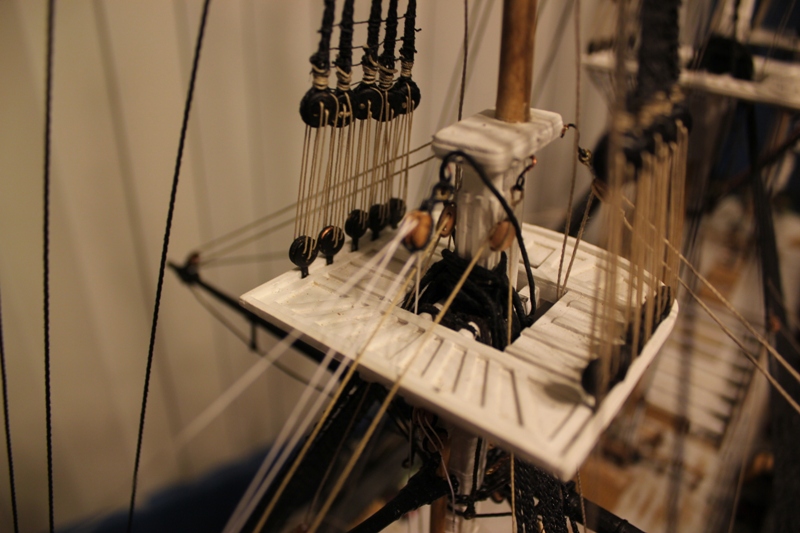
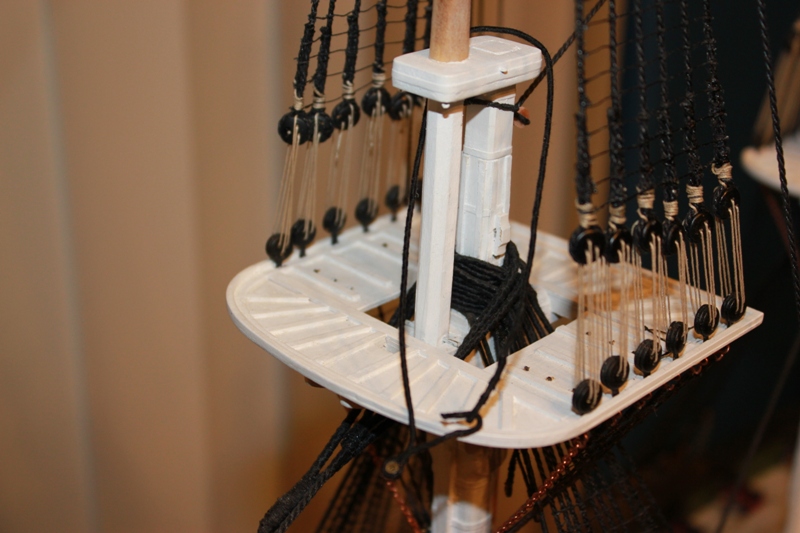
I made the corrections on the studding sail lashings. Figuring half inch diameter rope, I went with six turns to get three inches of lashing.
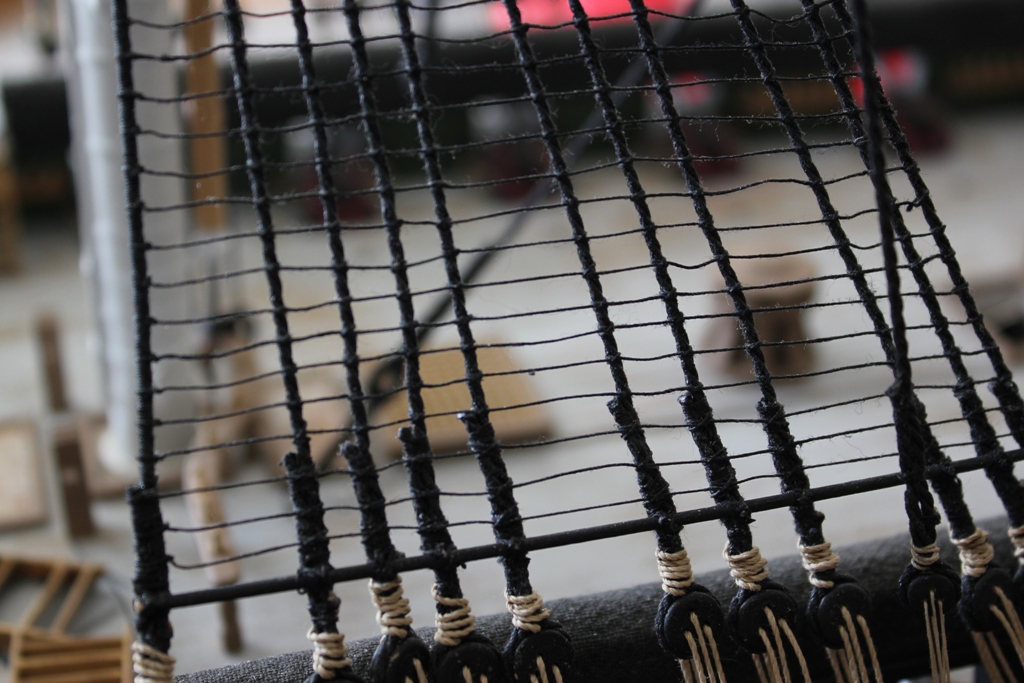
I will post some photos soon as I have now finished all of the running rigging I am going to do. No leech or bunt lines as there will be no sails. just have the spirit yard (if you can call it that, after 1830 US ships of the line had no real spirit sails). Lee's book shows the way the yard was made, but not how it was rigged. I will only rig two standing rigging lines until and if I can find out how it was actually rigged. Working on the anchors and their rig now. I also need the railing and net on the mast platforms. I am not sure if I am going to make all of the 10 or 12 ships boats. In the end I think six is going to be enough?
-
At 6 foot to the inch, the 1/4" lashing works out to 18". Still too much do you think? I know the angle makes it seem like more than it is.
-
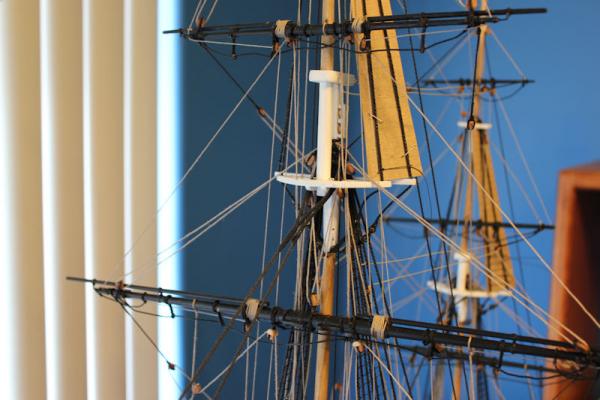
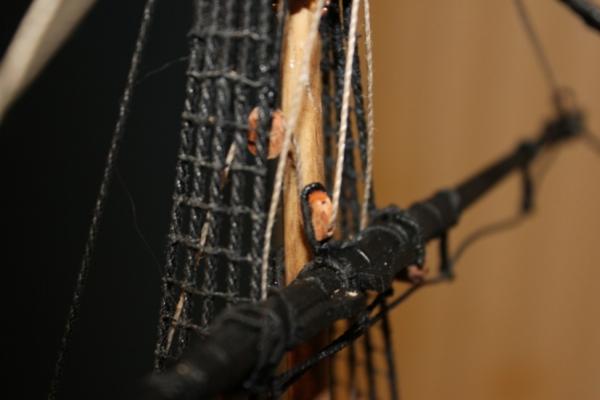
It is rather embarrassing that it seems I forgot to rig the ratlines on one side for the topgallent to royals. How do you do things like that? In m defense, I was just itching to get the yards up after so long it slipped my mind. Now however it will be more difficult on the main and mizzen as I will have to work around the yards and rigging. You can see from the photos how much easier access is to the fore mast. At least one of the photos shows parts broken away, I did this to make access to the belaying pin rails easier.


- SawdustDave, Elmer Cornish, hexnut and 3 others
-
6
-
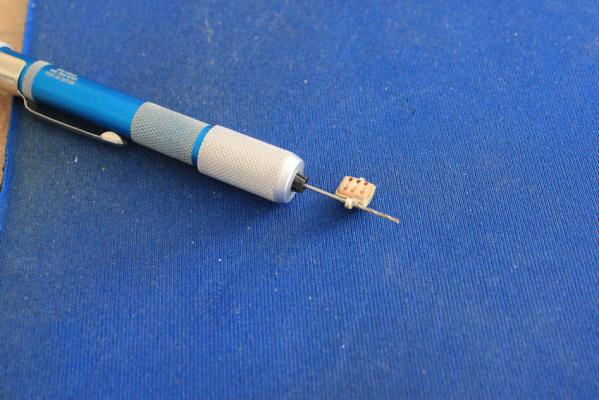
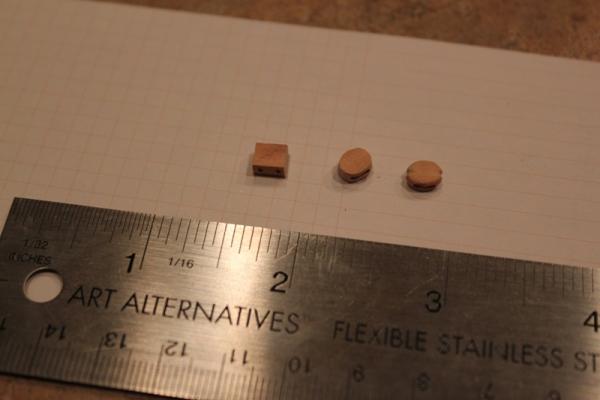
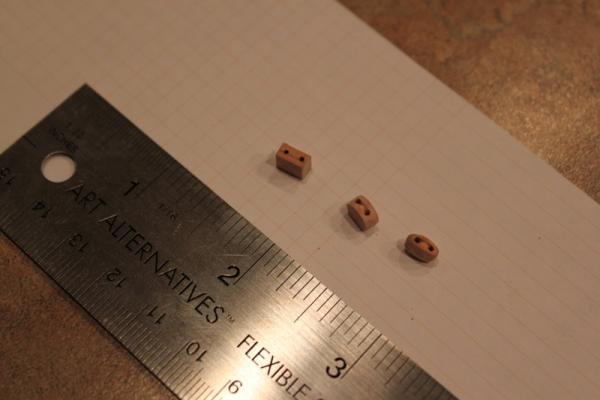
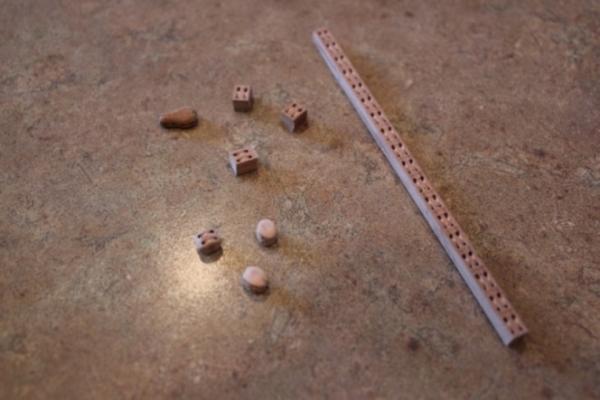
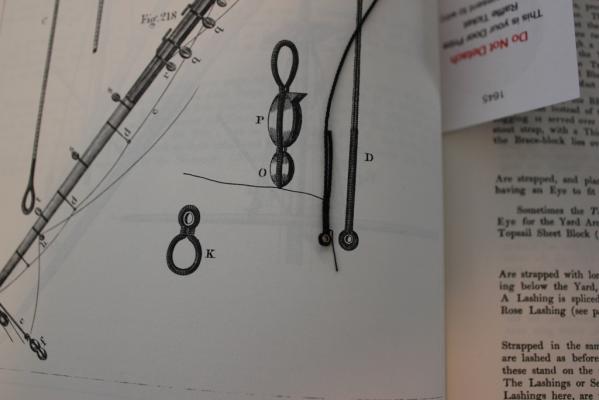
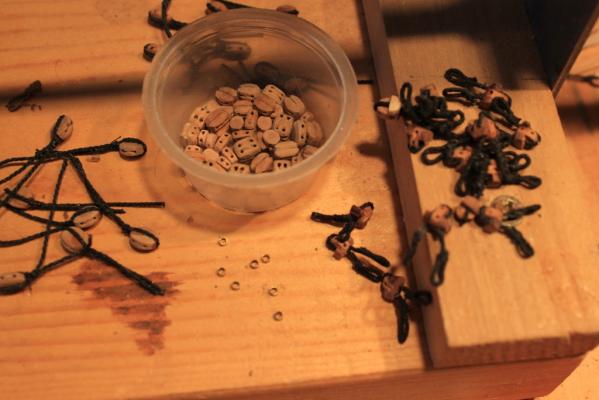
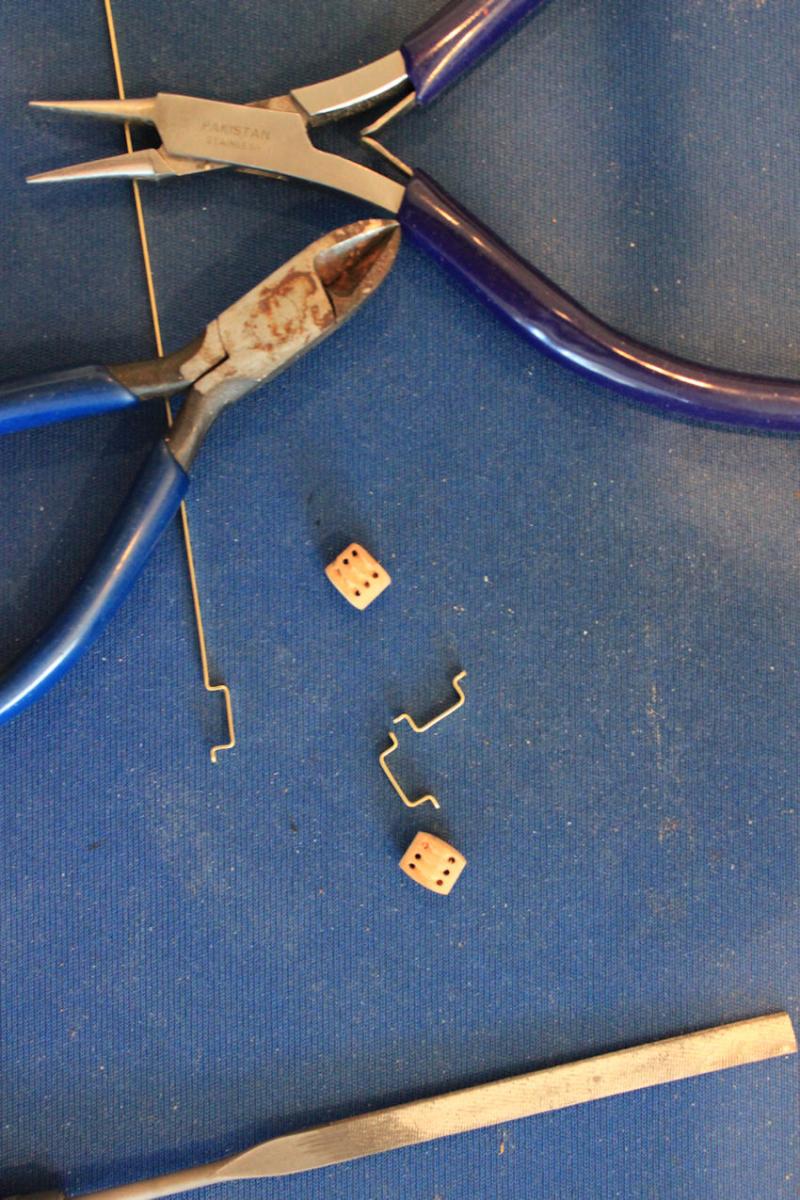
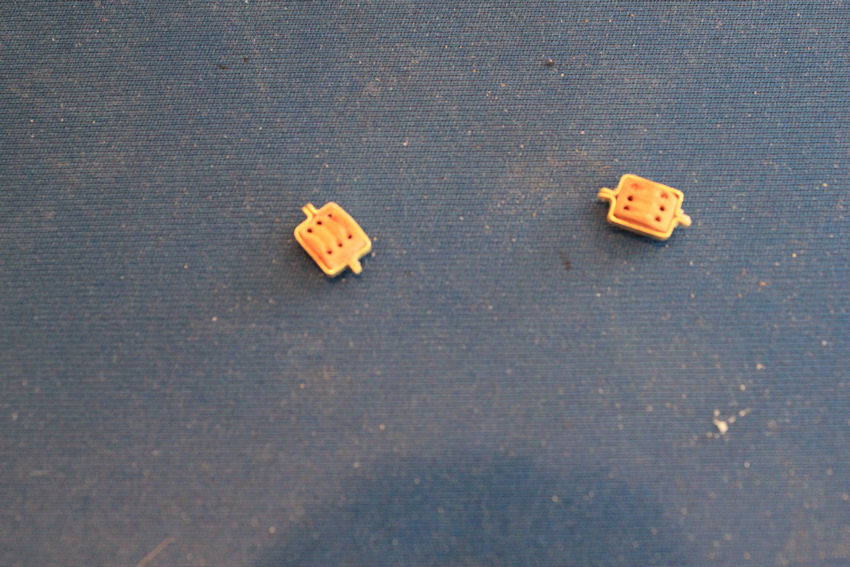
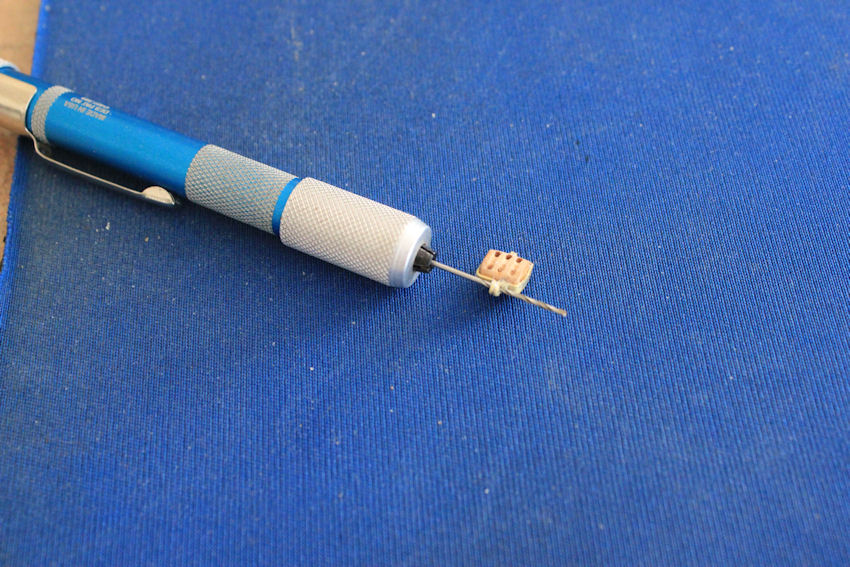
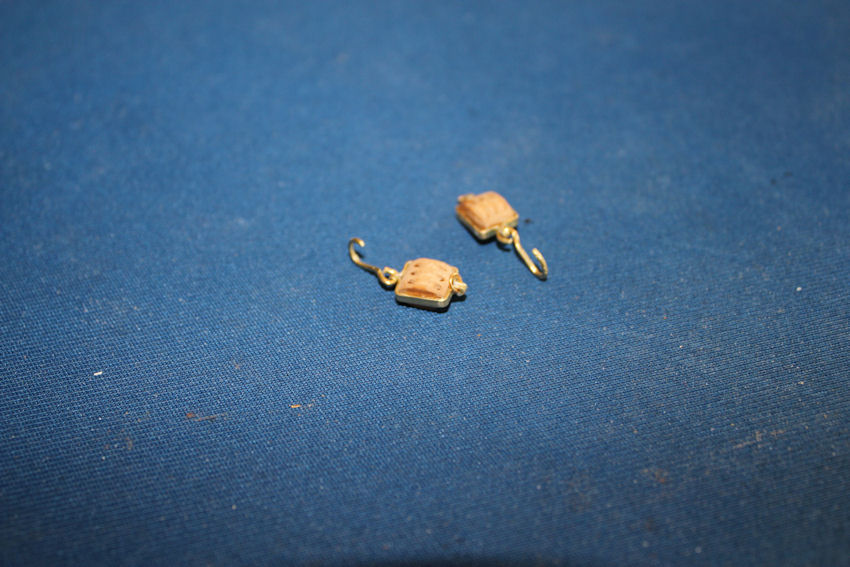
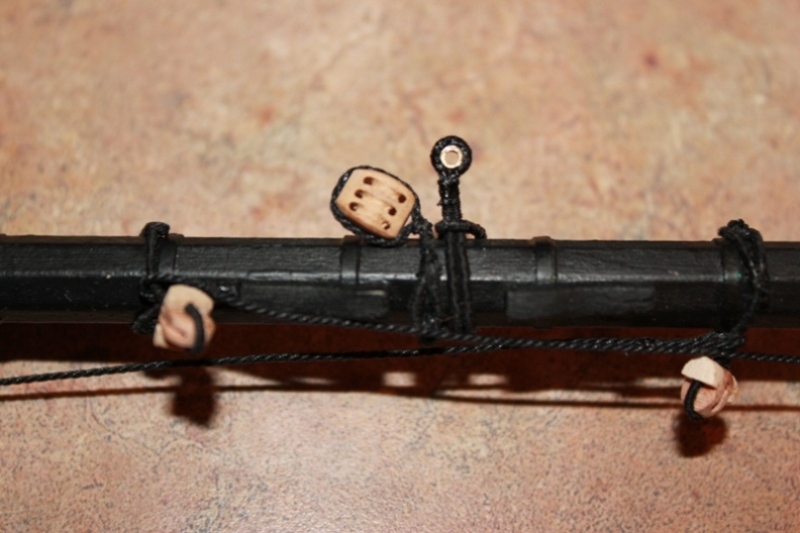
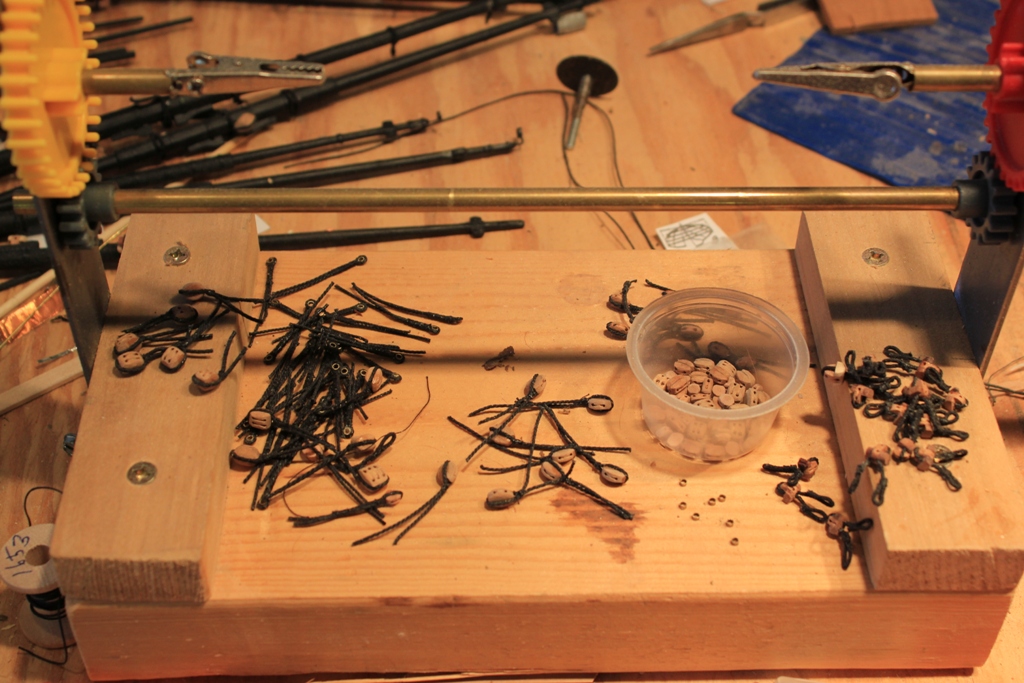
Here are some photos of the block process
- GrandpaPhil, Elia, qwerty2008 and 6 others
-
9
-
I hand make my own blocks out of boxwood and cherry. Lots of filing and drilling. I wonder if I should invest in a mini drill press in stead of using the stand for my dremel tool. It is hard to line up the bit just right and keep the holes reasonably straight and in line. The vise made for the dremel tool stand has too much play and it is a chore to get the piece clamped down level.
-
I have been working pretty consistently on the ship. Since my last post I have been putting in a minimum of an hour everyday. and closer to two most days.
Serving every block connection that connects to the yards takes a lot of time. Also, lashing thimbles to every block that hooks to an eye bolt also adds time.
I had forgotten how careful you have to be trying to get your paws into the rigging to belay lines and add rope coils. running the lines can be frustrating when you go to tighten up everything and the block twists so you have to re run the whole thing It has been a long road, and it feels good to finally be putting up the yards!


- SawdustDave, GrandpaPhil, mtaylor and 8 others
-
11
-
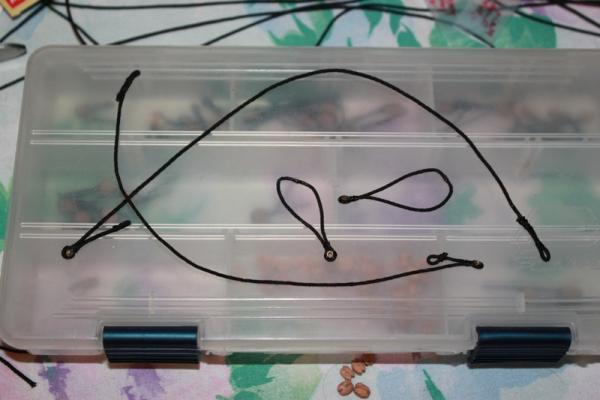
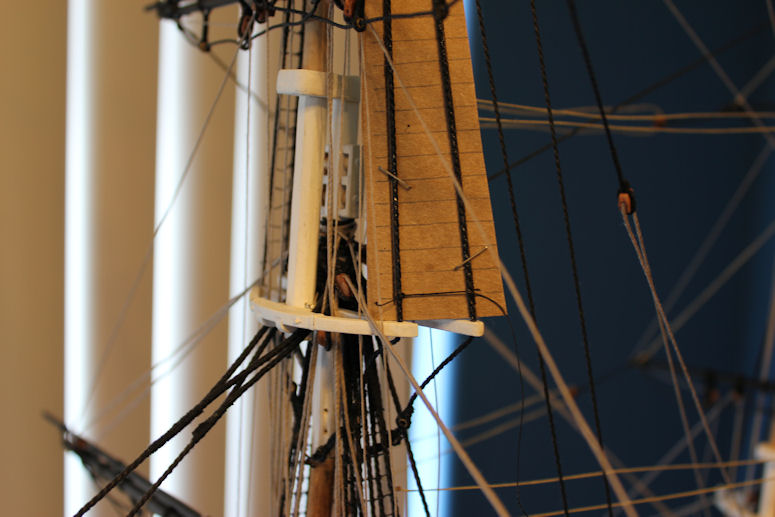
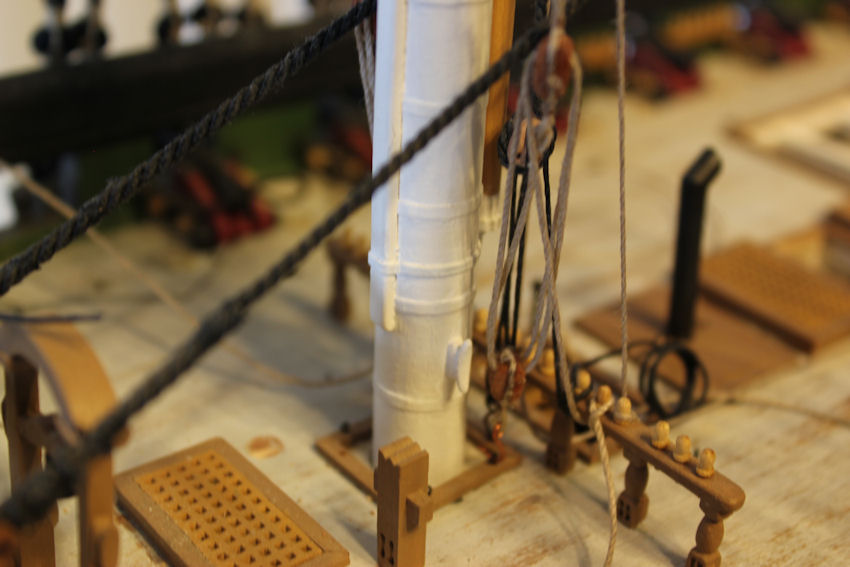
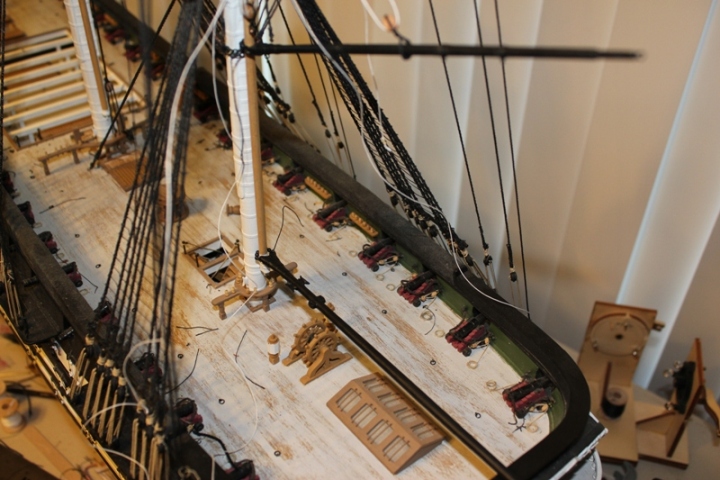
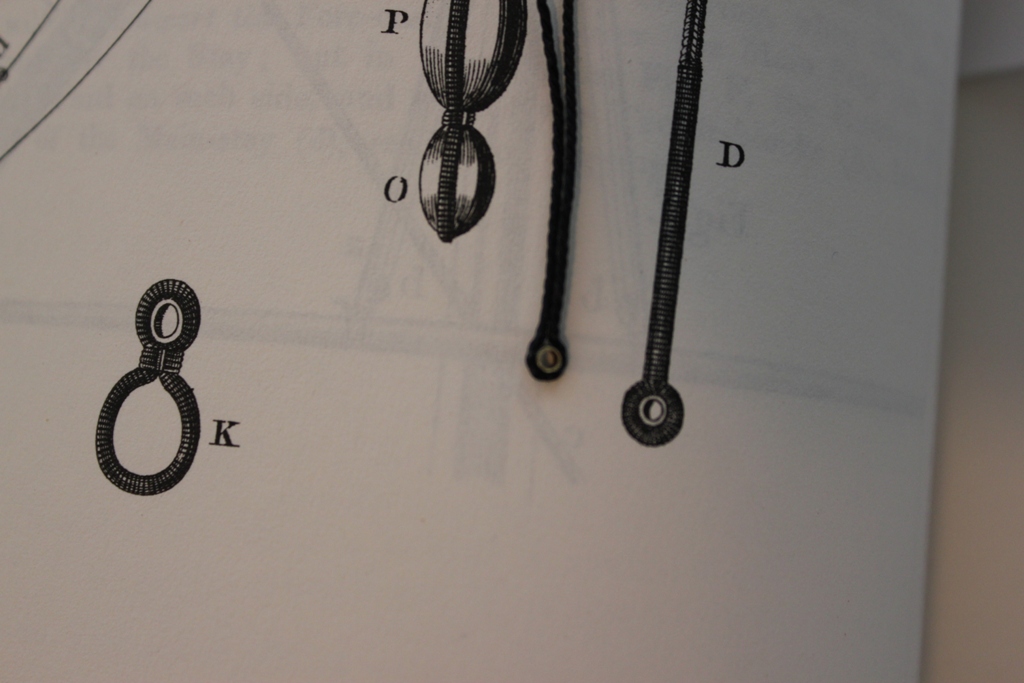
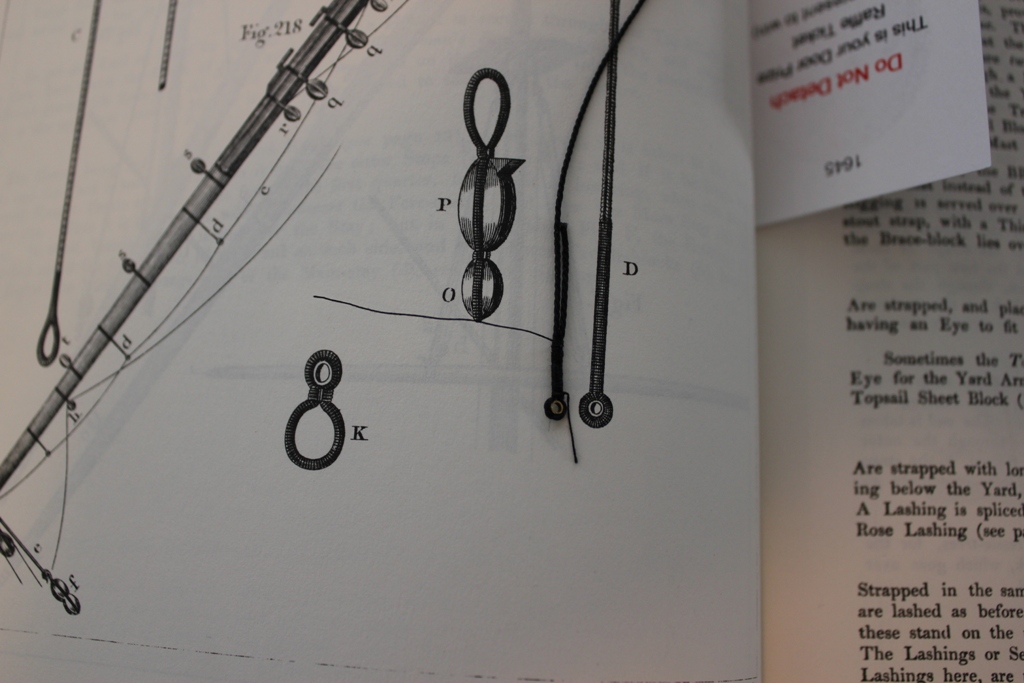
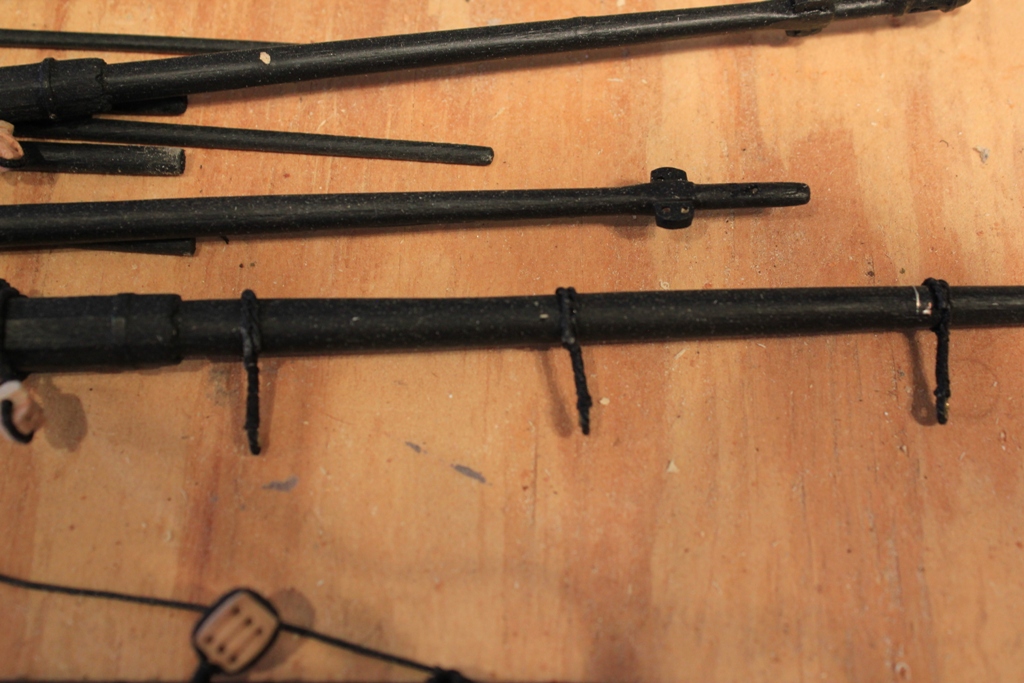
I have been working on the yards a lot lately. There is a lot more to do than I remember from my Victory Model 30 years ago. I am trying to get as many blocks as I can on the yards before installing them. As this ship will not have sails, I do not need the leech or bunt line blocks, so I will be leaving those off. Everything attached to the yards needs to be served, and attached primarily with rose lashings (or a close approximation). I made the slings as you can see, and I am making the trusses now (no photos of those yet). I am also putting on shrouds at the top gallant to royal yards tressel tree. I will post photos of how I attached them later. I also made and sort of installed the spanker and gaff booms.
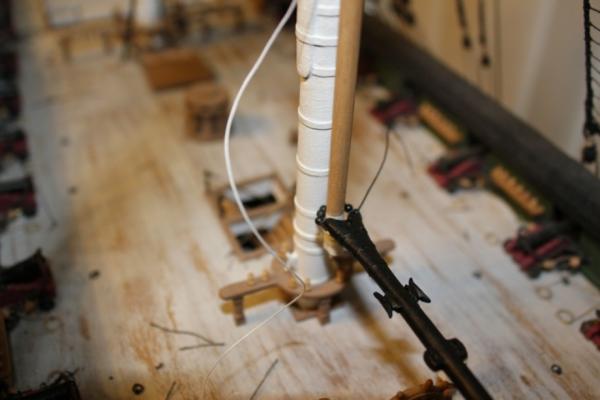
I apologize for the messy deck, I will vacuum it clean when I finish installing the yards. Once the yards are done, I think all that is left is the anchor assemblies, the davits, and the ships boats???


-
I was showing a relative, (no, not my wife), this post and he/she commented that I never seemed to acknowledge the kind compliments I get from the commentors on on this post. So, I thought a little explanation and an apology is in order.
I was born half deaf, and in the era I was raised, my peers we not very understanding. As a result I pretty much a loner all my life with few friends. I turned to books and model making to fill the void. Also as a result my social skills are not very good. I am sort of bashful and except for my family unused to compliments. So, I do not always know how to respond. If in the future I do not seem very forth coming in my replies, I am sorry and I hope you will understand. -
I need some input on running rigging. I know it was no where near as heavy as standing rigging of course, but, it must have had some sort of standardized size when given the load it would have to move? Did the diameter of the lines increase as they moved up the mast from yard to yard? I imagine the rope needed to lift the main topsail would need to be heavier than that which lifted the topgallent? I am thinking one inch diameter line for the lower yards and down proportionately as the yards get smaller? Any one help here?
-
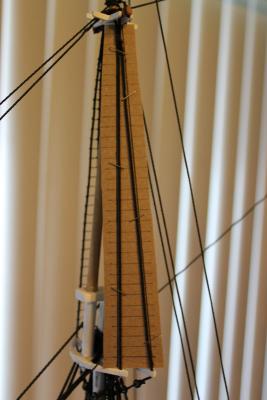
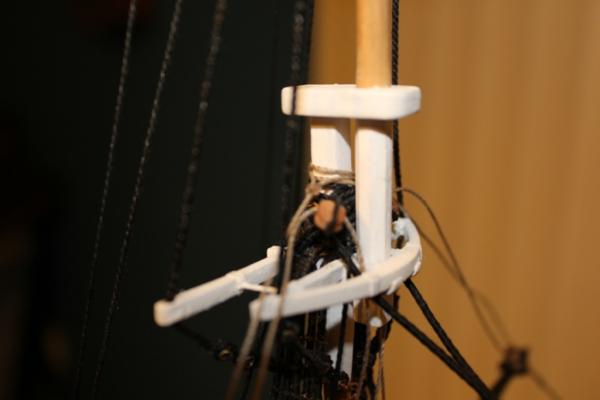
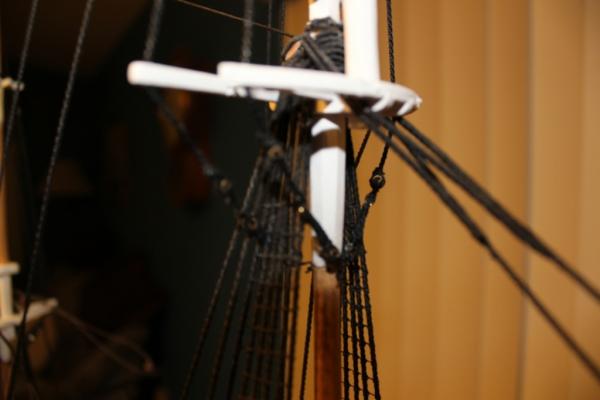
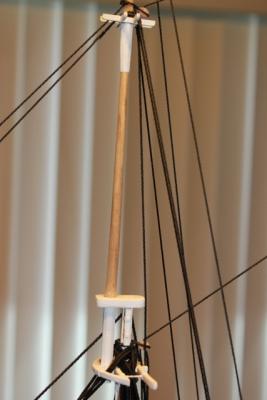
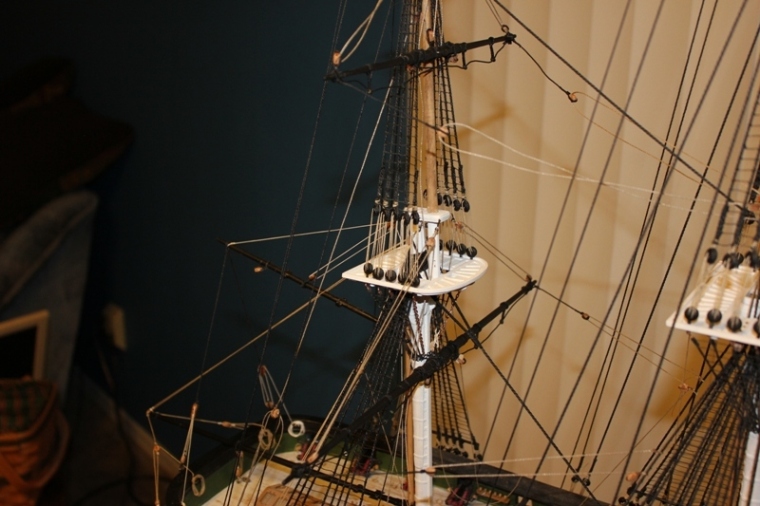
Here are photos of the bow shaped cross trees. Not certain how to run shrouds form the cross trees at the top of the photos to the bow structure. Not sure if there even are any. Lee's book does not show or say.
- Elia, GrandpaPhil, qwerty2008 and 5 others
-
8
-
Just a quick update. I FINALLY finished the rat lines. OMG what a chore! I am finising the stirrups and foot ropes on the yards now, then I will put all the relavent blocks and studding booms on them. I need to study the slings and pendents. This ship had the pendent strops sized to the cross trees somewhere. I am somewhat confused by the nautical terms in Lee's book as to exatctly how they were attached. This ship's rigging took place when alot of "improvements" were being used. I will have to read more closely just where parrels were used and where pendents took there place or not. I do not know if I have to be quite so accurate in this area, as I am sure that different Captains also had a say in how the ship was rigged? I am pretty sure the Navy at that time was not the slave to every ship being an exact dupicate of another to make maintenance easier like it is today.
Also, the 1830's version of cross trees on the top mast(?) is a bow shaped thing I I am not certain how the sailors accessed the royal yard to work the sail there with no obvious way to attach shrouds form the bow plat form to the cross trees at the very top of the mast? There are foot ropes on royal yard, how did the climb to them with no ratlines or shrouds to get there? Nothing in Lee's book to tell me, and no other books I have deal with this period or situation.
I am going to start the ship's boats as well. Have one launch form done. not the best, but, the only plans I really have are from Chappel's book and they do not blow up ver clearly. I will send a photo of the form I have so you can tell me if I am on the right track with this. My only experience with ship boats is with the Victory model from Mantua I built over 25 years ago. NOBODY'S memory is THAT good.
-
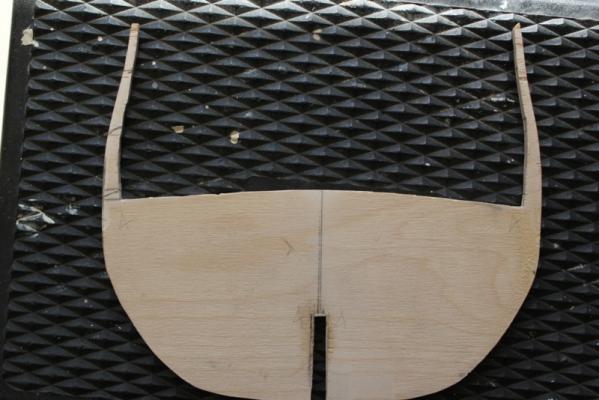
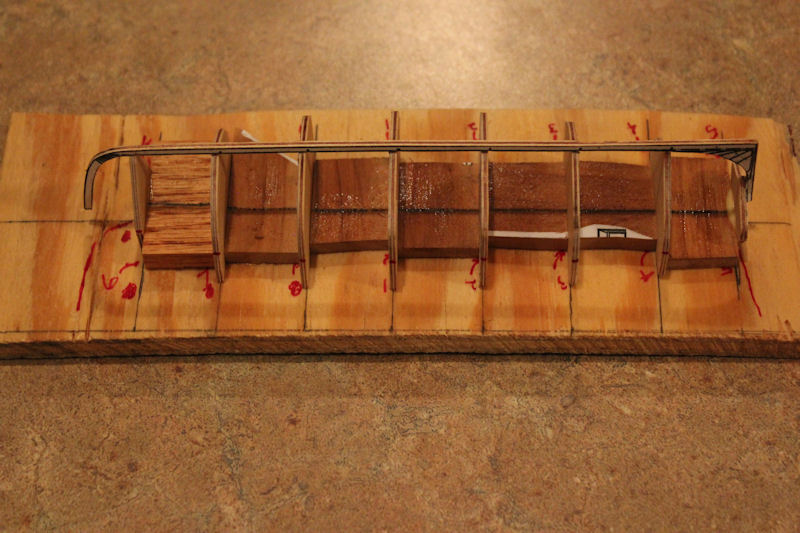
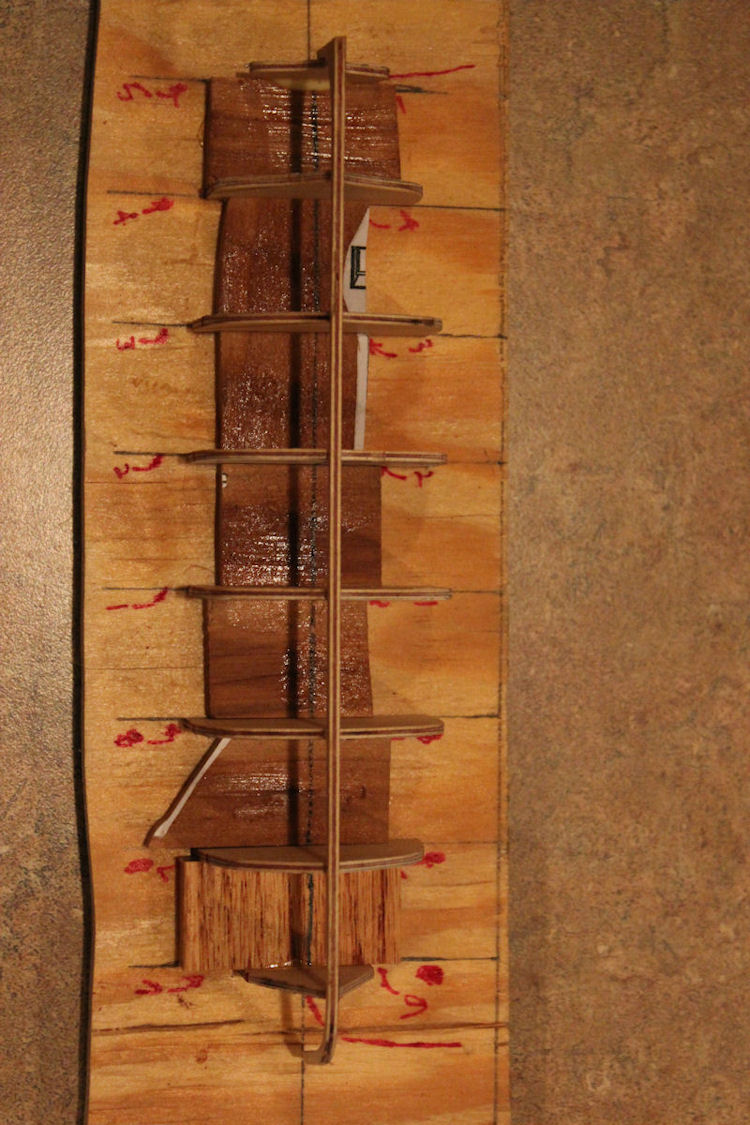
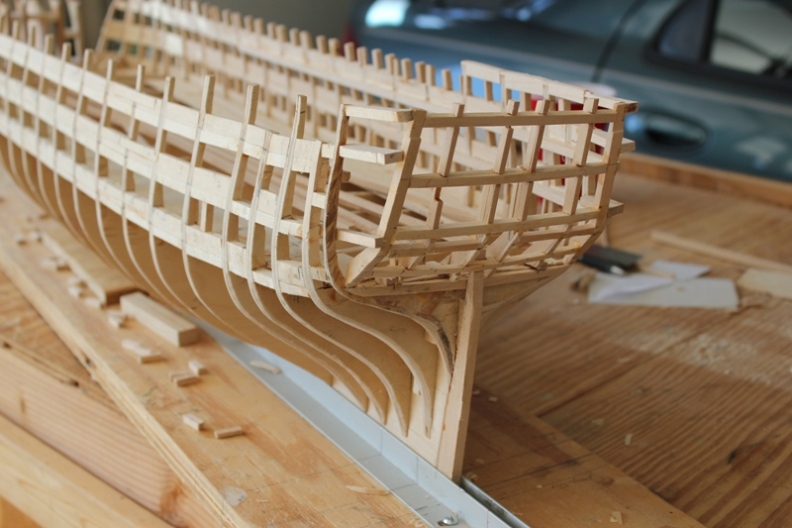
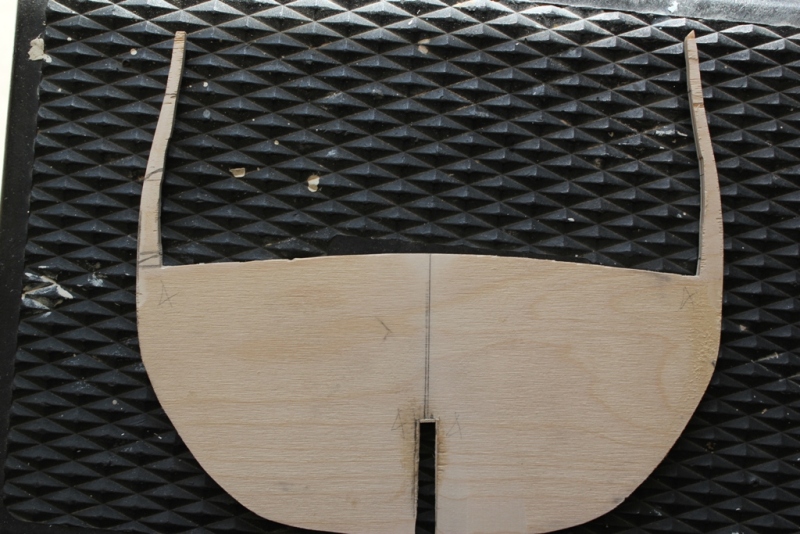
Bow and stern forms in progress

- WackoWolf, mtaylor and GrandpaPhil
-
3
-
I did not see the OHIO at the Maryland Silver company site, but, I did get a plan from the SI. If and when you gt ready to build the OHIO, I would consider having them scaled to what you want, print a couple of copies, and send them to you at cost. I think my Columbus was around 40 US Dollars.
-
Actually, I have been getting my plans from a company called The Maryland Silver Co. Way Quicker and easier than the SI.
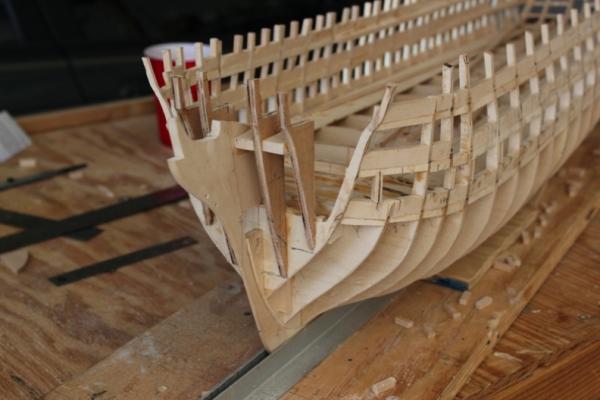
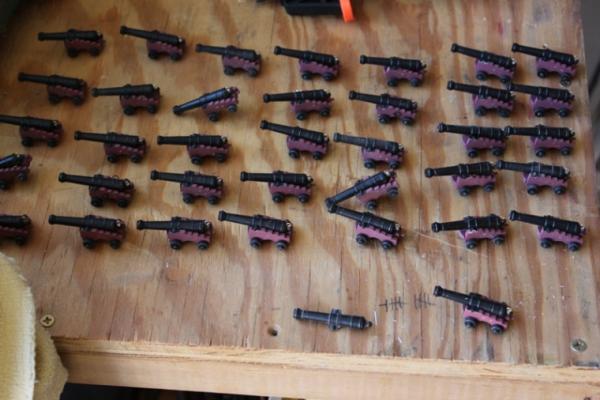
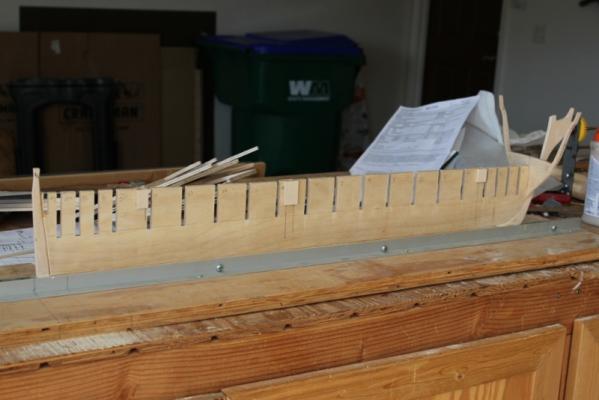
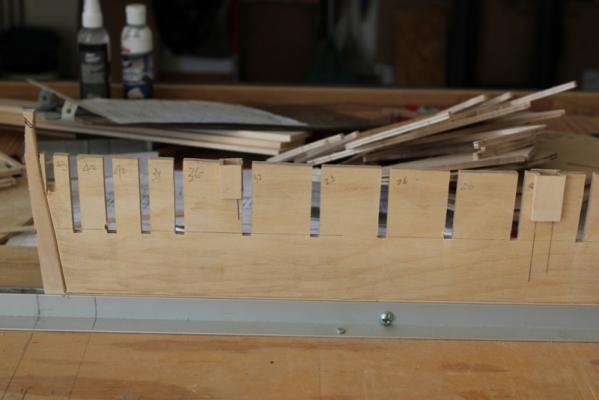
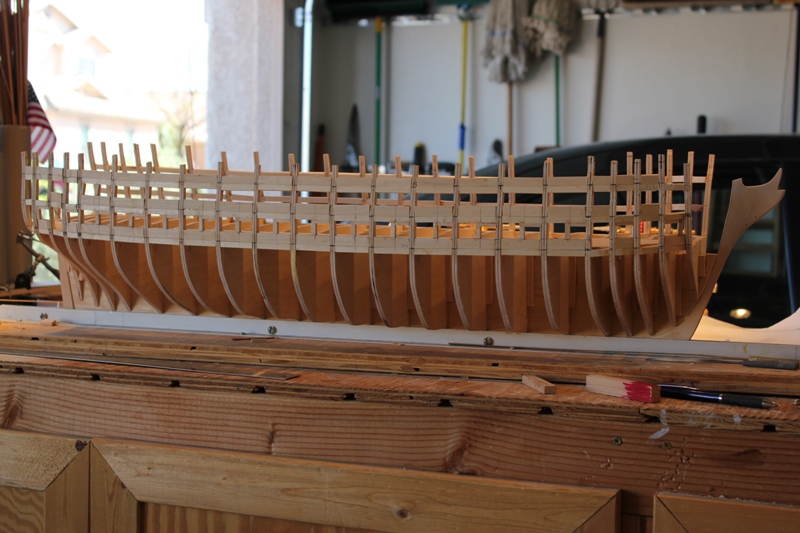
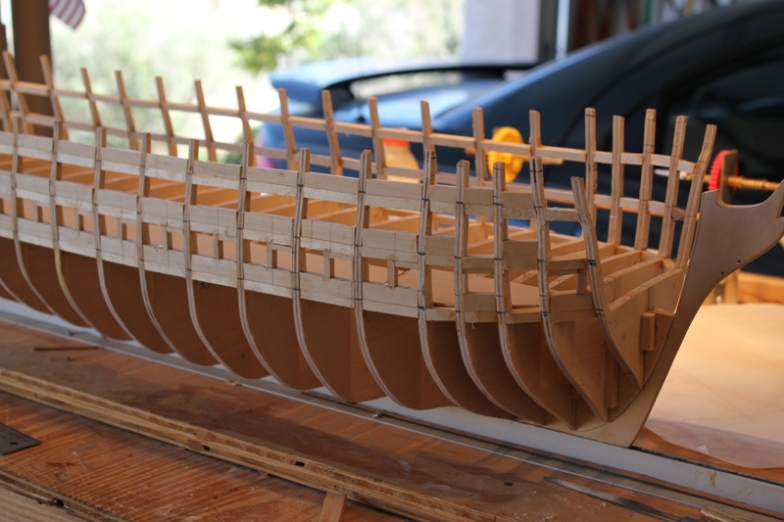
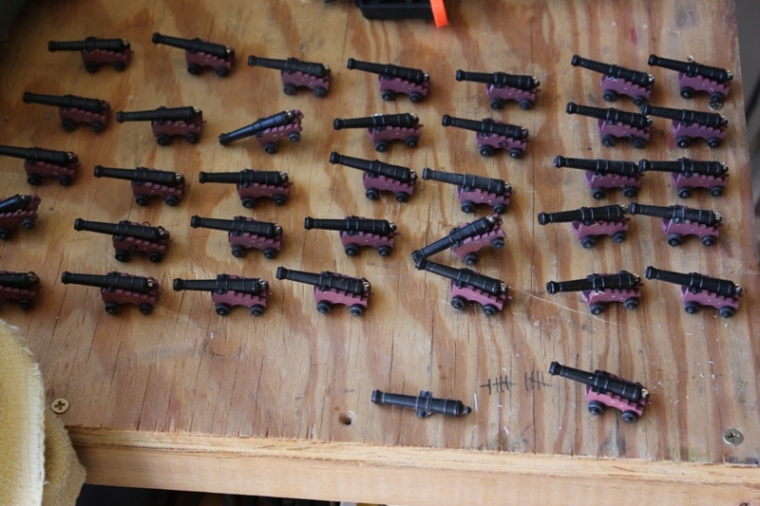
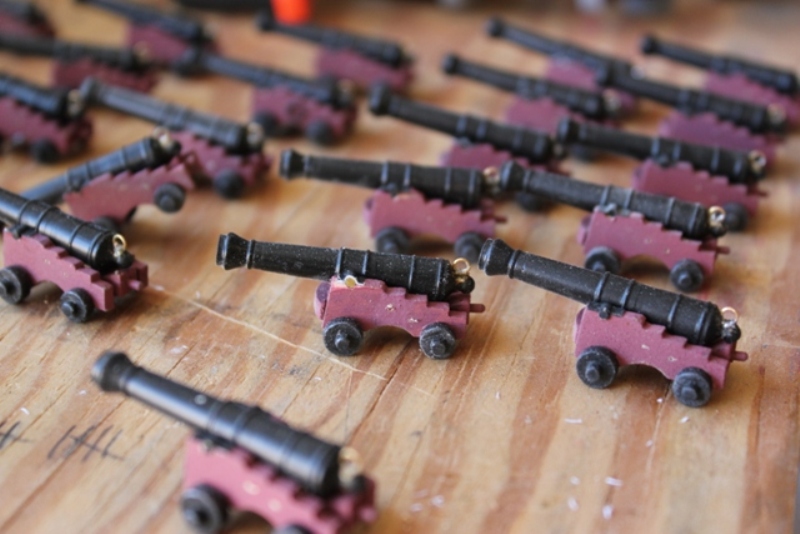
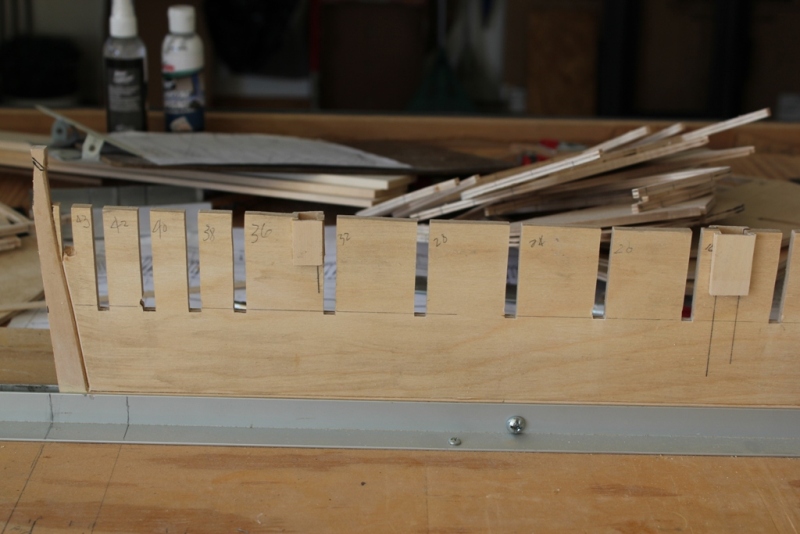
I made a lot of cannon for my Pennsylvania, but, did not use anly of them on her except those you can see through the spar deck hatch. With my Pennsylvania, I had such a hard time lining up the gun ports, and as it was my first build and I manually reduced the plans from1/48 to 1/72, the bulkheads were off quite a bit. I am doing much better with the Columbus, and I am framing each gun port before planking the hull, as you can see in the photos, which I did not do on the Pennsylvania. On the Pennsylvania I did not have to worry about the lower decks except for what you could see thtough the spar deck's thatch, because I built her with the ports closed for the most part. Now, on the Columbus, I will need at least partical decks to place the cannon on. I know I could use dummy cannon here, but, I built the HMS Victory kit from mantua that way and to this day (some 25 years later), I still do not like the look. I am not going to plank the lower gun decks, nor construct the entire deck, only a strip a strip of basswood 1/16" think and about 1-1/2 inches wide should be good don't you think? www.marylandsilver.com/ is the website for plans. I do not think there are any ship plans other than US. Also, I had a local print shop reduce the Columbus's 1/48 to 1/72. I wish I had thought it was possible on my Pennsylvania build! Live and learn!


- mtaylor, WackoWolf, fnkershner and 1 other
-
4
-
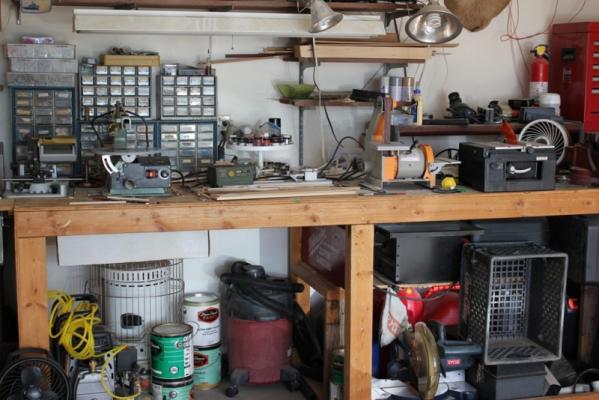
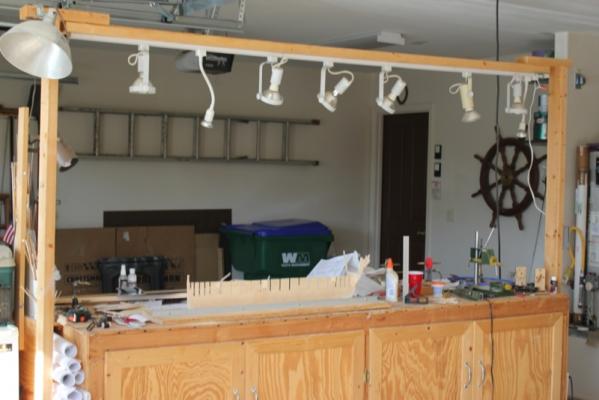
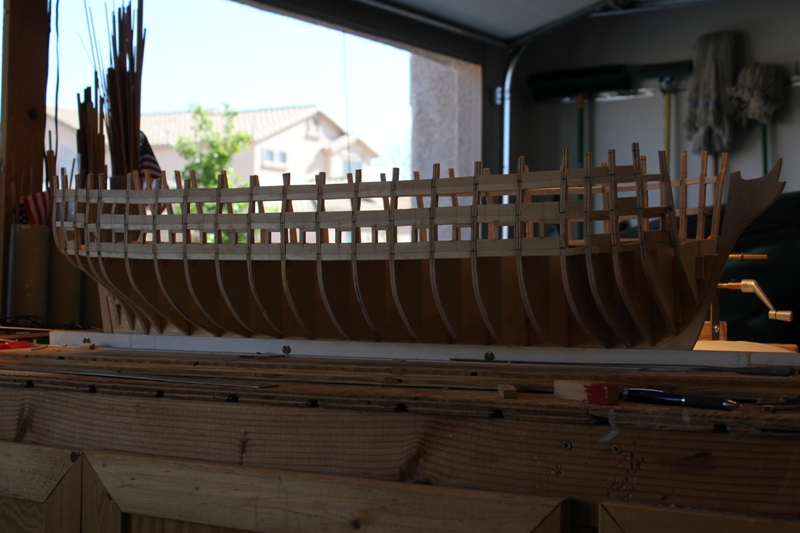
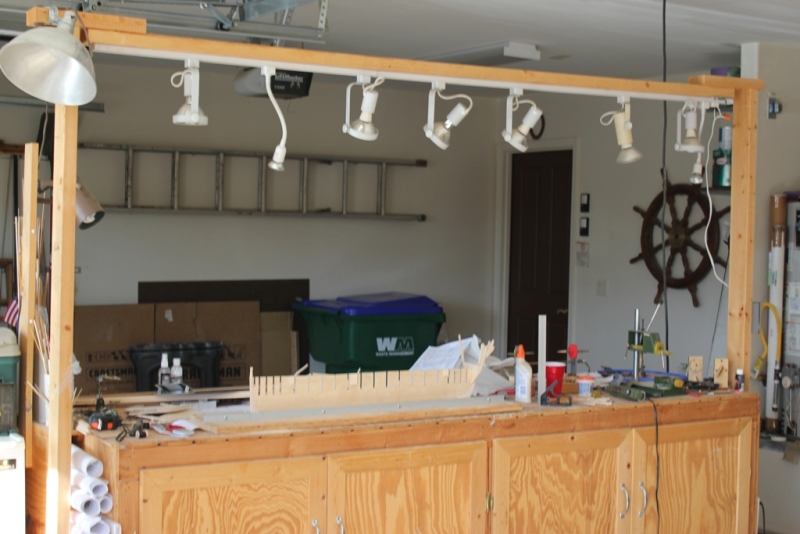
I am starting another plank on bulkhead project in conjuction with my Pennsylvania as something to do when I get bored or fustrated with the final rigging, ships boats and anchors on the Pennsylvania. I reworked the bulkheads from their original configuration as the first looked like it would be too difficult to work on the cannon on each deck. Also, a couple of pics of the controlled chaos I call my workshop!

-
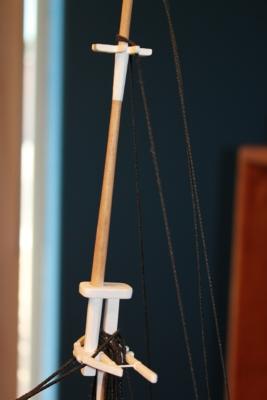
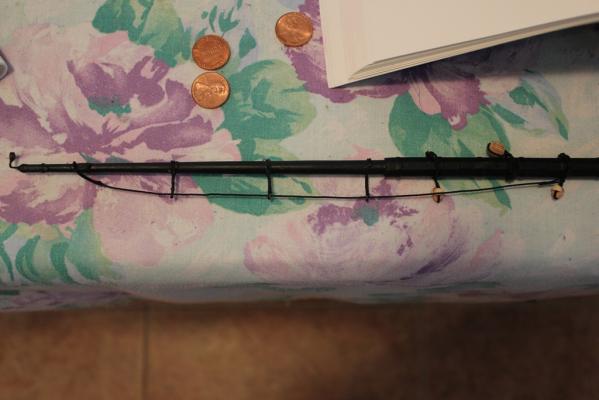
Here are some photos of the yards, yard tackle, and stirrups. At 1/72 scale I think this is about as small as I would like to attempt making the stirrups this way. If you coat the assembly with super glue it makes a nice stiff stirrup that hangs from the yard nicely. That is my self made serving machine the yard tackle is laying on.


- mtaylor, hexnut, Elmer Cornish and 10 others
-
13
-
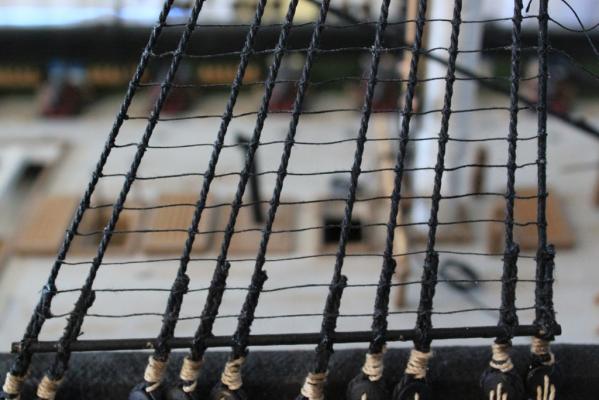
I thought I should expand on the ratline situation. I am not sure if there is a hard and fast rule as to their spacing. The Anatomy of Nelson's Ships makes a note that they are 13 inches apart. However several photos that I have of the USS Constitution that have Marines clinging to them show they run from the sole of the foot to just under the knee cap. Of course the guy could be only five feet tall, but I do not think so. That puts their spacing closer to 16 inches apart. I cut all of the ratlines off of the starboard side. I clove hictched to every shroud so that means I had to redo over one thousand knots!! I was pretty bummed. However the new spacing looks better visually and more like some of the other finished models I have seen. The first photo is spacing every "13" inches, or about 4.5 mm, second photo is spacing 5.5mm. Not much, but over all the whole asswmbly looks so much better.
I have all the yards done, all the tackle made for them, (photos later), and am starting to install the horsses on them.


Pennsylvania by threebs - 1/72 scale
in - Build logs for subjects built 1801 - 1850
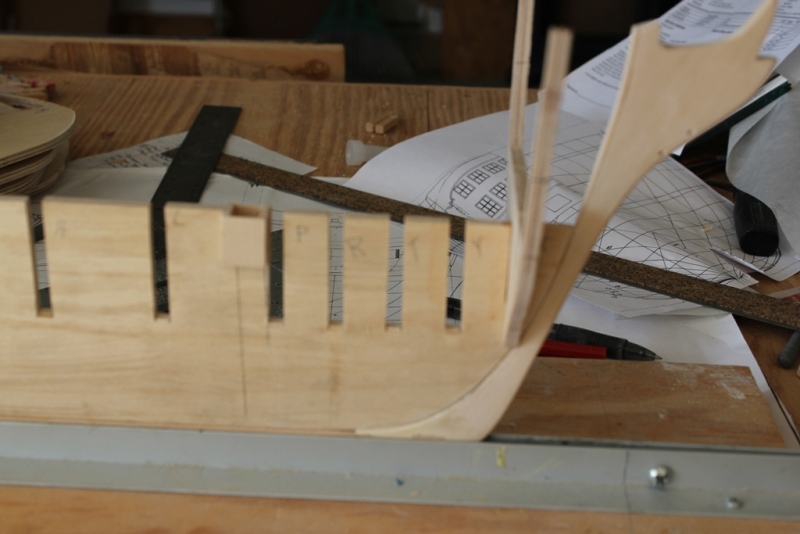
Posted · Edited by threebs
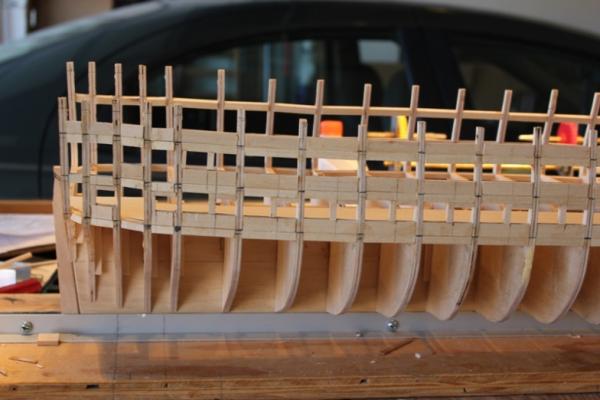
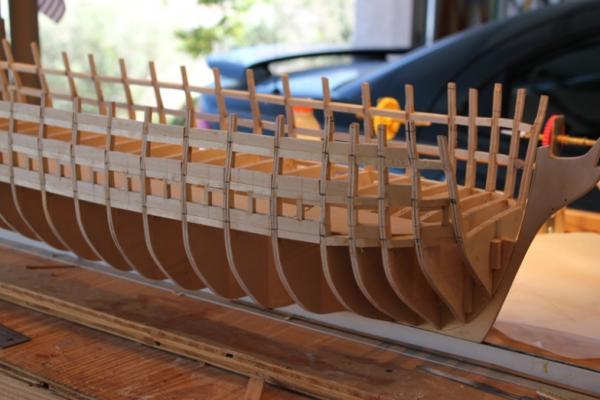
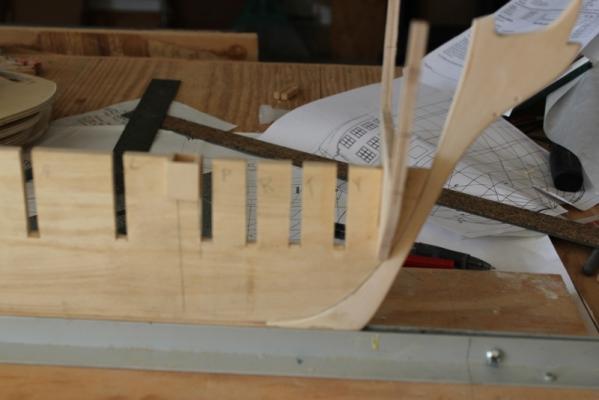
"Wait a minute! How do I get this thing off the frames when it is done?!!" Looked at the builds I had been viewing to get some pointers on how to proceed and noticed the "shims" bent over the frames and held down with rubber bands. Photos of the frames of the cutter I am starting show what I mean as opposed to the previously posted photos of the launch frames WITHOUT the ribs. I go into brain freeze sometimes and simply space out on some things