


*Hans*
-
Posts
461 -
Joined
-
Last visited
Content Type
Profiles
Forums
Gallery
Events
Posts posted by *Hans*
-
-
Don,
I think you have solved your "problem" yourself. On plan 1 it is shown how part 1G should be fitted to the keel - indeed forming a notch for the frame.
If you start with part 1A then 1B etc. the 1G should be on the right place in the end.
-
As far as the Olympias' hypozomata, I don't think they were even able to try using natural materials, since they couldn't find an adequate supply of hemp rope, and no synthetic materials had similar properties. The steel cable wasn't an ideal solution either. Because steel cable isn't very elastic, it would apparently slacken when the ship flexed one way, and snap taut when it flexed the other, leading to concerns about it potentially breaking and injuring the crew.
A material which could have been used was human hair. This was also used for the big catapults
By making a long string of it and then lay it double and twist it (simply with a stick through it) man could reach a very high tension on the rope.
-
Hans;
You may already checked these links but they have description of color themes.
http://www.ancient.eu/trireme/
http://www.mlahanas.de/Greeks/war/Trireme.htm
http://www.talismancoins.com/catalog/Greek_Trireme_Sailing_Ship_2.jpg
http://en.wikipedia.org/wiki/Fifth-century_Athens
Marc
Will surely check them (again) Marc!
-
Steven,
Guess you're right - just did a search on the web and also found next quote:
Homer (not Mr Simpson) speaks about the "black ships" in the Illiad; while Odysseus refers to the "crimson ships" in the Odyssey. The black could be pitch or tar or as Don says, which could be oiled wood. As red was one of the easier colors to produce during ancient time, versus purple which took about 60,000 rotting snails to produce one pound of dye. So it is possible to have black and red ships. You have to remember, the history police won't come knocking on your door because you chose colors that may not be historical accurate as this is a hobby
-
So i guess this is not visible from the outside because it is under the lower deck (which lies on level of the second row of seats).
I cannot mount it on the right spot anymore. I could think about mounting it just above the lower deck, so that it is visible, but that would be a bit incorrect though?
-
Nice one. It's on my wish list as well. Lots of good reading there, and very detailed and comprehensive. I've been through it twice (from the library) and I feel like I've barely scratched the surface.
Steven
Steven, there are a few things I am particularly interested in, maybe you know the answers (as I cannot look them up in my book yet):
- did they use some sort of colors on these ships?. I am thinking of using some pale red and oker for details, but am not sure about this.
- The hypozomata - at which height in the ship was this mounted? Was it visible from the outside?
-
I am a bit late and I am sitting in the back row on this one, but did bring my binoculars.
Beautiful built, well detailed and love the wood you are using.
Marc
Be seated Marc, and enjoy. I hope there is some popcorn left...
-
-
Thanks Banyan and Hans! The lack of any surviving ancient Roman/Greek vessels is one of the reasons why I like building them-- it leaves a lot more from for personal preference and aesthetics than a well-documented ship like the Victory.
Hans, the pump mechanism was in this thread. You're probably right about it being a bilge pump, not an air pump, since the rowing compartment is designed with screens to provide ventilation as well as protect the rowers from arrows and such. I suppose it might also have come in handy in dealing with smaller leaks when the hull sustained damage in battle.
I'm following your trireme build log with interest. Really looking forward to seeing all the oars at that scale!
170 pieces or so - all 4 x 4 mm to be sanded round and flat - man! what a joy!
-
It doesn't have to be difficult
 , and:
First - a dremel rotary tool (or any other brand of course) is very handy for these kind of jobs
Second - oak is tough and strong. I think if I would drop the hull there wouldn't be real damage to it. With the regular modelkit wood I'm not sure about this.
A rat tail file might be the better option if you're using walnut or basswood
-
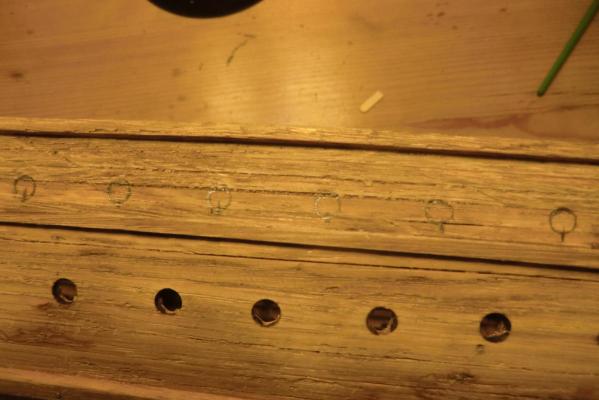
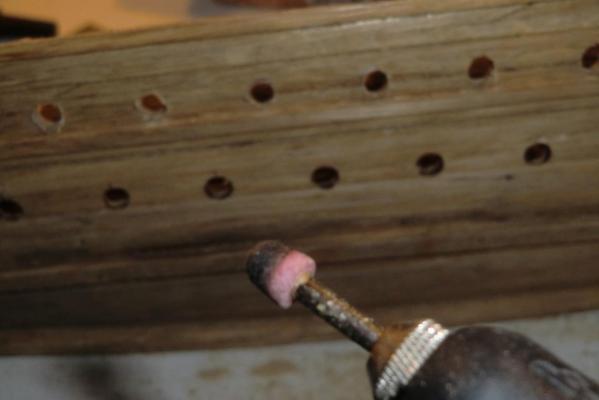
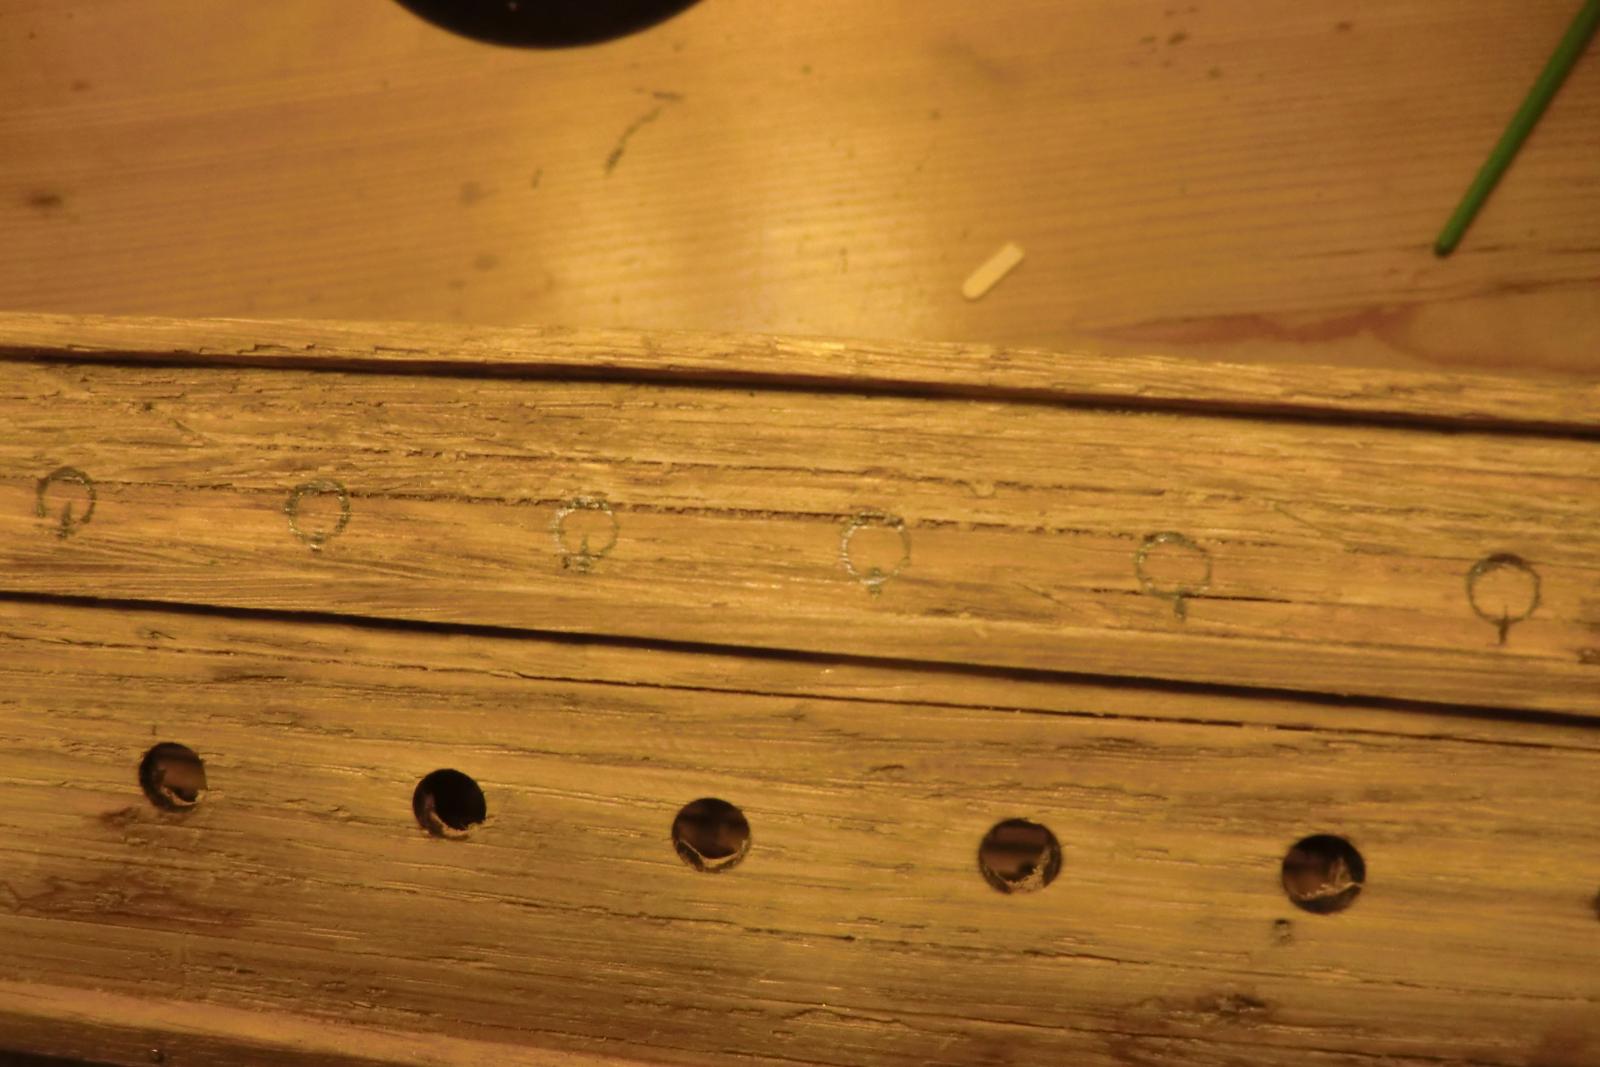
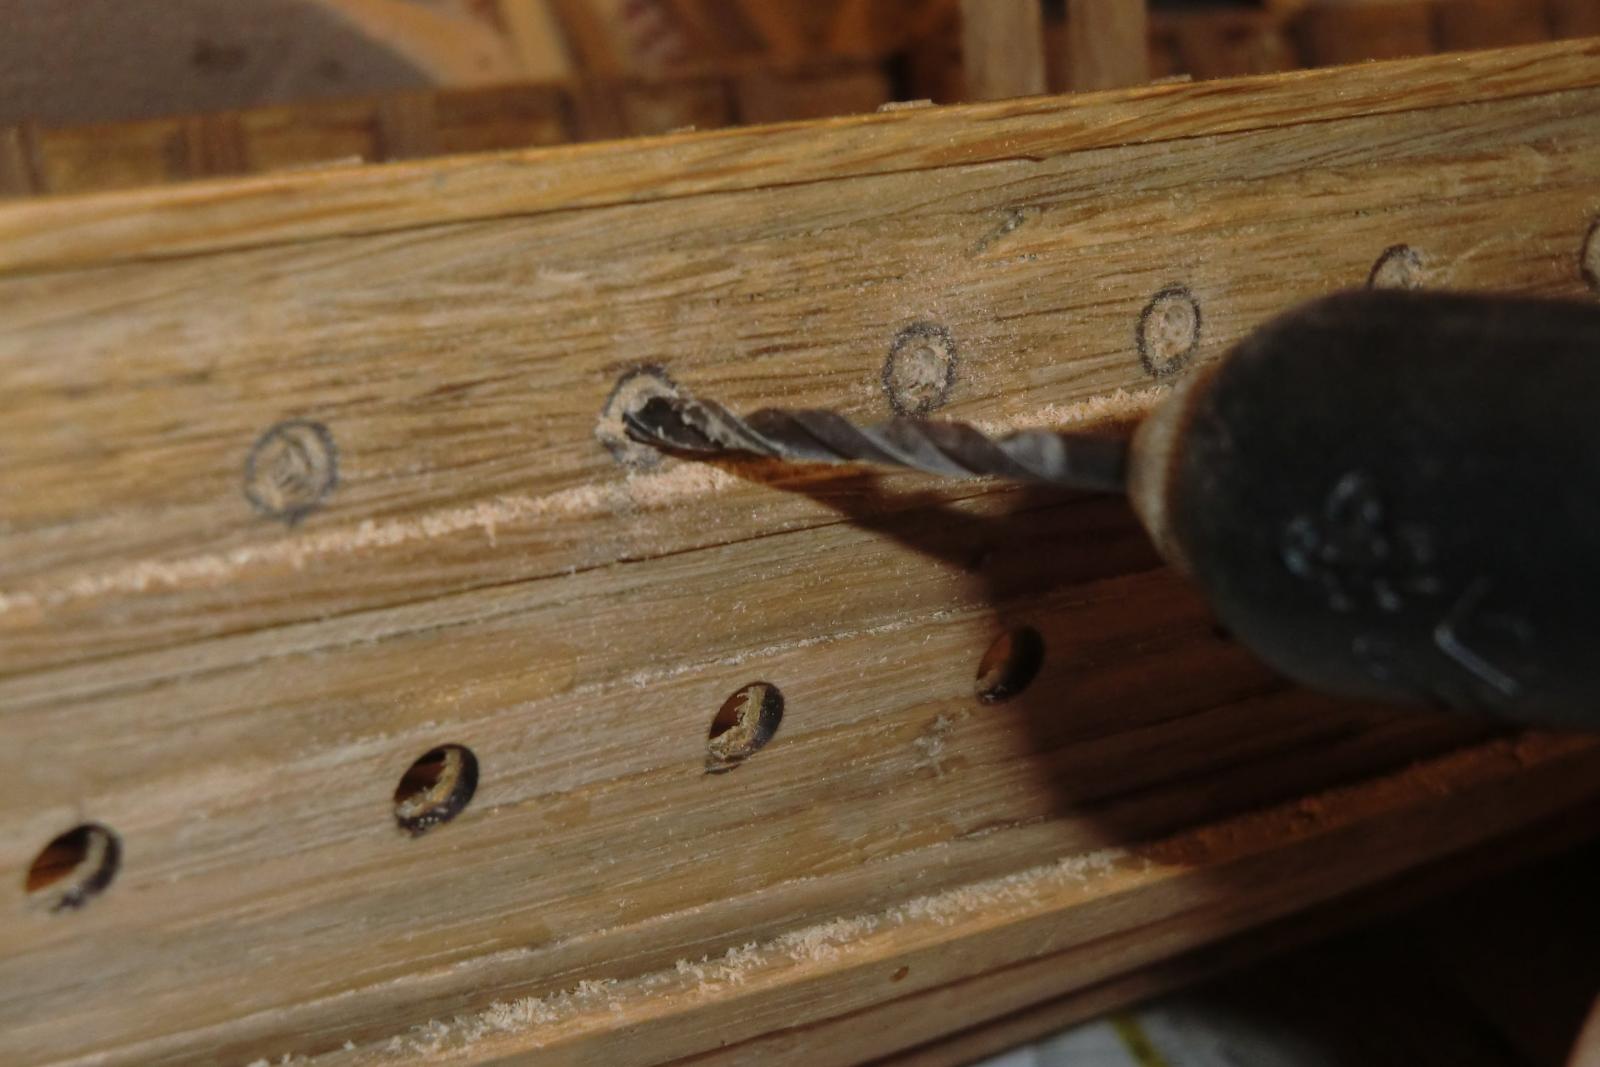
As promised: pictures of making the holes for the oars:
First step is to mark the right spots and rough diameter. I used an old fashioned letter template for this:
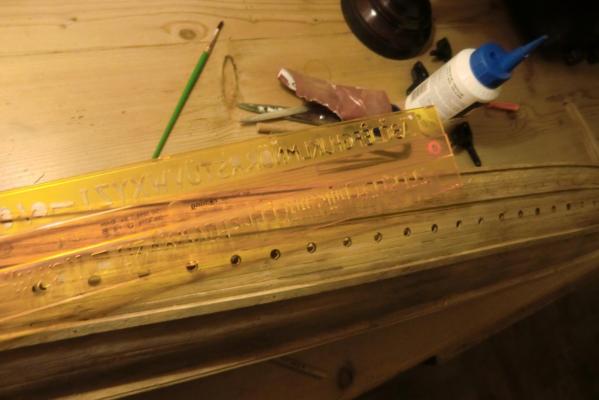
Then simply drill the holes with a 3 mm drill (rather difficult to drill and make a photo - the drill is actually turning, but the flash makes it not visible):

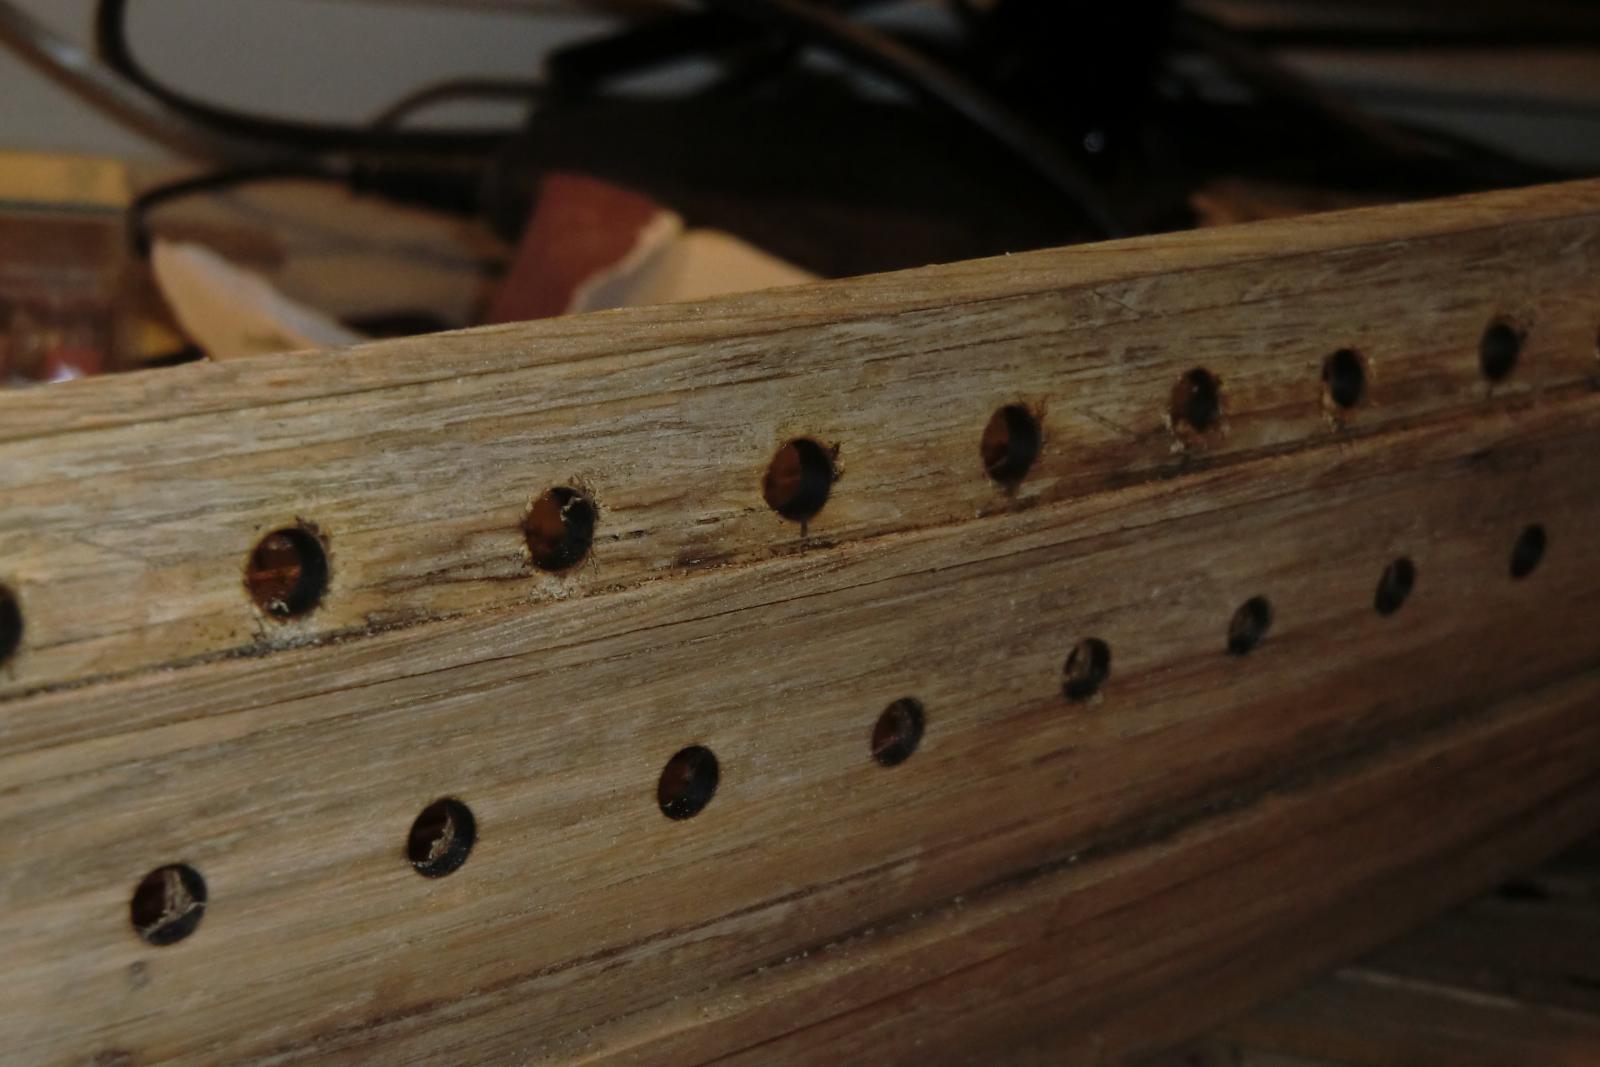
With a round cutter widened the wholes until the approx diameter is reached:
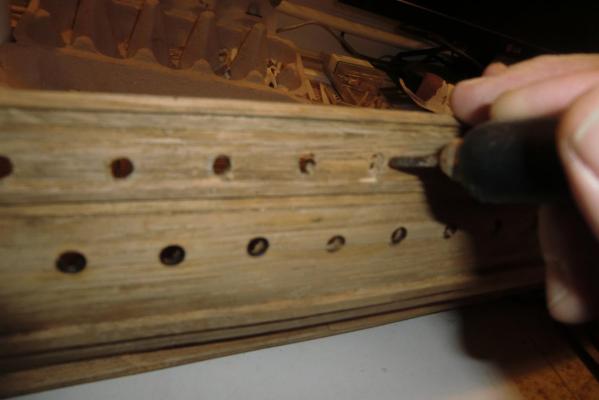
Then with some sort of whetstone (don't know how else I should call this) in the right diameter done the last step:
- Piet, cog, flying_dutchman2 and 9 others
-
 12
12
-
Very nice! What tool(s) did you use for boring the holes? I'm pretty nervous about making the oar ports on my current build (when I get that far, that is), since I'm afraid I'll damage the hull in the process.
Sharpie, will post some pictures on how i did it. It is quite simple
VERY nice work Hans and I like the weathering of the oak you did. I think you are right in not adding stain to it, perhaps a clear mat sealer to preserve the wood?
Cheers,
Piet, I am not sure yet, will do some trials.
-
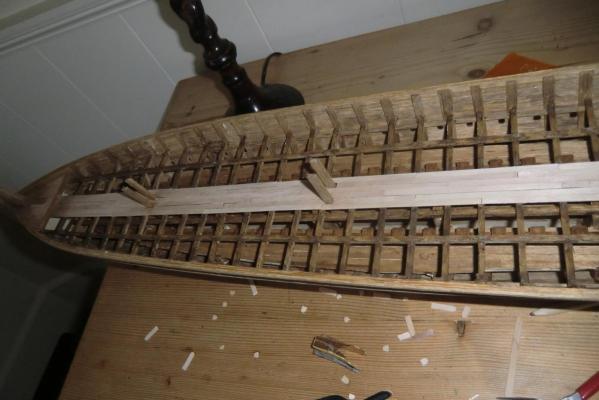
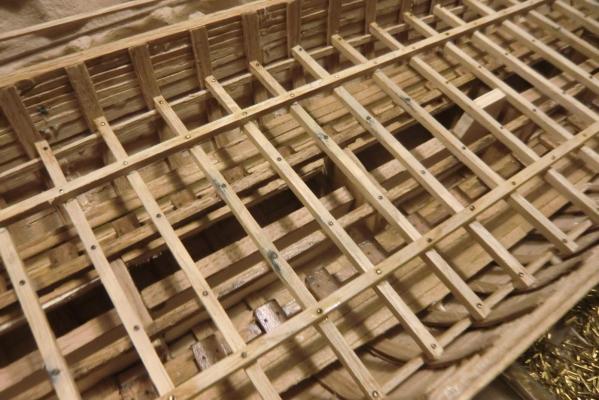
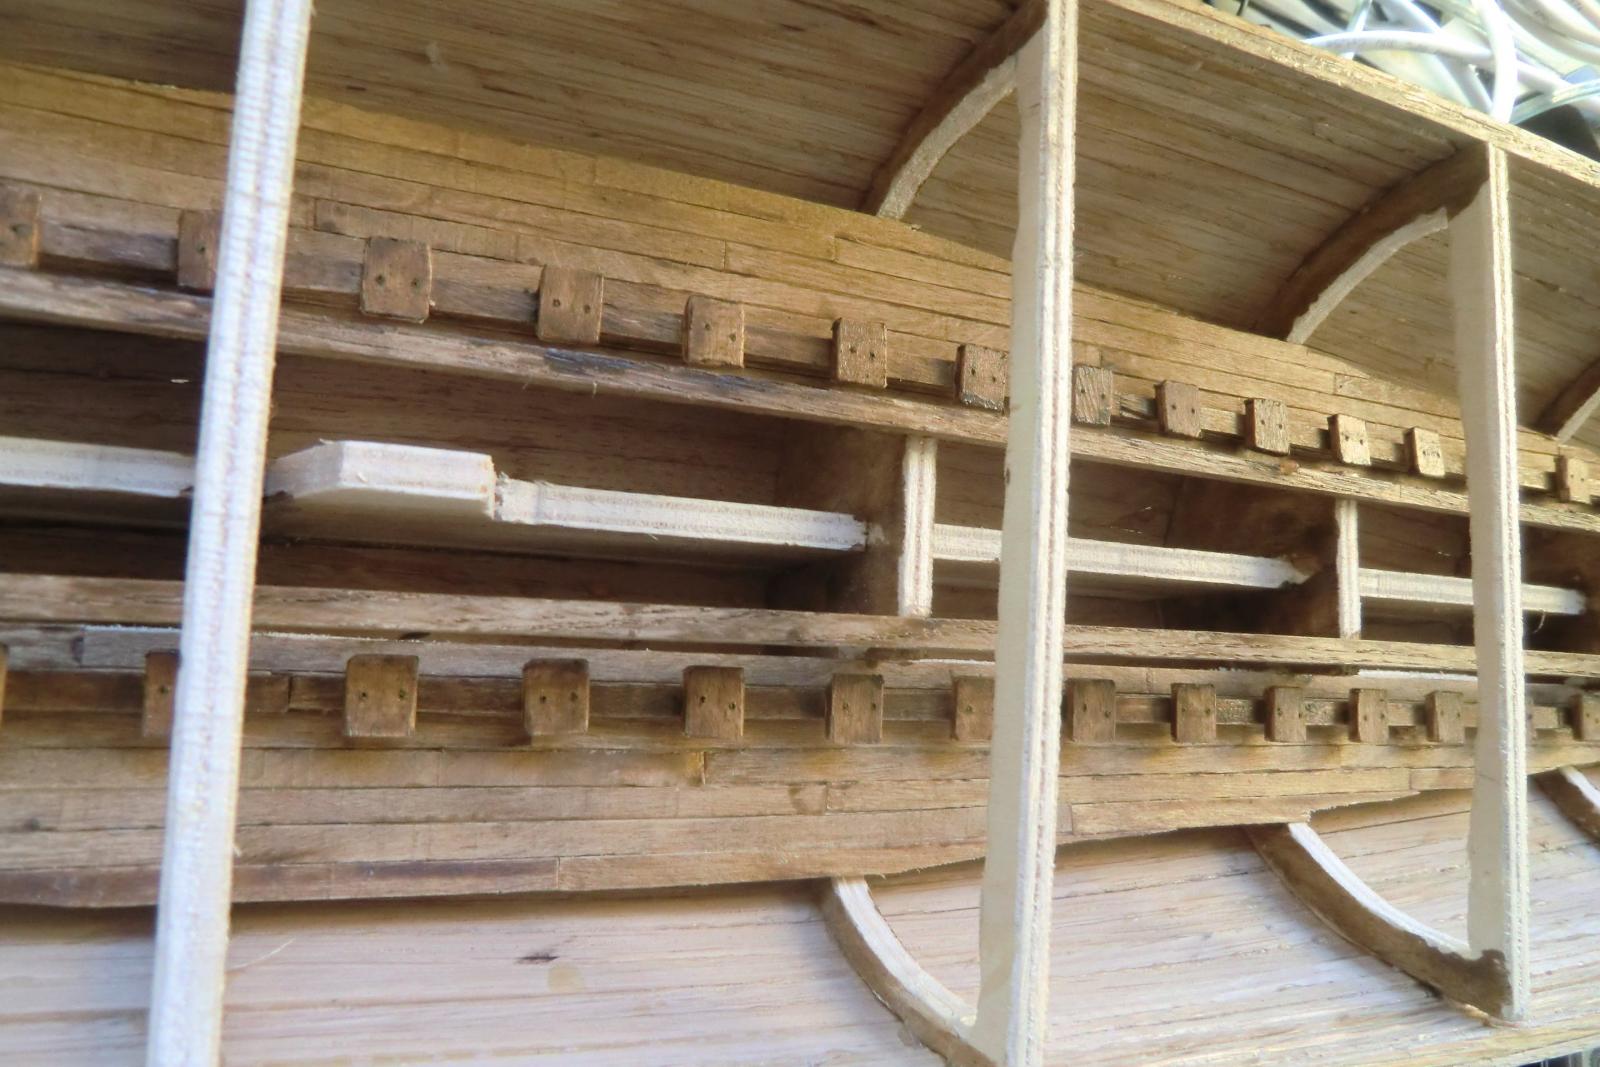
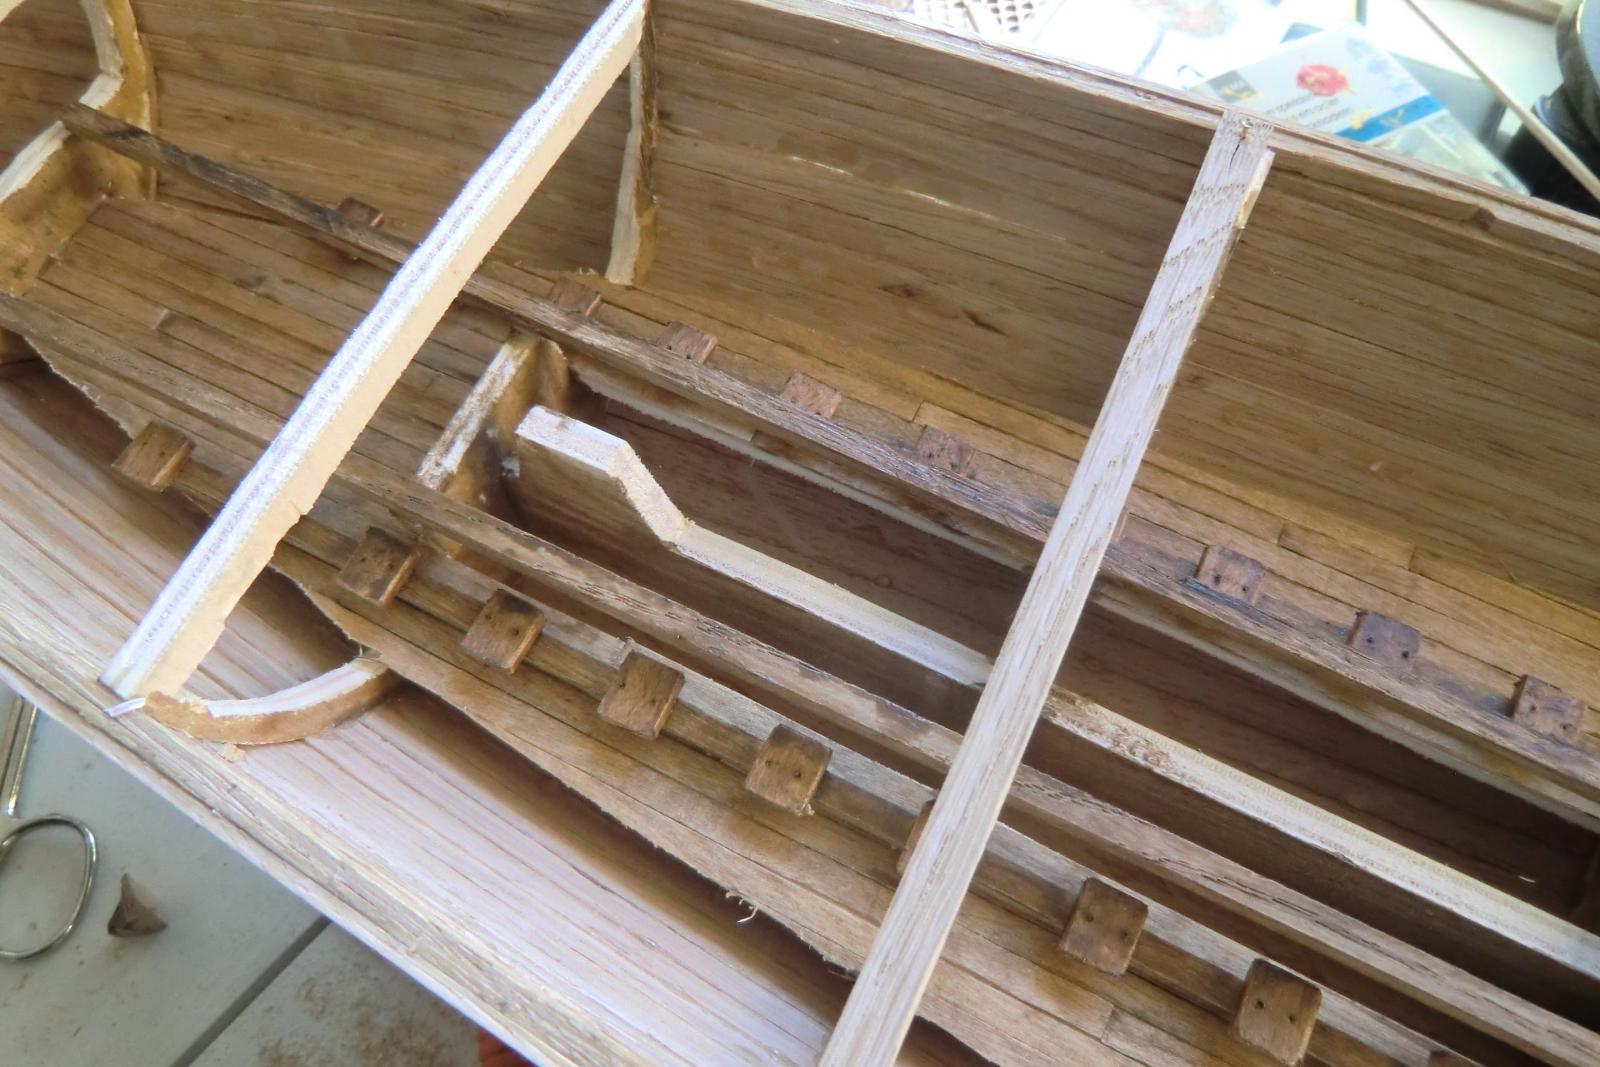
In fact this ship isn't that difficult. After making the substructure for the second row of seats I added the deck in between them. Quite simple with wooden stirrers again.
After this I started with aging the oak by treating it with ammoniac. This gives a dark shade over the wood. Not sure if I will stain it further - have to make some samples
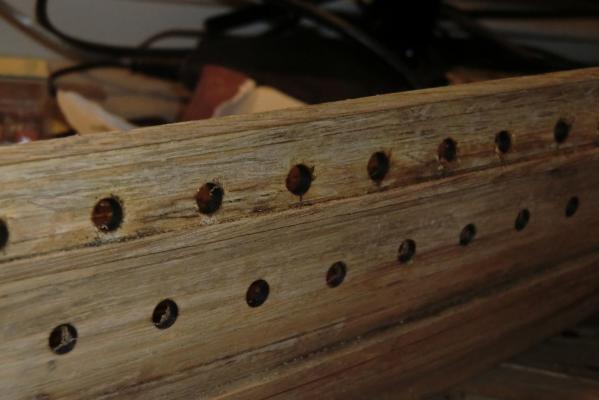
Also made the first row of holes for the oars:
And I started with the frames for the third row of seats:

Here my new circular saw is quite handy
- SailorGreg, flying_dutchman2, Piet and 7 others
-
10
-
Looking great! I wish I had seen this a couple of years ago; the structure for mounting the seats is so much more sensible than what I came up with for my trireme.
I quite agree with this. While I do admire the skill that goes into constructing a model on which every piece of wood is perfectly smooth, I can't help but feel that this would be somewhat unrealistic for a ship constructed entirely with iron saws and hand axes. Not to say that the classical civilizations were incapable of producing a smooth piece of wood, it just seems unlikely that every plank on a 37-meter warship would have been planed perfectly flat.
To be honest - this is a bit of a handicap which turns out to be (at least in my opinion) an advantage.
I am a bit of a sloppy builder - when I make some planks in say 4 x 4 mm in turns out that some of them are not exactly square, or the saw has ripped out some splinters or so. Never mind then I say to myself - in real this would have happened as well.
In the end my models turn out to be nice, with rough edges, but having a live and vivid character. Just like the real ones after many years of use.
(but this is also a long excuse for simply saying I'm not that a skilled builder....
 )
) -
Would be nice Don!
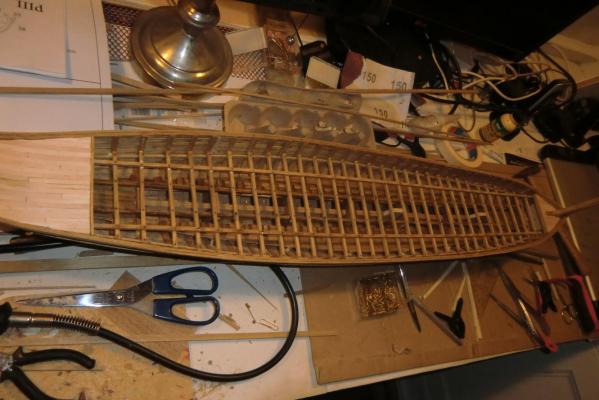
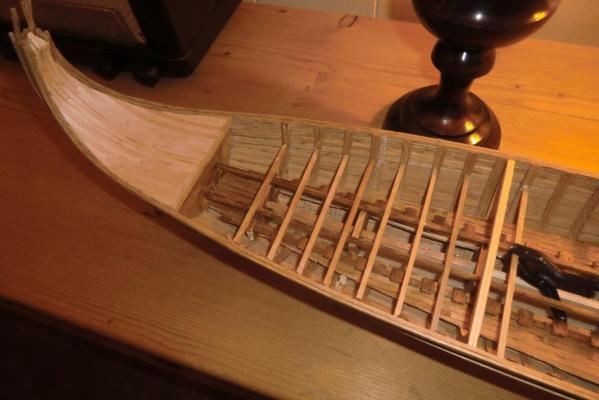
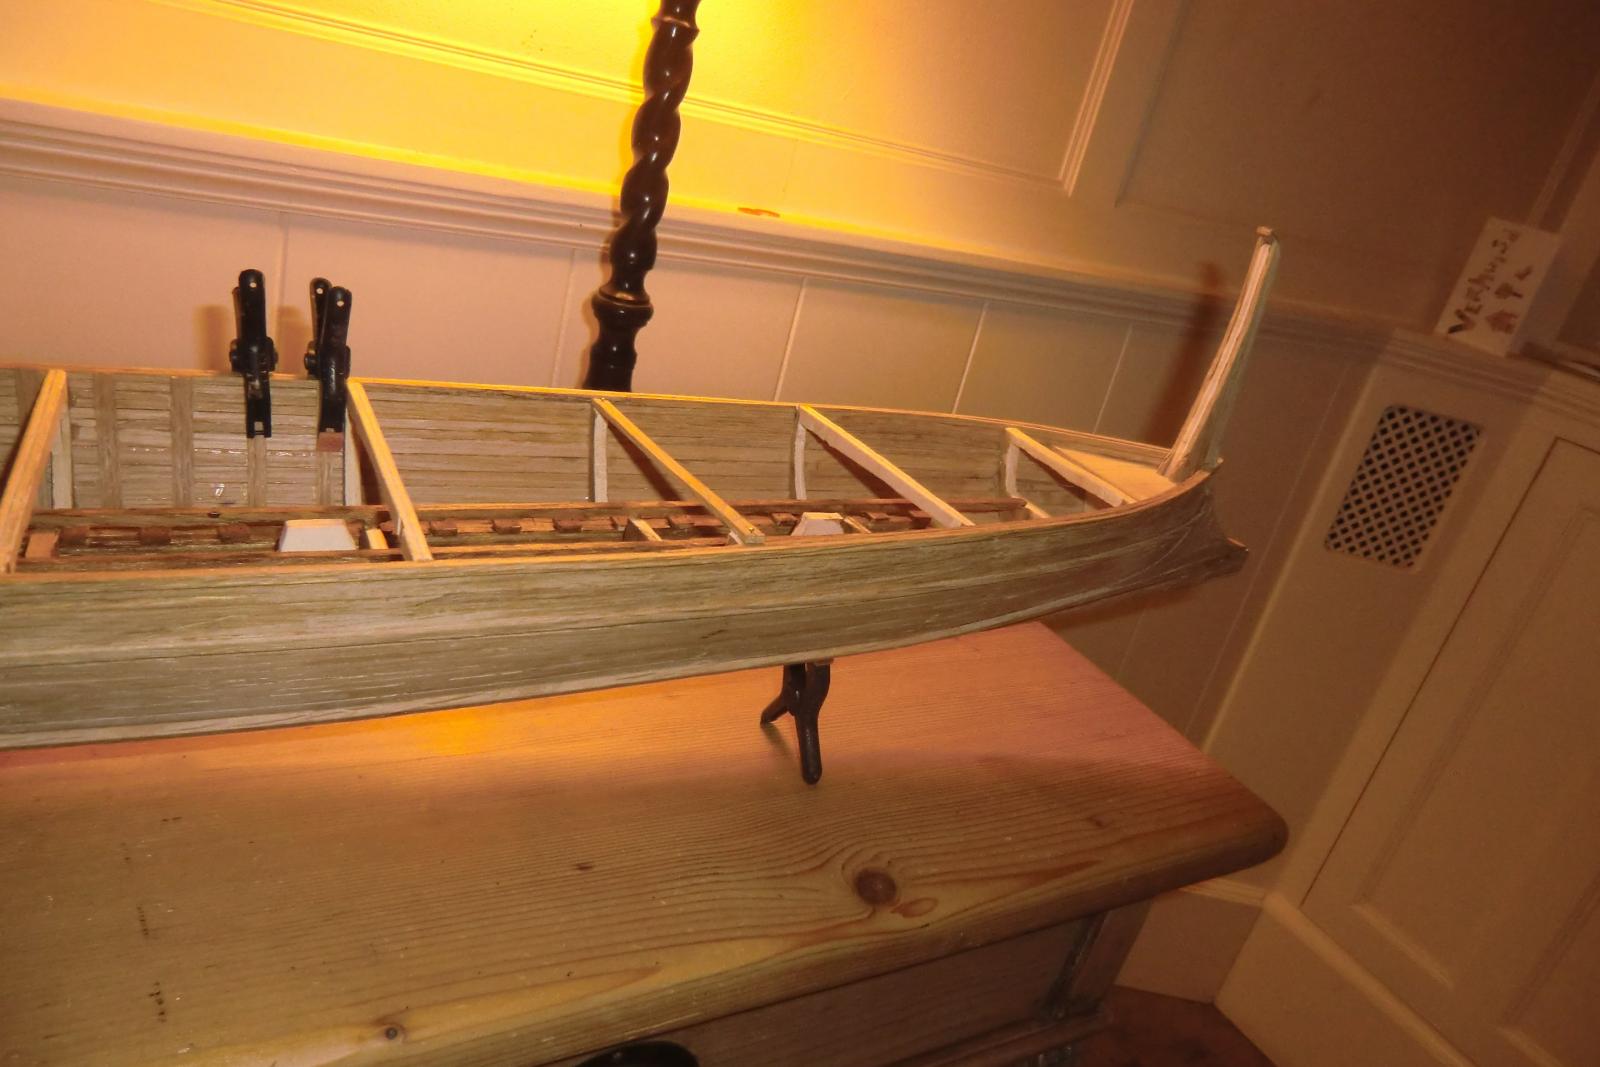
I just have finished the structure for the second row of seats, after having removed all the bulkheads.
-
Sharpie, you're doing a really fine job over here, with all the research! I think this will become a quite accurate model - although there is no real ancient model to compare it with.
I saw a picture somewhere (don't know where it was - appearently not in this topic) where you were talking about an airpump - but to my opinion this is just a waterpump.
You might have noticed I am busy on the Trireme at this moment. It is build in the usual kit-style, not plank on frame, not to the most accurate ancient methods like yours, and with a lot of my own input in it. What a luck I have no ancient vessel has remained....
-
New set of pictures:
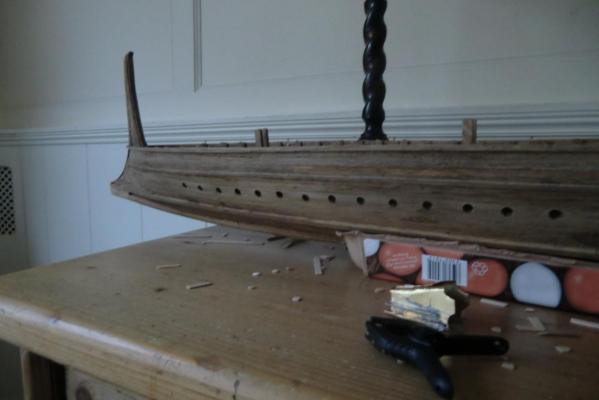
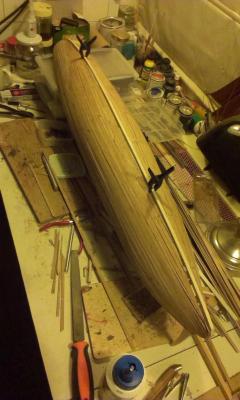
Bow - including reinforcement is getting in shape more and more:

On the inside the structure for the second row of seats is mounted. For the small view you might have inside I have added some extra vertical planks. The original frames will be removed.

-
Hey Jan, which Jan are you on the Dutch forum???
-
-
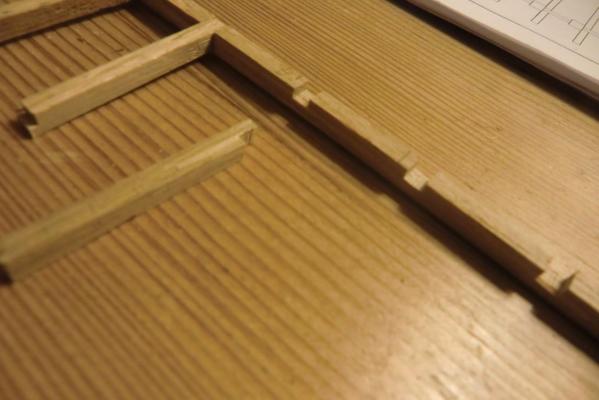
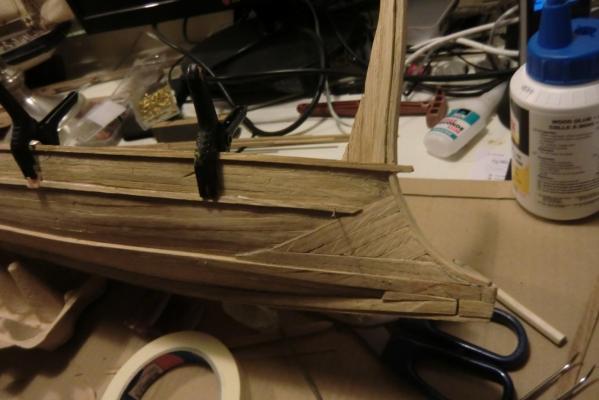
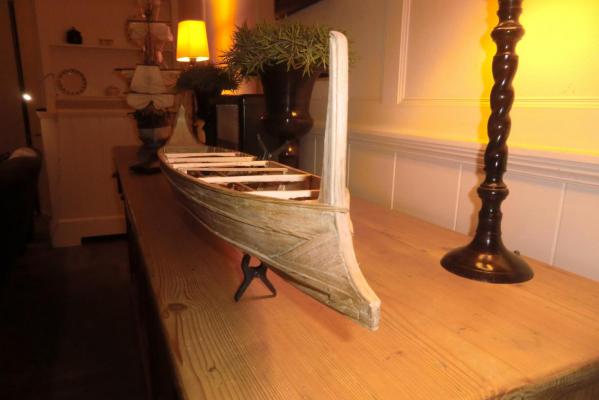
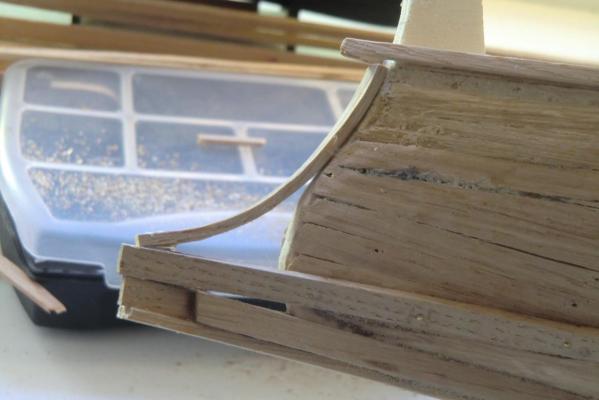
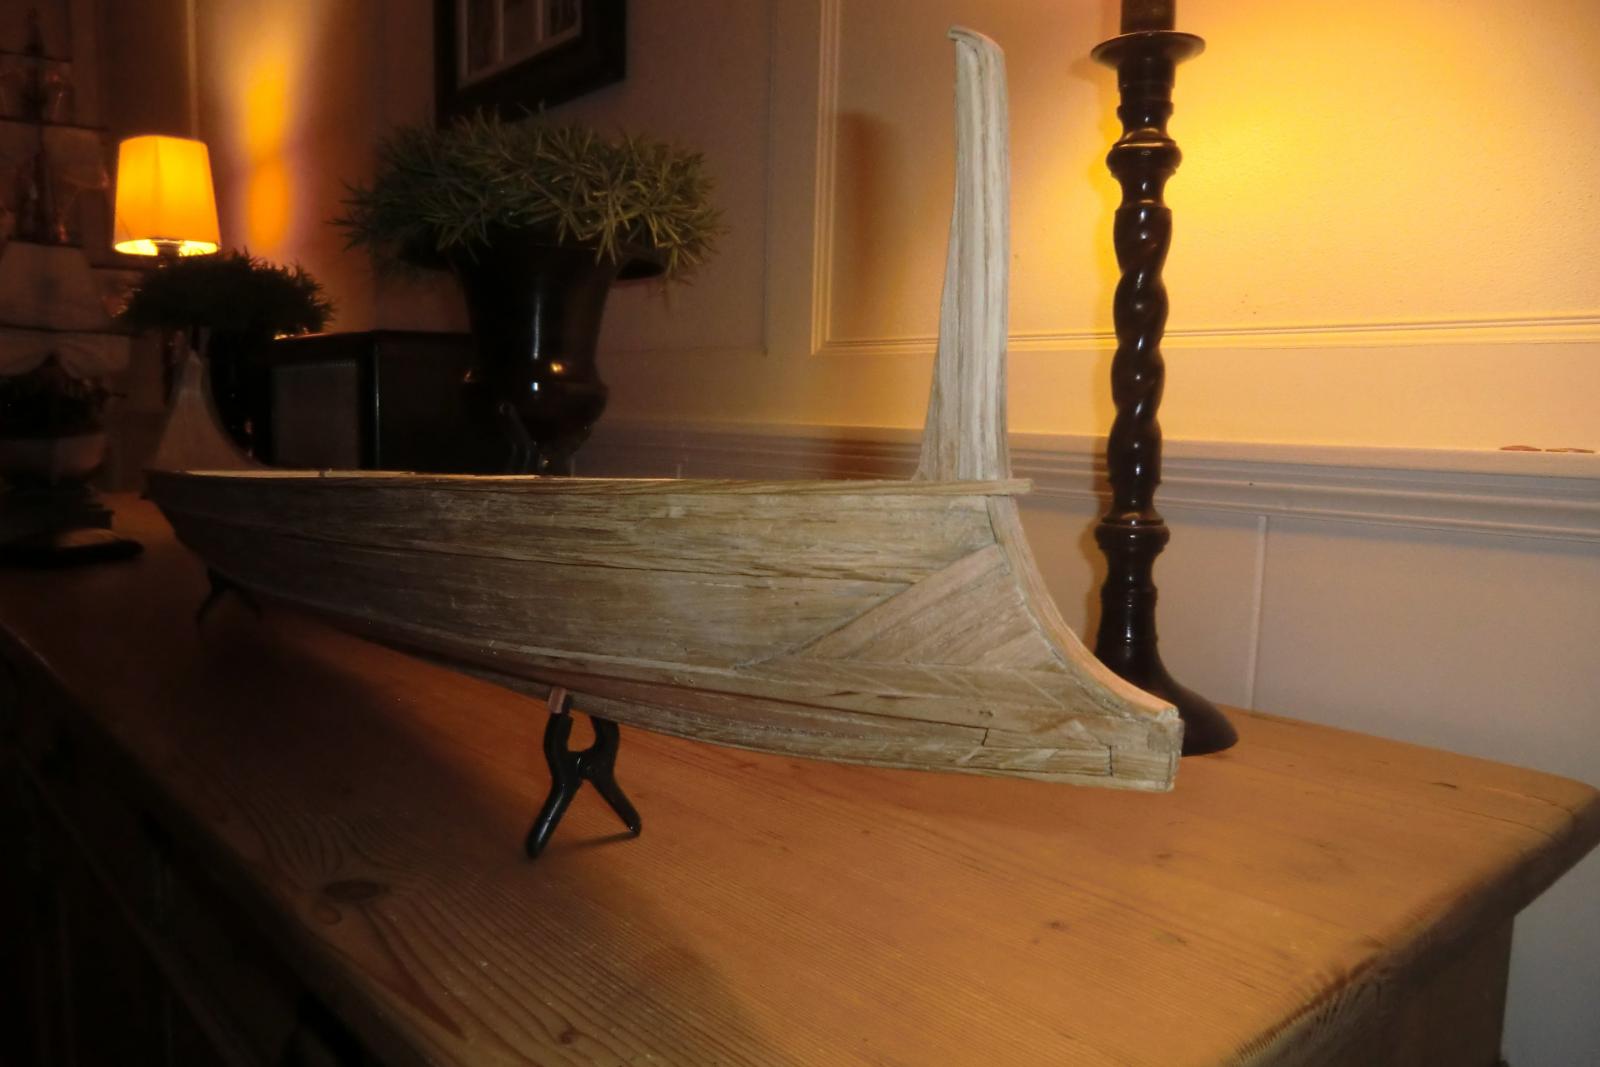
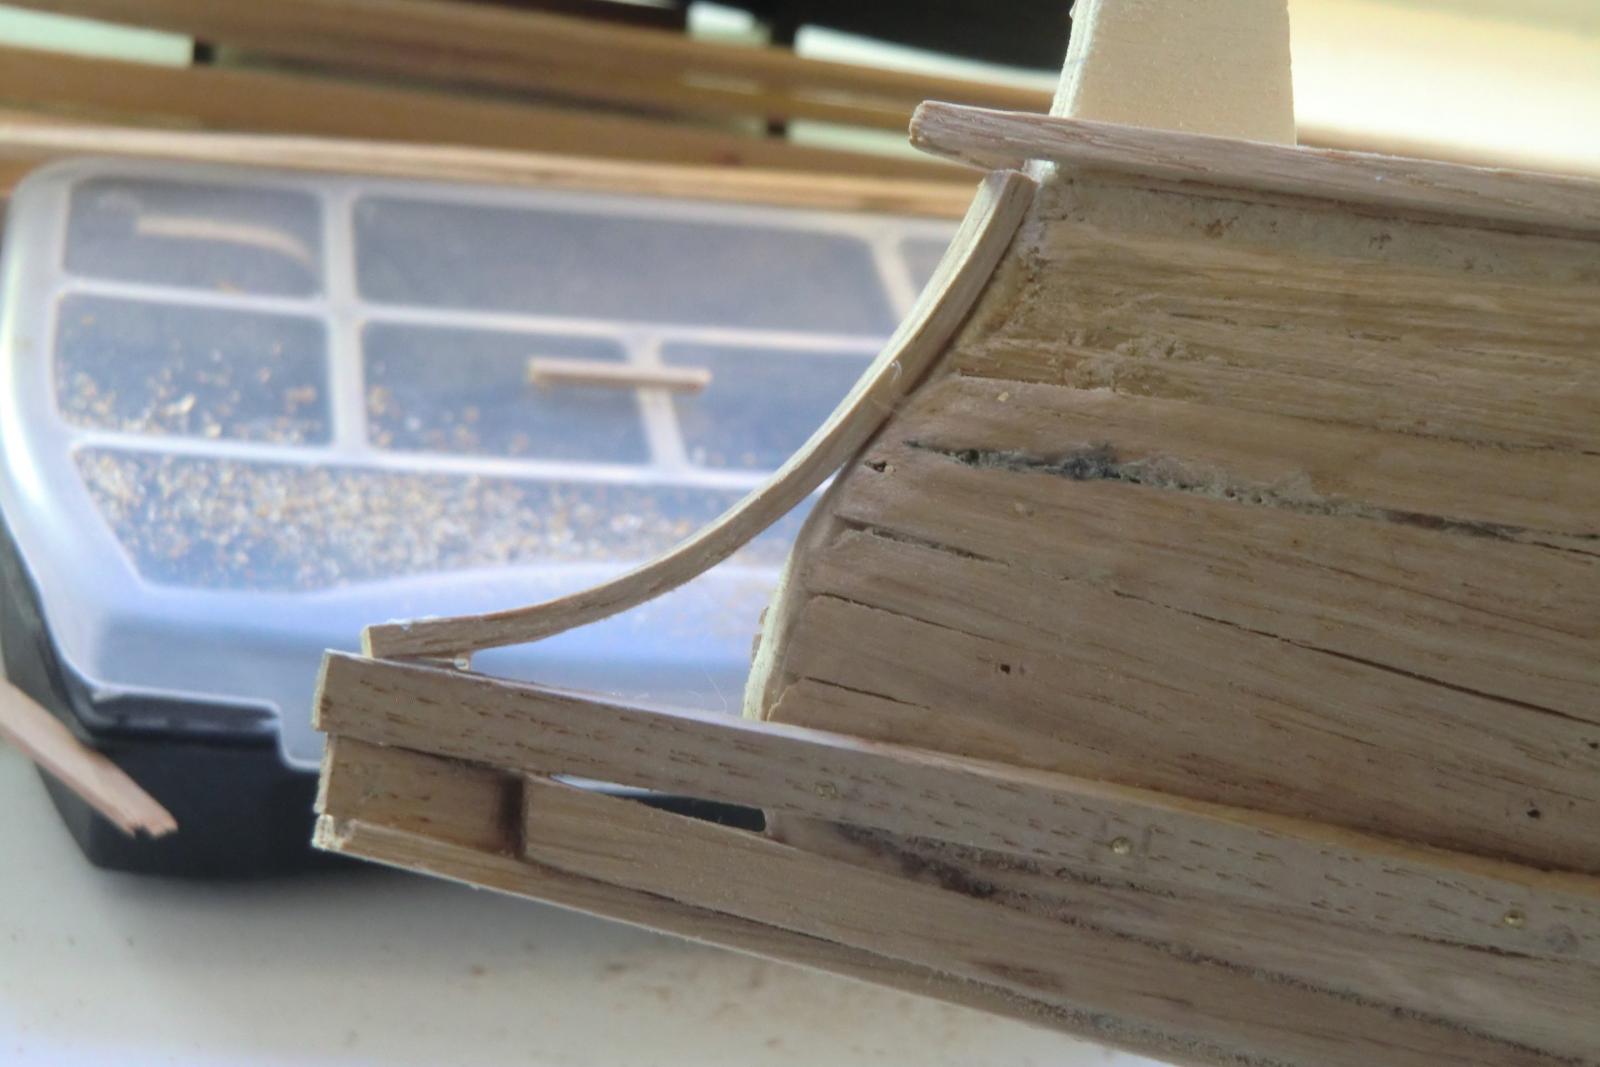
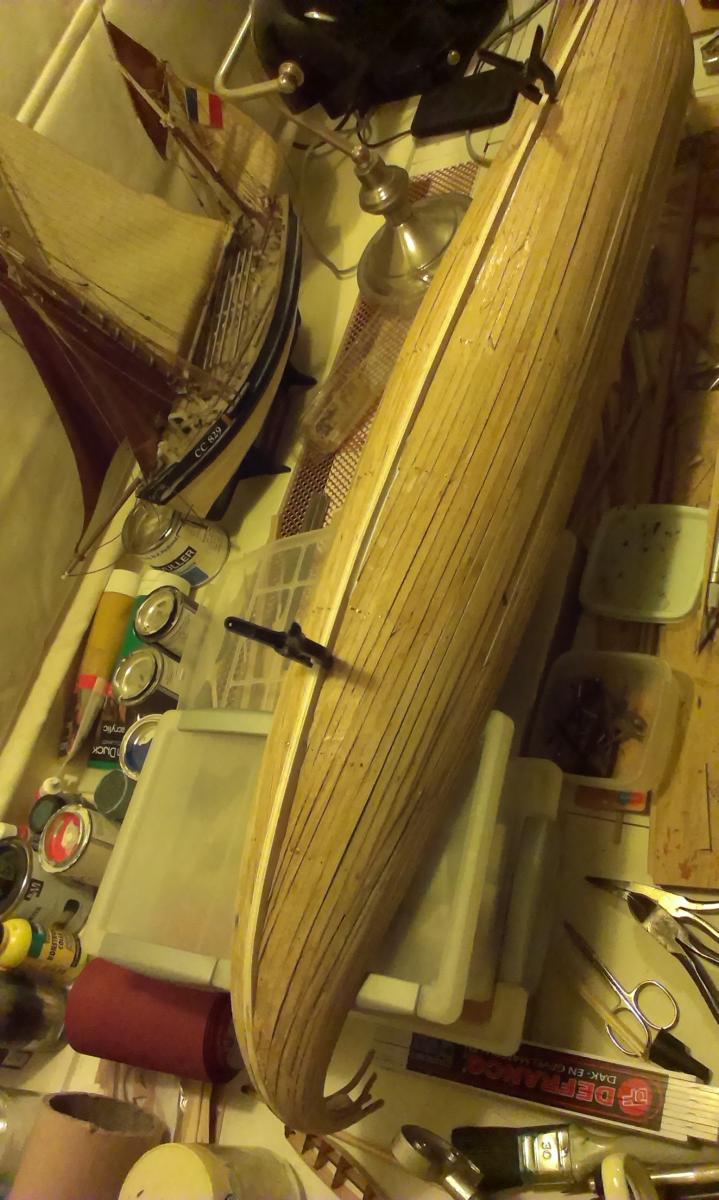
Planking of the hull is merely finished - and the ram on the bow is getting its shape.
When you make a mixture of oakdust and diluted white glue the oak will start to discolor to black a bit.
Fortunately this again will be covered by the further planking of the bow and the ram.
And a few pictures for Don, showing the inside so far:


-
Hi Hans, have not started mine yet but before week is out, have you got pictures of inside construction, and are you following Dusek instructions, Thanks again Don
Don,
I shall post some pictures within the next days. And in overall I follow the Dusek instructions, but I will add a personal touch as well.
-
As said - oak is quite tough to use.
But I managed to close the hull, will have to do some more sanding, and add some extra planks on both sides.

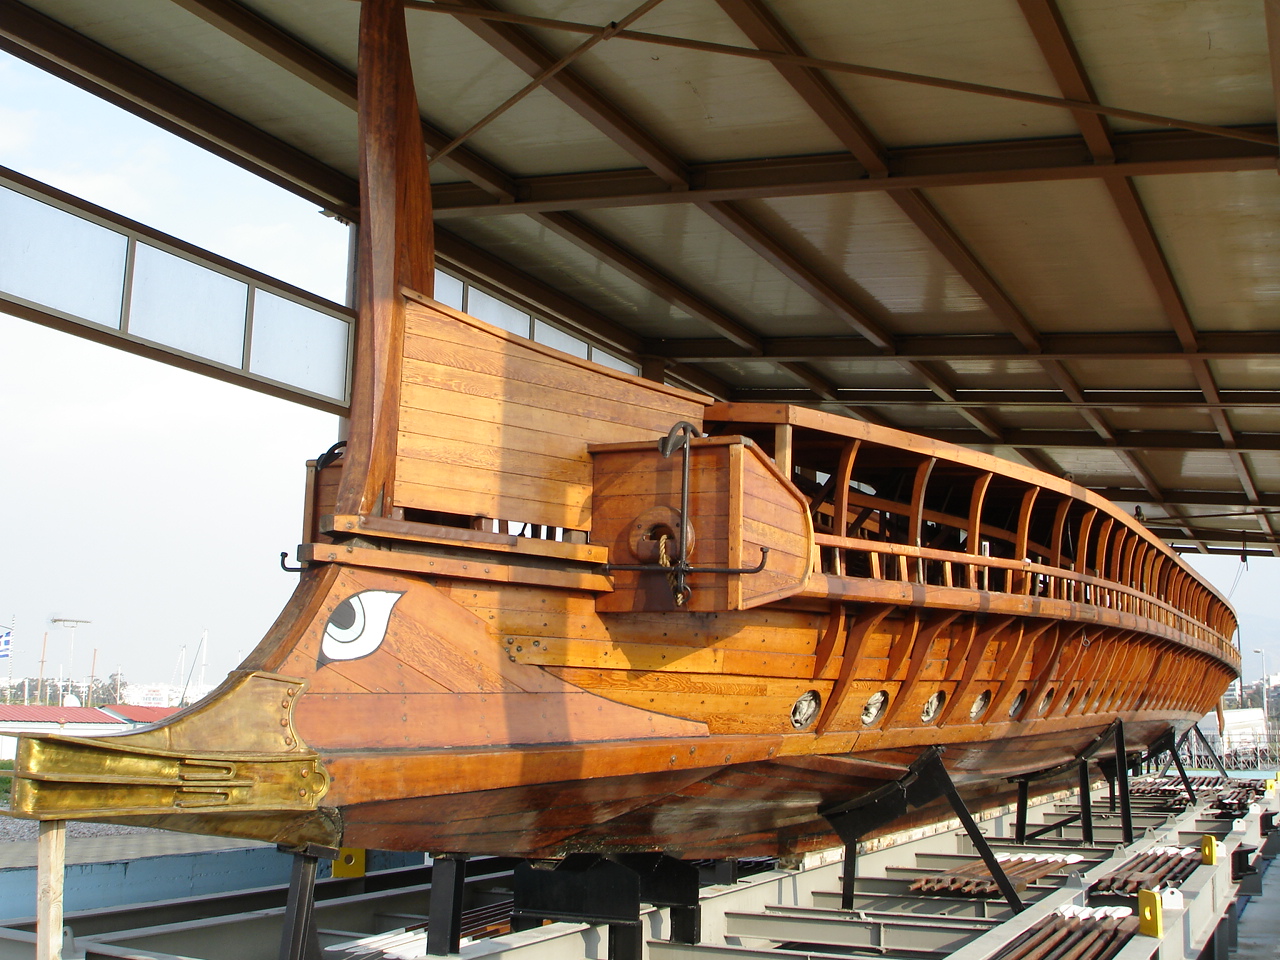
This is the image I use as example for my build:

- flying_dutchman2, mtaylor, Piet and 3 others
-
6
-
Looking at your pictures - and knowing the model a bit it is quite a tough one to plank!
- Vivian Galad and Piet
-
2
-
Don Farr, please feel free to ask your questions any time you want.
I think I also do have the Dusek kit - which is coded D004. But as you have read I have upscaled it to 1:35 - twice as big.


Trireme c. 480 BC by *Hans* - ancient Greek warship
in - Subjects built Up to and including 1500 AD
Posted
Cristiano,
Very nice pictures you have! And thank you for this information.
I use oak for the ship - will try as much as possible visible from the wood, but I also like the pale red colors. I am working out a color sceme with dark brown-black, pale red and oak as wood. The images you gave me are a very nice and good help for this.