HOLIDAY DONATION DRIVE - SUPPORT MSW - DO YOUR PART TO KEEP THIS GREAT FORUM GOING! (Only 13 donations so far - C'mon guys!)
×
Paul0367
-
Posts
512 -
Joined
-
Last visited
Content Type
Profiles
Forums
Gallery
Events
Everything posted by Paul0367
-
 Thank you Rich, Are you coppering the hull, If so any problems or questions I'd be happy to help, I've many pictures and as they say, a picture is worth a thousand words.
- 708 replies
-
- 1
-

-
- victory
- constructo
- (and 1 more)
-
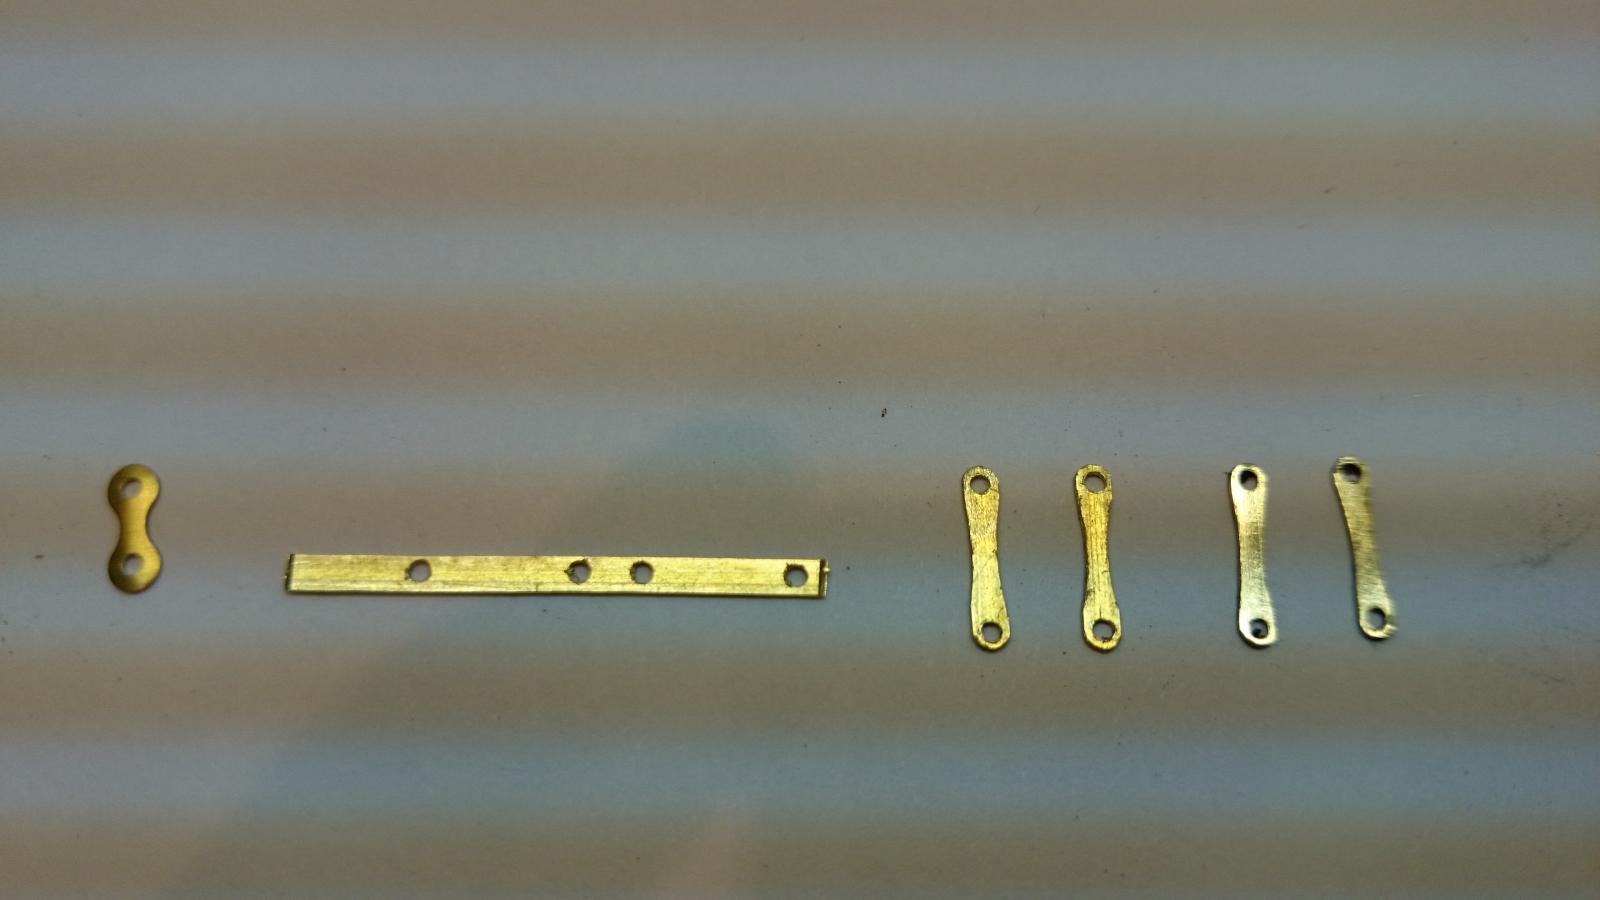
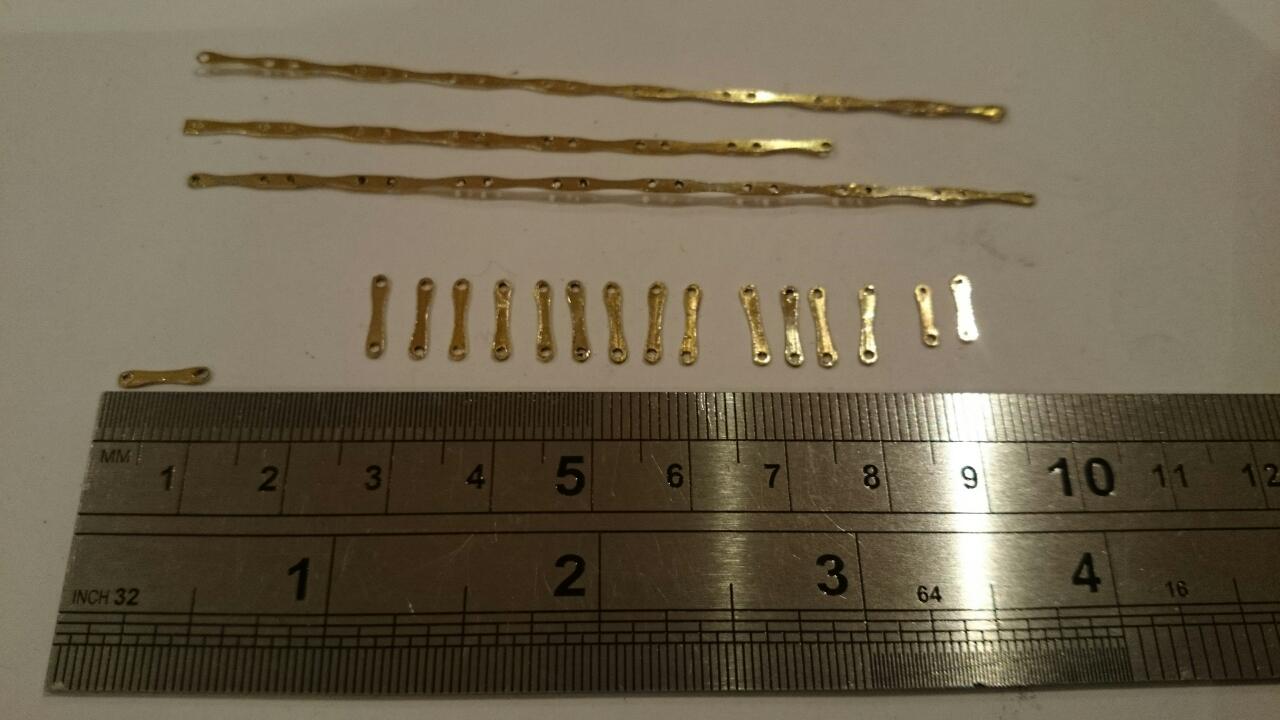
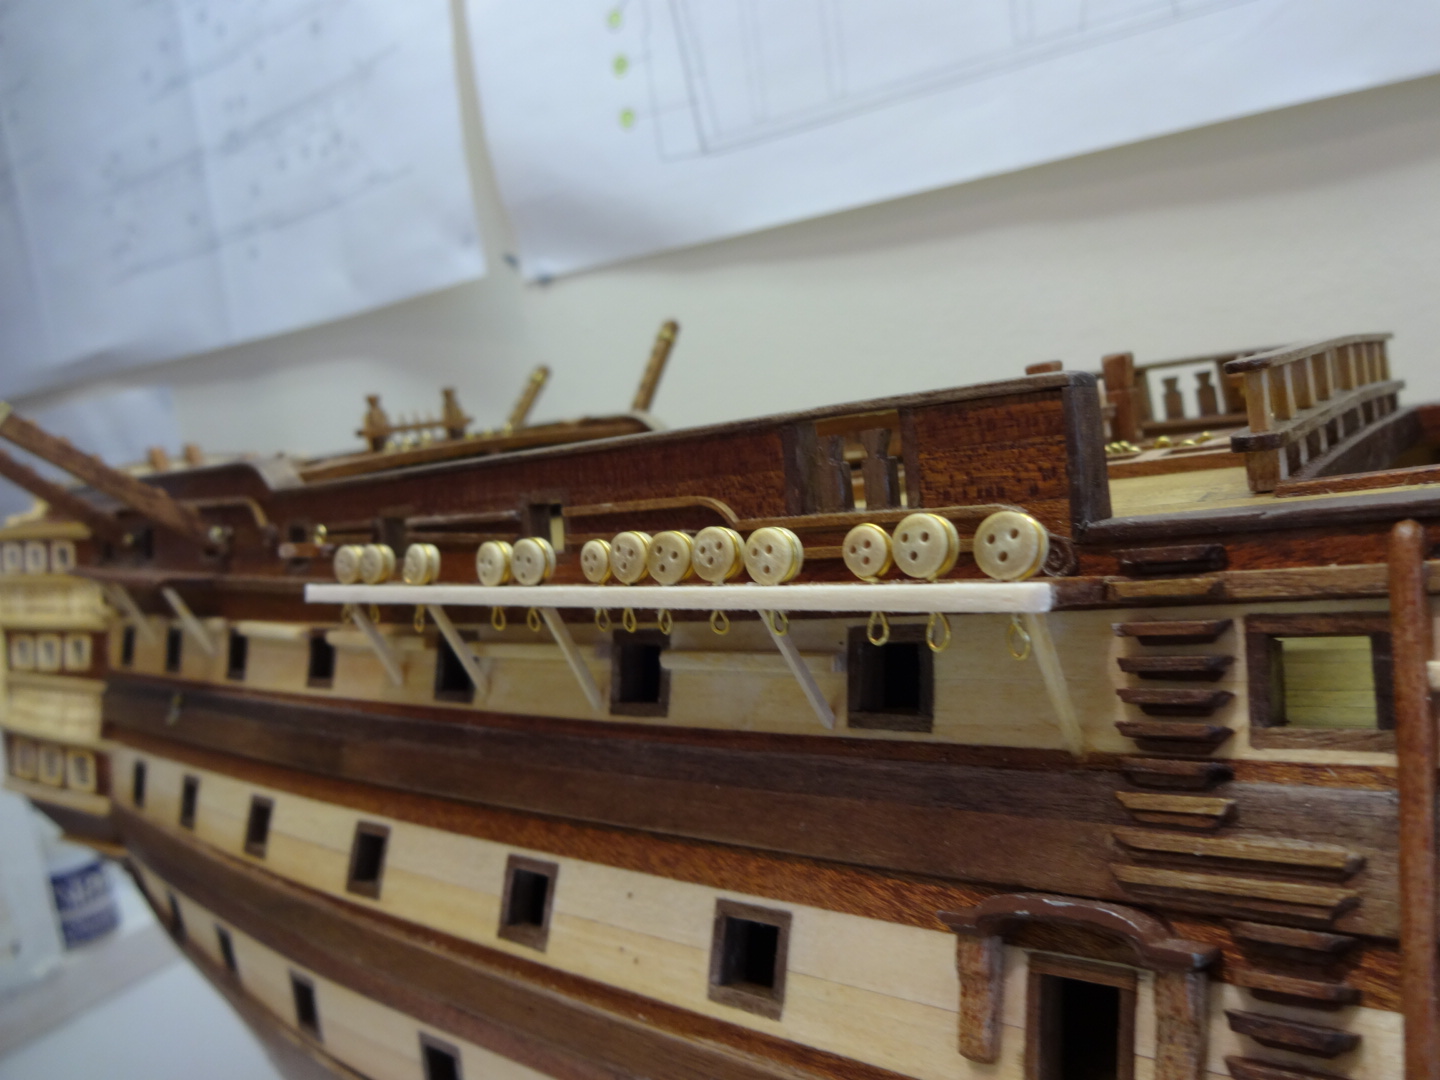
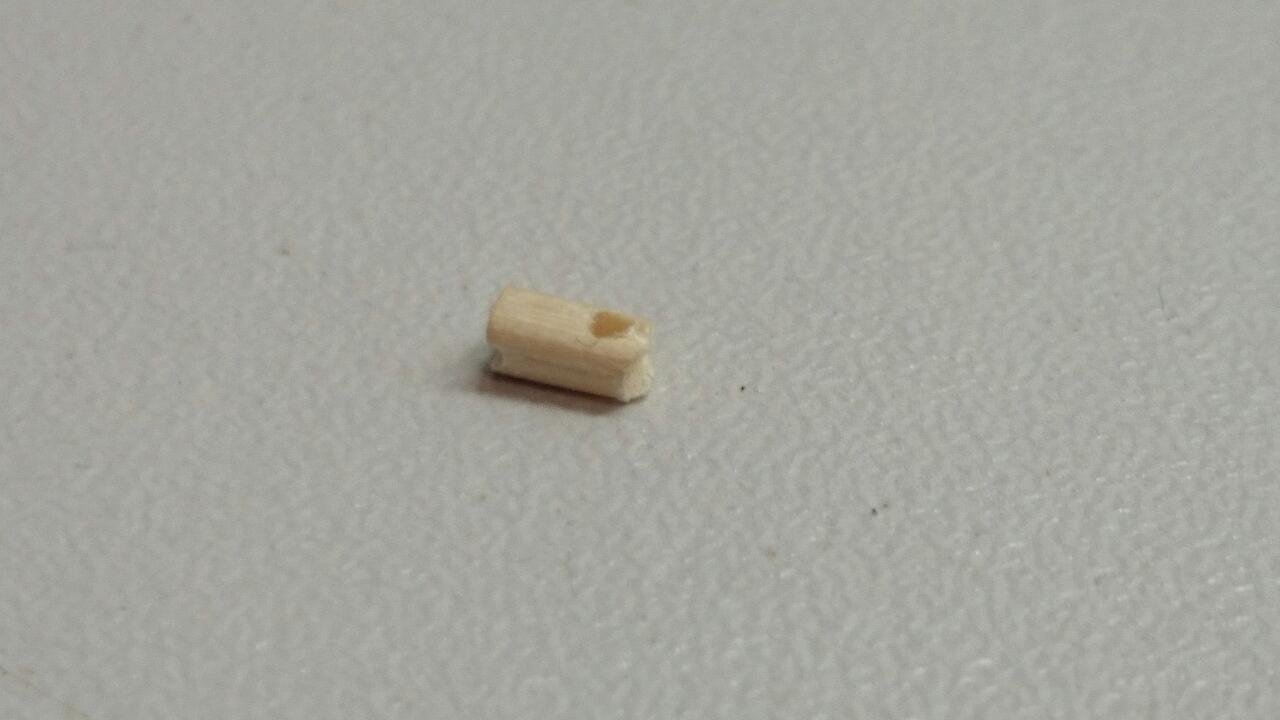
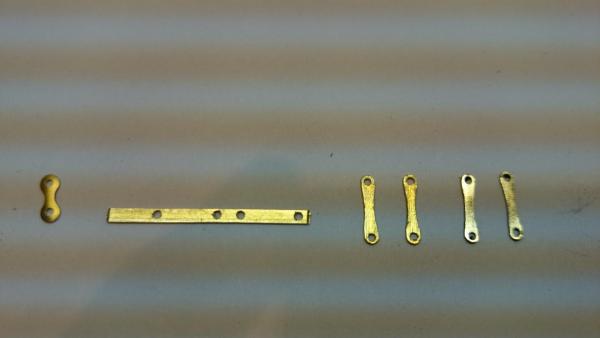
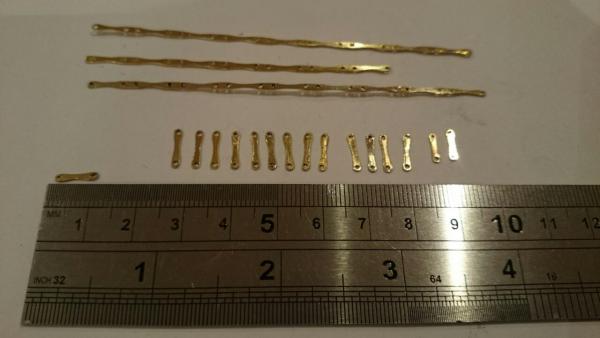
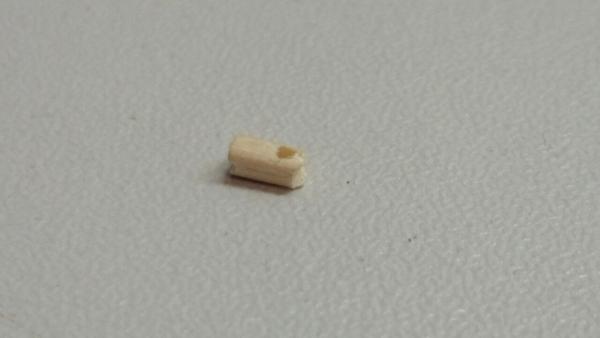
Well, I ordrered some preventer links, bingo easy life with a stock part, Sobeit from another kit manufacturer, well erm no, there too short and far too wide and a waste of money really. But since,,, Josh has given me the news I didn't really want to hear when asking him where he sourced his, hoping he found the perfect ones. NO and yes he fabricated them from the brass strips in the kit. Only one thing for it, follow Josh's lead. The first image shows the small preventer link I purchased on the left, how small (6 mm) and thick it is, it actually looks like the link of a push cycle chain, I've seen beautifully built models, really stunning looking models, only for it to be fitted with these, sorry if you read this and you did fit these, seriously, you can still pull them off. PLEASE.

- 708 replies
-
- 5
-
-
- victory
- constructo
- (and 1 more)
-
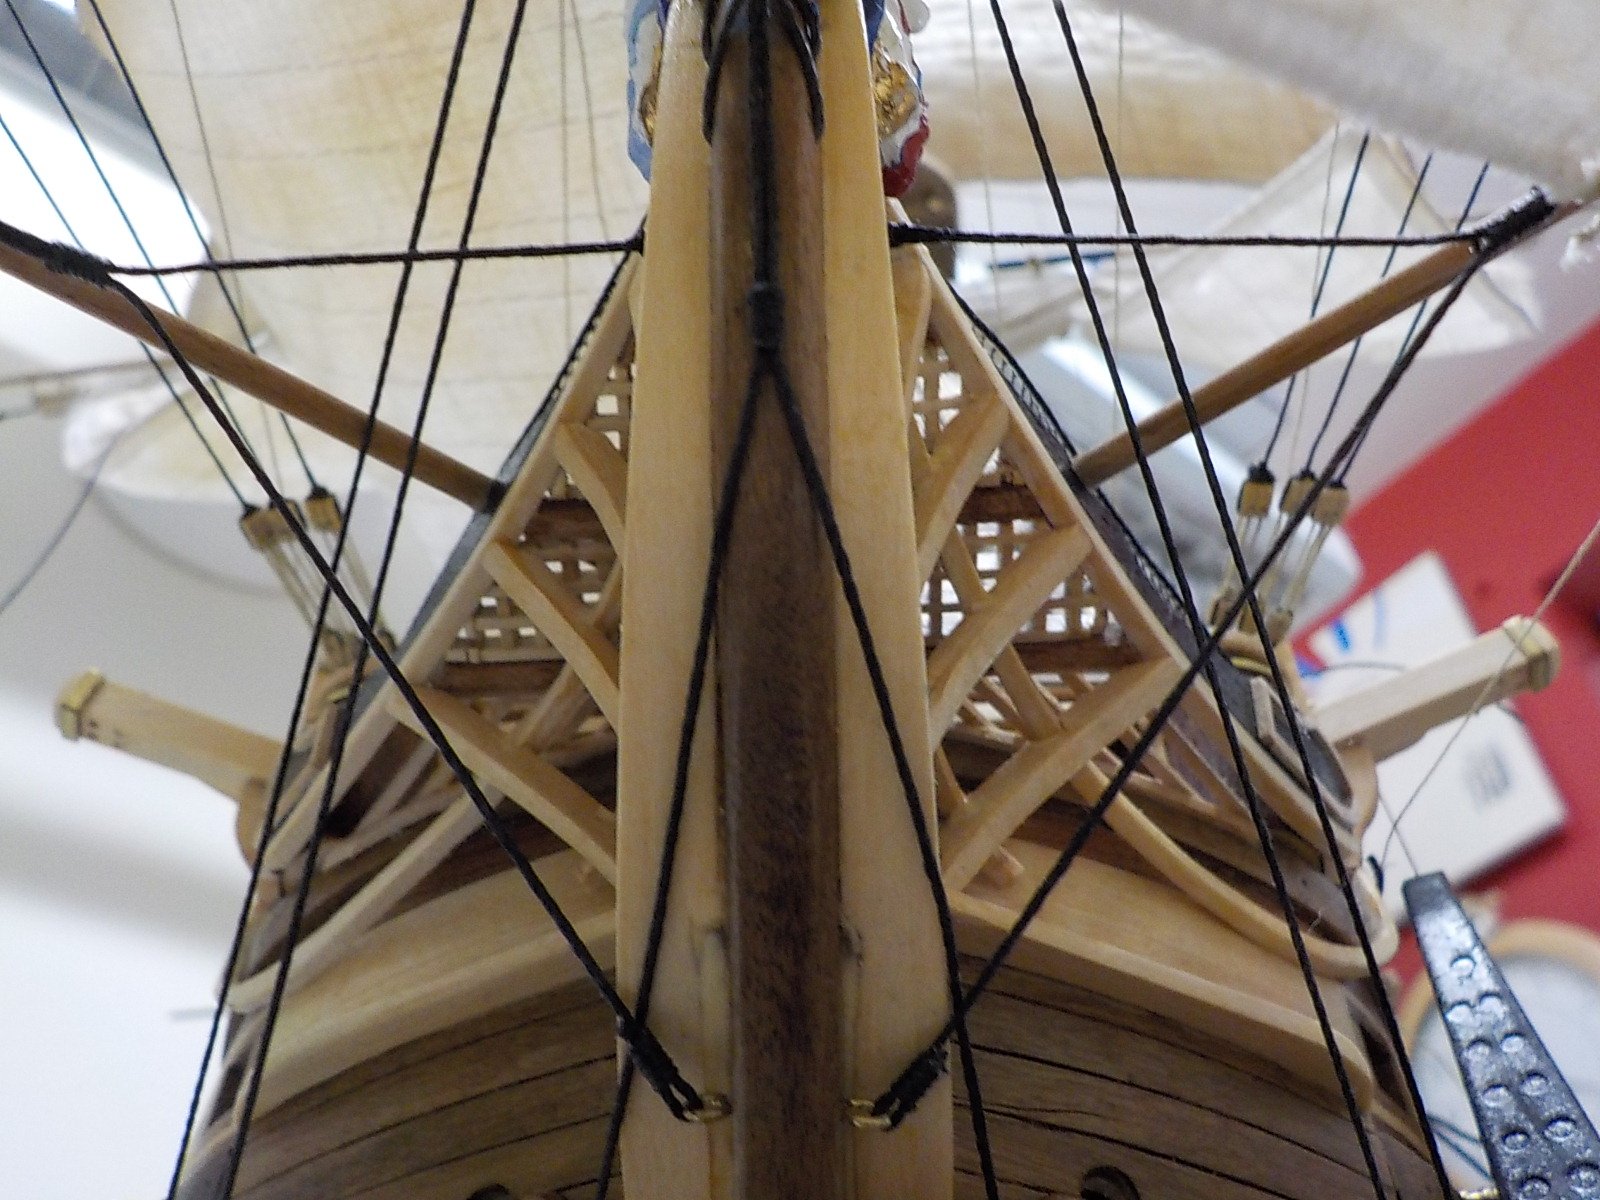
Yes the mast do tilt back slightly, imagine the mast under load as the sails drag her along, they allowed for this by having a rear ward tilt. Look at the image in yellow behind the messages it too shows this.
-
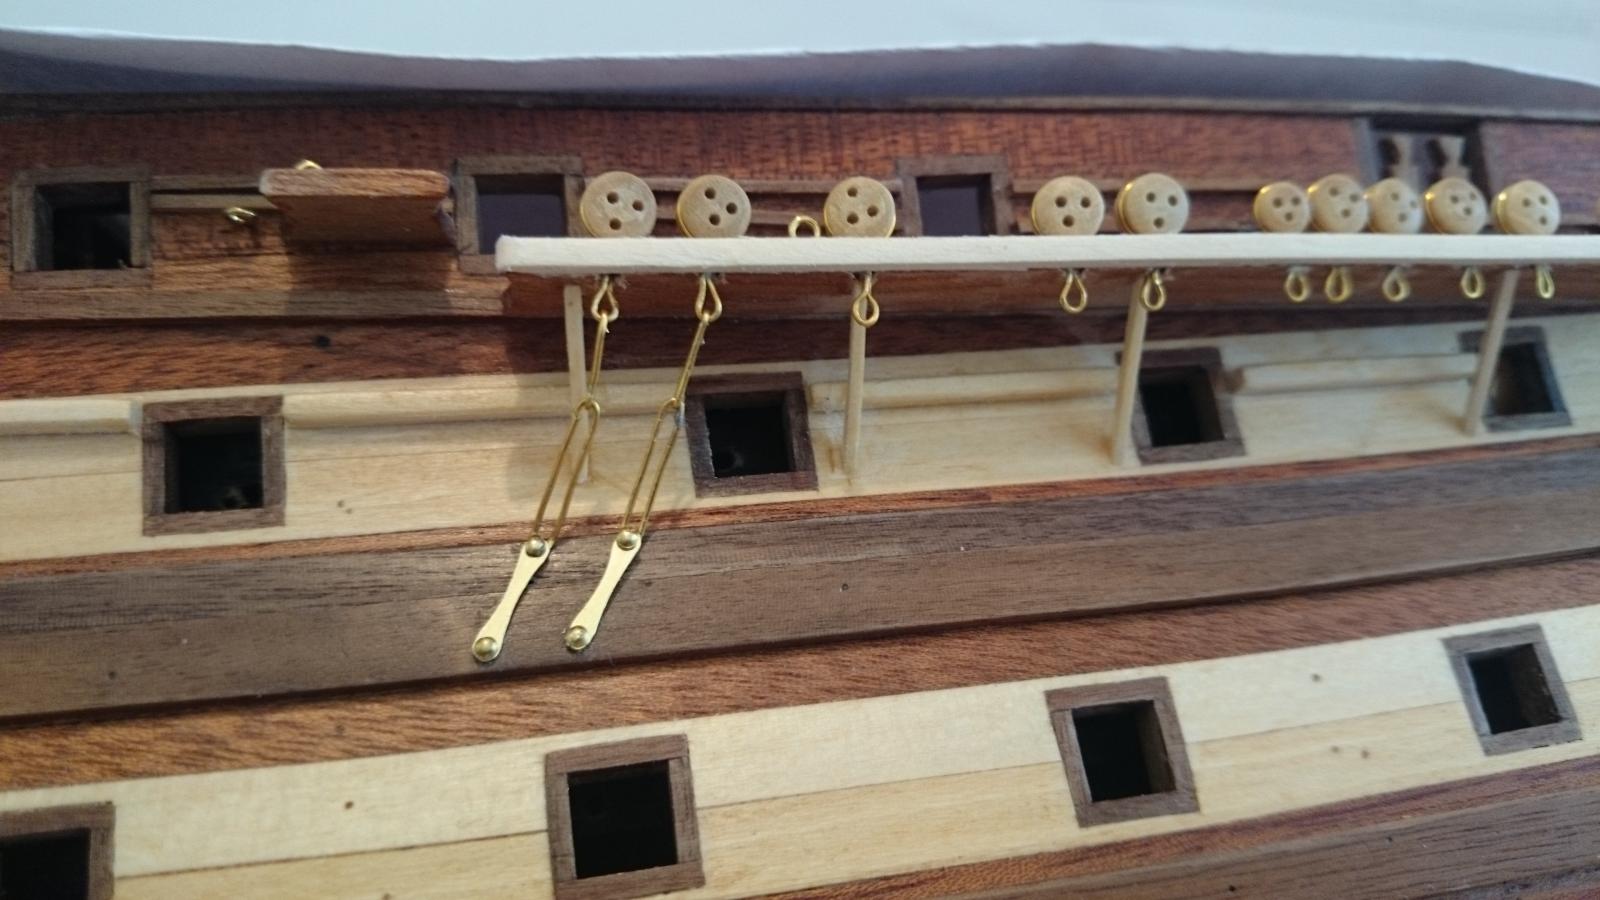
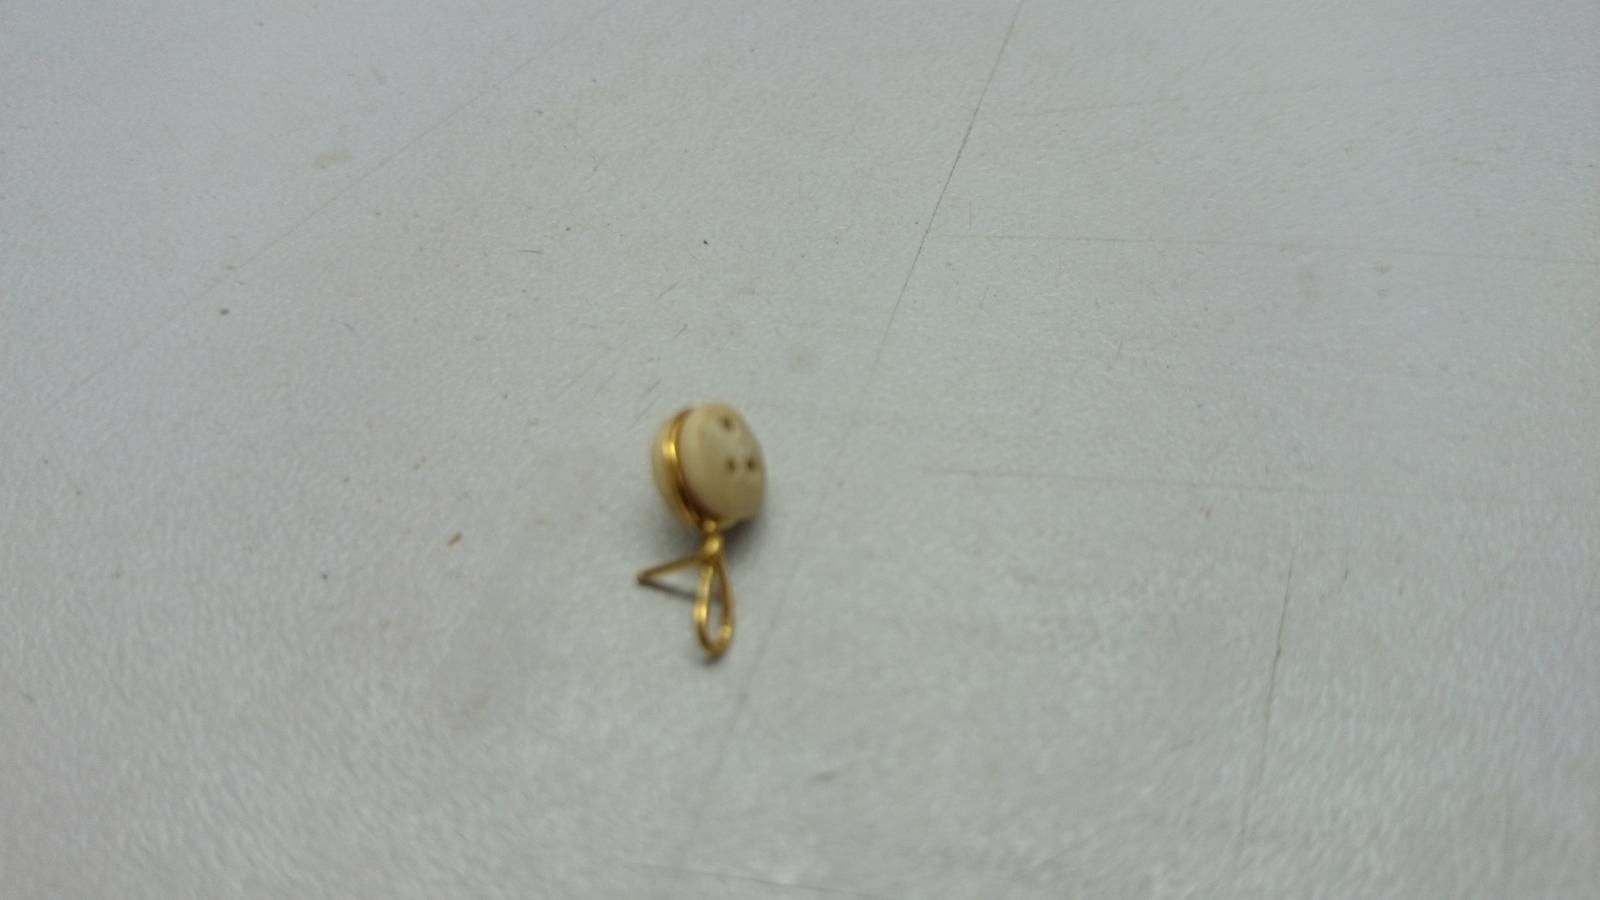
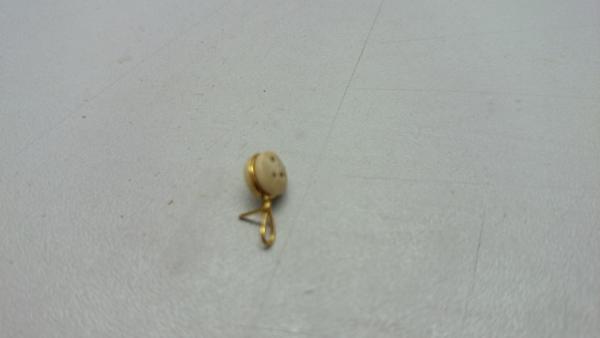
I've changed my direction to avoid the tedious canon rigging saga that's to come.. So what next, dead eye Installation to start. Again I've deviated from the kit as it's just not accurate at all, there is no effort to put chain links or chain plates on. ( instead just a twisted brass wire) This is to be addressed, starting work the deadeyes, these smiley face looking guys should just have a loop below for the chains to attach to. I have shown pictures of how I ensured the guys sat there without jumping up. Made the loop with an arm extending and drilled the board and slid it in followed by the capping. Look I would like to take the reward for this idea but I pinched it from another site.
- 708 replies
-
- 7
-
-
- victory
- constructo
- (and 1 more)
-
I am intending on fixing mine to the hull internal walls also, I fabricate my own rings to keep the scale. It will be tricky but I will try, worse case cenario I can do as you said and just glue a ring.. Will be fun trying to rope them up under there.
-
I believe all of them are red inside,
-
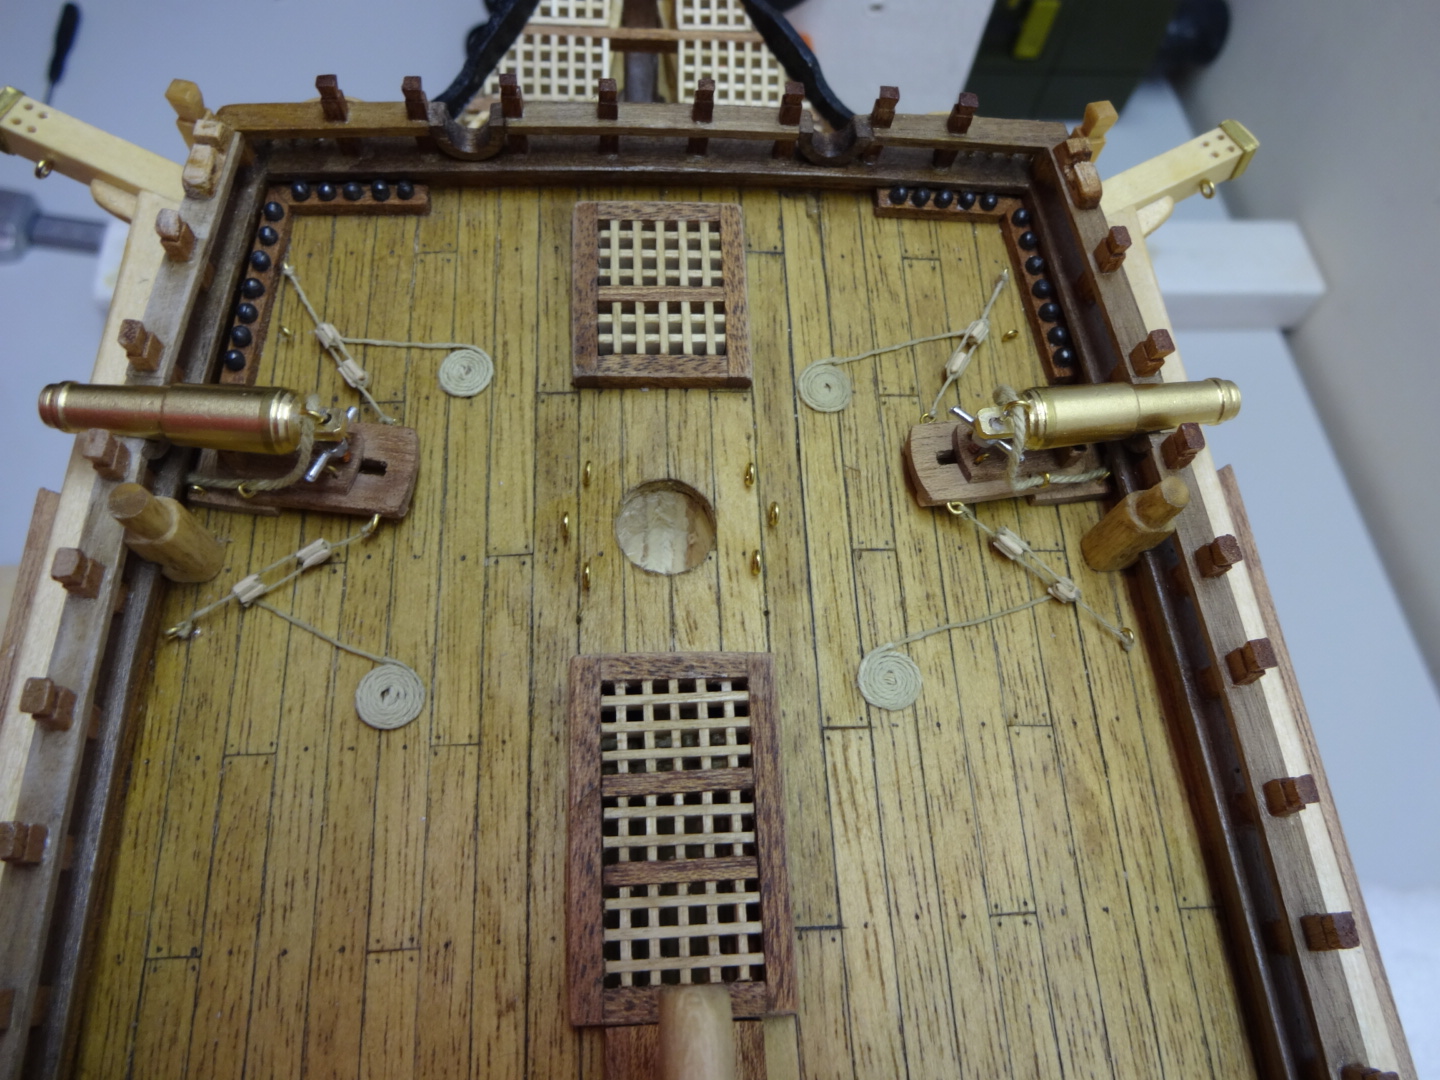
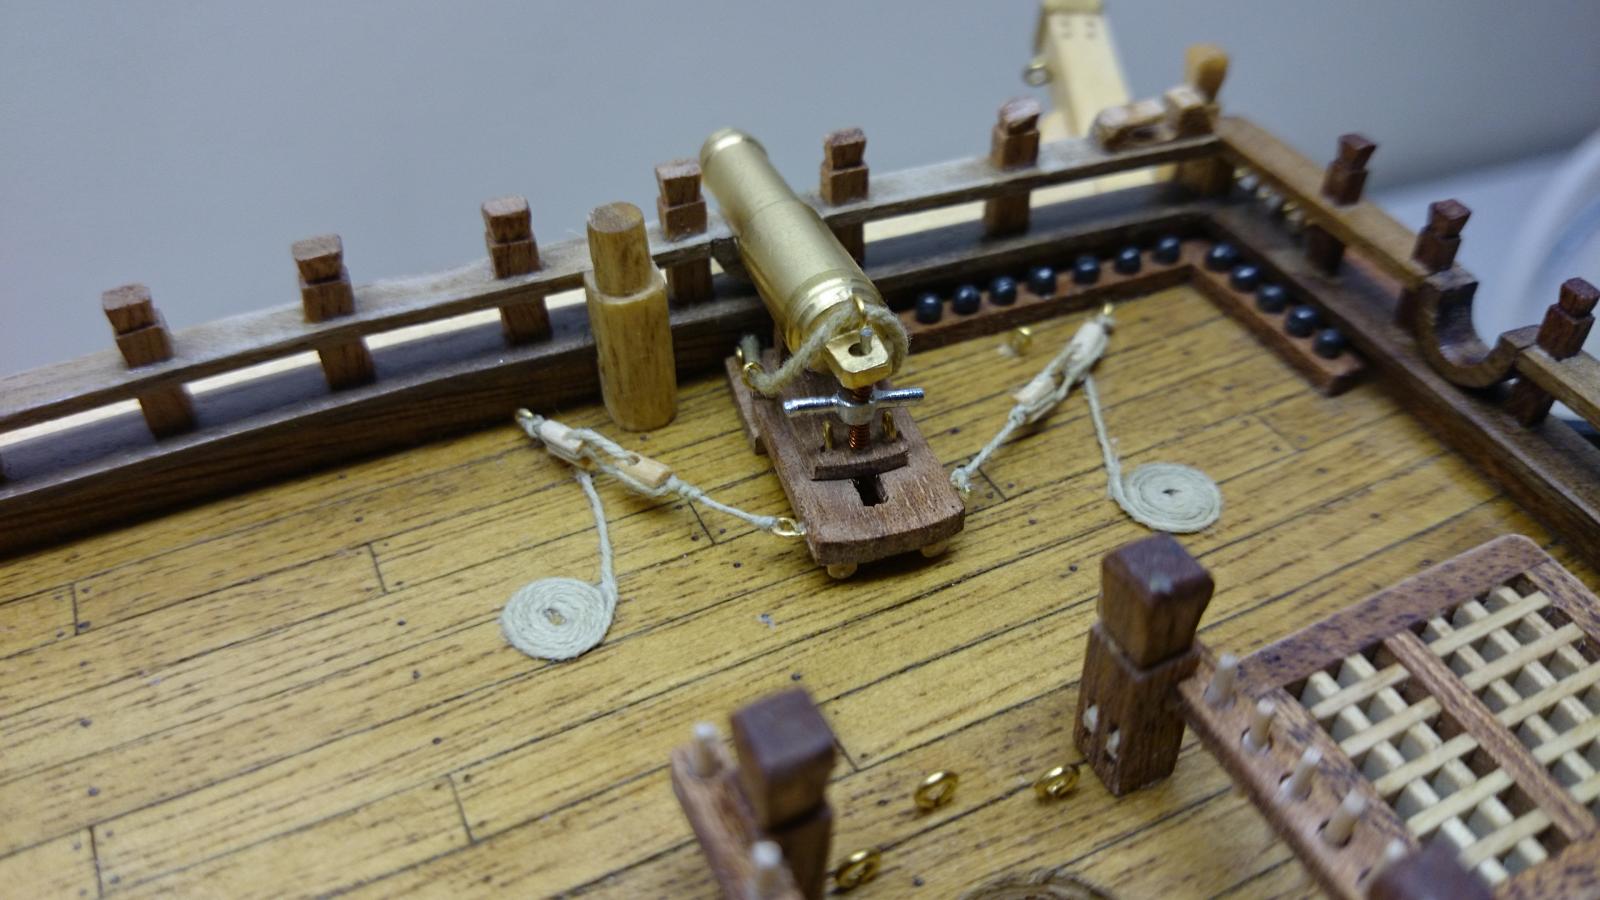
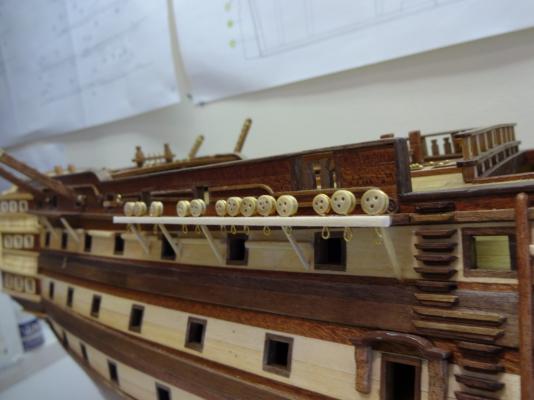
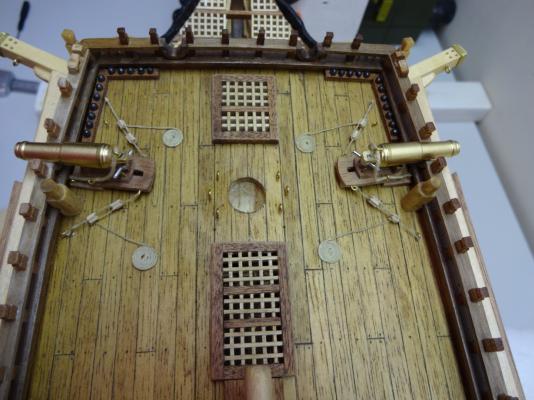
Both sides done with the smaller blocks. ( I also preferred) Just all the canons on the deck below and main deck to do 16 total. Trouble with this particular kit there was no way these could have been done before the deck went on as it goes on before any planks are fitted, leaving us with no reference point or anything to fit them to. Just a very difficult access area. Looking back I,m going to tidy the coils of rope and have them evenly matched on both sides.
- 708 replies
-
- 4
-
-
- victory
- constructo
- (and 1 more)
-
Cheers Bro, Took a lot of time to do as there so tiny but the first one I was initially happy with had to much glue and super glue is like a clump of wax on sting. So did it again and then came to the conclusion the blocks were to big and clumsy. When you leave it and go back it can look so different. Attempt three was smaller blocks. Oh you can delete the comment you sent in error.
-
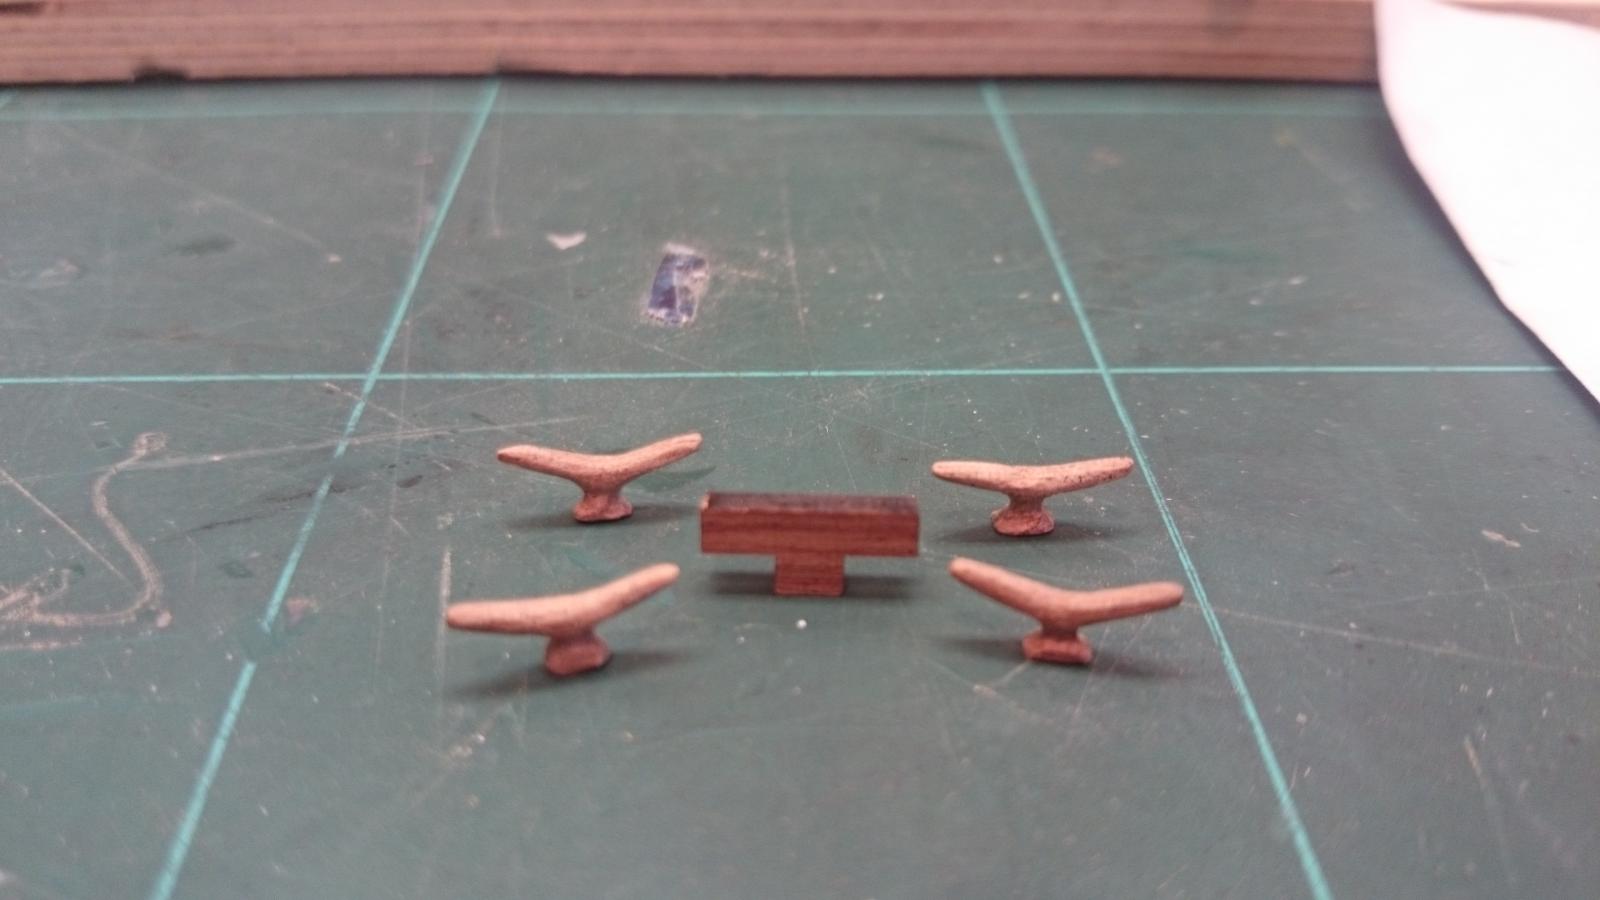
Two types made up.

-
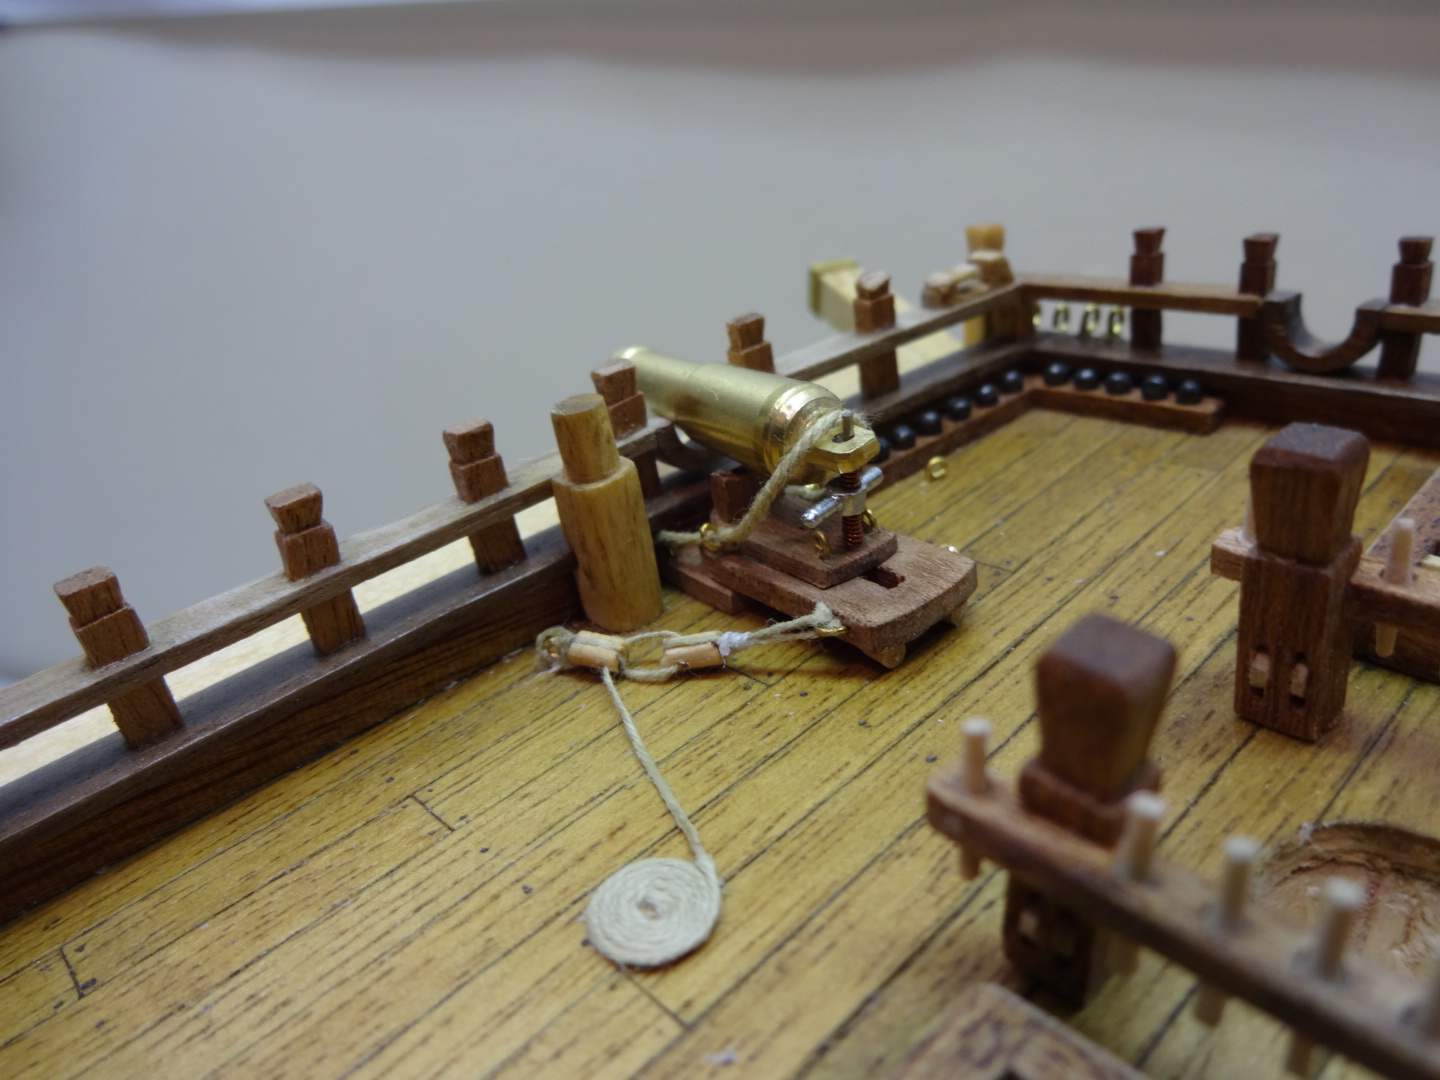
Thank you If you look at earlier image of the port side canonade it has larger blocks and also there drilled, the later picture has smaller blocks no holes drilled
-
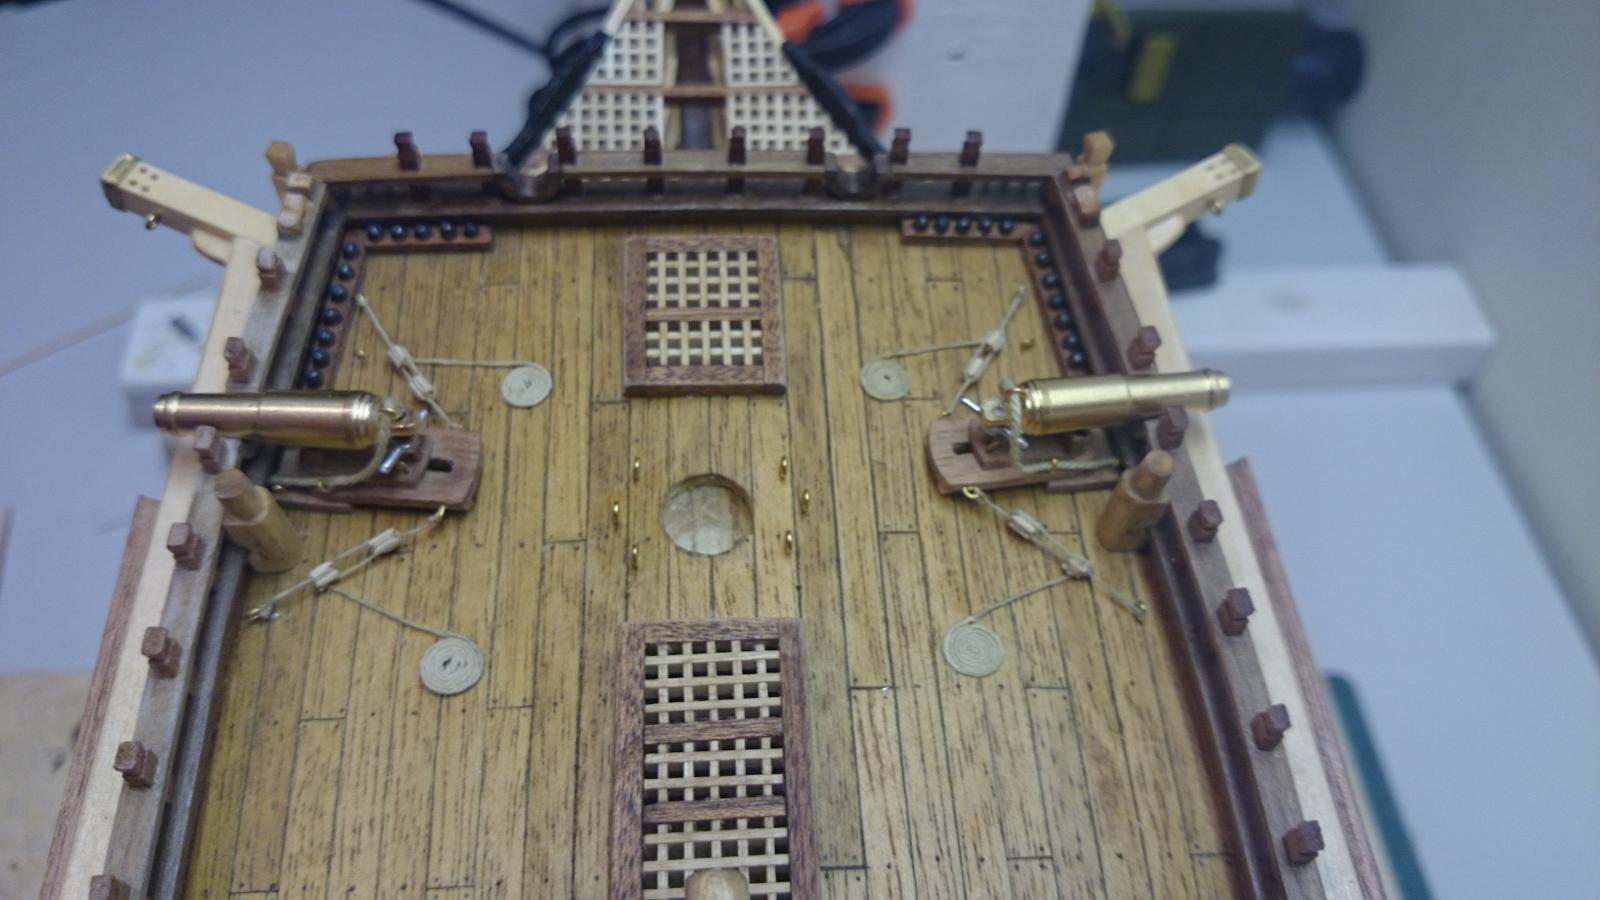
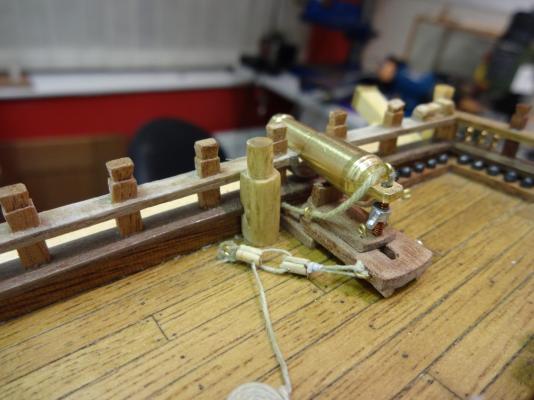
Well, I've done the other side, but a different approach, based on Andys picture, I may add a few lashes of rope to make it as untidy but may leave, I gone much smaller on the blocks. This is open for comments please, which one captures the look The best.
- 708 replies
-
- 2
-
-
- victory
- constructo
- (and 1 more)
-
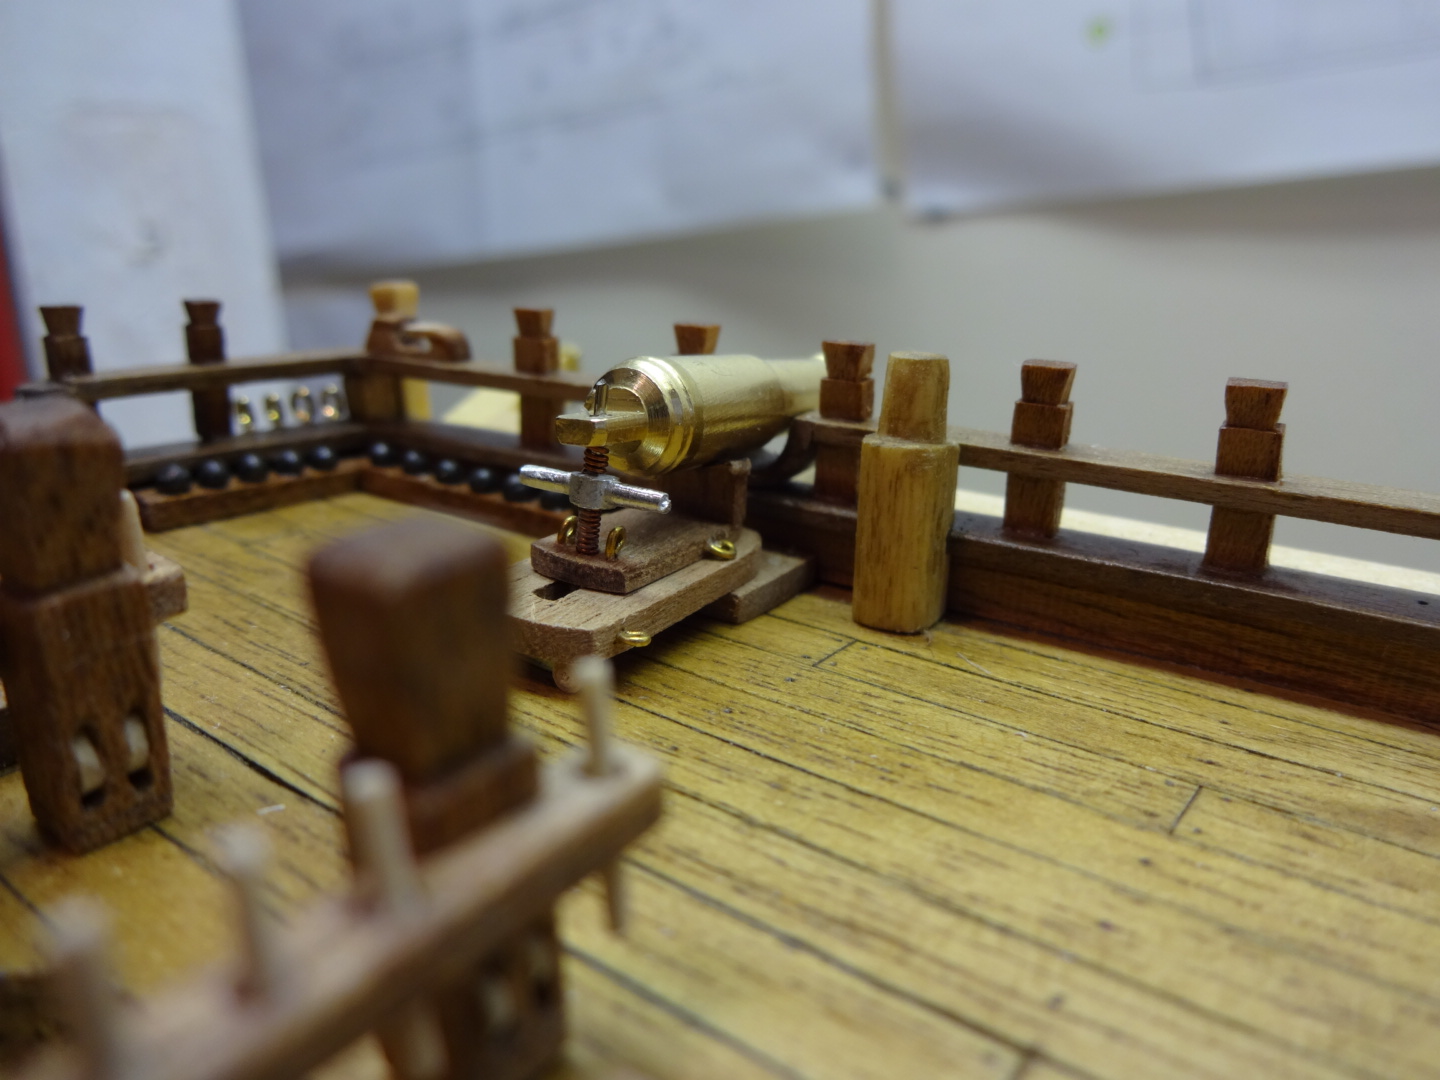
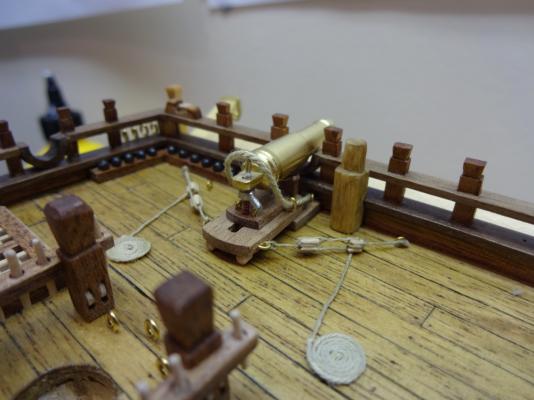
Well I've done them again, yes I did ditch the super glue, really the only time I've used it on my build, not a fan, I've just read these post after completion and yesI went the Pva route, not only does it glue but softens the line, removes the fuzz and dries clear. Captainsteve, to add the screws but leave her with fittings and no rope looked, well unfinished, so I needed to add the lines at this stage. So, so small these things. The keen eye will notice the thick wax looking glue has gone and the blocks feed the line central where before I had them to the side.


- 708 replies
-
- 4
-
-
- victory
- constructo
- (and 1 more)
-
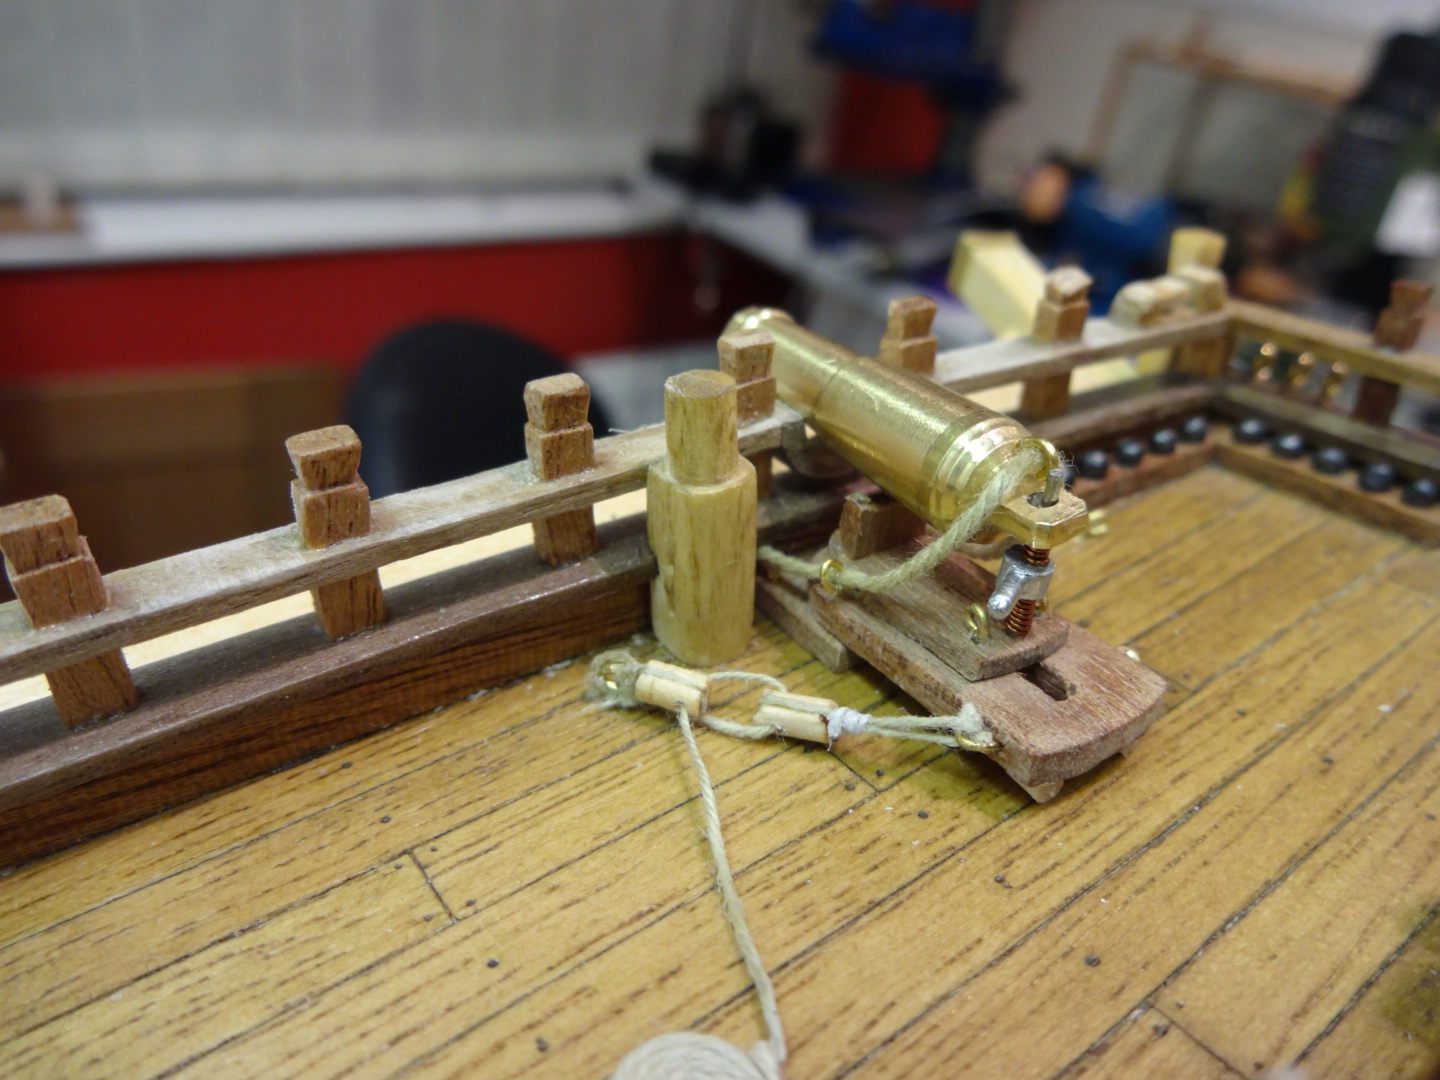
Well I've come back and cut off the lower ropes and blocks, back to the drawing board, I just felt the fastenings to the hooks looked like a blob of wax. Unfortunately superglue make a mess of string, especially this scale. I am having to rethink this and trial and error moments loom ahead.I've looked at some builds on the net and some blocks and ropes look huge in comparison to the canon, this I'm trying to avoid.
-
Oh, yesterday I have officially been building for 1 year 01/04/15 Well I have been cursing and feeding the carpet and hoover for about 4 hours today as I rope a canonade.Yes one, and only half done. Due to being very small I had to make the blocks to keep them in scale, well as close as I could with the confines of the rope/string... Never did I contemplate rigging canons when I purchased the kit, the box art looked fine back then but as it gets closer to completion I find myself pushing my boundaries as a first time ship builder. Anyone whom has done this, hats off to you. It's very frustrating when your work flies off the tweezers to carpet land.

- 708 replies
-
- 4
-
-
- victory
- constructo
- (and 1 more)
-
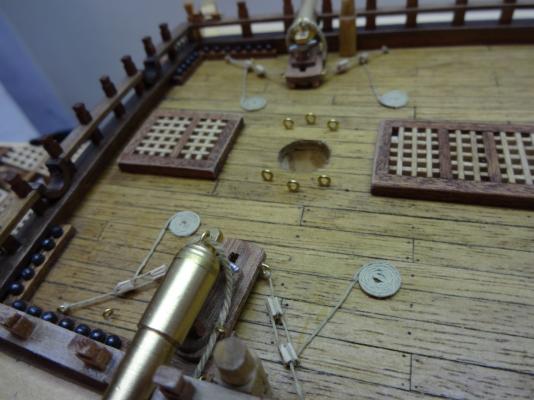
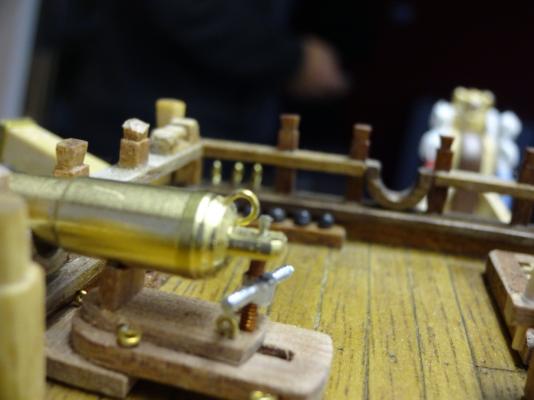
Added the vertical rings to the canons, omitted by Constructo. Rigging these canonaids will be started soon, had a build rest day
- 708 replies
-
- 4
-
-
- victory
- constructo
- (and 1 more)
-
Love the name plate, very classy. Regards the case, i'm also going to have to look at Perspex based on the comments regards the weight issues.
- 230 replies
-
- 2
-
-
- victory
- artesania latina
- (and 1 more)
-
Stop beating yourself up, that looks really good, look you have even changed the captains quarters from the brass and looks like you got it all level, unlike someone typing this whom had to rip it all out and start again. We are building our first ever ships, were learning on the job without training. Experience will help us for the next build, which I hope you are planing on
-
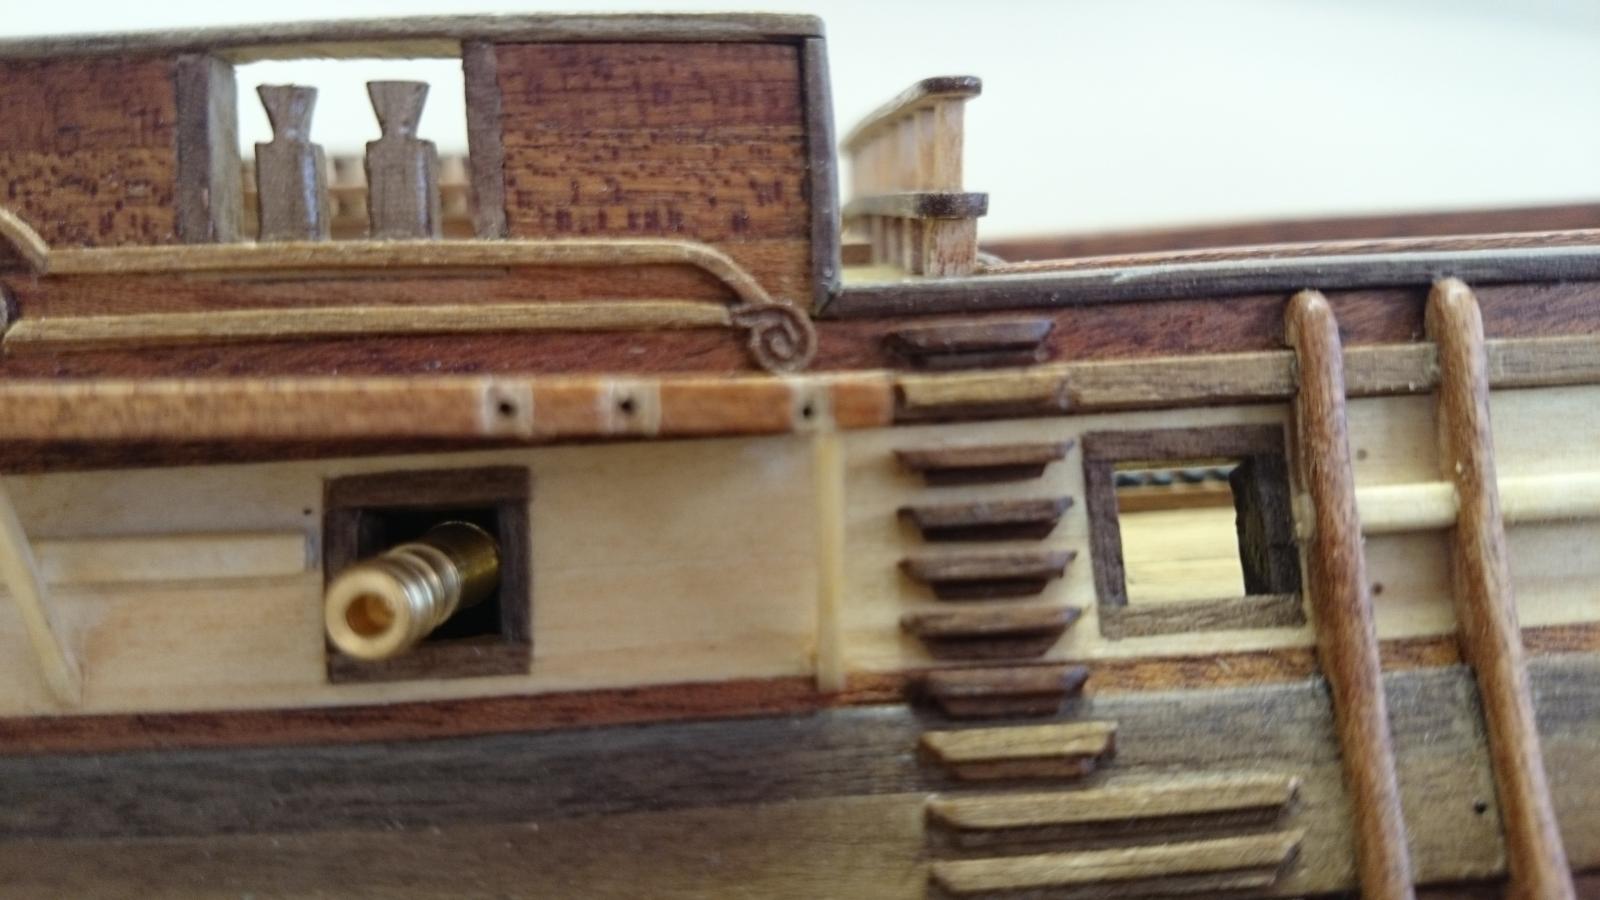
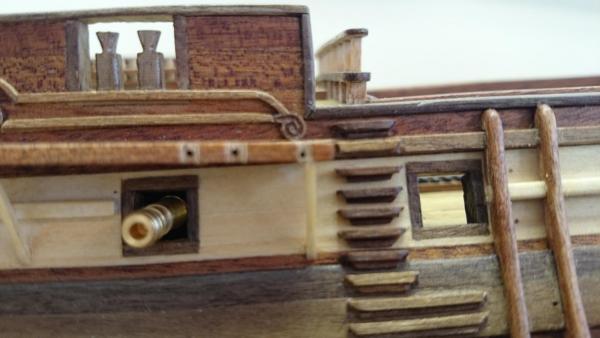
Thank you, Frank Andy This one's for you, ok I'm really not changing the barrel but I will add a vertical ring. Prior to roping her down. My brother called and inspired me to add them even suggested the approach to take.

- 708 replies
-
- 3
-
-
- victory
- constructo
- (and 1 more)
-
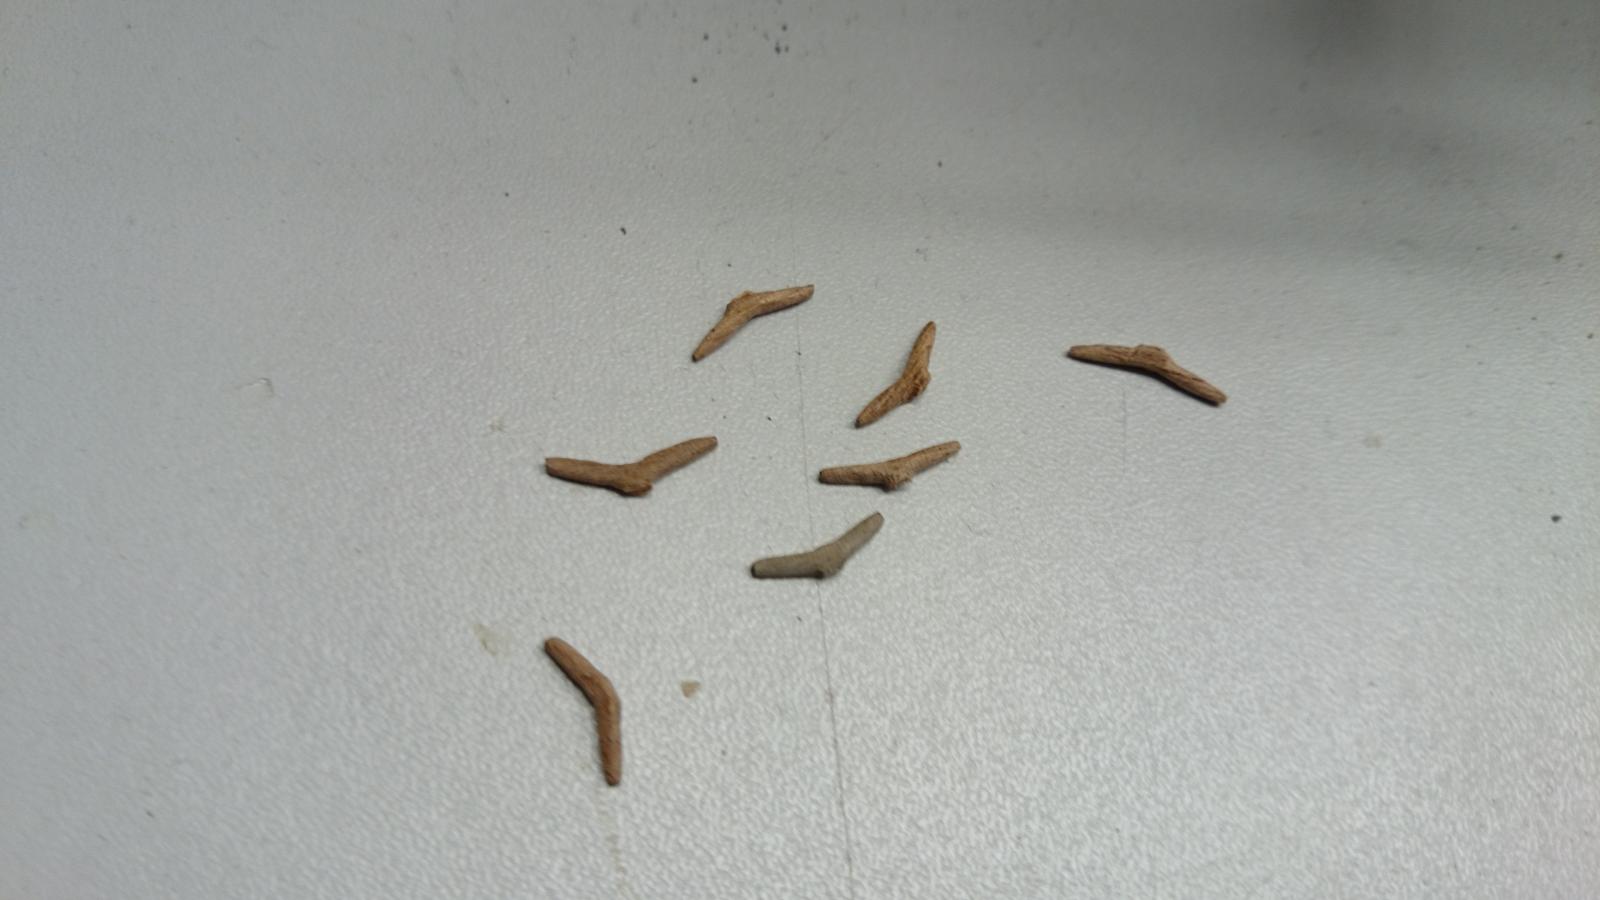
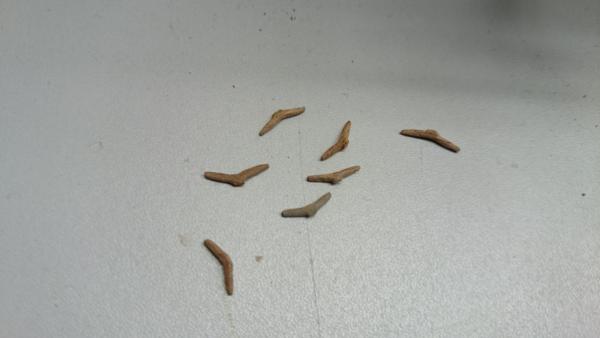
Pleats all fitted, simple, well erm no, I managed to destroy seven, they just didn't sit right and it was a case of press in, if the don't sit right they won't come out, in one piece anyway. I only had an issue with three, it just took me so many frustrating attempt. Would I consider cheating and buying next time. Never!

- 708 replies
-
- 3
-
-
- victory
- constructo
- (and 1 more)
-
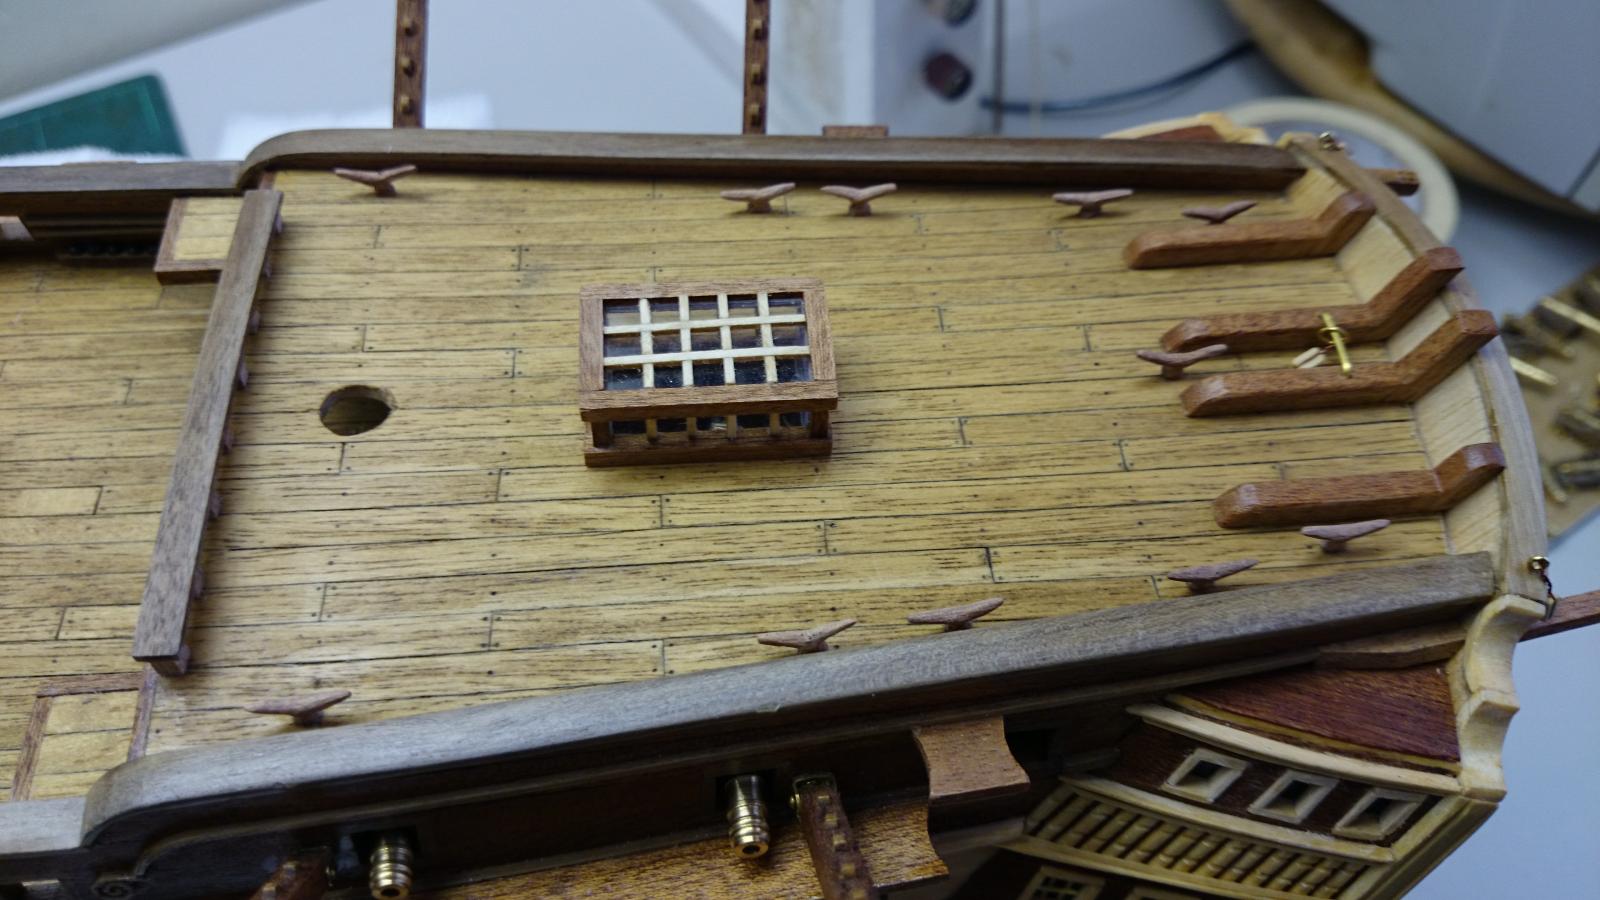
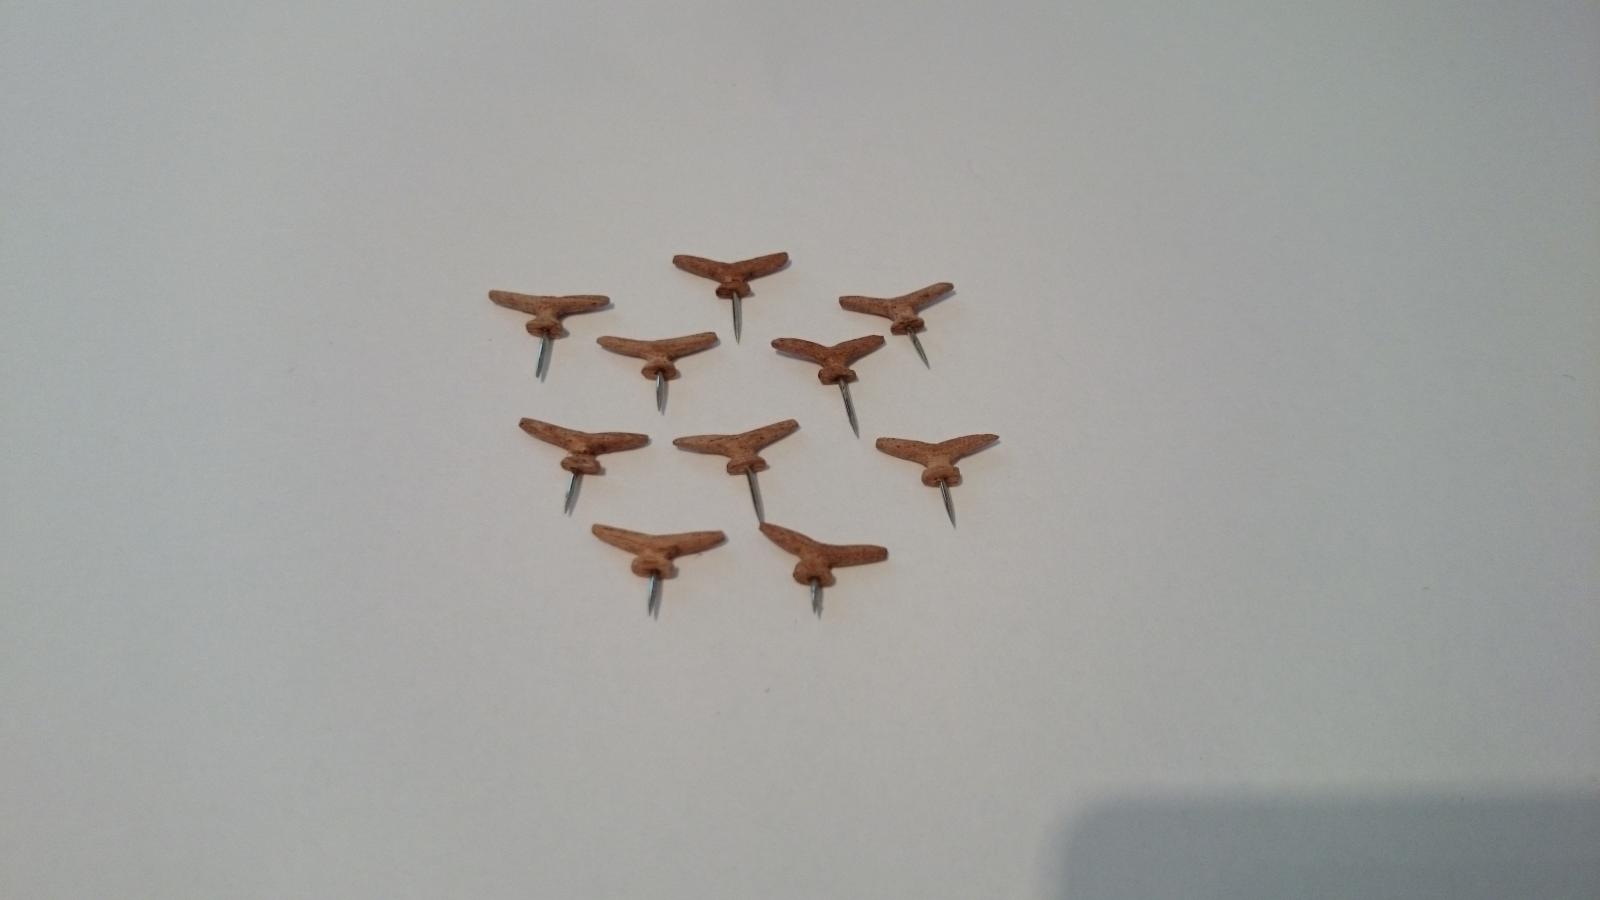
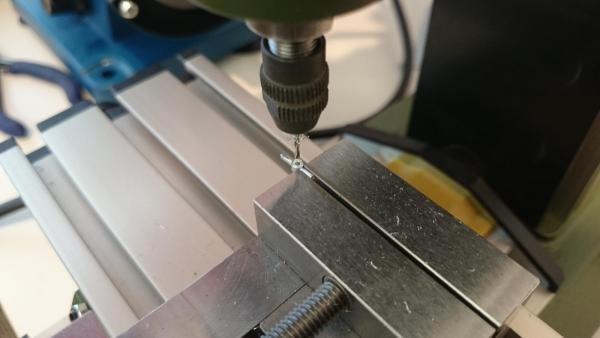
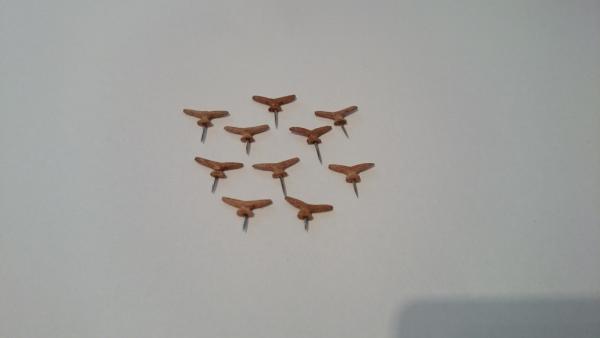
Cleats all pinned, oh yes I did destroy one drilling it out for the pin, nightmare starting one all over but there done now.
- 708 replies
-
- 5
-
-
- victory
- constructo
- (and 1 more)
-
Yes that is definitely my next job I've done the belay pin racks the same way. Very small glue surface area in the parts to risk glue alone.
- 708 replies
-
- 1
-
-
- victory
- constructo
- (and 1 more)
-
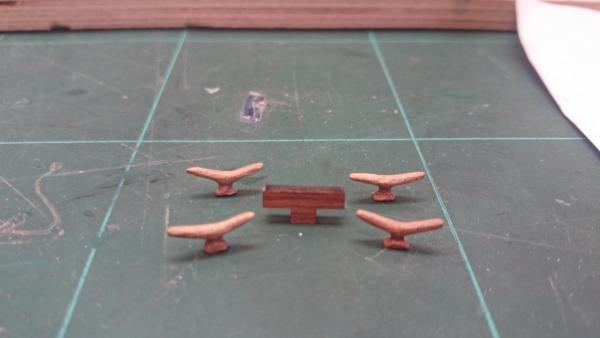
That's one very smart display cabinet, glad to see the ships not being bombarded with the dreaded dust. As for me it's been a tedious day, well hour or two making the cleats for the poop deck. Ok, you can buy these ready made but that would be cheating.
- 708 replies
-
- 3
-
-
- victory
- constructo
- (and 1 more)
-
Stunning, as is the wood used not to mention the golden colour, thats one nice model. was that carved by yourself, thats a talent.
-
Yes image three is yours (copyright) ? my preference I am unsure what to do regards the doors that are closed as the real ships doors are very flush this means i'm looking at picture one to reproduce this, refined of course. and if I outline the frame to give the impression its not fixed it should look ok.