


cobra1951
-
Posts
947 -
Joined
-
Last visited
Content Type
Profiles
Forums
Gallery
Events
Posts posted by cobra1951
-
-
You seem to have got a bad batch of planking as both sets I had were fine

The reason the Limewood is just as porous as Basswood is because it's the same wood named differently depending on where you are.
Personally I don't like it for planking as it's too soft and marks way too easily, but sometimes you have to go with what you have. You are right that the styrene gives a better colour blend between the planks. I also found the styrene easier to fit to the plank too. I just put a small amount of CA along one edge and glued it to the styrene sheet then cut it out once it had dried
-
-
-
-
-
-
-
Well it's done, I'm still thinking about some sort of fitting to go over the outside hole. To me it looks odd having the anchor cable coming out from the wood. However I have no idea what would be appropriate.
Try these Mike
 . Available on your side of the pond too.
 -
-
-
-
-
Hi Bryan
considering the lack of instructions you were not that far out on what is guess work for measurements.
What i usually do in that situation is dry fit it all using double sided tape then you can still take it apart to make adjustments
But well done on what you achieved
-
-
-
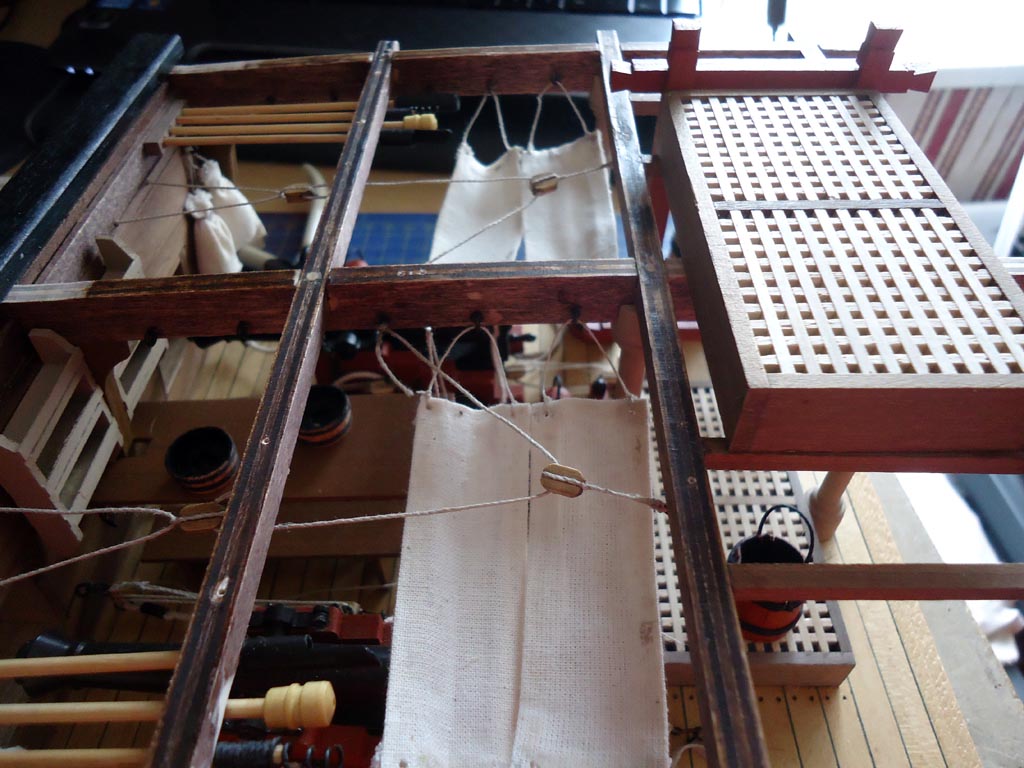
Cobr@, I am about to take one of your suggestions regarding support for the deck planks. Haven't decided whether to use a full sheet or just a few strategically placed beams. Besides the general support, I would like to cut deck planks rather than cutting the notch to simulate plank butts. The additional cross beams give me some extra places to tack down a plank butt. I noticed you used a 6 plank spacing between butts. Was this a personal choice? I don't recall seeing anything about this in the plans.
Just a general question regarding this kit - for anyone in the know. I know this is not a particular ship, but does anyone have an idea as to the time period?
Kit era is early 1800's
Support under the deck planks can't be done in one sheet as the support pieces have to fit in between the frames and cross beams. also it was done in sections after the planking was laid as you have to allow for the curvature of the deck, so be careful when laying them or a lot of sanding will be needed to level each one with the next
You can then cover it all over with one piece afterwards if you want.
Butt shifts were my choice, made so it was evenly done with the frame you have to work with
For the butt shifts i just put a joint in plank one over the left side support beam as you look at it from the front
The next plank no joint
The next plank i put a joint above the middle support beam
The next plank no joint again
The next plank a joint above the left support beam
Then the next plank no joint
Then repeat across the deck
This worked out well for me as i wanted the joints placed over parts that would give them some support especially if you simulate the joints as per the manual which is what i did, just don't saw too deep
-
The one negative I have run into has to do with the laser cut parts. There are several places where the laser did not get all the way thru. Had the sheets been basswood this would be no big deal. Not sure what wood the ply sheets are but it's pretty hard and also 1/4" thick. Trying to get thru that with an Exacto has been an ordeal. I have been tempted to pull out the scroll saw as one place where the laser failed is some of the cannon carriage wheels, meaning a round cut.
:Hi Mike
As you know i am doing 2 of these kits and i had exactly the same problems with the laser cuts not going all the way through.
 For straight parts this didn't matter as they need a good sanding to get all the soot off anyway.
As you point out there is a problem with the carriage wheels not being fully cut. Getting the small holes in the center of the wheels sorted is no big deal just use a 2mm drill. To get the outer rims of the wheels nicely round what i did was wait until i was ready to fit them to the axles, then i fitted the dowels into them a bit longer than needed then put the dowel in a drill and spun them while holding a sanding board against them, just don't go too far and make them too small

Good idea leaving the upper deck center support out wish i had thought of that with my big fat fingers

-
-
-
-
-
-
I like the contrasting planks on the deck
-

18th Century Longboat by heksanol - FINISHED - Model Shipways - 1:48
in - Kit build logs for subjects built from 1751 - 1800
Posted
That will look great once it's sanded