testazyk
-
Posts
337 -
Joined
-
Last visited
Content Type
Profiles
Forums
Gallery
Events
Everything posted by testazyk
-
 Thanks Brian! I just happened to have the green tape and the adhesive seemed good and strong so I used it. I've seen and used yellow and blue tape but don't know if the colour means anything as far as its properties. The main think I think is to use tape that is rigid and won't bubble and with uniform adhesive so you can get a good stick down edge.
 -
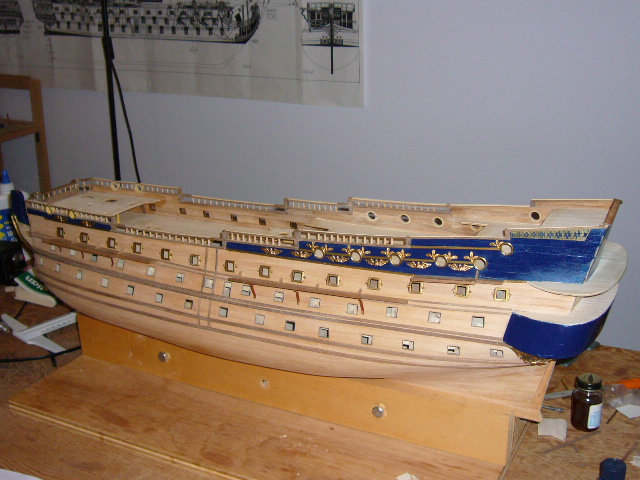
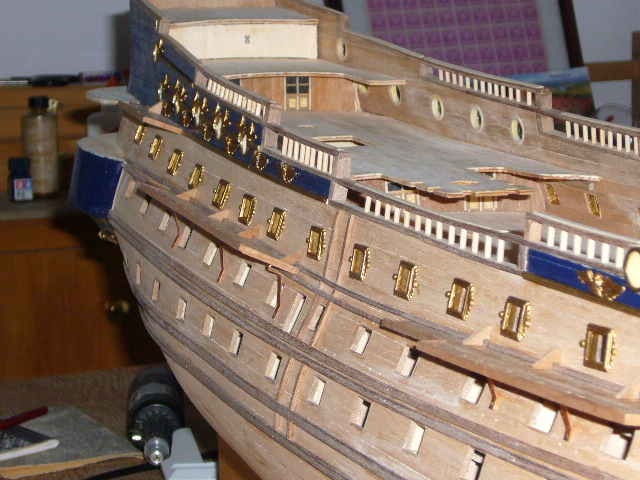
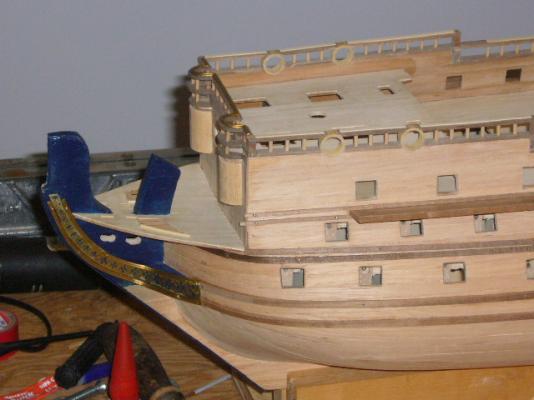
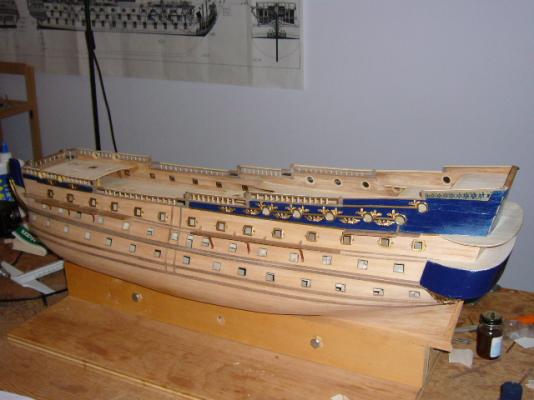
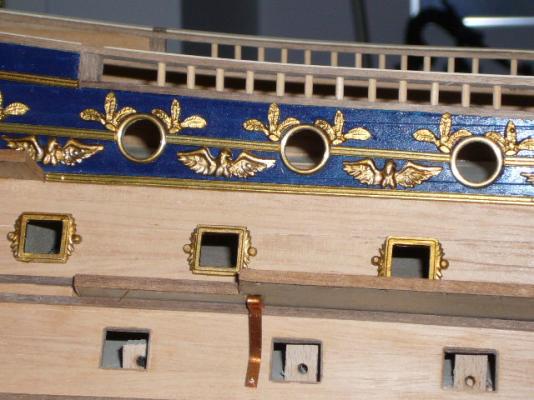
Thanks Max & Frenchy! It was now time to start some of the really interesting decorative work. But first I had to tackle a job that I'd been worried about--painting parts of the hull. I rarely use paint on my builds because (a) I like as much natural wood as possible and ( I'm worried about bleeding and running and generally screwing it up. But in this case paint is necessary because there is some beautiful gold decorative work and to make it show up you really need a dark background. I used Testors dark blue enamel. First I did the stern sections. Because I wanted them to be super smooth they required a lot of coats. Next I installed the wales and chainwales and painted the bow sections and put on the first decorative strip. Then it was time to take a deep breath and do the rest of the painting. I masked off the sections and went to work. I was really happy with the results. Then I started installing some of the decorative pieces. As I mentioned earlier I was very impressed with the quality of the castings in the kit. They required very little sanding and prep. I painted them with gold enamel to tone them down a bit. Also, I try to use CA glue as little as possible. Epoxy is hard to work with so I've been using anaerobic glue that they use for industrial applications. It doesn't work well on porous surfaces because there is supposed to be no air, but between enamel paint and metal it was great. There are no nasty fumes (compared to CA) and it dries quickly but not so fast that you don't have time to make sure everything is where you want it.

- 71 replies
-
- 5
-

-
- panart
- san felipe
- (and 1 more)
-
Fascinating build and it's looking good! Looks like the problem with the curved wall sections is resolving itself. I had a similar problem with the cutaway I'm working on now. I found sometimes you can put in bracing where it won't show or even a stringer that might look like crown molding or skirting. Plus putting the roof on usually helps to.
- 113 replies
-
- 1
-
-
- bohuslän
- nordic class boats
- (and 1 more)
-
Sorry, I meant the poop deck!
-
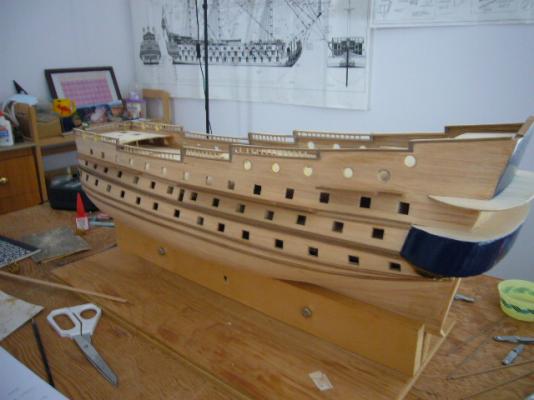
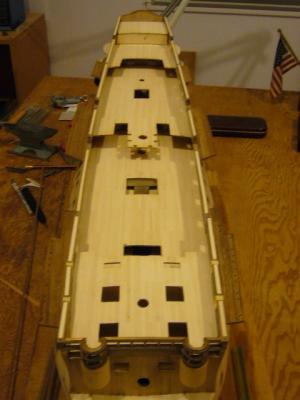
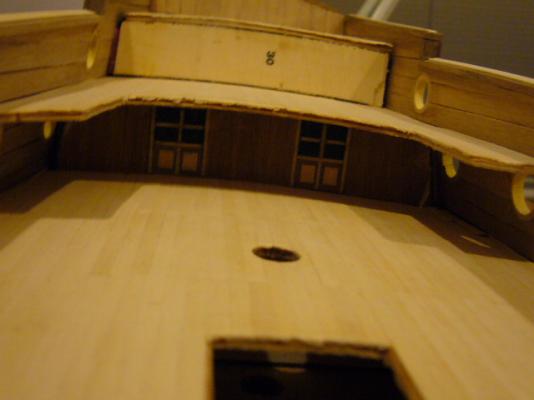
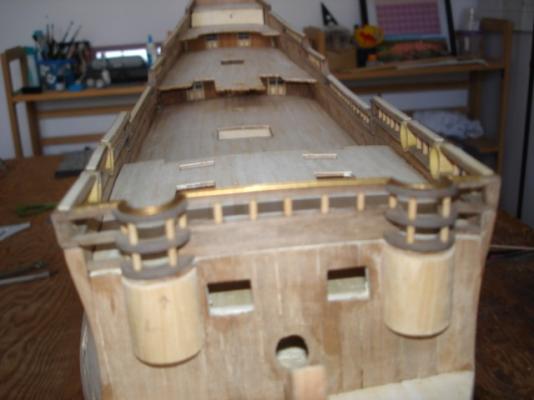
Brian, Joe and Max, thanks very much for your comments. Here are a few more pictures of the work so far: The plans suggest using fairly thick timber to make the grill in the bow openings but I thought that looked a little heavy so I found some thin strips and used them. Two overviews of the deck: I thought that the back wall under the quarter deck looked too bare so I made some door outlines. It turns out you can't see them on the finished ship but I'm glad they're there.

- 71 replies
-
- 2
-
-
- panart
- san felipe
- (and 1 more)
-
Michael to be honest I don't see the difference between the two pictures. I think your planking looks good! What am I missing?
-
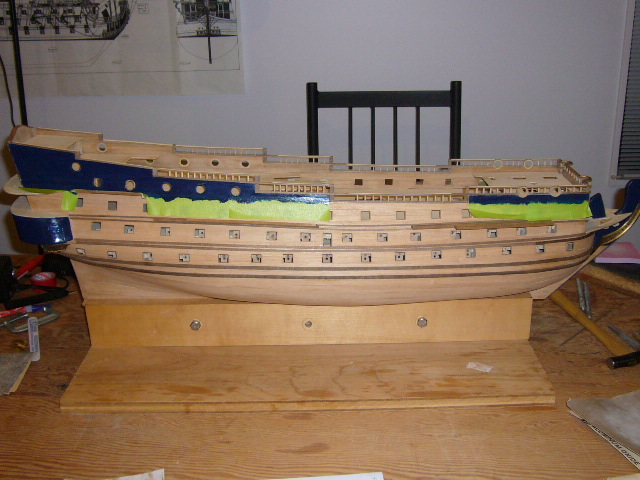
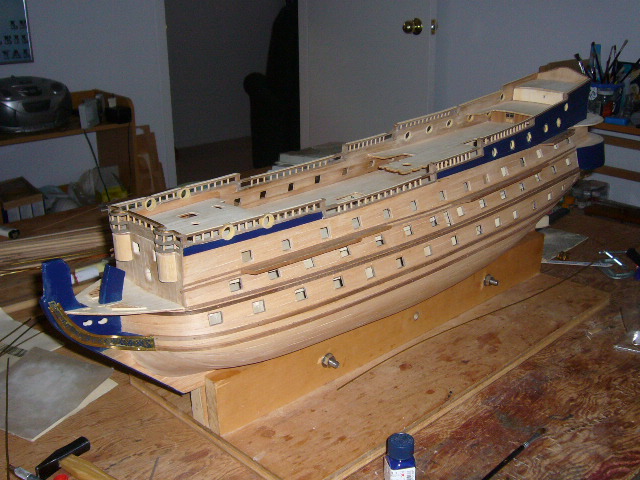
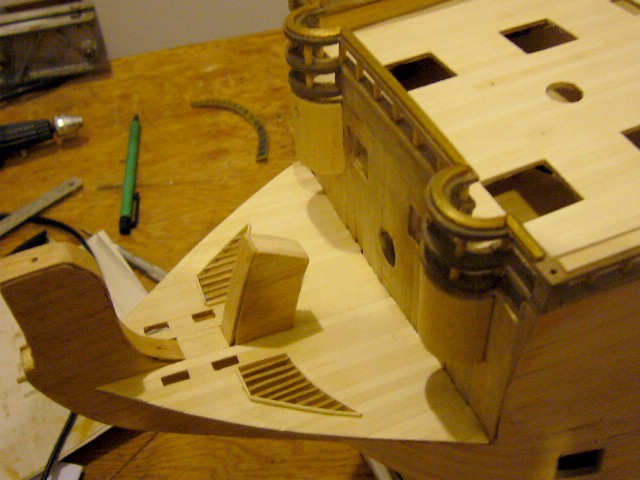
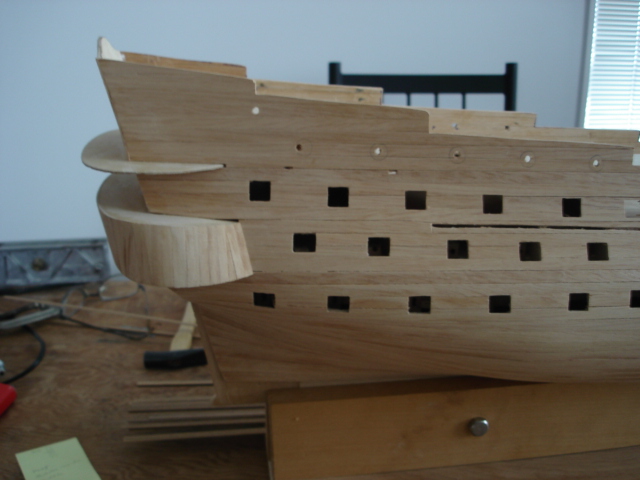
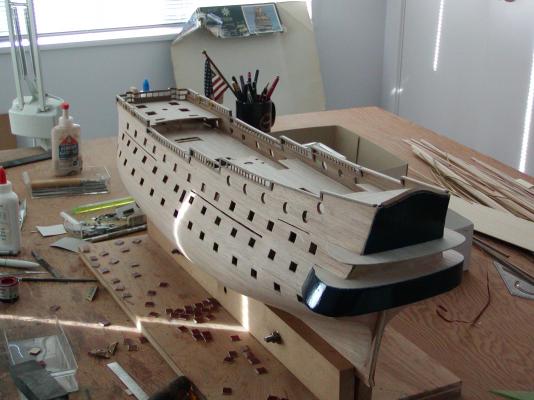
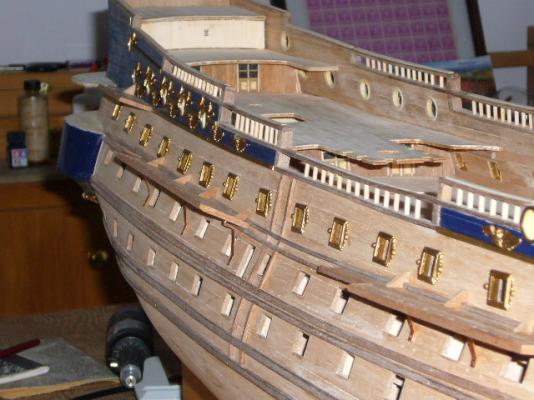
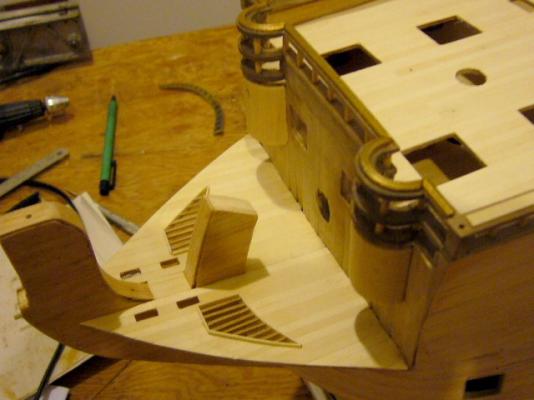
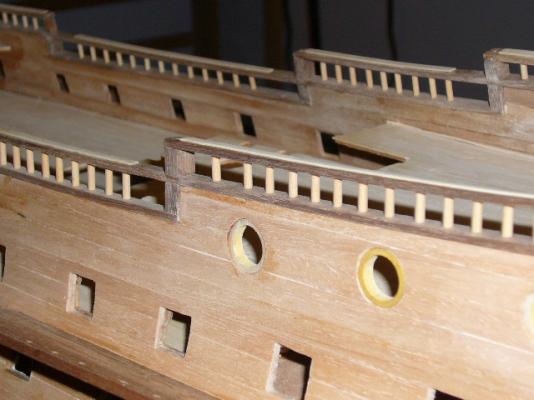
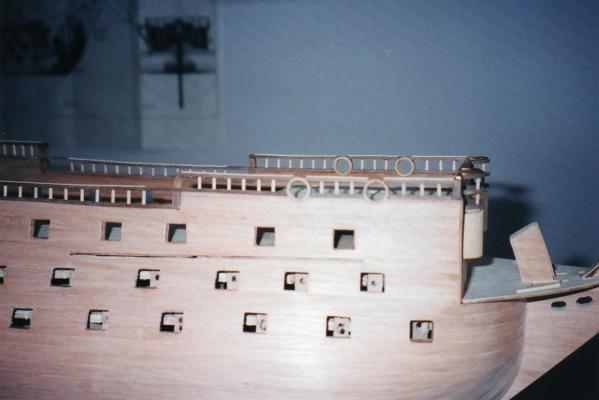
Once the planking is finished there are several very interesting tasks to finish off the bulwarks. The first challenge is some circular gun ports fore and aft. I'd never cut circular gun ports before and they have to be perfect because the kit includes wooden rings to use as gun port frames. I took a very conservative approach because I wanted them to (1) be the right size and (2) round. Plus I didn't want to damage the inboard or outboard planking. I drilled progressively larger holes and then used a fat round file to finish off the ports and was very happy with the result. There is also a double rail with vertical posts that runs almost the length of the ship. You make the rail by cutting the verticals from thin dowel and inserting them in holes drilled through the railing and into the base. There is a decorative strip on top to hide the holes. The challenge here is to get the spacing between the vertical posts just right and also to make sure they are all perfectly vertical. The kit instructions are excellent and with some careful measuring, marking and slow drilling you shouldn't have any problems. Before installing the vertical posts: One thing that makes the San Felipe so interesting is the wealth of unusual features. One is the semicircular rails in the focsle above the officers latrines. On my version of the kit you had to cut out the semicircular rails from a sheet with a jigsaw and unfortunately I found the quality of the wood wasn't very good.--the grain was very open and the wood split a lot and I couldn't get them to look decent. So I bought some thin sheets of higher quality wood, laminated them and stained them and they came out really well. Again the plans are very helpful for assembling the railings and getting the verticals in correctly. The last challenge is to cap the bow railings with a decorative metal strip. If I knew then what I know now I would have used a similar strip for all of the side railings too rather than the wooden strip provided in the kit. Be sure to take some time to mitre and sand the little strips so you get a nice joint. Bending the strips into semicircles seemed impossible at first. What I did was get a piece of pipe of the correct size to use as a form. Then made two crude wooden handles and stuck a length of the railing metal strip in each handle and heated it over a gas stove until the metal was soft. I then bent it around the form and tapped it into shape. I felt like a blacksmith and was happy with the result. These pics give an overview of all the things I've talked about in this post:


- 71 replies
-
- 6
-
-
- panart
- san felipe
- (and 1 more)
-
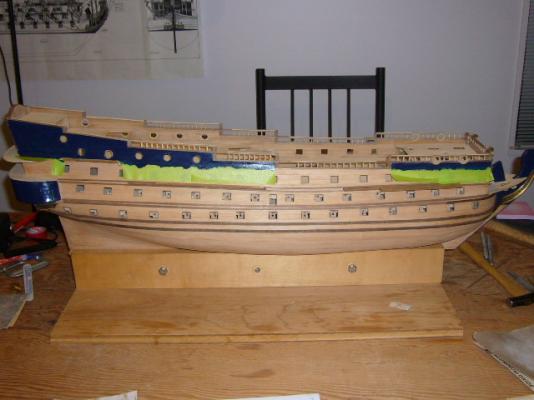
The first and second planking went on well. The plans don't say anything about the chain wales at this point but it's probably a good idea to plan where they go and to cut slots for them in the first layer of planking so you can do a nice opening in the second layer without having to worry about damaging the final layer. Once you finish the hull planking there are lots of interesting tasks like deck planking and planking the interior bulwarks. One unusual task unique to this ship is planking the outside of the balcony terrace. On the completed ship it is a solid curve around the stern and is decorated with beautiful carvings. I decided that I wanted the surface on which the carvings would be attached to be as smooth as possible and that started with having the planking that creates the curve to be as smooth as possible for future enamelling. It's not as straightforward a task as it looks at first. Because the platforms are not vertical, you can't just lay planks side by side around the curve because you will find the planks require an increasing slant. The solution is to taper some of the planks to make them wedge shaped. I started with vertical ones in the centre and worked my way out and was very happy with the result.

- 71 replies
-
- 4
-
-
- panart
- san felipe
- (and 1 more)
-
Thanks Ch!
-
Sounds good. You should post a picture of your styrofoam stand. I built the stand I use and it can be adjusted for any size keel and clamped tight with wingnuts.
-
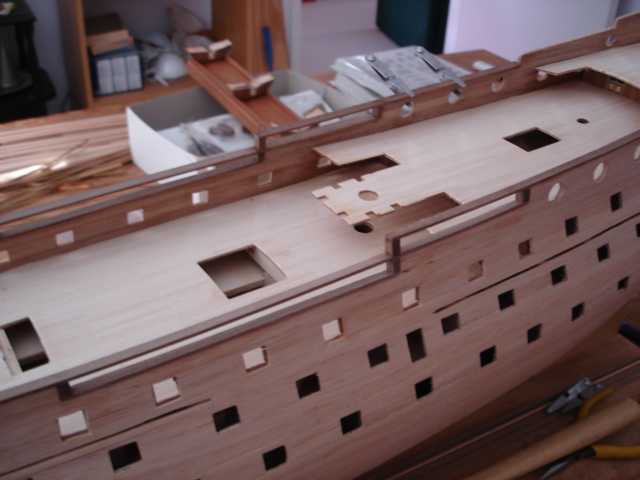
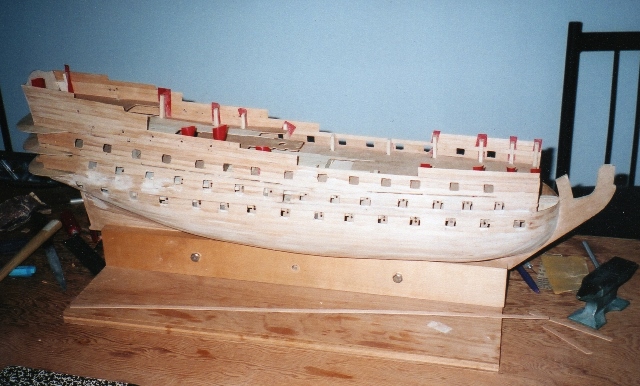
It was time to do the first layer of planking. For plank bending I use an electric Aeropiccola plank bender. For the first planking layer I usually drill holes in the planks and temporarily nail them to the frames until the glue dries. But I also sometimes use these clamps which I got from Model Expo. Here's the first layer "finished." The red tape is to prevent the bulwark planks from sticking to the frame bits that will be cut off. This is also where my first big mistake became apparent. The kit includes a cardboard template that you are supposed to use to mark the locations of the gun ports. Because of the existence of the template I didn't bother to mark the locations of the ports as I was planking. Here I've marked and drilled out the pilot holes for the ports according to the template. And here is how the hull looked after I started cutting and realized that the aft gun deck ports were nowhere near the blocks for the dummy cannon. I patched up the bad ports and cut new ones and was ready to move on. Moral of the story--don't trust anything but your own eyes!


- 71 replies
-
- 3
-
-
- panart
- san felipe
- (and 1 more)
-
Thanks Max! I agree about Panart.
-
Thanks ch! Glad to know I'm not the only one with a backlog of kits!
-
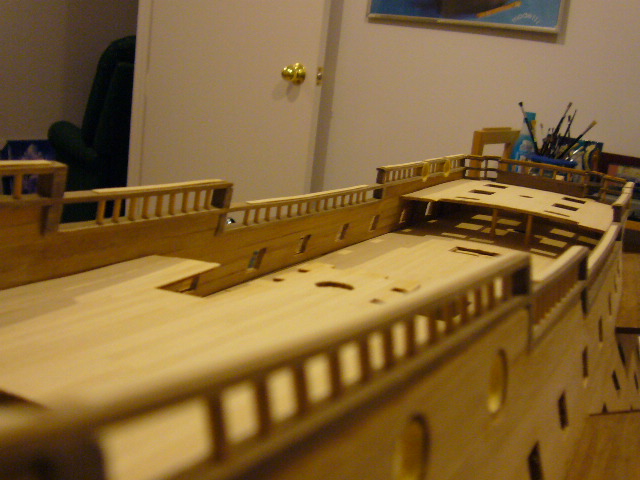
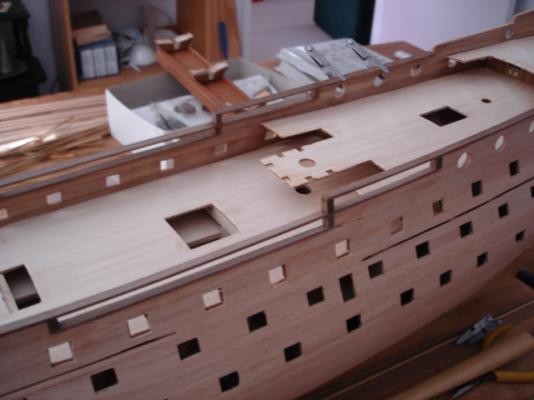
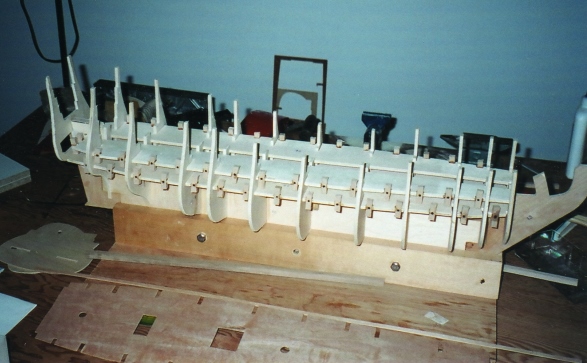
There is a lot of work to do once the frames are in place. Because the kit predated laser cutting it meant of lot of time with the jigsaw and file! The instructions for building up the back galleries are very good but be careful because there are three platforms and they look similar. Make sure you get the right one in the right place. Once the framework is in place you can put the decks on. They are made of very nice dark plywood and the deck planking is a nice light wood that I think makes for a great looking deck. Note that the plans don't tell you to plank under the overhanging decks until after you've done the hull planking. I thought that would make it a real challenge so I started the deck planking to finish off the areas under the overhangs. I cheated under the overhang on the main deck and didn't plank properly but figured no one would ever see it. This is a good time to triple check the alignment of the frames, especially towards the stern. If you look at pictures of the finished model, you will see how the stern balconies join with the sides of the ship and you want to make sure that the second to the last frame is in the correct line with the round balcony platforms. Lastly its also not a bad idea to make a larger block for the bow to attach the planks at the bow.

-
Thanks Ulises I'm sure you will enjoy building the SF!
-
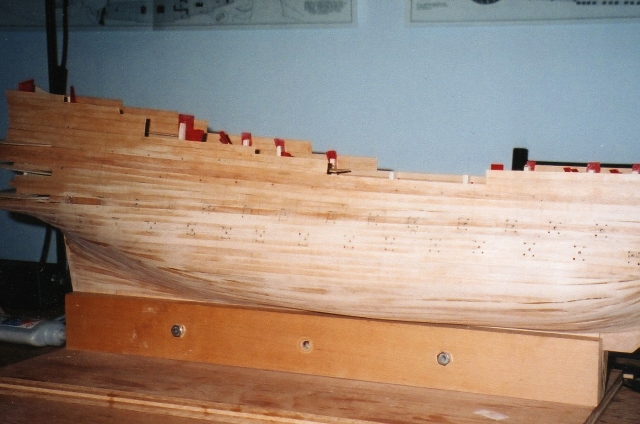
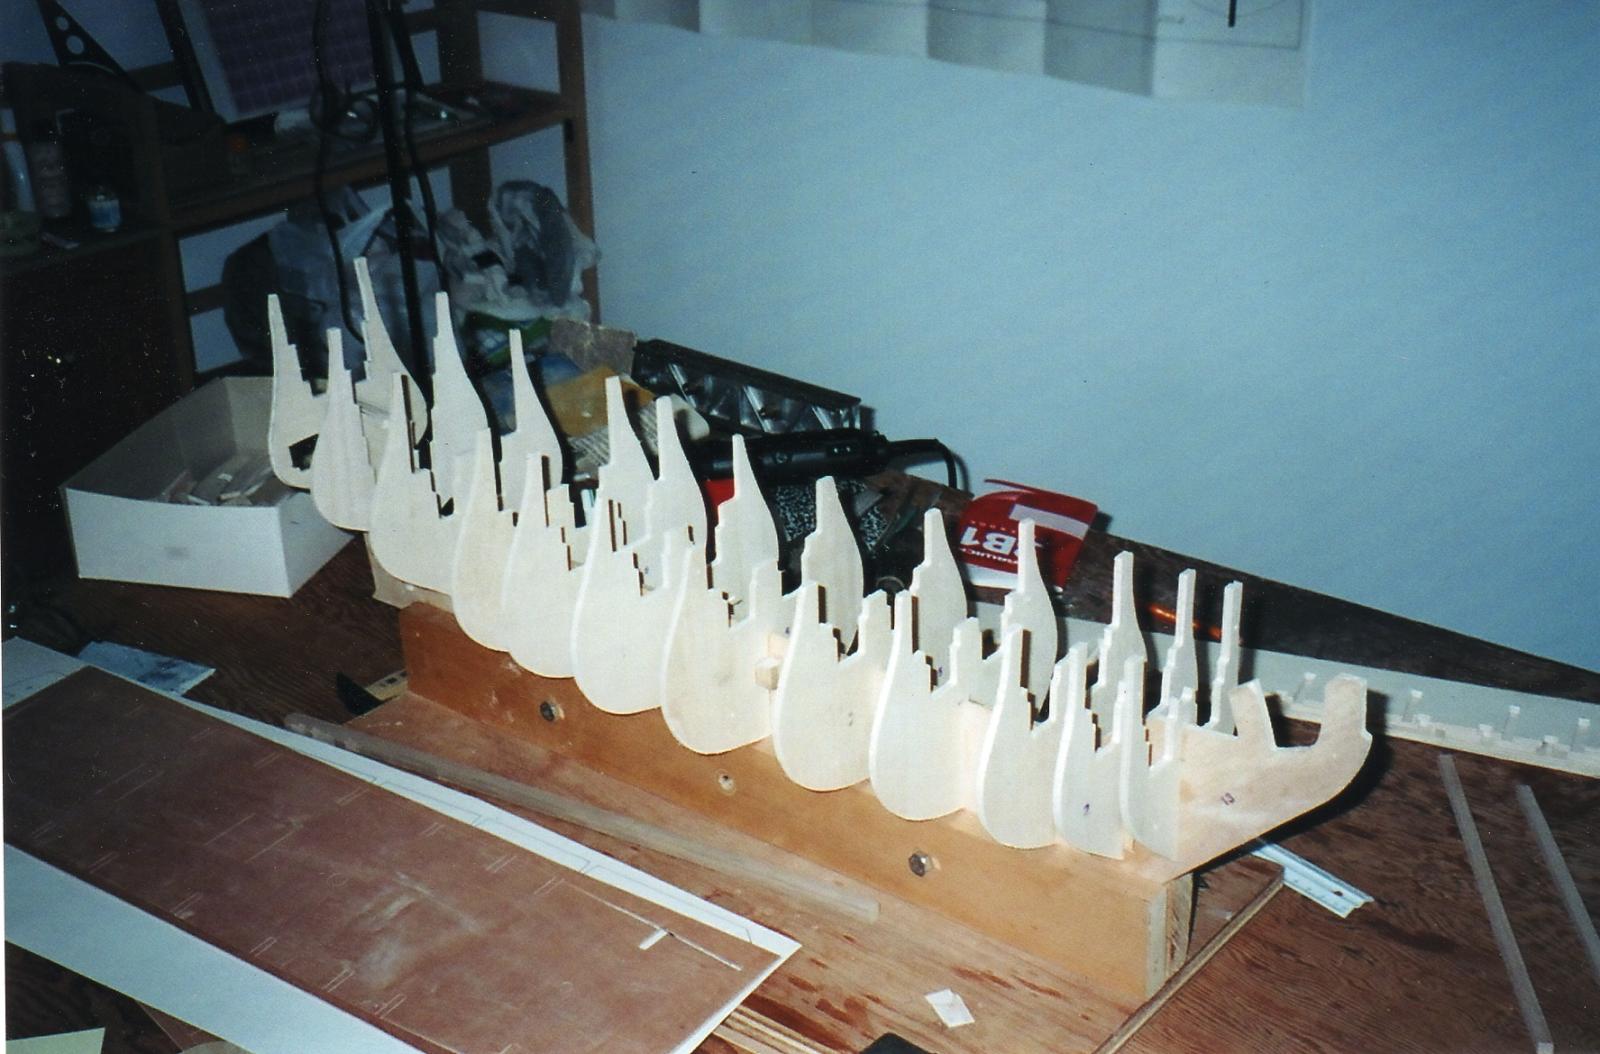
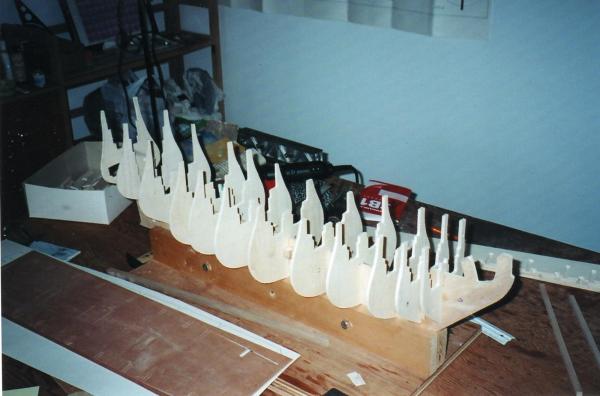
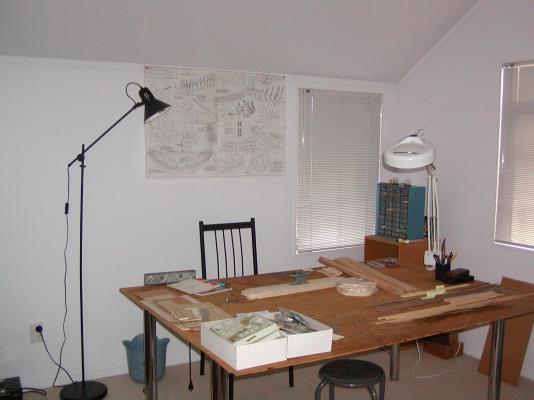
This was my first Panart kit. I'd previously done AL, Mamoli and the Mantua Victory. The San Felipe was the biggest challenge I'd taken on so far. I did the ritual unpacking and one of the great things about the kit was that it had a very comprehensive instruction manual that included a detailed parts list. To me, that made it easy to check and inspect each item in the kit and also get a better sense of what everything was for and how the build would come together. I was very impressed by the quality of the materials, especially the castings, blocks and deadeyes. The manual was much more than a translation of the Italian words on the plans. But at the same time there were things in Italian on the plans that weren't translated in the manual. It was no problem. Between Mastini's book, a and Italian/English dictionary I was able to figure things out as I went. The model has a three part false keel and I don't know if it was because of the time the kit had been in storage or what but the keel sections and the false gun decks had warped a bit. So my first task was to soak everything and weight it for a few days. (That's why the anvil is sitting on the stack in the picture above!). Once everything looked good I assembled the keel and fitted the frames. Once the frames were secure and straight I did the gun decks and posts for the dummy cannon.
- 71 replies
-
- 3
-
-
- panart
- san felipe
- (and 1 more)
-
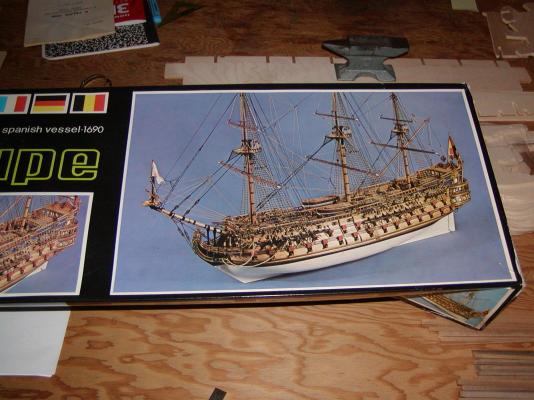
I'm still laid up with a broken leg and can't get to my workshop easily so I decided to amuse (embarrass?) myself by doing a retro build log of the Panart San Felipe. I bought the kit in the 80s so it's pre laser cutting and did the build 20 years later before I had access to the collective wisdom of all of you!
- 71 replies
-
- 6
-
-
- panart
- san felipe
- (and 1 more)
-
Yes nail polish remover is the best solution but don't use it on your model to take off excess CA--it can discolour wood and leave white stains that are hard to sand out. Also, if you are sensitive to CA fumes, you will definitely want to use the remover in a very well ventilated place because the combination of the two is really nasty!
-
I checked the definition of "topgallant" and it means "raised above adjacent parts or structures" which totally supports Wayne's comment. Technically, then you could use the term to describe lots of things--including a Lady Gaga headdress!
-
Yes, Rich, I did some looking around and can't find anything that supports different shapes. Maybe by tilt Longridge meant allowance for sheer?
-
Not sure what the exact formula is but Longridge says "Let us make the gun port lids first. Most of them are square but a few of them at the bows have a slight tilt." I realize that is no help but it implies that some allowance was made for the curvature of the hull.
-
You call that a side project?? Beautiful work on the trireme and I look forward to following your progress on this new challenge! Good luck.
-
Looks good! The nail cutters are an inspired idea! They would work a lot like the jewellers snips.
-
These are all great ideas and I would only add--don't overthink it. Pick up the general concepts from the tutorials, but especially with the first layer of your first build don't lose sight of the big picture and work out the method and style that work best for you. Good luck!
-
I use jewellers wire snips. It's also a good idea to dab some lacquer (the same kind you will varnish the deck with) on the ends of the planks. That will prevent them from splitting. If as can inevitably happen, you do get some splits, don't panic. If the chip is big enough and you can recover it, just glue it back in. If there are little gaps, take some of the sawdust from your sanding and some white glue and make a paste. Putty it over any gaps and immediately sand it before the glue dries. You won't be able to tell there was a problem. Lastly, if it's really egregious and you can get away with it, a stringer will hide a multitude of sins! Good luck! Tom