HOLIDAY DONATION DRIVE - SUPPORT MSW - DO YOUR PART TO KEEP THIS GREAT FORUM GOING! (89 donations so far out of 49,000 members - C'mon guys!)
×


testazyk
-
Posts
337 -
Joined
-
Last visited
Content Type
Profiles
Forums
Gallery
Events
Everything posted by testazyk
-
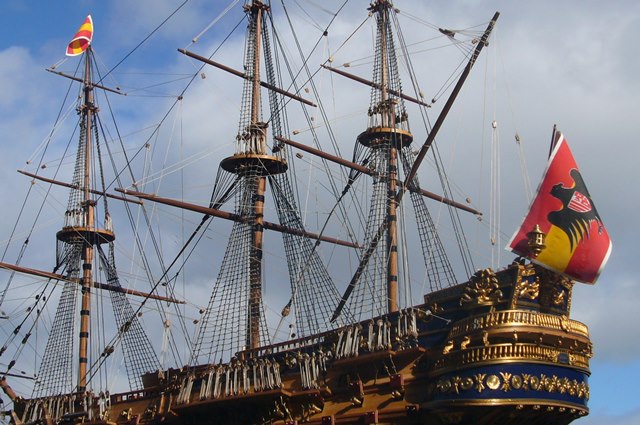
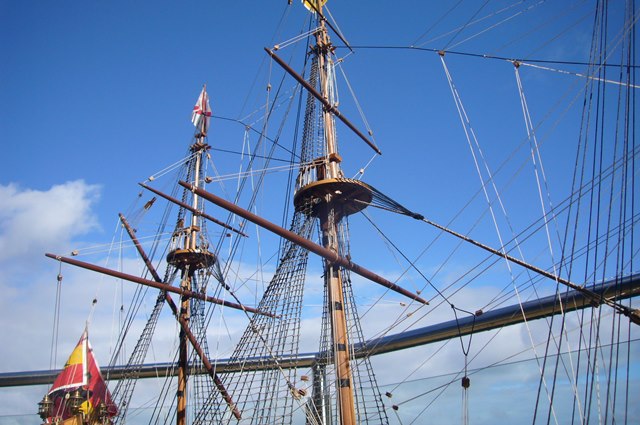
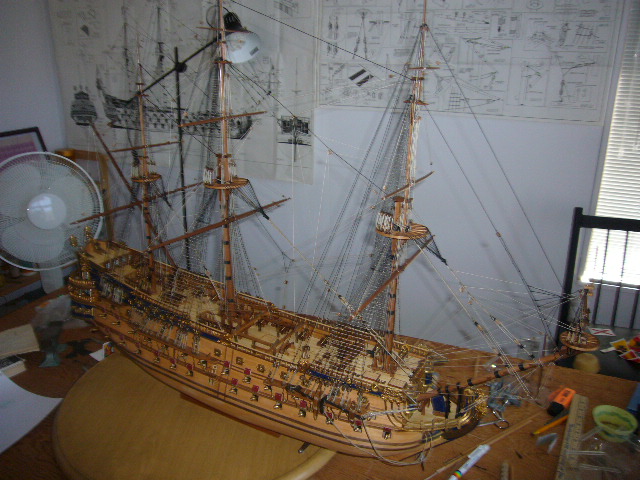
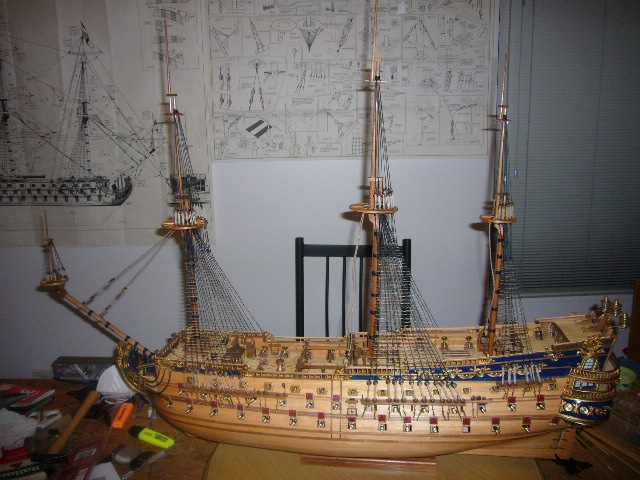
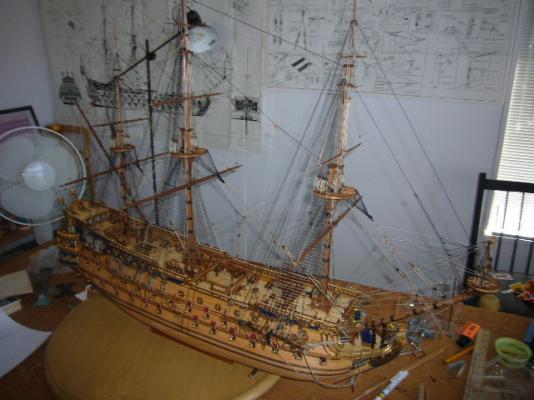
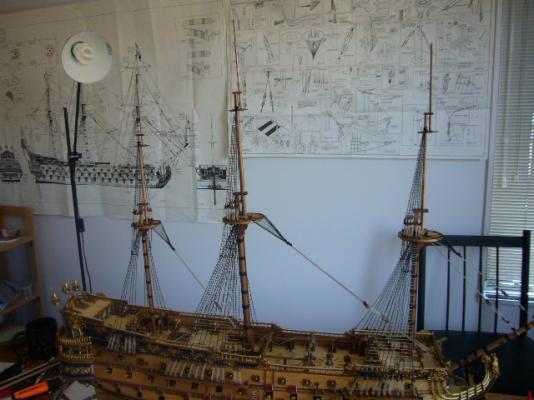
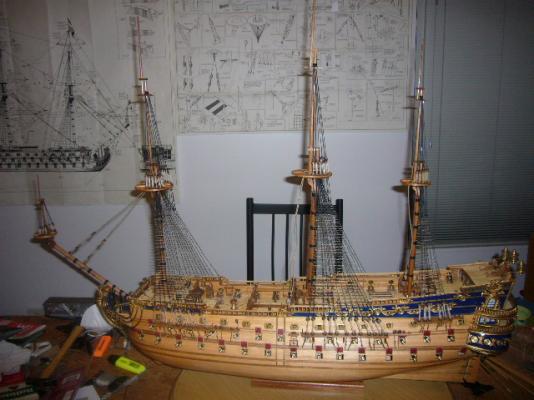
 Now that everything was finished it was time for a (sort of) maiden voyage. I took the ship out to the upstairs patio on a sunny day and took some pictures. If you use your imagination, it actually looks like a real ship. I want to thank everyone who had a look at this log and added their very kind comments. I hope I've been able to provide some useful information and wish you all the best with your modelling efforts.
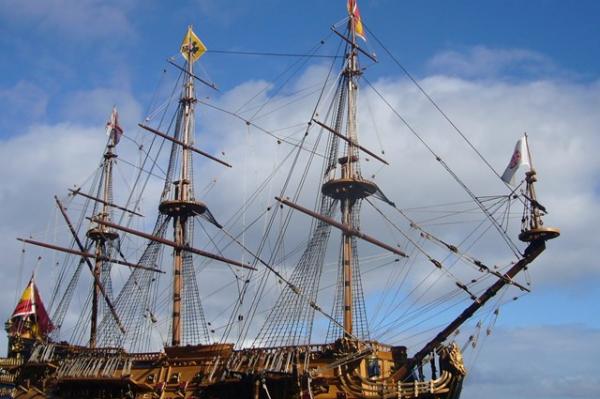

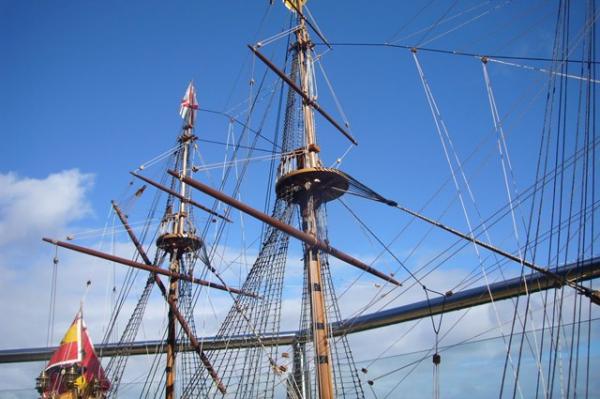
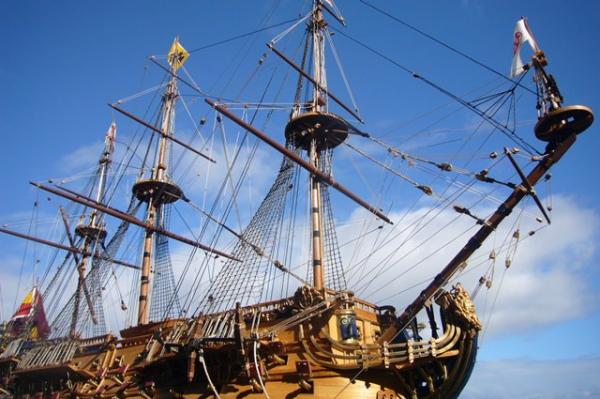
- 71 replies
-
- 3
-

-
- panart
- san felipe
- (and 1 more)
-
Thanks Brian and Max! Max I'm sure you'll enjoy building the SF and it will turn out fantastic!
-
Sounds like "Debonder" is well named!
-
I did the Amati junk and agree that the plans aren't the best. I did a lot of departing from the plans which didn't quite qualify as bashing and I'm pretty happy with the result. Definitely don't use the plastic boats!

-
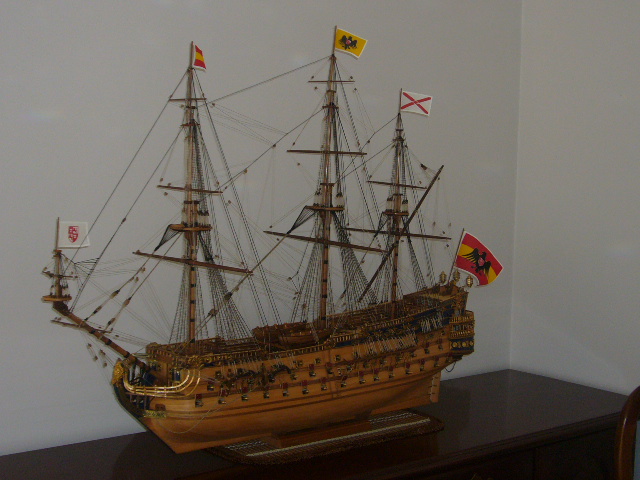
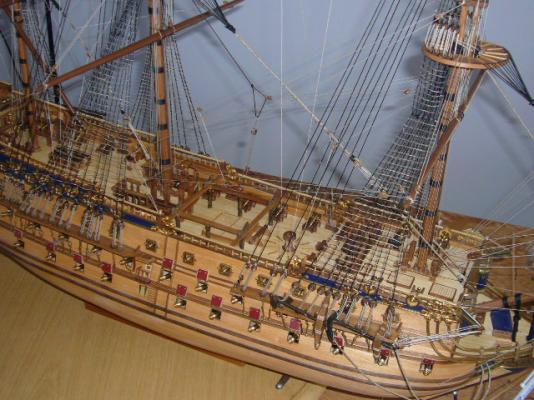
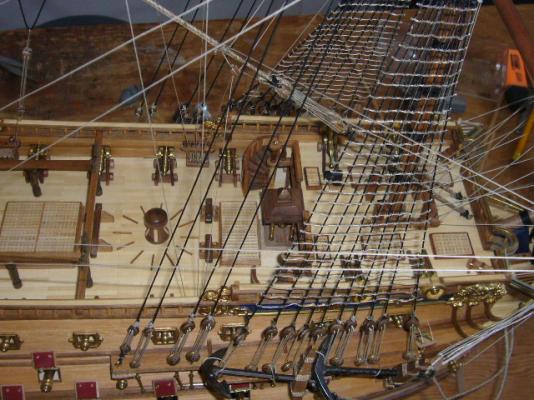
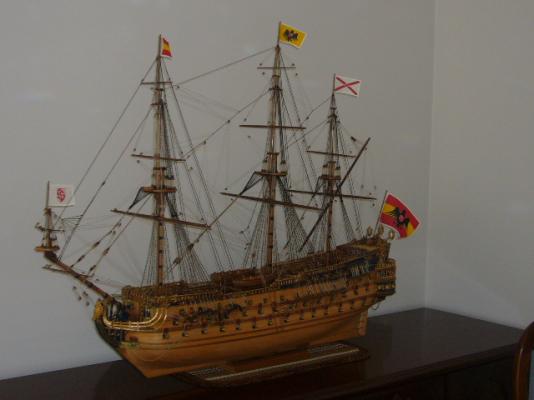
The running rigging went together very easily--the only challenges being the usual of getting into tight spaces. The rigging is very clean and the instructions are excellent. Probably the most difficult part of the rigging is securing lines to several belaying pin racks along the bulwarks in the waist and the quarter deck. The lines go through a little eyelet at the bottom of the racks. I used a sewing needle threading tool which made life easier but it's still very finicky work. Here are some shots of the rigging work from stern to bow. And once the flags are attached it's all finished!

- 71 replies
-
- 5
-
-
- panart
- san felipe
- (and 1 more)
-
Water will work on PVA but the older the stain the harder it is to get off. Then sanding works best I think. Be really careful removing CA because acetone can interact with some woods and/or cheap CA and leave hideous white stains on the wood. Test it out first and when in doubt sand rather than use a solvent.
-
Looks like a fascinating project. I look forward to hearing more about it
-
Wood Lathe and Router table
testazyk replied to michael mott's topic in Modeling tools and Workshop Equipment
Looks like Christmas came early! Enjoy! -
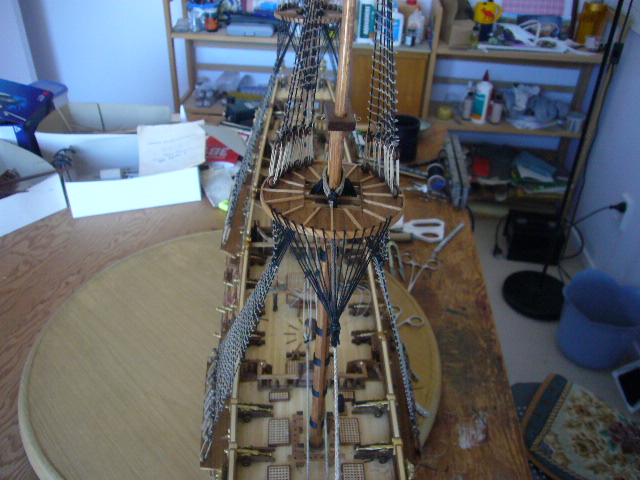
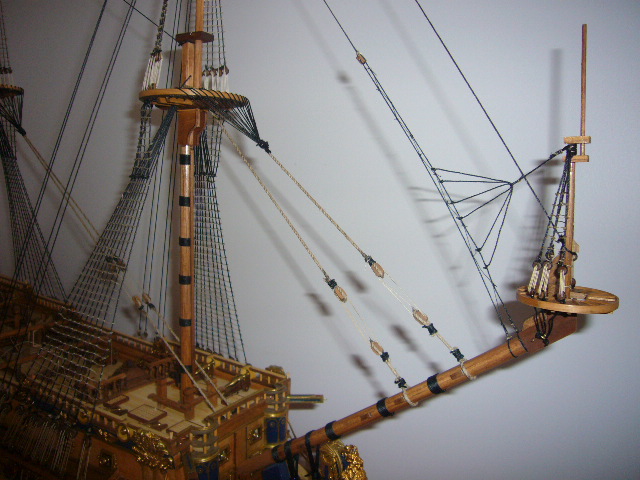
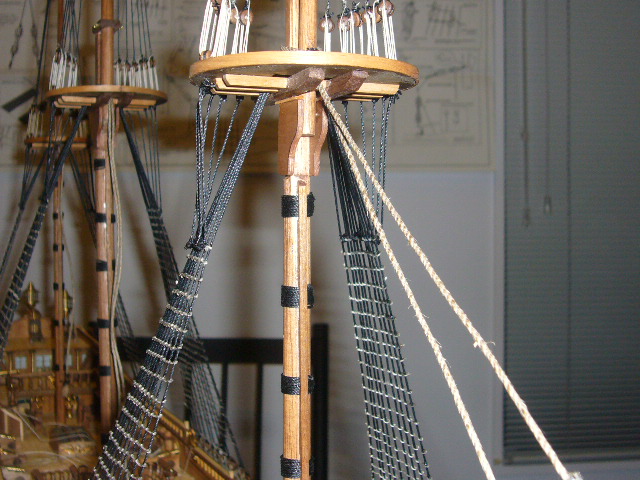
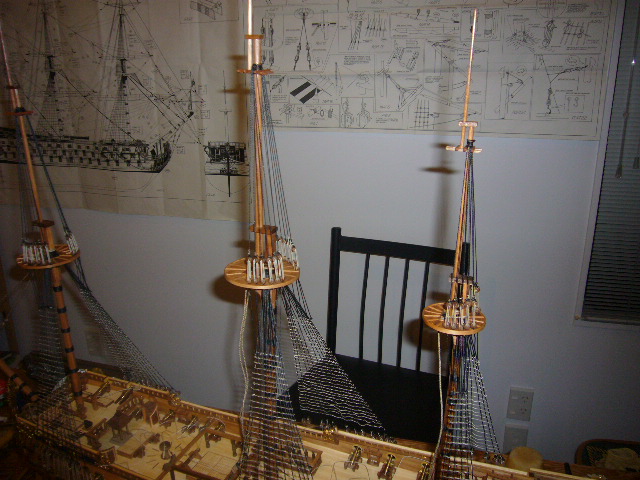
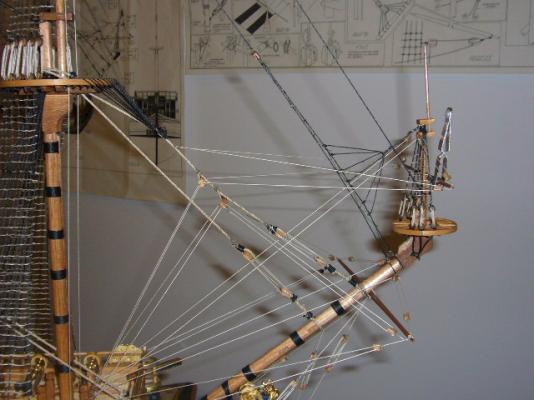
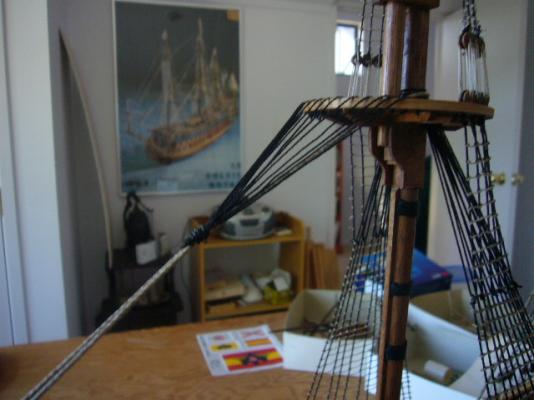
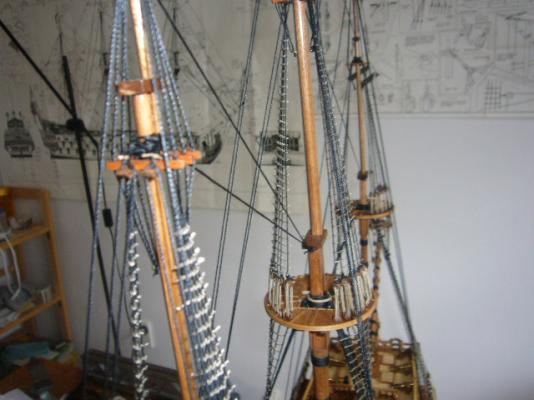
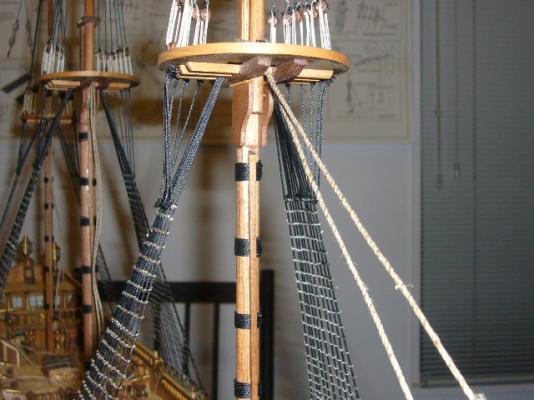
The next rigging challenge is doing something called the "crow's feet." It's an impossible thing to describe so I'll start by showing a picture of the finished product: When you make the trestle tree platforms you have to drill holes evenly around the front half of the platform to take the end ropes. Make the holes as small as possible so that you can get away with the tiniest knot you can to secure them under the platform. Once you install the ropes, gather them together and tie them at the end, then tie the whole bit to the stay. The secret is to flatten out the lines as much as possible so you don't have a big ugly wad. It takes time and patience but it not hard to do. The next step is do install the last of the standing rigging stays. Once I finished the standing rigging I stepped back and prepared the spars. The only caution here is that the spars on the foremast and the bowsprit spritsail are very thin and break easily.
- 71 replies
-
- 5
-
-
- panart
- san felipe
- (and 1 more)
-
I agree with Joe and Geoff as far as the way to do it. As far as whether to do it I think Bill Hime is right--if you can't get it too look right don't bother. No one will look at your deck and say "mmm no trenails" but they could well look at it and say "what a crummy job on the trenails."
-
Very cool project! Best of luck and I look forward to following your log.
-
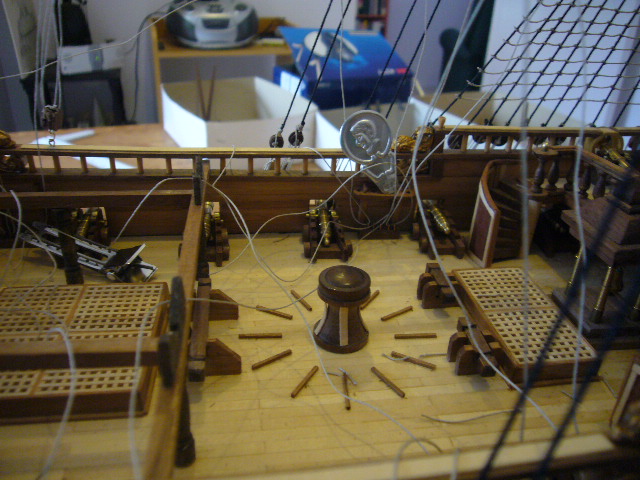
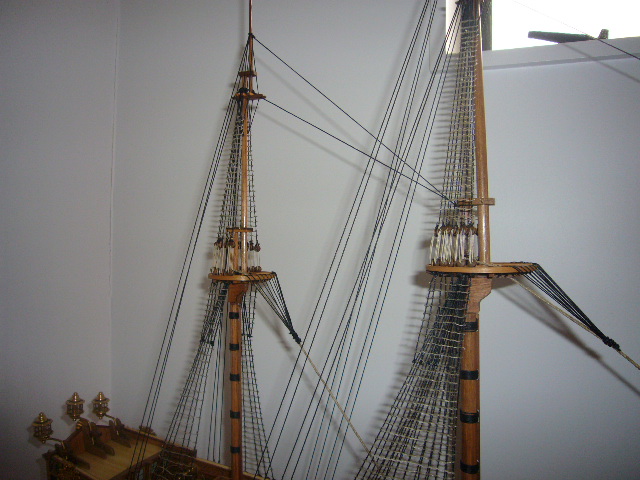
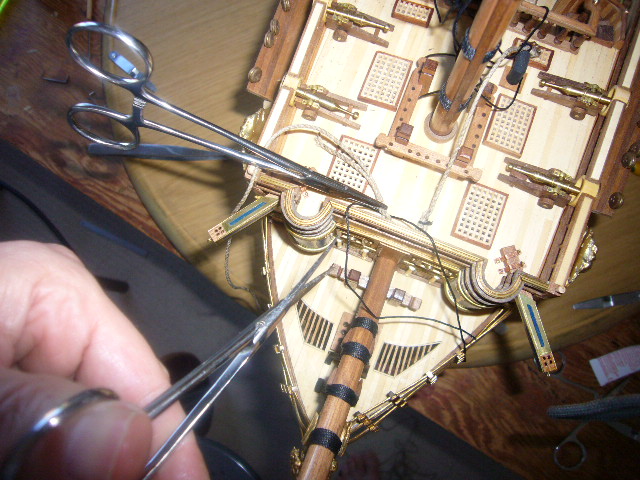
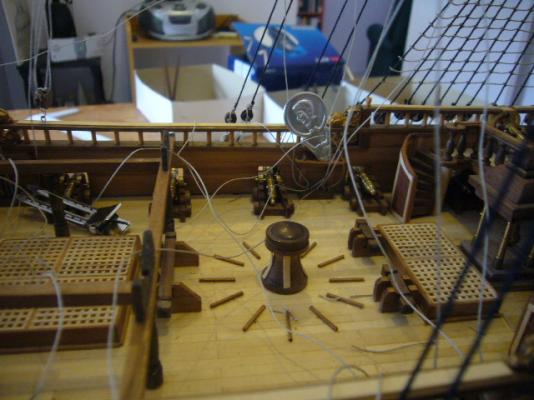
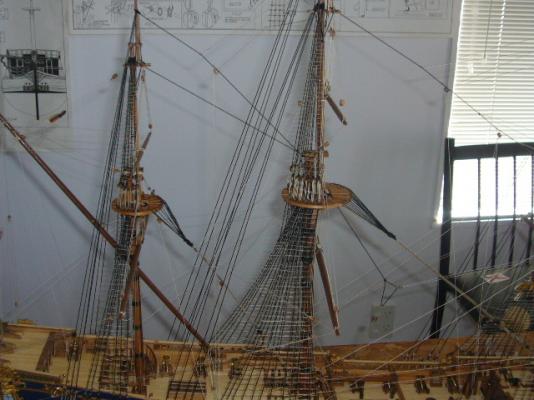
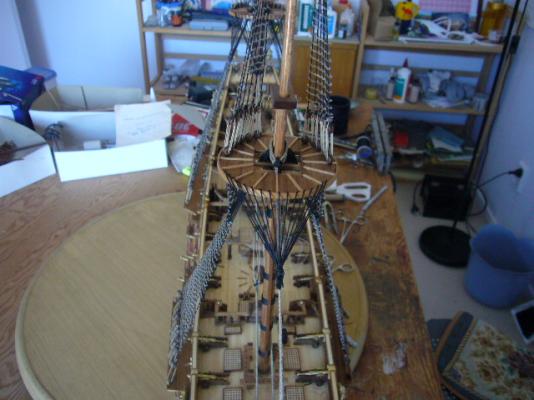
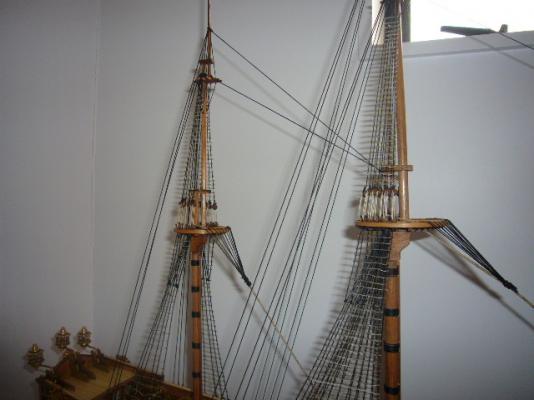
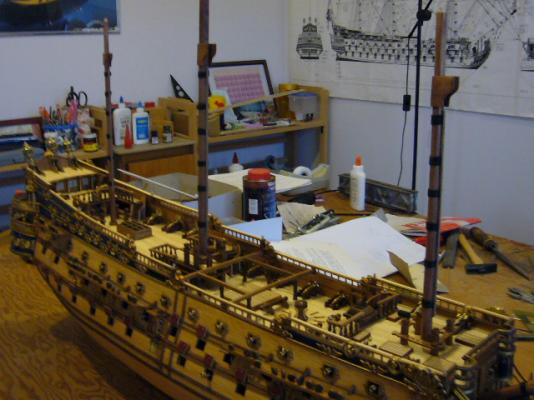
It was time to get back to the rigging. As far as tools, I use several different kinds of tweezers, little clamps to hold lines out of the way until I need them and probably most important a pair of surgical hemostats which are like super locking tweezers and also just the right weight to put tension on lines, and a good pair of scissors that are sharp at the tips for snipping off lines. I've had a lot of trouble finding good scissors over the years and one problem is that rigging is the only place on a build where I use CA glue. I use it to secure knots and a lot of times when snipping off the end of a line that I've dabbed with CA it will get on the scissors and over time basically ruin them. So I usually now just buy cheap scissors from the two dollar shop, bend them so they will cut at the tips and use them till they give up the ghost. The last important rigging tool I think is a needle threader. I usually don't need it for blocks and deadeyes but sometimes its very useful. Lastly, I have a 24 inch lazy susan which is like a turntable. I put the ship on it and it's easy to turn the ship and work on alternate sides. Here are the hemostats and scissors in operation. The standing rigging job starts with the shrouds. The instructions don't tell you this specifically but you should alternate port and starboard pairs as you go up so that the shroud lines look neat at the top of the mast. You also want them to fan out neatly and not be twisted or overlap at the top of the mast. I suppose you could reeve the deadeyes as you prepare each shroud pair, but I do that work all at once. I put a piece of tape and sequentially number each of the stays so I can easily sort them later. Here they are in place and ready to be reeved. And after the reeving: It's always a challenge to get each of the top deadeyes in a perfectly straight line. I use a heavy wire bent to the right length. I put one end in the bottom hole of the bottom deadeye and the other end in the top hole of the top deadeye as I'm securing the top deadeye to the shroud. Technically, they should all be equal but inevitably a few imperfections occur, usually because over or undertight reeving. The next task is tying the ratlines--or as it's called 'rattling the shrouds.' I don't know about you but I can only do a little bit at at time. It's not a bad idea to make a jig out of cardboard that you can lay in behind the shrouds to serve as a guide for how far apart to space the lines. I've never been able to do it by eye. You then do the same process with the topmasts as far as shrouds and ratlines. And the next step is to secure the stays and also install the futtock shrouds.


- 71 replies
-
- 3
-
-
- panart
- san felipe
- (and 1 more)
-
Thanks David!
-
Nice work and yes a triangular file is just what you need for bollards! Now if I could only figure out how to get each side even! The ship is looking good and I like your experimental shots--they give a nice different view of the work.
- 153 replies
-
- 1
-
-
- royal caroline
- panart
- (and 1 more)
-
Thank you very much Edwin and Max. I really appreciate your kind feedback. --Tom
-
Thanks CW! I appreciate it.
-
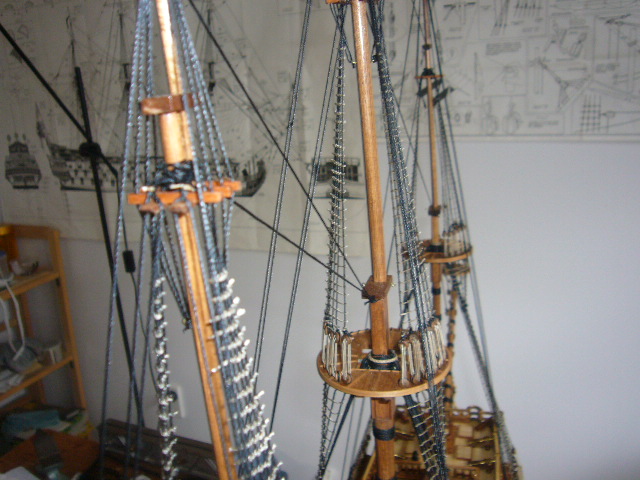
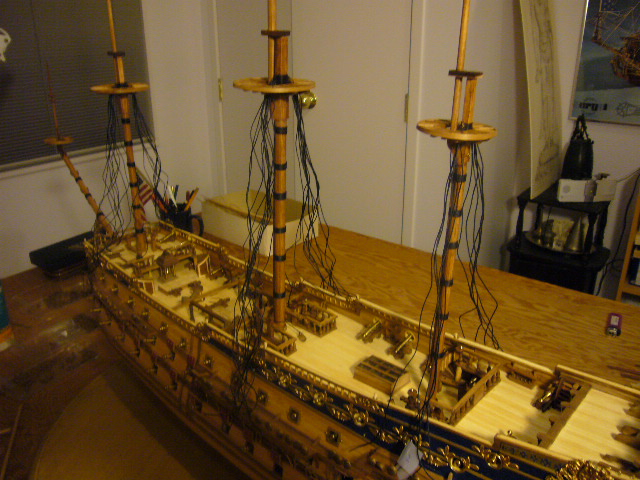
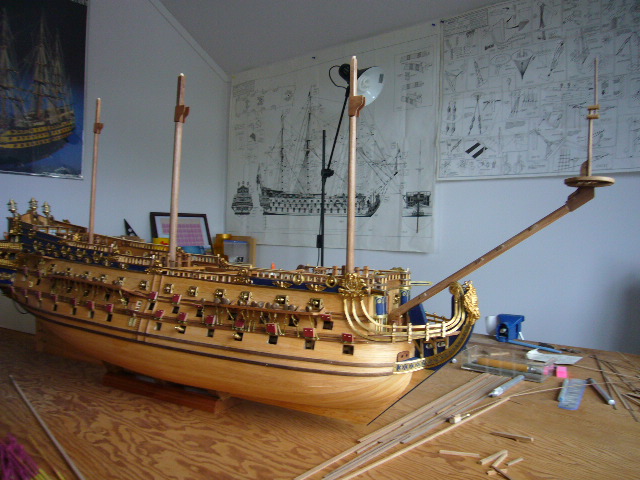
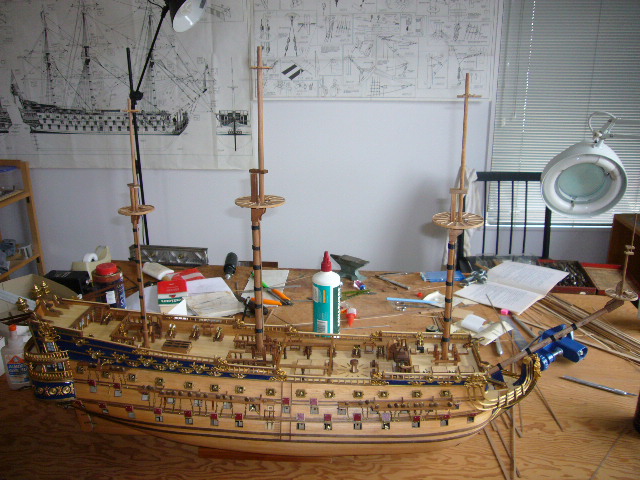
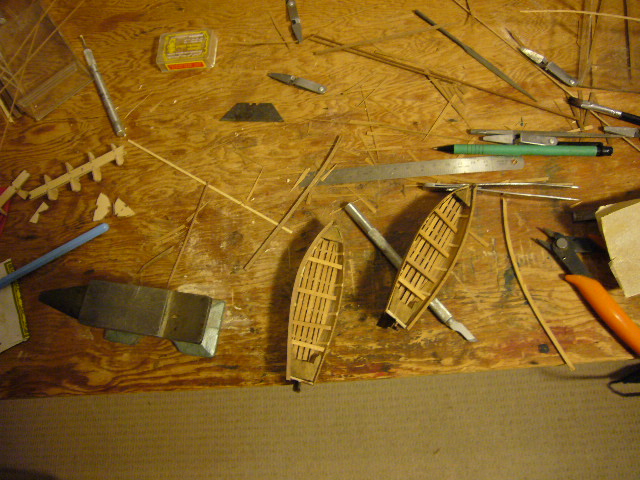
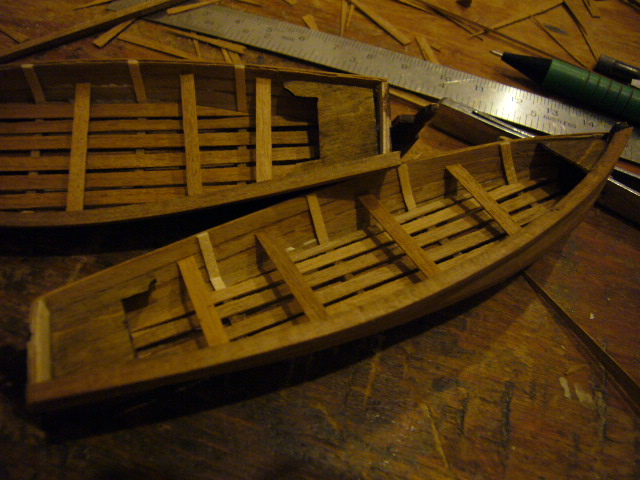
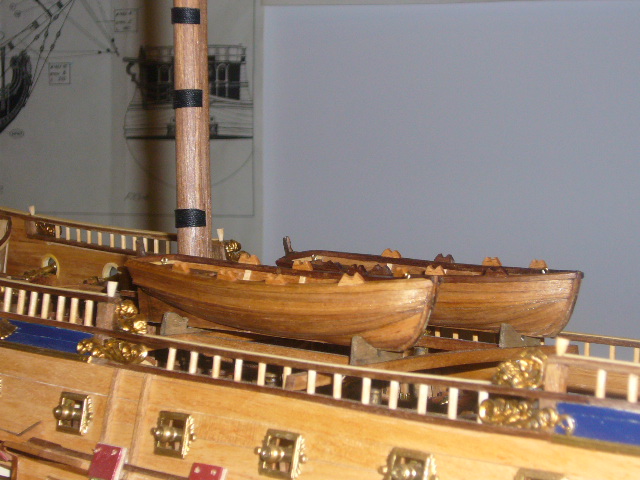
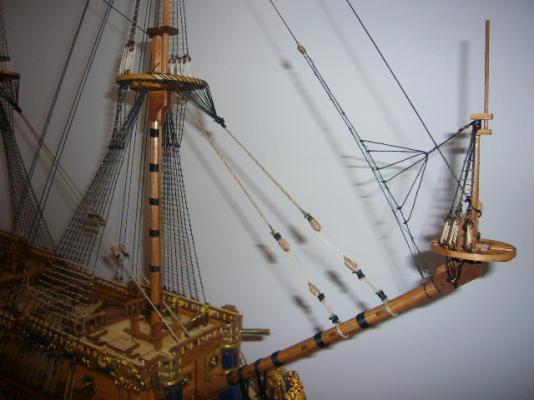
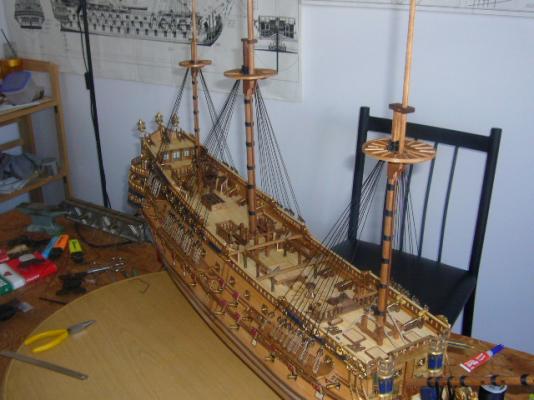
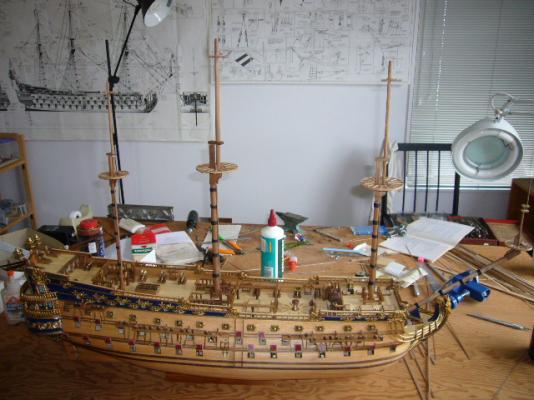
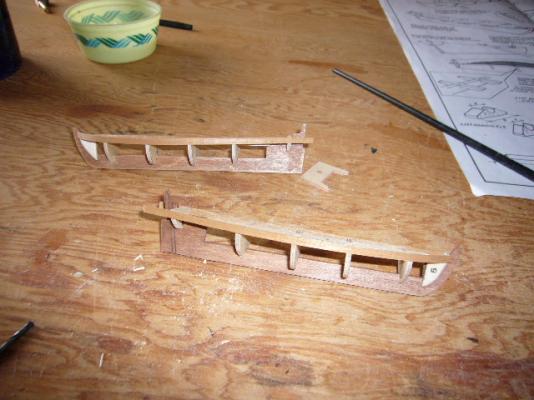
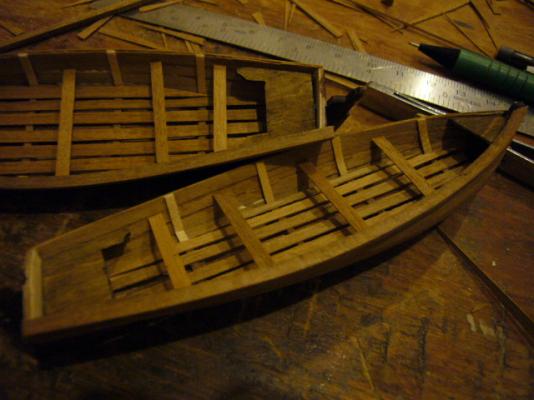
Now it's time to start my favourite part of any build--mast and rigging. The rigging was an easy and enjoyable task, mainly because the instructions are very good. But there are some interesting challenges. The rigging on the Victory is probably more complex and ambitious but the SF has some unusual items such as crow's feet and a sprit topmast on the bowsprit. I know that there is a running debate on whether to build up the mast structures independently and then install them on the ship or to build them on the ship. I've always been more comfortable building them up on the ship and that's what I did this time. Then the wooldings and the bumpers go on. And then you build up the tops At that point I took a break to tackle a job that I'd been worrying about from the very beginning. I don't know if you have a specific aspect of building that you think you can never get just right but for me it's building boats. Doing the four boats on the Victory was a major mission for me and I just couldn't get them to where I was happy with them. The SF has two boats and I'd been putting it off long enough and decided it was time to get them out of the way. As I've mentioned, this version of the kit was pre-laser cutting so I'd cut all the frames and false keels out earlier. They were white plywood so I experimented with different stains until I found the right colour. You plank the boats similarly to the ship. It's theoretically easier because the curves are more limited but (1) you are doing a single planking job and (2) there are so few planks, any imperfection gets greatly magnified. So I took extra care and was pretty happy with the results. The other challenge is that you can't glue the planks to the frames because the frames are a temporary structure to create the shape around which the planks are formed.


- 71 replies
-
- 4
-
-
- panart
- san felipe
- (and 1 more)
-
Plus there's always eBay but not as much fun as browsing an old Model Expo catalogue!
-
Long handled surgical scissors
testazyk replied to RGL's topic in Modeling tools and Workshop Equipment
I actually found some really nice long scissors at the two dollar shop. They can't even cut paper but with judicious bending of the tips they are great for snipping off lines. -
Hi Schnu--I think I can answer your question. Up until the mid 17th century big ships did not use the wheel mechanism for steering--it didn't become common until the later part of the 17th century. Before the wheel, ships used something called a "whipstaff" which was basically an extension to the tiller on a big ship. This link describes it better than I can: http://en.wikipedia.org/wiki/Whipstaff Hope this helps. Tom
-
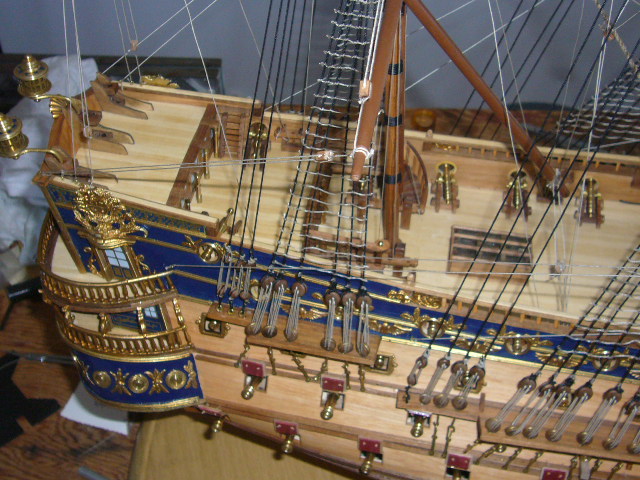
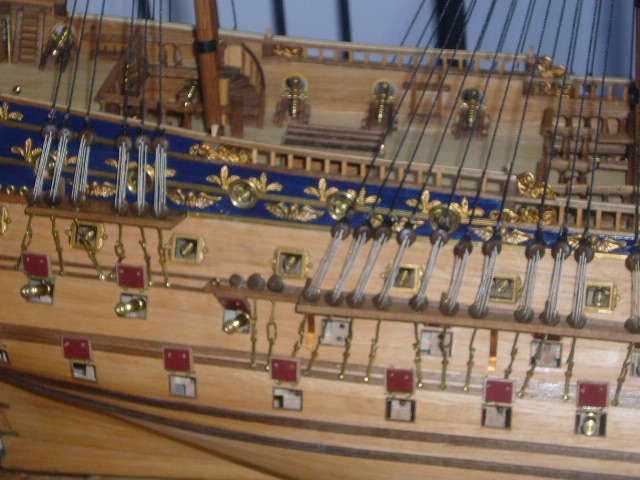
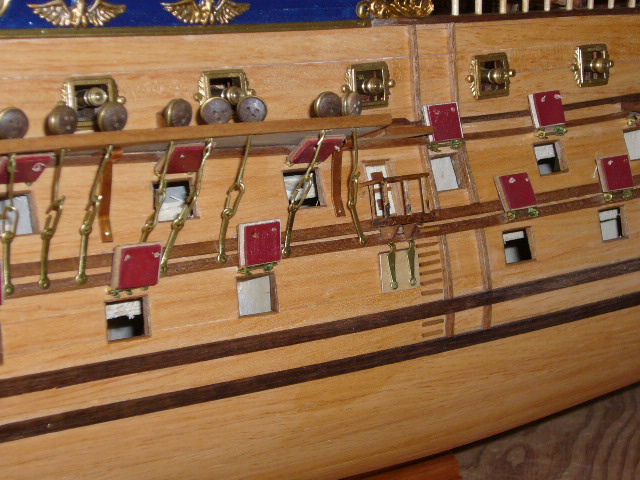
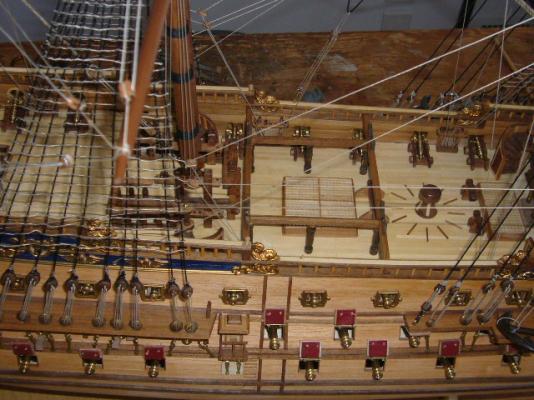
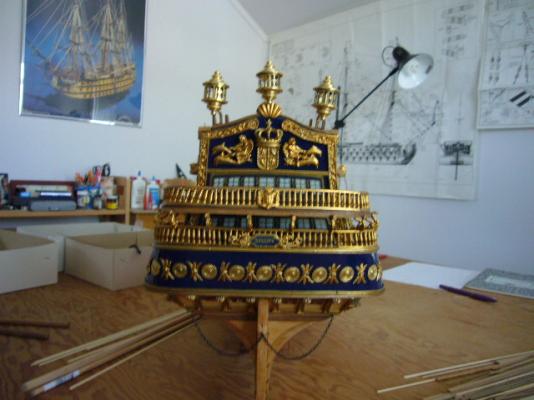
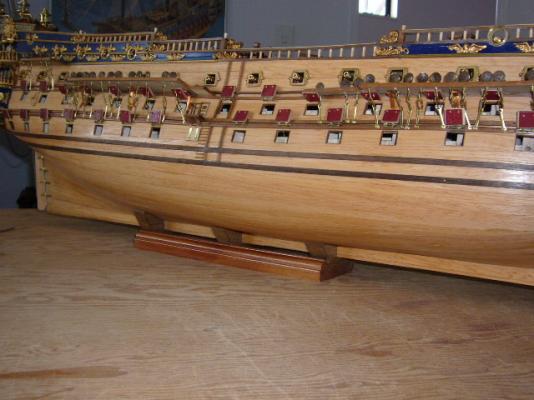
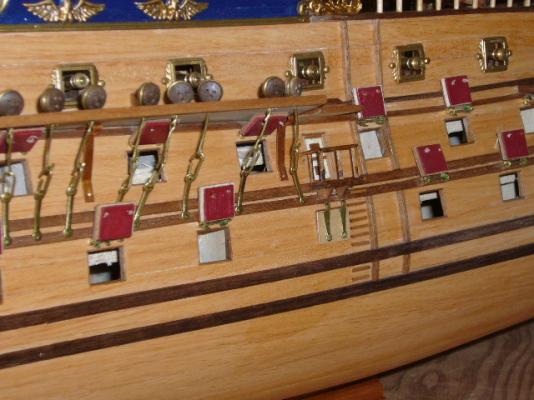
After the bow is finished there are a few more details to finish off before starting the masts and rigging. First is finishing off the decorative parts of the stern and installing the lanterns. Next is installing the gun port lids. This is a relatively straightforward project. I made a little template to guide where to drill the holes for the hinges. The kit provides little rings and pre cut wires for the job. This was the first kit I've built that had ports that don't fit flush to the hull--the lids are larger than the ports and there is a flange around the outside of the cover as you can see from the picture. Normally I don't paint the insides of the covers but because the ship is so light I decided to do it to brighten things up. I don't like the bright red that is usually used so I toned it down to a reddish brown. And the last step is to put on the interesting entryway ports and ladder. I thought the suggestion for timber for the steps in the kit was a little too heavy so I cut some very thin strips and used them.


- 71 replies
-
- 3
-
-
- panart
- san felipe
- (and 1 more)
-
Thanks Brian and Max! You are right about the metal strips Max. If only I could carve them out of wood!
-
PVA on treated surfaces
testazyk replied to JPett's topic in Building, Framing, Planking and plating a ships hull and deck
Good question JPett and the safest answer is probably "only time will tell." I am concerned about the same thing but I think that the countermeasures you are taking (sanding and nailing where necessary) are the best you can do to ensure good long lasting bonds. I try not to do any varnishing until the very end to minimise the amount of gluing to treated surfaces, but I think a little roughing up of the treated bit might be all you need. As I understand it, the key to good PVA bonds is that both surfaces be porous so unless you've really enamelled your surface you should be getting a decent bond. For what it's worth, my first build is now almost 30 years old and going strong.- 1 reply
-
- 1
-
-
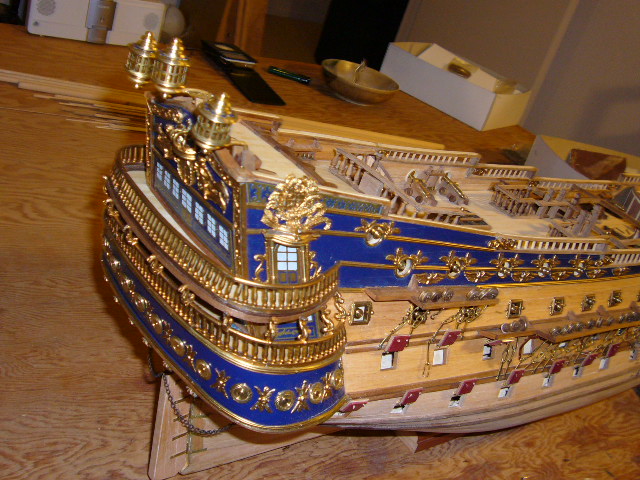
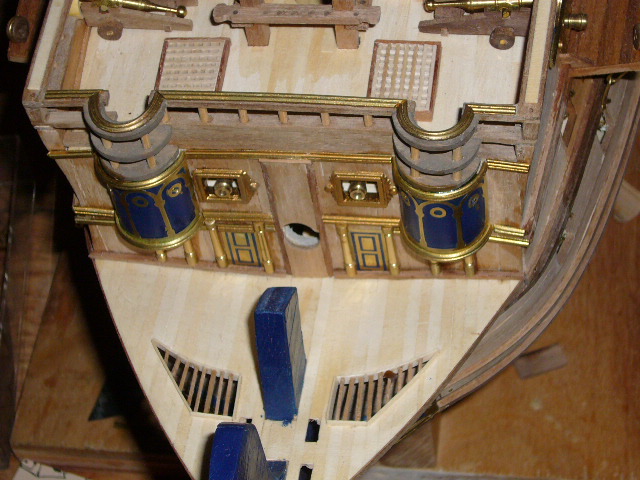
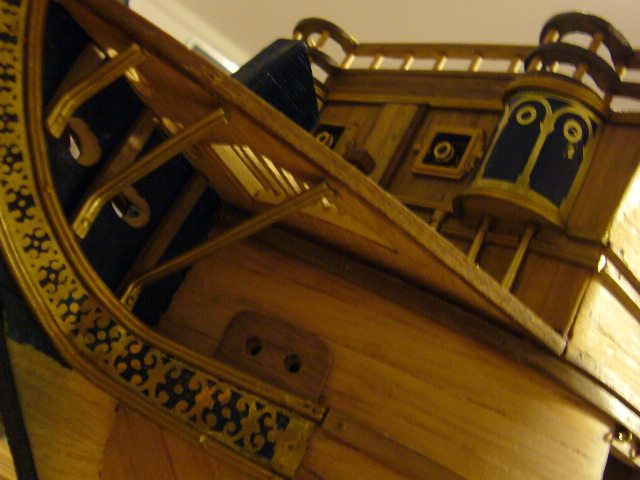
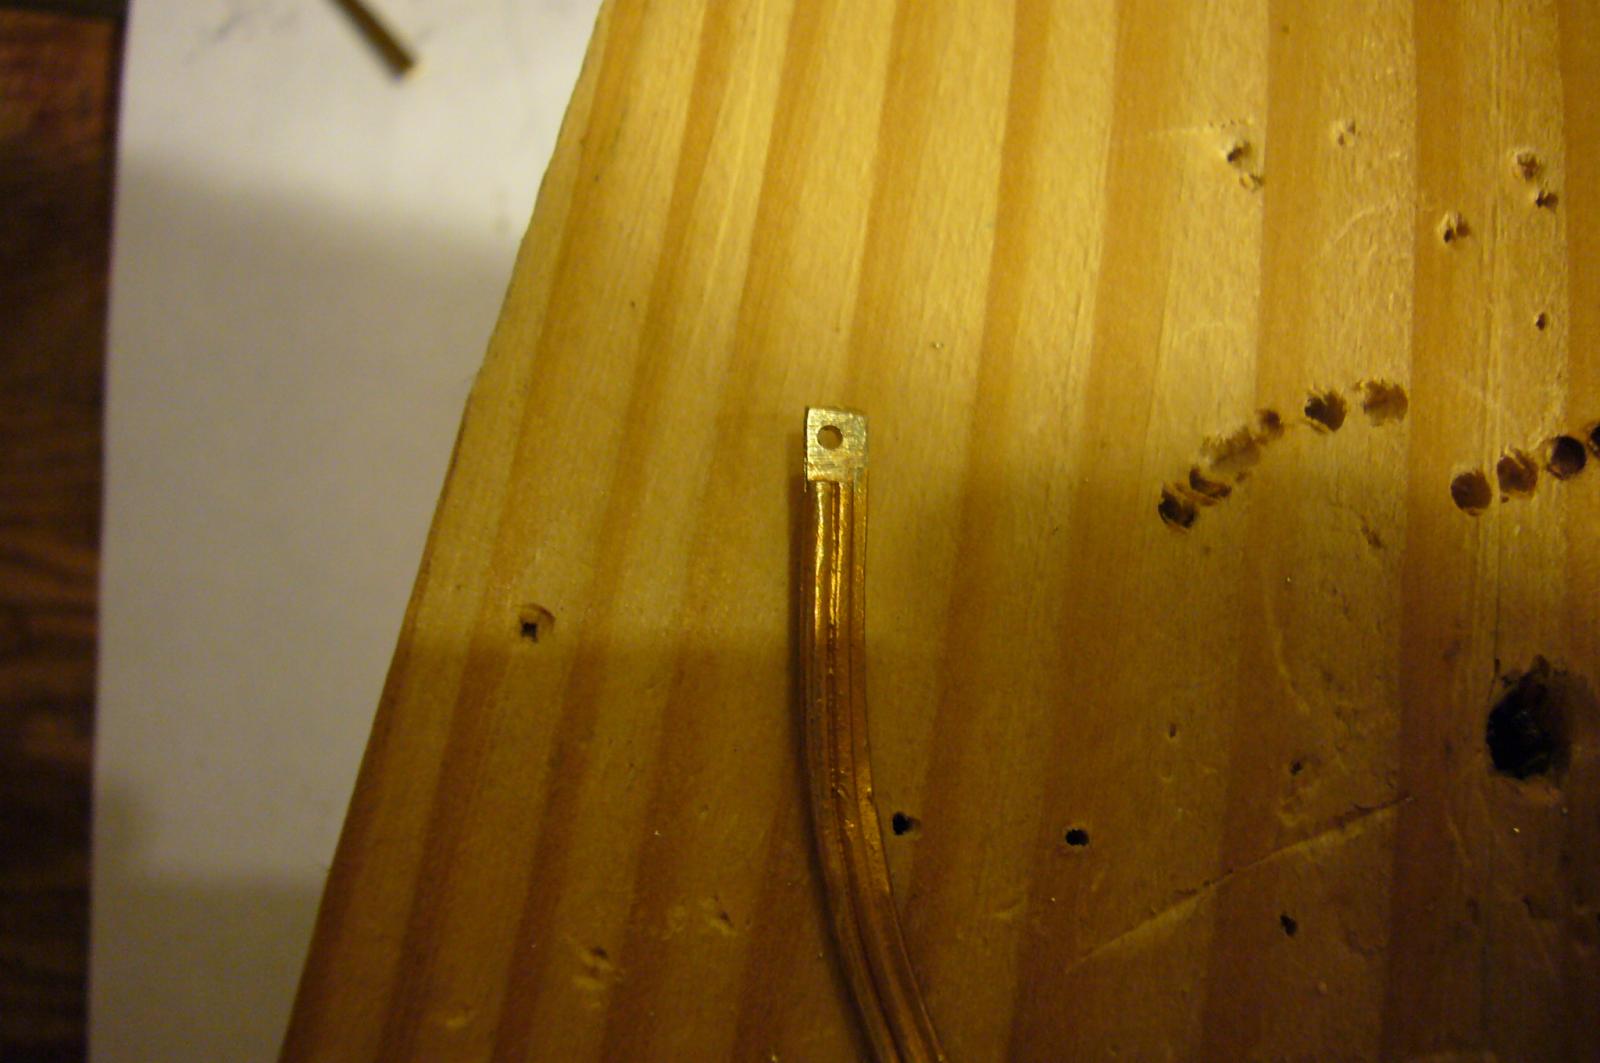
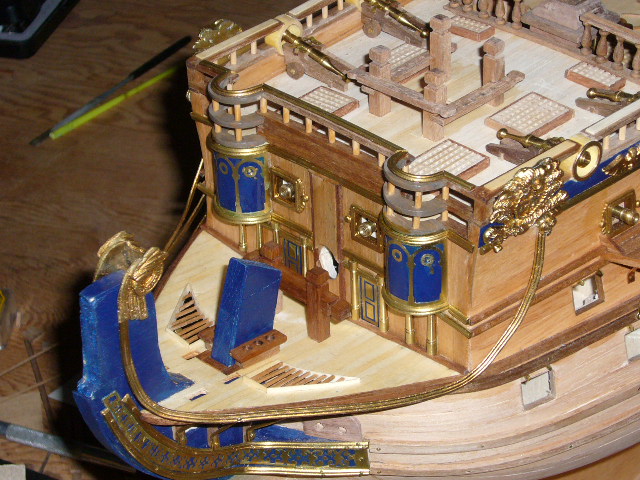
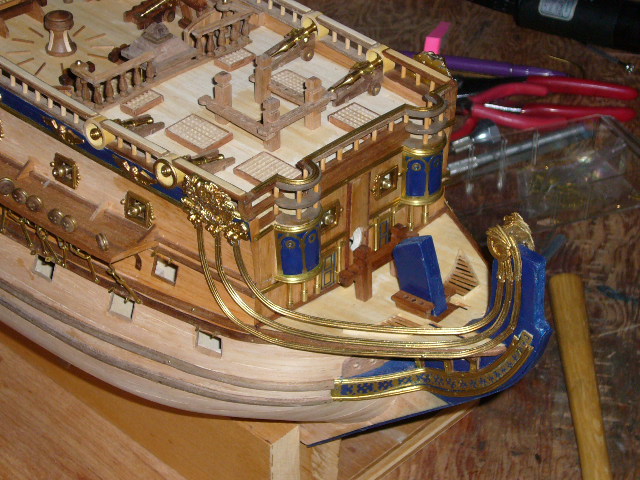
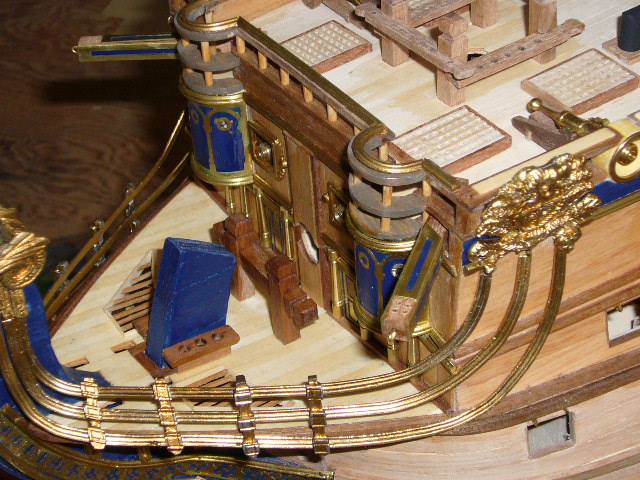
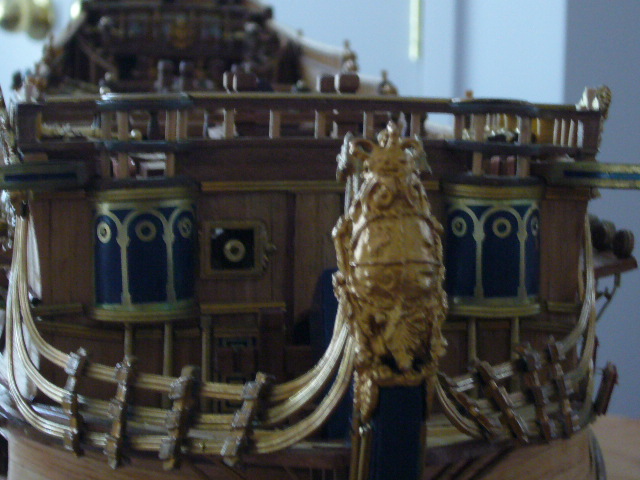
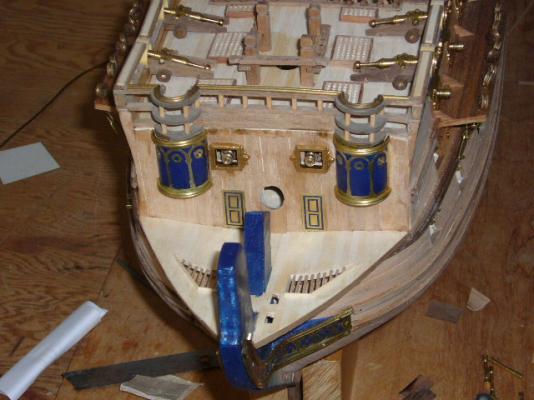
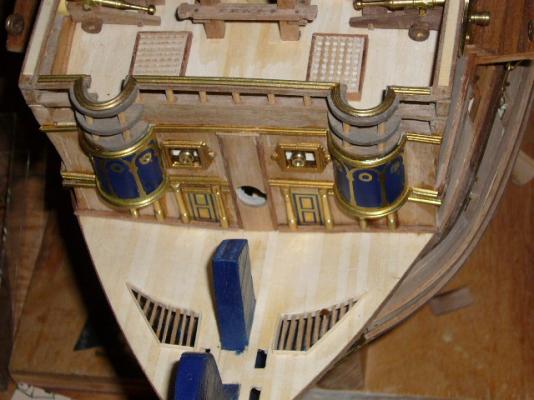
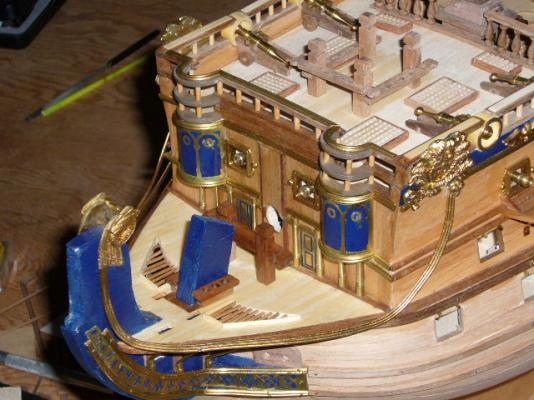
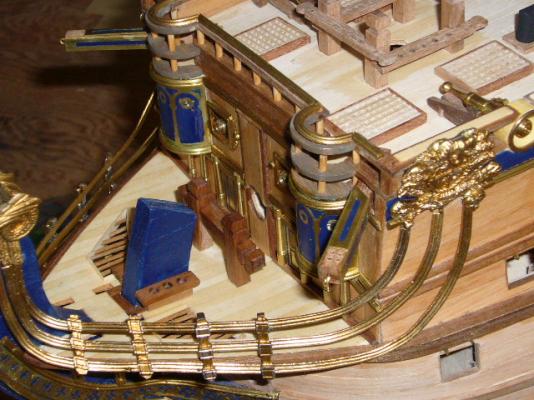
Thanks for the kind comment WackoWolf! The next step after finishing the deck work is to finish off the bow. There are a few interesting challenges. The kit provides metal coverings for the two semi circular rooms in front of the foc's'le. I've seen them referred to as "roundhouses" and "officer's latrines." Take your pick! There is a bit of an issue that I forgot to mention earlier. The Victory which I'd done had similar structures and when I did that I failed to test the sizing of the metal pieces with respect to the half dowel pieces that form the structure. You attach the dowel pieces early in the build so now if your metal pieces don't exactly fit you can have a rather acrobatic sanding job. The moral of the story is to check the sizing early on before you attach the wooden dowels. That means you've been able to bend and shape the metal before doing it on the ship and everything is a lot easier when you do the final assembly. Of course the decorative strips, which are easy to bend, can also disguise any problems but it's best to avoid them if you can. Then you put in the rest of the decorative trim. Take extra care to cut everything a half a millimeter longer than it needs to be and then sand it so the joints are flush, especially the corners where they join the wales. Enjoy installing the struts under the beakhead because that is the last easy task you will have for a bit! Now comes one of the most challenging parts of any build, at least for me--the headrails. On the San Felipe they are even more difficult than usual because instead of timber or brass cutouts you have to form them from the decorative brass strips. If you've worked with those strips, you know they don't easily bend laterally. I did it by heating the strips to make the focsle railings and that's was was required this time--with an added twist! In more ways than one. You form the rails out of three strips which start from a carved medallion on the focsle and terminate in a scroll sort of carving under the figurehead. Each of the strips is a different length and, as they are parallel to each other, has a slightly different curve. One of the plan sheets is an actual size drawing of the model and I traced the rails on the plan to create a template. I then cut out each rail and laid it on a board (sorry I don't have a pic of that). I pounded nails in to make the form of the rail and then went down to the kitchen and heated the strips over the flame of the stove. When each was soft enough to work I laid them in my jig and tapped them into shape with a hammer. You make two from each template (one port, one starboard) and flip the strip over for one to make it's mirror image. There are holes in the castings that the rails are attached to so that you can nail them in and I sanded the tips of the rails and drilled a hole so I could keep everything very secure. I was really happy how close I managed to get them on the first try but they did require a bit of bending to get them just right. The kit includes decorative brackets that join up the three rails and once you install them, the lines should be even all the way around. The last step is to add the figurehead. I don't paint any of the decorative pieces because of personal preference so I just left everything gold. One thing I forgot to mention--when you use a hammer to shape the rails, or even do any bending, you can mark up the rails because the moulding pattern is very fine. You can bring back the shine by rubbing with steel wool and then painting the strips with gold enamel.


- 71 replies
-
- 6
-
-
- panart
- san felipe
- (and 1 more)