patrickmil
-
Posts
1,209 -
Joined
-
Last visited
Content Type
Profiles
Forums
Gallery
Events
Everything posted by patrickmil
-
Another question. I'm modeling Nelson in the boring 1944 scheme. I know.... I just don't have the guts for all of the masking involved with so many delicate little parts at stake. To this end, there seems to be some conflicting ideas on paint scheme. Trumpeter shows the turret tops on the primary and secondary armament painted in a darker color but no difference in steel decking color from the main grey color. Black and white photos for HMS Nelson in "Standard Scheme A" are not numerous and most only show at water line view. The aerial photos are, for the most part, blurry and hard to make out any color differences. I have seen numerous builds and the horizontal surfaces vary. Any thoughts or experts on the matter? Thanks in advance, Patrick
-
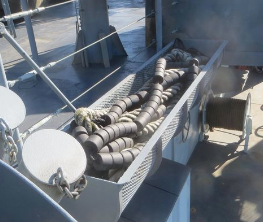
Next question... They will keep coming as I look over this and get some sub-assemblies together. I have seen some really excellent floater baskets detailing so many of these WW2 ship kits. What I have not seen, anywhere, is the floater nets to fill the baskets. I have exhausted my search capabilities. Does anybody have any suggestions? I'd like to replicate, if possible and not mind-numbingly difficult, something like in this picture off of Facebook. Any ideas? Thanks, Patrick
-
Thanks for the encouragement Gary!
-
Hopefully a quick and easy question! I have the Trumpeter 1/200 HMS Nelson kit and the Pontos upgrade set. The Pontos instructions are abysmal. I noted that there are many porthole and hatch parts in the PE sheets yet these are mentioned nowhere in the instructions. Does anybody know if you are supposed to replace the molded on detail with the PE parts? The hatches would be a definitive improvement in my opinion. If you did, is there enough to cover the ship? I'd hate to get started and then run out before getting to everything I aim to improve. Thanks in advance! Patrick
-
Should be receiving Trumpeter's 1/200 CV-5 USS Yorktown soon. Wondering if the Pontos set for Enterprise would be mostly appropriate? I know there are some differences, but thinking the pre 1942 set with the natural wood deck would be close enough. Thoughts?
-
 Hi Sjors! It has been some time. My mojo has been seriously lacking on wooden ships lately. I do still have Connie and pick her up from time to time to see if the bug bites me again. With my youngest almost flying from the nest, my wife and I should be moving in a year or two and that should come with a much larger work space to spread things out. I'm positive Connie will be resumed soon after that. Best, Patrick
 -
Hi Eric, I appreciate you checking in! This project has not been mothballed but just intermittently stalled with COVID life. I'm about a third of the way done sizing, cutting, and planking the main deck. When I get more of that finished I'll be sure to post some pictures. Thanks, Patrick
-
Tom, I really appreciate your looking at this aged topic and your generous compliment! I don't cover my ships or encase them in glass. After several years though, things start to droop or look too taught depending on the weather and humidity. My poor Niagara has some slightly dropping stays at this time, I'm sad to say. One of these days I will take her down and rework her rigging. Unfortunately, in my current home, encasing her in glass just isn't an option since she would be taking on the aspect of a piece of furniture as opposed to being a shelf-sitter like my plastic airplanes and tanks.
-
Hi Tom, Your finished product looks fantastic! I'm glad that you shared with us a subject that is not seen too often in modeling forums. Looking forward to seeing your next project.
- 9 replies
-
- 3
-

-
- st roch
- billing boats
- (and 1 more)
-
@Brian, thanks for the compliment! I do like to maintain work on several items at a time. I've been collecting aftermarket pieces for some time for the 1/32 Tamiya F-4J to make a VF-84 Jolly Rogers bird. @John, thanks for looking in and the compliment! I'm positive I'm not doing anything new, but am enjoying the process and sharing it.
-
Hi joep4567 (Joe?) and Michael! Thanks for looking in and the compliments! Patrick
-
Great looking engines! I might be "borrowing" some ideas. Patrick
-
Hi Eric, Thanks for the compliment! As a matter of fact, I am going for a clean look. When it gets dusty, it makes it easier to know what stays and what has to be brushed off. 🤣 Thanks, Patrick
-
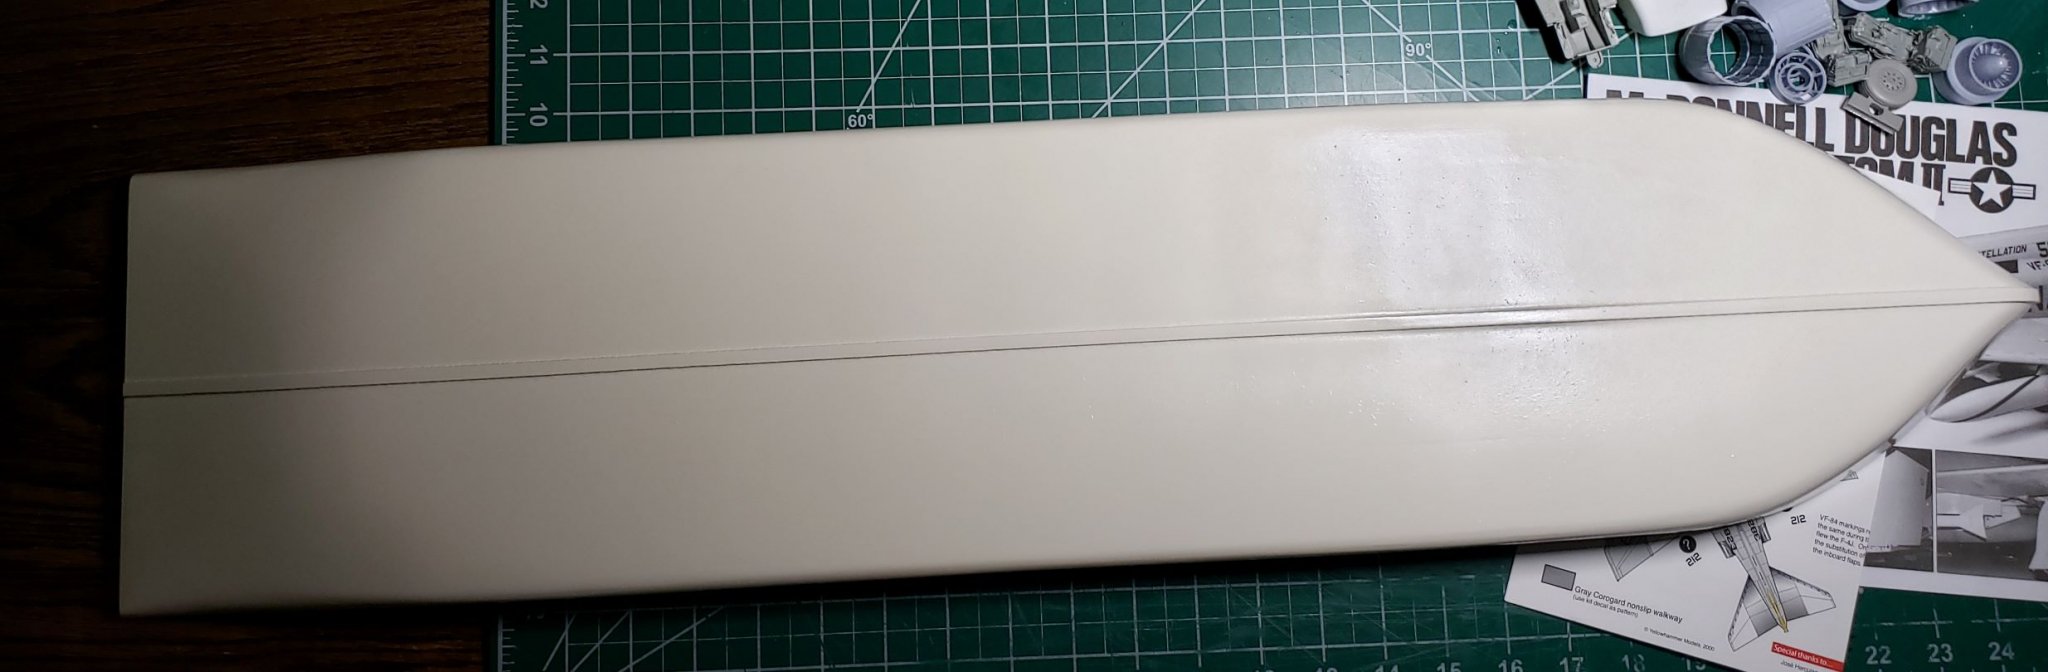
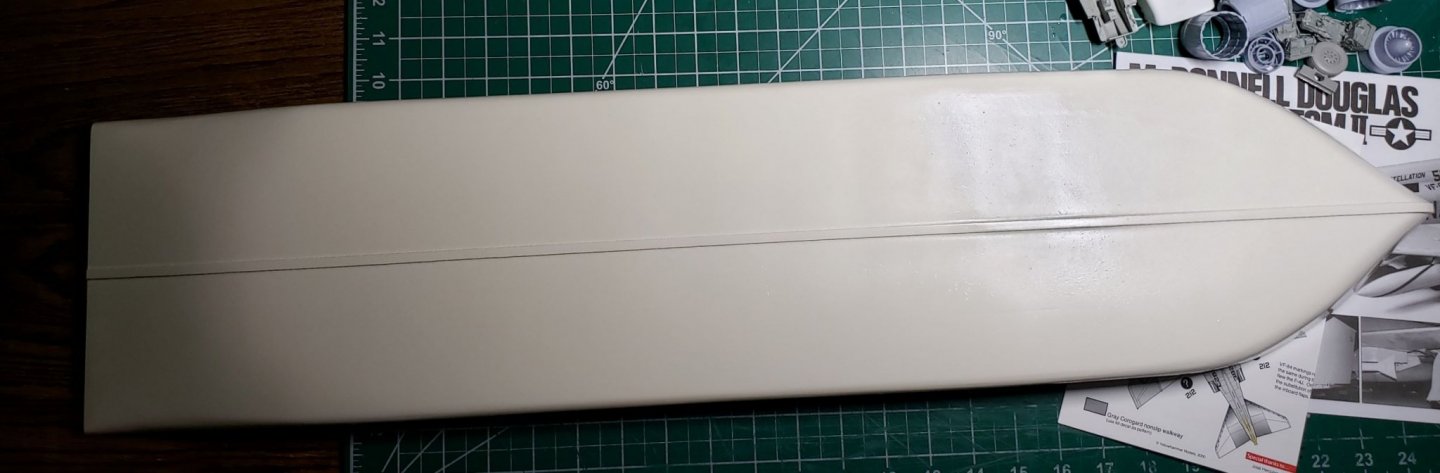
Hello to all! I hope everybody is staying safe and enjoying the remaining days of summer. I want to thank everybody for taking the time to look in, comment, and/or hit the like button. I finished painting the hull and my boiler and present the following pictures. I coated the boiler in primer to give the black paint better adherence and then used Tamiya weathering powders to provide a tiny bit of highlight to the rivets and seams and finally clear coated the whole thing. The hull has many coats of primer. I lost count after five. So as not to have such a stark white color, I used a shade of ivory instead of white. It looks more pleasing to my eyes. Sorry for the picture quality. Besides only having my phone to take pictures, I also share my desk with work and other model kits. The finished boiler Overall shot of the hull bottom Up front shot of the hull right-side-up I hope you all like. Please feel free to let me know what you think! Thanks, Patrick
-
Hi Tom, Your Niagara is looking great and you've done an outstanding job with her "teeth". I completely respect your position on the pins and was only asking out of curiosity. I look forward to seeing more of your work! Thanks, Patrick
-
Eric and Brian, I really appreciate the positive reinforcement! Thanks for hanging in with me despite the snail's pace with this kit. Thanks, Patrick
-
Hi John, I appreciate your feedback! The glue dots were done using a piece of Tamiya tape with little tick marks and in some places done by eye after a glass (or two) of bourbon to steady my hand. Thanks, Patrick
-
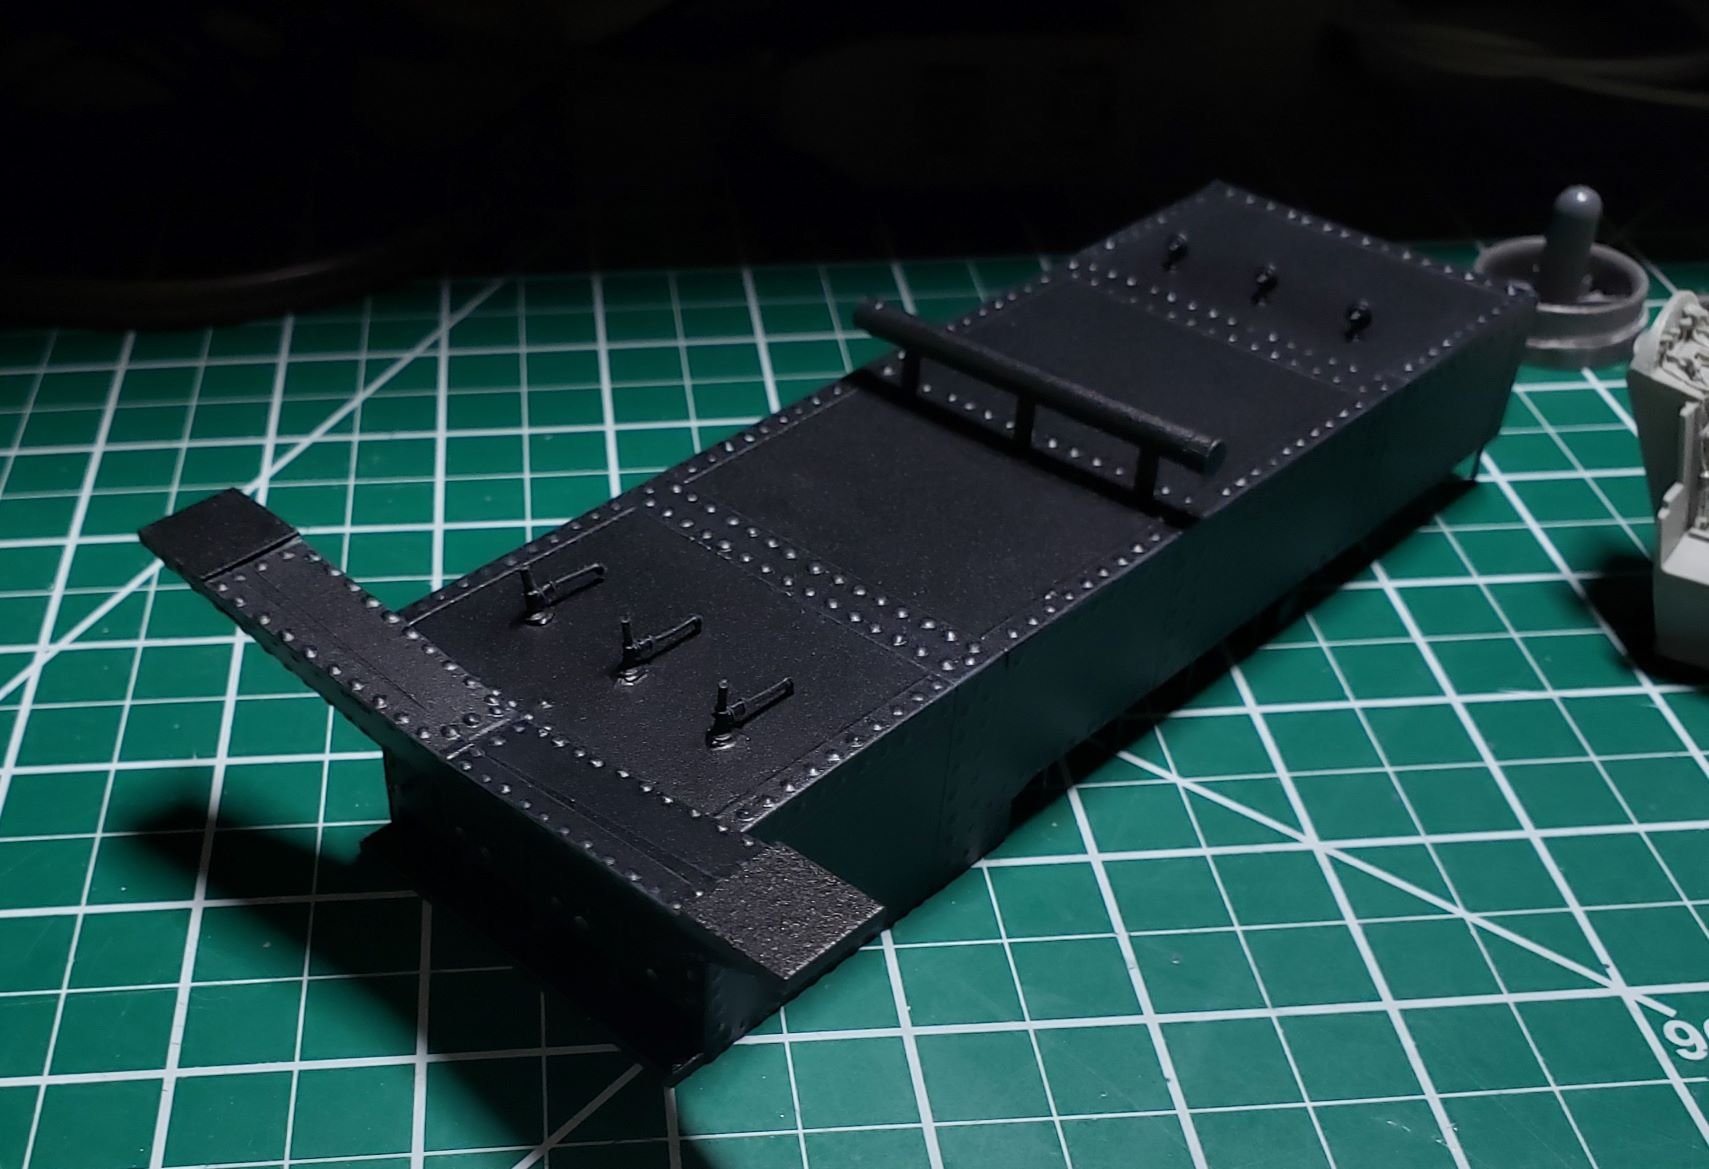
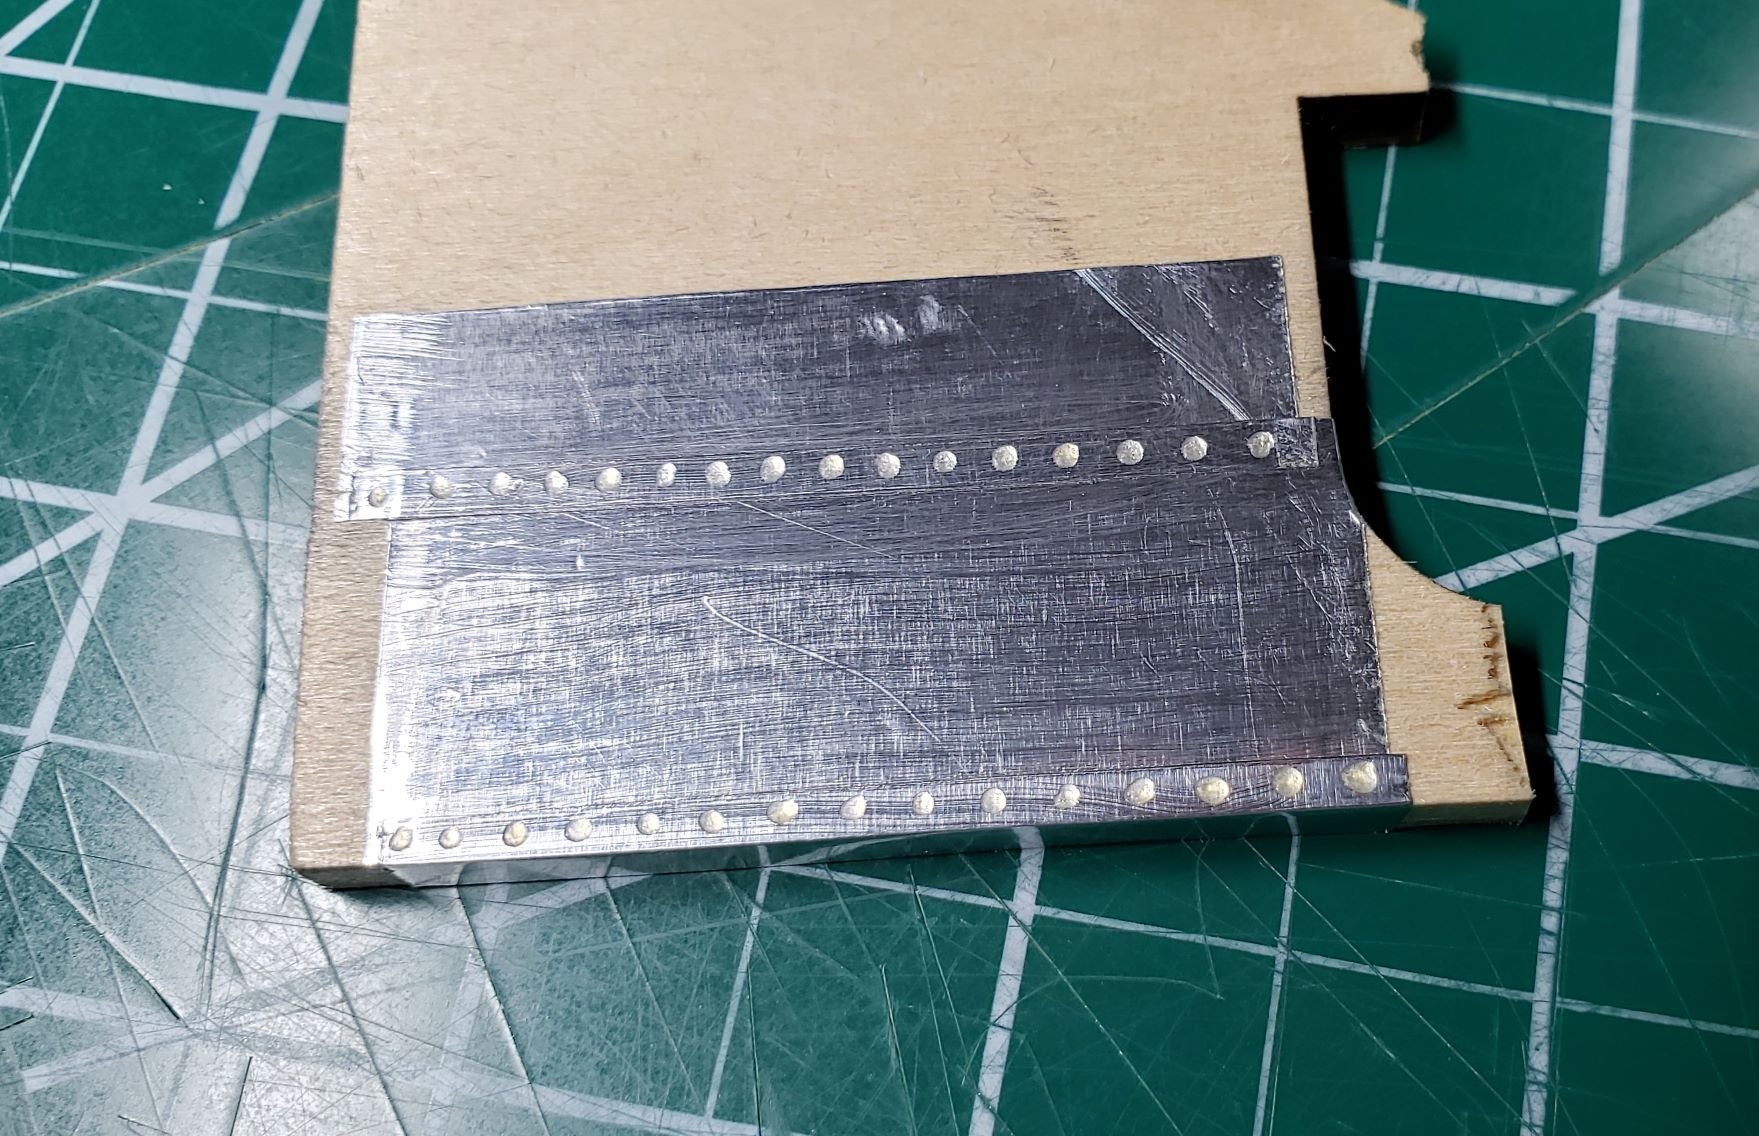
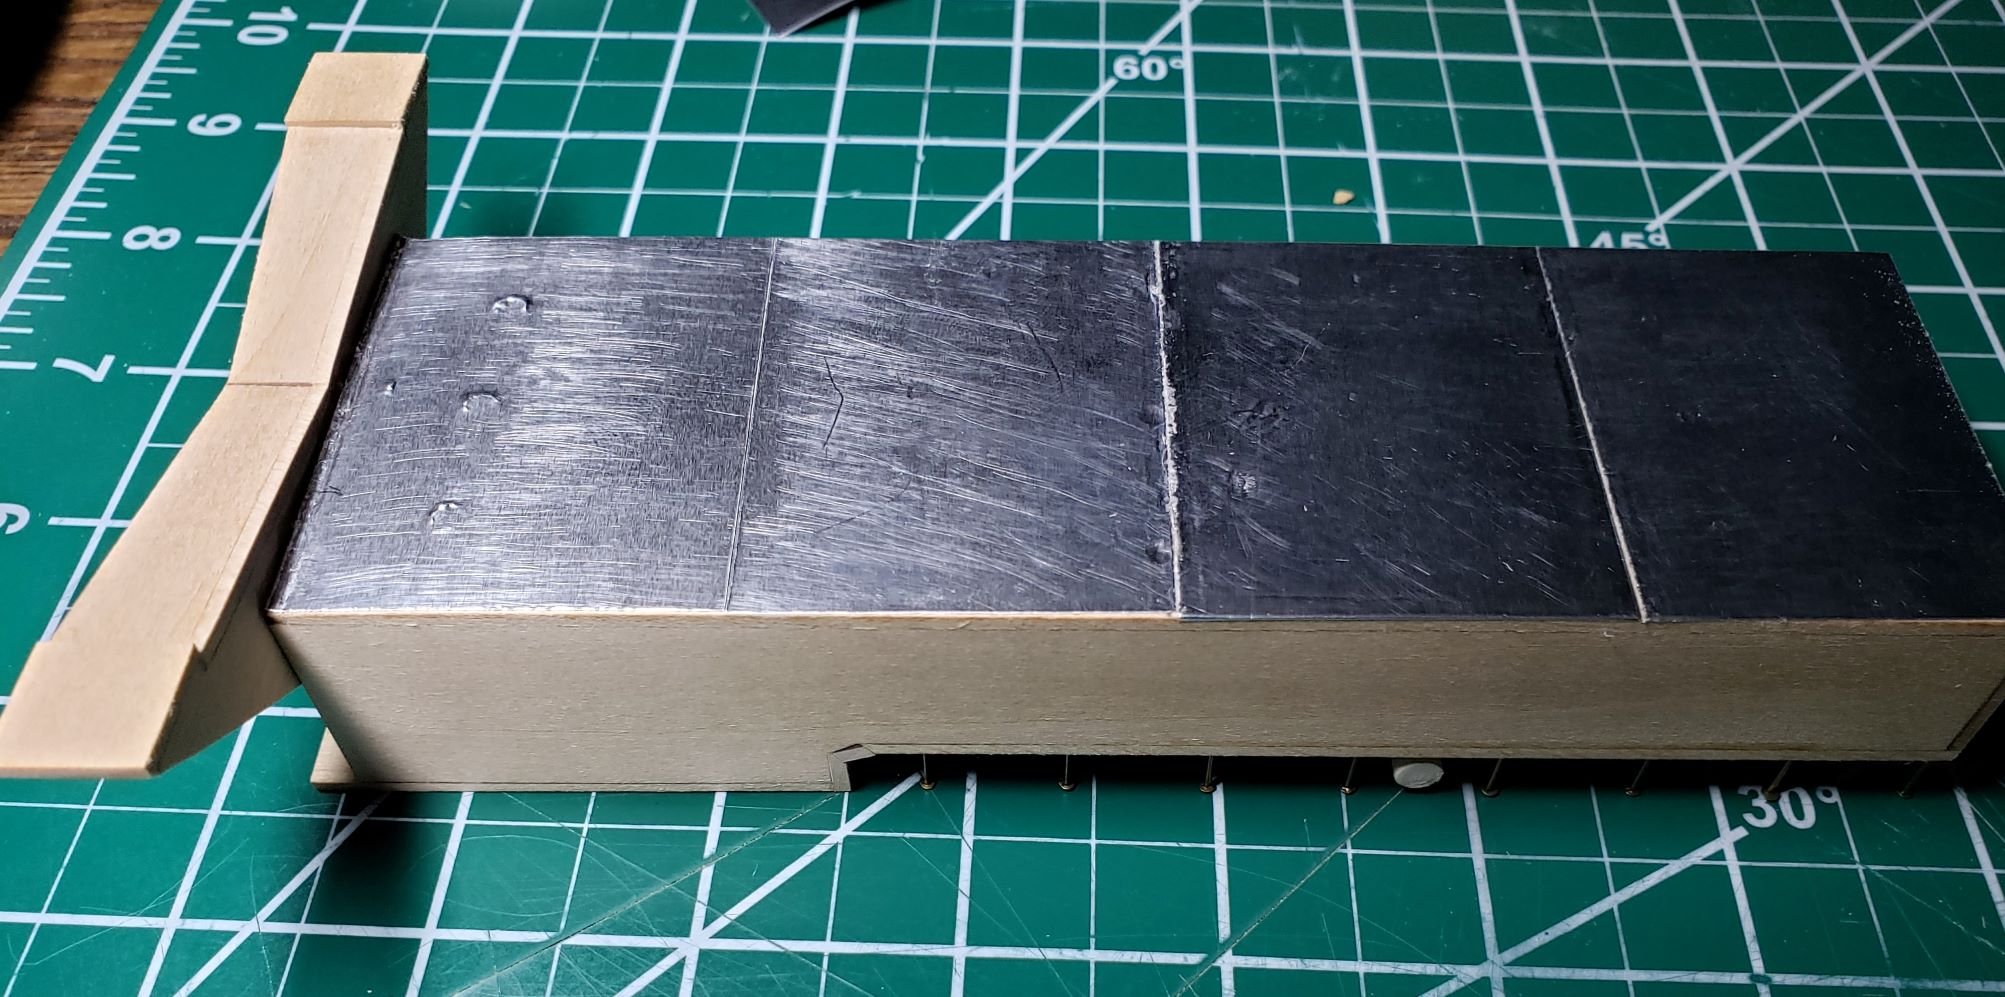
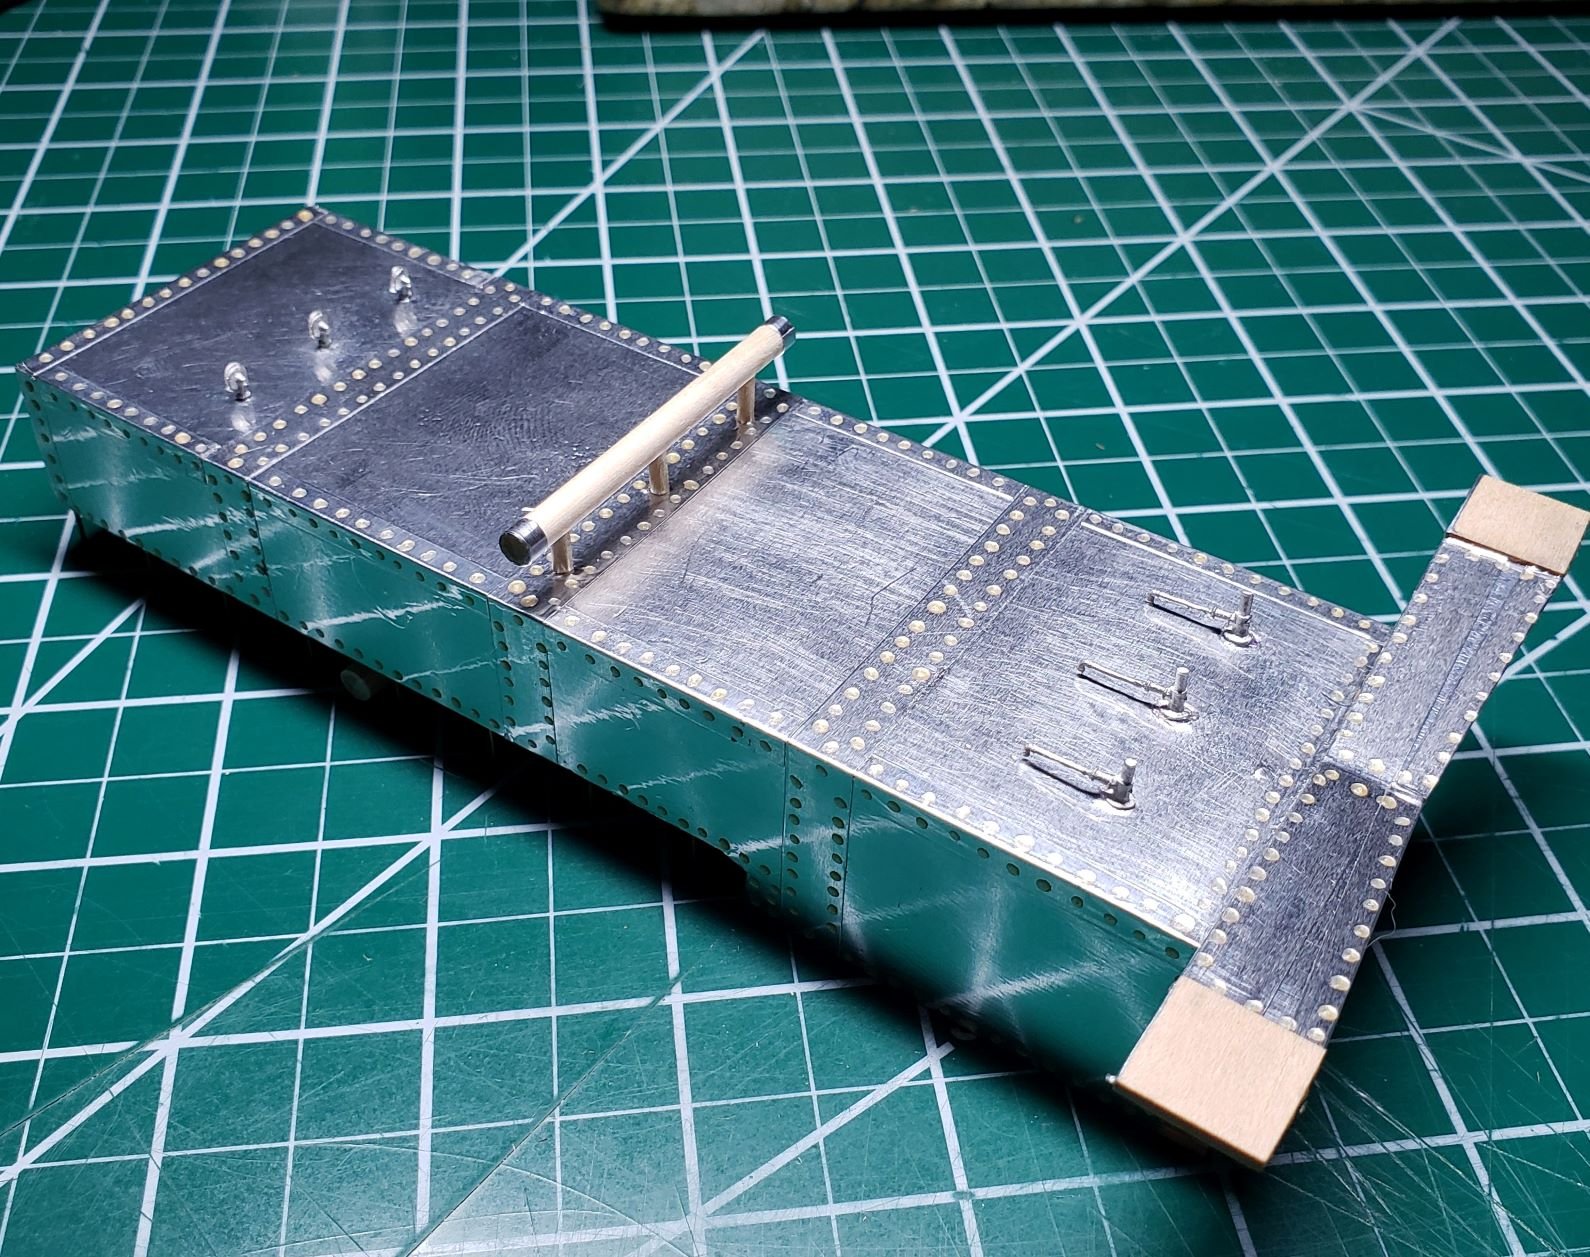
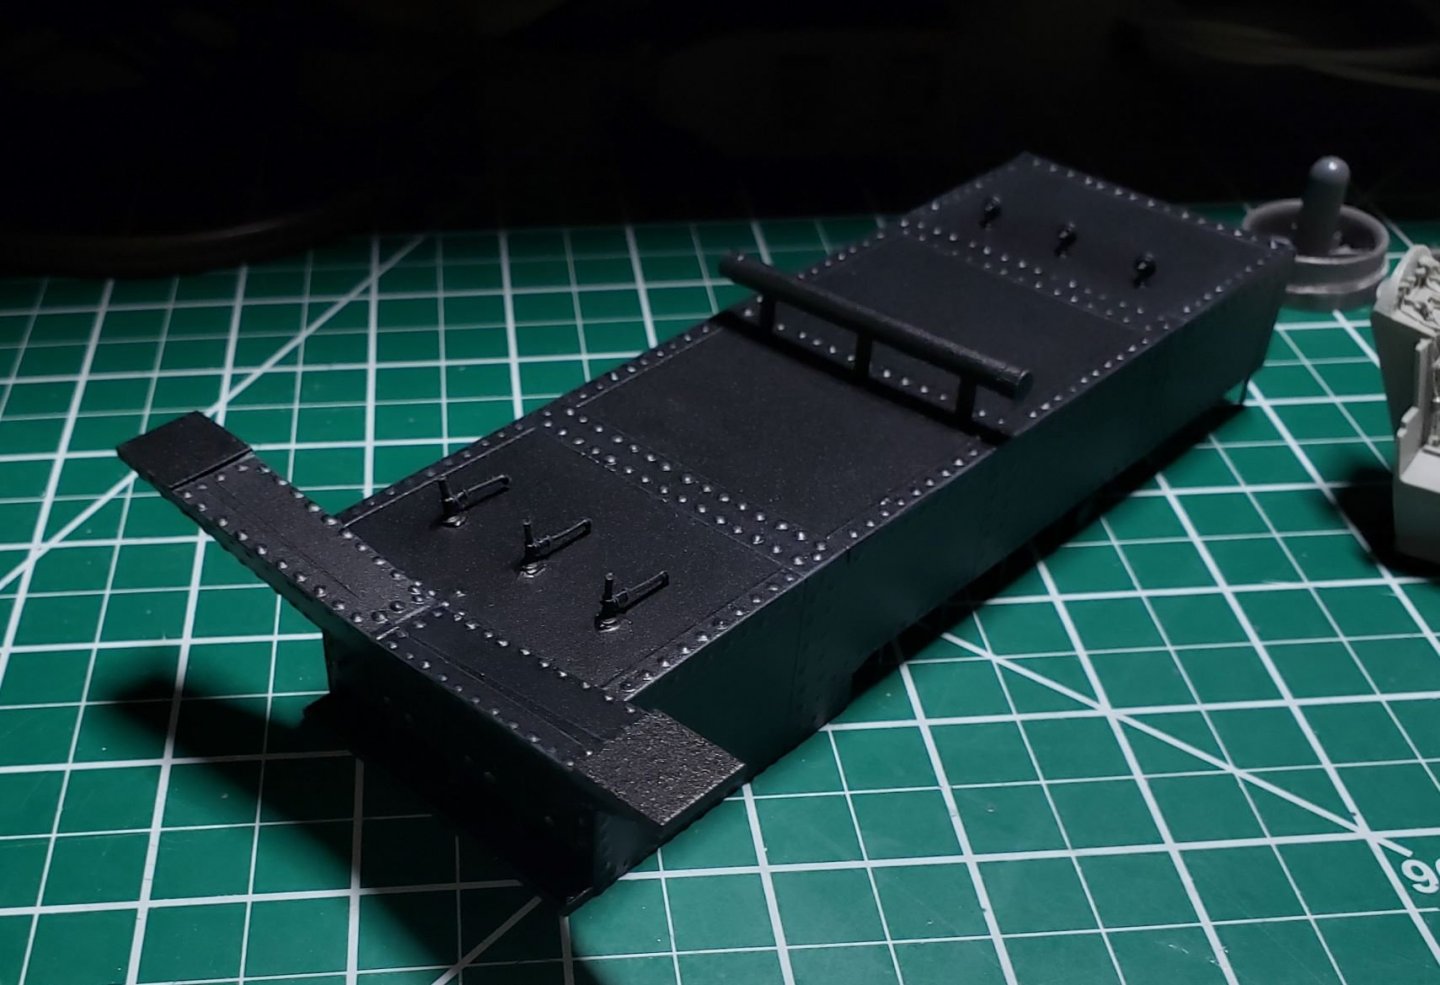
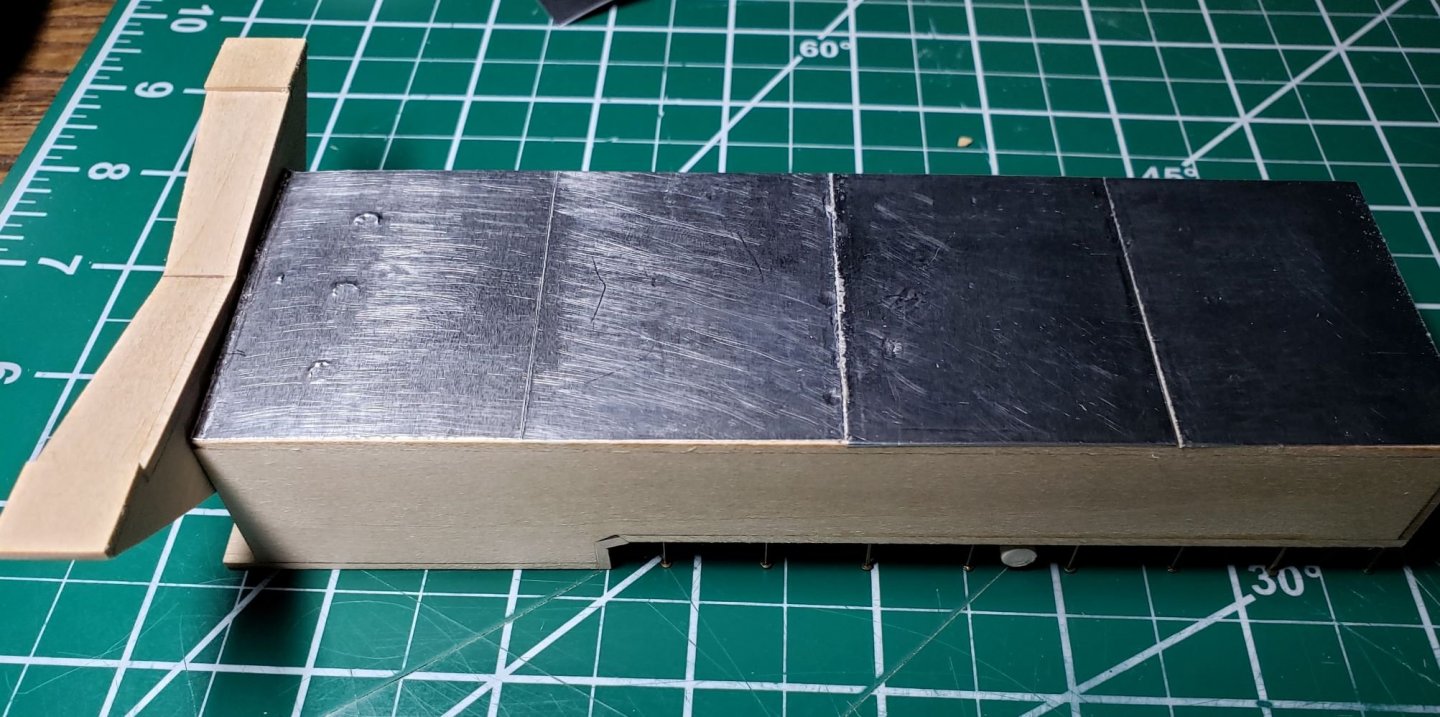
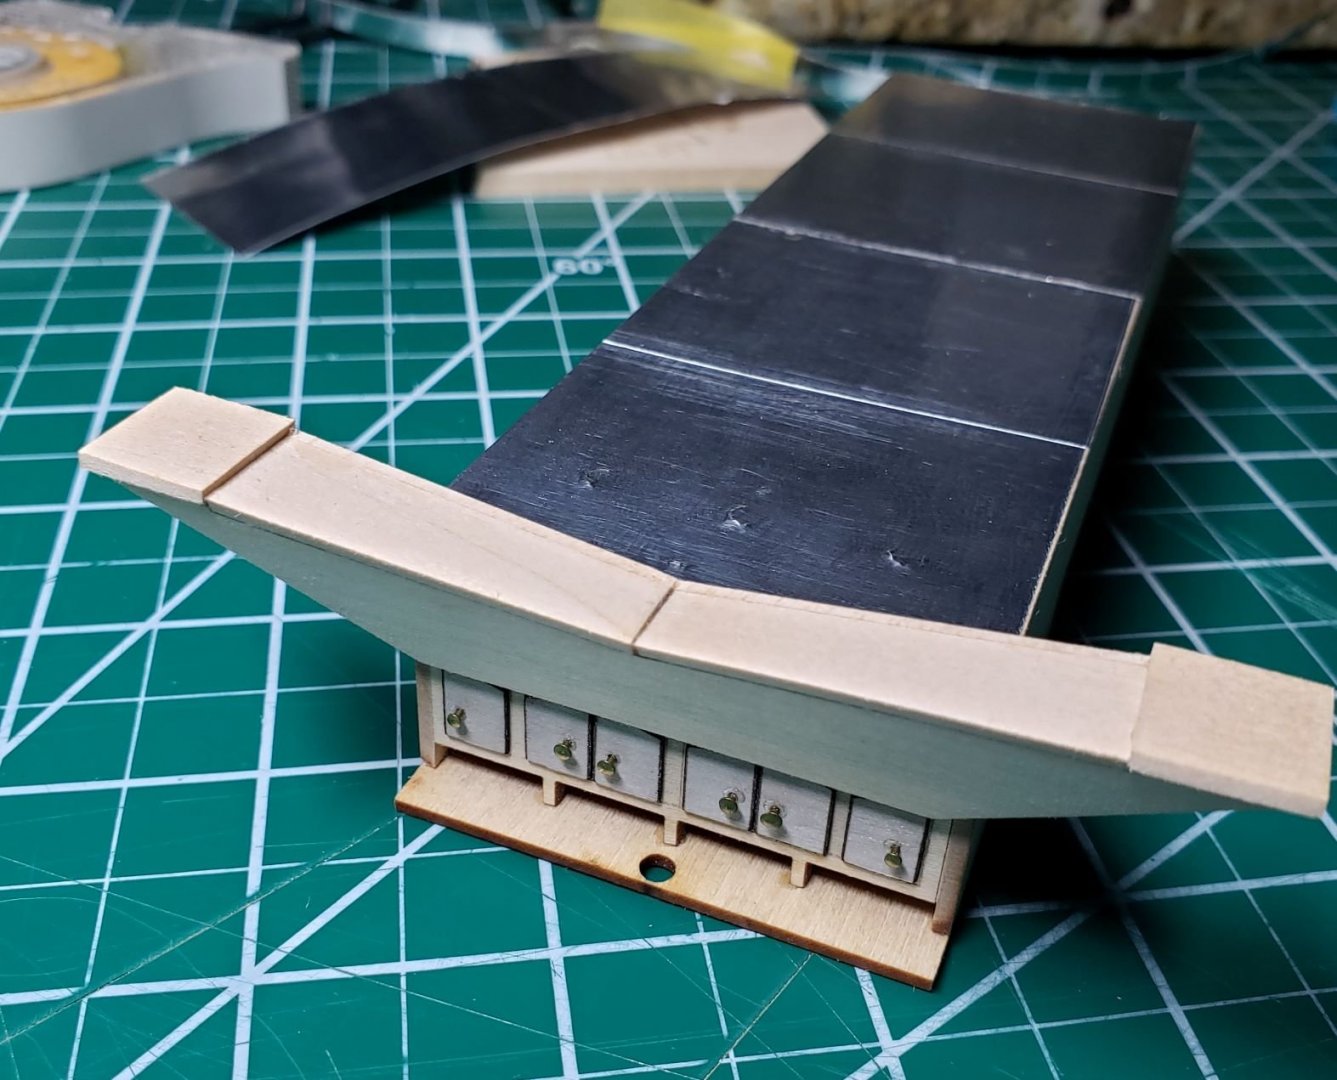
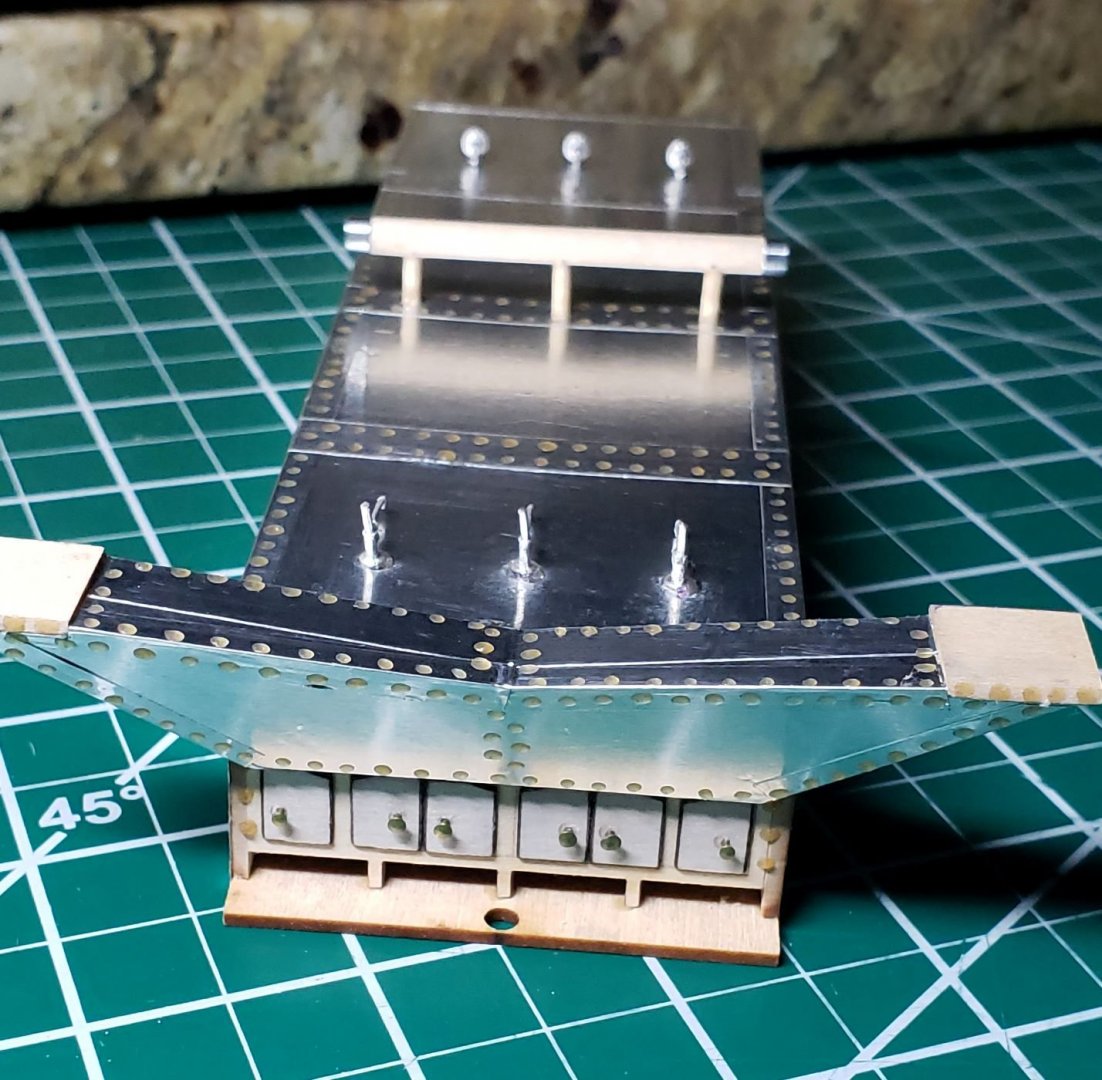
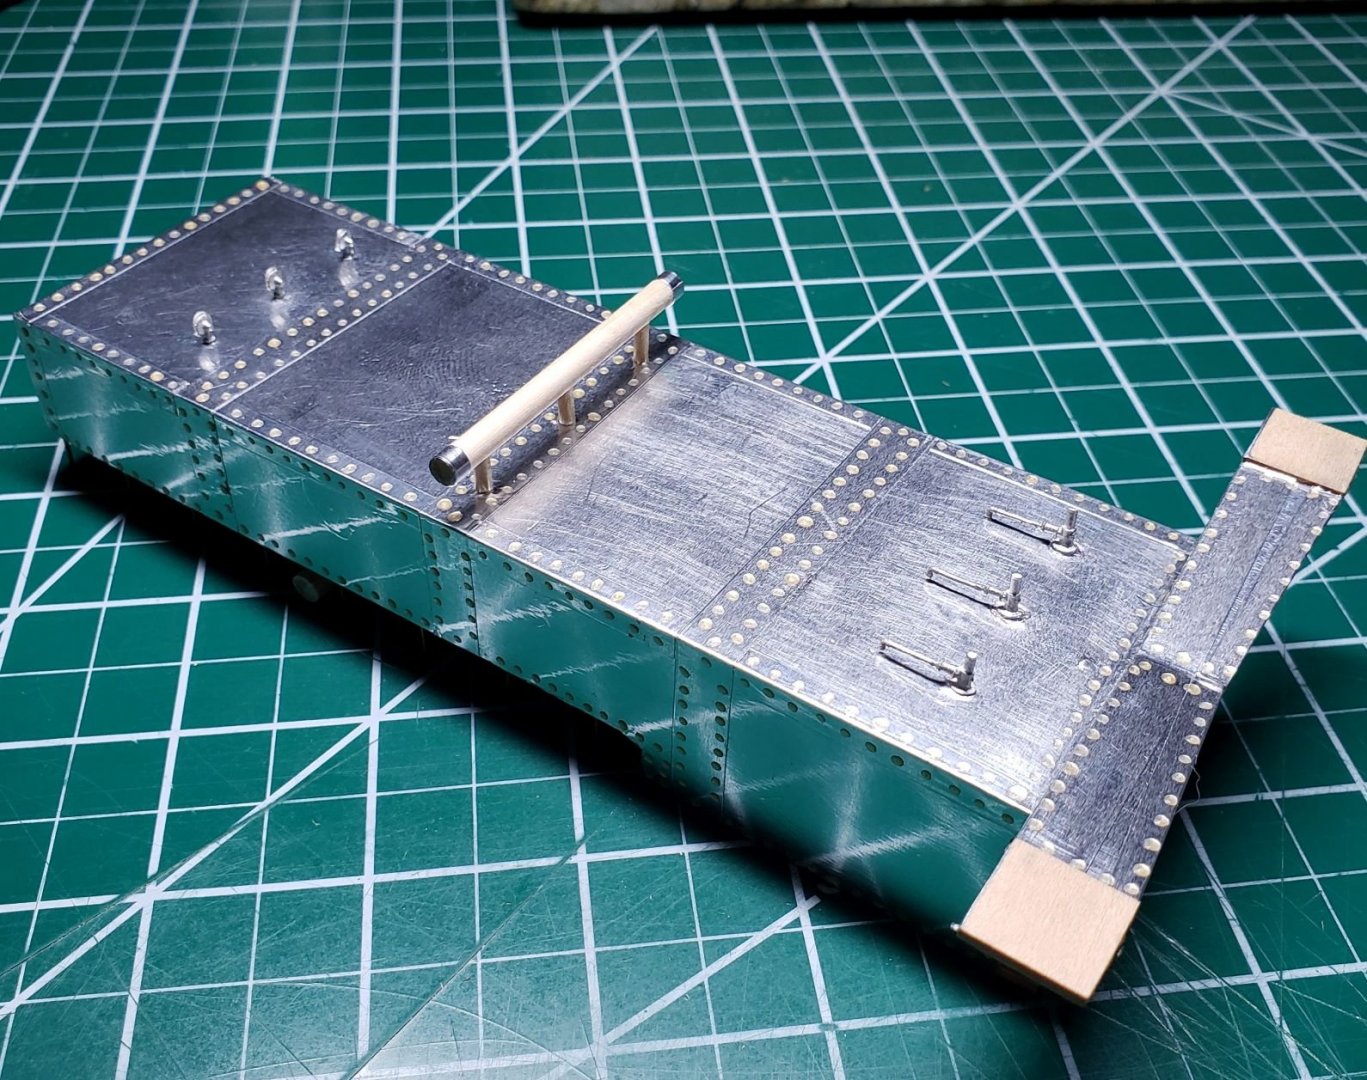
Good morning Model Ship World! Thanks to all for looking in and for the likes! Brian, one of these days I will be getting back to my Constitution by Model Shipways, but after finishing Niagara, it was just too much ship! I definitely appreciate your compliment. Getting to the build and what I've been doing... I've been priming, sanding, filling in spots, sanding, priming again, filling fewer spots, sanding, priming again... I think you all get the general idea. I should have pics of a finished hull soon after a little more work. Needless to say, the filling and sanding routine has been tedious, but I'm almost there. To help provide a modicum of variety in tasks, I decided to jump on the Chaperon's boiler. I built up the basic boiler, added tiny nails for the boiler door handles where I believe the coal would have been shoveled into, and finally added the white metal bits. I wasn't too impressed with the overall look of the wooden boiler, even before I primed and painted it. It just did not look "metal" enough. So I stripped off the white metal bits and came up with my own solution to give it that "metal" look since I believe these monsters were made from cast iron. I had some aluminum ducting tape that I cut into various size "plates" and strips and applied these using a soft wooden stick to burnish the foil down on the wooden boiler. Once I was satisfied with that I wanted to go a bit further and apply its "rivets". I tested using tiny drops of wood glue applied with a toothpick. After drying, I was very satisfied with the feel of these "rivets". Is this by any means accurate? I highly doubt it! Does it look better in my opinion? Resounding YES! Will anybody be able to see much of this once it's buried? I also doubt that. At least I will know. Hopefully my pictures below will help explain what I did. Testing of glue drops on some spare aluminum strips on scrap wood Top, overall shot of boiler with beginnings of simulated cast iron plates Front shot of boiler showing coal doors with handles Another front shot of boiler covered in metal and glue droplets Overall shot of boiler with metal and glue droplets Next up should be more progress on the hull and the finished boiler after priming and painting. As always, please let me know what you think, whether it's criticism or validating my half-cocked ideas. Thanks all and stay safe!

-
Hi Tom, Your build has been outstanding so far! I'm tagging along to see this to the end. I may have missed it in your build log, but are you planning on blackening the belaying pins or are you keeping them brass?
-
Hi Ron, Looking through your build log brings back fond memories of putting my Niagara together. You've done a fantastic job so far. I'm anxious to see more!
-
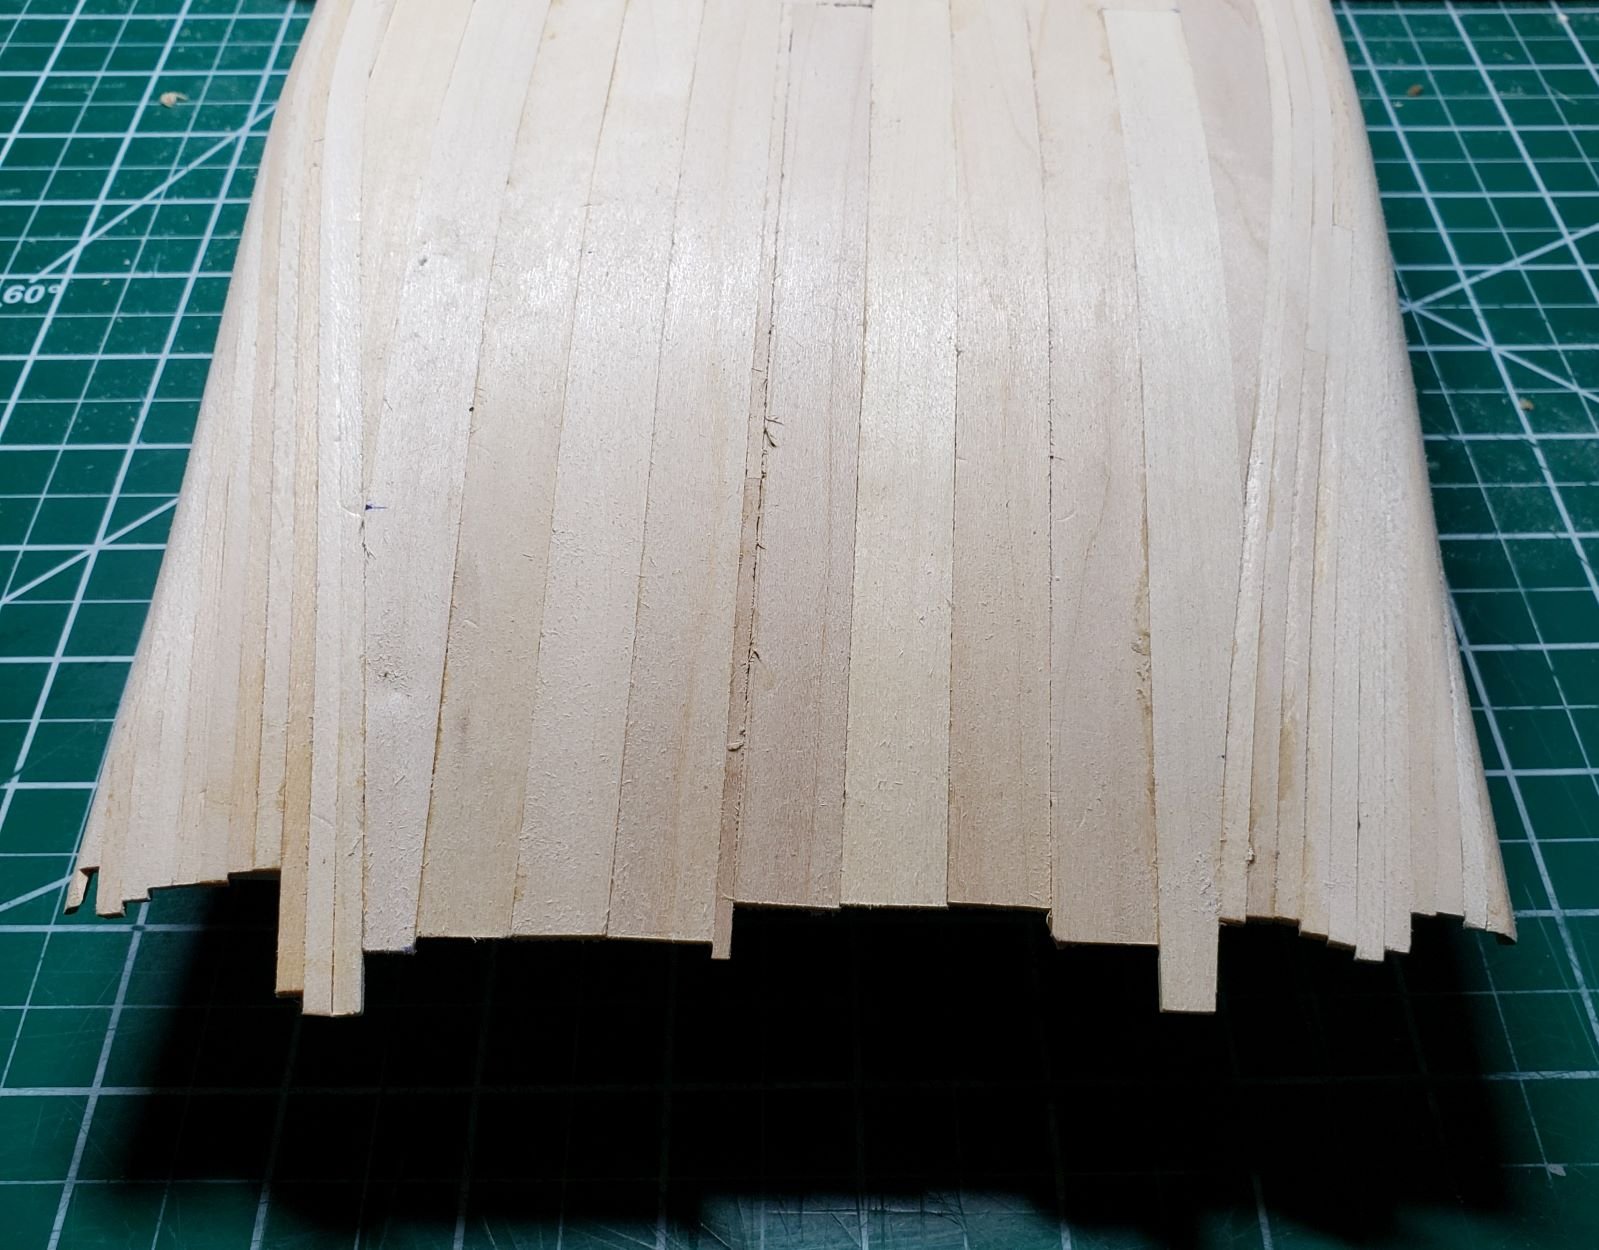
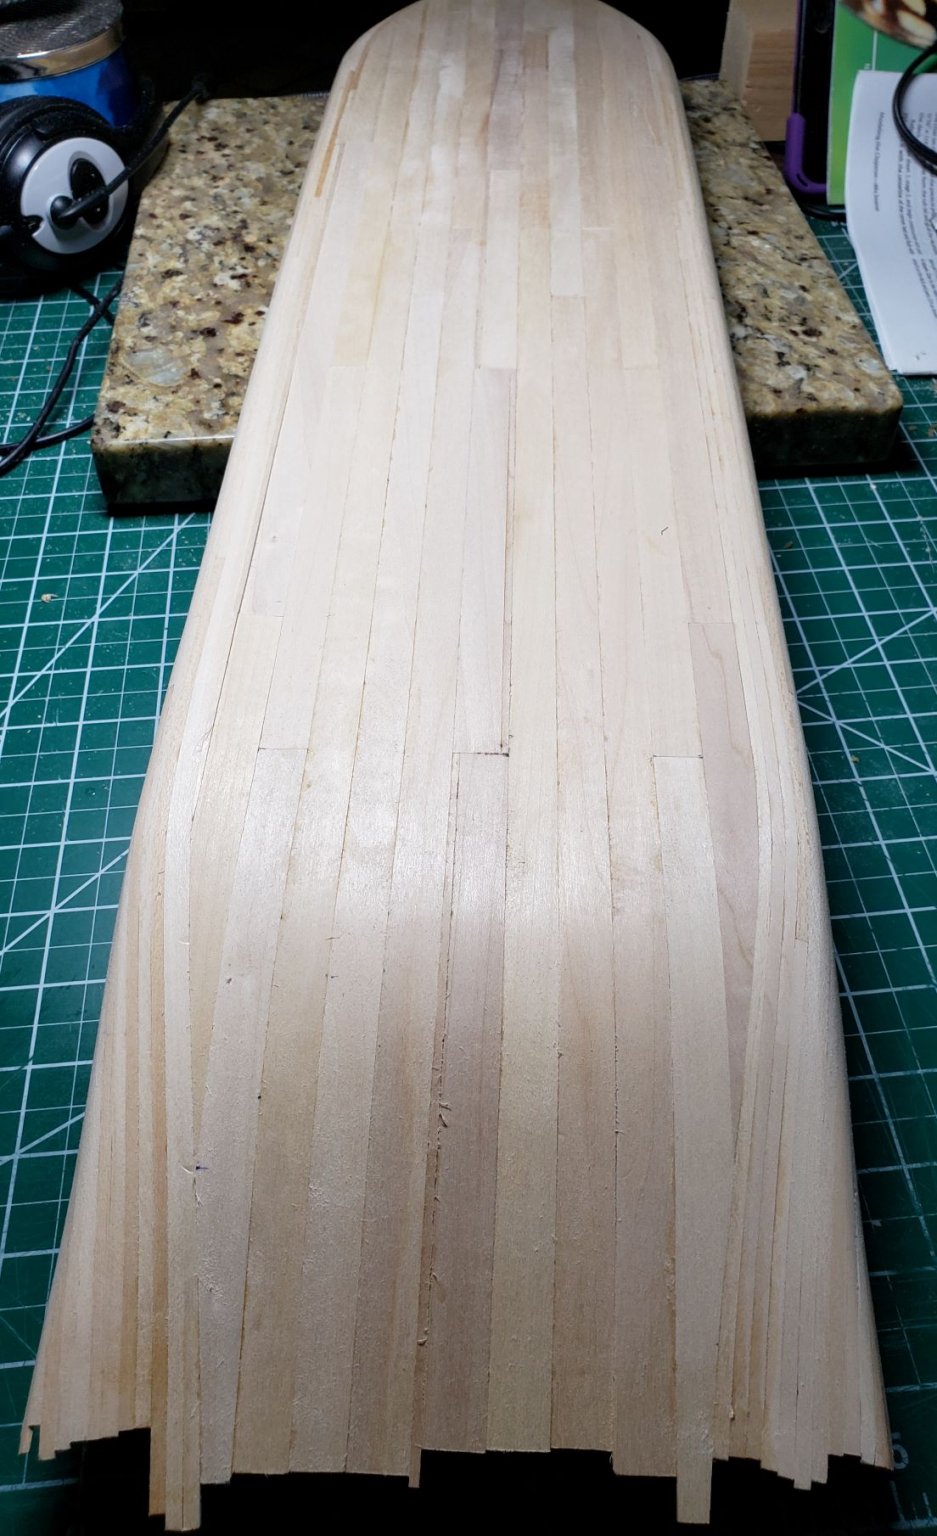
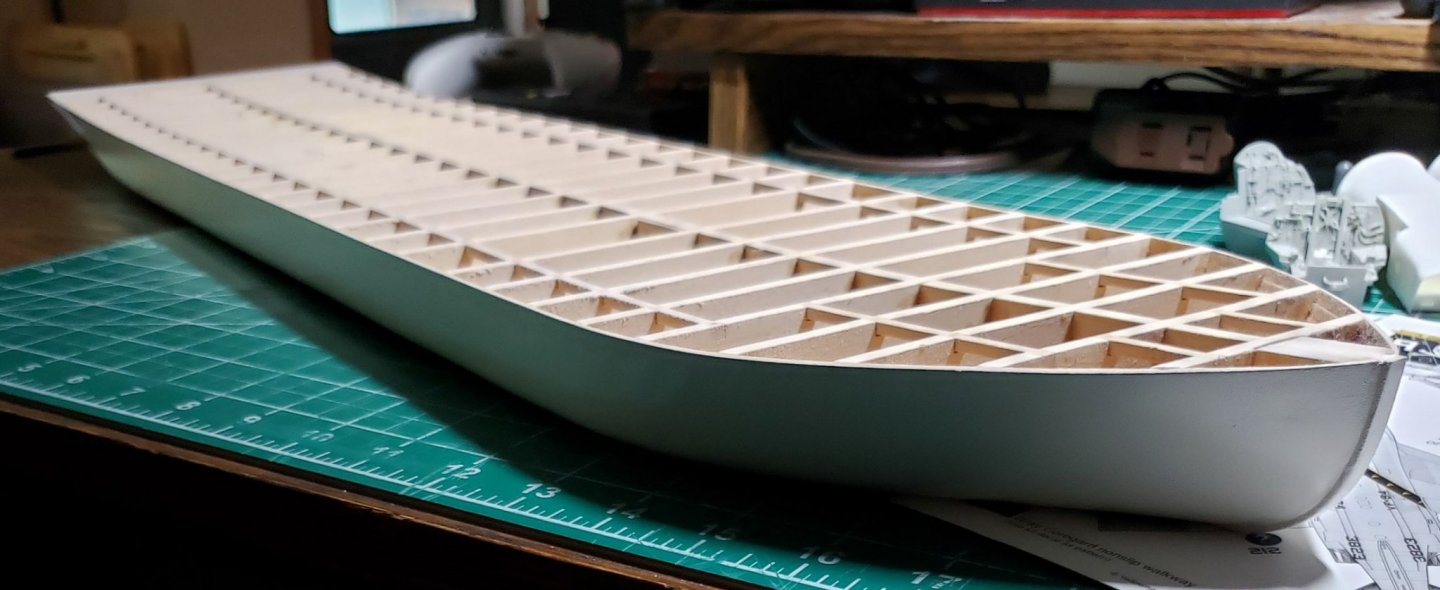
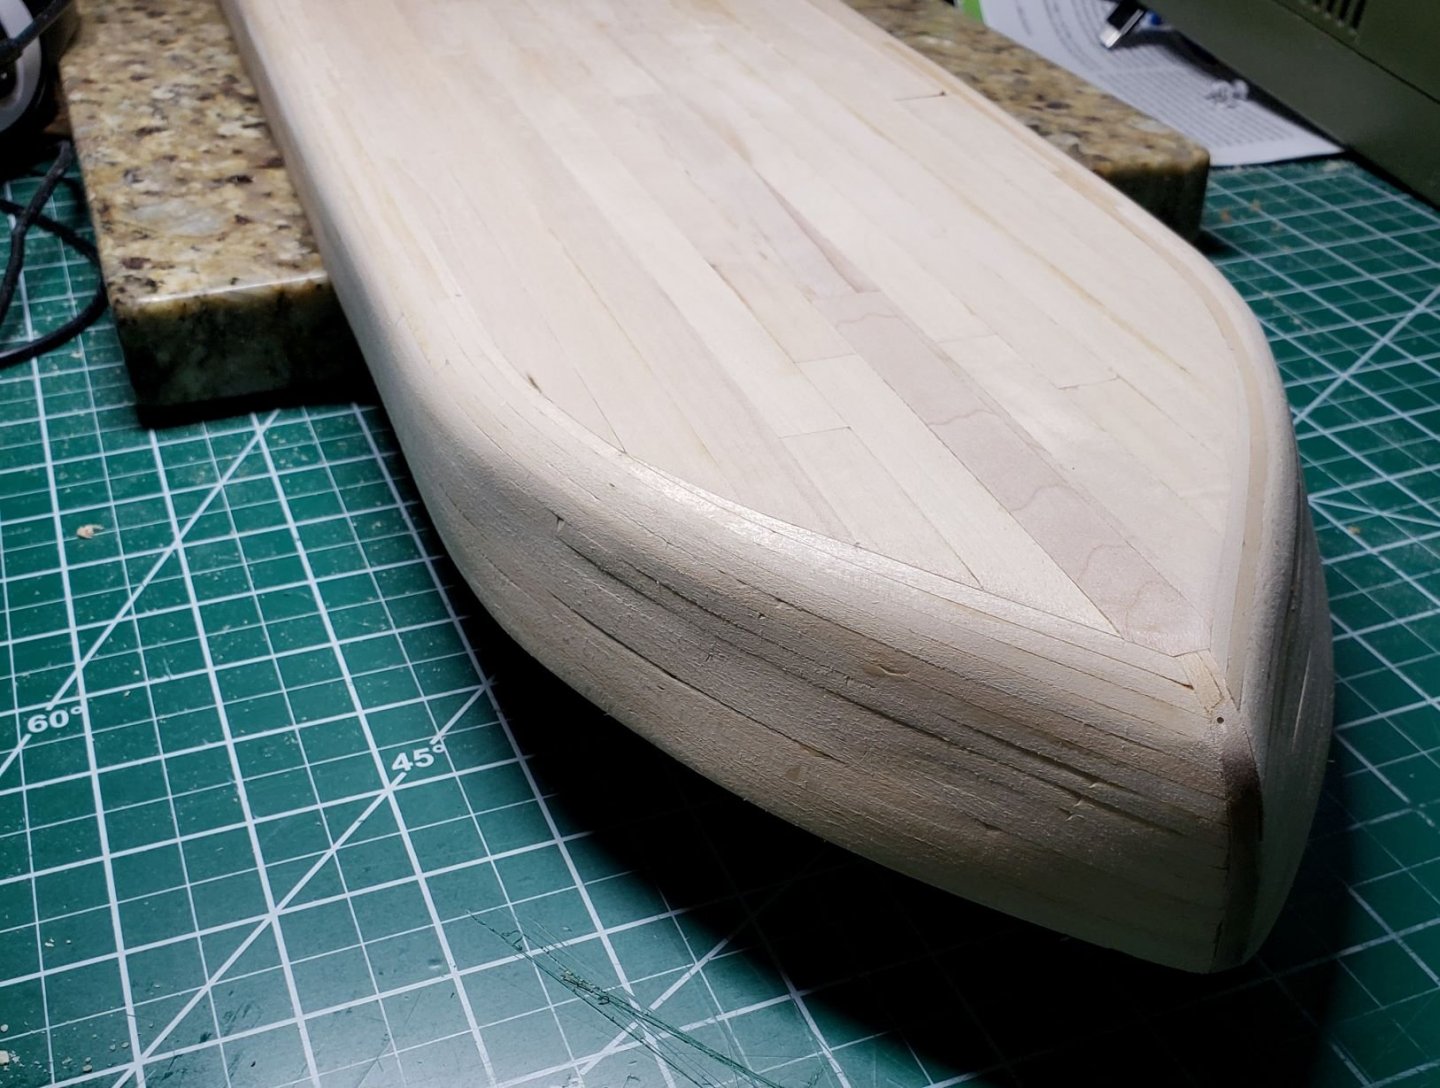
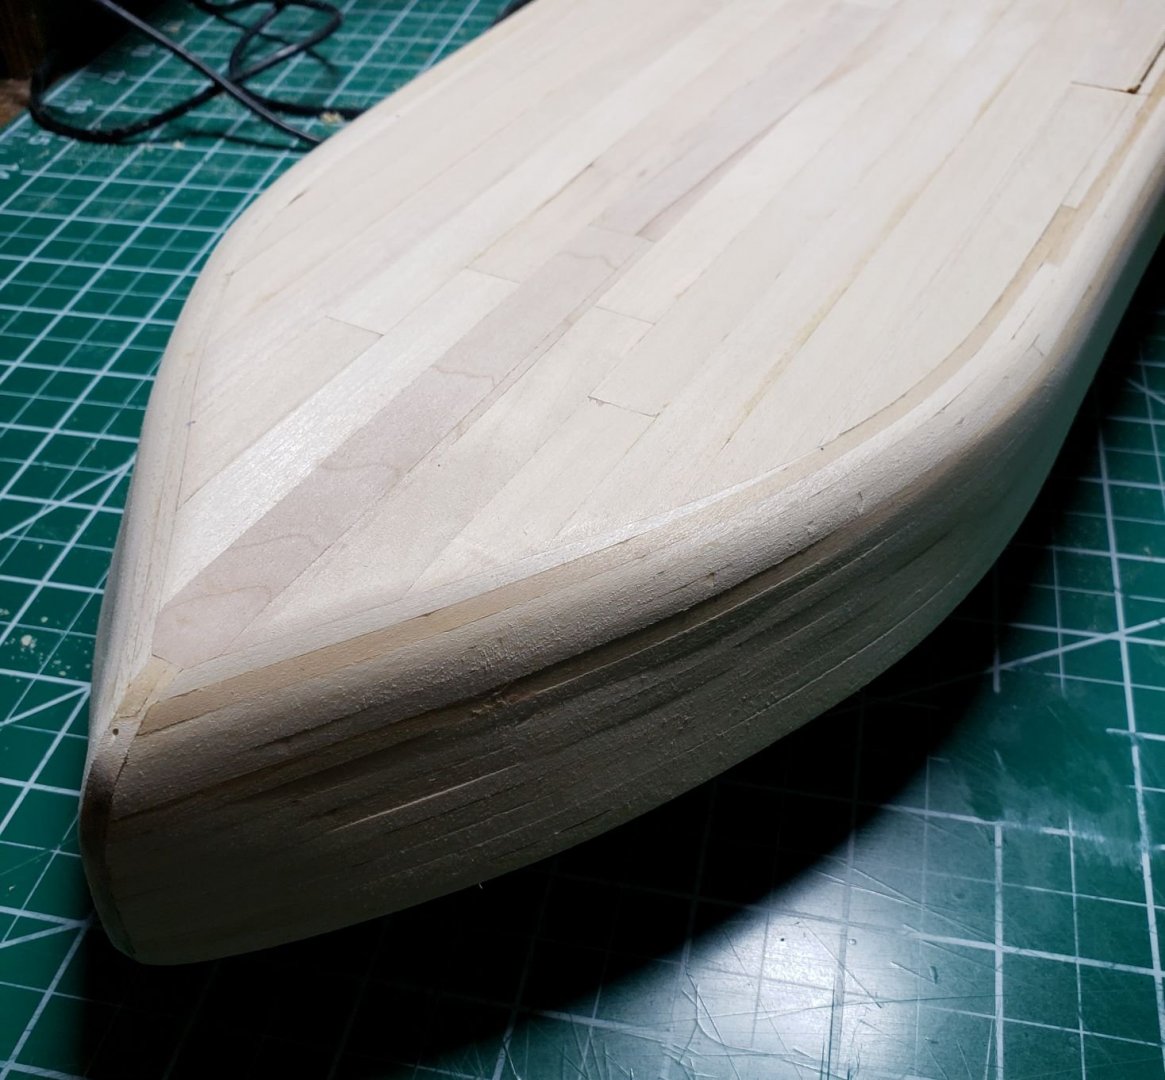
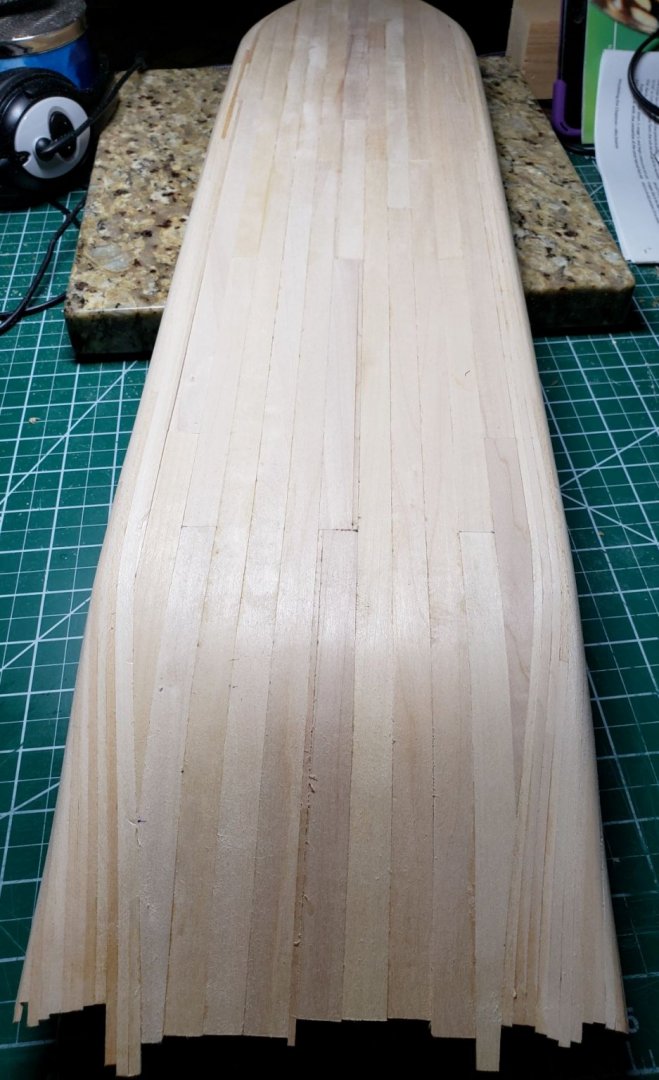
Hello All, Wow! It's been over two weeks since I last posted on here. First things first; thanks to all for the likes, views, and comments. I'm glad to have you aboard on my build log, Brian! I've been checking your build log out along with others. The planking on this kit is definitely easier than a typical, sea-faring, sailing vessel so I chose not to take pictures or comment on my planking progress. The only semi-challenging aspects of it were applying chamfers to plank edges and side-bending the planks for a better planking job that I've had in any of my past builds. I brushed PVA on the insides of the planks once I was done with the planking. Another day to cure properly and I can begin the rigorous sanding for a smooth hull. On to the pictures! Port bow, definitely needs some sanding Starboard bow, also needs some sanding Aft, of course, some sanding required Port aft, just showing off the planking as I'm pretty happy with how it turned out Best I can do with an overall view, and again, some sanding definitely needed Thanks to all in advance for looking in. I'm always open to comments, questions, and criticism.


-
Hi Brian, I'd be lying if I said I hadn't looked in on this build previously. Great work and an outstanding build! If I get to half as decent as your Chaperon, I will consider myself lucky. I've seen some discussion regarding the main desk being painted red. Did you keep yours natural out of preference or because the instructions don't mention painting it? Thank you!
- 133 replies
-
- 2
-
-
- chaperon
- model shipways
- (and 2 more)
-
Hi Brian, Thanks for your response!
-
Thanks for your response Kurt! I was sort of planning on doing that with the deck layout as I laid down each and every plank. I don't think 1/32" strips will add too much thickness but also should allow the deck plank butt joints to be visible.
- 23 replies
-
- 1
-
-
- model shipways
- chaperon
- (and 1 more)
-
Outstanding job on this build! Question for you as I get nearer to installing the main deck, how did you work with the unsightly seams between the fore and aft deck pieces? Are they visible on the finished model given the boiler room and other structures? I'm planning on planking over these decks with 1/32" strips but I'm wondering if all that work is necessary.
- 23 replies
-
- 1
-
-
- model shipways
- chaperon
- (and 1 more)