Blue Pilot
-
Posts
222 -
Joined
-
Last visited
Content Type
Profiles
Forums
Gallery
Events
Everything posted by Blue Pilot
-
Very nice work. Please do tell us more about your new toy! I have been thinking of getting one too. I have always wanted to get into turning wood.
- 831 replies
-
- 1
-

-
- Armed Virginia Sloop
- Model Shipways
- (and 1 more)
-
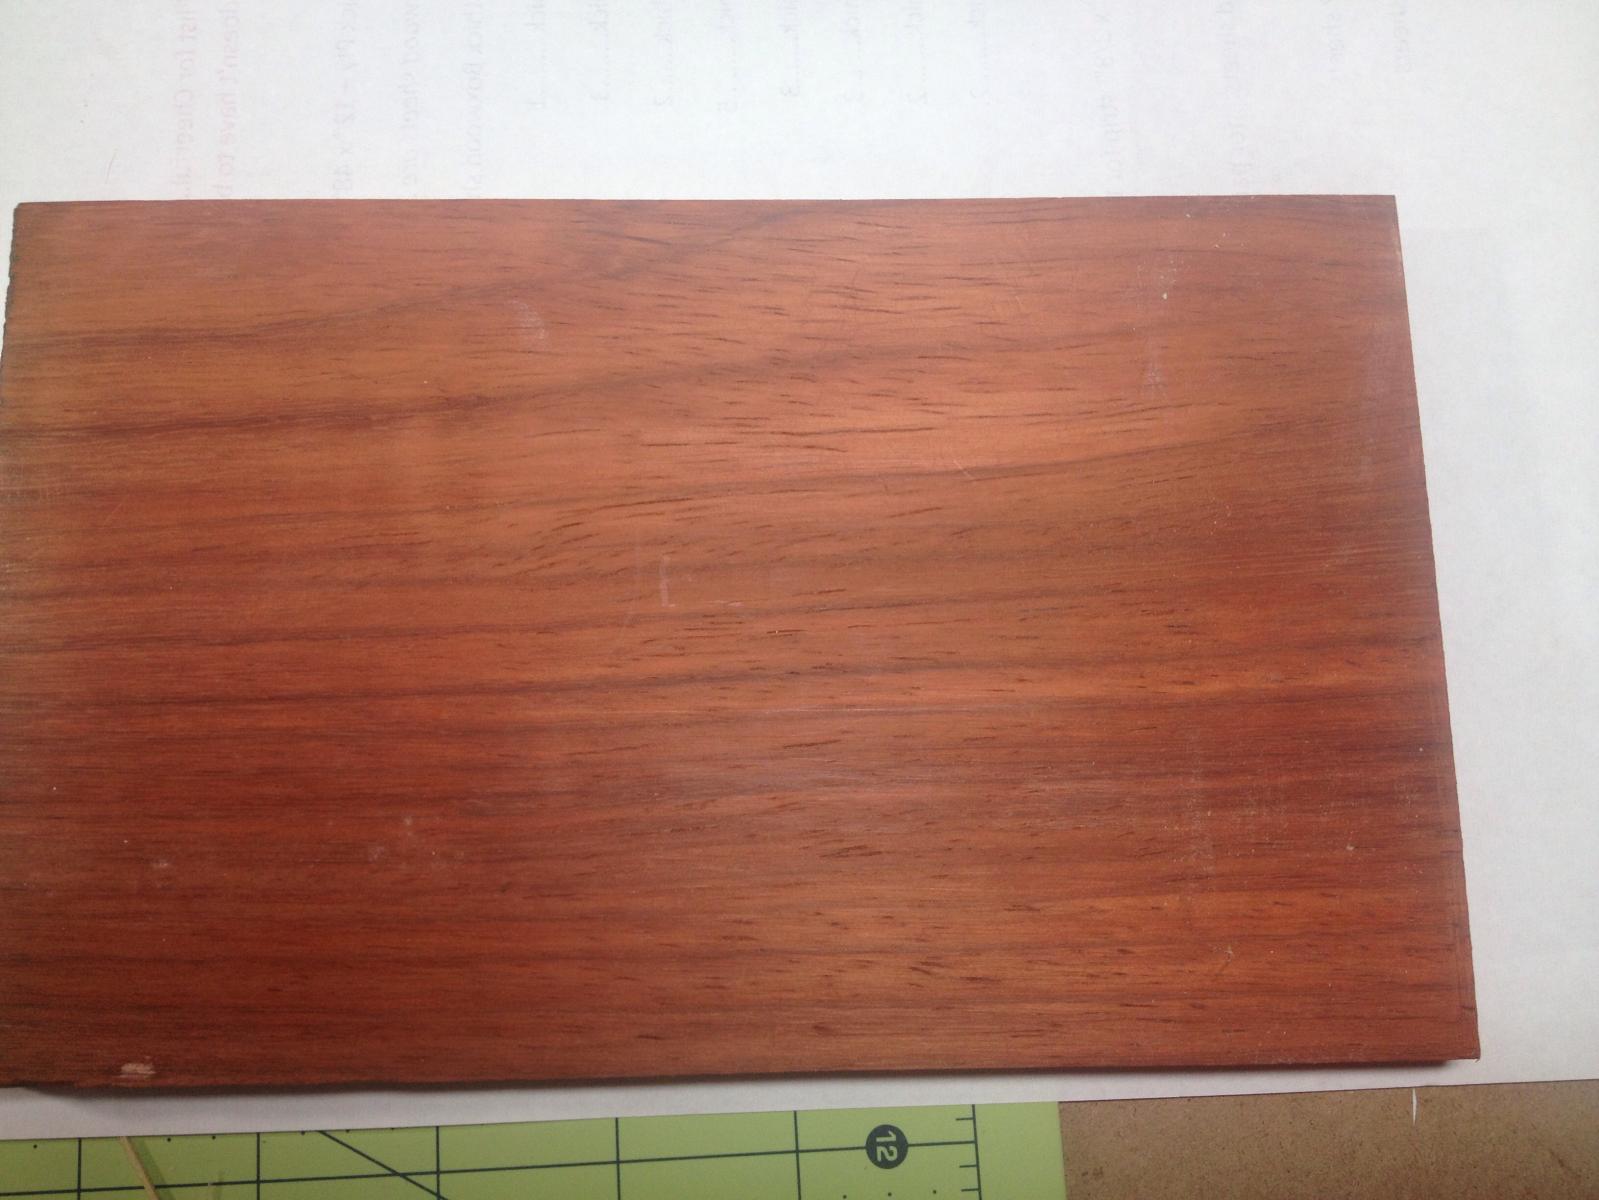
You have a point. I will try and post some of my own when I can. Weather sunlight, filters, cameras all do make an impact but having been on the ship those Flickr photos are much as I remember seeing the ship when I toured it. Other options I am considering are: 1) stains called for in kit and kit wood. I have been experimenting with these but haven't found anything yet that's not to dark for the mahogany. 2) use Castillo Boxwood for the deck, stern knees, fife rails, windless and the patauk to simulate the mahogony. This wood be more in line with the colors on the plan.
-
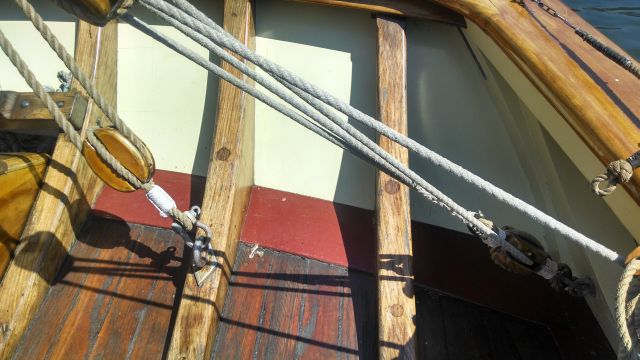
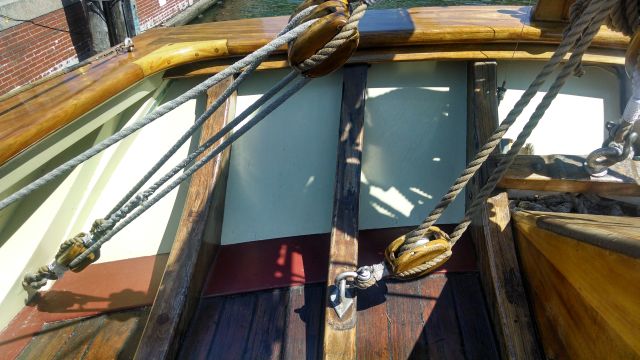
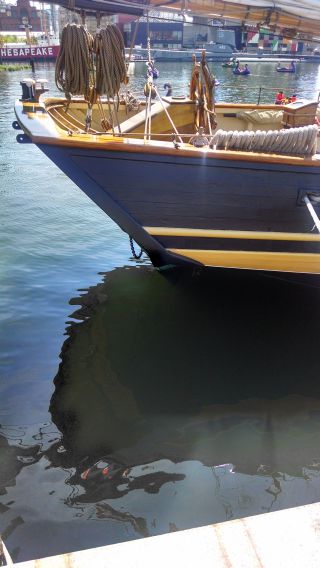
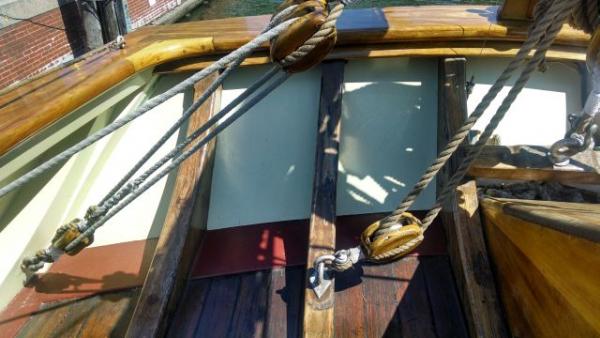
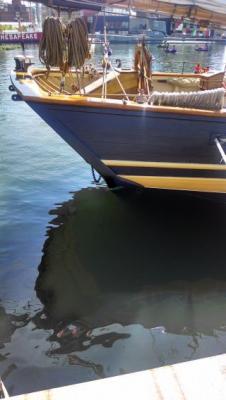
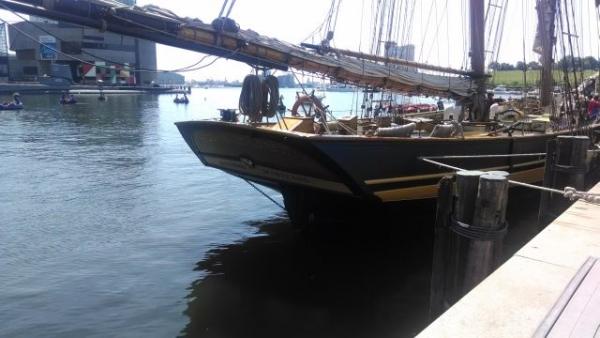
Last year I took a trip into Baltimore to specifically see and photograph the Pride of Baltimore II. I spent a pleasant couple hours taking photos and chatting with some of the crew. One of the things I found most striking was the color of the deck and of the wood on the deck furniture. the standard reference in so many build logs on MSW is a ships deck should be light colored to simulate the practice of holly stoning the deck as was common practice on Navel vessels of the 18th century. Whereas the Pride's deck is dark and streaked with gold, reds, and oranges, brown, and blacks, as a result of time and age. In addition, much of the mahogany trim has faded and in many spots almost honey colored. As I scoured the internet you can see where the deck does change in color with time. I have been corresponding at length with Jason of Crown Timberyard. I can't praise his level of customer service enough. I have not yet ordered a thing but he has been very gracious of his time and we have been bouncing ideas back and forth. With his help we have come up with a few ideas but if two heads are better then one many are even better! So I thought I would bring our discussion to the group here. I want my model to replicate the ship as she was when I saw her. To give you an idea of what I want here is a link to a flicker stream with lots of great photos I pulled of the Internet, not at home to use my photos at the moment also doing this on iPad. So what we have came up with, ok Jason came up with the idea of using padauk for the deck and cabin roofs. Rubbed with mineral oil to darken on the deck and cabin tops and possible Padauk sealed with poly for a lighter look for the Mahoney on the roof trim, roof hatches, Top Rail, helm, or Castillo Box Wood to simulated the weathered mahogany on the real ship. Open to your thoughts. I will post some of my own pictures perhaps later. If I can pull this off I think it could be stunningly beautiful, if not then then I guess it will leave you just sunned

-
I have been searching the web and my own photos at great length, as well as studying the kits plans and practicum to develop up a plan on how I want things to look when she is done. First, to everyone building the Pride I have concluded our own eagle eyed shipwright, jcoby has spotted an error in the kits plans above. The fashion piece or trim on the side profile of the transom is a narrower strip of board on the real ship then the plans describe. You can compare the photos above to jcoby's pictures where his model does reflect how the kits plans are drawn. It's a small point, and only a keen and knowing eye would ever notice it. In fact, I would not have caught it if he had not brought it to my attention. However, it's a point others may or may not want to address in their models. The choice is yours.
-
Cutter Cheerful 1806 by rafine - FINISHED
Blue Pilot replied to rafine's topic in - Build logs for subjects built 1801 - 1850
Bob, I have spent many enjoyable hours reading your build logs. Looking forward to watching this new build!- 525 replies
-
- 1
-
-
- cheerful
- Syren Ship Model Company
- (and 1 more)
-
I did the same thing on my AVS, for the same reasons. I like the color I think it looks good. There is something special about putting the tiller on. It makes me real like I am entering the home stretch.
- 831 replies
-
- 1
-
-
- Armed Virginia Sloop
- Model Shipways
- (and 1 more)
-
I have a passion for American Privateers and the ships and men of tne Colonial Navy. This ships former Captain, Abraham Whipple has been largly forgotten in th mist of time but he was truly a hero of the revolution! This ship will be great build to watch.
-
Thanks for the photos. I wouldnt change a thing on your build, I think it looks great. If mine looks as good as that in the end I will be thrilled! The transom always seems to be a problem area to build even on what appears to be a fairly simple transom. I will take a close look at the plans and that trim piece when I get home. I was hoping the width would help to hide whare my plankshear is to thin.
-
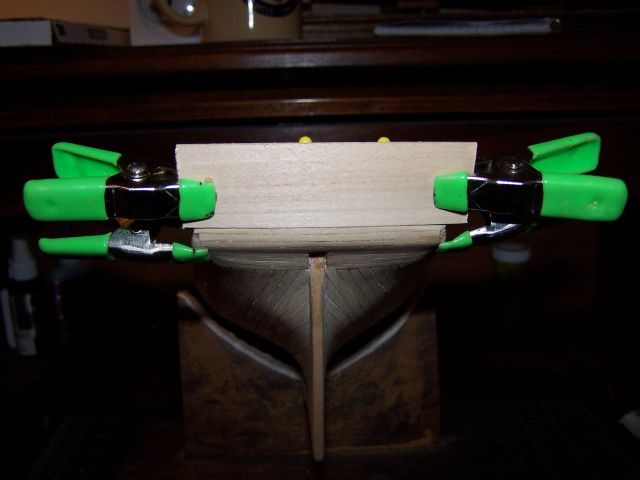
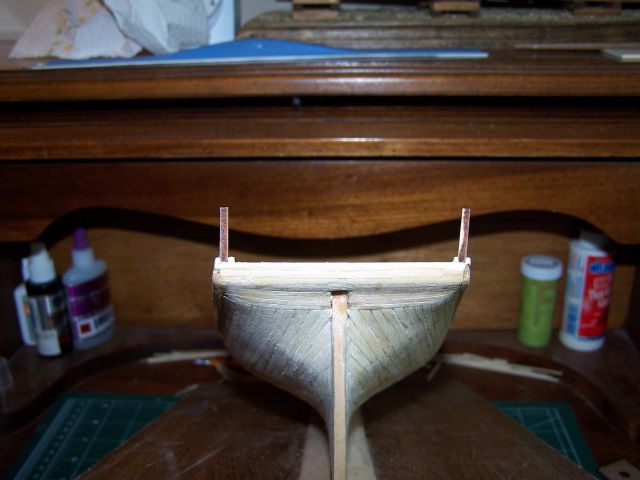
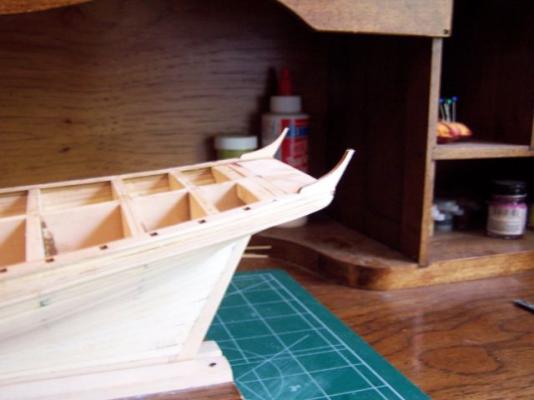
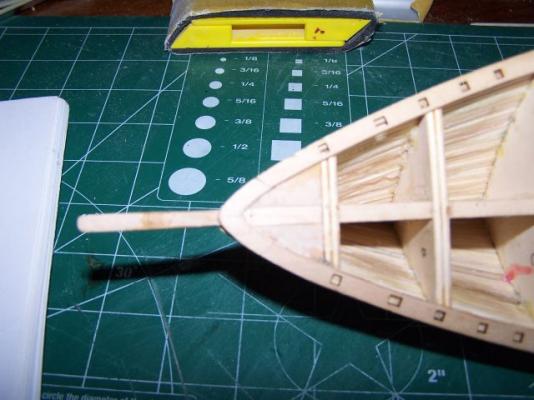
After reading jcoby's last post I decided to play around a bit and see what the transom might look like installed with the knees aft edge flush with the end of the stern. I cut a piece out of the 1/32 sheet included in the kit approximately the size of the transom. After a little trimming of the slots the outboard knees sit in and a bit of sanding here and there this is what I came up with. The piece I made in the last post is not glued in place. It does push out the transom into very gentle curve, which the plans seem to indicate is normal as opposed to perfectly perpendicular to the stern. Of course I am no expert at reading plans. There will be a trim piece installed across where the deck and transom join All in all I think it will do, but welcome more thoughts.

-
Here is the area we are discussing on the actual ship.

-
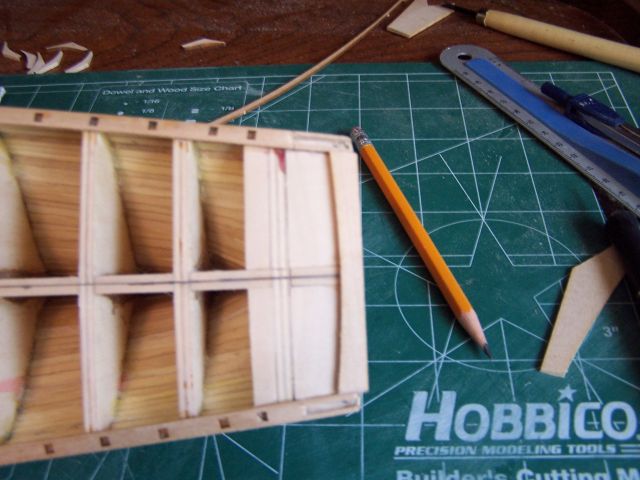
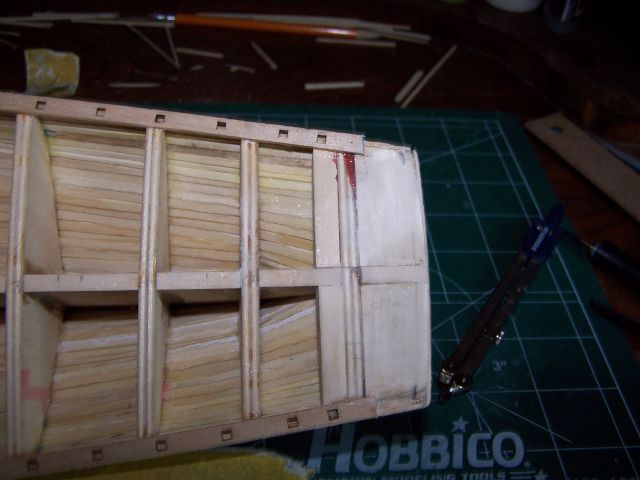
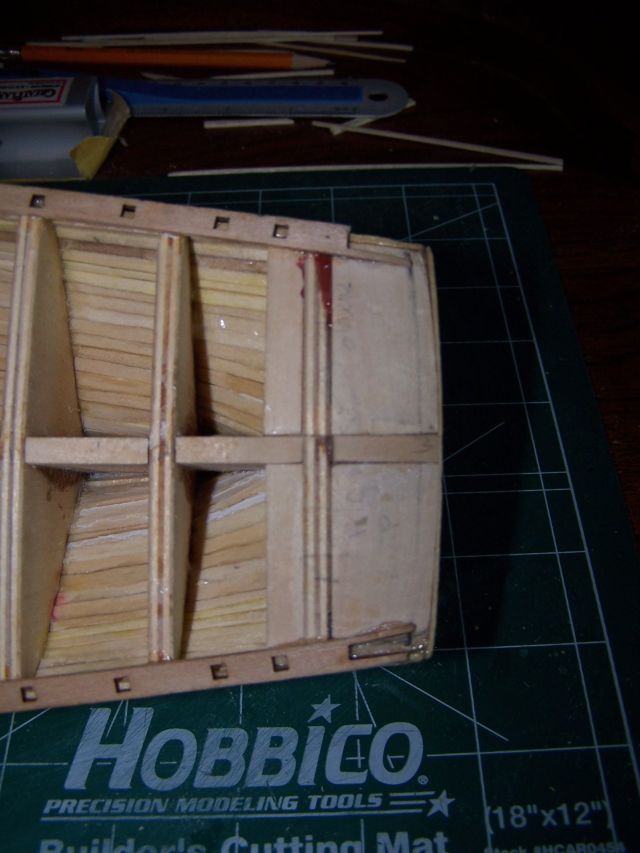
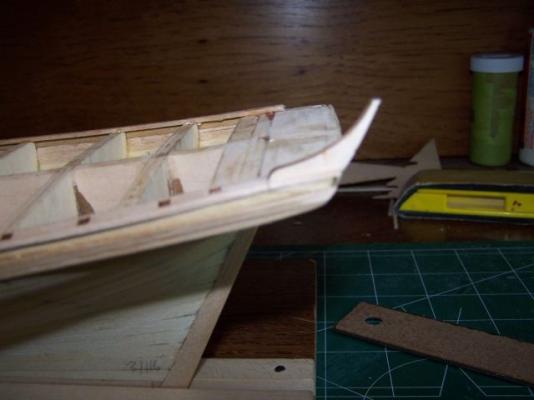
One piece not included in the laser cut plank shear is the aft piece. However, it is in the plans. In Bobs Practicum he does not include this piece and simply runs the deck planking in solid runs across the deck. In keeping with my goal of trying to build the ship as true to life as my skills allow I made this piece. In addition, I will be planking the deck based on previous guidance from jcoby in his build log. Thanks again for that. I started by marking a 3/16 line across the shape of the stern. I then used part of the scrap from the plank sheer (so inboard curve was already made for me). Then I just trimmed up the aft edge. Photo is before aft edge was trimed.

-
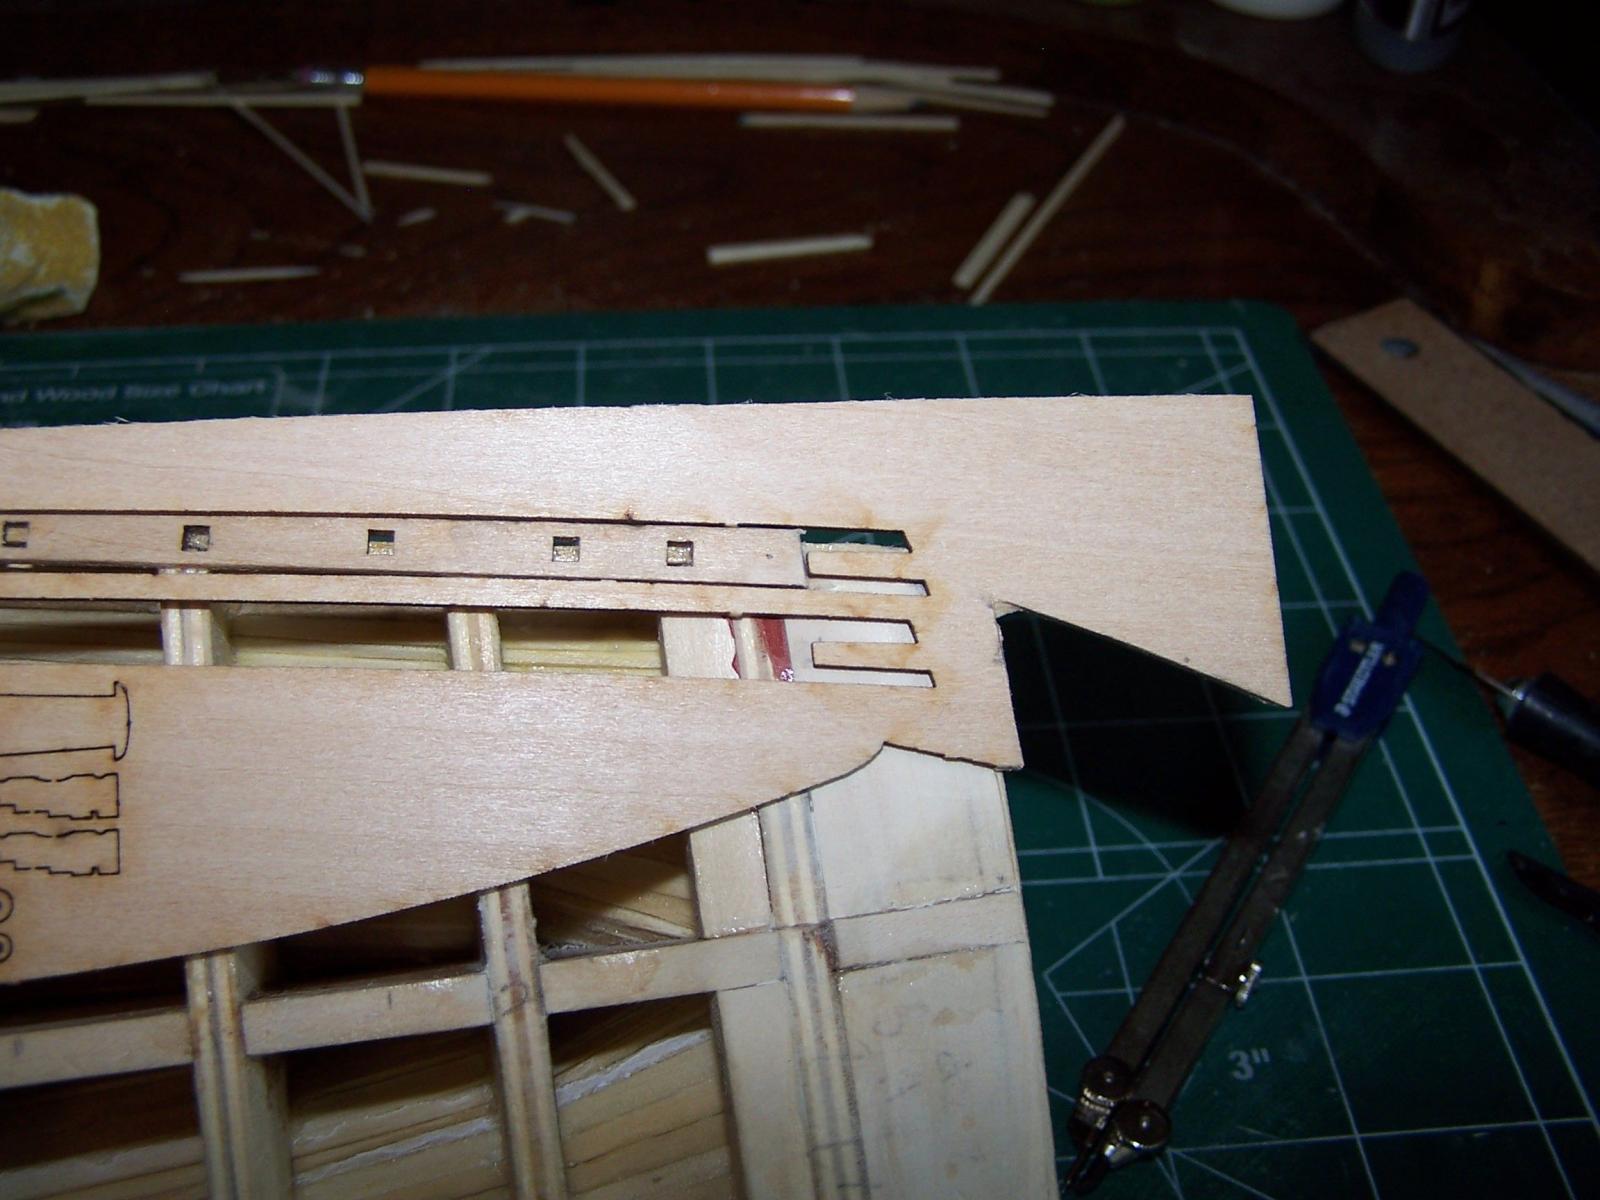
Transom Question: I hope someone can answer this for me. I have been looking at the plans and have a question about how the transom piece and knees all come together at the stern. Looking at the practicum the transom piece fits on top of the planking. I am not sure if that is correct or if the knees the transom connects to should be flush with the aft edge of the planking (aft Plank sheer Piece)? The transom is made of 1/32 sheet and/or strips so it is very thin. There is also some trim pieces that go on the transom as well, lower, middle. And outboard edges. So I am thinking the Knees need to be adjusted inboard from the most aft edge 1/32" to adjust for the transom, or do I leave them flush with the aft edge then add the lower trim on the bottom edge? This is probably clear as mud! I can’t really tell which is right from the plans.
-
Good to hear from you! I have been studying the photos in your log, my photos of the ship, the Practicum, and the plans. I plan to move away from Bob Hunts Practicum in some of the deck and bulkhead work for the next phase. some details in your build are more accurate to the plans and the real ship. Playing with some stain samples at the moment. Interestingly the part of my test strips I did not sand seem to take the stain better then the sanded side. I tried a stain called red oak for a possible substitute for the mahogany. Still a bit to dark I think. I will post a picture when I can.
-
I beleave it is. It's been well documented to be a problem. As far as I know it has not been fixed, though to be fair my kit was bought several years ago.
-
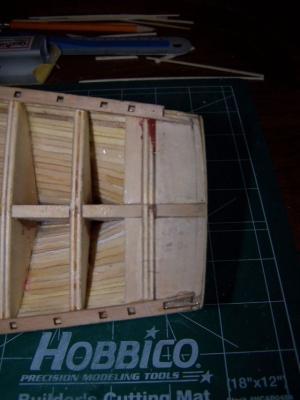
Now that that is done I have a lot of tough decisions to make on how to go about doing the deck and bulkheads. I plan to stain my deck. Can anyone tell me if paining over stained wood is a problem? I am trying to decide what I need to painting before or after construction of upper deck area, the plank sheer, bulkheads, and supports will all be painted. I am also still on the fence whether it is best to build the cabin comings first or after laying the decking. I also plan to add a few details jcoby did not. There is separate planks under the windless,fife rail (larger then deck planks) and a small round hatch in the bow I want to add. They will hardly be noticeable in the end but I am trying to come up with a plan on how to do all this. In addition, as I want to make her as she is in real life, I will be adding the props and drive shafts to the hull. I have not seen anyone add this feature so I will be running solo. My first thought is silver solder metal bands and support tubes for the prop shafts. I will need to order tools for that from some ware as I have no experience with this kind of soldering. Which is a great reason to go that route . I also thought plastic, or wood could be used. The prop shafts will be brass rod and the props are cast parts that came with the kit. Any additional thoughts are welcome.
-
Finally here are a few shots after the repair, sorry the photos are not great. I hope this helps at least document the problem for other POB II builders

-
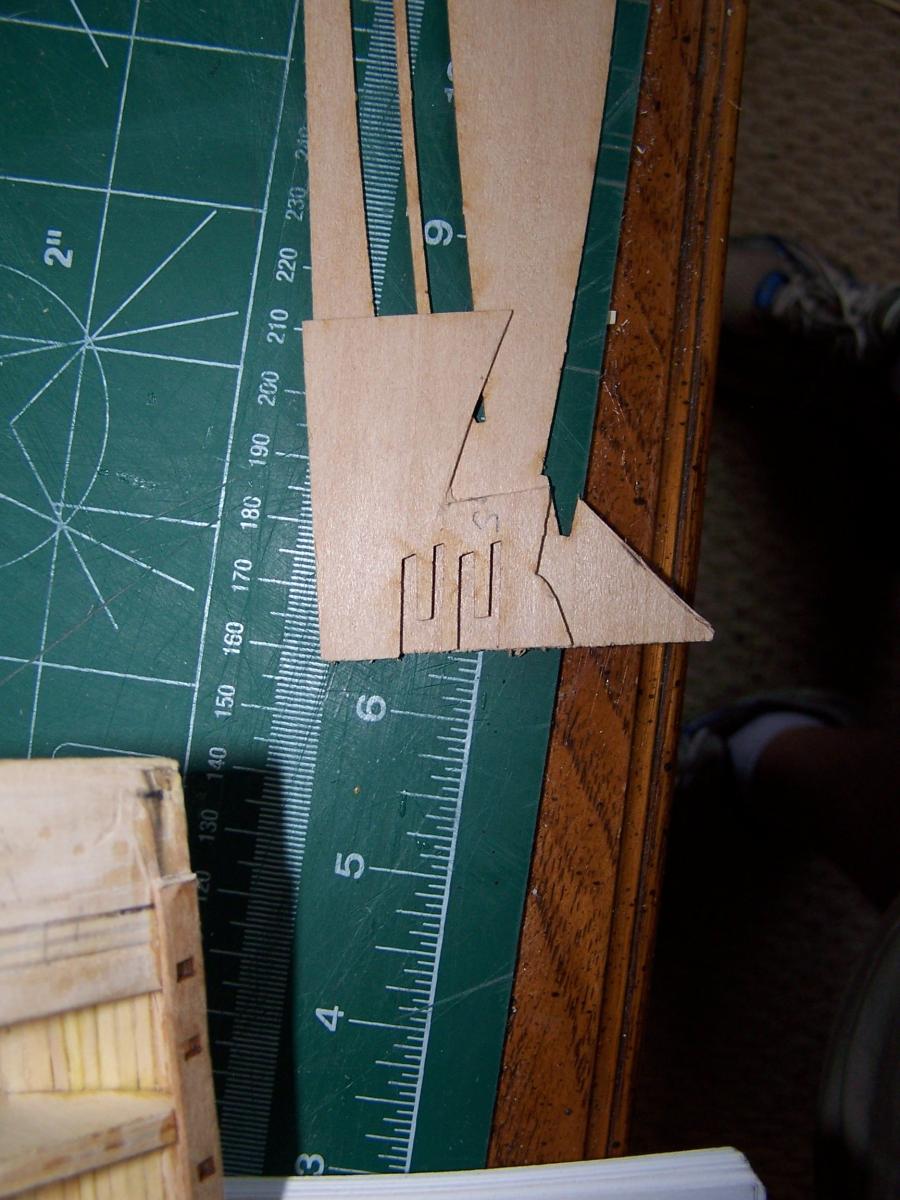
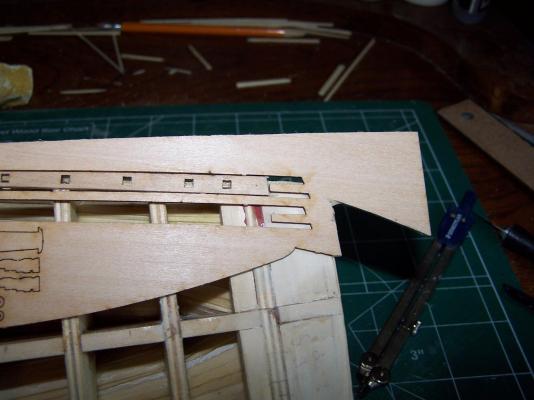
There is probably an easier way to fix this but I will try and illustrate how I fixed the problem. I started by trimming off the ends to the proper length with the knee in place. I then used the laser cut portion as a template to draw a new piece. I did this on the same sheet that held the original plank sheers. I then used a straight edge and x-acto knife to trim what would be the two prongs. These I then carefully glued in place. I then carefully used the x-acto knife and a jewelers file to widen the slot as needed for the stern knees to fit in place. Then I sanded the top and sides to match the rest of the plank sheer.


-
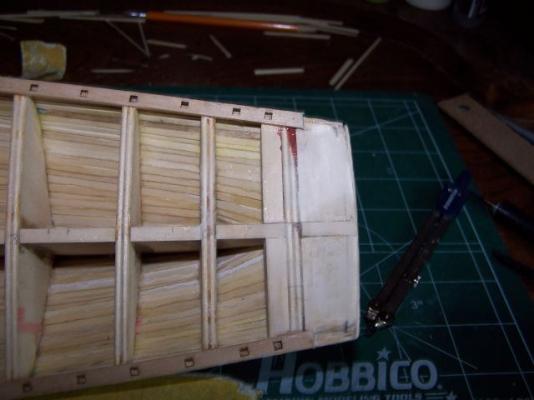
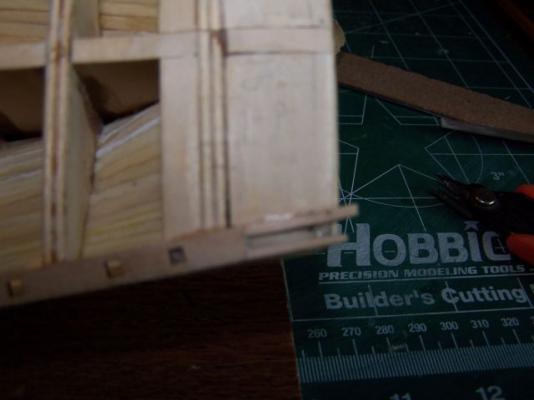
The second problem with the Plank sheer is it is to short aft, approximately 1/4" . The second photo shows this and you can also see a piece of the starboard piece has broken off as well. There are eight knees that mate with the hull and the stern here. The two outboard fit in this slot in the plank sheer. As is this will leave a gap. This is the problem jcoby mentioned previously. Here are two photos showing what I am talking about.
-
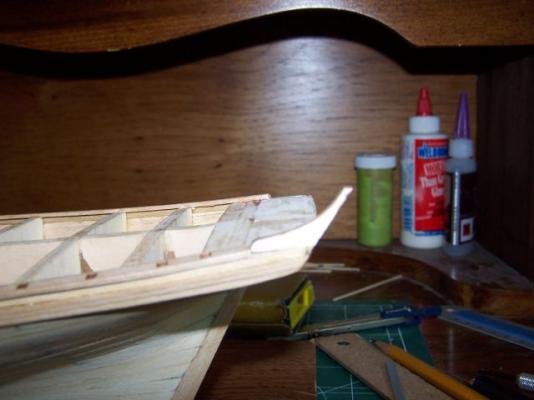
I am trying a new wood putty, Elmers Probond wood filler. While it drys I thought I would update my log. As previously mentioned by jcoby the plank sheer is not long enough at the stern. In truth the bow area does not properly follow the curve of the hull either. I previously fixed this portion when I installed the laser cut plank shear pieces by cutting out approximately 1.5 inches and fashioning new pieces to fill in the bow. Here is a picture it is not the best but at the top you should be able to see the joint I made and how new pieces were fashioned.
-
Very nice clean lines. The deck looks great! She is going to be a beautie when launched.
- 831 replies
-
- 1
-
-
- Armed Virginia Sloop
- Model Shipways
- (and 1 more)
-
She is looking great!
-
This is a bit off topic but I just have to share! I just sent off an email signing up to attend Admiralty Models November Echo Class workshop in Atlanta. I have had the long term goal of getting into scratch building. However, being a novice I have tried to pick my projects as much on what each has to teach me as looks. I don't think skill wise I am ready to take the plunge to building a plank on frame model from scratch, but this is an opportunity I couldn't pass up to learn first hand with some of the worlds finest craftsmen and take on a project that I could realistically finish. I look forward to meeting some of you there.
-
Beautiful!
-
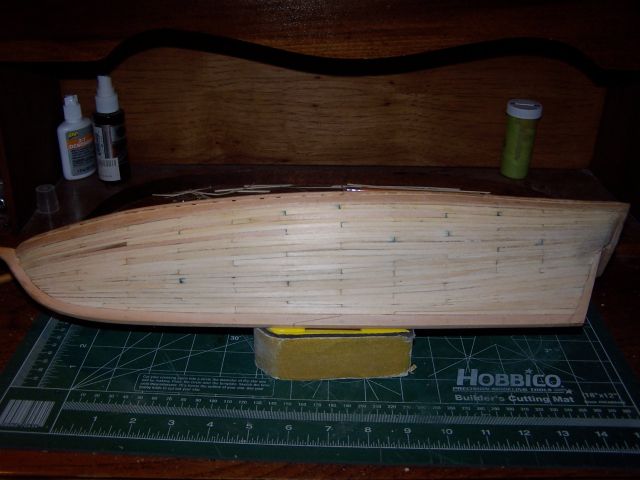
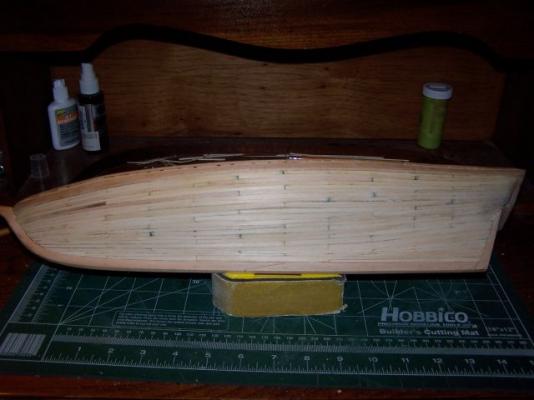
Finished! Lessons learned. I had a lot of trouble on both sides getting my but joints to work out correctly. Next time perhaps I will try using tic marks and marking things out completely in advance. I also had my two bands become very narrow at the last bulkhead to the stern post. I had to cut the planks very narrow here to make the rows work out. I could not figure a way to make a drop plank or joggle plank of some sort to fix this. This was made even more complicate by my but joints not working out correctly. To other new model shipwrights who may be reading this, planking the hull seems like such an overwhelming task. Just focus on one or two rows at a time. Little by little it all comes togather. Problems will happen that’s a given. Just accept that and deal with it as best you can, remember it’s not like we are building the Space Shuttle here. I am constantly learning new things and improving my skills. I want to thank everyone who has helped me get to this point in the build. Time to celebrate with nice glass of bourbon. A toast to the Pride of Baltimore II and to all of you!
-
So many days I thought I will never finish this job, then all of a sudden Voila, One plank to go!