MORE HANDBOOKS ARE ON THEIR WAY! We will let you know when they get here.
×


Blue Pilot
-
Posts
222 -
Joined
-
Last visited
Content Type
Profiles
Forums
Gallery
Events
Everything posted by Blue Pilot
-
All I can ever say when I look at you logs is Wow! Amazing as always Chuck.
- 1,784 replies
-
- 3
-

-
- winchelsea
- Syren Ship Model Company
- (and 1 more)
-
Your work is always amazing and an inspiration to get to work on my ships and strive to do more.
- 642 replies
-
- 2
-
-
- winchelsea
- Syren Ship Model Company
- (and 1 more)
-
I have only planked two kits so I am not what you would say an expert but I would say no nails. I use a good medium CA glue on the two hulls I have planked. I then just used my fingers to hold the planks in place until they set. The medium gives you enough time to get things set in the right spot but sets in 15-30 seconds. Put a dab on each bulkhead and a thin bit on the edge. It doesn't take a lot of glue or time. If the plank is long glue a couple bulkheads at a time. That has worked for me. It is fast and easy. If you get the debonder you can even unglue the plank if you find you attached it upside down or something. Don't ask me how I know that. Hope this helps. Good luck, you will do fine. It all seems intimidating but with wood you can correct most mistakes.
-
Willkommen! Glad to have you aboard.
-
Thanks Nic and Juhu. I sent BJ an email and received a fast response. However, I also spent some time in my shed where most of my ship model books and tools have been stashed away in boxes. After a lengthy search my initial comments were in error and I have edited my original post. My kit did come with a manual. I found it buried away in one of the boxes. I don't recall separating it from the box but clearly I did. Sorry for the confusion, and for this senior moment. In the mean time I contacted NRG and ordered the Ships in Scale data BetaQDave mentioned and will be working on making some hull templates before I do any more shaping to the hull and I my start with making the keel pieces.
-
Thank you juju I actually I looked more closely at the box last night after posting this and it does say that a manual is included. I will call Blue Jacket today to ask about a new one and amend this post. My experience in the past with BJ has always been positive so I am sure they will work with me.
-
Great idea! Thanks for the tip I will do that.
-
Model #2 - Mamoli Constitution vs. The Field
Blue Pilot replied to CarolinaCommodore's topic in New member Introductions
Welcome aboard and yes the build logs are an incredible aid to all of us. I get so many ideas. -
Welcome aboard and those are fantastic!
-
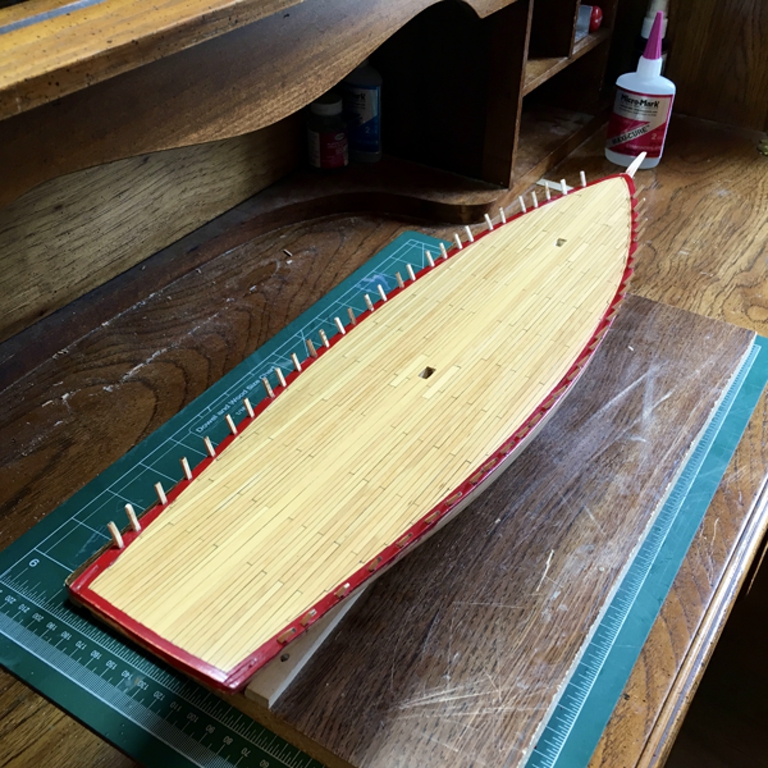
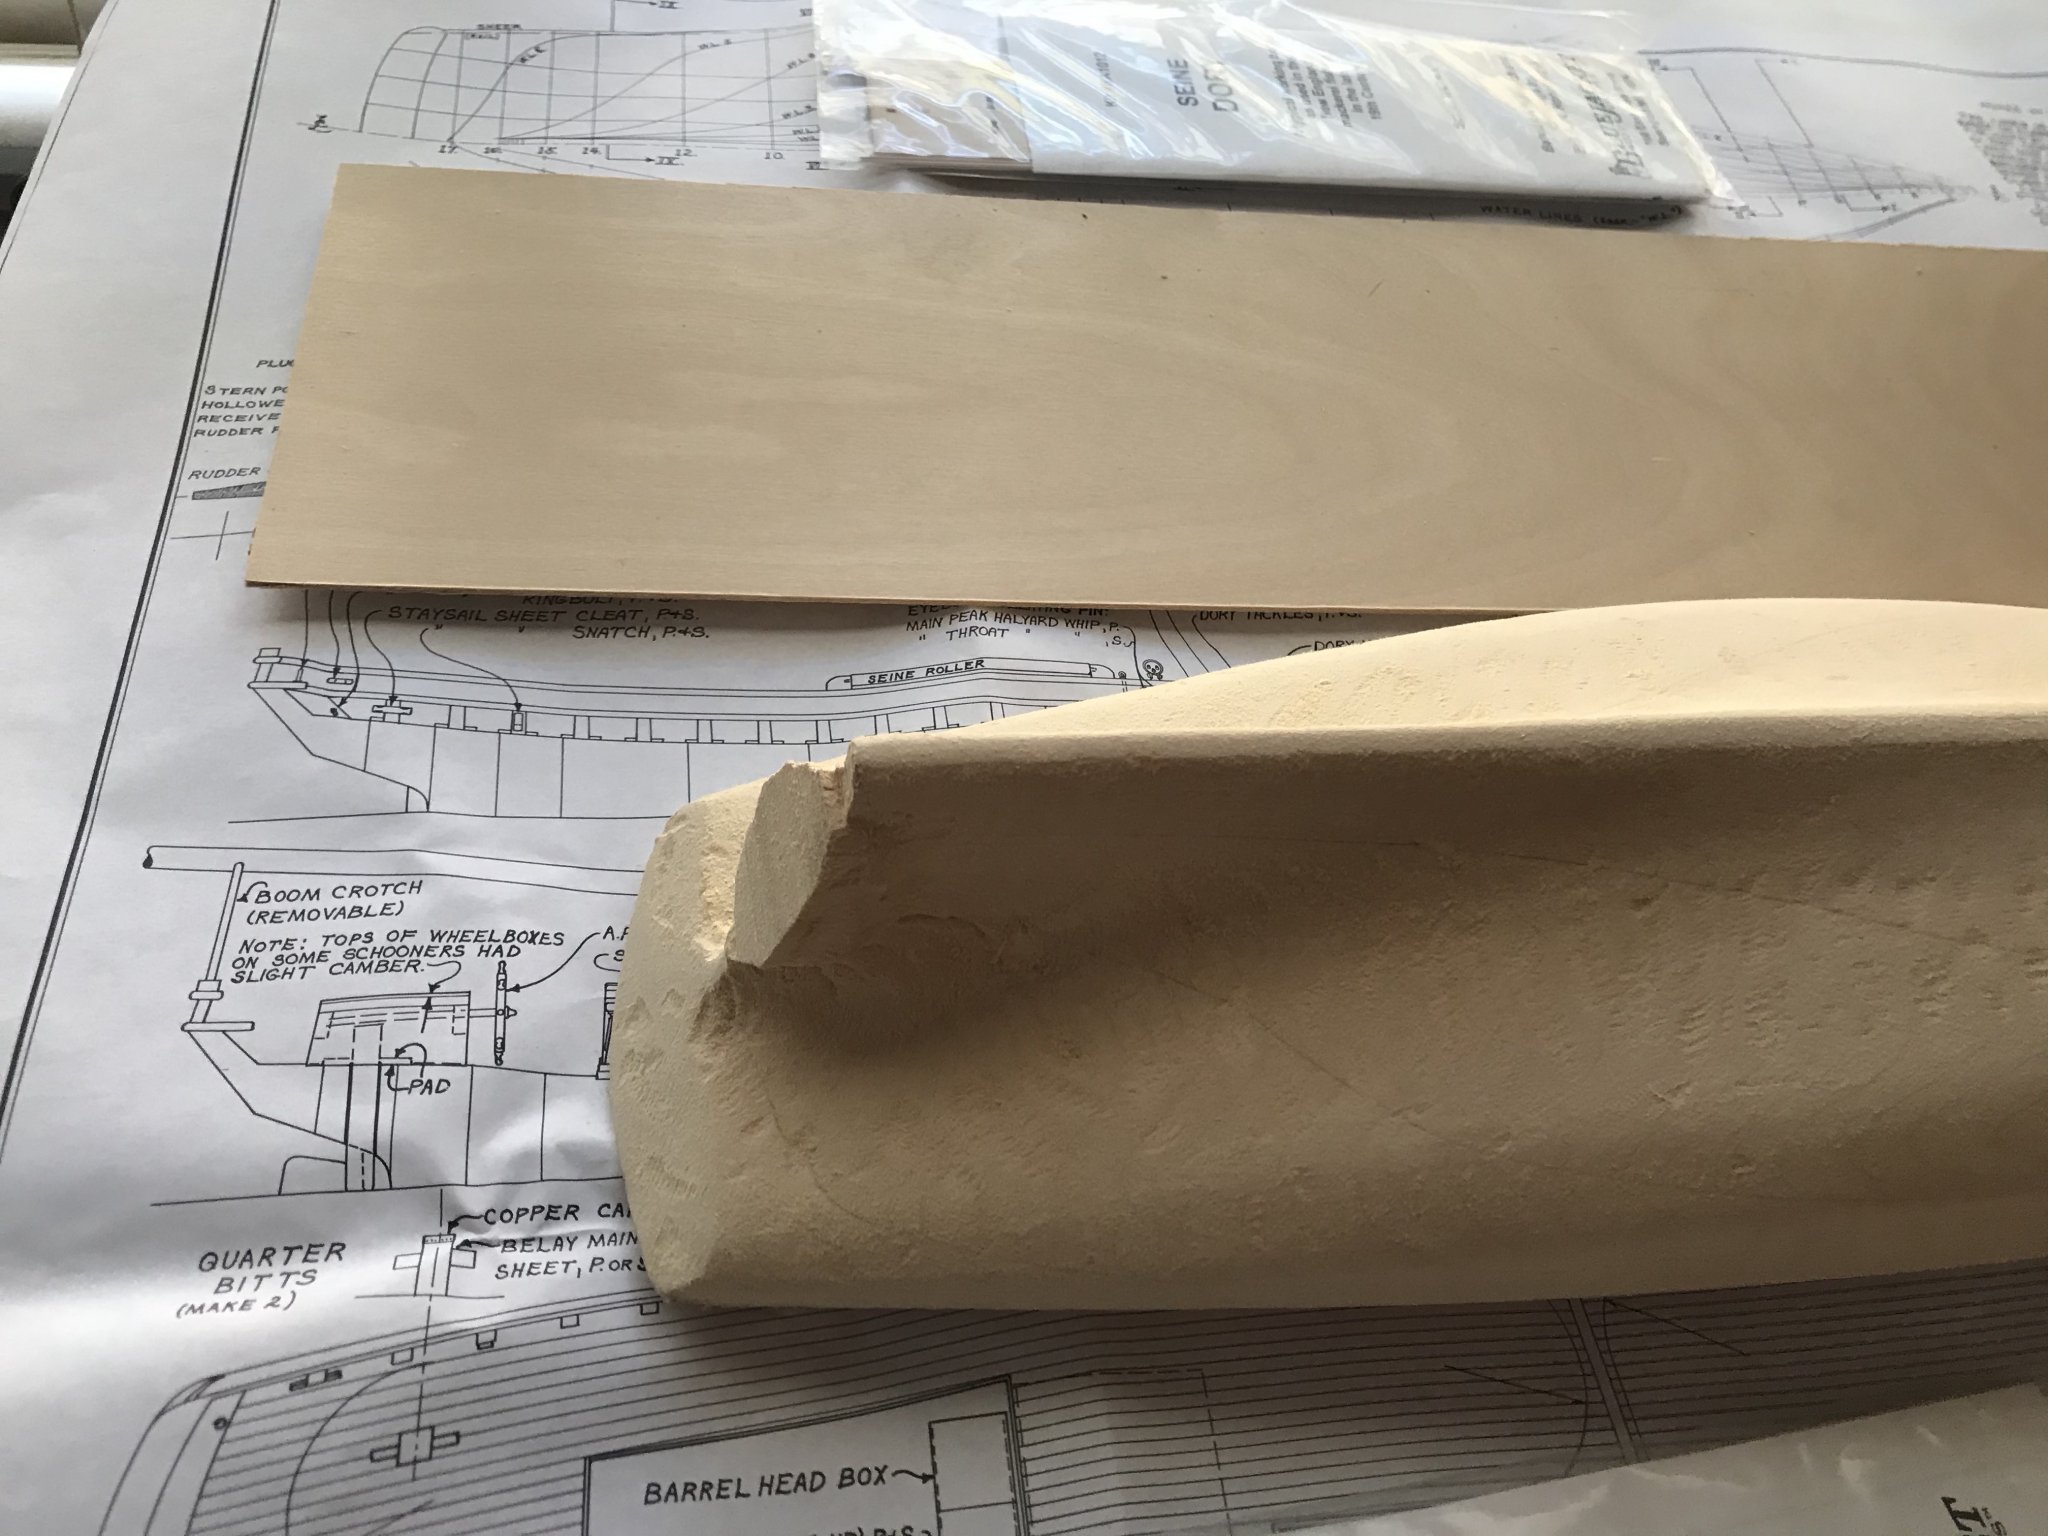
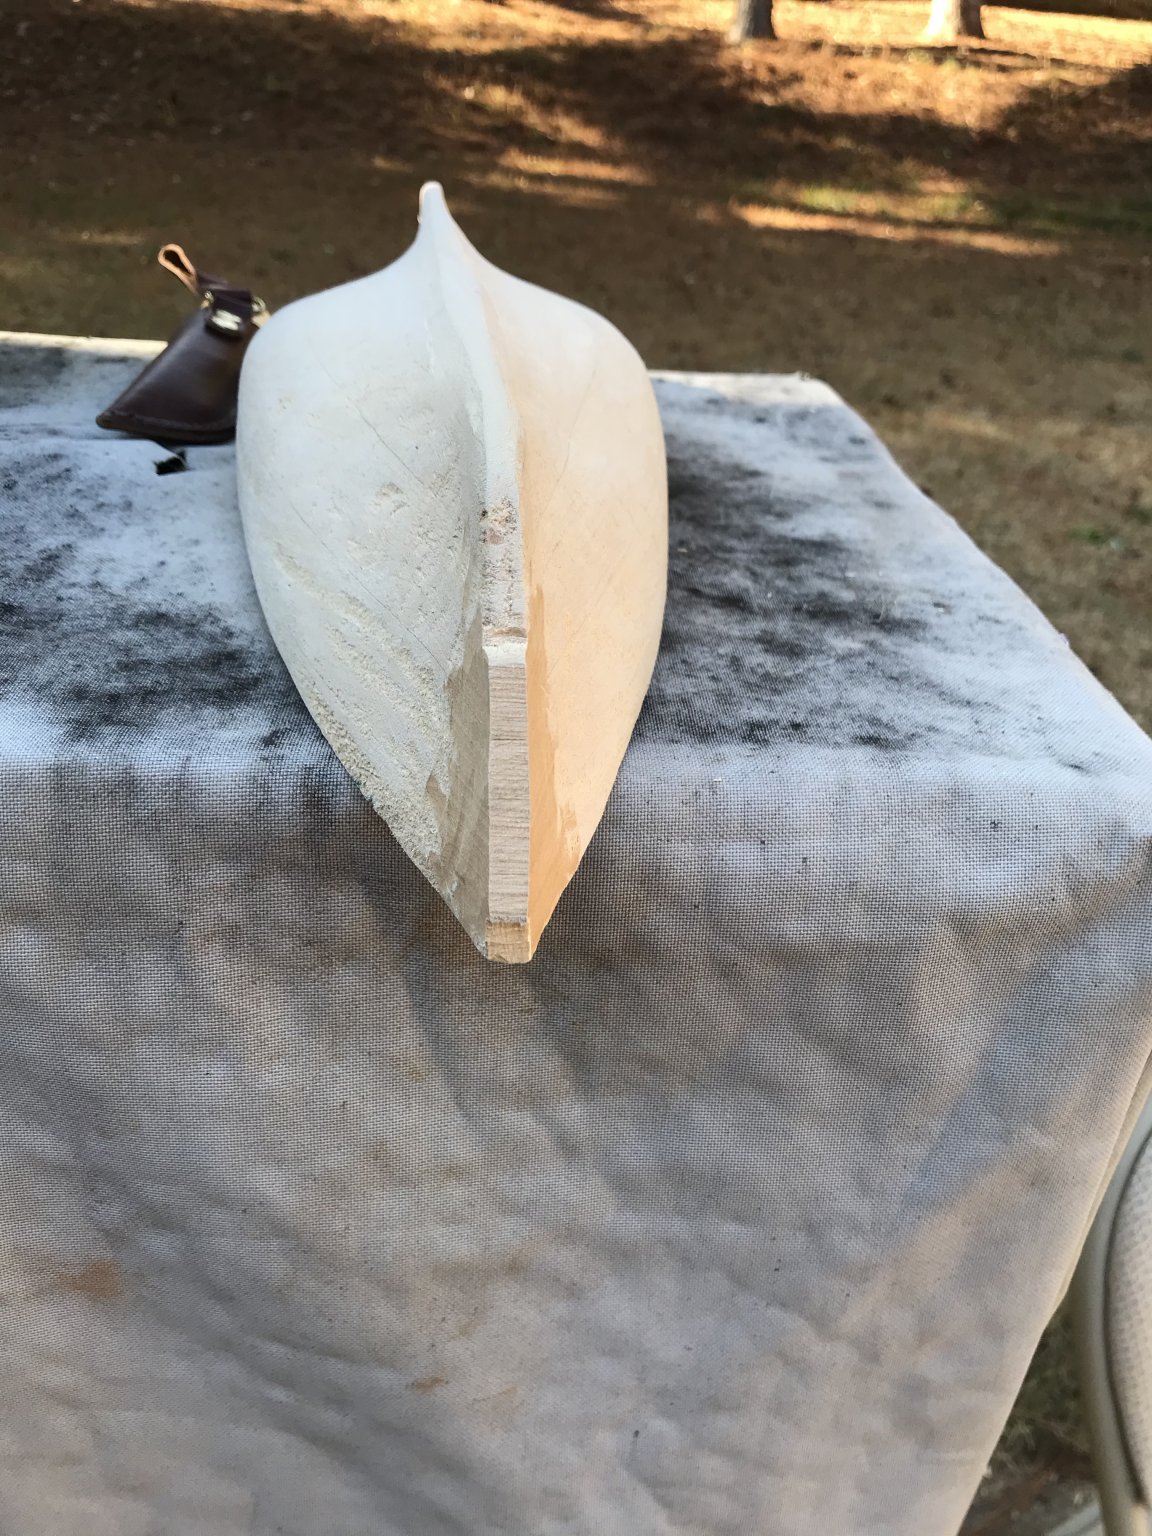
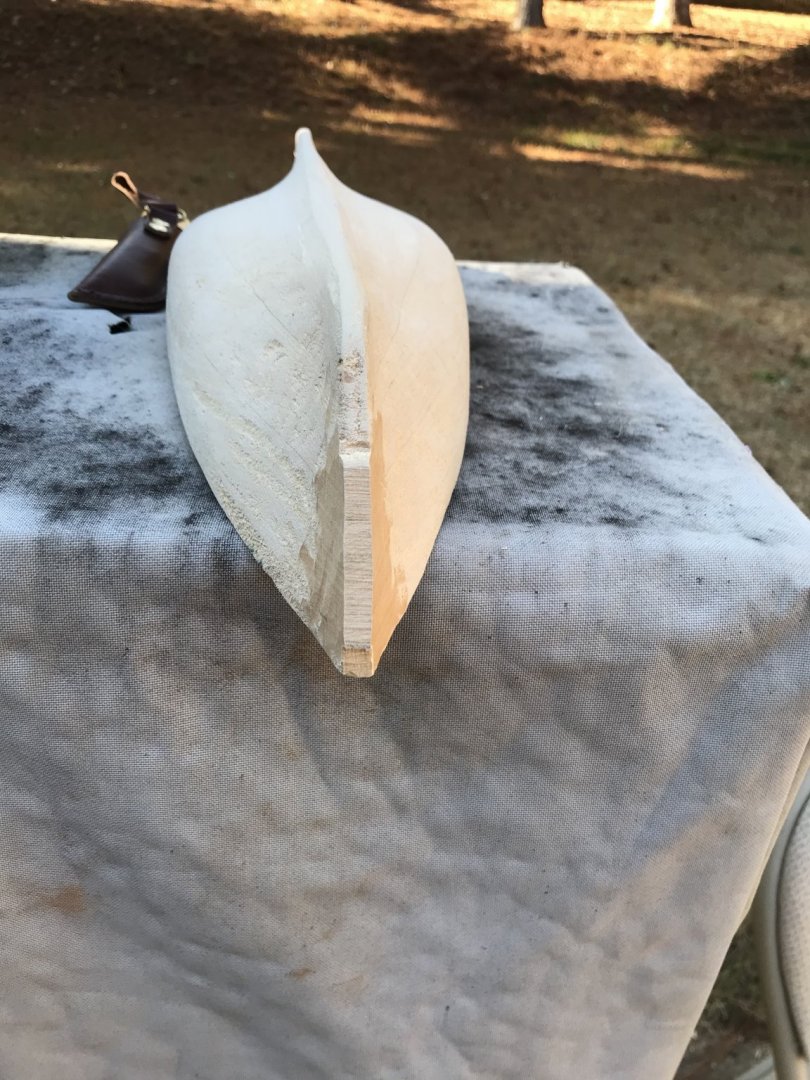
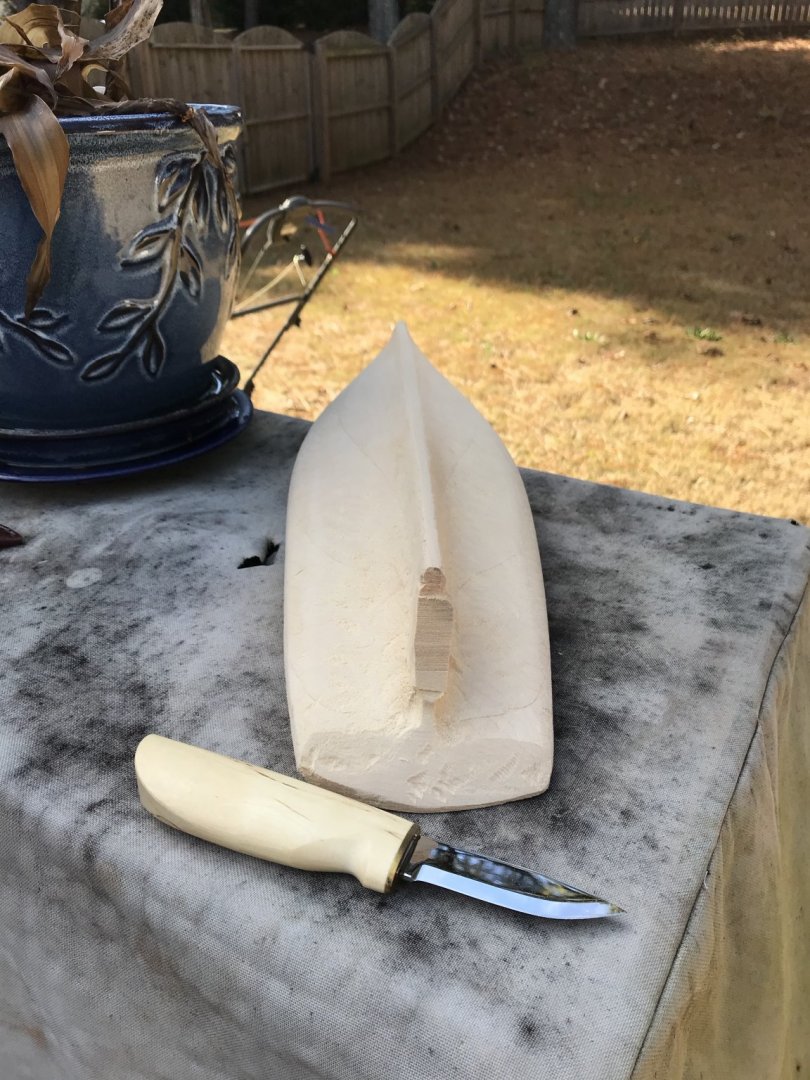
A bit of whistling down on the keel and bow dead wood.

-
Very nice! You don't see a lot of Bluejacket kits which I think is a shame. I have just started the Blue Jacket Smuggler. It looks like you are off to a great start. The Atlantic is such a beautiful ship I was really torn between it and the Smuggler.
-
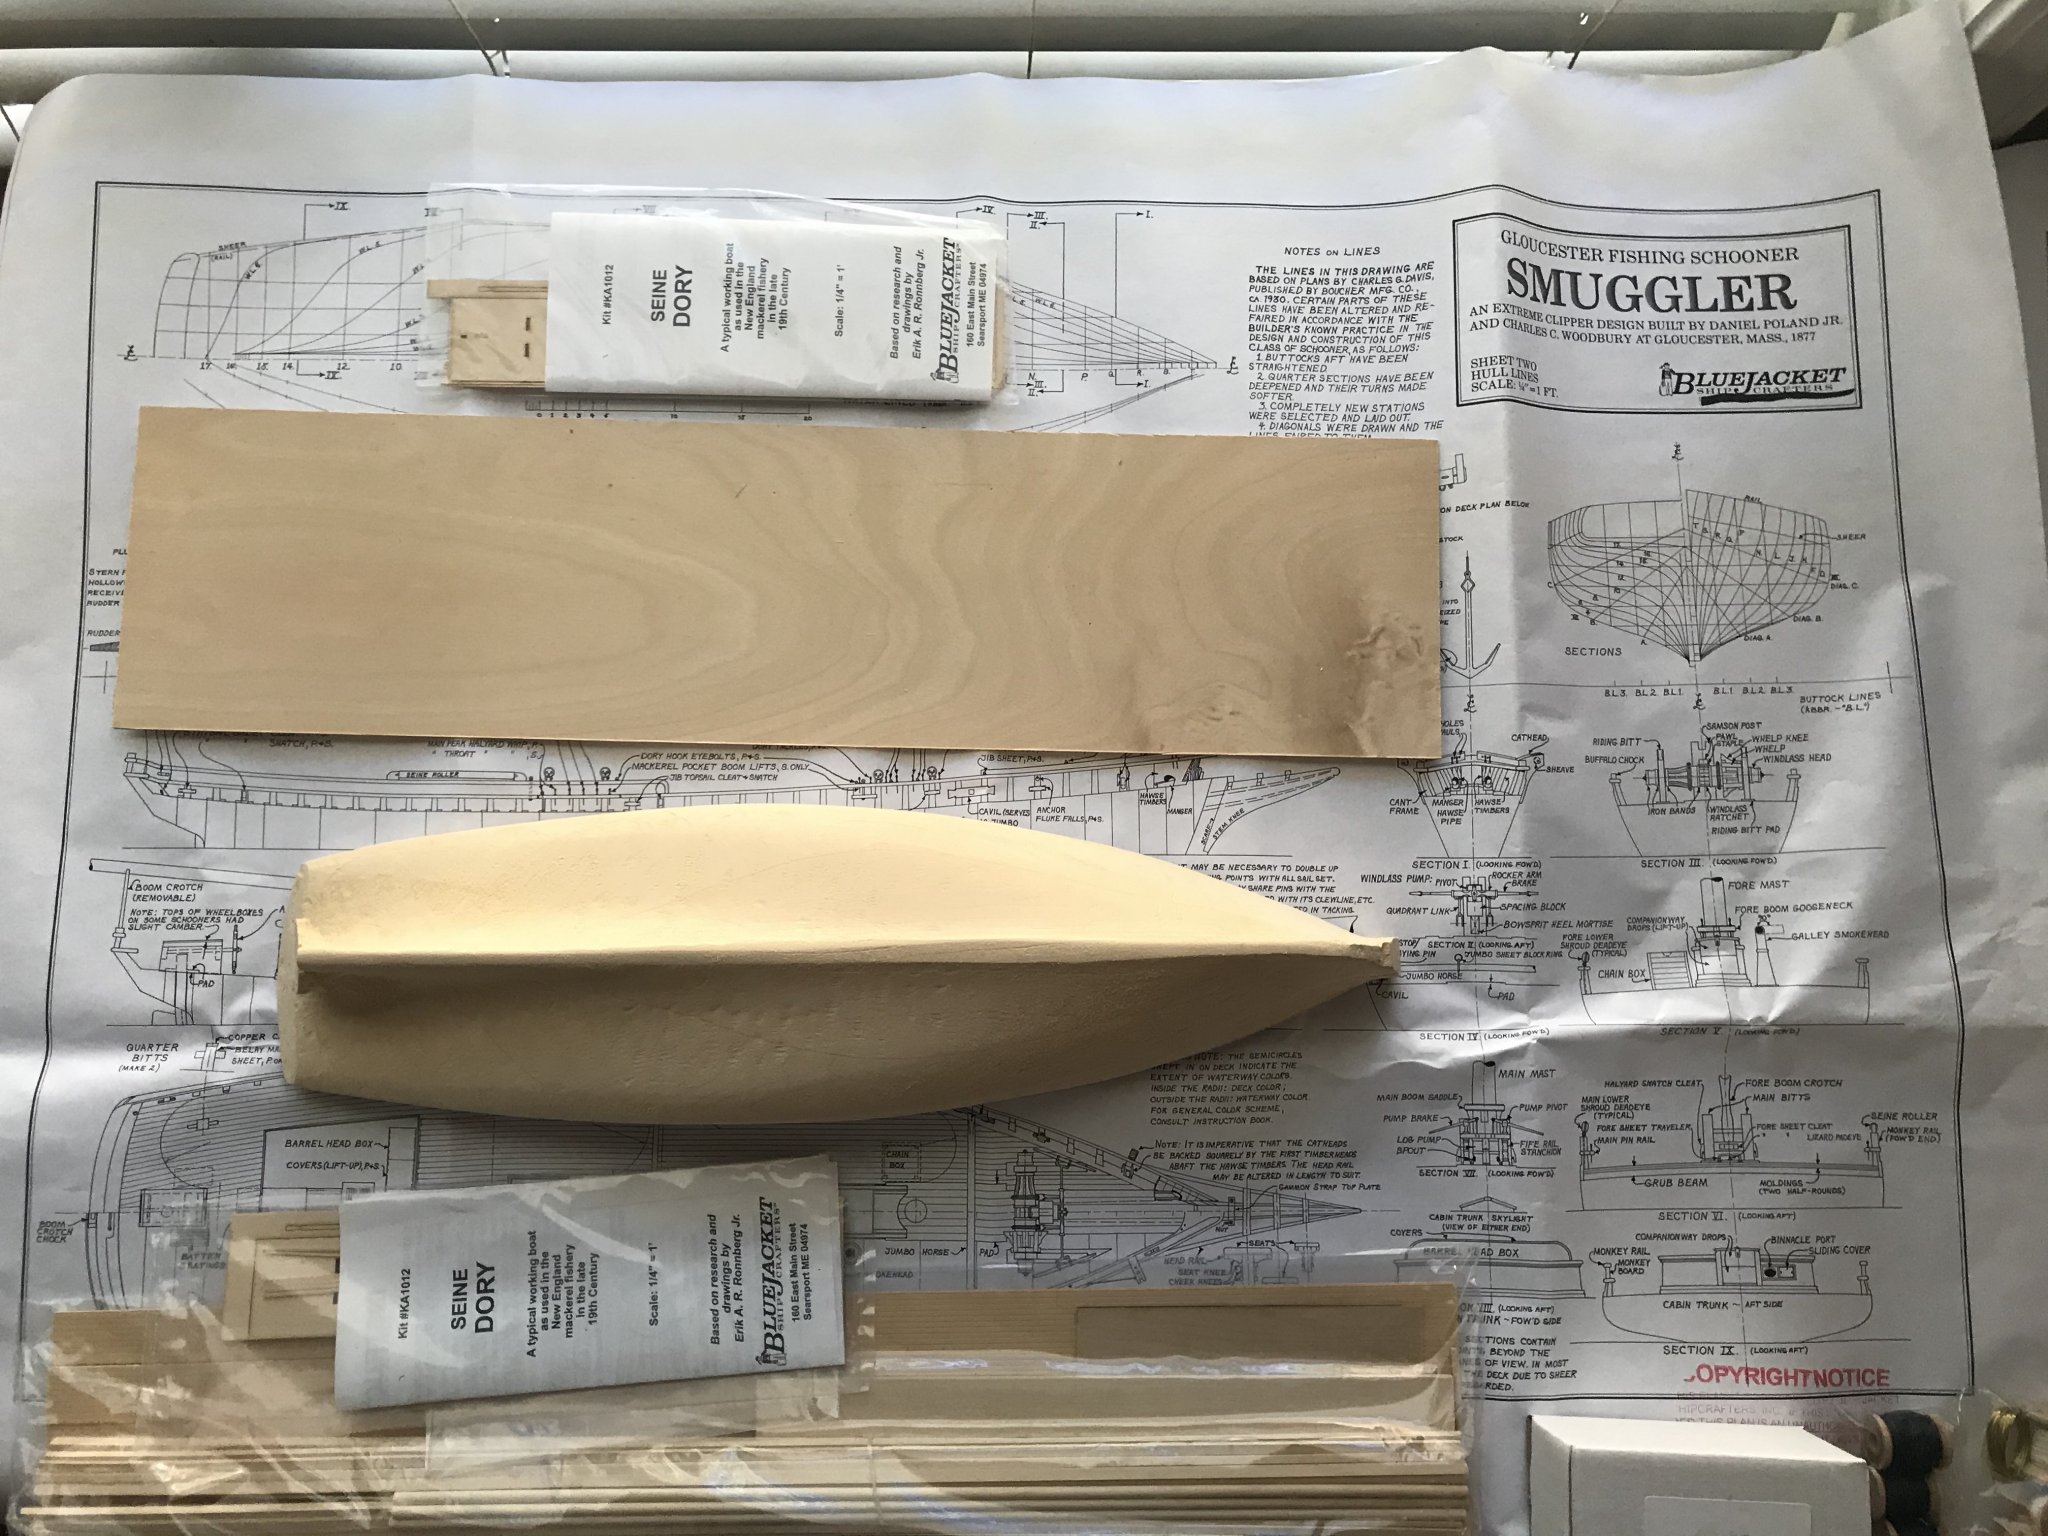
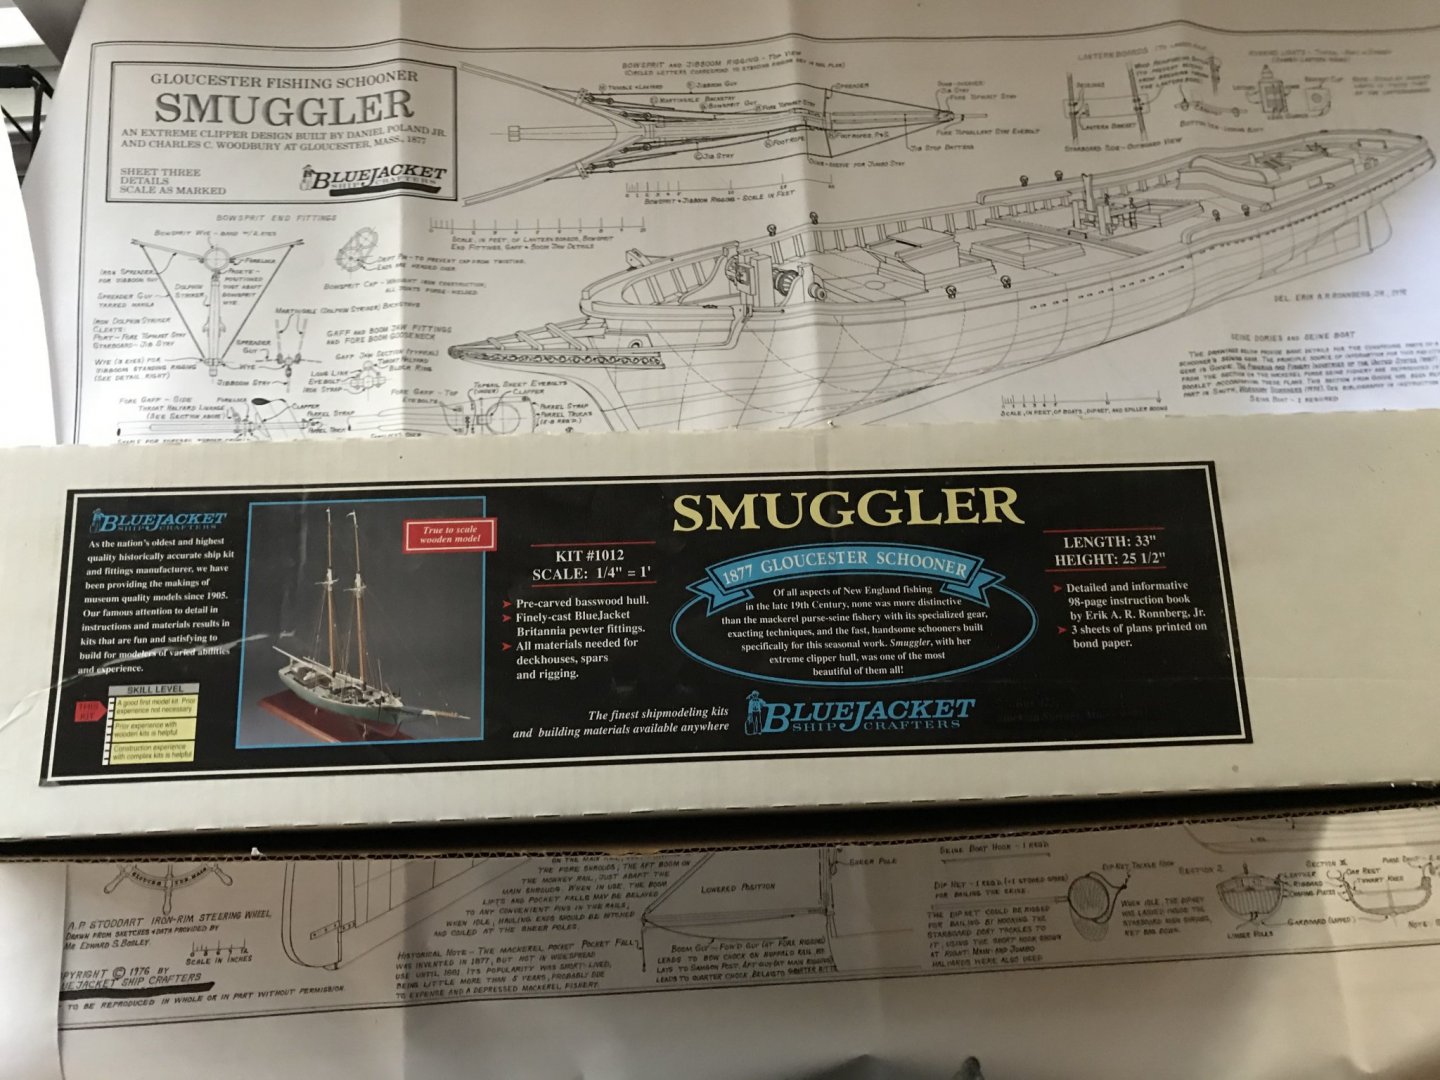
Hello again, I have had this kit in the wings for a long time but life seems to take me away from this hobby. I do drop in from time to time to look at all the amazing work going on here by all of you. All in all this is a fine kit. The wood is nice and the basic hull has some tool markings and excess wood fore and aft where the machine tools were attached that cut the hull. This is not a negative, it is completely normal for this style of kit and anticipated. Blue Jacket calls this a beginner to intermediate kit, which I think is accurate. In my opinion this is great first or second ship for a novice like myself. It includes a detailed instruction book. It also has 3 very large sheets of well drawn plans. So a complete beginner might find this a challenge, but no more so then say the AVS which was my second model. Compared to the AVS there will be two mast to rig but no guns to rig, gun ports to fuss with, or hull planking as this is a solid hull kit. However, having finished a couple ships and a third planked and a partially completed Pride of Baltimore II, I think it will be a great challenge for me. Bottom line this looks to be a fabulous kit there is a good amount of information available as well as a few build logs here. If you are looking for for your first ship this is certainly doable thanks to the great support you can get on this forum and also Blue Jacket (BJ) themselves. This will be my second BJ kit. So without further ado here is what's in the box:

-
Thanks guys for the input. Andy I think your right I should have sanded them down a bit and that would have fixed the hight problem now that you mention it.
-
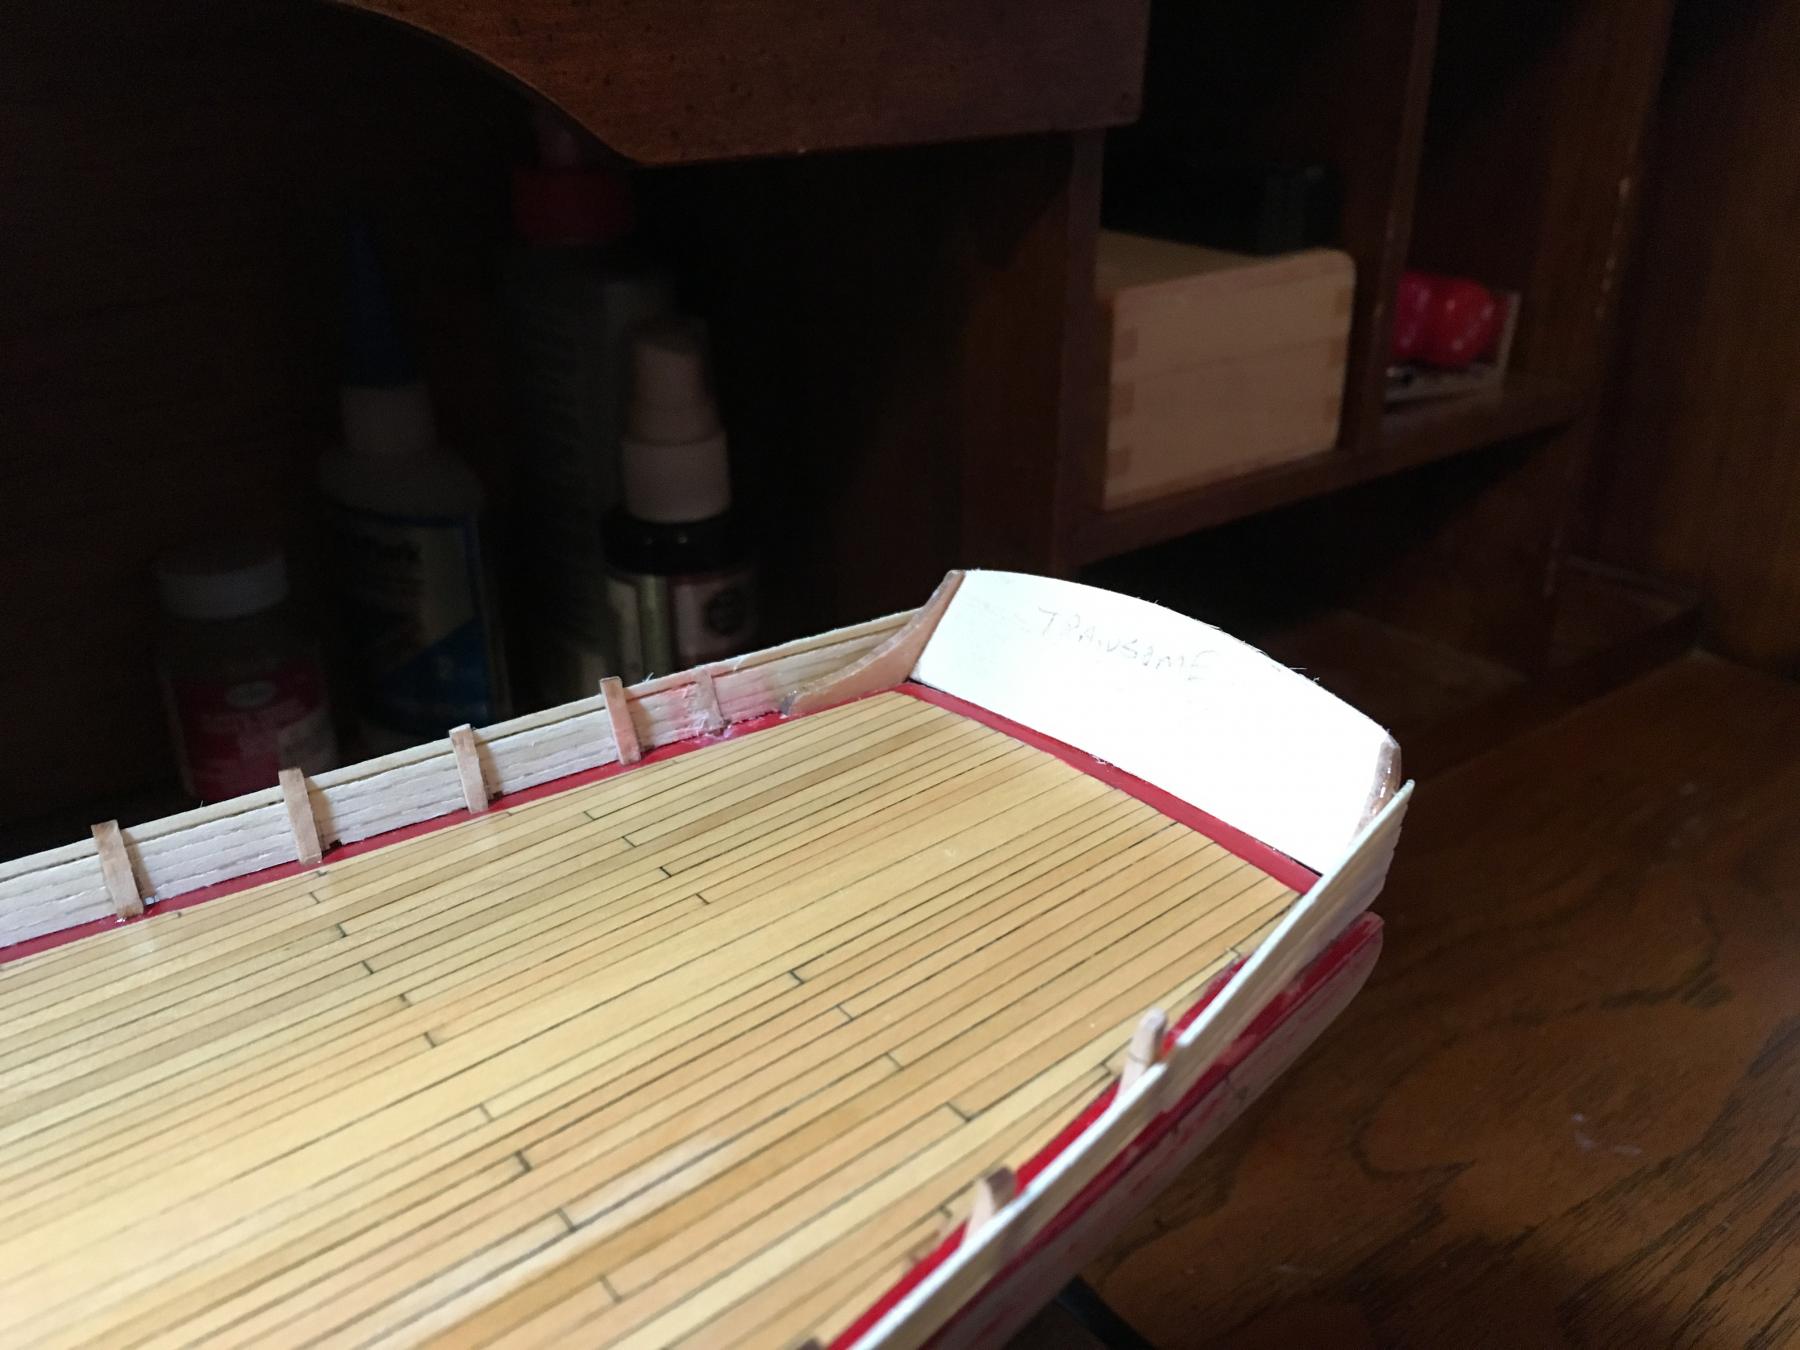
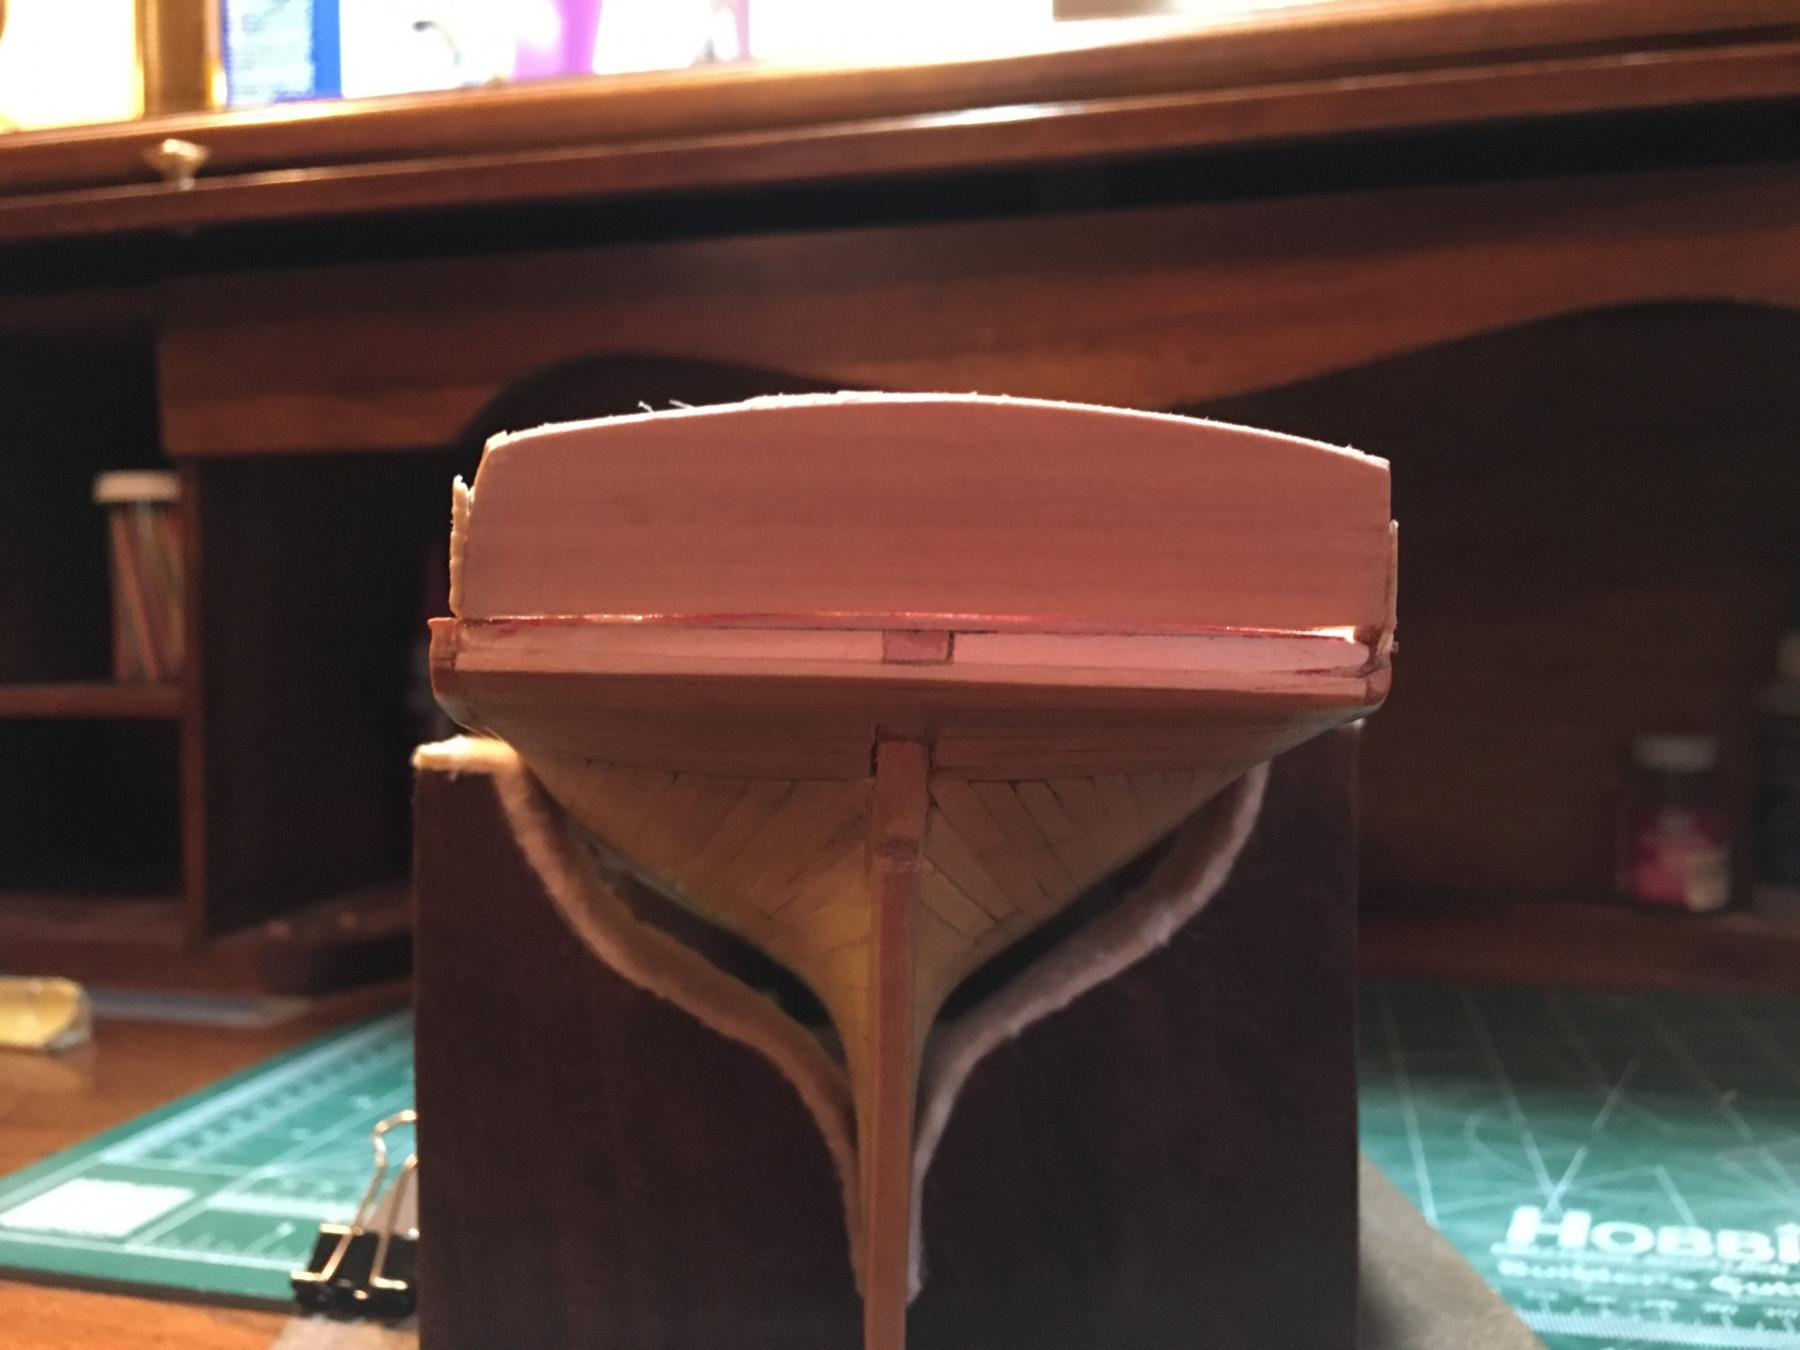
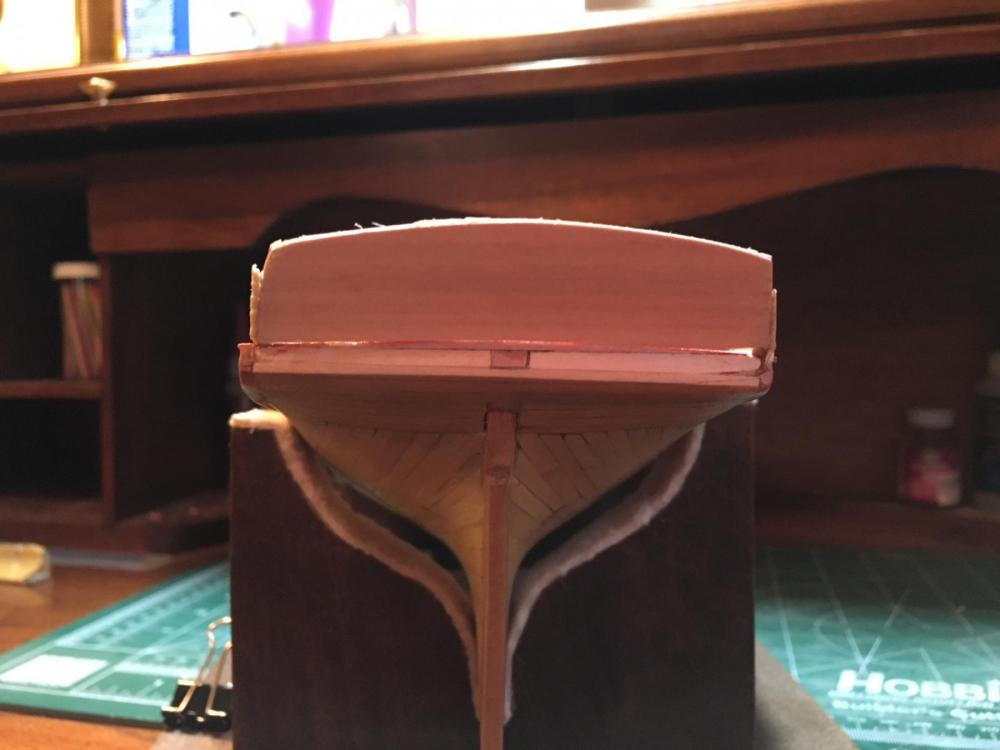
Stern troubles: So I had previously rough fit the transom pieces and everything seemed ok but as I started work on this section a few problems have developed. First I will be adding another 1/32 piece of square stock but it looks like the transom is going to be a bit to high and require sanding down to fit. I am going to leave this for now as I have made the mistake before of sanding to soon! The basic shape looks pretty good though in the first photo. The next two shots show that I have an angle between where the new transom piece is and the counter. I did not see this before I have looked at other build logs and ship photos and I can see this is wrong it should be a continuous flat area following the angle of the stern knees. I can only think of one fix and it is simply sand the counter down. Before I do anything hasty though thought I would run it by all of you. I also had a problem with a gap between the knees and the Starboard bulkhead planking. I had the same thing on the port side but the fix presented itself as I was fitting things together and the aft stanchion snapped off and went flying off into oblivion! I still haven't found it. This gave me the great idea to try and debund the stanchion on the starboard side to flatten things out rather then go for the putty fix. As I tried to wiggle it loose it ripped apart so I will be making some new ones from scratch. Wow the gaps looks way worse in the photos.


-
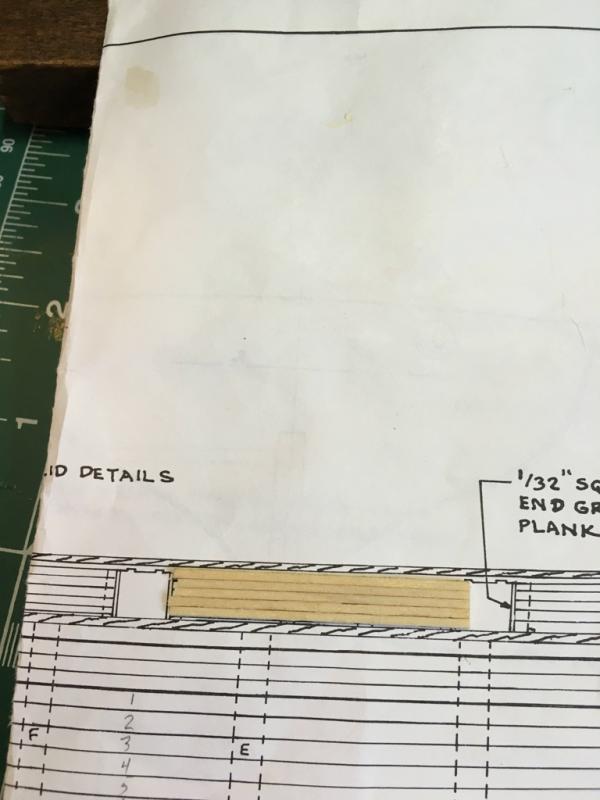
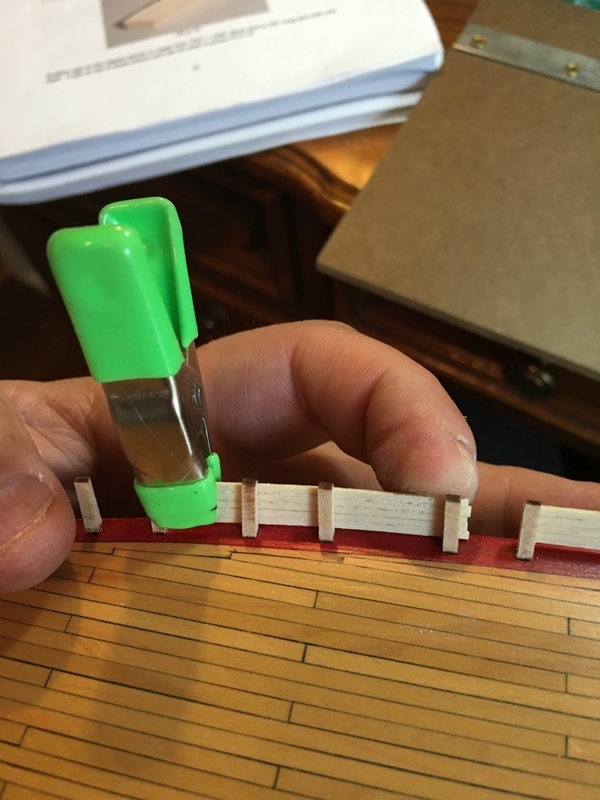
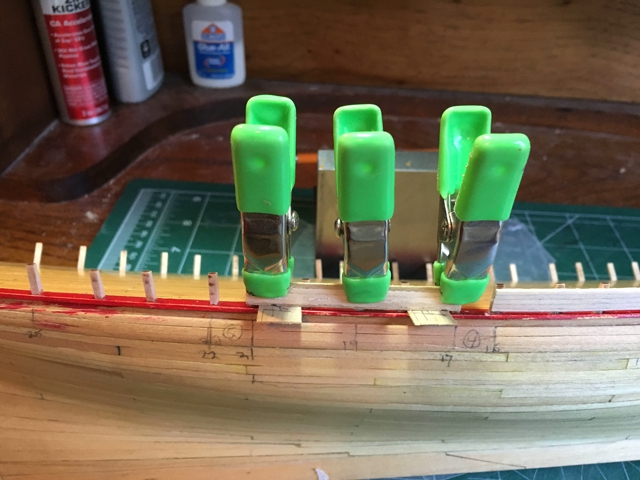
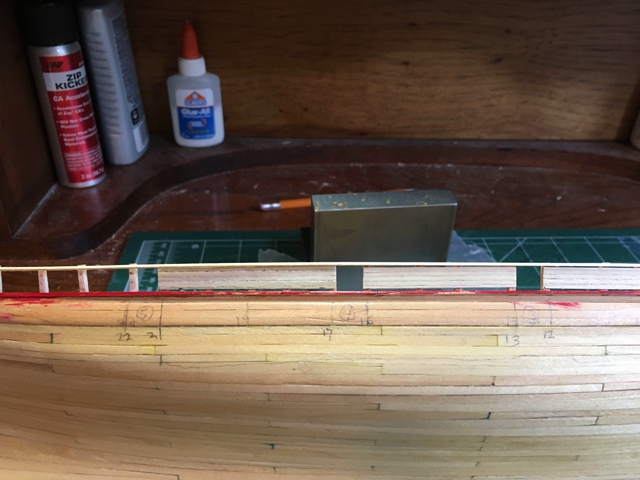
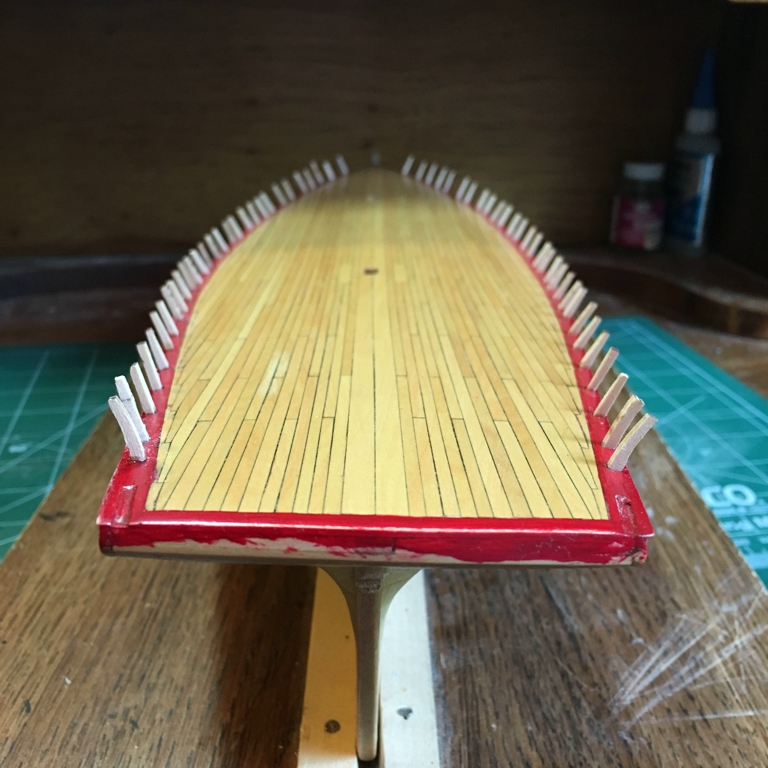
I started by gluing all of the stanchions in place. Not all of my stanchions are the same hight. So I decided to work from the deck up in the hopes everything will match up at the cap rail or at least be pleasing to the eye when I finish. The bulwarks are made up of five 1/32 planks and one 1/32 x 3/64 at the top. The later is not included in the kit. I may rip one to size later. I decided to go with the kit provided 1/32 x 1/16 stock. From the deck to the top plank the Gun Ports are approximately 5/16". There is also a scupper drain that extends from Gun Port 2 to 5, which should be 1/64. I started by marking the Gun ports on the side of the hull for reference as well as the bulkheads. I then cut five pieces of 1/32 x 1/16 x 24 (the kit includes 20) to approximately the length between bulkhead 13 & 16 (gunport 3-4) then glued them together. Then I marked of 1/32" and trimmed off just shy of that line (trying to get close to 1/64). I made a couple shims that I sanded down to be approximately 1/64 thick. Honestly for the scale and ease of the modeler I think if you just made the scupper 1/32 it would be just fine. Next I trimmed one side even with the chopper and lined this up with the bulkhead. I clamped that in place then marked the other side and trimmed and sanded it to be flush as well. Then I placed my shims on the deck and glued the section in place. I left a hair over the bulkhead and then sanded these flush once the glue dried. I then did the same forward and aft completing the scupper. The final photo shows this. I will continue by doing the same on the port side then work forward and aft much the same way. I will have to see moving forward if I have a problem at the top edge on the rest of the portions that don't include the scupper. Finally, I clamped a piece of the same 1/32 x 1/64 edge ways across the top to see how it looks. This may be the way I finish the top rail or I may try and make a piece to size on the plans. Then end result is my gun ports from the plank shear to this top rail measure out to be 5/16 so it matches up with the plans. Cheers!

-
The bulwarks have had me scratching my head as to how to do them. While I have Bob Hunts practicum I have been deviating from it quite a bit and referring more to the plans. I mention this now because the general idea is similar to how Bob does this in the practicum so I want to give him credit here, I do go about it somewhat differently and when I get to the bow I will not follow the practicum but do it as is drawn in the plans. The build log of other Pride builders like jcoby and AndyMech are also a wealth of valuable information. I would encourage all who read this to check out there fine build logs. The kit plans are also of some help but are very vague. Combine that with as others have stated the kit does not include wood cut to the size specified in the plans. Finally there is the usual issues of lazar cut parts that don't always match up perfectly with the plans. This hobby is all about problem solving and this makes it equal parts an enjoyable challenge and at other times infuriating and confusing! The bulkheads are a case in point. So I took everything I could from jcoby, AndyMech, Bob, my previous AVS build, and the kit shook them all up, added a dash of Irish Whiskey, ok truth be told, maybe more then a dash and came up with my own plan of attack. As I progress we will see if it works or is an utter disaster! I am not saying this is the right way but its one way and I post it below just in case it may help others building the POB II and at the very least point out some of the trip falls.
-
So after looking at the log of AndyMech I released the moat aft two extensions were on wrong. This picture shows the incorrect orientation. They should arc outward here to flow into the counter properly. So after I debonded and reglued them I thought I would post here for others who may make the same error.
-
Thanks for the pictures the input from you an jcoby have been a great help to me as I am sure it is to others. I realized looking at your photos I had the most aft bulwarks extensions facing the wrong way! I was able to unglue these and reorient things before it became a problem. Thanks!
-
You are doing an incredible job!
-
I am constantly humbled when I look at the build log of others. Well done sir. Beautiful work!
-
I have made some progress of late and all bulwark extensions are now in place