


guillemot
-
Posts
178 -
Joined
-
Last visited
Content Type
Profiles
Forums
Gallery
Events
Posts posted by guillemot
-
-
Yup, just as well you can't see the rest of my 'studio' in the pics.
-
I got the technique from
Construction of Model Open Boats by Ewart C. FreestonI notice that on Amazon it's going for £78? Sheesh.
-
Well done. You make it seem so simple.
Bob
Blood, sweat and tears, mate! That's always the thing with WIPs, they get edited
 Any time I try something new, like making sails, there's a stack of chuck outs, but we learn best through cock-ups, eh?
 -
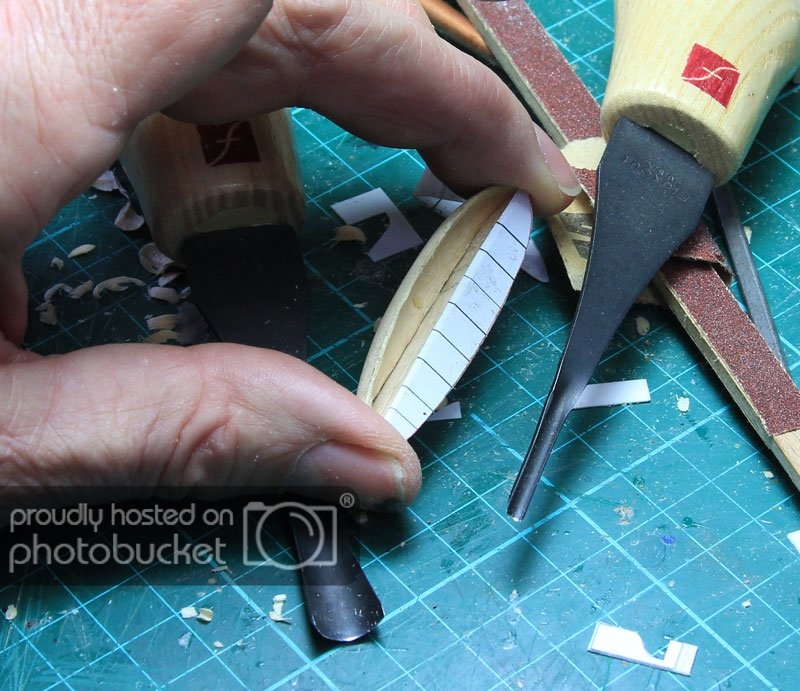
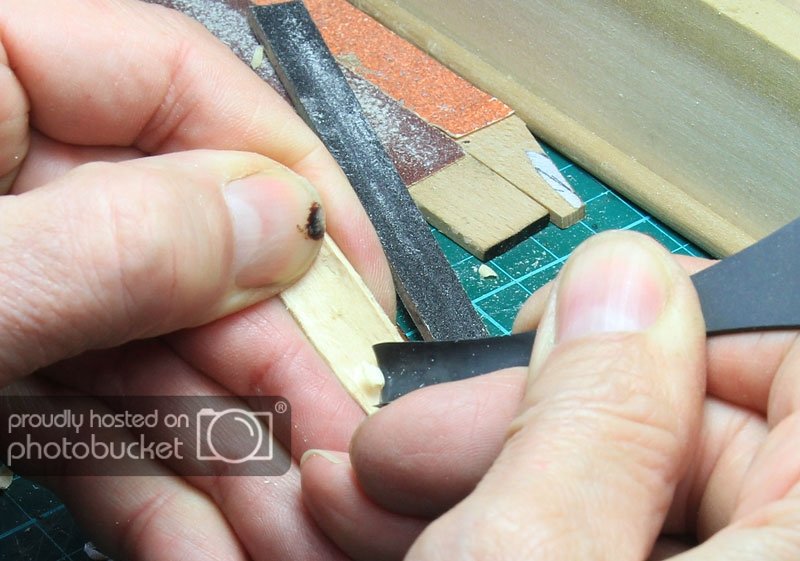
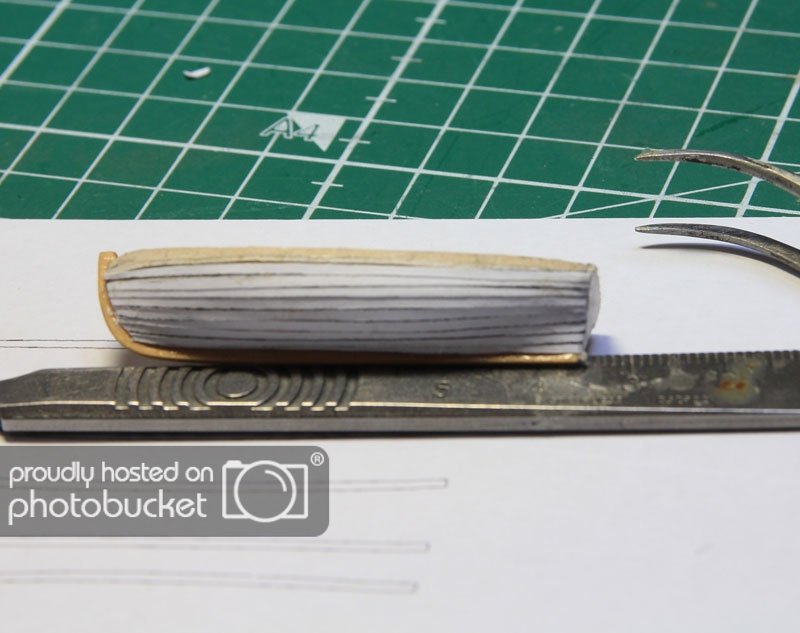
More on the boat... This is one of those jobs you start knowing that there's a fair chance you won't get it right first crack...Making sure the gouges are really razor sharp - less likely to slip and get buried in your thumb...and using a very light touch help.The two halves were gouged out till they were thin enough to be translucent.
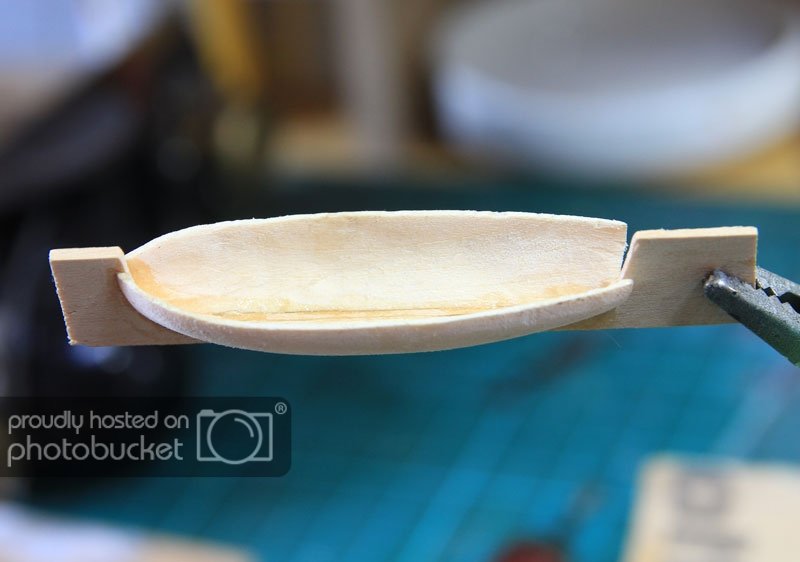
Carved out and in... then a really thin bit of Degame was cut to be the keel/deadwood/cutwater...2 attempts.
Then the interior was detailed.....
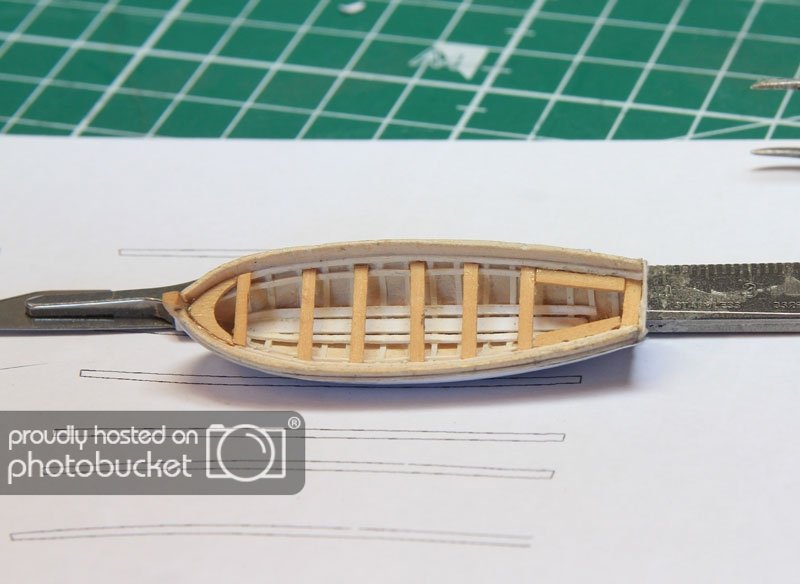
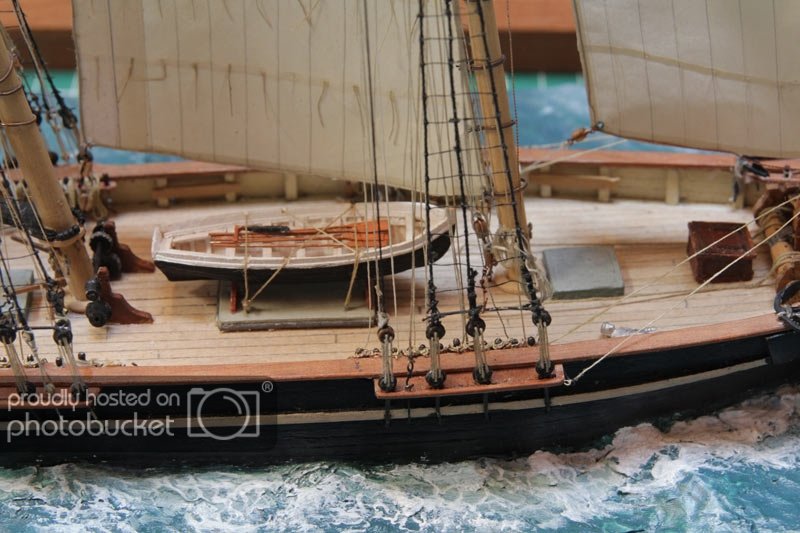
The hull planking is paper, think i might have used slightly thicker paper to make the 'clinker' more apparent. Now it just needs oarlocks cut, a rudder and oars, and paint and it can then be put onto the ship.
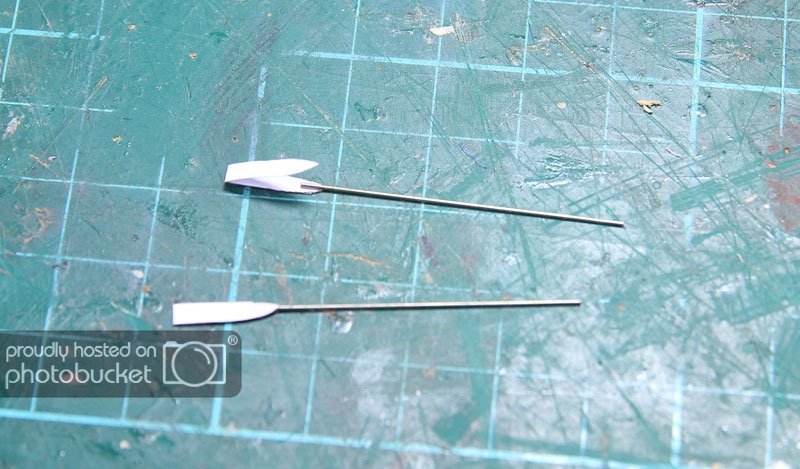
Oars, 6 of them for the ship's boat. Printed out the blade shape, doubled which is then cut out, folded and glued to the shaft. Then painted and put into the boat
- JesseLee, tasmanian, SailorGreg and 7 others
-
 10
10
-
Ah, right, sorry about that, thought I had...duh...OK, here tis.
OK, Sailmaking for Dummies actually more like by a Dummy... Ain't rocket science, but um, ain't easy either... I've been doing a lot of experimenting...(read 'cocking up') I've tried various papers. Philip Reed uses tissue, but then he's working at a smaller scale. I kept ripping them. Daler Layout Paper, is strong, acid free and weighs in at 45g -thin- without being too fragile is what I'm using at the moment.
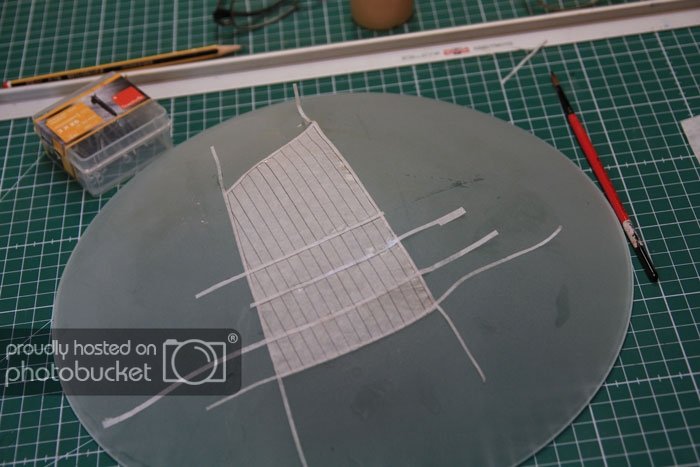
So watcha do is stain the paper a nice warm off-white with some yellow ochre water colour applied to both sides with an airbrush. I taped the paper to an old canvas stretcher so I could do both sides at once... Then, draw lines (both sides, and make sure they line up) to represent the panels that make up a sail, back then they were generally about 2ft. wide. It helps, a lot, to have patterns printed out to trace from. Layout paper is thin enough to see through to do this.
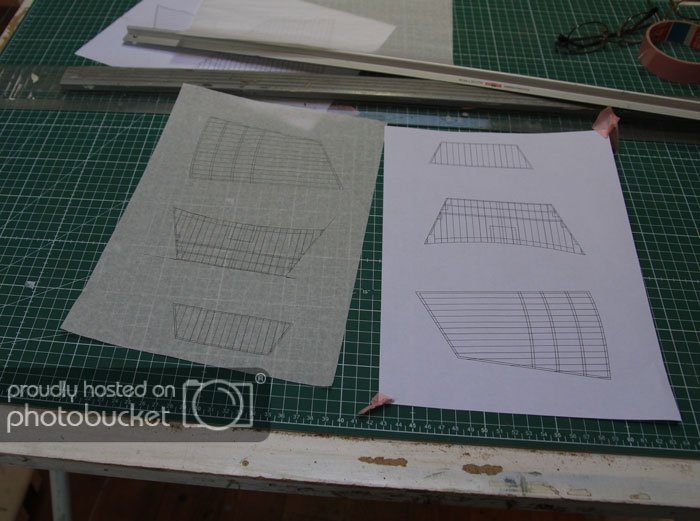
I tried printing the lines out, but couldn't get an accurate enough line up to do both sides... Right. Cut out yer sail/s
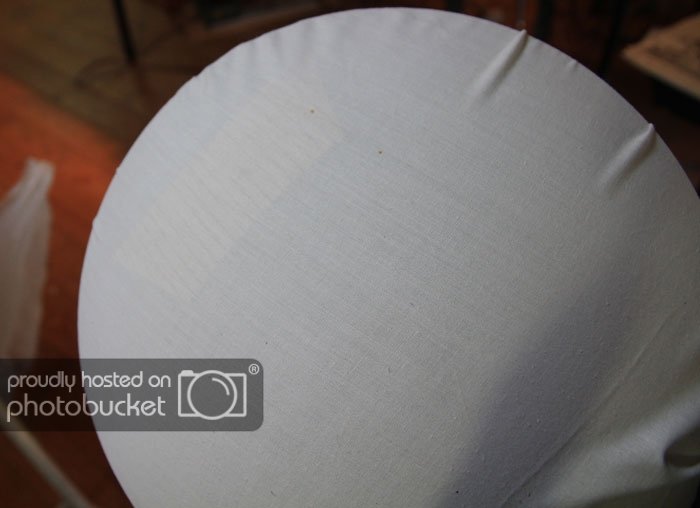
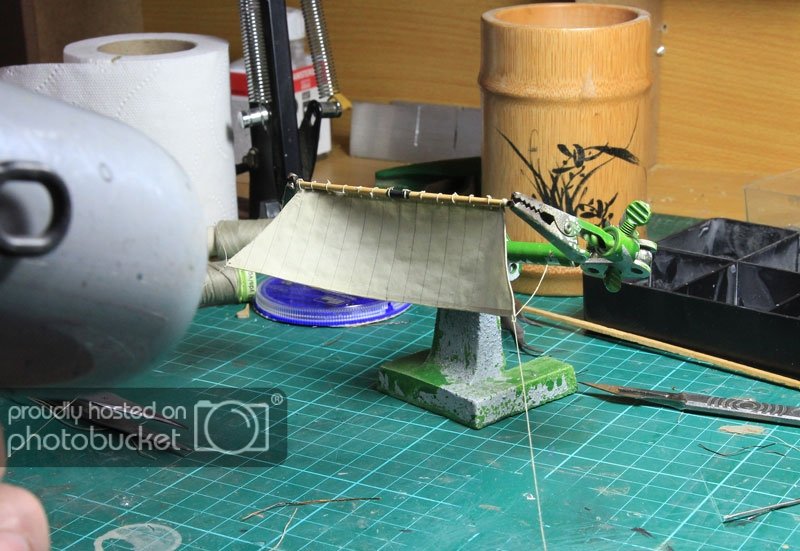
The usual thing is to then put the sail onto the 'mould' a ceiling light glass cover, in this case, but a a plastic bowl giving a reasonable curve would be best.
Then stretch a chunk of old tee-shirt over it and dry. A hair drier or fan heater is good at this point as blowing on it would probably be exhausting and take a long time...
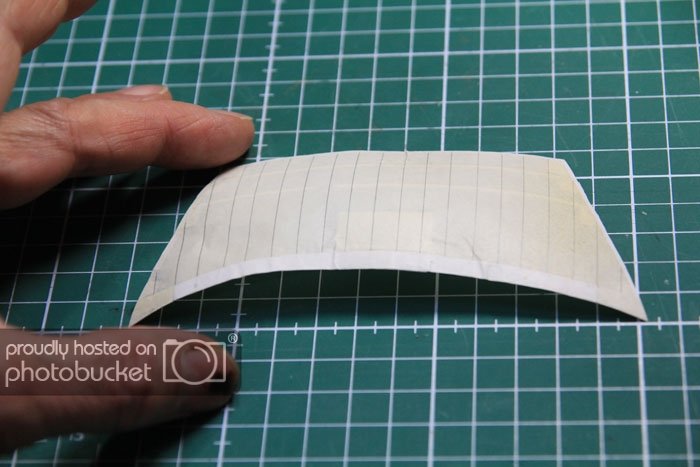
Then you'd start gluing on the relevent doubled bits, like the edging and banding where the reef points go through..
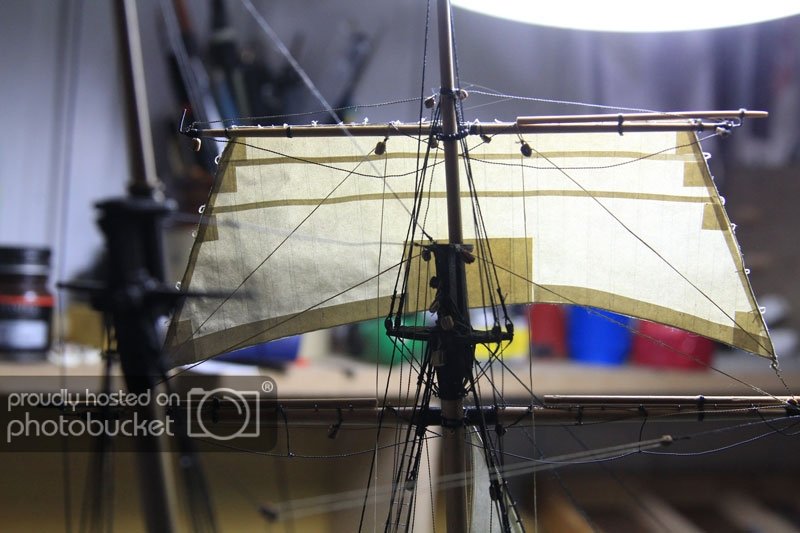
In fact, I found that it worked OK to put all those bits on while it was still flat and then set in the curve. Here's a tops'l I made today. It's not quite right as it stuck slightly to the glass and shows a bit of damage so I'll be making yet another, but you get the idea: a translucent sail with the shadows of the tablings etc.
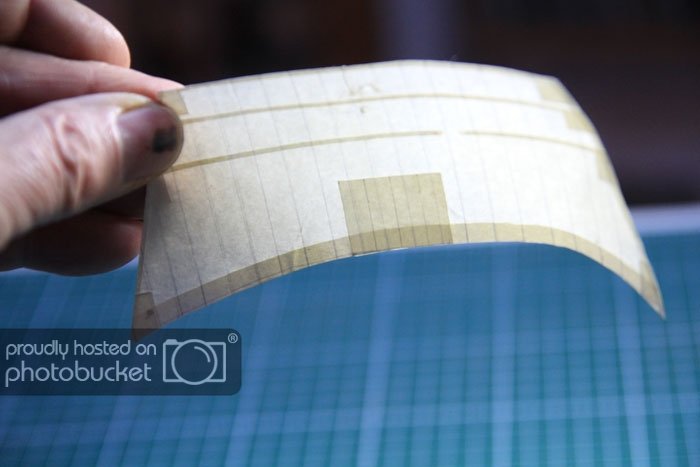
The sails are then laced to the relevant yard or boom and given another splash with matt medium and tdried with a hair drier, which adds to the curve.
After this there was a lot more block making...
and rigging...
Needless to say, much has been done since the last entry, Things have been a bit busy around here and I've gotten rather behind with postings.
A boat had to be made. Here's the first hull half, roughly carved.
more shortly...
-
I found this painting on the web:-
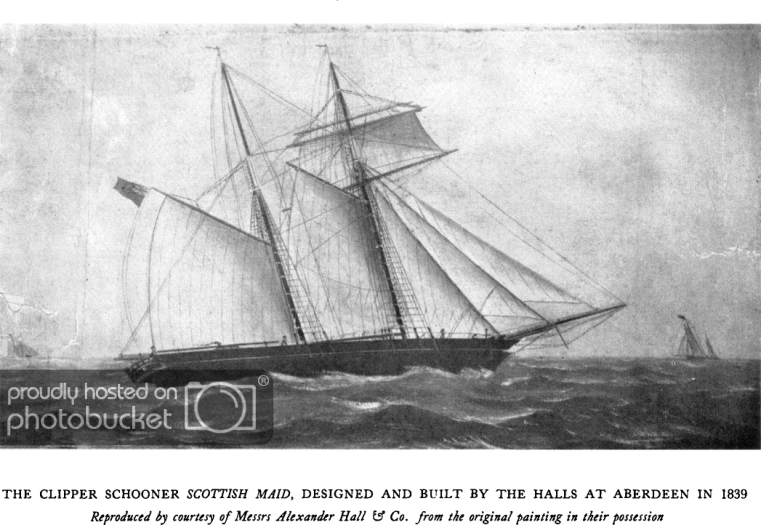
Which clearly shows the open stern. I'm just coming to the end of a 1/96th scratch-build of Scottish Maid. - http://modelshipworld.com/index.php?/topic/3255-sottish-maid-by-fraser-halls-1839-clipper-schooner-18th-scale/page-2
and one of the first things I noticed was that Artisania Latina have the stern wrong anyway. Probably for ease of construction, they left out the lower counter, which changes the look of the stern a lot. I'm not holding my build up as some sort of paragon
 , but I've tried to get it as accurate as possible....still working on that!
Best,
F
-
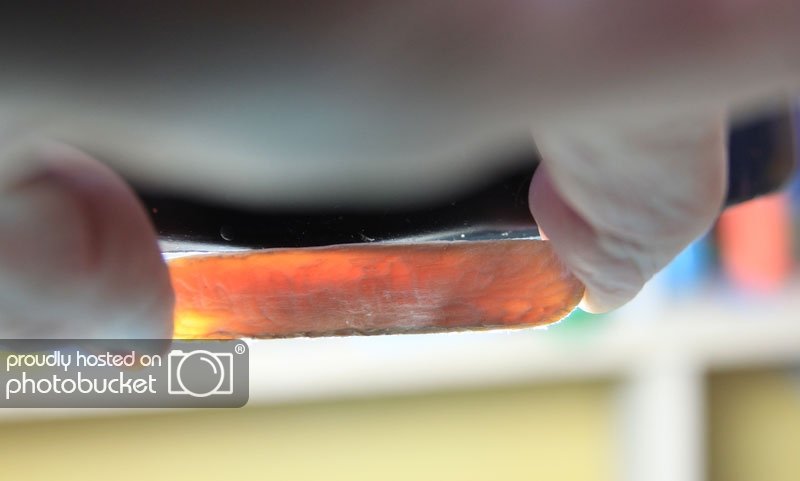
On the subject of weathering copper, I remember reading somewhere an eye witness description of the fleet heeled over, sailing down the channel into a low sun. The writer remarked on the glitter from the copper. Apparently when at sea, unless on the dreaded blockade, the motion of salt water on the coppering kept it shiny.
F
-
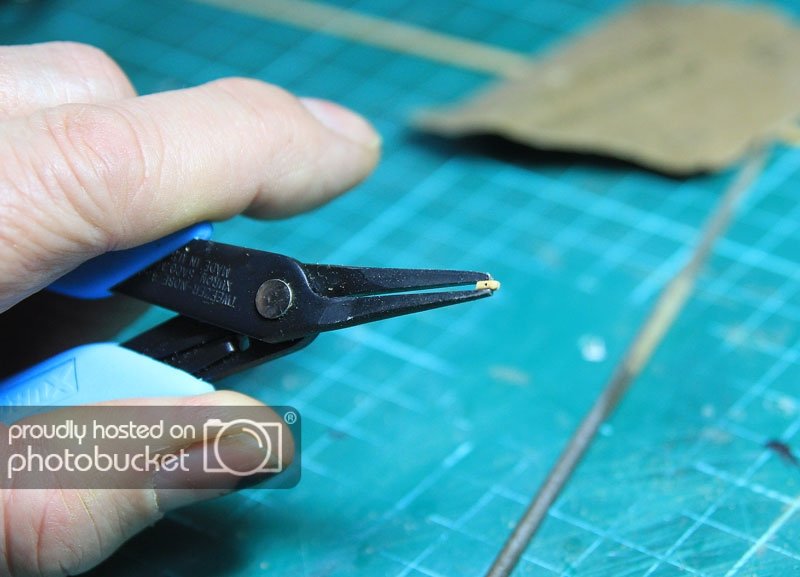
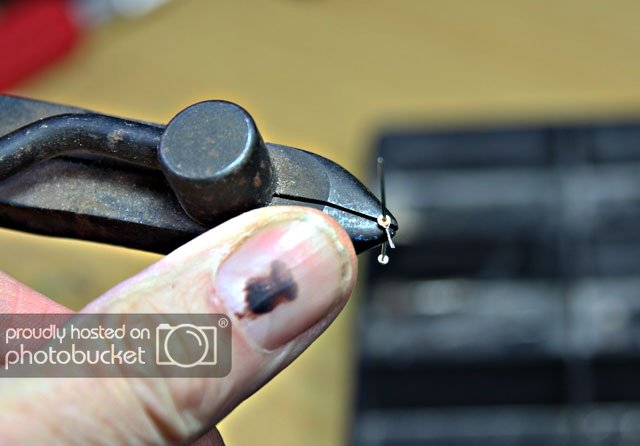
Just my tuppence worth of variance - Working at 1/96th, I need some seriously small eyebolts. I use the twist method with a tin pin, or here, a fine brass tube,bent into a hook. This is inserted in a pin vice - it's in my Archimedes drill because my smallest pin vice was hiding in the chaos that is my desk... The other ends are gripped in a pliers or my old fly-tying vice and the pin vice is given a spin, resulting in a really tight wound, tiny eyebolt. Keep winding and the twist usually snaps off at the pliers.

-
Thread heaven sounds great, but AFAIK, not available, like Microcrystaline wax, here in Portugal. Amazon tell me I can't have it sent here either - the new idiotic UK Post Office rules.....damn.
-
Congratultations on a job well done.
David B
Cheers, but not done yet.... watch this space
-
Thank you! OK...nearly at the end of the rigging now. WHEW! All of the sails ( at least all it's getting...) are up now. There's a bit of fettling left and the main mast shrouds need rattling down... I think a couple of days off and then start on her boat and anchors. Now, before anyone says anything, I know that there are undoubtedly errors and omissions in my rigging. It's been a bit of a struggle finding out what where and when. Since this is my first scratchbuilt sailing ship, I'm reasonably pleased with how it's going.
-
(Big smile:
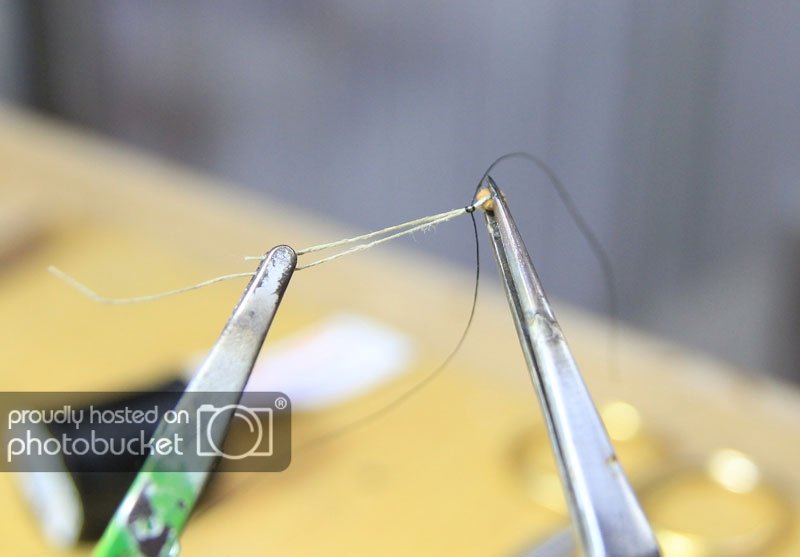
 ...) however: Running the line over beeswax does not "eliminate" fuzz on it, just hides it. To really eliminate the fuzz, I clip one end of the line in a small clamp permanently fixed on my bench and while holding the other end with my fingers, run a really quick pass of a lighter flame over it. Every single line that goes on my ship, receives this treatment.
Just another option.
Needs a bit of practice before you stop burning line too! Ask me how I know...
-
Nice work, very accurate cutting!
-
Someone asked about melting beeswax in turpentine. I've done this to use it as a painting medium. Basically you need a double boiler, a bain Marie, or similar. You need to be very careful though as the gasses given off by hot turps is probably flamable and very likely a bit, um, toxic. do it outside. Makes a great furniture polish too!
F
-
Hi Ed,
I stretch my made up rope in the machine too. After dying it I hang and stretch it by hand while wet and put on a weight and let it hang for a few days. Where did you find that linen? All that I could find was Londonderry and it has lumps and fuzz. I don't defuzz the tiny thread for the seizings. I was, but kept burning it. What I do is put my seizings on with undyed white thread. Then I mix India ink and white glue with a bit of water and paint that on the seizings, it lays down the fuzz. Any fuzz I see left I hit with my stencil burner. Next post with pics I'll put on a pic of the burner.
In case anyone wonders, Egyptian cotton is usable due to it's long fibers, which give it strength and less fuzziness. Regular cotton I would consider a no-no.
I used Londonderry linen on my first rigging attempt. It was stripped due to sagging. I had used shellac instead of conservators wax. This wax is used instead of beeswax as beeswax has some acidity and may deteriorate the thread. I thank Druxey for this info.
Frank, I get my thread from a place called Fine Threads. I get it in ecru and dye it. I used India Ink split with about 1/4 water for black, and Raw Sienna FW acrylic ink mixed with some black India Ink.
Rob, no problem, feel free.
Bruce
I used to get Linen lace-making thread from a craft shop in Bath when I lived there. Try a needle work shop? As to preserving thread; on my current build I've been running thread through acrylic matt medium, which makes the thread rather stiffer, flattens fuzz and ought to protect it quite well. If anyone is looking for *really* fine thread there's always fly-tying material. The finest stuff I've run into is 'Uni-Thread' which is available in a stack of utterly unsuitable colours plus black and tan down to 0000. I've got a reel of the black and use it a lot for seizings etc. Only trouble is that stuff that fine I can't feel!
-
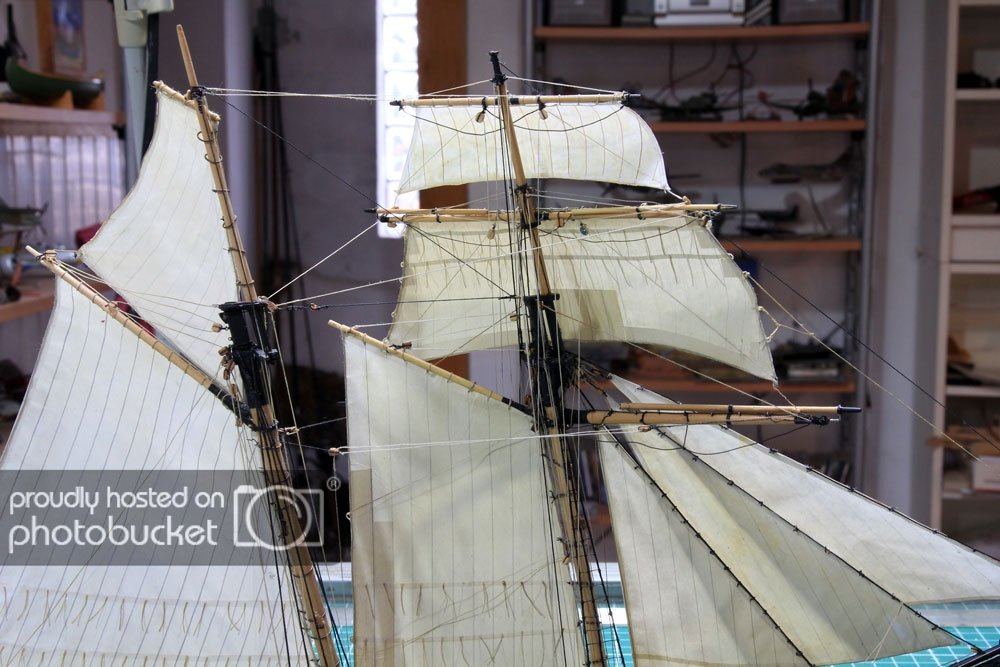
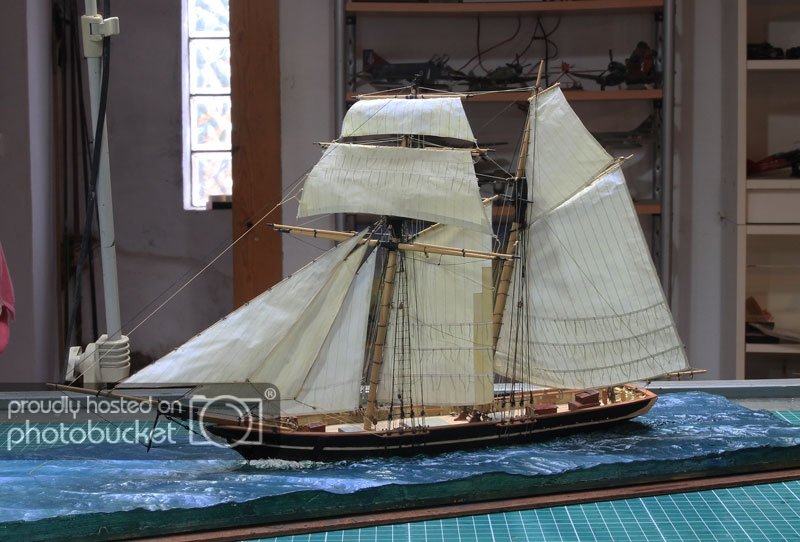
I have fallen horribly behind with updates to my build. Catch up time! On of the major considerations with this build has been that of trying to produce a reasonable accurate rig. I have three sets of plans of various 19th c. Schooners and they all differ, a lot. So everything I do is accompanied by a fair bit of head scratching and research. However, progress continues. Fore tops'l up -
Accompanied by a lot of tiny blocks, of course.
and more sails...
...and a lot more lines! the reef pendants really try the patience.
They're a far cry from perfect...maybe next time, but they look quite good with a bit of light shining through.
Generally, I think it's easier to get a sail laced to a yard, and then put up the yard. It's a good idea to make sure you have all the blocks needed in place first, unlike me. another lesson learned.

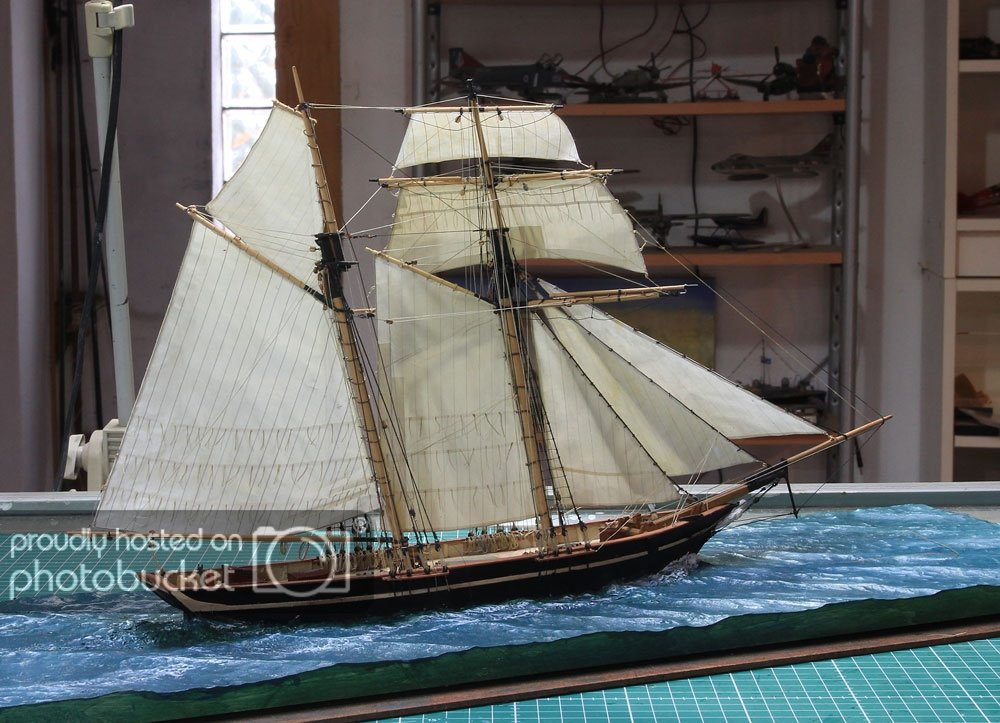
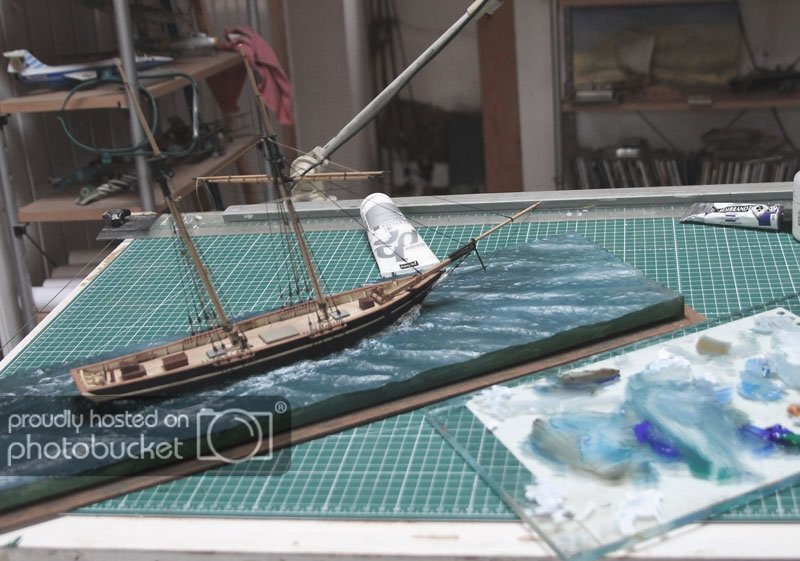
So here's where I am now, a few sails, a stack of rigging, anchors and, shudder, a 17ft longboatleft to make. I think the open boat is going to be, uh, challenging
The colour balance is way off here, the sea is not such a lurid blue!
Thanks for looking!
-
Hi, Just came across your build. I've done Billings 'Roar Ege' Which I'm very fond of, now that it's done. I would really like to do the Oseberg as well. Have you seen the 'Saga Osebergwbsite? They sail her a lot. There are, or were, lots of shots of her being built. The Vikingship Museum also has a website and they both have facebook pages with lots of pictures. Thinking about that nifty scrollwork, There are references to Viking ships ' glittering with gold and silver'....
You're doing some seriously nice work on her! I would have thought that the decking could easily be replace with nicer wood than Obeche anyway, most model ship places stock other woods either in strip or sheet, like Lime, for instance.
Best,
Fraser
-
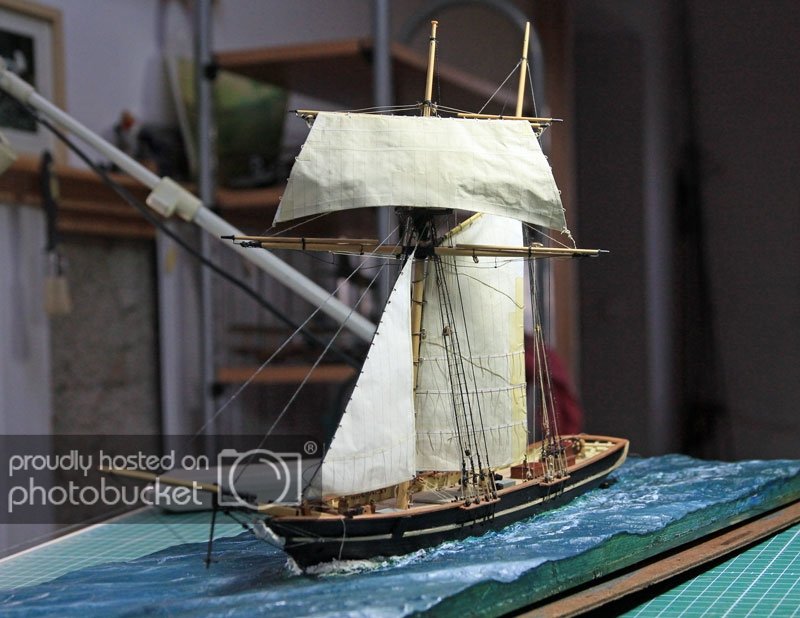
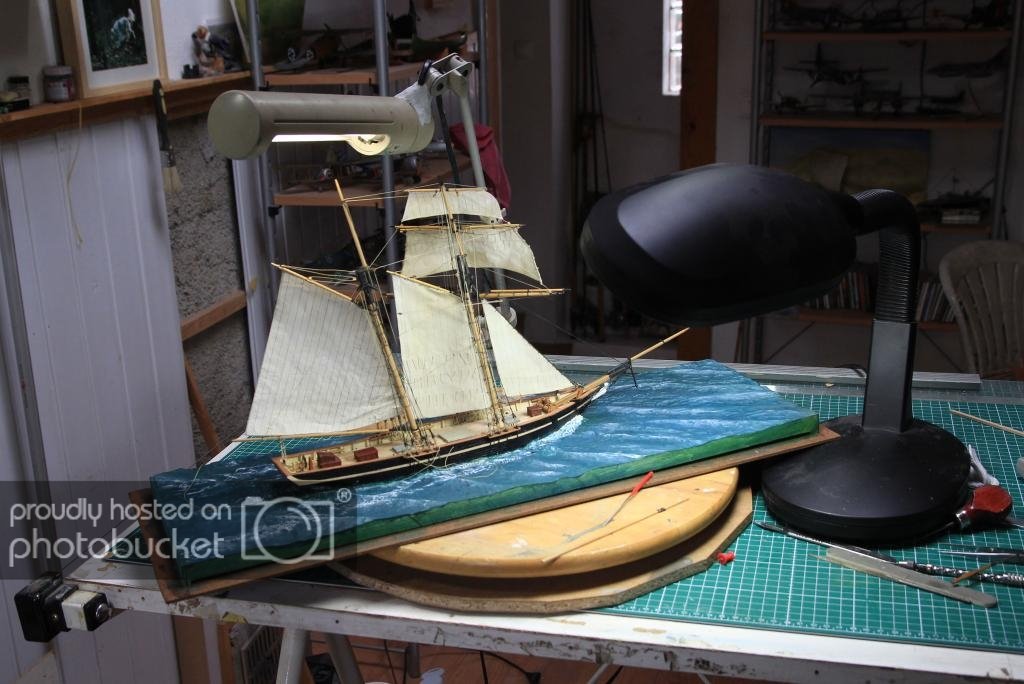
Been laid off for a bit. Christmas, outdoor work etc. and got back from the UK with a nasty chest infection...terrific so now drugged up, chest infection seemingly abating. The barky is now on it's base and the base is pretty well painted..bits of foam to be added....
I've also got the first sail up - hooray, but haven't included a shot yet as I've had to get help (thanks Weflack) about the run of it's sheets.....details, always more details. More tomorrow, all being well!
A tops'l
Rather useful having it on it's base as it creates a bit of a buffer zone...
-
My solution, on my Scottish Maid was to use a sheet of Lime - Basswood on t'other side of the pond - gesso it and get stuck in with artists' Acrylics.http://modelshipworld.com/index.php?/topic/3255-sottish-maid-by-fraser-halls-1839-clipper-schooner-18th-scale/page-4
On smaller models I've used both Milliput and also Plasticene - which is surprisingly permanent.
-
-
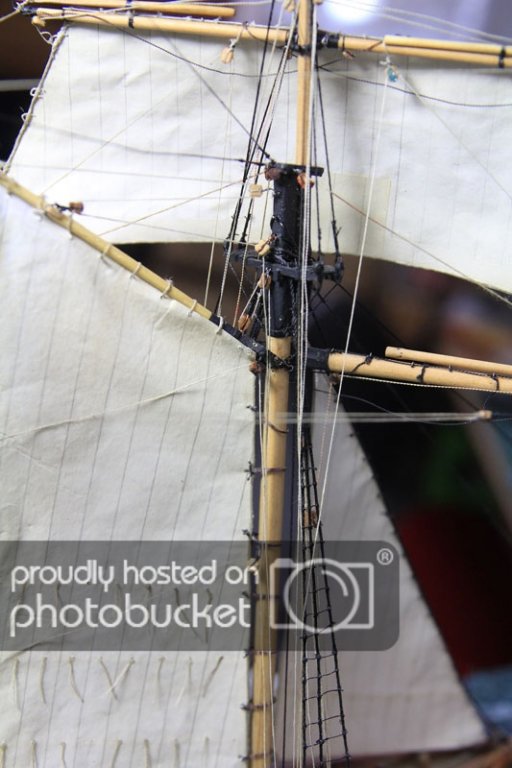
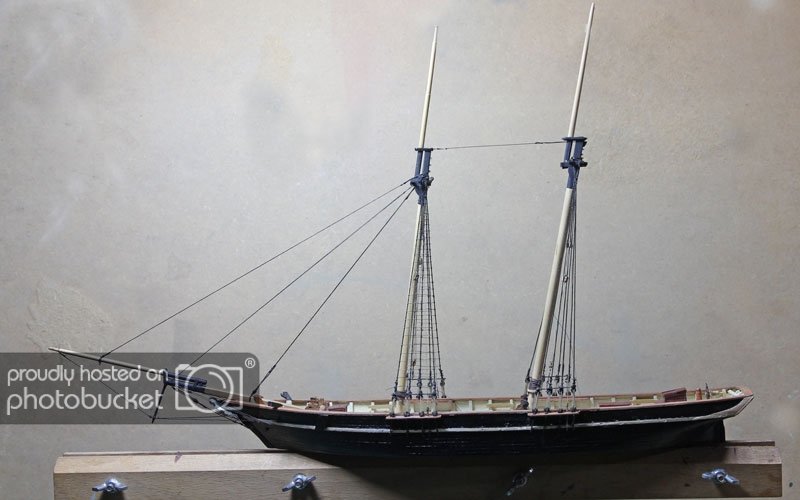
Thank you for the kind comments! Yesterday, I discovered that I was busily rigging the mainmast incorrectly...typical! I stumbled across a scratch-built Scottish Maid someone had done a while back, plank on frame. He must have had a much clearer copy of MacGregor's sail plan than appears in the books! However, if the contemorary painting I found of SM is anything to go by, even he's not completely right... Anyway here's where I was at last night, crosstrees and futtock shrouds, ready to put up the topmast shrouds....until.

So today I ripped it to bits and re-did it and repaired the damage (ahem). So now it looks like this.
More like a Yacht rig... I thought it looked pretty unusual and then I looked at an engraving of 'Wild Daryl, an Opium Clipper by Whites of Cowes. Same rig...whew. Anyway I'm happy (enough) with it.
-
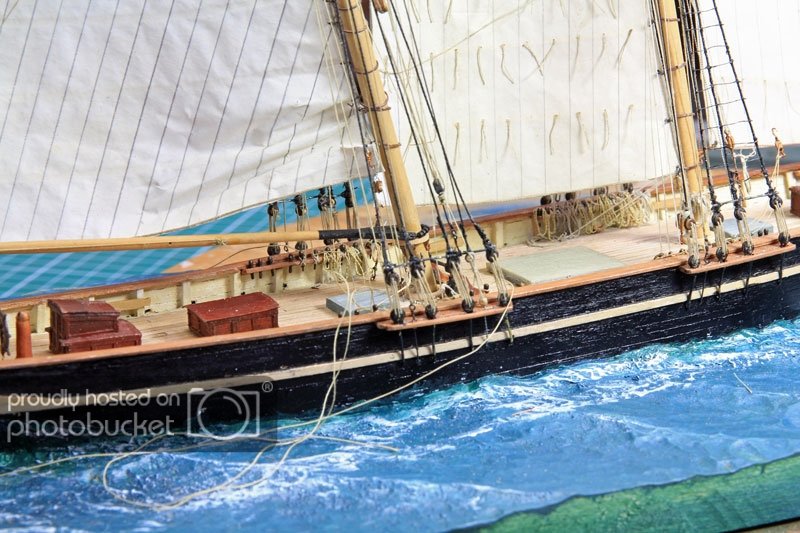
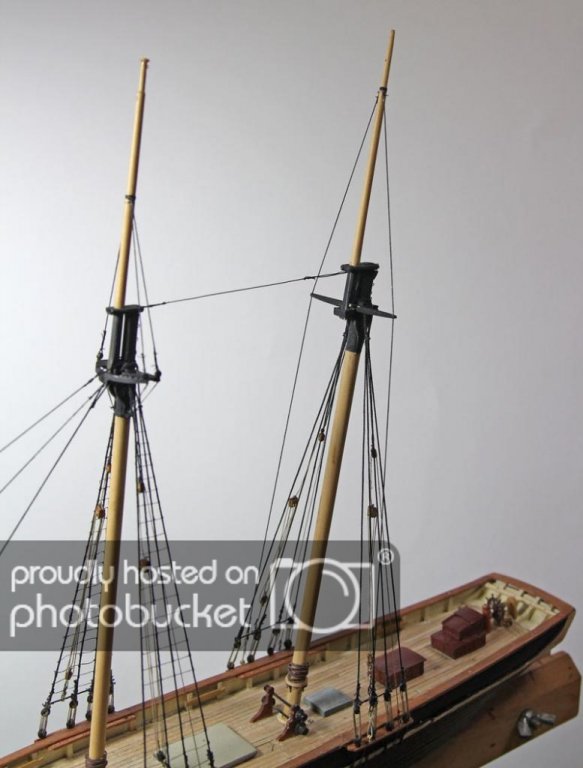
Some progress, rigging is a very long job when you're intending to add running rigging as well... Starting to look a bit more shipshape now. topmasts added, mast tackles, shrouds....
- Rudolf, Small Stuff, dnputnam and 4 others
-
7
-
-
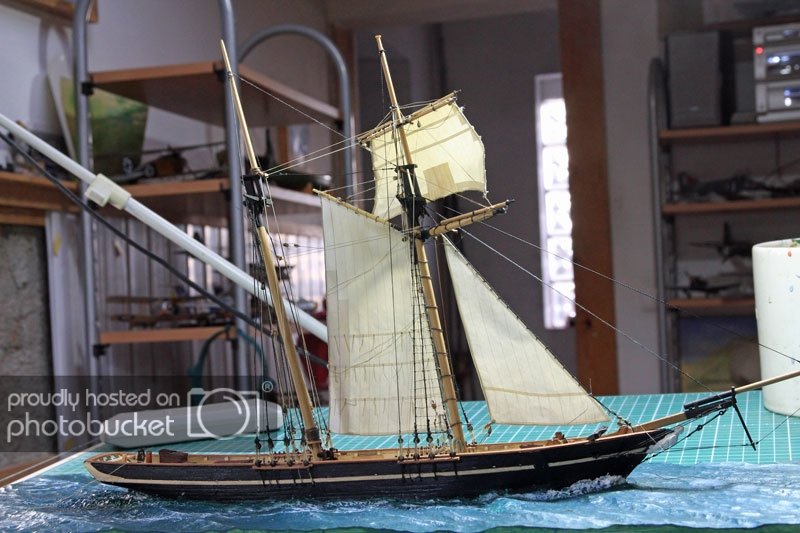
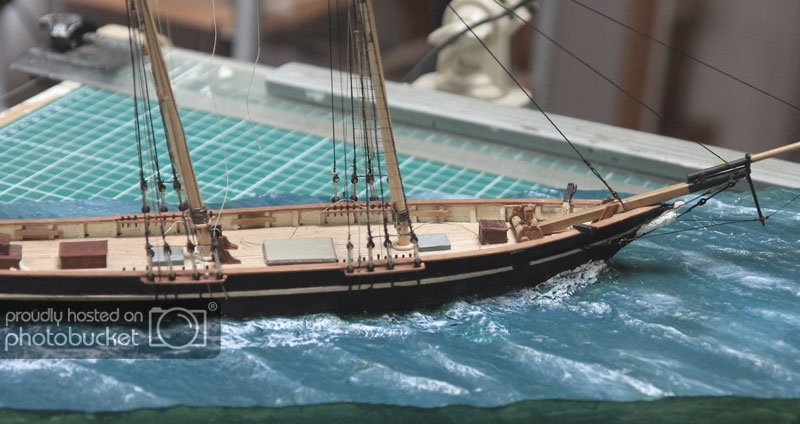
Haven't had a lot of time to work on the ship as this time of year there's all that crap like firewood to be thinking of etc. etc. However...
I've been seeing how small I can turn bullseyes - this one is about 1.5mm. Don't think much smaller is practical. They have a habit of flying off into the ulu... Worth it though as they do look better on the model...
So here's the bowsprit and jb-boom with their standing rigging. Nice to be finally getting on with what makes a sailing ship interesting. Lot of eyestrain to come!

- Small Stuff, tasmanian, JesseLee and 2 others
-
5
Scottish Maid by guillemot - FINISHED - 1/8" scale - Hall's 1839 Clipper Schooner
in - Build logs for subjects built 1801 - 1850
Posted
A 4H pencil! ends up grey.