


mtdoramike
-
Posts
2,060 -
Joined
-
Last visited
Content Type
Profiles
Forums
Gallery
Events
Posts posted by mtdoramike
-
-
hahahahahaha, I know what you mean George. They are soooo tedious. I try and do a little bit on the rats each day, some times for only an hour. That is a major factor with doing a ship like the Vic, is repetition.
mike
- thomaslambo and GLakie
-
 2
2
-
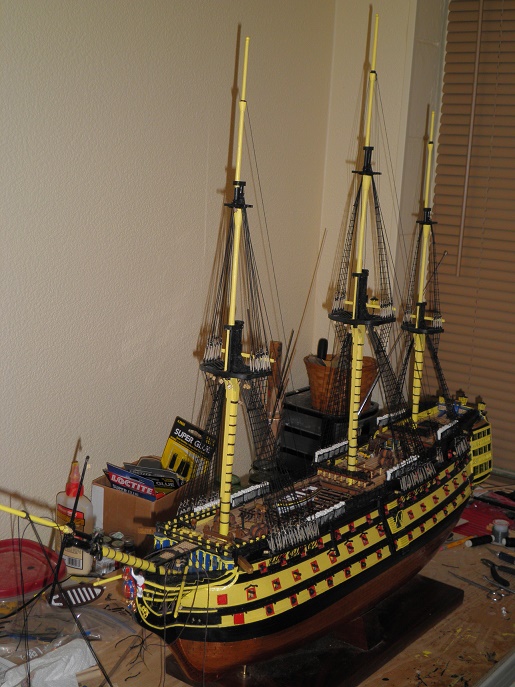
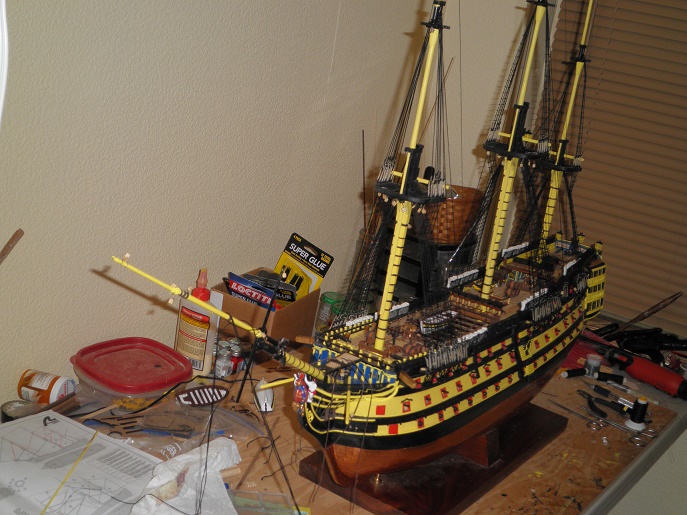
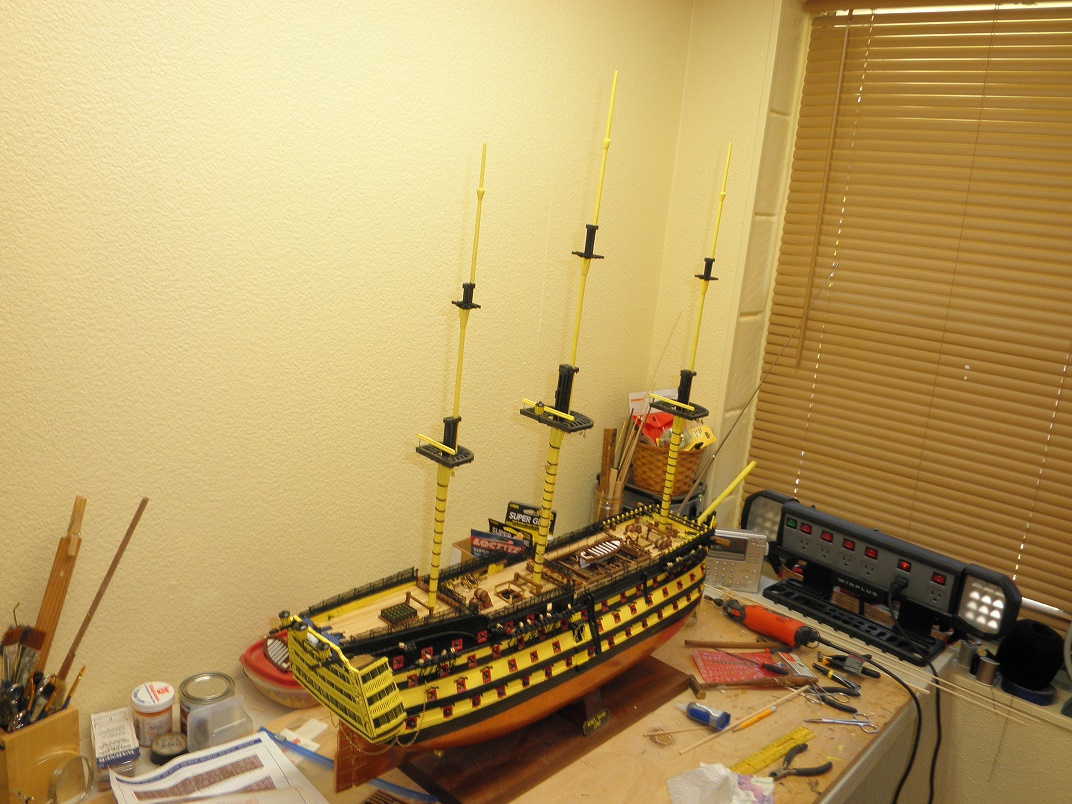
Well here is a progress update on the Vic. I've about completed the ratlines and most of the standing rigging and the spares have been made and awaiting sails and installation.
mike


- thomaslambo, Dimitris71, foxy and 2 others
-
5
-
Beautiful work on her, but that pink box kind of turns me off a bit

mike
-
Chuck,
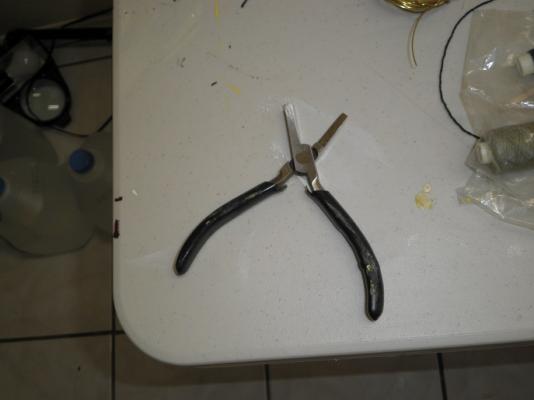
Here is a pic of the planking pliers I use from time to time. I found these particular ones on Ebay for about $15.00. They also sell a cheaper or plastic version made by Artesania Latina that will work, but they are plastic and will eventually break. These will not. Also, soaking the plank for an hour or so helps make those really nasty bends even easier.
Good Luck,
Mike

-
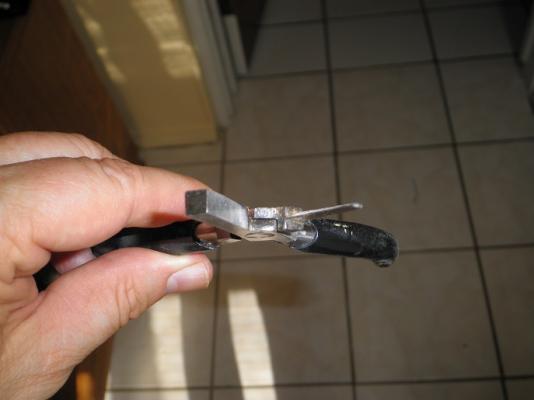
I have found these plank crimping pliers to be indispensable for the first time ship modeler. These actually make planking FUN. Yep your heard me, FUN. It makes those ridiculous bends effortless. But, and there's always a but isn't there? This is not the traditional method of planking a ships hull (I state this for all the purist out there that are twisting in their seats reading this post). Now, once you have mastered your first or second model, you can start experimenting with the traditional way of planking like soaking the plank for hours, using a heating iron or tool and possibly a bending or radius jig. Also, look for a more straight hull like the Cutty Sark style of ship. I also plank solid hull models as well and it makes it easier when you have a solid background to lay the planks on versus ribs.
I still use the planking pliers every once in awhile when I run across a stubborn curve, if it's a railing, I use thicker wood and sand the crimp marks out with a sanding wheel attachment for my rotary tool. Also, the planks are easier to crimp when they are wet. The planking pliers run about $15.00 and I have found them on Ebay as well as most hobby shops and they come in a variety of designs.
I believe a hobby should be fun and not stressful. So I use various methods to achieve a desired result, even if those methods aren't traditional in nature. I like to think of myself as the Bob Ross of ship modeling, I'm not a purist by a long shot but more of a realist. I hope this tip will help keep someone from stroking out from a hobby that should be fun.
I would also like to add that if I were making a museum quality ship model, I would not use these pliers and secondly, If I were doing a commissioned model for a client, I would use these sparingly.
mike

- trippwj and Mike the Maxx
-
2
-
I wished you hadn't thrown them away and sent them to me, I may have been able to salvage them for you and sent them back. I have had to do this numerous times for new or fellow modelers including my brother.
To answer your question, no ship model is easy to plank, but some are easier than others. I have found sharp hulls like the Cutty Sark to be a bit easier to plank than round nosed ships. Do yourself a BIG favor and look for a pair of Ship Model Planking pliers, they cost you about $15.00 for a pair of them and makes planking actually fun. This will help you make those ridiculous bends without soaking, heating, bending and breaking. Then once you have mastered you first or second model using the planking pliers, you can start soaking, heating & bending those planks the traditional way.
Lastly, pick a ship model that would look good with a painted or coppered hull. Paint and copper foil cover up a ton of putty and a multitude of sin. Before you know it, that souse ear will turn into a silk purse and no body the wiser of it.
Good luck,
mike
- mtaylor and Seventynet
-
2
-
Good luck "E". Now one of the greatest adventures of your life is about to begin. Keep in mind that the build is only half of the project, the other half is the research.
mike
-
-
-
Hi Paul, nice of you to drop in. I know what you mean, I was questioning the paint thing as well, eventhough there are two ships I think really should be painted, which is the Connie and the Vic. But now, I'm glad I chose to paint her. I hope to have some updated photo's of my progress shortly. I have been a tad under the weather for the past couple of weeks with angina pain quite a bit and being overly tired. Hopefully, I will get back to work shortly.
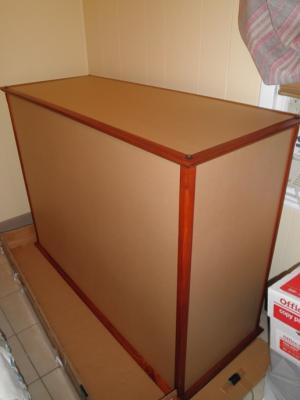
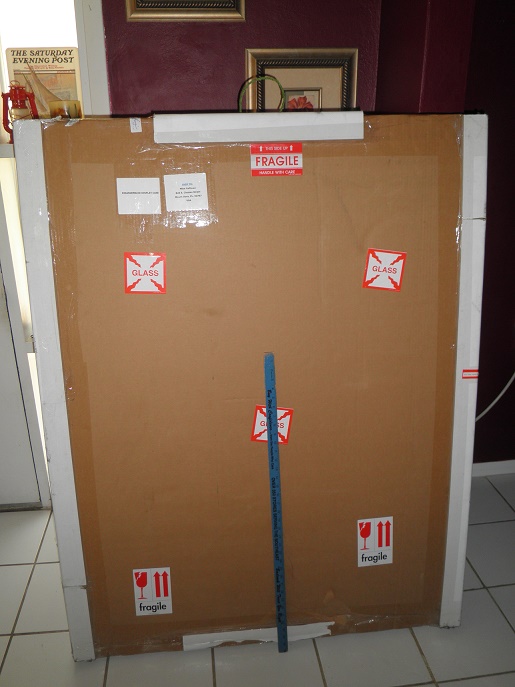
Here is a picture of the display case finished putting it together. I left the paper on the acrylic until I get ready to take it to the library. The case, which was ordered through Abordage ship models and cost $870.00 and the measurements are 54" x 40" x 20" (inside measurements). It took about 6 weeks to receive from Abordage. The case is manufactured in Dominican Republic and then shipped to Abordage's Miami Florida office and then dispatched to you by UPS. It's a great case made from Mahogany and the price can't be beat as long as you can wait for the 6-8 week construction and ship time.
mike
- GLakie and Dimitris71
-
2
-
-
Yeah, but how much are you wanting for the whole lot and where abouts are you located? Regular Sovereign of the Seas kits go for about $600.00 on Ebay there abouts, so if this is the magic you are looking for than Ebay maybe your best bet. But I would at least put a price on it and list it in the classifieds and see what happens. You might get a bit more by explaining that DeAgostini kits come with well documents and better step by step instructions than the normal SOS kit that you can buy from Mantua.
mike
-
Now that I'm getting close to starting the rigging, I'm going to get some tar from my local home improvement store and try and thin it down enough to make it the consistancy of paint to use on some of the rigging like the rat lines. Model Expo used to sell liquid tar made by Flow Quil paints that I used to use. But they stopped selling their paints.
mike
-
-
-
The display case arrived this afternoon. The UPS driver said it was one of the biggest packages that he had ever delivered to a residence at 128 pounds. I told him that it was a display case for a ship model, he replied "Dude, 128 pounds, that must be one heck of a model". Upon inspection, I would guess that at least 30 pounds of the 128 pounds will end up being packaging because it is packages very well. Here is a picture of how I received it with a yard stick in front of it.

- GLakie and Dimitris71
-
2
-
Thanks George, The mast board makes sure to keep the glue off of the main deck while building the masts. The only issue is keeping everything lined up and straight. I should have a report on the display case shortly since it shows that UPS is scheduled to deliver it today. The weight on the display kit isn"t for the faint of heart with the UPS tracking info indicating the weight at 128 pounds.
mike
-
hahahahahahaha Thanks, not really, I haven't finished it yet so the jury is still out on it. But seriously, I have built so many models over the years for them to either wind up in some private collect, board room or lobby of some corporation that I just wanted to build one that local folks could see and appreciate it, hate it, nit pick it, critique it or admire it and it not cost them anything to do so. I also have a kit of the Montane's by OCcre that I picked up on the classifieds here that I hope to build once the Vic is finished and donate it to a charity of some sort like Make a Wish, St. Judes or similar, (which ever will accept it) for them to auction or raffle off. But that will be a couple of years and about 2500 hours down the road.
Mike
-
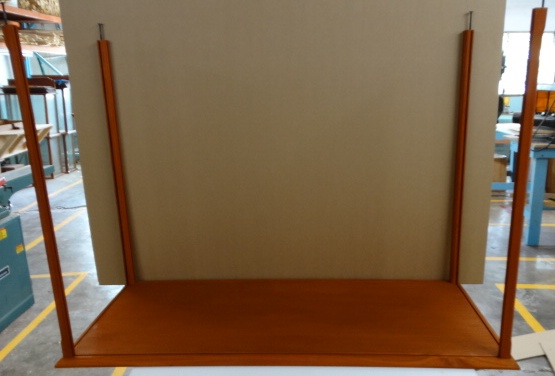
Here are a few pictures of the display case that I'm having built by Abordage of Miami Florida. They had the best price for a display case that uses 4.5mm plexi (the biggest they offer) and framed with solid hand rubbed mahogany frames and base for a tad under $1000.00 shipped. It comes in a kit form and must be put together. I will do a little build log on the display case with my review also when I receive the kit. The only drawback I see so far is they quote you a time frame of six to eight weeks for delivery and so far it's spot on, I just received the tracking number from Abordage yesterday, which was at the end of the sixth week.
Mike
- GLakie, Dimitris71, clearway and 1 other
-
4
-
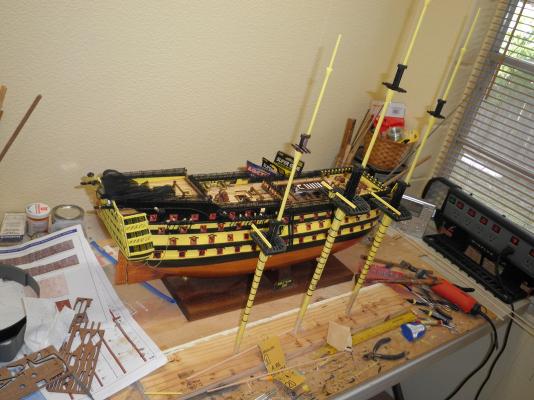
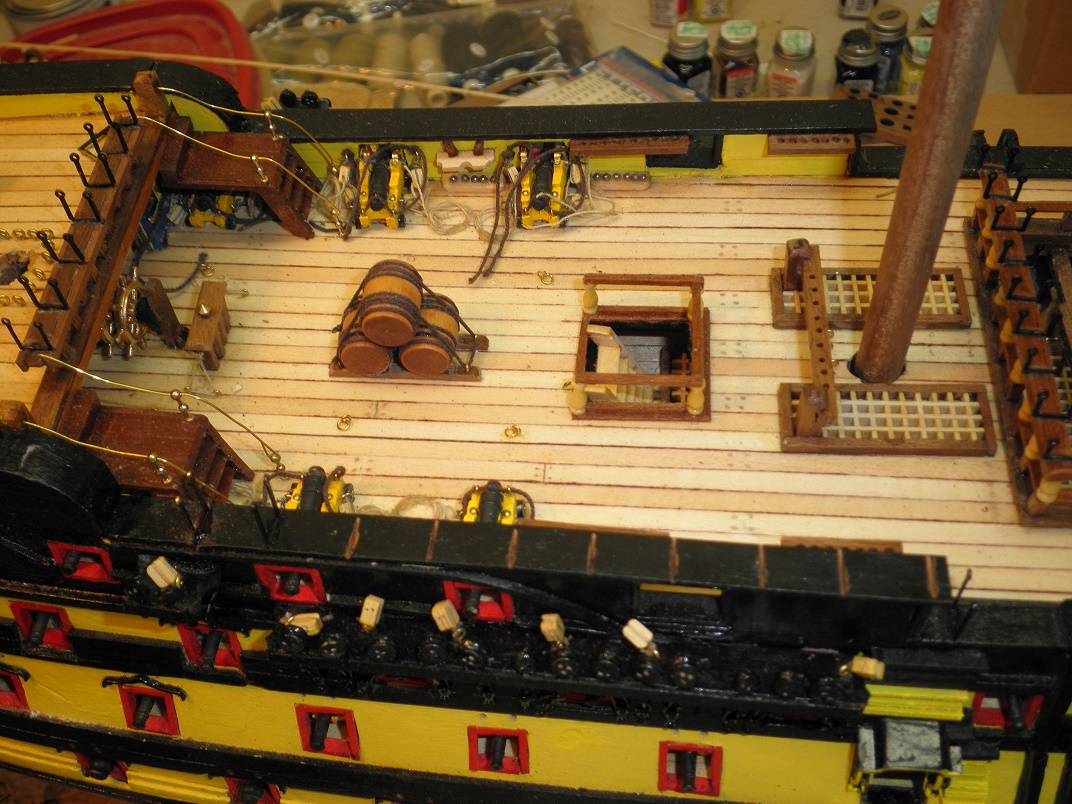
Here is some updated pictures of the build so far. As you can see from one of the pictures, the board that I use to build the masts on before mounting them on the model.
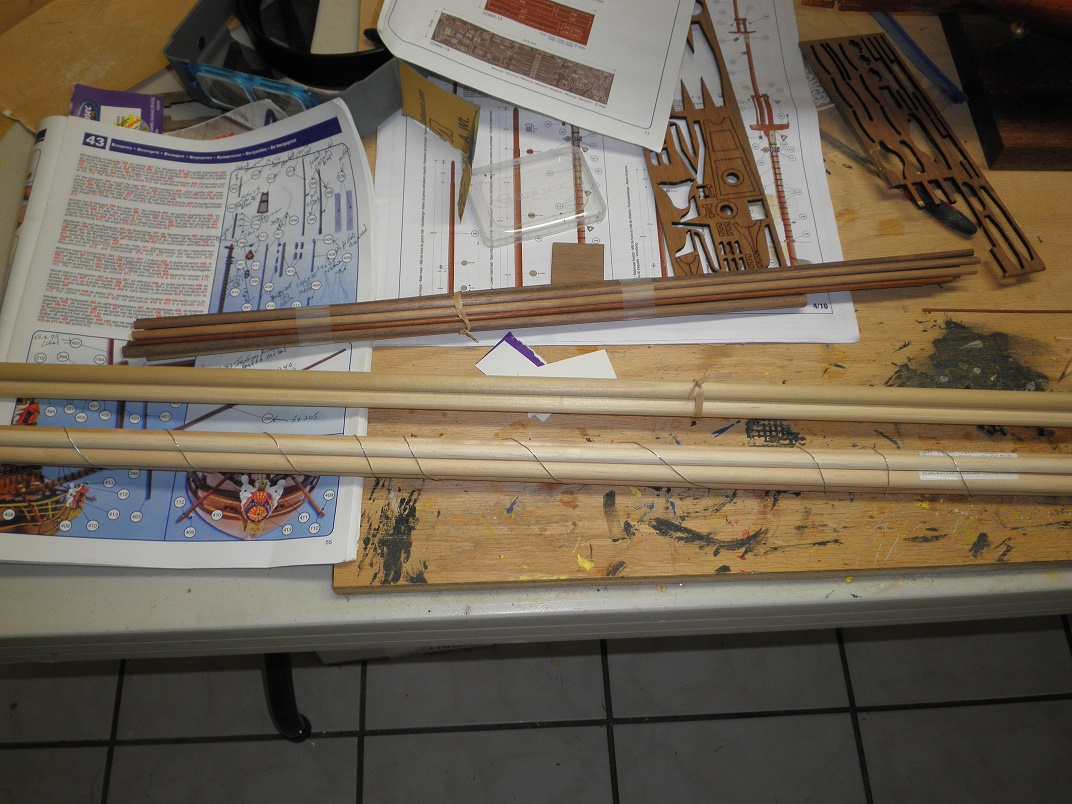
I also really, really hate to paint nice beautiful wood, so I went by my local Hobby Lobby and sifted through their stock of dowel rods and found most of the sizes I need to build the mast and spares with.
Mike


-
I usually just hang a line from the ceiling of my work room with a weight at the bottom of it.
Mike
-
Very nice job on the masts.
Mike
-
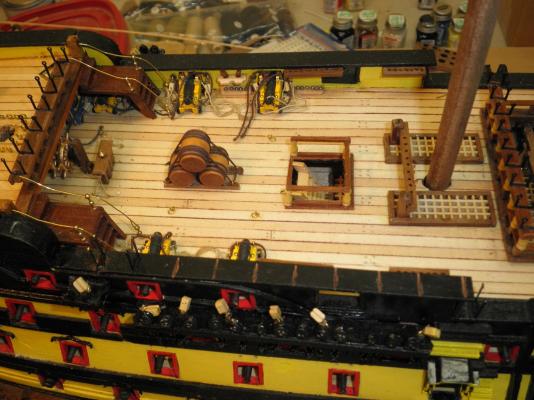
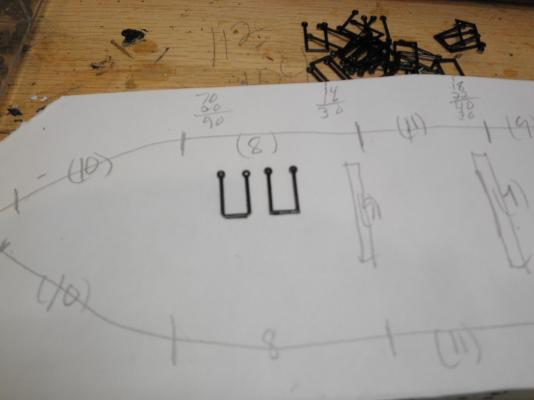
I have been working on the hammock stays and found that I have to cut a groove into the railings in order to mount them securely since the hammock stays that were sent to me by Artesania Latina weren't the supplied etched plate, but loose hammock stays sold individually. I cut the bottom corners off of the hammock stays, which helped them fit into the groove better. They also only sent me three sizes and I believe there are about 4-5 sizes shown in the manual. It's not that big of a deal except for the rear railings in front of the stern castle, there is like 4 different sizes shown just to get that slope correctly. So I will have to use the largest stays, cut off the posts and drill small holes the same width as the normal stays and cut the posts once I gauge the height properly. Thanks Latina for throwing that little curve ball in there.
Mike
- Dimitris71, GLakie and clearway
-
3
-


HMS Victory by mtdoramike - FINISHED - Artesania Latina
in - Kit build logs for subjects built from 1751 - 1800
Posted · Edited by mtdoramike
I used some of the wood from the REAL HMS Victory that I received from England to fashion a couple of anchor collars. You can still see and smell some of the tar that was on the wood. Cool stuff.
mike