


Jack12477
-
Posts
5,619 -
Joined
-
Last visited
Content Type
Profiles
Forums
Gallery
Events
Posts posted by Jack12477
-
-
BEADING NEEDLE
Not sure if these have found there way into anyone's tool kit yet.
Use them all the time. I get them in Joann's Fabrics in the US.
- mtaylor, GLakie and mattsayers148
-
 3
3
-
As a photographer I have dealt with Light Impressions many times; their products are excellent and their service is also.
-
-
I think you are safe Mark. The postmen's slogan is "through rain, hail or sleet, will never stop the postmen to do his duties". It doesn't say anything from interruption from model builders.
Havagooday
Greg
Hell, Greg, this past winter here the mail delivery was stopped due to SNOW and SLEET. - So much for the "slogan"
- mtaylor, GLakie, mattsayers148 and 1 other
-
4
-
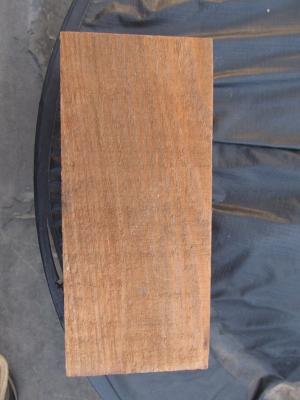
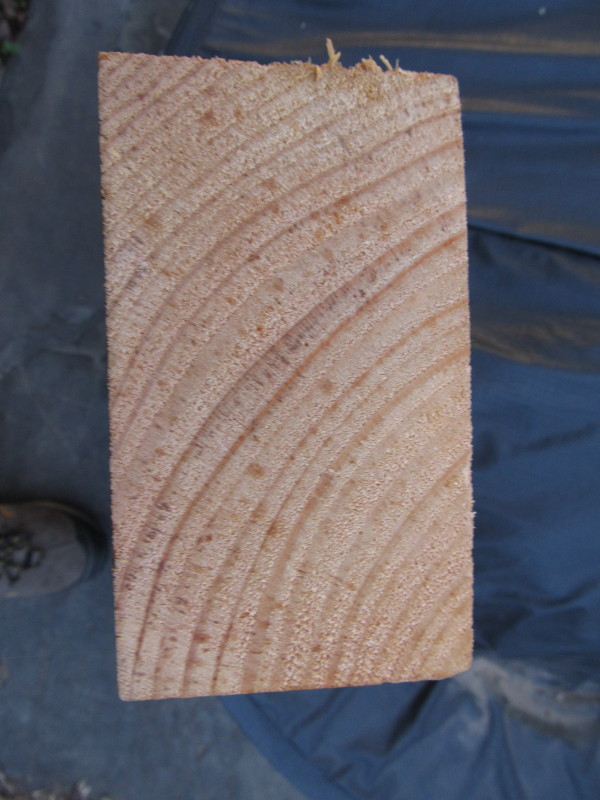
Tim, these pictures are of a block of Yellow Pine (rough sawn) I got from a fellow woodcarver - it's also favored by woodcarvers - has a "new house construction smell"


-
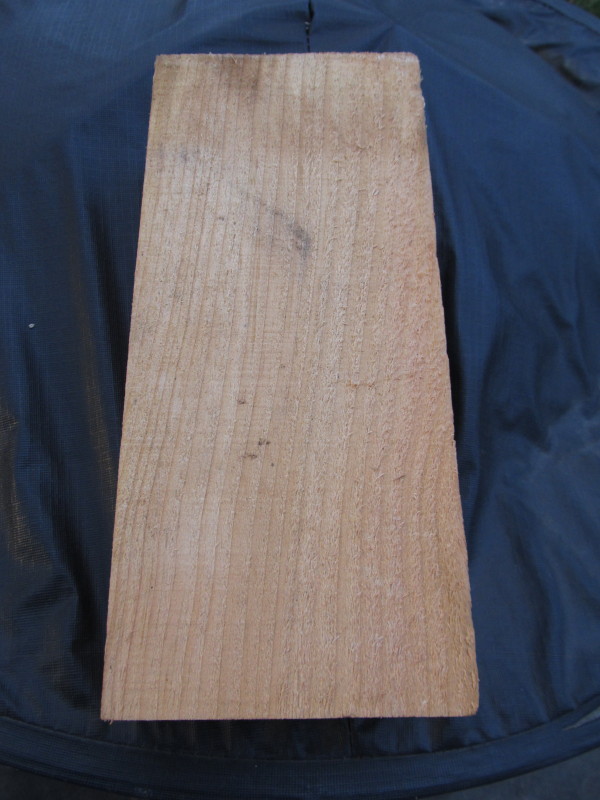
Tim, a wood that is very popular with woodcarvers is Butternut ! It's slightly brownish color. Tight grained.
-
I have seen Dan's model HMS Vulture and started to follow his build log recently. Have to go back to the beginning and read thru to play catch up. Have not (yet) seen his technique for making blocks but will certainly look carefully for it in his log(s).
- tkay11, mattsayers148 and GLakie
-
3
-
Thanks, Tony. What prompted my question was the level of detail, especially in the rope and blocks on each of the models. It's amazing what they could produce 200-300 some years ago without the aid of all the "power" tools we have today. I have not seen blocks or rope like that from any of the current kit manufacturers with the exception of Chuck's Syren products.
Even the scalloped edging on the plank ends on the foredeck of the 1790 Trial is amazing detail.
Thanks for posting !
- GLakie, mattsayers148, Canute and 1 other
-
4
-
Tony, beautiful photos. Thanks for posting. In what year(s) did NMM say these models were built?
- GLakie and mattsayers148
-
2
-
CaptainSteve, I'll take a seat on the poop deck and watch the build too.
- GLakie, CaptainSteve and mattsayers148
-
3
-
-
-
-
the garage is somewhat 'loaded' if not 'over loaded' ...
Carl, you have one of "those" garages too !
 My car hasn't seen the inside of the garage in over 5 years, maybe even 10 years.
  :(
:( - Salty Sea Dog, GLakie, src and 3 others
-
6
-
-
-
I have a friend who swears by Model Shipways paints; I, on the other hand, swear at Model Shipways paints. Main problem - they are too thick - unless you dilute them heavily with water they are way too thick (IMHO) to apply even with a brush. For this reason I would never try them in an airbrush. Even applied with a brush the obliterate any small fine detail with their thickness.
-
I think you will find that this group of modelers offers constructive critique not destructive ! Come join us !
- CaptainSteve, Dimitris71, GLakie and 2 others
-
5
-
Looks pretty darn good to me ! None of the "mistakes" you point to are obvious to me until you pointed them out. And I'm really not sure they are "mistakes". I'm not sure what you mean with the coiled ropes on the deck? The stern detail looks good, even the molded wood (instead of brass) looks good.
We modelers sometimes tend to be too critical of ourselves. I would say your model is excellent.
- CaptainSteve, michael20, GLakie and 4 others
-
7
-
Hi Michael
Happy Birthday ! Enjoy your day. Your workmanship is amazing!
- michael mott, IgorSky and garywatt
-
3
-
Michael,
Nice photos of the plane! Nice cane chair ! Yes, I would die for one of those old Adirondack guide boats, they are beautiful as well as practical.
If you ever get the chance to come East, you should plan a trip to the Aerodrome. They fly that Bleroit every weekend, mostly an "Orville Wright" kinda flight - 10 feet off the ground and just the length of the field - very impressive to watch. Cole Palen, the founder, built a replica of a Fokker tri-wing (DR-7 if my memory is correct), the engine and prop are original - the rest of the plane he scratch built from original plans he found in an archive in Germany. He used to fly it as the "evil Black Baron" (until his death some years back) in their airshow every Sunday. Airshow is very impressive.
I'm planning on taking my 9 yr old granddaughter to one of their shows this summer when she comes for a visit. She's at the age where she will appreciate it.
Love your little engine ! Magnificent workmanship! Looking forward to seeing it run.
-
I take it you have visited Old Rhinebeck in person then ?
-
I have used both a 60o and 90o V-gouge to cut rabbets. Set the V-gouge so that one side is perpendicular to the wood and lay the other leg against the inboard side of the keel piece and gently take small cuts in the wood. With a little practice you can get the hang of it and cut a pretty decent rabbet. As everyone has said make sure the gouge is SHARP and go slow
-
1/4 scale model of the Bleriot 11 the first plane to cross the English Channel.
Michael, there's a full sized original across the river from me in the Old Rhinebeck Aerodrome - flys most weekends every summer in their air shows. It's only one of many WW I aircraft.
 Bleriot XI (Original)
Country: France
Year: 1909
Engine: Anzani
Horsepower: 35
Wingspan: 25′ 7″
Top Speed: 47 mph (75 km/hr)
Gr. Weight: 661 lbs (300kg)
Current Status: Active
 Bleriot XI “Cross Country” (Original)
Country: France
Year: 1911
Engine: Gnome Rotary
Horsepower: 70
Wingspan: 25′ 7″
Top Speed: 47 mph (75 km/hr)
Gr. Weight: 661 lbs (300kg)
Current Status: Static Exhibit
- mtaylor, Piet and popeye the sailor
-
3

Andrea Gail by popeye the Sailor - FINISHED - 1:20 scale
in - Build logs for subjects built 1901 - Present Day
Posted
Popeye, outstanding workmanship. Love the buoys !