HOLIDAY DONATION DRIVE - SUPPORT MSW - DO YOUR PART TO KEEP THIS GREAT FORUM GOING! (Only 13 donations so far - C'mon guys!)
×


DaveRow
-
Posts
691 -
Joined
-
Last visited
Content Type
Profiles
Forums
Gallery
Events
Everything posted by DaveRow
-
 Thanks for looking in and your kind comments on the hinge posts Greg/s, Rohan and Steve. My fingers were too big, going the way of jigs and using tweezers helping a lot. Dave R
 -
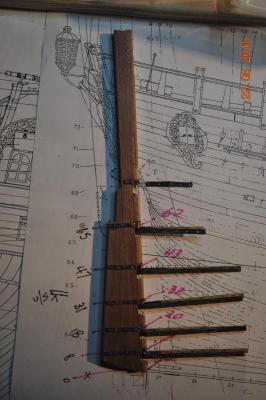
Problem Huston, I hope I have done the right thing. I started having a look at the Roughtree rails while the glue was drying on the mid Airing port hinges. The Waist(front) Roughtree Rail(WRR); I laid out the rail with a stanchion height so the rail rested over the Quarterdeck Gunwale like in the AOTS and as many of the NRG MSW Endeavour builds. That makes sense to me. See Pic 01 below. However it did not look right as the rail looked too high, and where the cannons poke through the stanchions, had a high aspect whereas the AOTS has a wide aspect(wider than the height), and the rail is lower(in height). Why ? Well I kept the gunwales very low to the deck, at the change in height between the Quarterdeck and Mid decks. Too late the change now. So I lowered the waste roughtree rail 3mm. See other Pic 03 below. Not happy that the rail does not lock over the rear gunwale. There is a an Endeavour Model in the Torpedo Bay Navy Museum, Auckland, NZ that has the WRR butted to the vertical gunwale section. Maybe had the same problem. ? I don't know if I have done the right thing now ? or what else is possible to do. Gentlemen reading this post, ANY ADVICE - IDEAS ! Don't be shy. Dave R
-
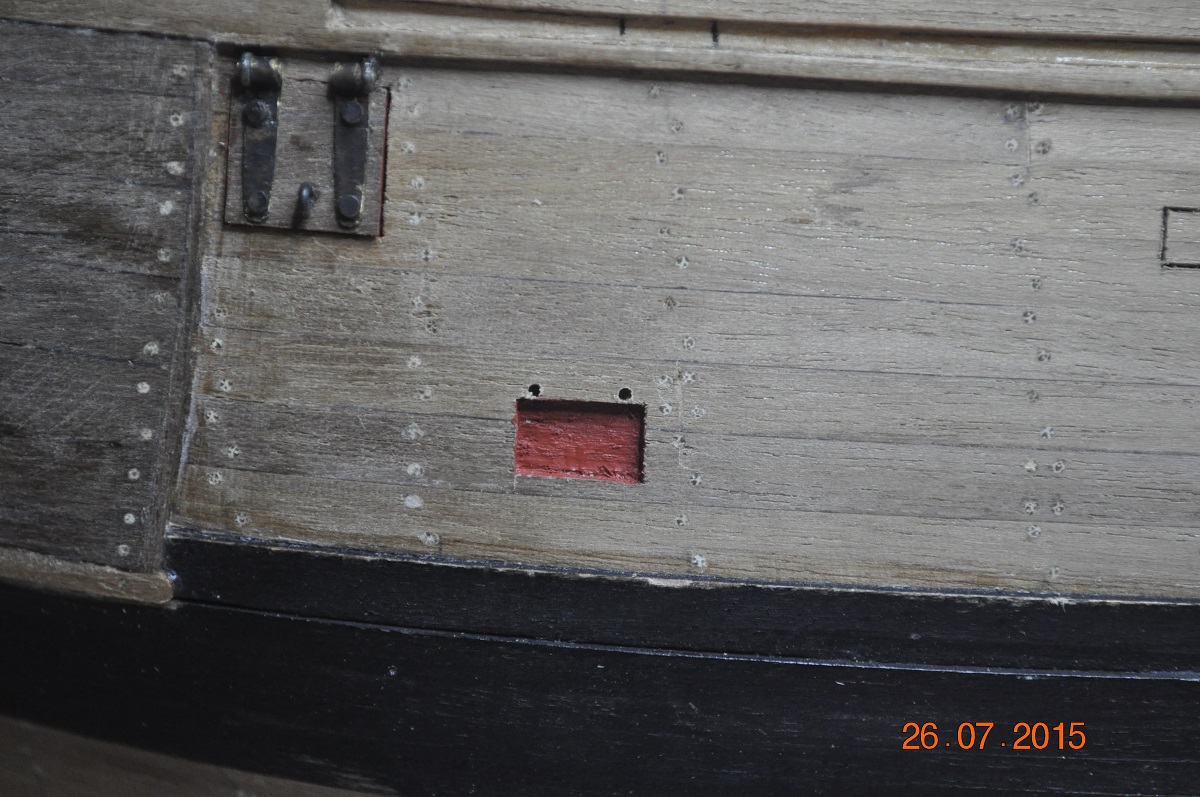
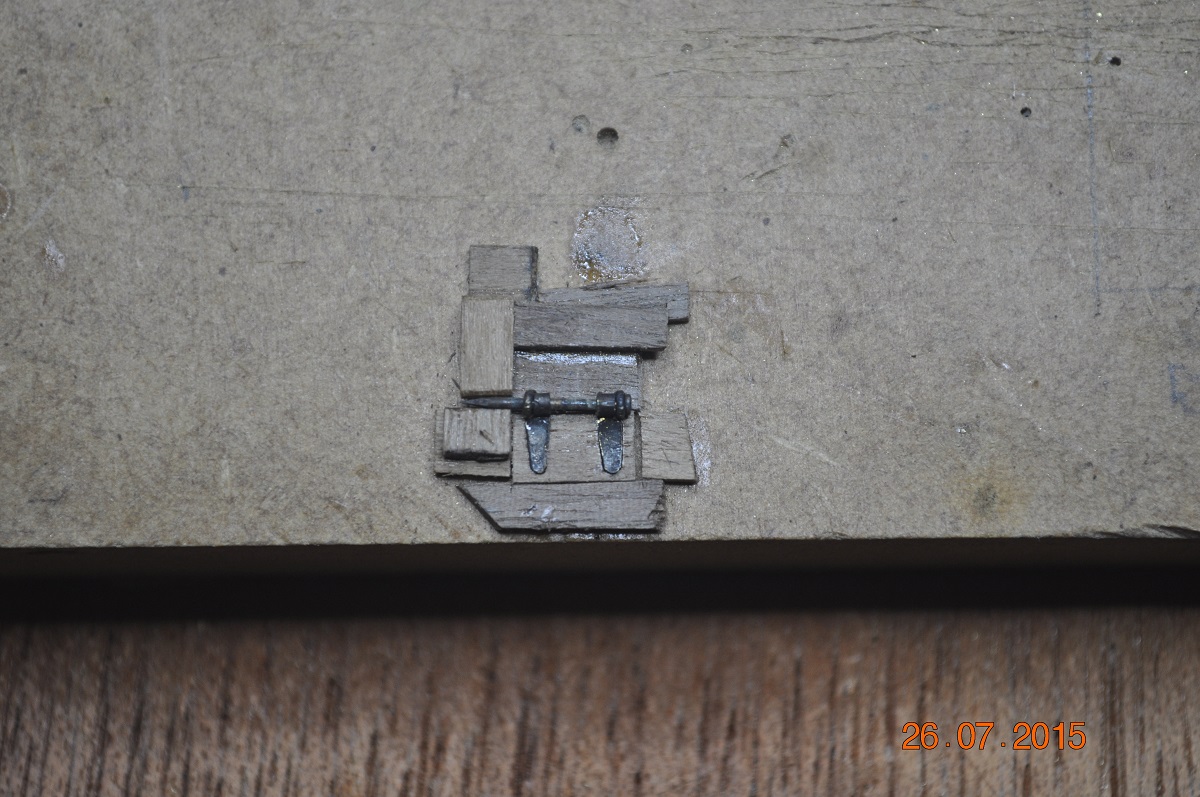
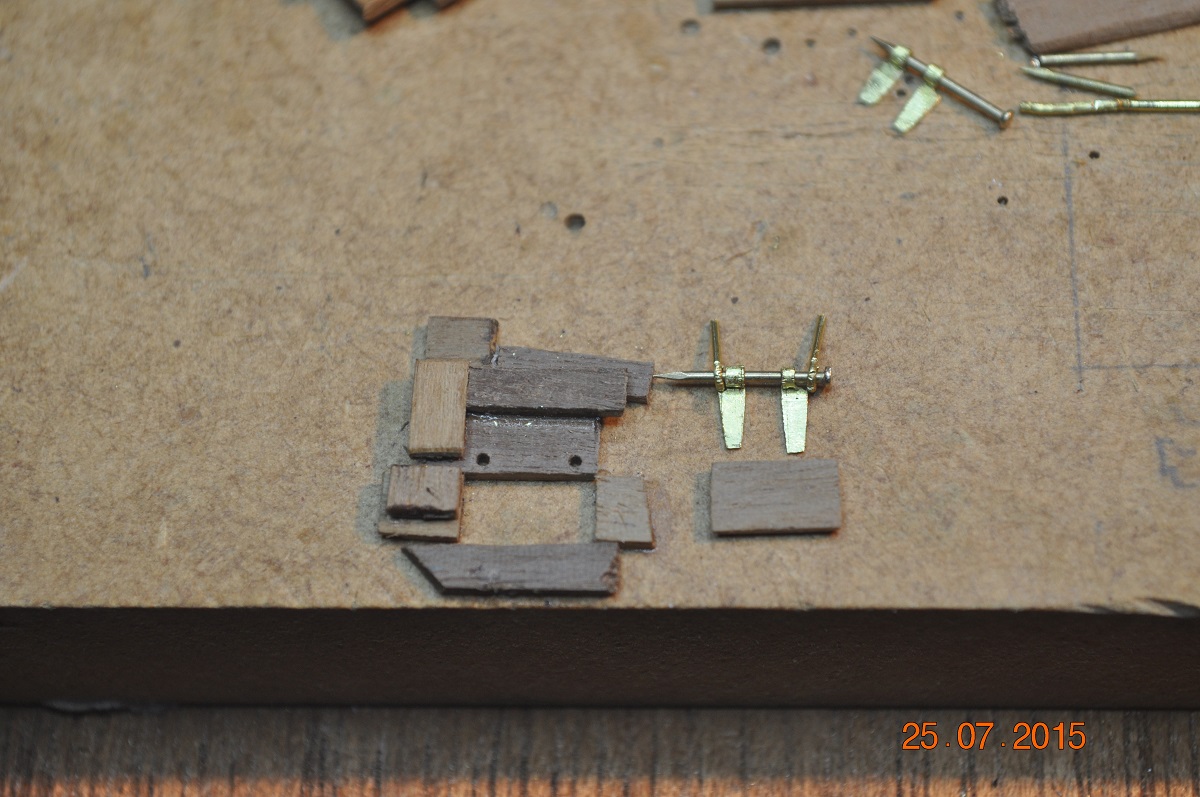
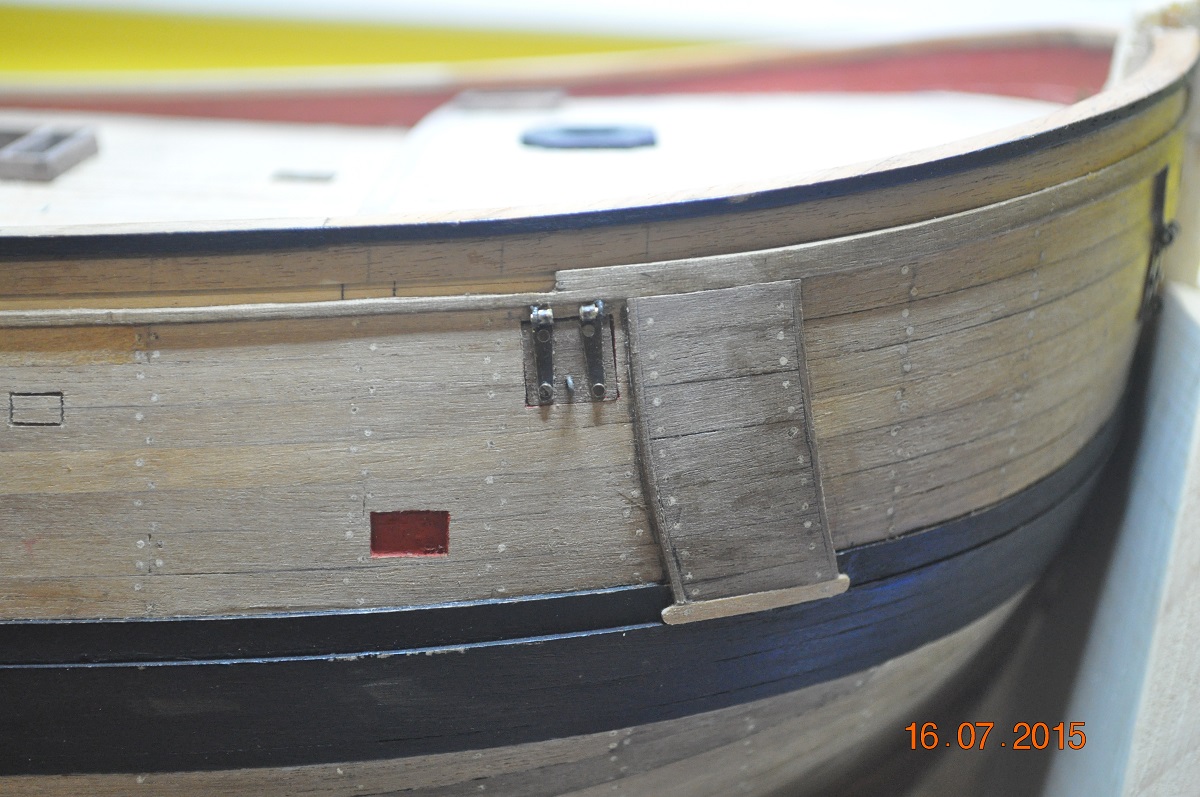
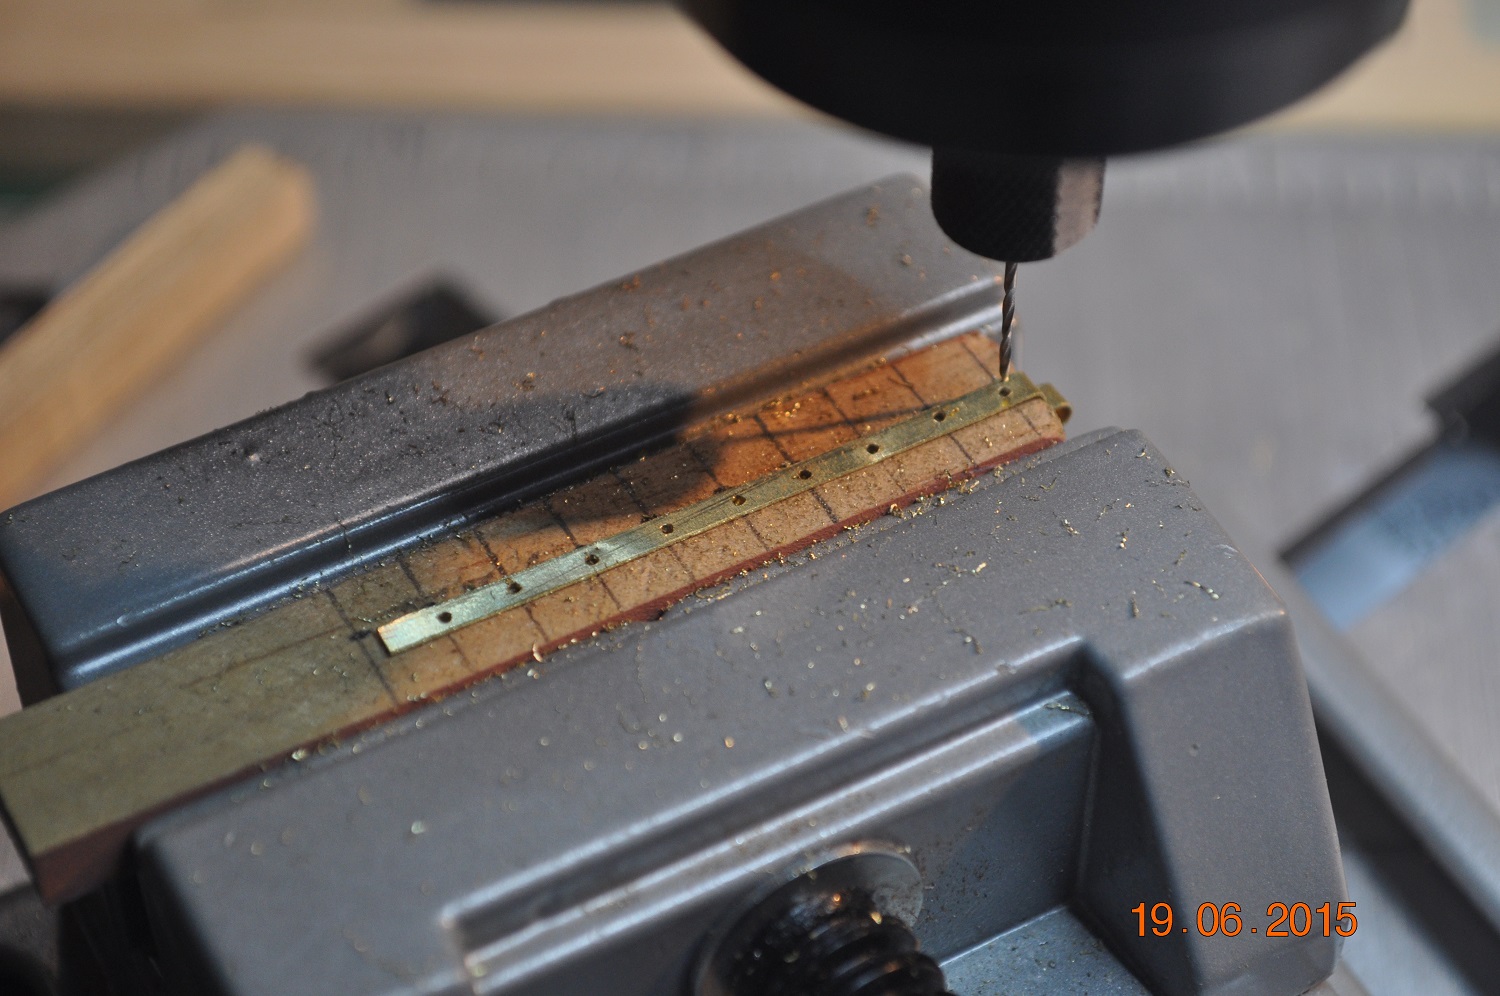
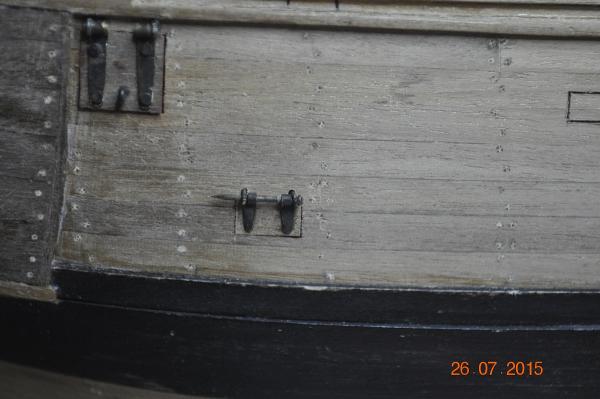
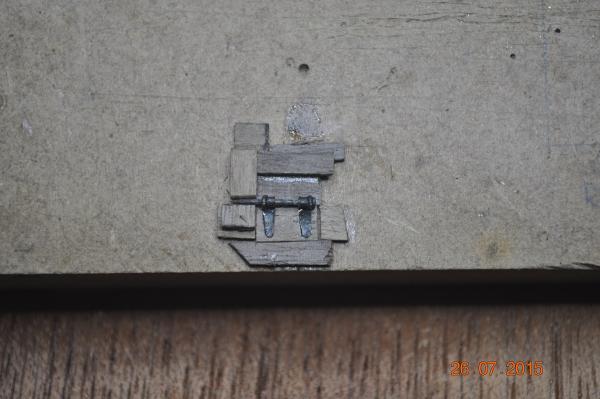
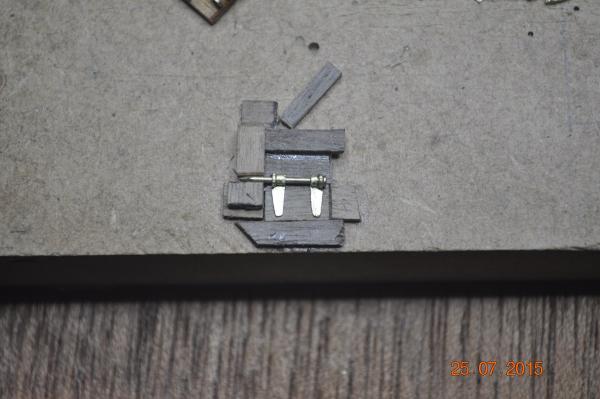
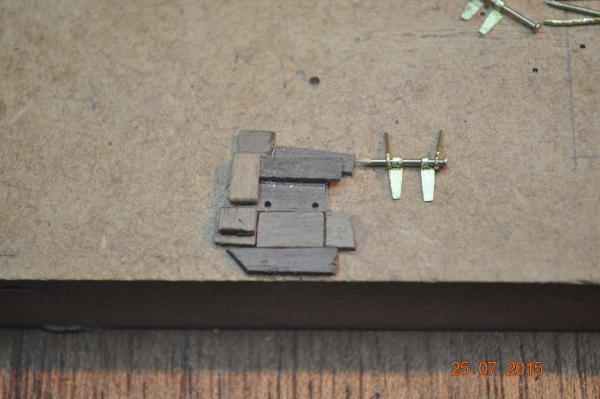
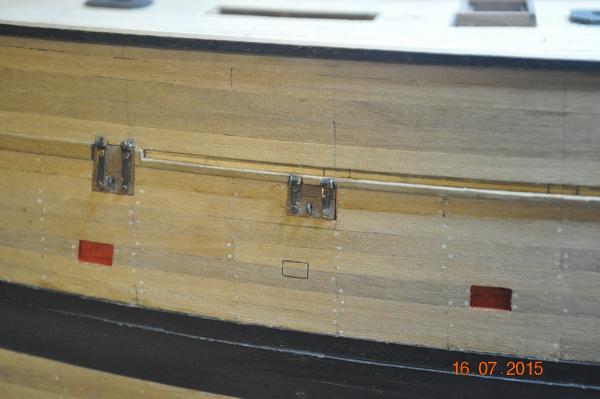
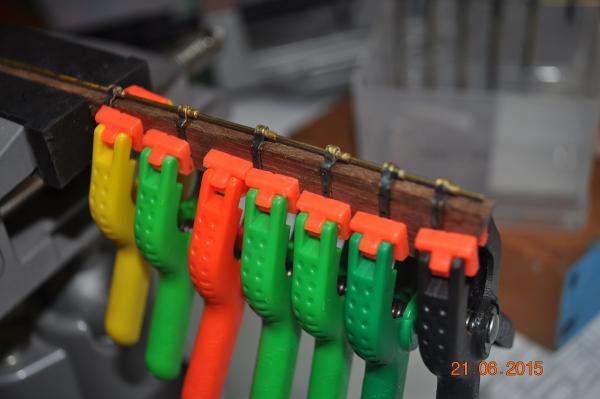
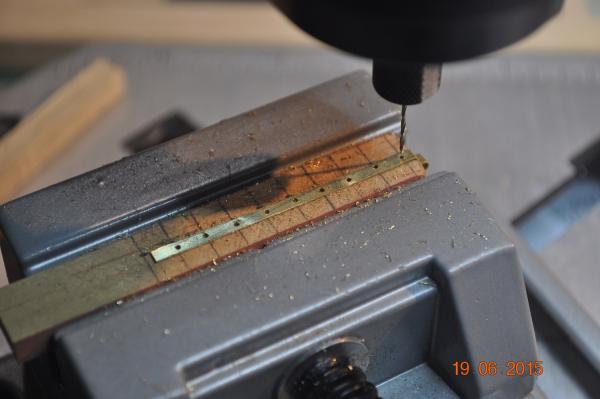
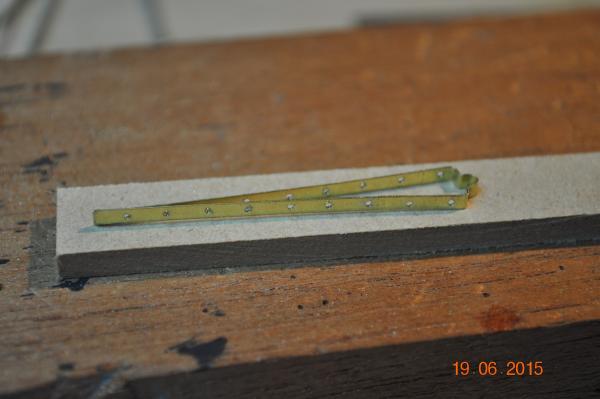
Airing Port Jig. Bit crude, however does the intended job. I use the crappy looking hinge glued onto a scrap piece of planking, with 2 holes drilled in the brass hinge. These are same as for the previous post alignment jig holes for the 2 x eye bolt pins. Pic: Port Jig1 The jig is positioned into a airing port on the hull, and the 2 holes drilled through the brass holes. Pic: Port P1 Holes drilled above the hull hole Pic: Port P1 Port01 A part completed Airing Port fitted to the hull(with tmp pin). Some more work on the pivot pins to go. All this takes time, esp. making the sets of hinges, eye bolts, jigs etc. And I still have the lower Airing ports to go. Dave R

-
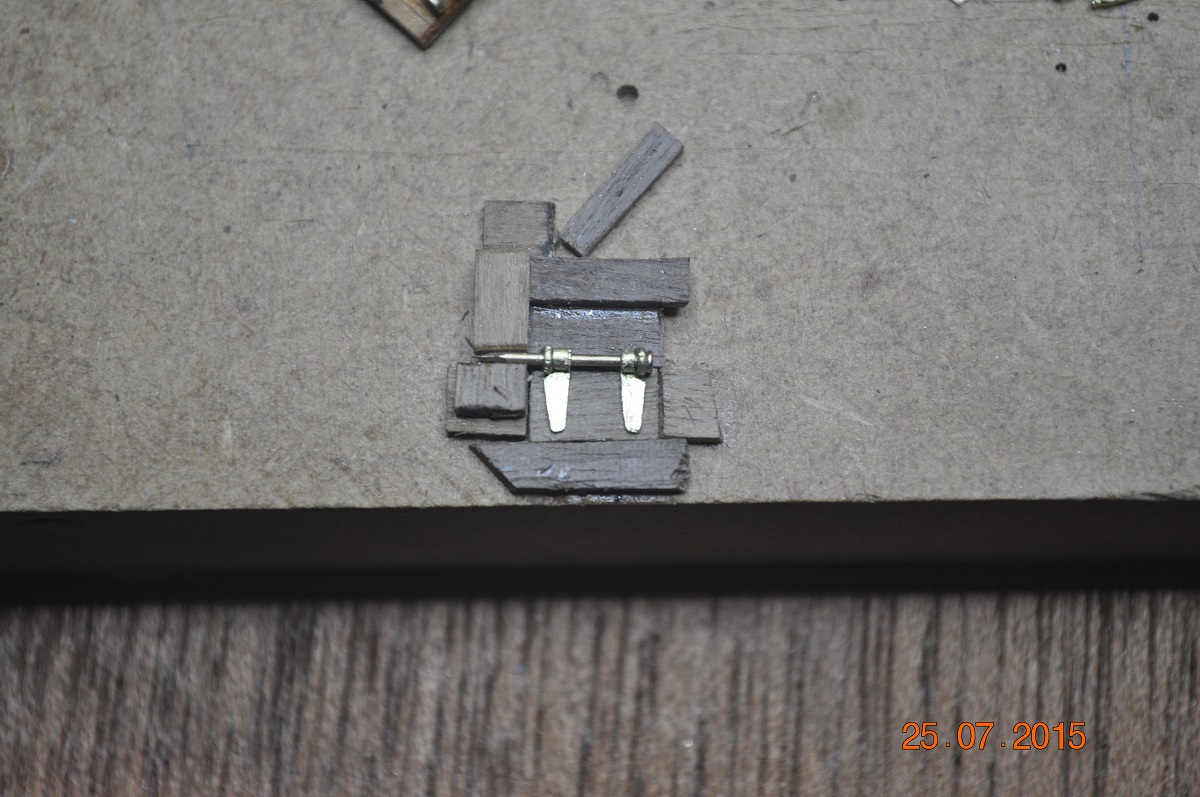
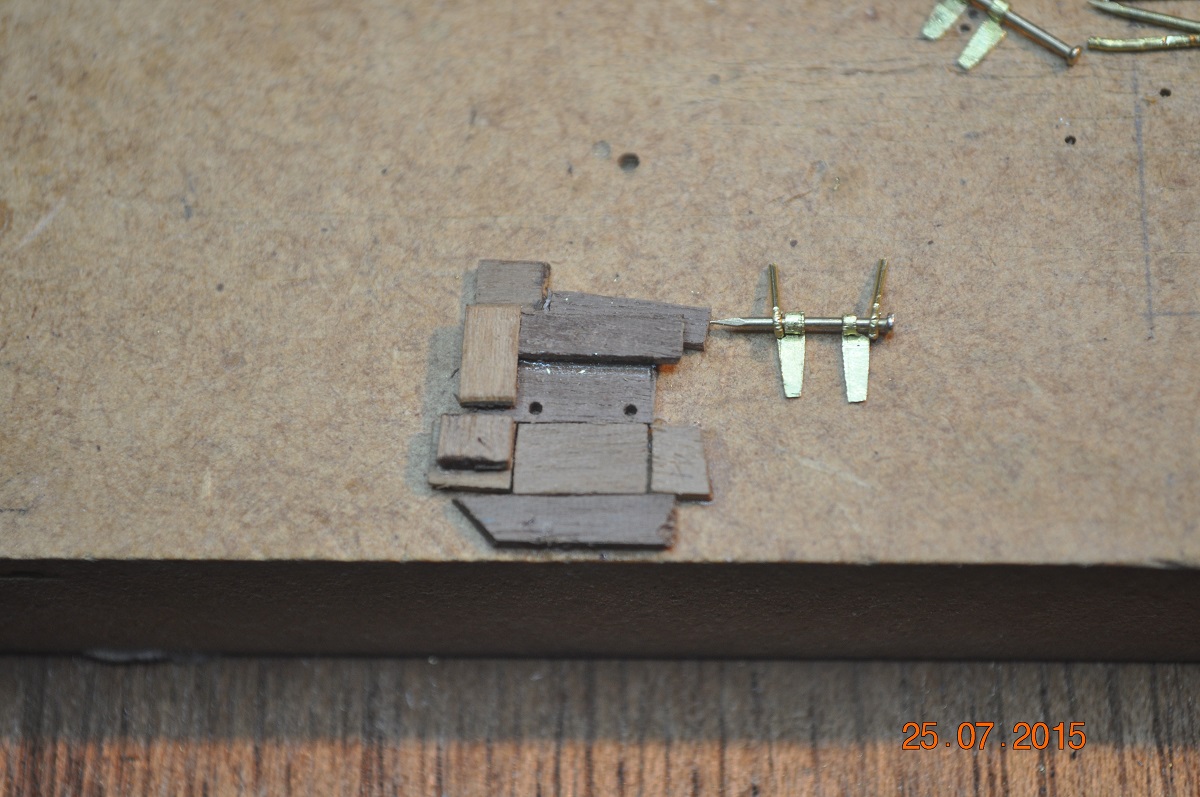
Airing Ports - update The shipyard got smart on this one. Well hope so. We made a jig to mount the small port timber, the 2 hinges, eye bolt and temp pinion(nail). The series of picture hopefully indicate the alignment of the hinges whilst they glue onto the timber port. I also have a hole drilling jig that I will use to position the eye bolt holes into the hull. Next Post. Dave R

-
I am mesmerized by the detail in the joints, the timbers, the finish, the lot. Great work Alexandru Dave R
-
Hi Mal, The shipyard going well I see. A tip on the planking if you have not already done so. Read up on planking wooden models, if you haven't done so/a lot or want to, I can email you some doco I found that helped a lot for me(being a first time). Private Message me if you want me to email them. Dave R
-
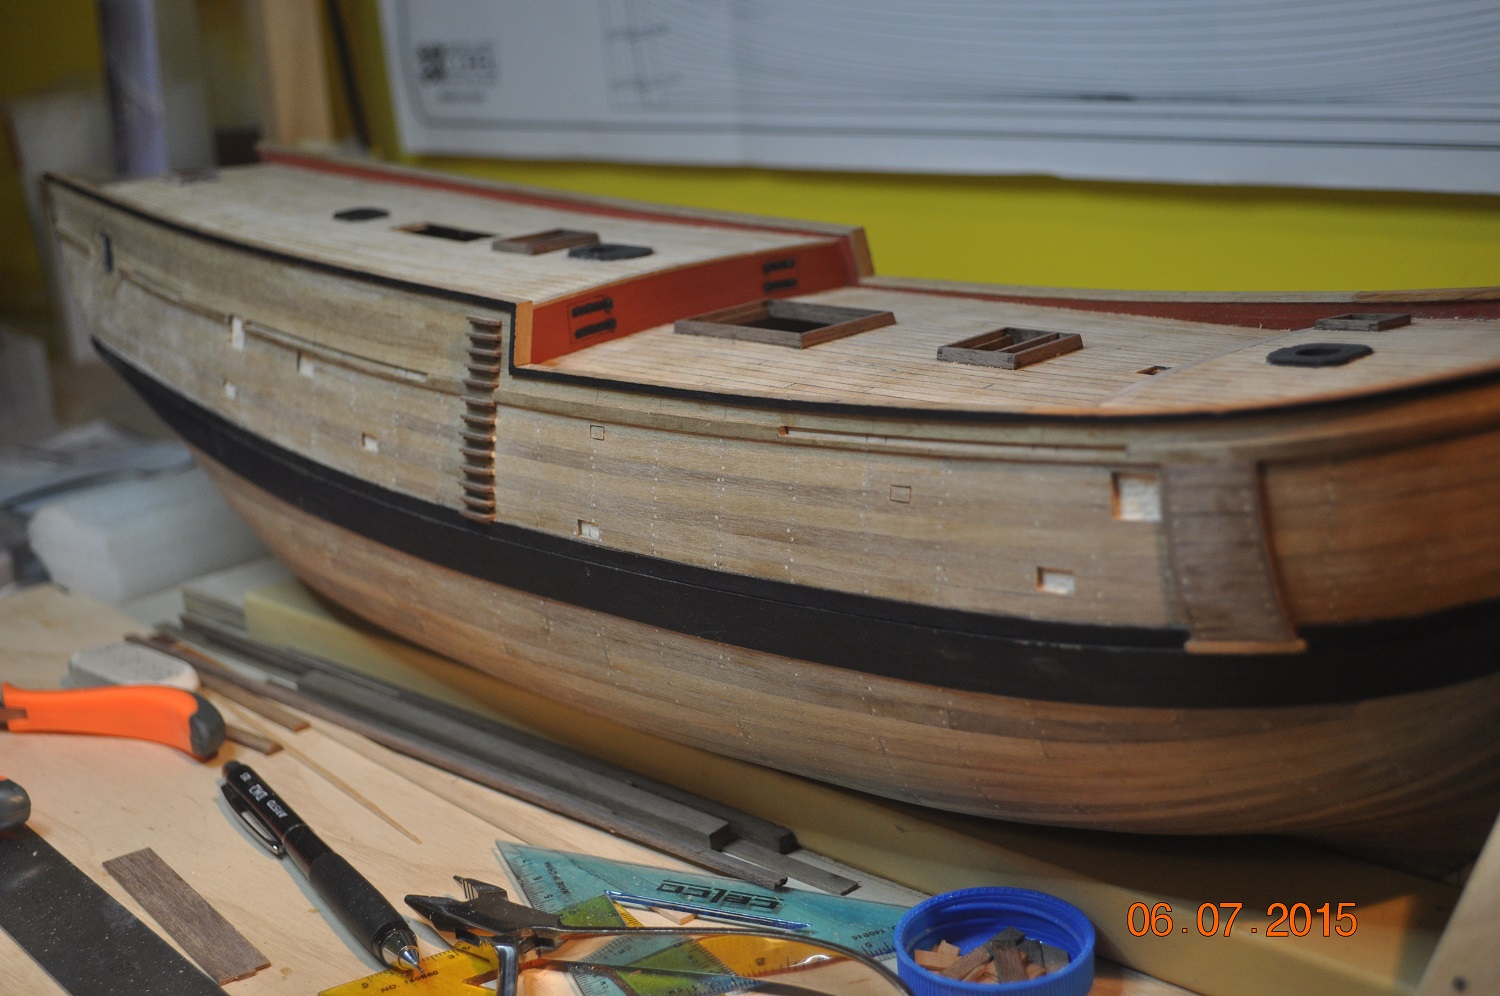
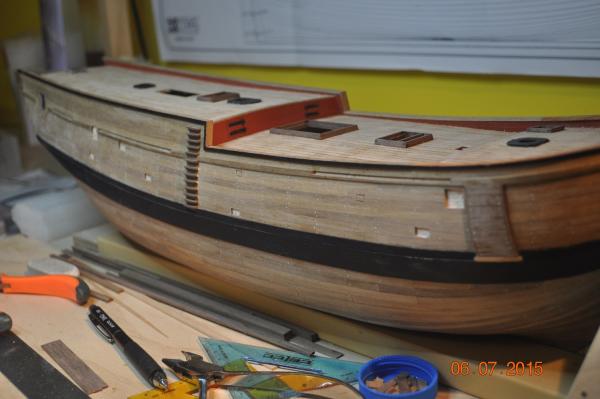
Shipyard finally has the 3 larger hatches on the side of the hull. 90% happy with them, very fiddly work making them hinges. Next is the mid size ones. Updated Sun 26July2015: Added pictures with starboard ports open. Dave R


-
Hi Paul, I agree totally. My kit stern parts was nothing like the Parkinson's sketch, so I built if from scratch. Made some errors along the way, did my best to rework some of the build and come up with something with 4 windows and hatches. Mie is not finished yet, still has carvings to add on. Is it like Parkinson's ? Working in with the constraints of kit hull, maybe similar, not exact, but what is exact anyhow.? As you said "no plans of the ship" Dave R
-
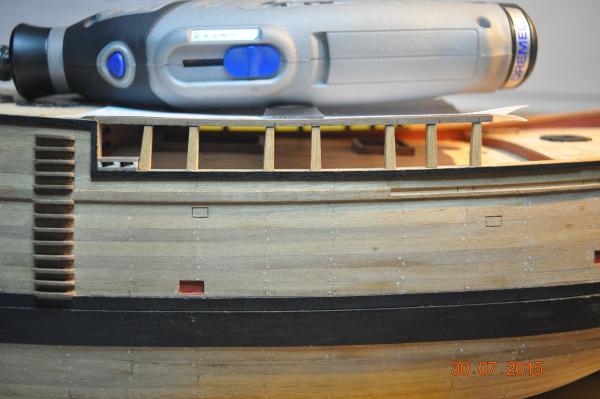
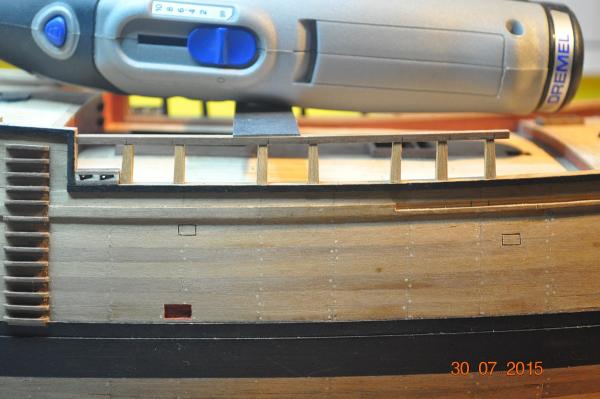
There are holes starting to appear in the side of the hull. Is the shipyard getting serious about doing the remaining hatches and loading ports ? Dave R
-
You guys will have the AOTS and other great things sorted out by the time I get to rigging. Thanks Dave R
-
Shipyard update. Stern taking shape with couple of features in place(not fixed). Slow progress, all takes time. Dave R

-
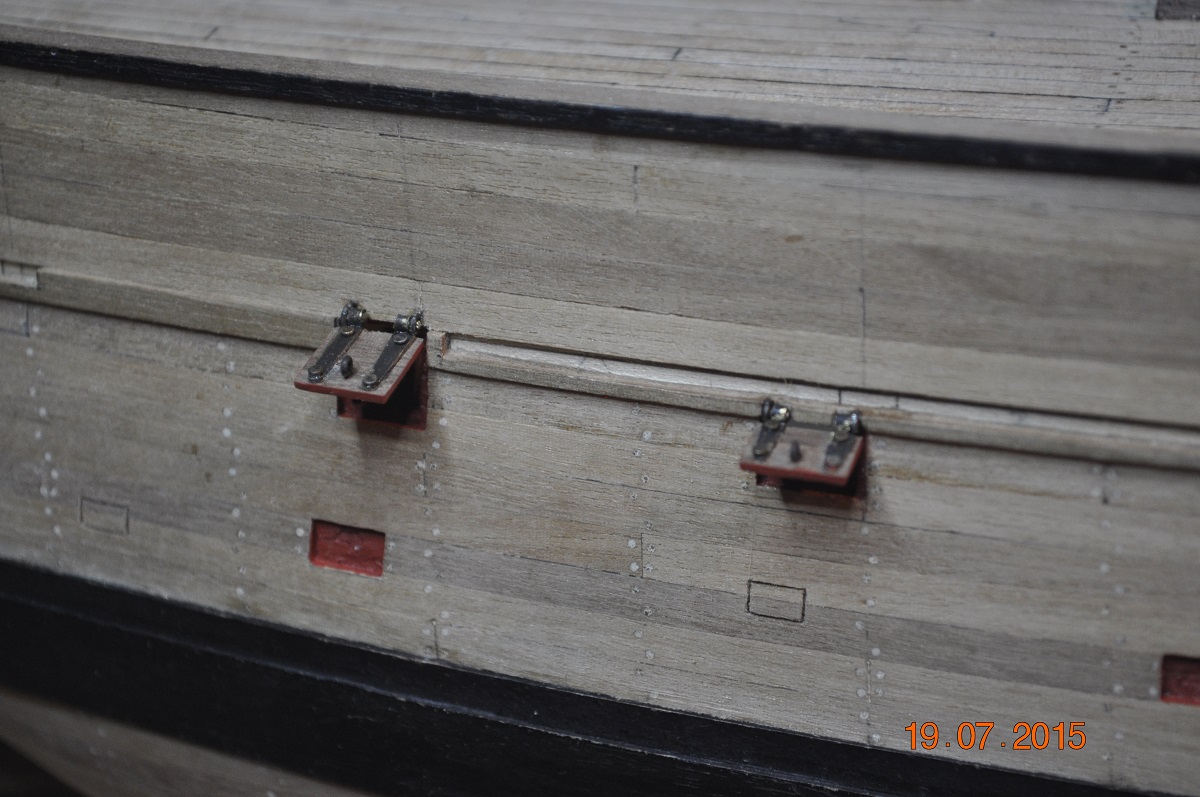
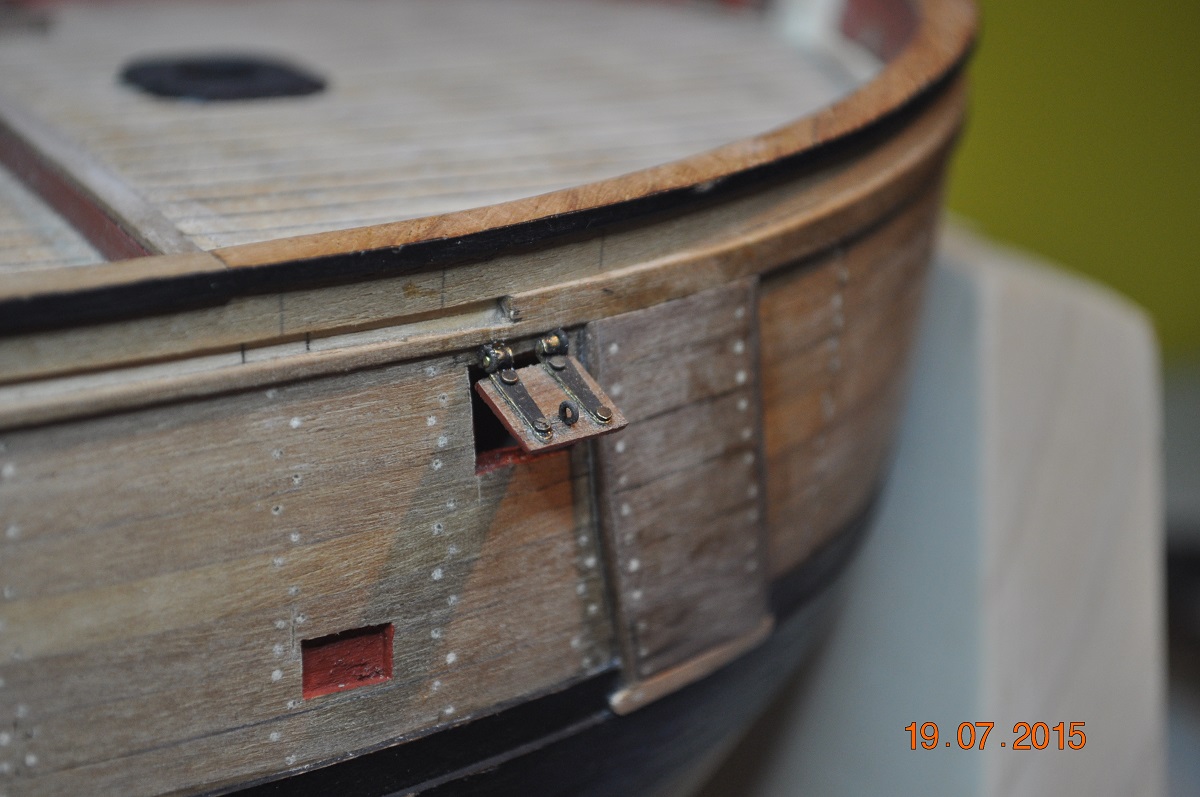
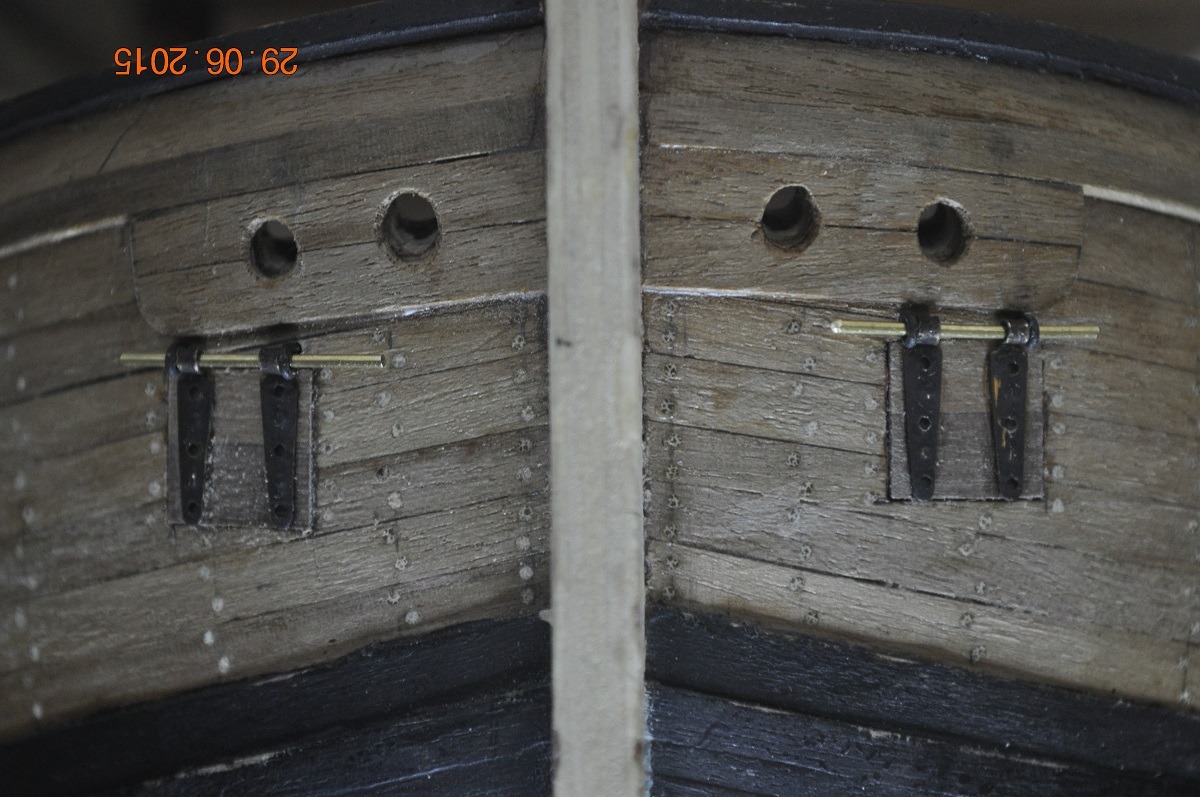
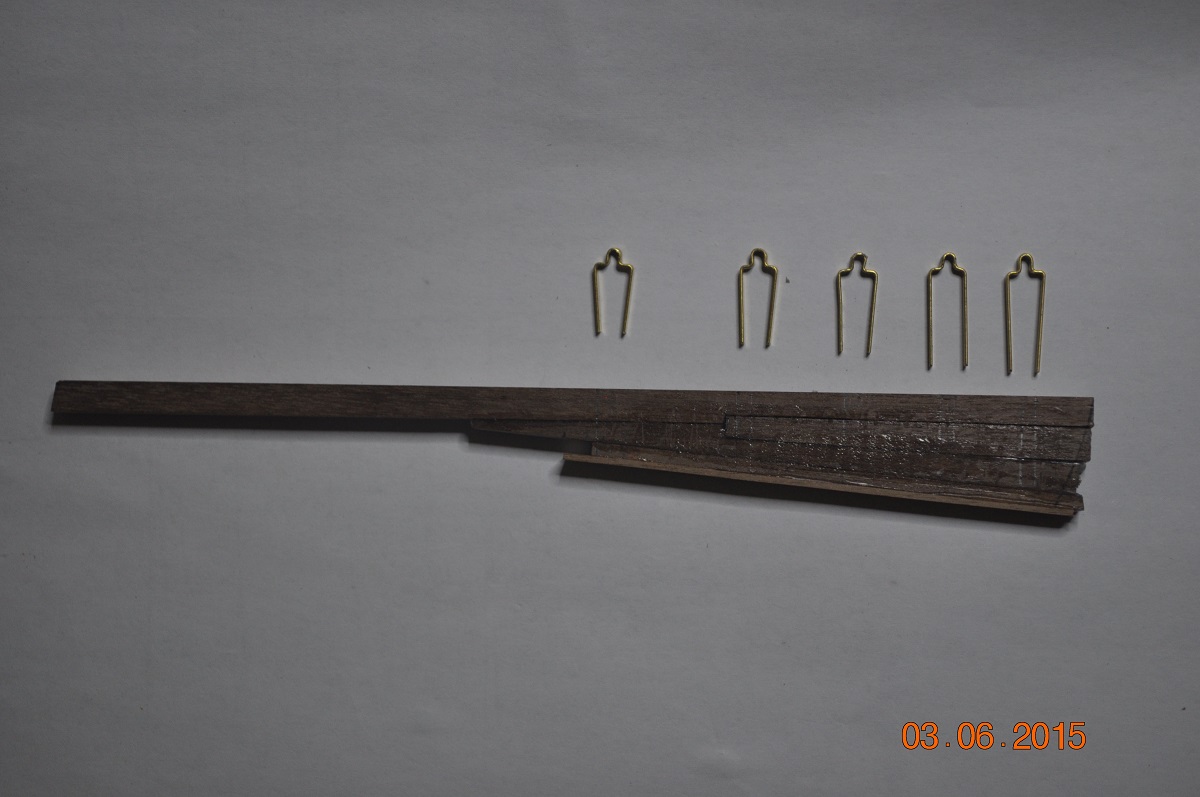
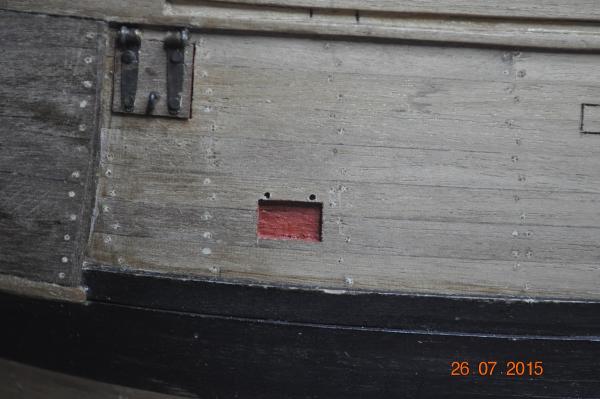
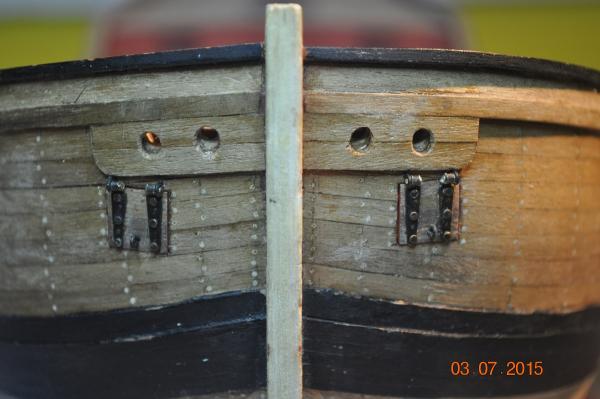
2 x Bow loading ports. Change of style a bit on the ports. Using eyes/pinned to the hull, to hold the hinges. They are on the outside of each hinge. I used a rod to align the 2 hinges and whilst the glue dries them to the port cover. When the glue dries, pull the pin out, covers off and: - drill fit the fake fixings(6 pins and a eye each) - fit short pins to the hinges and hull pins They fit pretty neat. The pictures show up any scratch eh! Bit of touch up to do again. Dave R Update: added in ports after rod cut to length and all glued in place. Touch up to come.

-
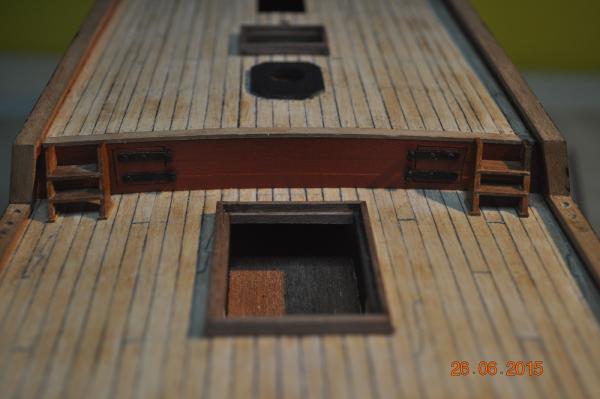
Bit of combing around where the rudder stock comes up through the deck. Dave R

-
Hi Graham, Welcome to the Endeavour build club. My best advice is research, research and research and don't rush into it. If it doesn't look right, then it probably isn't. Ask for help, as others have said, plenty of us about to help. I gathered as many articles I could on planking, went through many of the build logs on this Web Site to see what others were doing. Consider the final look you are wanting to attain. i.e. are going to paint the hull white or a clear finish. I decided to have a timber finish, showing the traditional methods of planking a hull, thus each plank is tapered, some are dropped, stealers added in. All this explained in an article called "Simple hull planking techniques for beginners". PM me if you would like me to email it. For a painted finish, not so important, and you could cut corners and taper planks. I can only agree with Pat's comments, don't get down the track and regret that you haven't fixed some of the Boo Boos. In the end up to you, and how you want it to look. PS I am watching some 12 Endeavour builds on this site, gaining as much insight to how to do things. I probably spend as much time researching and looking at other builds as actual construction on my model. Dave R
- 10 replies
-
- 1
-

-
- endeavour
- artesania latina
- (and 1 more)
-
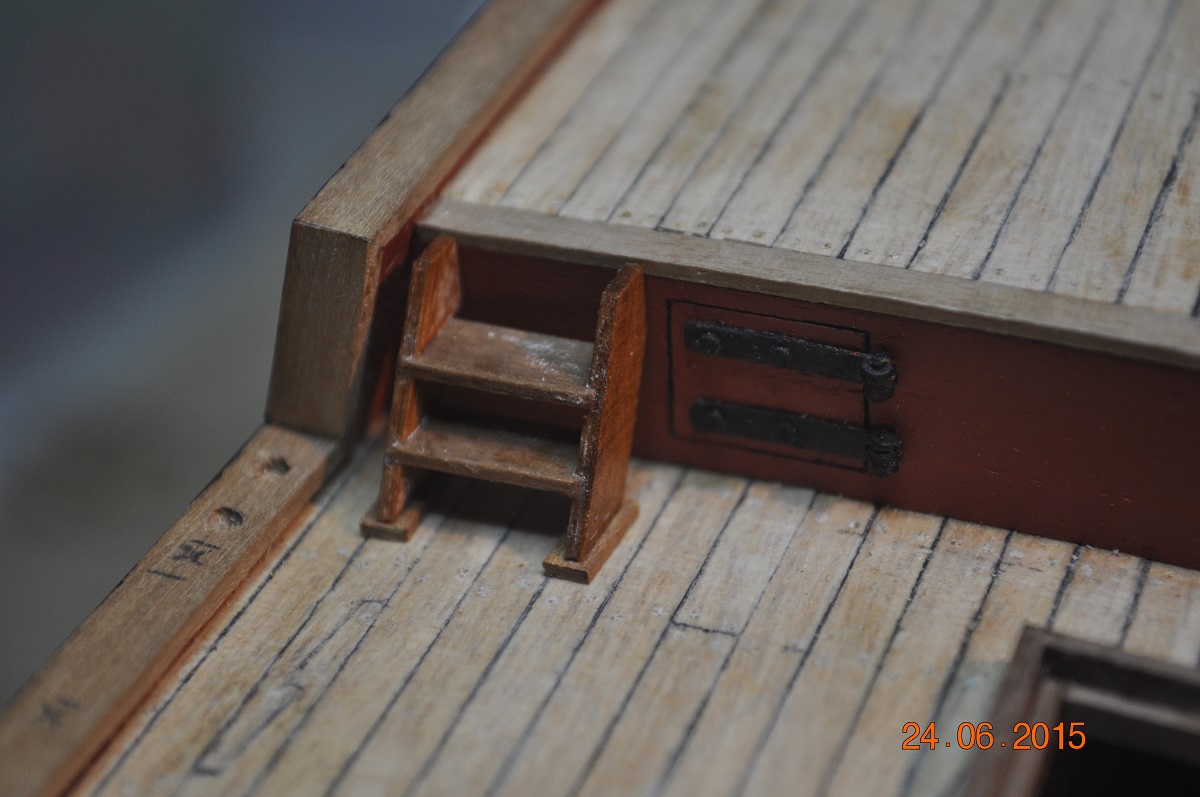
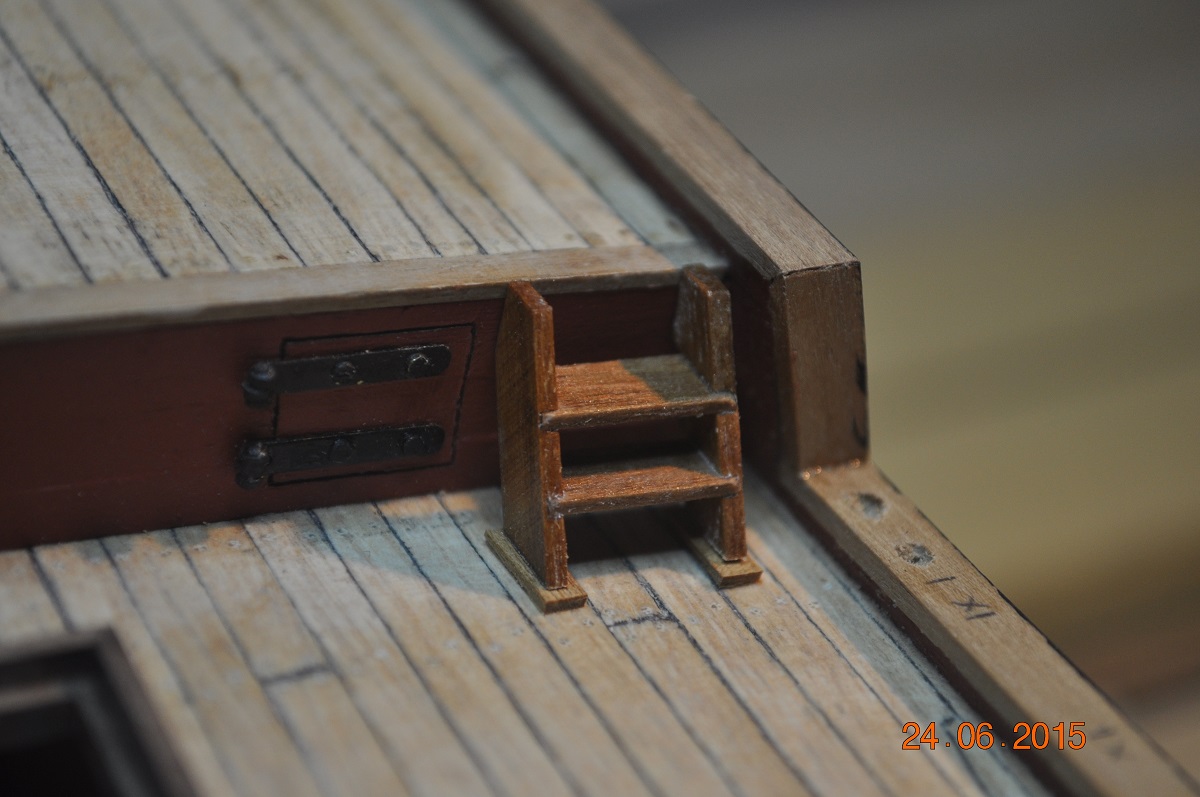
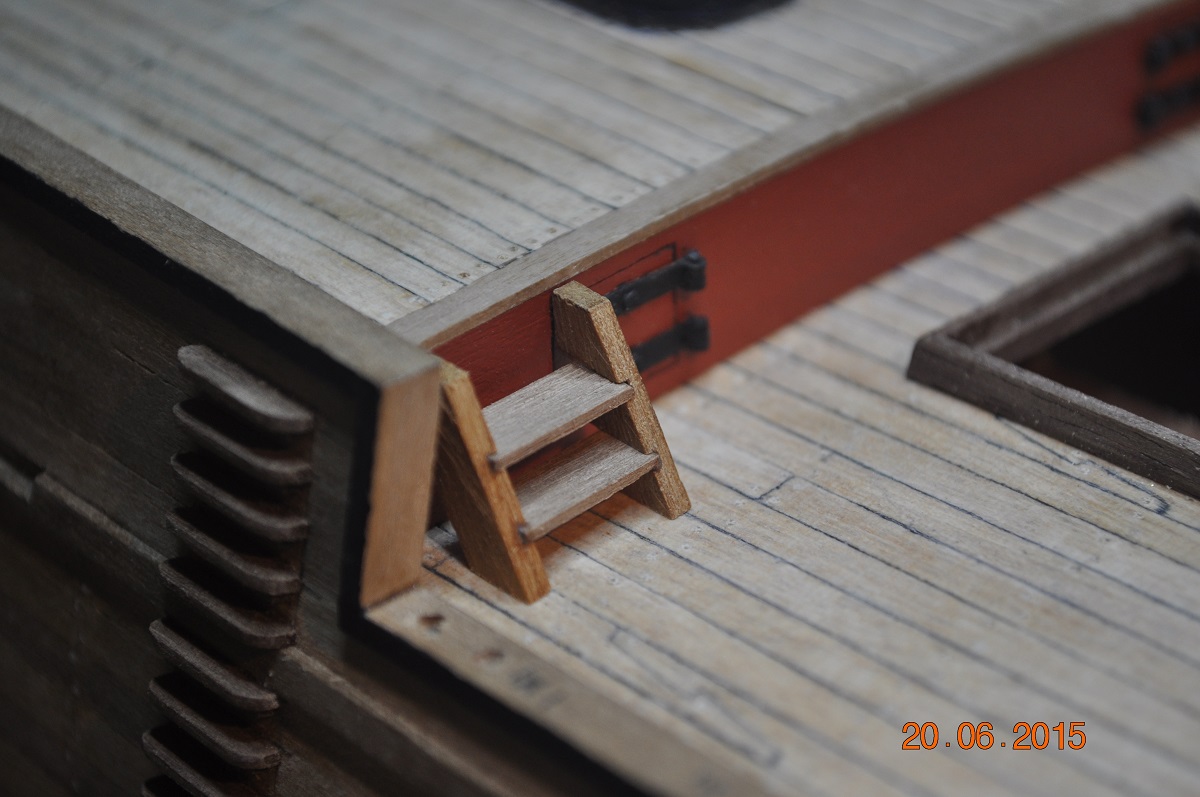
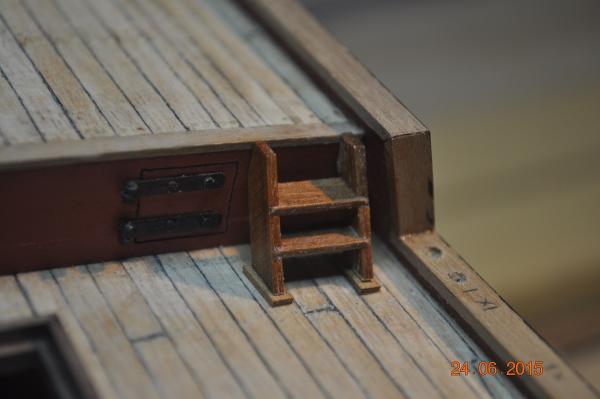
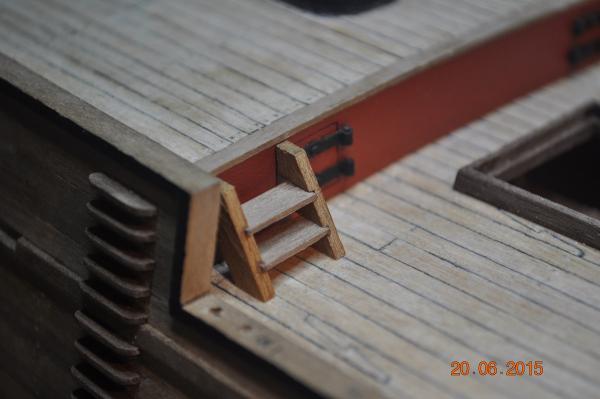
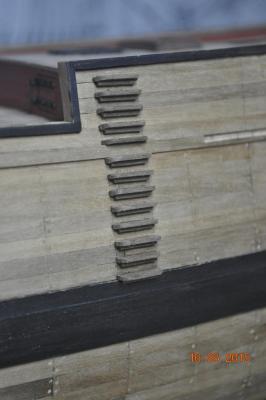
Thanks for your comments Beef Wellington and Greg. The mid deck steps: I thinned the side stringers down a wee bit and added little feet under each. Not glued in place yet. I think I will run with this though, the proportions look better. Dave R Update 29/6/15: added in third Pic. The feet are bit narrower and glued onto the steps. Run with this.

-
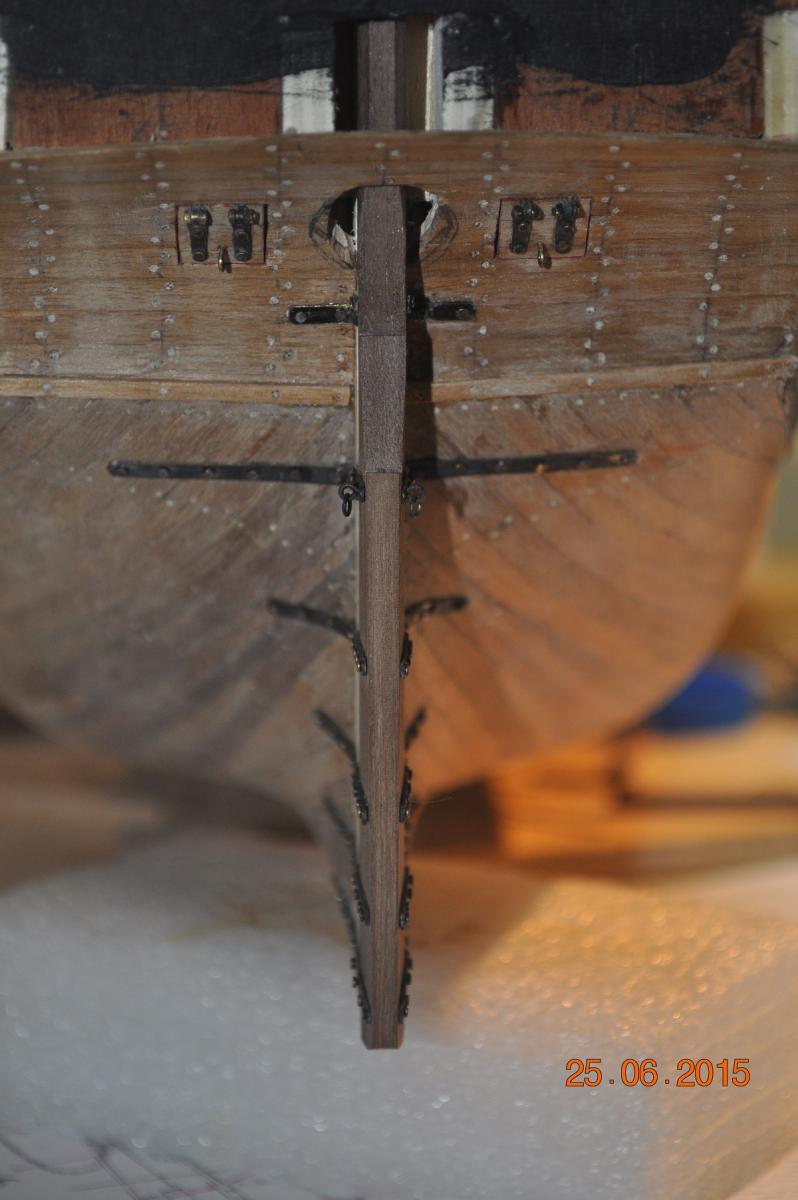
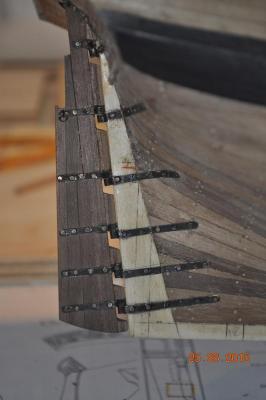
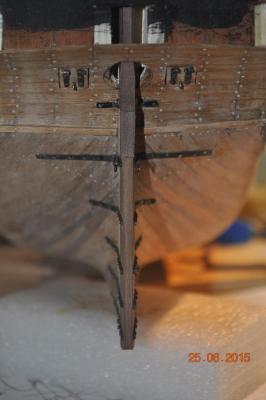
Rudder #4 Well the shipyard was eager to fit the rudder to the hull. I am pleased the fitting all went well, though it took many hours of fitting the hinges to the hull and filing the pins to allow the rudder to come off. Yes I was keen to have it removable for the rest of the build. And it swings P and S well. Pics enclosed. Dave Row

-
Mid deck steps: Not real happy with the steps - they are made from the bits supplied with the kit. The side stringers are too thick, they need to be thinner I reckon, out of scale. and not quiet high enough, probably add a 1mm timber packing strip under the 2 legs to raise them up so top flush with rear deck. The packing strip to act as a block to distribute the stringer load on the deck. ?? Dave R
-
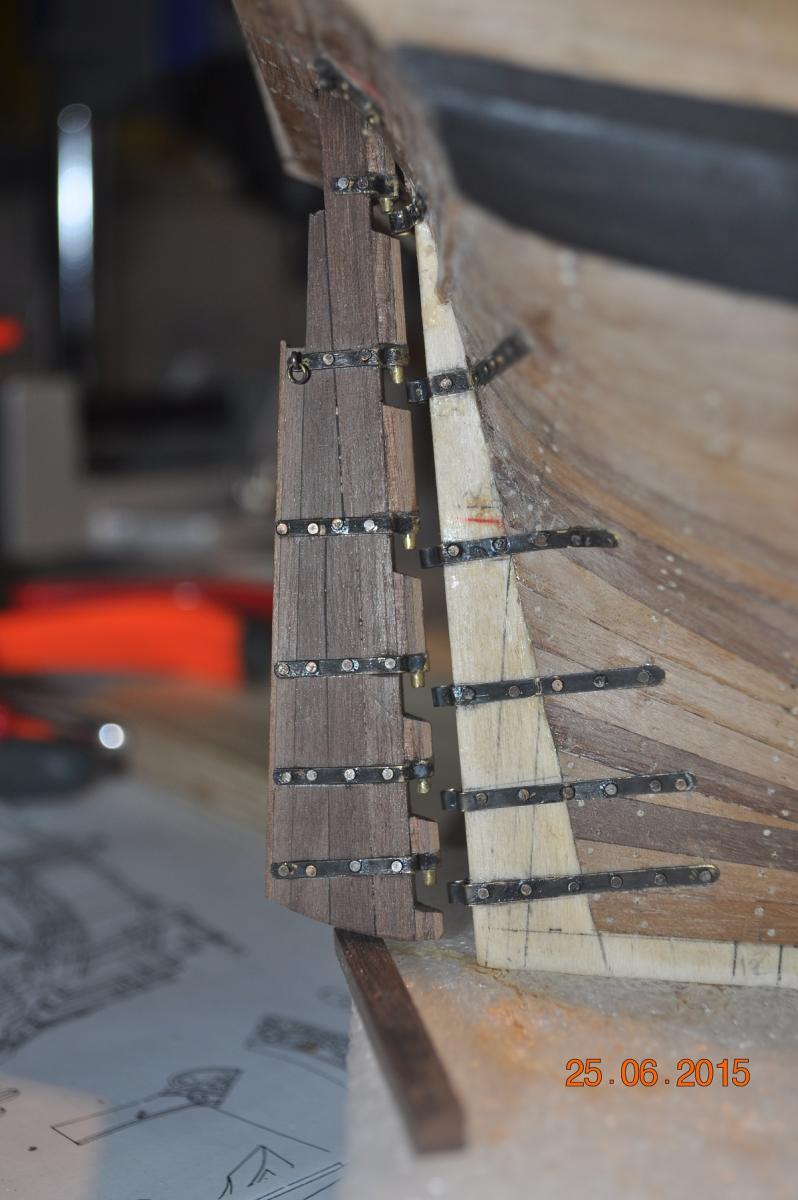
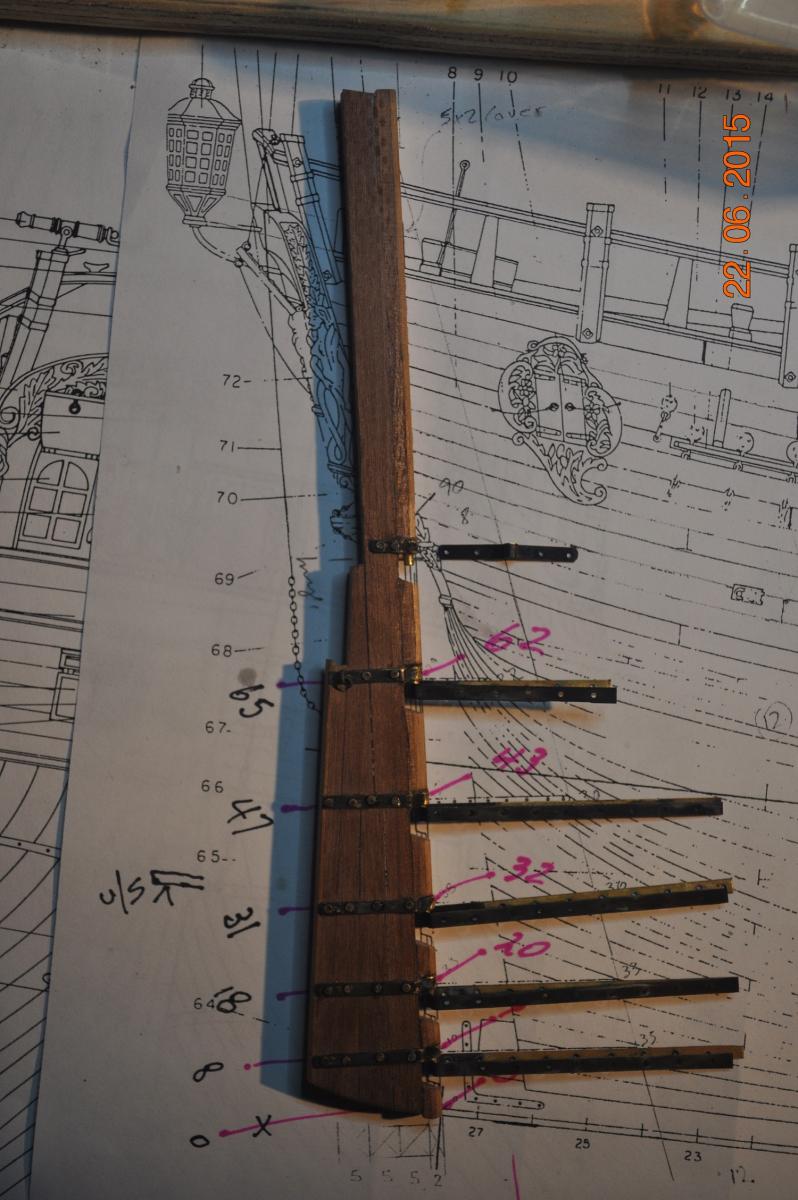
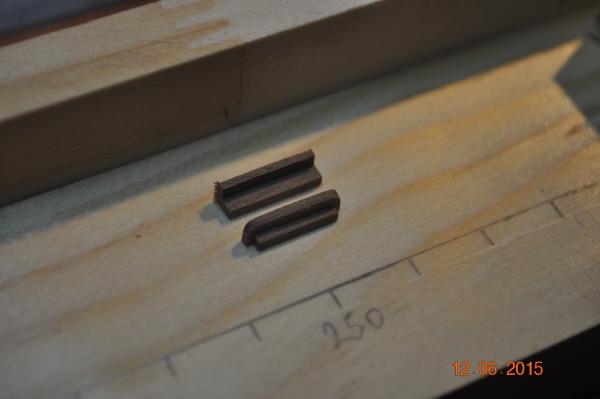
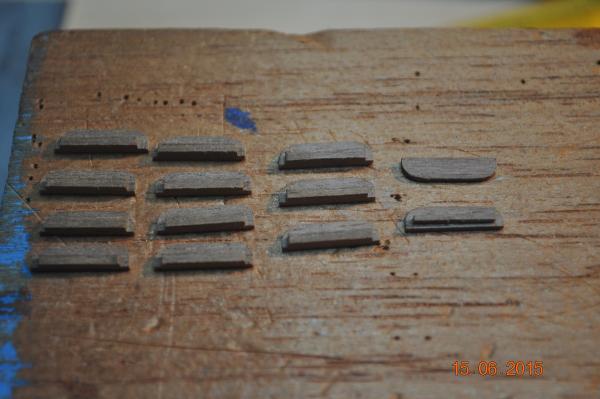
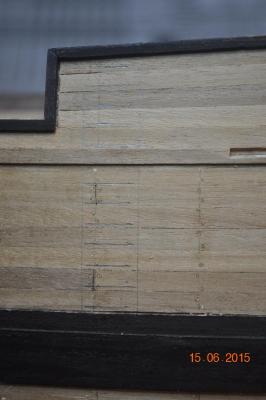
Rudder #3: Ready to mount hinges to the hull - at a future time ? as I know it will get knocked, maybe damaged over the many months/years of the build. A lot of touching up of the blackening to the brass. Gets knocked about during fixing. I added tapered infill blocks between the hinges(shown in AOTS), apart from filling in the gap, this helped secure the hinges/pins(glued all around with epoxy). These blocks(with space below the pins) allow the rudder to be removed when mounted on the hull. A bit of sanding to go on to smarten it all up. Maybe I will mount the hull hinges and rudder to allow the other associated rudder work. The fixing of the hull hinges depends on what I do with hull finish. Toying up to leave as is - timber plank look, with maybe a stain applied under the waterline. Definitely no white though. Dave R

-
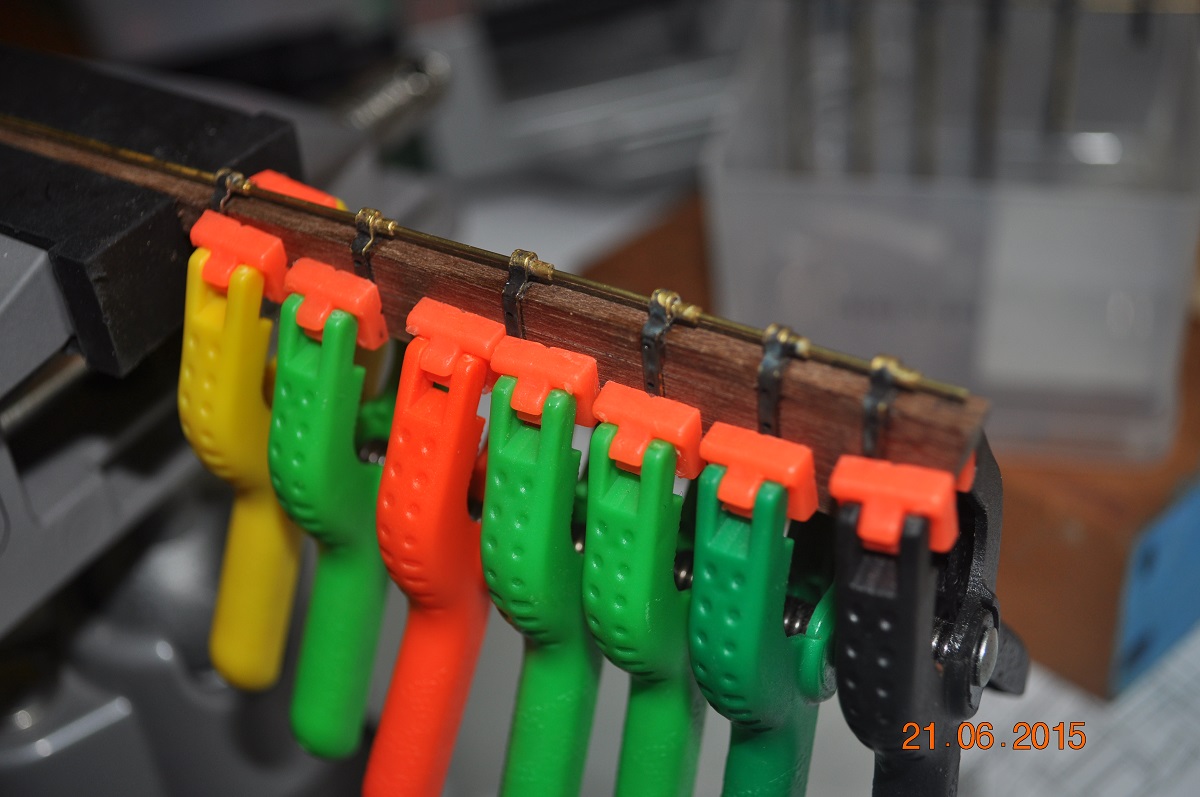
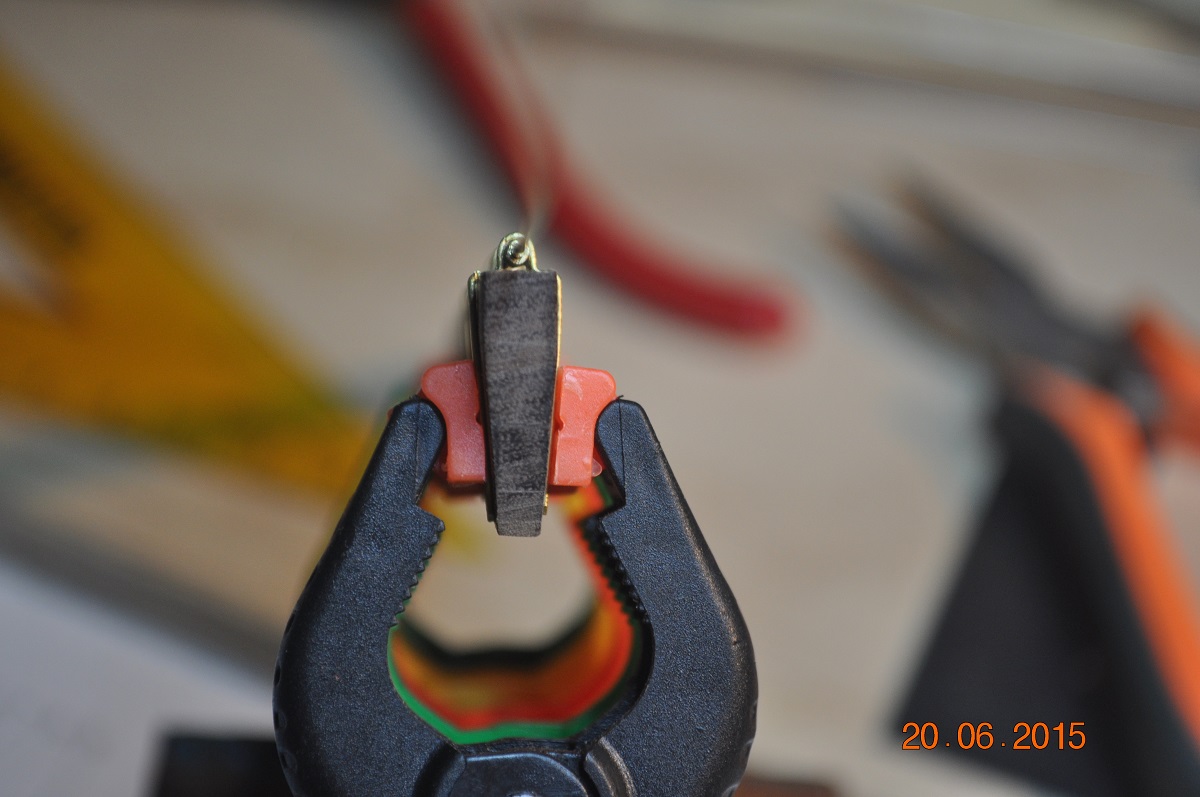
Rudder #2: I used tube for the pins, so a rod could pass through to align the hinges pins, so at best the rudder can pivot. Pictures shows the rudder hinges - test fit for alignment. The rudder was also tapered a little. My attempt to braze/solder the pins to the hinge failed, so they were glued(quick dry stuff). But any twisting effect would break the bond. Problem ! See next Log. Dave R

-
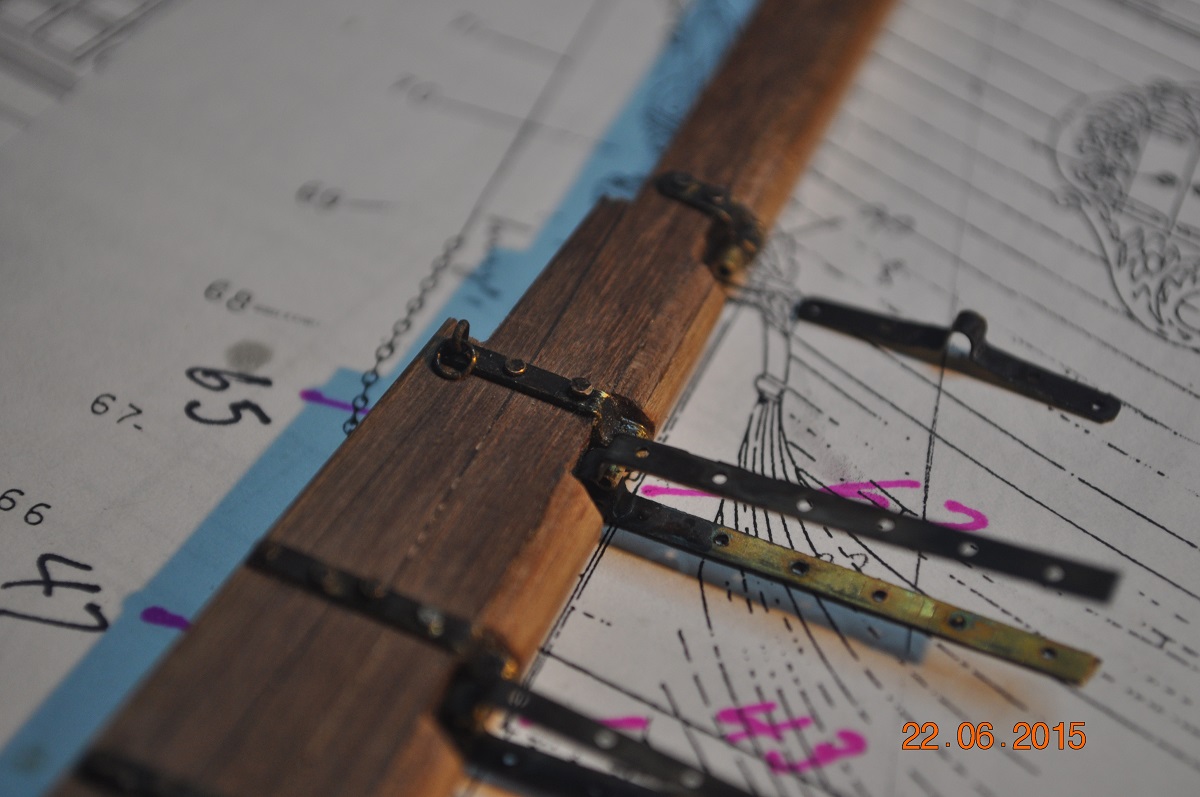
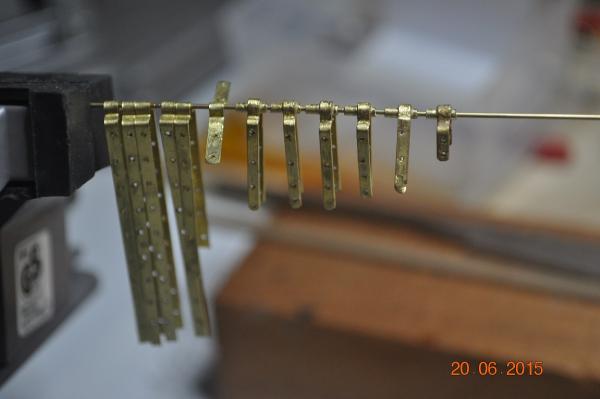
Time for an update to the Rudder #1. I made the hinges from strip or sheet brass metal. The rudder hinges from 2mm brass strip. The hull hinges from thin sheet(cut 2mm strips) with the thought the sheet being thinner, it will bend to the shape of the hull better. Dave R
-
A fantastic wooden model replica of the HMB Endeavour Greg. You must be relieved it is finished. I am truly amazed at the detail you put into it's many features. It has spurred me on with my Endeavour, hopefully it will take me less than 10 years to complete. Dave R
-
The rudder blade was made months ago. I made a set of basic hinges(not happy and their gone), and then made another set of longer ones, got a little bit better at bending where the hinge pin goes. I aligned the hinges and pins(tube) with a rod and super glued the pin to each hinge. So they all are straight, well I hope they stay that way. The hull hinges will go around the longer end of each pin. When I get there - more pictures will tell the story. I better sand the lower hull below the wales so I can glue the hinges onto a smooth bum(at the stern that is). Then maybe start the main hull hatches. Dave R


-
As a distraction to cutting the hull hatches, the shipyard has proceeded with the hull steps. I have started the rudder and hinges, next post. Dave R
-
Hi Rowan, I am undertaking the exact same task at the moment on my Endeavour rudder. The Corel kit hinges were ?? - I didn't want to use them. I also am making my own hinges, not happy with my bending attempts. Persevering, be keen to see what you came up with. Dave R
-
And I thought you had finished Greg. Luv the small boat though. Dave R