JSGerson
-
Posts
2,646 -
Joined
-
Last visited
Content Type
Profiles
Forums
Gallery
Events
Everything posted by JSGerson
-
 Let me start out by saying I have images for over fifty different models and build logs of the USS Constitution. I am collecting them to help me when I start my model (when ever that may be). I checked every one of them and for those which showed a clear image of the skylight, you sir, have made the best. I found only two other builders with whom I would even consider a near second or third place. You out shined them all. Jon
 -
If I knew then what I know now, a better choice would be to thread the blocks as soon as the blocks were installed and have them coiled up with a clip until it's time to actually rig the lines. I was/am trying to work by the rule of rigging from the inside and working my way outward and from bottom to top somewhat in the manner of how the actual ship would be rigged. Others opt to build the masts and their associated rigging as much as possible off the model. Each method has its pros and cons. In this case, pre-rigging the blocks would have been better. Jon
- 974 replies
-
- 3
-

-
- rattlesnake
- mamoli
- (and 1 more)
-
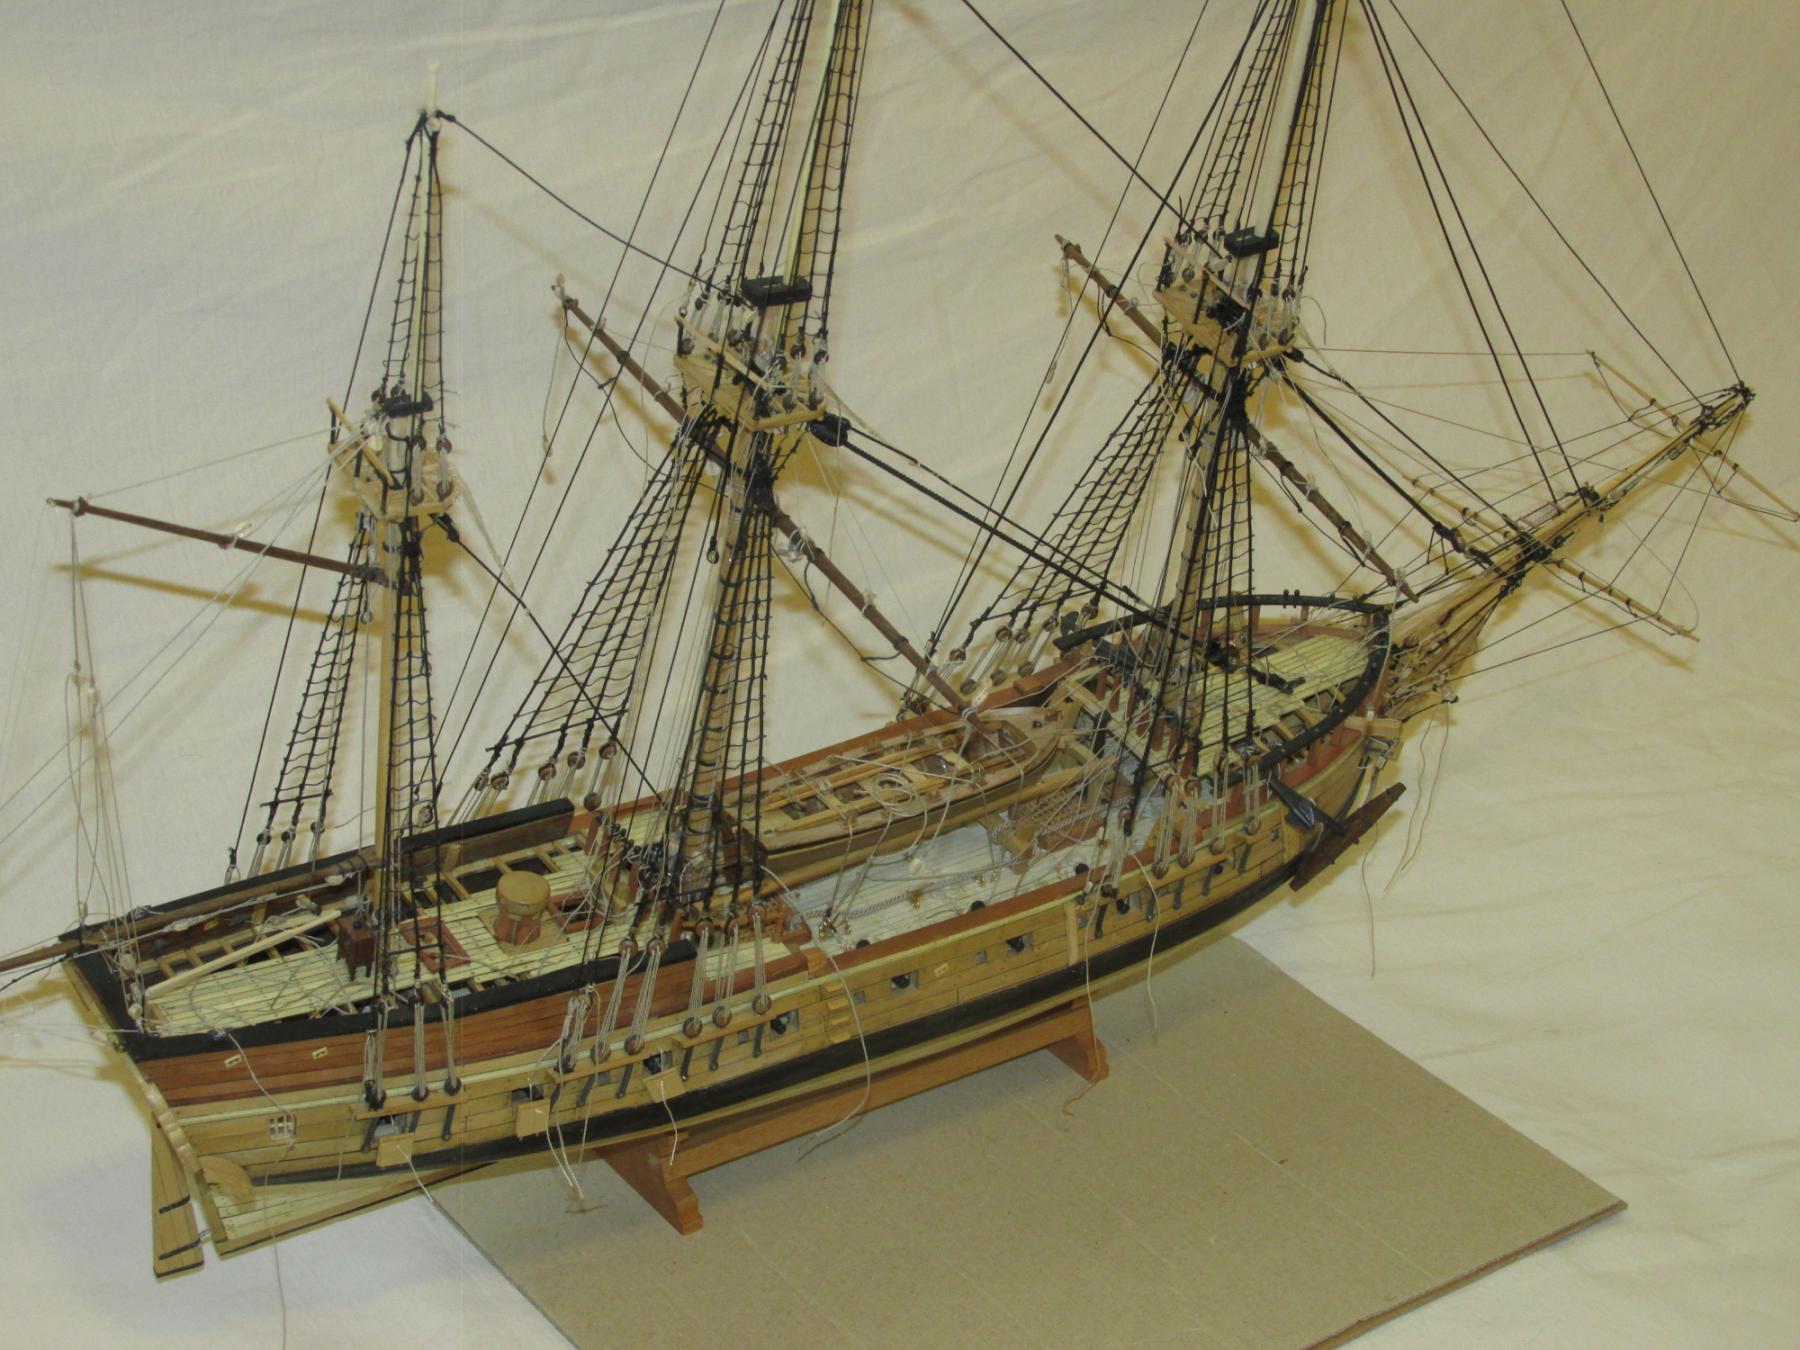
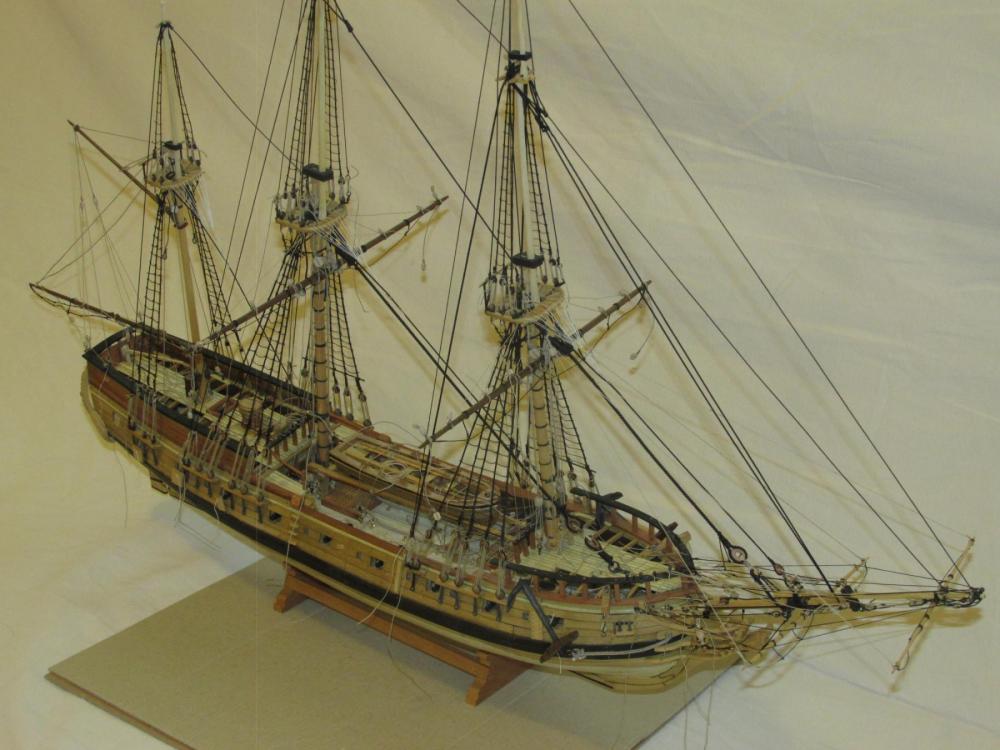
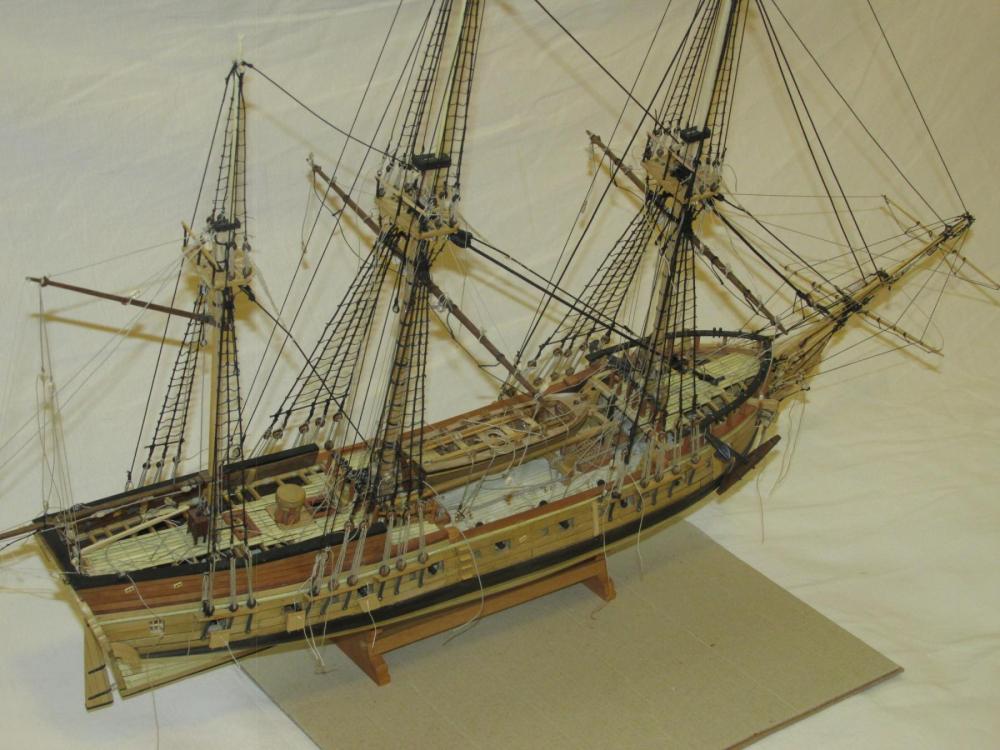
Well the fore main yard has now been hung. It actually took me less time than the main yard but I was set back first, by breaking off the starboard fore castle stair railing from the waist. Not only was it knocked off, but I somehow lost the upper stanchion which obviously had to be refabricated. Second, by somehow catching the bowsprit yard haul-in block that is attached to the top of the fore stay. It got pull off which meant I had to tie back on. I thought it would be a cinch (pun intended). But like we all know, Murphy rules: it’s never as easy as it looks. The problems were the usual: confined space to work in, not enough fingers, fingers are too big, etc. Here is what she looks like now. Please note there are still a LOT of final tie offs to be done, gun ports to repair, etc.

- 974 replies
-
- 10
-
-
- rattlesnake
- mamoli
- (and 1 more)
-
WOW! you have been busy! Again beautiful work. Jon
-
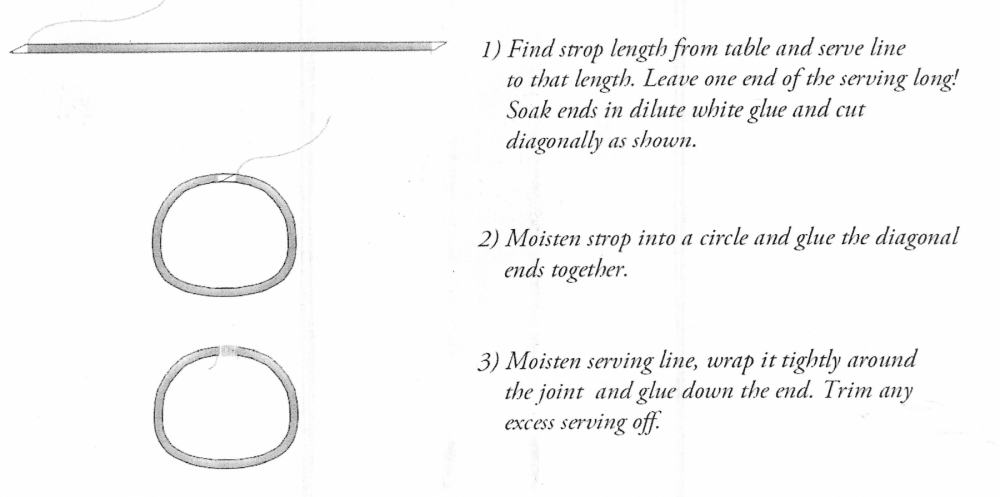
Antscherl's method is: "...once released from the serving machine, cut the ends on a long diagonal...Glue the ends..." The problem I had was cutting the ends. If done exactly as described, the serving is cut and begins to unravel. Here is his method from a handout he passed out during a demonstration he gave at a past NRG Conference. It adds a few more details. BTY, Blue Ensign's method (the one that I could find) is for eye splices, not line splices. Jon
- 481 replies
-
- 4
-
-
- rattlesnake
- model shipways
- (and 1 more)
-
I didn't double-up my bobstay. I didn't know at the time I rigged it that it should have been because both the Mamoli and the MS plans did not show it that way. You did good. According to Jame Lees' The Masting and Rigging of English Ships of War the splice (which needs to be made on the model) lay in the grove of the heart (or deadeye). You placed it in the stem, but it won't matter except for the purest because in either case it will be hidden. I don't know how you made your splice, but when I have to make them, I unravel the two ends, butt them together so that the loose strands overlap and lie on the other's end. I then apply some diluted PVC glue and hold with my fingers until nothing comes apart when I let go. I've have problems of them coming apart if the dilution is too thin. In this case because the line is served, I would leave a length of serving thread to continue the wrap around the splice which also gives it physical strength. Nice work Jon
- 481 replies
-
- 3
-
-
- rattlesnake
- model shipways
- (and 1 more)
-
It always helps to have the right tools for the job. Well done. If I were to do that same task today, I would have had to use wood stock, a saw, straight edge, a micrometer, hand files, sand paper, glue, and paint. I know it wouldn't have looked as good as yours. Jon
-
Thanks again for providing those beautiful pictures and great explanations. I will probably buy one of those new toys in the future before I start my Conny after all, it's only money 8-) Jon
-
Ah yes, Cast Your Anchor. I've dealt with them before, but it's been a while. I'll have to check in with them more often. Thanks for your quick reply. Jon
- 117 replies
-
- 2
-
-
- constitution
- model shipways
- (and 1 more)
-
I have no experience with a lathe, let alone a metal lathe, but I assume one was use for making the capstan top as well as the inset underside for the indexing pin. How did you initially cut the disc and then hold it in place to spin it on the lathe to create its final diameter and inset? Jon
-
Very lovely, clean looking, hull. A word of caution: DO NOT smash a bottle of champagne on the hull during your launch party. 8-) Jon
- 481 replies
-
- 3
-
-
- rattlesnake
- model shipways
- (and 1 more)
-
Out of curiosity, what was your source for the #75 nails? Jon
- 117 replies
-
- 3
-
-
- constitution
- model shipways
- (and 1 more)
-
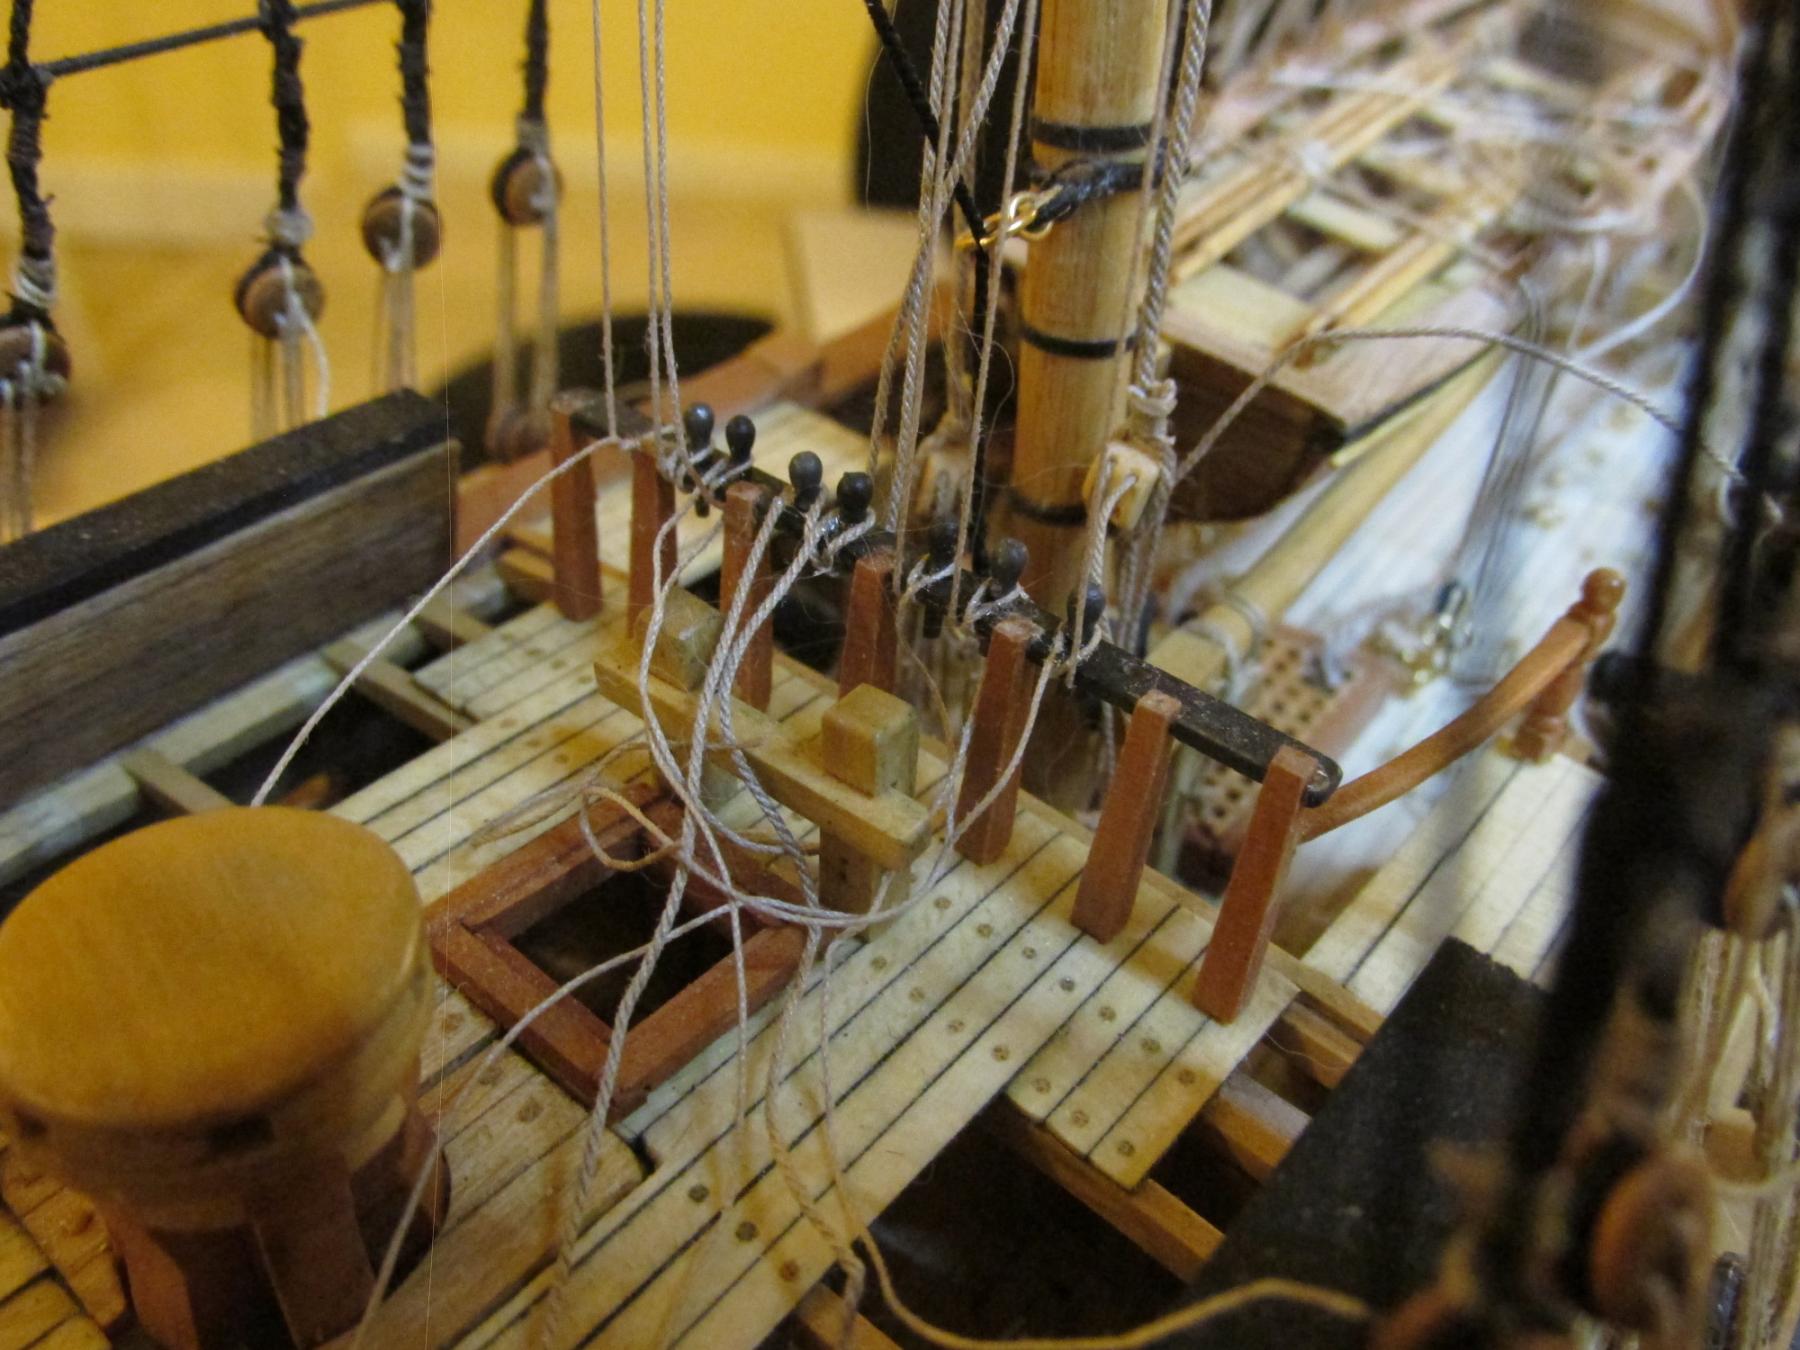
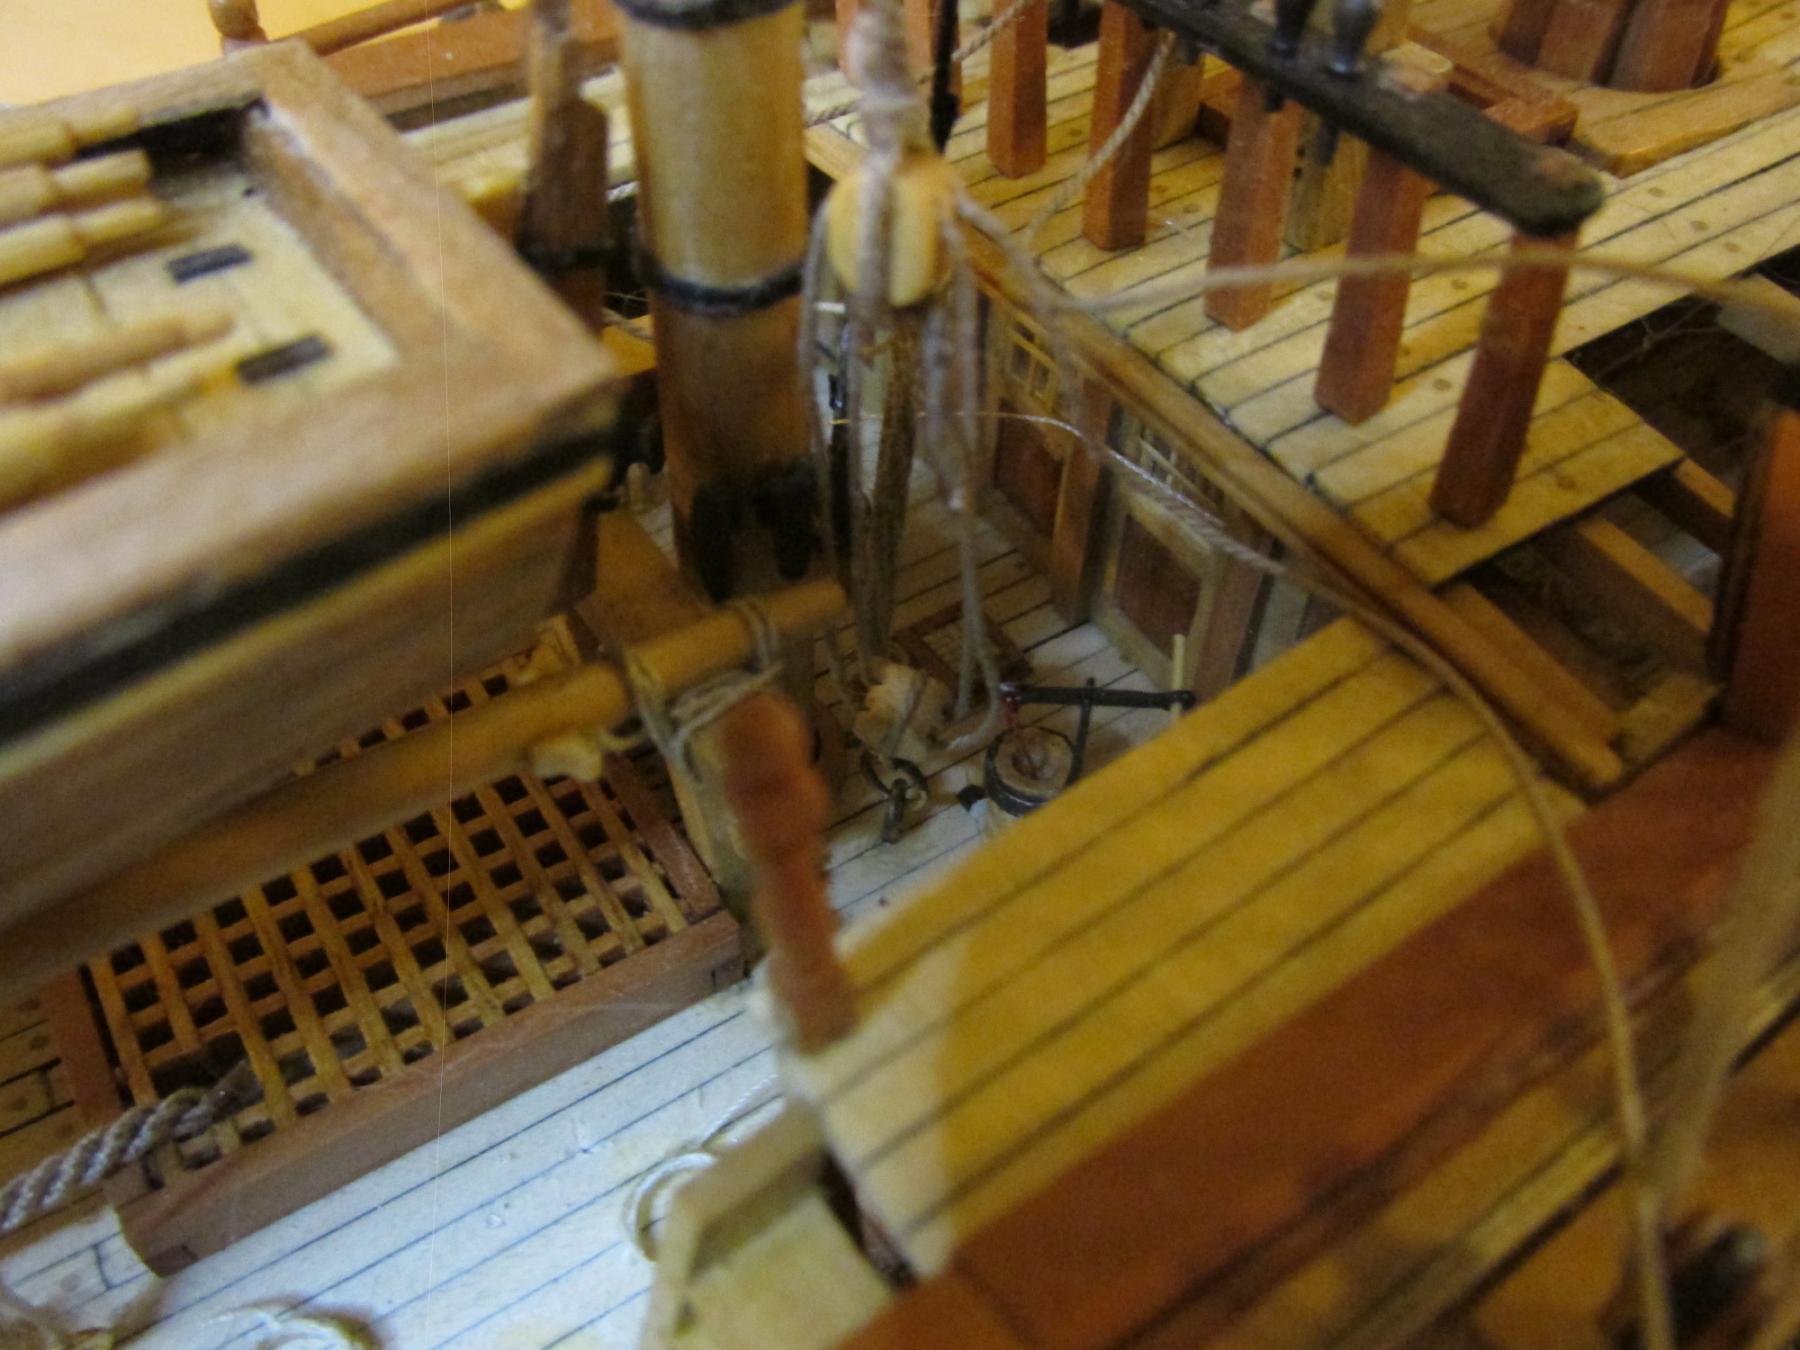
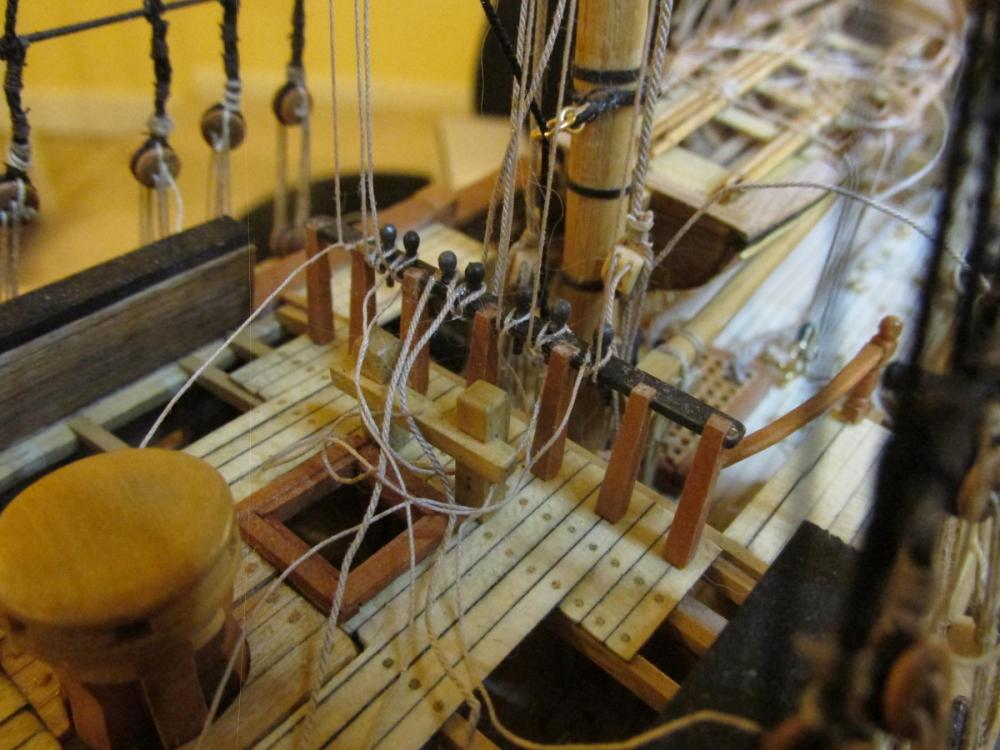
The new block positions left very little wiggle room for rigging and that was before all of the other factors were considered: Getting underneath the fighting tops just to look at the blocks on the underside was difficult Actually seeing the rigging holes in the blocks very difficult When they could be seen, the blocks were not necessarily angled such that the rigging holes were facing in a direction to optimize rigging Confined working space due to interference with other lines Use of headset magnifiers and eyeglass clip-ons magnifiers reduced depth of field to zero – I couldn’t tell what was in front or behind of what. I was constantly grabbing for things with my tweezers that weren’t where I thought they were and running into rigging the was blurred so strongly, they were invisible Because of the magnifiers, the working distance was reduced and getting one’s face and hand close enough for focal range of the magnifiers was deterred by existing rigging If I could hold the rigging line in a pair of tweezers to try to rig the block, I could not brace my hand on anything to steady it If I could actually get the line to the block, the block could move at the slightest touch because it was just hanging there without support It took a lot of concentration, patience, and tenacity sometimes taking anywhere from 5 minutes to two hours just to rig one block. There are six blocks on either side of the mast for a total of 12 blocks per mast and there are two masts to rig this way. .I had to stop after no more than two hours, successful or not. Surprisingly, if the stars and the planets lined up just so, and if good fortune smiled at me, the rigging line slipped right through the block. However, some of the block rigging was faked by wrapping the line that was supposed to go through the block, around the block tie used to connect it to the fighting top. It’s not what I wanted to do, but it was all I could do. Lucky one would be hard pressed to see my cheats. Just recently, Blue Ensign, a highly regarded builder posting here on ModelShipWorld.com, showed an image of his Pegasus foremast top blocks. I noticed his blocks hung a bit lower than mine which probably makes rigging them much easier. I wish I had known that a year ago. Once the lines passed through the blocks, they were terminated at the pin rail on the forecastle with some GS Hypo fabric glue. Since more lines have to be installed on the main yard, I was afraid they may affect the tensioning on these lines. The fabric glue can be easily removed to re-tension if necessary. Once I feel confident that the lines are properly set, I will add the rope coils to the pin rails. Now I have to do it again for the fore main yard.


- 974 replies
-
- 7
-
-
- rattlesnake
- mamoli
- (and 1 more)
-
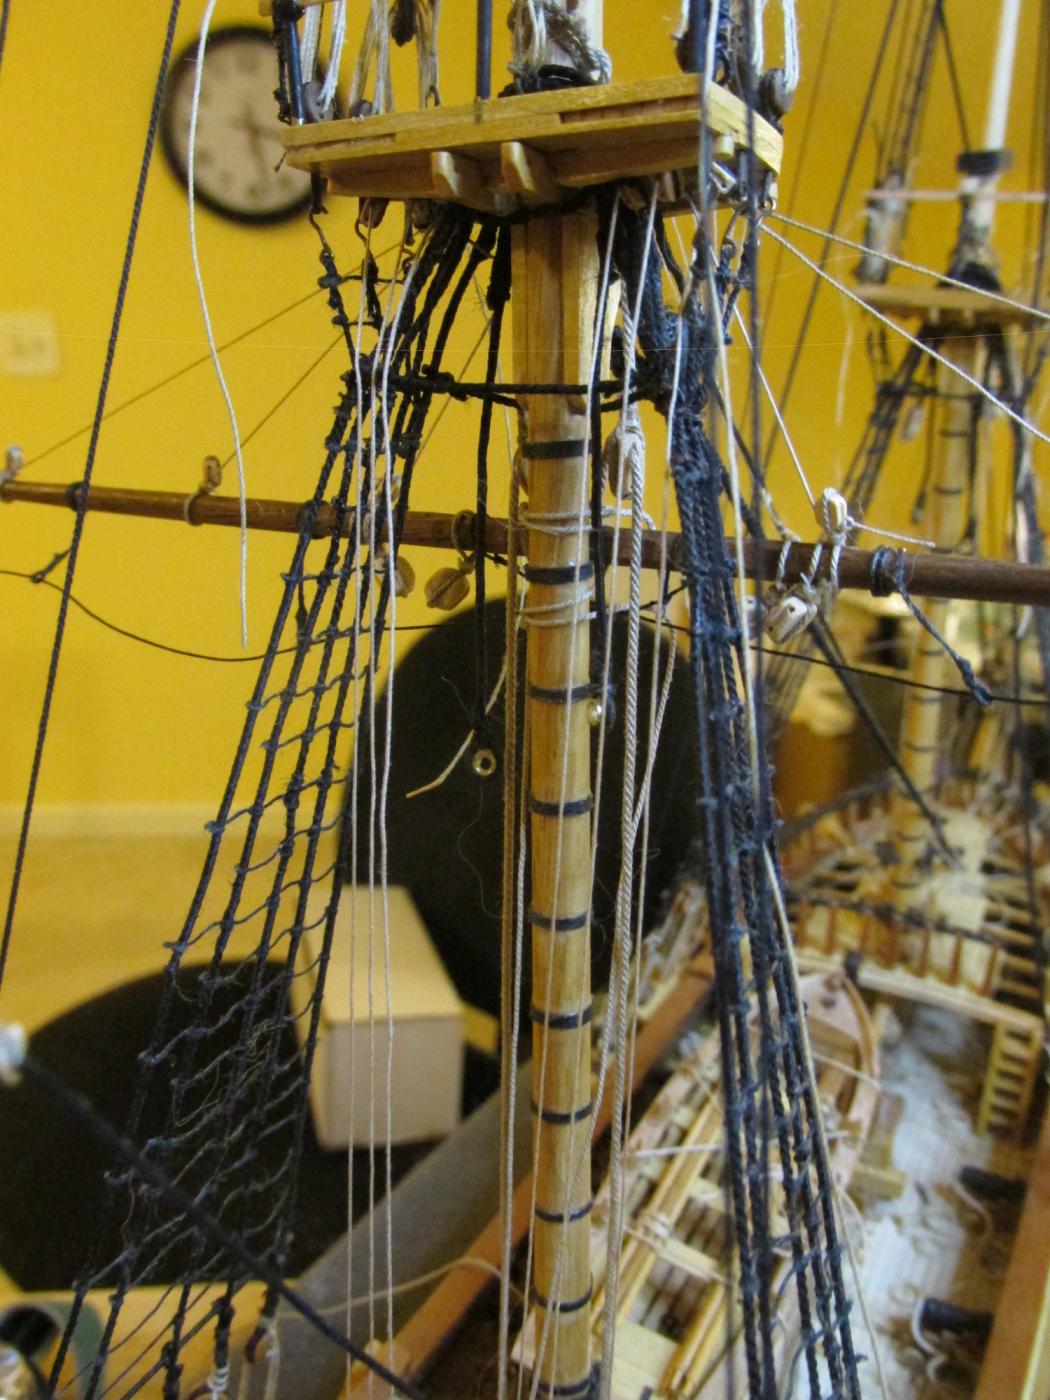
Now came the part I’ve been dreading ever since I installed them last year – rigging the blocks under the Main and Foremast fighting tops. If you may remember, I decided to rig crow’s feet because it was shown on the Harold Hahn plans and it looked like an interesting project. Neither Model Shipways nor Mamoli showed it in their plans. As a result of creating the crow’s feet, the blocks which were tied to the edges of the top in the kits’ plans had to be move to the underside of the top platforms.
- 974 replies
-
- 5
-
-
- rattlesnake
- mamoli
- (and 1 more)
-
I was just checking my PMs and noticed that the last PM I replied to your request last month was rejected and returned to me again as: Technical details of permanent failure: Google tried to deliver your message, but it was rejected by the server for the recipient domain modelshipworld.com bymail.modelshipworld.com. [205.234.253.68]. The error that the other server returned was: 550 No Such User Here I had made three attempted replys to your PM, but did not see the last rejection until now. If you could provide me with an alternate email address, I will re-attempt to send you the info you requested. Jon
-
I am still working on my first real build but plan to construct the Constitution in the future. At this stage I am planning to include the rivets because I see them on the real ship. Even though they are small and may be over looked by the casual observer, it does give texture and authenticity to the model. As an example, I've included tree nails in my Rattlesnake build. I did not enhance the contrast or in any way make make them conspicuous so at a slight distance they are not noticeable. As the observer is drawn closer to the model by just looking at it, more and more detail is revealed. It is that act of discovery that delights the observer. As many modeler know, there is a lot of detail that is almost impossible to see (for God's eye) but somehow the effect of that detail is felt. Finally, the detail that is included is up to the builder to the extent that makes him/her feel good about making the model in the first place. That is my personal humble opinion Jon
- 117 replies
-
- 7
-
-
- constitution
- model shipways
- (and 1 more)
-
Those steps came out beautiful!
-
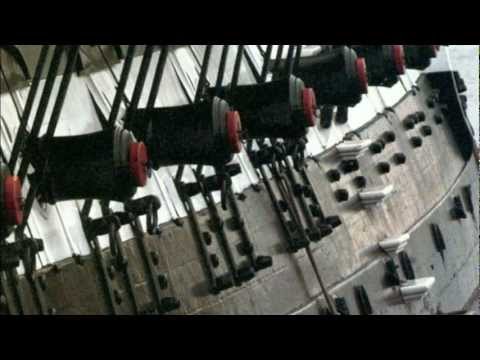
Those sea steps look very nice. Would you mind telling us how you made them? Are there three pieces of stacked wood or did you cut a solid piece somehow? Speaking of the step's three layers, I was wondering why you made three when the plans (as shown in your pictures) appears to show two. I went back to my library of images and found this nice shot of the steps which clearly shows three. Nice job on your research. If you will notice, all of the steps in my photo are painted white, not just those in the stripe as shown in the 1931 photo. As we all know the paint scheme (among other details) has changed over the years. Which leads me to my last question: what era is your model going to depict? Jon
-
Thanks for the fast reply. I realize the Dremel stand is not perfect by a long shot but it's all I have. Because I have never used or worked with anybody who has one, every time I consider a milling machine and/or mini lathe, my eyes get too big for my abilities and budget. I get overwhelmed and don't do anything. My present model is in the rigging stage so I don't need any equipment until I start my Conny build, so again no rush. Jon
- 1,354 replies
-
- 1
-
-
- constitution
- model shipways
- (and 1 more)
-
I don't have a milling machine, but I do have an X-Y table which I attach with C-clamps to an old Dremel drill stand. Of course the problem with that is getting the X-Y axis lined up properly which is a real pain. I was curious as what kind of milling bits the Proxxon machine uses. Would they fit a Dremel style rotary tool? Jon
-
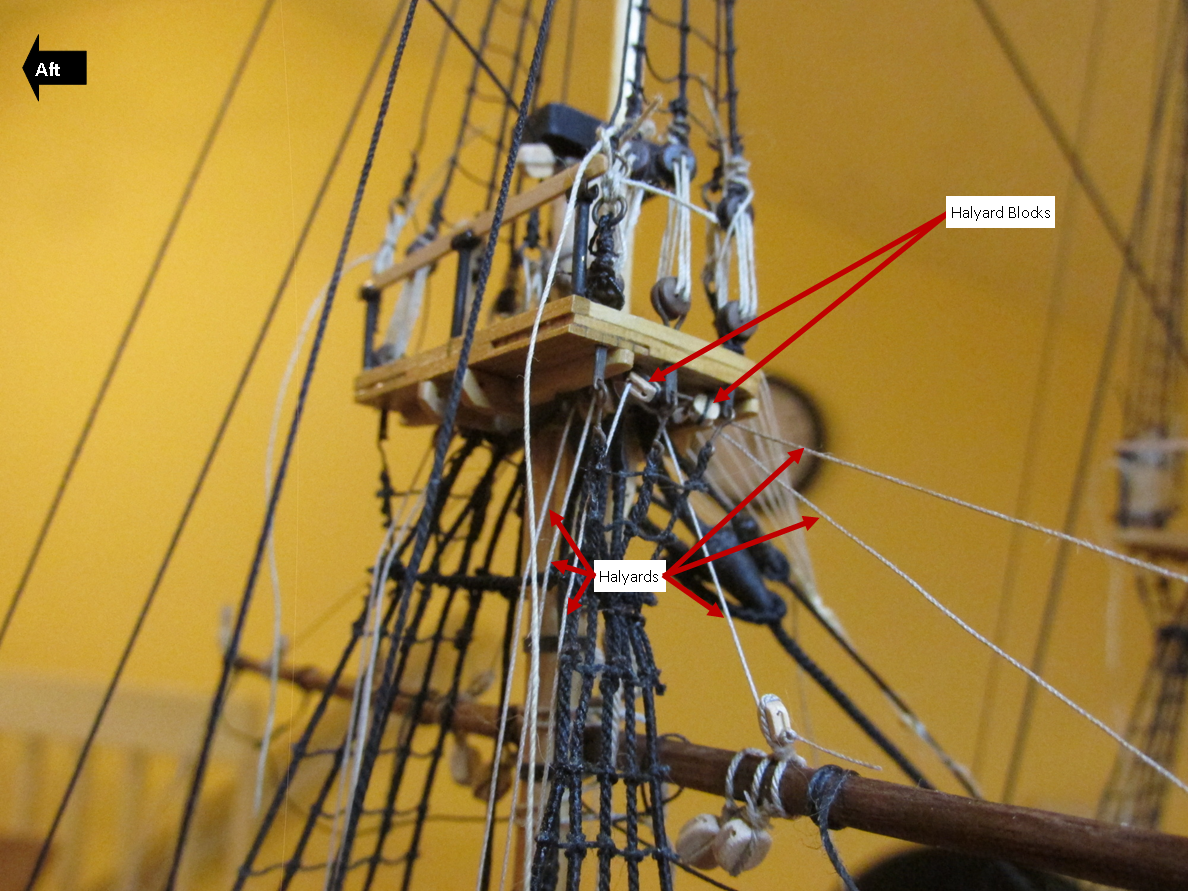
The halyards then pass through the leer block and down towards the deck. There, just above the forecastle deck the halyards terminate at a double block. The double block is rigged with 0.45 mm line to a double block on the deck next to the main mast. The deck double block is connected to a ring which in turn is connected to a deck eye-ring In addition, the yard is secured to the mast with two 0.45 mm rope loops starting on either side of the mast, which allows the yard to slide up and down the mast as well as pivot. I tried getting a clear image of the double blocks, but getting a camera in there was very challenging. BTW, I broke my hand rail by the fore castle ladder, which I will have to re-glue. Not sure if I should wait after more stuff is installed or do it now while I still have clear access to it.

- 974 replies
-
- 6
-
-
- rattlesnake
- mamoli
- (and 1 more)
-
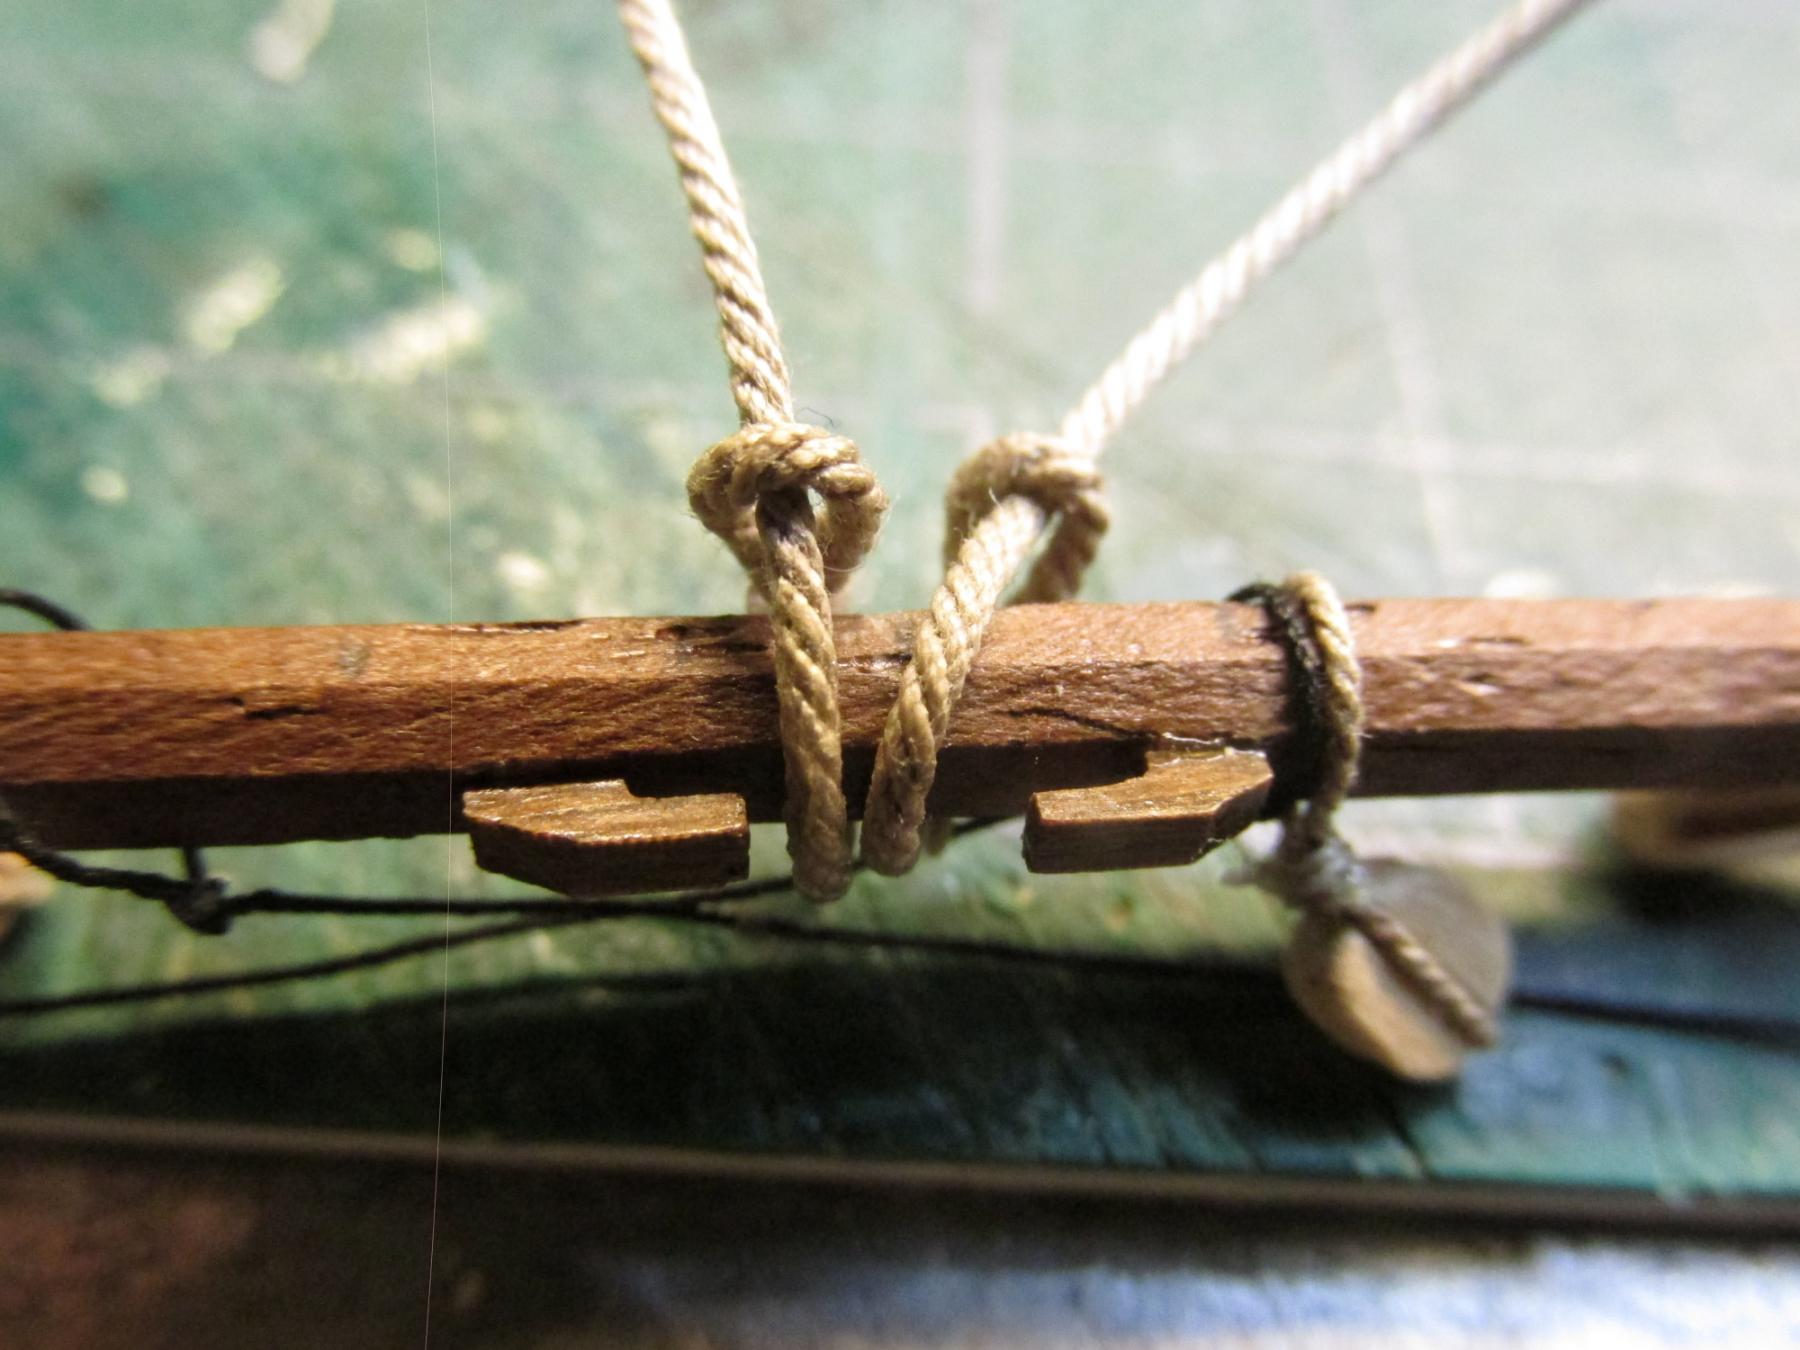
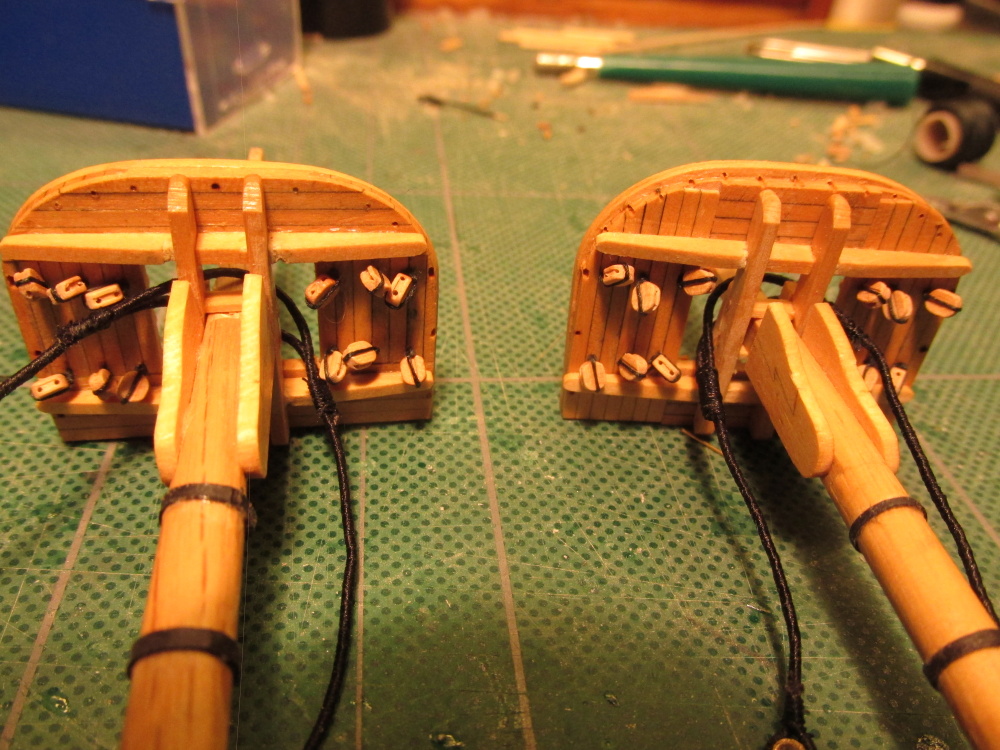
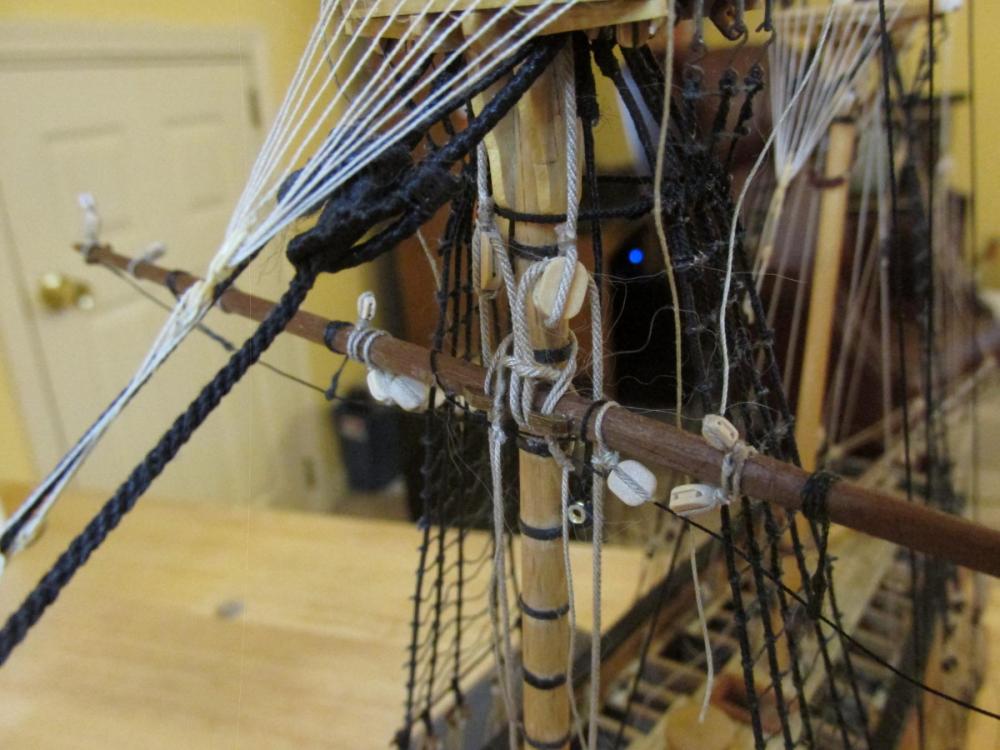
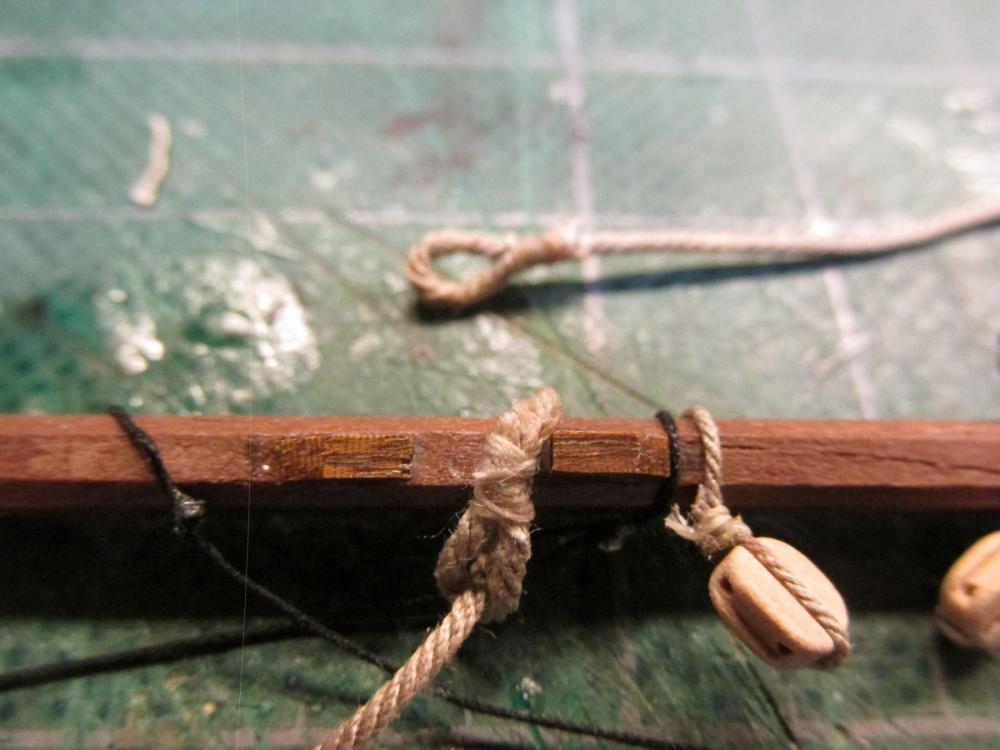
Main Yardarm The first yardarm is now on the model, not fully rigged, but still, on the model. This was accomplished by first making an eye splice at one end of a 0.80 mm leer halyard, looping it around the main yard inside the yard’s center cleats and threading the other end through the eye splice and pulling it taught. The first photo below shows one halyard on the yard and the other halyard lying behind it, waiting to be wrapped onto the yard. The second photo shows both attached.

- 974 replies
-
- 6
-
-
- rattlesnake
- mamoli
- (and 1 more)
-
Those lids are VERY delicate and easily knocked off. Just about all of mine are. If you feel comfortable about it, I would suggest that you hold off from installing them now and save yourself the heartache of breaking one or two or more off and losing them. I won't be reinstalling mine until after I finish the rigging...if I live long enough 8-) Jon
- 481 replies
-
- 1
-
-
- rattlesnake
- model shipways
- (and 1 more)
-
I thought you did. I asked the question for others who are following your build who may not have thought about the consequences of adding a support deck. I wouldn't have known if I hadn't worked on my kitbashed Rattler. Jon
-
If I read and understood you correctly, the support decking was your contribution and not the kit instructions. If that is correct, will that make any difference in the final height of the deck? I'm thinking cannon clearance through the gun ports. I don't know what was the original deck construction plan. When I was making the gunports for my Rattlesnake, I made a card dummy cannon that I could poke through the gunports to ensure the opening were of proper height. Jon