JSGerson
-
Posts
2,643 -
Joined
-
Last visited
Content Type
Profiles
Forums
Gallery
Events
Everything posted by JSGerson
-
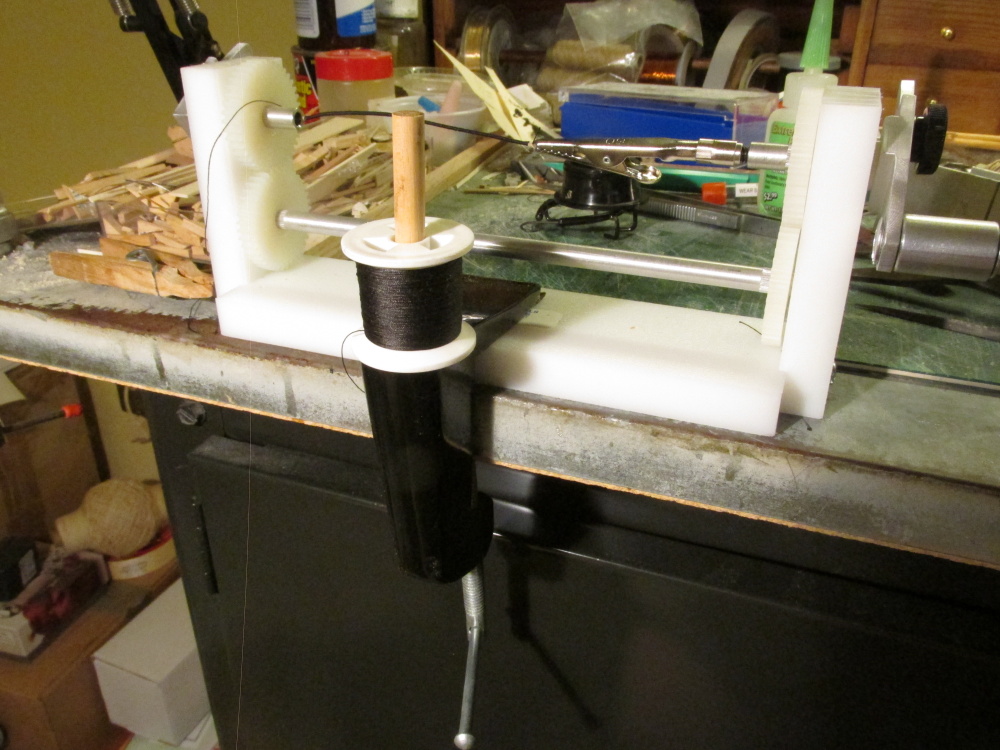
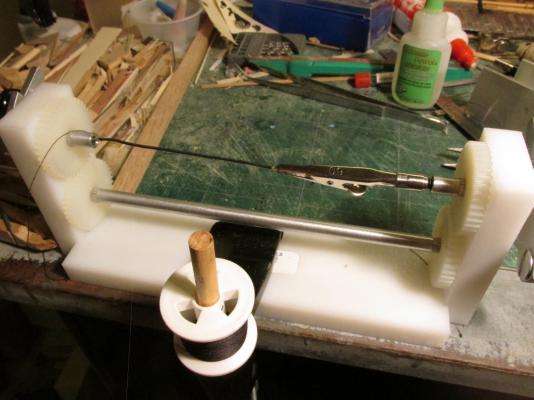
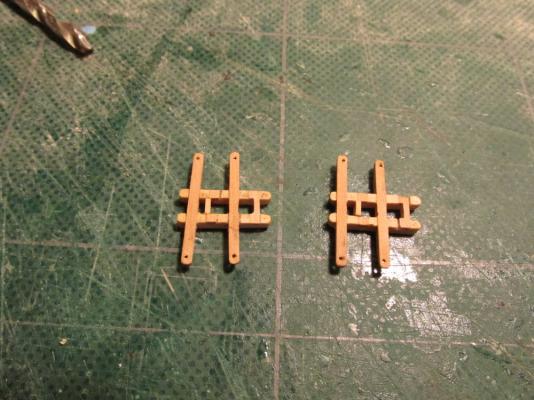
 In case anyone was wondering, my seizing machine came from shipahoymodels.com. The clamp I using to hold it in place is a desk lamp clamp and where the lamp would pivot, I stuck a piece of dowel to hold the spool of thread. It worked quite well. Once the line was seized, it was removed and one end was folded over to create a loop and it was seized again. It was then repeated for the other side. As you can see, two components were made, one smaller than the other. I wasn't sure of the exact length needed.
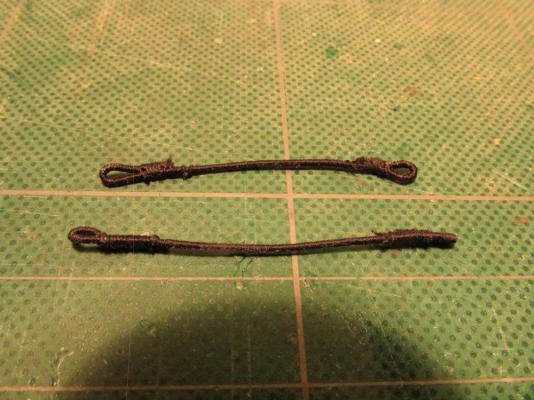
- 974 replies
-
- 3
-

-
- rattlesnake
- mamoli
- (and 1 more)
-
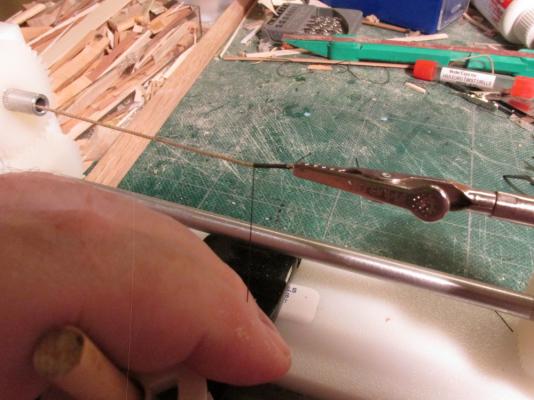
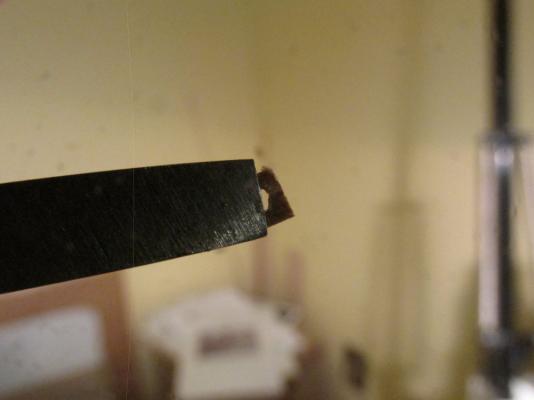
Next I had to make the stropping that goes around the heart and the bowsprit, which required that I seize the full length of line. The actual line is 1 5/8” f scale or 0.6 mm. The kit provided beige (no black) 0.25 mm, 0.4 mm, 0.8 mm, and 1.2 mm line sizes. I decided to use the 0.8 mm line with black 0.1 mm sewing thread for the seizing. The black thread would completely cover the beige color. Standing rigging was waterproofed with a tar covering and thus black. Using my never before used seizing machine, I proceeded to seize about 3” of line so I would have plenty to work with. First the beige 0.8 mm line was pierced through with the black thread to mechanically secure the thread. The seizing proceeded by cranking the handle of the machine and feeding the black thread through my fingers to keep the line taught. It worked flawlessly.

- 974 replies
-
- 2
-
-
- rattlesnake
- mamoli
- (and 1 more)
-
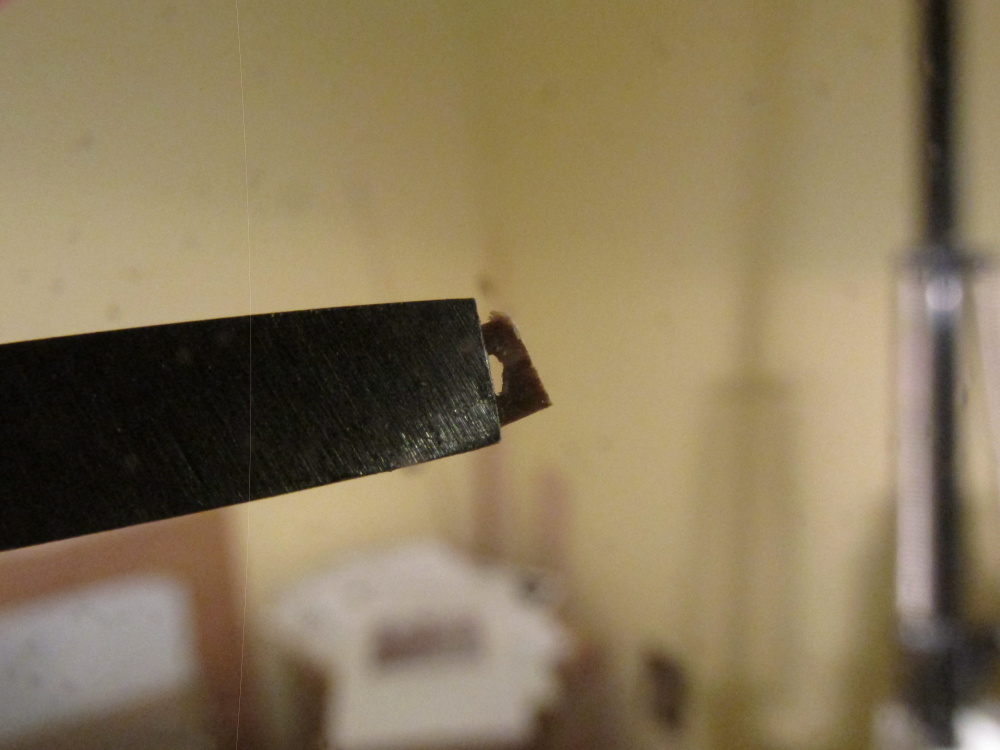
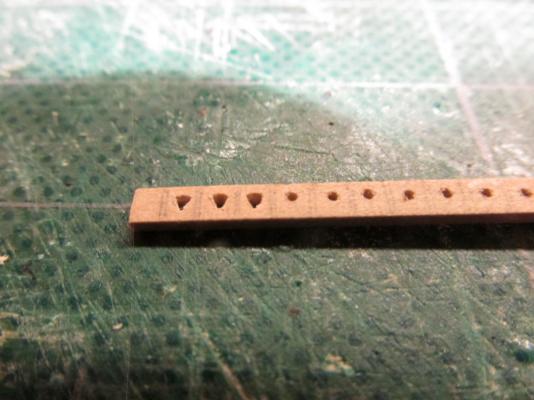
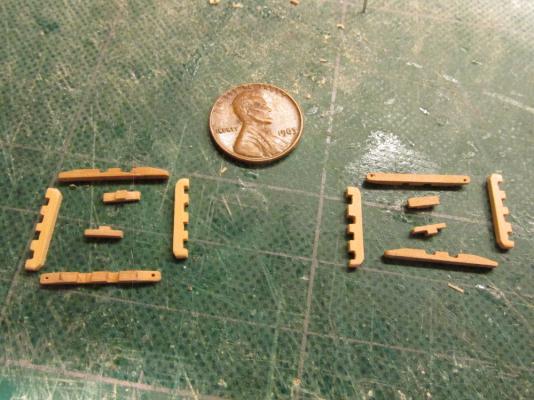
Once the holes were completed, the individual hearts were cut off from the stock and held with needle nose pliers in order to file the sides to the proper shape. Then, with one of the edges of the triangular needle file, a groove for the rope line was cut around the sides of the heart just like you find on blocks. I only lost one heart when it crumpled in my hands. I filed one of the edges too close to the internal hole. One down, nine hearts left.
- 974 replies
-
- 2
-
-
- rattlesnake
- mamoli
- (and 1 more)
-
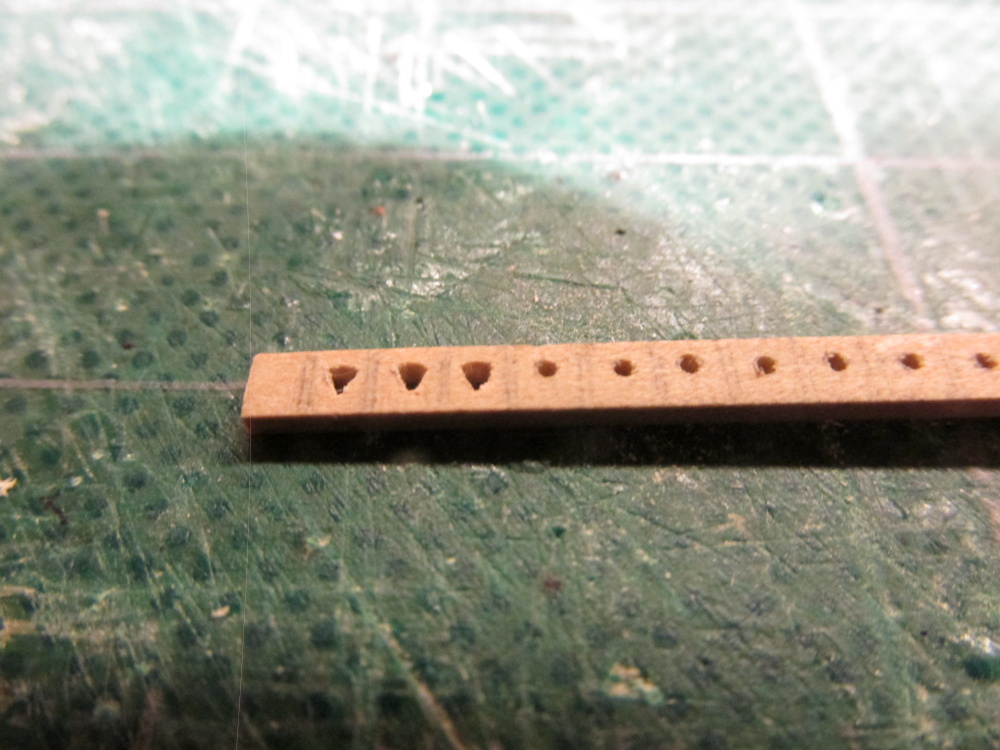
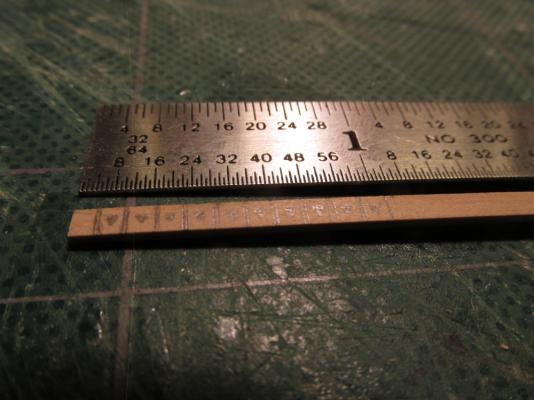
Following my plan to attach everything I can to the mast and yards before I install them onto the model, I decided to try my hand at the parts of the bobstay that are attached to the bowsprit. The first thing I needed was a 6” closed heart. Unfortunately none came with the kit and I couldn’t find any on the internet in scale (1:64). I had to make it. Choosing a piece of 1/32” x 3/32” boxwood stock, I sketched out 10 hearts because I really don’t know how many I’ll need in the course of the build. A hole was drilled and then filed into a triangular hole with triangular needle files.
- 974 replies
-
- 1
-
-
- rattlesnake
- mamoli
- (and 1 more)
-
I purchased the MS plans as well as Harold Hahn's plans, and of course I have the Mamoli plans. Each one shows certain details better (or different) than the others. I also downloaded the MS instructions. You never have too much information (unless it's all contradictory). The MS plans show the gap very clearly but does not depict the planking of the transom. Think about how the shipwrights of the day would have made the stern. They didn't have large sheets of plywood so they had to have planked it. I'm following a Practicum by Robert Hunt (LauckStreetShipyard.com). He provides a detailed set of instructions to either build the kit straight out of the box or kitbash it. Although the Practicum is based on the Mamoli kit, he claims it should work for the MS kit as well. Now the Practicum is not perfect and even less so beginning in the last chapter before the rigging starts, but I couldn't have done what I did with out it. The Mamoli instructions are printed directly on the plans in multiple languages and are hard to read especially with my eyesight. So I read the books, look at other people logs, ask questions, and learn from my mistakes...and I have made a lot of them. Your model is showing off your great skills. I have yet to see two models of Rattlesnake that look the same. So who is to say which one is right?
-
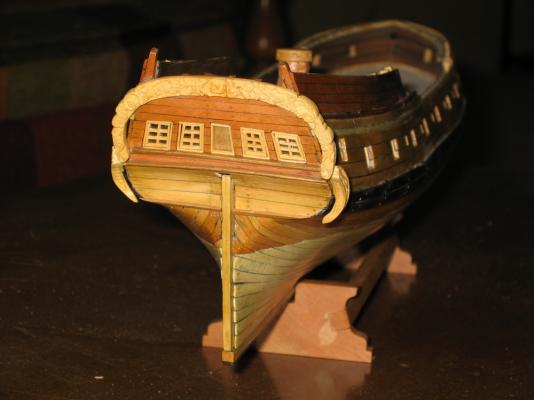
As near as I could determine, the "gap" is suppose to be there. You can see from my build the space between the ornamental carved arch and the transom. This is what I have seen in all the models I have looked at. It just makes the stern look bigger and it appears on a lot of other period ships. Be that as it may, this is your interpretation ship. Since there are no physical remains of the actual ship left, your vision of what it might look like is as good as anyone else.. BTW I like your idea of using the kit supplied arch as a template to make the carvings. This was my first attempt at carving so the results were more impressionistic than a true representative of the actual art work. From a slight distance it seems to work.
- 131 replies
-
- 1
-
-
- rattlesnake
- model shipways
- (and 1 more)
-
I too have a Proxxon XY table on a Dremel drill press and am not so happy. The XY table is fine but a bit of a pain to align on the drill press. The real problem is the drill press itself - it just isn't sturdy enough. I can't tell how many times I've lined up the drill only to have it move laterally when lowing the drill assembly due to the press's low precision. It's made of plastic parts with low tolerances. Hopefully in the near future I will have a true dedicated drill press that can be adjusted with precision. It's just a question of time and money. Isn't it always?
-
Excellent! I think you did much better than I did on our first builds. It looks nice and clean.
-
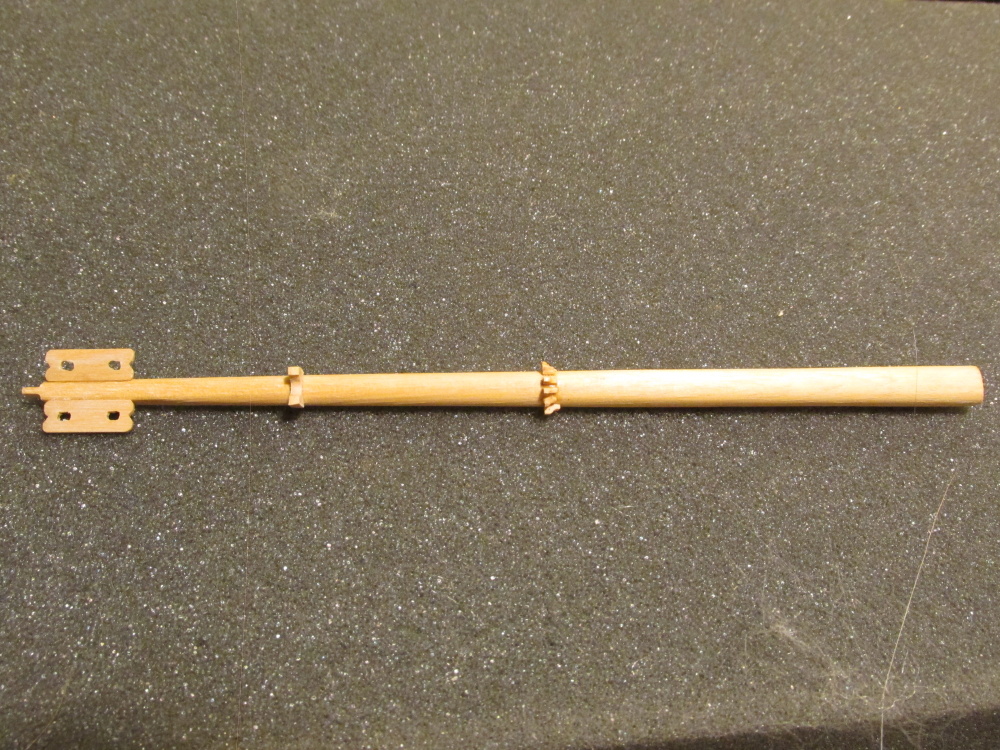
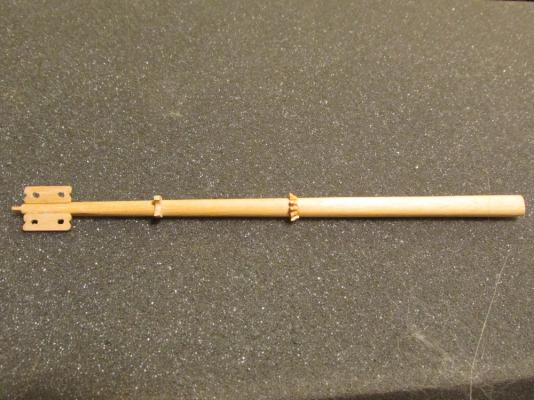
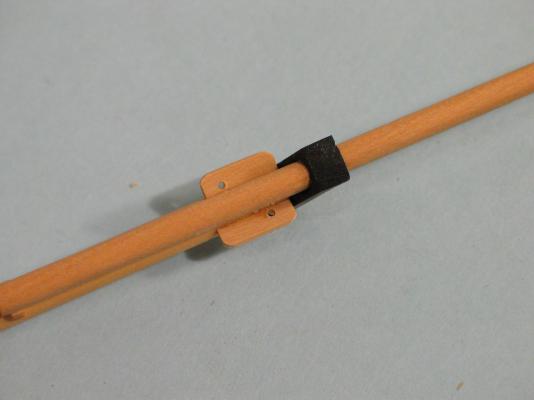
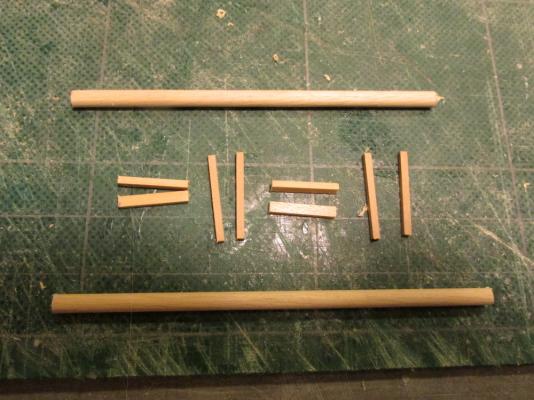
The bowsprit was then dry fitted into position on the bow to determine where and how the gammoning cleats were to be positioned. This was done by wrapping a single line from the fore end of the gammoning slot straight up and around the bowsprit and through the gammoning slot again. A pencil line was draw tracing the rigging line on the bowsprit. Based on Hahn’s plans, I determined there were 7 cleats that needed to be made. Using a piece of 1/32” x 3/32” boxwood, a corner was first filed off the stock piece and then an “S” curve was fashioned into that angle cut with a fine round needle file. The piece was then cut off and repeated for the next one.
- 974 replies
-
- 3
-
-
- rattlesnake
- mamoli
- (and 1 more)
-
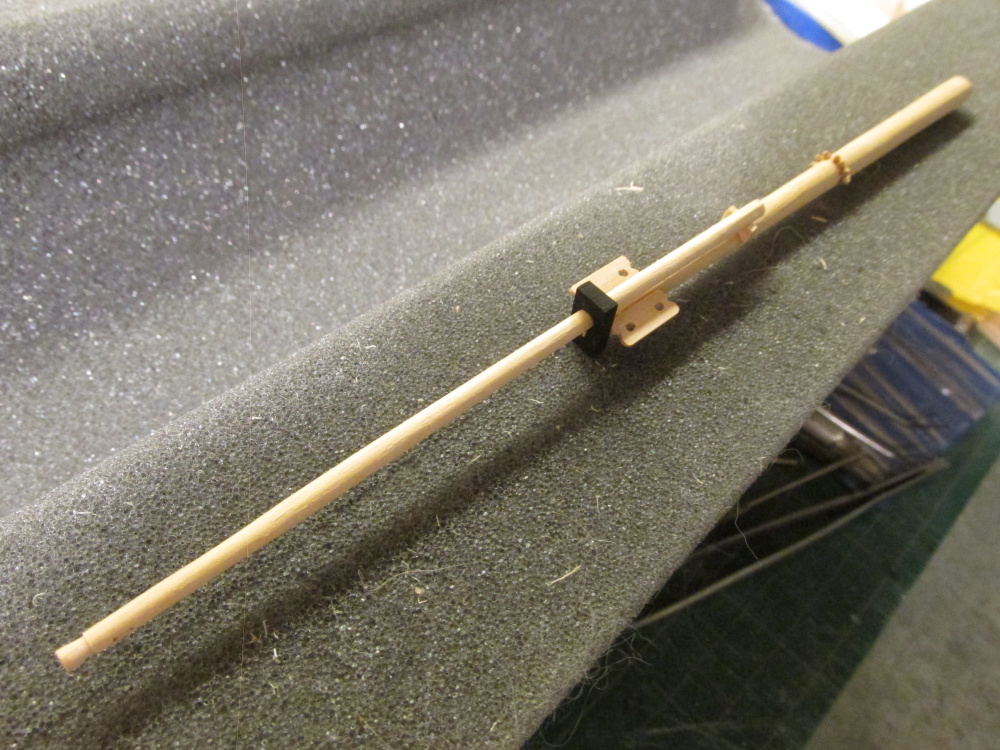
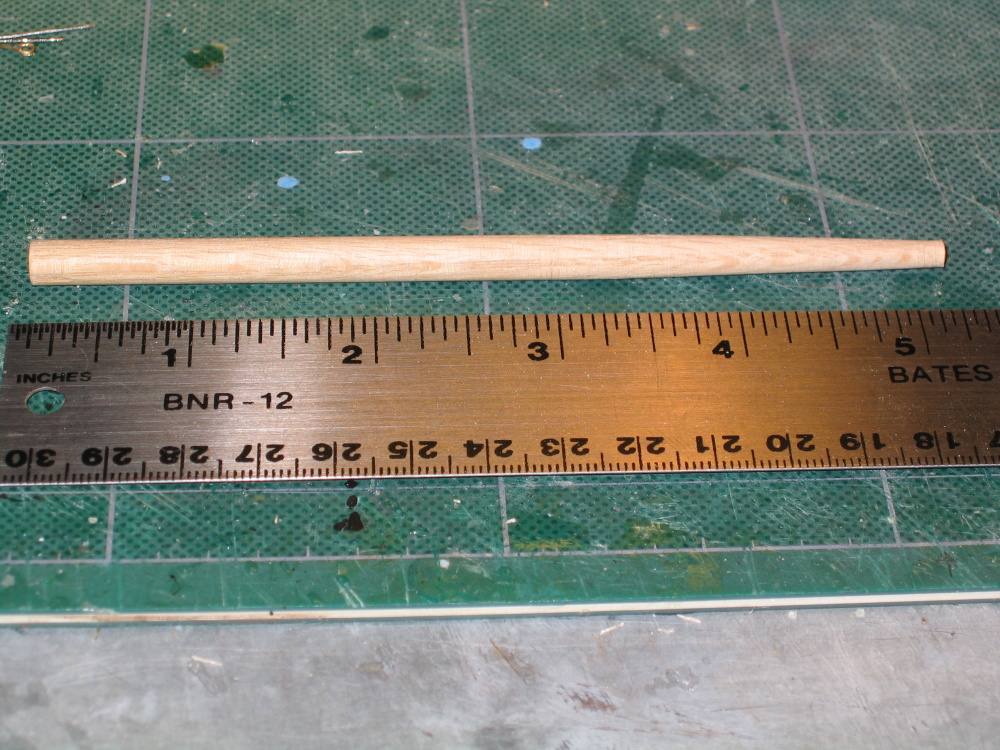
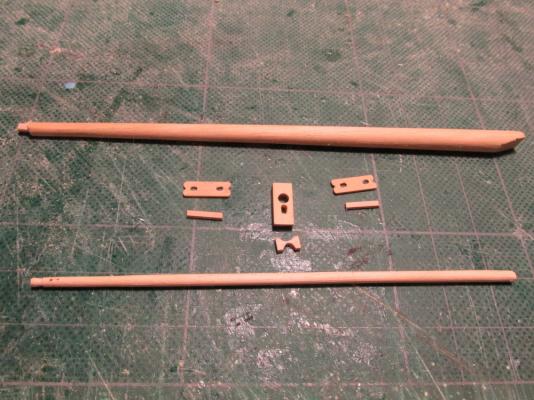
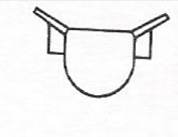
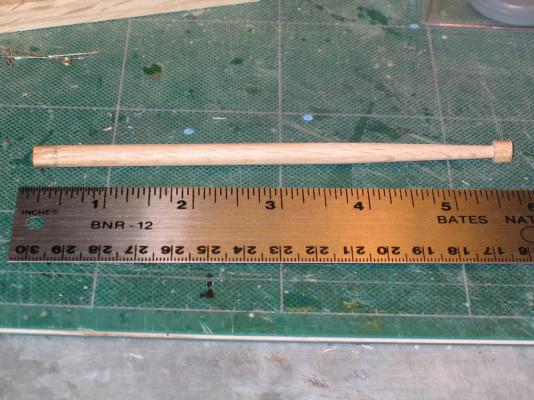
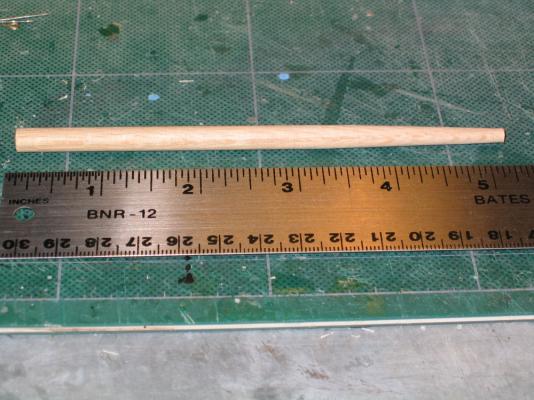
Studying the bowsprit bees in David Anscherl’s book a little closer, he stated: “In earlier days the bees were fitted at an angle to form a shallow ‘V’ as seen from dead ahead. However by the time period of the Swan class, the bees were set horizontally.” So since all the plans show horizontal bees which is confirmed by the fact the Swan class boats were built between 1767 - 1780 (per the title of Davis’s book) and the Rattlesnake was built 1781, I can assume the bees on her were horizontal as well; who am I to argue, James Lee notwithstanding. A new bowsprit was constructed as well as its jib boom filing and sanding by hand wooden dowels. My small wood lathe is still too big for this delicate work. The cap, saddle, bees, and the bee blocks were also made and then all the parts were assembled and glued.

- 974 replies
-
- 5
-
-
- rattlesnake
- mamoli
- (and 1 more)
-
Martin, the reason you only needed two bee holes for the lines was that the other two were spares. I still haven't decided whether to angle the bees or not. Lee states they should be; and Antscherl left them flat as shown by Hahn and the two kit plans. That's what so great about model building: consistent inconsistencies!
- 974 replies
-
- 1
-
-
- rattlesnake
- mamoli
- (and 1 more)
-
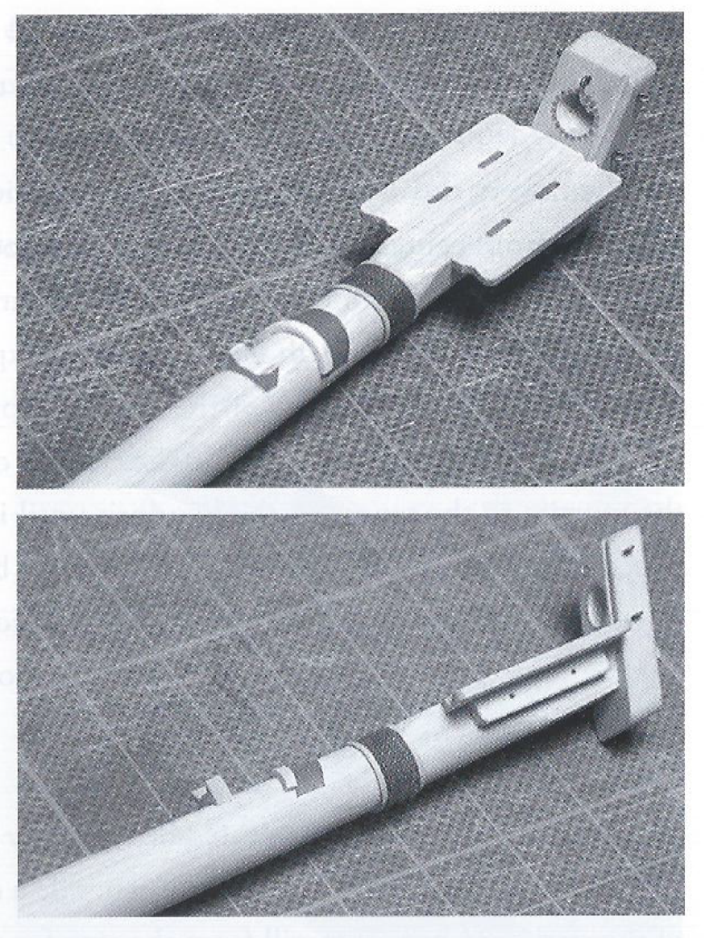
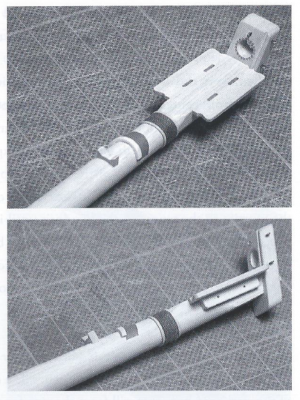
Based on the above and rounding out for 1/64 scale, I determined that the bees on my model should be: Bees · Length: ½” · Width: 3/64” · Thickness: 1/32” at the bowsprit Bee Blocks · Length: 25/64” rounded to 3/8” · Width: 3/128” rounded to 1/32” · Thickness: 5/64” rounded to 3/32” Here is a case where nobody agreed on the shape, dimensions, and number and shape of the rigging holes. As a confirmation as what the bees should look like, David Antscherl’s The Fully Framed Model, Rigging a Sixth Rate Sloop of 1767 – 1780, Volume IV, showed this: Now all I have to do is follow David.
- 974 replies
-
- 5
-
-
- rattlesnake
- mamoli
- (and 1 more)
-
According to James Lees’ The Masting and Rigging of English Ships of War 1625 – 1860 the Bee’s dimensions are as follows: Bees · Length: Same as the length of the bowsprit cap · Width: ½ the greatest diameter of the bowsprit · Thickness: ¼ of the width at the edge next to the bowsprit thinning to ¾ width at the outer edge Bee Blocks · Length: 7/9 the length of the bees · Width: ½ the bees width · Thickness: 2” per bees’ foot length Configuration The bees stood up from the level at the outer edge by the thickness of the inner edge plus 1”
-
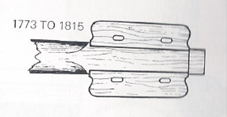
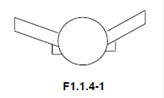
What I thought would be straight forward and fairly simple…well, I got an education. Hahn’s plans only had an elevation view which indicated the Bees were 3/4” in length x 3/64” in depth and the Bee blocks were ½” in length x 3/64” in depth; therefore no width, rigging hole pattern, or plan view shape were shown. The Practicum stated the bees were 1/8” wide and the bee blocks 1/32” square. Looking at the two kit plans, they indicated the bees were between 5/16” to a ½” length. Both the Practicum and the kit plans showed one rigging hole per side diagonal from each other all with subtly different shapes. Here is what the Practicum would have you build:
-
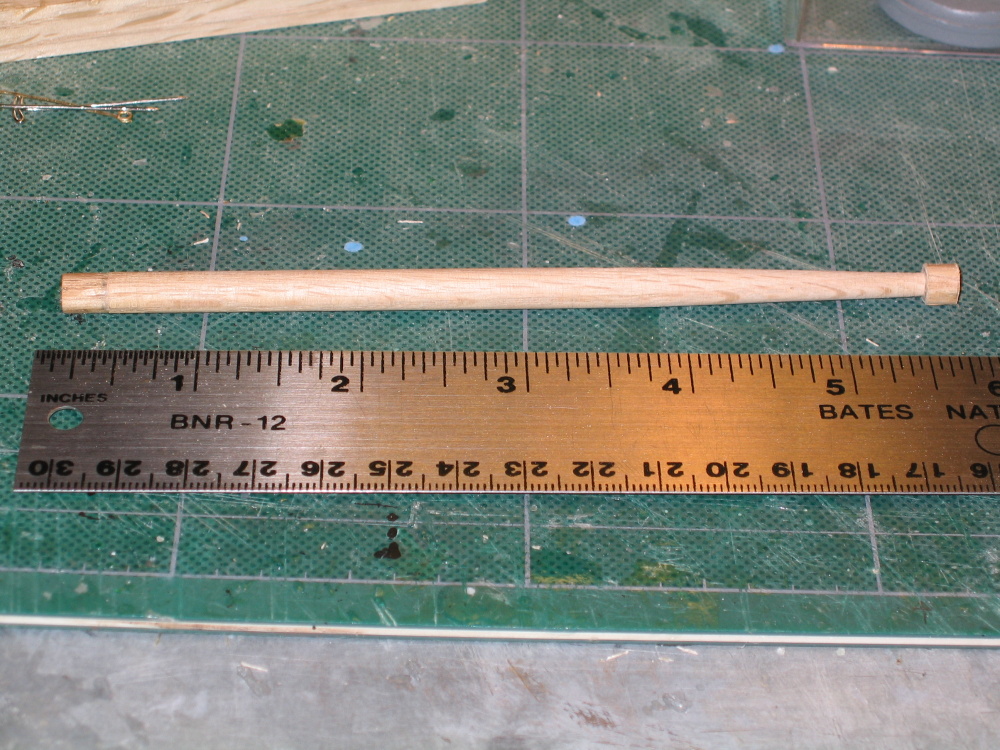
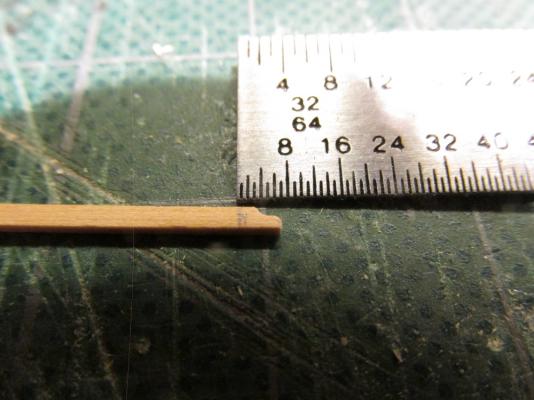
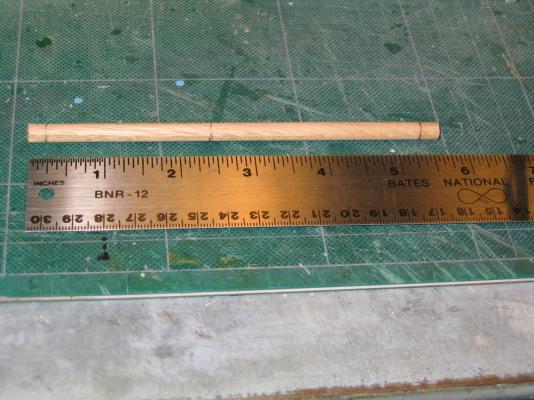
Bowsprit The last of the masts to be made were the Bowsprit and the jib boom. Actually I made the basic bowsprit way back when I was constructing the bulwarks and needed the bowsprit to measure for the bowsprit bow opening. That was before I realized that Mr. Hunt was cutting corners and was not all that accurate with his dimensions it the late stages of the Practicum. As it turned out, the Practicum called for the bowsprit to be 5 1/16” long which I blindly followed and made back then. However according to Harold Hahn’s plans, it’s actually 5 7/8”. A new bowsprit has to be constructed.
- 974 replies
-
- 2
-
-
- rattlesnake
- mamoli
- (and 1 more)
-
Another comment on the ship's boat - I have seen logs/practicums (can't remember which) on how to make this style of construction. One of the tips was not to initially glue the bottom piece on. This way it makes it easier to file, sand, or drummel the interior because now it's open at the top and bottom. Once the insides are finished, the bottom piece is then added and finished off. I know it's a bit late for you at this point but maybe it will help someone else.
-
That is the plan. Do as much as I can off ship where it's relatively easier.
- 974 replies
-
- 1
-
-
- rattlesnake
- mamoli
- (and 1 more)
-
I heard the same thing about the ebony wood. I guess it was a blessing in disguise I didn't use it. And you are right, those trestletrees were tricky and delicate. I broke a few pieces it its construction. The masts will be installed piece by piece as the rigging progresses...at least that the plan. I still have to create the bowsprit parts not to mention the all the yards. So I got a bit more work to complete before full fledged rigging commences.
-
Having never built a wooden 3 masted ship before, I really put a lot on my plate especially because I was "coloring" the model by using different woods. No chance to cover errors with wood filler and paint. The Practicum called for the use of ebony in many places but at the time I purchased the wood package from HobbyMills, Jeff Hayes its owner, didn't have any. So where ever you see black, it's painted because it should have been ebony wood. As near as I can tell, it still looks OK.
-
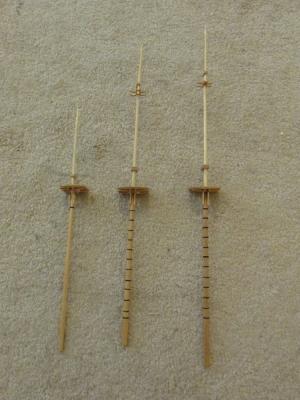
The image below shows the dry fit of the masts. The mast caps will be painted black because I didn’t have any ebony wood. All of the blocks, rings, etc. will be installed before the first masts are installed into the hull.
- 974 replies
-
- 4
-
-
- rattlesnake
- mamoli
- (and 1 more)
-
According to the Practicum, Mr. Hunt constructed each mast assembly as a whole before moving on to the next one. I elected to work on all the masts at once working my up. The instructions give you the choice of using stock square boxwood or the dowels to create the remaining mast sections. I would have preferred using the boxwood as I did for the spares stored under the ship’s boat, but I did not have much left of the sizes I needed or the size called was not part of the wood package [3/16” square boxwood for the mizzen mast], so I used the dowels. I found myself actually squaring the dowels to get the proper widths along the length of the masts based on Hahn’s plans and then rounding them out again. Unfortunately my lathe is a bit too heavy for the delicate turning required -it was all done by hand. The topmast trestletrees were constructed based directly on Hahn’s plans, not the dimensions the Practicum gave. I found that the plans of Mamoli, MS, and the Practicum were not consistent in their measurements of the trestletree, so I fell back to Harold Hahn.
- 974 replies
-
- 1
-
-
- rattlesnake
- mamoli
- (and 1 more)
-
I am assuming that you will be painting your creation according to the MS instructions as well. That gives you an extra advantage over those of using natural wood. You can cover up most of your mistakes. You can use wood filler to fill in cracks between planks, and minor low areas, and then paint over the whole thing and nobody would be able to tell if and where you might have messed up a bit; so don't fret too much about minor consistences I jumped in with no experience in planking at all and used natural wood so I couldn't hide my mistakes, and make them I did. It could have come out worse but it could have come out better had I known what I was doing. Take your time, and don't forget to bevel your planks on one edge otherwise each plank will appear to have a narrow space between them especially where the hull curves outward.