72Nova
-
Posts
675 -
Joined
-
Last visited
Content Type
Profiles
Forums
Gallery
Events
Everything posted by 72Nova
-
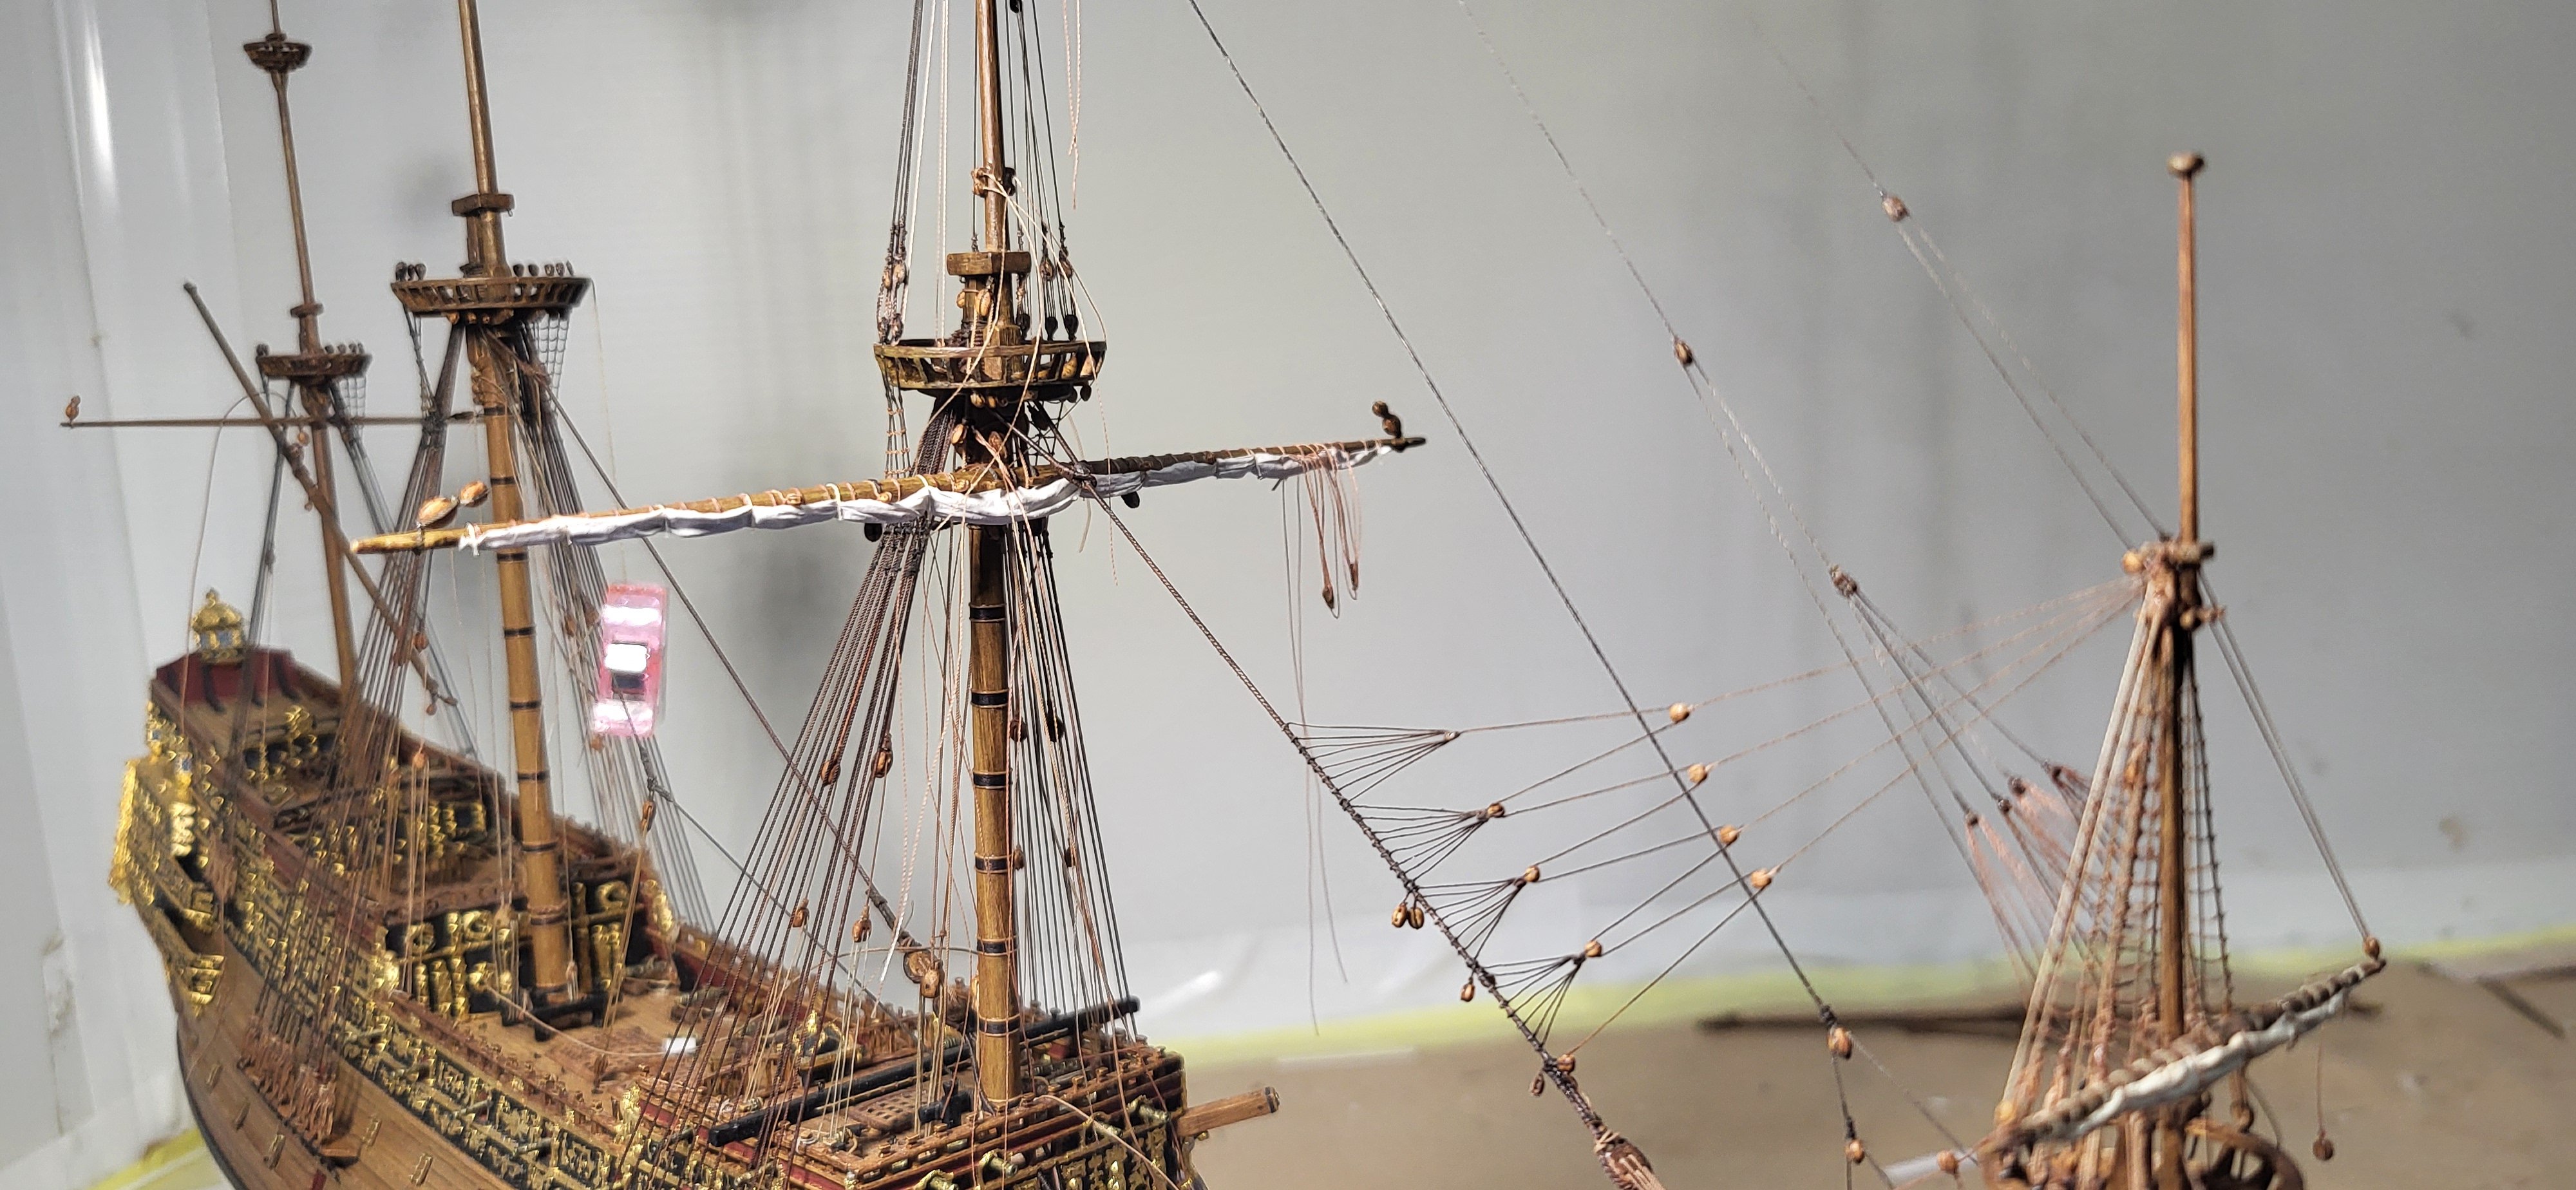
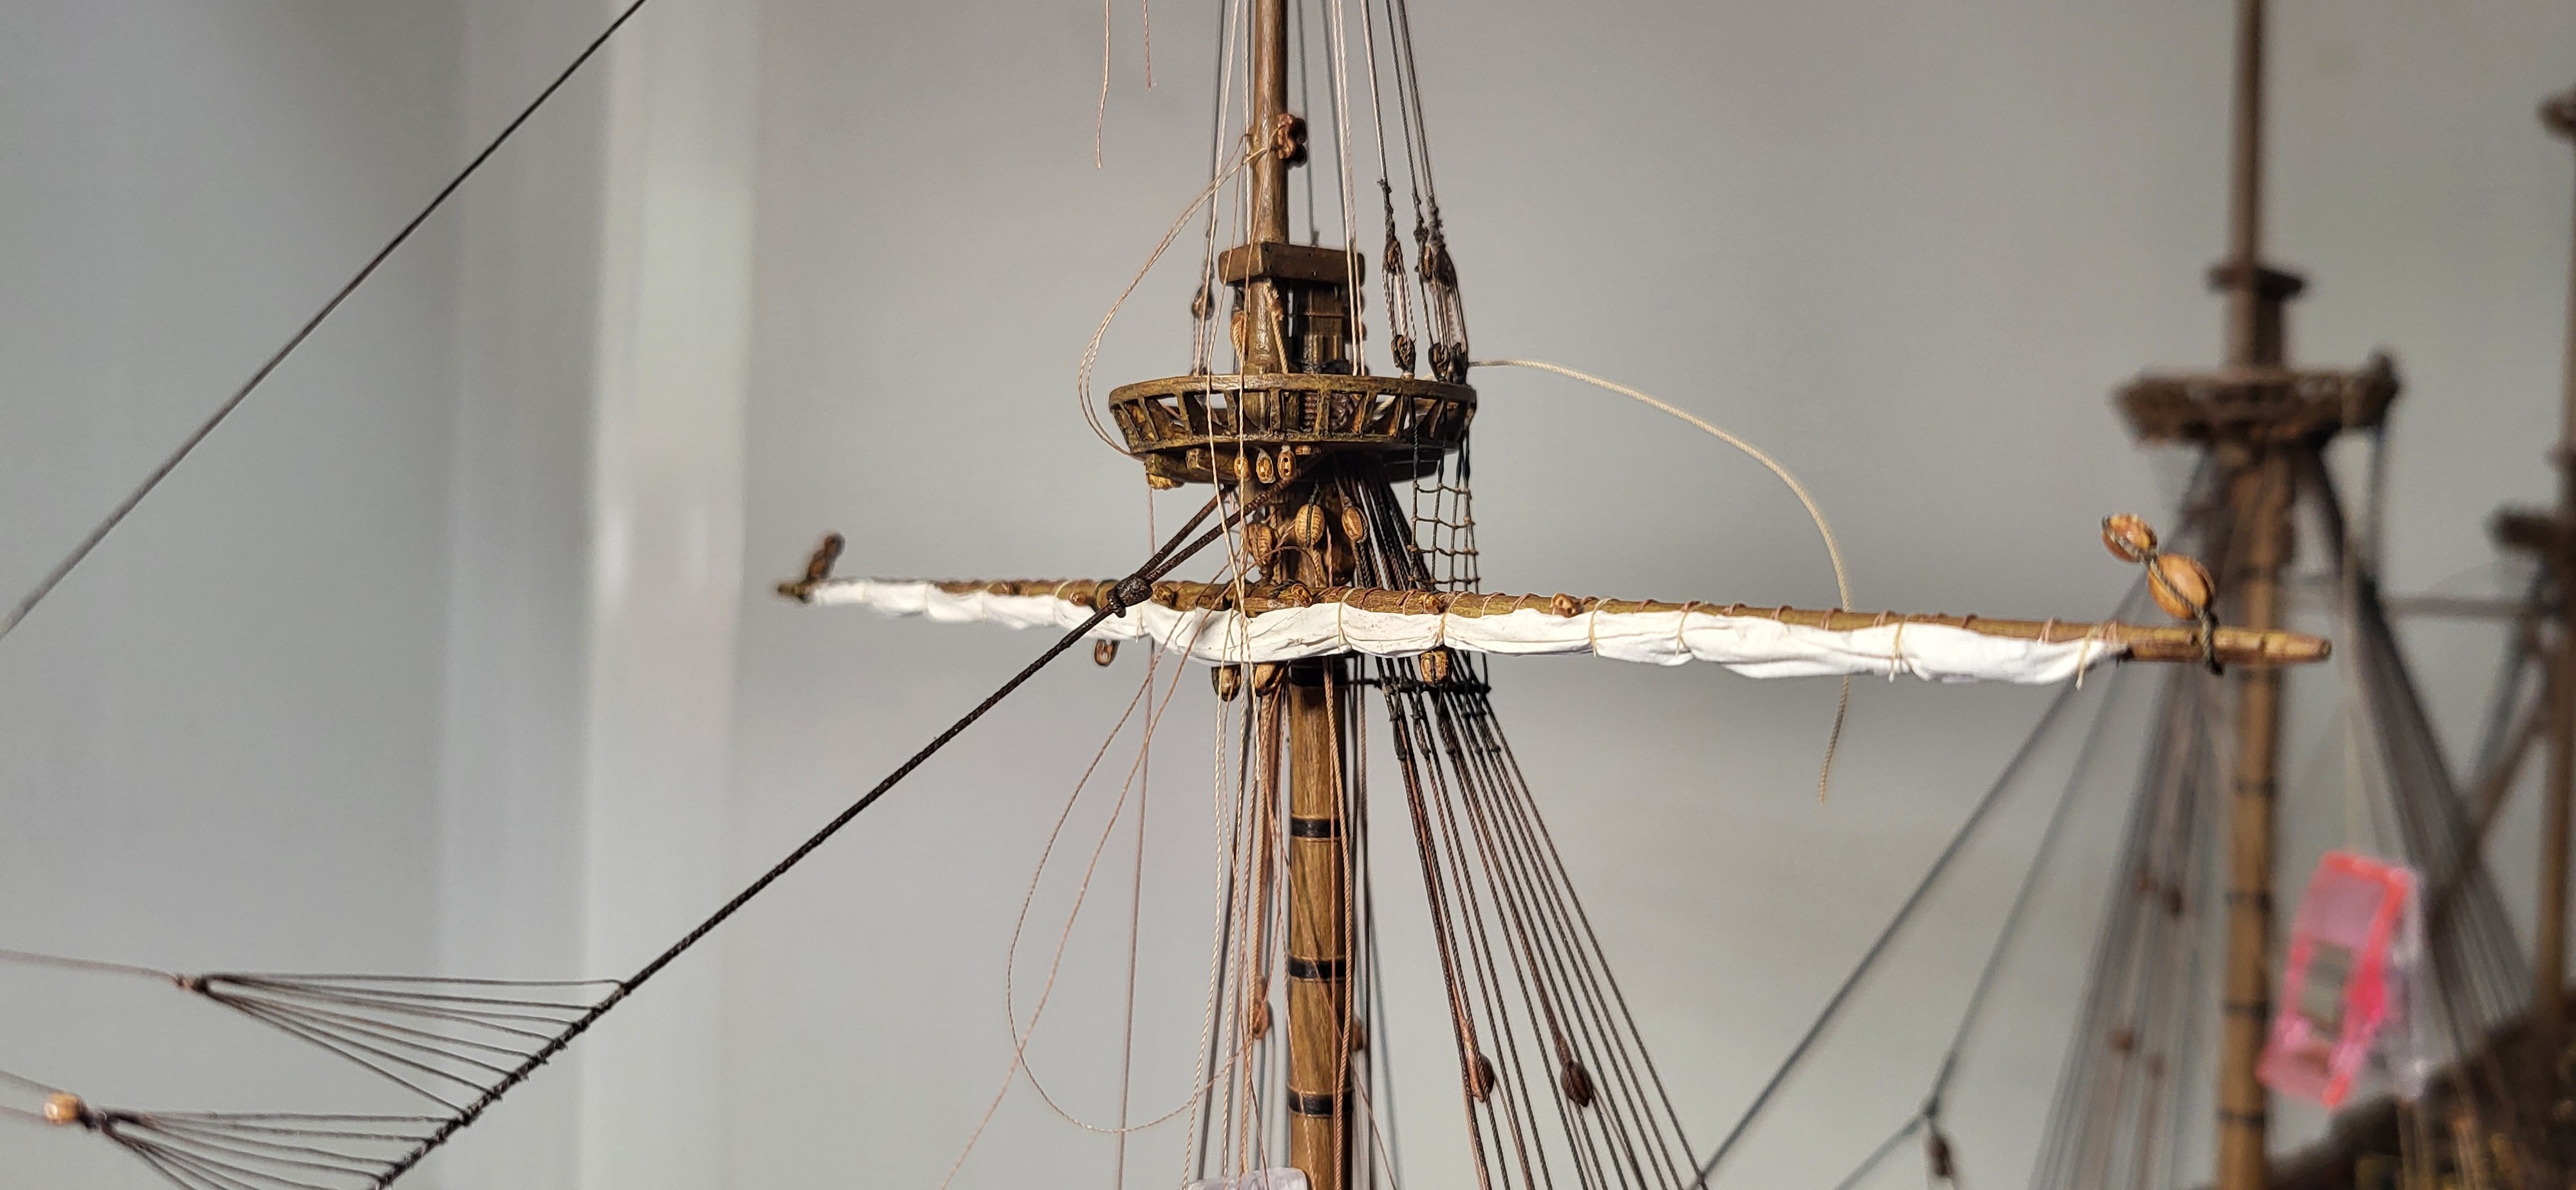
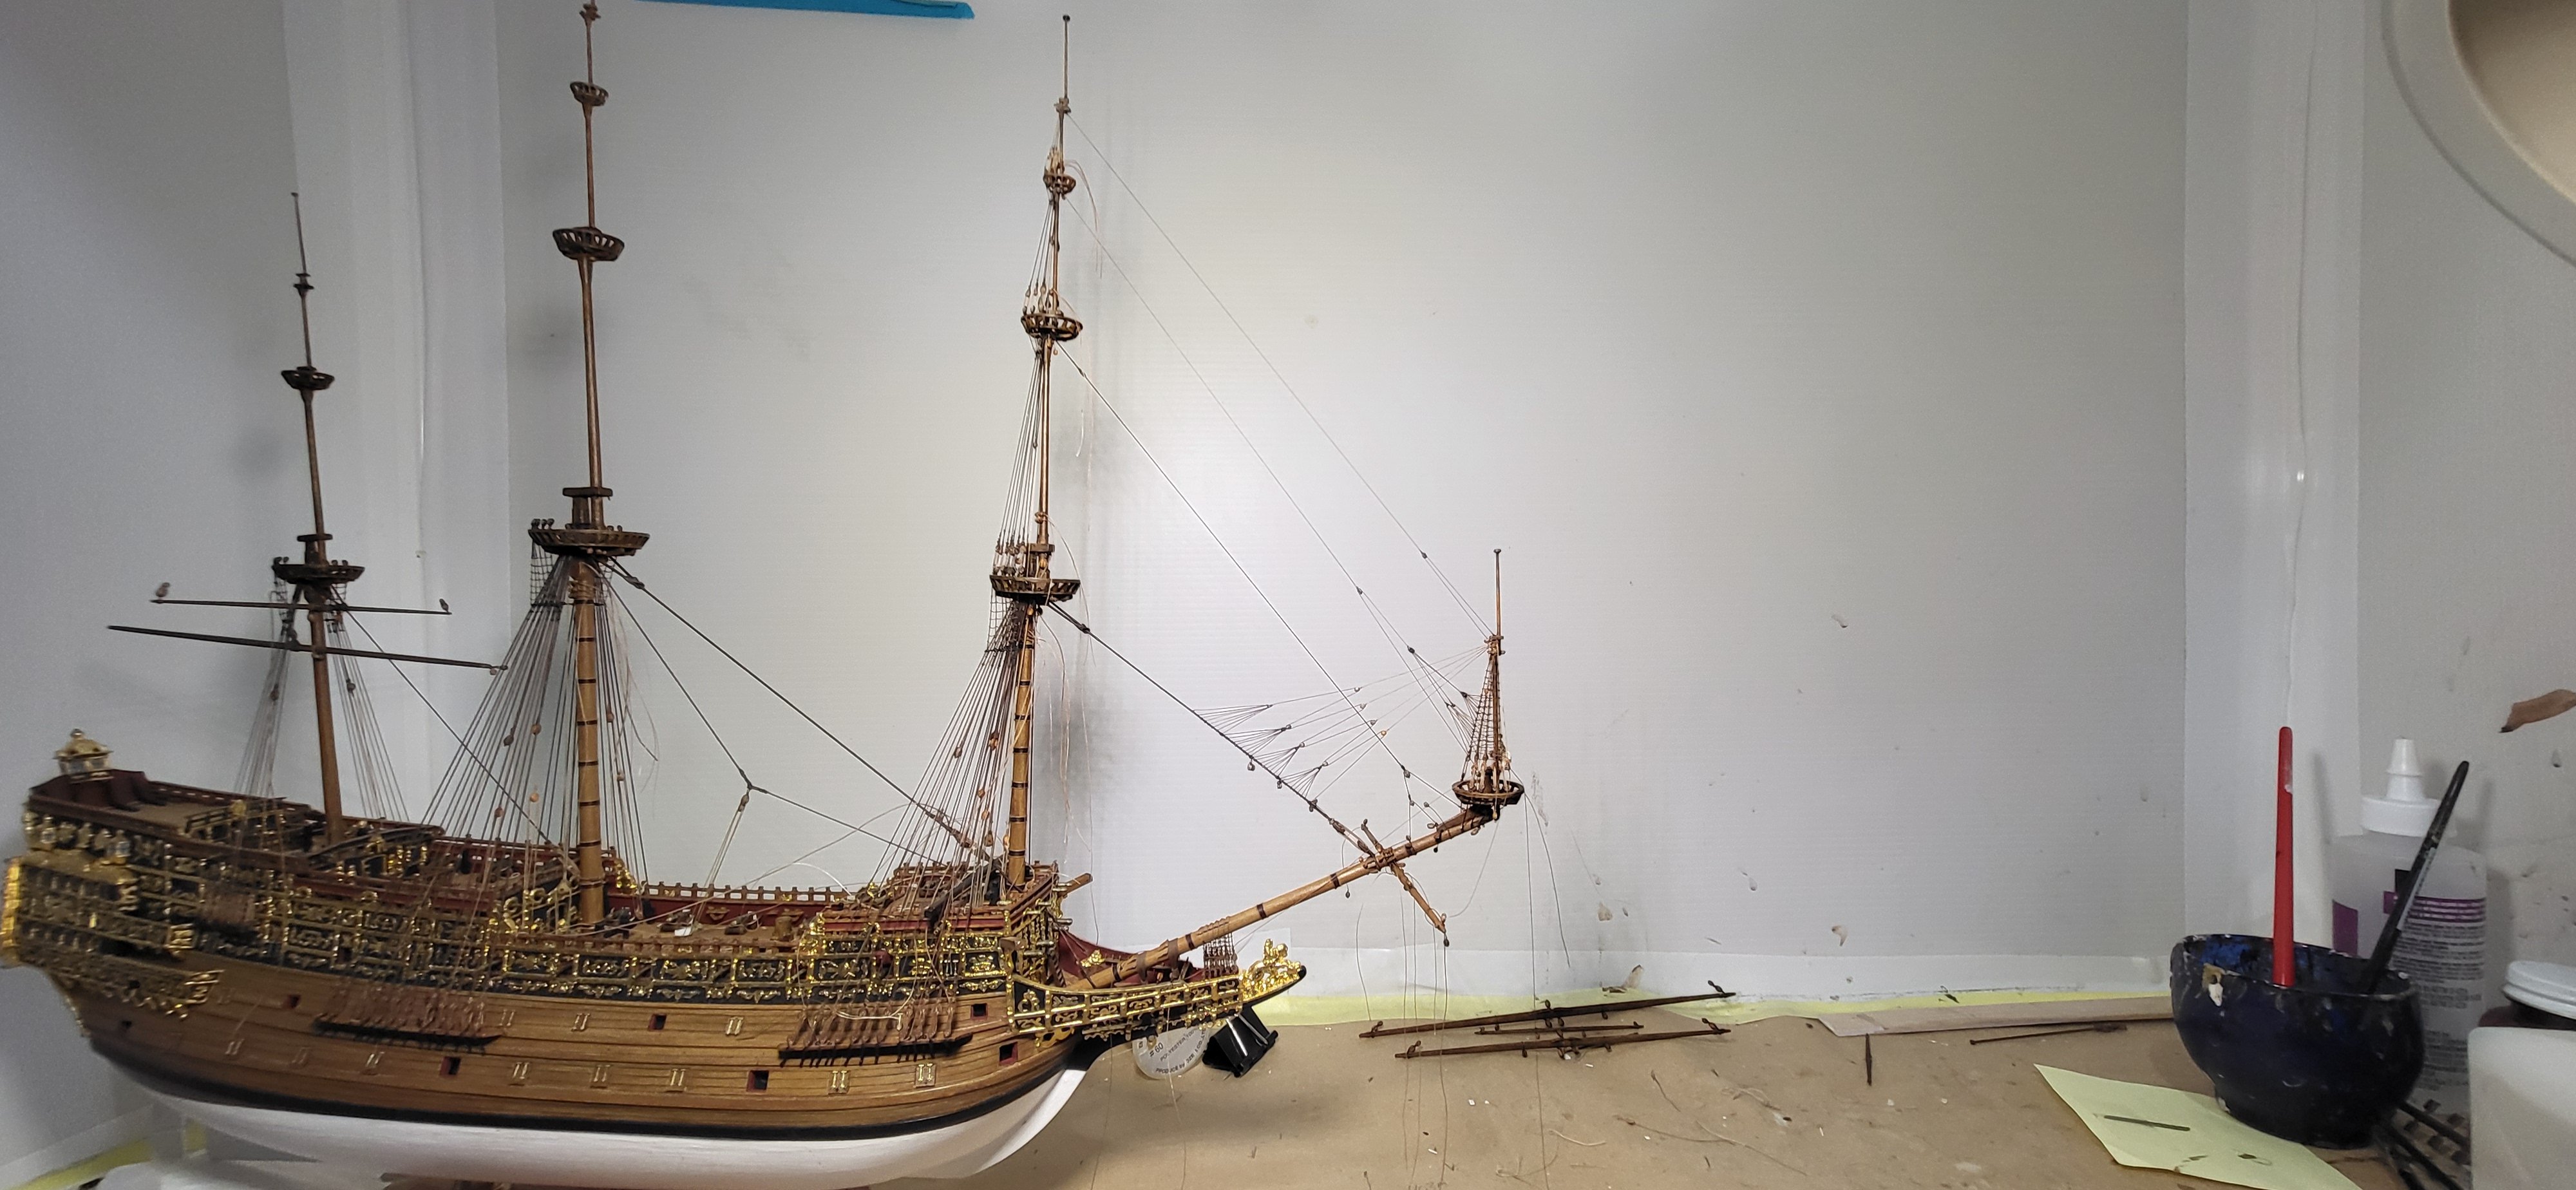
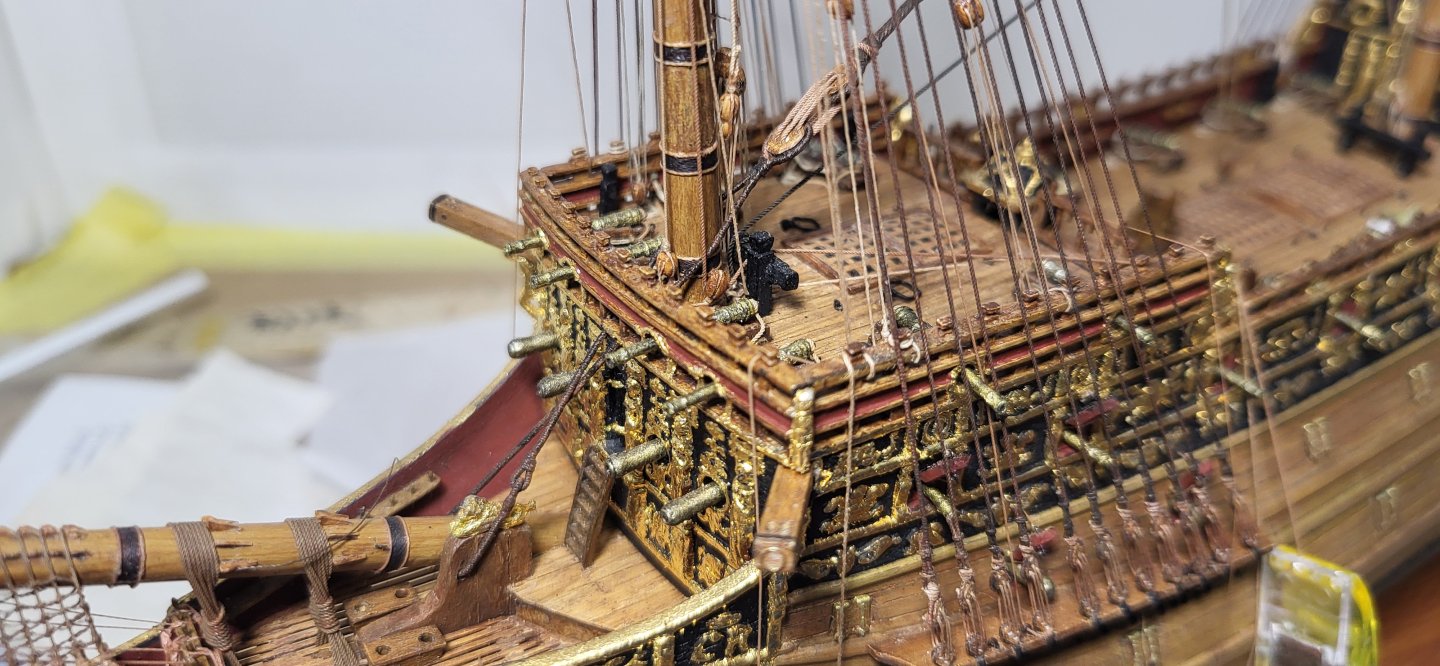
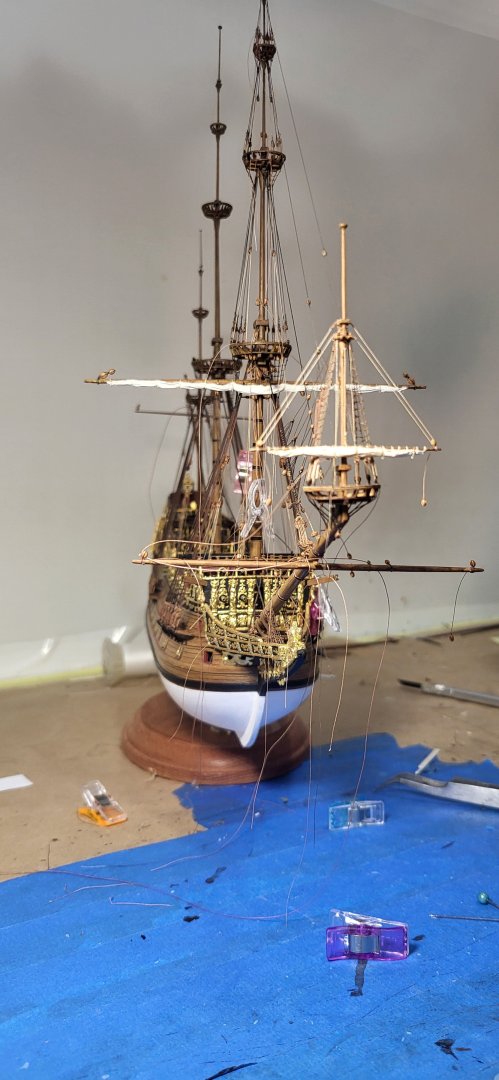
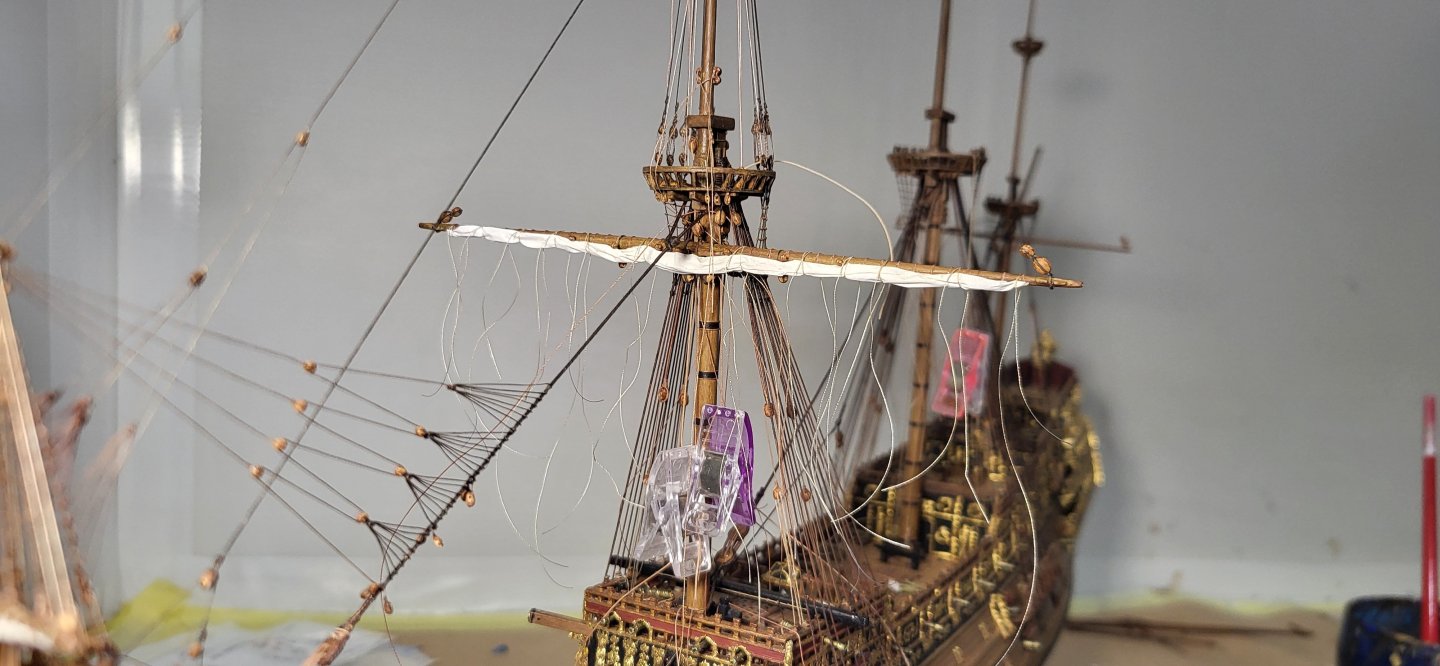
 I was able to finally set the main top mast in place and complete rigging the shrouds using .20mm line, dead eyes measure out at about 1.70mm, slightly oversized but visually looks good. I used .35mm line for the stay, led thru a block at the fore masthead and down to the long tackle I had rigged like almost 2 years ago, it's not perfect but at this scale looks fine. As always, I appreciate everyone stopping by and looking. Michael D.
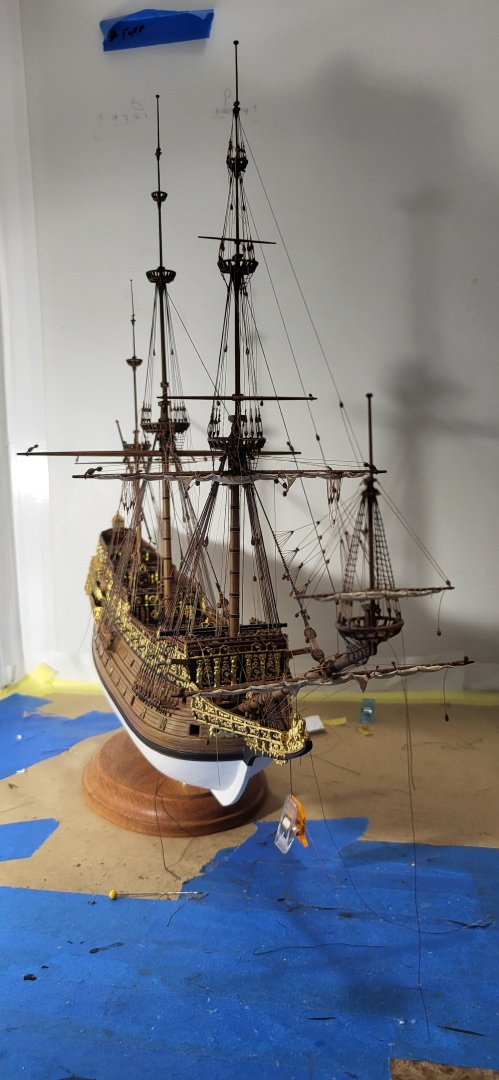


- 324 replies
-
- 11
-

-

-
- Sovereign of the Seas
- Airfix
- (and 1 more)
-
Still amazes me what can be accomplished using card, just love the work you're doing thus far. Michael D.
-
Outstanding job!! 👍 Michael D.
-
Impressive Ian, I hope you have stock in that media you're using...😀. Happy New Year! Michael D.
- 24 replies
-
- 2
-

-
-
- ferry
- Europic Ferry
- (and 1 more)
-
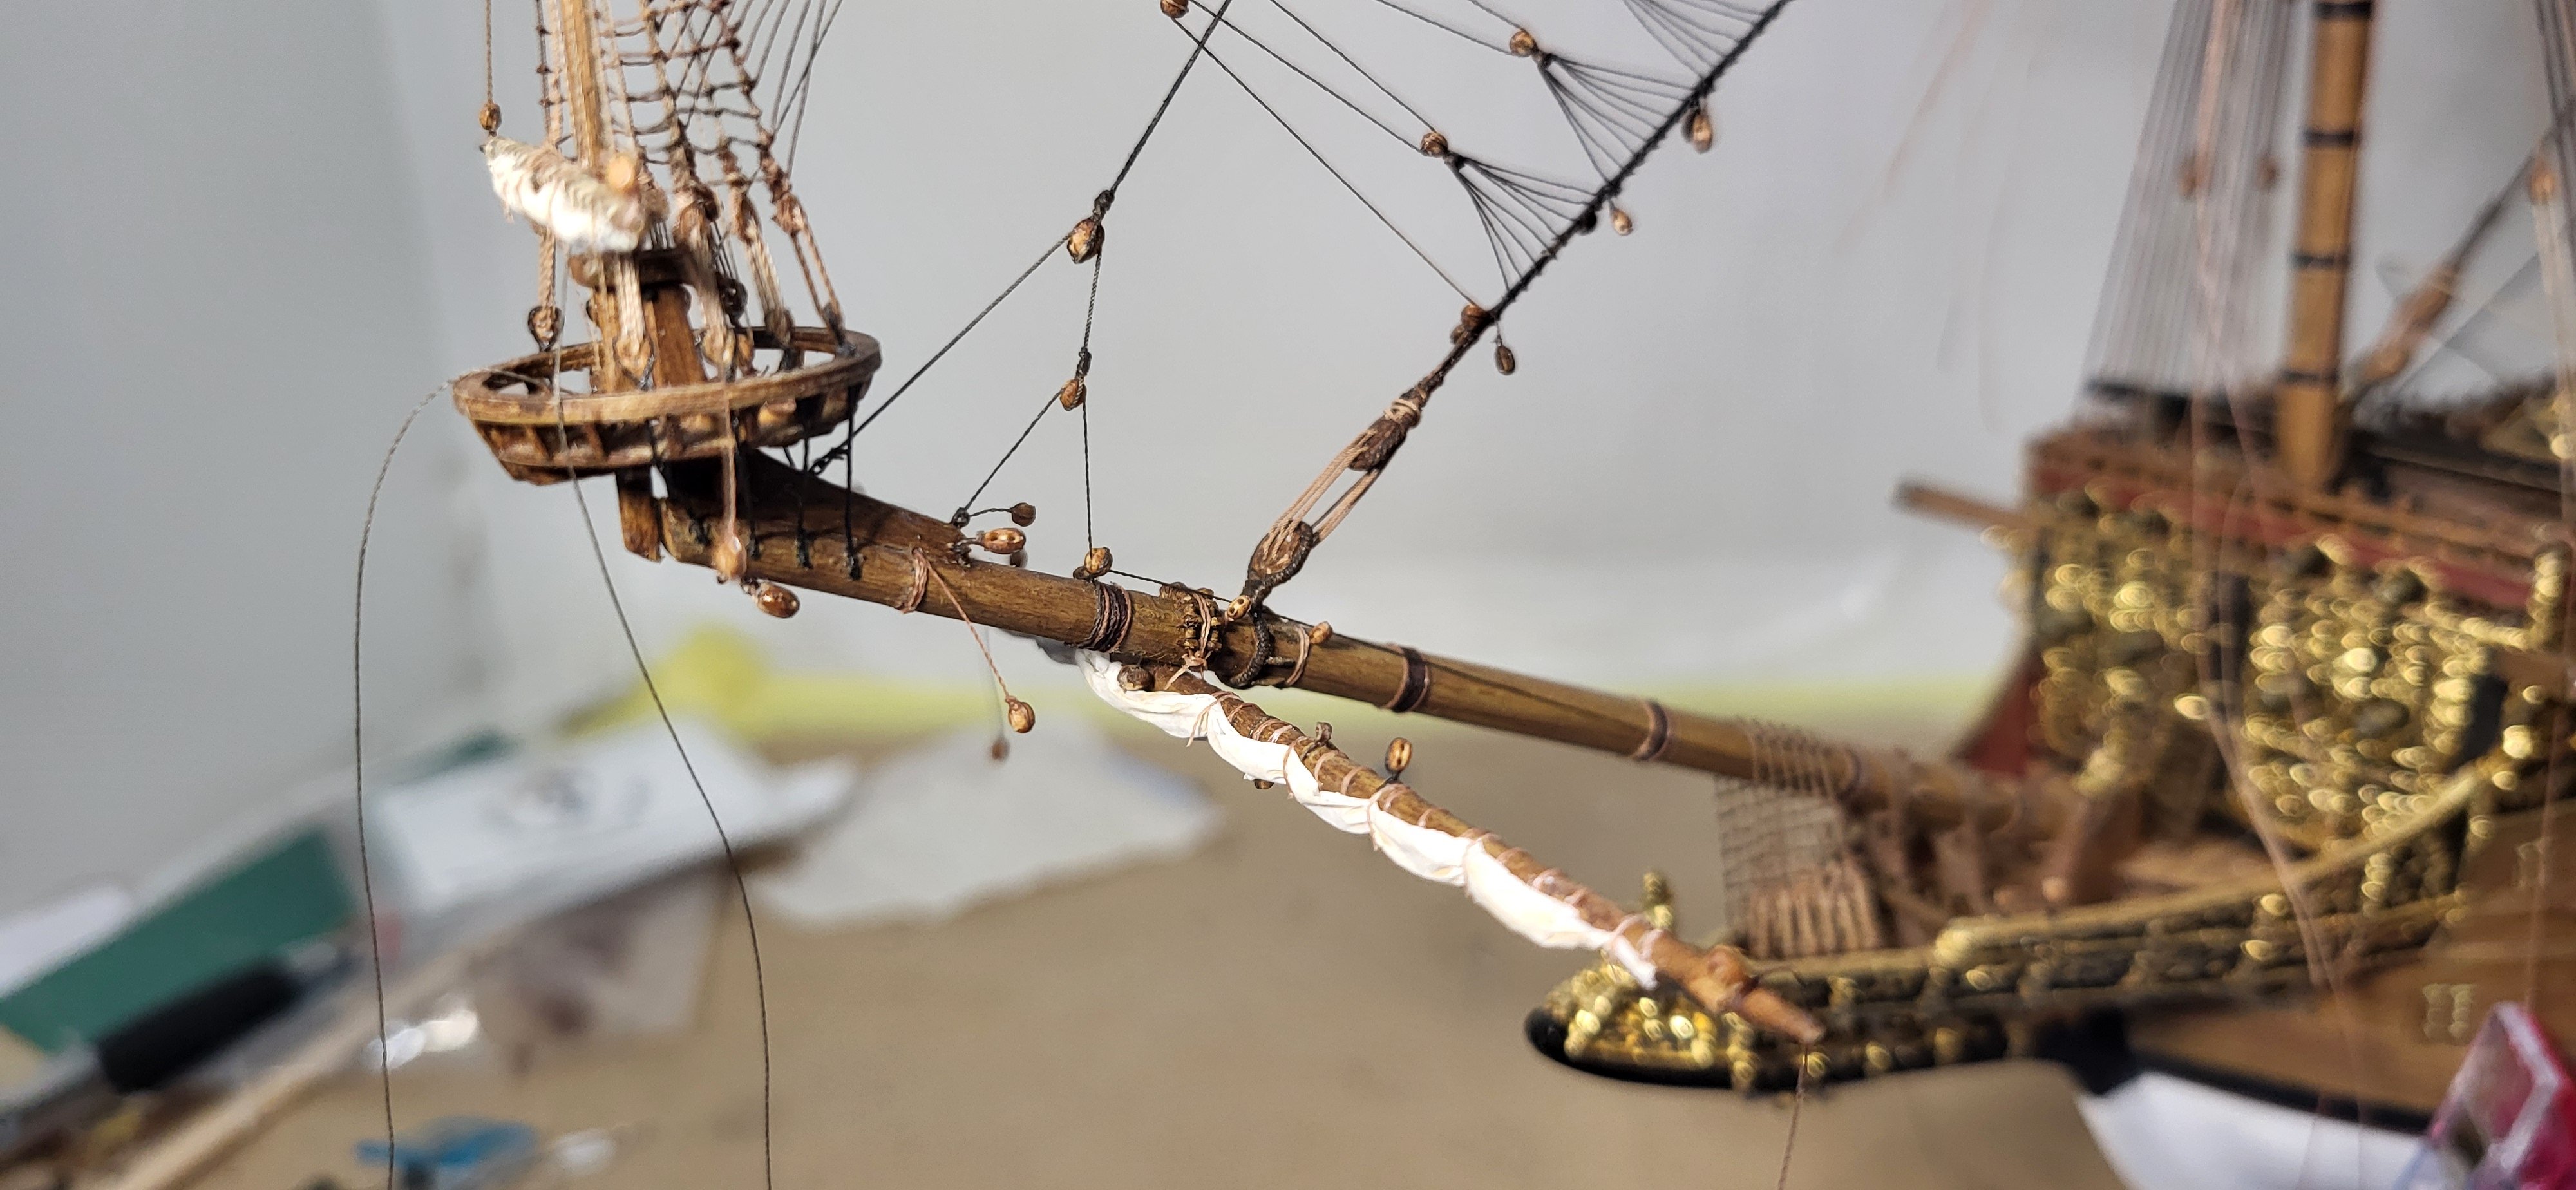
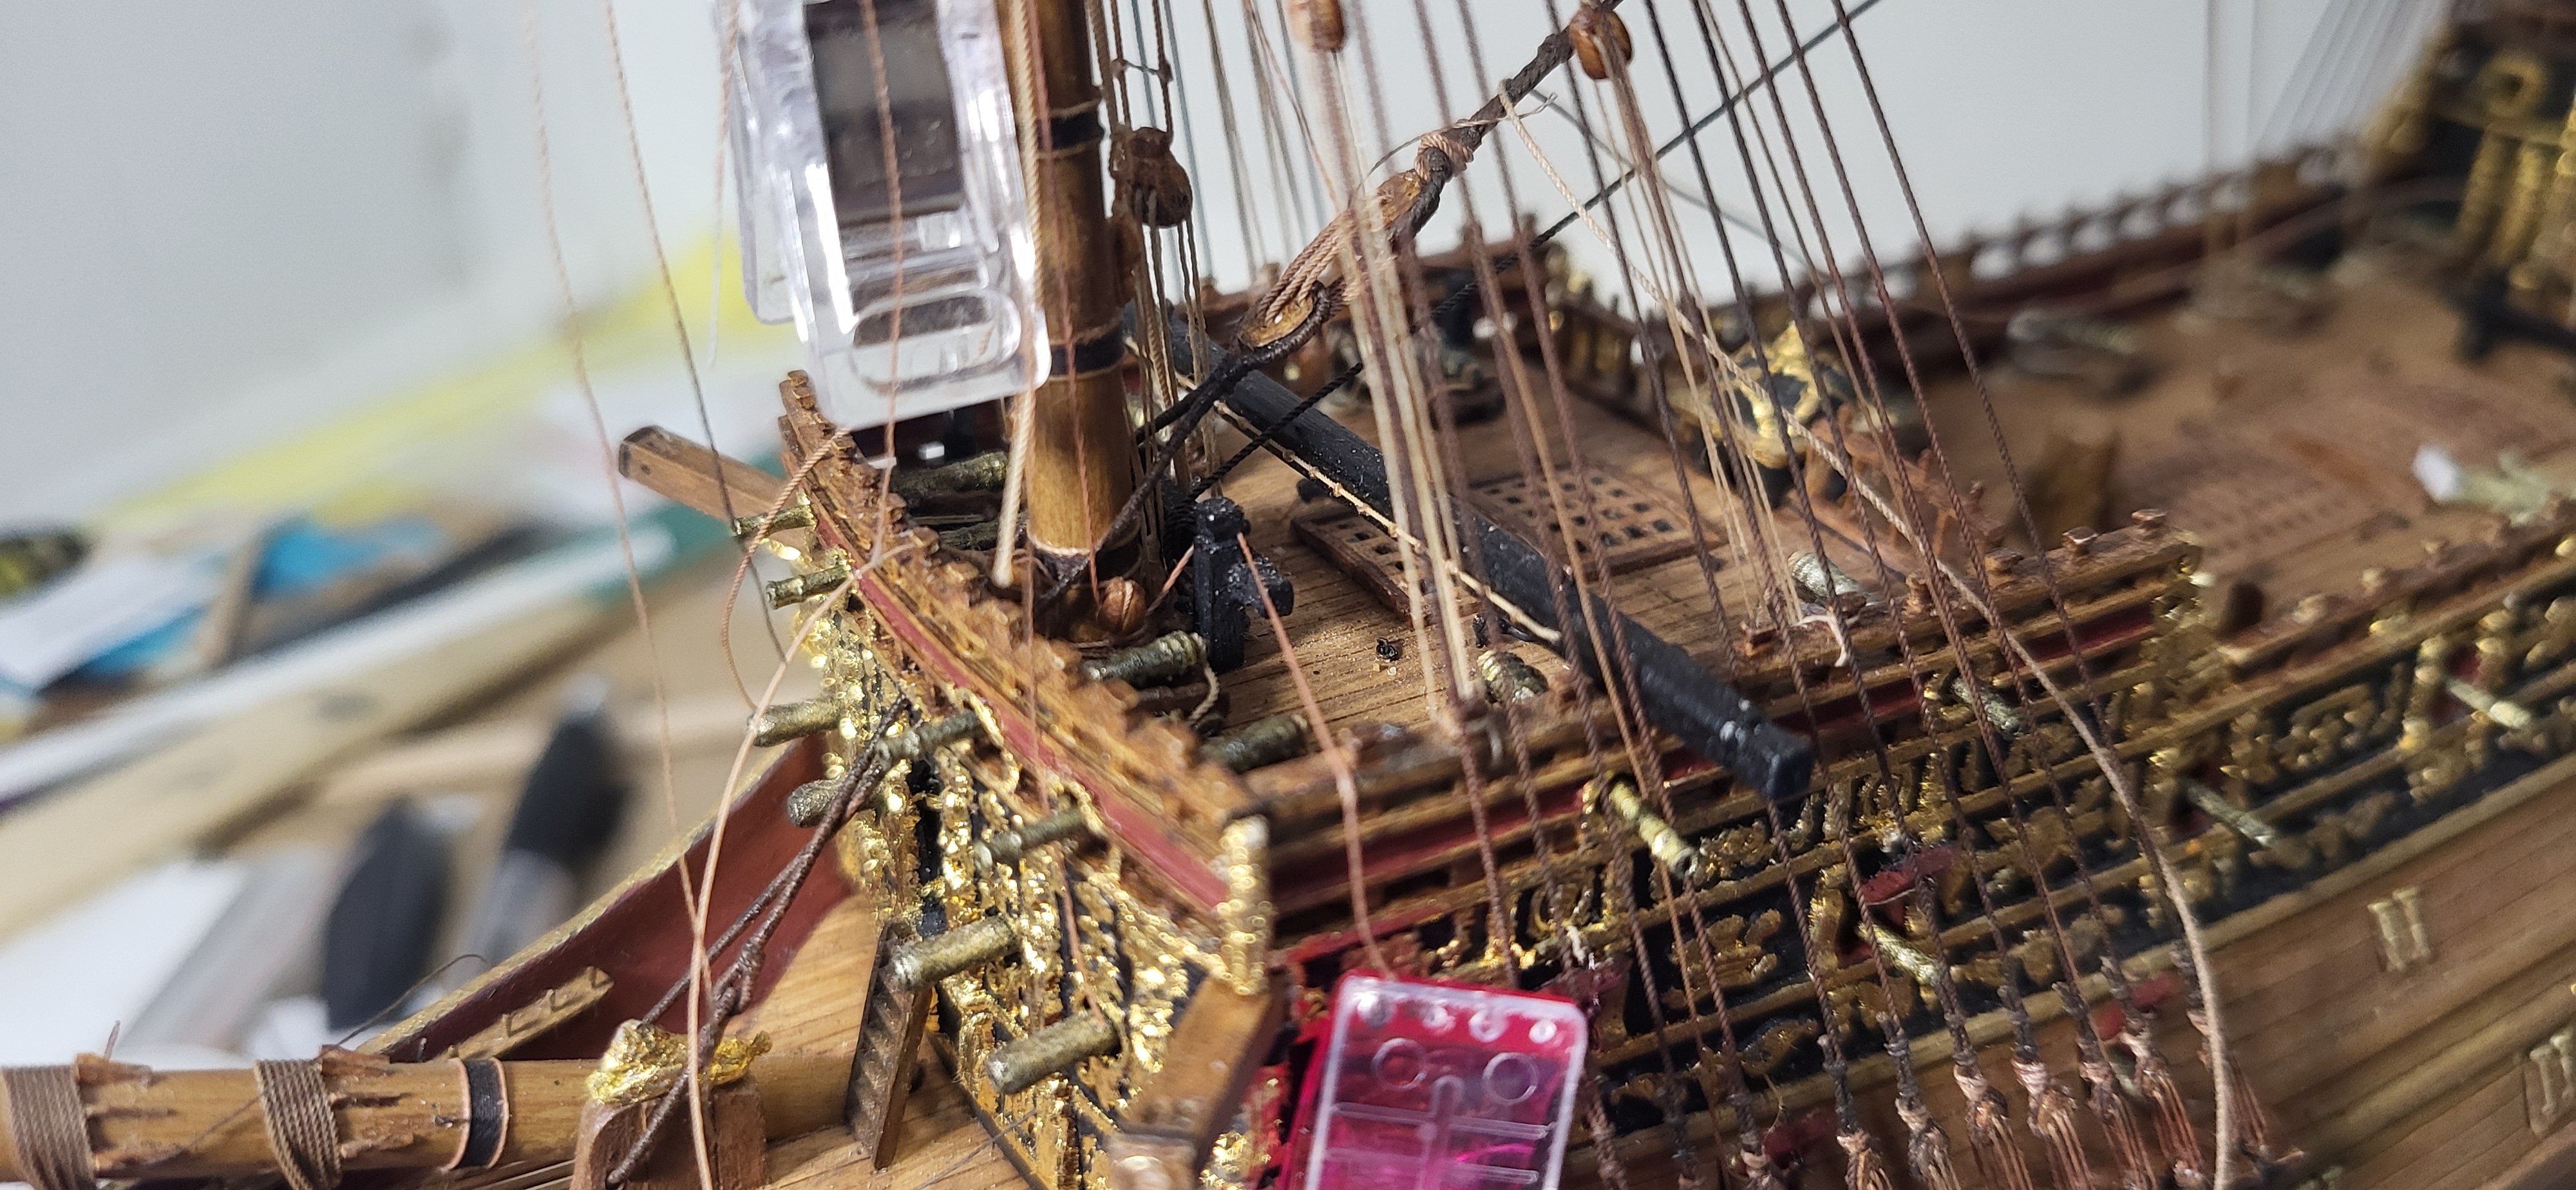
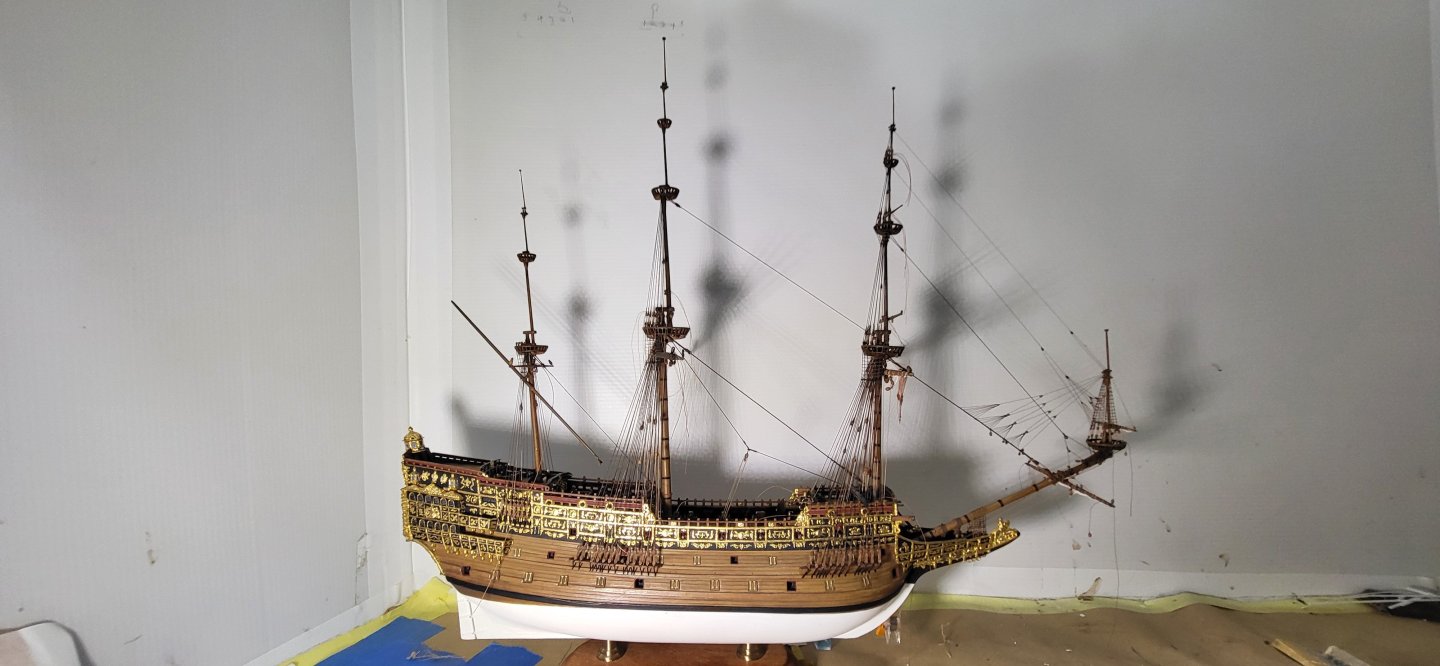
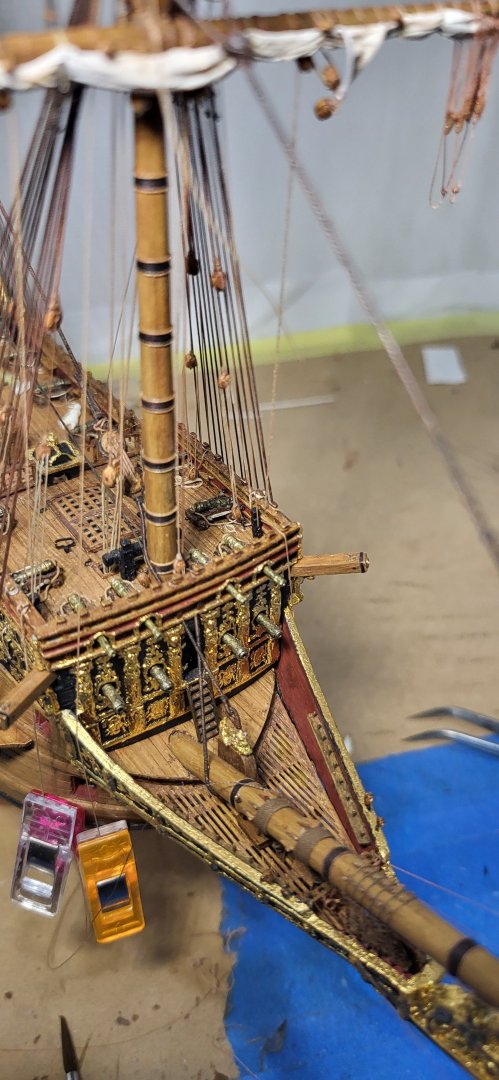
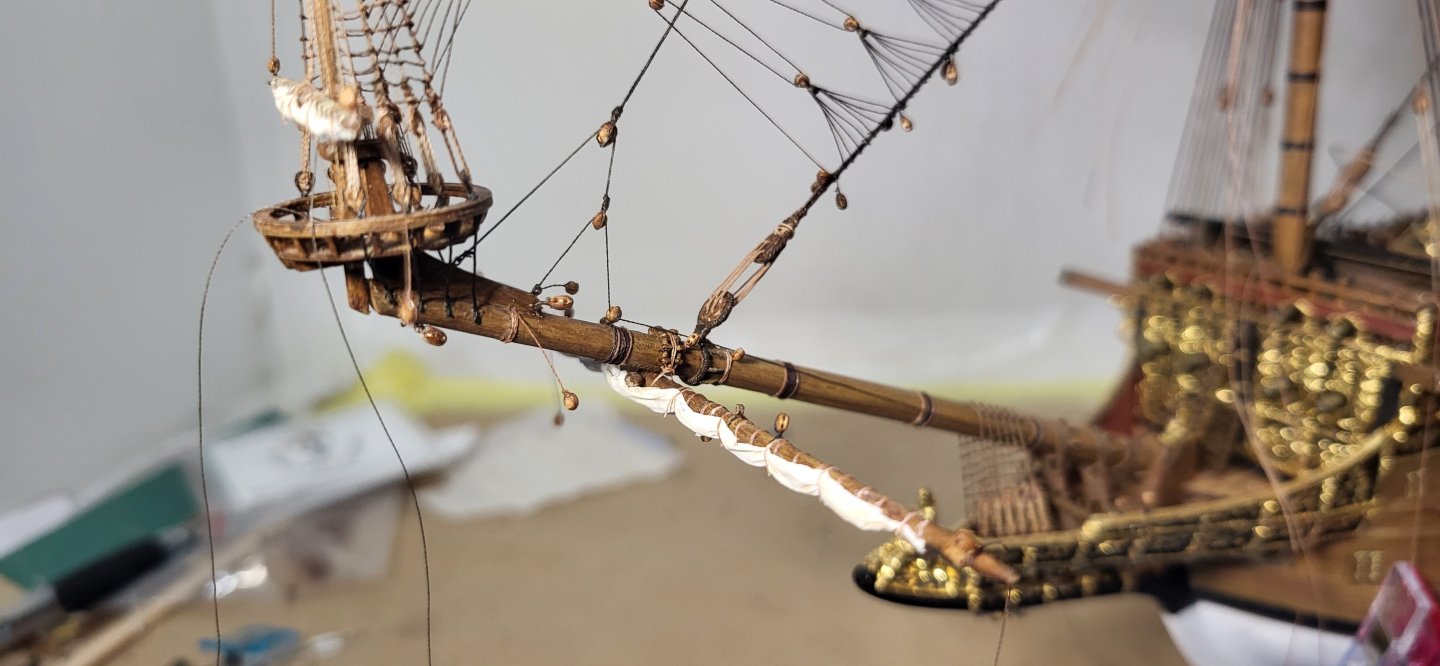
I've rigged the single jeer using .30mm line that's led to base of the mast, thru a single block and will be belayed to the bitts. The lifts are rigged using .25mm line, the standing part at the stay collar, thru the blocks and down to the deck belayed at the caval. The fall for the martnets is 100wt thread with the standing part at the stay collar, thru the sister block, maybe should've been a shoe block but oh well, thru a 1.5mm block on the collar and down to the forecastle rail, once I complete the port side, I need to focus on the main topmast shrouds and stay as this is led to the tackle at the base of the fore mast. Thanks for looking. Michael D.

- 324 replies
-
- 7
-
-
-
- Sovereign of the Seas
- Airfix
- (and 1 more)
-
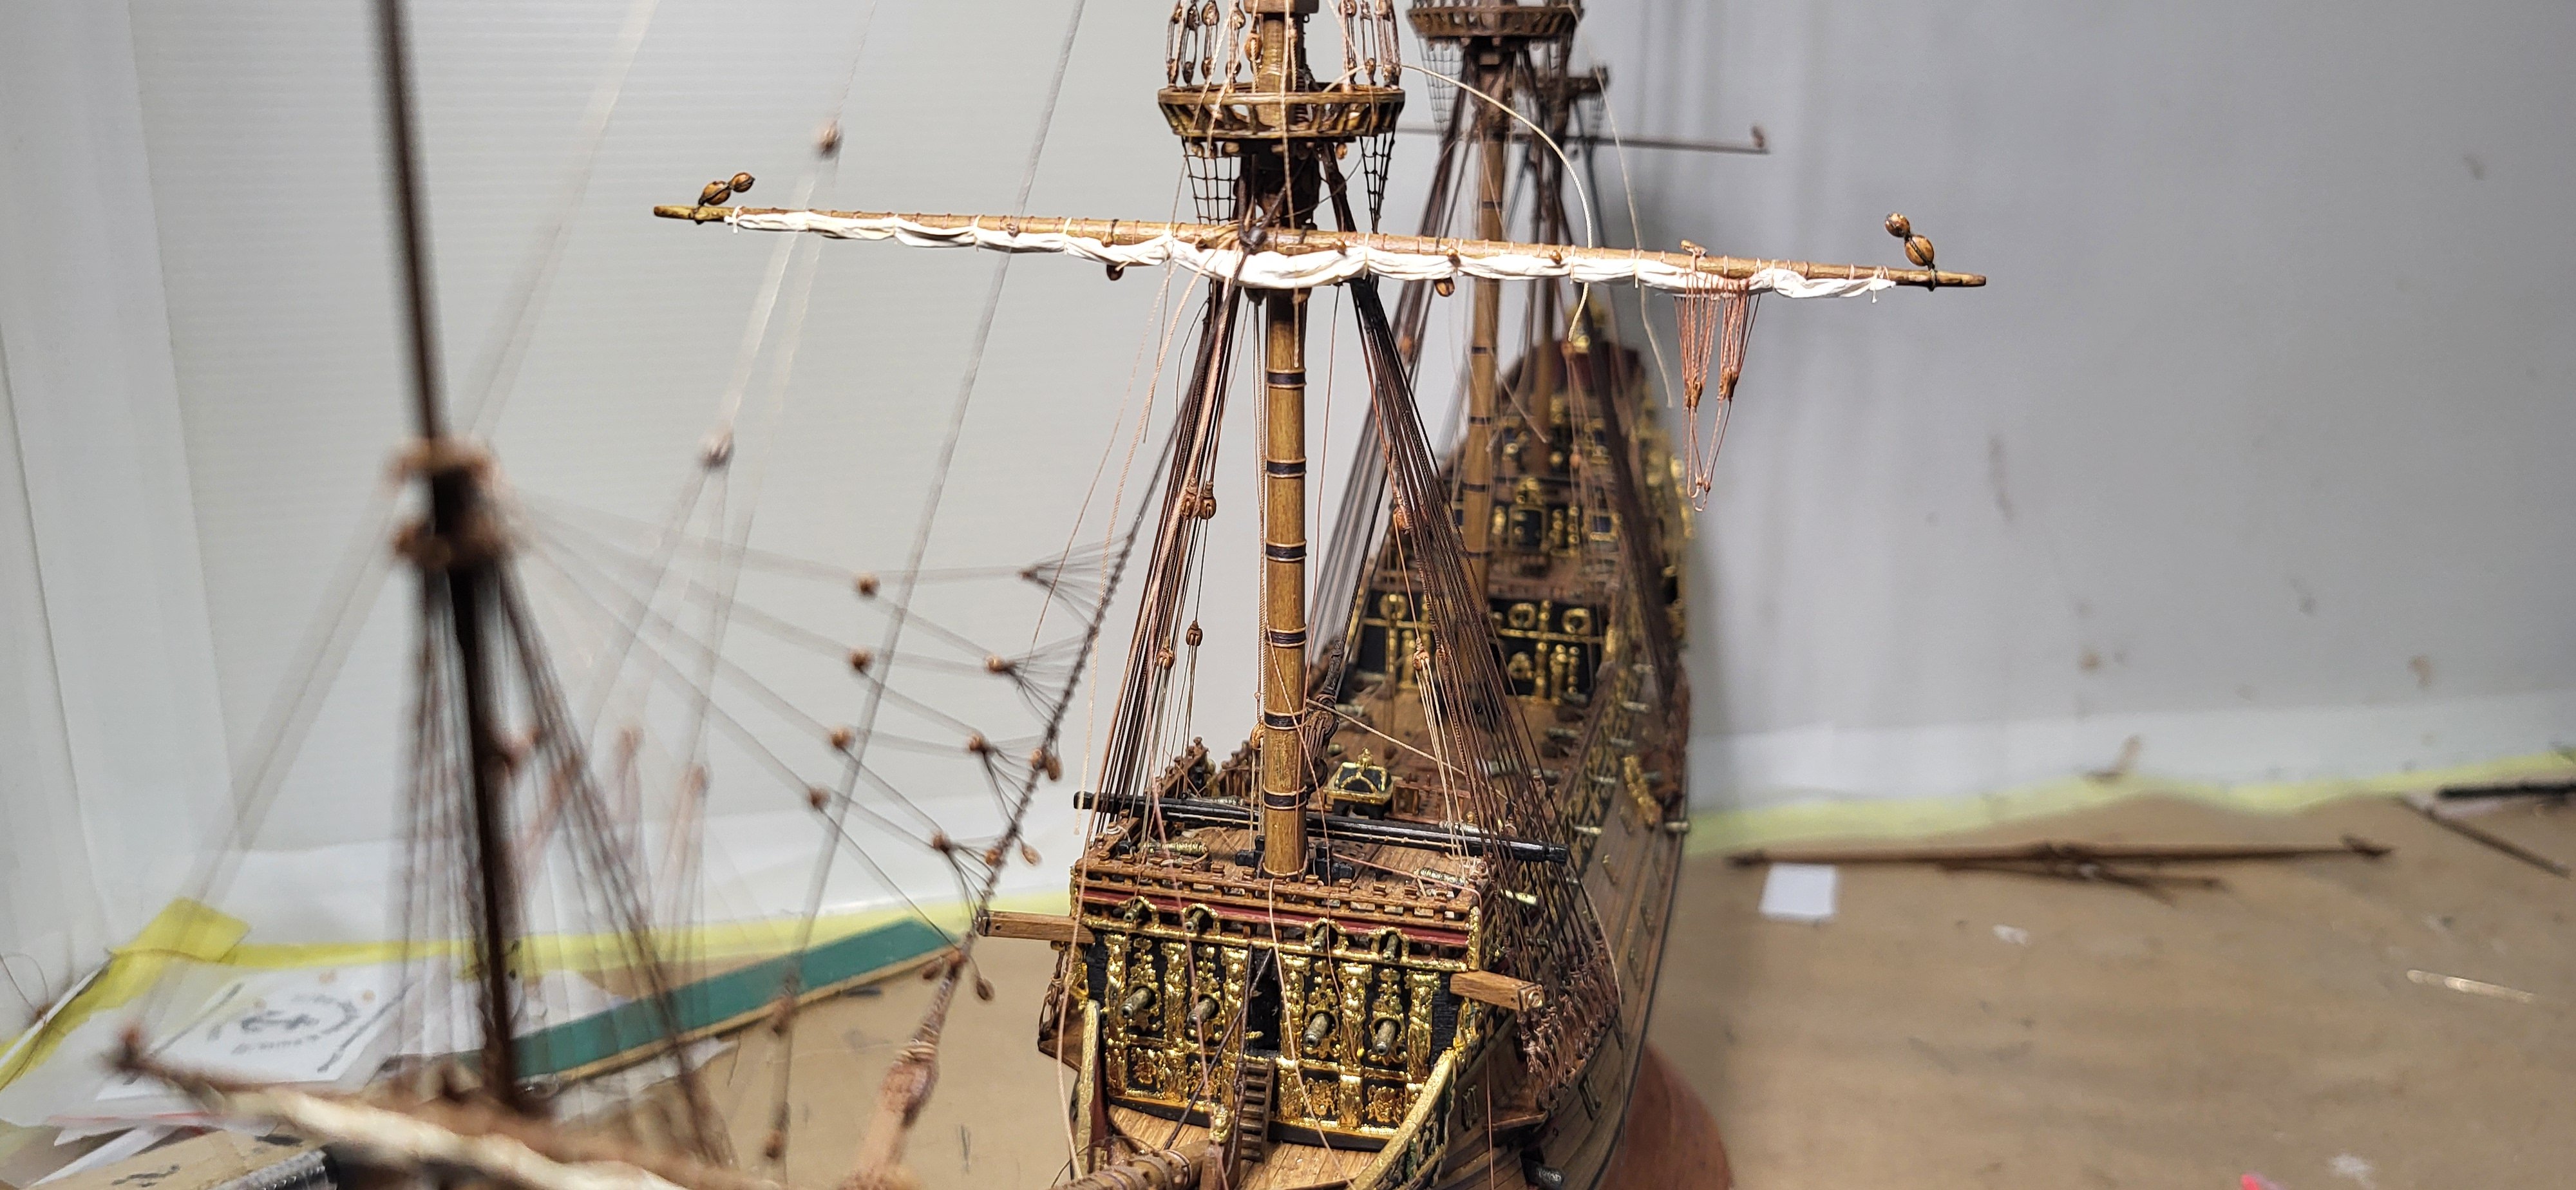
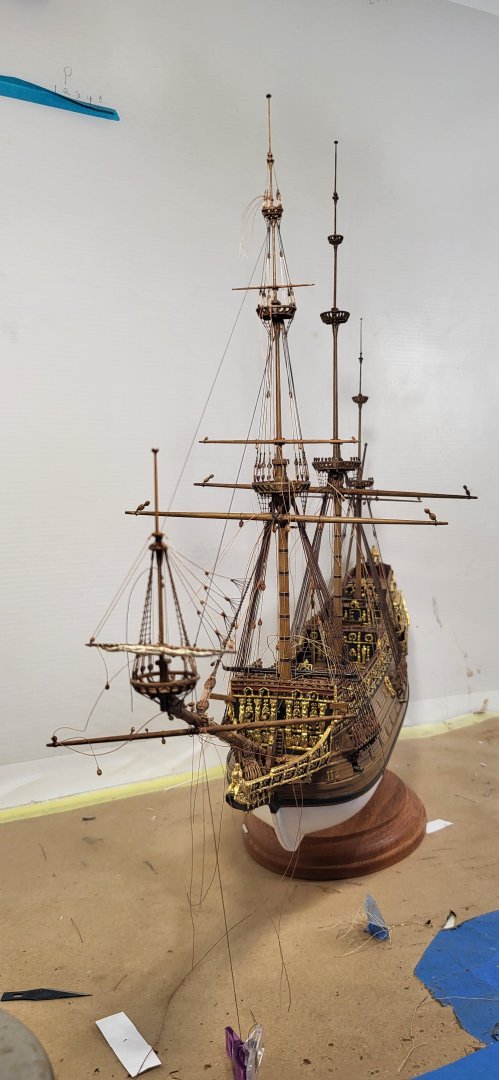
The Fore course yard is finally installed with some of the rigging completed, still much more left to do but is looking ok, thanks for looking. Michael D.

- 324 replies
-
- 8
-
-
-
- Sovereign of the Seas
- Airfix
- (and 1 more)
-
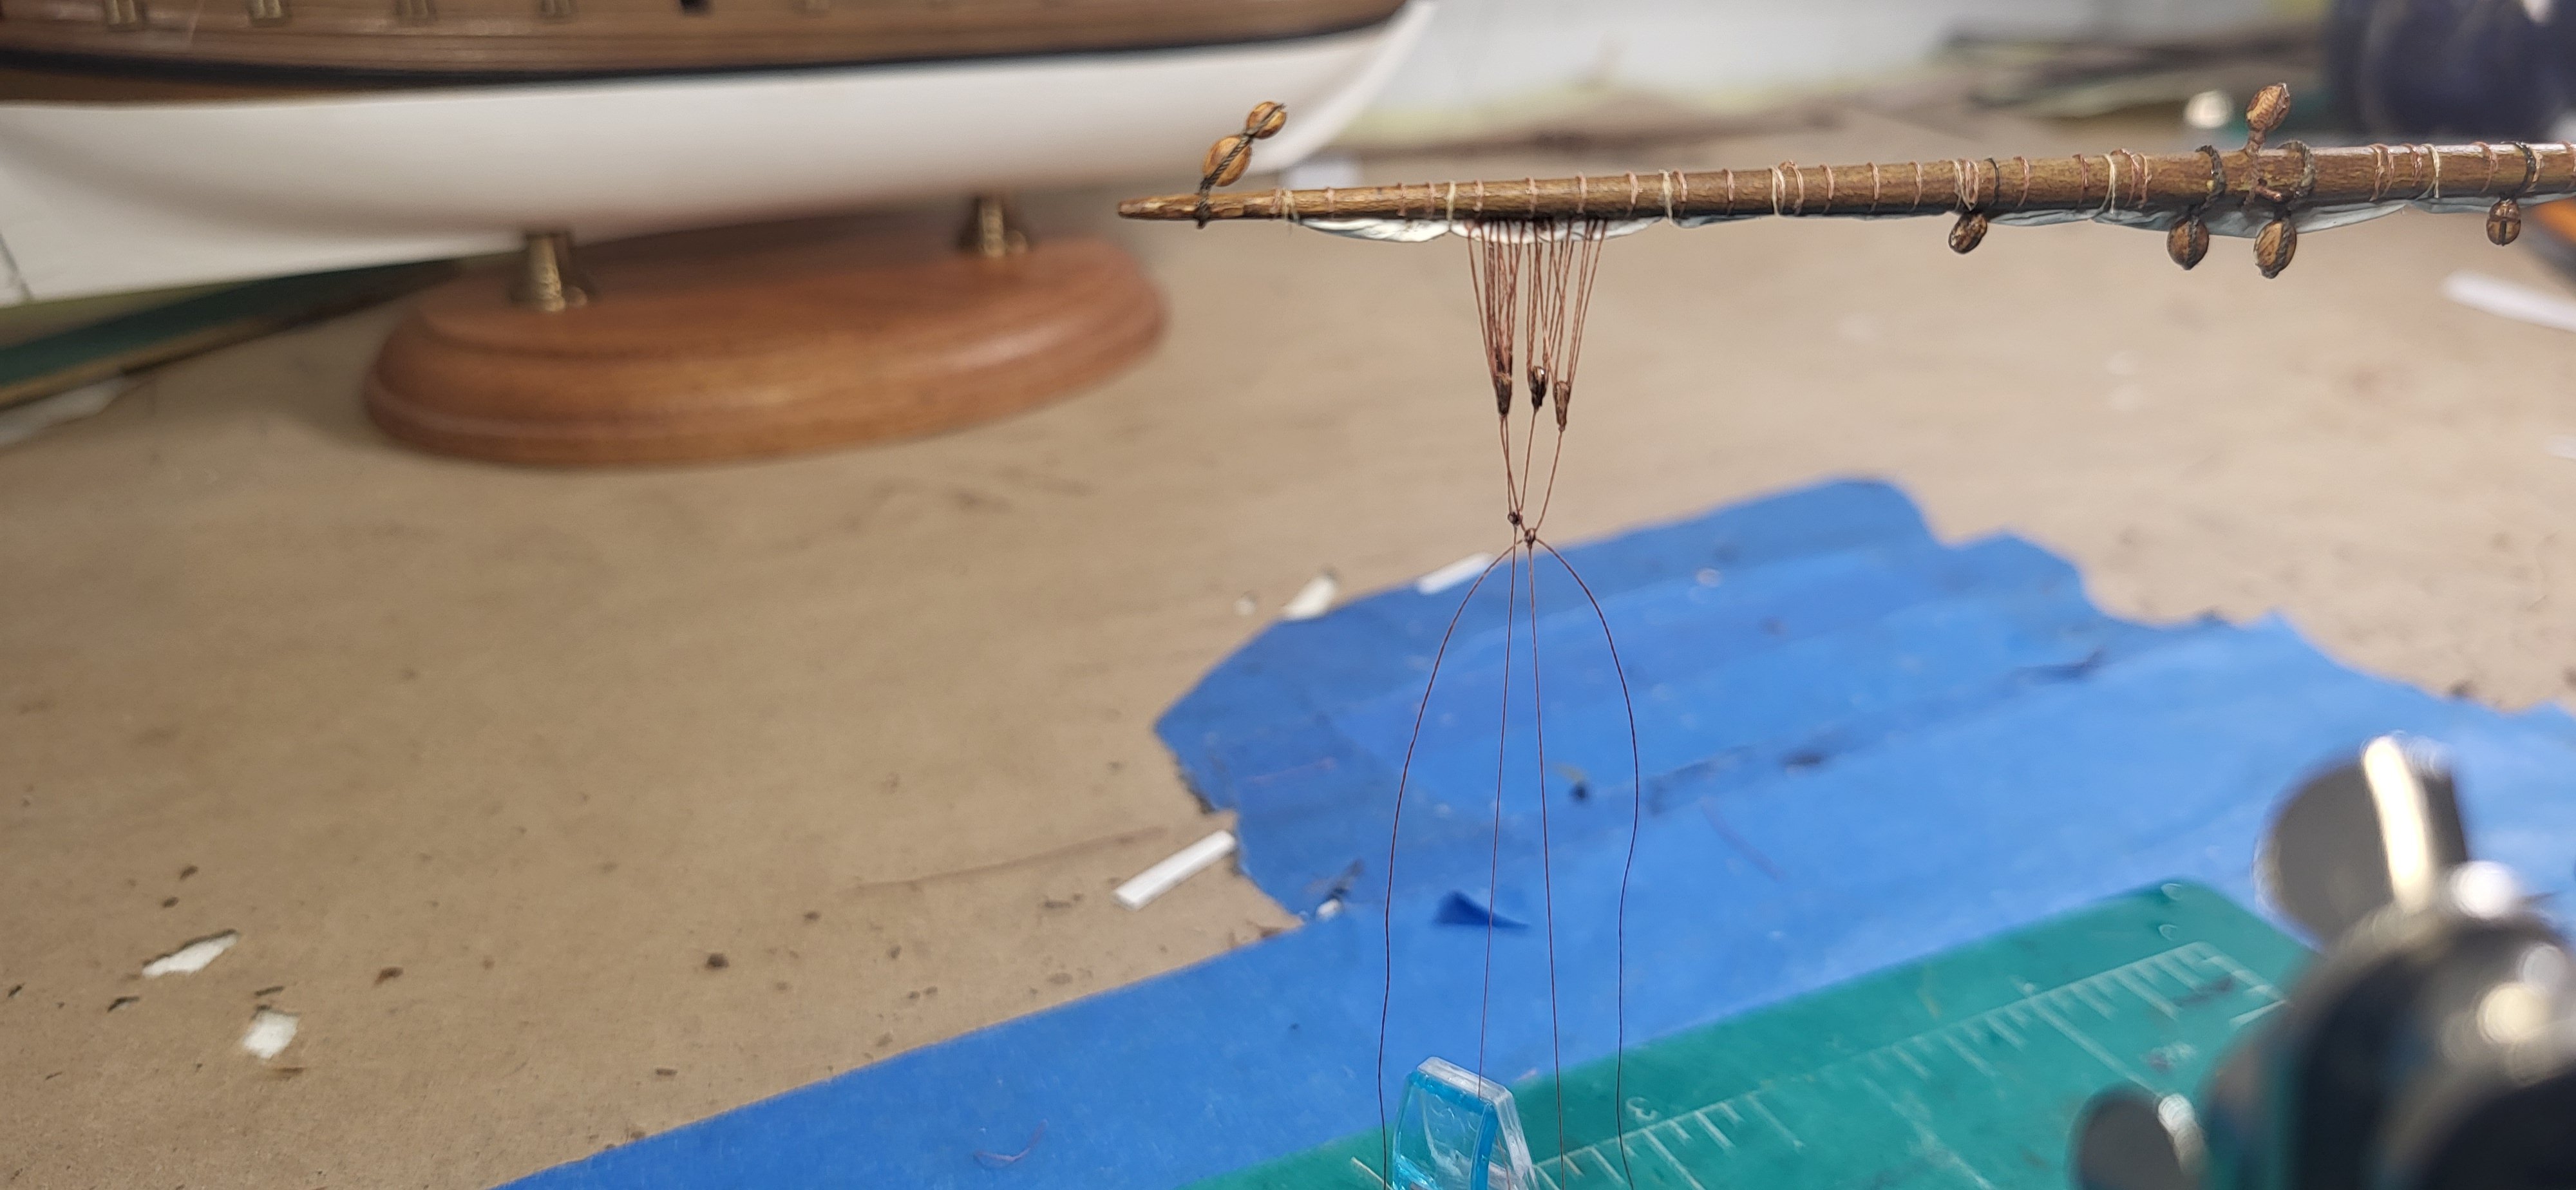
The port side martnets are completed and challenging to say the least, the crow feet on the fore side was straight forward feeding them over the sail and trimming them on the back side once the glue set, for the aft side I just cut to length and tucked them up to the underside of the yard, I wasn't too concerned about all the crow feet being taught as I suspect there be some loose ones during the gathering of the sail. The bridle in reality is one piece, but I faked it by passing to two ends thru a bulleye in opposite direction, glued then snipped the ends, I did the same thing with the legs running thru the sister block, once the yard is set the fall will start at the stay collar, thru the sister block, thru a block on the collar and down to the deck. Thanks for looking. Michael D.


- 324 replies
-
- 7
-
-
-
- Sovereign of the Seas
- Airfix
- (and 1 more)
-
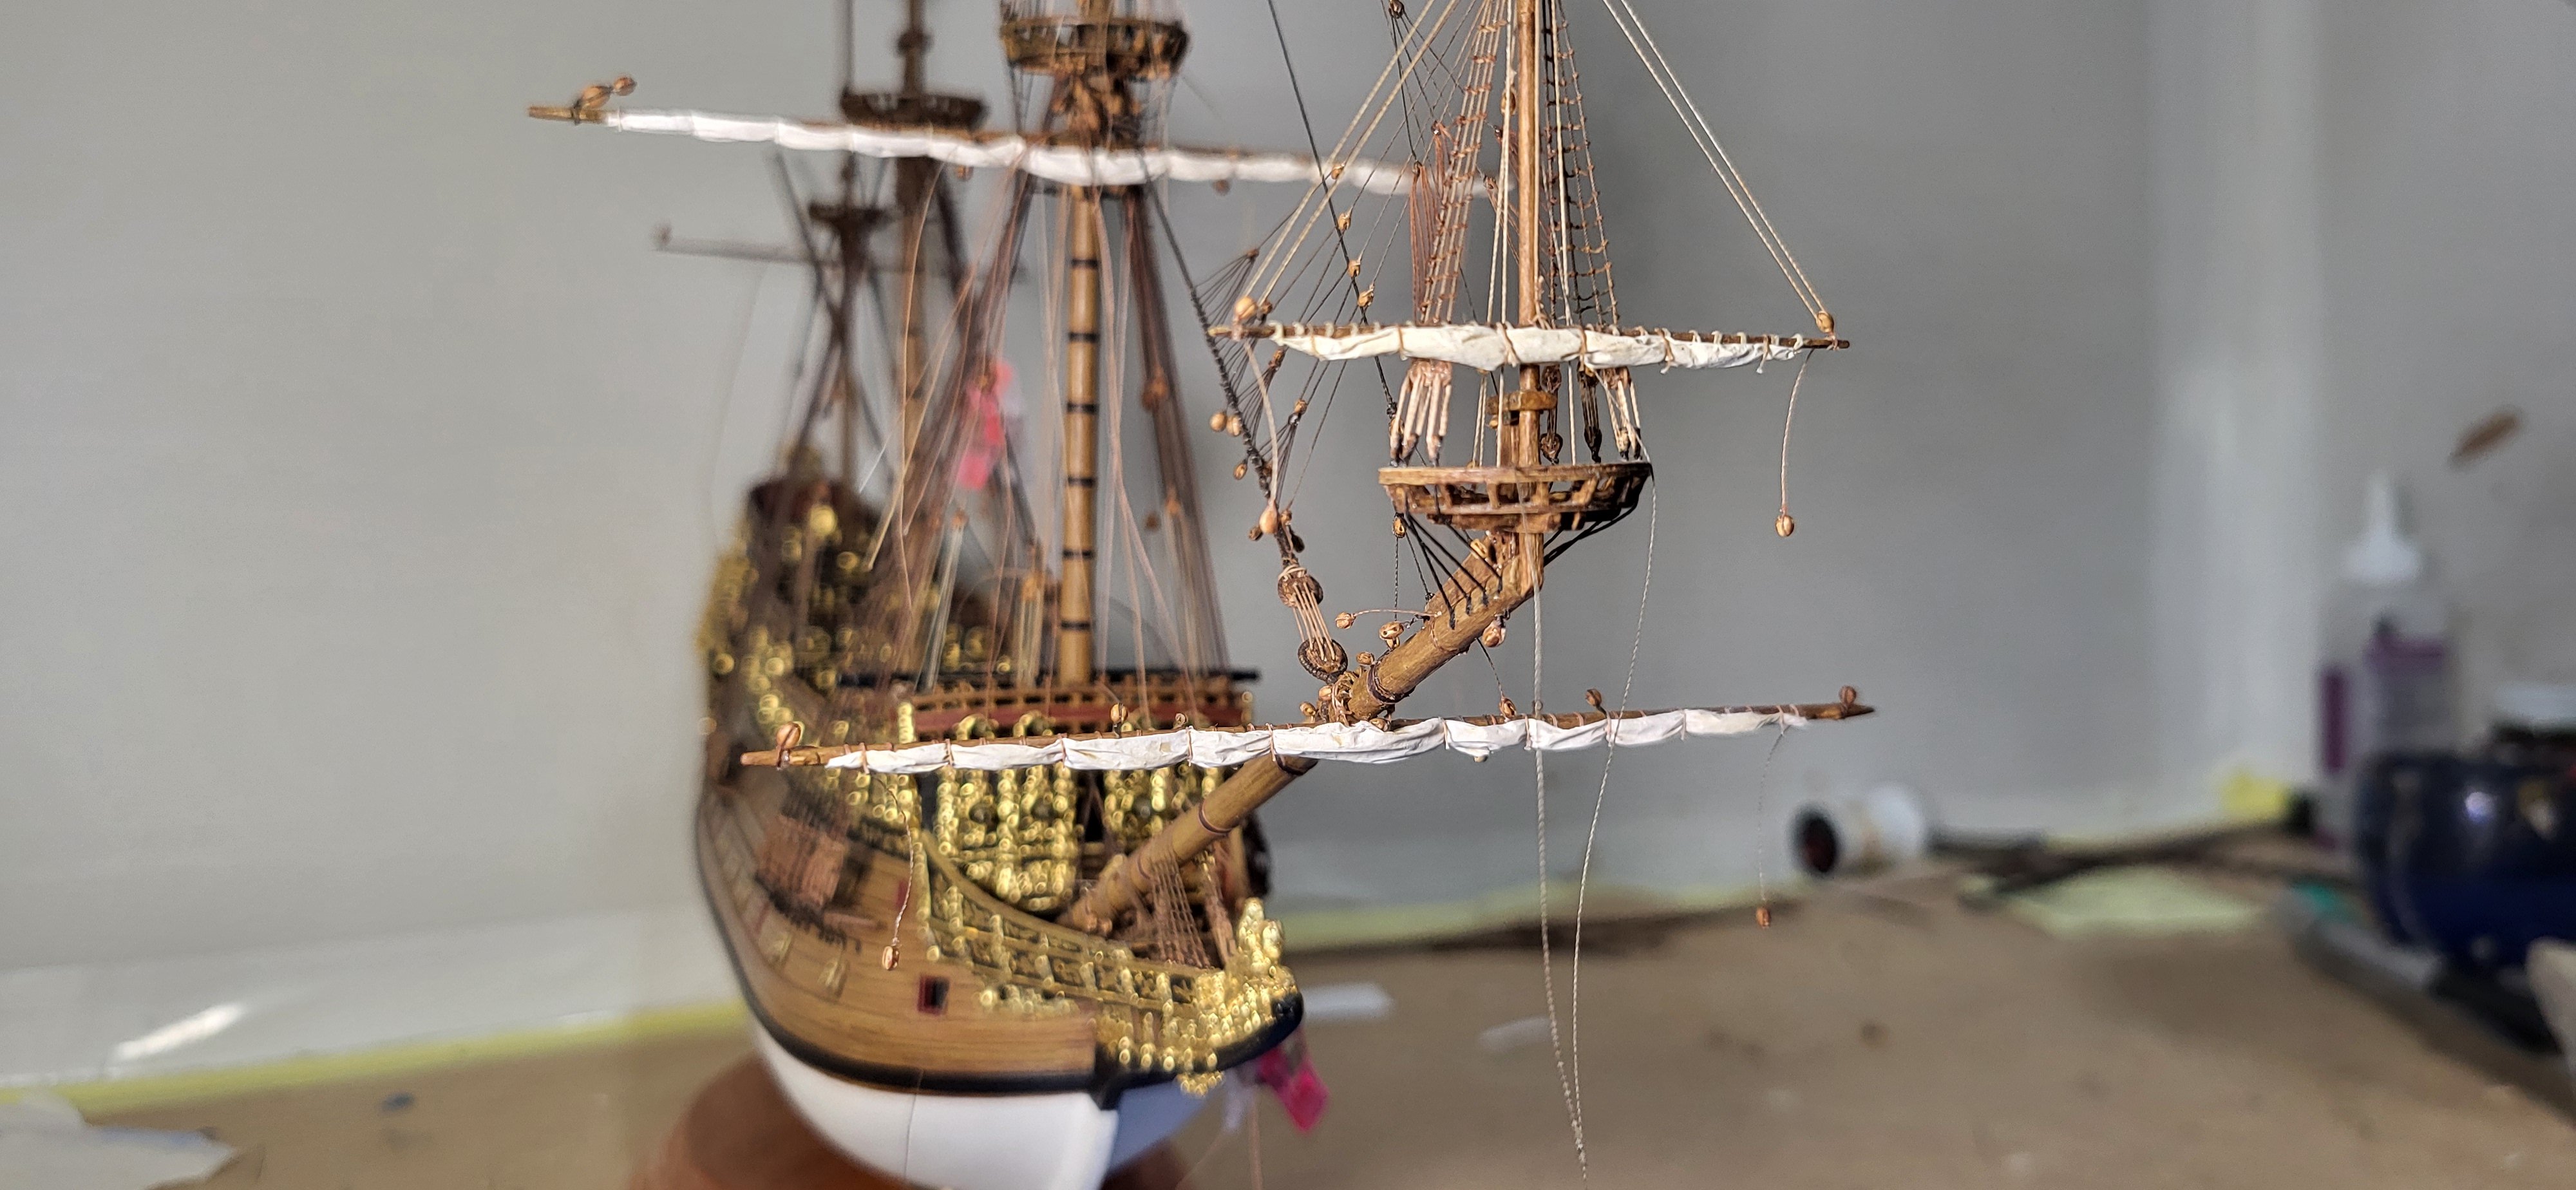
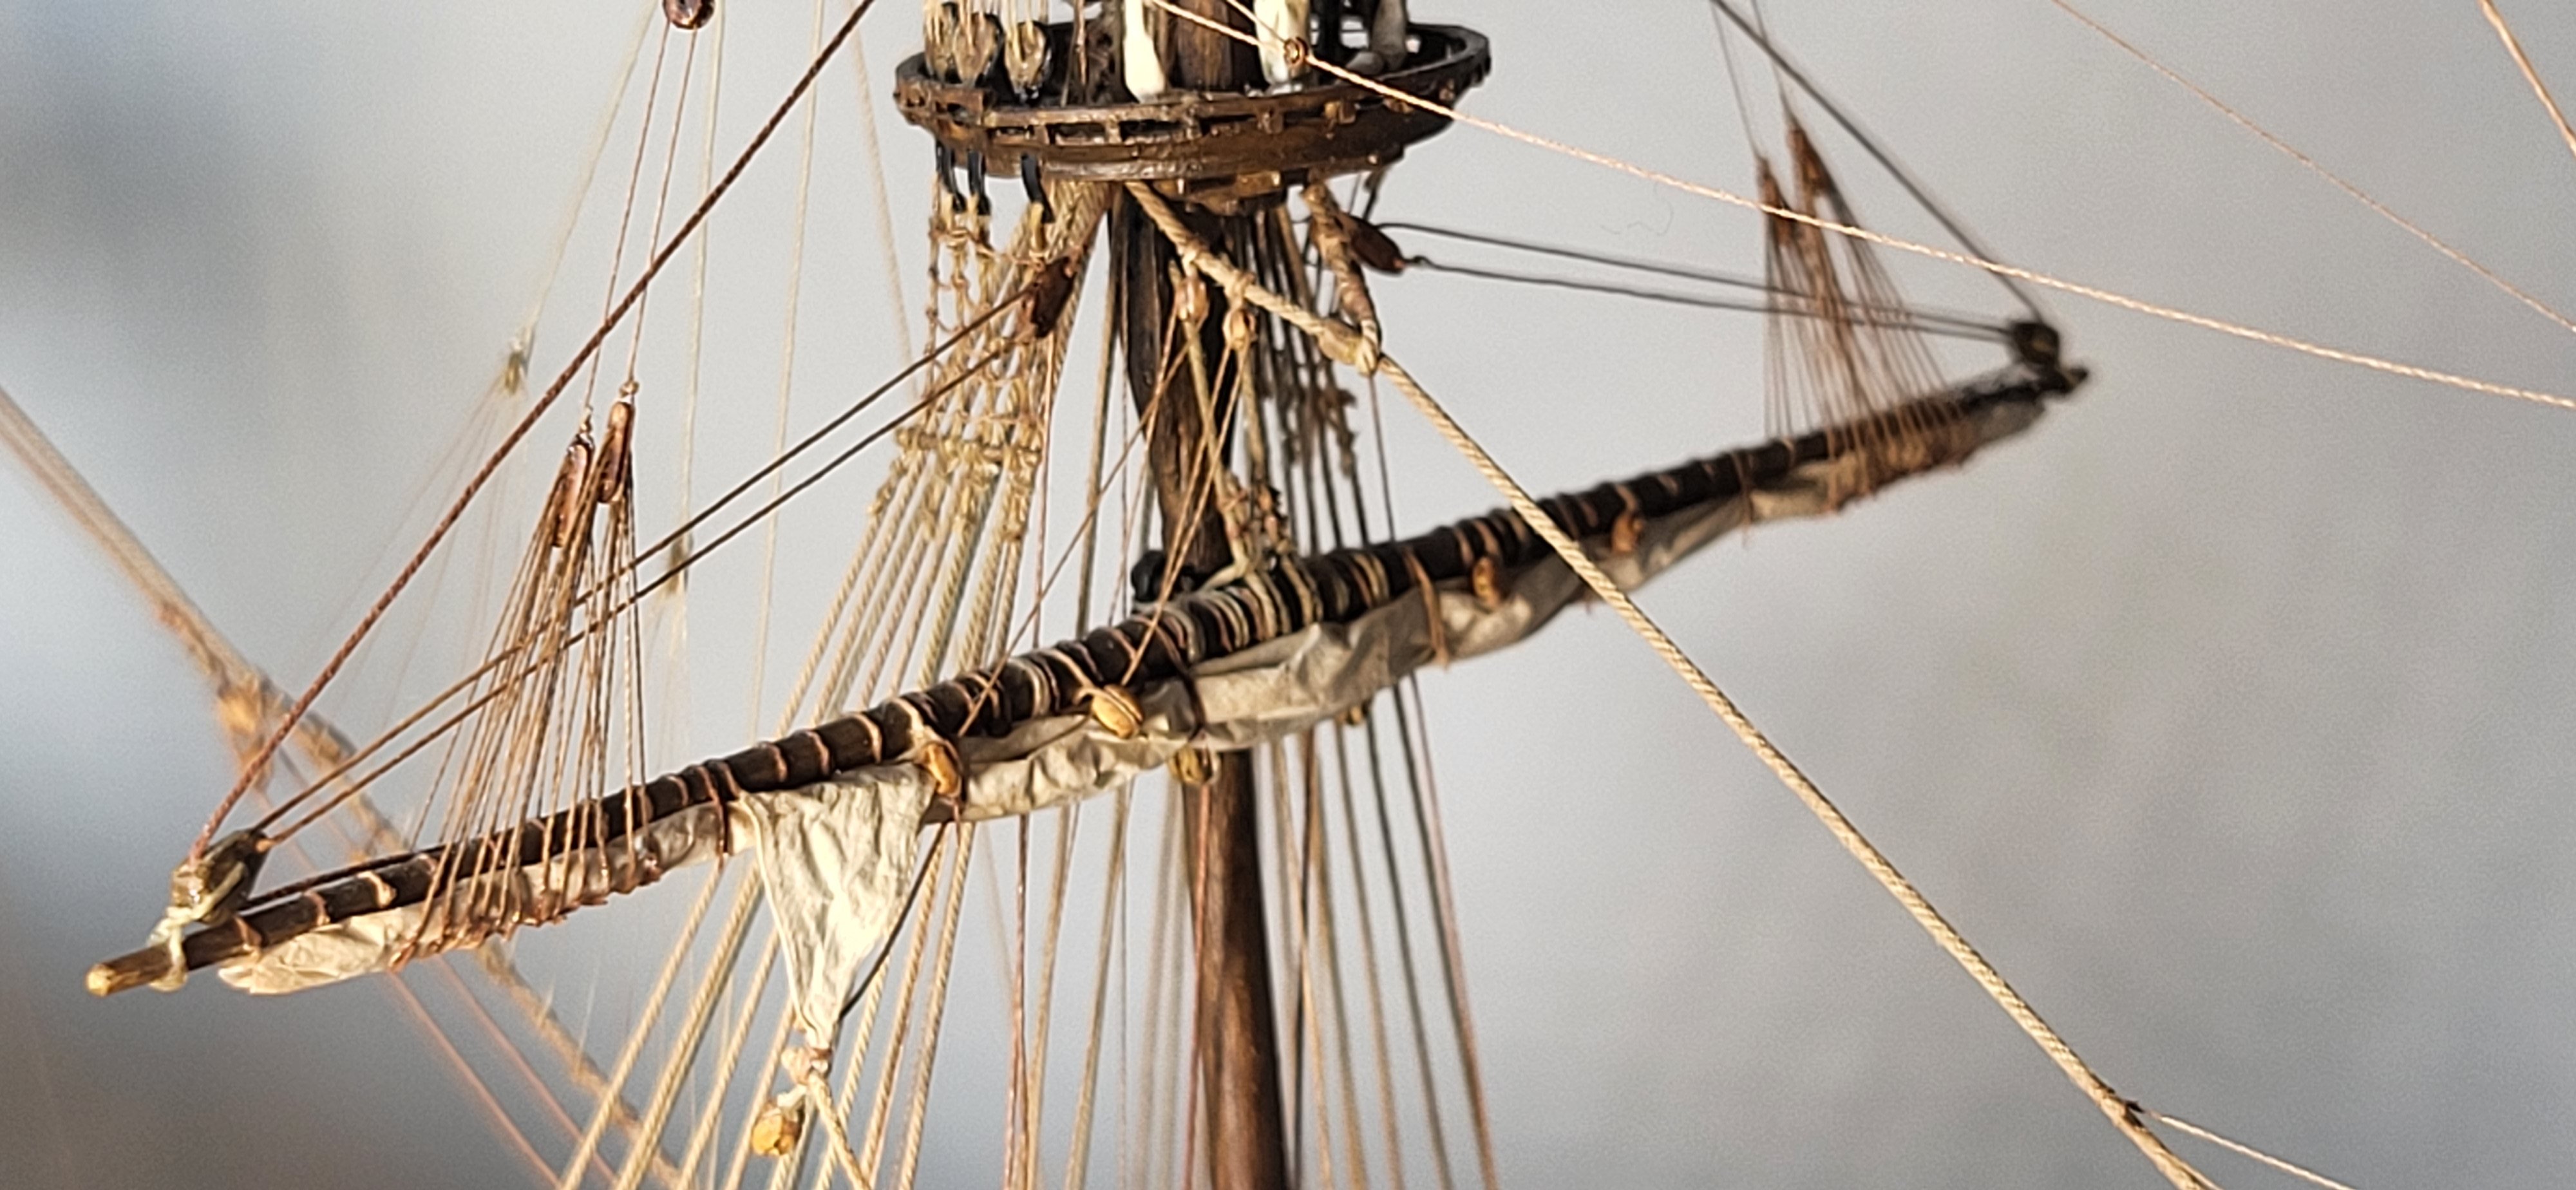
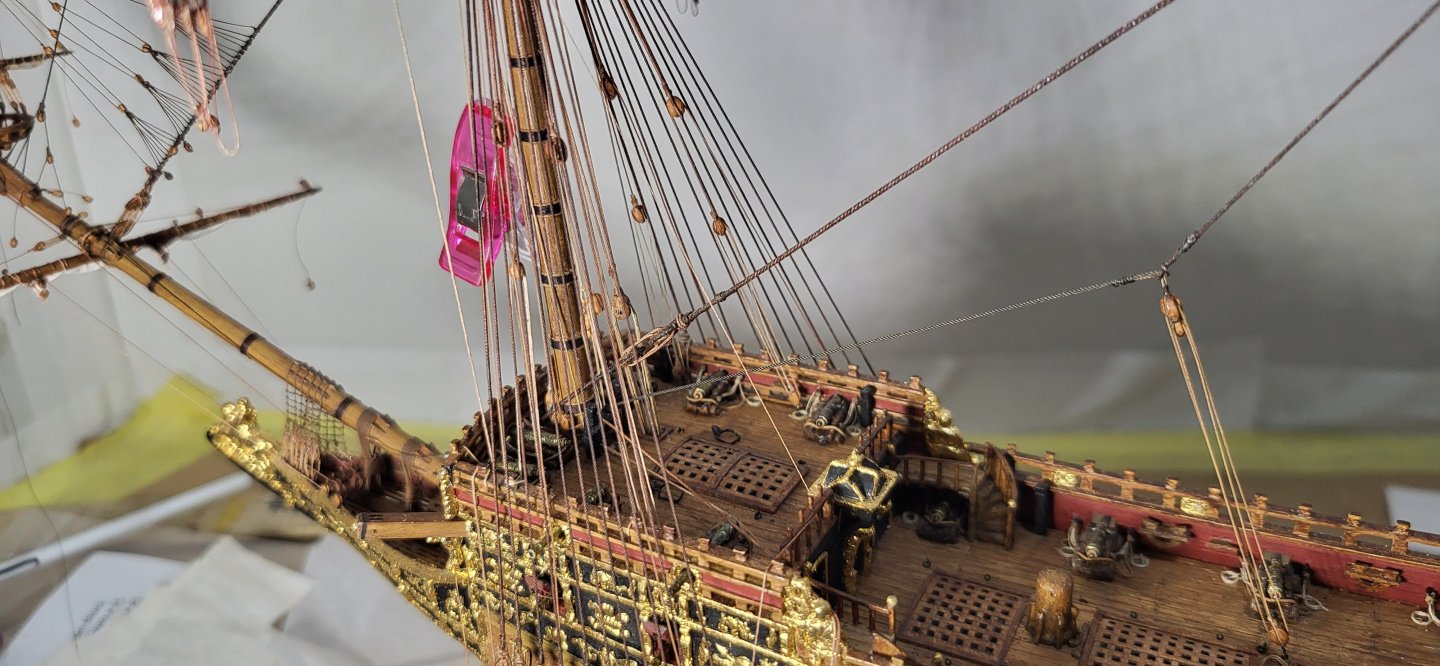
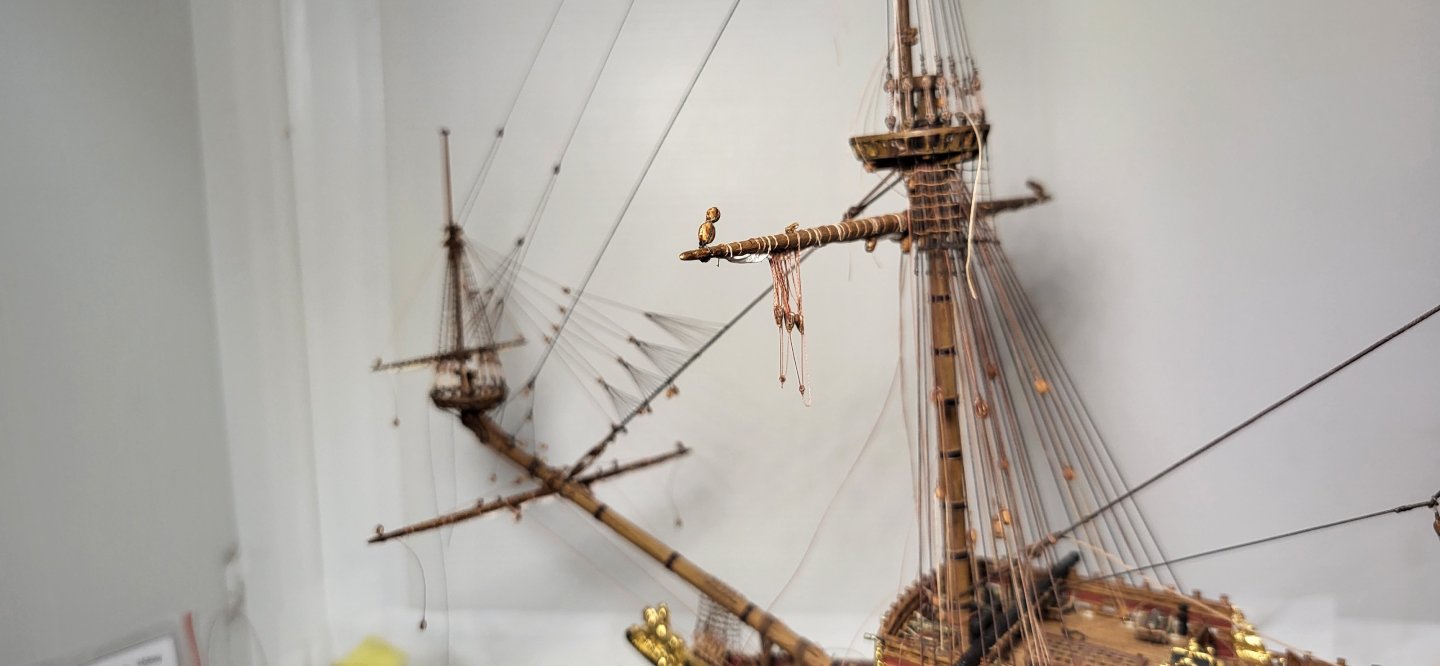
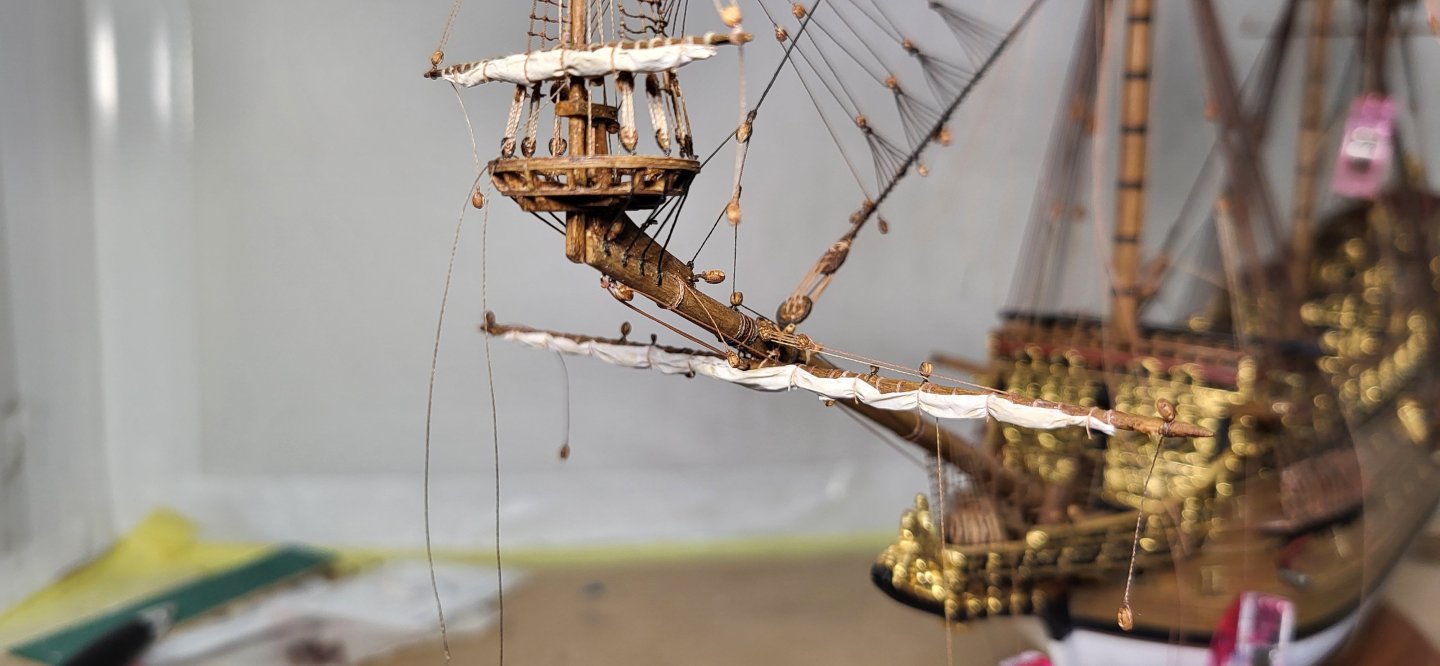
Thank you for the gracious compliment, Mark. A bit more progress on the spritsail rigging, I've attached the clews, rigged the clew lines and the 3 buntlines, all of these are led to the range and belayed. As much as I want to continue in this area, I need to shift my focus on attaching the fore course yard as the remaining rigging will be in the way. Michael D.

- 324 replies
-
- 6
-
-
-
- Sovereign of the Seas
- Airfix
- (and 1 more)
-
Ian I have a feeling you won't be able to hide this one from the wife. Looks like another epic build in the making👍 Michael D.
- 24 replies
-
- 4
-
-
-

-
- ferry
- Europic Ferry
- (and 1 more)
-
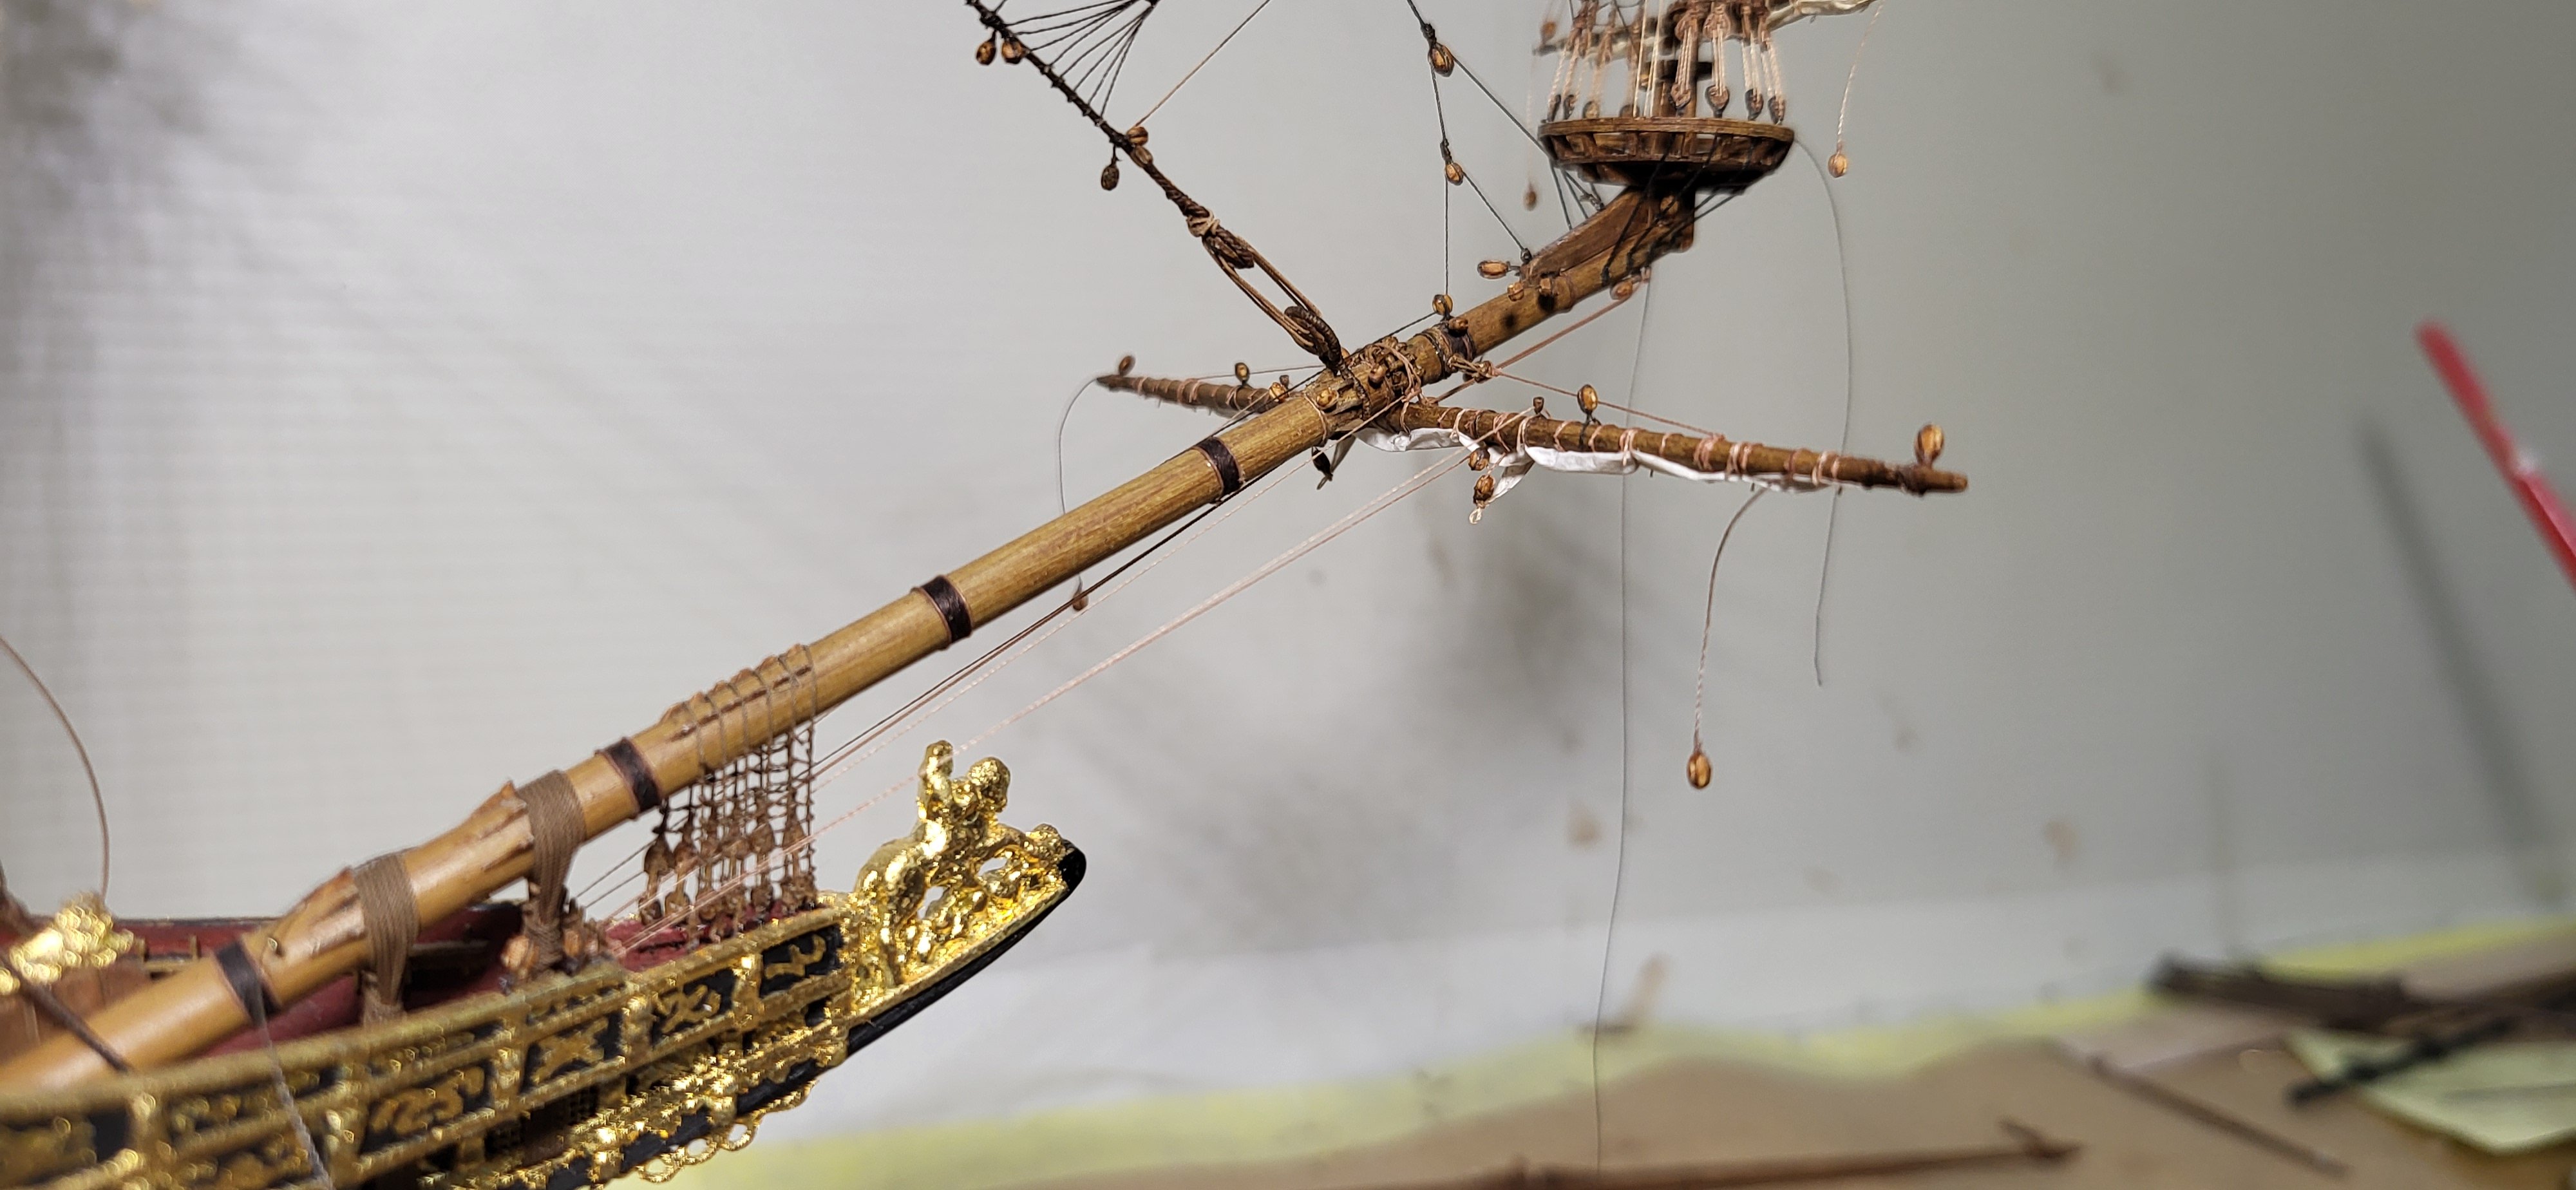
This info is very interesting and contradicts most everything I've read in my limited research, thank you for sharing your extensive research, Mark. I'm in agreement with Trevor though on the lack of rigging leading to the forecastle timberheads, at the time I was too focused on the Payne engraving and others builds when reworking the beakhead area when I came across information that Paynes engraving was made prior to S.O.S even being rigged, by then it was too late and I think I made reference regretting this decision, at any rate I will run a few lines to the forecastle as Illustrated in an earlier post and move forward. I appreciate you guys taking time to share your thoughts. Small update, I've rigged the halliard which is lead to the range and working on the standing lifts void of any knots, sometimes these have knots according to Lee's, anyways thanks for looking. Michael D.
- 324 replies
-
- 7
-
-
- Sovereign of the Seas
- Airfix
- (and 1 more)
-
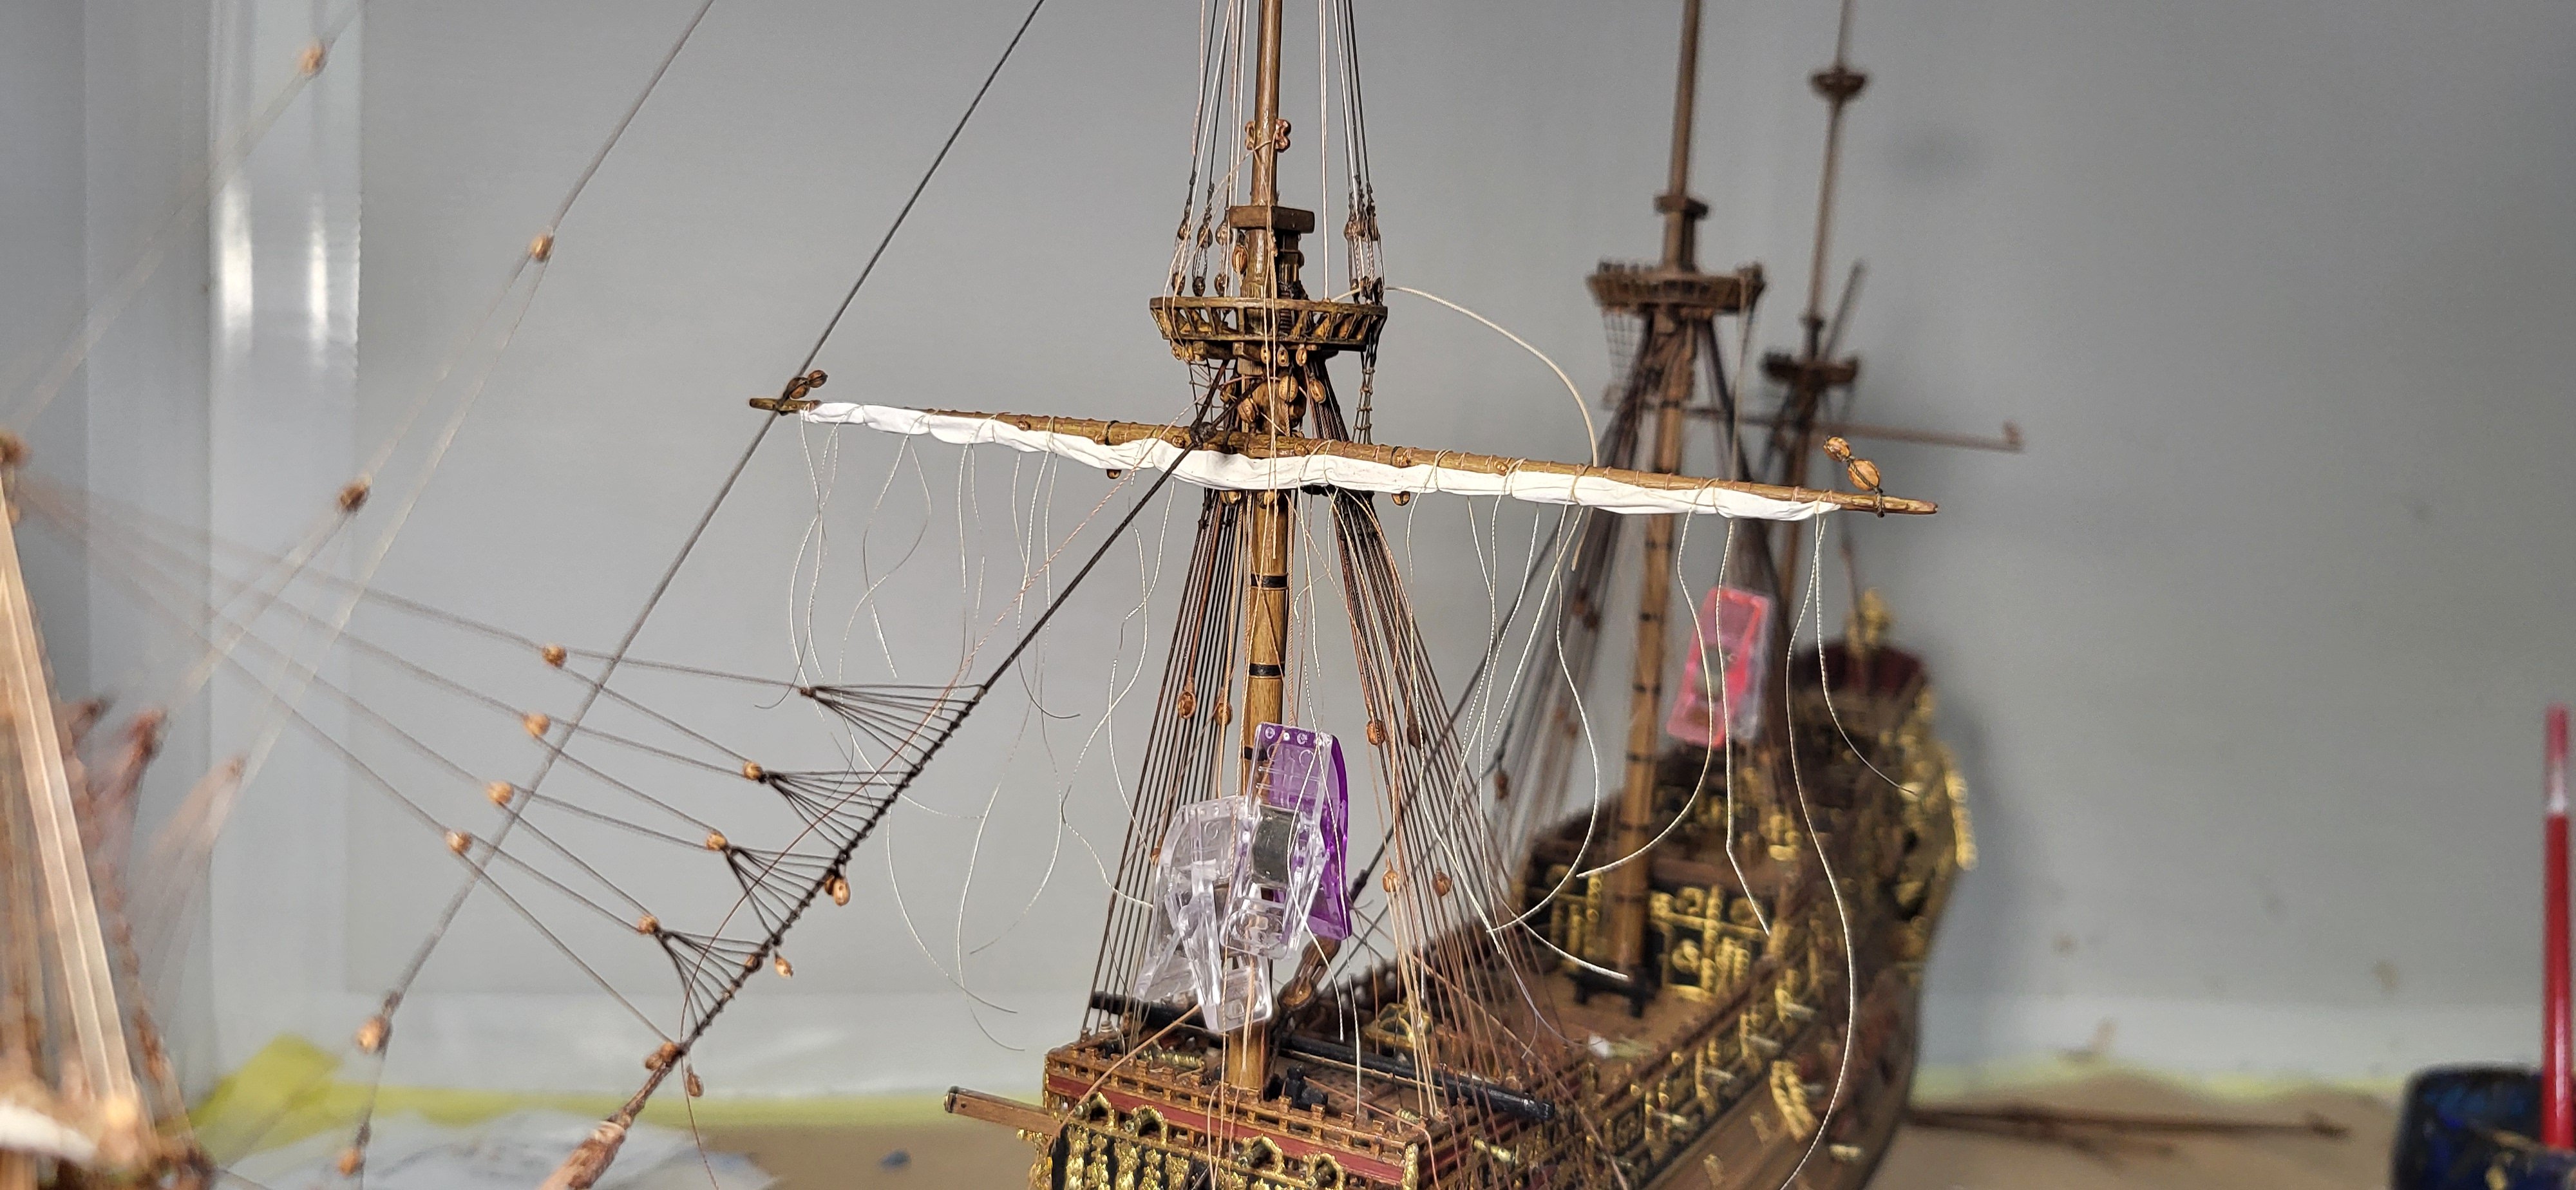
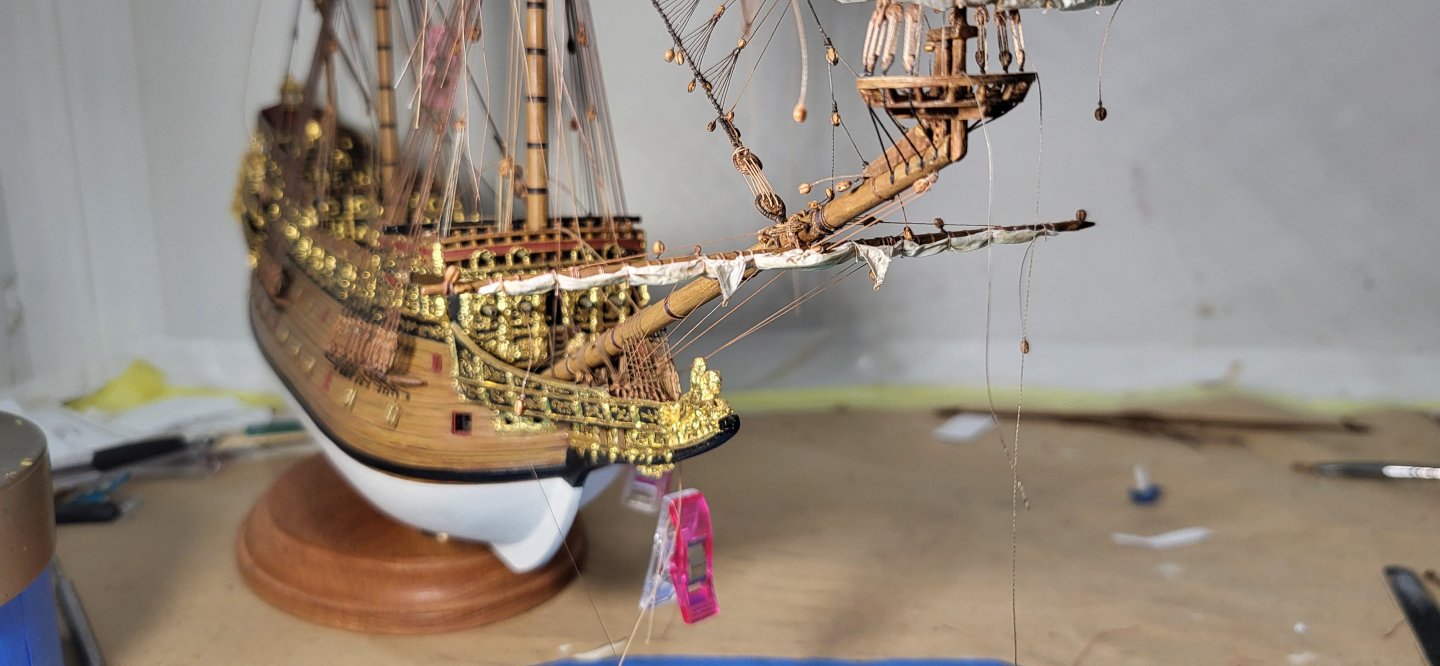
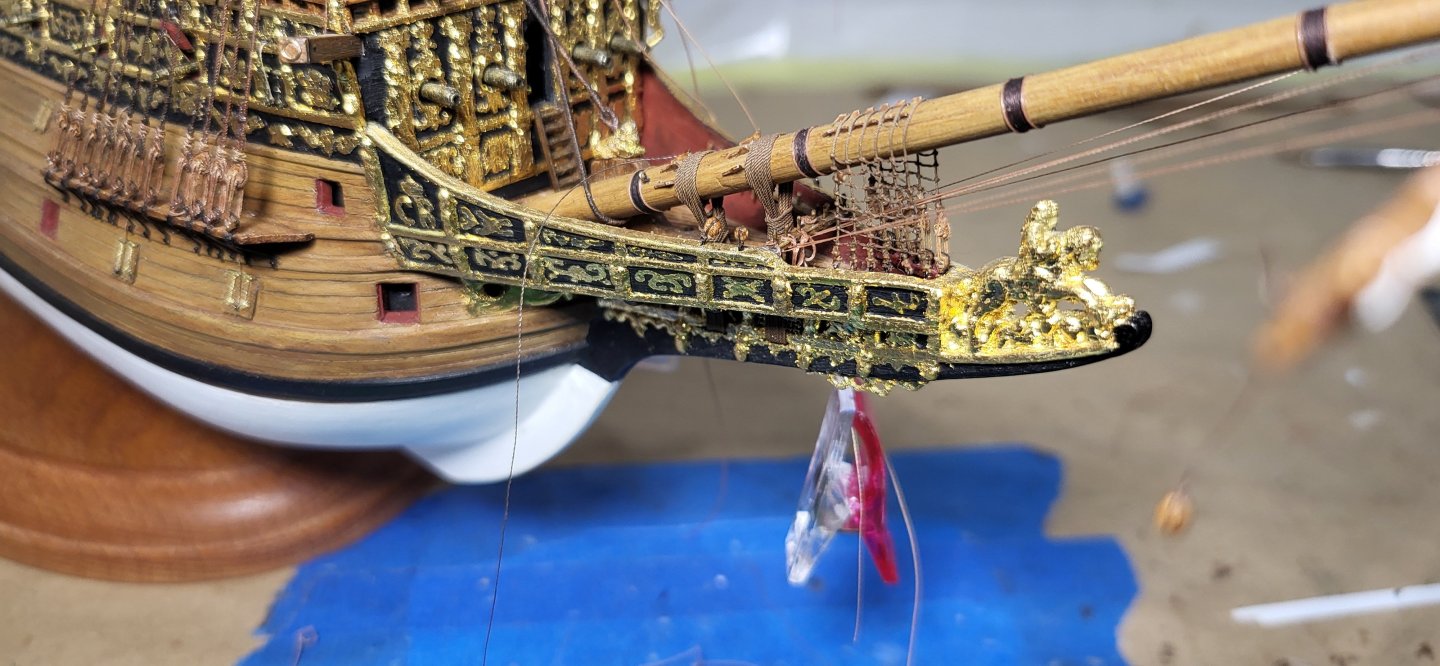
The spritsail is bent to the yard and furled and the yard attached to the bowsprit, still much fine tuning and rigging left to do but at least it's one less loose piece floating around. Michael D.

- 324 replies
-
- 11
-
-
-
- Sovereign of the Seas
- Airfix
- (and 1 more)
-
Thank you, Frank, for the wonderful compliment. I've been experimenting with how I'll be displaying the martnets and this is early in the mockup stage, I think using just two will suffice in their presentation at this scale. I'm still undecided on where to run the falls, either under the top attached to the stay or taken up to the topmast top with pendants. As always, I appreciate the comments and recommendations. Michael D.


- 324 replies
-
- 7
-
-
- Sovereign of the Seas
- Airfix
- (and 1 more)
-
Your sewing machines stitches per inch look really good at that scale, better then most I've seen and your hand stitch looks really good as well...hehe. Sails look great!! Michael D.
- 97 replies
-
- 1
-
-
- Corel
- Große Jacht
- (and 2 more)
-
Thanks Trevor, I will attach the clue of the sail later on and still undecided on the martnets, I might just rig them as I did on my Vasa with 2 per side instead of 4 and I think will look fine as in this picture. Michael D.

- 324 replies
-
- 5
-
-
-
- Sovereign of the Seas
- Airfix
- (and 1 more)
-
The furled sail is for the most part completed along with mocking up the rigging of the single jeer, next I'll be working on the sprit sail yard while I figure out the martnet situation. Thanks for looking. Michael D.


- 324 replies
-
- 8
-
-
-
- Sovereign of the Seas
- Airfix
- (and 1 more)
-
Work of the fore course continues with the rigging of the buntline blocks and the furling of the sail, I still to manipulate it some and tone down the white before finishing up the gaskets but looking good so far. My plan for the martnets is to let them hang down below the yard instead of drawing them up tight above the yard like I did on the Vasa, this will be quite the challenge. Michael D.
- 324 replies
-
- 9
-
-
-
- Sovereign of the Seas
- Airfix
- (and 1 more)
-
Nice work Patrick. I've found twisting the dead eye one turn in the direction of the twist and redo the lanyards corrects this. Michael D.
-
Thank you for the compliments gentlemen, Ian the 100wt silk thread works great for the crow feet and upper stays along with the 50-60wt polyester thread for some of the other lighter lines. Tumblehome I hope my Vasa build log will be of some use to you. Wish you all the best on your build and do hope to see your progress? Michael D.
- 324 replies
-
- 2
-
-
-
- Sovereign of the Seas
- Airfix
- (and 1 more)
-
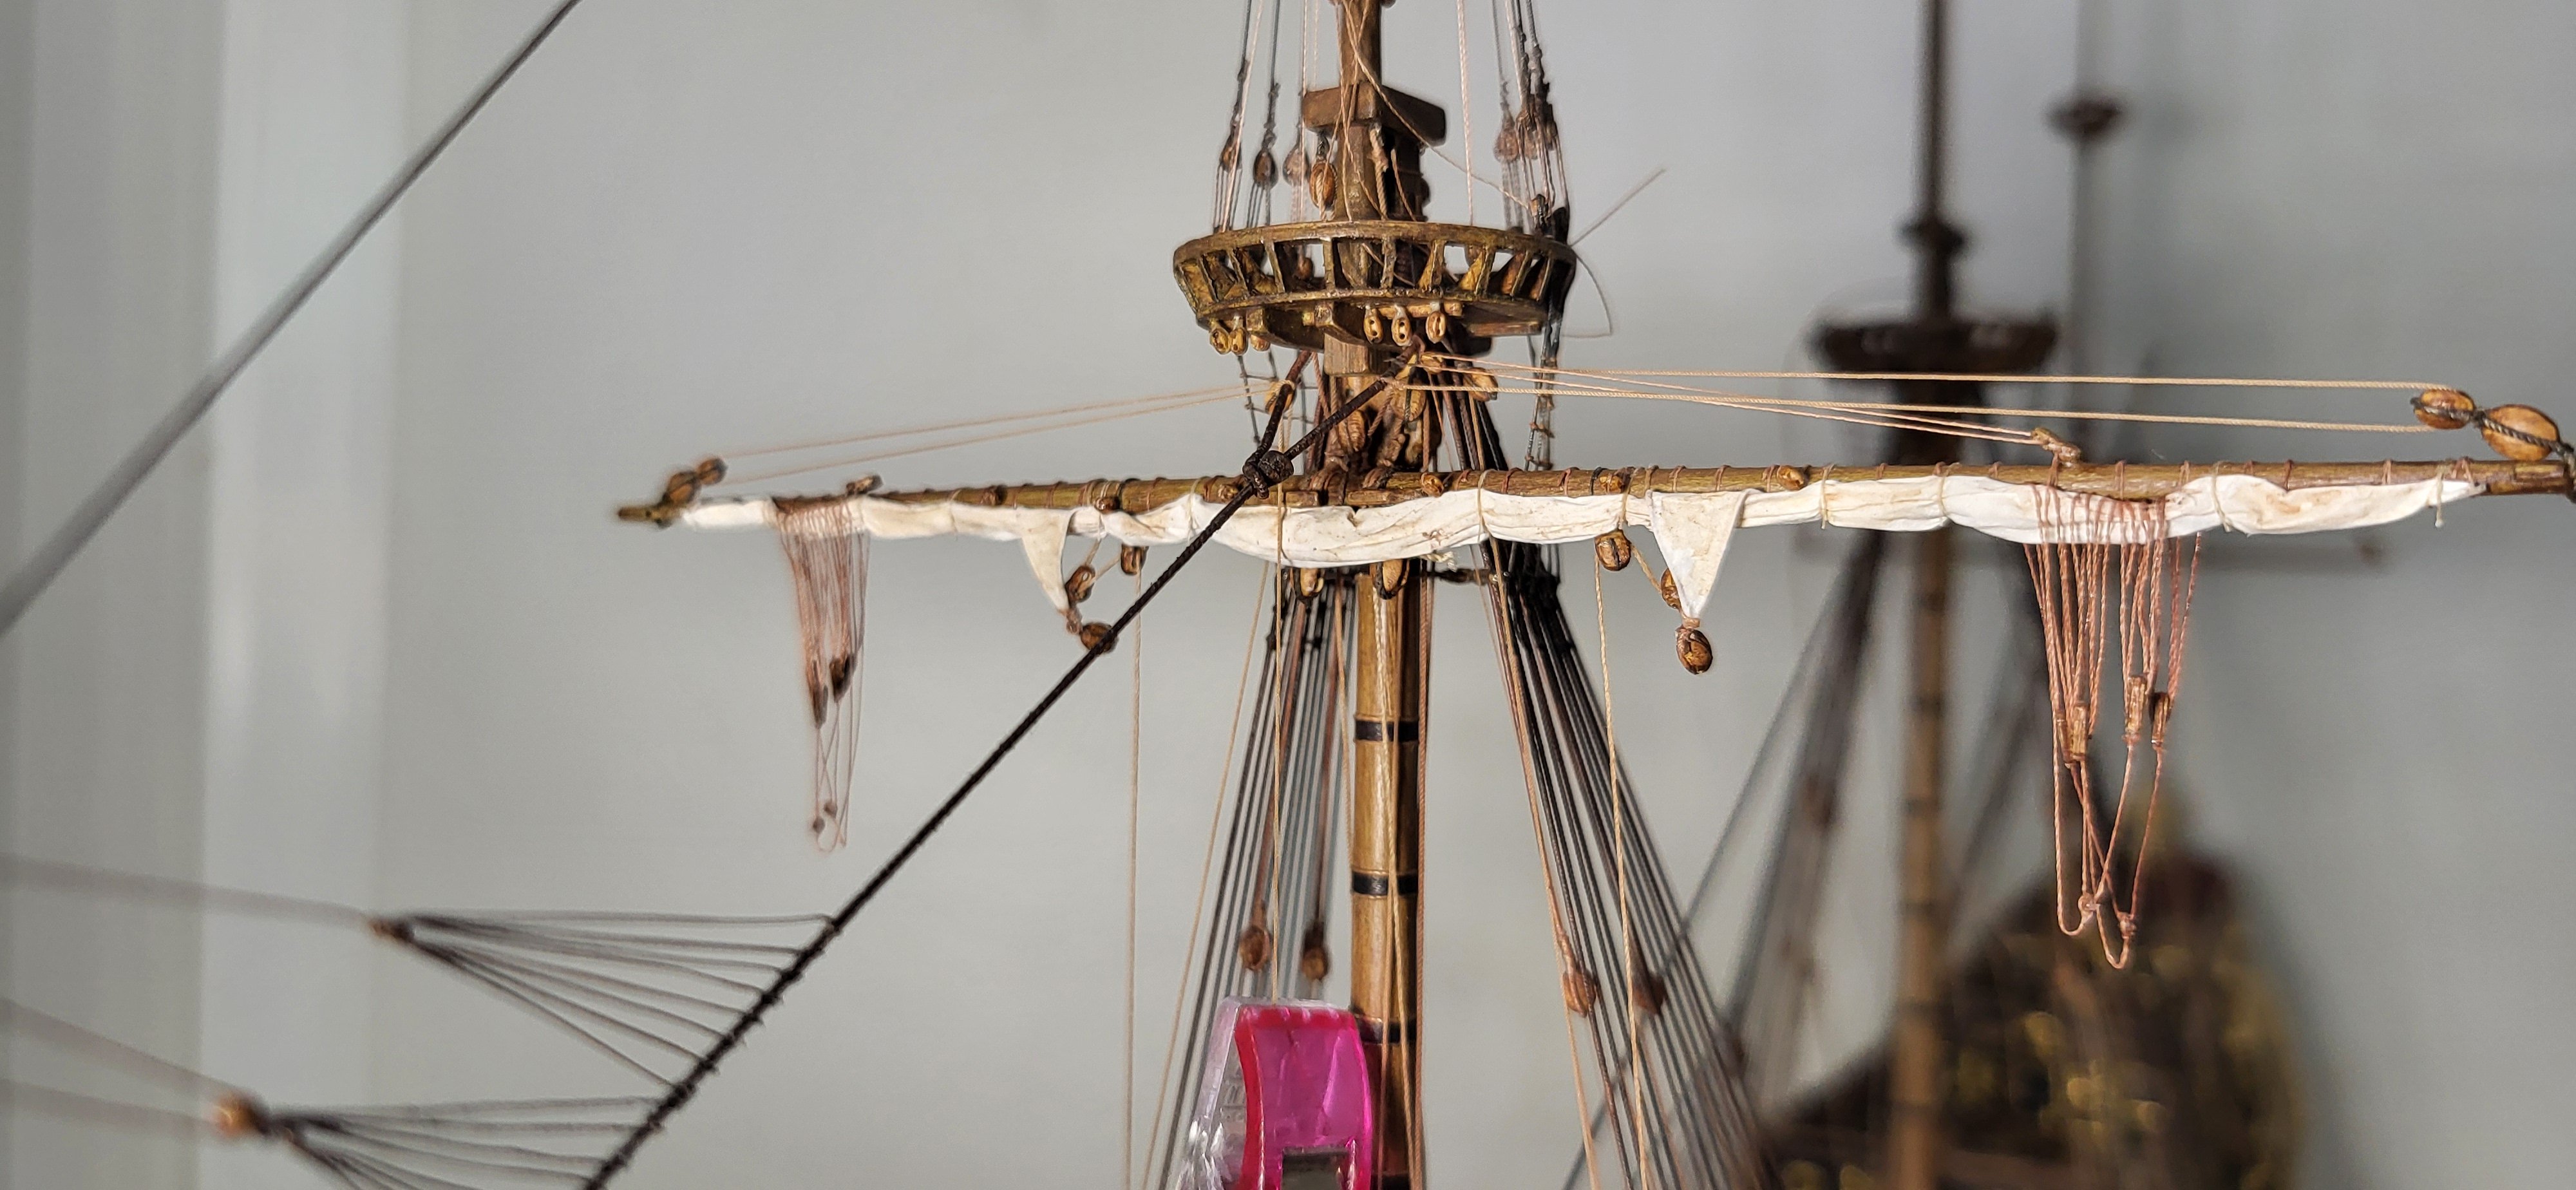
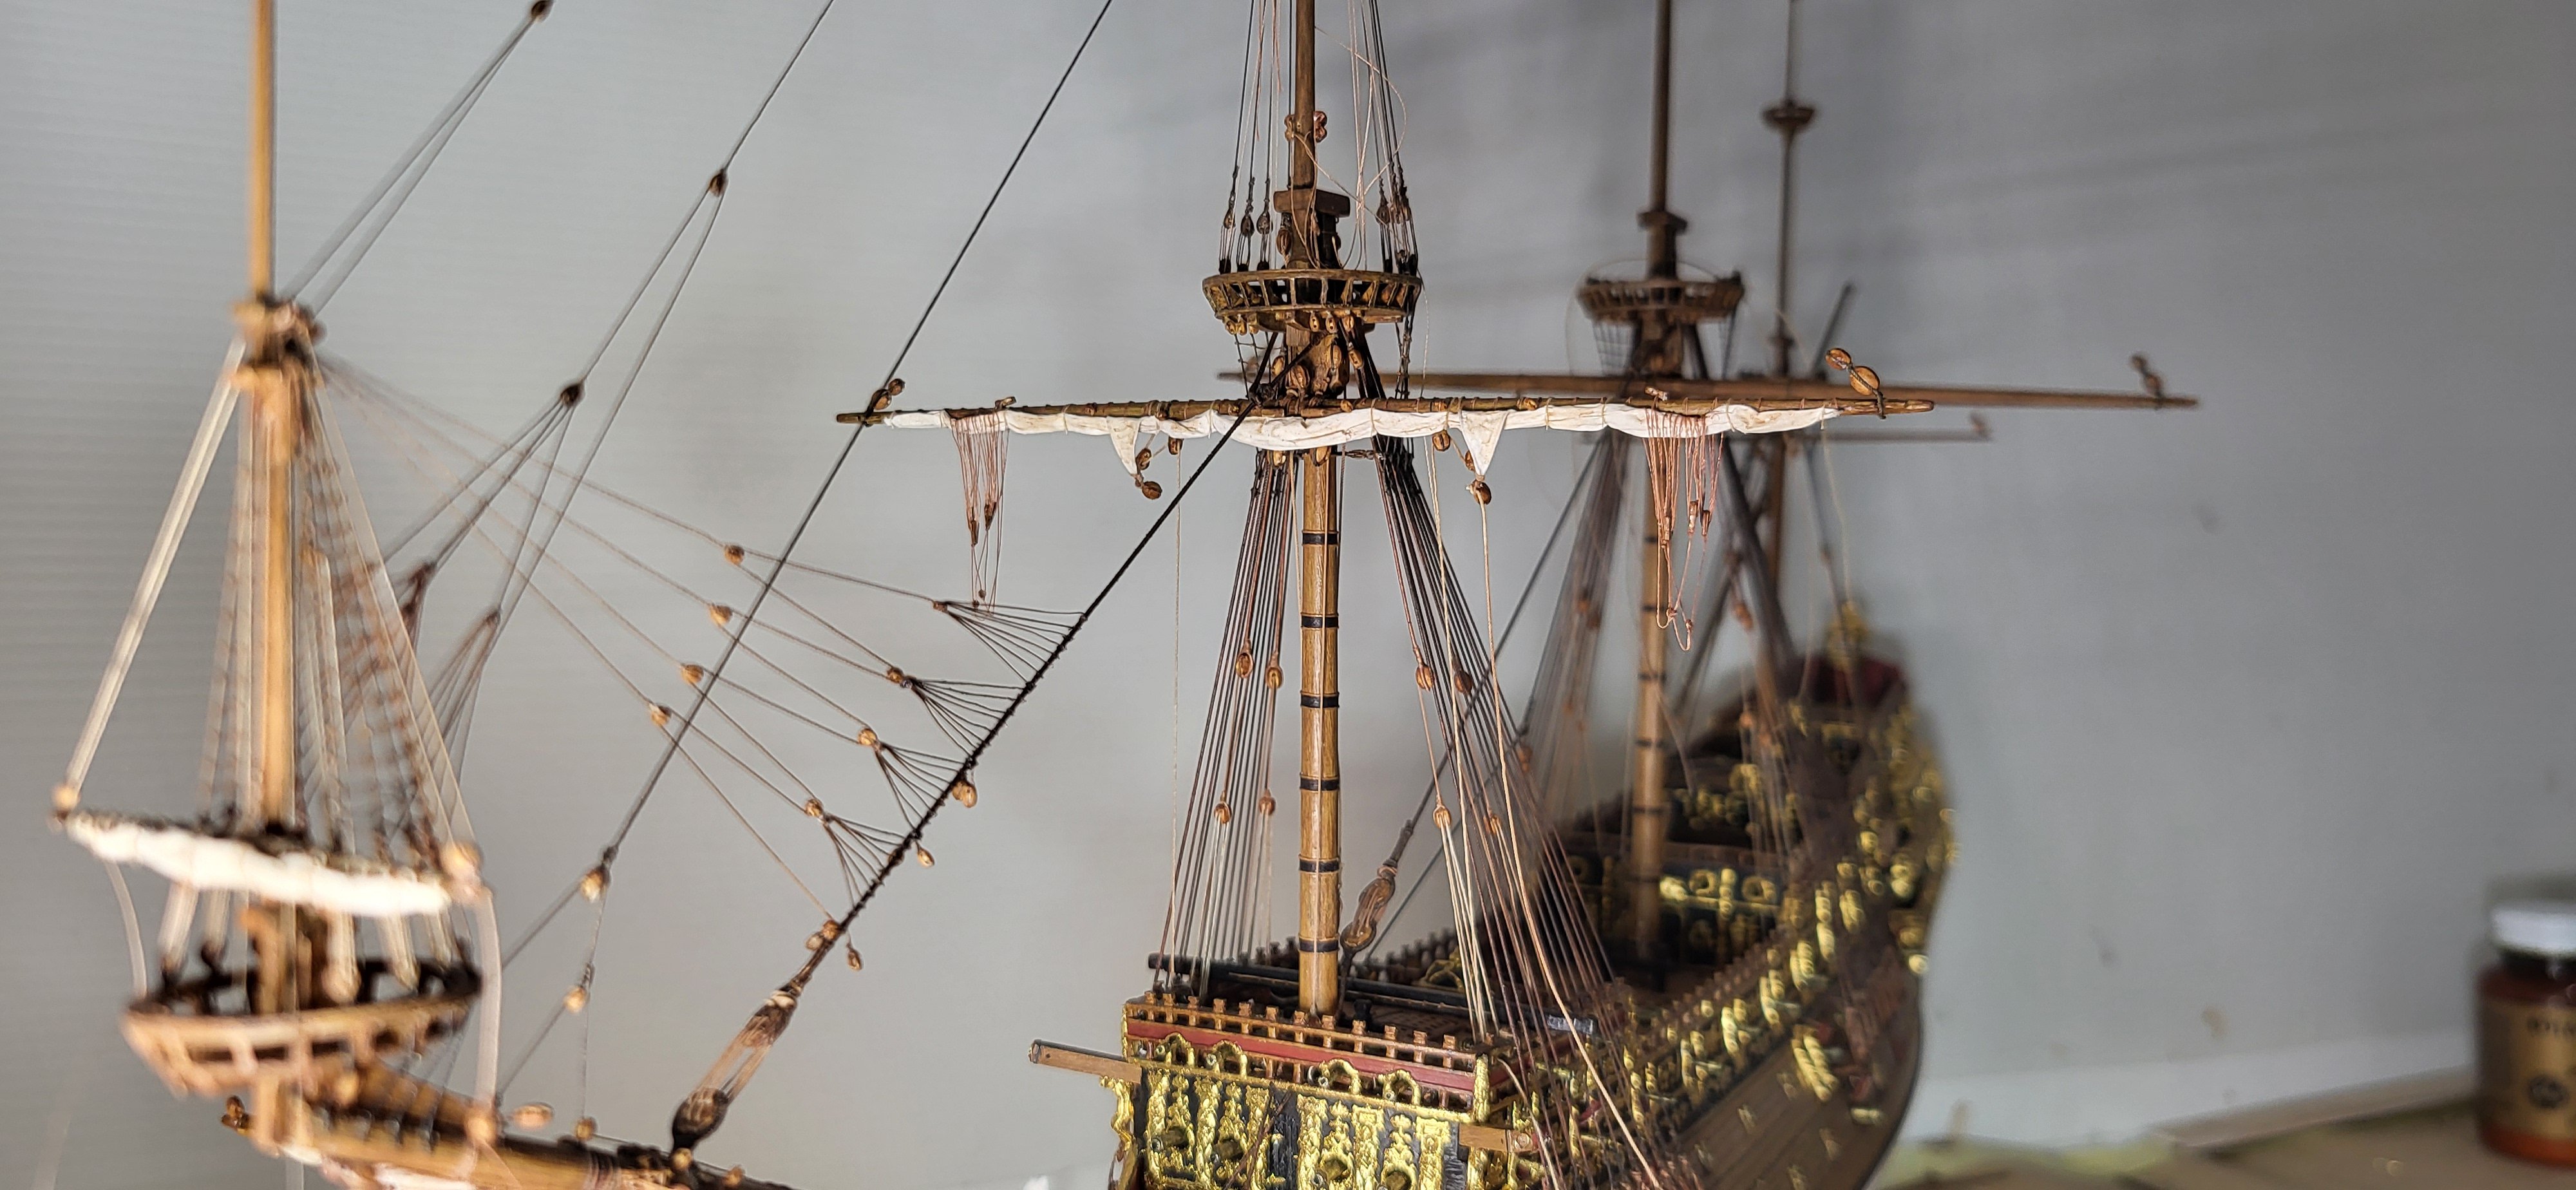
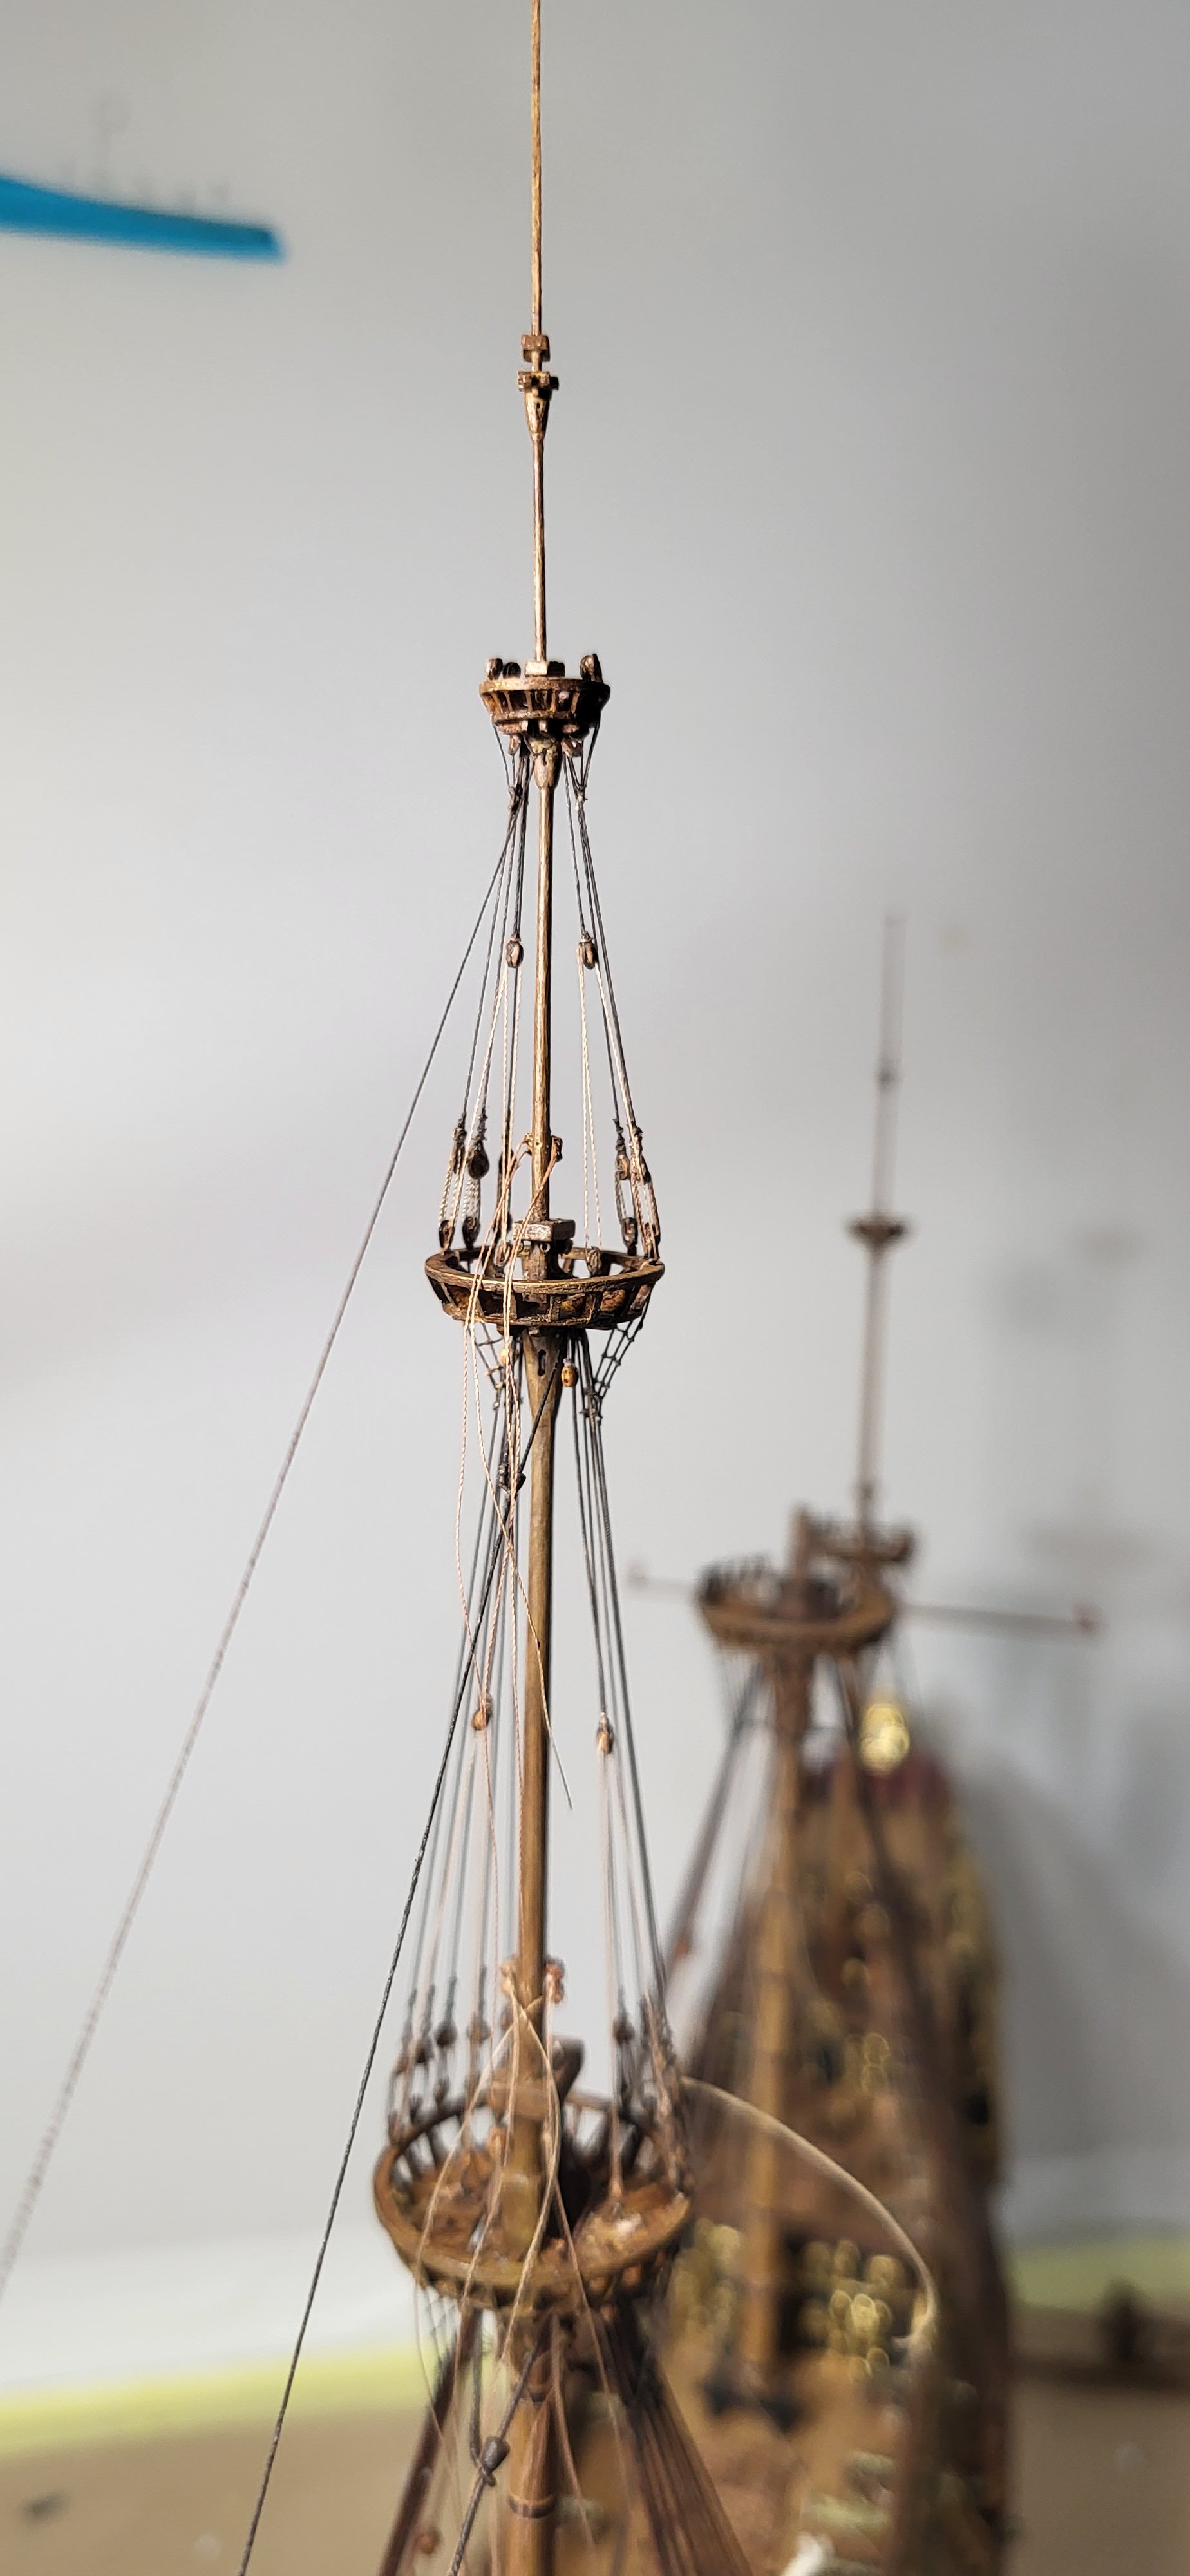
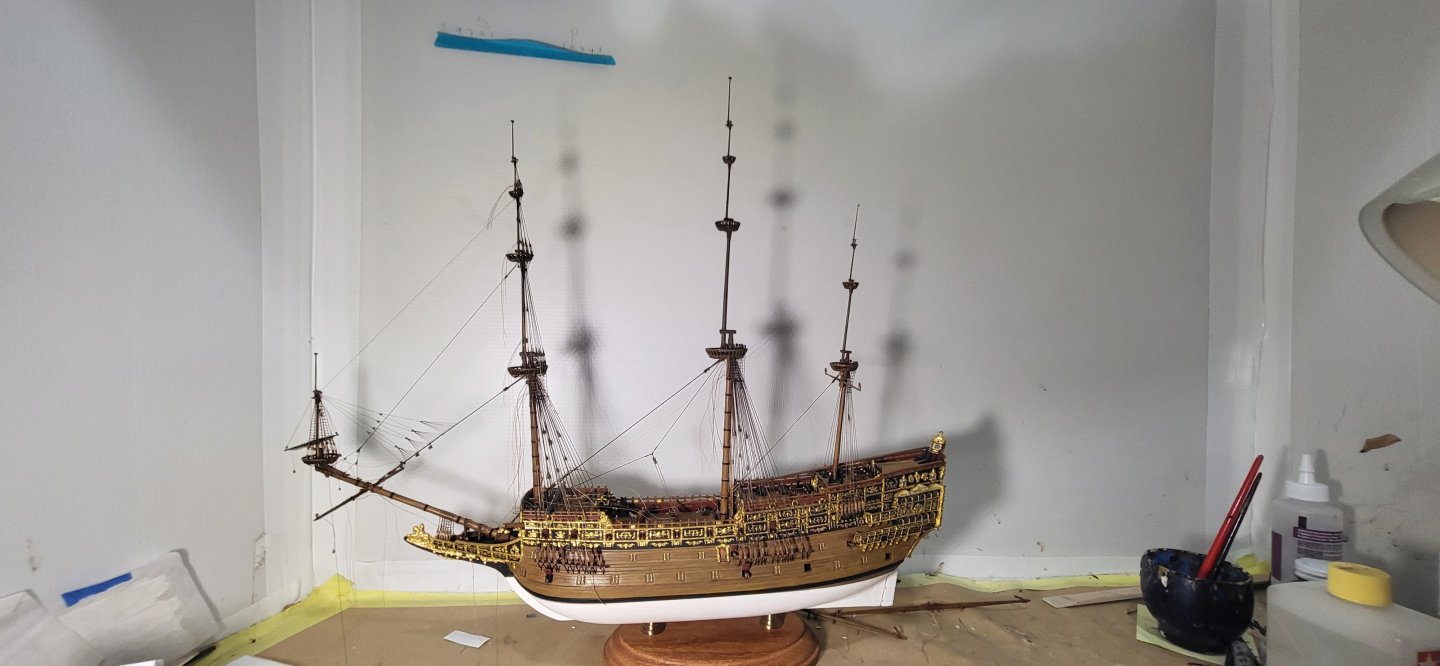
The Royal and Top Gallant stays are completed, I changed my mind regarding the Top Gallant stay and decided to rig the crows feet mainly for the challenge and I think they turned out okay. Thanks for the kind complement, Trevor and all who stop by just to look and like. Michael D.


- 324 replies
-
- 10
-
-
-
- Sovereign of the Seas
- Airfix
- (and 1 more)
-
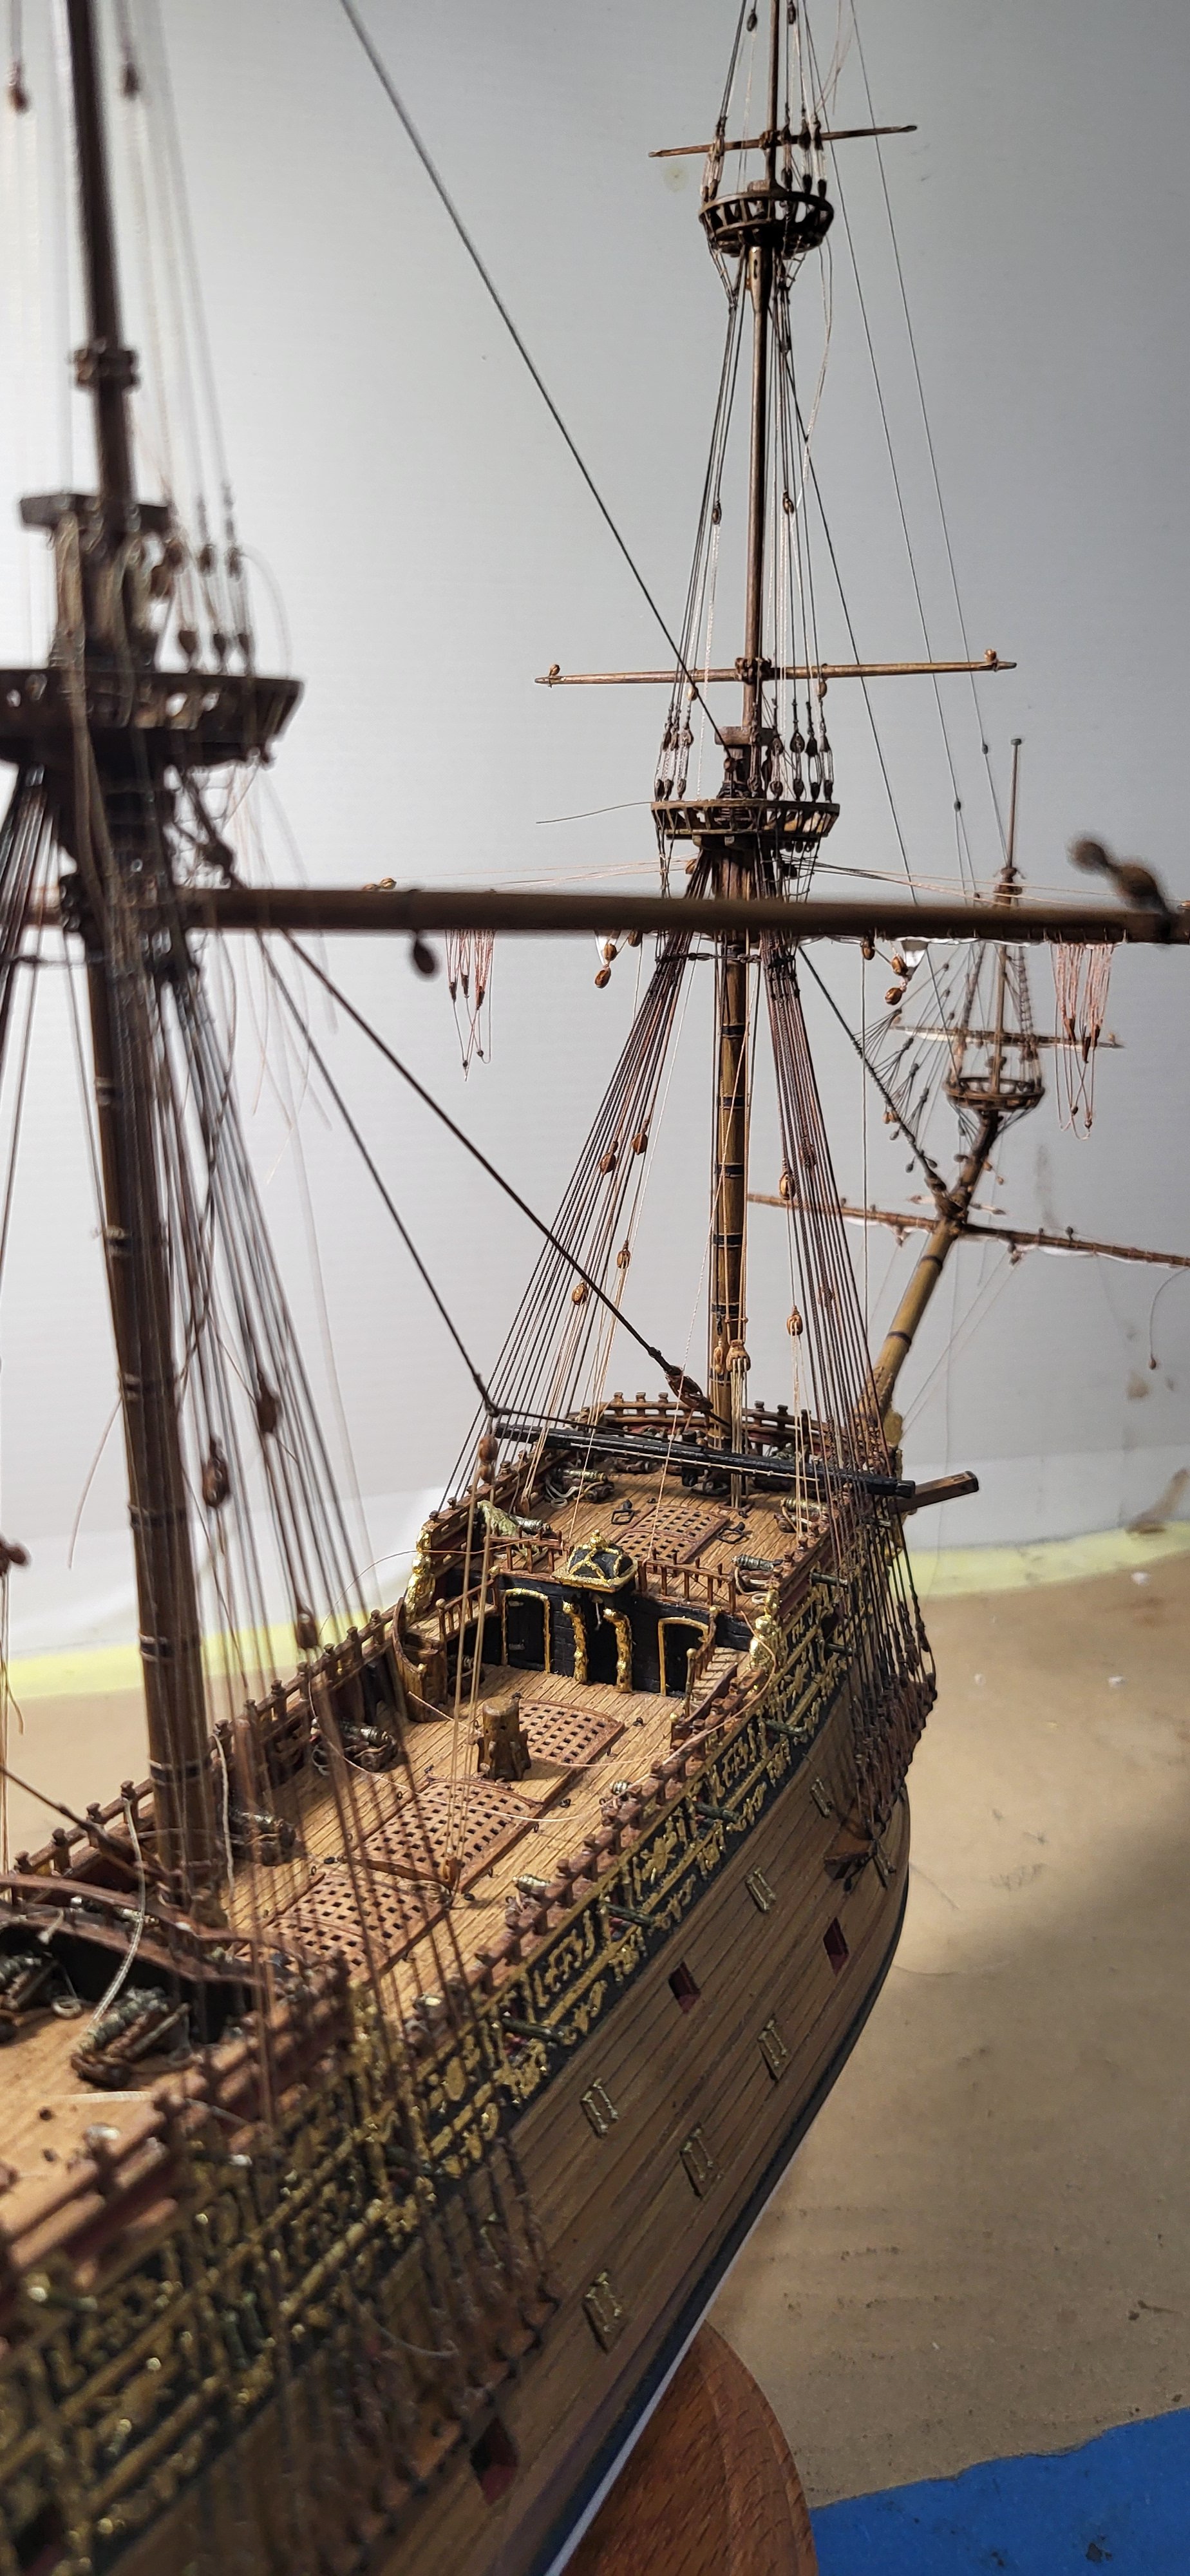
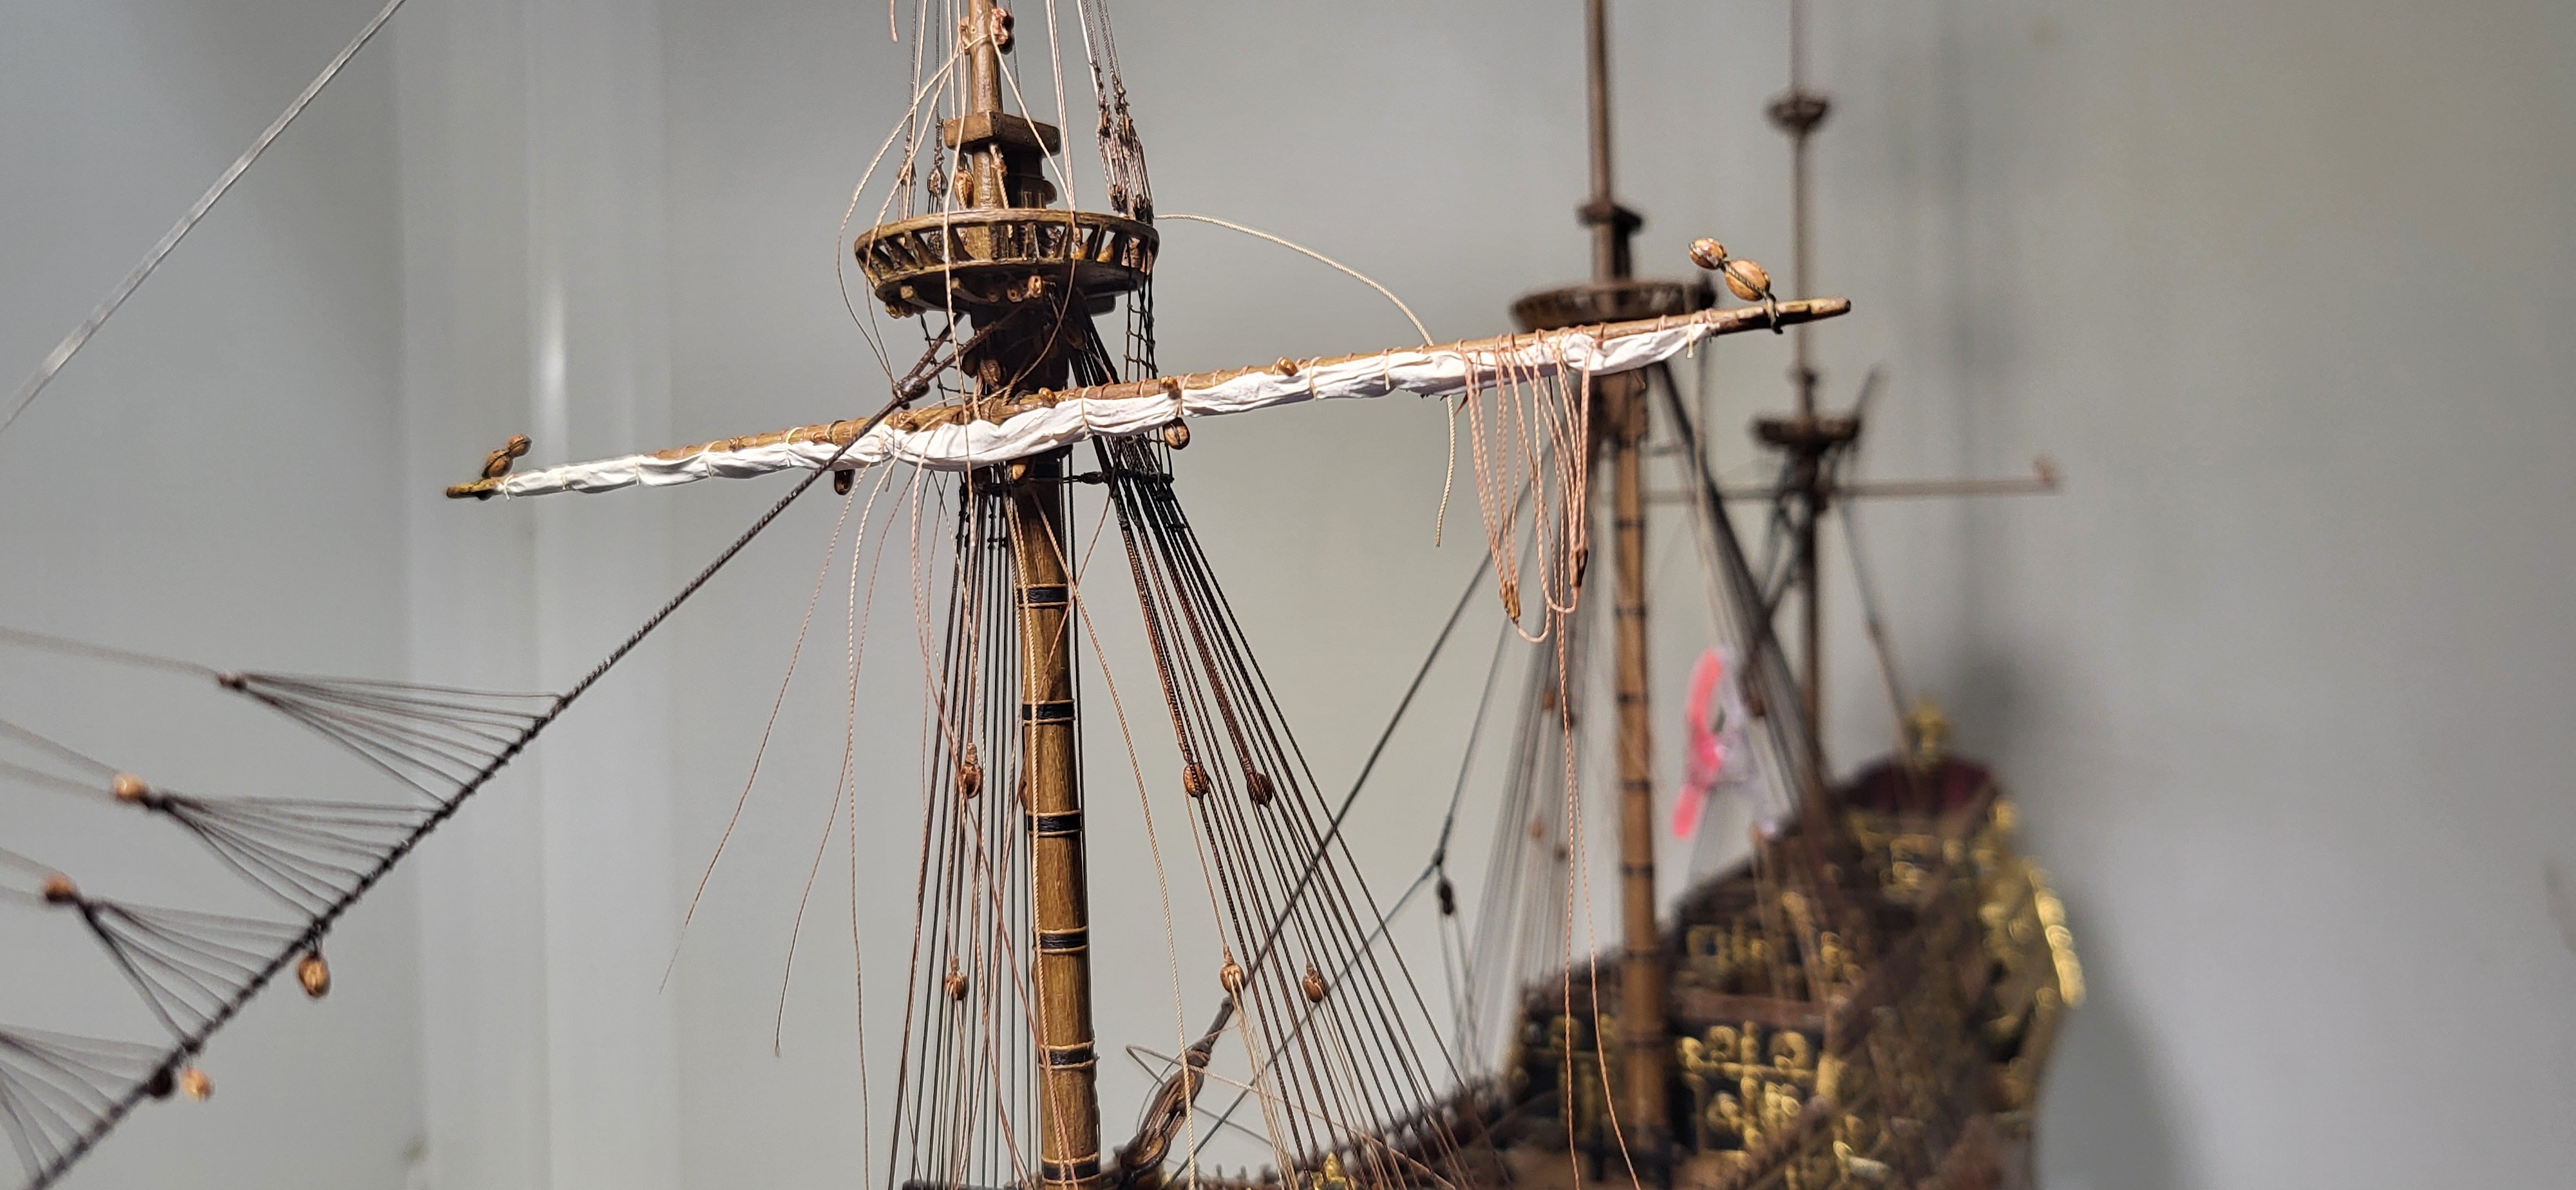
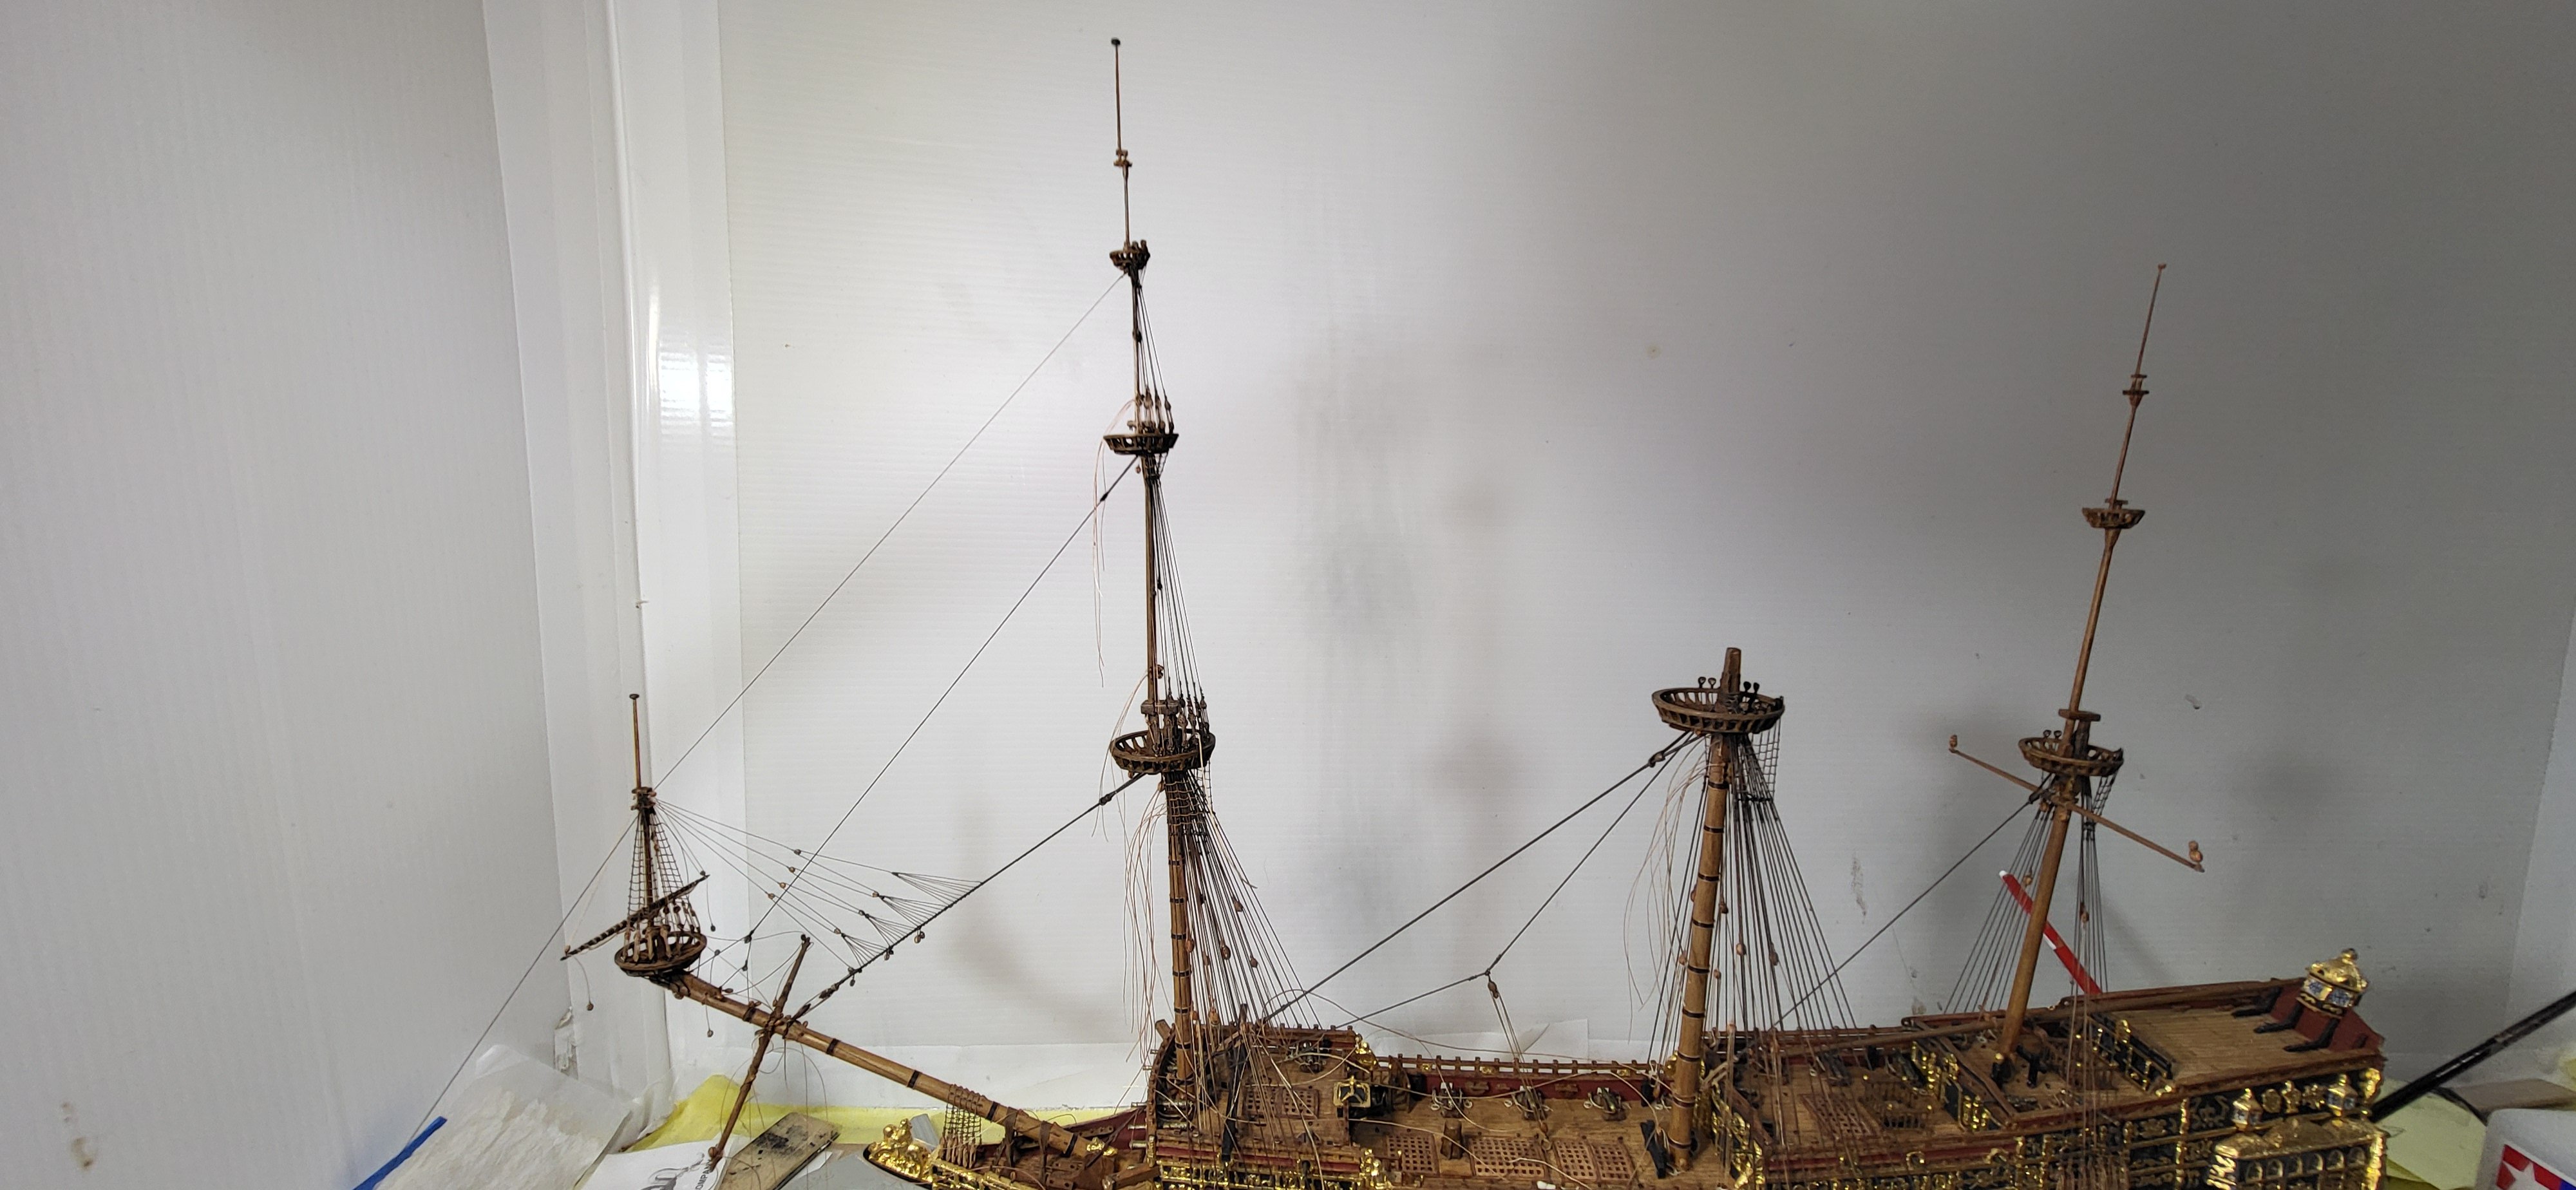
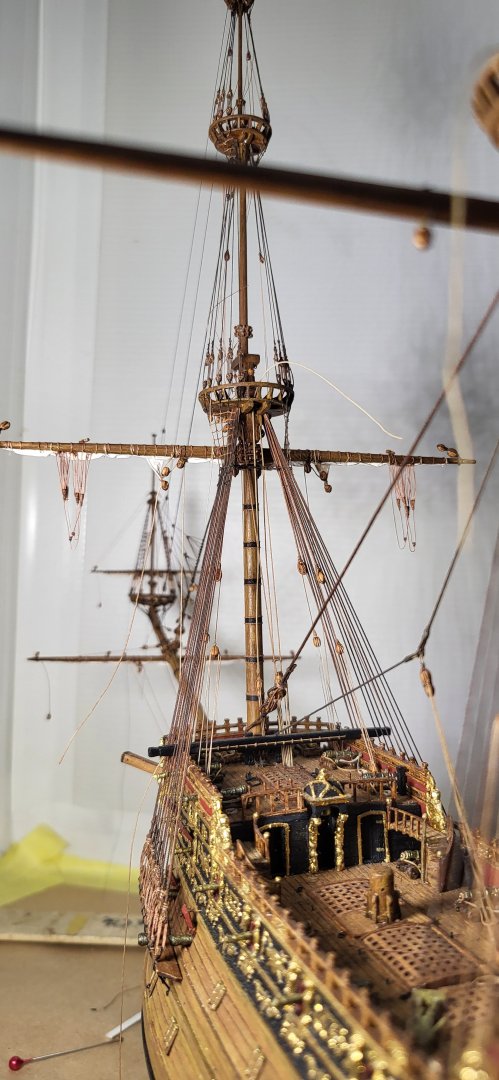
I have the royal shrouds, lanyard and parrel completed. The deadeye's measure out at approximately 1.30mm in diameter, a little overscale and a bit crowded looking but the smallest I'm able to work with when trying to drill 3 #80 holes and rig the lanyards, I'm happy with the result. Michael D.

- 324 replies
-
- 10
-
-
-
- Sovereign of the Seas
- Airfix
- (and 1 more)
-
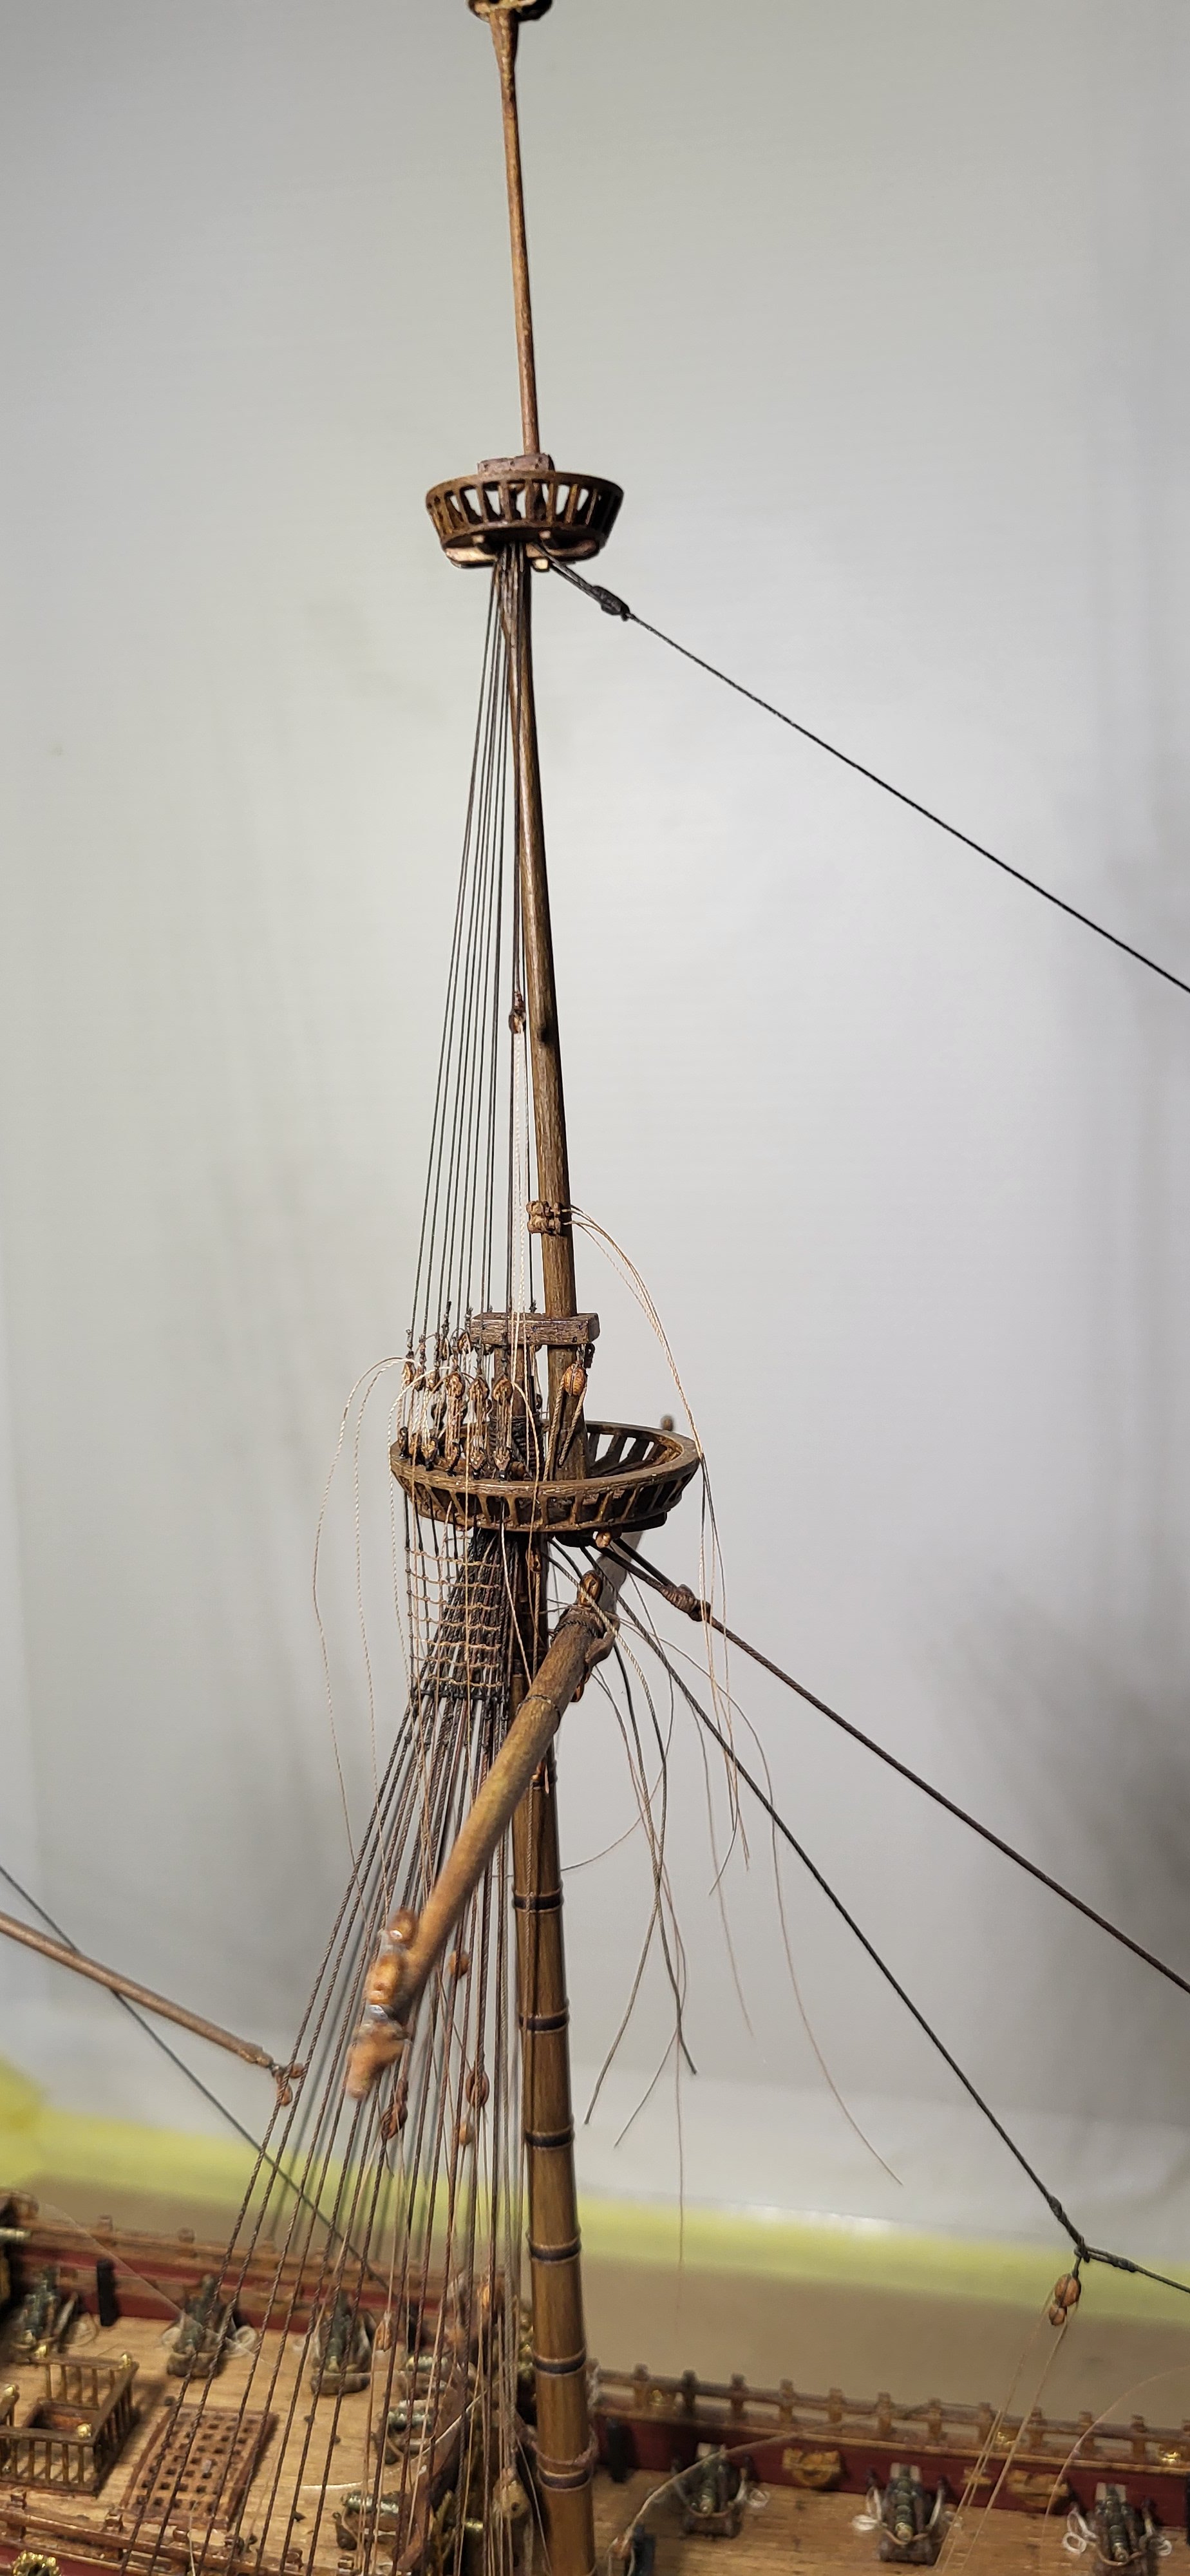
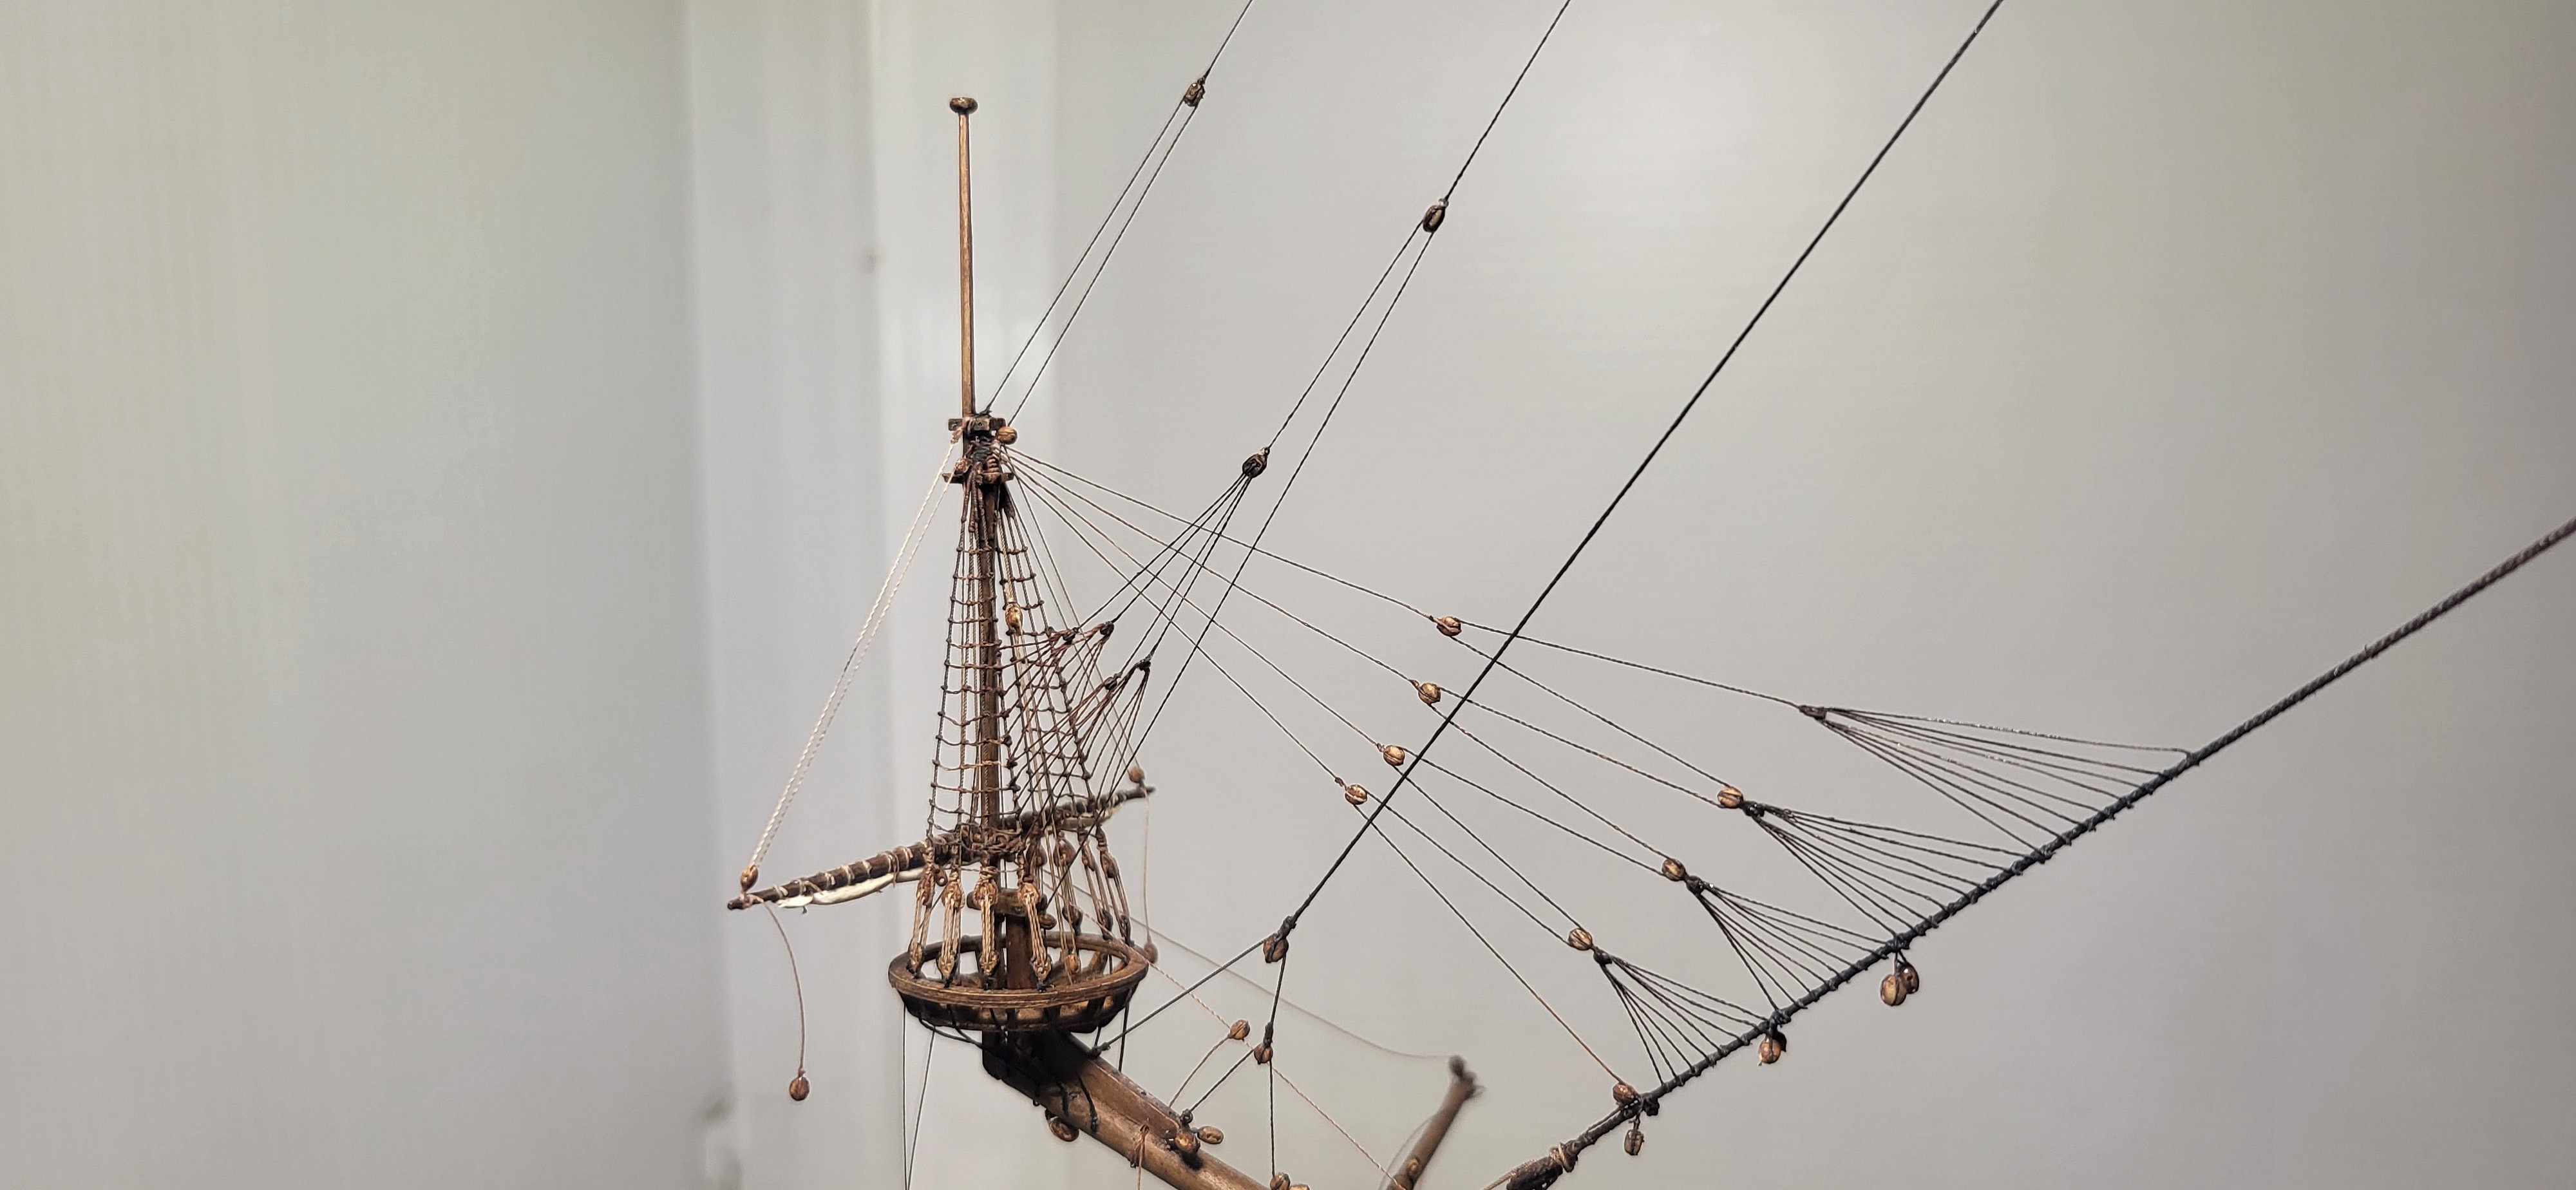
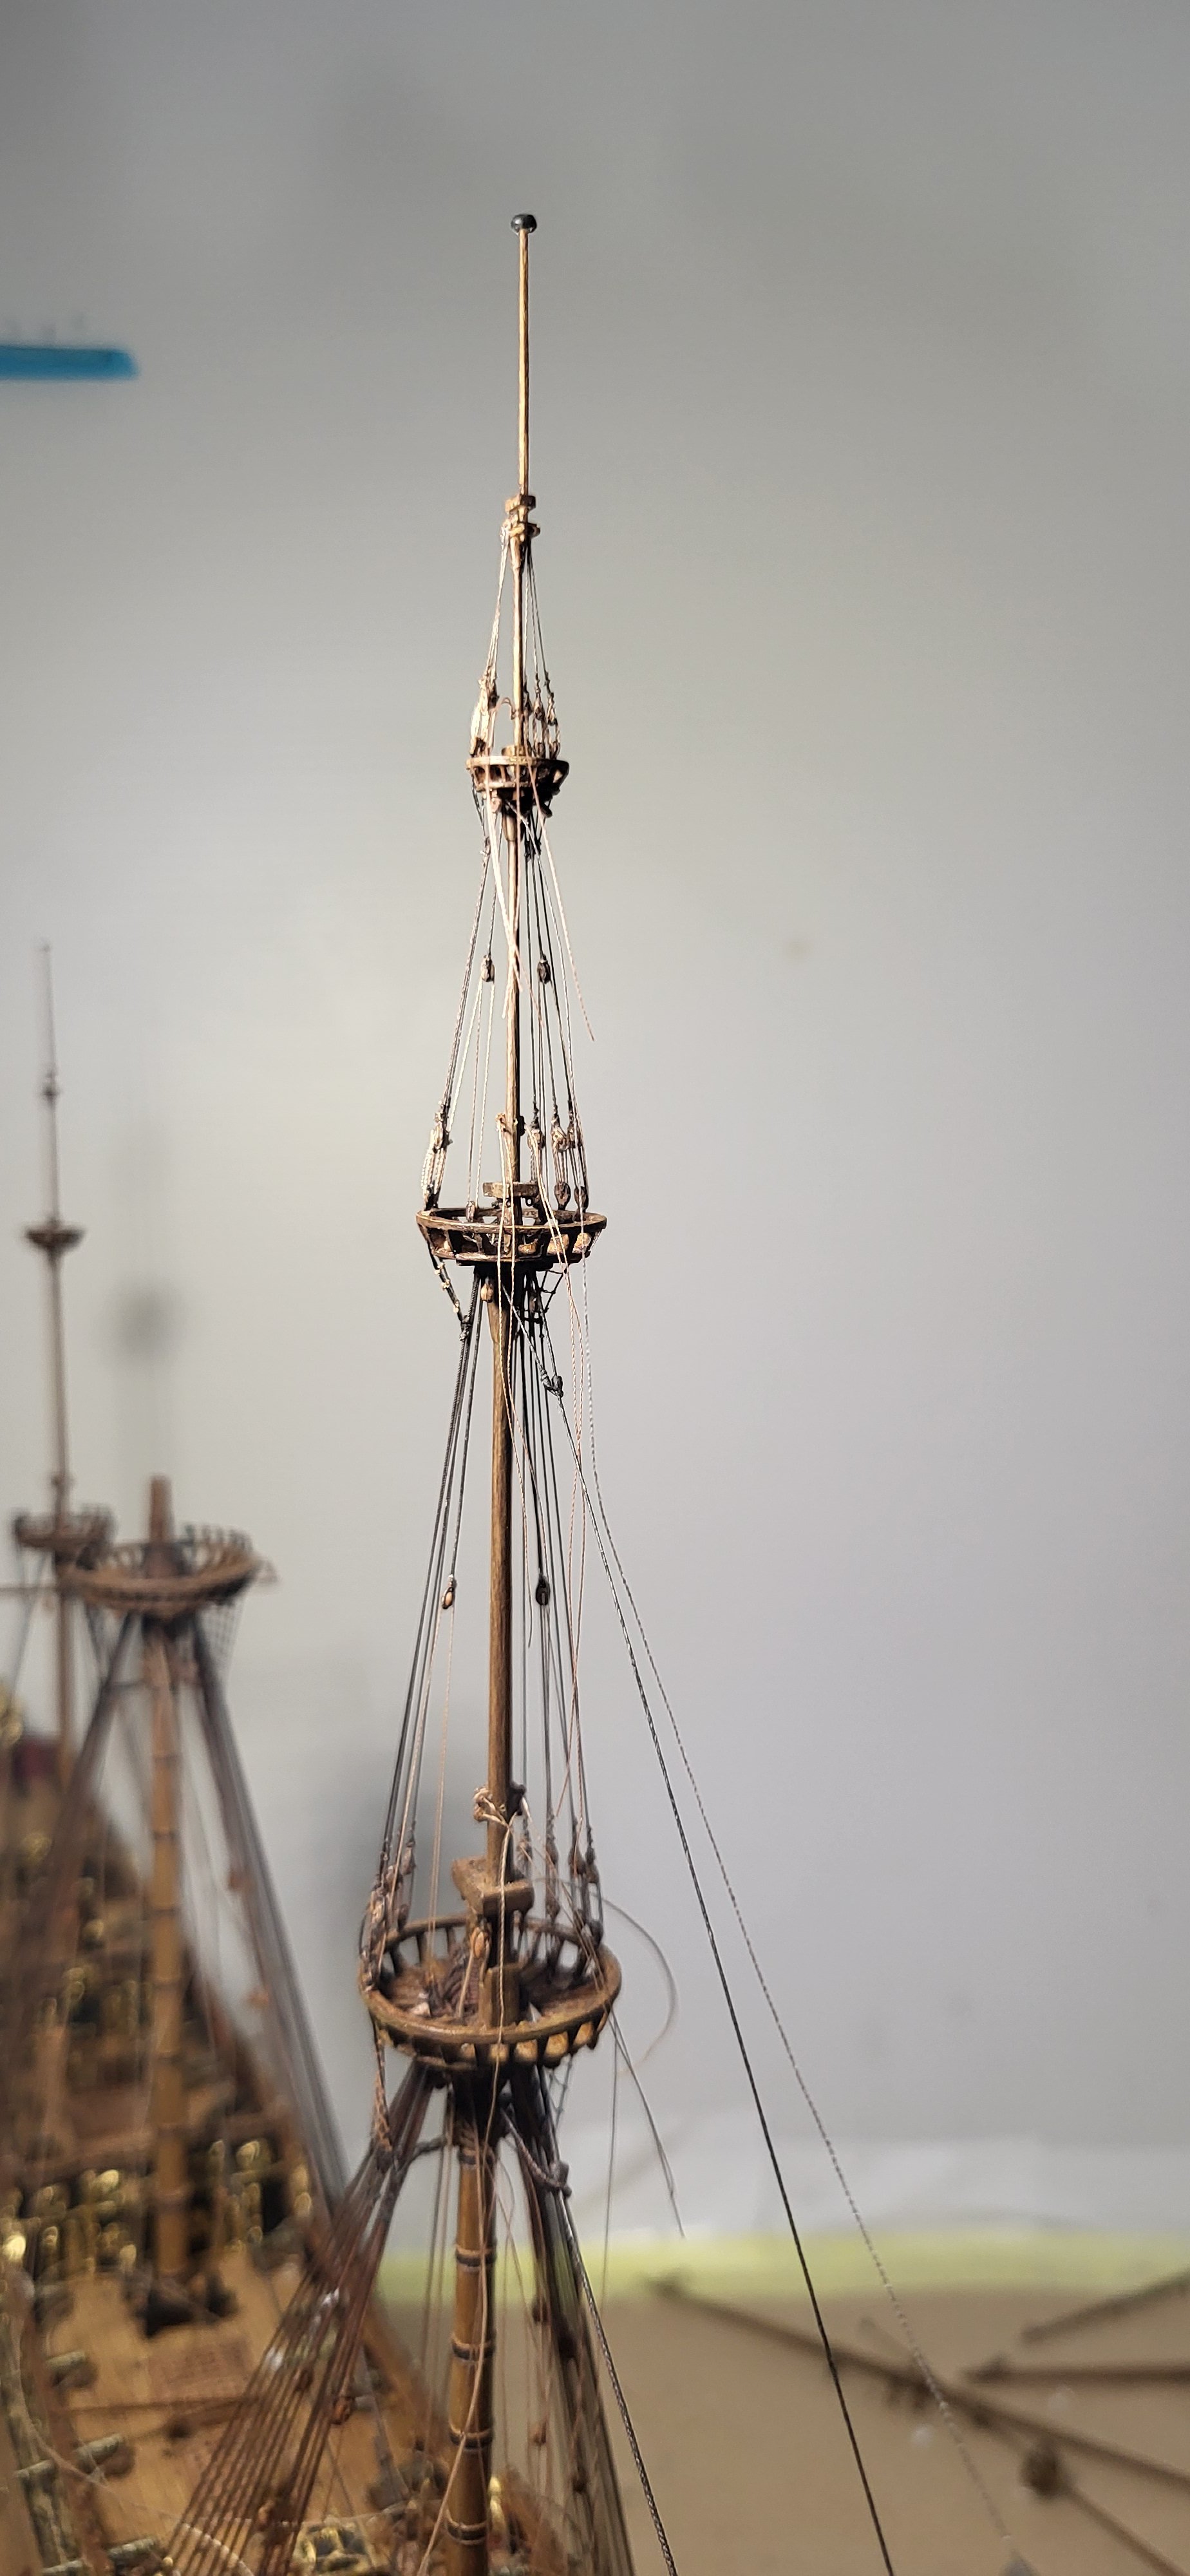
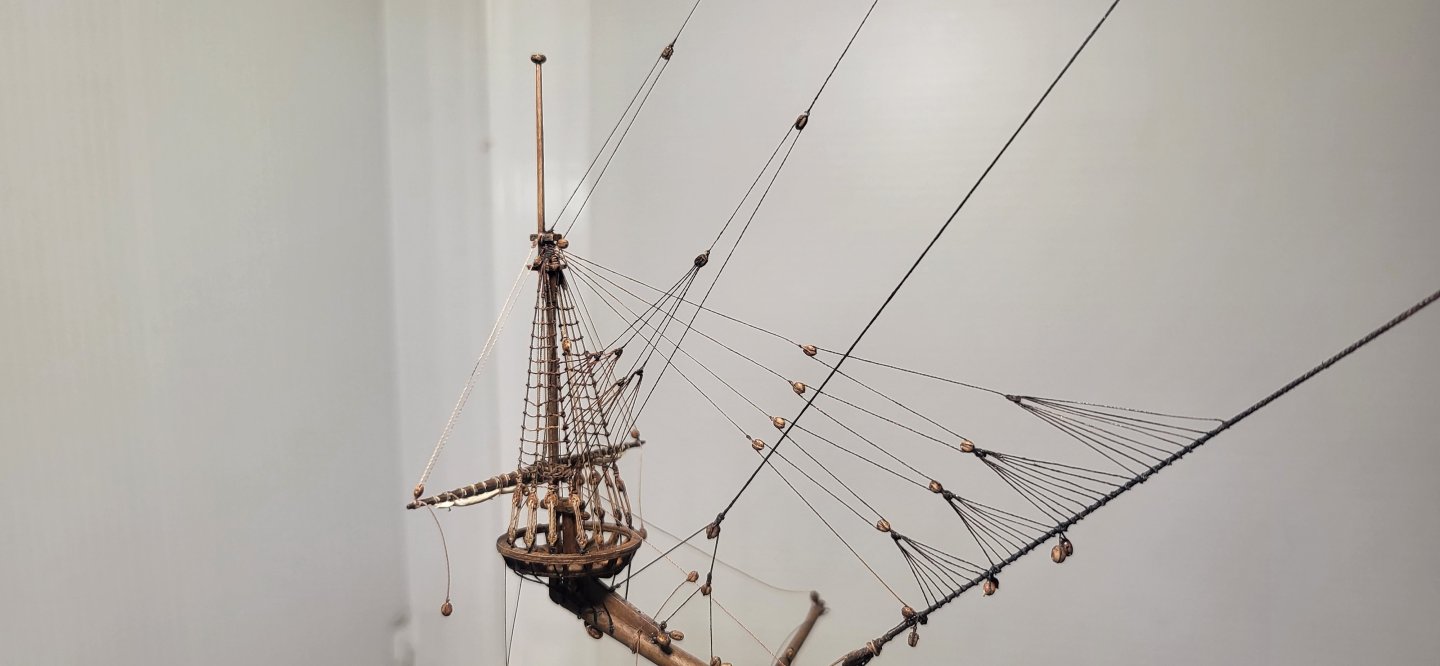
I'm continuing my climb up the fore mast with the completion of the top gallant shrouds, I've rigged the burton pendants as added detail, the royal mast shrouds are next along with finishing up the stays, keep in mind that top gallant top is smaller then a dime so rigging those shrouds and lanyards will be challenging to say the least. Thanks for looking. Michael D.


- 324 replies
-
- 7
-
-
-
- Sovereign of the Seas
- Airfix
- (and 1 more)
-
That turned out really well! nice addition to your collection. 👍 Michael D.
- 43 replies
-
- 2
-
-
-
- card
- Speeljacht
- (and 2 more)
-
You're forgiven..haha. For this build I'm using rope from Syren, ropes of scale and silk linen thread for the smallest lines, hope this helps Tumblehome? Michael D.
- 324 replies
-
- 1
-
-
- Sovereign of the Seas
- Airfix
- (and 1 more)
-
It's been quite the journey thus far Marc, the amount of hand fabricated parts in a world of 3D printing is nice to see and has really brought your build to life!! That proverbial light shines brighter upon competition of every detail/phase. Michael D.
- 2,699 replies
-
- 2
-
-
-
- heller
- soleil royal
- (and 9 more)