


72Nova
-
Posts
516 -
Joined
-
Last visited
Content Type
Profiles
Forums
Gallery
Events
Posts posted by 72Nova
-
-
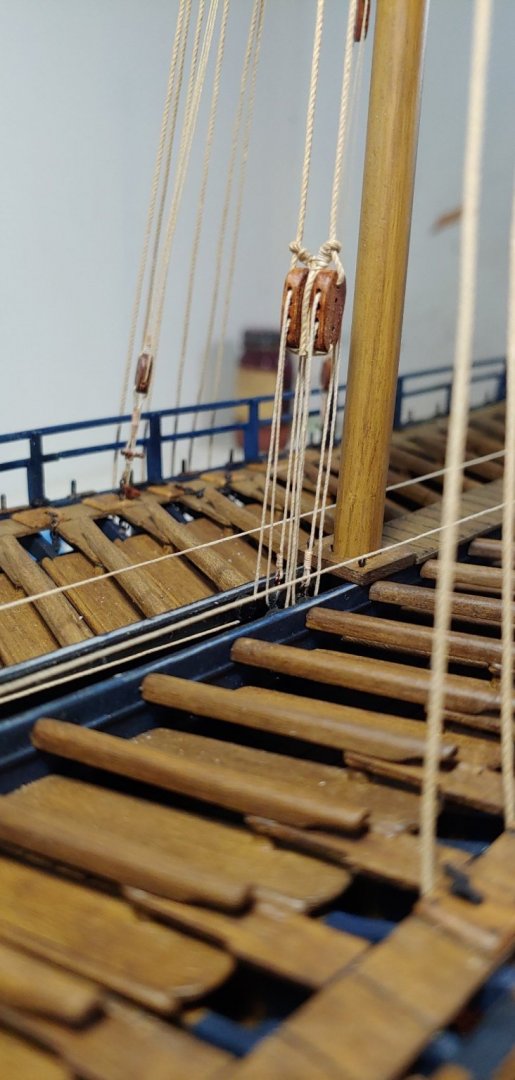
I made up the long tackle blocks for the main yard lifts and completed the rigging for them, I will need to make a section of the middle deck in this area to cover up the opening. The rigging for the parrels and stays are also completed, only about 70+ more sheed blocks to make. Up next is the shrouds and when completed I will belay what I have rigged so far.
Michael D.
-
Thanks for pointing that out Bill, wonder if it would of been easier to trim the tap on the bowsprit?, your model is looking real nice!
Michael D.
-
Such a beautiful model Kirill, well done Sir.
Michael D.
-
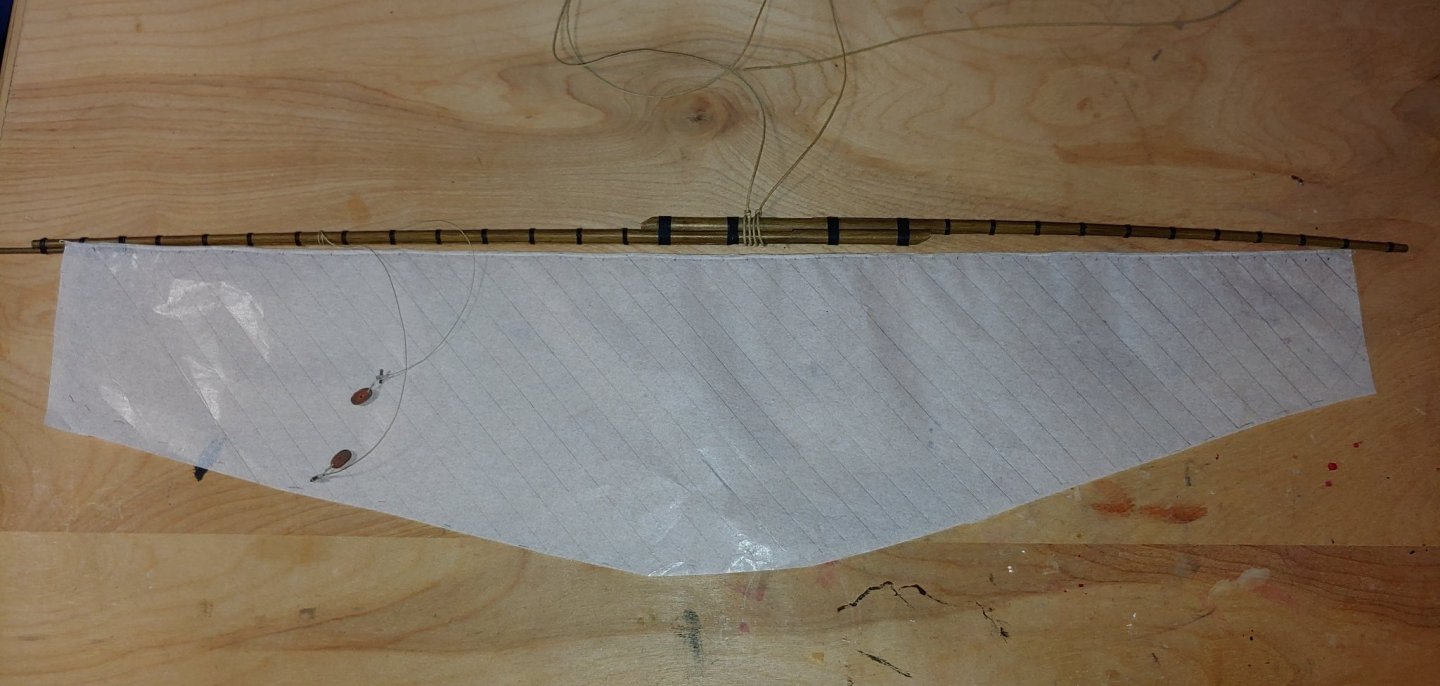
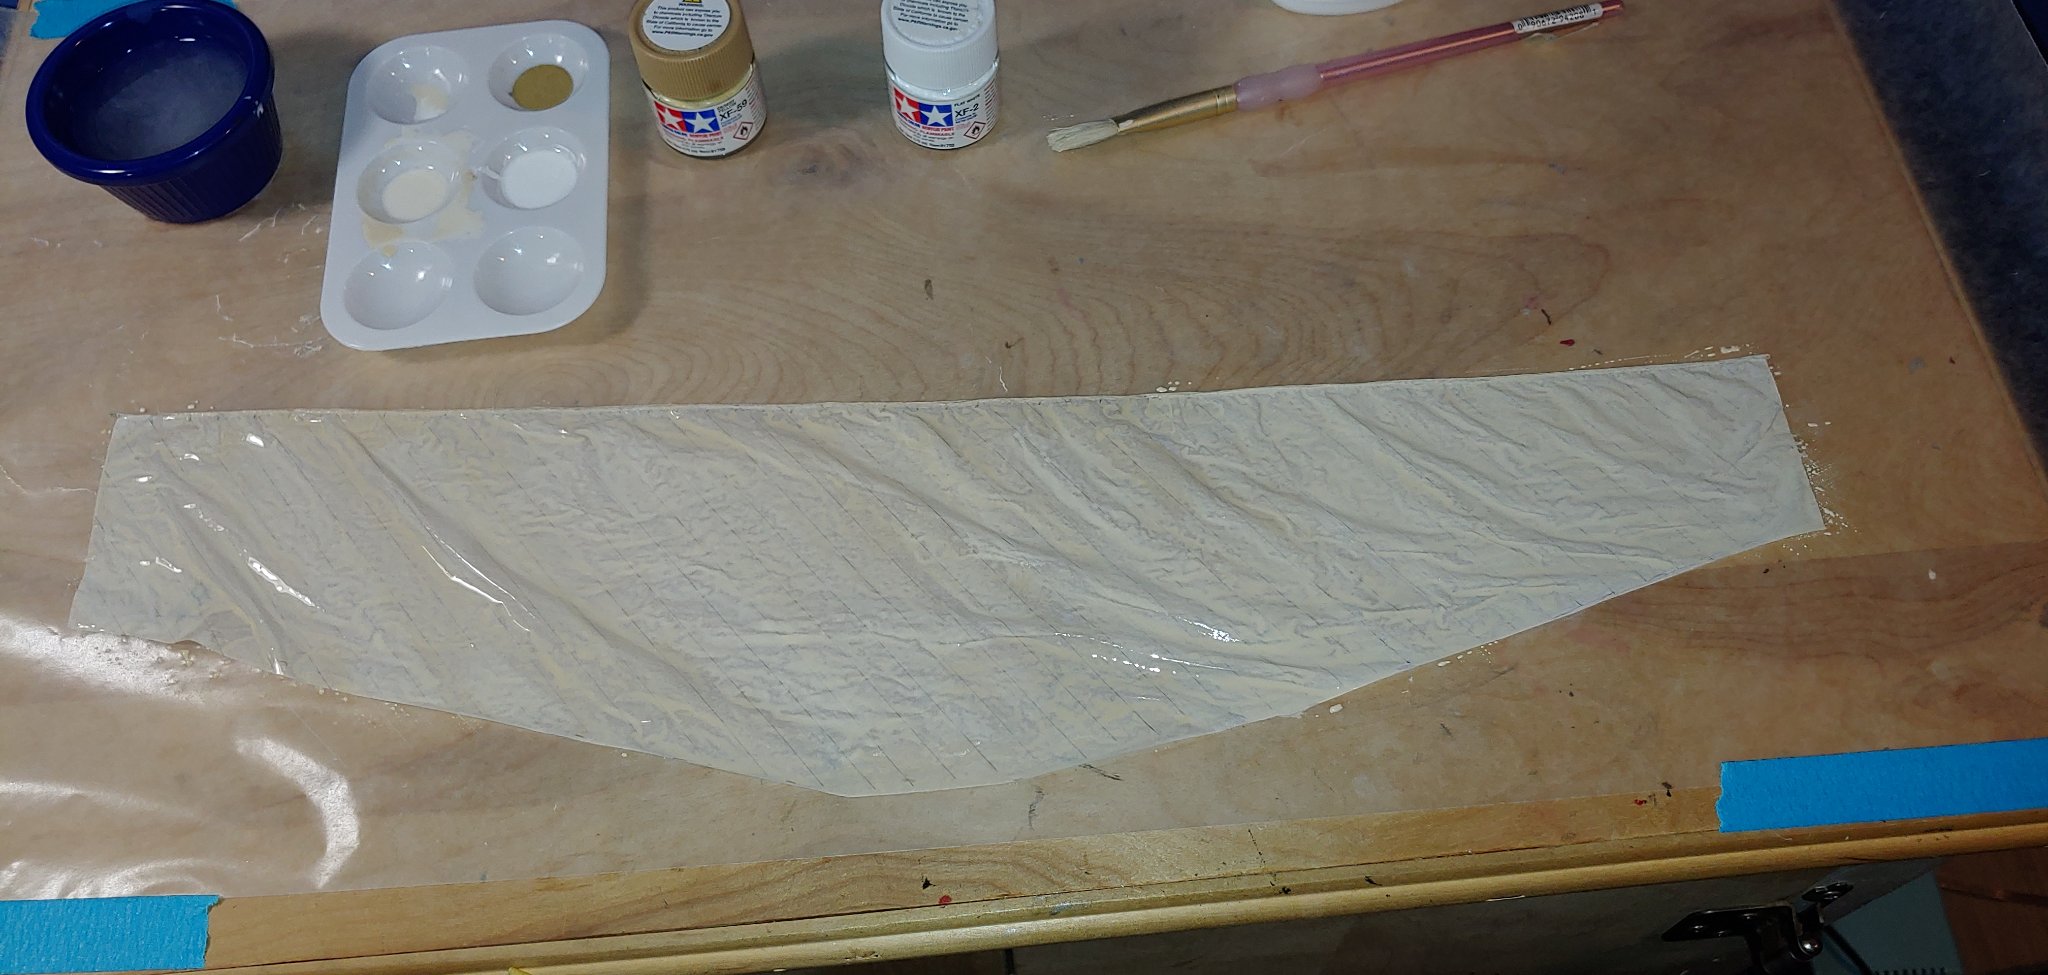
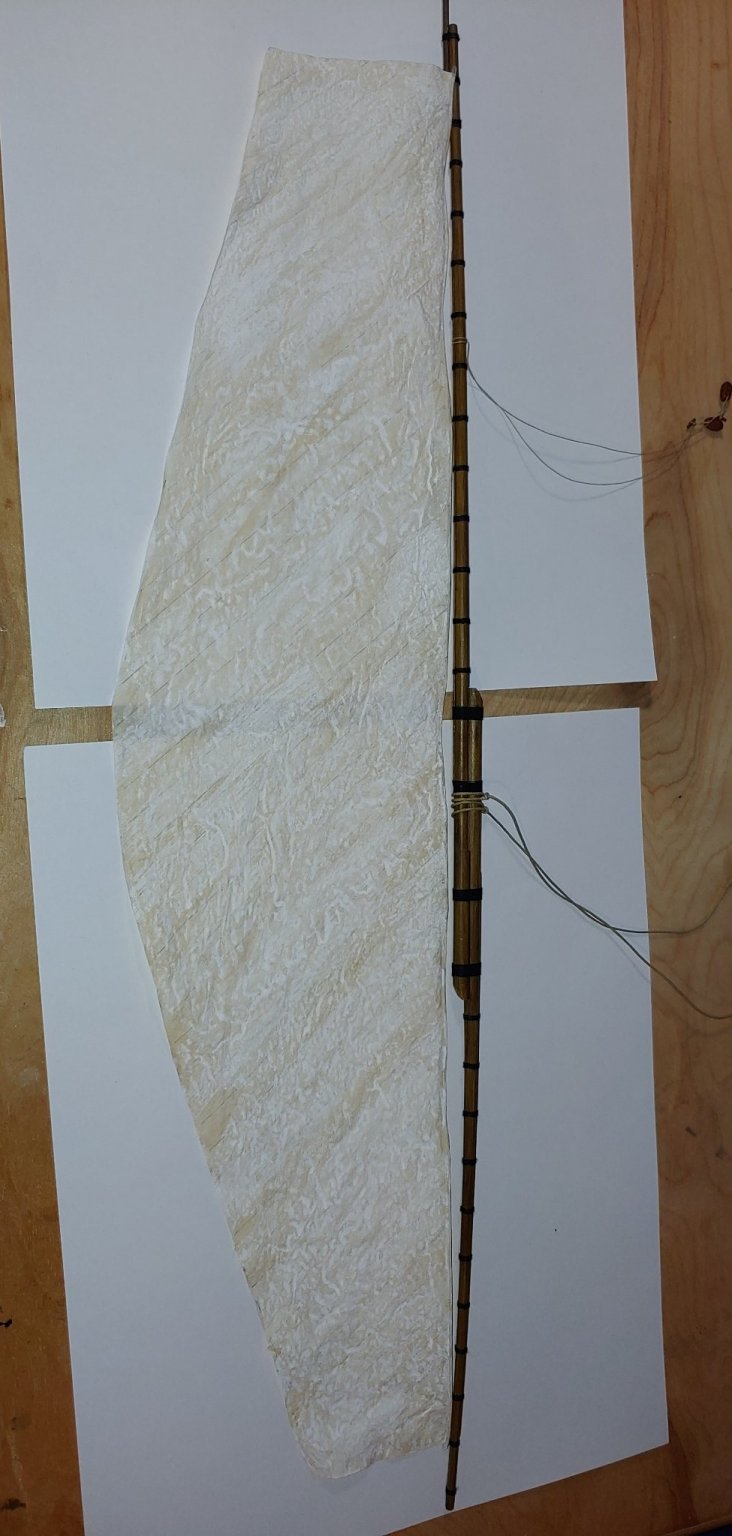
Frank I used gift tissue wrapping paper. Marc yes I cut the same shape for both. I followed Maurice's build of the Le Superbe when Pete Colemen's Victory was up and running, in fact he helped me out A LOT!! when I was back dating Victory. Kirill I hoping the pictures and my brief explanation would help, first cut to a reduced shape, install bolt rope about 1/8" from edge and pencil in the stitching then apply thinned PVA glue to sail, I never wait until it's dry before I start painting and used just the 2 colors shown in the picture, tamiya desert yellow and white, first a thin wash of yellow and let dry followed by another thin wash of desert yellow and white..tinting as you go to suit your eye and let dry, as you can see the paper gets pretty soaked but dries out quick, lastly a thin wash of white, if I were doing full sails I'd wait and pencil n the stitching prior to the white wash so they are not so pronounced. The trick is to not soak the paper, I just dab a small area with a wet paper towel as I go, loosely rolling it up as I go, tighter on the ends and flip it over about half way and bunch it up towards the yard with fingers and let that setup a bit, I do this so it is not so flat on one side. Turn it back over and finish rolling up, the gaskets help with the final shape, any sharp creases you can address by wetting the area and using a suitable tool, wooden stick works good to relax the crease. Once you get going you'll get a good feel for what you need to do, hope the helps?
Michael D.
- fmodajr, Hubac's Historian and EJ_L
-
 3
3
-
I received it today and that's the first thing I checked...no rail..lol. I still need to finish up my Reale De France before I start work on the Wasa.
Michael D.
-
It actually looks like it belongs, nice work!👍, once detailed out and all rigged, it'll blend in nice Bill.
Michael D.
-
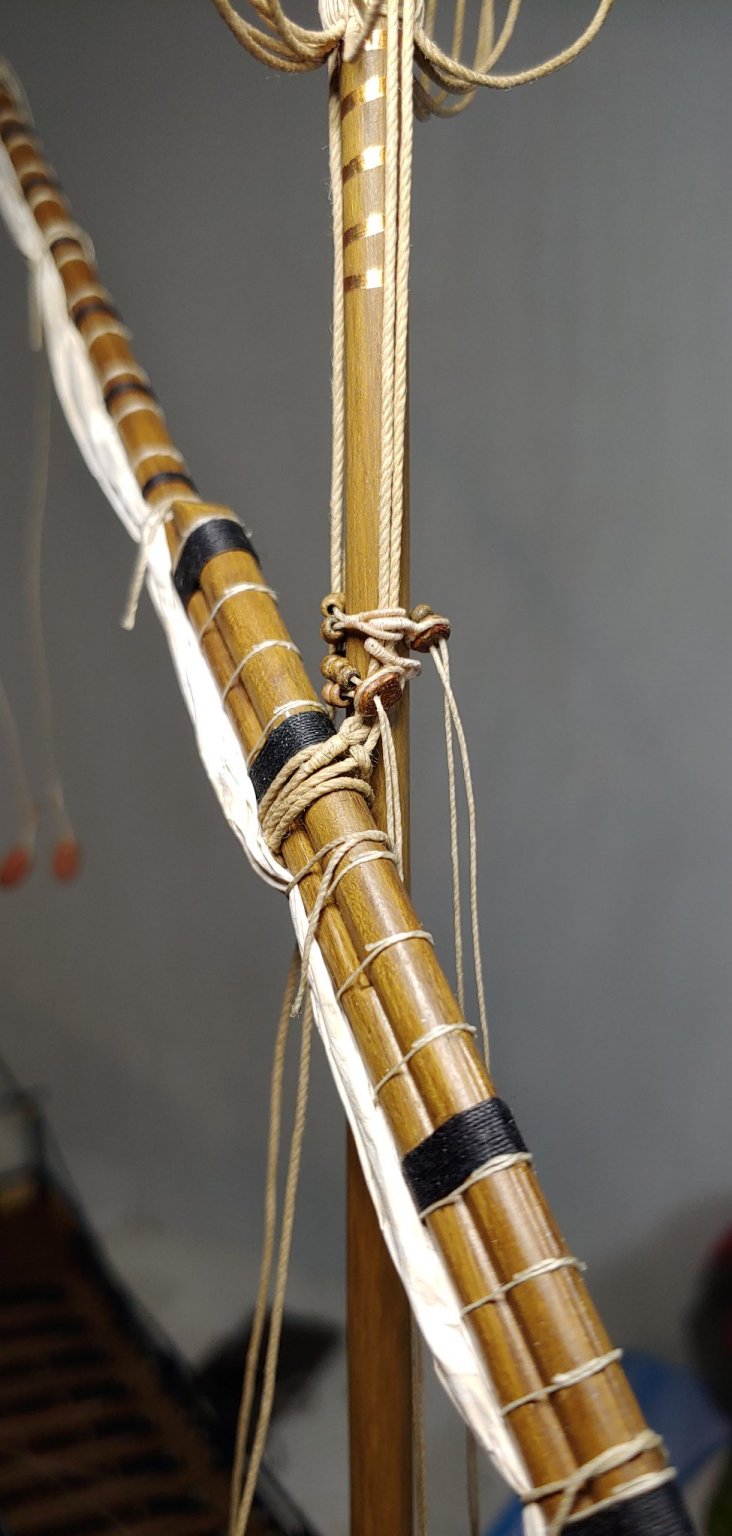
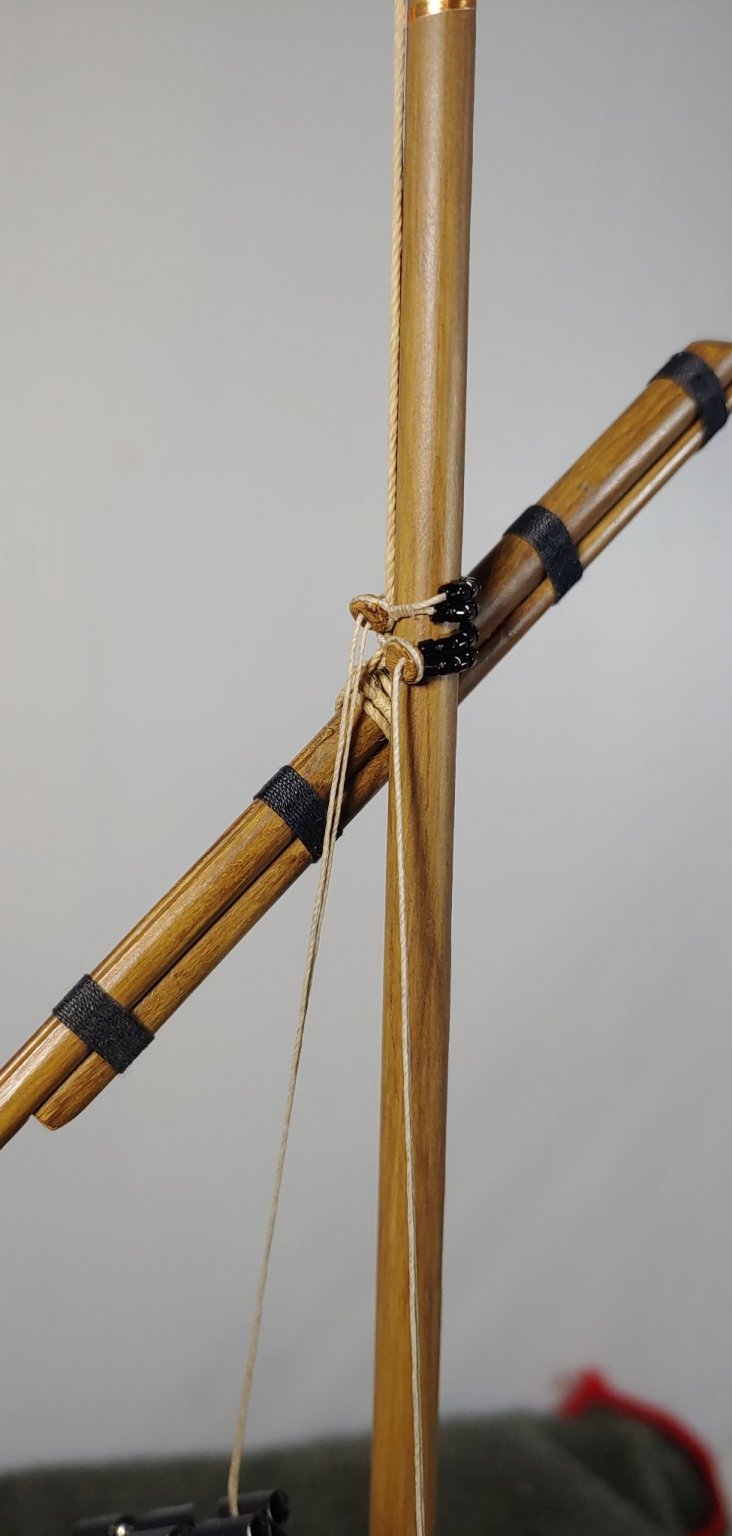
The main yard is installed and this picture shows the arrangement of the parrels.
Michael D.

-
Great stuff...WOW!!. For that blemish I'd probably leave it alone Marc, but not after applying a gloss clear acrylic on a test piece just for the heck of it, it might mask it a bit.
Michael D.
-
That is odd about the lack of a railing and I agree your decks looks fantastic Bill. Marc's fab idea is a sound one and yes I'll my best to duplicate the look as she appears in the museum....we shall see.
Michael D.
-
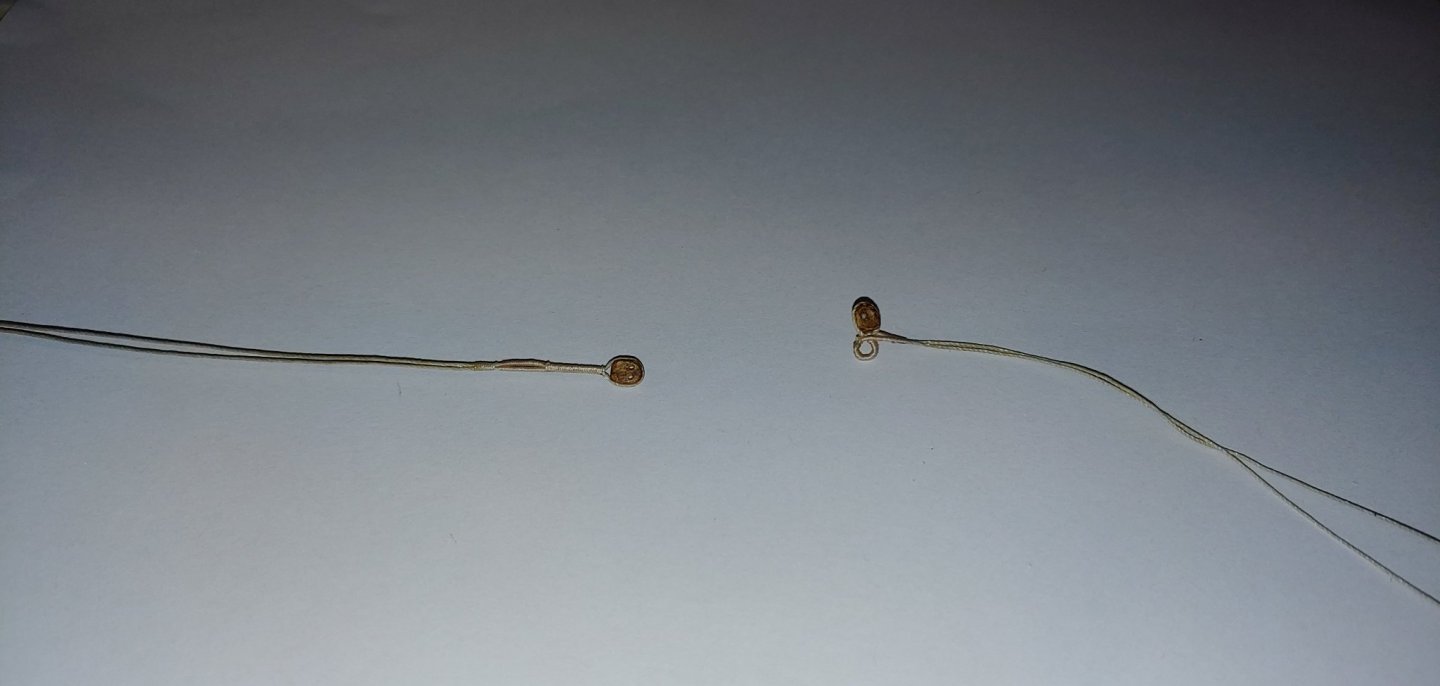
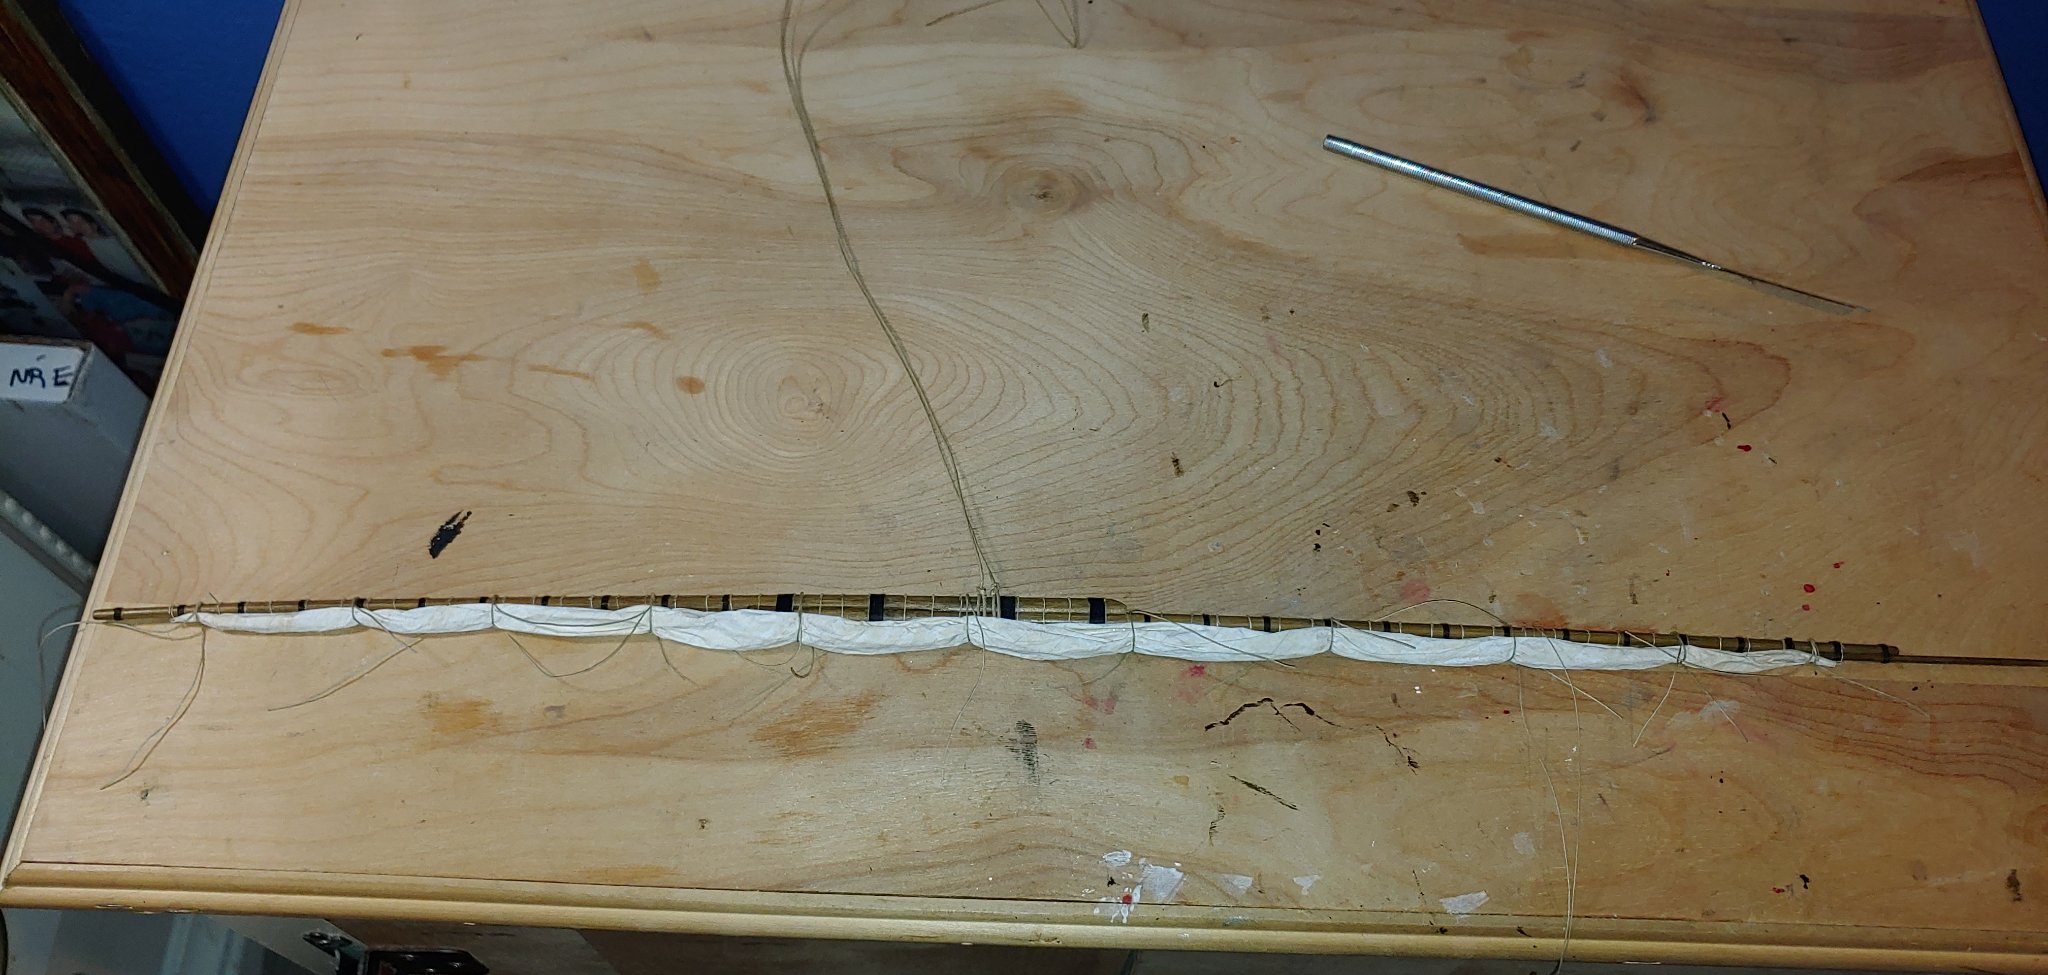
The parrels for this is a little tricky, the serving isn't bad, but there is an eye splice for the deadeye to pass through after wrapping around the ropes for the lifts before being taken around the mast. I ended up using glass beads and painting them. The main sail is furled and held into position by the temporary gaskets until dry, I manipulated the shape using a wet paper towel as to not soak the paper. Still have more fine tuning left to do, but looks fairly good.
Michael D.


- fmodajr, EJ_L and GrandpaPhil
-
3
-
-
-
Obviously one modification to leave well enough alone, but interesting intel Marc.
Michael D.
-
Thank you Kevin. Kirill I will not be using the 5th parral since I do not see it on the museum model, I have completed the portside rails, while not perfect they look fine.
Michael D.
- GrandpaPhil, fmodajr, EJ_L and 2 others
-
5
-
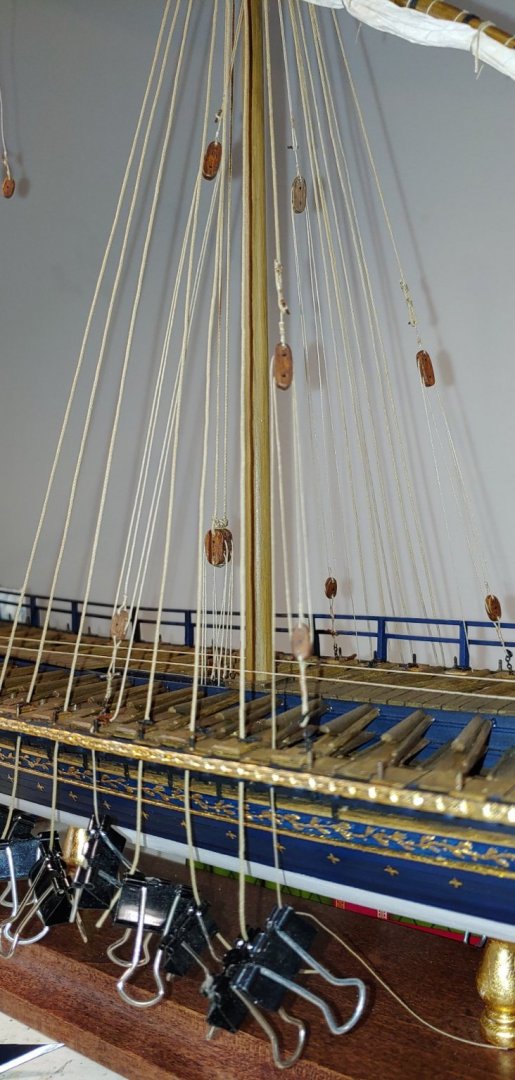
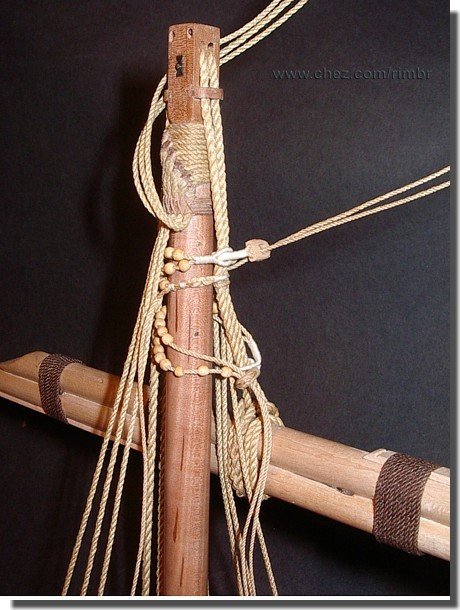
I figured out the belaying points...the 4th chain and toggle from aft with a single block, the parral ropes will be spliced at the ends with a long tackle block and the fall belayed to a cleat or eyebolt on the deck a. Kirill I'm going by this illustration that has the same setup as the museum model.
Michael D.
-
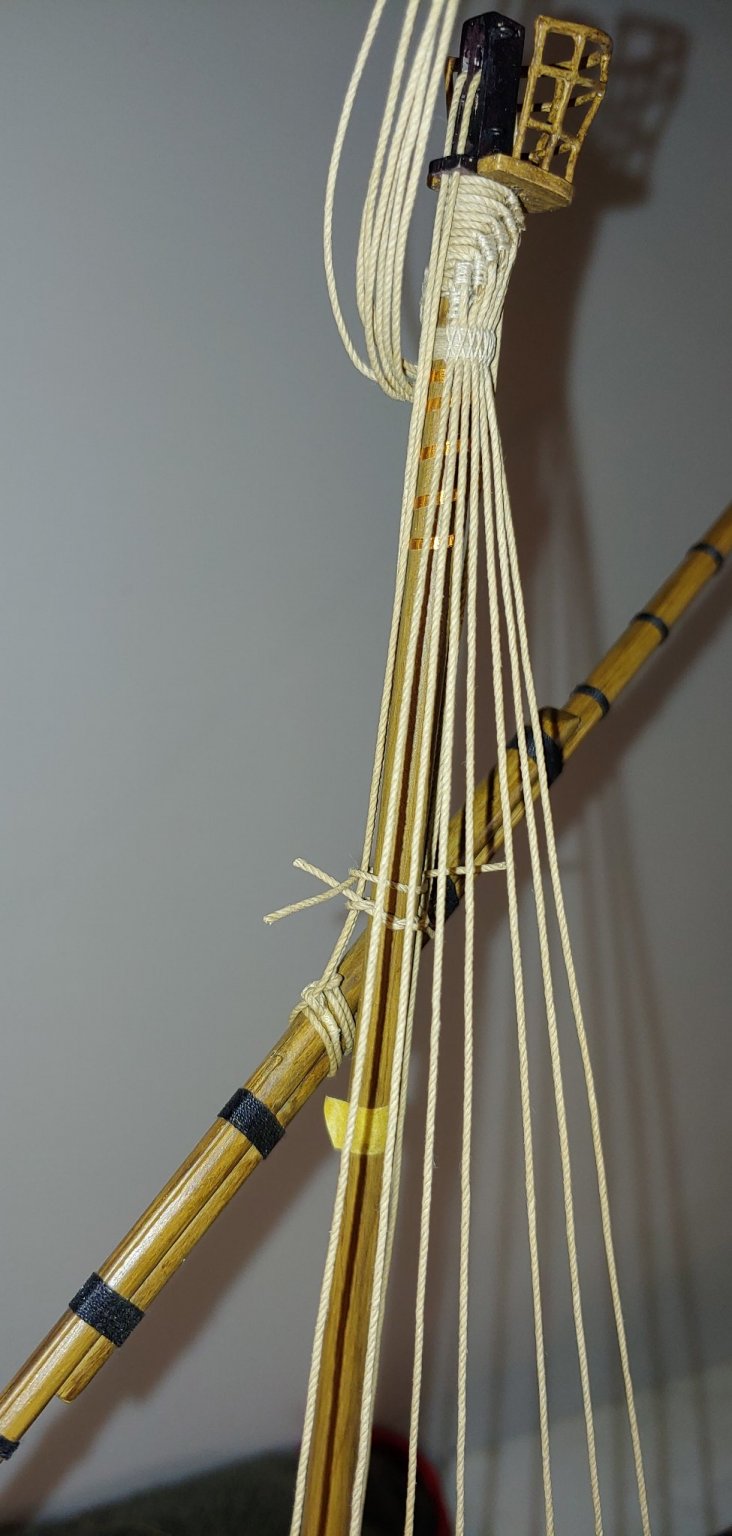
I'm working out the parral arraingment using 0.25mm line and at the moment trying to figure out how to rig and where to belay the 4 lines?. English ships of the time have the lines spliced together about 3ft down with a long tackle block hooked to the parral rope and a single block hooked to an eyebolt in the deck at the base of the mast, did the French rig them in similar fashion?, oh and those black beads are temporary as I await for the wood beads, although do like the contrast.
Michael D.

-
Yes exactly Kirill it's something I've always wanted to try and it sounds like you have had great success it!!
Michael D.
-
Hi Marc,
Well as much as I would love to build the Corel kit, I settled on the Airfix kit primarily to see how much detail I can induce at a smaller scale and to represent her as displayed in the museum ie: no painted figures/details , but fully masted and rigged using bobbin thread down to 100wt for most of the running rigging.
Michael D.
- mtaylor, EJ_L and Hubac's Historian
-
3
-
-
Hi Chris,
This is good information as I have never noticed this small detail and Marc's picture is especially beneficial since the Vasa is up next for me. How about using styrene strips or wood, bevel the edges with an exacto knife or file and glue them together creating the grooves, sand with 100 grit paper for the wood grain, add simulated nails cut and test fit then paint?, just a thought. Your conversion intrigues me and looking forward on your progress.
Michael D.
- mtaylor, EJ_L and Hubac's Historian
-
3
-
Hi Kirill,
Yes I do, although I want to try and transfer the pattern on the paper flags to an iron material for cloth, we'll see how that works out, if not I'll use the paper flags.
Michael D.
-
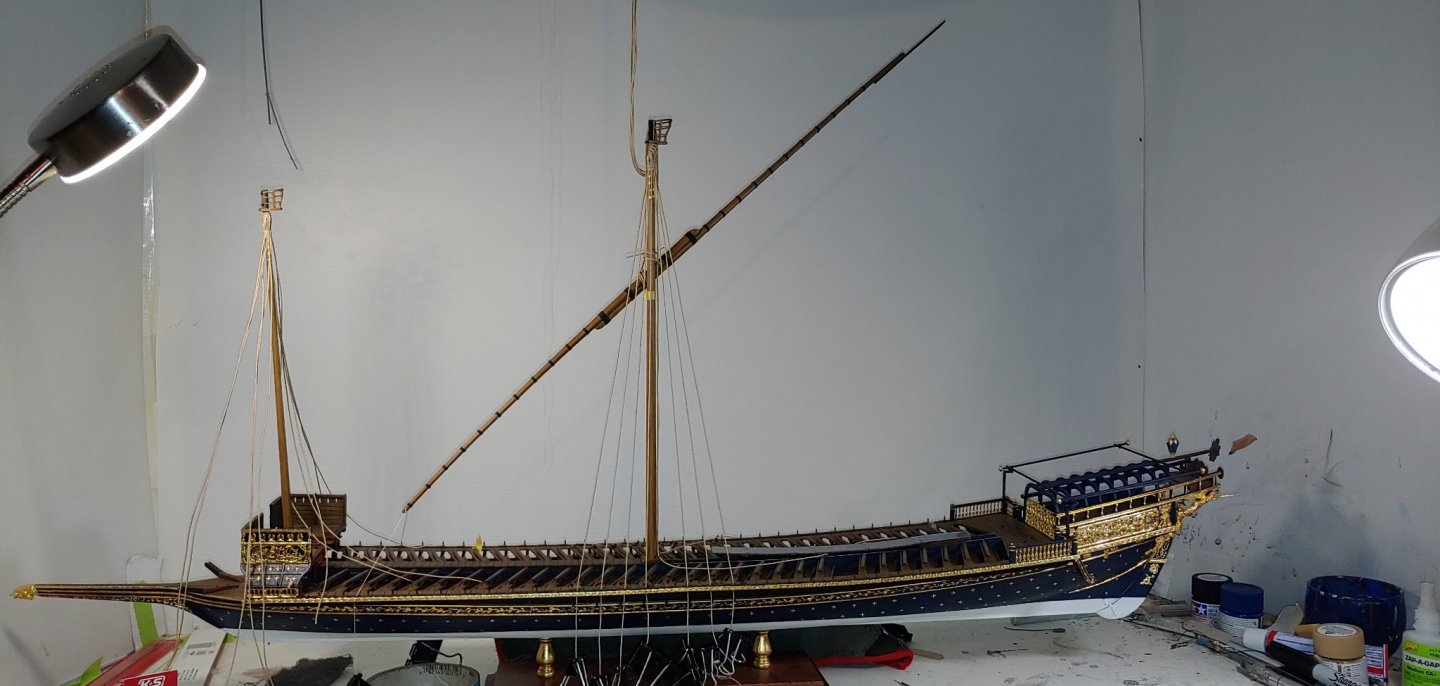
Great info Kirill, very much appreciated. I've been working on the main yard and still have a long way to go yet, but wanted to do a mock up to get an idea where to position the yard on the mast, since the sails will be furled I need to know how far to lower the yard without the large flag hitting the deck. I think where it sits now will work. Up next will be making the parrels and test fitting them before removing the yard and attaching the sail.
Michael D.

- EJ_L, fmodajr and GrandpaPhil
-
3
-
Appreciate your input Kirill and just admire the rigging on your Spanish Galleon, the one area I really need to get more proficient at is introducing a more natural sag in the lines.
Michael D.
-
It looks great! and love the seascape scene also. Always wanted to build this one and may have to start searching. Thanks for sharing your progress and really enjoy all your builds.
Michael D.


Reale De France by 72Nova - FINISHED - Heller
in - Kit build logs for subjects built from 1501 - 1750
Posted
Thank you Kirill, all plastic sanded and painted, using my go too color desert yellow as a base and raw umber for the graining. Your wood effects look great also, curious as to what colors you use?.
Michael D.